wm cheng
-
Posts
4277 -
Joined
-
Last visited
Content Type
Profiles
Forums
Events
Gallery
Everything posted by wm cheng
-
A Tomcat phreak is a good thing - so am I, its my favorite bird of all time (real that is) I realise the forward slats will be a given, they'll stay out, but the rear flaps must be an easy thing? no? make a hinge by adding pins to the ends like the Yamato 1/48 flaps right? Well, I haven't thought it out yet - still concentrating on the task at hand - new waterslide decals for my 1/48 VF-1S and then the 1/72 YF-21 to finish off.
-
I'm sorry, but I might just have to digress a little - I just recieved my waterslide decals from our buddy Anasazi37 and I have to interrupt this model to put those puppies on my naked 1/48 Yamato VF-1S. I'll post some pictures in the Toys sections when I have something to show. Thanks for tuning in...
-
Hey MechaEd, Absolutely beautiful F-14 there - definitely something to be proud of. I would love to see more pictures especially how you did the weathering - it looks great in the pictures. I picked up a 1/72 scale Hasegawa kit (the complex one) with the Jolly Rogers squad decals too - hoping to one day put it next to my Valks. I still can't decide to build it with the wings out showing all the nifty forward slats and flaps or show off the sleekness of the Cat with them swept back - any way to modify it so they can still swing? Excellent work!!
-
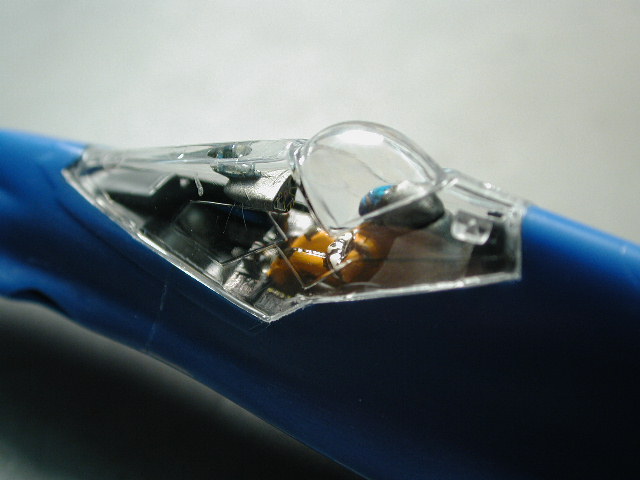
This view shows the forward screens/display console with the supplied Hasegawa decal for the display - I doubt that once the canopy decal pattern is applied you would see much of this, it would proabably be just a blurr of colours. I wonder if I should paint the interior of the canopy black - I'll wait to see if I need to after the decals.

-
Here's a closeup of the cockpit area through the canopy. I sealed the cockpit in with a white canopy glue (essentially a white glue like weldbond) I like this glue since it dries crystal clear and stays somewhat elastic. I can always remove the glue and canopy later. With the only small ports visible once I decal the canopy, this might be the last chance I get to admire the cockpit interior.

-
I wouldn't say Mr. Surfacer is an alternative to putty, it just does a different job. Mr. Surfacer (I am using the bottle - I haven't used any other yet) is good for the small blemishes and to fill in cracks where as putty is better for larger seams or gaps or especially when you have to build up differences in levels. I will use a liquid mask on the canopy when I get to that stage. Here's a shot of the bird pieced together, its big! Bigger than I expected.

-
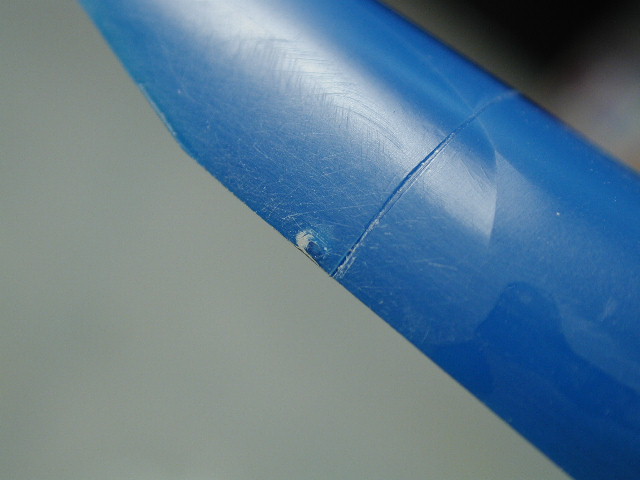
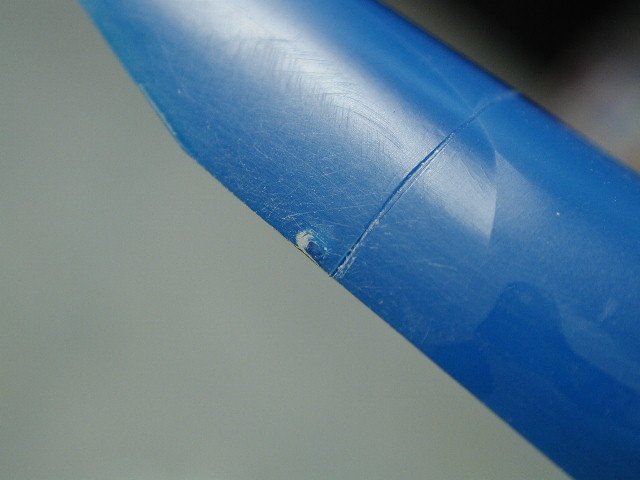
Here's an extreme closeup of a section where the sprue joins - I thought I had made a clean cut and trim here, but after some Mr. Surfacer, and sanding, you can see here the small section of plastic that was taken away has now been filled in with the Mr. Surfacer. I normally wouldn't see this until I primed the model - I'm now glad I dabbed Mr. Surfacer where ever there is a connection to the sprue. P.S. hey did anyone see what happened to my pointer to this thread in the Models section?? <_<
-
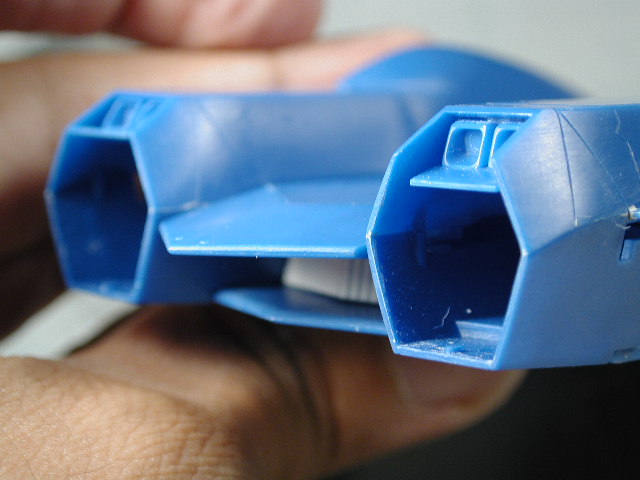
Here's the back section sanded too - I had to becareful since the plastic was so soft its easy to sand too much away, especially when the Mr. Surfacer is almost as hard as the plastic. Here in the rear section, its important to keep the curved corner profile where the pieces meet.

-
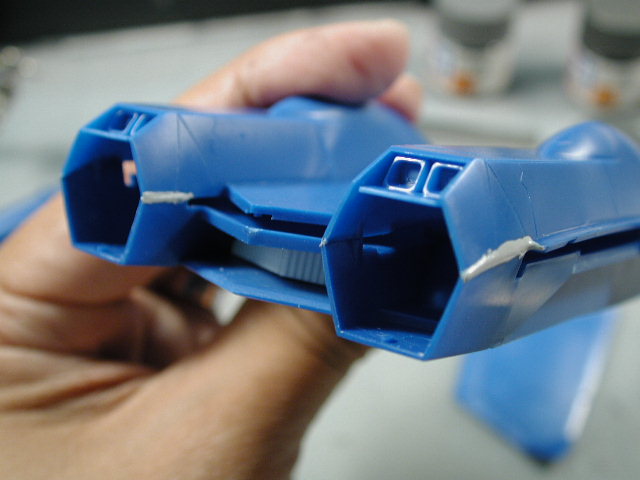
Here's the front section seams sanded, you can see that by the time you're finished sanding, there isn't a lot of Mr. Surfacer left. I needed to re-scribe some of the panel lines that cut across the horizontal seam. I also glued the pilot in at this point.
-
Here you see the cockpit in place and the top and bottom of the fuselage halves glued together, I used tube cement here whereever large pieces are going to have to be jointed that require strength. Plus I don't really have to worry about the excess oozing out the sides (kind of like filler), since I will sand these edges down. I have applied a line of Mr. Surfacer 500 to this edges in case there are any small cracks to fill when I sand this puppy down. Well, thats it for now - today is a day of boring sanding. But after today, I would probabily have 90% of the raw construction done. As I mentioned, its a really easy kit, I would guess that it would take my a little over 6 hours to put all the pieces together - not including sanding. Now sanding is another thing all together, it could take a day to 4 days - well see how it goes. Hopefully some shots tonight.

-
Here I dabbed some Mr. Sufacer 500 on all the sprue connection points to the pieces. The plastic is so soft (as I mentioned earlier) that its tough to get a clean slice when you are removing the excess sprue - so I thought this willl be safer to sand this portion down again. I just love how all the pieces are designed so the seams follow the contours or panel lines of the aircraft. Additionally, the side packs, really hide where the top and bottom of the main fuselage comes together.
-
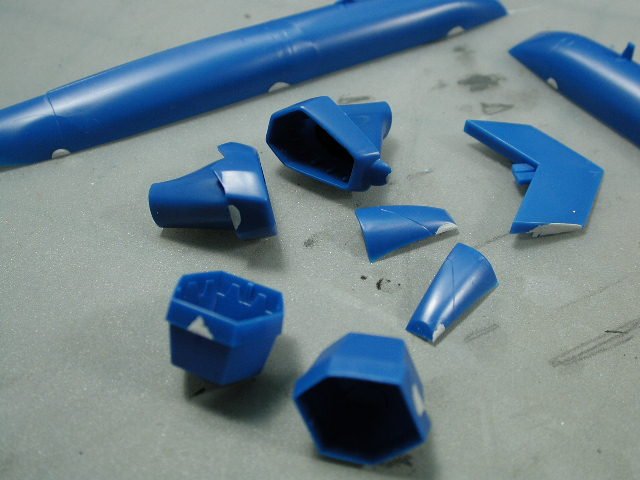
Here's a rear shot showing the lower plate in place with the added styrene "panels" so it prevents you from seeing into the "hollow" of the plane. Note I started to lay in some Mr. Surfacer 500 around the seams awaiting sanding (yah not!)

-
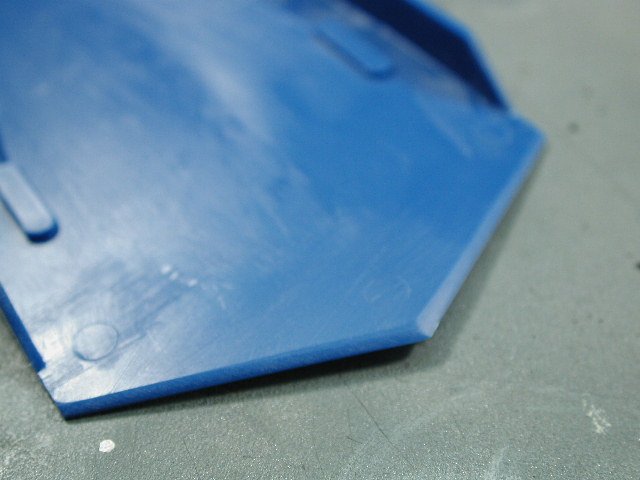
Here's the top side of the rear of the big underside fuselage piece that will cover this leg transformation section. I sanded off the center mold injection circular pin marking (you will see this when the model is completed) and I sanded down the trailing edges of the "doors" or bevelled the edges since it looks odd to have a squared rectangular surface on an aircraft. It kind of looks more like trailing surfaces of a wing now.
-
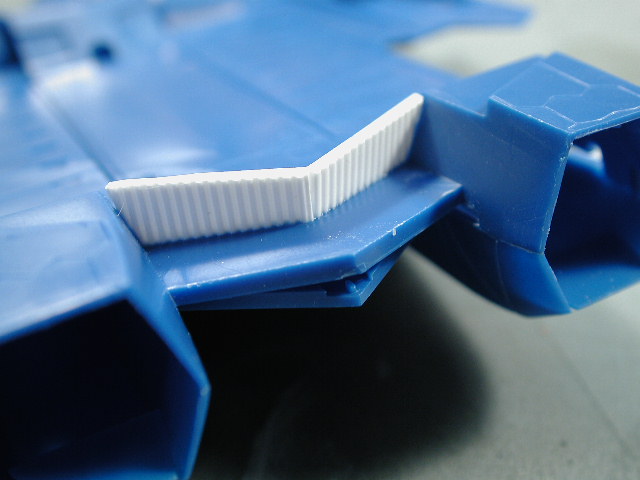
I noticed that when you glue the large underside fuselage plate in you are left with this huge gap at the rear of the plane. I guess, if I were truely nuts, I would scratch build the bottoms of the foot assembly in this space. I looked through all my line art and animation cells to search for a detail for this area and couldn't find any - they mostly drew this bird from the front or in the animation cells, they conveniently blacked it out. So I decided to add a panel to close in this area. I had some styrene sheets what was corrugated (same stuff I used to close in the Valkyrie tail when I didn't have the photo-etched part) - I think they sell them in model train stores as siding material for scale buildings. I trimed them to fit into the space following the same angles as the tail plane.

-
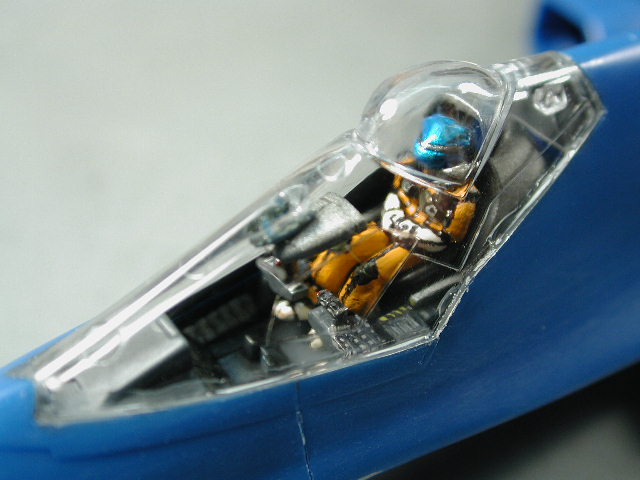
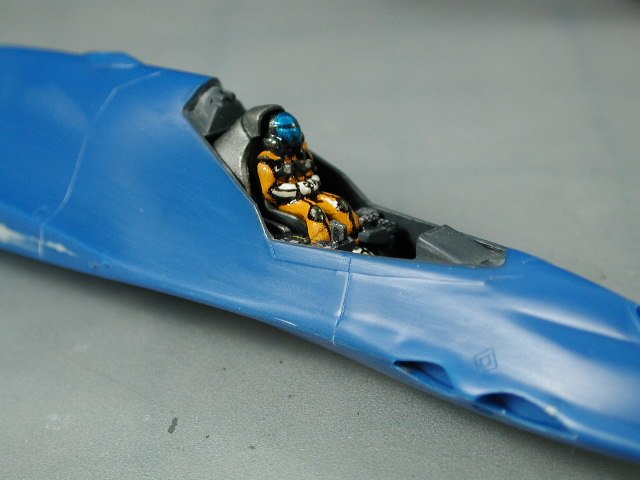
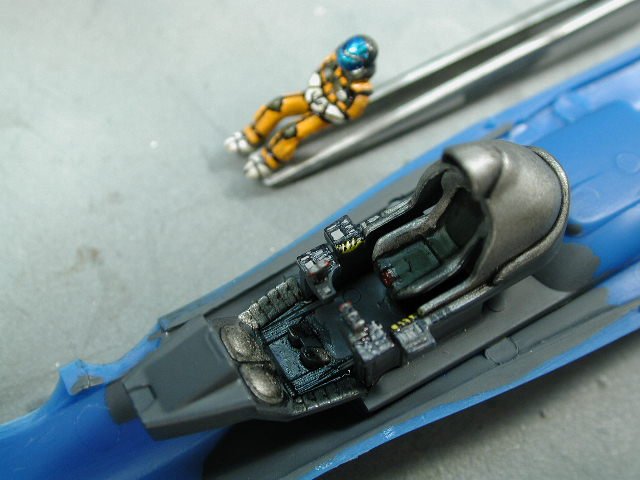
Here we have the cockpit further along with a little oil wash to pick out some of the recesses. I drew in some controls and yellow warning details on the forward control panels and detailed the throttle and joystick. I realize that I probably won't see much of the interior when the canopy is closed - oh well, I think I may of gone a little overboard. However, the cockpit will require a ton of extra work if you want to display it with the canopy open (lots of those little tiny ribbon wiring). So I've chosen to close the cockpit behind the canopy on this bird. The pilot is painted in the background, I used the cover to one of the "This is Animation" Macross Plus books as reference. The black lines are drawn in with a gundam marker, the helmut was painted silver, then a dark gun metal and finally a clear blue for the glass pieces. Hasegawa was kind enough to provide decals for the helmut glass sections, but they were black, and I wanted a bluish look to it.
-
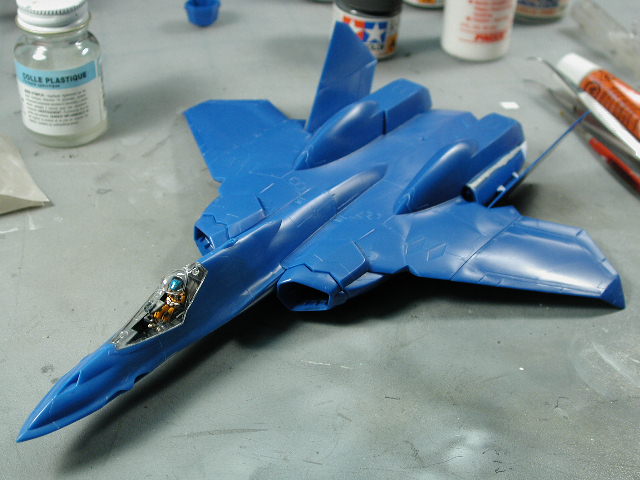
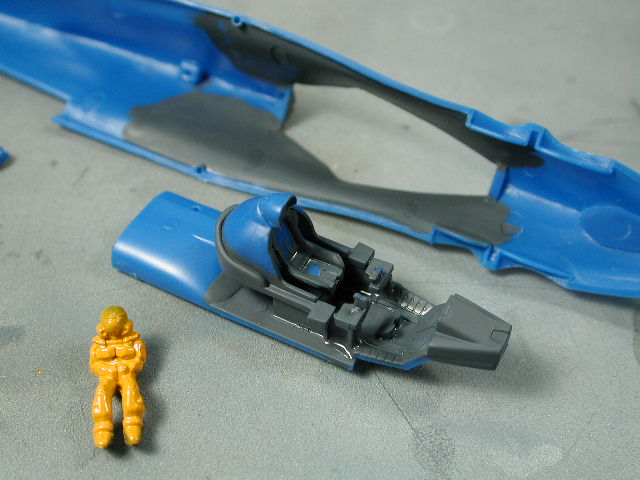
Hi all, I am back at it again - still no work yet, the film business is really slow in Toronto, so if you guys have any producer friends, convince them to come up to Toronto to film I've finally started on the YF-21 (gotta make room for that VF-0 at Christmas time!) Boy its nice to work on a Hasegawa kit again (they are nice and well engineered). First off, the plastic is so much softer - the Bandai kits seem to have harder more brittle plastic. So it took a little getting used to back in this kit, becareful you don't cut too much plastic away when trimming the pieces off the sprue. What struck me is the fact that this kit has some pretty huge honking pieces - which also translates into a quick easy build. So far it seems as though this YF-21 is the easiest of all the Hasegawa Macross series to build. I think the tough sell here is trying to make the blue paint scheme look convincing - again, its in the final paint stage where this kit comes alive. I think I might vary the blues in the panels a bit, and vary the finish (gloss/matte) on the surfaces like the Yukikaze Mave model to give it some interest. Doing post-shading on dark colours is always difficult to show though - I might experiment with a lighter post shading (an reverse effect maybe). Well see. On to the first section which is the cockpit area. It all came together pretty easy, there are some really small parts. This picture shows the initial dark grey background that I painted first with a few metallic grey highlights.

-

*Sigh* Some days you wonder why you even bother
wm cheng replied to David Hingtgen's topic in The Workshop!
Man, I really feel for ya!! Sh@t happens sometimes and it will probably take more time to figure out what really happened than to strip it down and redo. We are here for you brother -
Yes, they were at Pacific Mall. Oh, I didn't know that Pacific Hobbies were affiliated with Advanced Hobbies, I've been there once or twice, but found that they catered to the R/C crowd. Does this mean that Advanced hobbies would be carrying japanese models now??
-
Bandai 1/850 Enterprise A photos...
wm cheng replied to wm cheng's topic in Anime or Science Fiction
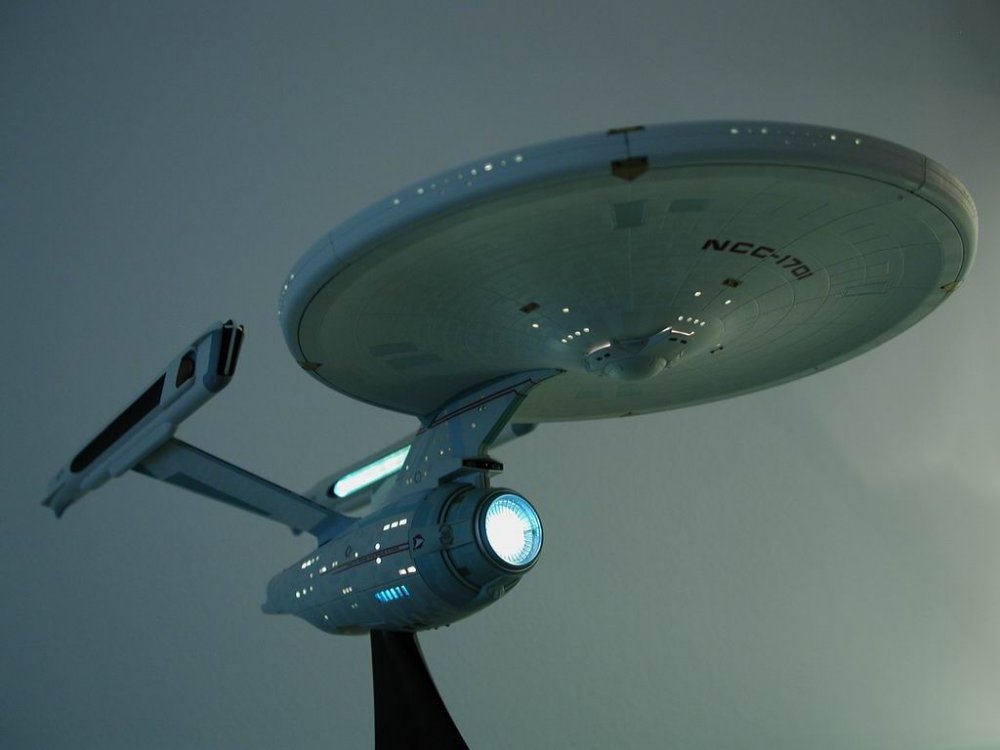
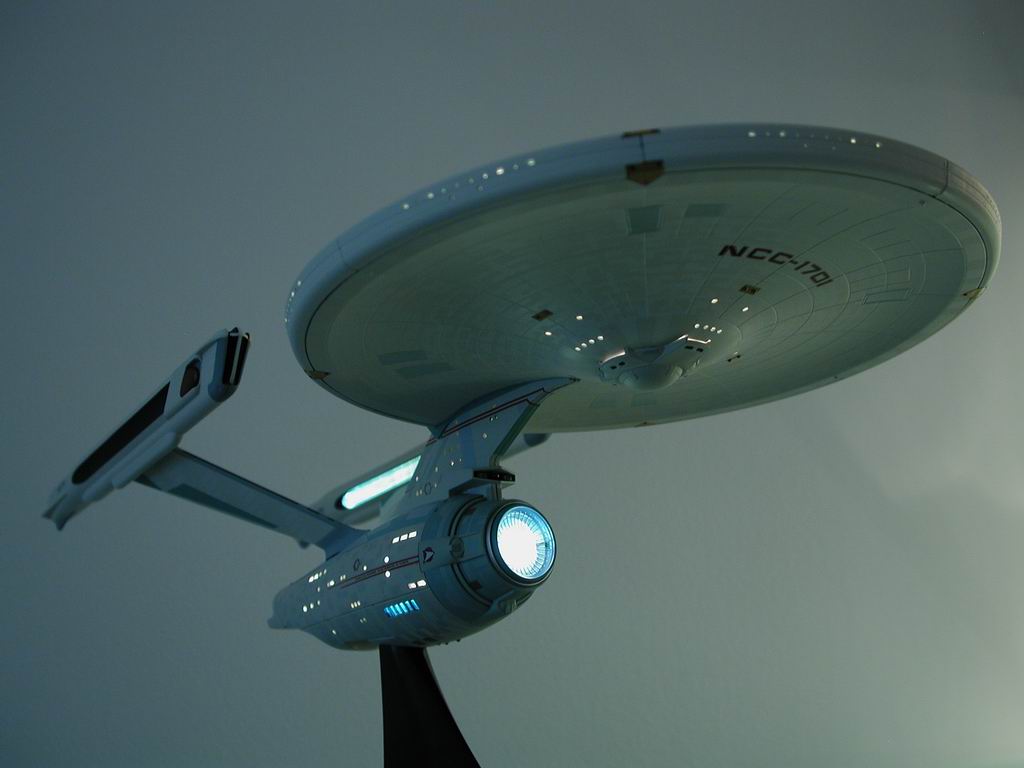
This Bandai was sure less work and looks far surperior!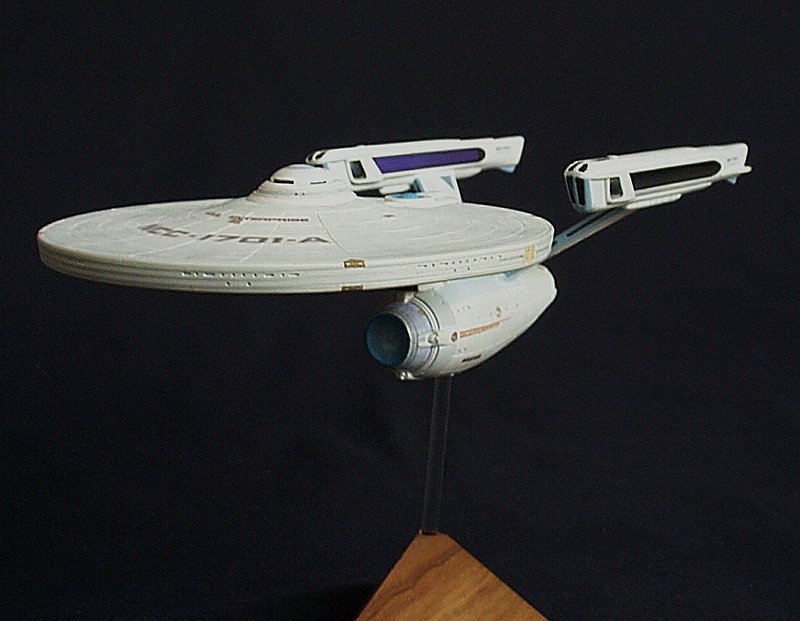
-
Bandai 1/850 Enterprise A photos...
wm cheng replied to wm cheng's topic in Anime or Science Fiction
Hey I bought that kit too - must of been 6 or 7 years ago. It was tiny, around 7 inches at 1/1400 scale eh? I remember trying to mask and spray that aztec pattern on the hull and doing the decals in photoshop and getting them laser printed onto decal paper - boy that brings me back a while. Here's a shot of it.
-
Bandai 1/850 Enterprise A photos...
wm cheng replied to wm cheng's topic in Anime or Science Fiction
Hey UN Spacy, Its pretty much a great model out of the box. I was just a bit anal. I think it would look amazing without any of the work - its so well engineered, I would highly recommend it to any trek fan. The only bit of caution to those planning on building it is, follow the instruction steps to the letter (I skipped ahead to paint and fill and sand) where the engine struts connect to the warp nacelles and where it connects to the secondary hull is a really tight fit. You really need to attach them to the nacelles while they are still halved so that you can push back behind the nacelles. Then you really have got to jam them into the secondary hull - I had to pad it up with tissues and use a big pair of pliers to push the pieces together. But once your are done - it is a very solid and permanent connection. I found gluing most of the assembly ends up making the overall model much more solid. Good Luck. -
Yep, thats the one, great stuff. What I like even more is the 50498 Solvent (comes a metal can). It really good a cleaning clogged airbrushes.
-
Unfortunately even US shipping still dings me with really bad customs & duty, then brokerage by the shipper, and of course 15% tax (PST & GST). We are taxed to death in Canada!! Any good Canadian online retailers?
-
Hey guys, I case some of you are interested in why the delay from the Hasegawa YF-21 - I've been temporarily distracted. Take a look here... http://www.macrossworld.com/mwf/index.php?...26&t=1293&st=0& Hope you like it, its kind of a toy, so I didn't take as much care as I would a "rear" model and left some of the assemby seams.
-
Bandai 1/850 Enterprise A photos...
wm cheng replied to wm cheng's topic in Anime or Science Fiction
I would highly recommend this kit to any Trek fans out there. Its just a little pricy.