wm cheng
-
Posts
4311 -
Joined
-
Last visited
Content Type
Profiles
Forums
Events
Gallery
Everything posted by wm cheng
-
Since its gloss white over a dark base colour, I decide on a really thick mixture. I used 4:1 paint to thinner ratio and bumped up the pressure to 20PSI. The glossiness of the paint works against you when you want to cover up dark undercoats. So I sprayed it on pretty thick - a few passes holded the airbrush far enough away that the paint is almost dry on contact. It looks pretty good, there were some bit of overspray because I was attempting such a heavy coat - I would suggest multiple light coats next time. The little bit of overspray around some of the edges were cleaned up with some windex on a brush - since the previous gloss coat of ModelMaster Acrl protected the blue beneath.

-
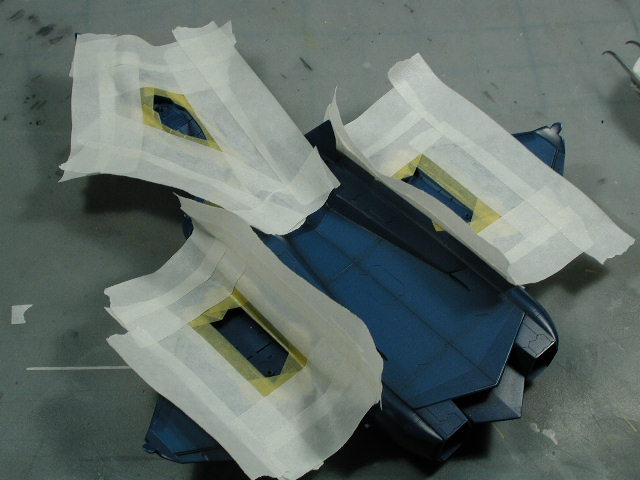
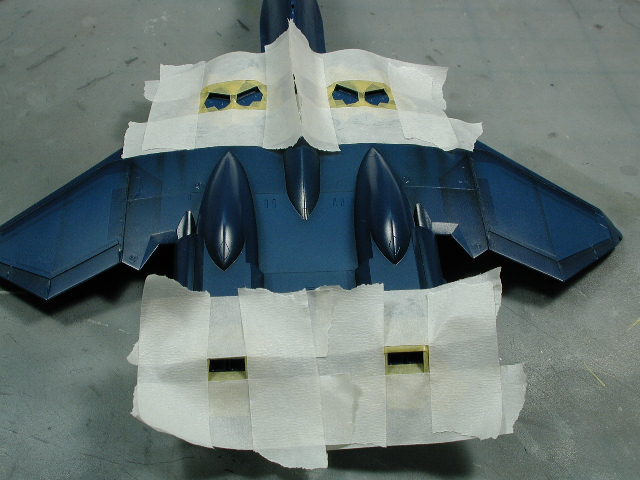
Again, the cheap stuff to prevent overspray. I still stick the tape to my jeans first to take away some of the tackiness first. I made the area extra large since I would be trying to spray at odd angles trying to get into the crevices of the wheel well.

-
The white wheel wells are now to be masked and painted. I thought this would be the easiest way - I wasn't sure. One could always paint the these areas white first, then mask it off to paint the rest of the plane blue, but I tought that masking around the holes would be easier.
-
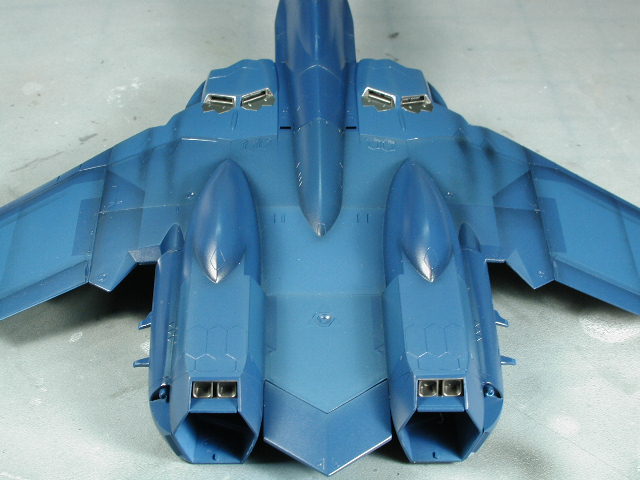
This shot shows the intake bleed doors painted

-
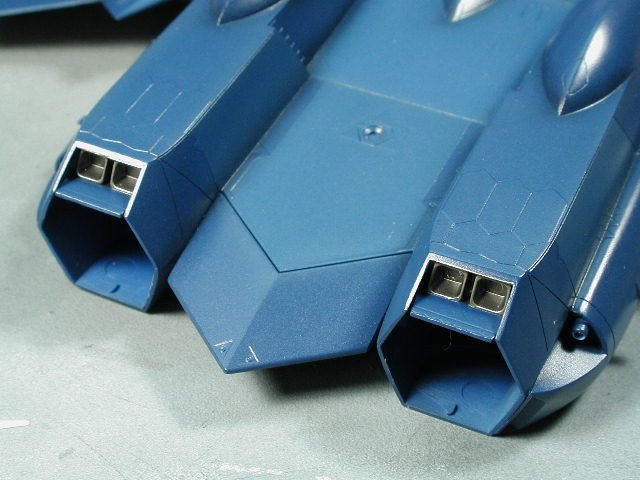
Here's the rear thrusters finished. There will still be a wash and a light black burnt dusting to simulate some wear.
-
Here's the cheap masking tape around the good stuff to provide more of a barrier in case I over spray too much metallizer. I am spraying AlcladII steel for these areas. You can see that I usually build up lots of little masking pieces for more complicated shapes.

-
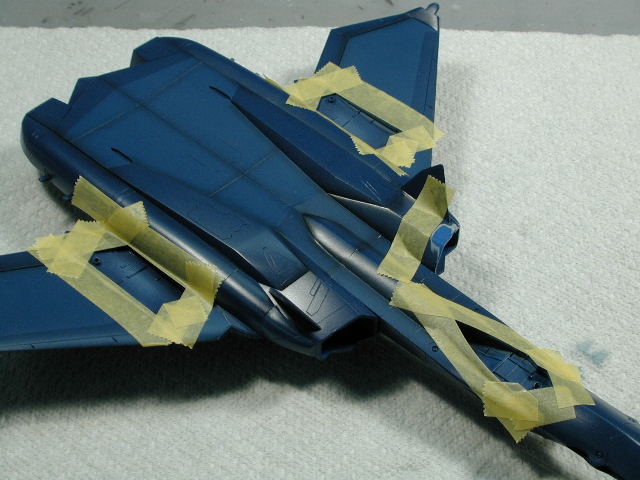
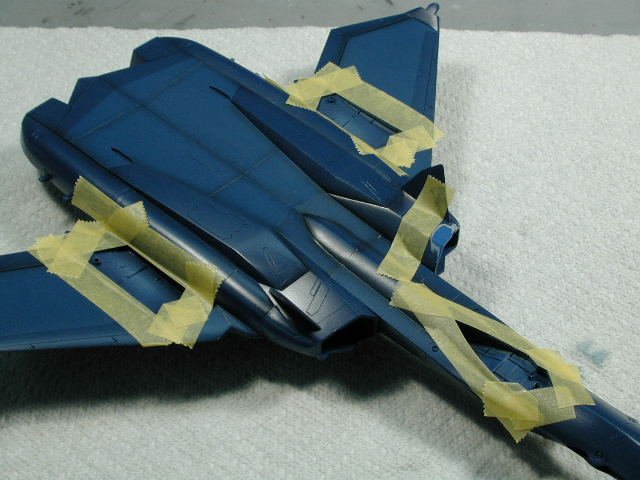
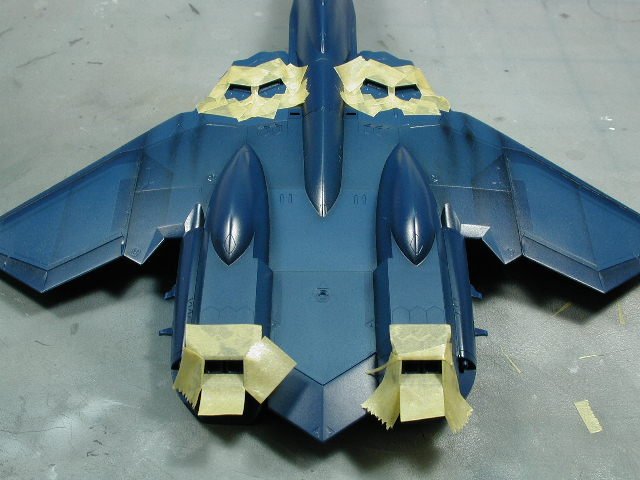
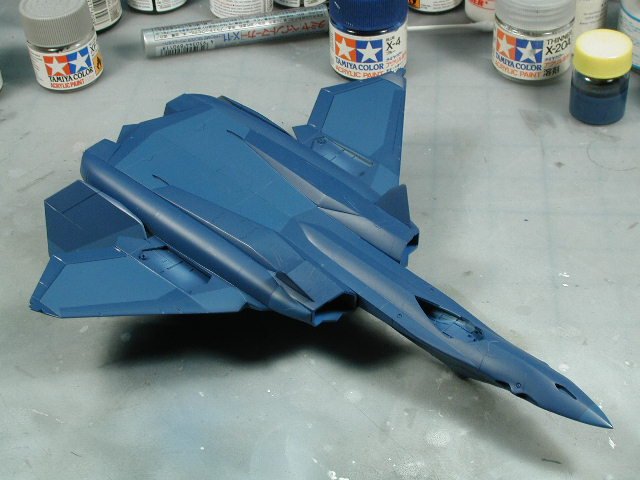
Thats not the final gloss finish - I'm not a fan of glossy models either (unless its a car or bike) its just a gloss coat for the decals. I will tone it down to a semi-gloss after the decals with some flat panels. Here's the masking for the bleed intakes and rear thrusters. I decided to mask the little triangular plates behind the intakes as well - I have seen references that have them blue as well as metallic grey.
-
Welcome to MW Ter-or!! Always glad to hear other fans of modelling - the more the merrier! Yes, I wished Starship modeller had more Macross too - thats why I'm here I really like how this posting step-by-step works, I like adding to the thread as I build along - and especially the input I get while I'm building from all the wonderful people here, it always makes me build a better product in the end. If I were to finish the model, I would never get a chance to sit down and comment or write about it after the fact. Now if someone were interested over at Starship Modeller to compile my threads into a gallery submission like yours then great - but I know I would be too lazy to do it that way Thanks for your article in the Starship Modeller, it was really great to get a heads up on the kit and it really informed me as to where the potential trouble areas could be. Feel free to post some of your other works here - I'd love to see (I don't really check over at the other boards much ). Again, welcome - its a great community here!
-
Good Job!! I may have an answer to that shrivelling decals - it used to happen to me too. Its too much MicroSOL while its still wet. I have found that you could use as much MicroSET as you want and its still okay, but MicroSOL is powerful stuff. I find it best to pre-brush MicroSET onto the surface, then lay your decals down, and once in position, press in down into all the engraved details with a damp soft cloth or paper towel to get the details to "telegraph" through. Then, I use a bit of MicroSOL to brush around the edges and just where there are panel lines or details only - not the entire decal - so the wrinkles are usually confined to the panel lines or details - and they usually flatten out when they dry. However when you brush MicroSOL over the whole thing, it will tend to wrinkle everywhere and sometimes it doesn't completely flatten out when its dry. Good work so far, can't wait to see more.
-
I'm not sure, I think it was lost - it was done so long ago that I couldn't find it in the old boards, I think there was a cleaning of the old boards some time ago. If anyone has a link to it, I would really appreciate it too.
-
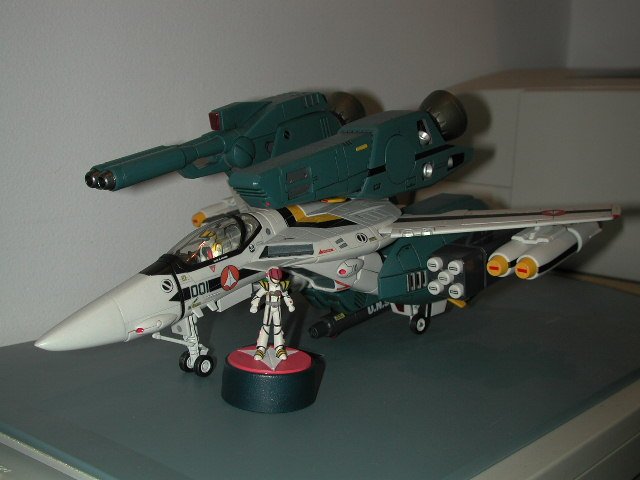
Hey, has anyone noticed that the Hikaru pencil sharpener is around 1/48 scale, pretty perfect to pose beside the 1/48 Yamato Valkyrie. Anyone taken him off the pencil sharpener?
-
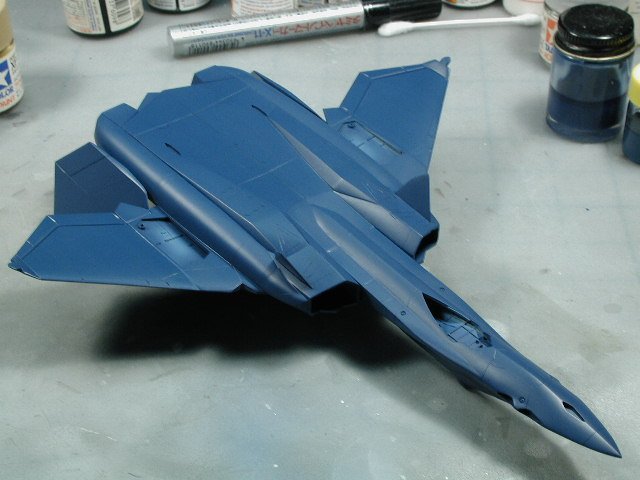
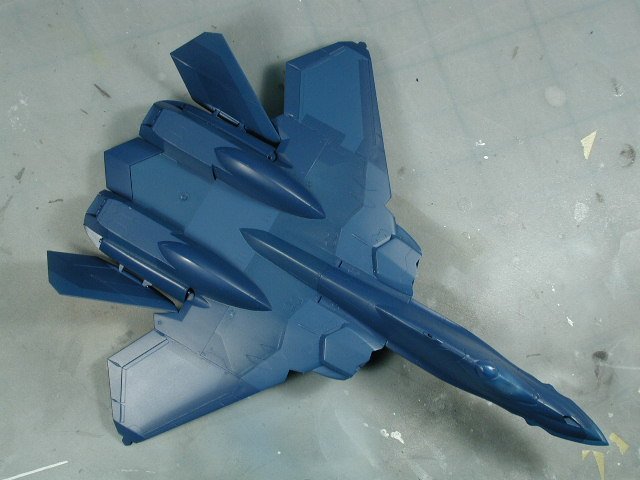
Here, after the gloss coat, almost all the lighter weathering has dissappeared. I'll bring them back after I decal this sucker, and selectively airbrush a flat clear coat over where I want a lighter shade to show though. I need to mask off the underside white wheel wells and the little bleed intake vents above as well as the rear little thrusters above the engines.

-
Underside ready for the oil wash...
-
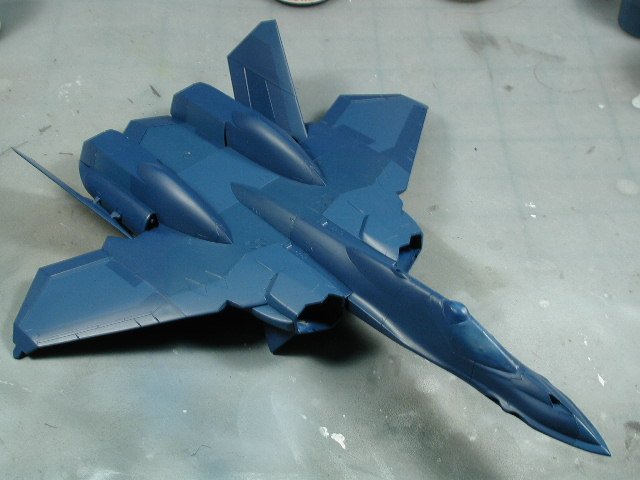
Here's a little more life - I know the weathering is a bit heavy, but after the overall gloss coat, it will tone down substantially.
-
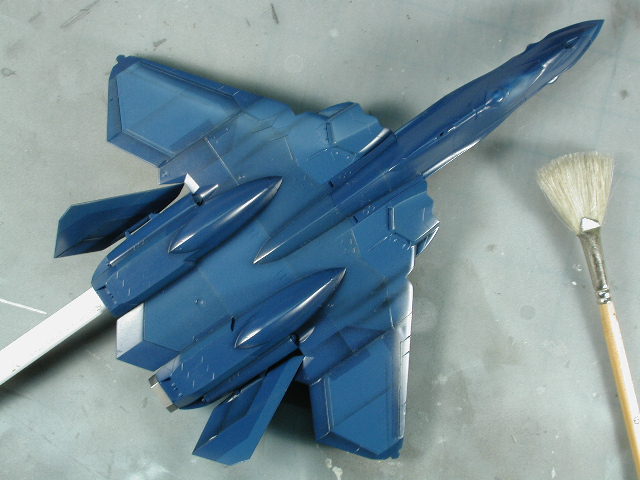
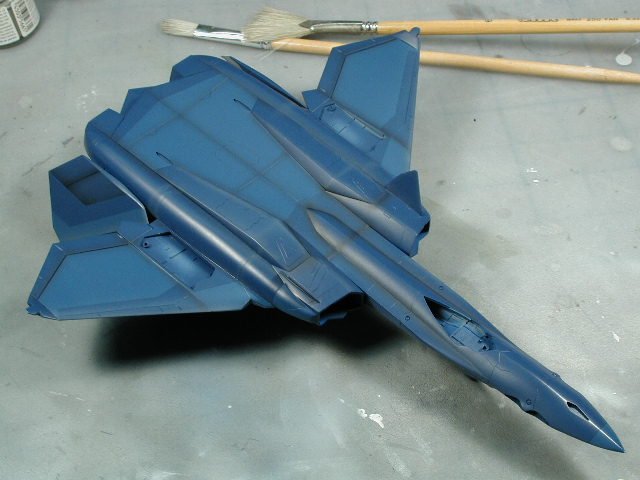
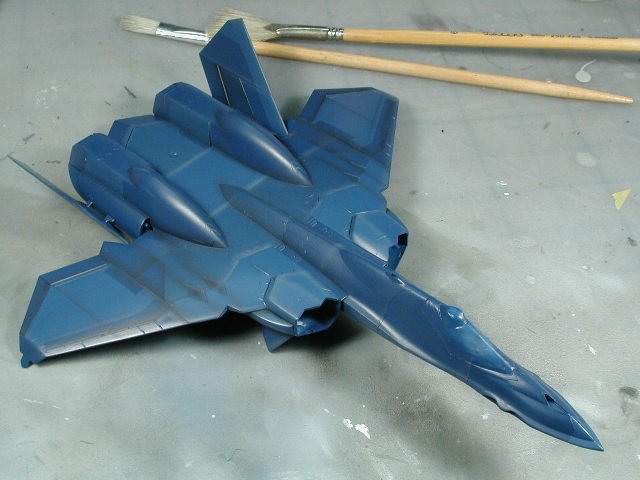
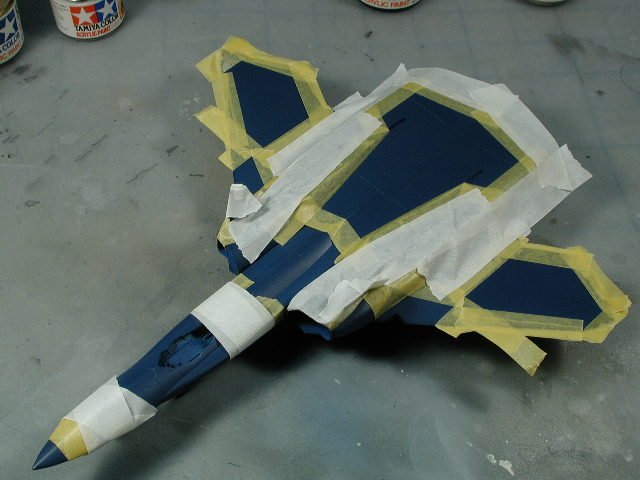
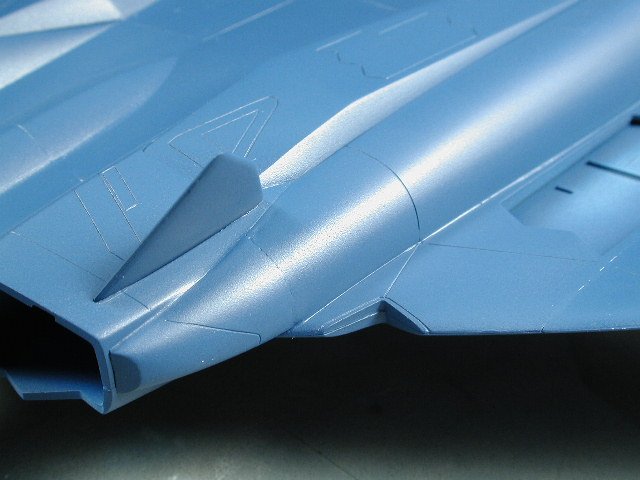
This top view shows off some more of the different panels. I'll give it a few hours to dry and I'll do a clear-coat to protect it before I do a little weathering post-shading. The plan is to do a black shading on the crevices, and a light grey/blue to pick out the highlights and convex surfaces.
-
Well, the 3rd shade of blue is on there - damned if I can tell Its tough getting something inbetween. What I'll do later is weather around it a bit to pick out the colour separation, and alternate the flat / semi-gloss finish at these areas - it should work out (keeping my fingers crossed).
-
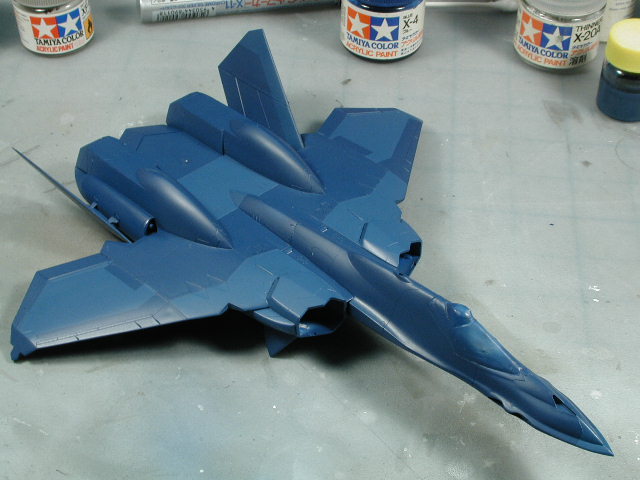
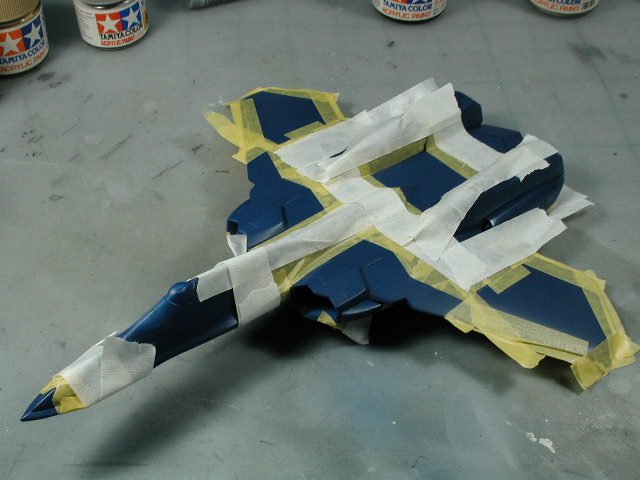
More masking to come...
-
Hmm, I think I'll do a colour inbetween the two blues tomorrow instead of a darker one. When I weather it slightly, the different shades will tie together better.

-
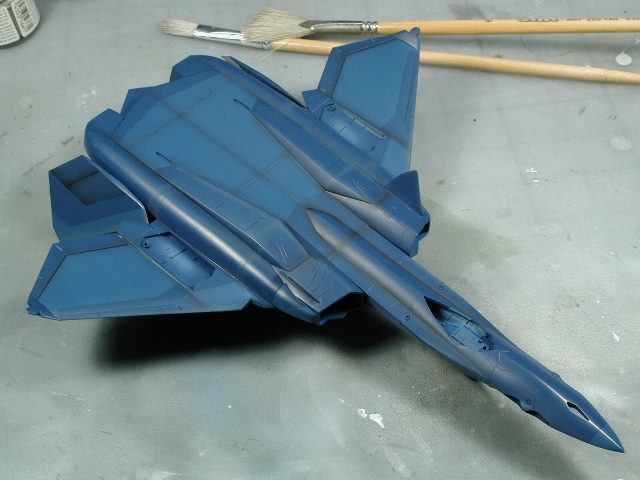
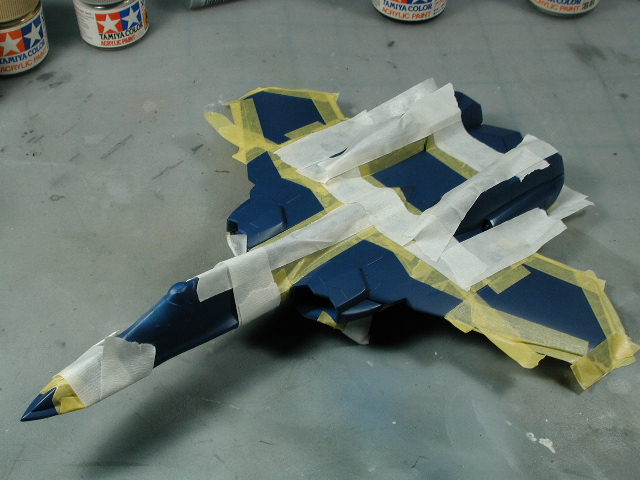
And still more masking... I was thinking that I will do a shade lighter and a shade darker - then with three shades, I will vary the finish from semi-gloss to flat, giving me a total of 6 shades in the end I hope.
-
More masking...
-
Hey don't worry about it Capt Hungry I love reading what others have done - the more info always the better. It helped me out as to what to expect and what to avoid - I will always welcome all modellers point of view (until I am old and crotchety ). Good point Gerwalker, I hadn't intended to go the expoxy route either - I generally find that the epoxy is harder than the plastic (especially this Hasegawa plastic) and thus harder to shape without damaging the surrounding plastic. I still intend to use the lenses supplied, I find it hard to believe that after all the good engineering that Hasegawa has done, that these wing tip lights will fit so poorly. I'll come to that bridge when I have to cross it. Here's a shot of the lighter tone - I hope t doesn't dissappear when I gloss coat the entire thing in prep for decals
-
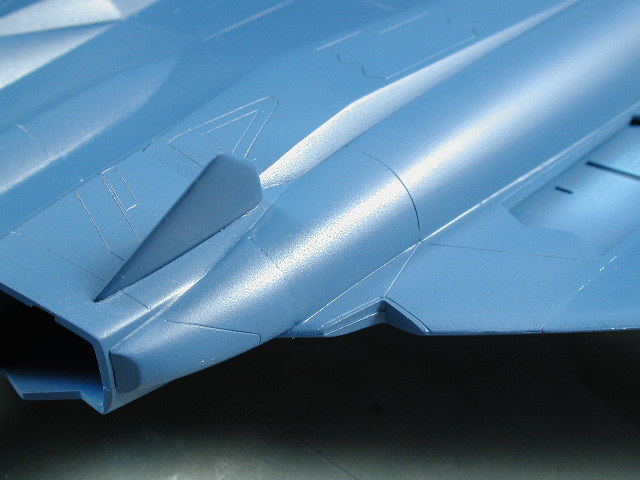
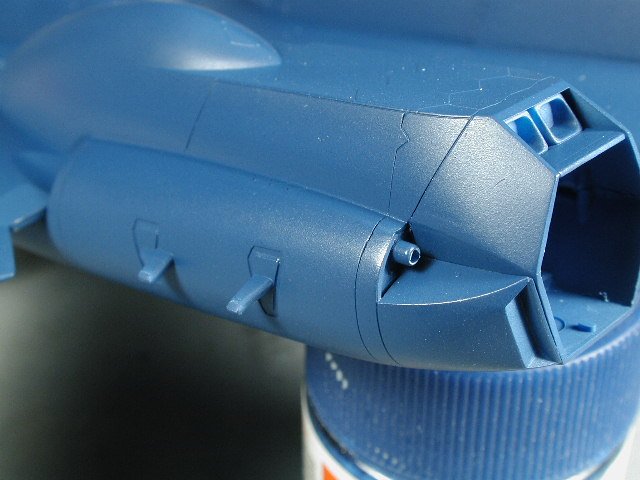
This other problem area where the bulge joints the engines is also fixed with another coat of Mr. Surfacer, I used that Tamiya Tritool scribber to restore those panel lines and I drilled out the "laser" ports. Actually I take back what I said about drilling these out after I sanded this area. I can't really reach the front laser port because the fuselage of the YF-21 is in the way or my pin vise is just too fat - so I would recommend drilling them out before hand then installing them into this bulged housing. Its off to masking for that panelled effect now.
-
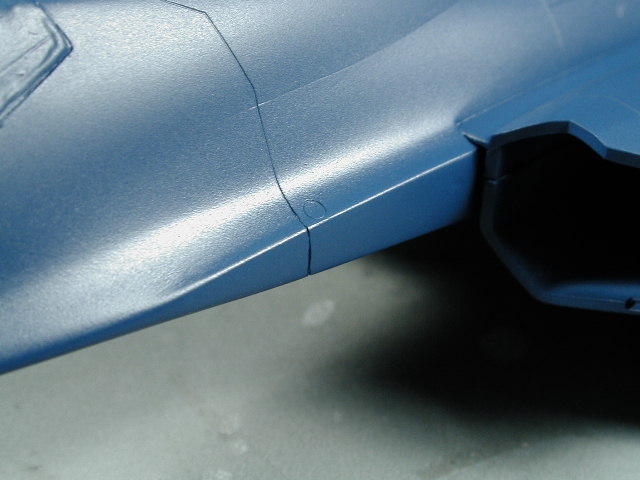
Here's that crucial joint that didn't turn out so great when I primed it, but after another coat of Mr. Surfacer and sanding, then the layer of blue paint, it is pretty seamless now.

-
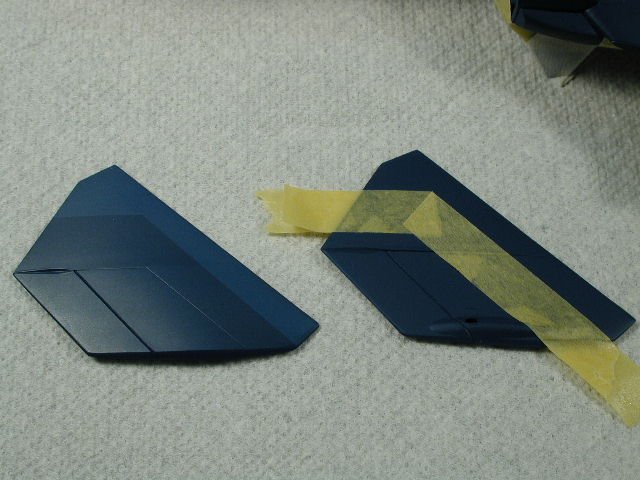
Here are a couple of seams that I think turned out okay after painting. I will separate a different shade at the filled break - I think its fine to have this separation, I suppose some could majorly fill it and feather it back to look like one piece, but I think the YF-21 already looks like too many big pieces IMHO.
-
I am actually really happy with the way all the seams turned out - the fill job was pretty good (if I do say so myself ). Actually, yes there are some seams, maybe more than we would expect from a top notch company like Hasegawa, but certainly less than most model companies out there (anybody ever built "Airwolf" from AMT/ERTL - I think there were more gaps than plastic in that kit, its amazing it held together ). It may seem like I filled a lot of seams, but it wasn't a big deal, I usually spend a day or two sanding all the Valkyries I have built. I was just a bit more careful on this one and outlined some of the seams because I read that other article that was suggested on the Starship modelling site. The leg seam on the VF-1 sucked too or the YF-19 for that matter. I still think that this has been the easiest Valk from Hasegawa to date - lots of big pieces However, I haven't tried to fit the wing tip lights yet nor the canopy decals - so knock on wood I wish there was more articulation on the lower surfaces.