wm cheng
-
Posts
4305 -
Joined
-
Last visited
Content Type
Profiles
Forums
Events
Gallery
Everything posted by wm cheng
-
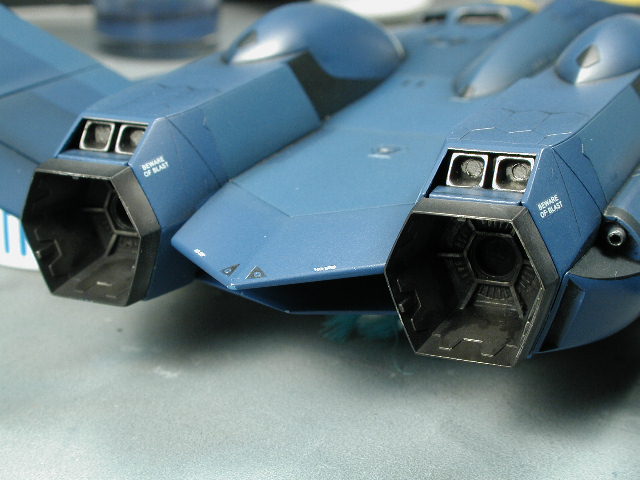
The guns I painted in Alclad Steel, with a flat black post-shading and oil wash to pick out the rear exhaust. Man, with this dark colour, every speck of dust shows up - its almost statically attracted to the model
-
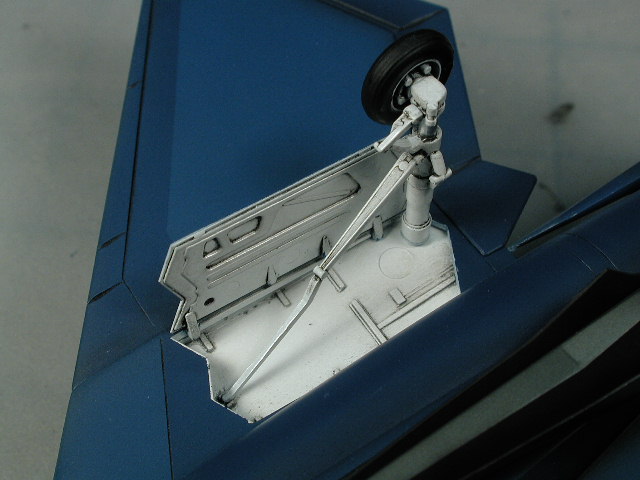
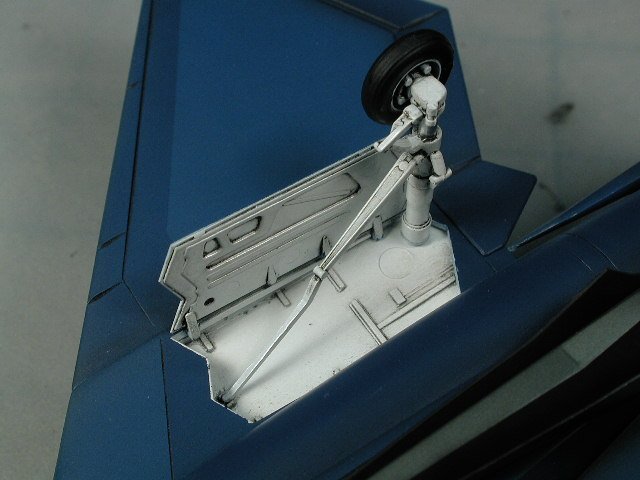
Rear landing gear.
-
Close up of the forward landing gear.
-
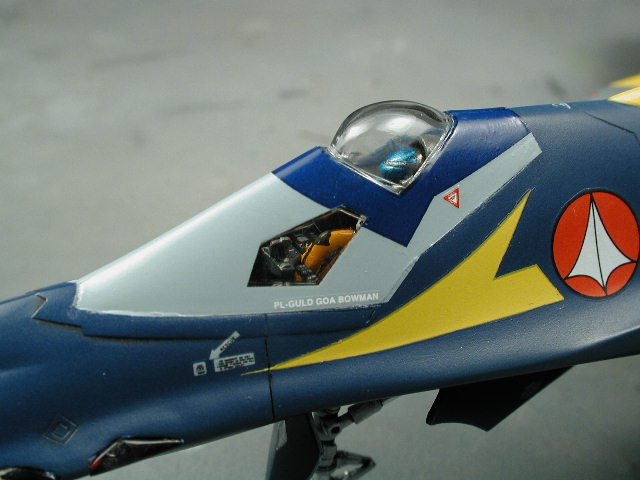
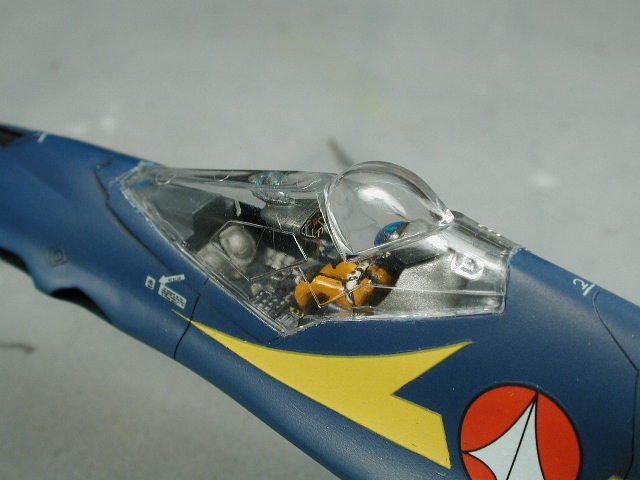
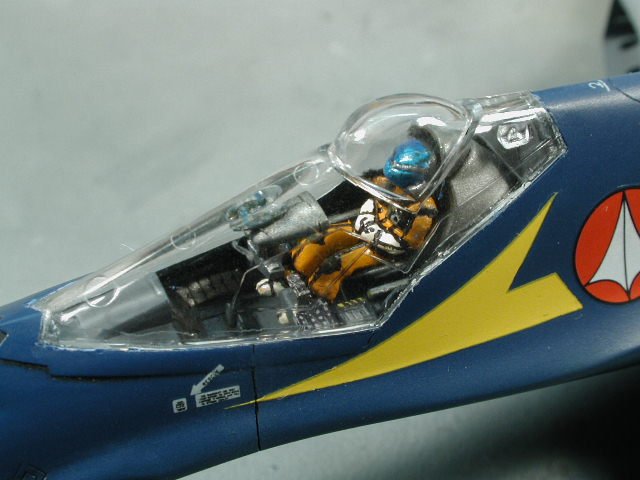
Better shot of the canopy with Bowman inside and his flight controls are clearly in view!
-
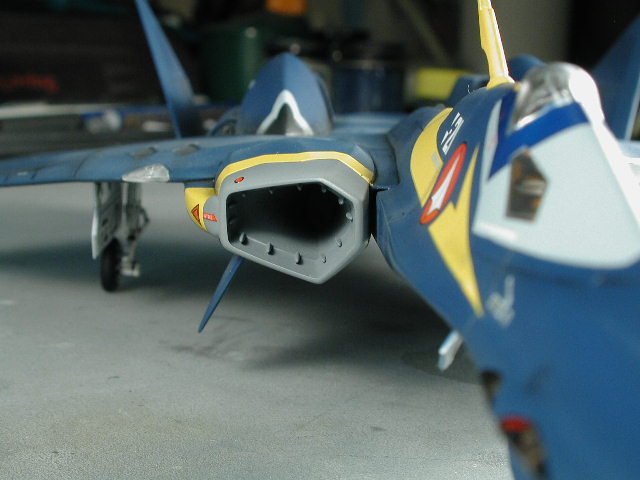
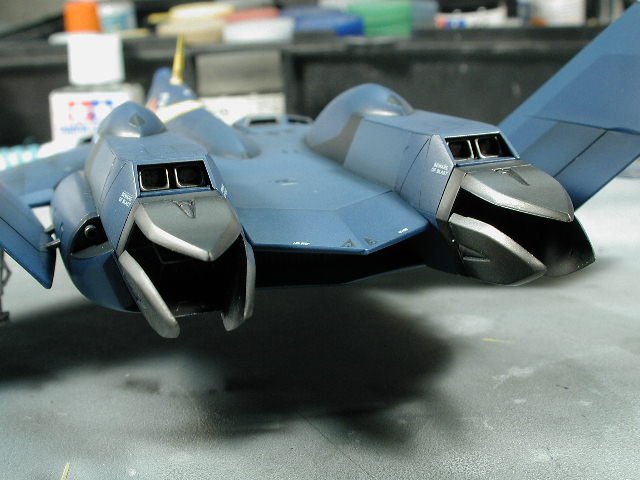
Here's a shot into the intake with the black shading in place to look like a shadow - its too bad that these intakes are so short and capped flat - maybe it would be a good idea to chop it off at the end and stick a spare Valkyrie turbine blades in behind (we've all got some of those lying around after our super/strike valks eh?)
-
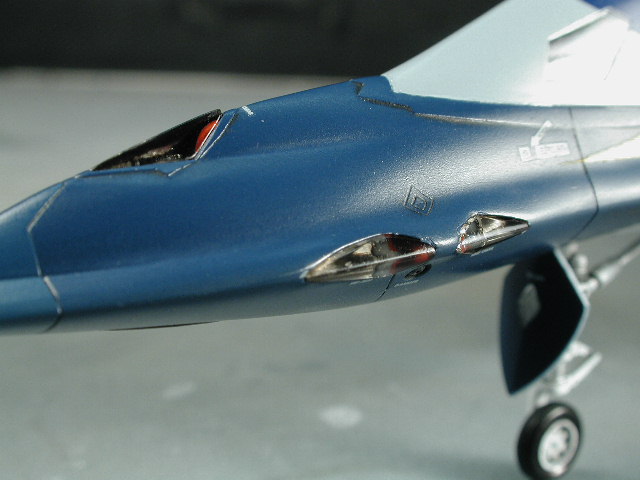
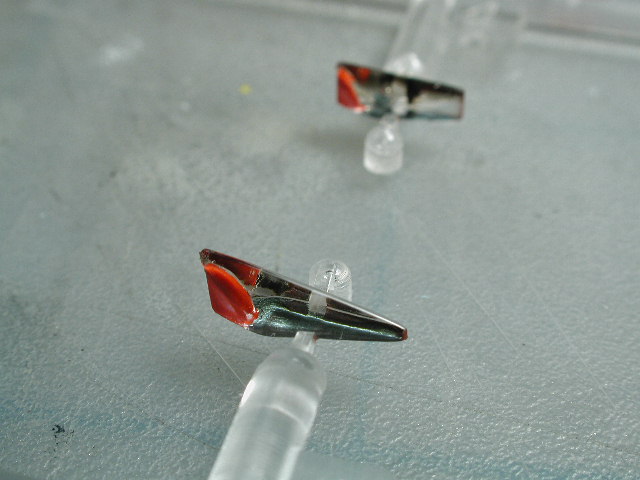
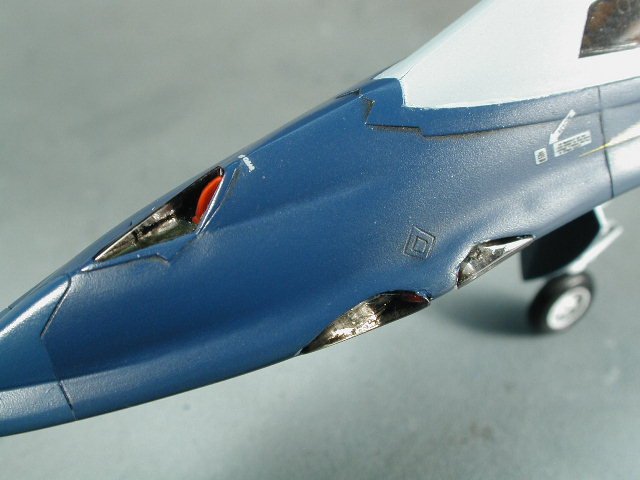
The side ones I am especially happy about, since you can see the red at the right end - its very cool The photographs don't do it justice.

-
Again, those forward clear sensor lenses fit perfectly. Infact, you should not even try to pre-fit them (otherwise you won't be able to get them out again). The tinting worked out well, especially since I painted the interior well black first. I put in a dab of white glue, so that it will dry clear, then fitted each piece narrow end in first and pressed. You can see the red sensor painted inside.
-
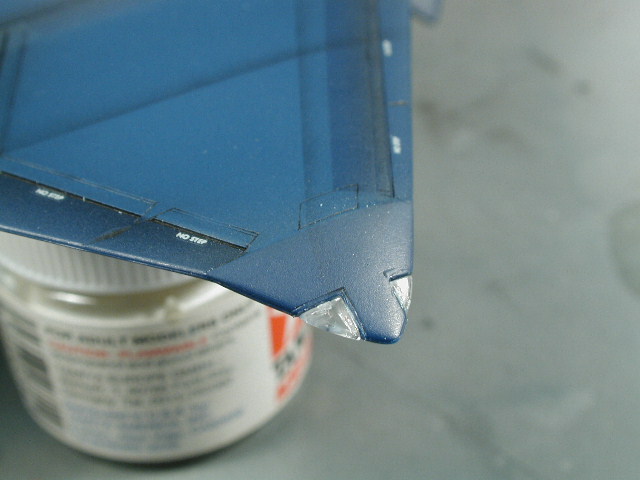
Again another fear solved - the wingtip lights. What I did was heed the other warnings that they did not fit properly and undercut (undersized) the openings. When I got to this stage, I then carefully filed back the opening constantly checking with the clear piece until I got a satisfactory fit. Yes, if you just blindly follow the scribed lines, the clear pieces probably would not fit as nicely. In fact the top and bottom scribed lines don't meet up exactly - tisk, tisk...Hasegawa. I glued the pieces in with white glue - its a canopy glue that dries clear. I will paint them with Tamiya clear red and blue later.

-
Well, one of my biggest fears have been allieviated - the canopy decal fits perfectly! Oh, well, too bad the blue and grey doesn't exactly match the rest of my pant job - its not too bad here, since there are quite a few shades of blue to work with. I guess the advantage to masking is that you would get the exact shade of blue and greys that you have painted with. I didn't mind too much. One tip is that I trimed all my decals right up to the image - as close as you can without cutting into the graphics - it always helps to not see the carrier film - especially when its on a clear surface. Oh well... Bowman is pretty much hidden - however, you do see more in person holding the model than these photographs can show.
-
This view you can actually see the forward display inside with the decal.
-
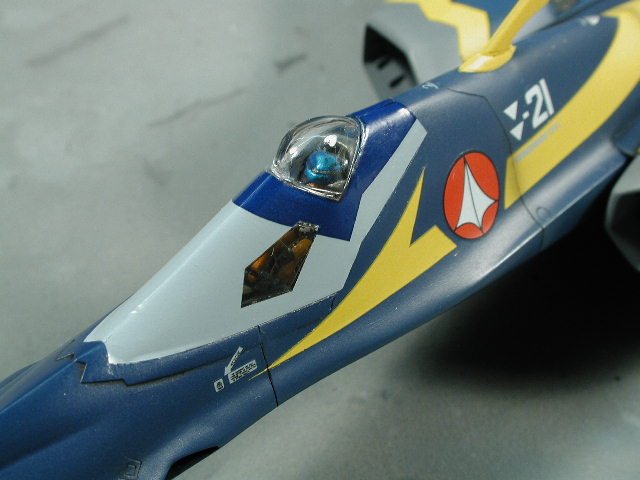
Here's the last shot we'll see into the cockpit before all my detailing gets hidden The messy seam is the liquid mask residue left over after I took the masking off - I'll clean it up
-
Well, backed by popular demand, here's probably the last shot you'll see with a clear canopy without the decal pattern.
-
I decided that I would space the vectoring fins out a little so it looks as though there is room to move. I filed away some of the paint from those little tabs so that it would have a better plastic to plastic bond. I think it looks better a bit out from the tailcone, than glued hard up against it - however, unfortunately, there is very little surface to left to glue against to create a tight bond - this may the most fragile part of the model. I would suggest maybe building these connection points up before you paint the area and maybe either pinning it like a resin model, or creating some kind of better joint between the pieces.

-
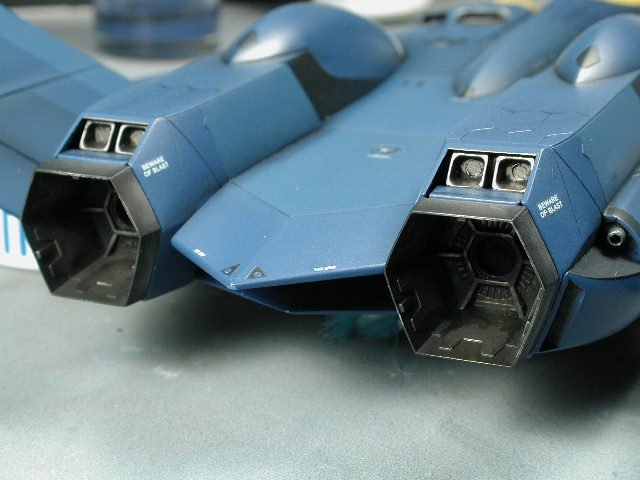
You see, most of that detail inside the afterburner goes to black after the thrust vectoring fins are in place, you can only see it if you shine a light straight up into it - but I know its there
-
Here's a shot with the tailcones fitted into place.
-
Thanks Gerwalker, great info - I might try that Tenax stuff sometime.
-
Good save!! I found the canopy decals to be an excellent fit though Sometimes the MicroSET/SOL has a tendency to allow you to stretch the decal out of shape and its is what dessolves the decal. I used a lot of water, and no MicroSET or MicroSOL - without these chemicals, you can play with a decal for hours without anything happening to them - you might loose the glue in the process though . Don't use this stuff unless you have too - the Hasegawa decals are really excellent quality and normally don't require any of this stuff. There are no details to telegraph through on the canopy anyways - its just flat. Yes, I find using the canopy to be easier than trying to mask a cockput that has already been detailed and painted with the pilot in. I am always afraid the tape will pull something out of the cockpit. Hey LTSO, if you can show me a good way of masking the cockpit - then I would love to learn, since it is preferable to leave the canopy till the very end.
-
Hmm, I guess I would be treated like a kid too (at age 34) - I use testors glue too!! Although, I have been looking at some of those other types of glues now. I've used CA (crazy) type glues, liquid cement, white, and epoxies, but there are two other types that I may want to explore. One is this Tenax stuff, some kind of chemical solvent, and the other seems to be Methyl Hydrate (?) - I think they bond acrylic display cases with this stuff. My main reason thus far for staying away was that I feel I have been breathing in enough bad stuff that I don't need some other solvent in my lungs. I was hoping that I could find something that bonds as quickly as CA, but stronger and easier to clean up leaving no white film or residue. If anyone has ever used these glues, I would love to hear your experiences.
-
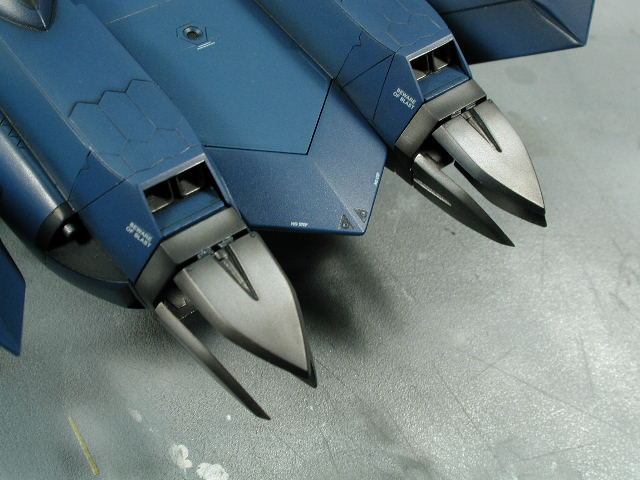
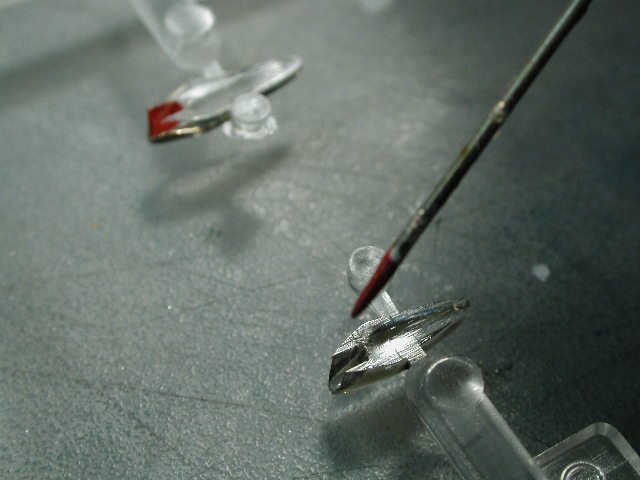
Here you see it from the other side - the side you are supposed to see when they are mounted on the plane. The clear lens appears darker, since I have brushed on a layer of Tamiya smoke to tint the lenses - I will brush another layer on tommorrow when this coat dries. I like the lenses darker tint since it will match my YF-19 nose lenses more that way - they sometimes appear black in the animation. I also painted the interor of the holes on the fuselage in flat black in preparation for these lenses.

-
Ahh, a very cool detail I noticed while looking at my reference material in the TIA books. I noticed that all the clear forward sensor lenses had a slot molded into them. When I checked the reference materials, there seemed to be a red sensor at the end of these lenses. If you put some red paint at the end of a pin, and brushed the pin into this slot - it convincingly simulates the head of a sensor unit underneath the sculpted glass lens when viewed from the exterior (hmm, did that make sense?)
-
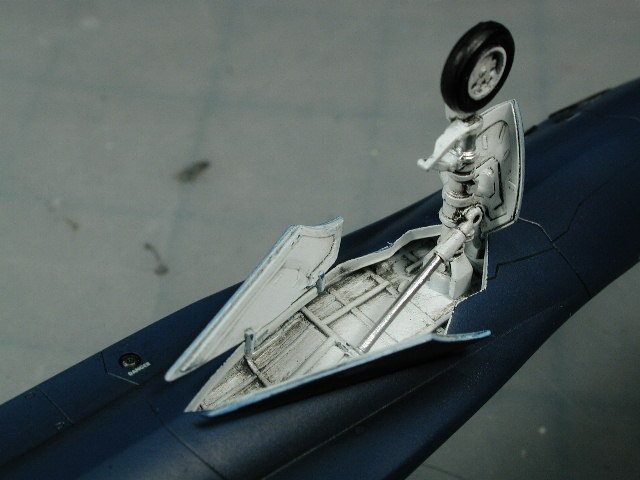
Here's a dry fit of the landing gears - no real purpose - just curious and impatient

-
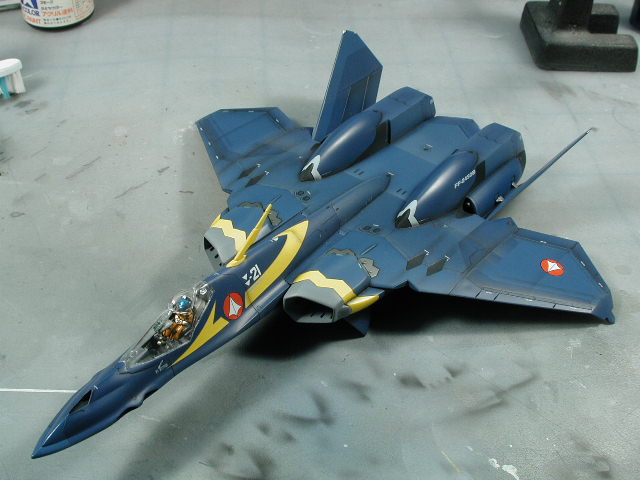
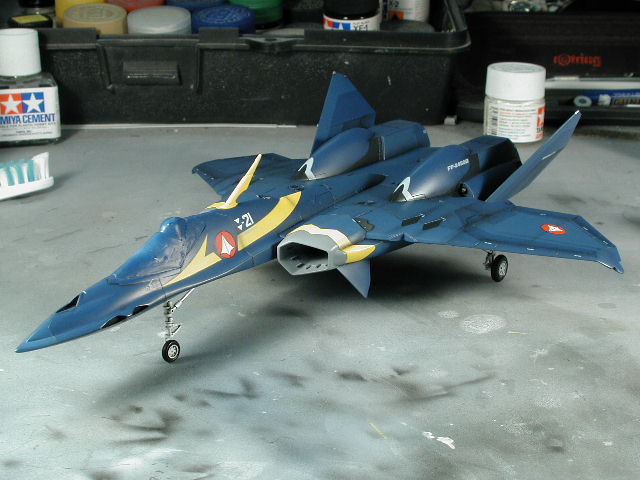
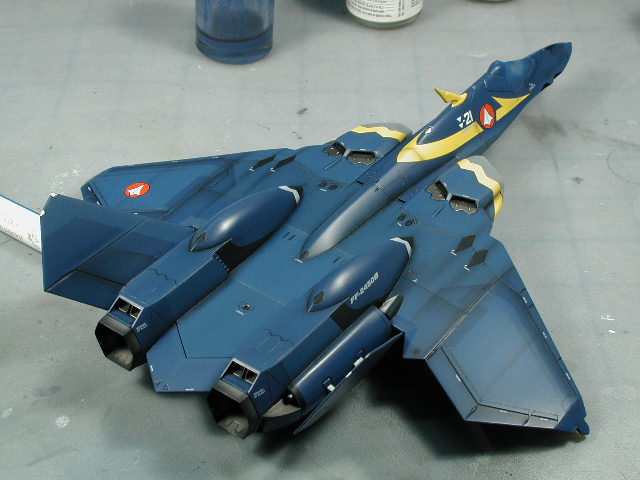
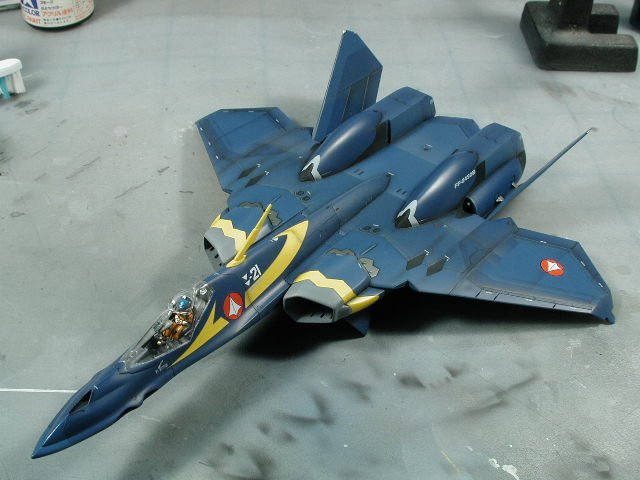
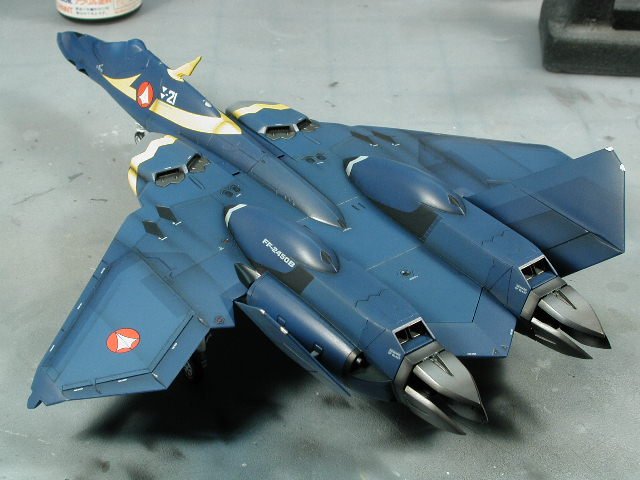
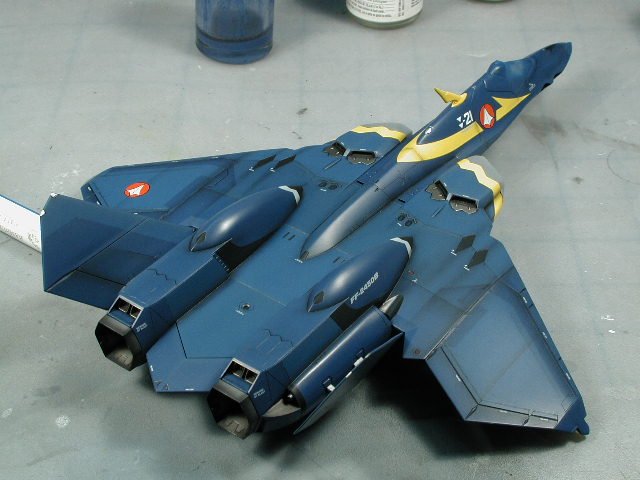
Here's a shot from above with the semi-gloss clear coat applied. I like the sheen now, it ties together the decals with the paint finish better and its still not totally flat. I will weather it with the flat clear coat tommorrow hitting all the leading edges and masking some panel lines to "wear" it further slightly - it should introduce any colours, just a shift in the clear coat sheen. By making certain areas flatter - it will lighten those area slightly.
-
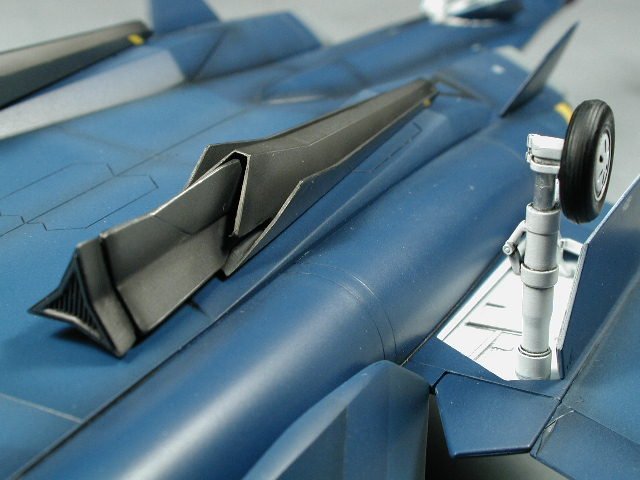
This lower view shows the opening under the fuselage where the legs would be tucked in and the corrugated sheet styrene I placed into that area to prevent us from seeing into the body of the aircraft.

-
Well, I wouldn't use that much of either - it wrinkles too much. I would use MicroSET first (sometimes its enough - and sometimes I don't need it at all - I don't use any of these solutions at all some of the time) only when I think there will be trouble. The Hasegawa decals are about as good as you can get from a kit manufacturer - so the problems are minimal. That being said, I do brush some on to the area to be applied, sometimes diluted with water, then slide the decal on, and brush some more on especially around the edges. I then blot and press down with a damp paper towel or cloth to get the decal to lay down flat against the surface details and telegraph as much detail underneath through. Because I blotted the decal, its kind of dry now, so I would "paint" some microSET on the edges again and let dry. If there is still a problem with the details telegraphing through from underneath or conforming to some wierd shapes, then I would selectively brush MicroSOL on just those affected areas, not the whole decal (it would wrinkle too much). Of course the MicroSOL works best while still damp. Okay, I didn't do much today - was out for most of the day. I did do a test fit of the tail afterburner cones - this shot shows the weathering done to them.
-
Wow! Great work Myerjessee!! Excellent work on the decals - all those large pieces can be tricky - but it seems as though you pulled it off, it looks great. You'd have no problems with the YF-21 yellow stripes Can't believe this is your second model - it looks great - can't wait to see more. Keep it up! I sense a modelling renaissance comming on... this is fantastic. p.s. I really love the green for the wheel wells and airbrakes - it adds an air of authenticity.