jardann
-
Posts
1050 -
Joined
-
Last visited
Content Type
Profiles
Forums
Events
Gallery
Everything posted by jardann
-
Hah! Great idea Benson, but it's definitely too late for that now. A Minmay guard theme of her red Chinese dress would be hilarious! Thanks for the tip MechTech, but I wasn't too worried about some uneven paint as I wanted the kit to look a bit old and used/reused by the Zents. We know they arean't supposed to really repair anything or do much maintenance on these and I wanted the finish to look a little rough or uneven, just not slathered on and drippy. I haven't used pine-sol, but for removing paint I have had good luck with a product called Greased-Lightning. It is a degreaser and is biodegradeable and pretty easy on the plastic too. Well, I actually finished this baby last week. I spent a couple of very late nights finishing up and then when I checked back on the club website I realized that the "Anything Asian" theme night isn't until September!!! My own darn fault, but at least I finished a kit!! Now that I realize I have more time, I may add a touch more weathering and a nice flat coat, but it is done for all intents and purposes. Sorry I didn't post more in-progress pics as I went, but I thought I was under a severe time crunch!
-
Lookin good benson! That wash makes a huge difference because of the nearly all white scheme. Breaks up the flat areas nicely and pops the details. You are really showing a good process to your builds and it looks like you are learning a lot as you go. Keep up the good work! I'll be interested to see your next project.
-
Sounds cool I might give it a try. Thanks for the tips!
-
Wow, I never really thought a technique like that would work with Tamiya or other acrylics. I'm guessing the base color coats weren't acrylics? Or did you use an enamel or laquer clearcoat before the weathering? I thought the iso would eat through the acrylic base coat. Thanks for the description!
-
Green is the first color that comes to mind, but that's not a big variation from the blue. Purple could be an option, just like the male power armor. Or it could be orange for a trainer like the VF-1D! Limitless possibilities!! Last night I got the head part all taped up ready for painting so I've got to decide. I really want to get some paint on it tonight if possible. Does anyone know how long Tamiya fine primer needs to cure before spraying a color coat over it? It sure does leave a nice durable surface.
-
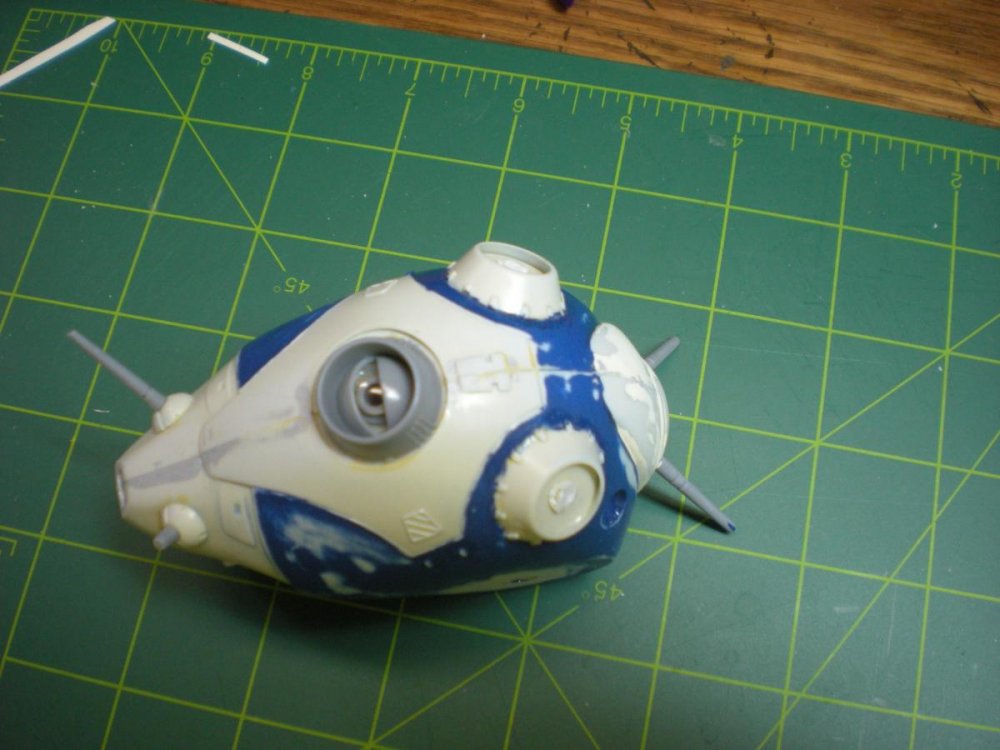
Thanks for the interest guys! Gabe, the repops are pretty reasonably priced, and to be honest, the "bones" of this kit aren't bad. The joint system is pretty ingenious and they seemed to work pretty well although they coudl be fragile and loosen up over time. That's why I have to go with a fixed pose for this refurb. It is kind of freeing to work on these old kits because there's nothing to lose and I can experiment as much as I want. jipe, It's funny that you mention that because I was just contemplating some changes to the scheme as I worked on the kit last night. The decals had to be sanded off and I don't have exact replacements. I do have some other Zent style decals but they are a bit different. I just might follow your suggestion and mark this pod up as if it was from a different platoon or something. Keep watching guys. Hopefully I can get this done by next week.
-
Hey yeti, can I still get in to purchase one of these? The kit looks great. It's a great finish to all of the planning and talent you put into this project.
-
Very sweet work on those kits! The VF-11 is my favorite mecha from Macross Plus. Yours has the cleanest, most crystal clear canopy I've ever seen on a model! Is that just from a nice dip in future or do you have a special technique?
-
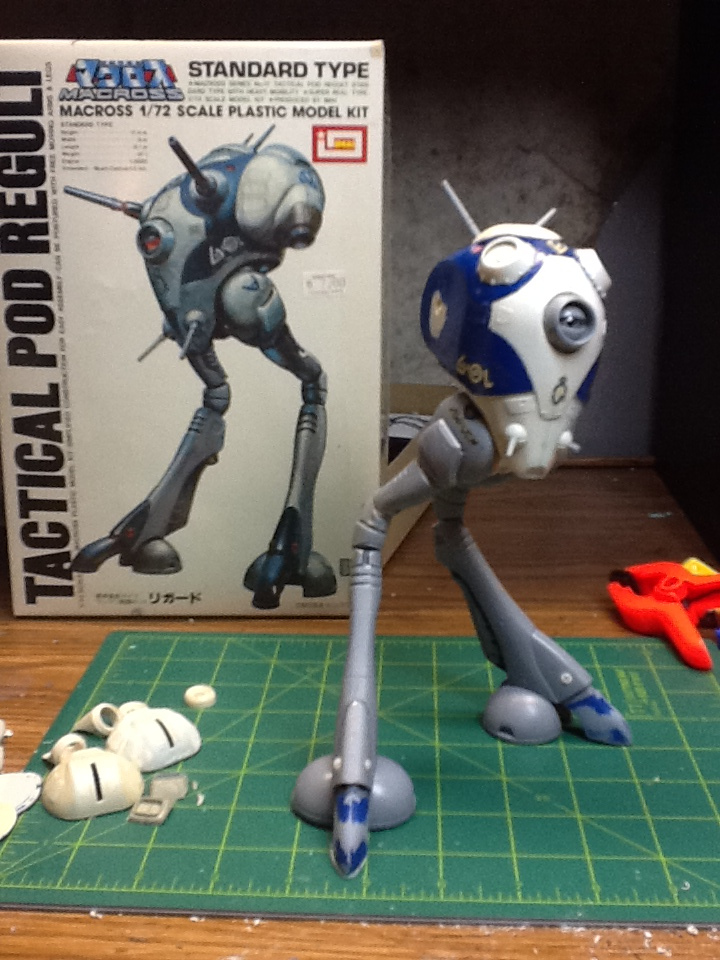
Bumping this thread because it is pure awesome! Mike, that is the way a Regult should look! I love the Imai box art too. I'm currently redoing a 1/72 Imai kit and my goal is to get the finish to look like the box art (or yours). Did you use oil paints for the streaking and weathering, or pastels? I think I am going to try some "filters" with artists oil paints to get that old painted metallic look. Has anyone else started building one of these behemoths? Show some pictures! I need more Regult!!!!!!!!! Mike, did you get this to Wonderfest? I hope it was a successful show for you!
-
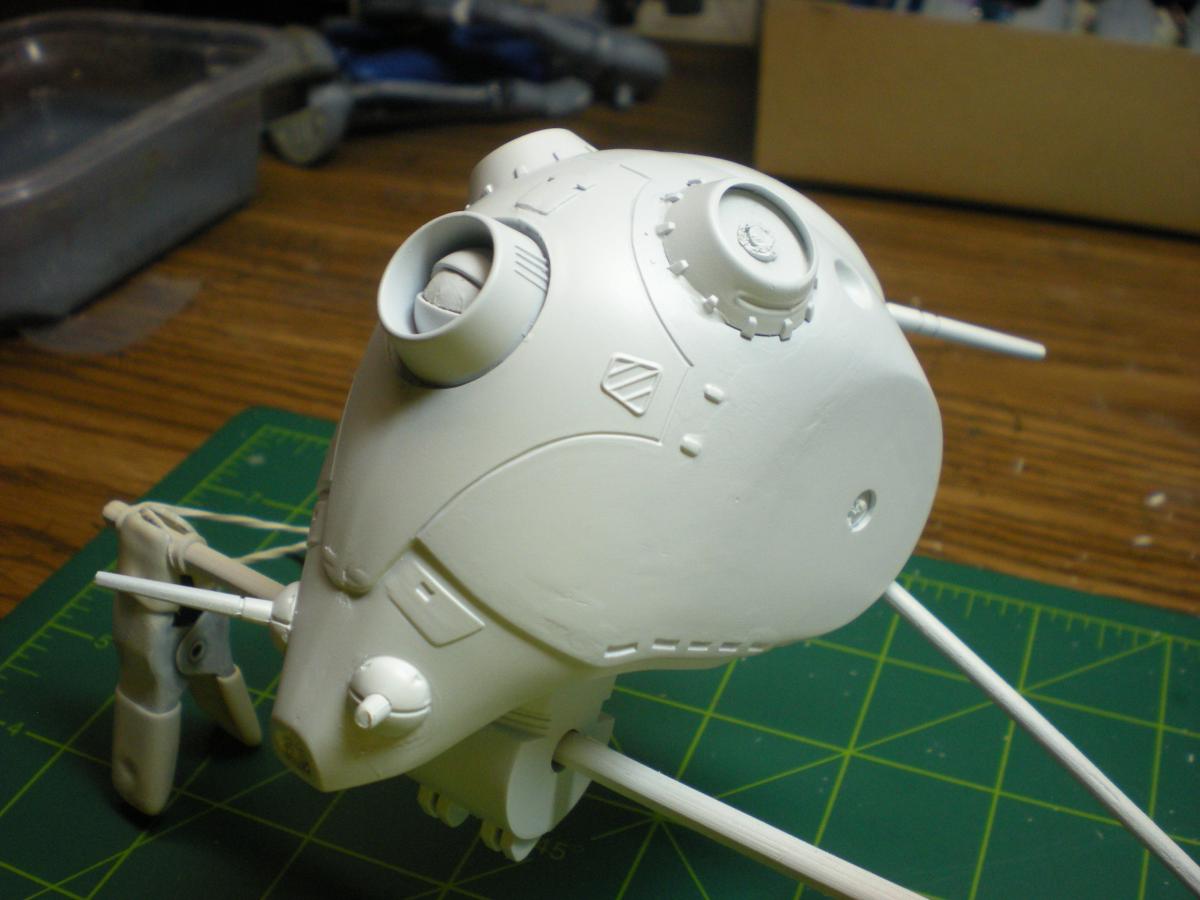
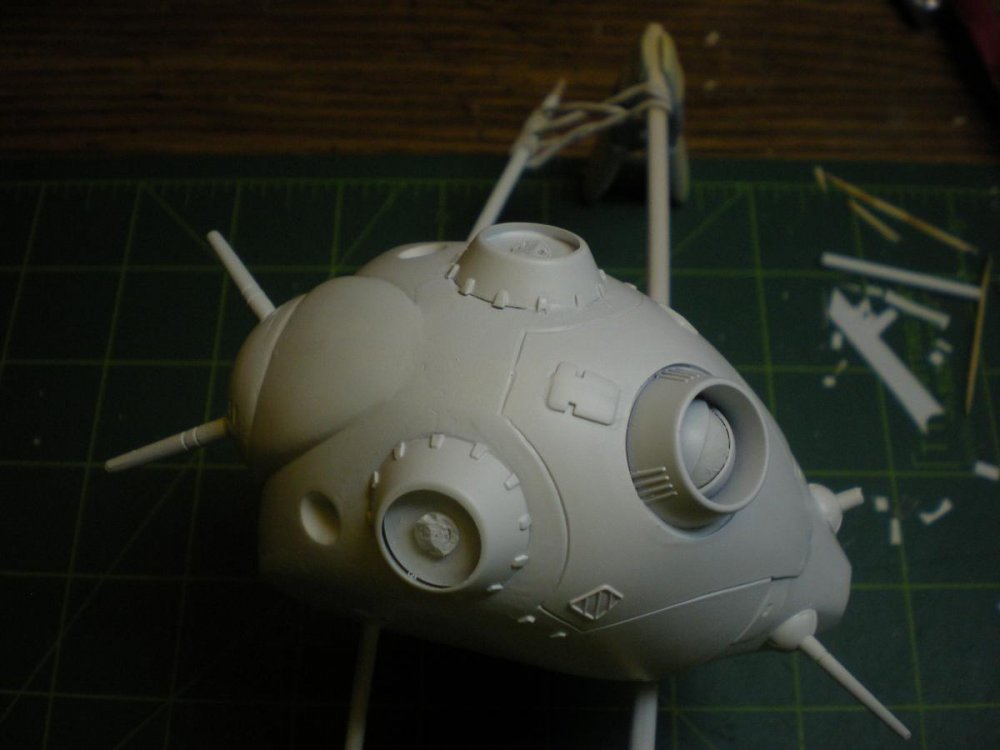
I was able to spend some time on the kit yesterday and so there was much sanding, and sanding, and sanding, and.....you get the idea. After I had the seams taken care of (relatively), I decided to add some detail at the joints that were really moved out of place due to the pose. I cut some concentric ring shims to fill in the spaces at the joints. Hopefully they provide a little bit of detail in those areas. Tonight I was able to get a layer of primer on the head and ears. The primer does reveal some flaws, but I think I'll be able to live with them. I want to dirty this Regult up a bit and make it look kind of worn and used up. Hopefully the flaws will blend in a bit as I add the weathering. My goal is to get this finished by next Tuesday so that I can take it to the local IPMS meeting. The theme for this month is "anything Japanese" so I think the Regult will fit in nicely! Thanks for looking in on the thread, and please feel free to share any thoughts and ideas. I'll post some more as I make progress.


-
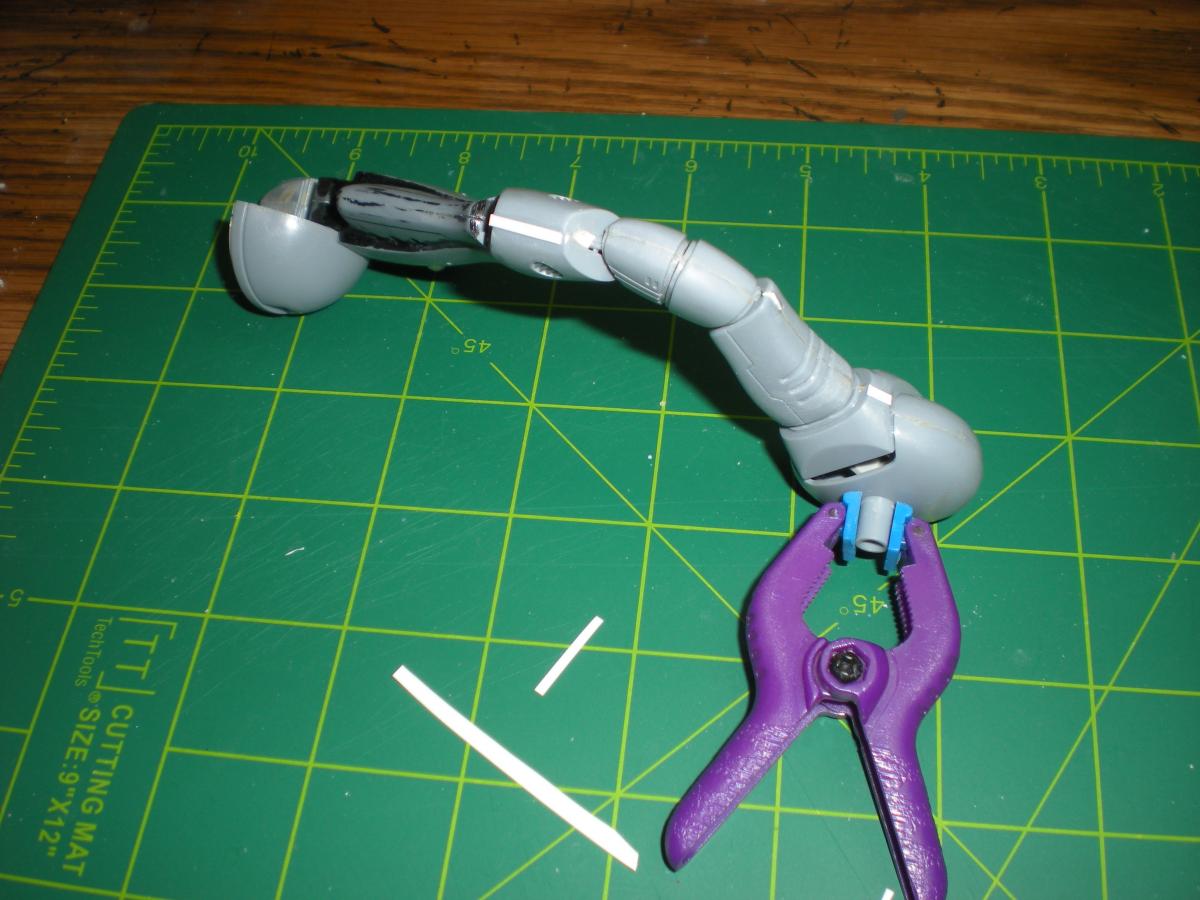
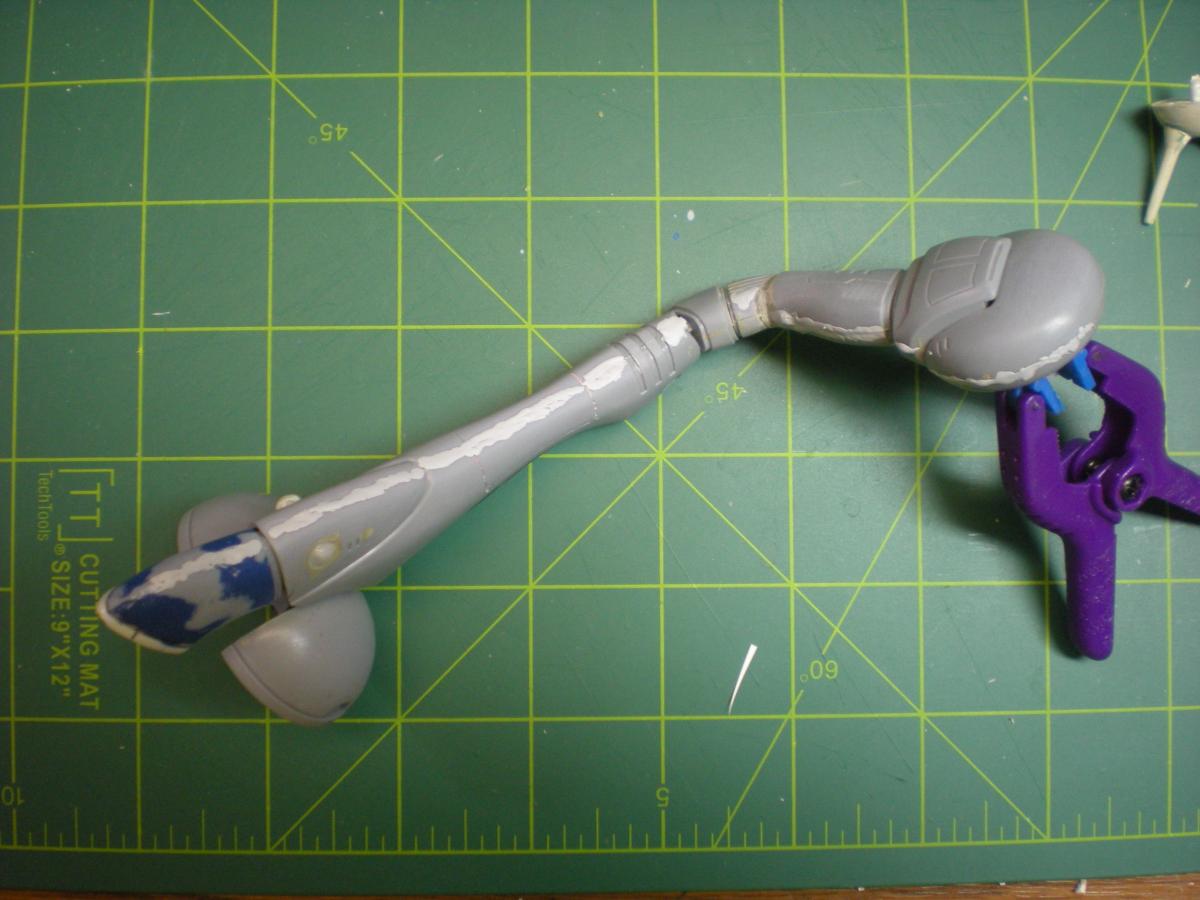
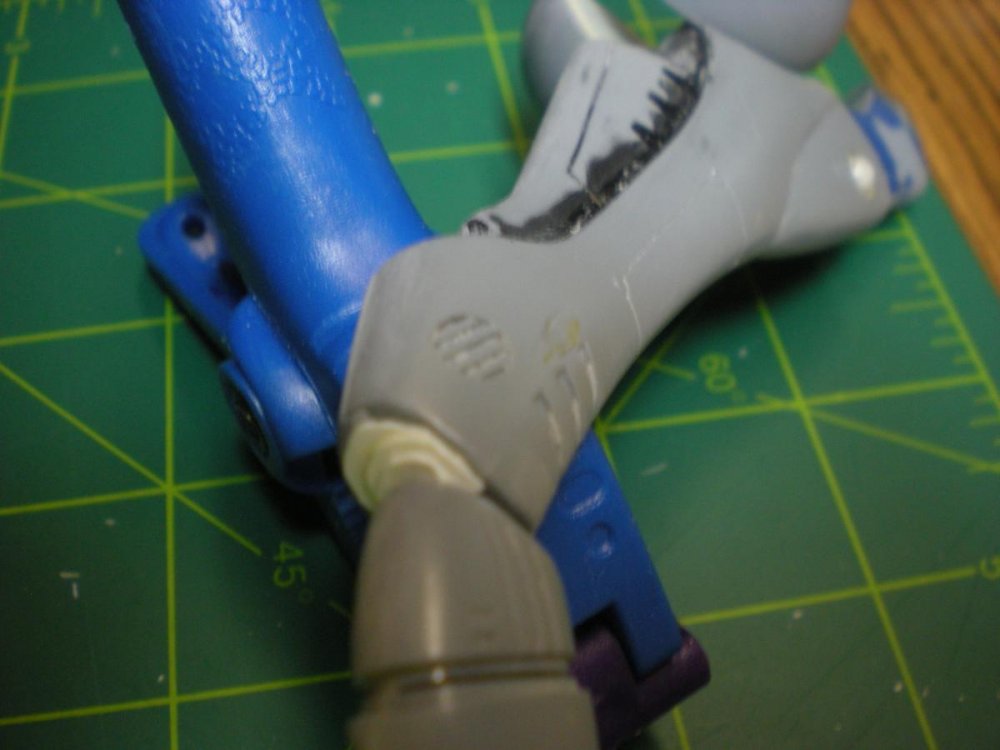
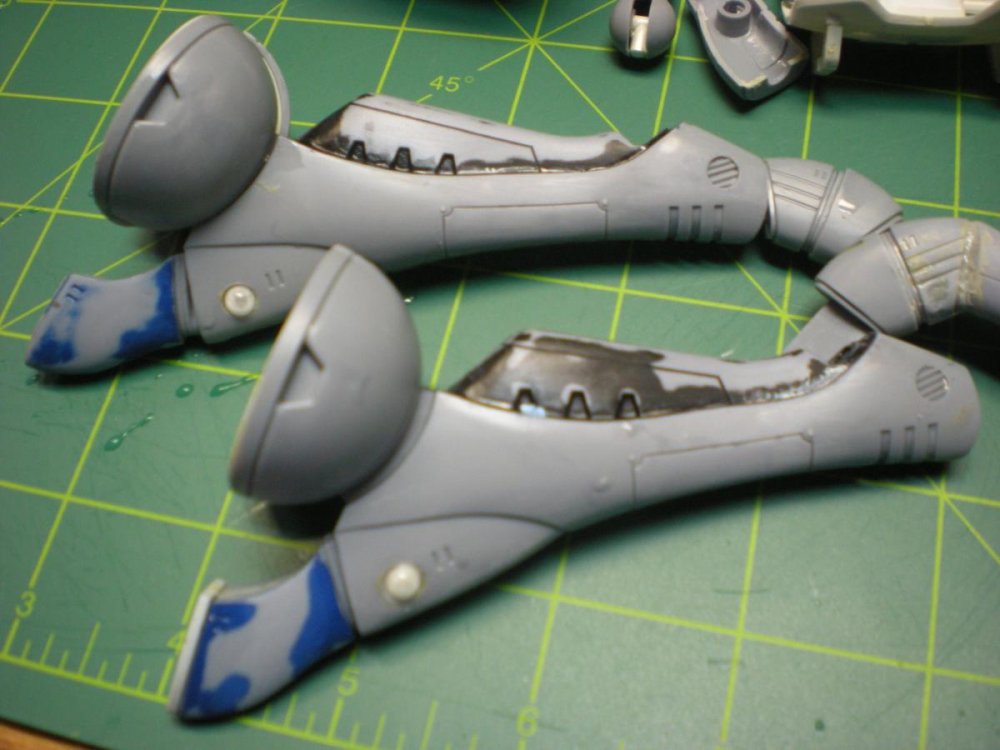
OK, so I tried to sand all of the rough paint off of the parts. The head and the one ear were the worst. I hit the legs too. At this point I wanted to get an idea of how the model would be posed. This needed to be put into a fixed pose because most of the joints were loose and wobbly, or just falling apart. This is the pose I decided to go with: I think it has at least a little bit of life to it. I secured the pose by cementing all of the joints into position using Tamiya Extra Thin cement. It works quickly and flows easily into the seams in those tight spots. After that, I turned my attention to the legs. I added shims to the seams with wide gaps and also wedged plastic into the spaces left at the joints in order to secure them a bit more. Then I puttied all of the seams and left the parts to cure for a couple of days.


-
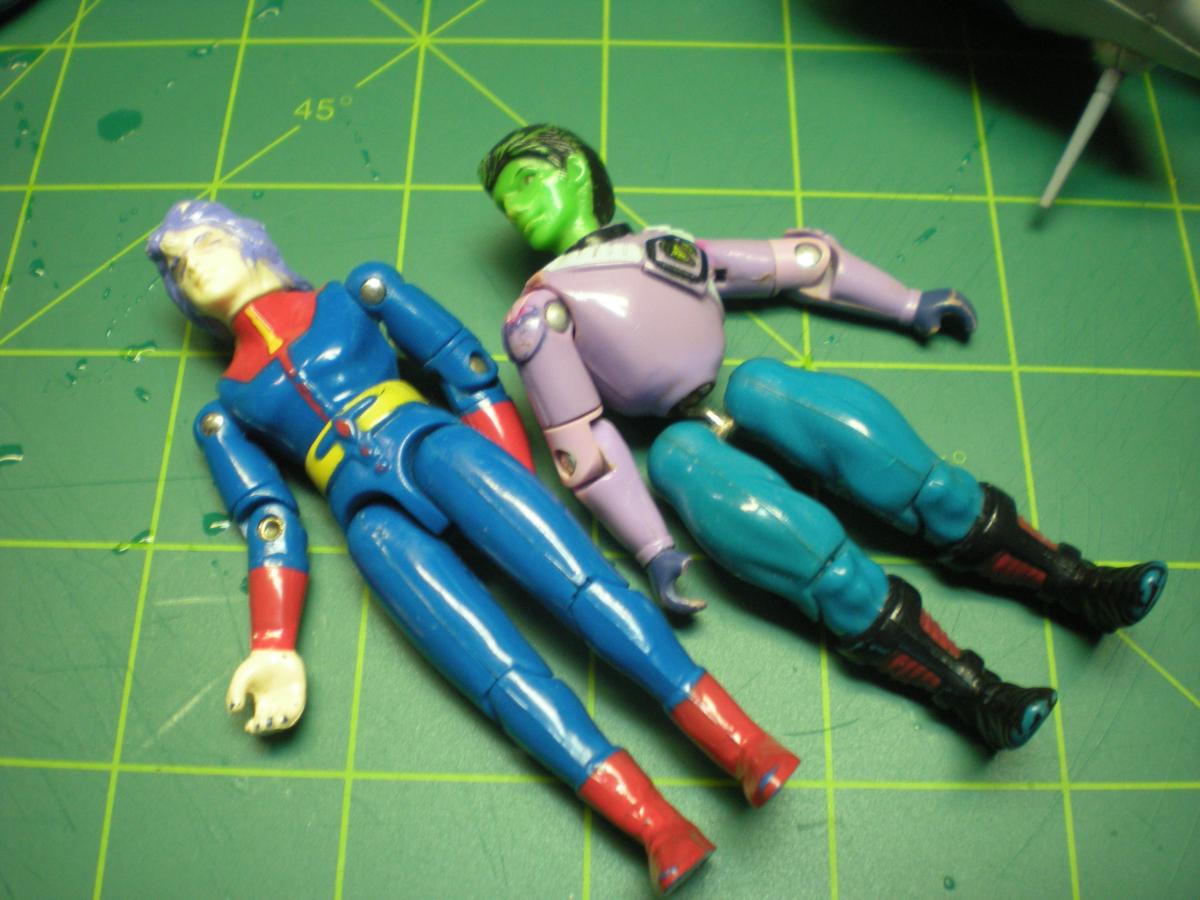
Oh yeah, the kit had some exciting "bonus" figures riding around inside the box too. Take a look at these specimens! Pathetic aren't they?

-
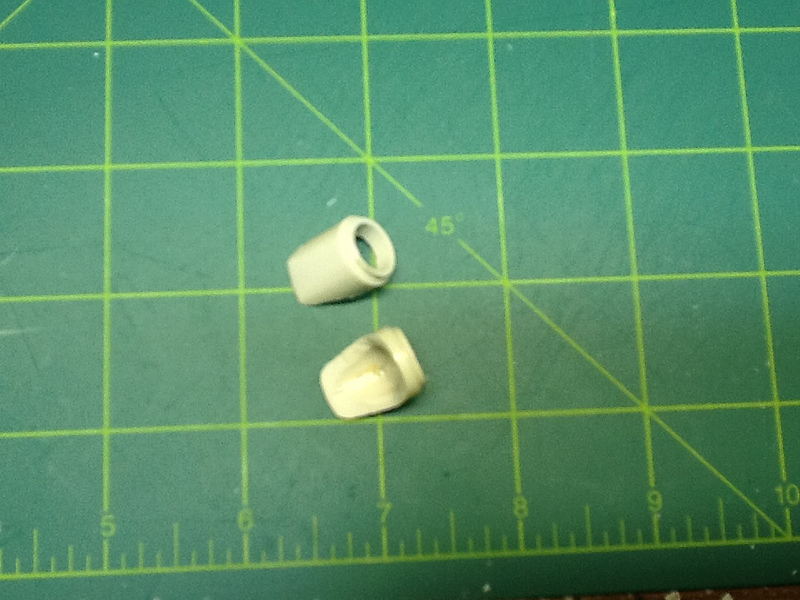
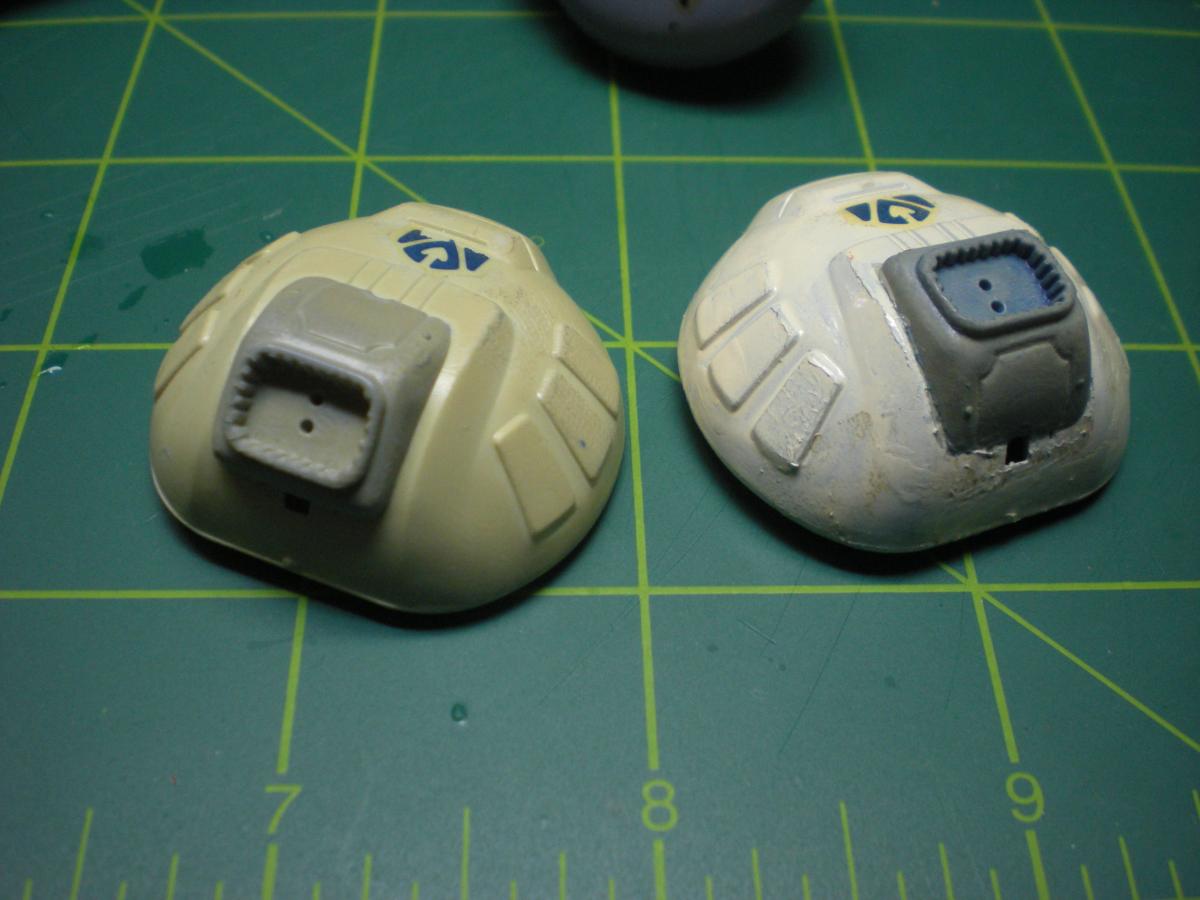
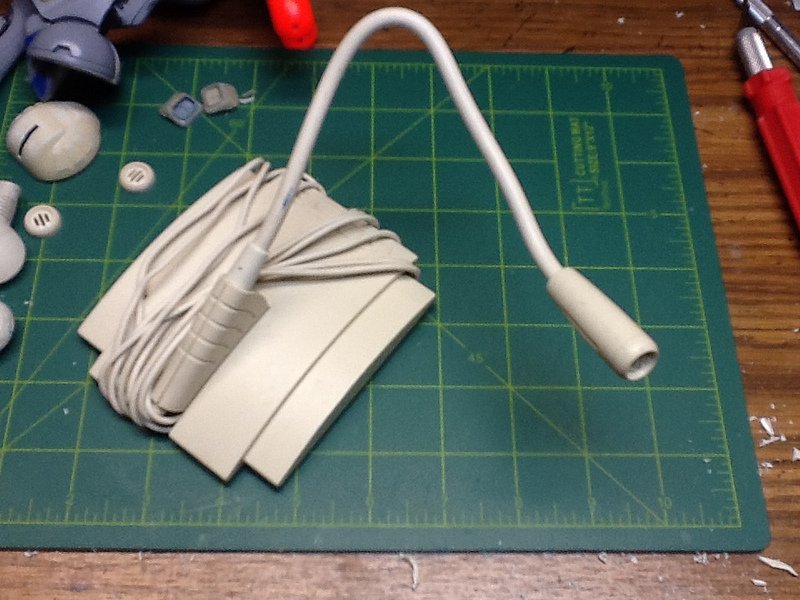
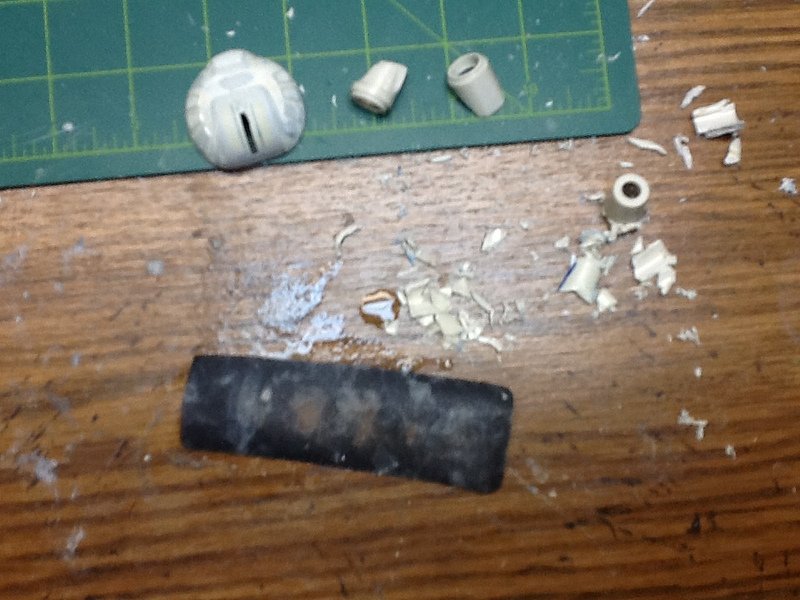
Looking at the box top and line art for the Regult, I decided that the thruster housings on the "ears" were more round than the original parts represented. So, I scrounged around and found a couple of these to start with: They are old PC microphones. I am using the microphone end part and cutting it to conform to the "ear" part on the Regult. After a bunch of cutting, grinding, sanding and filing: I was able to come up with these new thruster housings: You can see the difference here: I'm pretty pleased with them and I have found the perfect size bell housings to fit in the ends to represent the actual thruster nozzles.


-
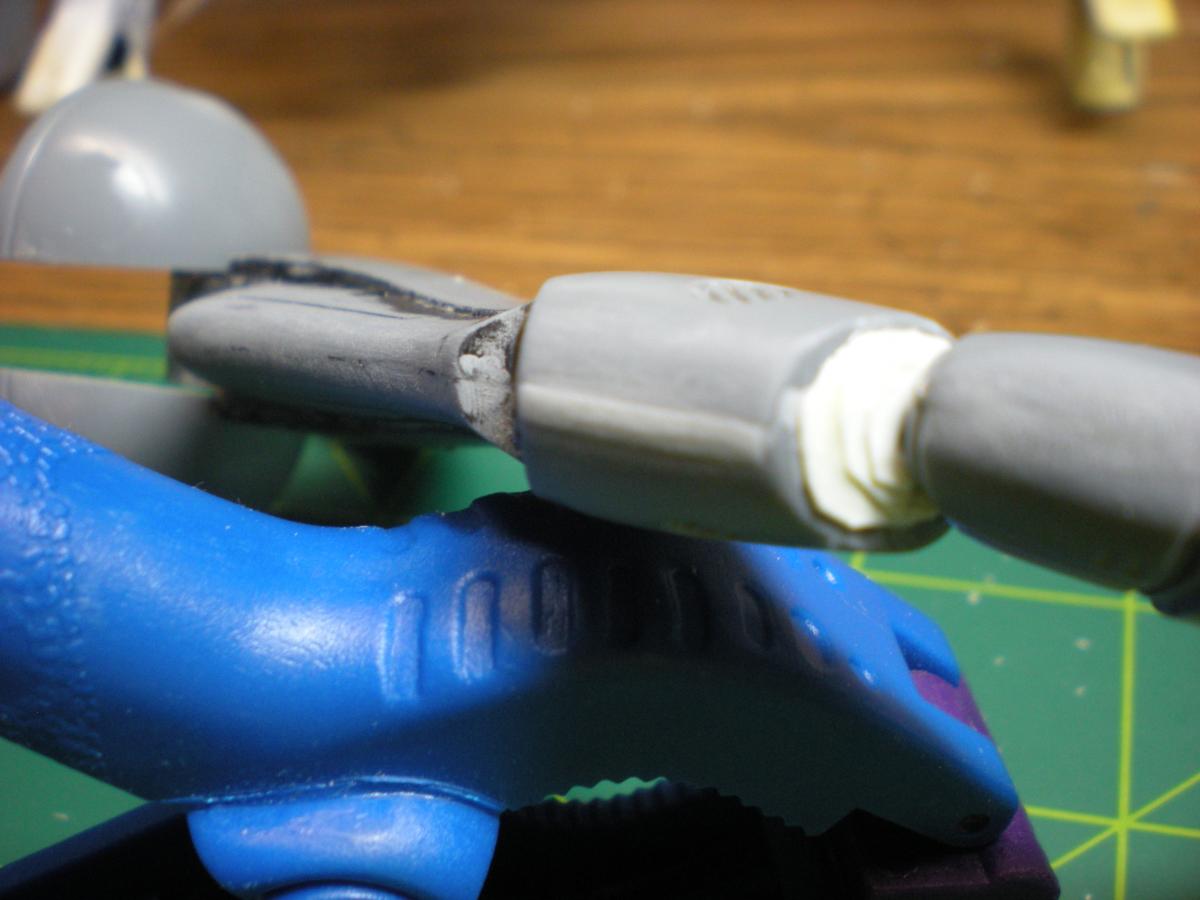
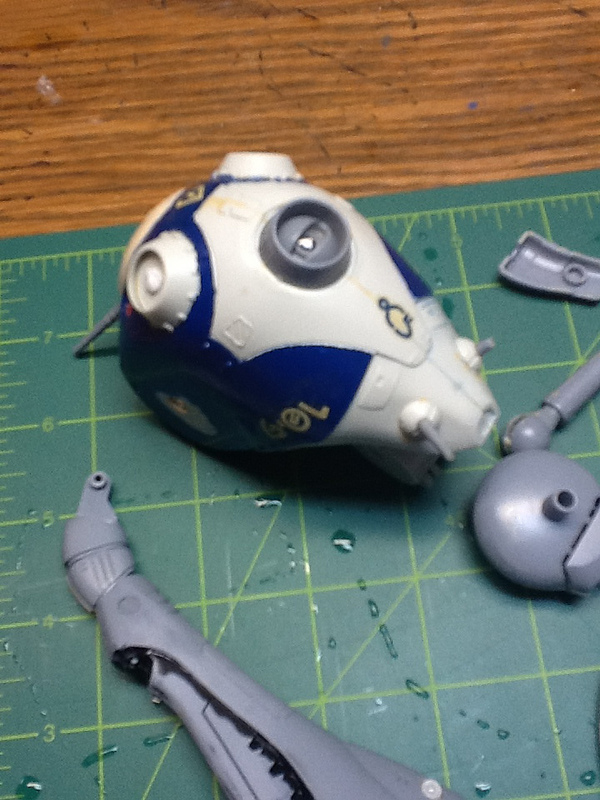
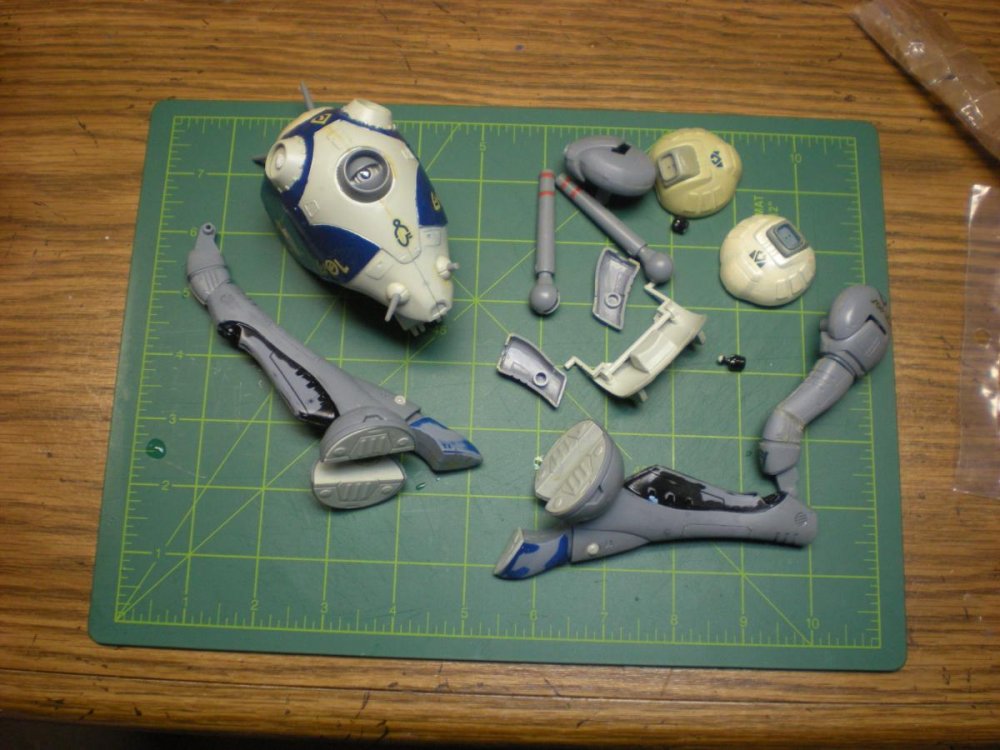
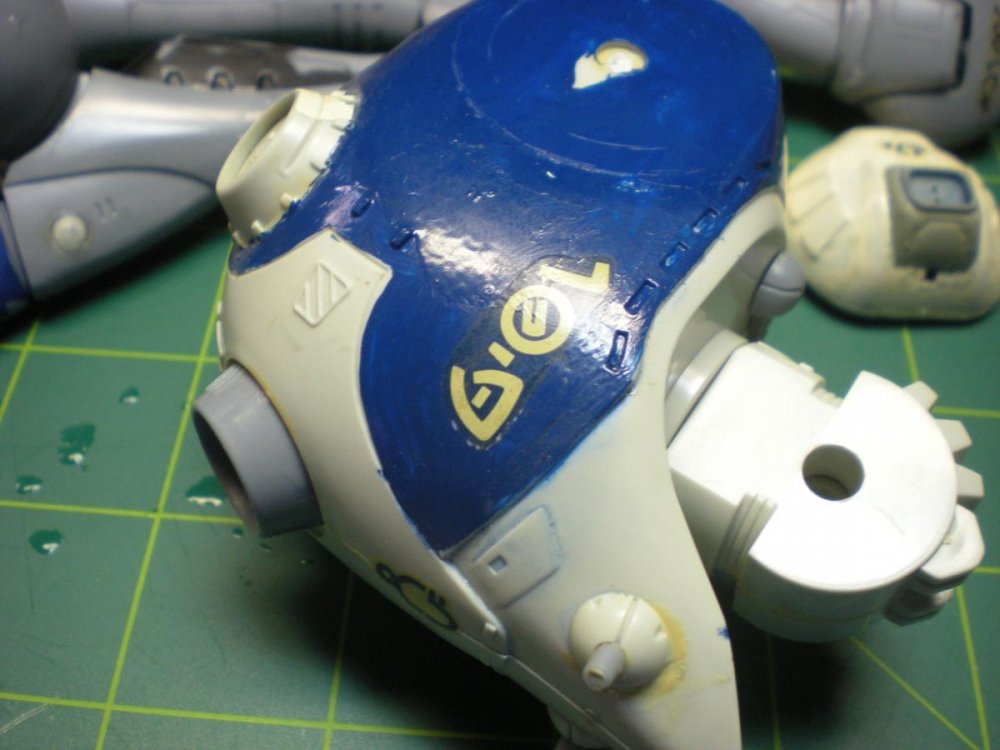
Hi everyone. I've been pretty quiet on these boards lately, but I've begun work on an old Imai Regult 1/72 kit and I thought I would post some pics about it here. I actually started a WIP thread over on Starshipmodeler Forums, but since this is a Macross kit I thought it would be good to post here as well. This kit came to me from a large lot of built and unbuilt kits that I picked up off of Ebay a long time ago. I got a ton of stuff for cheap and have had a bunch of fun looking through all of the old kits and random stuff that was thrown in the lot. The Regult kit had been built, but was done pretty poorly and was in pieces anyway. You can see the state the parts were in in the following pics: Pieces Close up of the head, showing the heavy and sloppy paint job and the ugly seams. You can see in this pic that one of the thruster details for the "ear" parts is installed upside down and the paint is piled on the one part. Those thruster detail parts had to come off, but unfortunately the edges broke into ragged pieces and I decided to scratchbuild some replacements.


-

Repaint DYRL Max VF-1 to DYRL Hikaru VF-1 advice for noob?
jardann replied to ultraman zoffy's topic in The Workshop!
No reason why you couldn't just mask around the blue areas and overpaint with the correct color red paint. That's the theory anyway. In practice, you may find that you would need to prime over the blue in order for the red color to show the correct tint. Also, you would have to be very careful to leave all of the blue parts uncovered or else you could find a strange thin blue stripe around parts of your new red color. It would probably be a good idea to test the paint you plan to use to be sure it does not cause a bad reaction with the blue factory paint. If you are only wanting to cover the blue areas though, I don't see why you would really need to remove the blue. That would be an added step and added difficulty. The factory tampo printed paint seems to be pretty durable so it should be an OK base for the new color; as long as there are no chemical reactions between the paints. I think you can often find the Hikaru 1As on sale for a pretty reasonable price though. It may be worth your time and effort to pick up one second hand. Then you could have two valks, or you could sell the Max to recoup the costs. -
Wow! Your progress on this is incredible! It looks quite amazing. I can't wait to see it completed.
-
I just caught up to this thread and I've gotta say things are looking pretty sweet in here! I think the tops of the engine nacelles need to be a bit more rounded. They should have a bit of a humped look to them. All of the corners on the nacelles need to be rounded a bit. They are still too square. They definitely look much better lowered "into" the wings a bit. They don't really stand off of the wings on mounts or anything. The rear exhausts/vents on the nacelles look very good now. I also think you will need to round off the fuselage top at the wing/fuselage joint. It needs to conform more the the rest of the fuselage shape. It shouldn't be so square across the top. It is kind of like a flat piece of clay that is draped over the fuselage to form a ridge at the front and then blended at the back. I hope that description helps you. The intake (pod..bump?) on the top of the fuselage right behind the cockpit will probably need to be enlarged too, but I'm probably getting ahead of your process a little bit. Wow! That passenger cabin must be a really noisy place. Especially during VTOL! You're really progressing along great on this project! As always, my little quibbles are just posted to hopefully help you in the process. Hopefully I will be able to pick one of these up when they get to the kit stage.
-
Congratulations! That must be quite a feeling of accomplishment to see your work generated in solid three dimensions. Can't wait to see it with a primer coat for a better view of all the details.
-
Fantastic job on that kit. It looks great! I don't usually care too much for camo schemes on destroiods, but your SEA camo turned out quite nice if you ask me. I have to agree on the mud, it needs some volume/chunkiness maybe and color variation to make it look a little bit more appropriate. Everything else looks lively and very realistic.
-
That thing is awesome! Your work never ceases to amaze man. I would definitely like to be on the list for a kit when you get around to it. I remember a small picture in a Starlog magazine of the primary regult attack on Macross island is what piqued my interest in Macross. It took me a couple of years to track down any more information on the series, but the look of the regults stuck with me until I could find out what it was all about. I really think the enemy mecha are the most unique and inspiring designs from Macross. Fantastic project Mike!
-
Gauging interest for 1/55 MOSPEADA FIGURES!!!
jardann replied to Jasonc's topic in Anime or Science Fiction
Hey! These look really sweet! Please add me to the interest list if it's not too late. You may want to start a thread in the for sale section to pick up more interest. I just saw this thread today and had no idea this project was in the works. I also noticed mention of a 1/72 scale set. I would be interested in that too depending on price. -
Amazing work on that lolicon! Just getting those stickers to conform like that must have been a real PITA. The time and effort paid off though. I can't believe Bandai did not produce those as decals!
-
Yes!!! These have been needed for a long time! Thanks for finally getting to this set.
-
Nice Grayson! One of my all-time favorite planes and you've got it looking excellent. How was the build with the Hasegawa kit? My LHS just got the new Trumpeter 1/32 Skyhawk in and I was soooo tempted to pick it up, but I didn't really have the funds ($124) available that day.
-
Thanks for all the tips and info. And the great pics! Those are certainly some beauties! I'm going to have to take some time and try the Alclad stuff. Don't know if I can get the surface prep good enough for it, but I'll never know until I try! Good to hear about the kits too. I always appreciate knowing about some older kits that still have great potential.