jardann
-
Posts
1050 -
Joined
-
Last visited
Content Type
Profiles
Forums
Events
Gallery
Everything posted by jardann
-
Hey Jason, Hope you're feeling better. I'm still waiting on a Mom's Kitchen 1/72 kit. Just wanted to touch base and make sure it is still in the pipeline. Hope to hear from you soon. Take care.
-
Fantastic looking job on that kit. Really love the CF scheme too! you've got some good skills, I hope to see more from you.
-
Take your time man. Lord knows the kit will probably sit in my stash for a couple of years before I get to building it anyway! As long as you're communicating with us like you always do, it's all cool and I'm in no rush.
-
I primarily use the Tamiya Extra Thin as well. Sometimes I use the Testors liquid cement, This is thicker than the Tamiya and can give you a longer working time to align the parts and it won't run down every little nook and cranny on the parts. Make sure you get the black bottle with the black label. It has a metal applicator tip that doesn't clog. Stay away from the orange labelled bottle. It has a plastic tip that clogs and becomes useless after a couple of uses, I don't even know why they sell it in that bottle. Any of the various plastic cements actually melt and fuse the plastic parts together so that they kind of "weld" the parts together creating a strong bond and if done properly, fills the seams where two parts meet. I know several people who use CA (super glue, there are various brands in varying degrees of thickness etc.) for all of their assembly. I only use it for certain applications like when joining non-plastic parts etc. It can help fill gaps, but it eventually cures harder than the plastic, so sanding it can be difficult after a while. For clear parts, I usually use plain old white glue (Elmer's brand etc.) It doesn't mar or fog the clear plastic and it can fill small gaps around the edge of an airplane canopy. Sometimes I just flow a bit of Pledge/Future acrylic floor polish around the edge and let that hold the clear parts in place. That is not as strong, but easily removed or corrected if needed and very gentle to the plastic.
-
Don't buy lacquer thinner from a hobby shop. You should be able to get a huge container of the stuff for cheap at your local hardware or home goods store. Anywhere that sells paint should really have some. You can use the lacquer thinner in small containers to soak your AB parts to clean them and just spray a little cupful through your brush outside in the open air to give it a quick flush. You should be able to do that safely without a respirator if you are outside, but I certainly wouldn't use it to thin your paint and run a long (or even a short) painting session inside. The lacquer thinner should clean up just about anything you use in the airbrush with ease. Just don't let it sit for long on any plastic parts as it could attack the plastic.
-
Yeah, the Valkyrie is a small aircraft to begin with and 1/100 is much smaller than 1/72. I had a whole collection of 1/100 scale kits including the huge Robotech factory for a long time. In the old days, 1/100 scale was the way to go to get the largest variety of Macross subjects. Some of the old kits in that scale are really bad though and I never got around to building too many. Then Hasegawa redefined Macross models with their 1/72 line and I jumped on that bandwagon. Much better scale fidelity all around and its easy to modify accessories from modern jet model kits to be used along with the Hasegawas. Then we have had a bunch of garage kit makers on these forums and in a few other places start making wonderful resin kits of nearly any Macross subject you could desire and I haven't looked back. Now I have a whole collection of 1/72 scale Macross kits, and a much thinner wallet, but I still haven't gotten around to building them!
-
I've got to agree with Noyhauser. the old Imai or Arii 1/100 fighter mode kits are actually nice little kits and can usually be found for very cheap prices. Not much in the cockpit, but they build up quite nicely. the 1/100 battroids and gerwalks take a bit more care to look good, but they are quite simple too. The 1/100 destroids are quite nice as well, but do have some seams that take some attention. I'm sure you won't go wrong with the Wave 1/100 kits either. I haven't built one, but they do look snazzy in the pics I've seen. Be sure to post some pics of your finished project. We all love to see built up models!
-
Amazing job as always Mike! That is a definite "Grail" kit. I love the stance on that kit. It makes it look like it just wants to jump off the base.
-
Oh, hey what's the status of these? I'm not in a hurry and glad to wait, but I hope I don't miss out on ordering one of these.
-
Oh yeah, moving is rough! We moved a year ago and I'm still trying to organize hobby stuff in the basement. Having a dedicated space will definitely be worth it though. Good luck with the move, can't wait to see more of your work!
-
Definitely need 1/72
-
I'm guessing you didn't put a gloss coat on before the decals. That's probably what is making the decals stand out. It's called "silvering" and happens because the clear decal film around the edges can't conform to the rough, matte surface of the paint. You can give the whole kit a gloss coat before you apply the decals or you can just apply some gloss coat to the spots the decals will go. Then, after the decals have settled and dried you can go back and give the whole kit a clear flat coat to even out the finish. Many modelers including myself like to use Pledge Future floor polish as a gloss coat. You can brush it or airbrush it straight with no thinning and it is pretty forgiving. As a whole the kit is really great. You should be proud of your results. I've been modeling for most of my life and I'm always pleased to get results like that. The weathering is nice and subtle. The seam work is very good (fixing seams drives me crazy !) And the paint application looks very good and even as well. The decal thing is a pretty easy fix that you shouldn't have any problems improving. You need a pilot in there though! lol! I always want to see a pilot in a plane with the gears up. How's that thing flying anyway? Remote control? Anyway, that's my own little nitpick. Great job man, can't wait to see your next project!
-
Glad to hear you could fix up those joints again. It looks great. You really improved that kit. Thanks for showing us your process with it.
-
Looking good. Great job on replacing the intake area. I would have thought that would be a lot of difficult work, but it looks like you didn't have any trouble! Can't wait to see it painted.
-
Looks good Kelsain! You've struck a nice balance between the straight anime look and the box artwork style. Good job outlining those squares on the sides of the "ear" parts. Were there some nice panel lines there for you to follow, or did you use some stencils? On my 1/72 after the original heavy paint job, my sanding and then the fresh coat of paint, some of those details were nearly obliterated! I ended up just shading around them when I did the oil wash and trying to very gently clean up the area to leave a little bit of the wash around the squares. I think they look better like yours with a bit more demarcation. It's really great the way you've managed to hide all of the aftermaket joints you integrated into the kit too.
-
Oh yeah! that little bit of streaking/dullness to the finish gives it some life! I just want to be clear that I certainly wasn't criticizing before, just making a friendly suggestion/sharing ideas. You've done a very nice job on that valk and however you like it is the way you should make it. Glad to see you're not too timid to experiment a bit though. That's how your skills will improve even more! Keep up the great work and keep having fun with it!
-

Repaint of an Older Armored Yamato 1/60 VF-1J
jardann replied to Project YF-67's topic in The Workshop!
That turned out excellent! I really like the color scheme with the greay accented valk and the orange/yellow accented armor. They complement each other nicely You should be able to find some of the older 1/60s on sale from time to time for reasonable prices. I encourage you to do more. We deserve to see more of your great work!!! -
Very nice custom. It's too clean though! A rough and ready marine 'mech should look like it's been out slogging through mud and kickin' a$$! j/k Really is a cool scheme and I agree we need a better pic of the squadron artwork. What kind of paint did you use? Is it holding up well to transformation?
-
Kelsain, you make that bad boy look good! That's a really smooth build up. Your skills add quite a bit of quality to that kit. Great job!
-
Holy Cow!!! You get some radical poses with those improved joints! I'm glad my build up inspired you to get back to this! This baby looks fantastic. It is a huge improvement over the stock 1/100. I love that you can get it to sit in the "stowed" position! It makes me want to pick up another 1/72 and build in some of those joint pieces to really show off what a regult is supposed to be able to do. Your finish on all of the joint areas is really superb too. It's a testament to your modelling skill. Keep up the great work!
-
Thanks guys! I'm glad you like it. I always enjoy seeing other people's WIPs and finished kits. It's nice to contribute some content back to the site. Kelsain, I'd love to see some pics of your 1/100. They are nice, but yes, the detail and proportions are even better on the 1/72 regults. I highly suggest you pick up a repop! They are pretty reasonable now and the assembly is fairly simple. If I can rejuvenate this old one, it shouldn't take you too much effort to build one up straight from the sprues! Grapetang, I first heard that motto over on the ScaleModelAddict website. A nice website for all around modeling with a lot of Sci-fi too. I think it rings true in almost all situations, but especially this hobby! Those are some nice decals you have listed jefuemon, but I've already got two Minmei Guard valks waiting for bench time and I think I'd have to go a little different for a regult. It's a nice deal though, good luck and thanks for checking in!
-
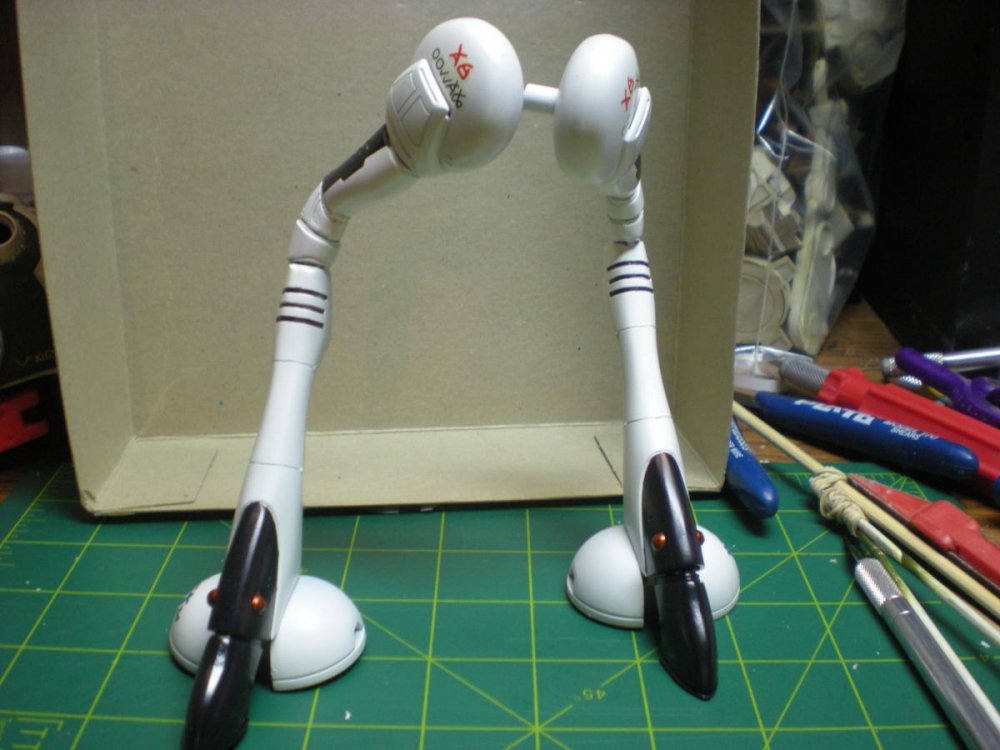
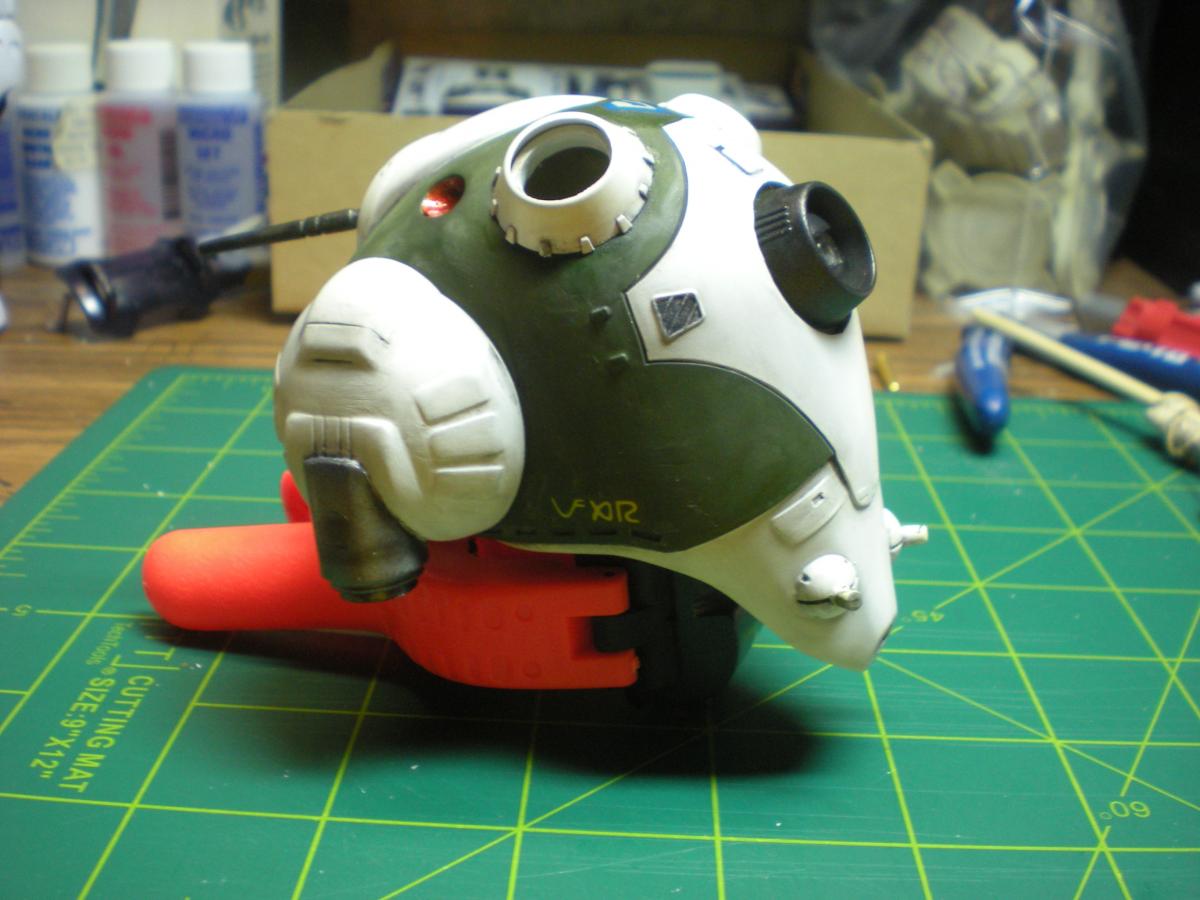
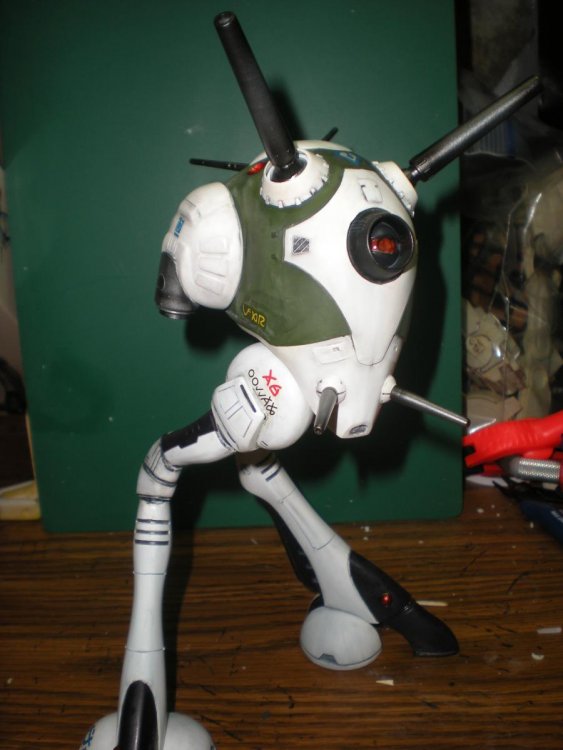
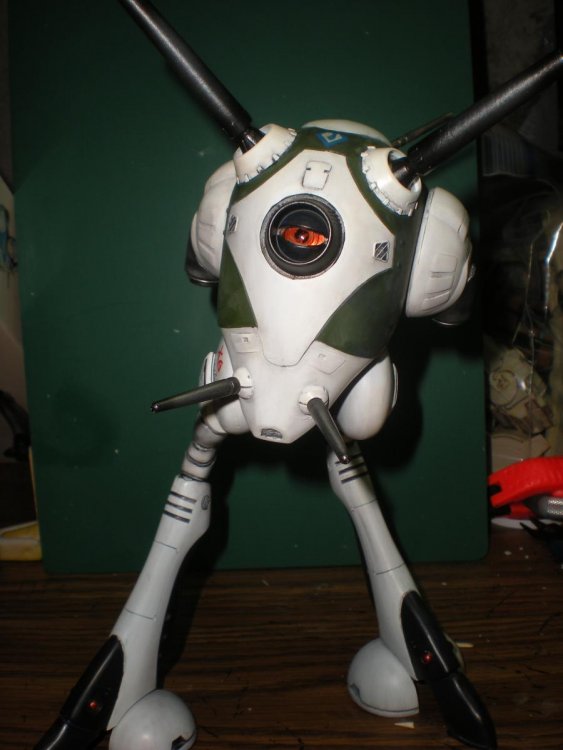
So here are some pics of the final assembly! I'll try and take some pics out in the daylight one day soon just to see if they will show the details a little better. I'm quite pleased with the results, especially considering what the pile of parts looked like at the start! Seams really are the bane of my modelling existence, and there are still some that show in spots on this model, but they are pretty small and over all I like having this baby finished and on the shelf. Like I said, finished is better than perfect and this one is done. Thanks for all of the comments and support guys! It really helped keep me going while I was trying to finish this thing under my percieved deadline. lol! Anyway, more comments are always welcome and hopefully everyone enjoyed watching the process of this build. Let me know what you think!

-
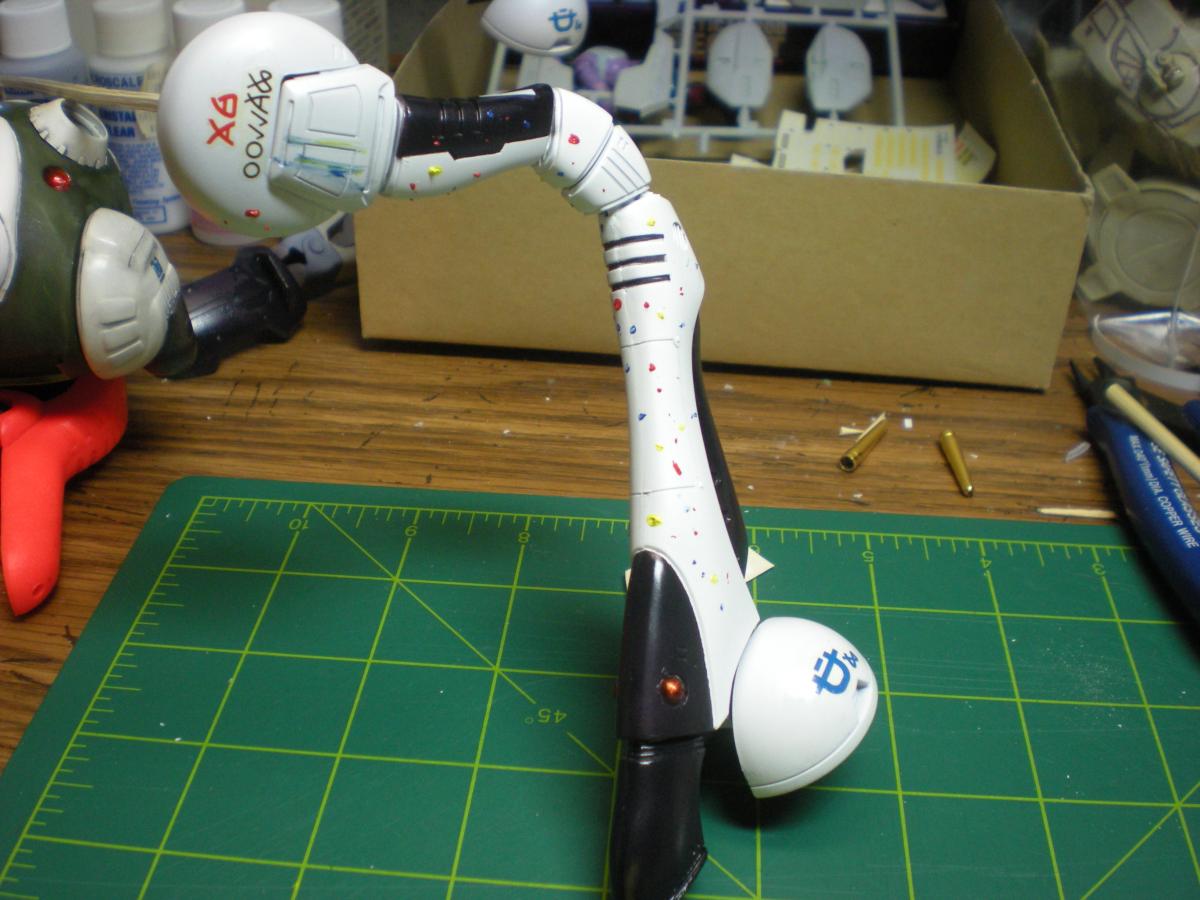
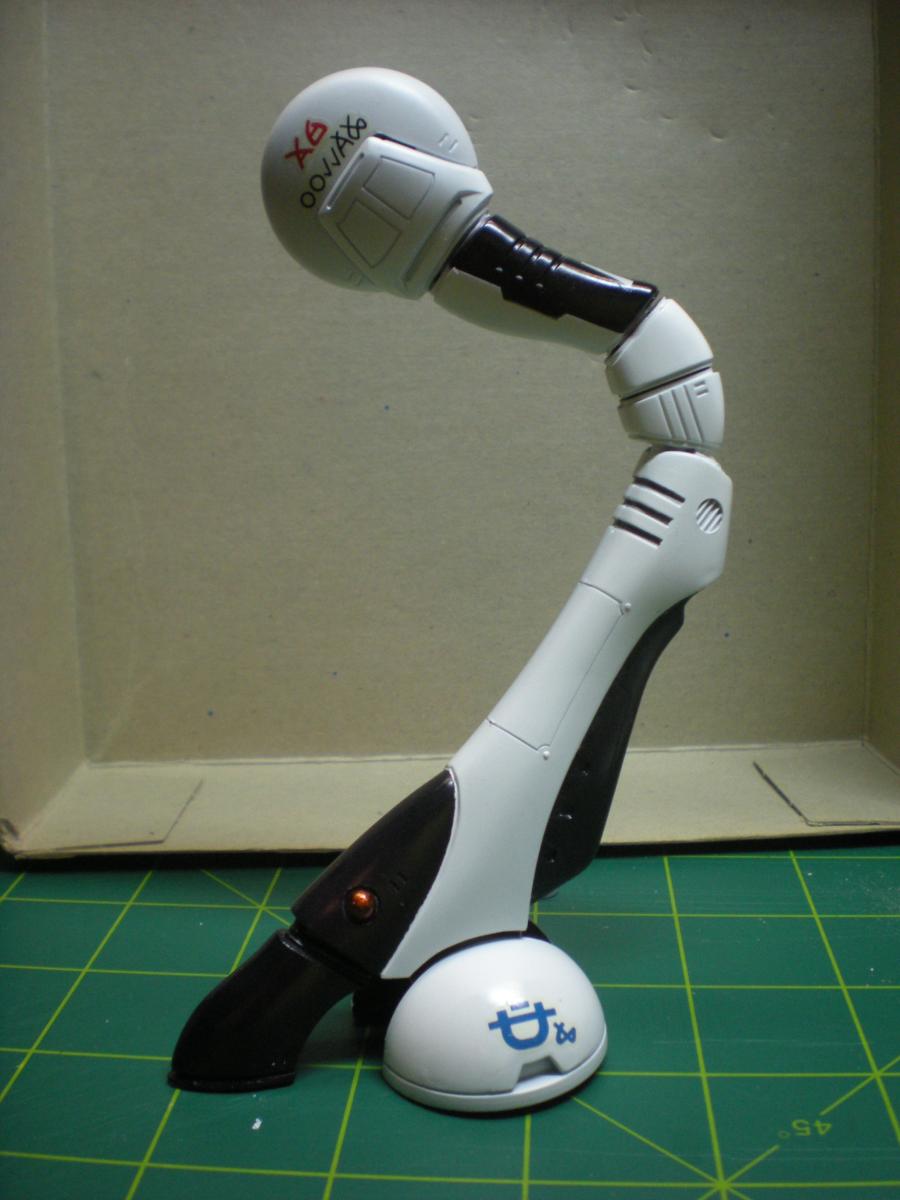
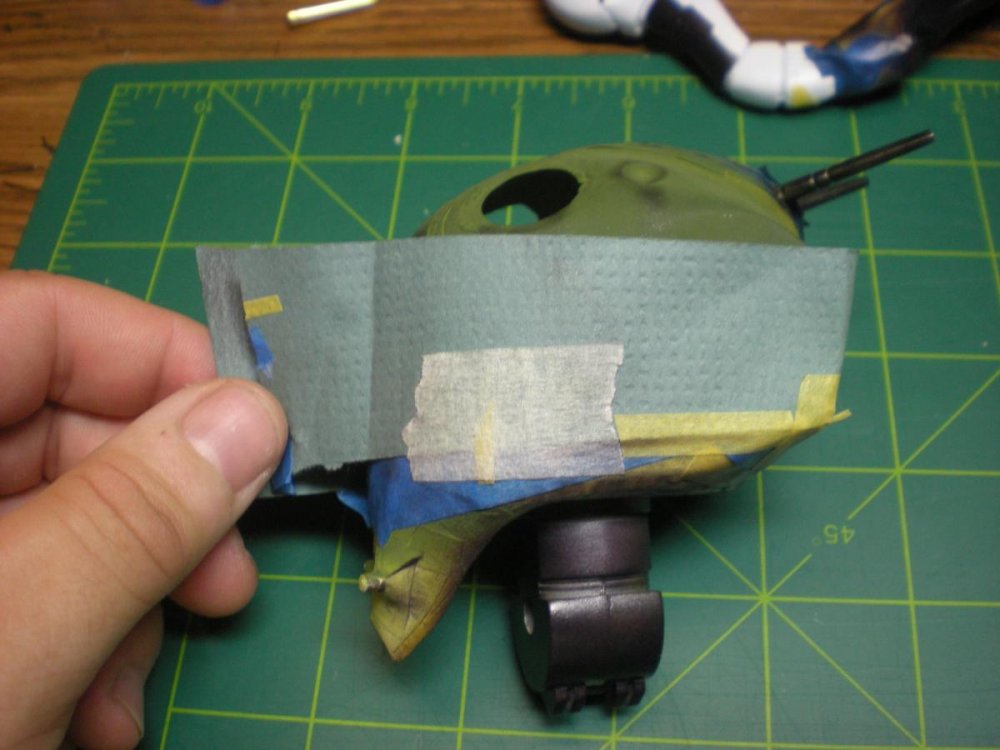
Here is a picture of the beginning of the weathering process for the legs. Mike Salzo had mentioned his process for weathering with acrylics on the acrylic base coat in his 1/48 pod thread. I tried his method, but I was either too impatient or too heavy handed and when I used the iso-alcohol it really tried to remove the base coat and I had to touch up a few spots on the head. So, I reverted back to oils and tried a ''filter" technique with various colors. You can see the dots of oil paint and the first streaking I did on the upper part of the leg. I think it worked well, but the red was too much. I ended up removing as much of the red as I could because it just overpowered the other colors and as it blended it just turned everything brown. Unfortunately I didn't take a lot of pictures of the weathering process. Once I got started, I just went at it until i was finished.
-
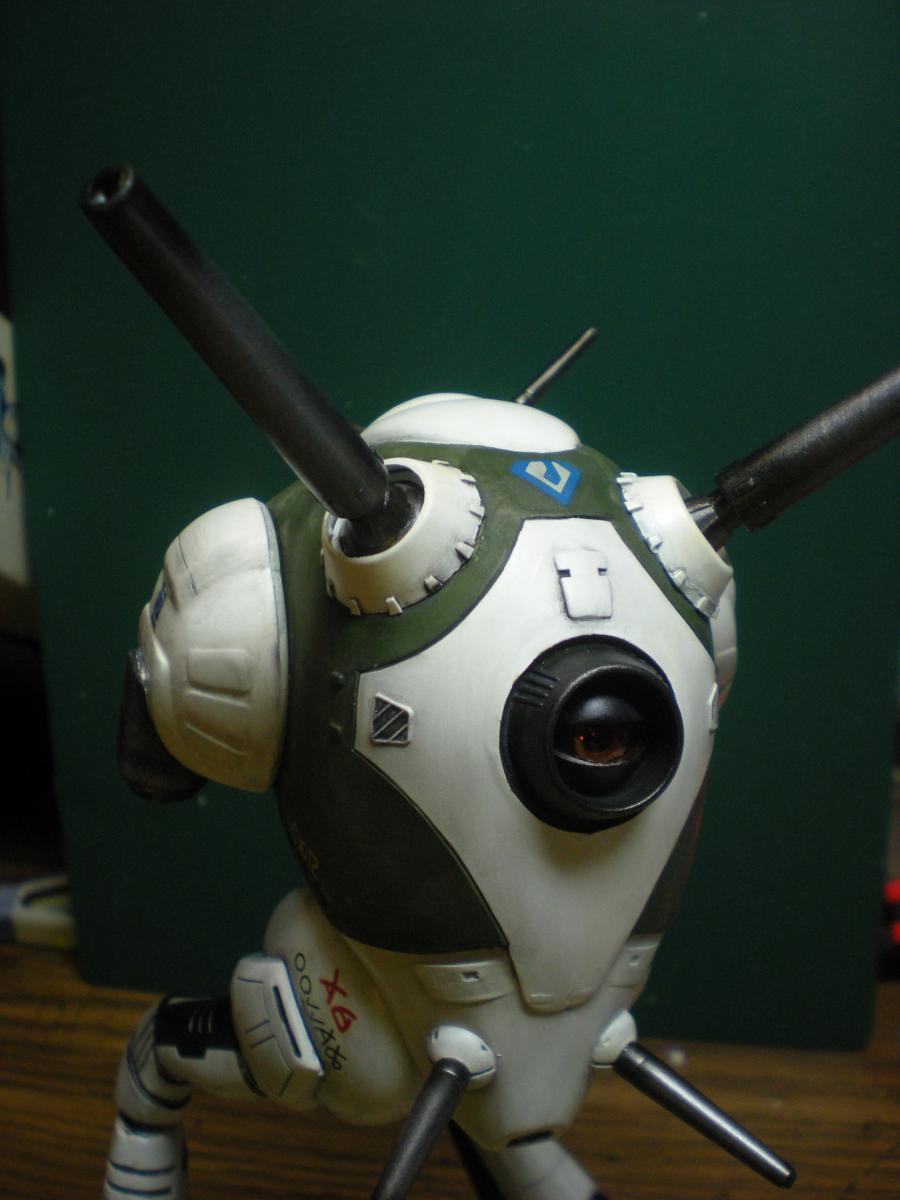
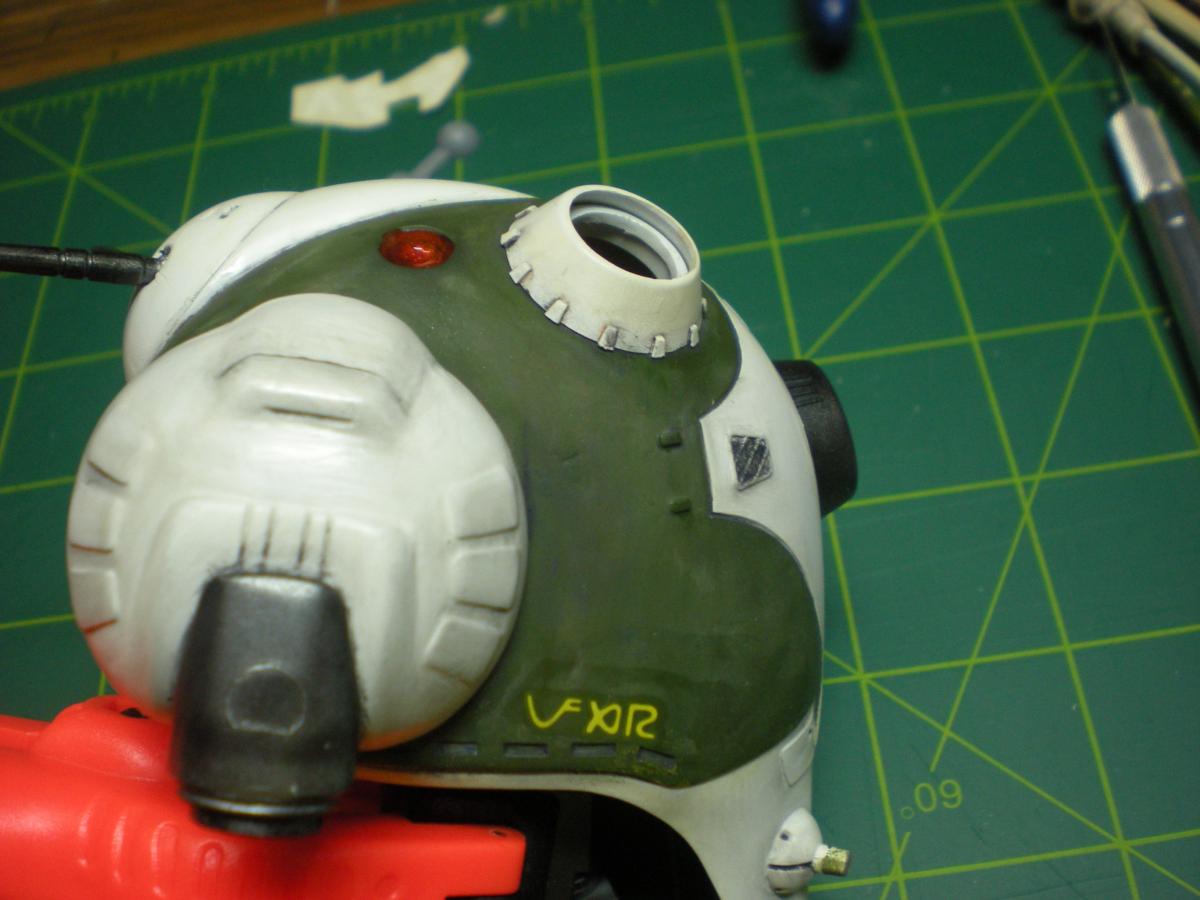
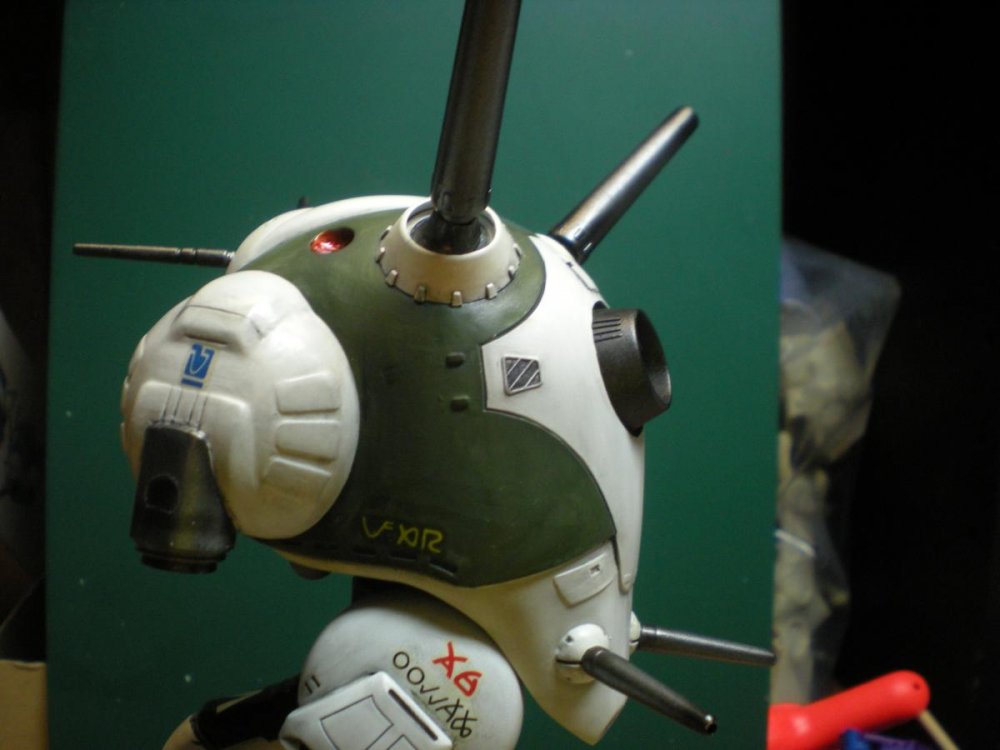
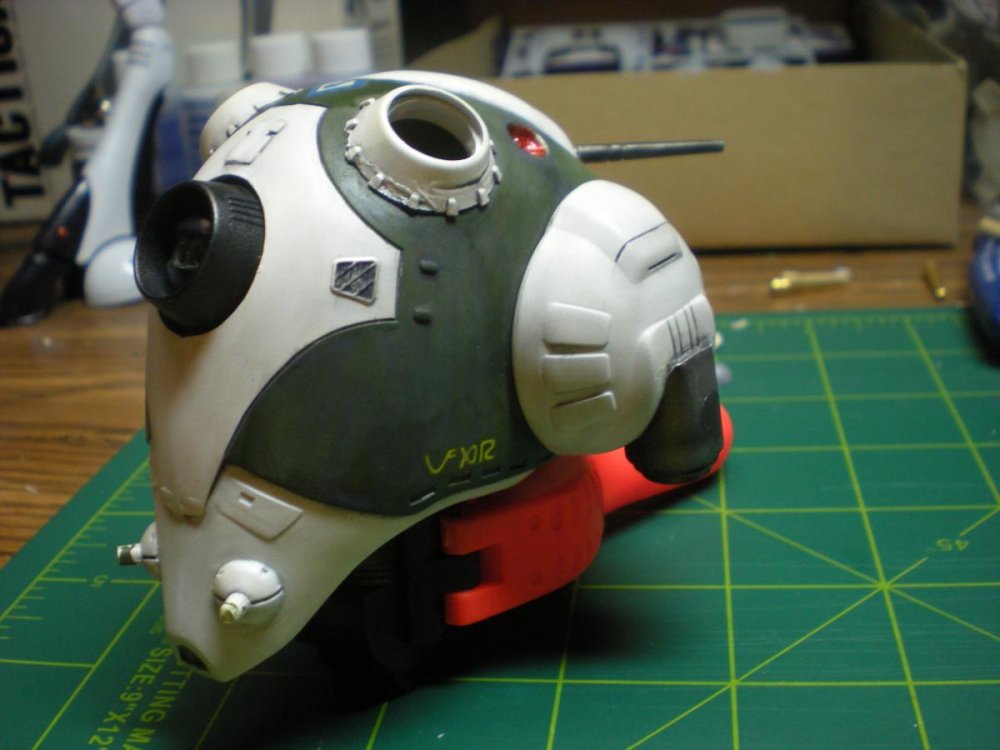
Next up is the head. Here it is still masked up from the painting session. I had masked for the body color. Then I had to add some more to protect from overspray of the purple and gunmetal colors. Various angles of the head with the masking removed and the weathering begun: The green isn't a dramatic change from the anime blue color, but I think it maintains the military feel and besides, these pods are for the average Zentraedi grunt so they don't get as bright and complex paintjobs as the armored soldiers or the Meltrandi elite warriors. (that's my story and I'm sticking to it!)


-
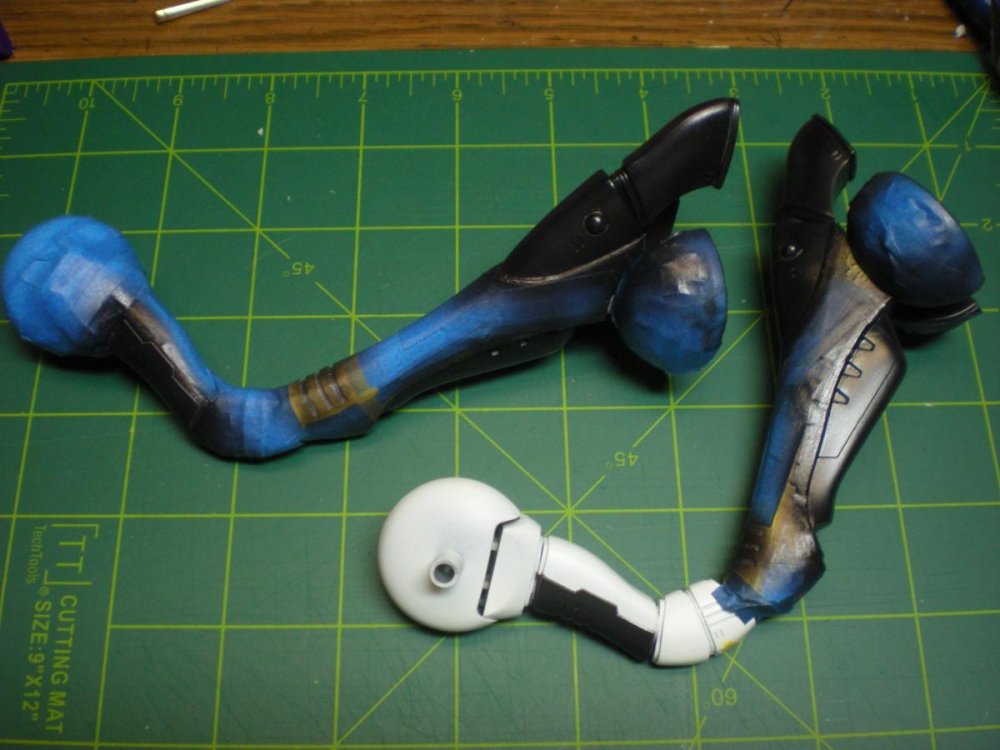
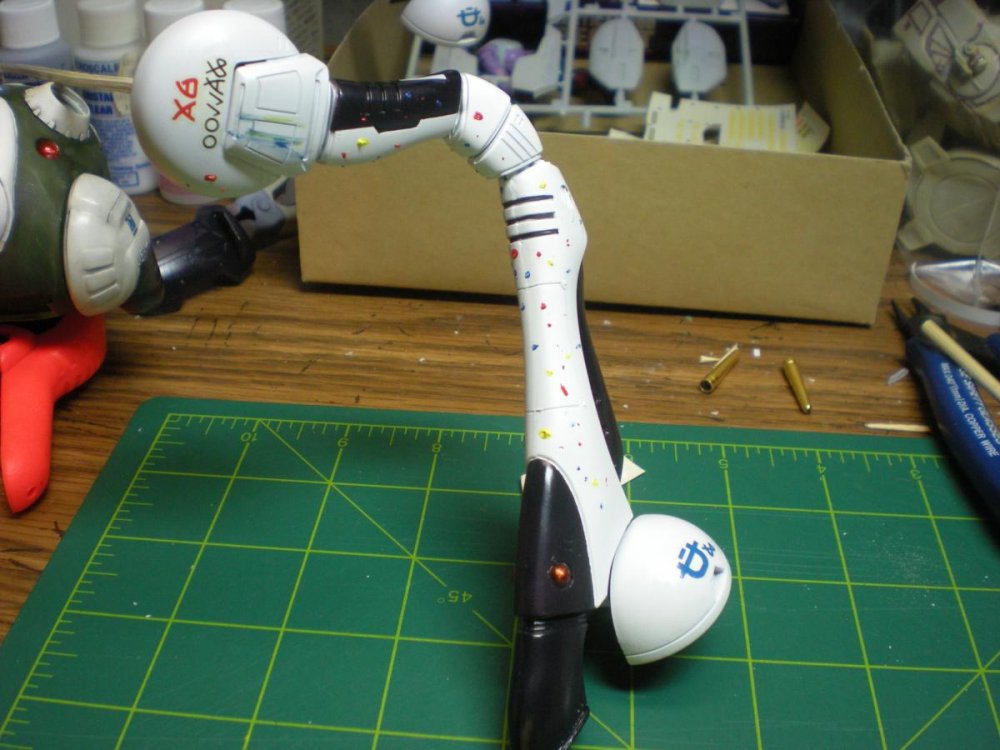
I'm going to post the other pics I took now in the build order so you guys can see how the build progressed. First are the legs after masking and painting. I have just started to remove some of the tape here: A couple of pics of the legs with the fresh paint job: It's pretty hard to make out with the poor lighting in these pics, but the dark areas are actually a very dark purple. I think it looks pretty good in person and I really liked the sheen that the paintjob had at this point, but I couldn't leave it like this. It was too clean for a Zentraedi mecha! Next is a pic of the "ears" and the gun barrels. I was really pleased with the way these turned out. I used Tamiya gunmetal and then added some black and airbrushed in the shaded areas. The original two smaller guns on the chin area were broken, so I found some inexpensive paint brushes and I'm using the ferrules to replace the broken gun barrels. I actually painted the rear hatch black and had just used a brush. I really wasn't happy with that though. So, I sanded the black down lightly, exposing some of the plastic again and then I gave it a light coat of the dark purple color. You can just make out some of the color variations that produced and I decided to go with it.