Rock
-
Posts
408 -
Joined
-
Last visited
Content Type
Profiles
Forums
Events
Gallery
Everything posted by Rock
-
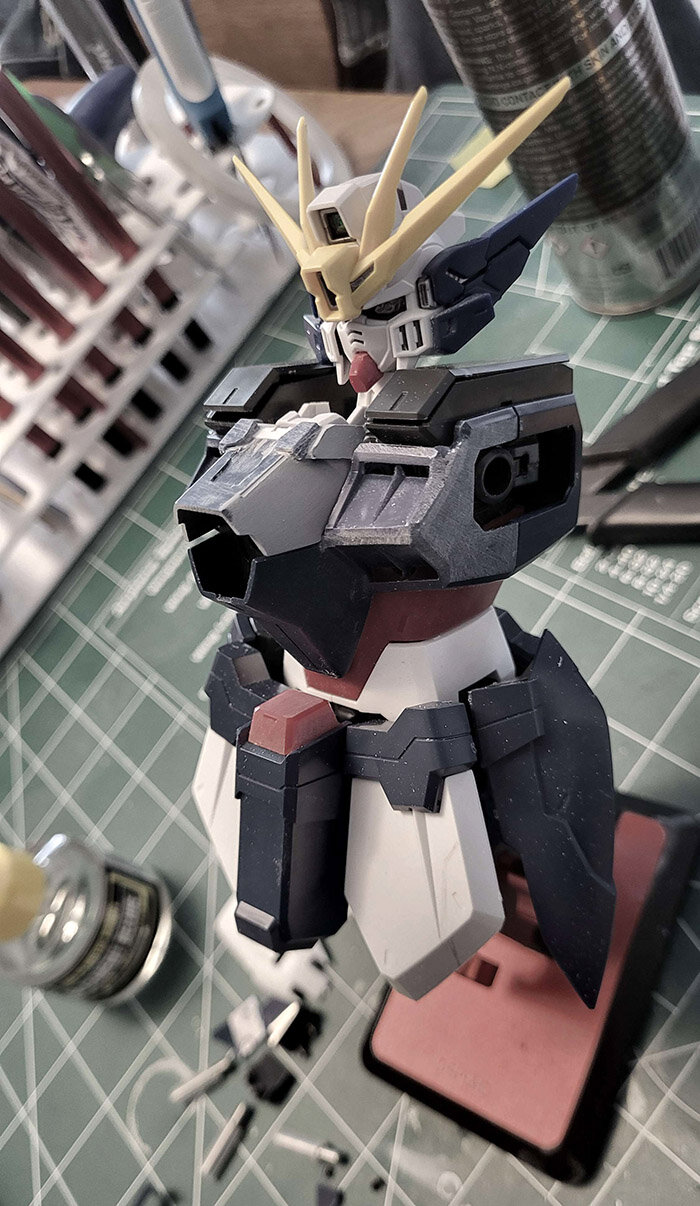
 The machine head zeta gundam is a great alternative for the ver. Ka and possibly the metal build. Here is a compare myself and a friend recently did. The machine head comes in 2 versions, precolored and clear. If your going to paint, grab the clear one as the plastics is a bit closer to gunpla plastic than the slightly gasphon feeling precolored ones.


-
The Kog-At is a 1/100 IMS with parts for the stripped face for it's final battle appearance. The SR4 is a Volks resin kit. The VSMS #3 (gothicmade 1/100 ims kits) Die Kaiserin was also shown. As were prototypes for the VSMS Z.A.P.
-
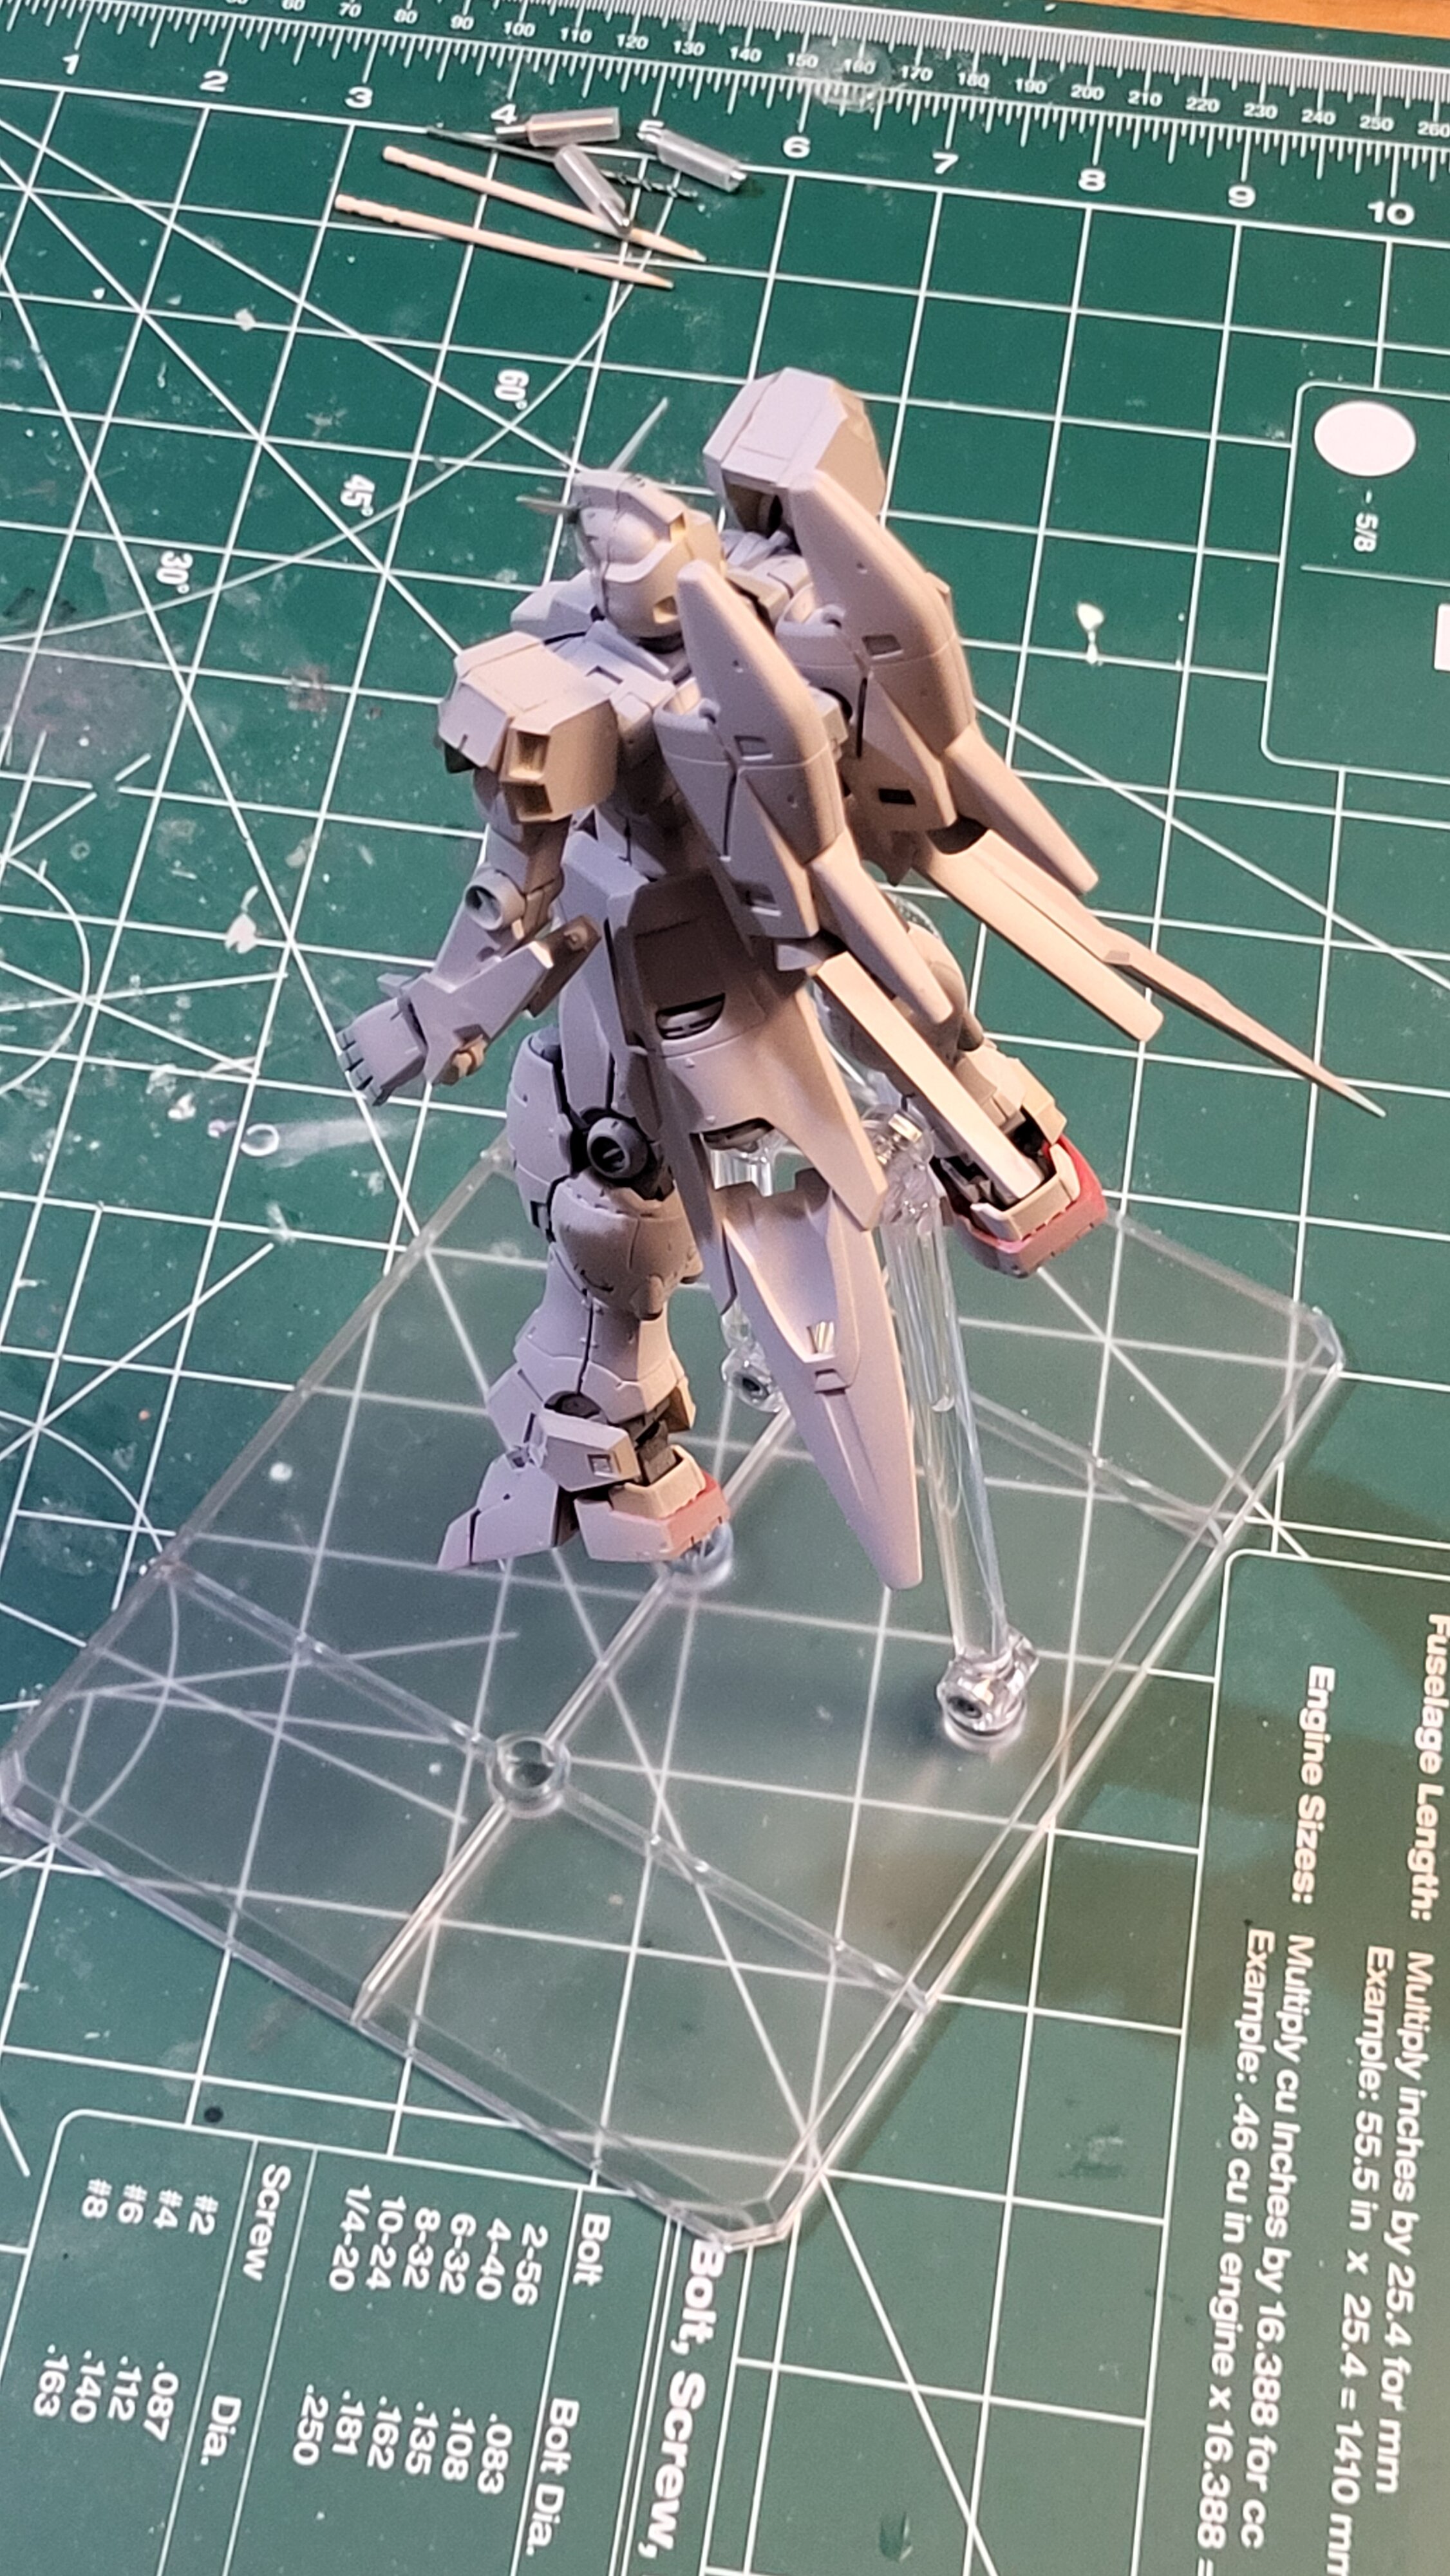
Still chugging along on my Hi-V resculpt. Only one leg left to finish matching, then I can finally work on cleanup and detailing! Aiming for paint Feb 1st for a 2026 comeback!

-
First example of the new Hase Minmay resin kit? https://x.com/i/status/2007356411785949532
-
I can't bring myself to. It's one thing to pay shipping costs and tarrif cost... it is entirely another to also have to pay hlj the same cost + some in handeling fees. My breakdown is something like: $65 fedex shipping $44 tarrifs $112 handeling fees It be one think of my warehouse was older than 1-2months old where I could understand it a little better. I think my oldest item is 2.5 weeks.
-
Milia is onsale an restocked at hlj! https://www.hlj.com/macross-do-you-remember-love-milia-639-hsg65892
-
Hope everyone has a wonderful Thanksgiving!

-
Not much time this day as finishing up other project before winter hits. Visiting the backlog and pulled out on a whim. Feels good to finally be making progress on this old gal.
-
The 'Hey look at this really cool model build I saw' post
Rock replied to Shawn's topic in Model kits
-
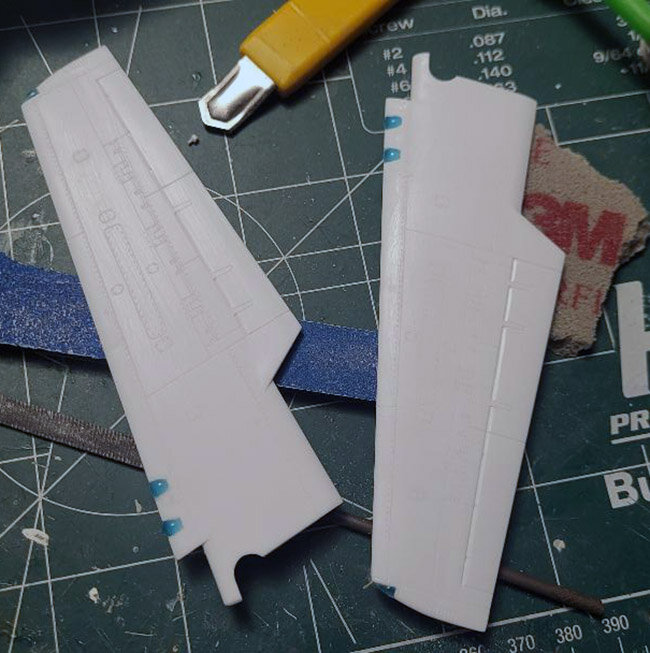
The lines you see on the close up of the underside barely can be felt with a finger nail. It is mostly visible because of the way the printer finish. 2 coats of MR. Surfacer 500 and you likely won't see 80% of the texture. Add in a pre-sand and post sanding and it should be cake walk, I use a small 400g sanding sponge attached to a vibrating tool to make most of the sanding rough work.
-
Based the size roughly from a data sheet comparison with all the calks scaled next to eachother. The measured of the Hasegawa VF-19A and had my friend printed it at 15.5" (nose tip to foot.) 1/48(ish) Will be a test bed for plastic type, painting and how it reacts to traditional modeling. If all is well, I've got a Lucifer and Durandal ready to go to the printer too!
-
Glad to see how this turned out! Minmay looks great! What Misa figure is that?
-
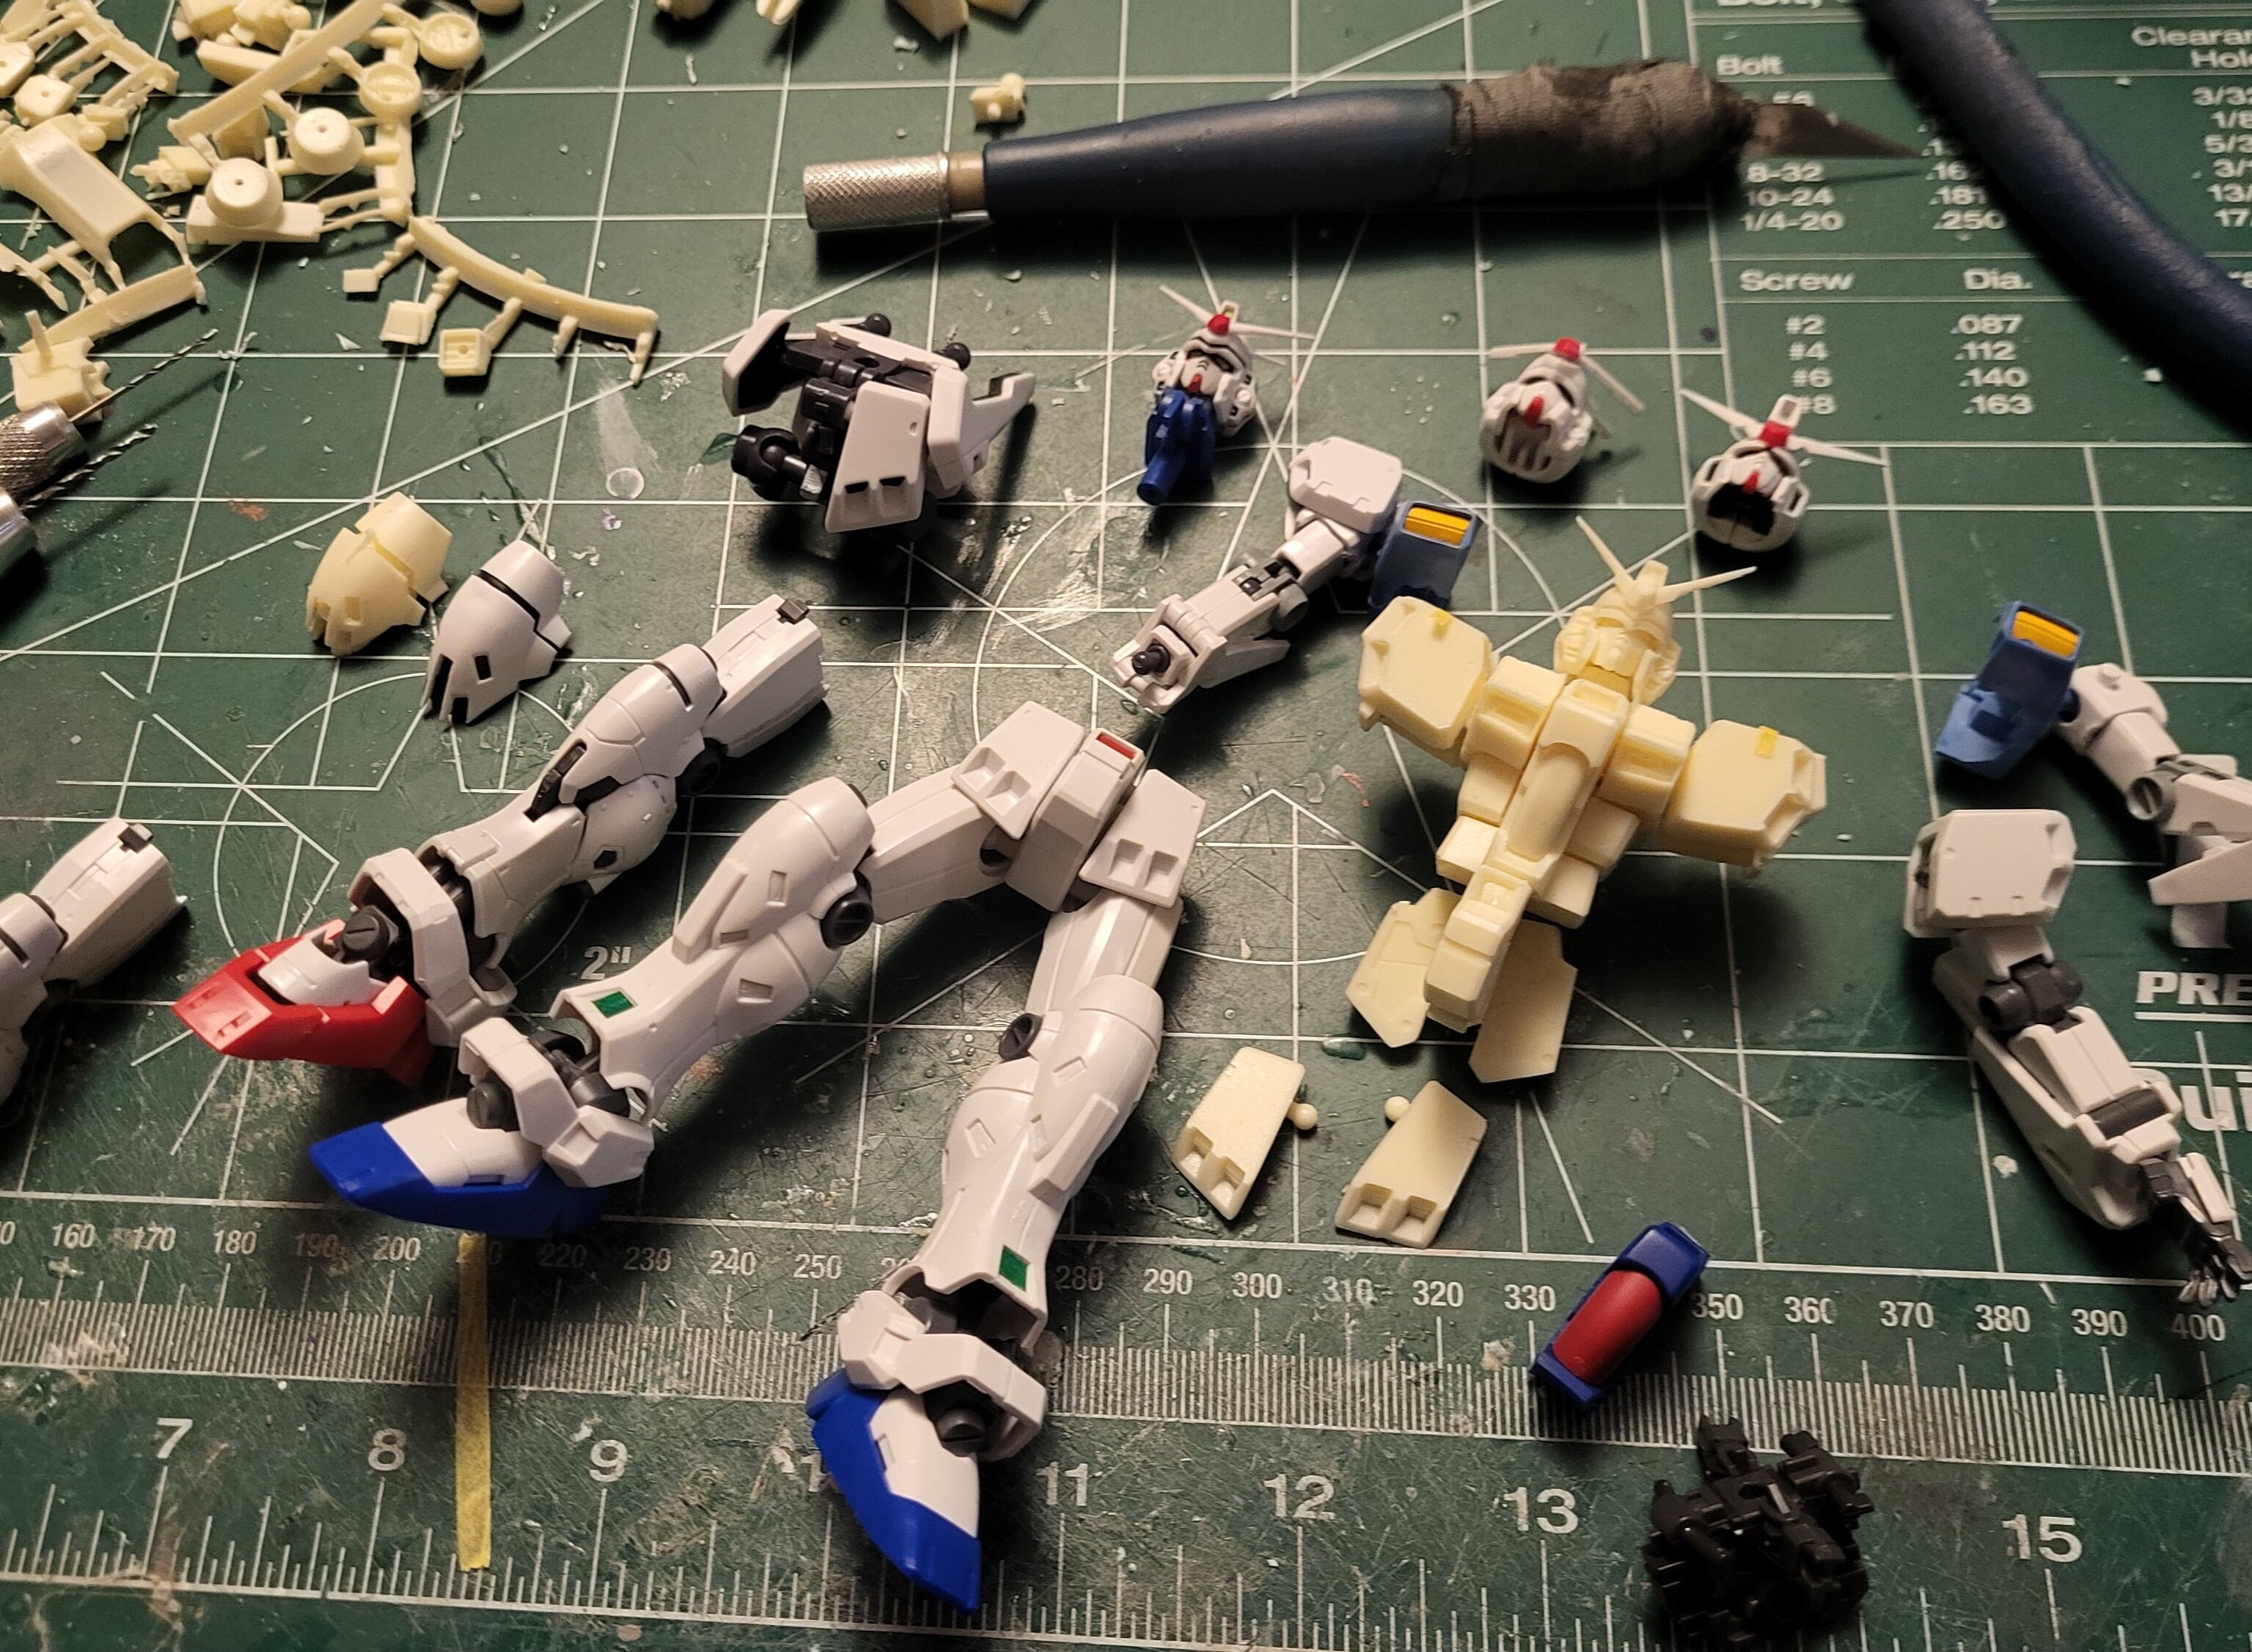
Pretty happy with how quickly I got the base kit together! I think I can re-break down and process the parts individually. Focus now on blending the individual kit' styles together. MS Mixing recipie: Robot Damashi torso/arms/binders Studio Reckless head/shoulder/skirts HGUC backpack/verniers RG Gp01 legs and feet The base is Bandai's 'new' 1/100 kit base. To adapt to the damashii connection point I simply used on the the included hex/allen bit tools and glued the head to the bases's arm. I really like these cheap action bases. They look really clean and I see tons of used outside of Bandai. Should easily support a 1/72 valk and not too pricey either!
-
What retailers in North America are carrying Milla? Only place I can find is even is AmiAmi japan. All the usual places I get Hase kits seemed to skip over the resin.
-
-
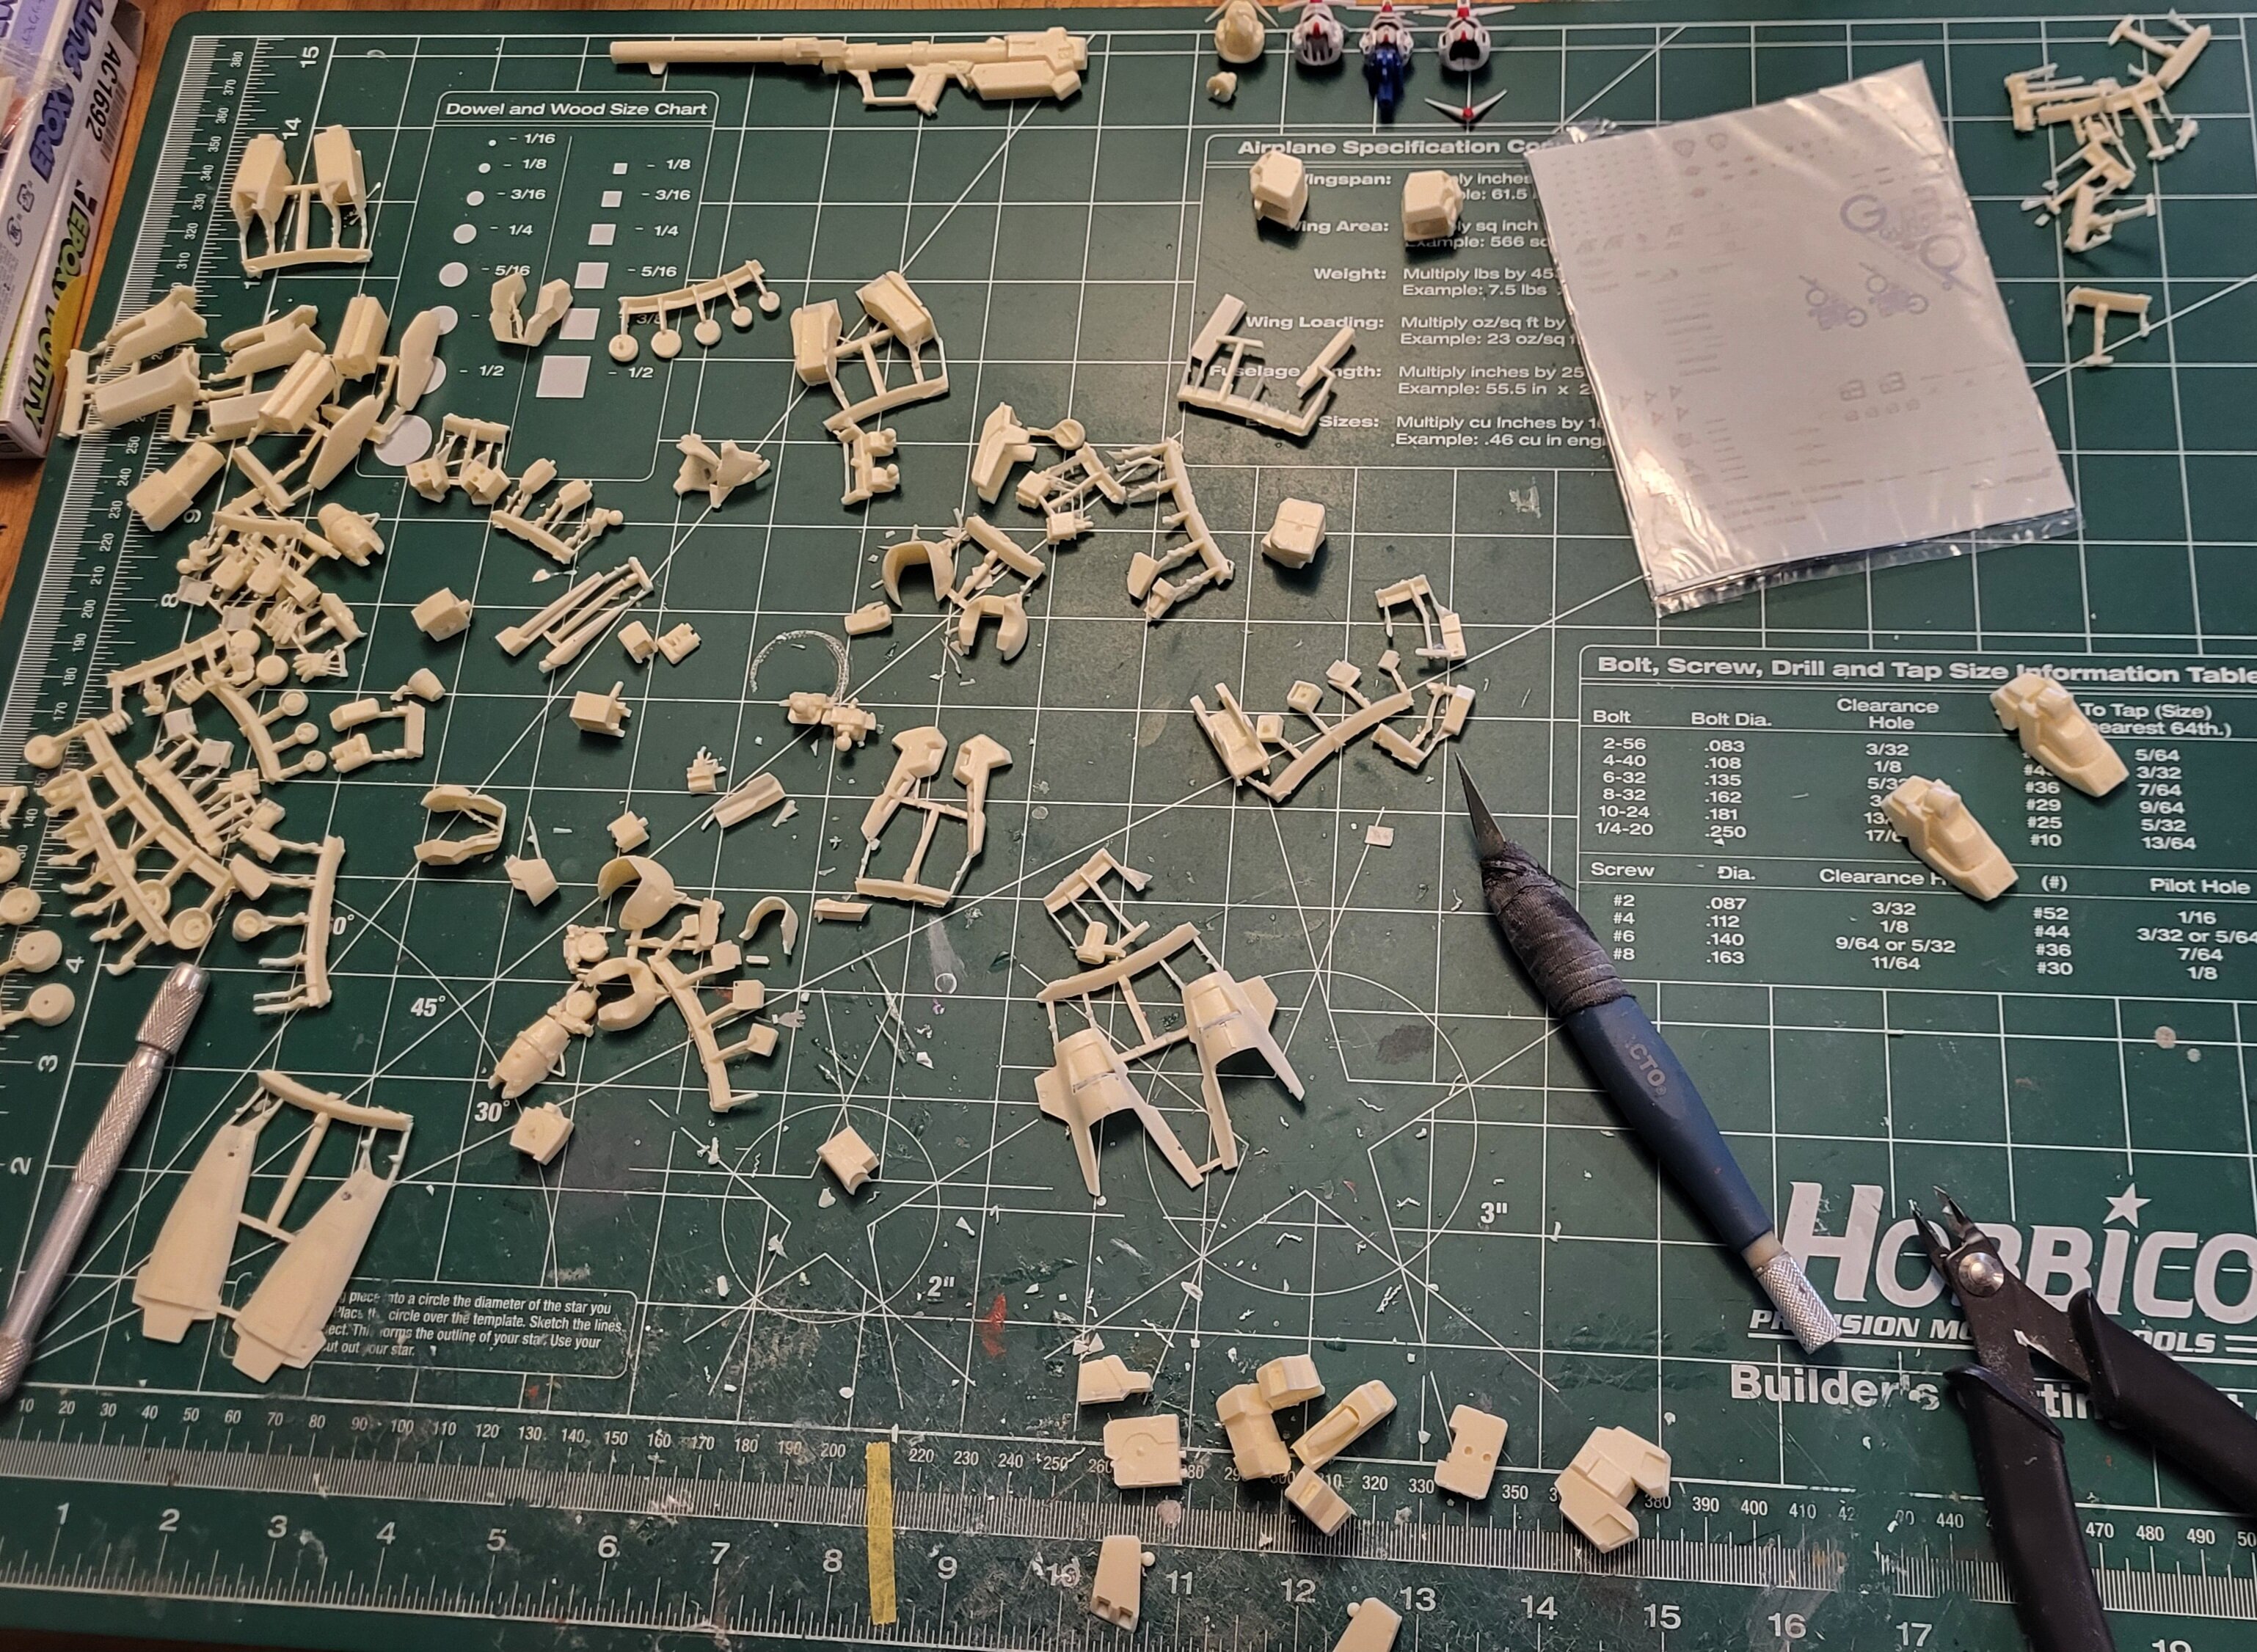
Finally got the courage to tackle one of the oldest kits in my backlog (16+ years) and also a "holy grail." It probably tje last time I ever build 1/144 again. A Studio Reckless X RC Berg Gp03s Stamen from Gundam 0083! It wasn't for a lack of trying though... this kit, despite being an original, is really, really small and very rough even by 2010 resin kit standards. The majority of the parts have warped as the armor is so thin it is see through despite being opaque resin. The box, decals and manual were damaged in a hurricane years ago making the puzzle even more fun to put together. All the pinning is so far done with a 1/32" drillbit and brass rod. I thought to mix this with [at the time the only] HGUC kit. Now I'm considering either using the Robot Damashii ver.ANIME figure or the RG GP01 Bandai model kits i mainly needed joints to ultimately place it into flying pose, ejecting from the HGUC Dendrobium. Lowkey feels good to have resin in hand again.
-
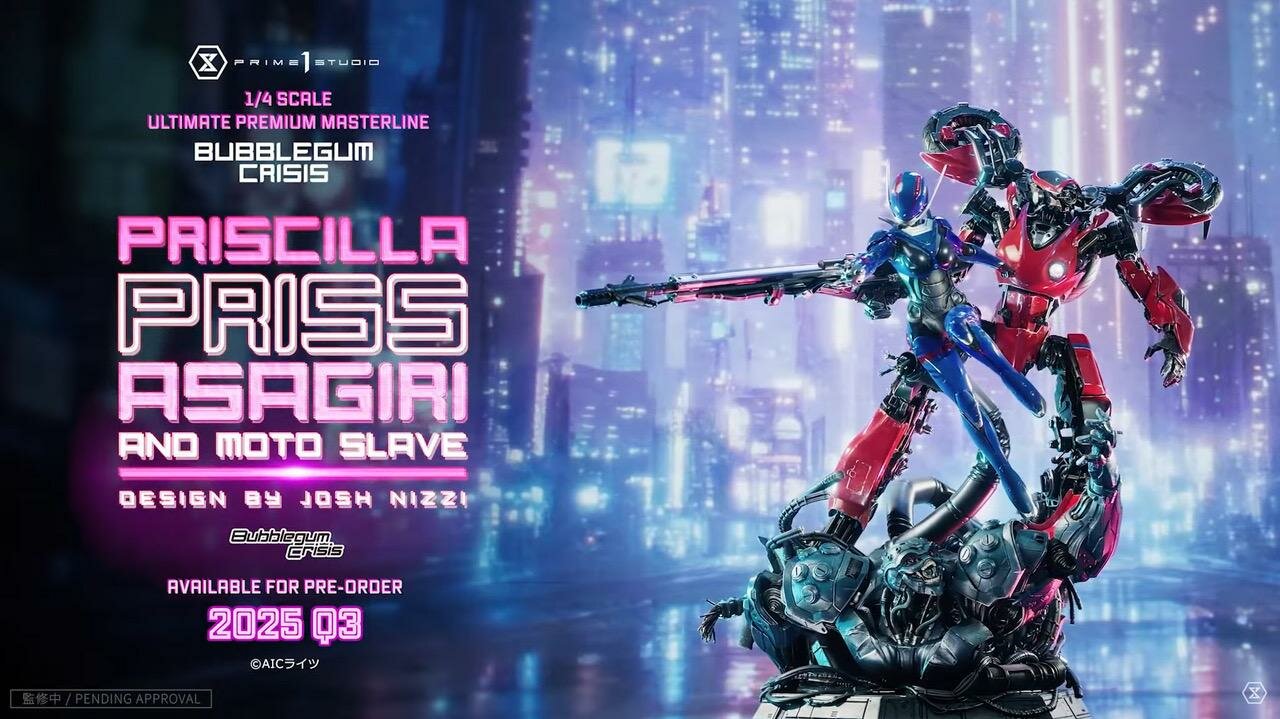
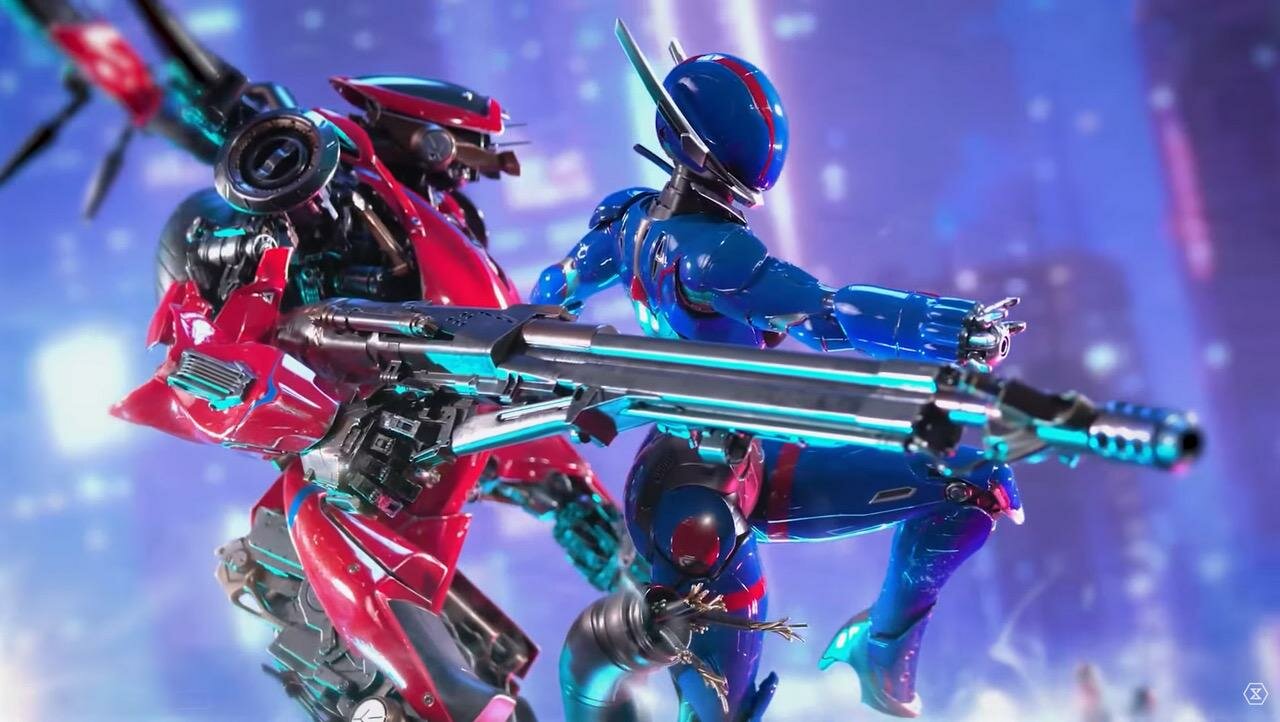
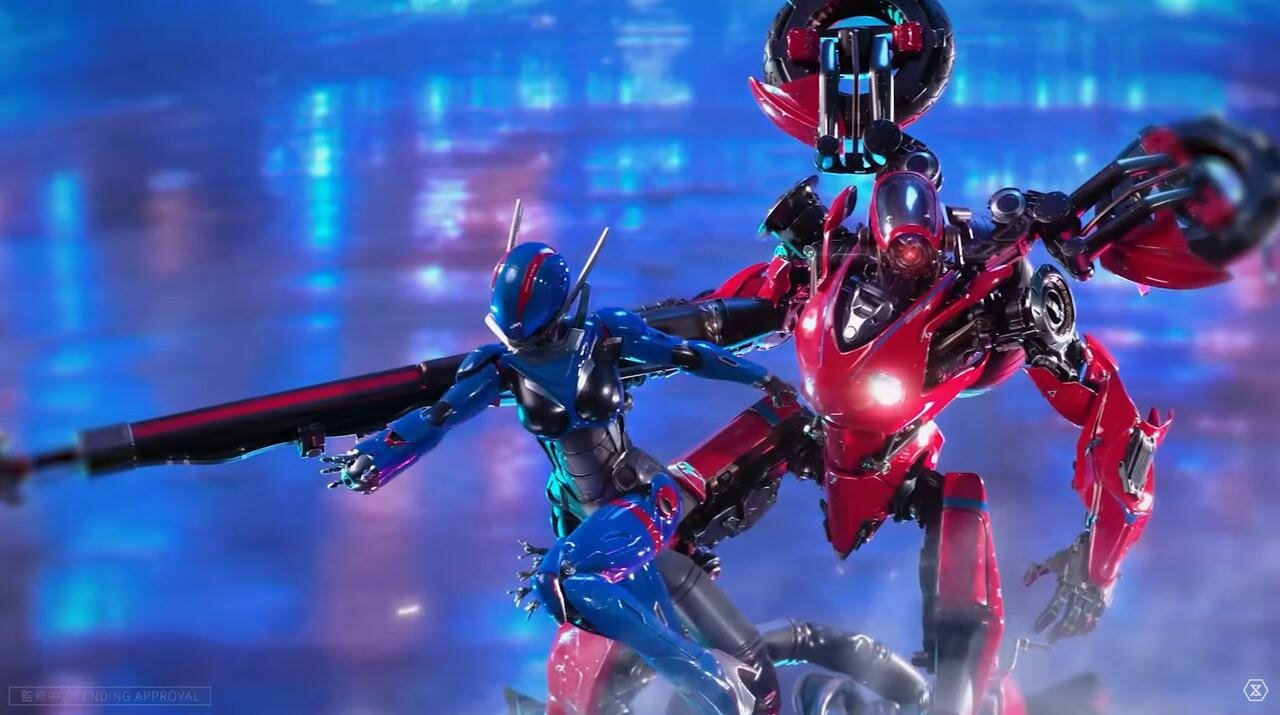
Prime 1 Stuido

-
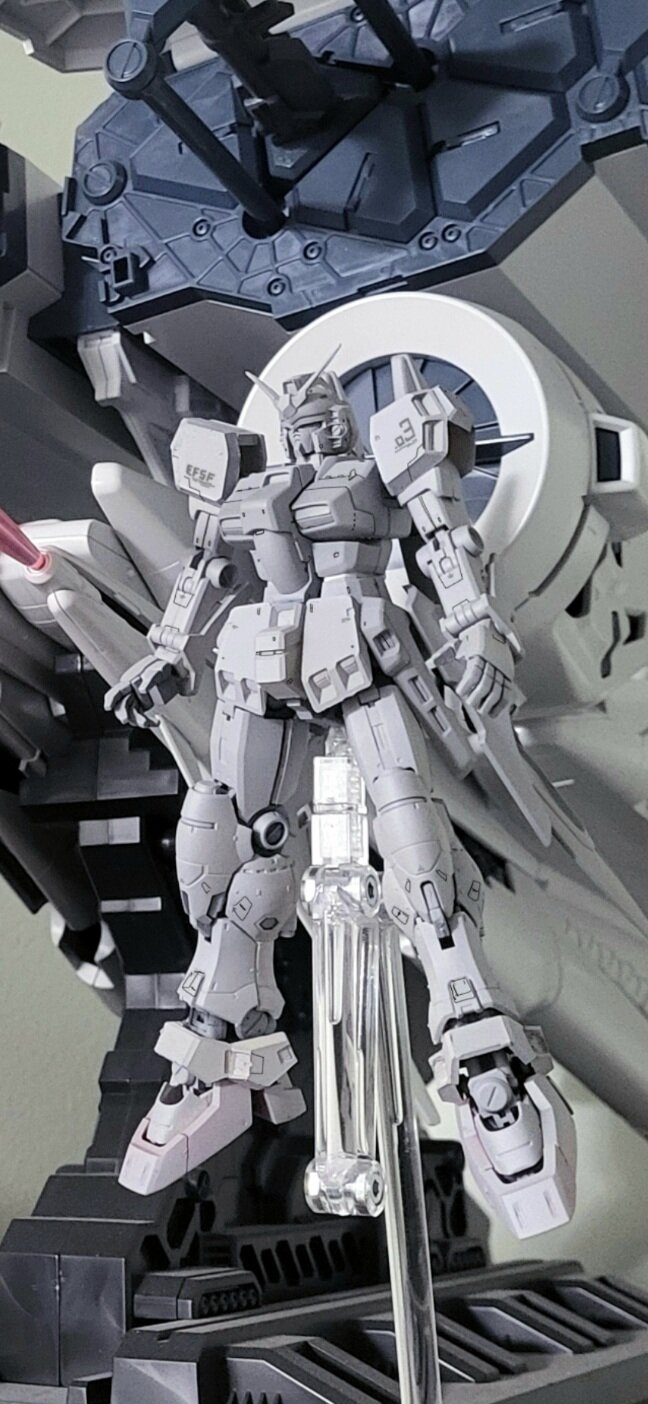
Taking a break and remodeling the 25 year old PG for the 30th anniversary. Already did the Katoki styling so this one I'm using the HiRM as inspiration.
-
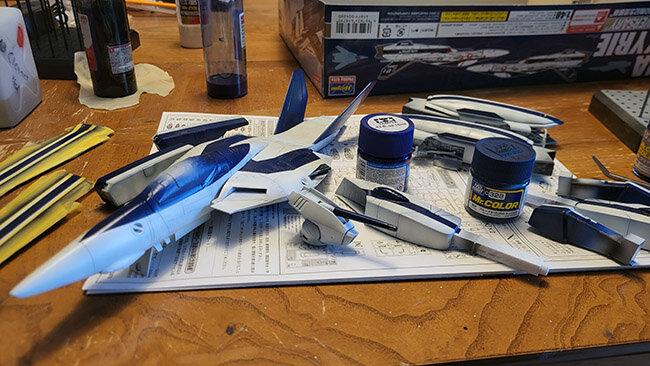
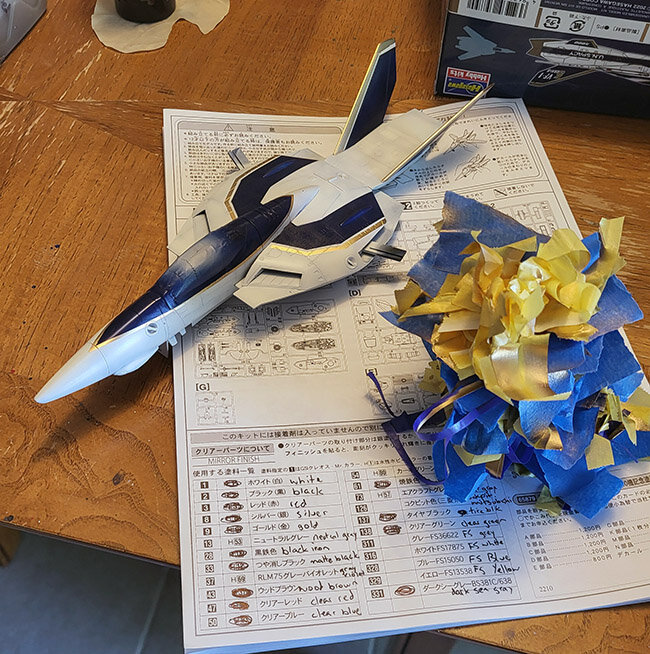
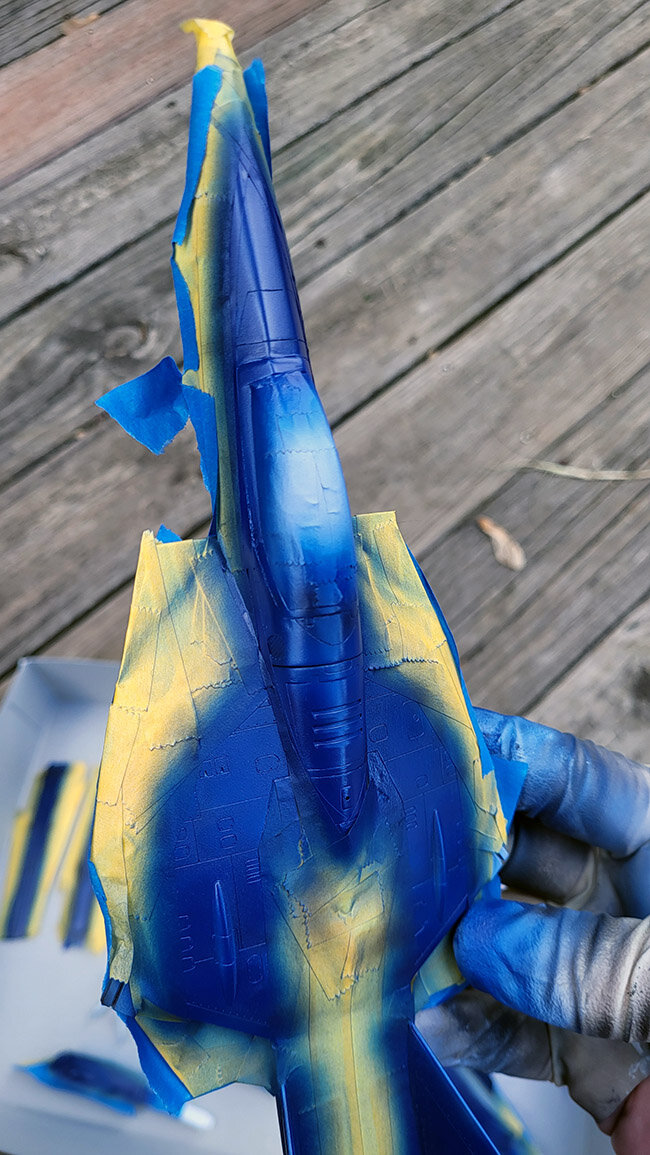
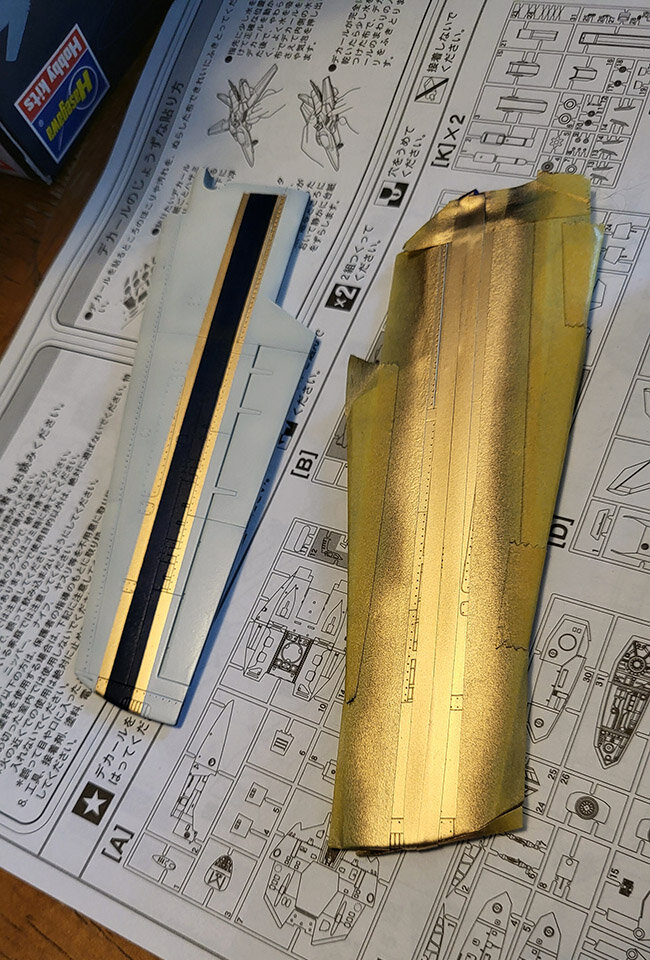
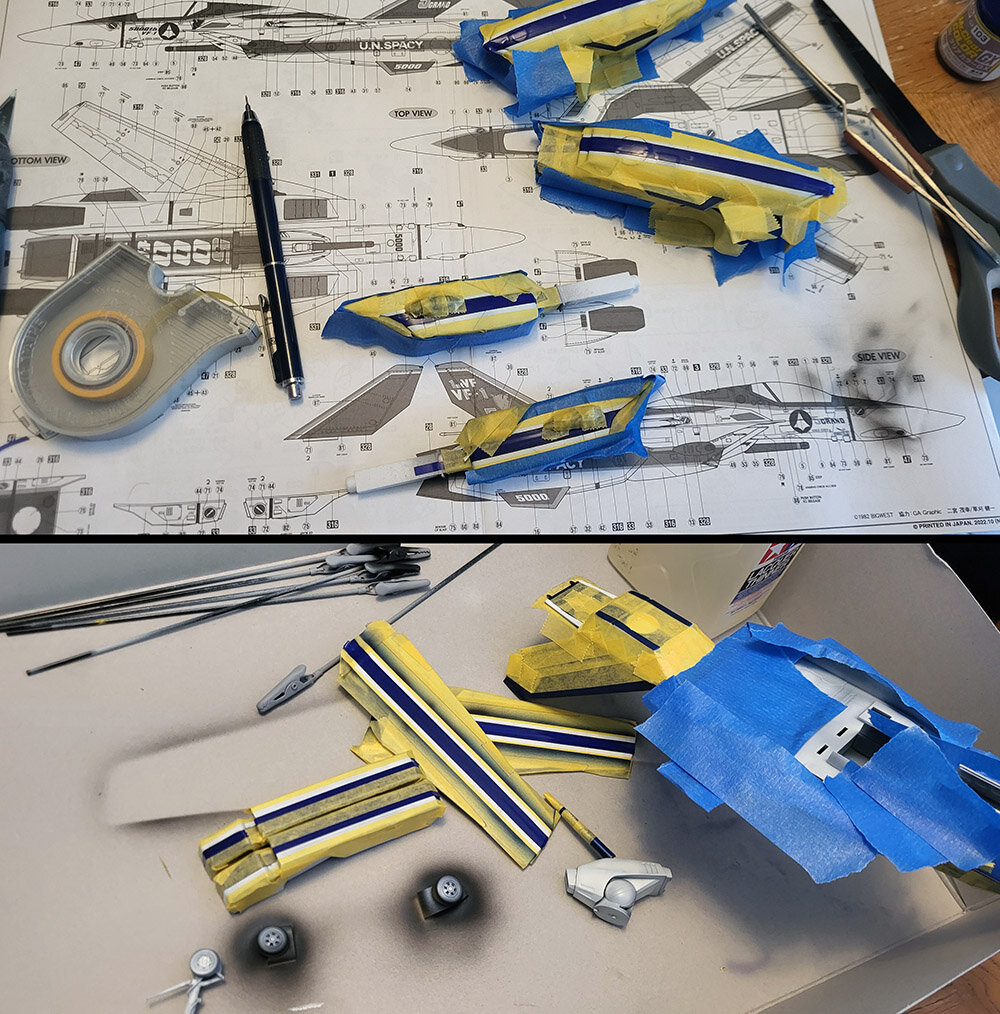
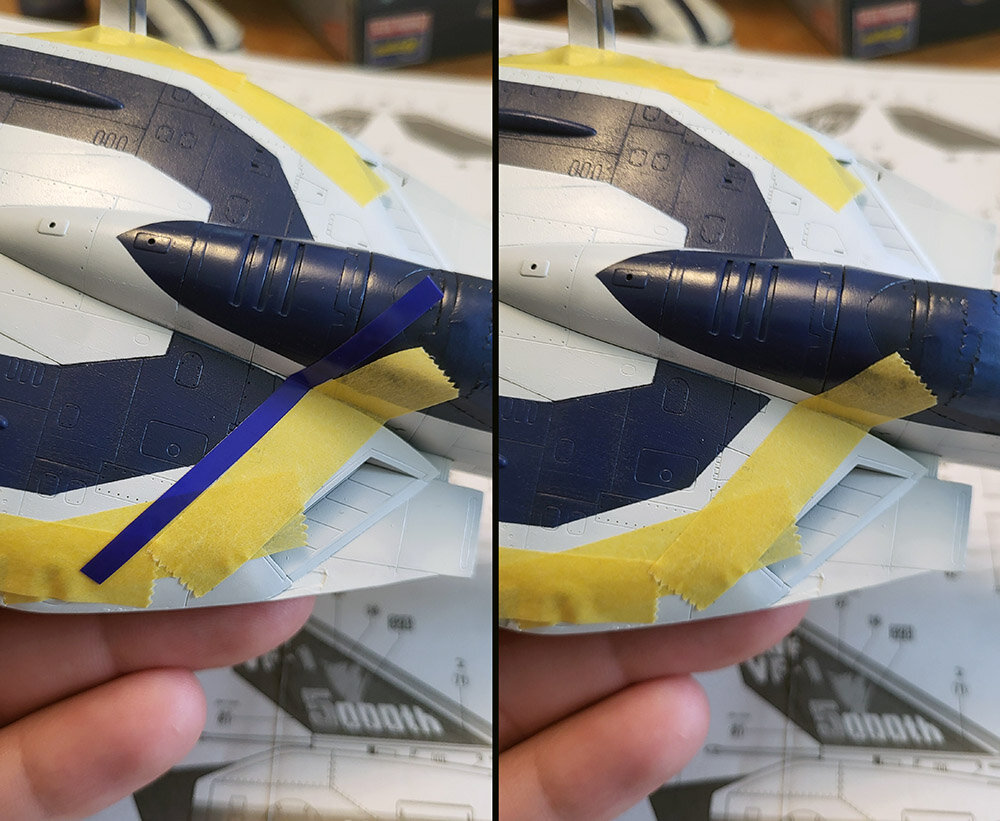
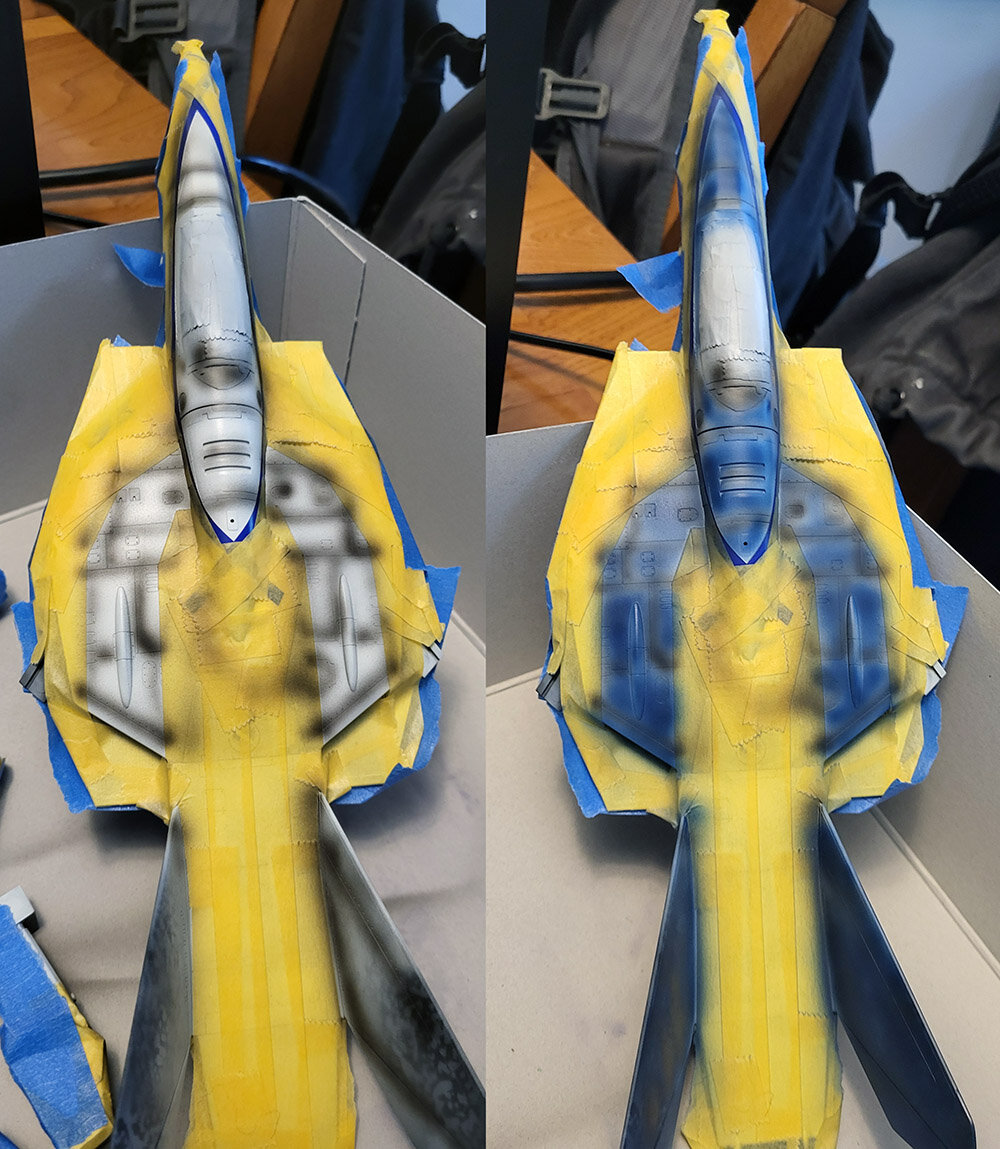
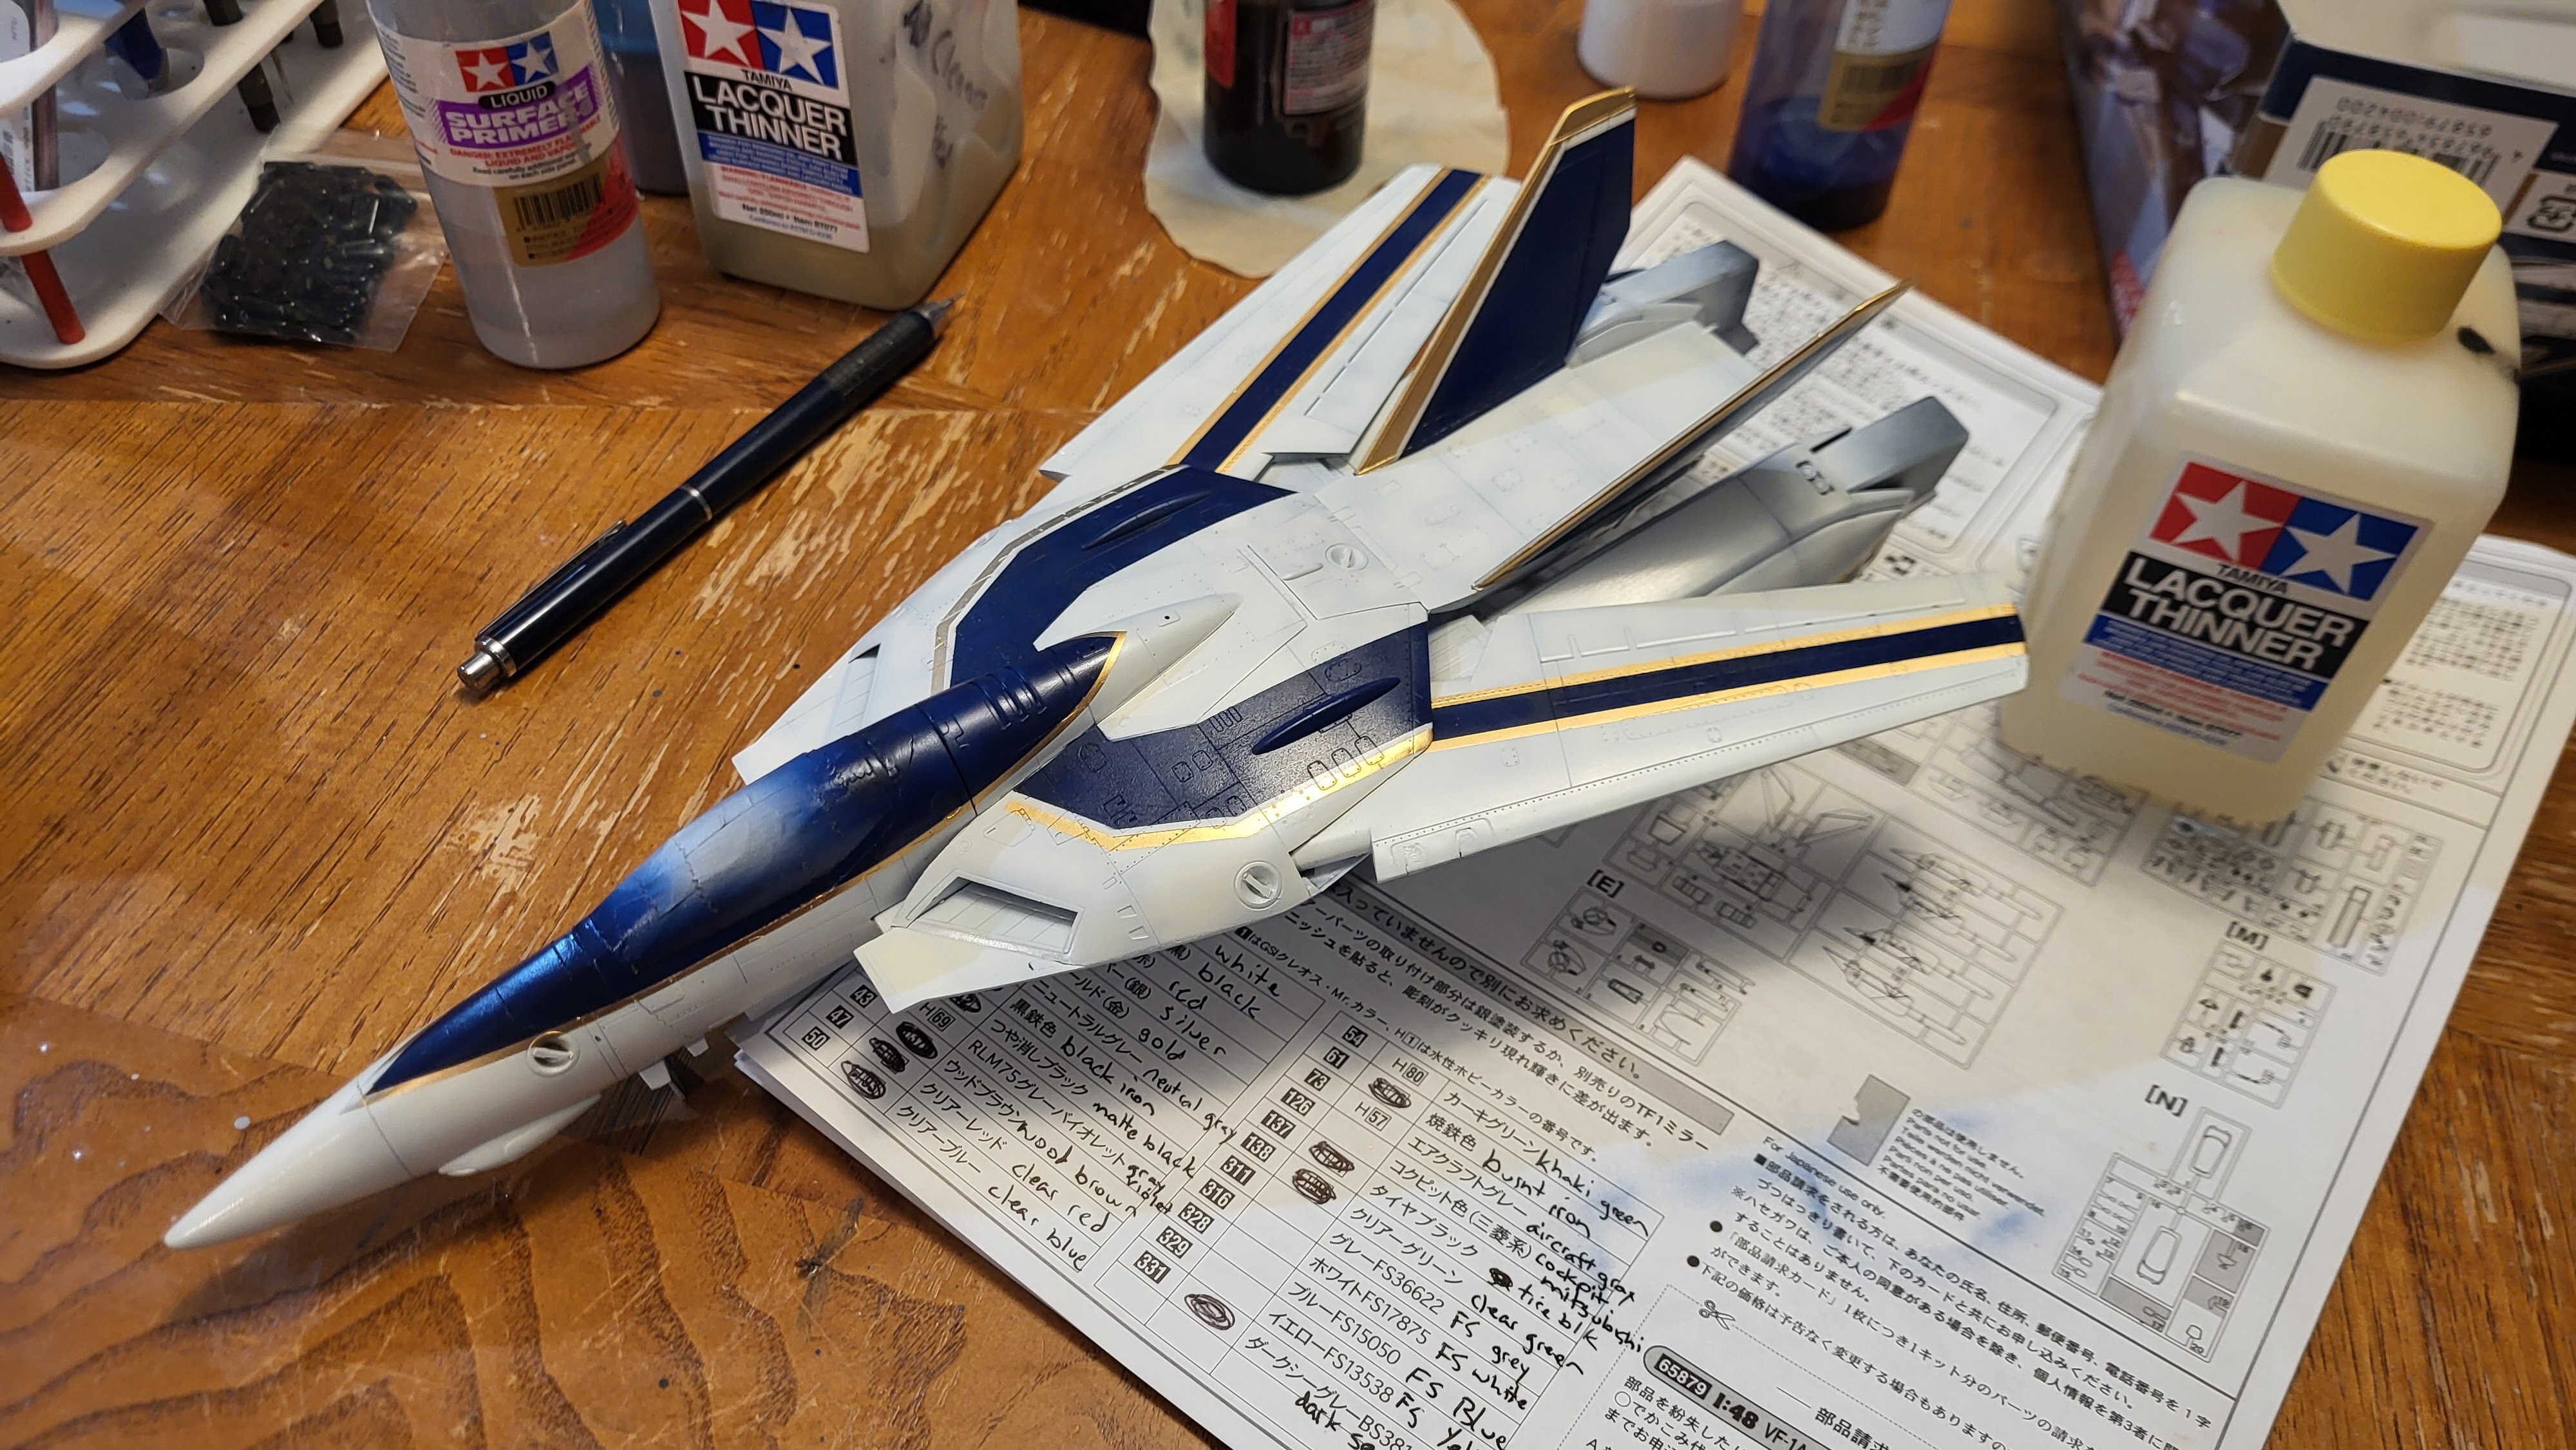
Remasked. Reshaded. Recandied. White, post shaded with Tamiya Black. Filled the white in with the FS blue (Mr. Color 328) called out in the manual. Added a few drops of black to the blue after preshading/covering the white to blend in with the black. From there I mixed in some Tamiya Racing Blue Metallic and some Mr. Color EX Clear Blue. The mix thinned heavily with Mr. Leveling thinner to allow a wetter coat with more translucency and gave the whole thing a few coats to tie it together. In the sunlight she pops and the shading is still visible! From there remasking (hell) begun for the gold accents. I choose to stick with Mr. Color 9, so that the gold would match the gold used on the decal lettering. I don't generally like this gold compared to Gianotes or Starbrite, I have to admit it does look sharp on this planes livery!. Sometimes it is best to cut the tape to the thickness of the stripe you want and then mask around it to get uniform/even spacing. You'll waste a bit of tape but, much better knowing everything it 100% the correct thickness! Just keep masking! Had to remember to periodically reassemble the kit to make sure the arm's and underside body's lined up. 2 parts thinner to 1 part color did nicely over my white shaded paint (no gloss black undercoat required!) Surprisingly, not many touch-ups and corrections were needed. About 14 total, nothing major. All said and done, about 7-8 hours of masking! But!!!! SO WORTH IT!

-
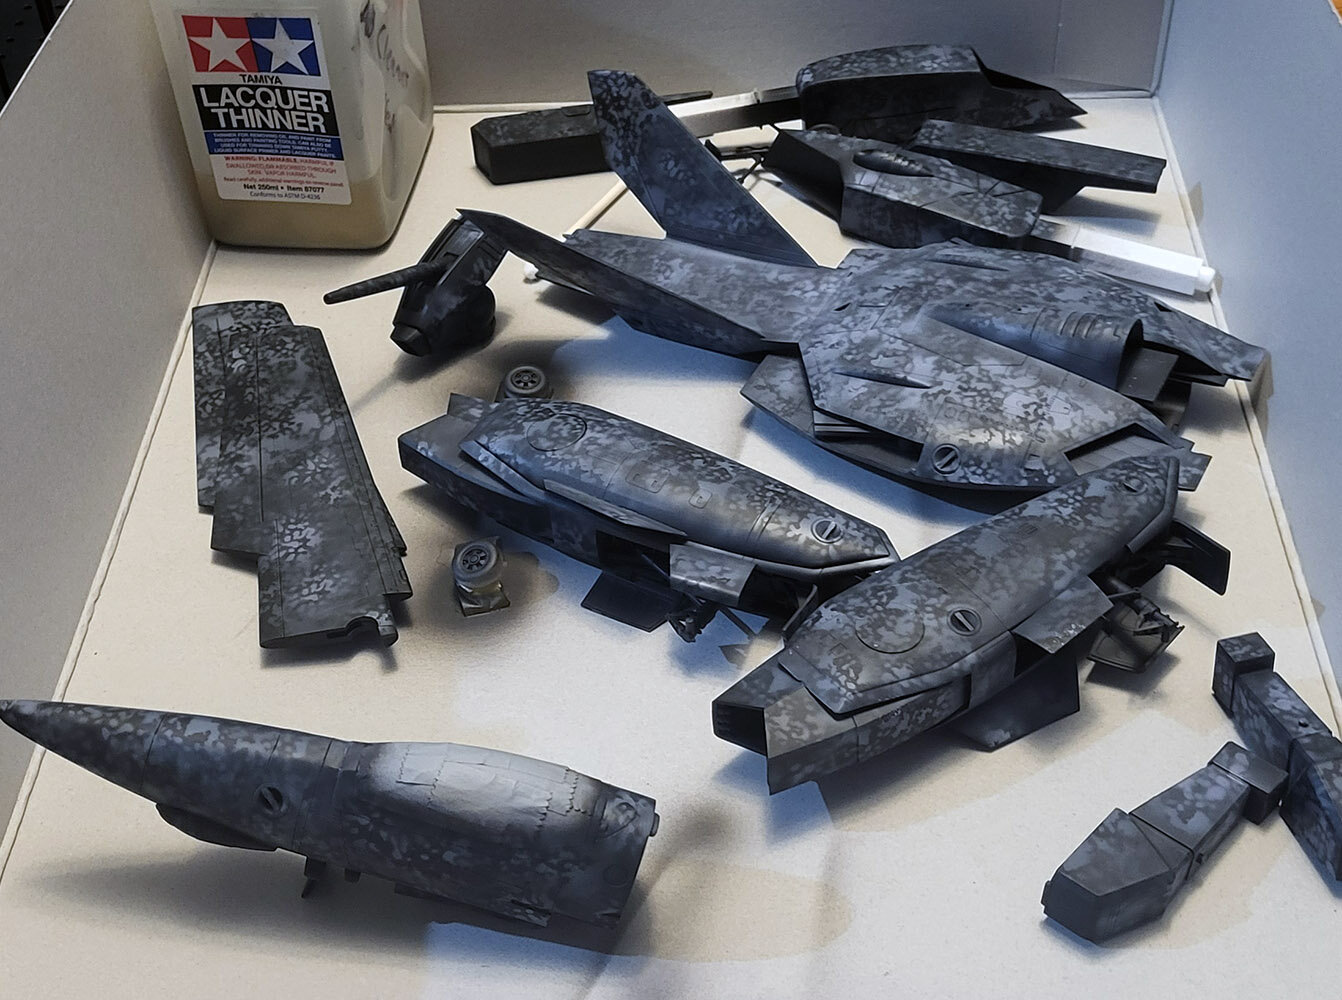
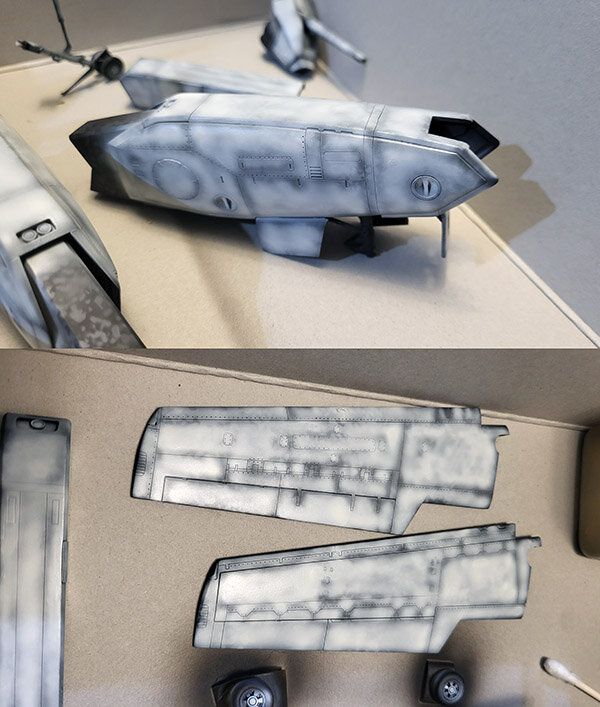
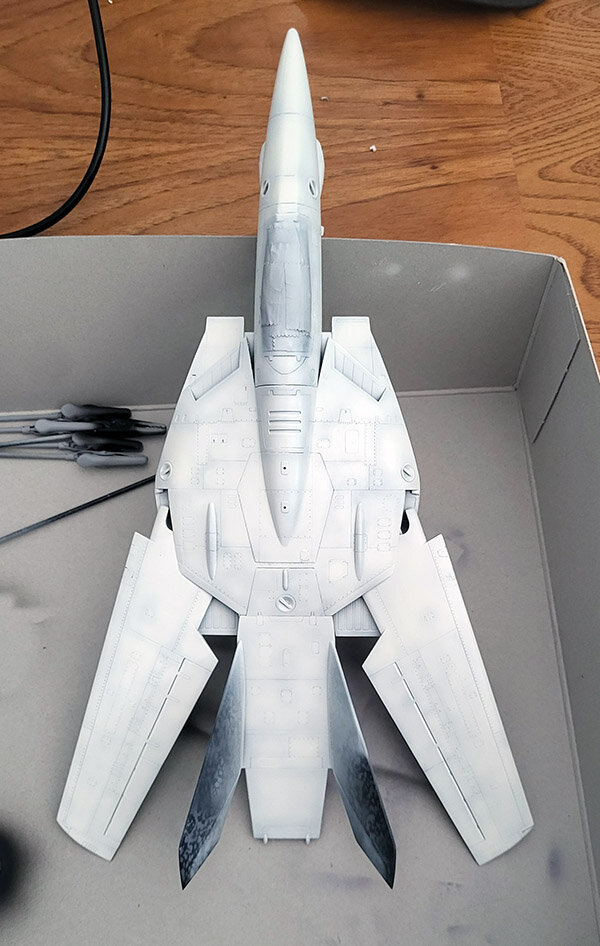
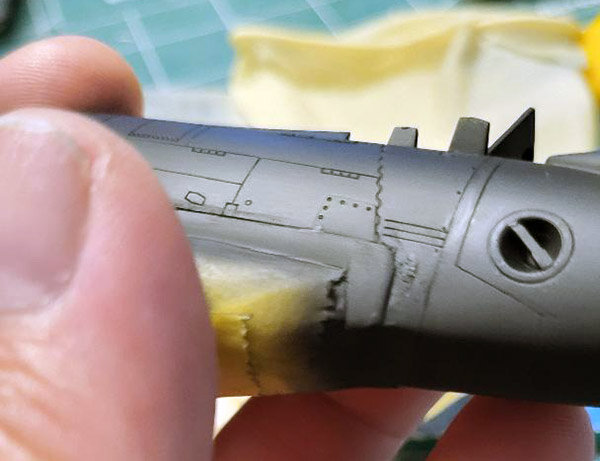
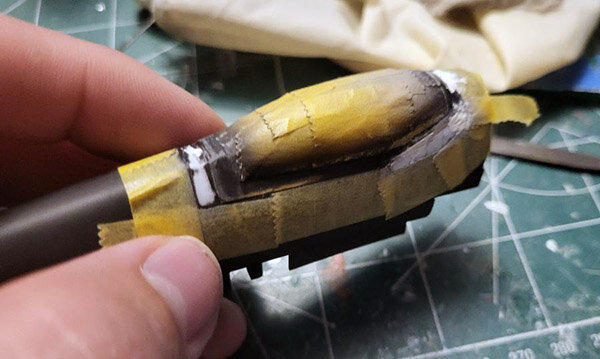
Got to work with what time I had. After corrections, Mr. Surfacer 1500 was reapplied as a black base. I then zig-zag'd my airbrush over the surface with some AK Colors white. At this point I remembered this build is a 'clean' build and wanted to switch to a more purple/blue undertone. I remembered I still had paint left over from my VF-19 Ravens build last year(s) and began stippling and using templates to create variations in undertone. From here some Gaia Color EX-White was used (1:1) for do some very loose pre-shading and highlights. This stage is always challenging because the old-gunpla builder in me wants to keep preshading until full color smoothness is achieved. For aircraft, I find sloppier, the better. Lastly, I grabbed some Mr. Color 316 FS White and went to a 1:1:1 mix (color, leveling thinner, regular lacquer thinner.) This is the color I believe all VF-1's are called out for in Hase's instructions. I actually really like this white and keep it on hand. The 316 white was then airbrushed over a few key panels and then the pressure was turned up and light quick passes were applied over the entire surface to achieve a (hopefully) subtle look! I will let this dry and then re assemble the kit to make sure things look uniform and adjust as needed. Forgive the sloppiness. As most know, my hobby room died when the wife took over the space as a work-from-home office. I was a little reluctant to setup the spray-booth for a 'quick' paint job. So... just sat in the back porch rocker and let the fresh air deal with the fumes between rain showers with the dogs. Next up, hopefully were masking up for some color!

-
Why the blonde and not one of the gals from MacrossF? I mean Kathy was good enough for the deculture decal set Bandai did for Ozma's 1/72
-
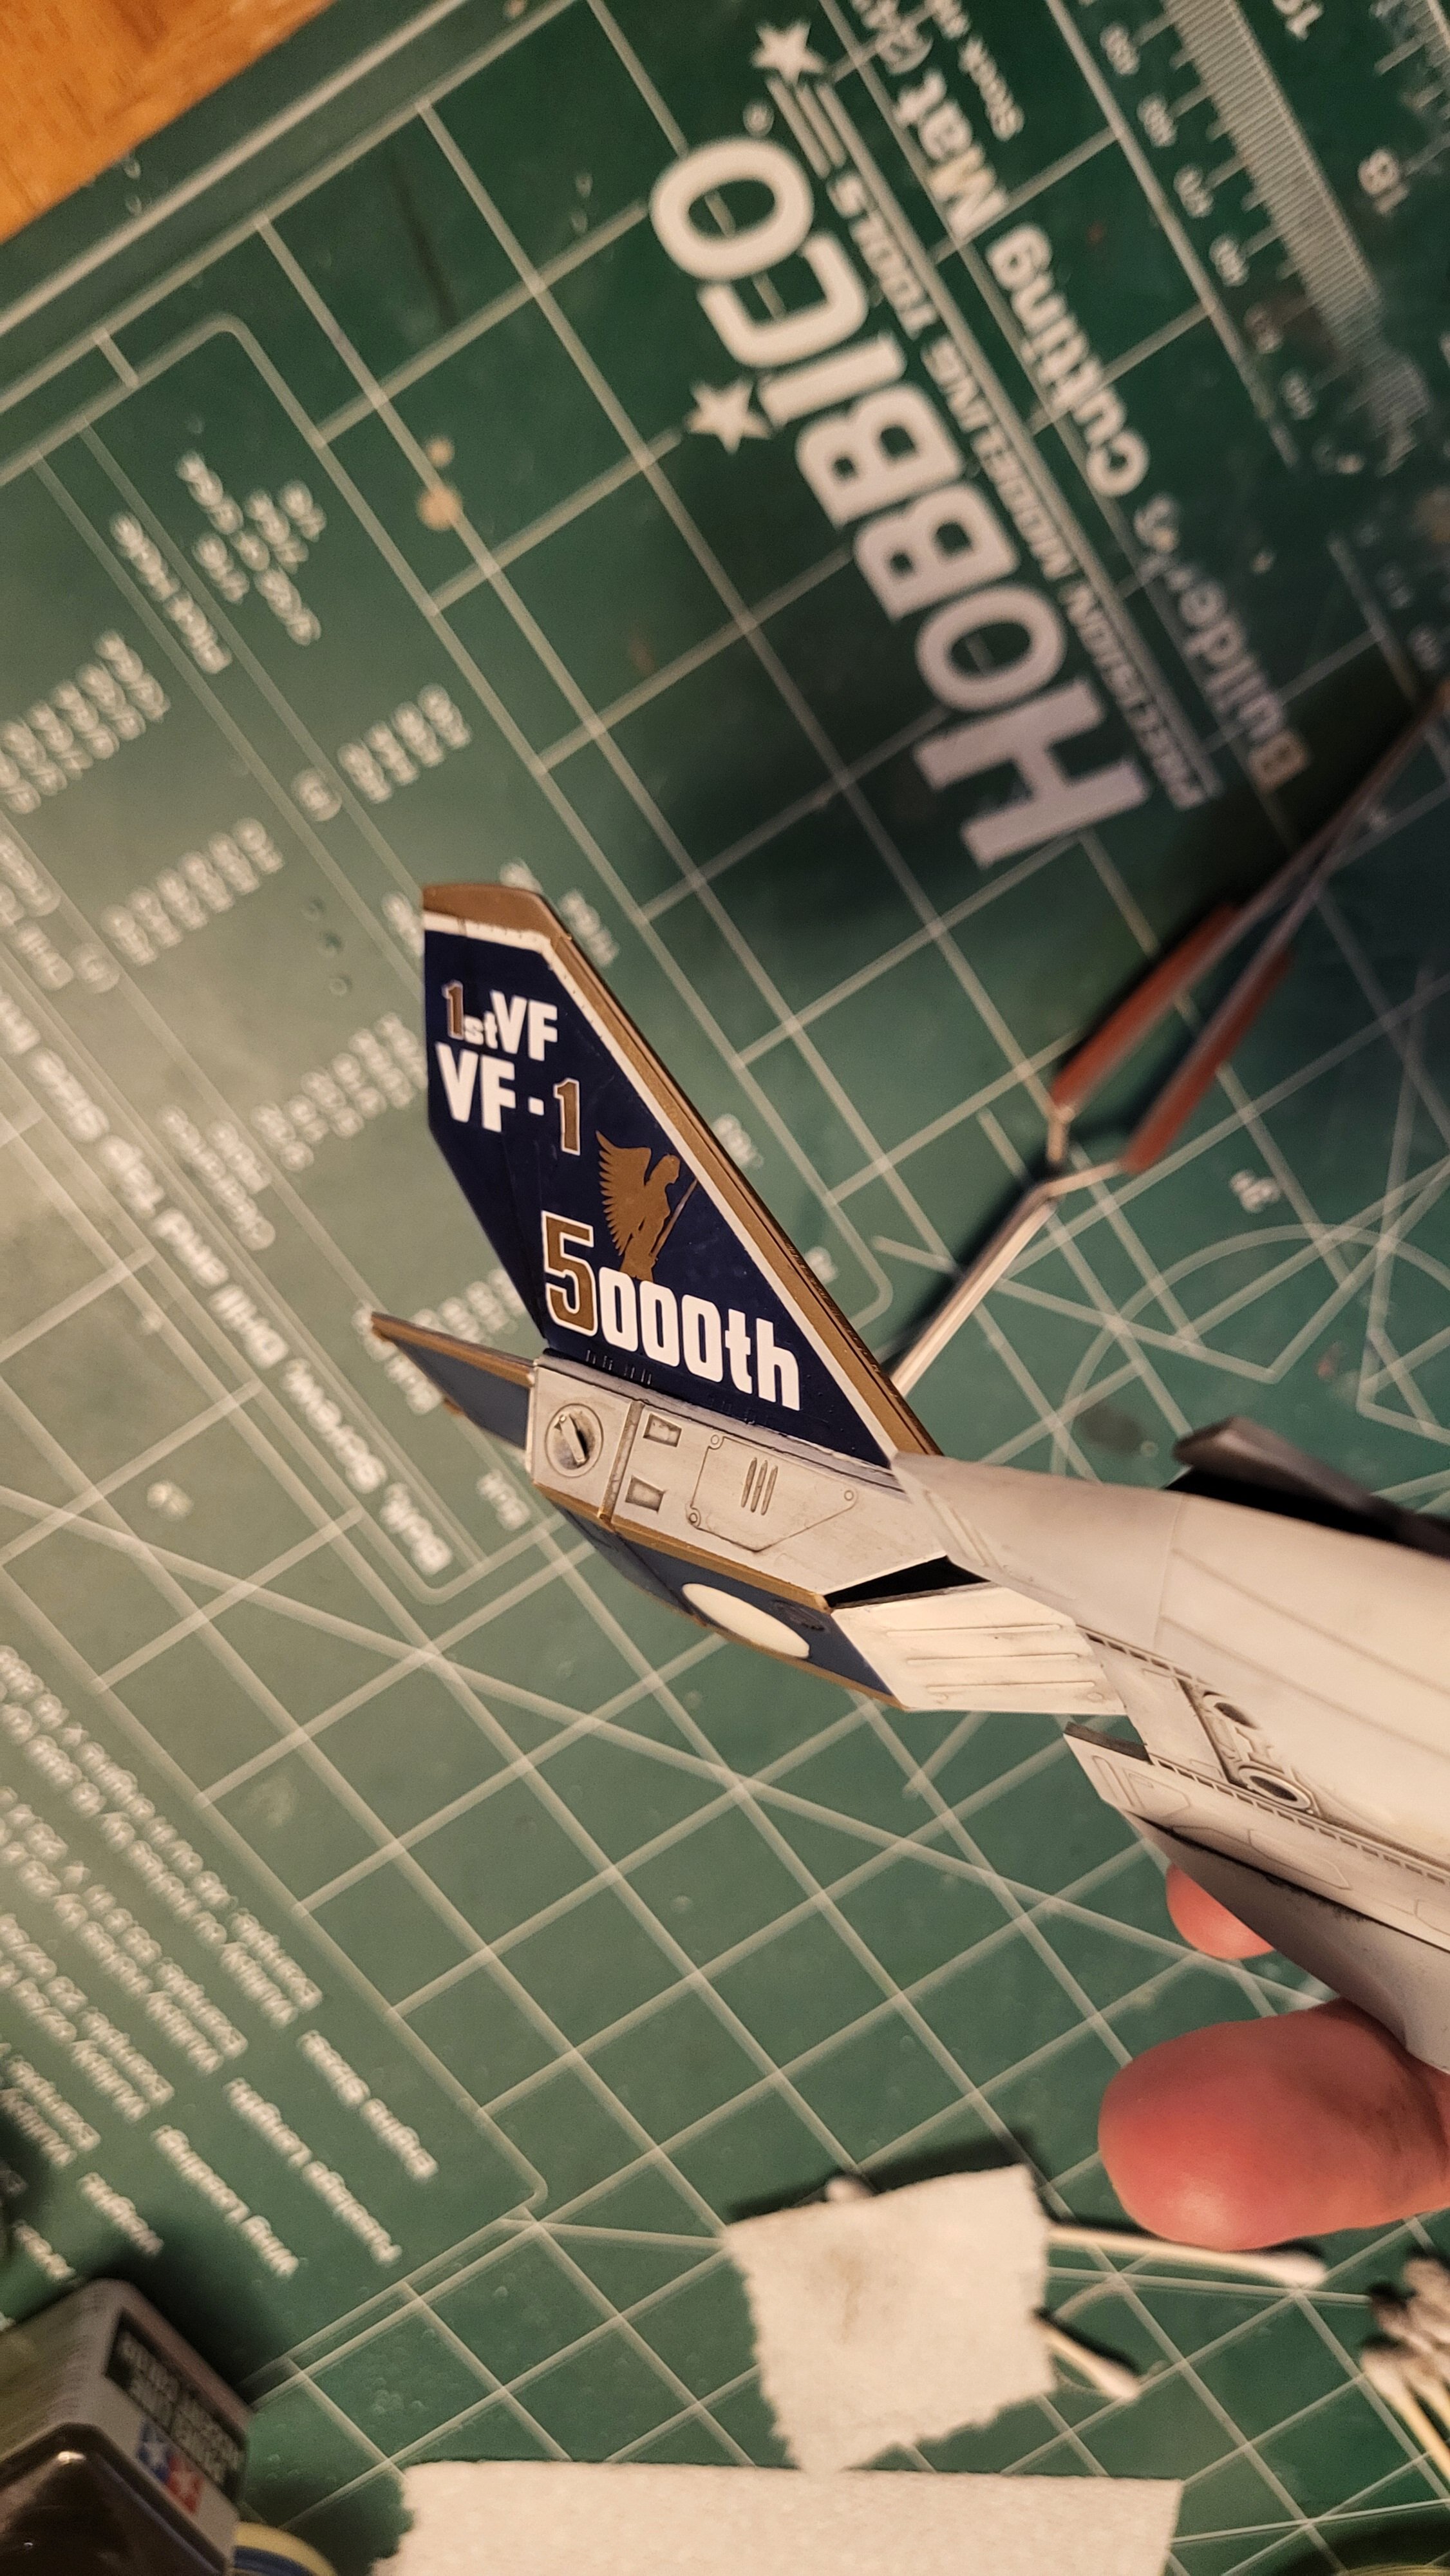
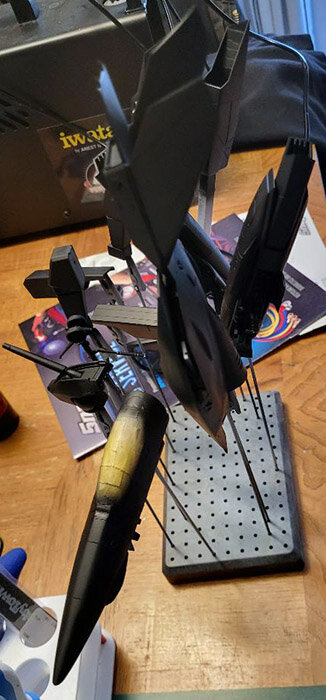
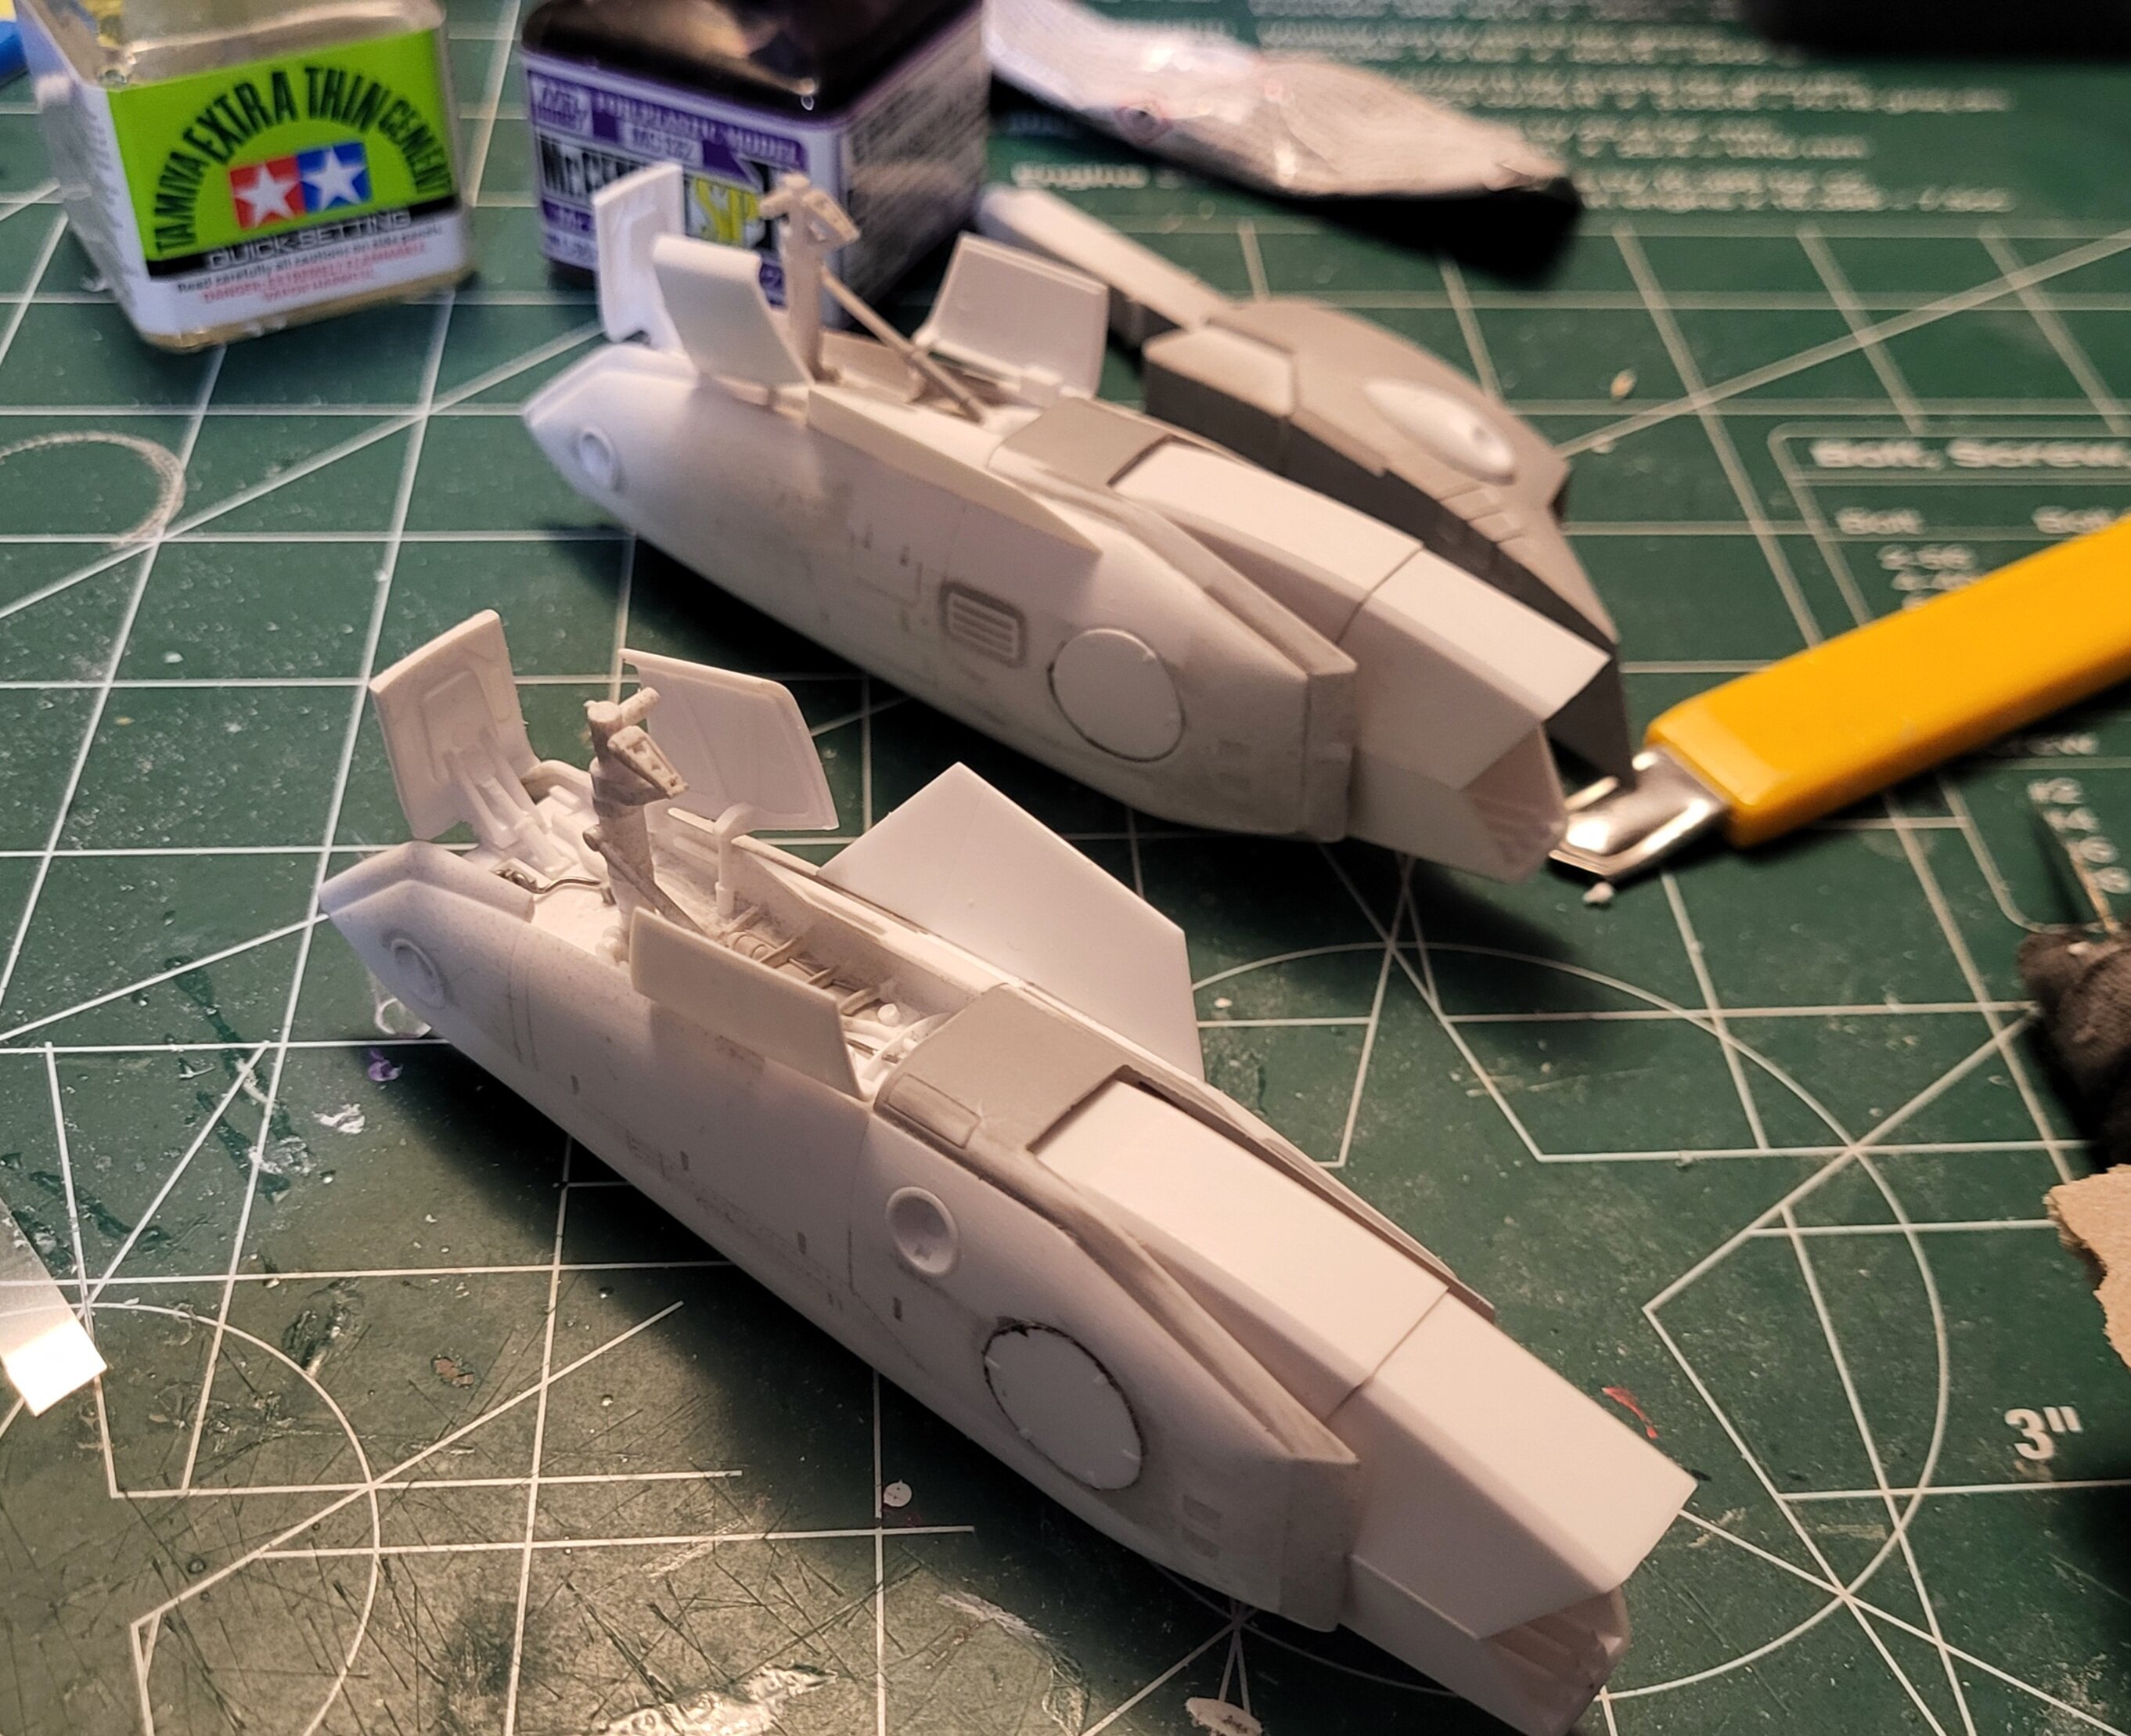
Went ahead and installed some of the clear parts, I tend to always make a mess of the job if I do it after painting. Installed, sanded and then coated in Microtech's brushable liquid masking film. Hopefully the edges stay as sharp and clean as they are here. Finally got time to drag out the airbrush for the black basing. Everything looks wonderful except for the nose cone. Not sure what happened. Part of me think the canopy glue stayed wet on the inside and slowly ate at the plastic. All the way around the joint is like this. Giving me old Testors glue tube vibes when you'd apply to much. So off to fix it with some putty. Masking off details to try to save myself on rescribing later.

-
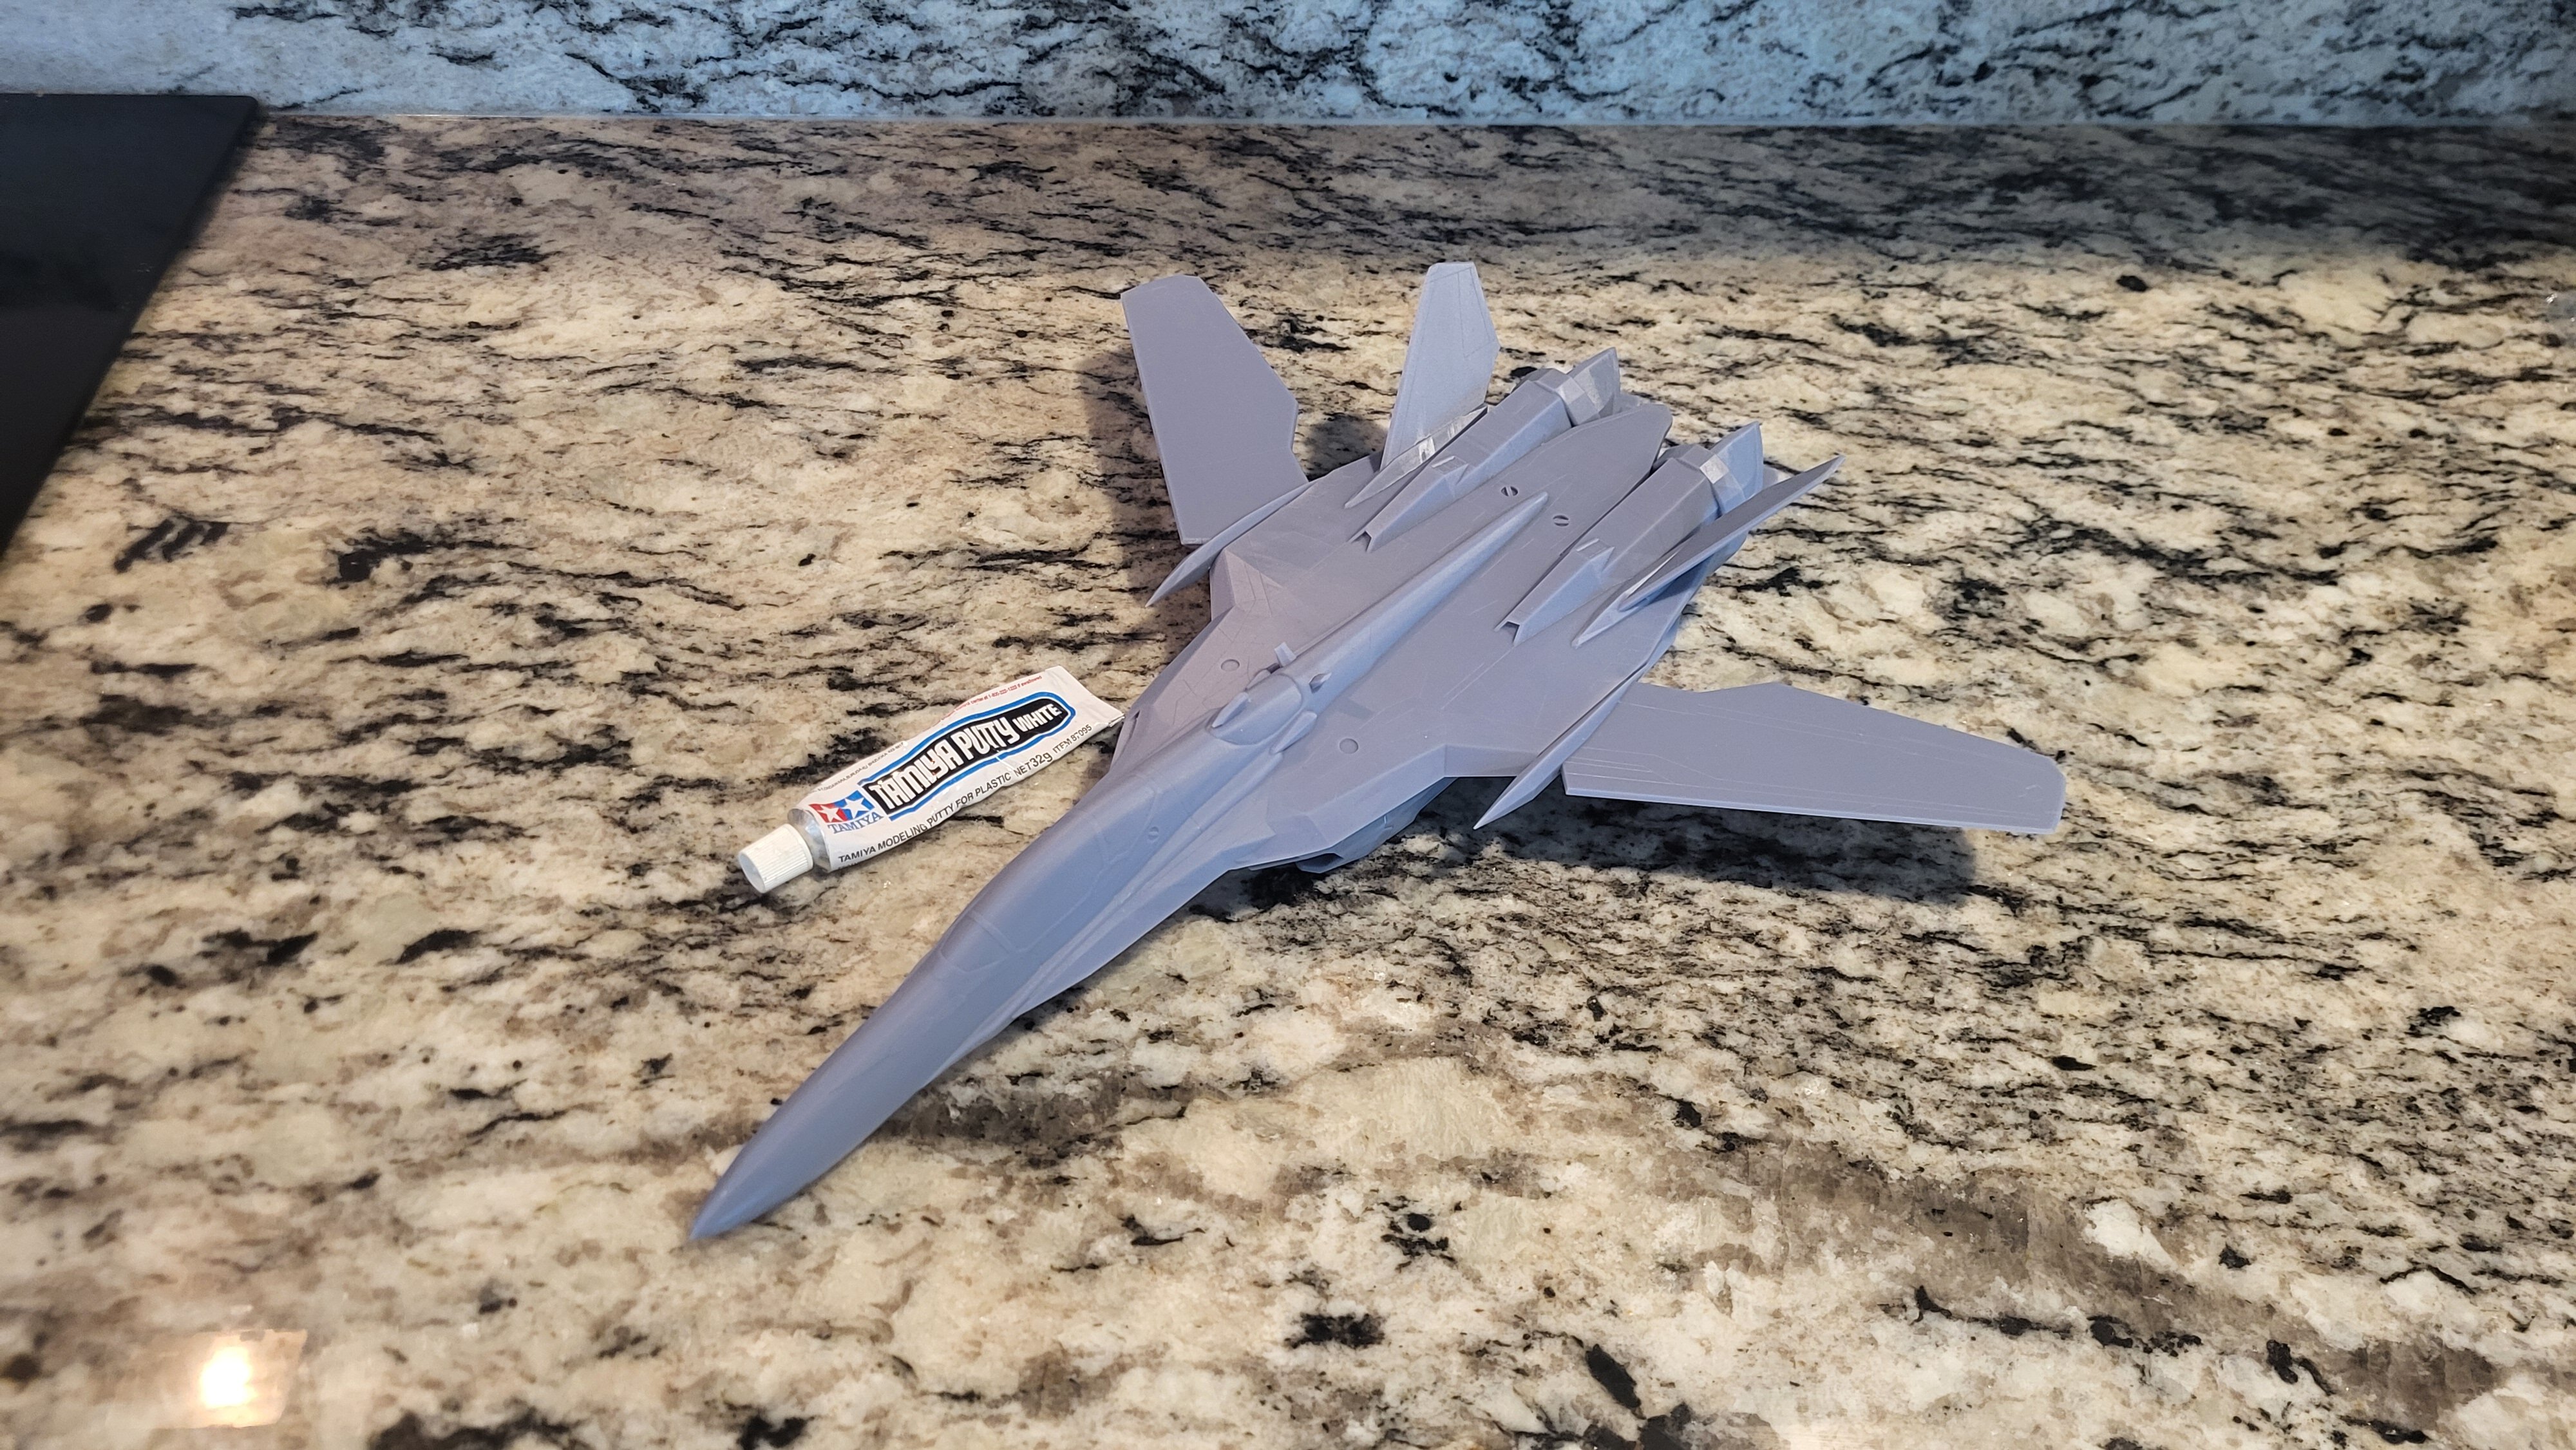
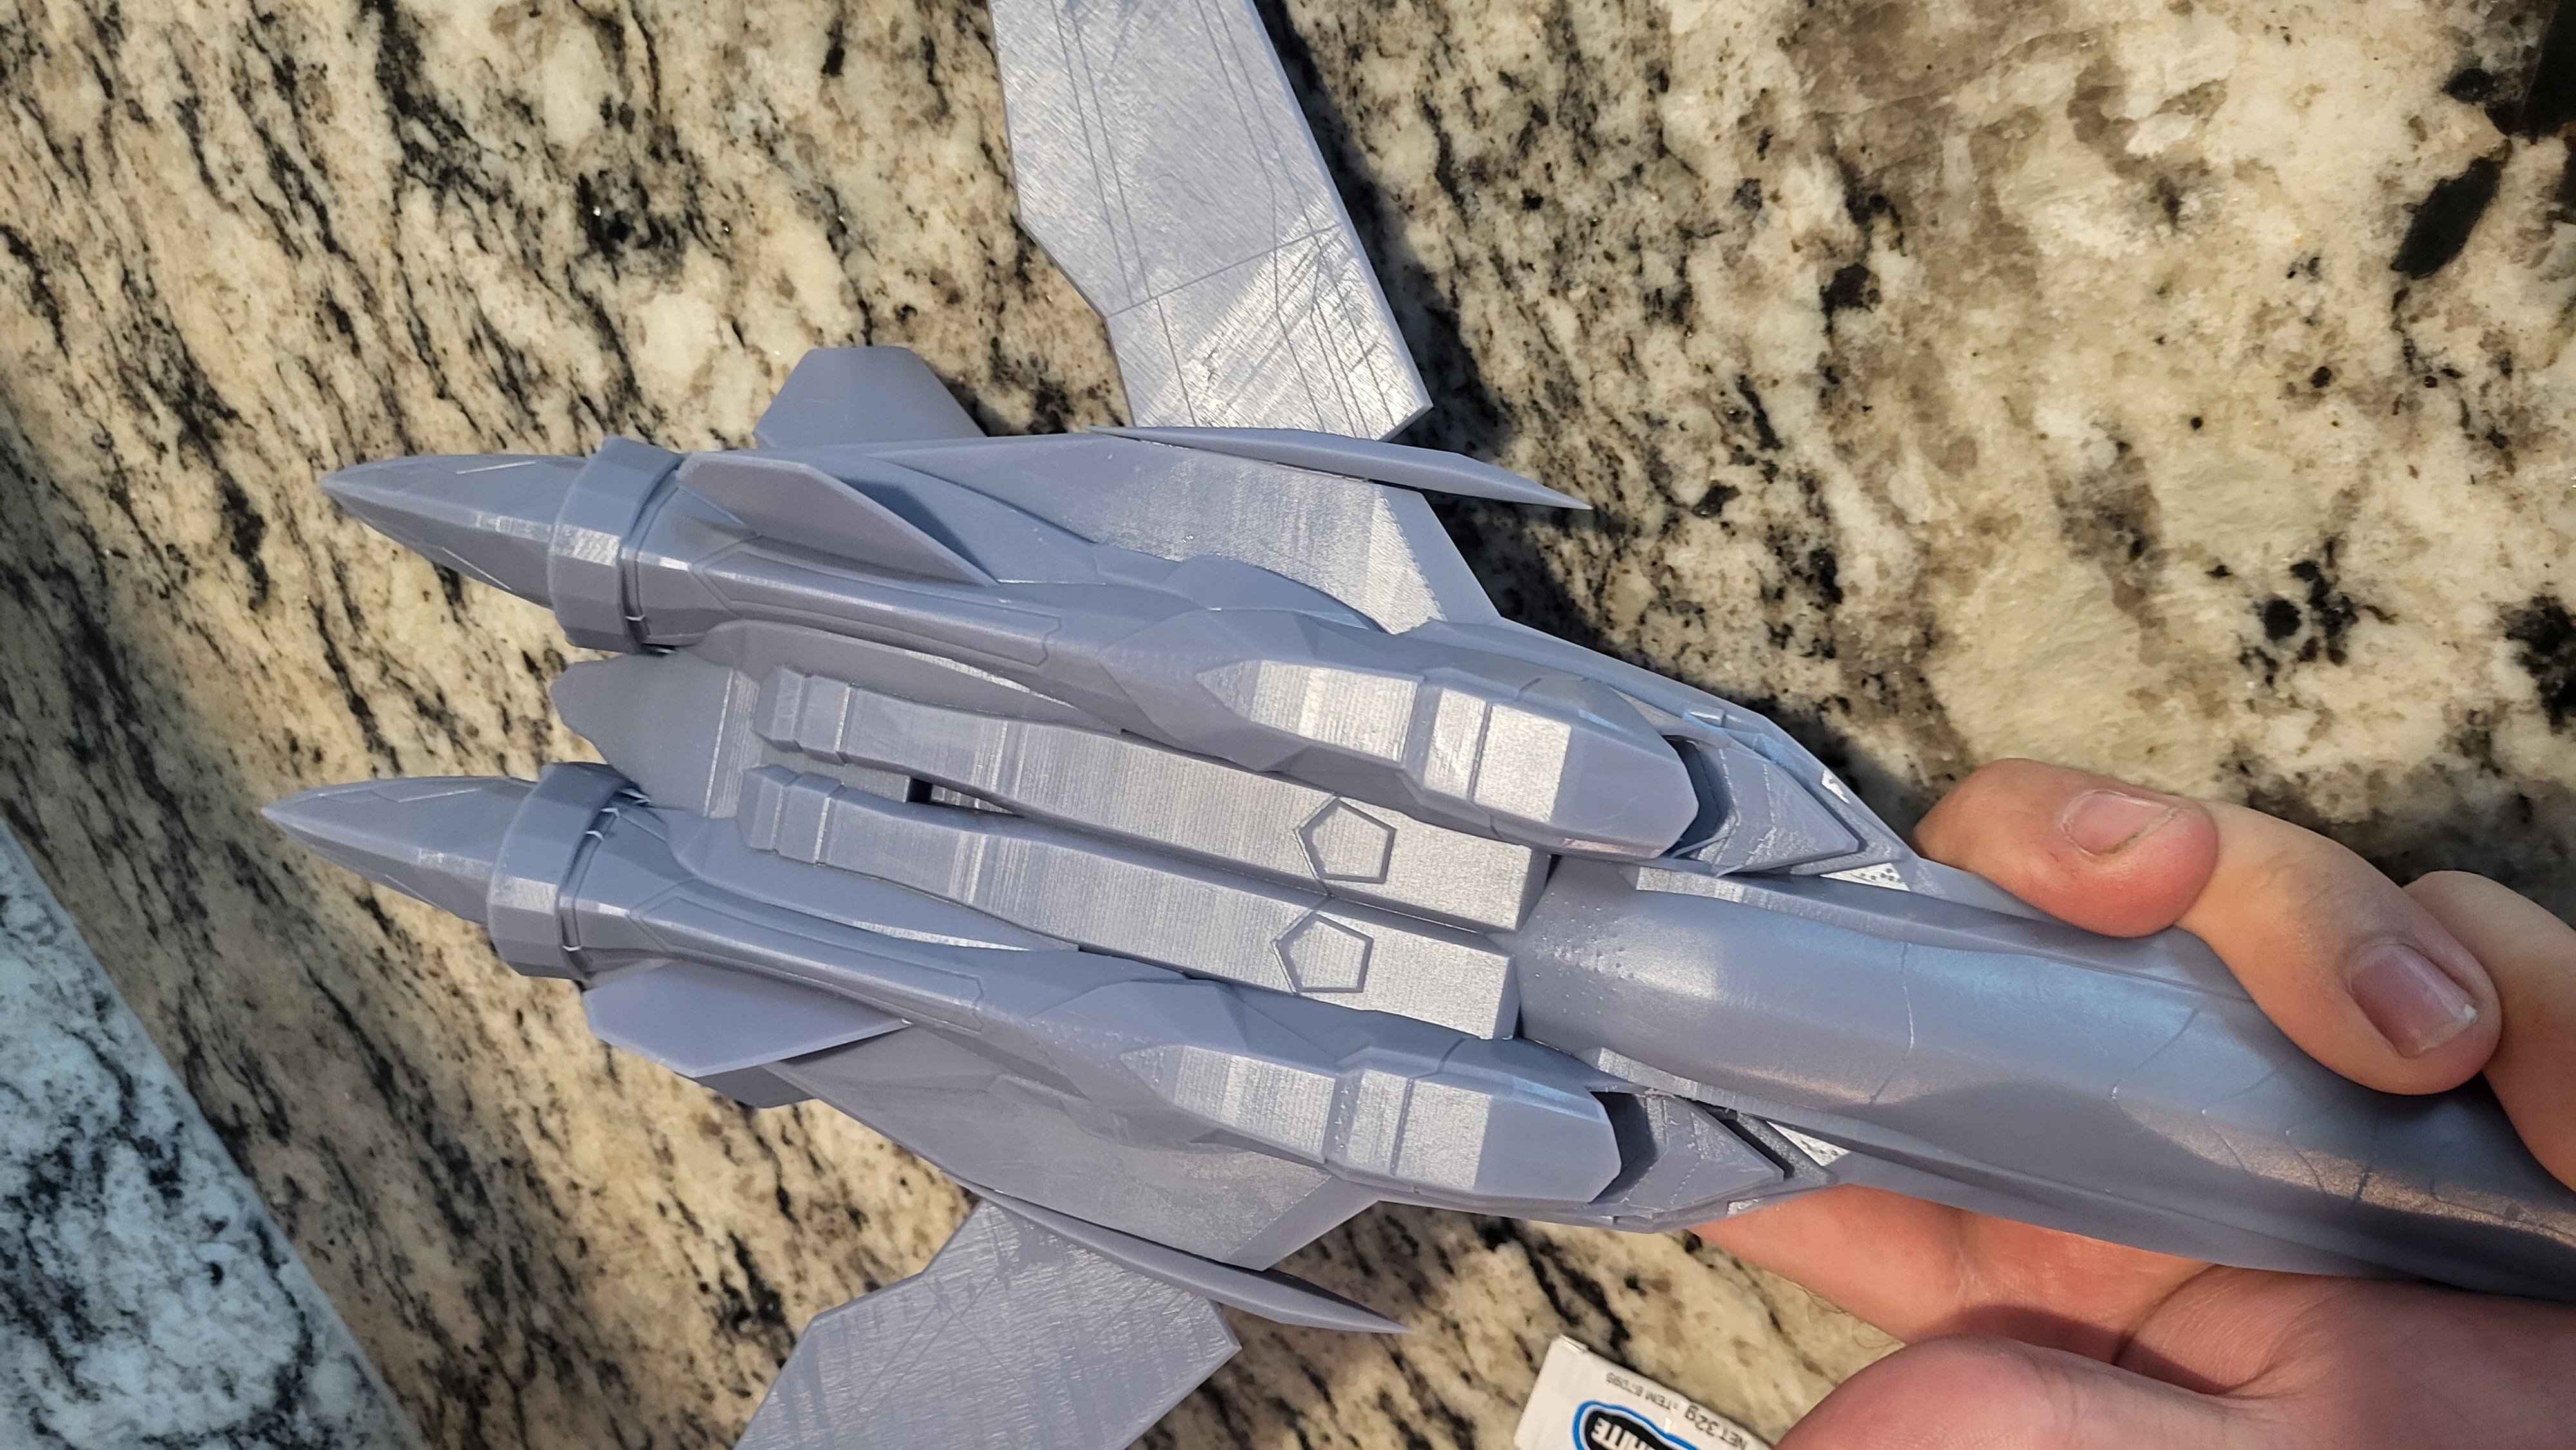
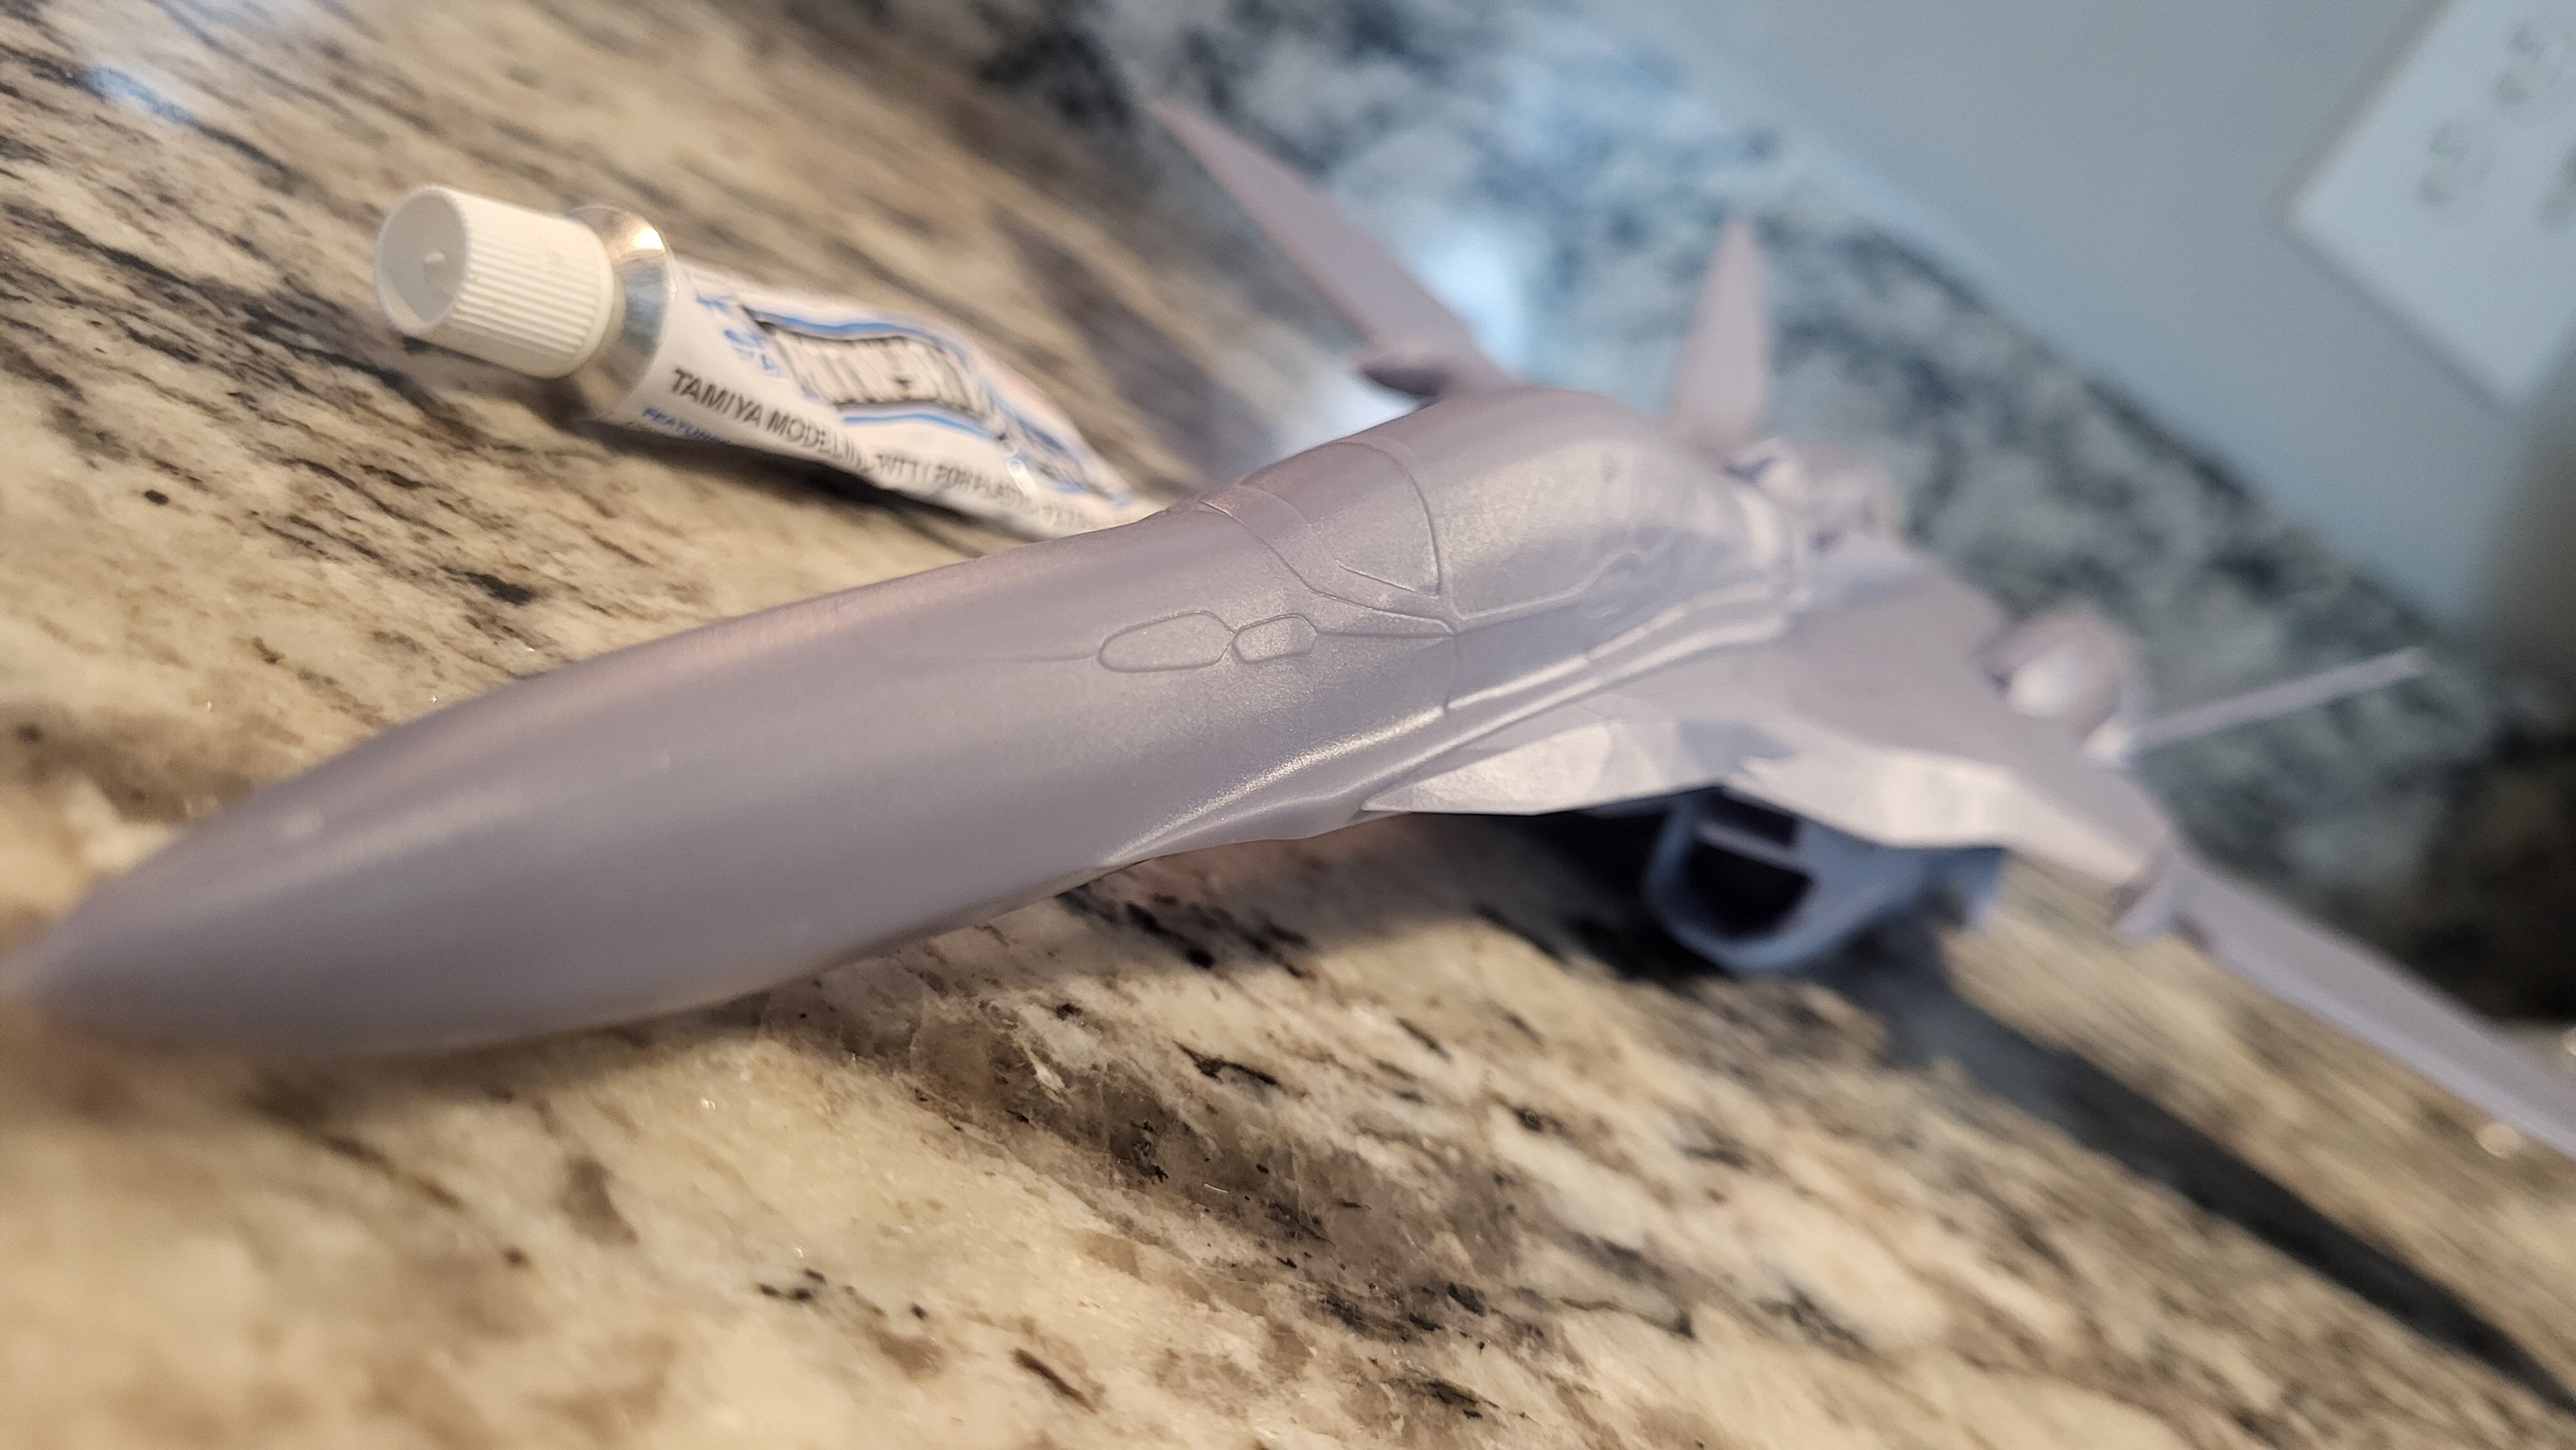
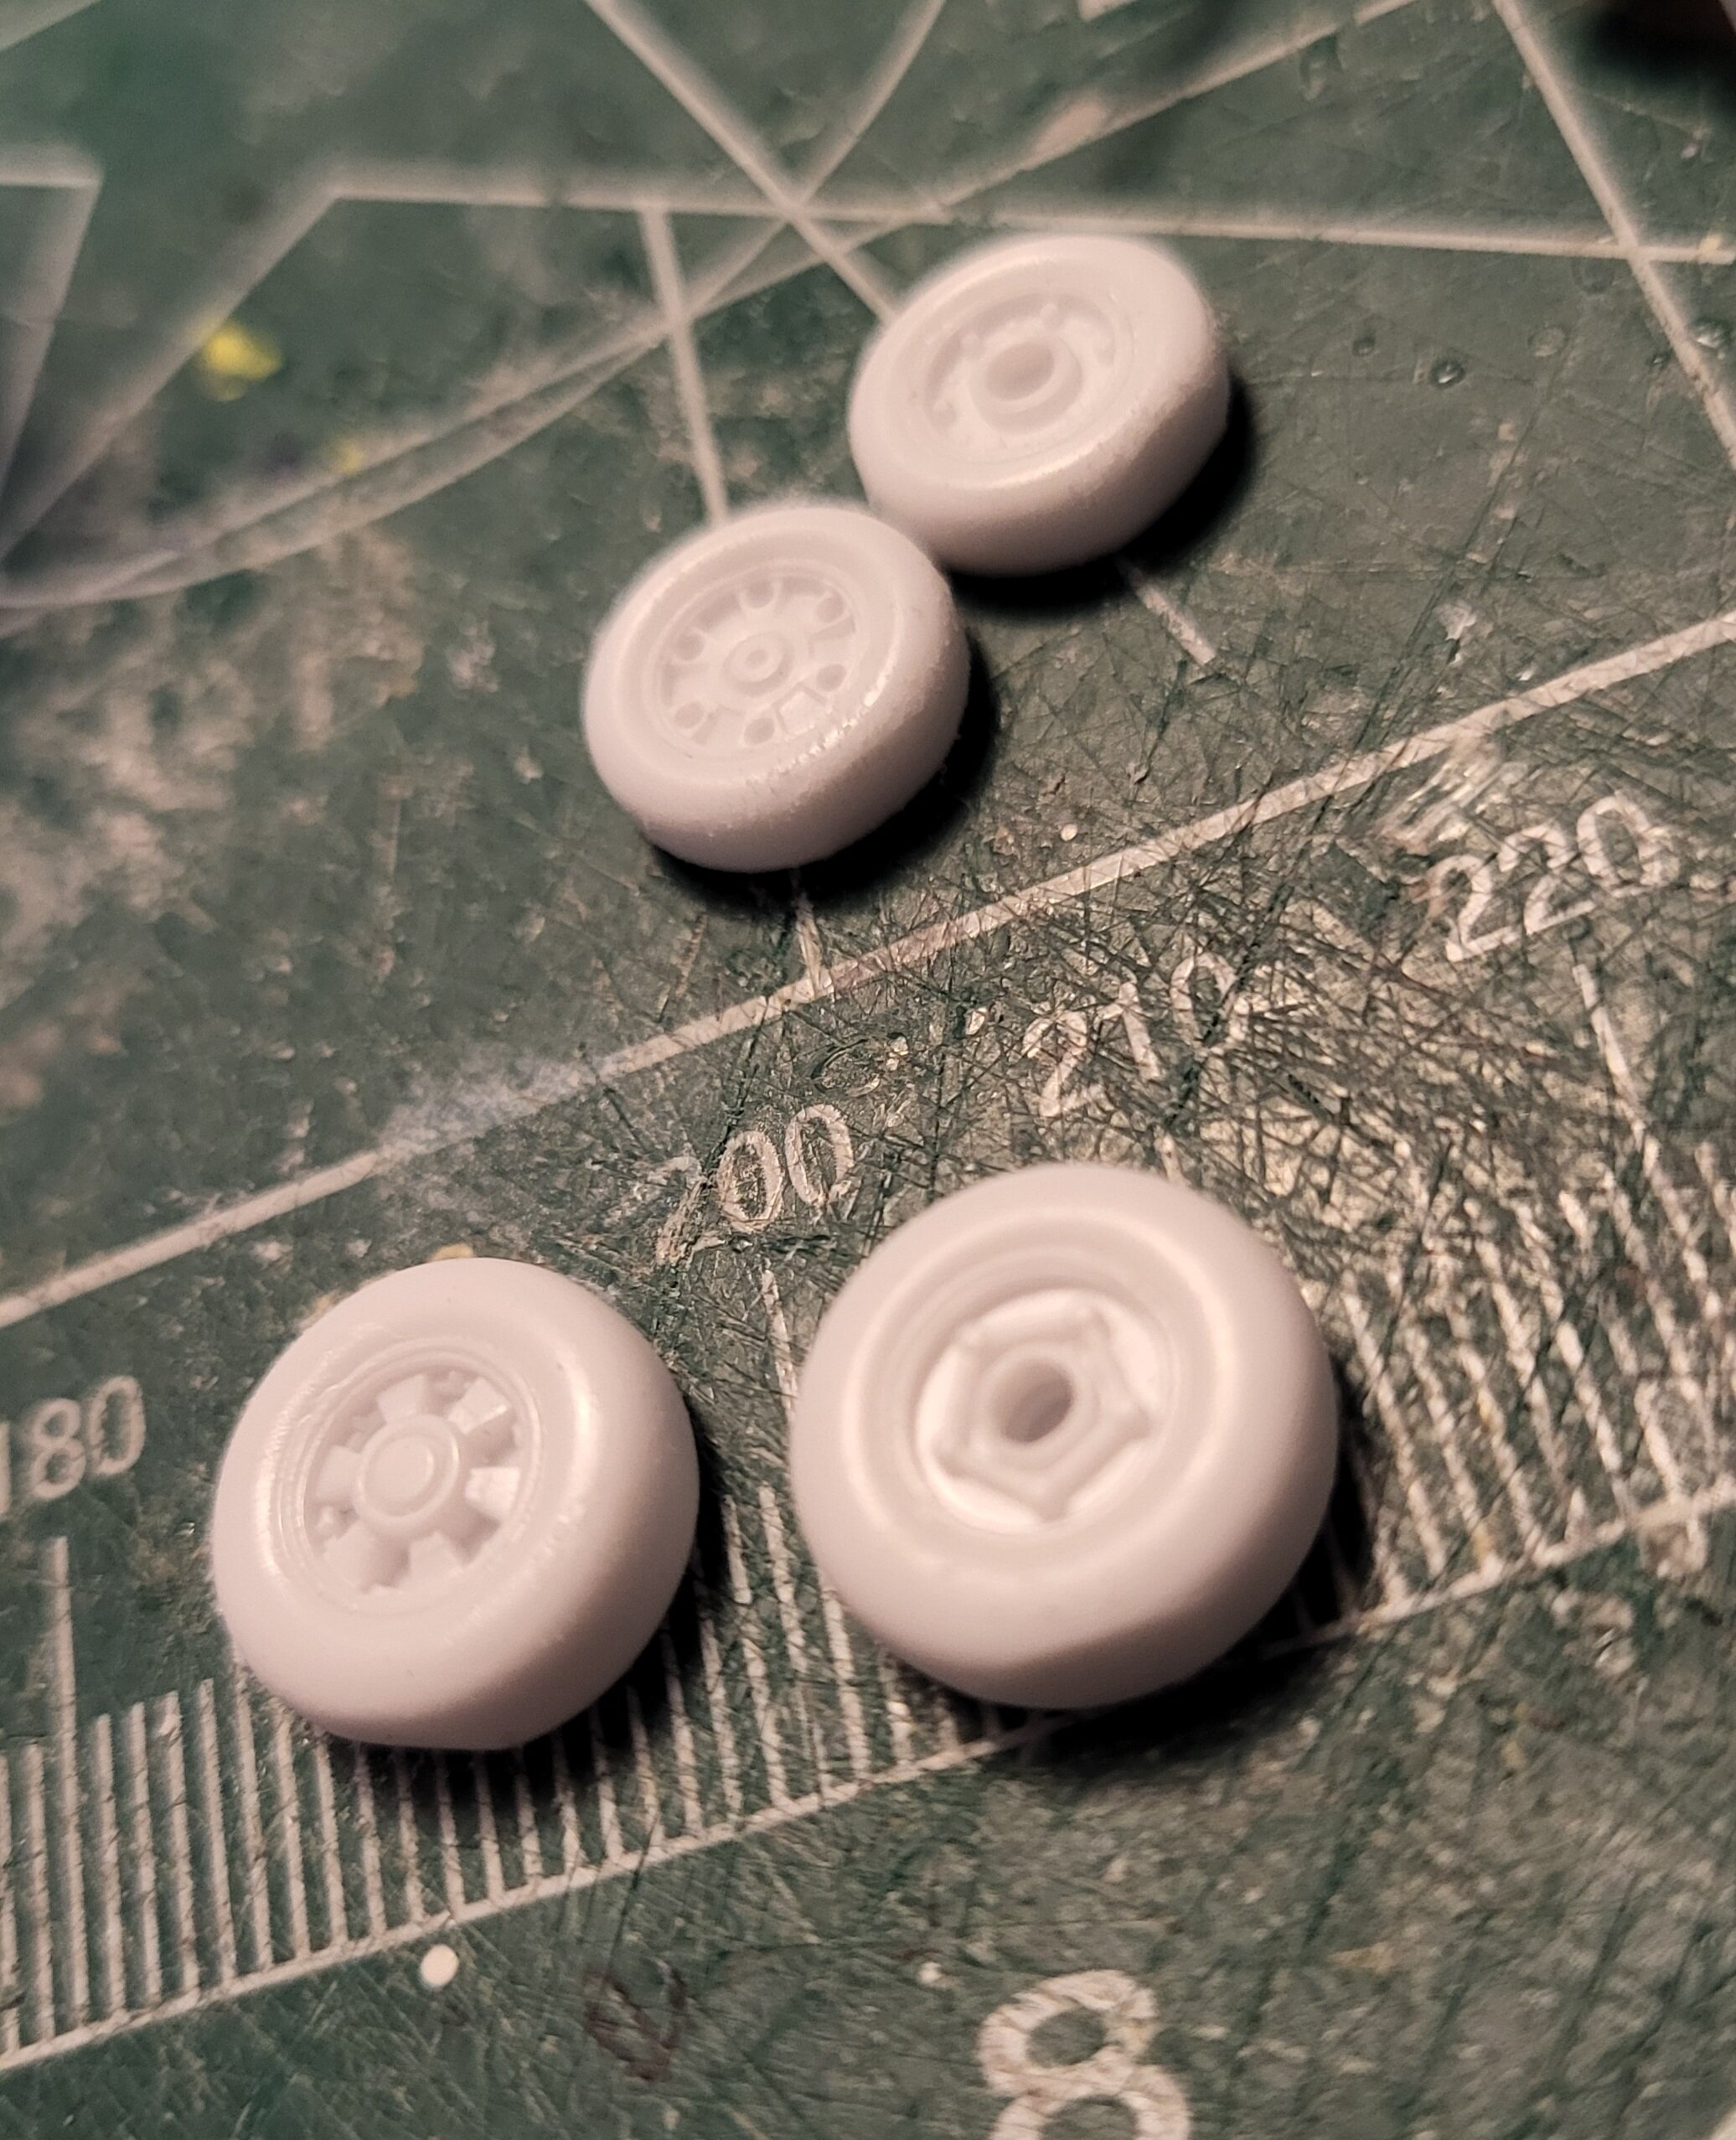
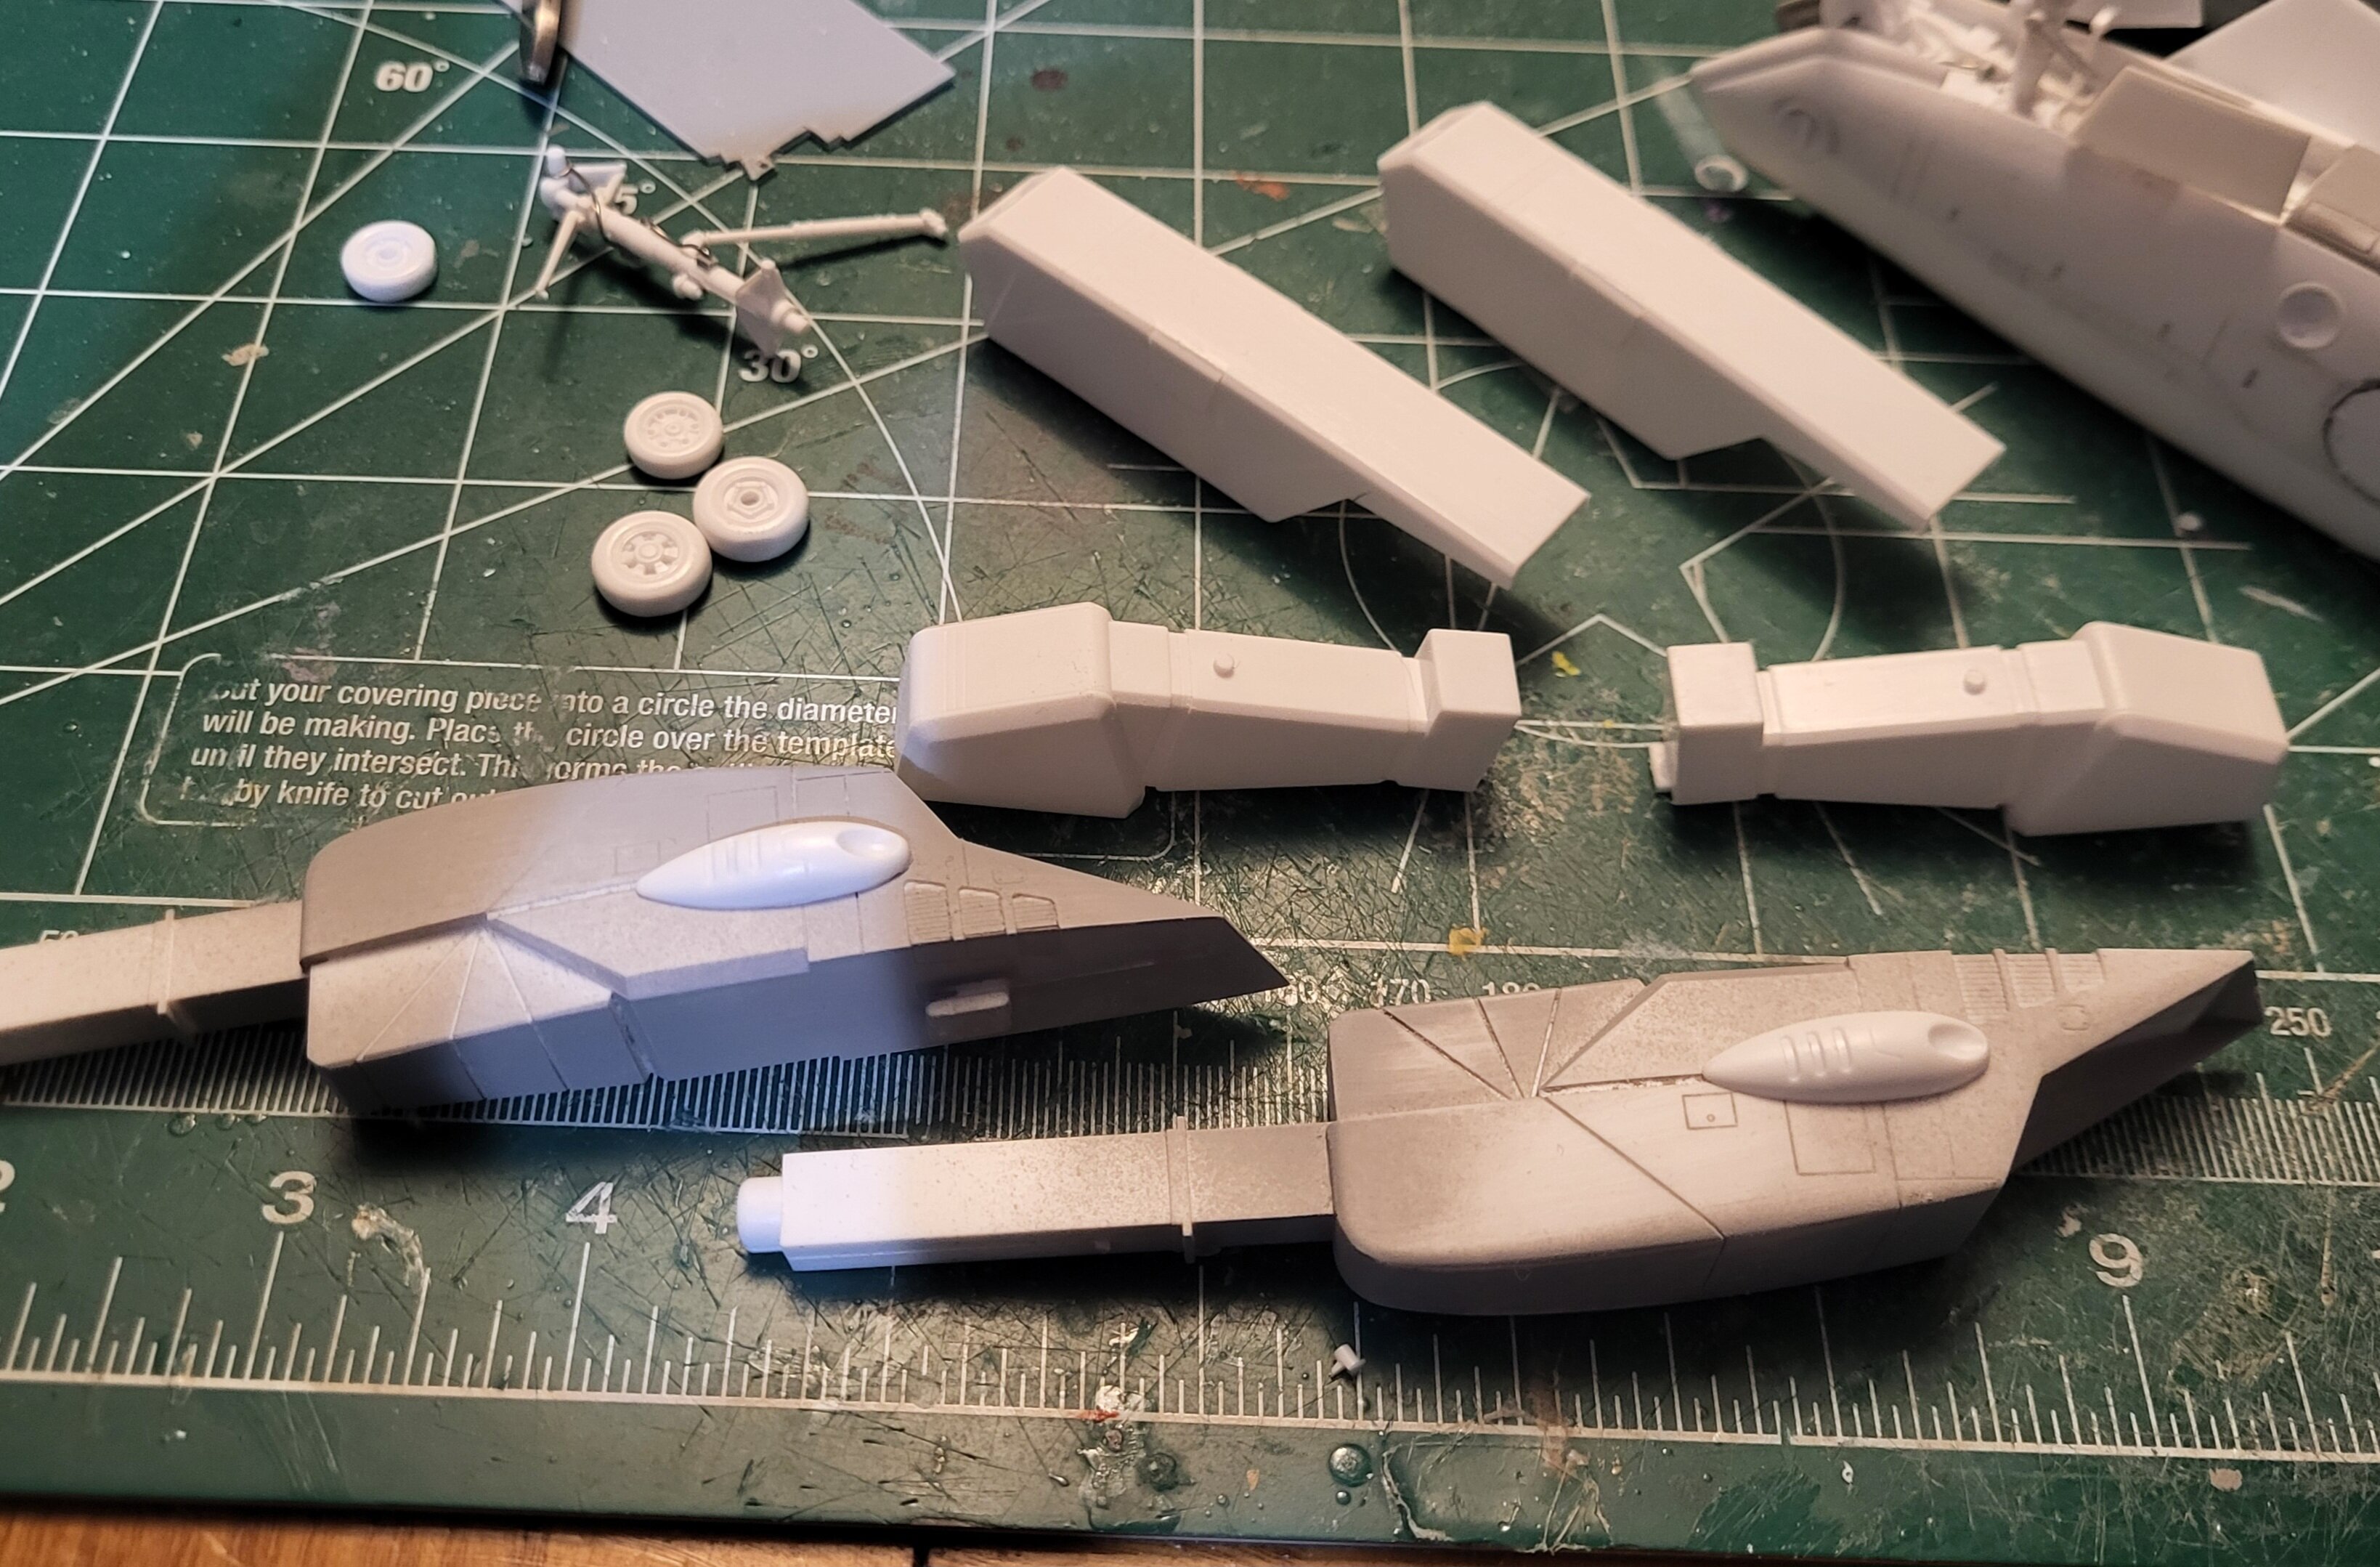
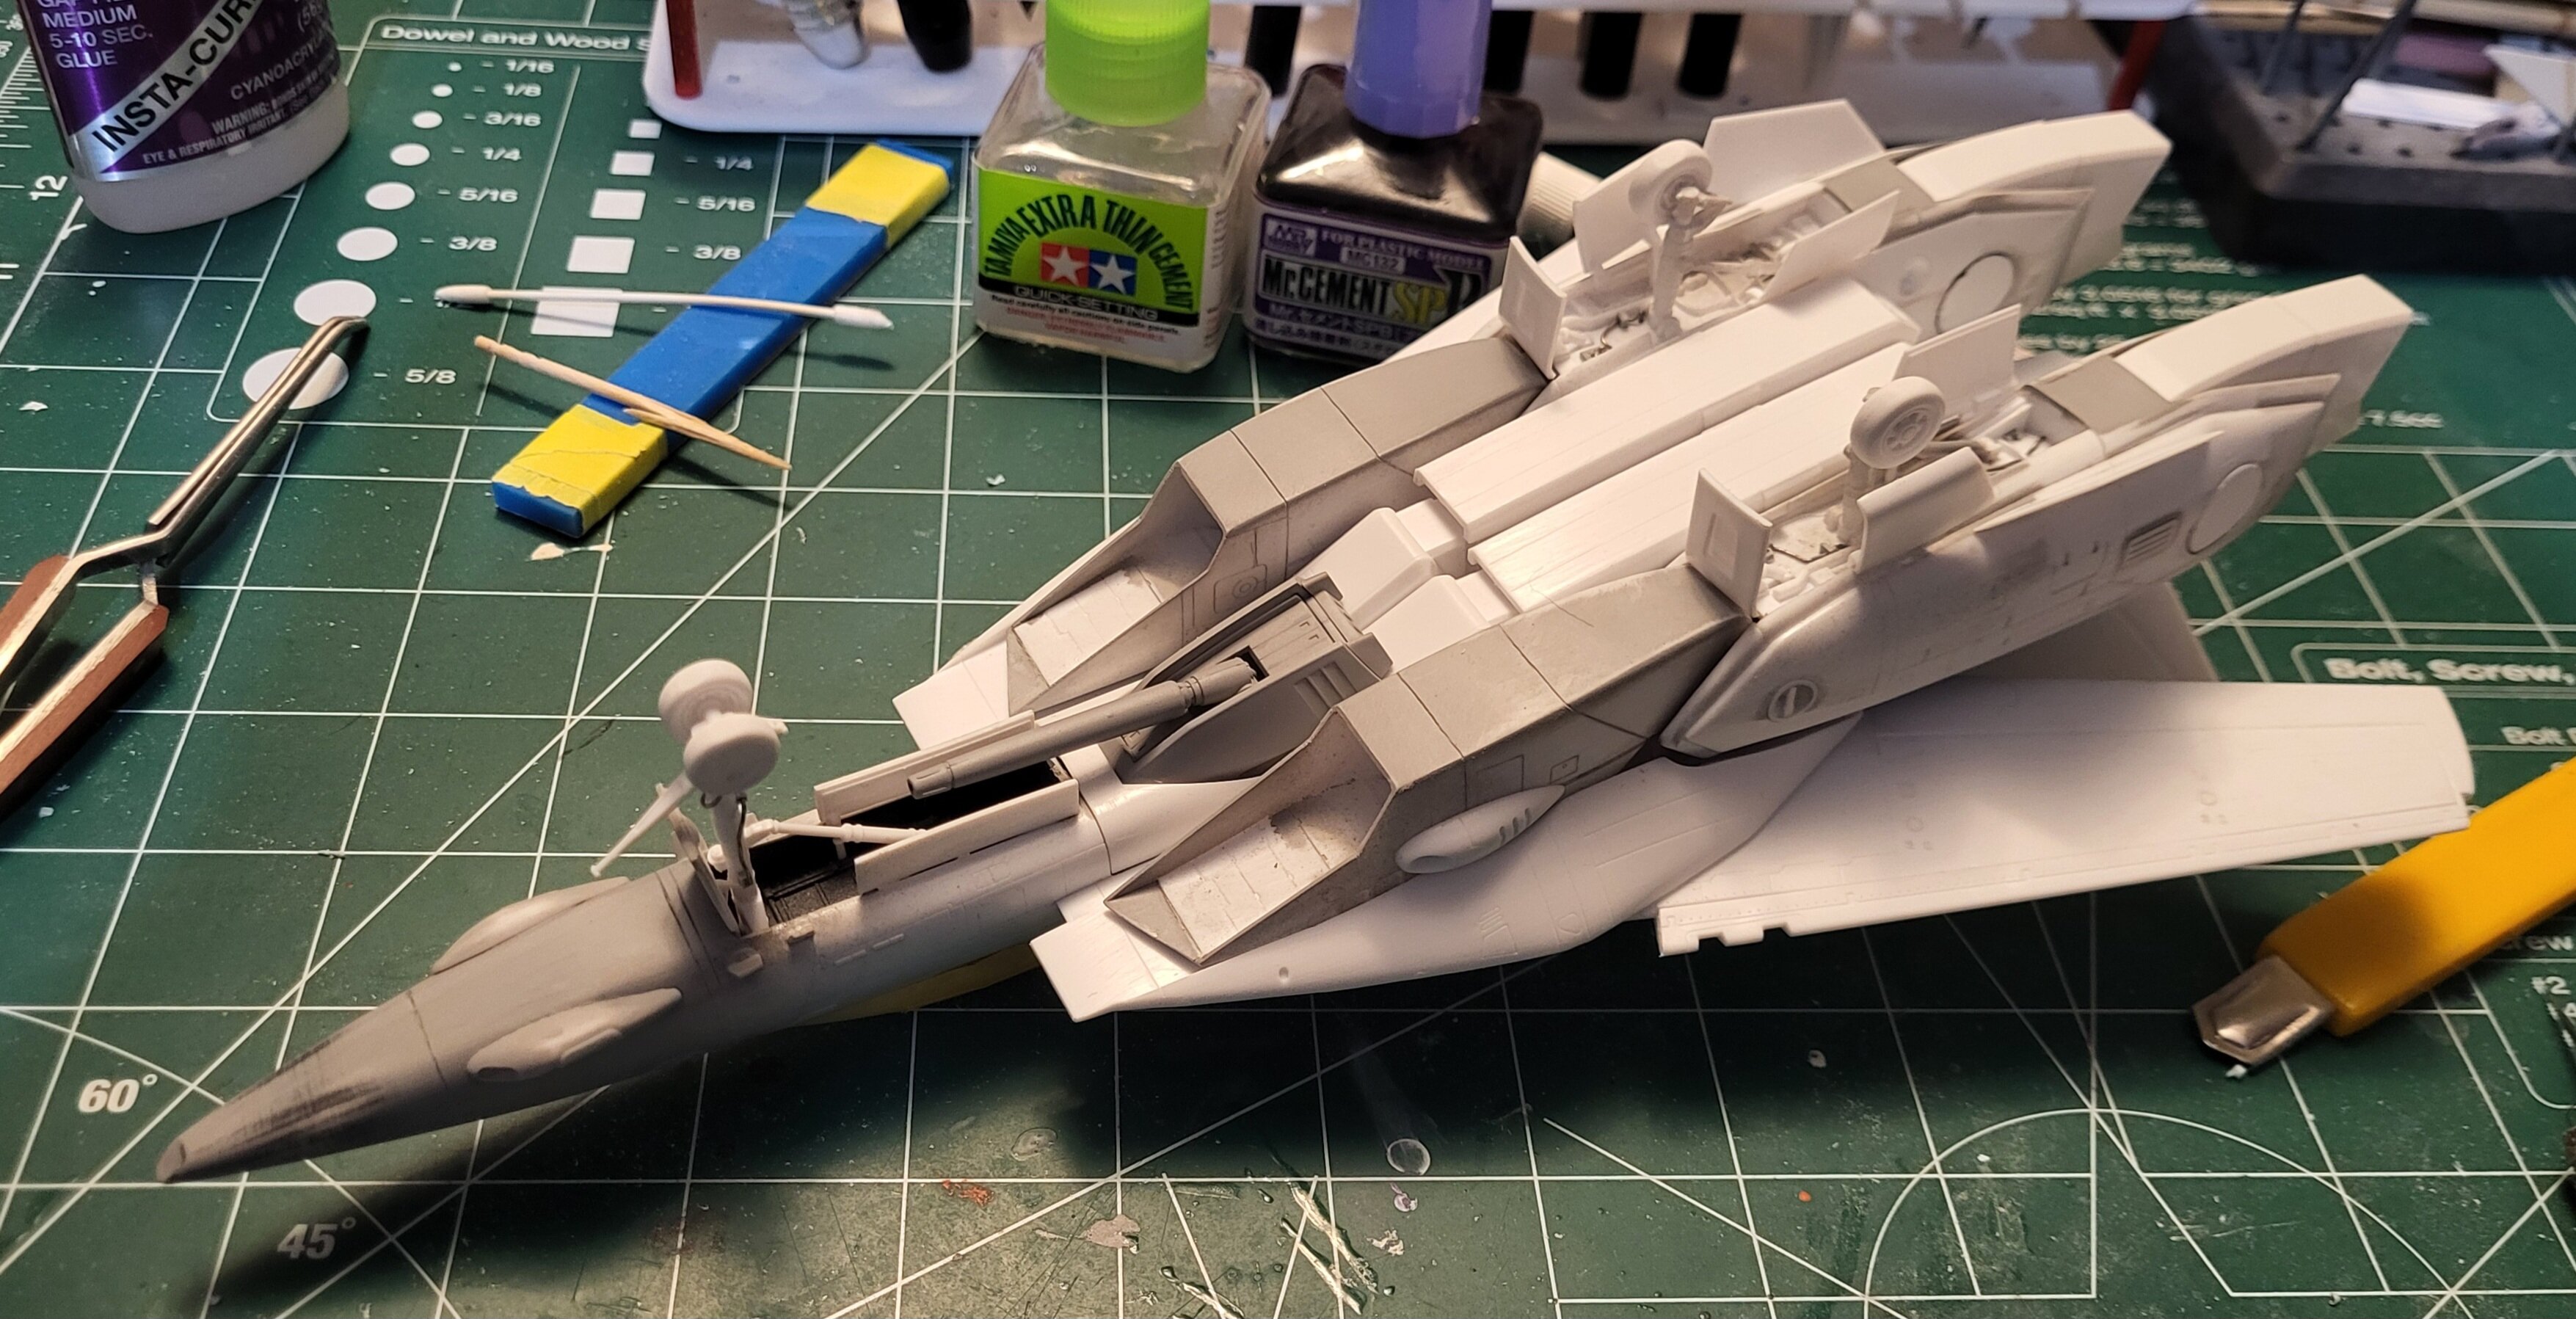
Got them flat spots in for ya R. Personally, I never thought they made much difference as they weren't really convencining of weight on tires. On my F-14's I really want to grab set of resin wheels that look deflated. Intakes smoothed out and rescribed. Head built, probably the smoothest fittong part of the kit! Legs finished up. All glued together and puttied for a gap-less fit. It'll make painting a pain but, I feel the resulting finish will be more uniform than painting the flaps separately. And there we go! All together, (minus the clear parts.) A few more rounds of smoothing and it'll be ready for black base!
-
You're missing the other 2 Flip Knights, LT.