

MacrossJunkie
-
Posts
3254 -
Joined
-
Last visited
Content Type
Profiles
Forums
Events
Gallery
Everything posted by MacrossJunkie
-
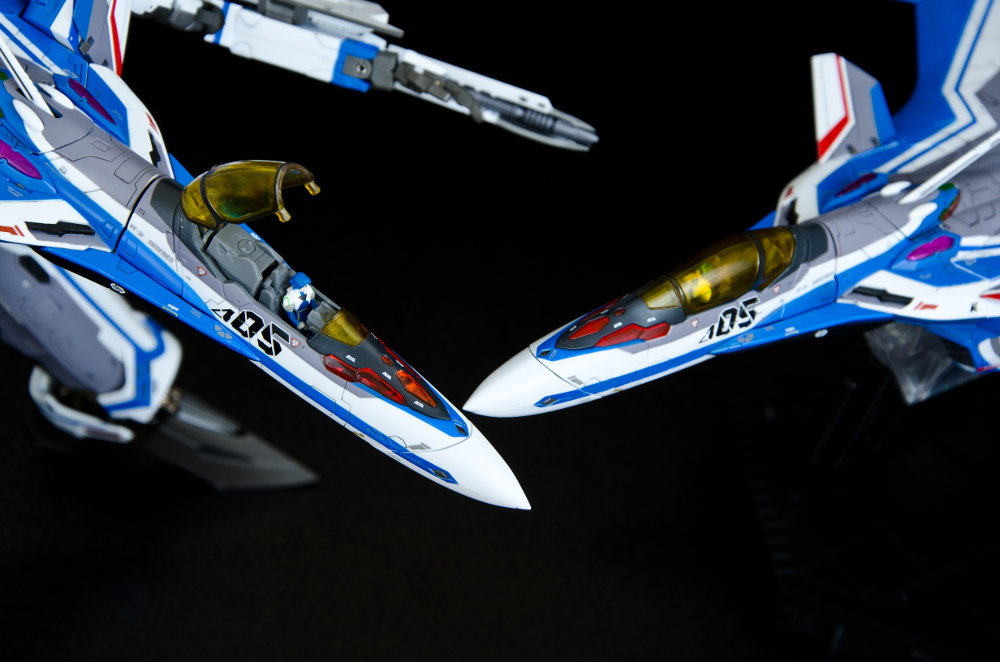
The difference between clear red sensors and "clear" red sensors...
-

1/48+fp's, 1/60+fp's, 1/72, 1/2k, 1/3k,1/100 and now 1/144
MacrossJunkie replied to VF-18S Hornet's topic in Toys
Thanks! I wish they sold the ghosts separately from the super parts. I would have ordered another set if they did. I couldn't bring myself to order a second set of super parts as it seemed like a waste. I think the 171's are great. The fighter mode especially feels really solid. I like the non-EX version the most because of the color and canopy, but it's too bad that one has has so many issues. Thank you. I continue to look for ways to improve, including trying out new paints and products to make things easier. I have not moved away from Future entirely and am considering going back to the non-polyurethane Matte Varnish. What I got was the Vallejo Premium Airbrush Color branded acrylic polyurethane. I bought a gloss and matte version off ebay to use and mix as needed. It has a built in dropper and you can squeeze out drops as needed right into the airbrush with no pre-thinning. The matte by itself is very flat, but in a nice looking way, not like the Tamiya flat base, and about comparable to the matte varnish I used before in terms of look. Mixed with the gloss in varying amounts will produce a range of matte to satin to semi-gloss finishes. The ones pictured in my above post were done with 13 drops of gloss to 9 drops of matte. I think the finish looks fairly nice. Here's the downside. With the Future + matte varnish combo I used before, if I did get a scratch or chip, it was just at the point of contact and it was easy to do touch ups. With this acrylic polyurethane mix, the extra hardness from the polyurethane works against it. If there is some abrasion or a part knocks hard enough against another part, one of several things seems to happen. The coating doesn't break, but loses adhesion to the surface at the point of contact, leaving a white spot, or there is a break in the coating. When the latter happens, it's not just a clean chip or scratch. It starts to peel. Ever have dried skin peel off? You know how if you try to get it off more of it starts to lift and peel off? That's what it's like with this. You try to remove the lifted off flake of coating and more peels off with it, always leaving a ring of white around the edges. Pretty soon, you have a disaster area. Also, despite letting it try the first time around for several days, getting it wet got it to start rubbing off like if you got a paper sticker soaked through. I totally did not expect that. I eventually stripped everything off, including the weathering and had to fully redo. Try #2, I mixed the matte with Future. Seems to mix just as well as the gloss acrylic polyurethane. I'm hoping it won't produce that peeling result. I'm letting it dry even longer now. But none of this was a problem with my old combo of Future + vallejo acrylic resin matte varnish and the results looked just as good.
-
I don't think there has been any with the actual completed premium finish version. Just photos with the stickers/decals applied showing where the markings would or would not be. plus some photos of parts like the chest with the tampos applied.
-
1/48+fp's, 1/60+fp's, 1/72, 1/2k, 1/3k,1/100 and now 1/144
MacrossJunkie replied to VF-18S Hornet's topic in Toys
Knocked a few items off my to do list. Weathered my Maruyama VF-171EX and Luca's RVF-171 as well as the VF-27β. Lightened the overall green on Luca's and added more paint where it was missing on the 27. Notably on the hip guns and the upper canard pieces that move up and down where the darker green stripe should have been painted. Only took a few pics as I don't have much time right now. Not going to transform them for a while either as I'm letting the acrylic polyurethane coating cure longer so see if it helps with the issues I had with it. (Can I no longer make an image a link? Selecting the pic and clicking the link button doesn't do anything unlike before where you could. If it's possible, how? Wish I could edit the BBcode like before the upgrade. Also, why can I not insert more than one image from URL? The editor won't insert an image for from URL after the first one. I put in the link and click insert into post and it does nothing. How does everyone else put in multiple images after the upgrade? The options appear to be more restricted now.) Nevermind. I kind of figured out how. I have to double click an image to insert a link. Also. for some reason, the board software won't let me do more than one insert from URL per save. so I have to submit, then go back and edit and insert another image from url and repeat. What a severe pain in the butt... -
It's just Arcadia's standard "white" plastic. Their VF-1's and the missiles that come with the YF-19 are also pinkish.
-
Also clear coating, I would think, puts a layer between the plastic and the air, slowing down or preventing oxidation that could occur.
-
It's full of pink canisters... Is this a Mary Kay cosmetics vending machine?
-
I have two and both are fine. But mine are also clear coated in Future, so that might be helping.
-
Nice. You must really like the 31J. What did you weather the one on the stand with?
-
Not so much showing off my collection as I am showing what most of my collection will be in. I put together my new display case recently and did the lighting earlier this Saturday using a 16ft LED light strip . It was a pain in the butt putting the case together but I think it looks pretty nice and with a little more work, I think I will be able to dust proof it or at least make it harder for dust to get in. I'm still trying to figure out how to lay things out, but I stuck a bunch of stuff in to see how much I could fit. It definitely gave me more room to work with not having wasted space between three separate Detolfs. Unfortunately, I still can't fit everything in there. I'm hoping the YetiStand Detolf mounts will give me more to work with as well as some use of fishing line. And yes... There's masking tape all over the VF-0's and the 0A looks funny because I had just re-painted the blue parts to a more proper gray while waiting for a couple VF-171EX's to dry in the dining room.
-
If you are concerned about scratched paint, get some Tamiya masking tape and put it over the contact points. I've done that to avoid scratches for things like the YF-29 super parts because the pegs on the back boosters scrape along the surface before going into the attachment points, so I trim some tape and run it along the area the pegs make contact and then put the boosters on. It's hidden from sight and the valk is protected.
-
I put it in fighter mode since the leg can lock in without that part intact.
-
I think I was the only one with the issue. I asked and no one else seemed to have that happen to them. I wasn't able to repair it. I didn't even attempt to glue it because of all the little bits it crumbled into would have been like trying to put together Humpty Dumpty. Like I said in another post, I just have very bad luck with these things.
-
I think it's great that Macross has something for everyone. The valks have three modes to love and people can pick and choose what modes they like. The fighter modes for the majority of valks are beautiful and can stand alone as actual aircraft. Fighter is my favorite mode and the majority of my collection is in fighter mode, followed by battroid, and no GERWALK, but that's because that mode takes up the most display space by far. You could say that those of us that love all three modes, love valks three times as much as those that love only one
-
Thanks for the suggestion! I had looked up Plastruct and saw they had two types. Bondene amd Weld. It sounded like Weld was for gluing two different materials together while Bondene was for gluing like materials together, so I ordered the Bondene. Got it today and tried it out and it works fabulously and doesn't make a mess or crust like superglue does. I was able to glue the pieces together and put them back on without the pieces immediately breaking apart again.
-
Alright. I'll order a few at 5.85mm first to see how it fits. Thanks very much!
-
So I put together my new display case yesterday. I measured the thickness of the glass shelves and my digital calipers read 5.71mm, so about 6mm. Is that still doable?
-
Correct, I skipped it for the front piece since I saw no fogginess in the clear plastic. You can just go ahead straight to the tinting phase without that extra step.
-
I coated it to make sure it would become clear first, or else I'd have had to come up with another plan. Fortunately, it worked and so I just went ahead and tinted it sometime after. I wonder if the paint actually had metal particles that was causing micro-abrasions in the plastic when I was trying to get the yellow tint off. The Future coating would have filled in the abrasions in any case.
-
Thank you. Yes, the canopy was kind of milky and no amount of cleaning made any difference. It was just the plastic. Coating it with Future fixed it right up though. The front piece wasn't milky like the canopy was. My tinting mixture was 5 drops clear yellow, 1 drop clear orange, 2 drops Future (for leveling and extra gloss) , and 2 drops of tamiya thinner. Sprayed at a low psi (approx 15psi). When cleaning off with the alcohol, just make sure the swab is not soaking wet, but just damp so it doesn't soak through the tape or squeeze out of the swab.. It takes me about 15-20 min or so to get the tinting off from just carefully rubbing back and forth and changing swabs occasionally when the tips are caked with paint.
-
I definitely would. The YF-21/VF-22 are among my favorites and they could use a redo according to today's standards.
-
It's definitely doable. Just have to take precautions to keep yourself from rubbing off the framing. Otherwise, you'll need to color match the dark gray and do touch ups. Thanks! Without being able to take these darned things apart, I can't think of a way to properly give that recessed look. My previous attempt with putting a smoked tint didn't achieve the results I wanted, so I may just leave it be. It would just be like those 2d perspective drawings that only look right from a certain angle. Stupid Bandai for making it too hard to take these apart. Makes me wish they made a kit like Yamato did with the VF-1's.
-
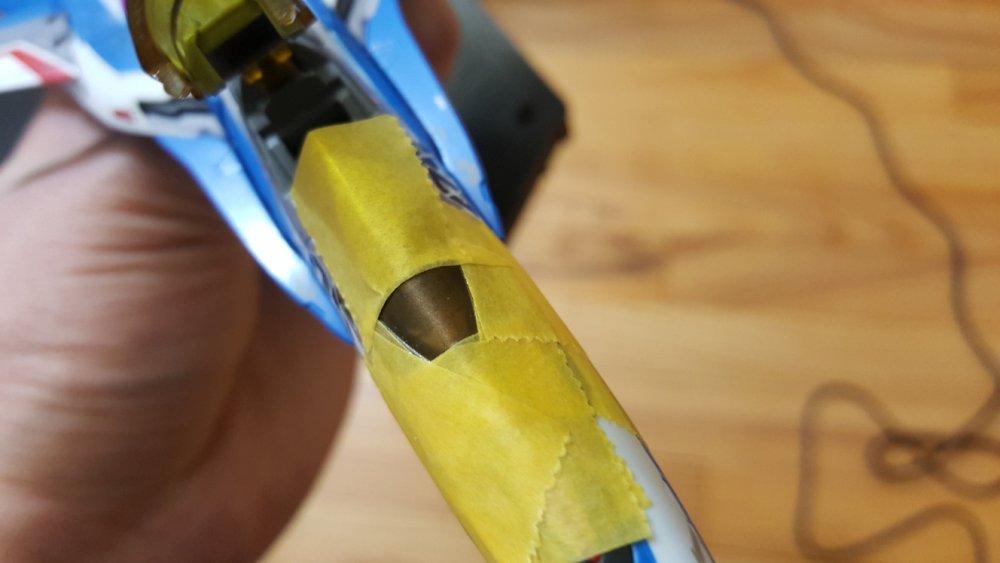
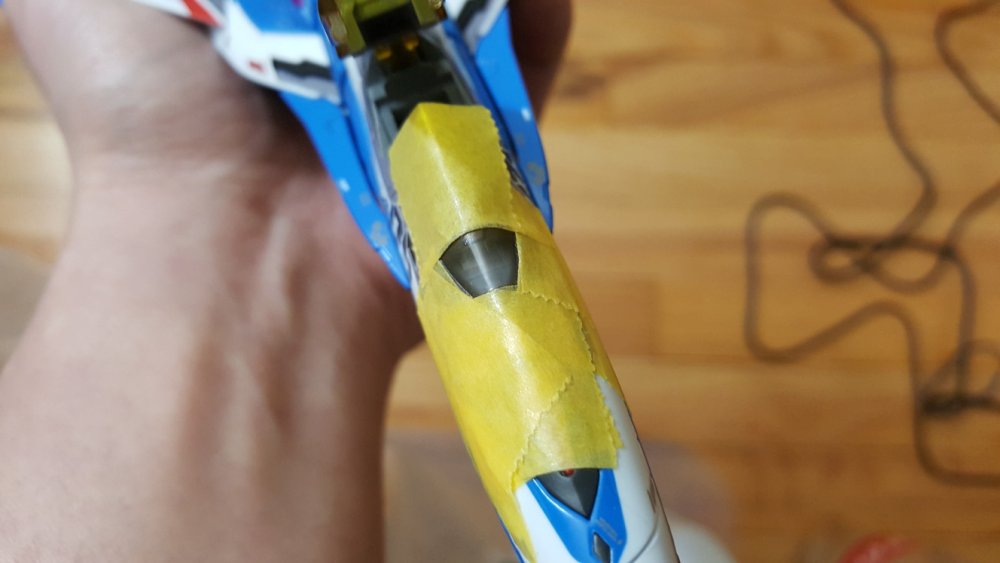
Well, here is how I did the forward section of the canopy if anyone wants to try. Please excuse the crap phone camera photos I've been taking. The area is very small with hardly any room to work with for a cotton swab, so I masked it off as a precaution. Carefully rubbed it off with the alcohol and cotton swabs. Sprayed it with the tinting and here we go. Now you can see inside like you should instead of it being like trying to look through a frosted church window. The red sensor array is really foggy too and I think that's the next item on the list to wipe off and spray with a clear red.
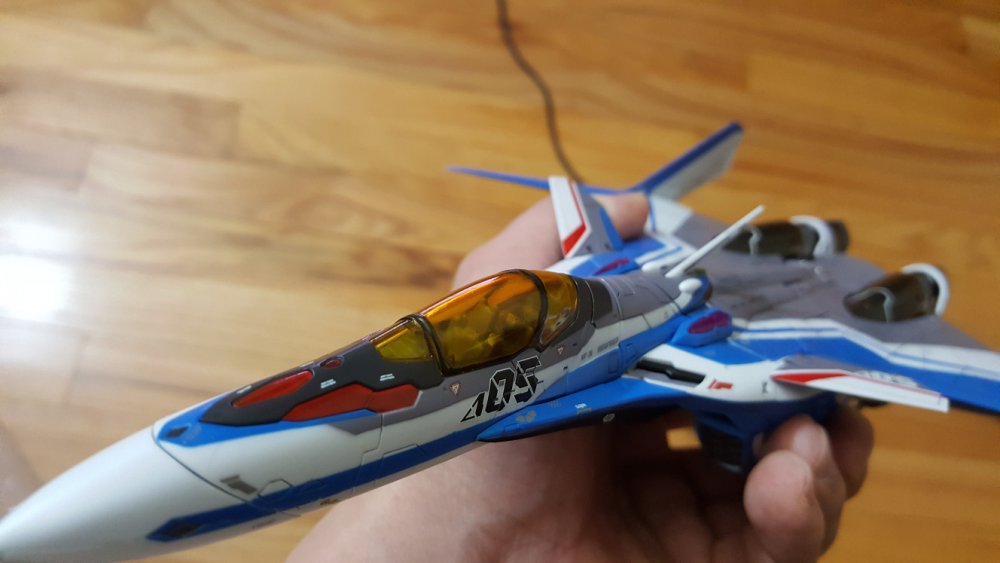
-
The alcohol will strip the black off as well. I was just very careful removing only the yellow, but I had to do some touch ups still. I haven't done the front piece yet, but I'm just going to use alcohol, cotton swabs, and twisted up paper towel pieces to get it off and then do any necessary touch ups. The black is on the outside. The whole outside is painted with that foggy yellow actually, and then they painted the dark grey/black frame over top. You can either soak it in alcohol and wipe the whole thing clean and repaint the frame or painstakingly remove the yellow. Using a fingernail or dulled down pencil tip with a small piece of alcohol soaked paper towel over the edge can help to get the yellow off the edge close to the frame.
-
Yeah, you just lift it and pull and wiggle it right out. That sounded a little dirty...


