MechTech
-
Posts
4567 -
Joined
-
Last visited
Content Type
Profiles
Forums
Events
Gallery
Everything posted by MechTech
-
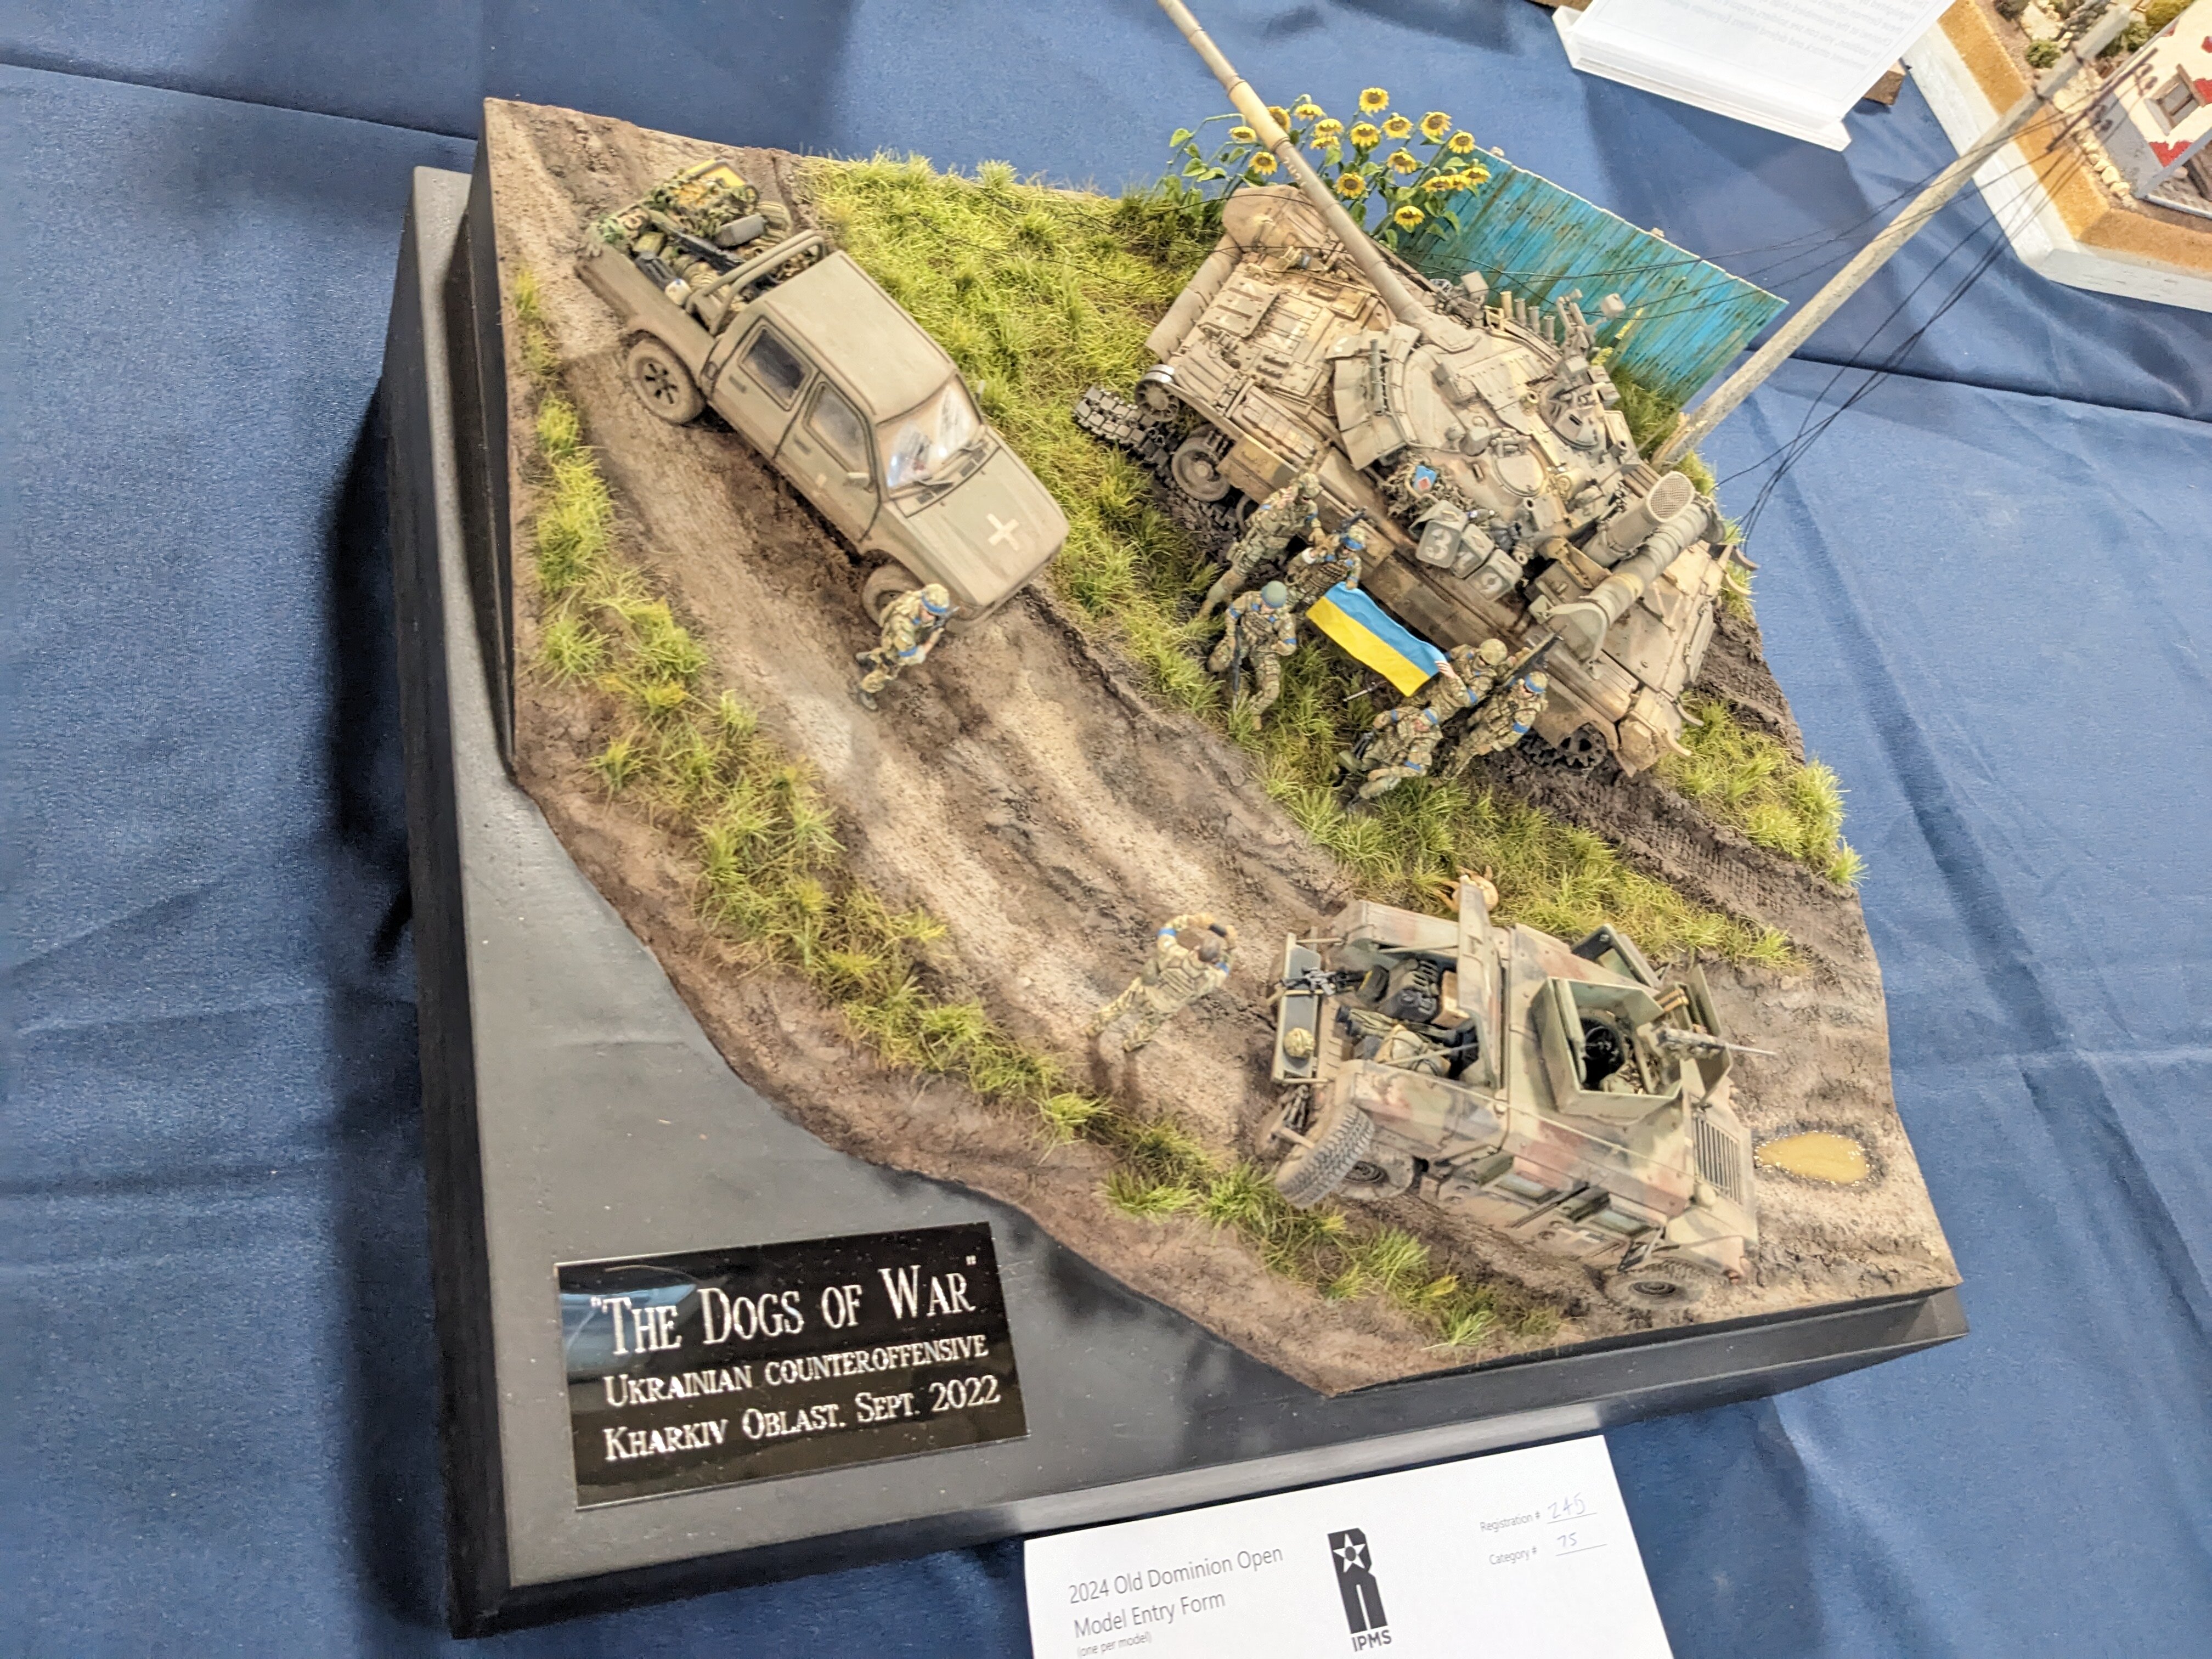
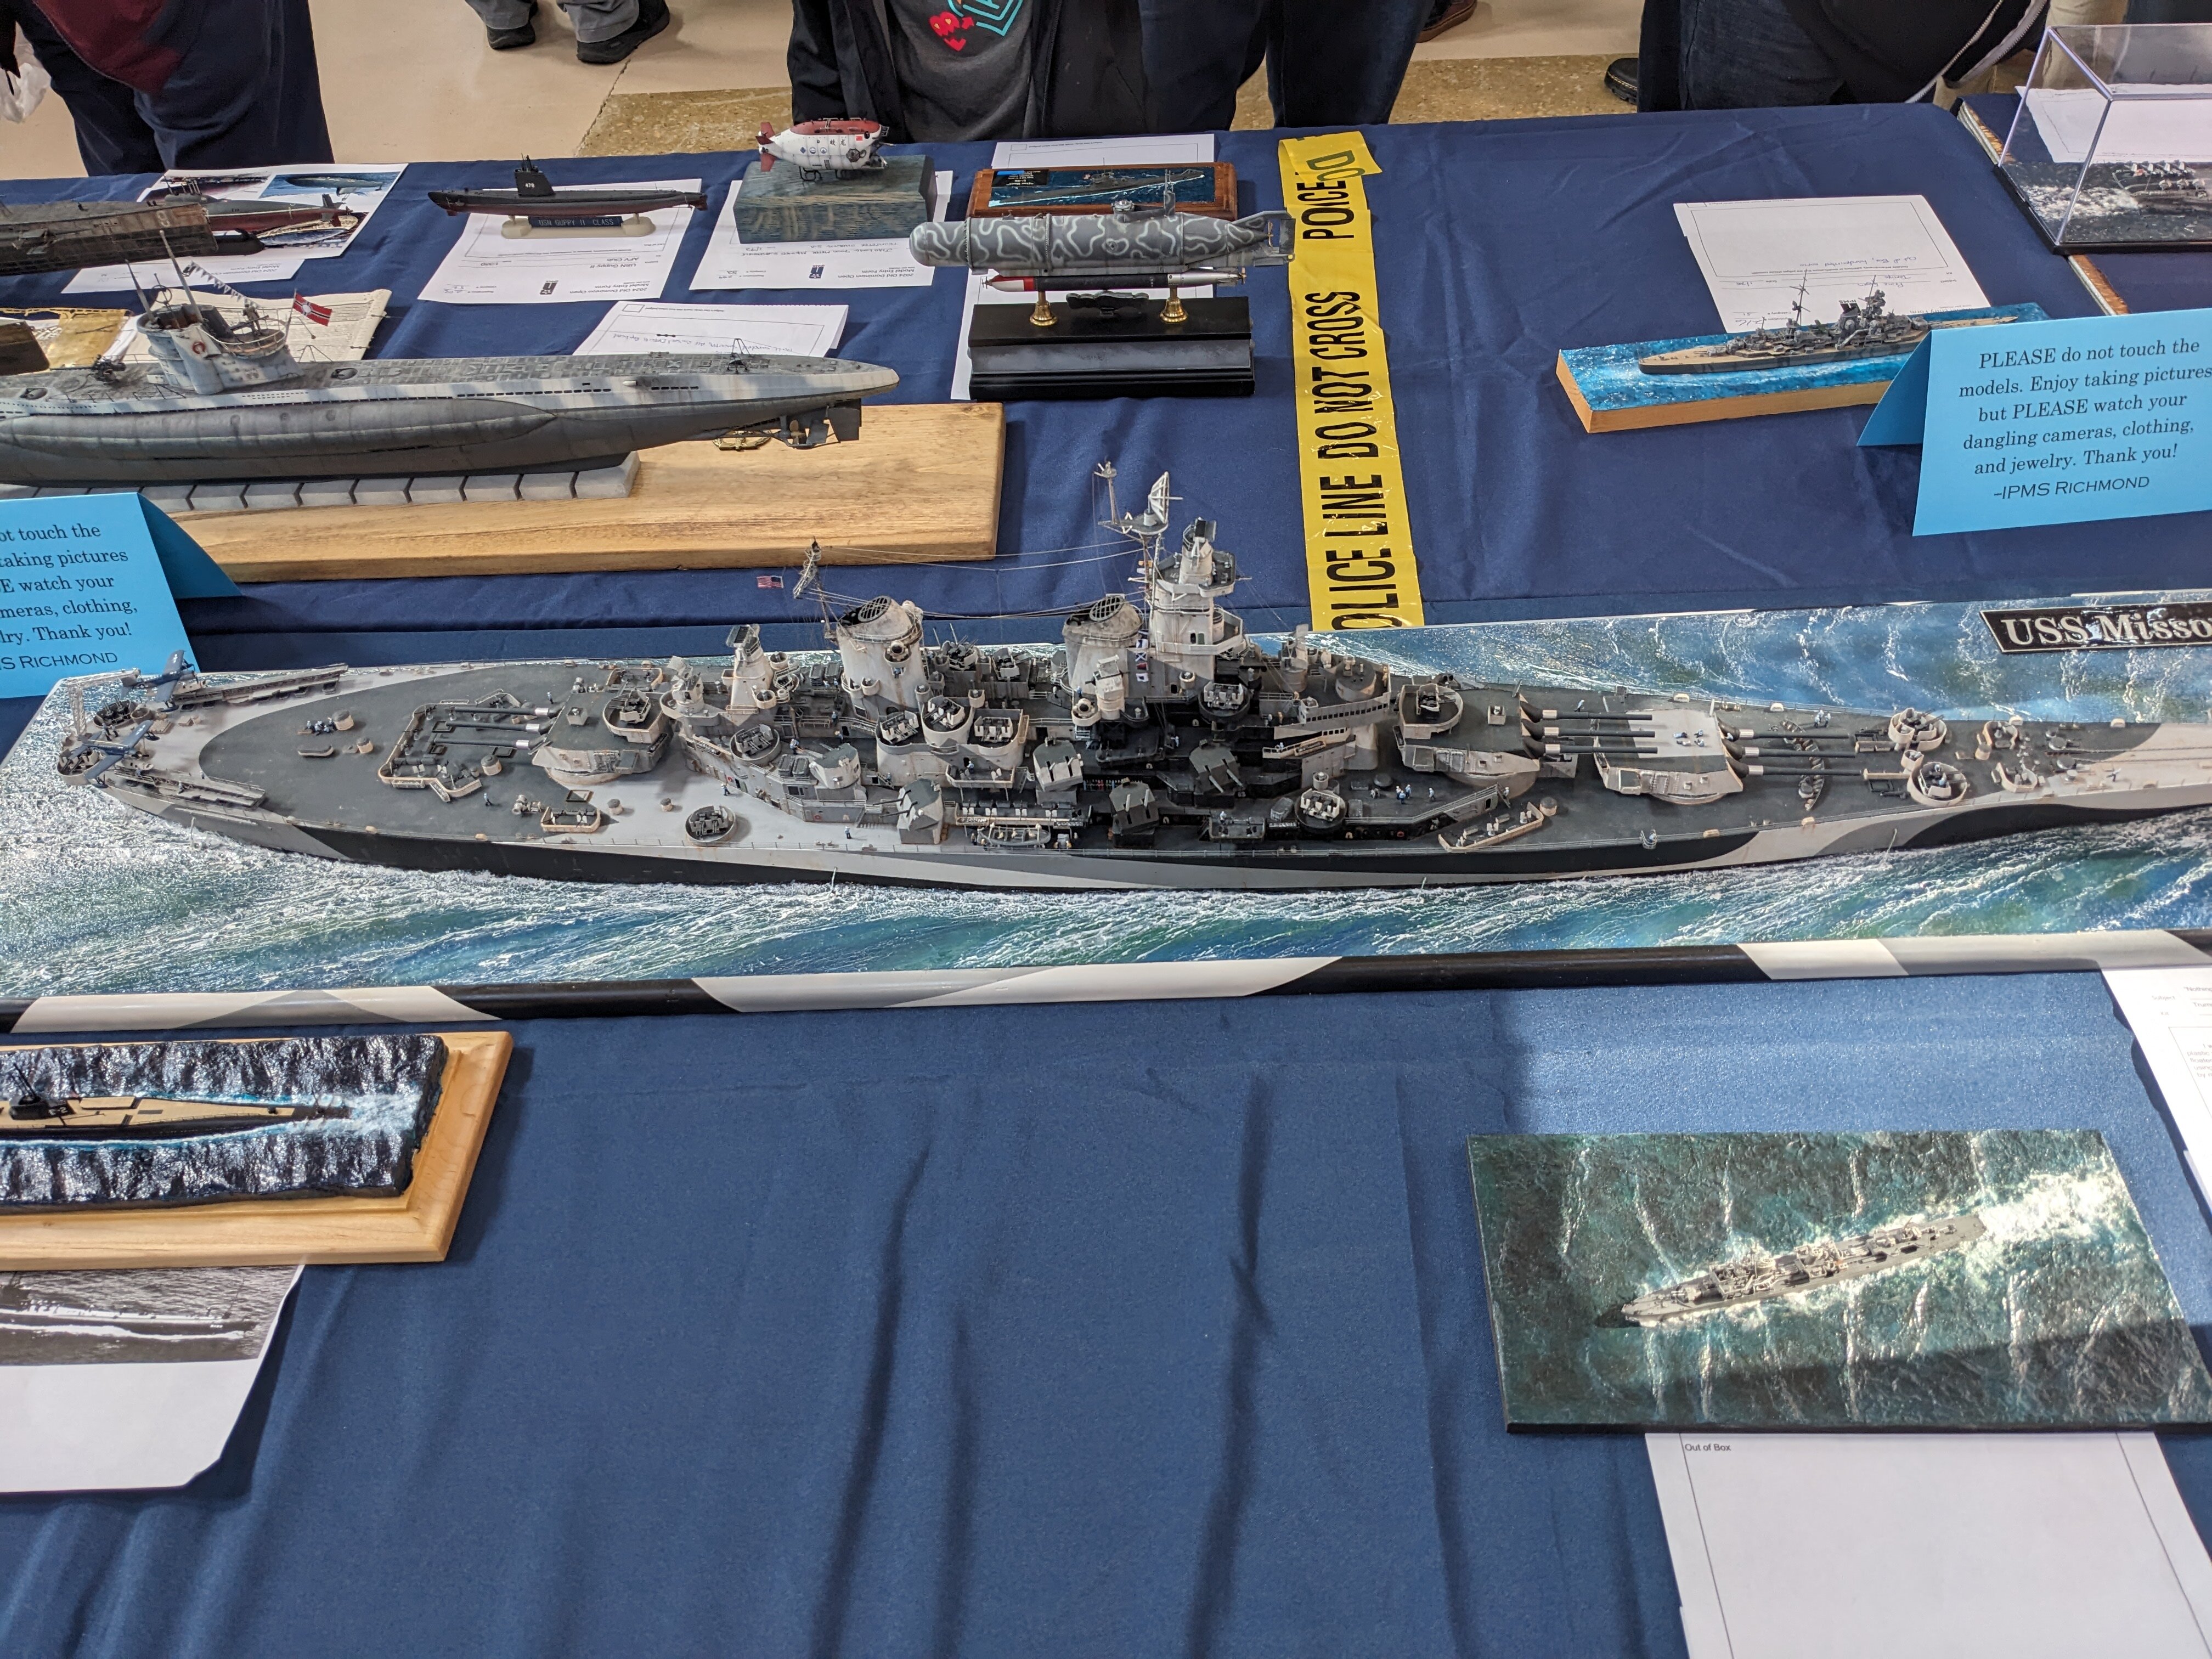
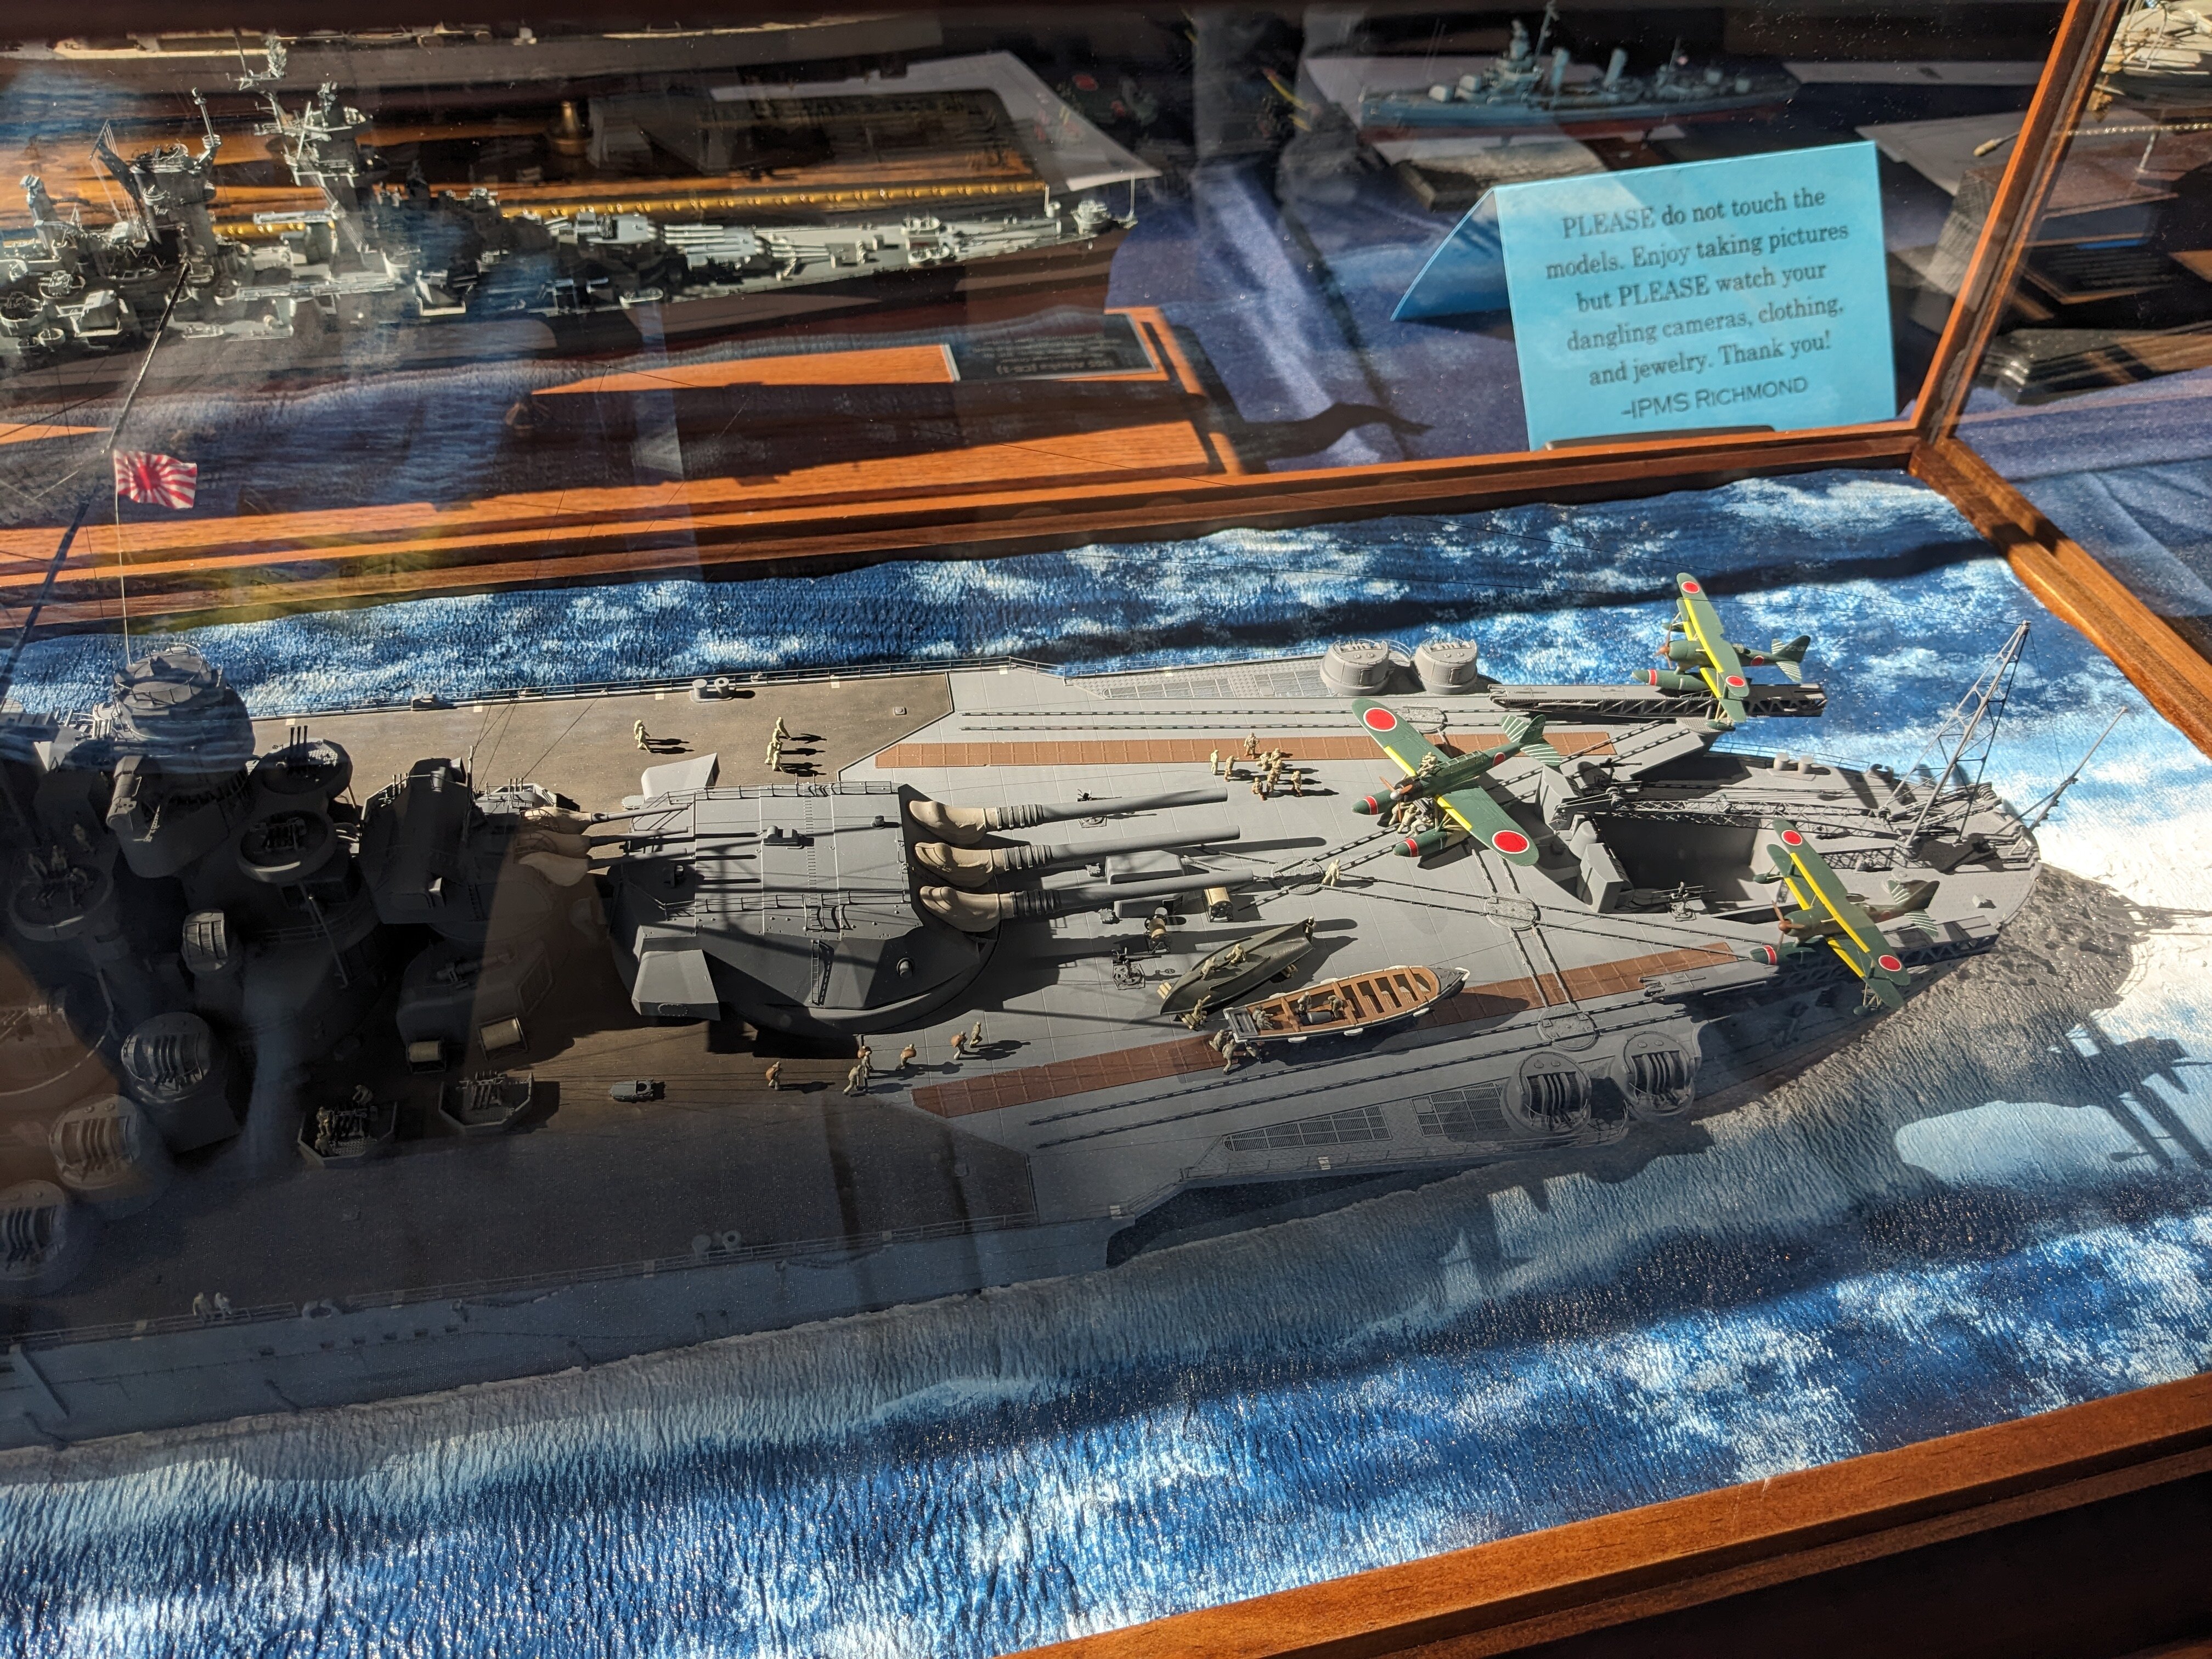
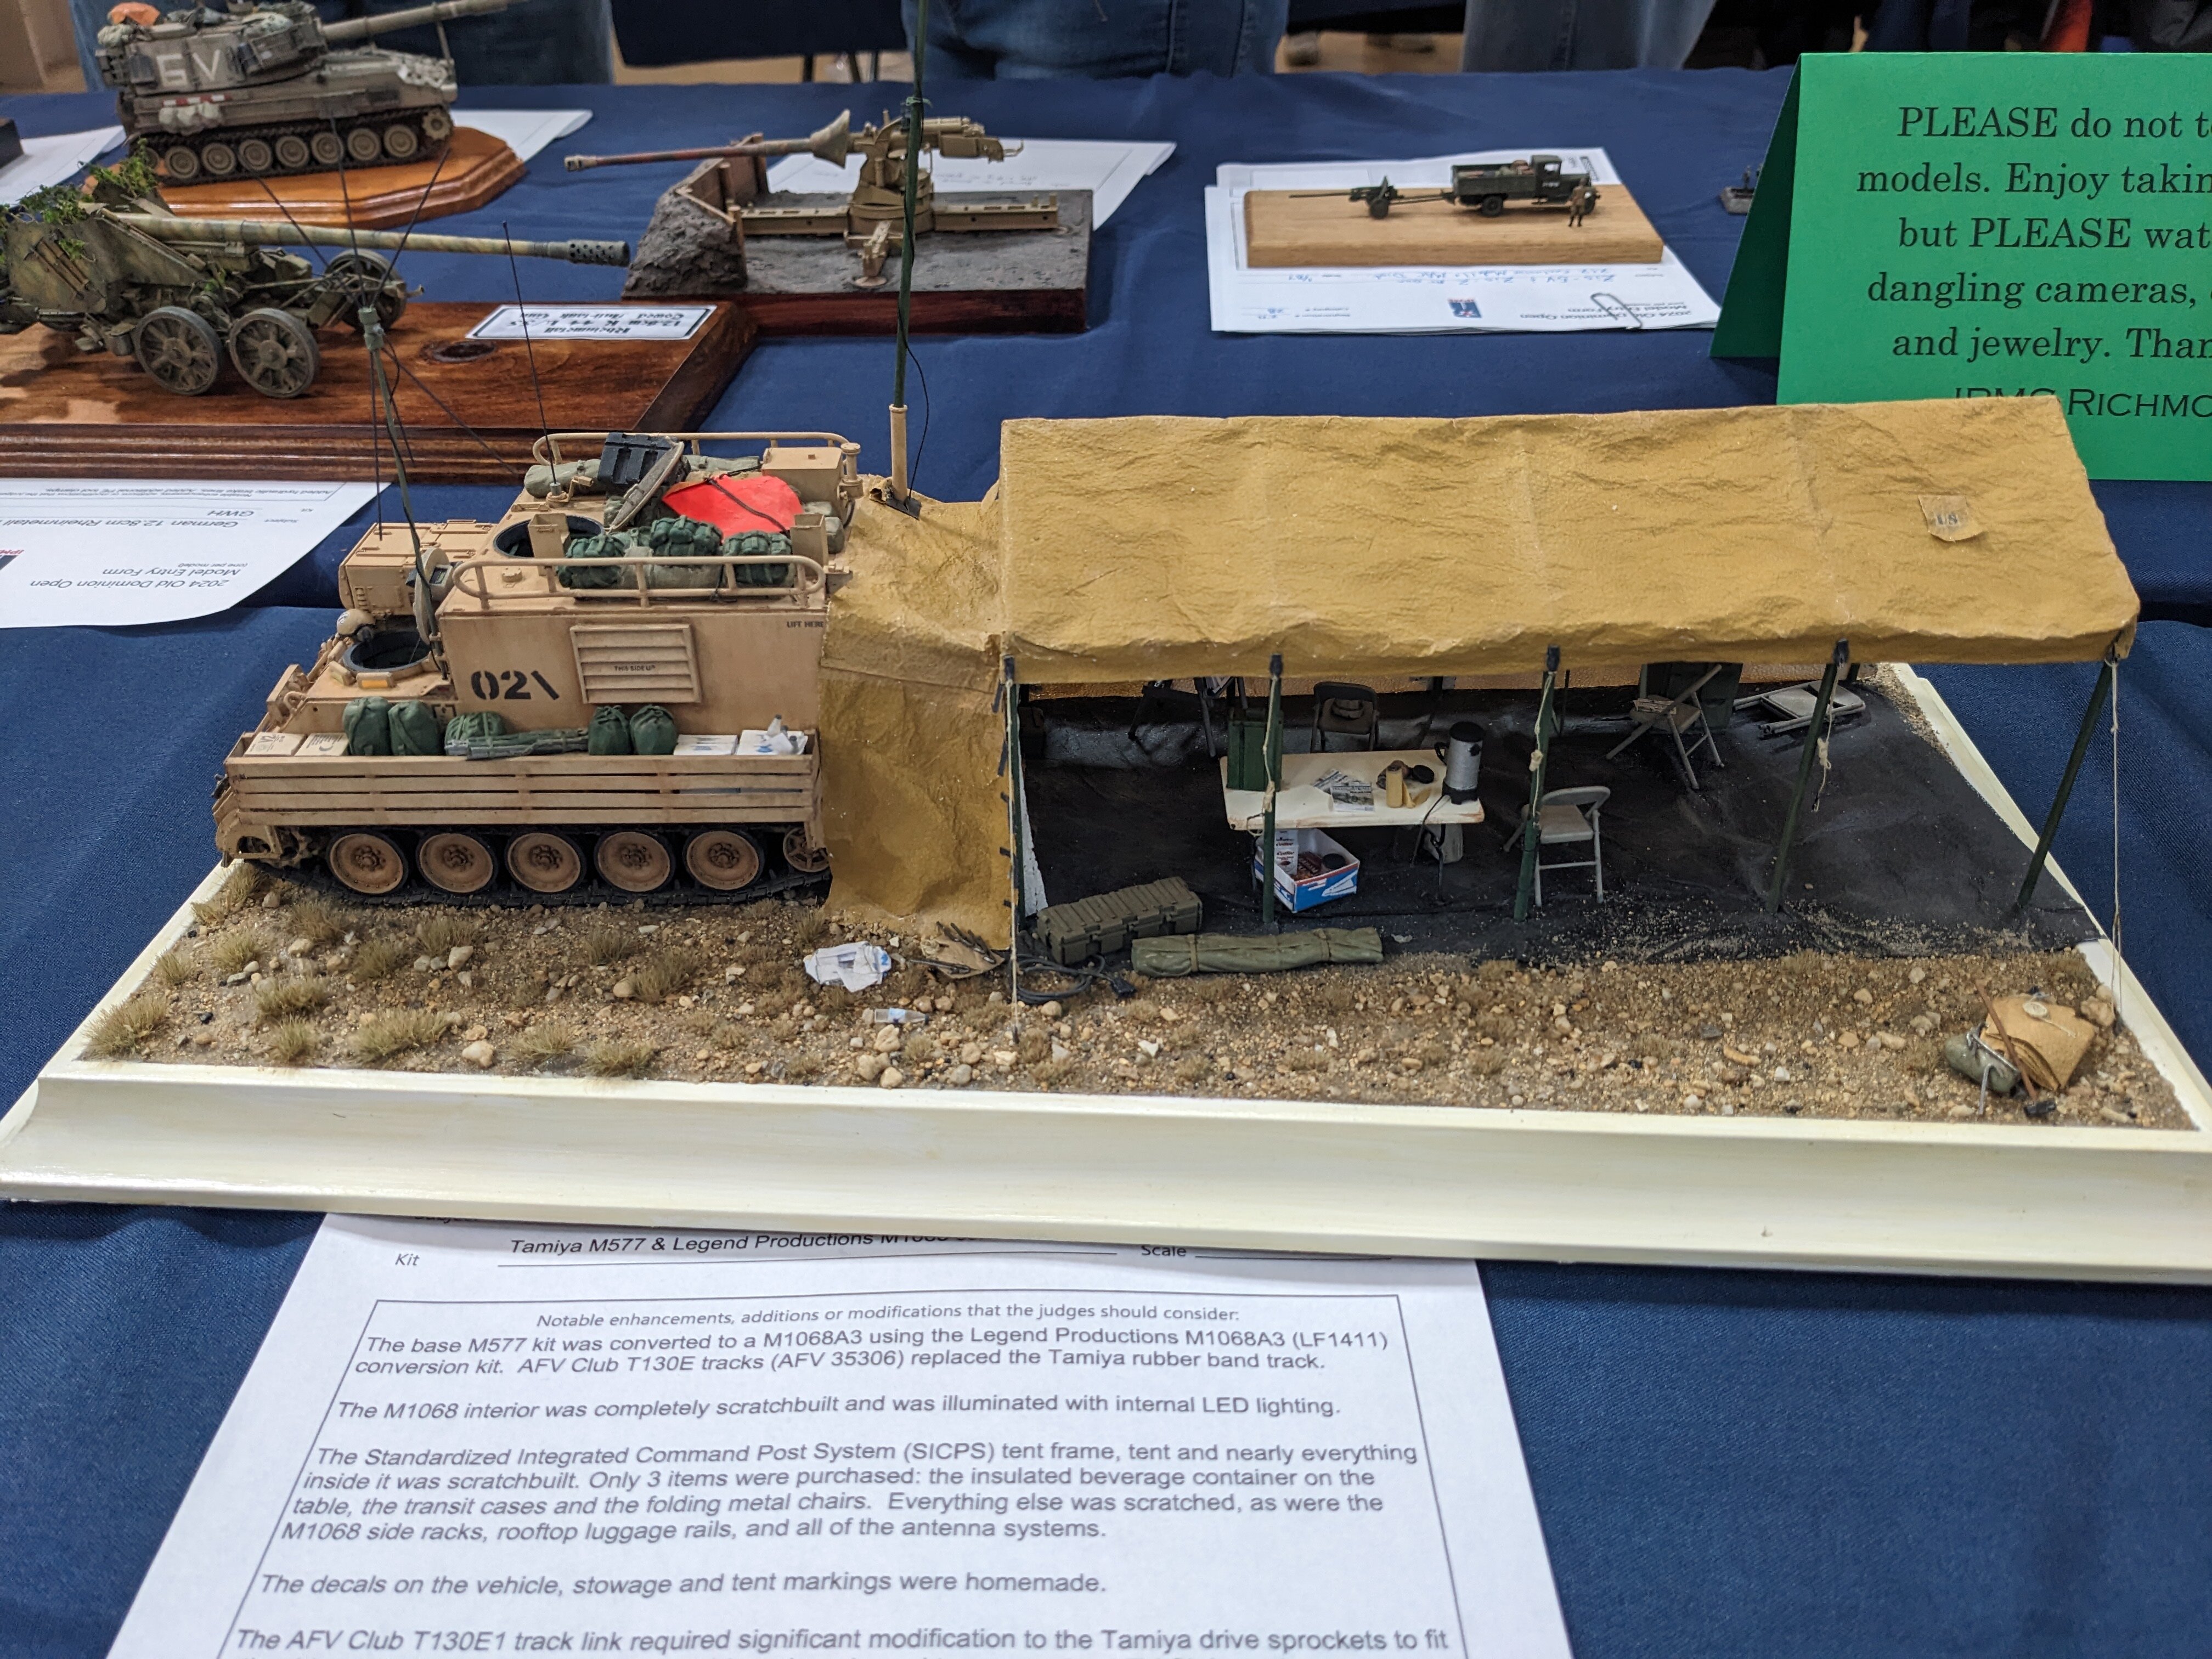
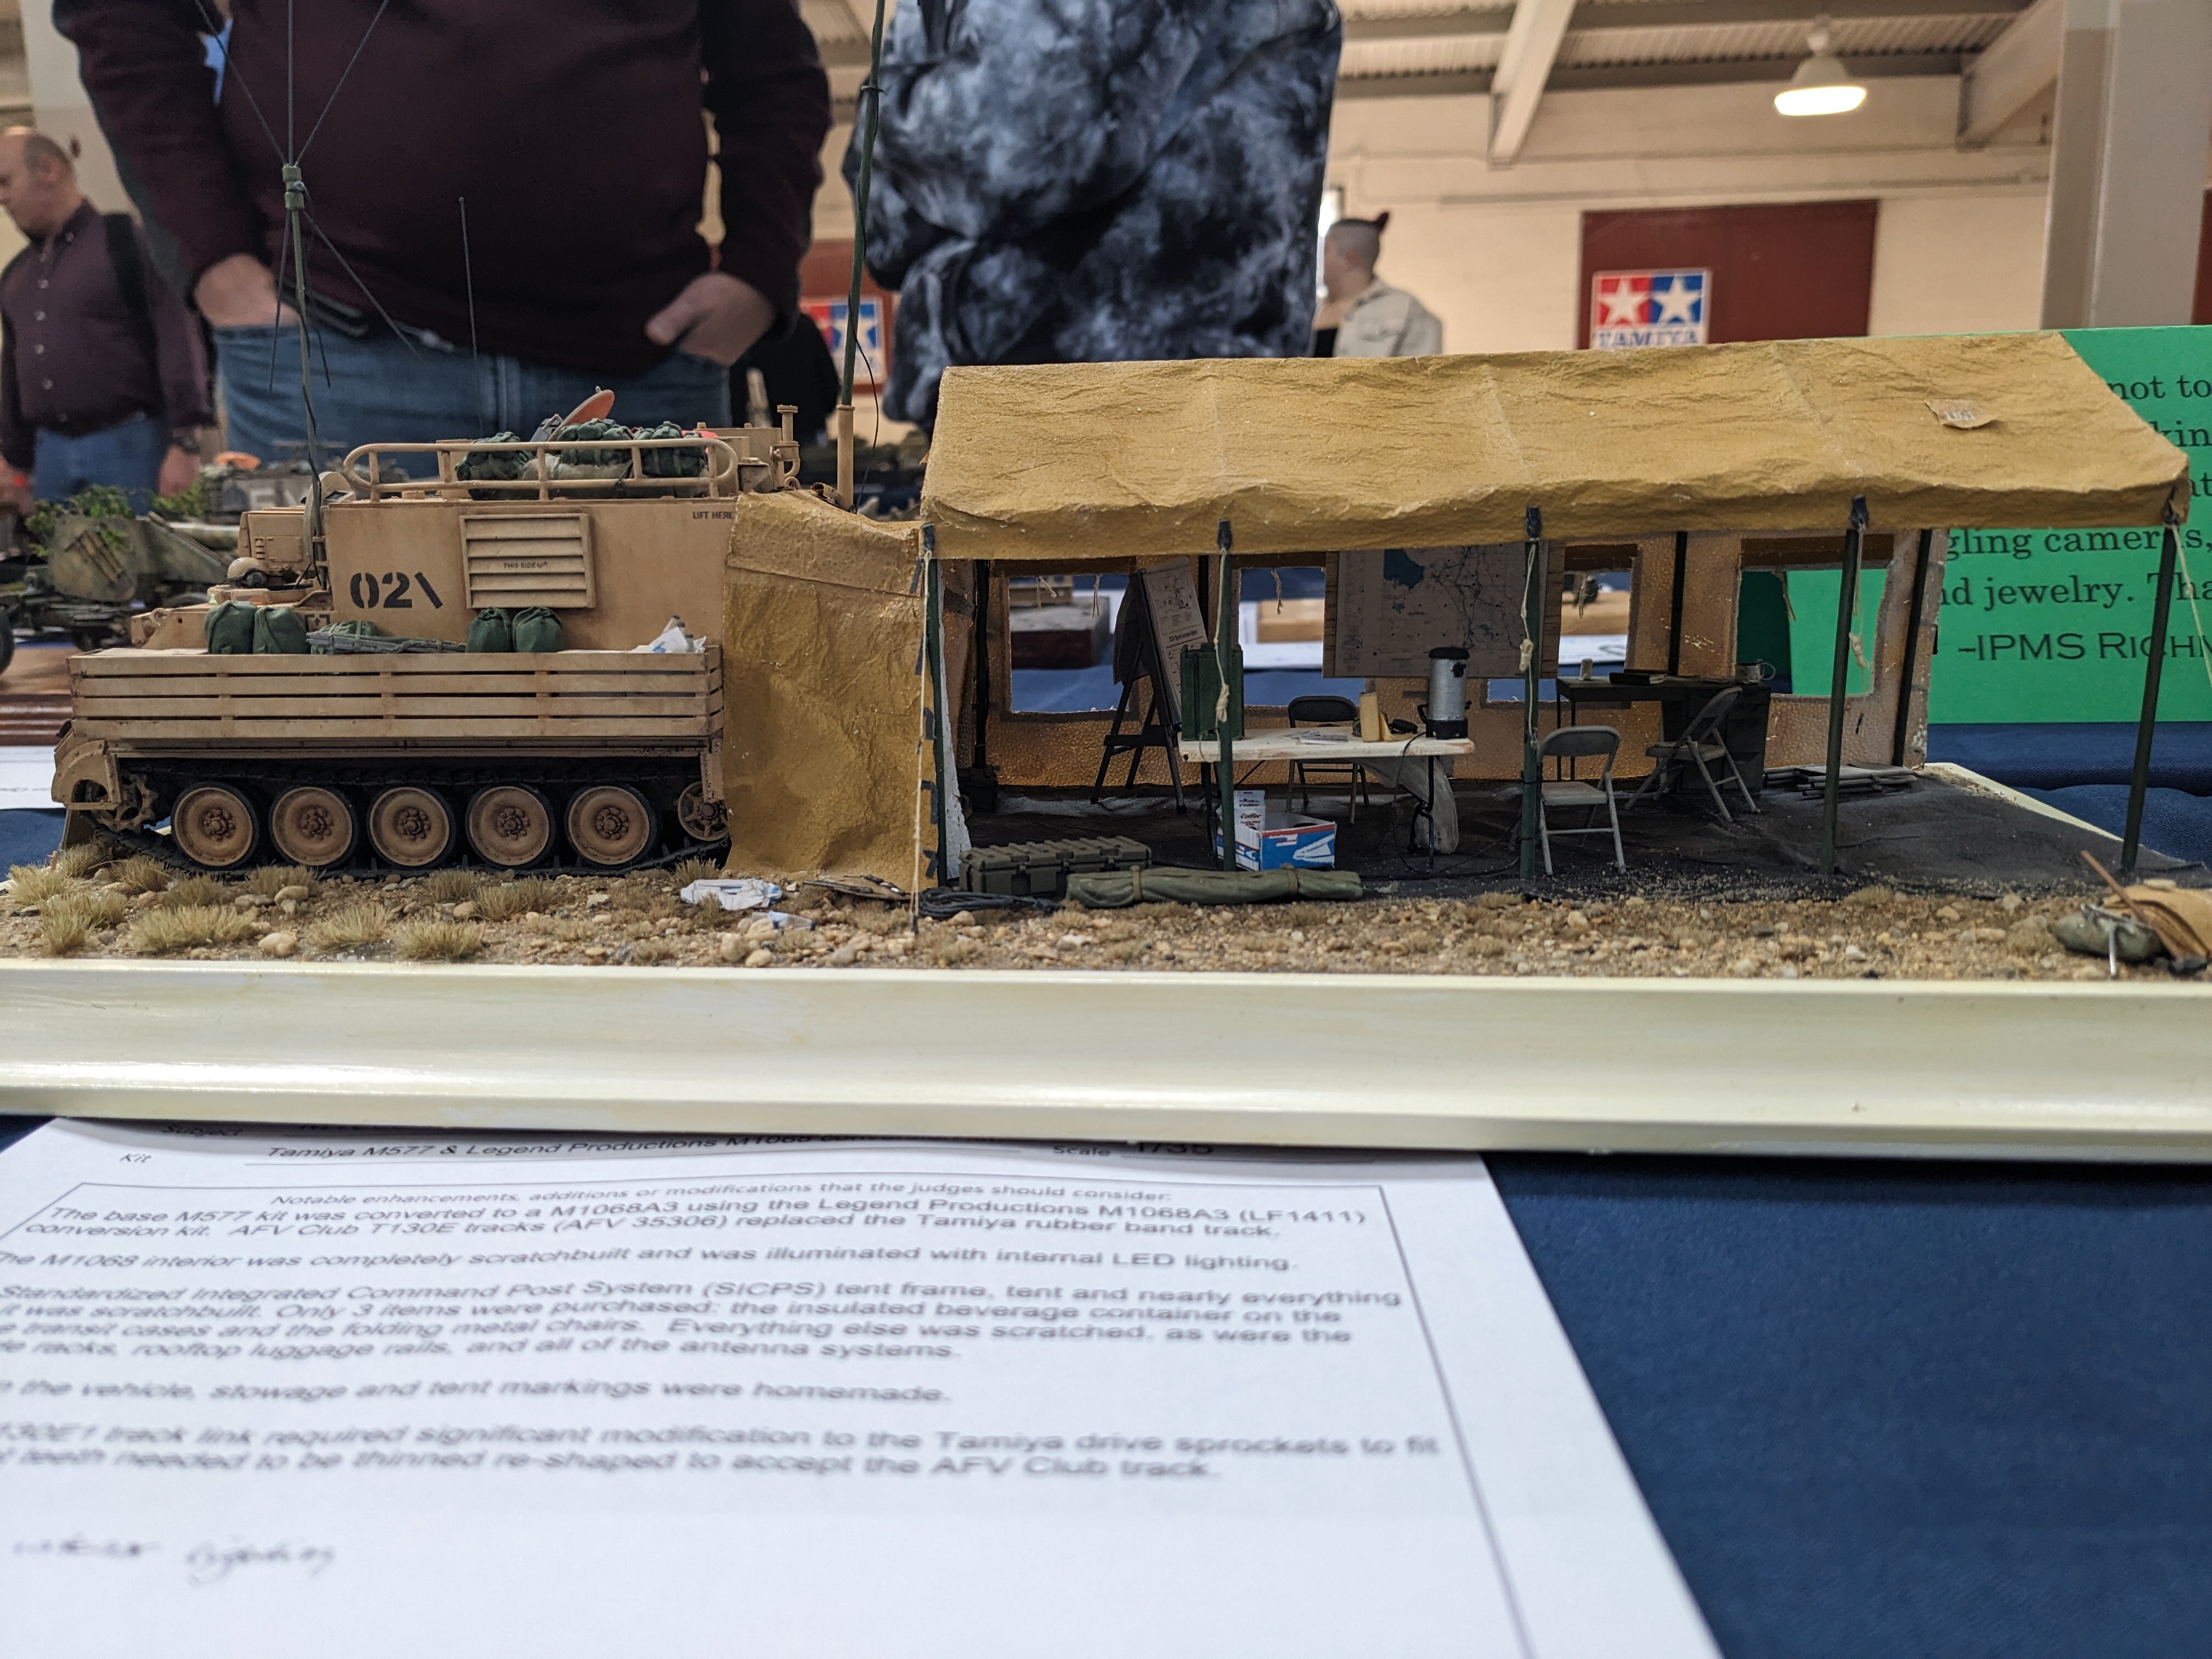
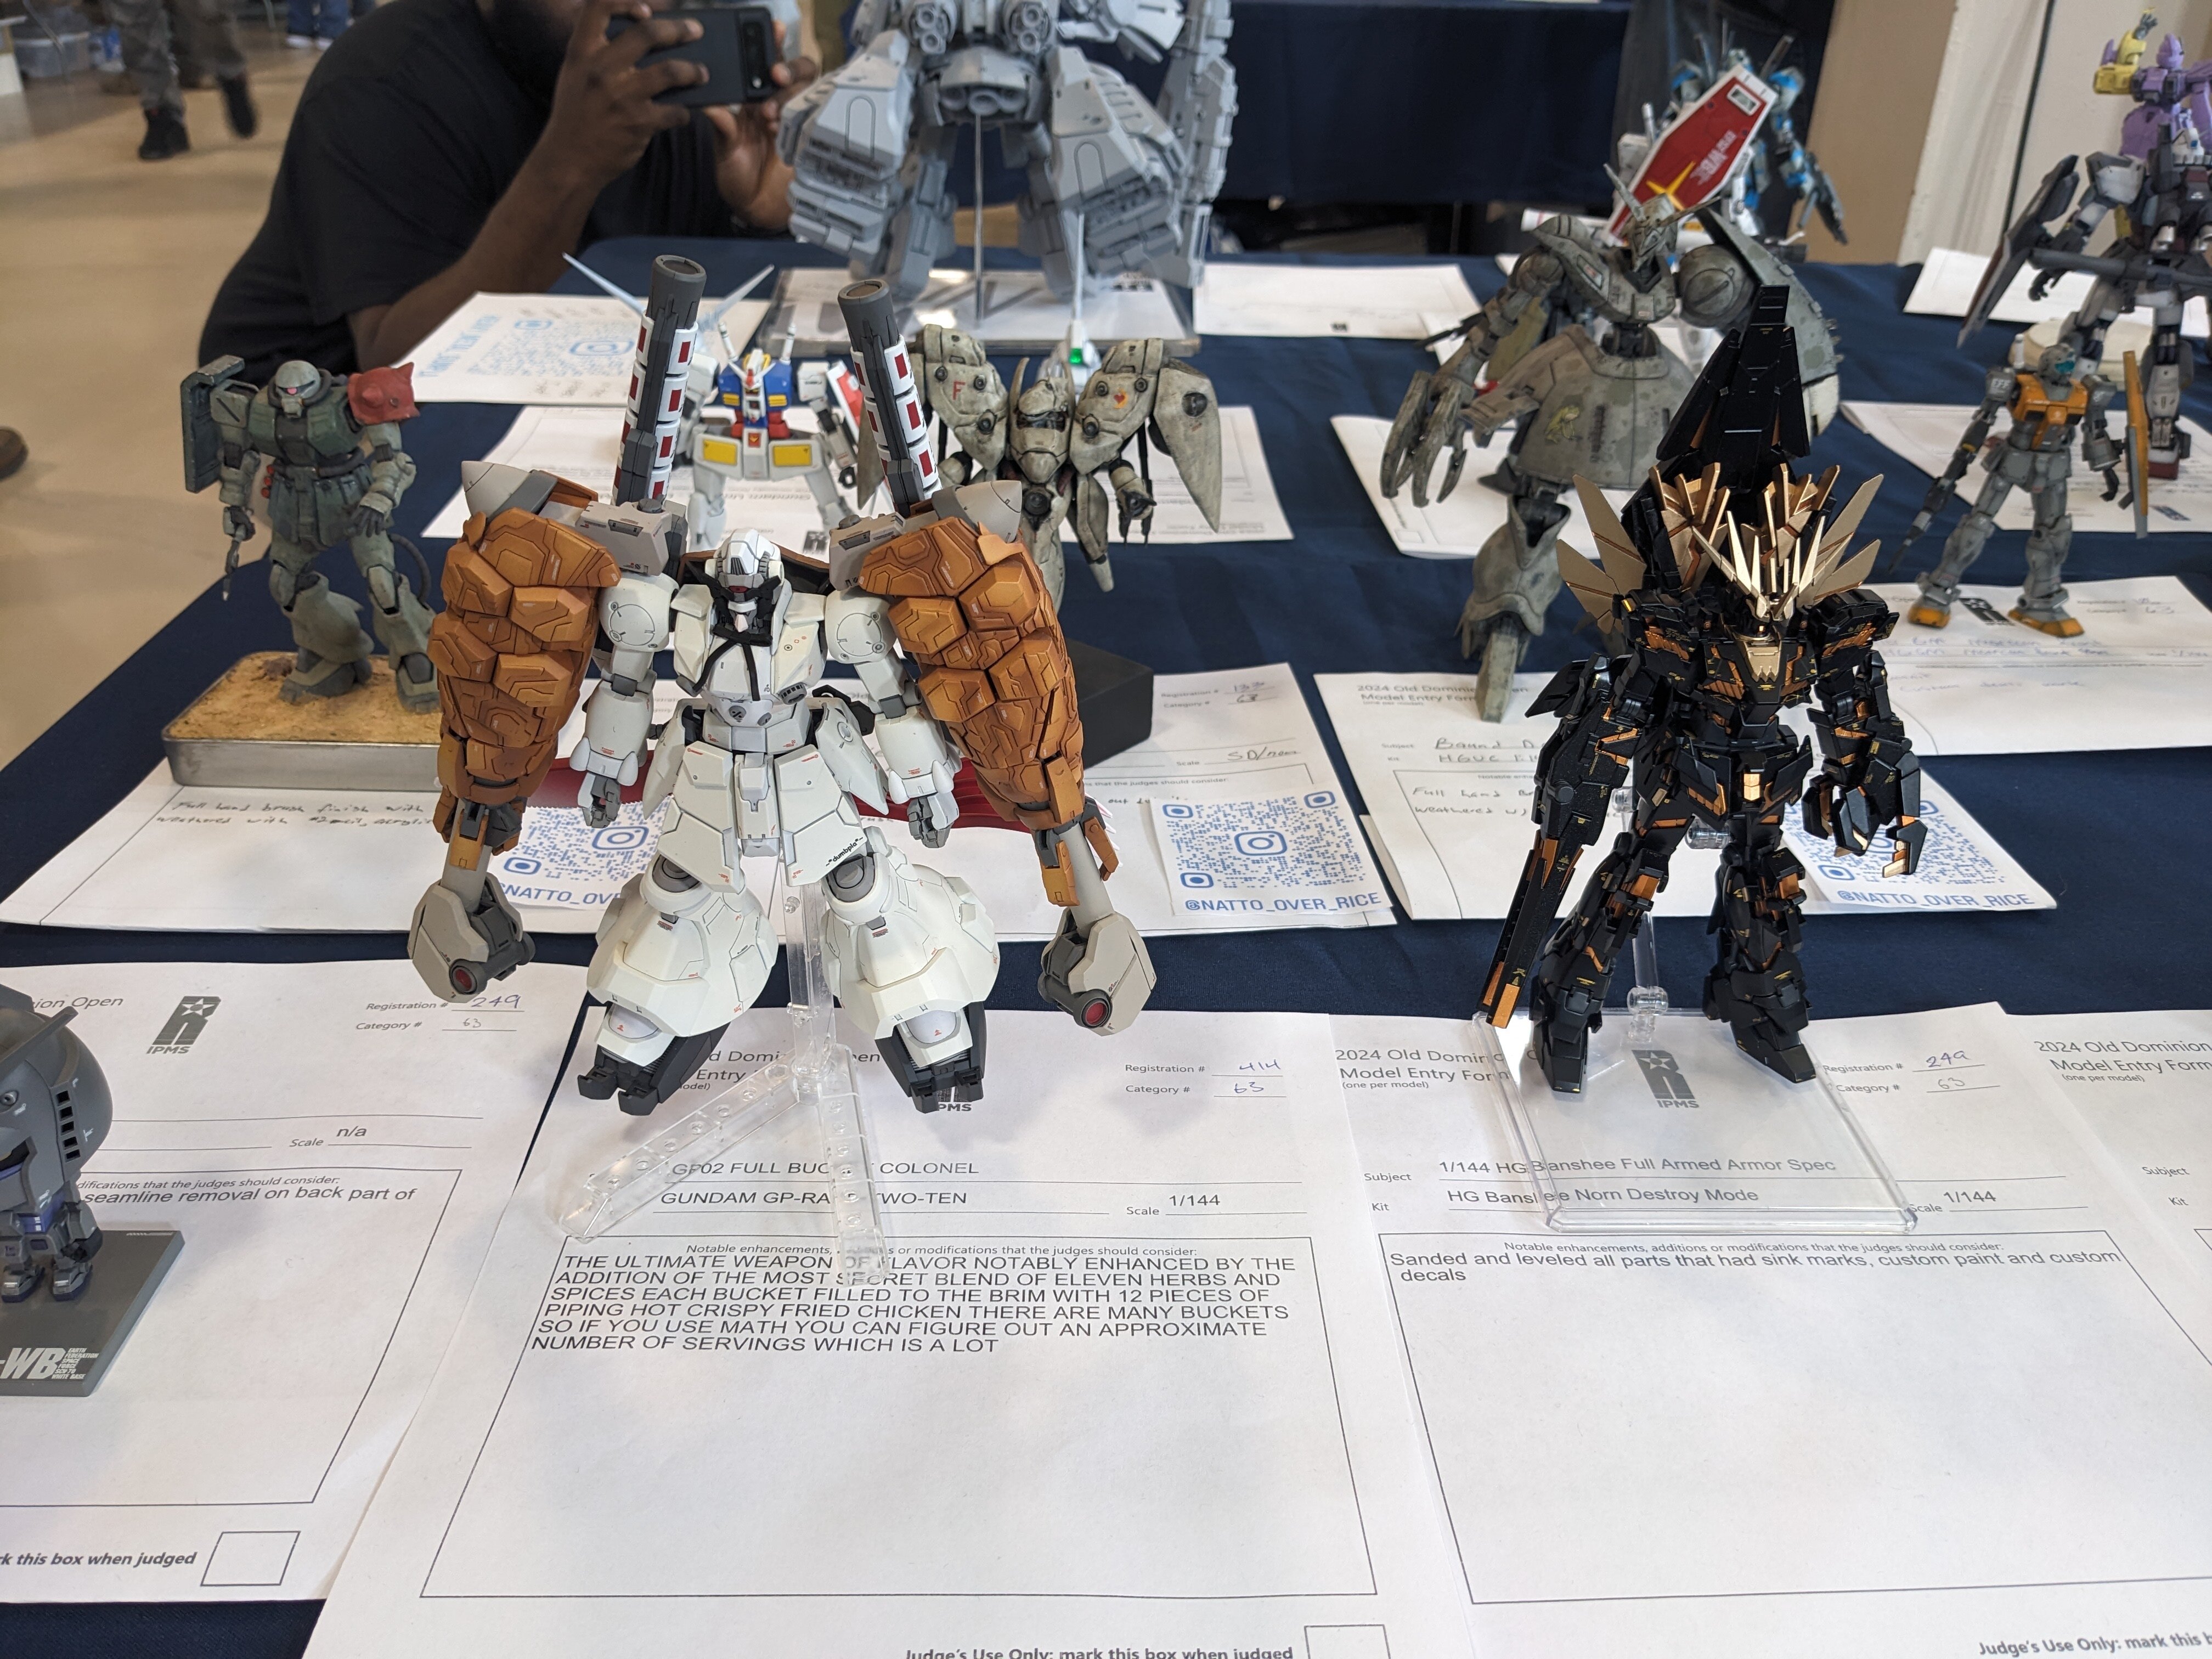
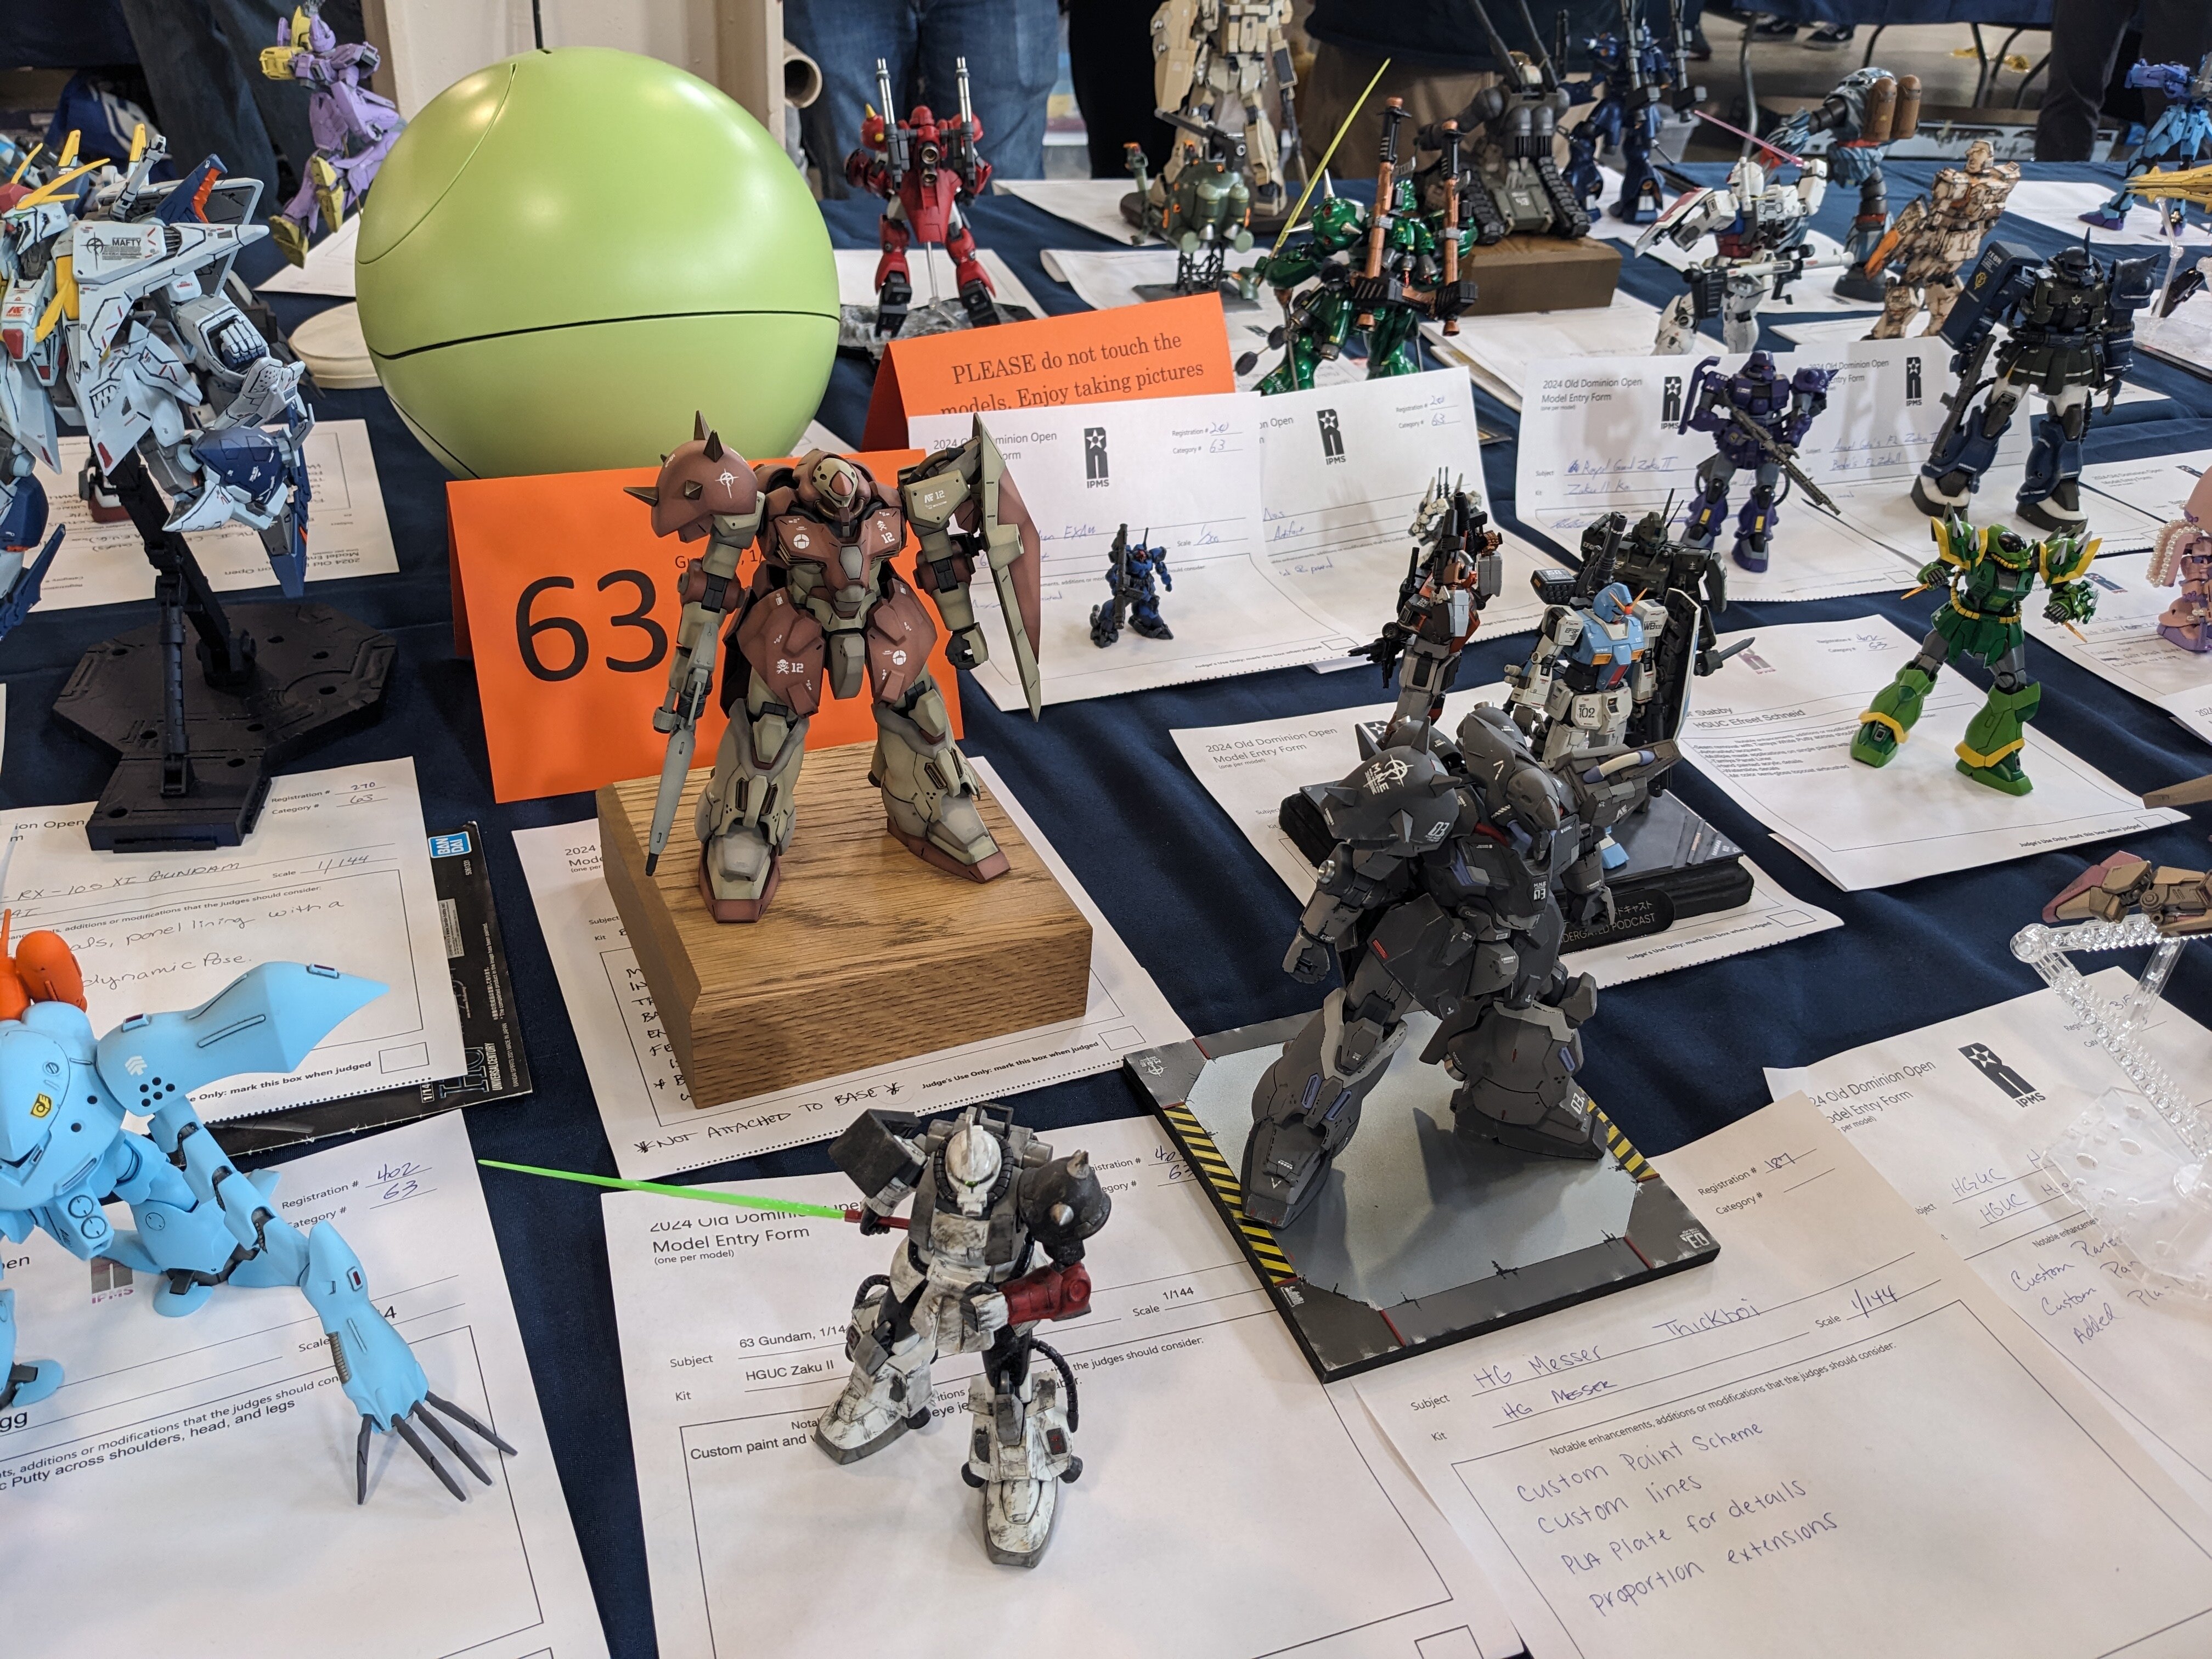
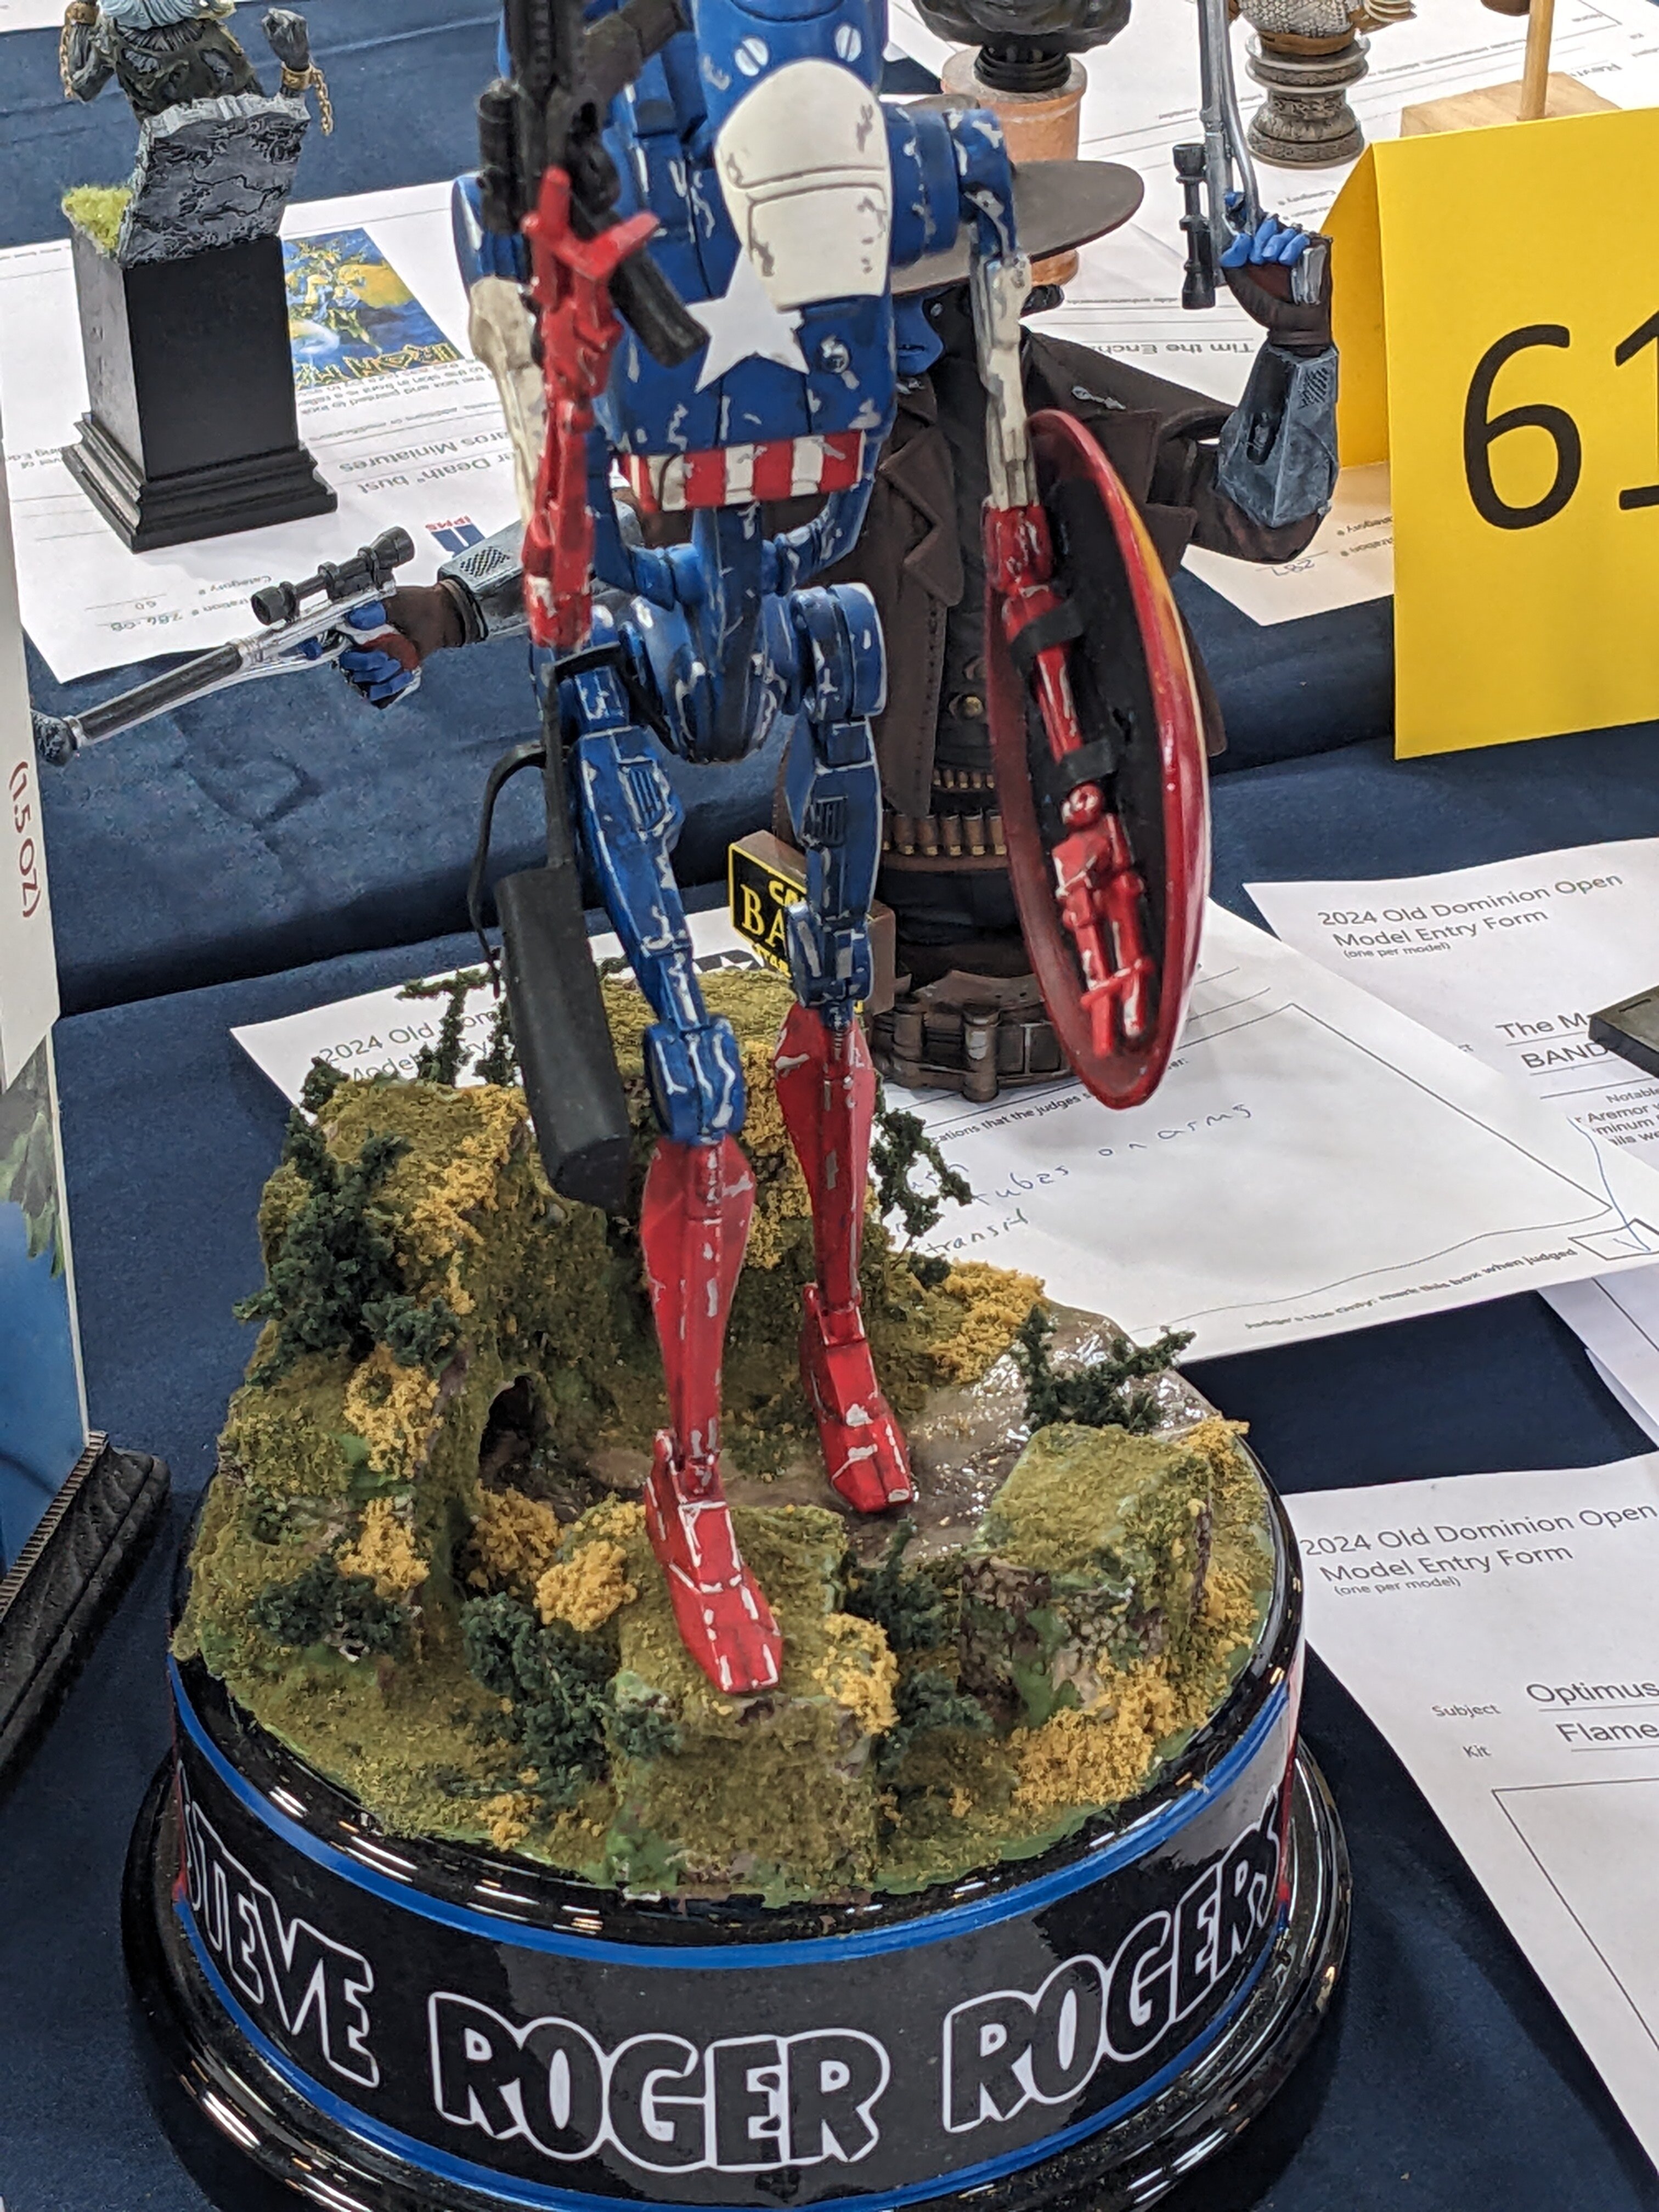
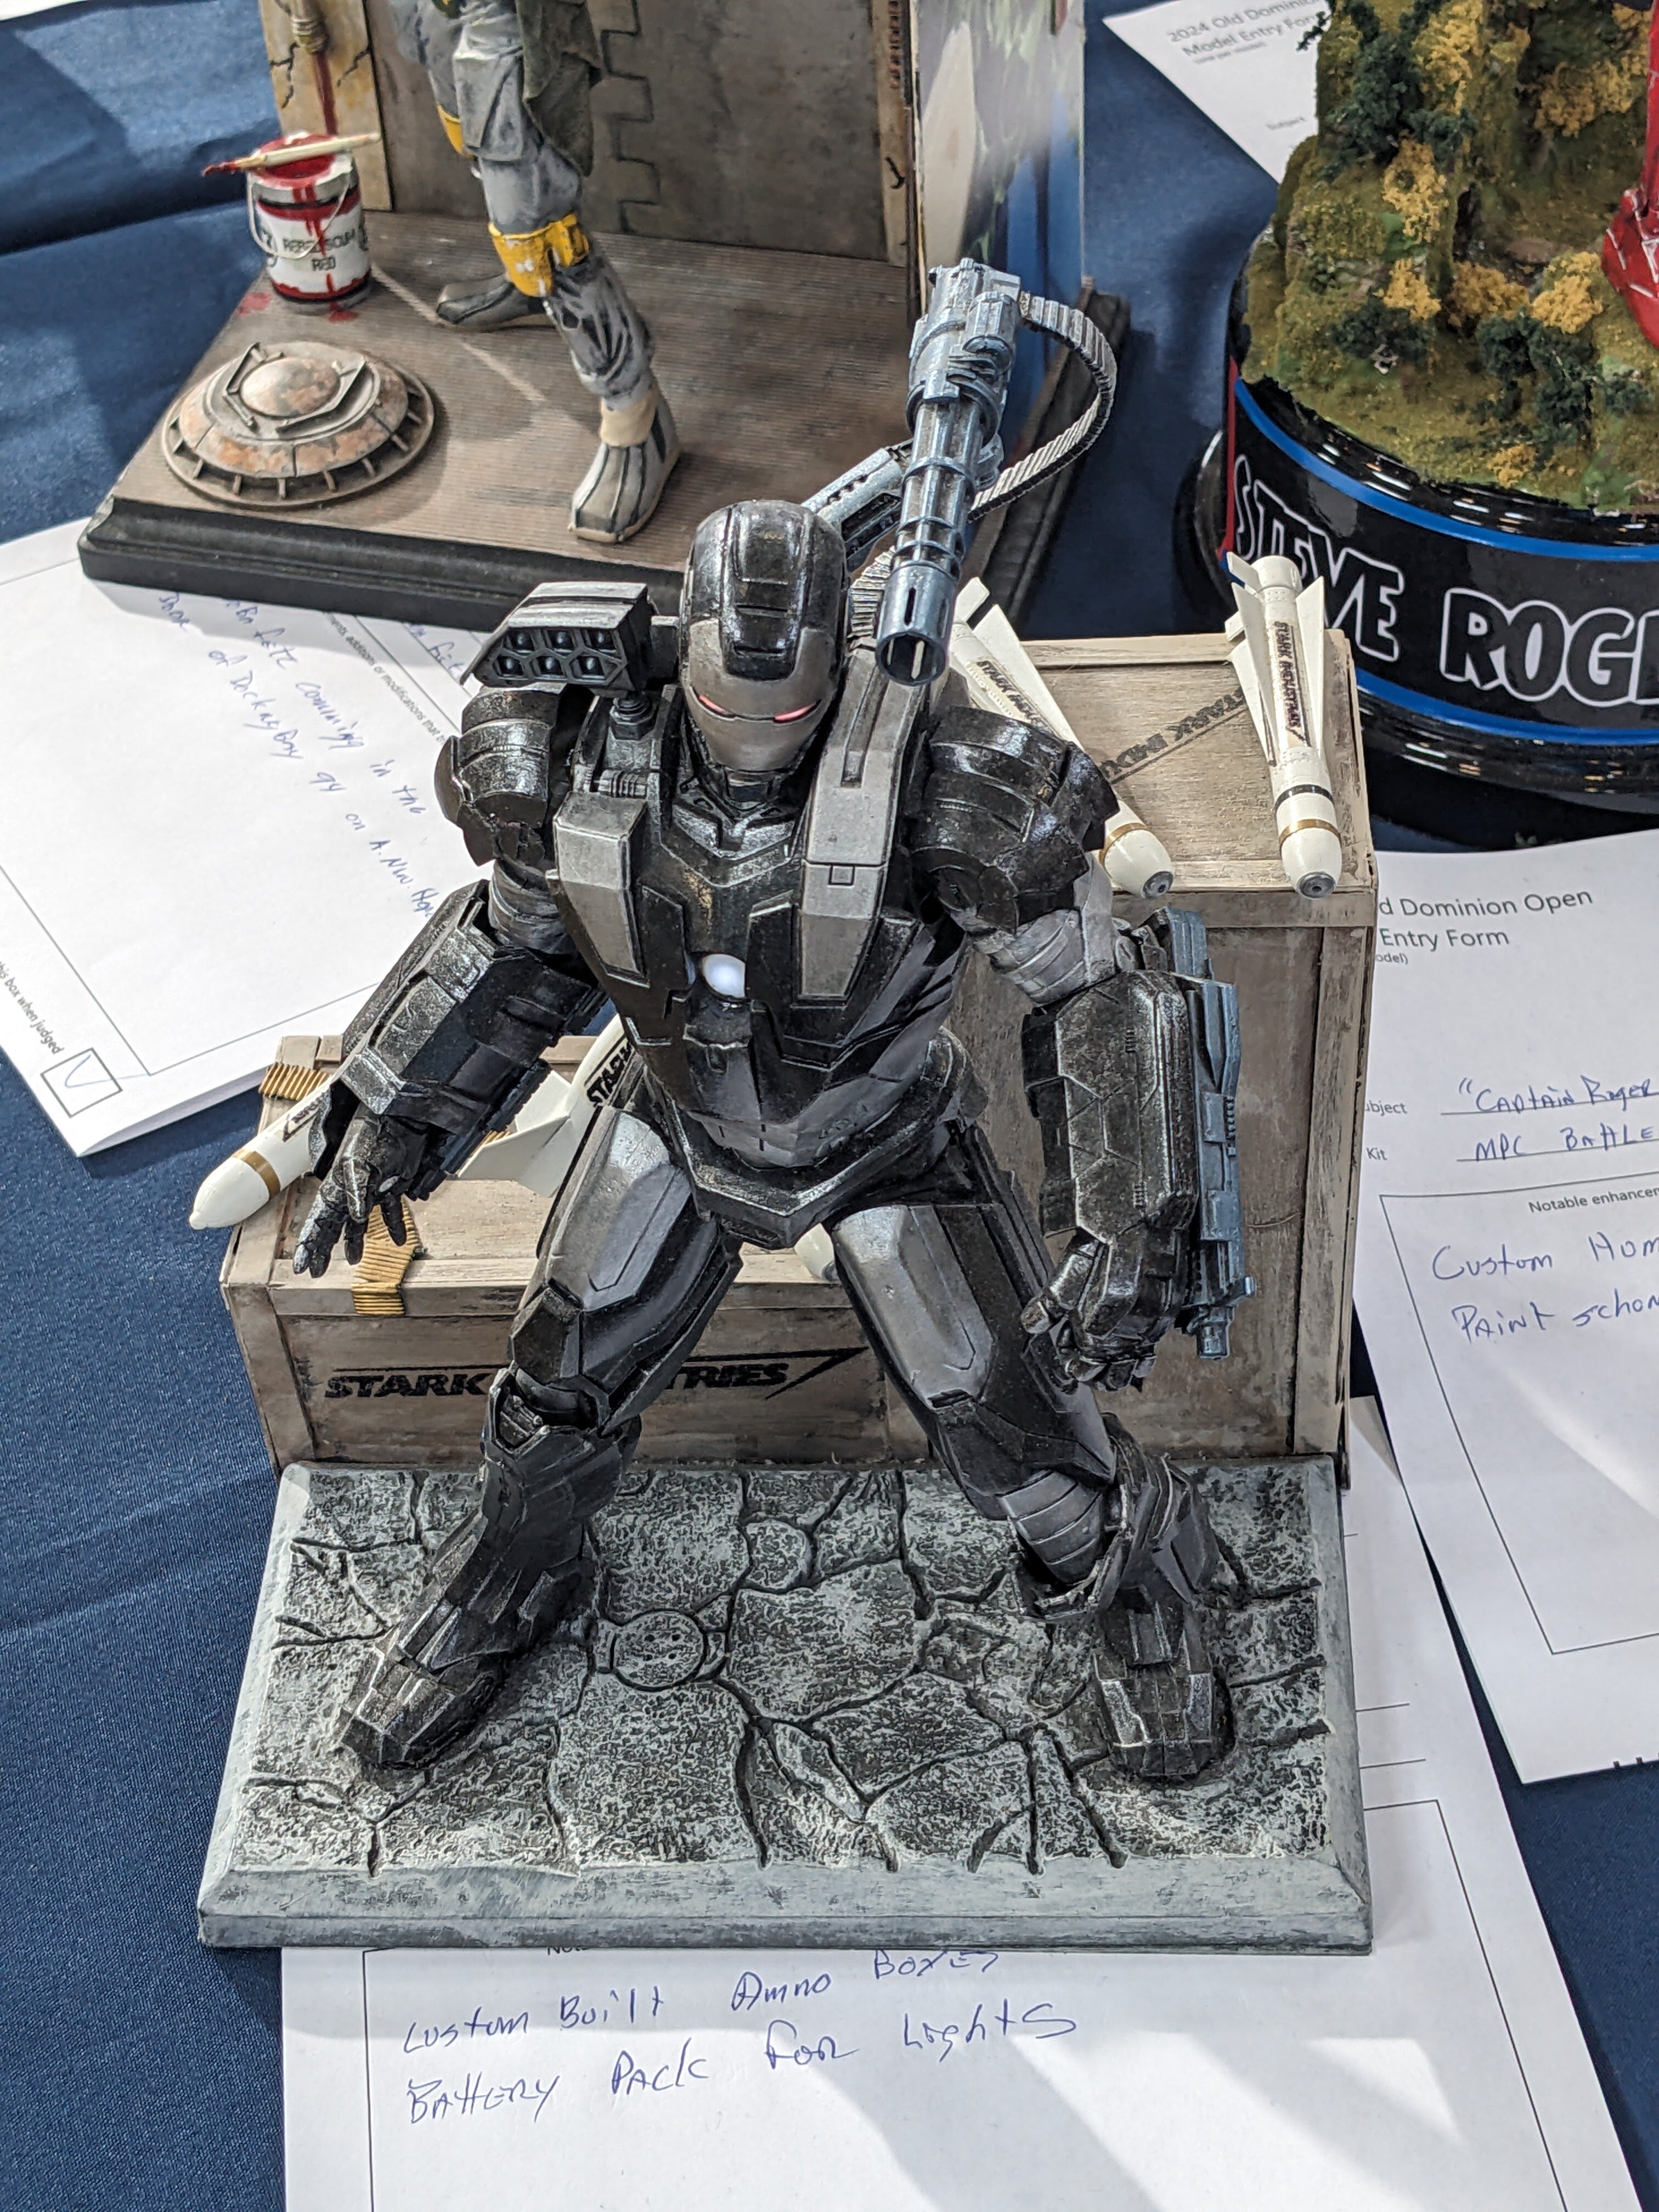
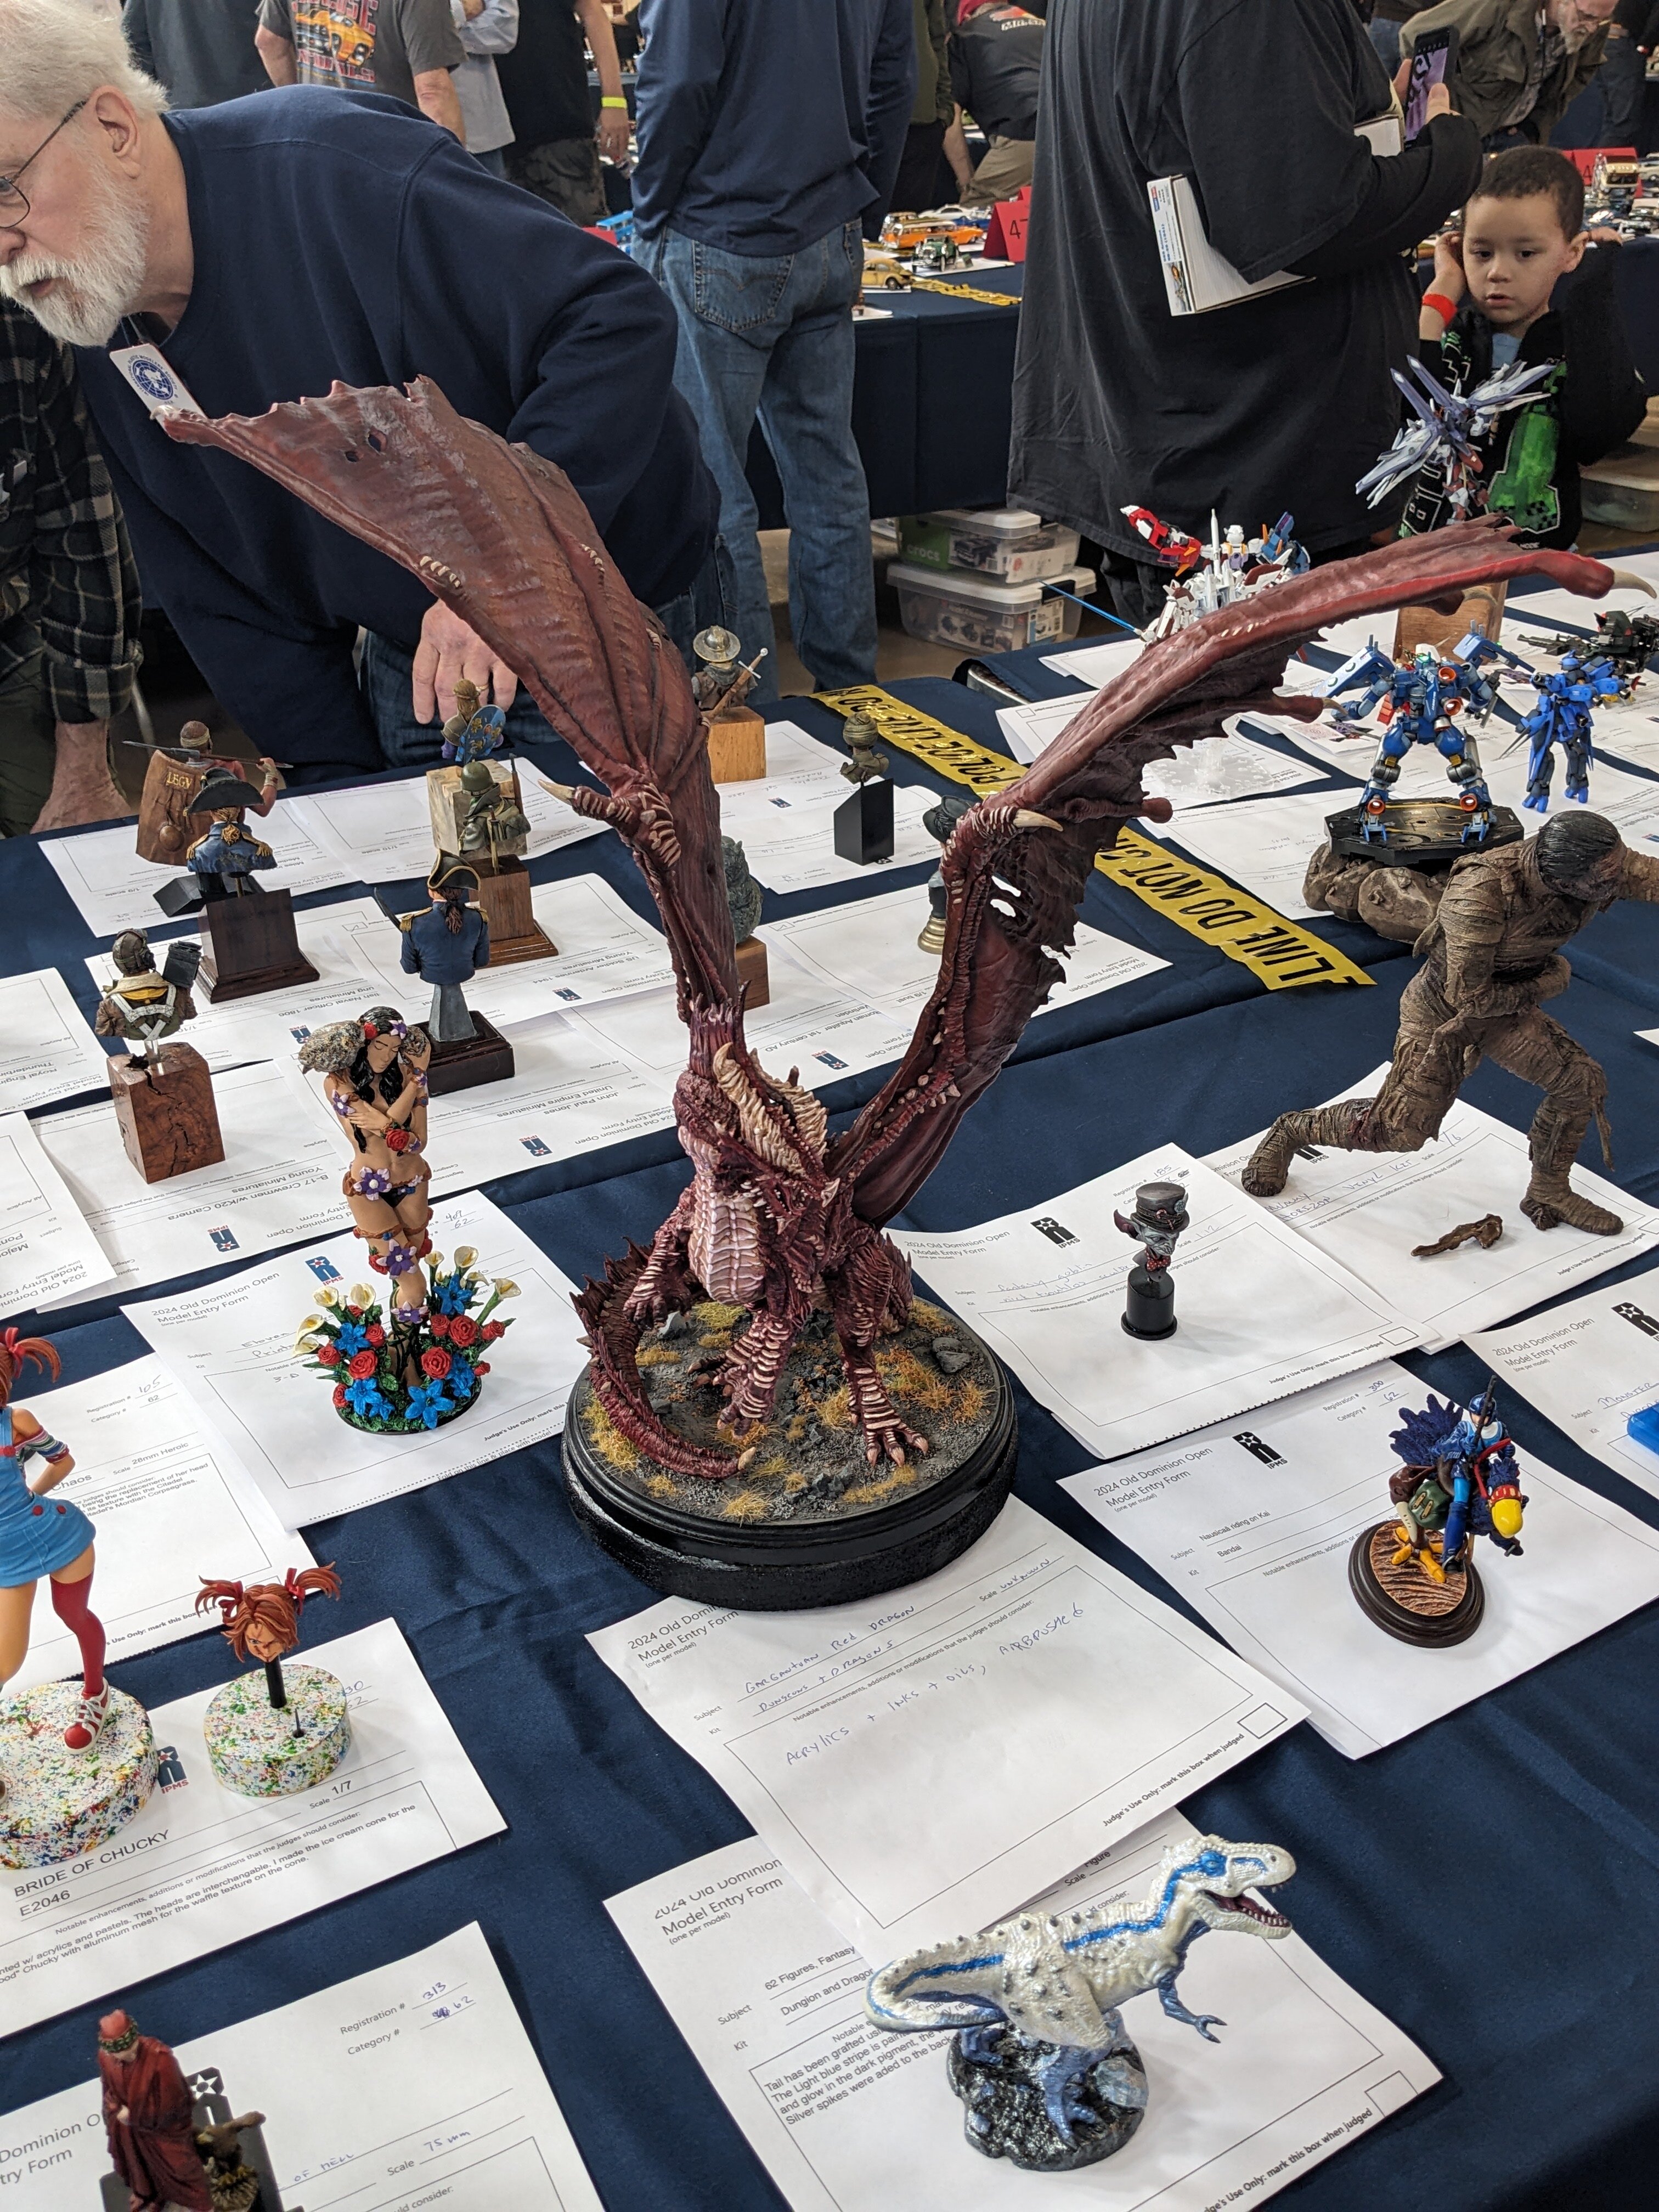
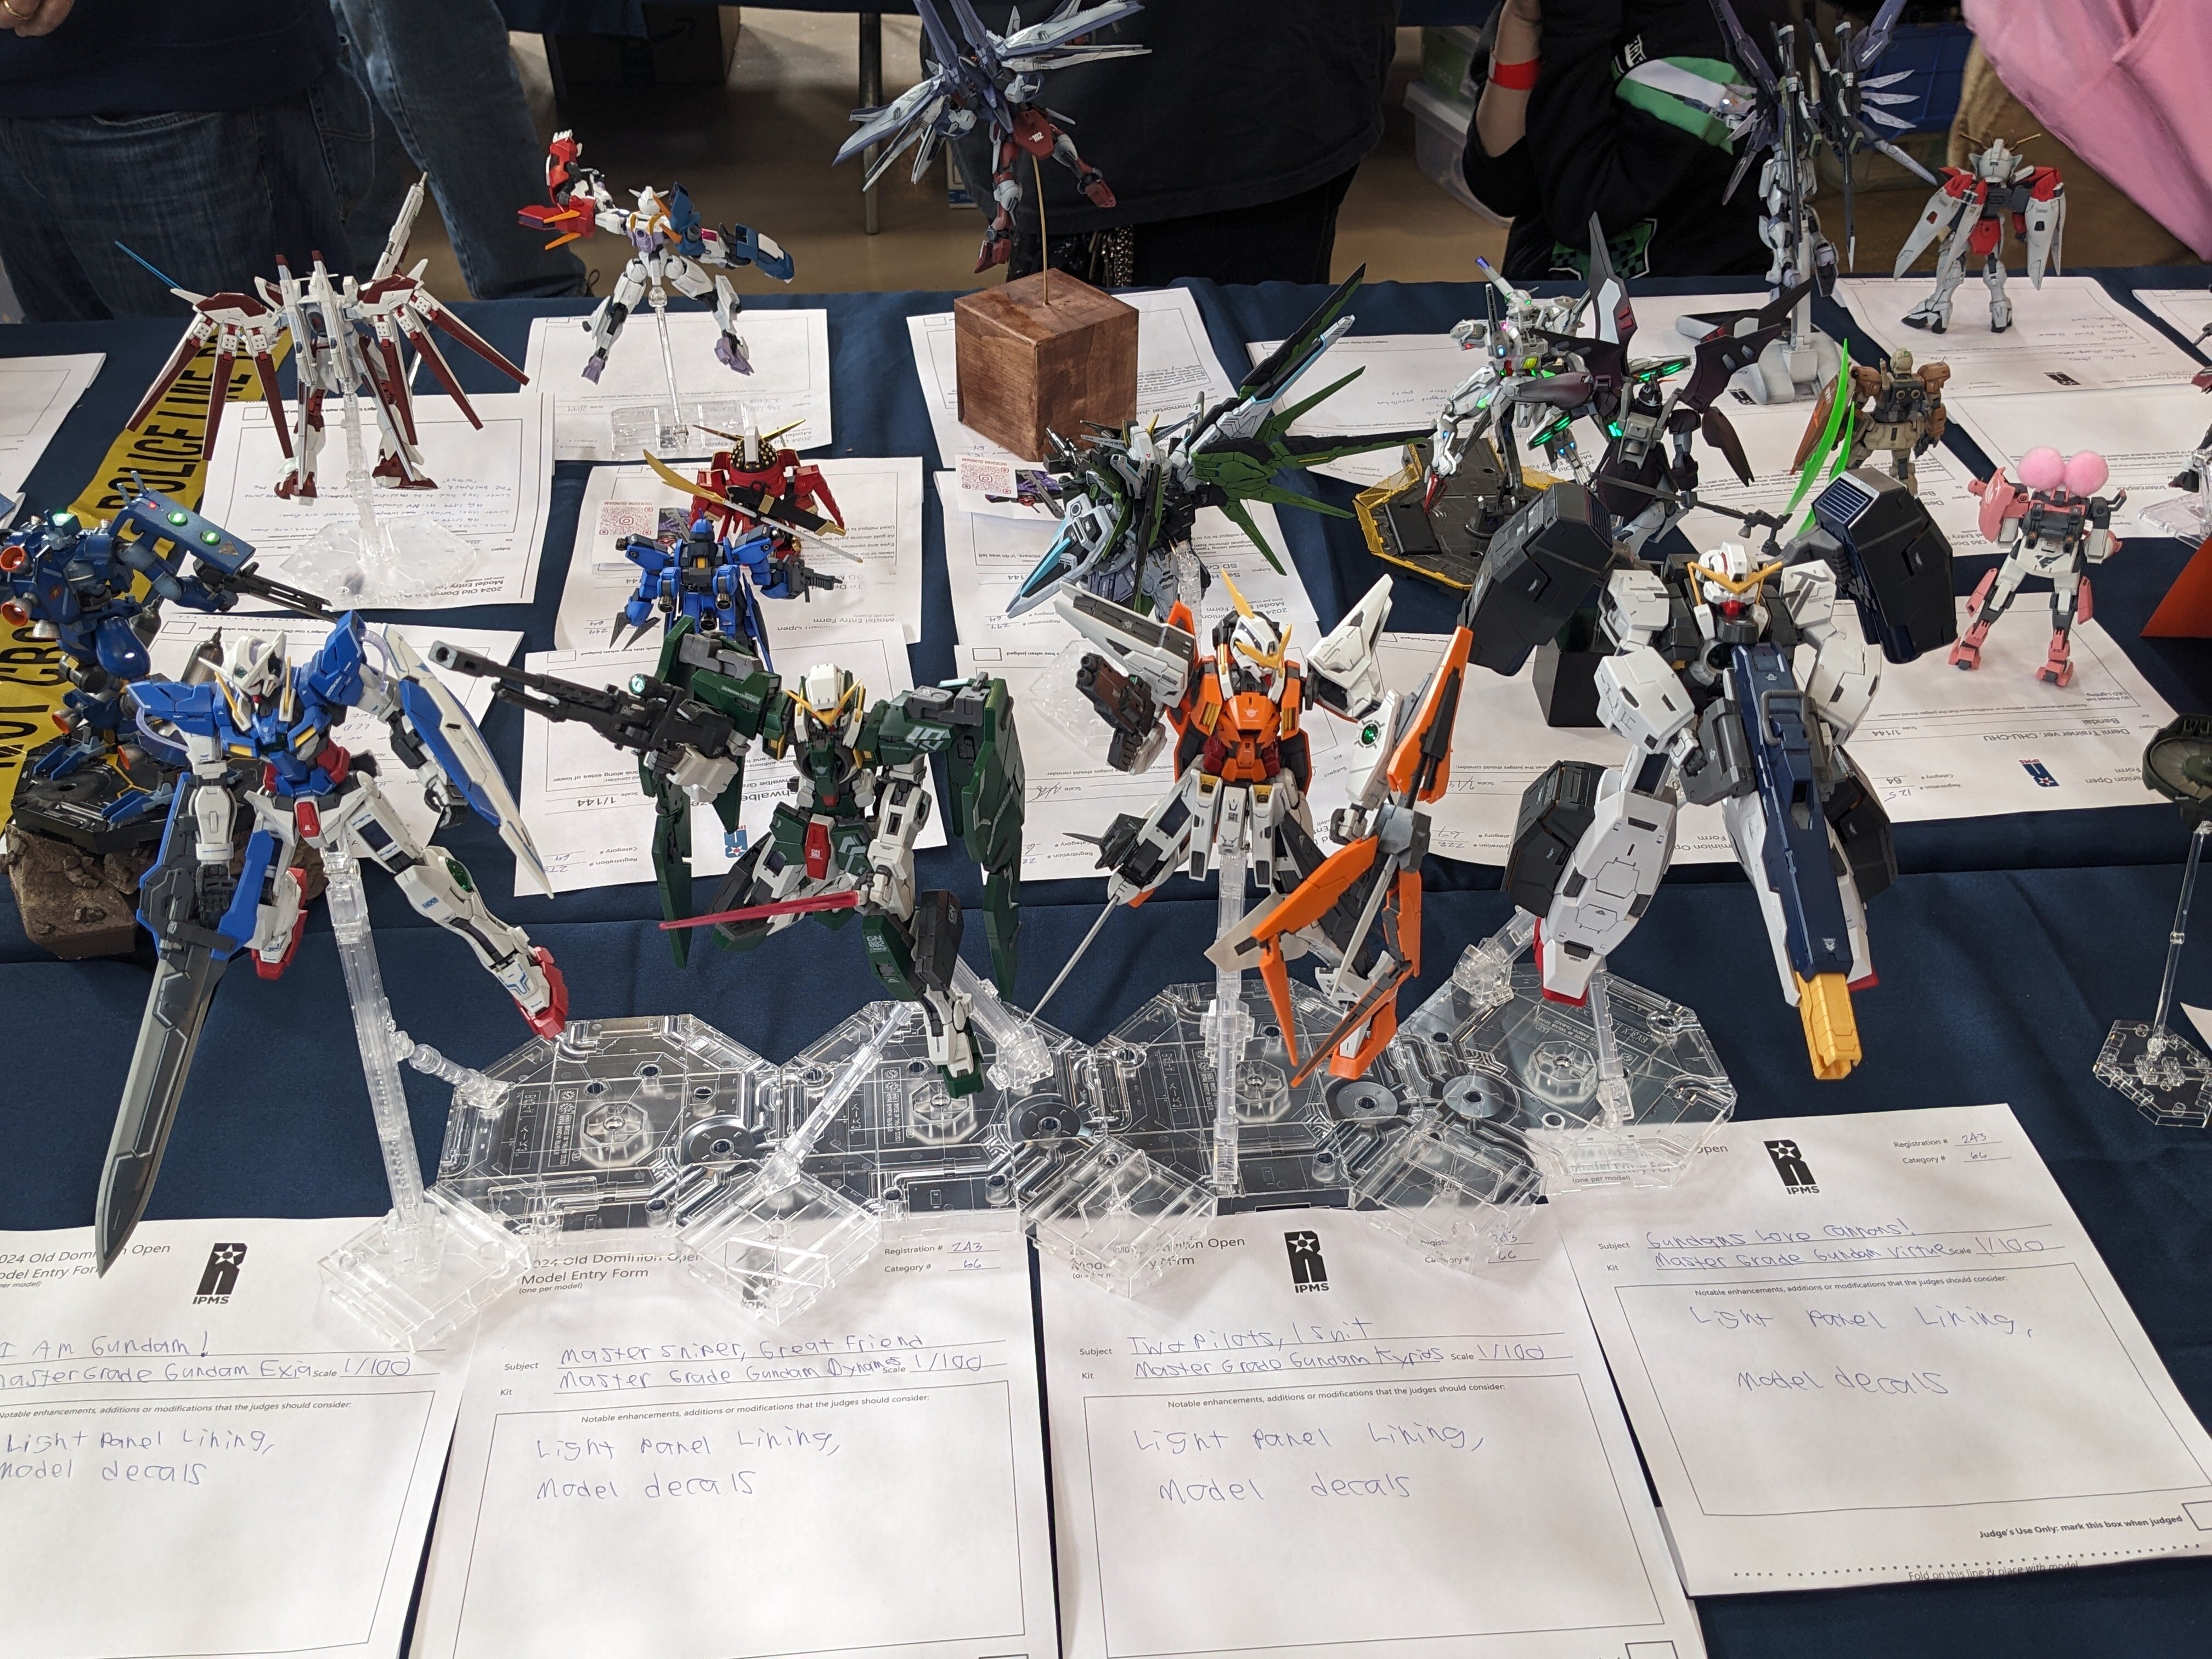
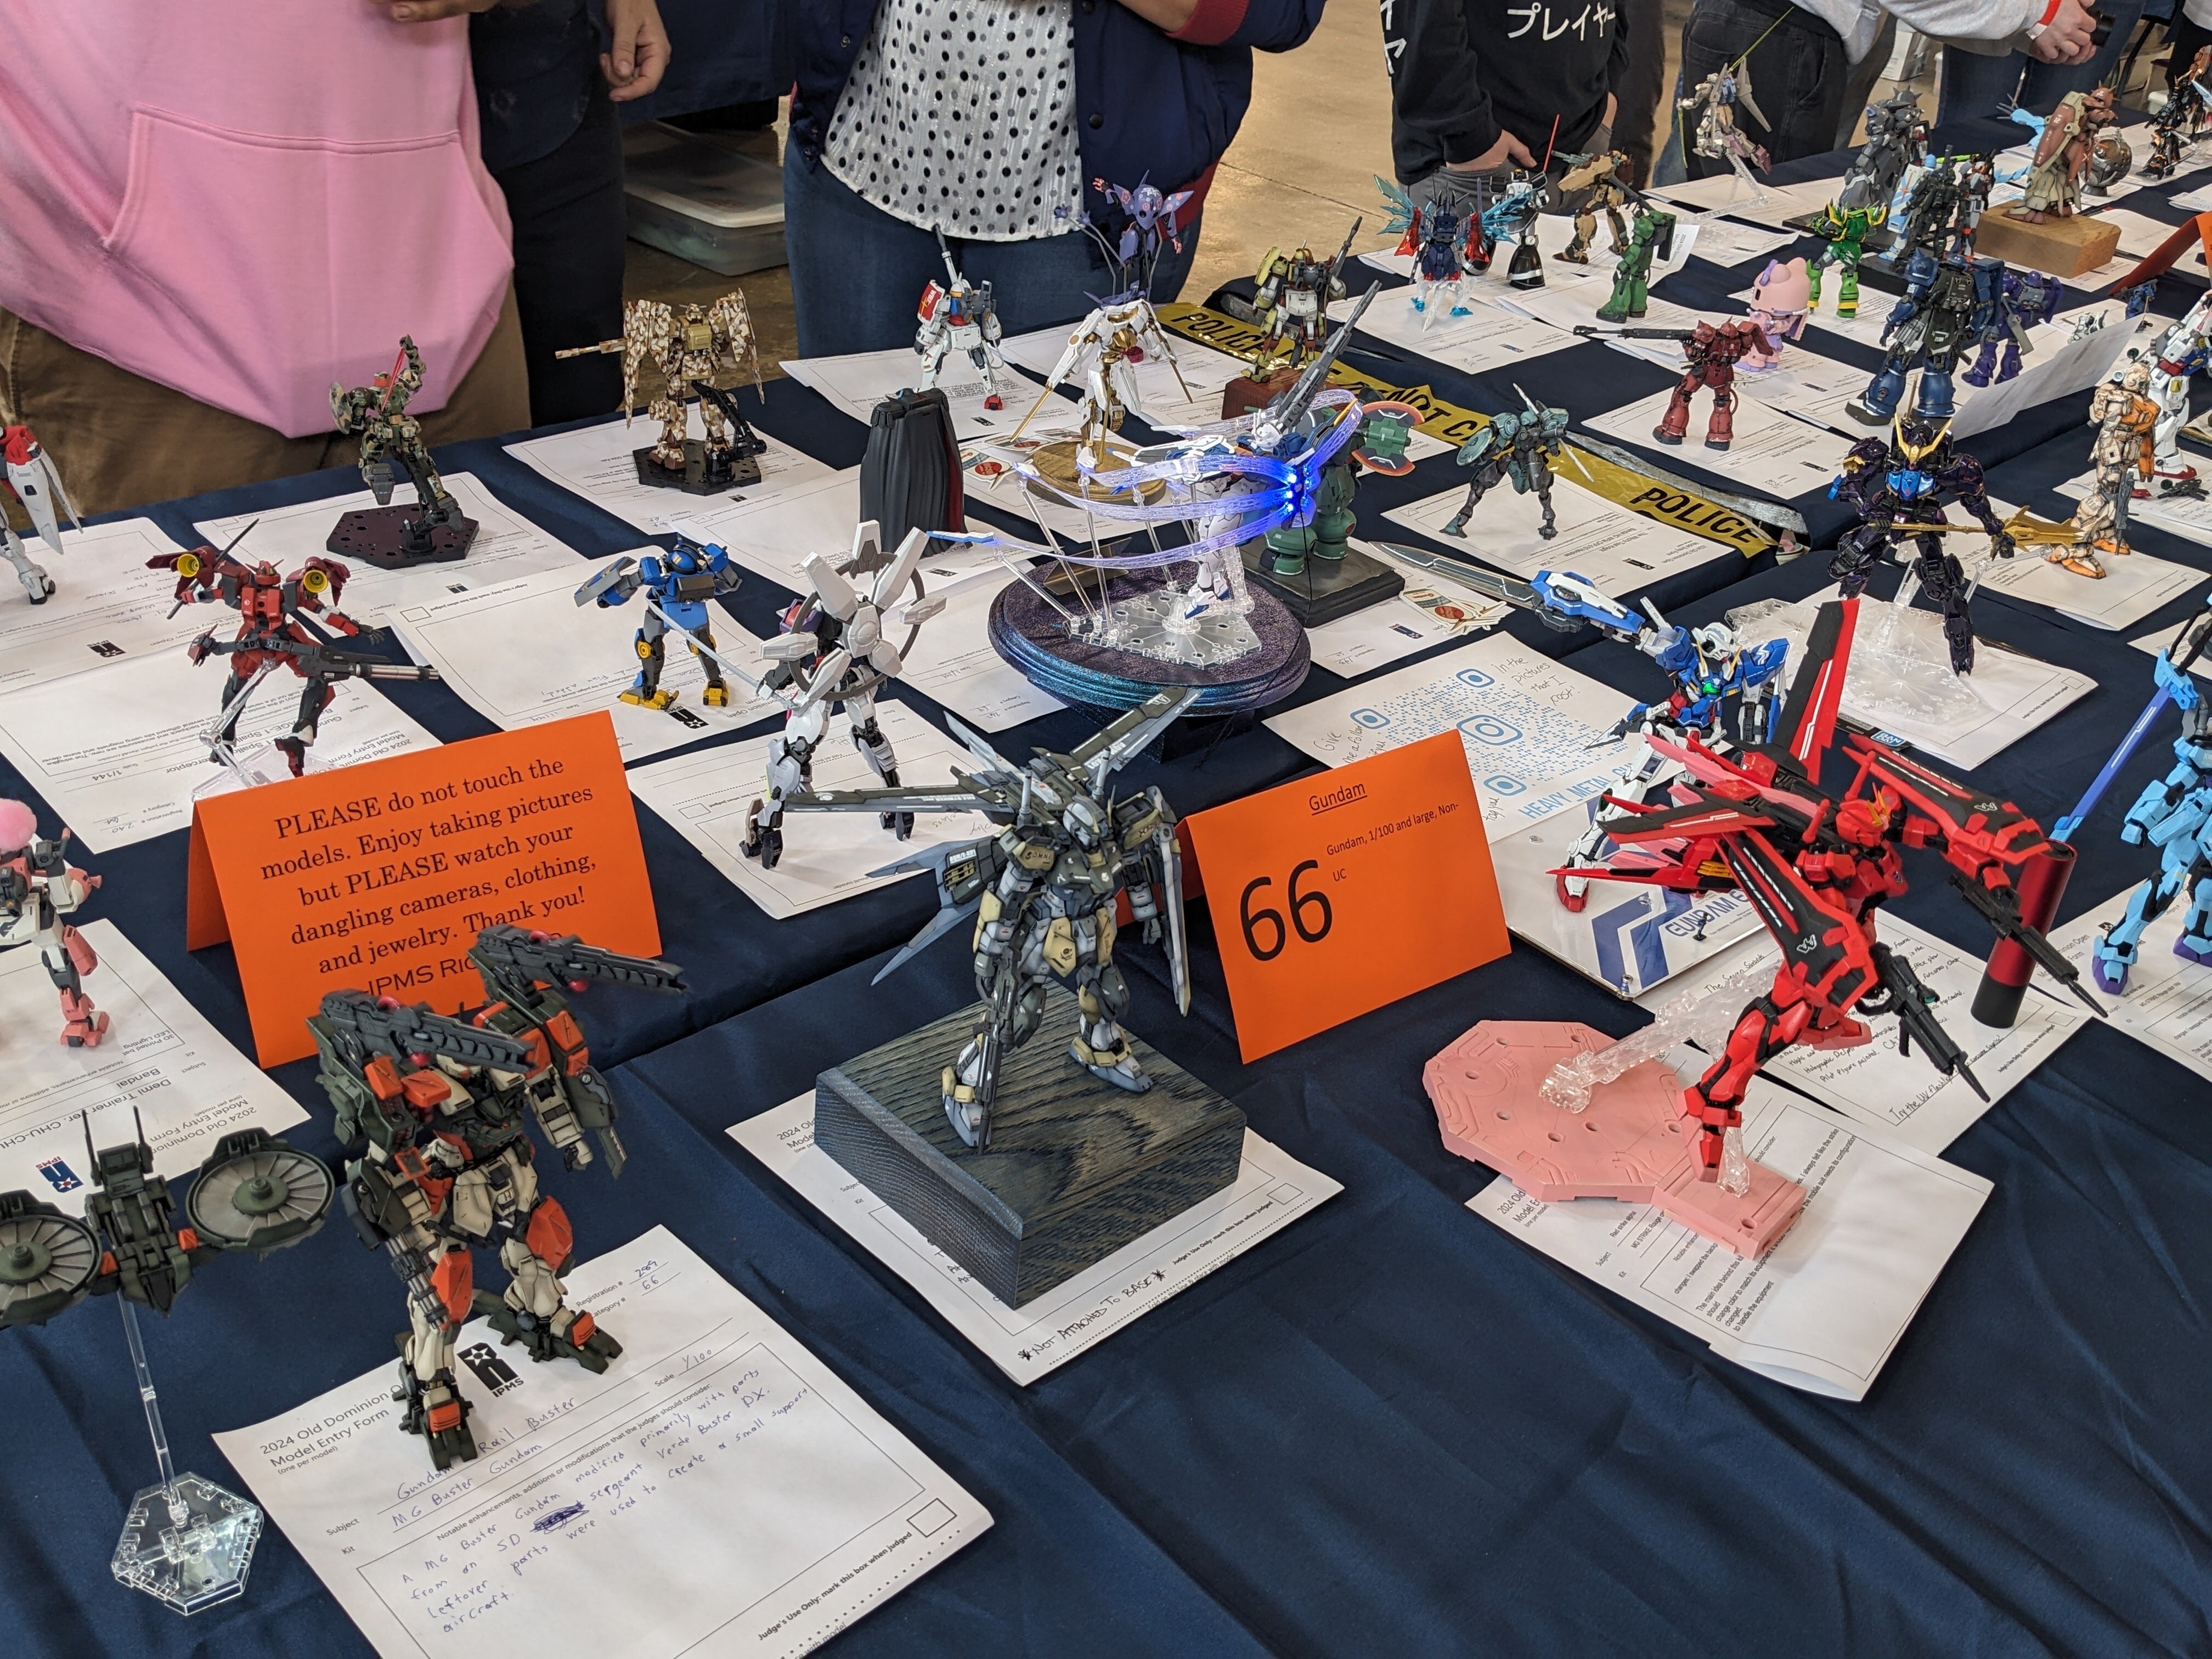
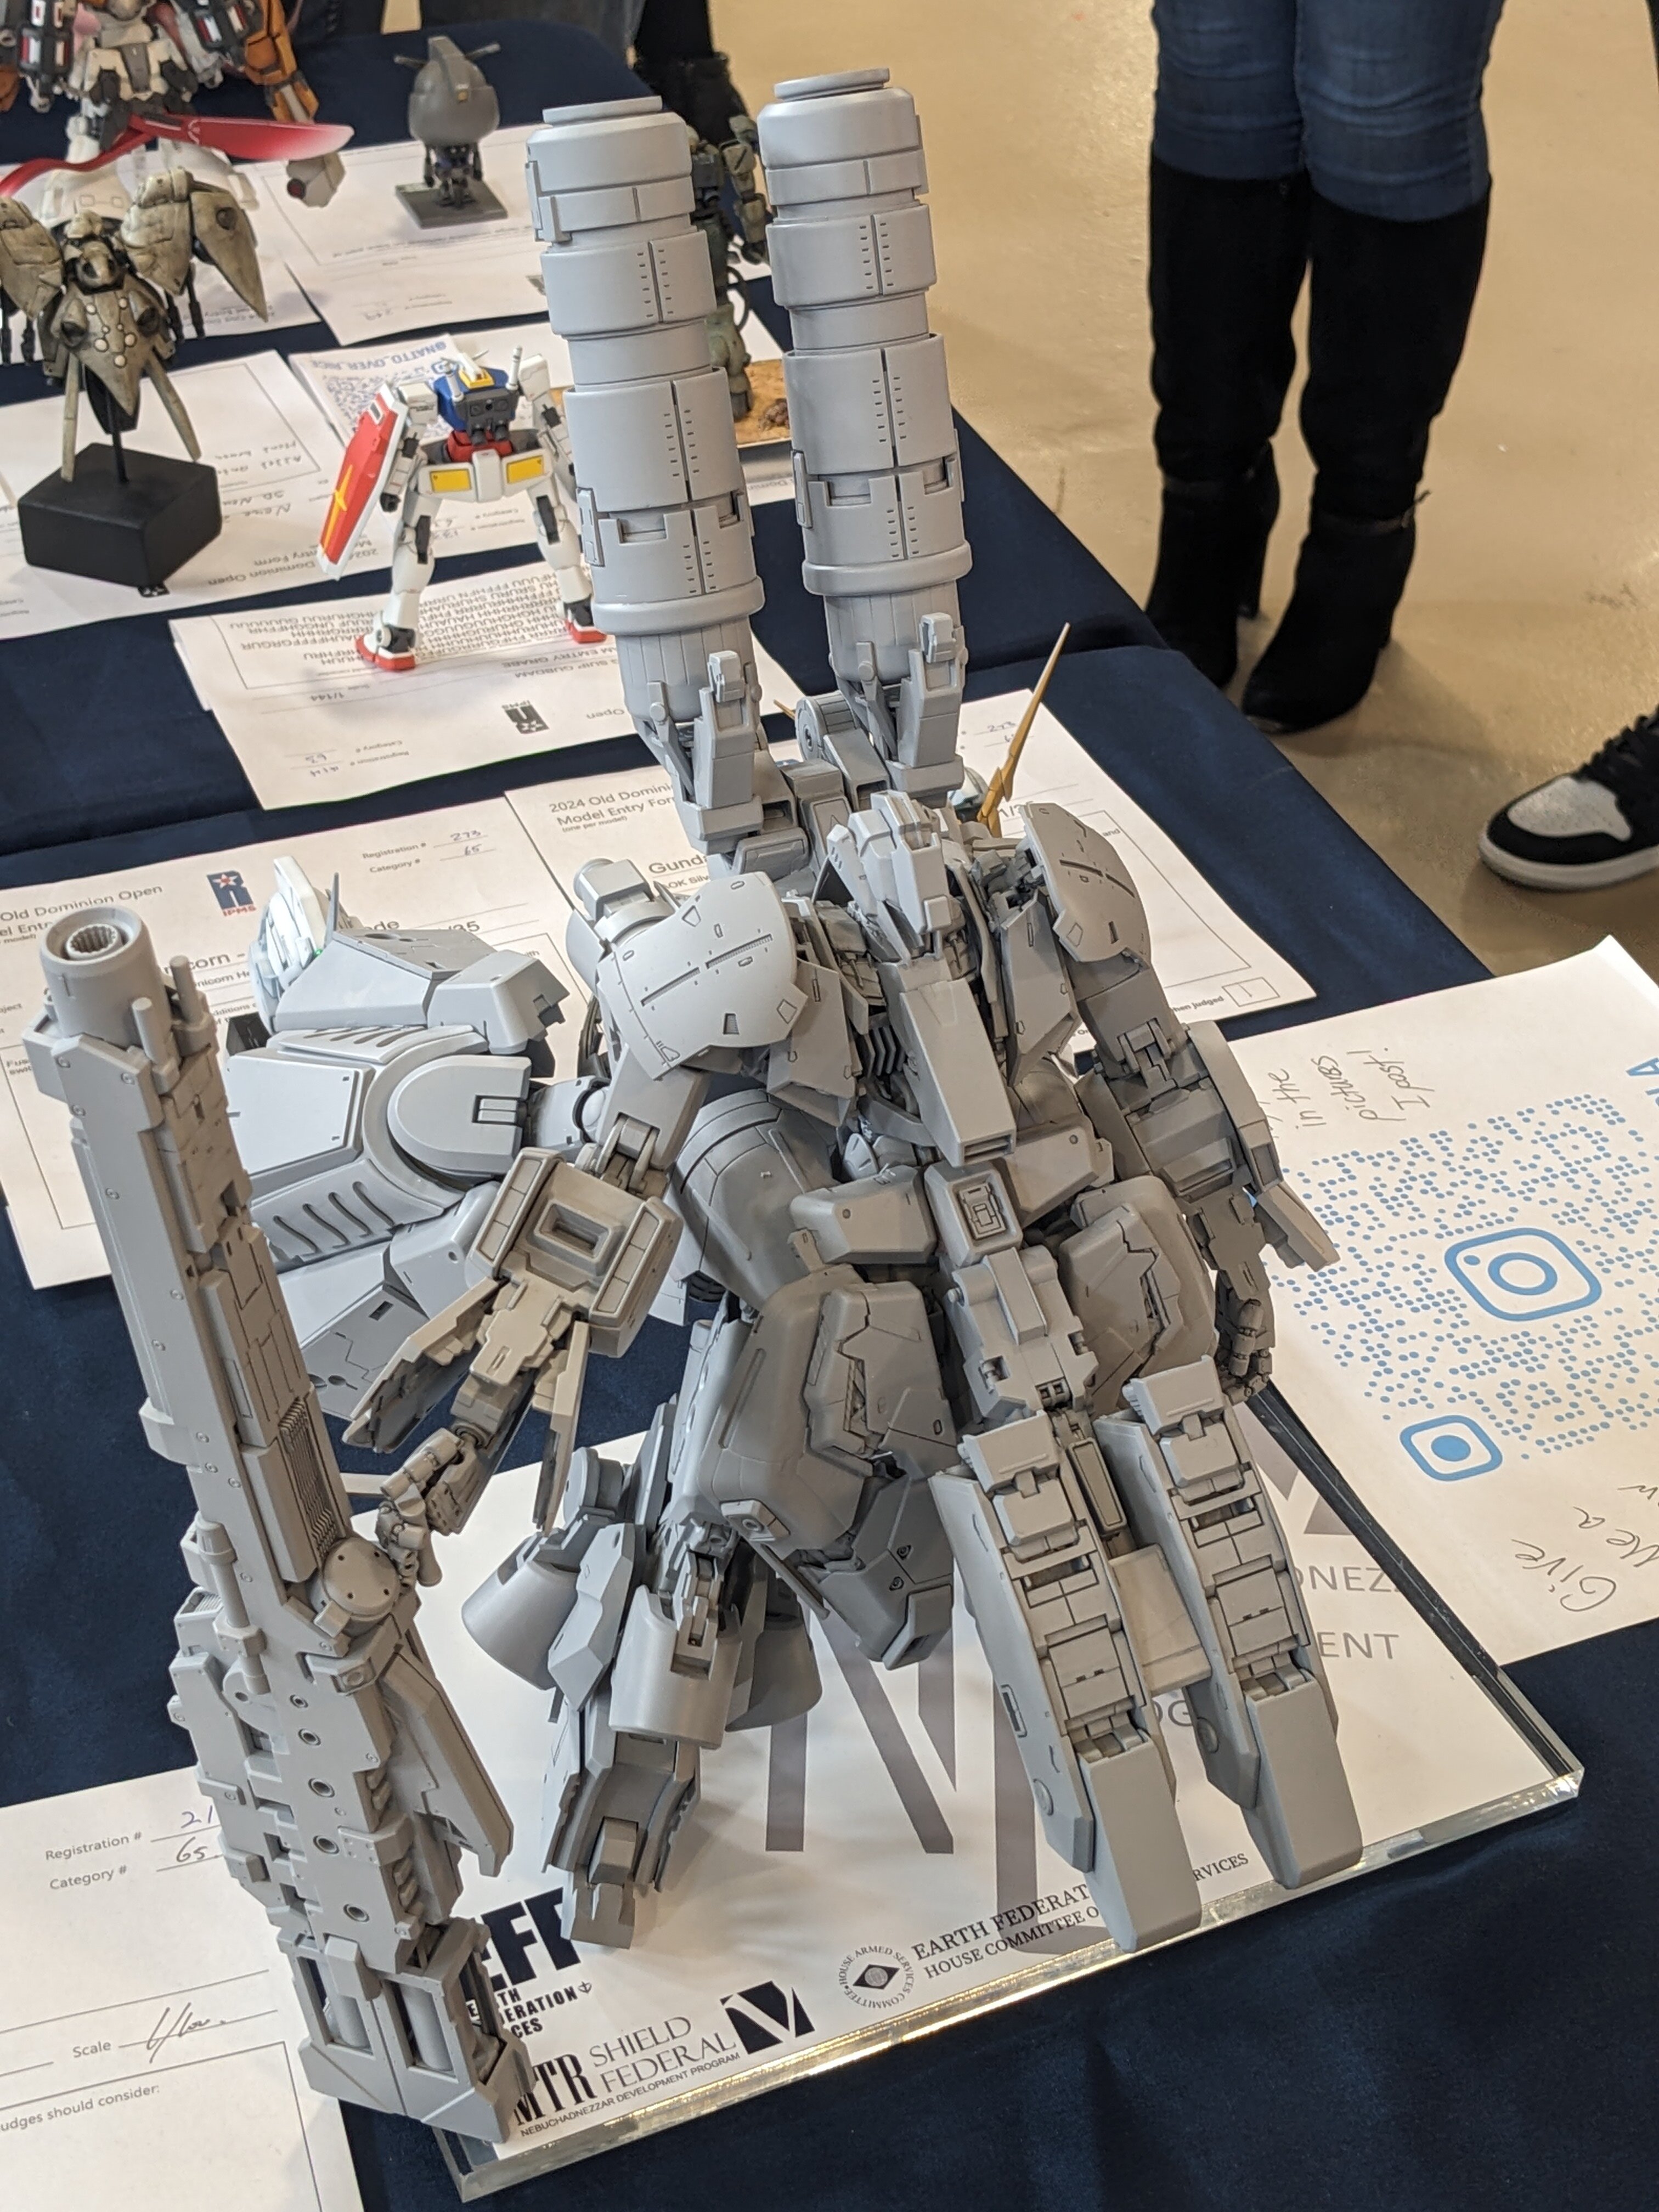
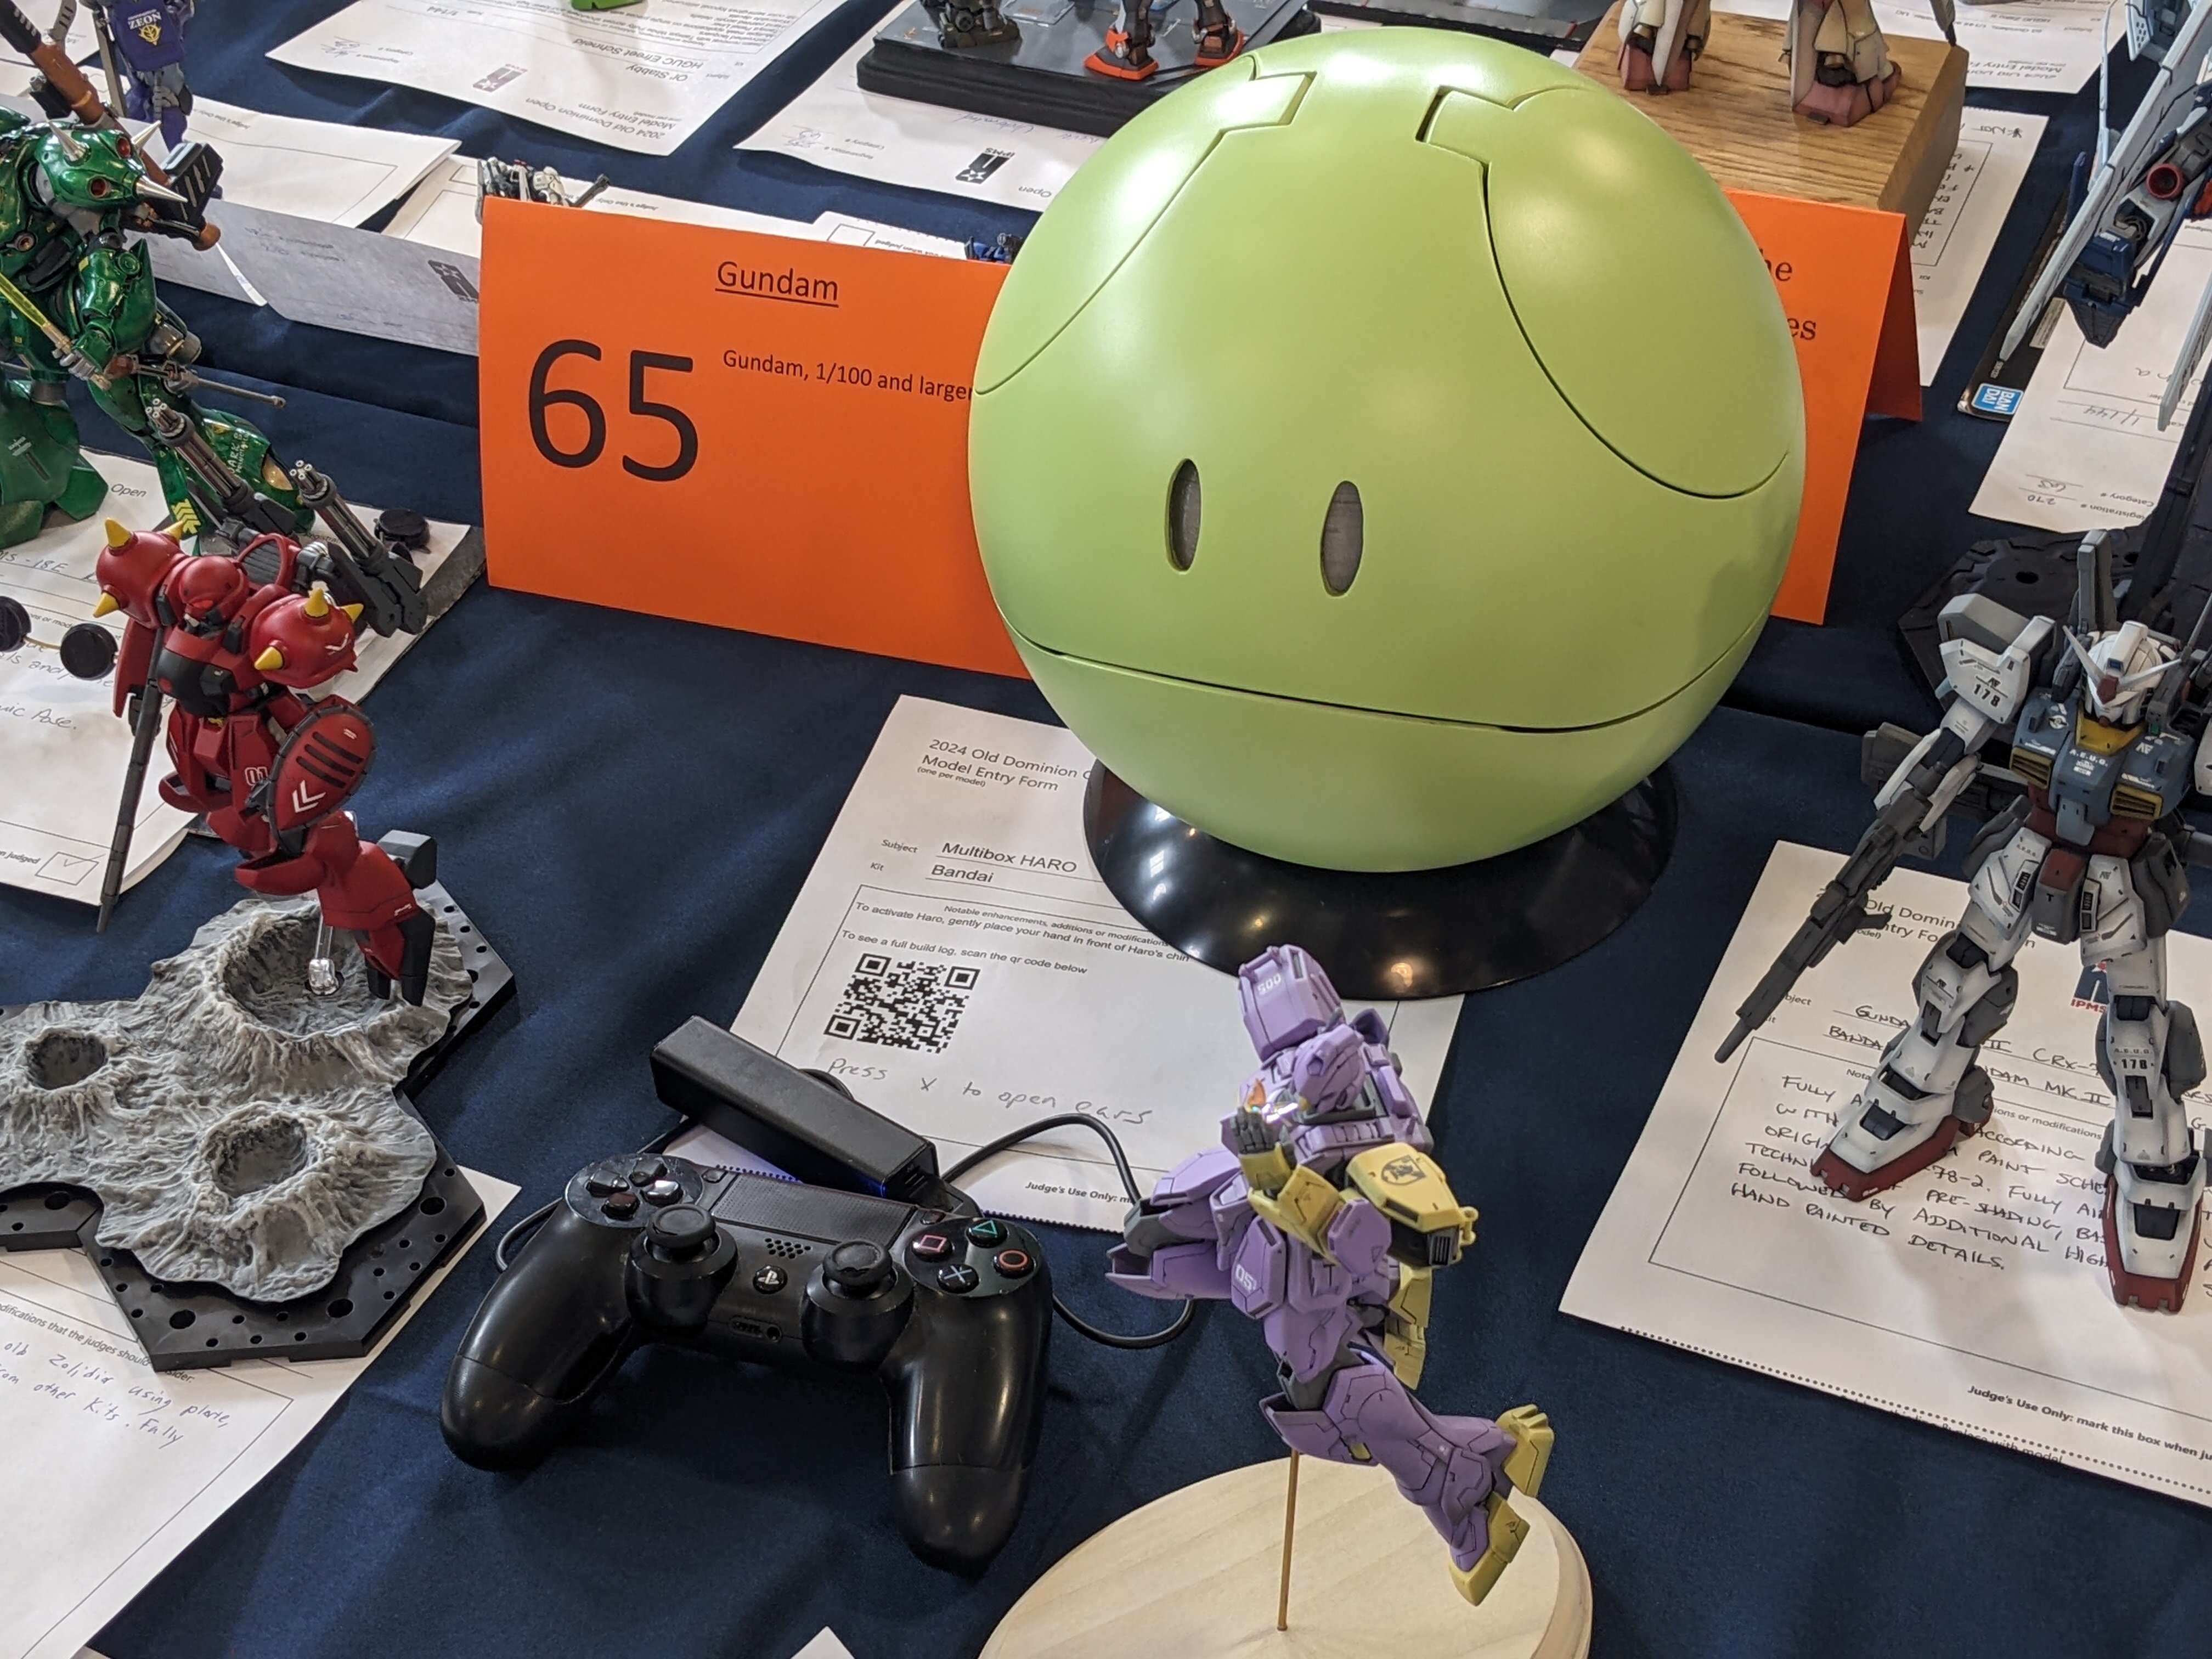
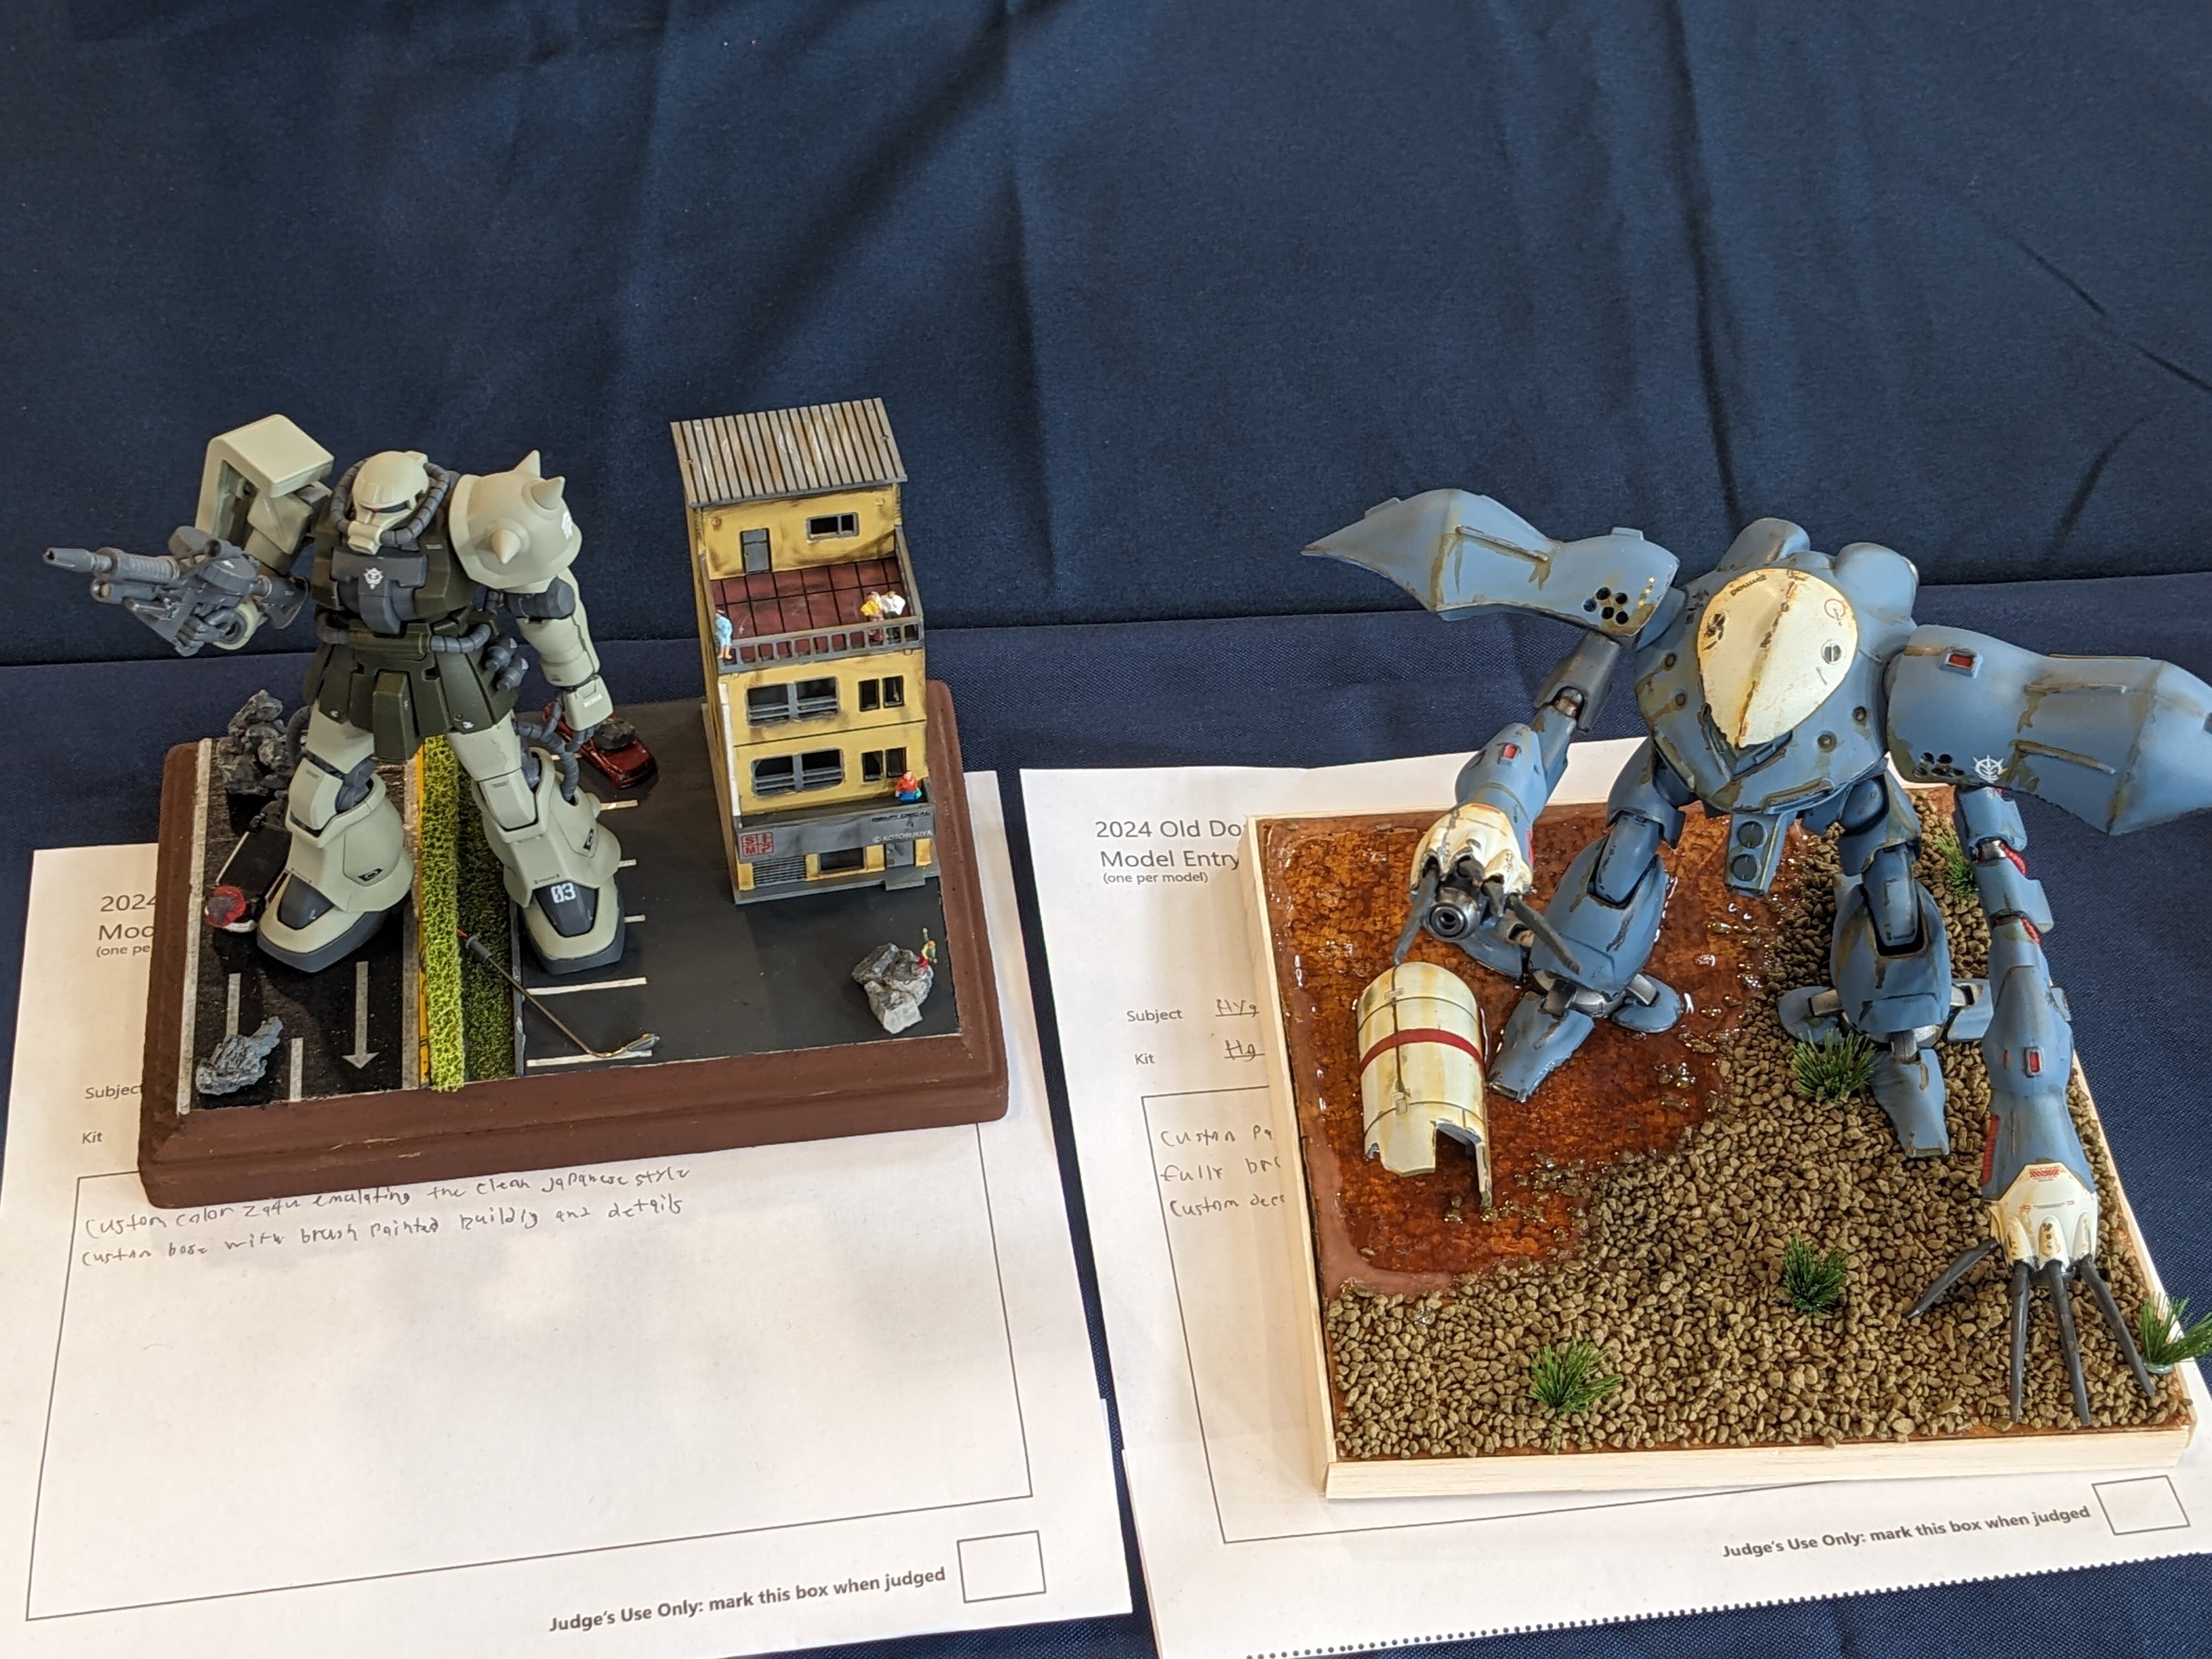
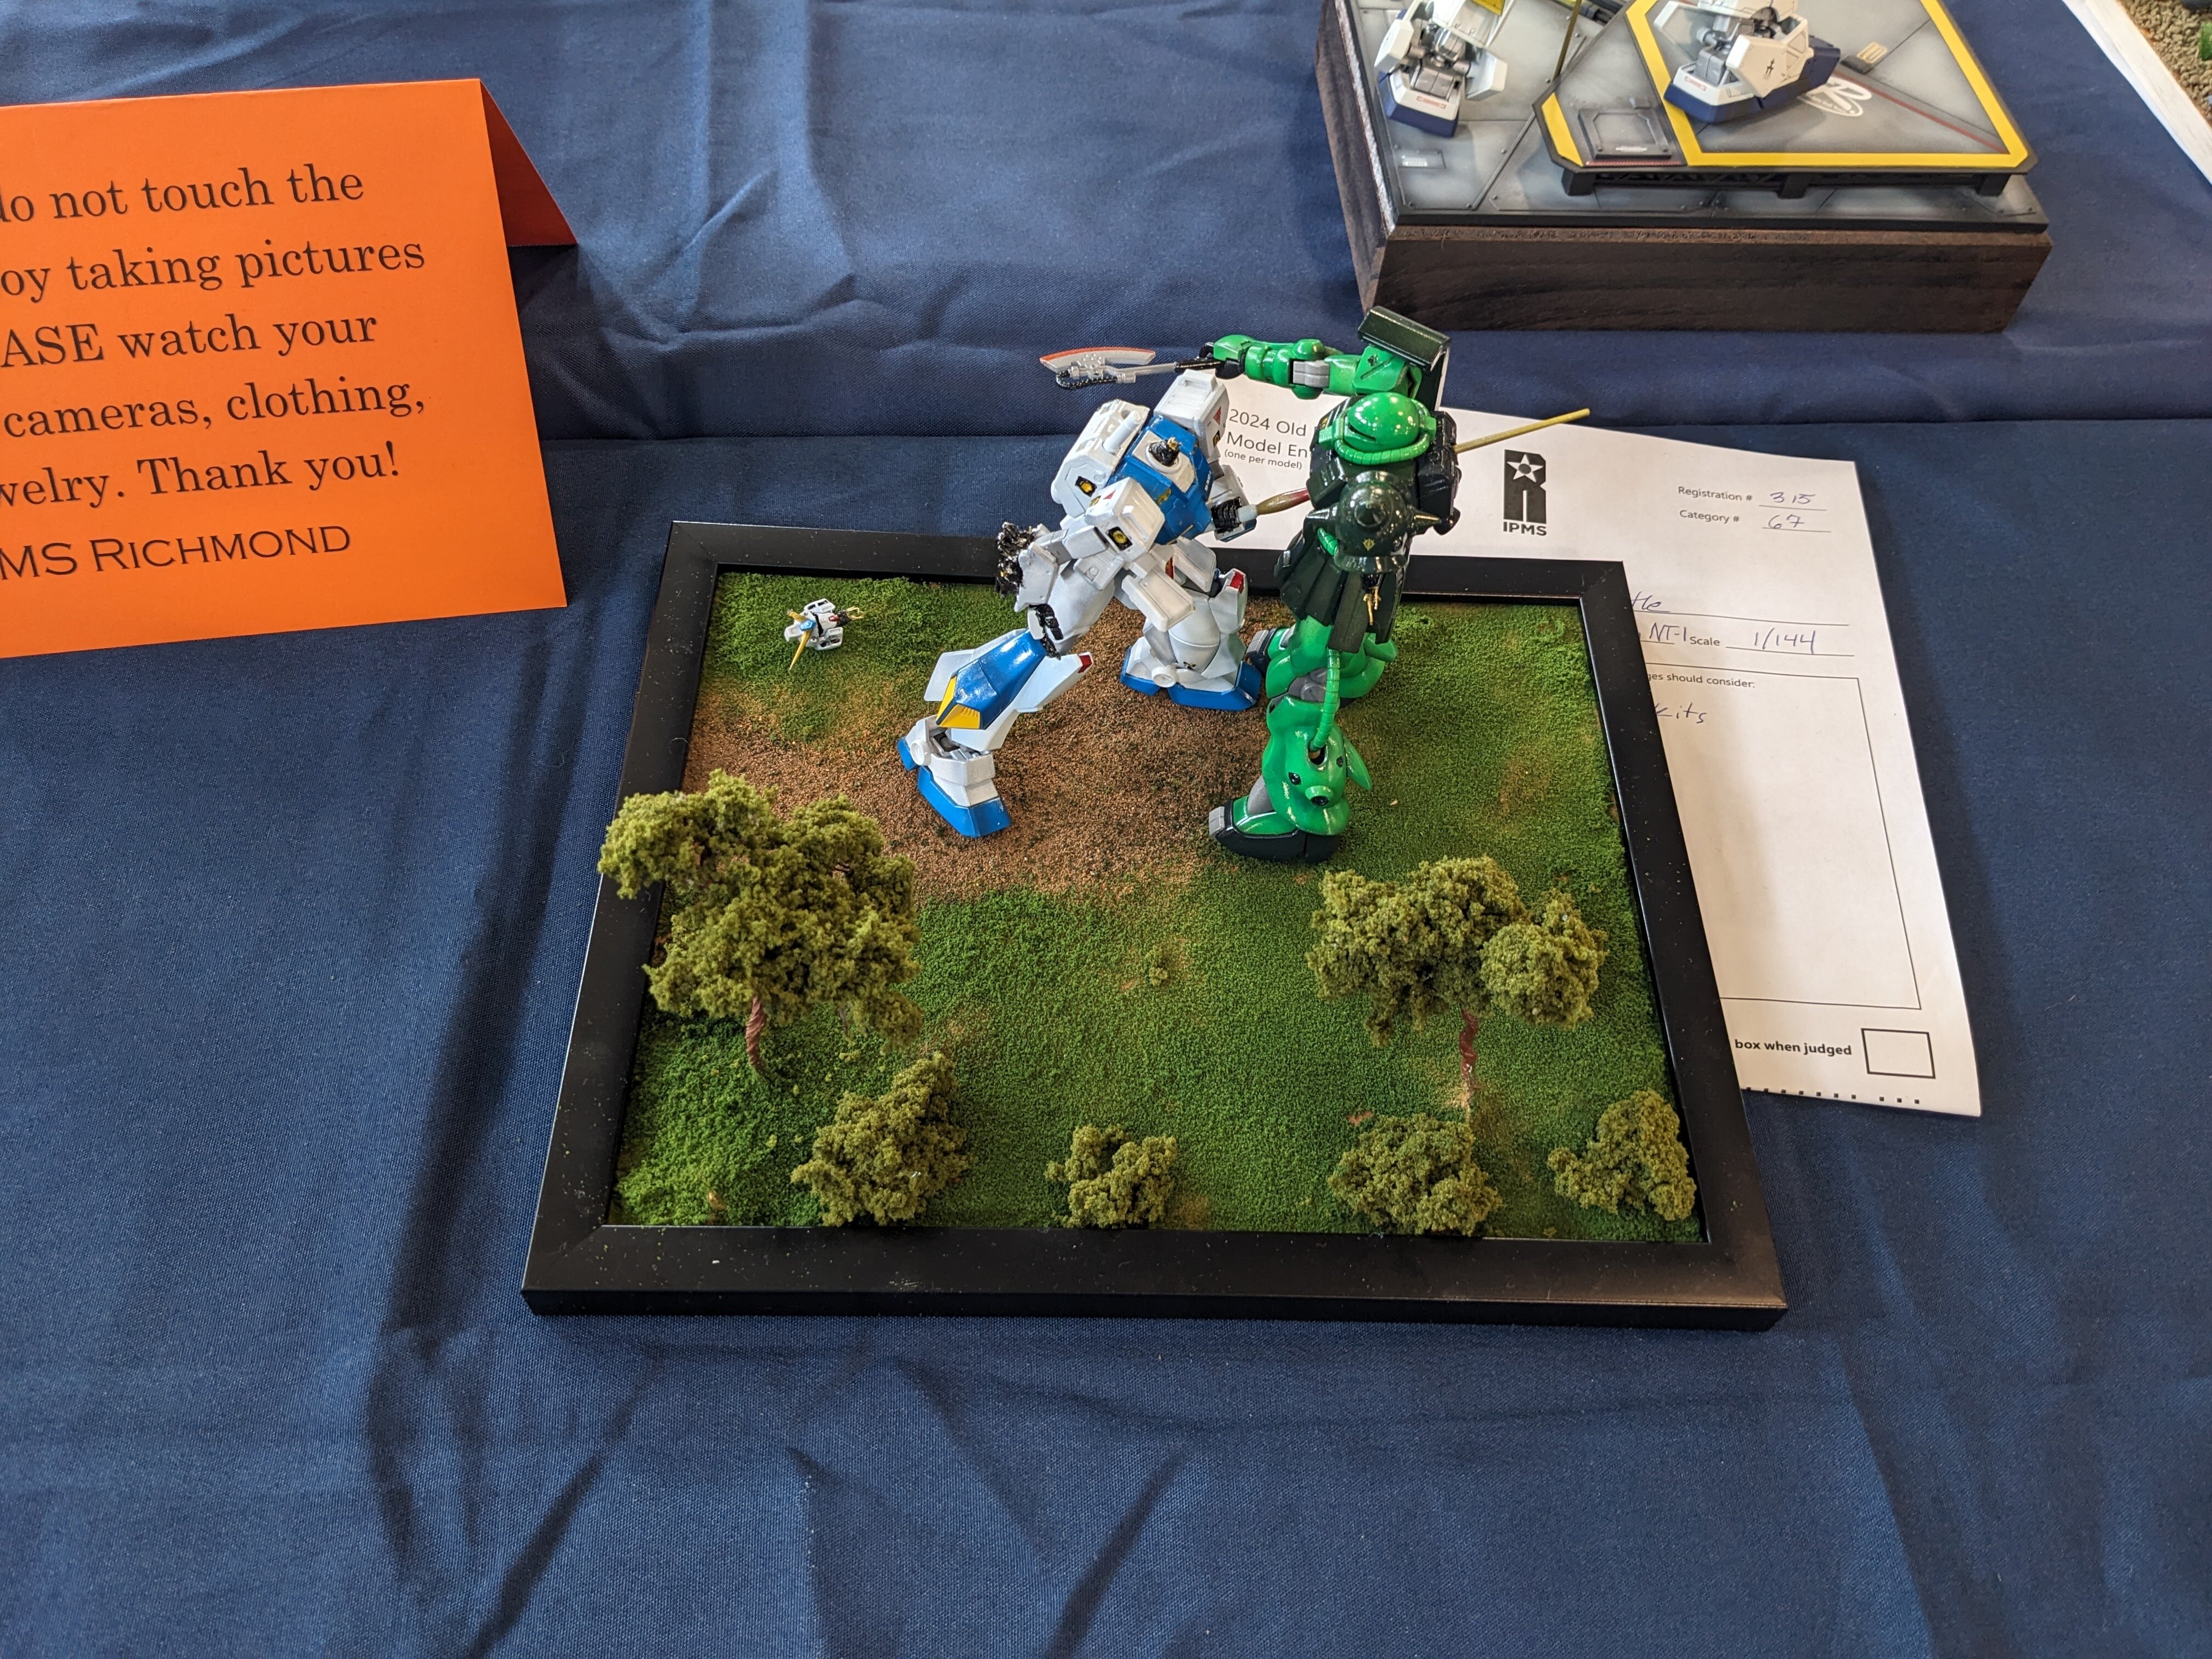
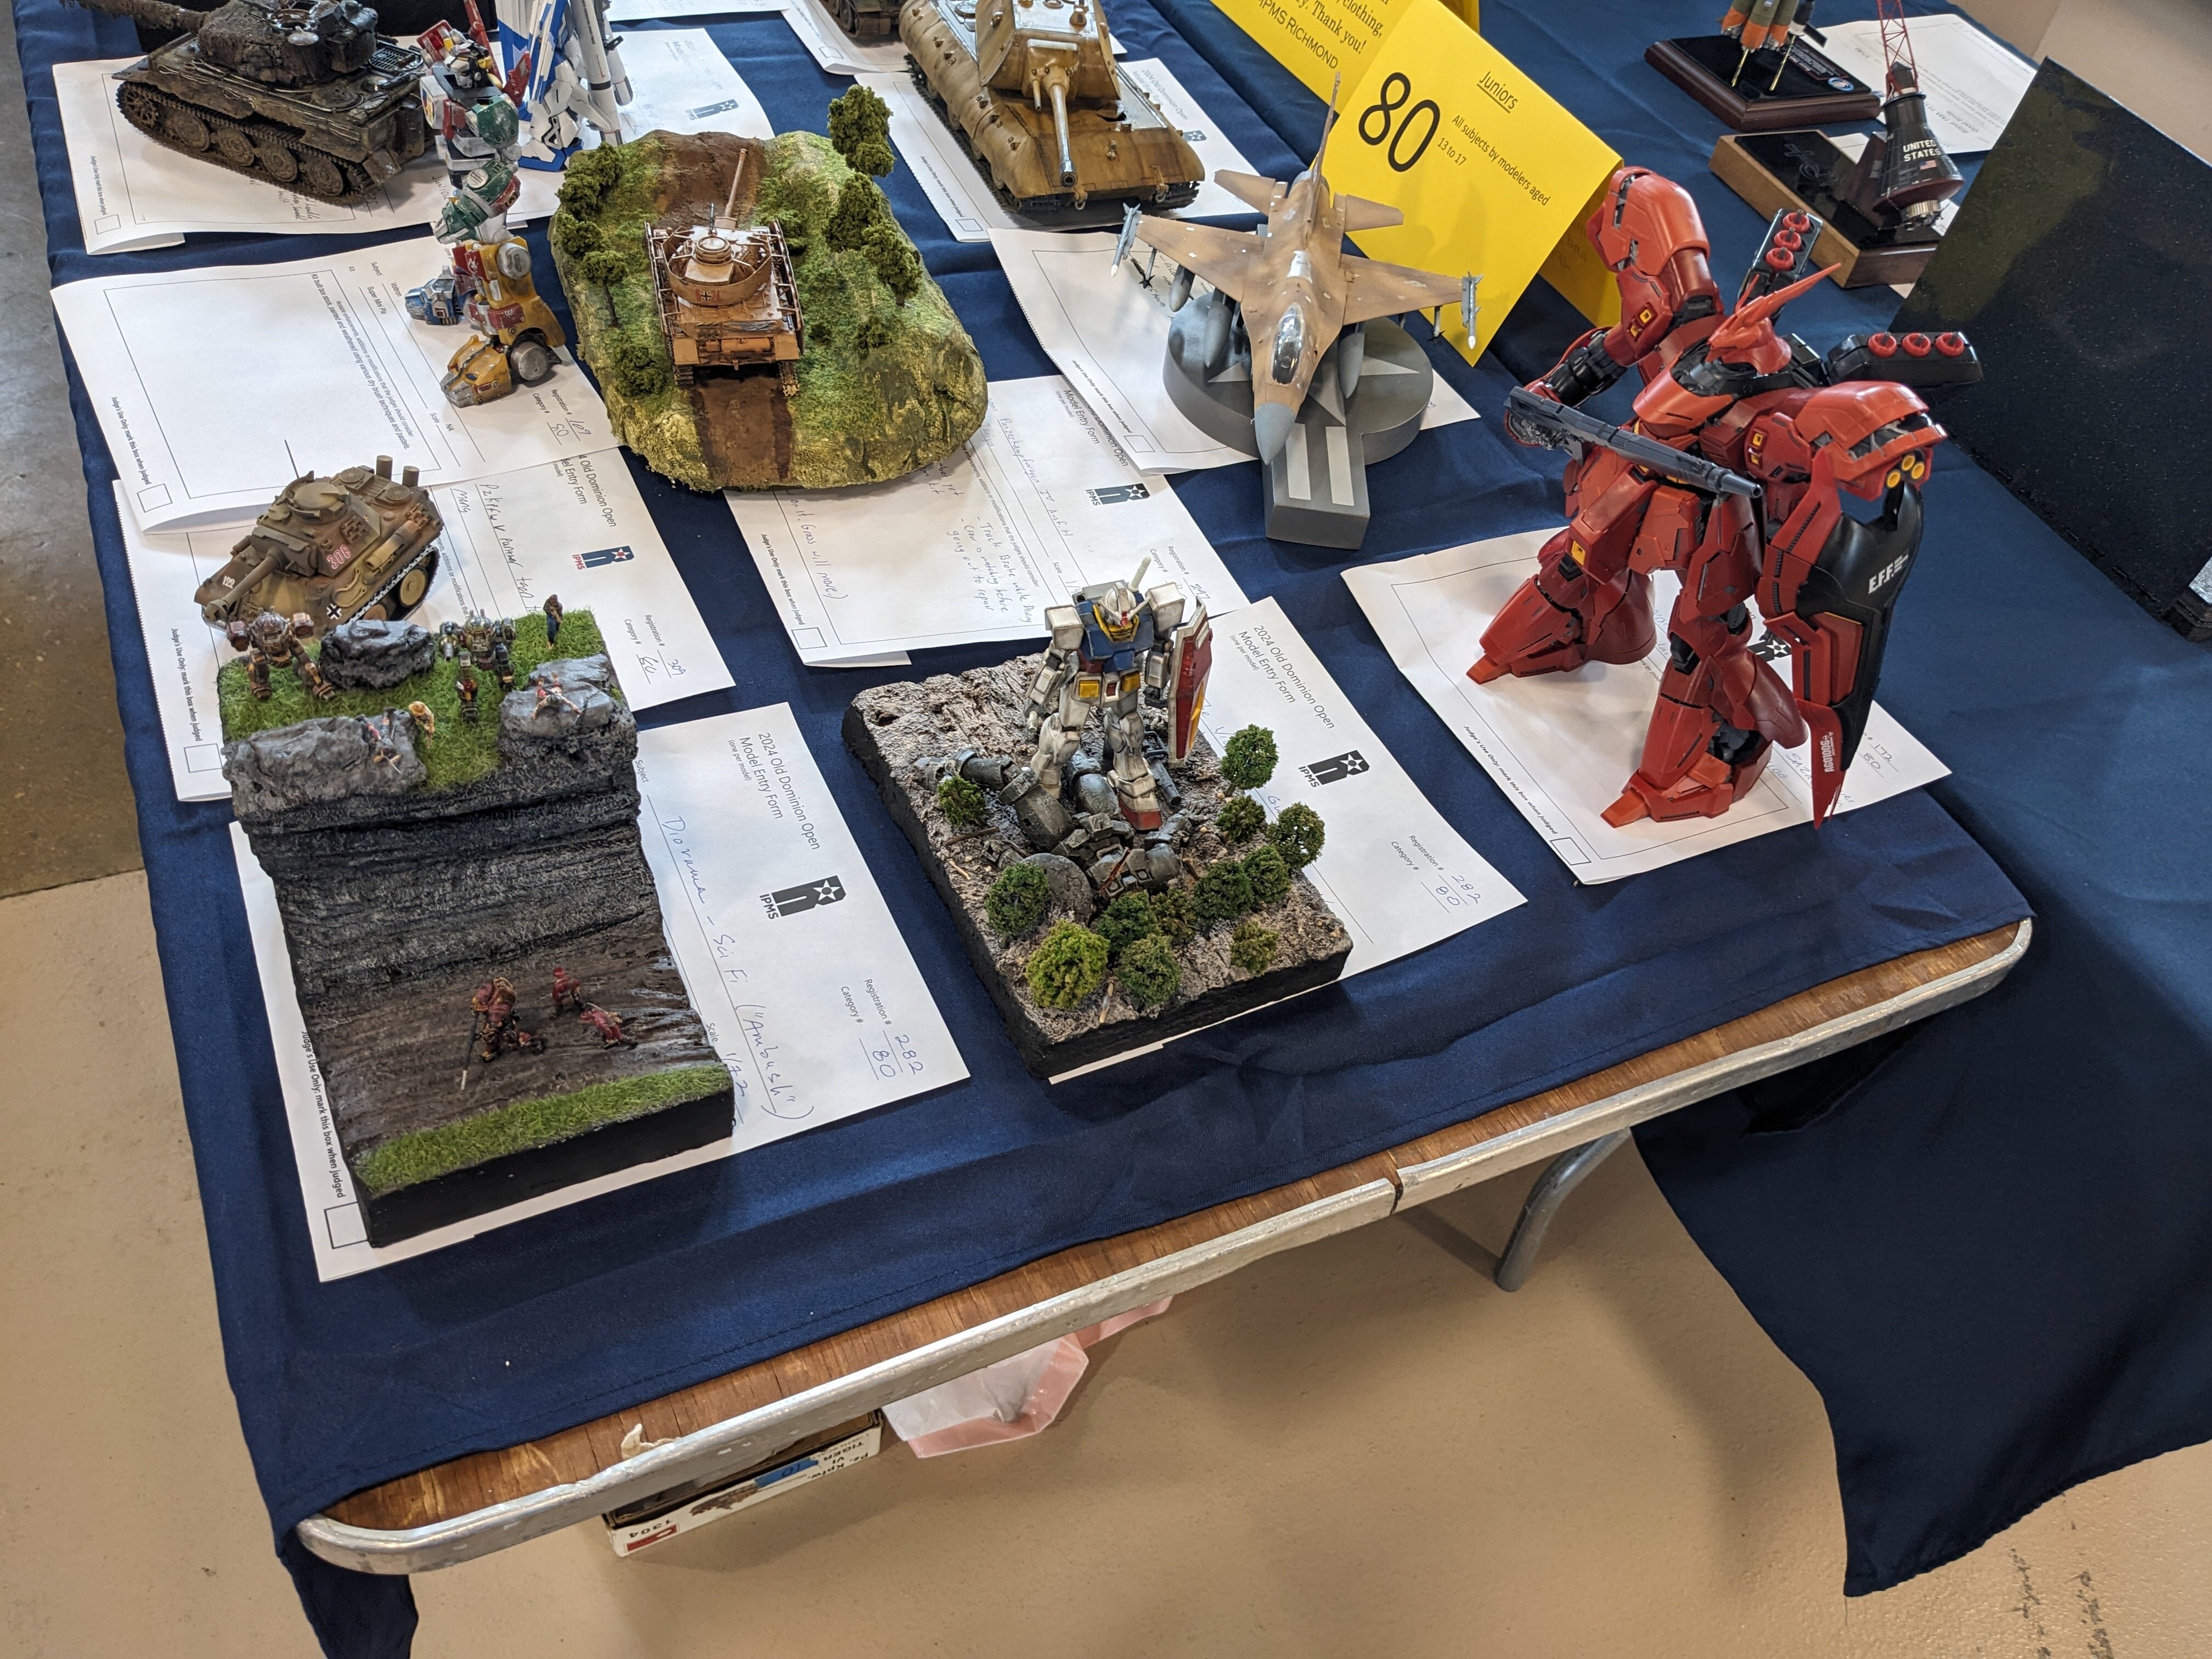
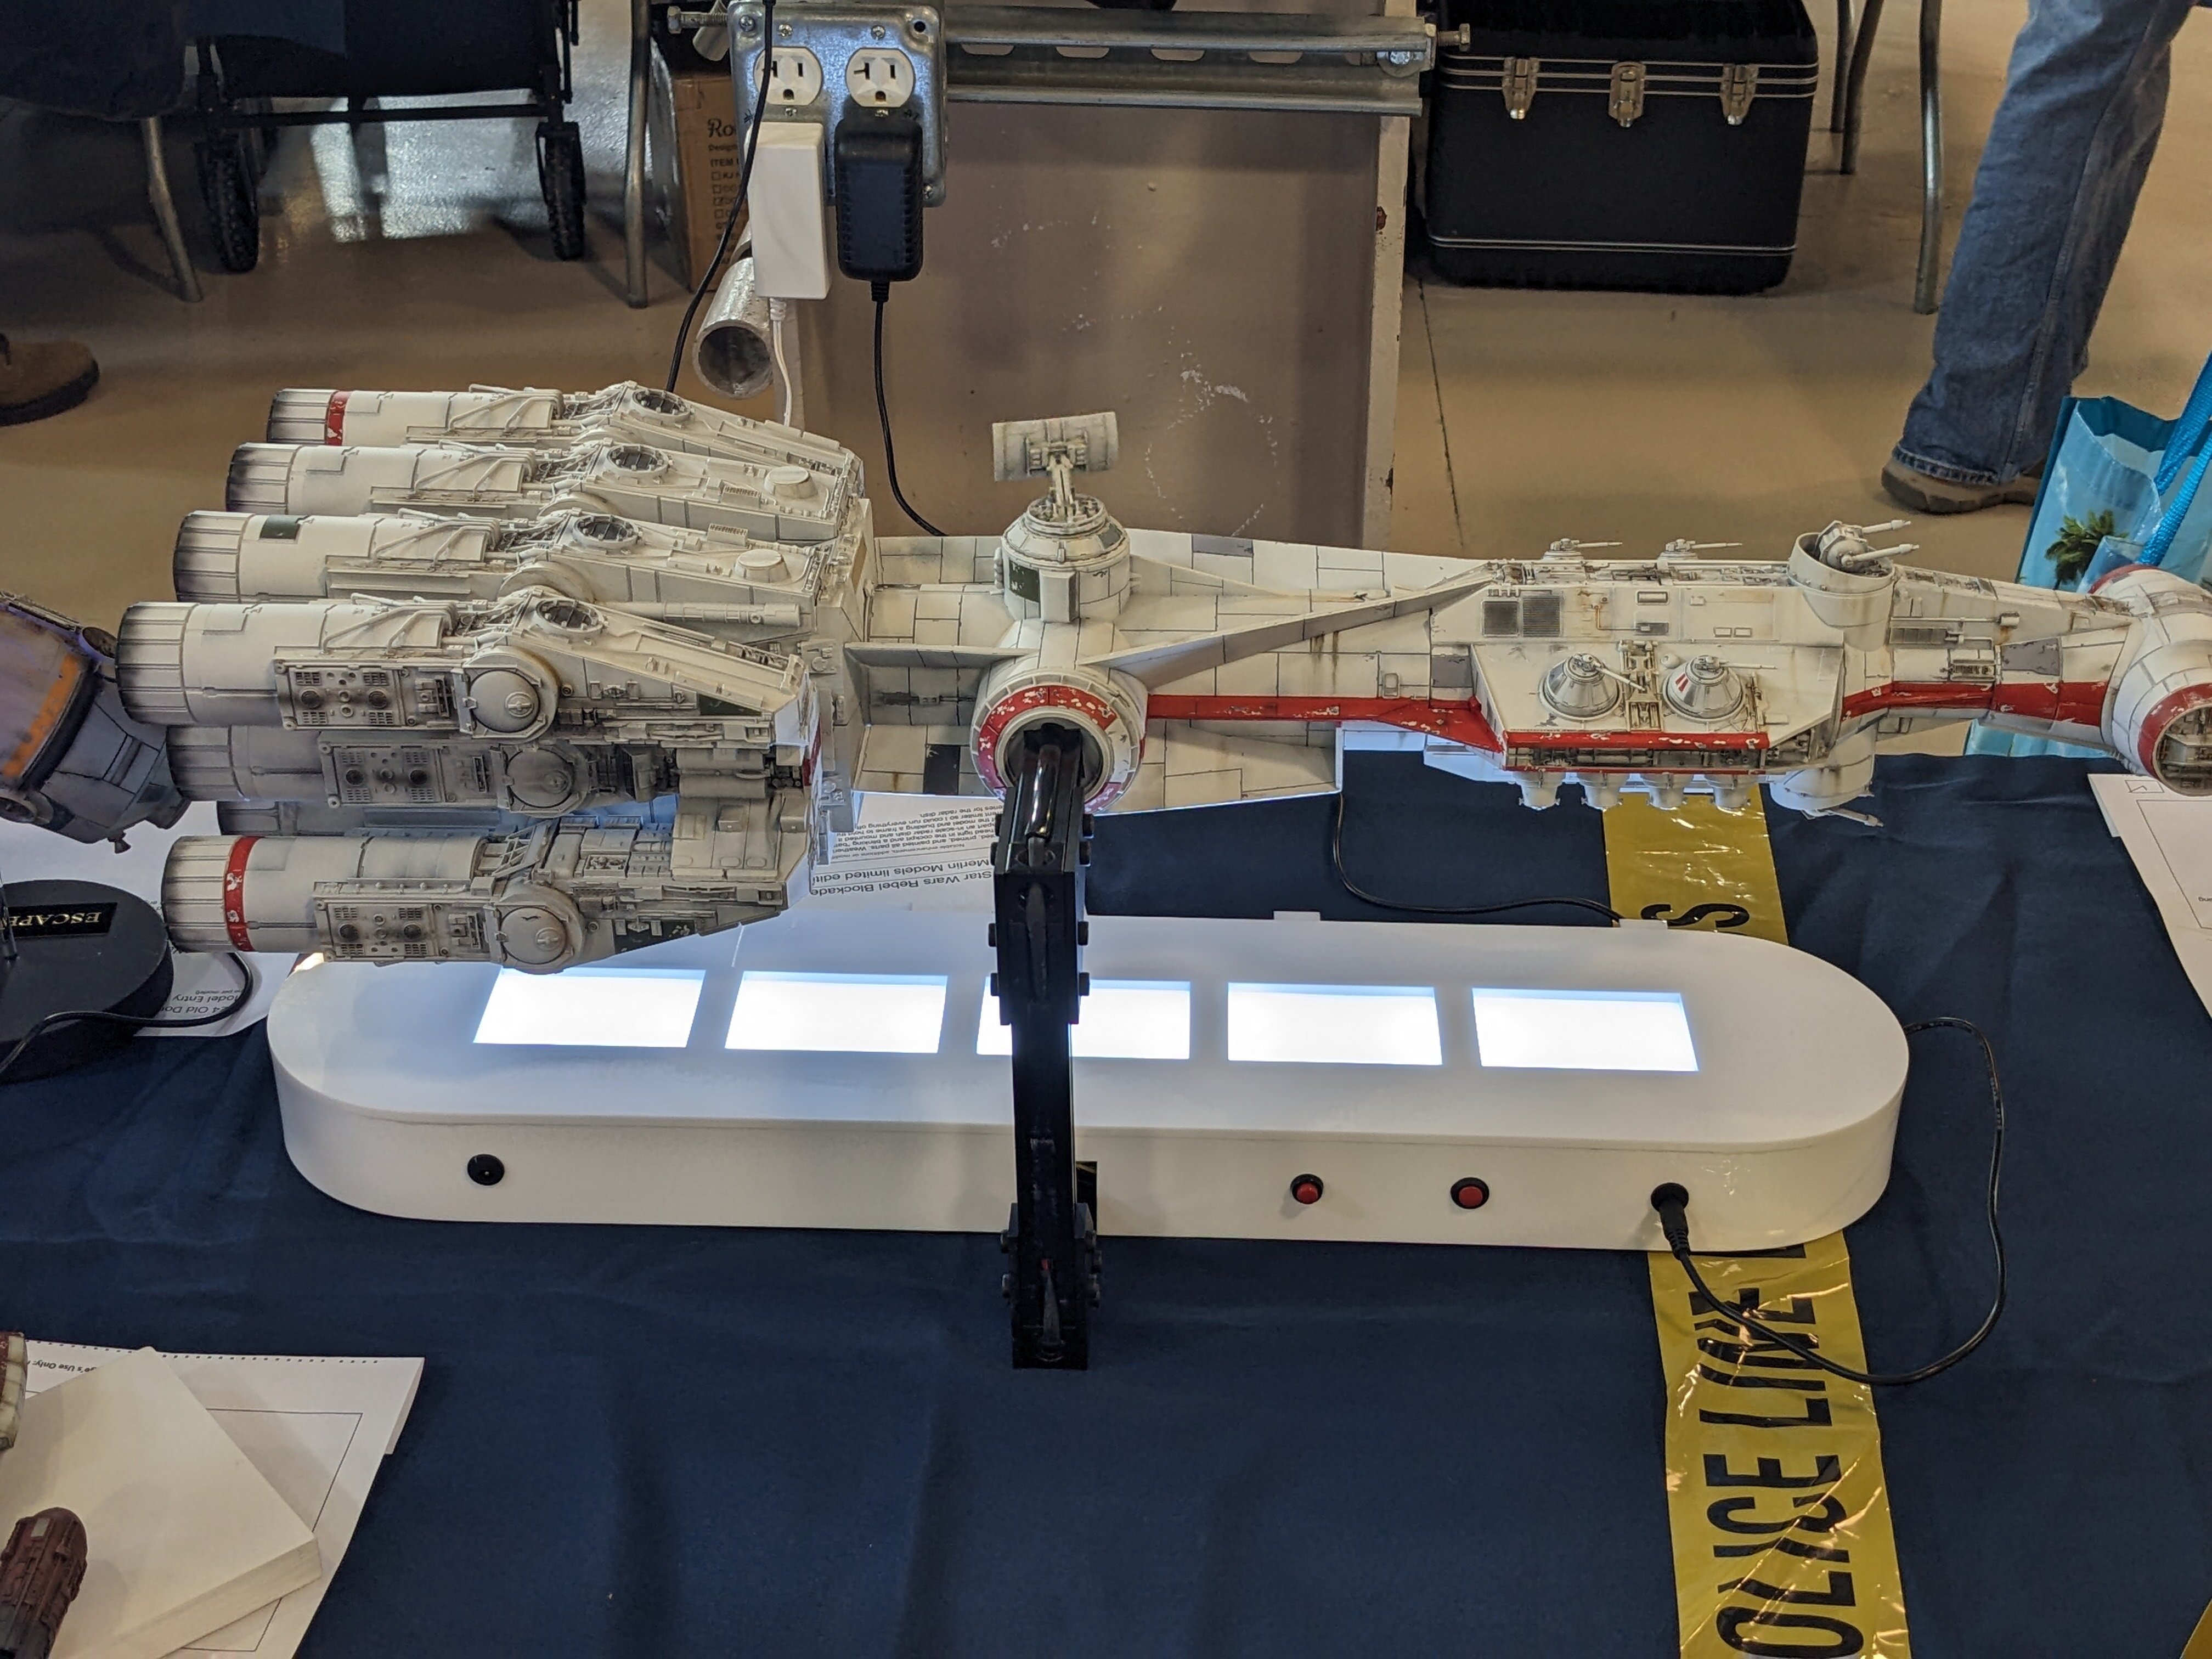
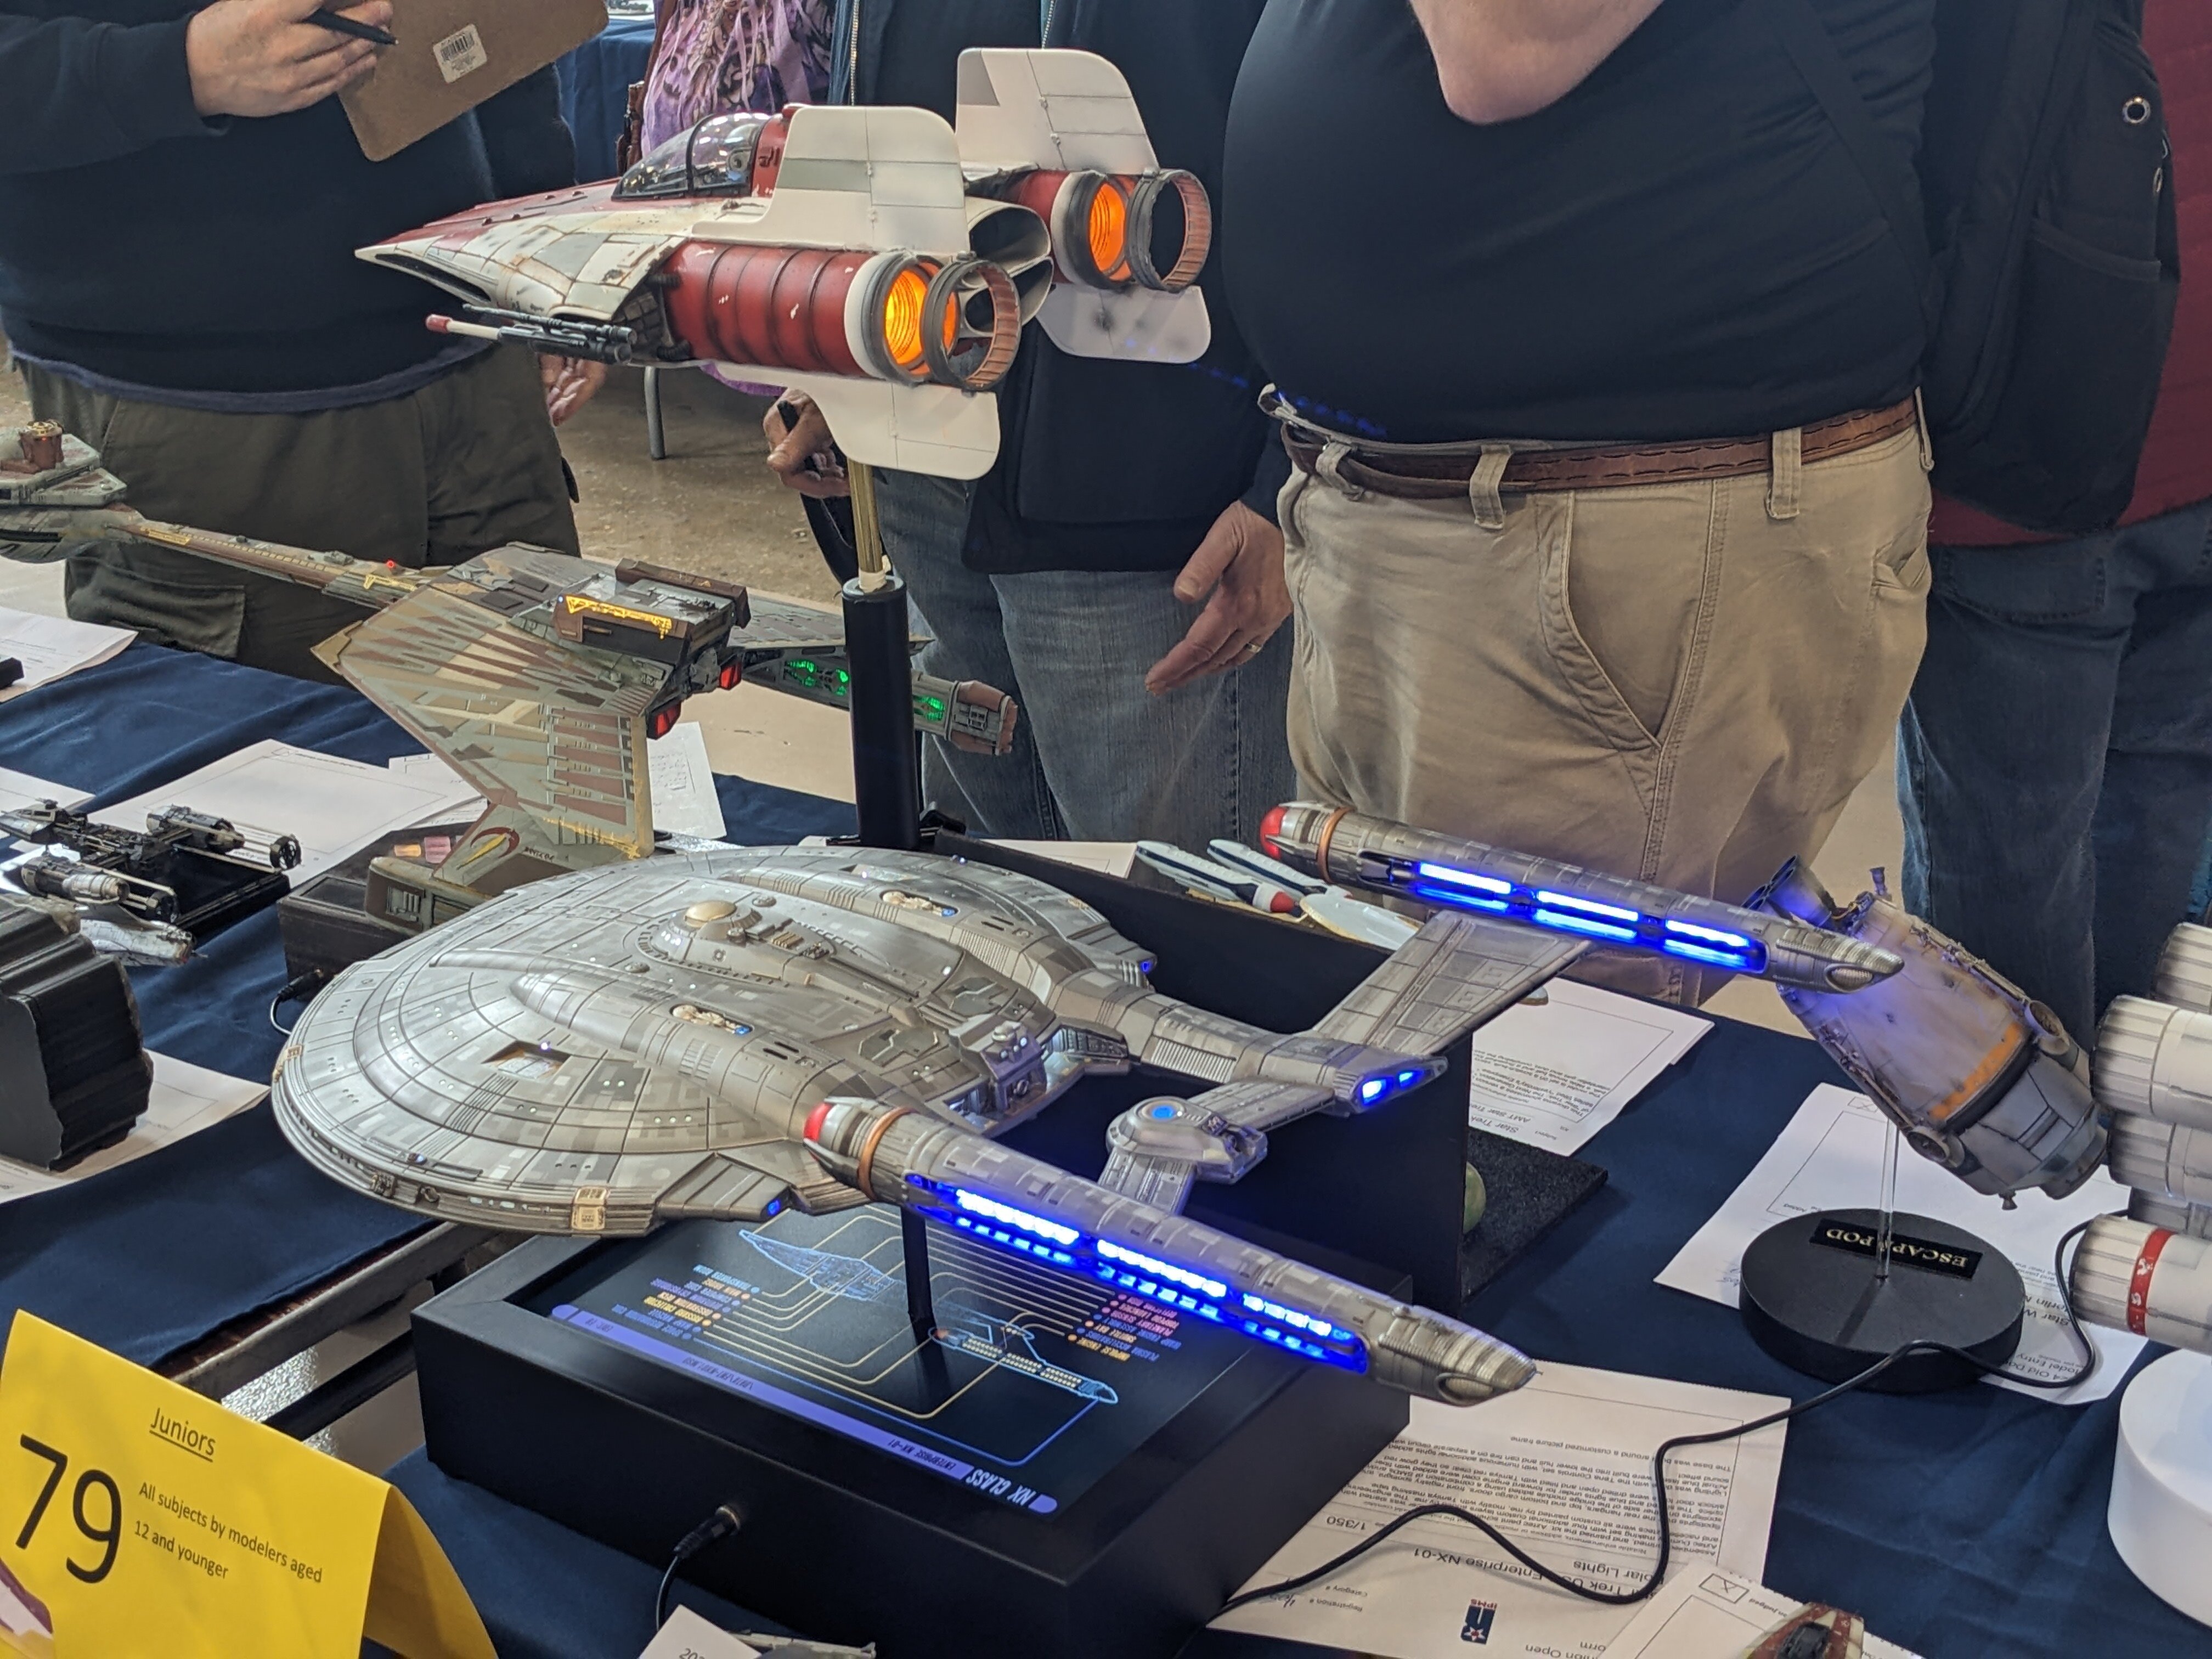
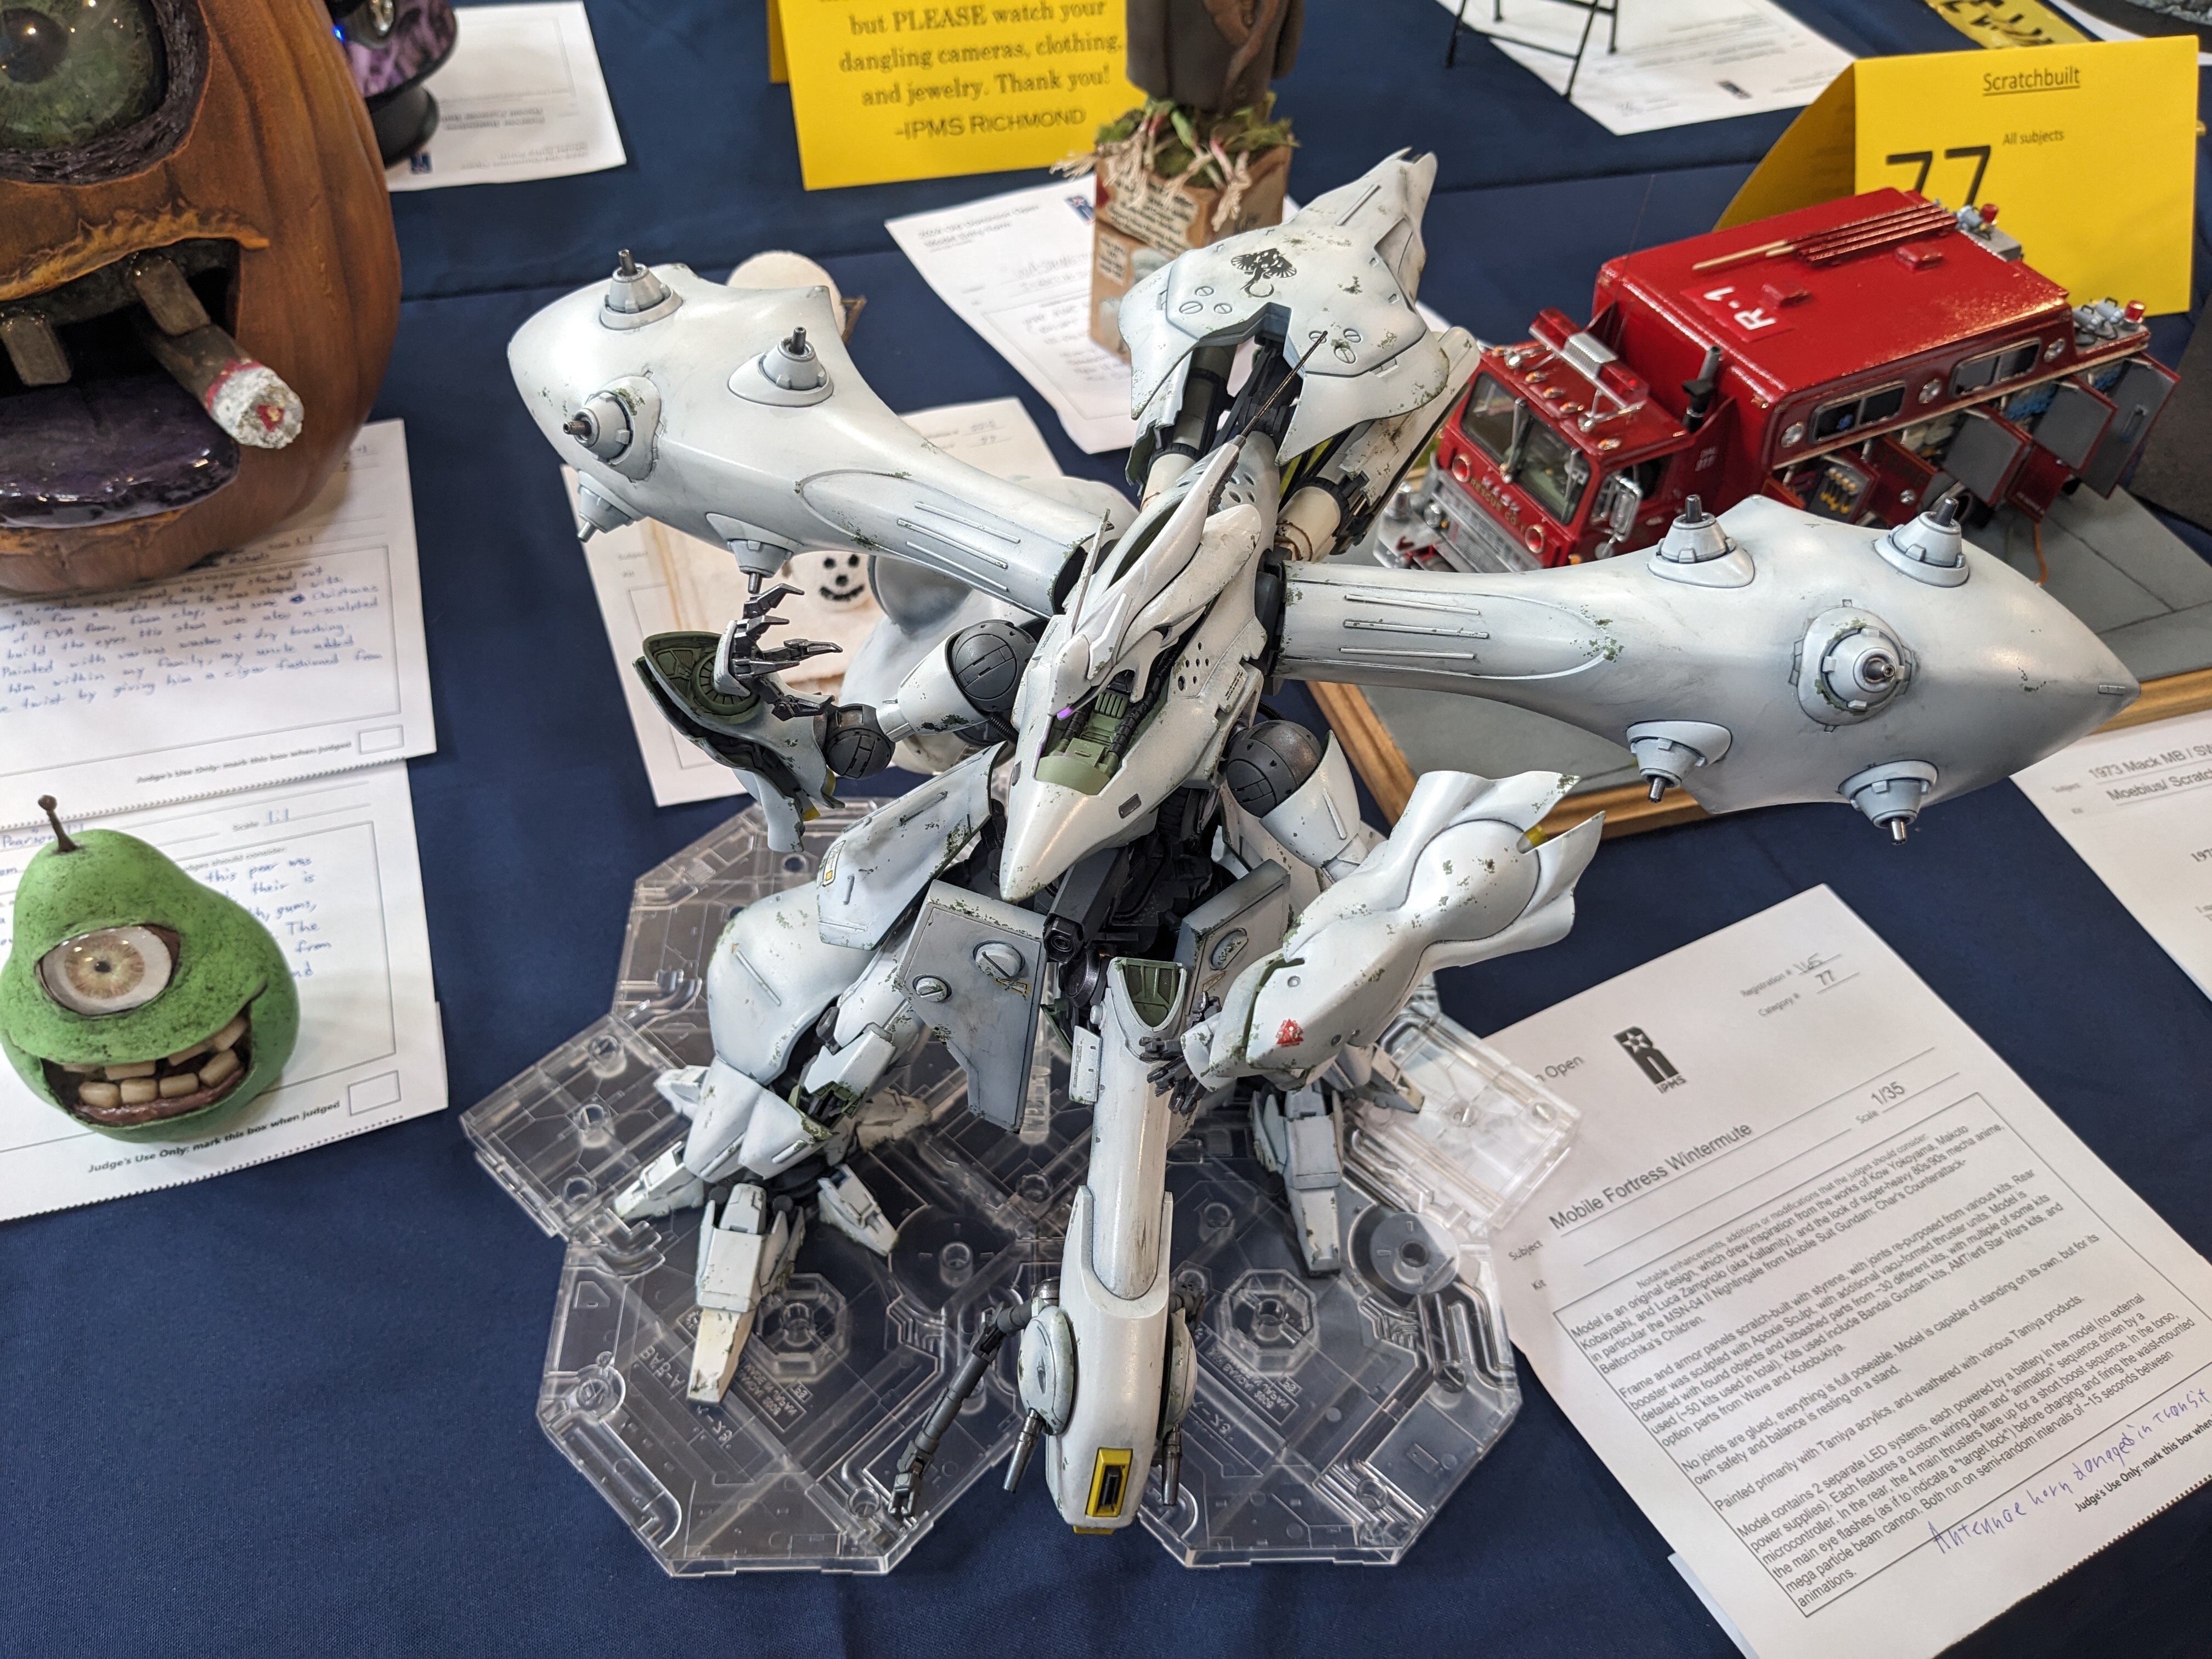
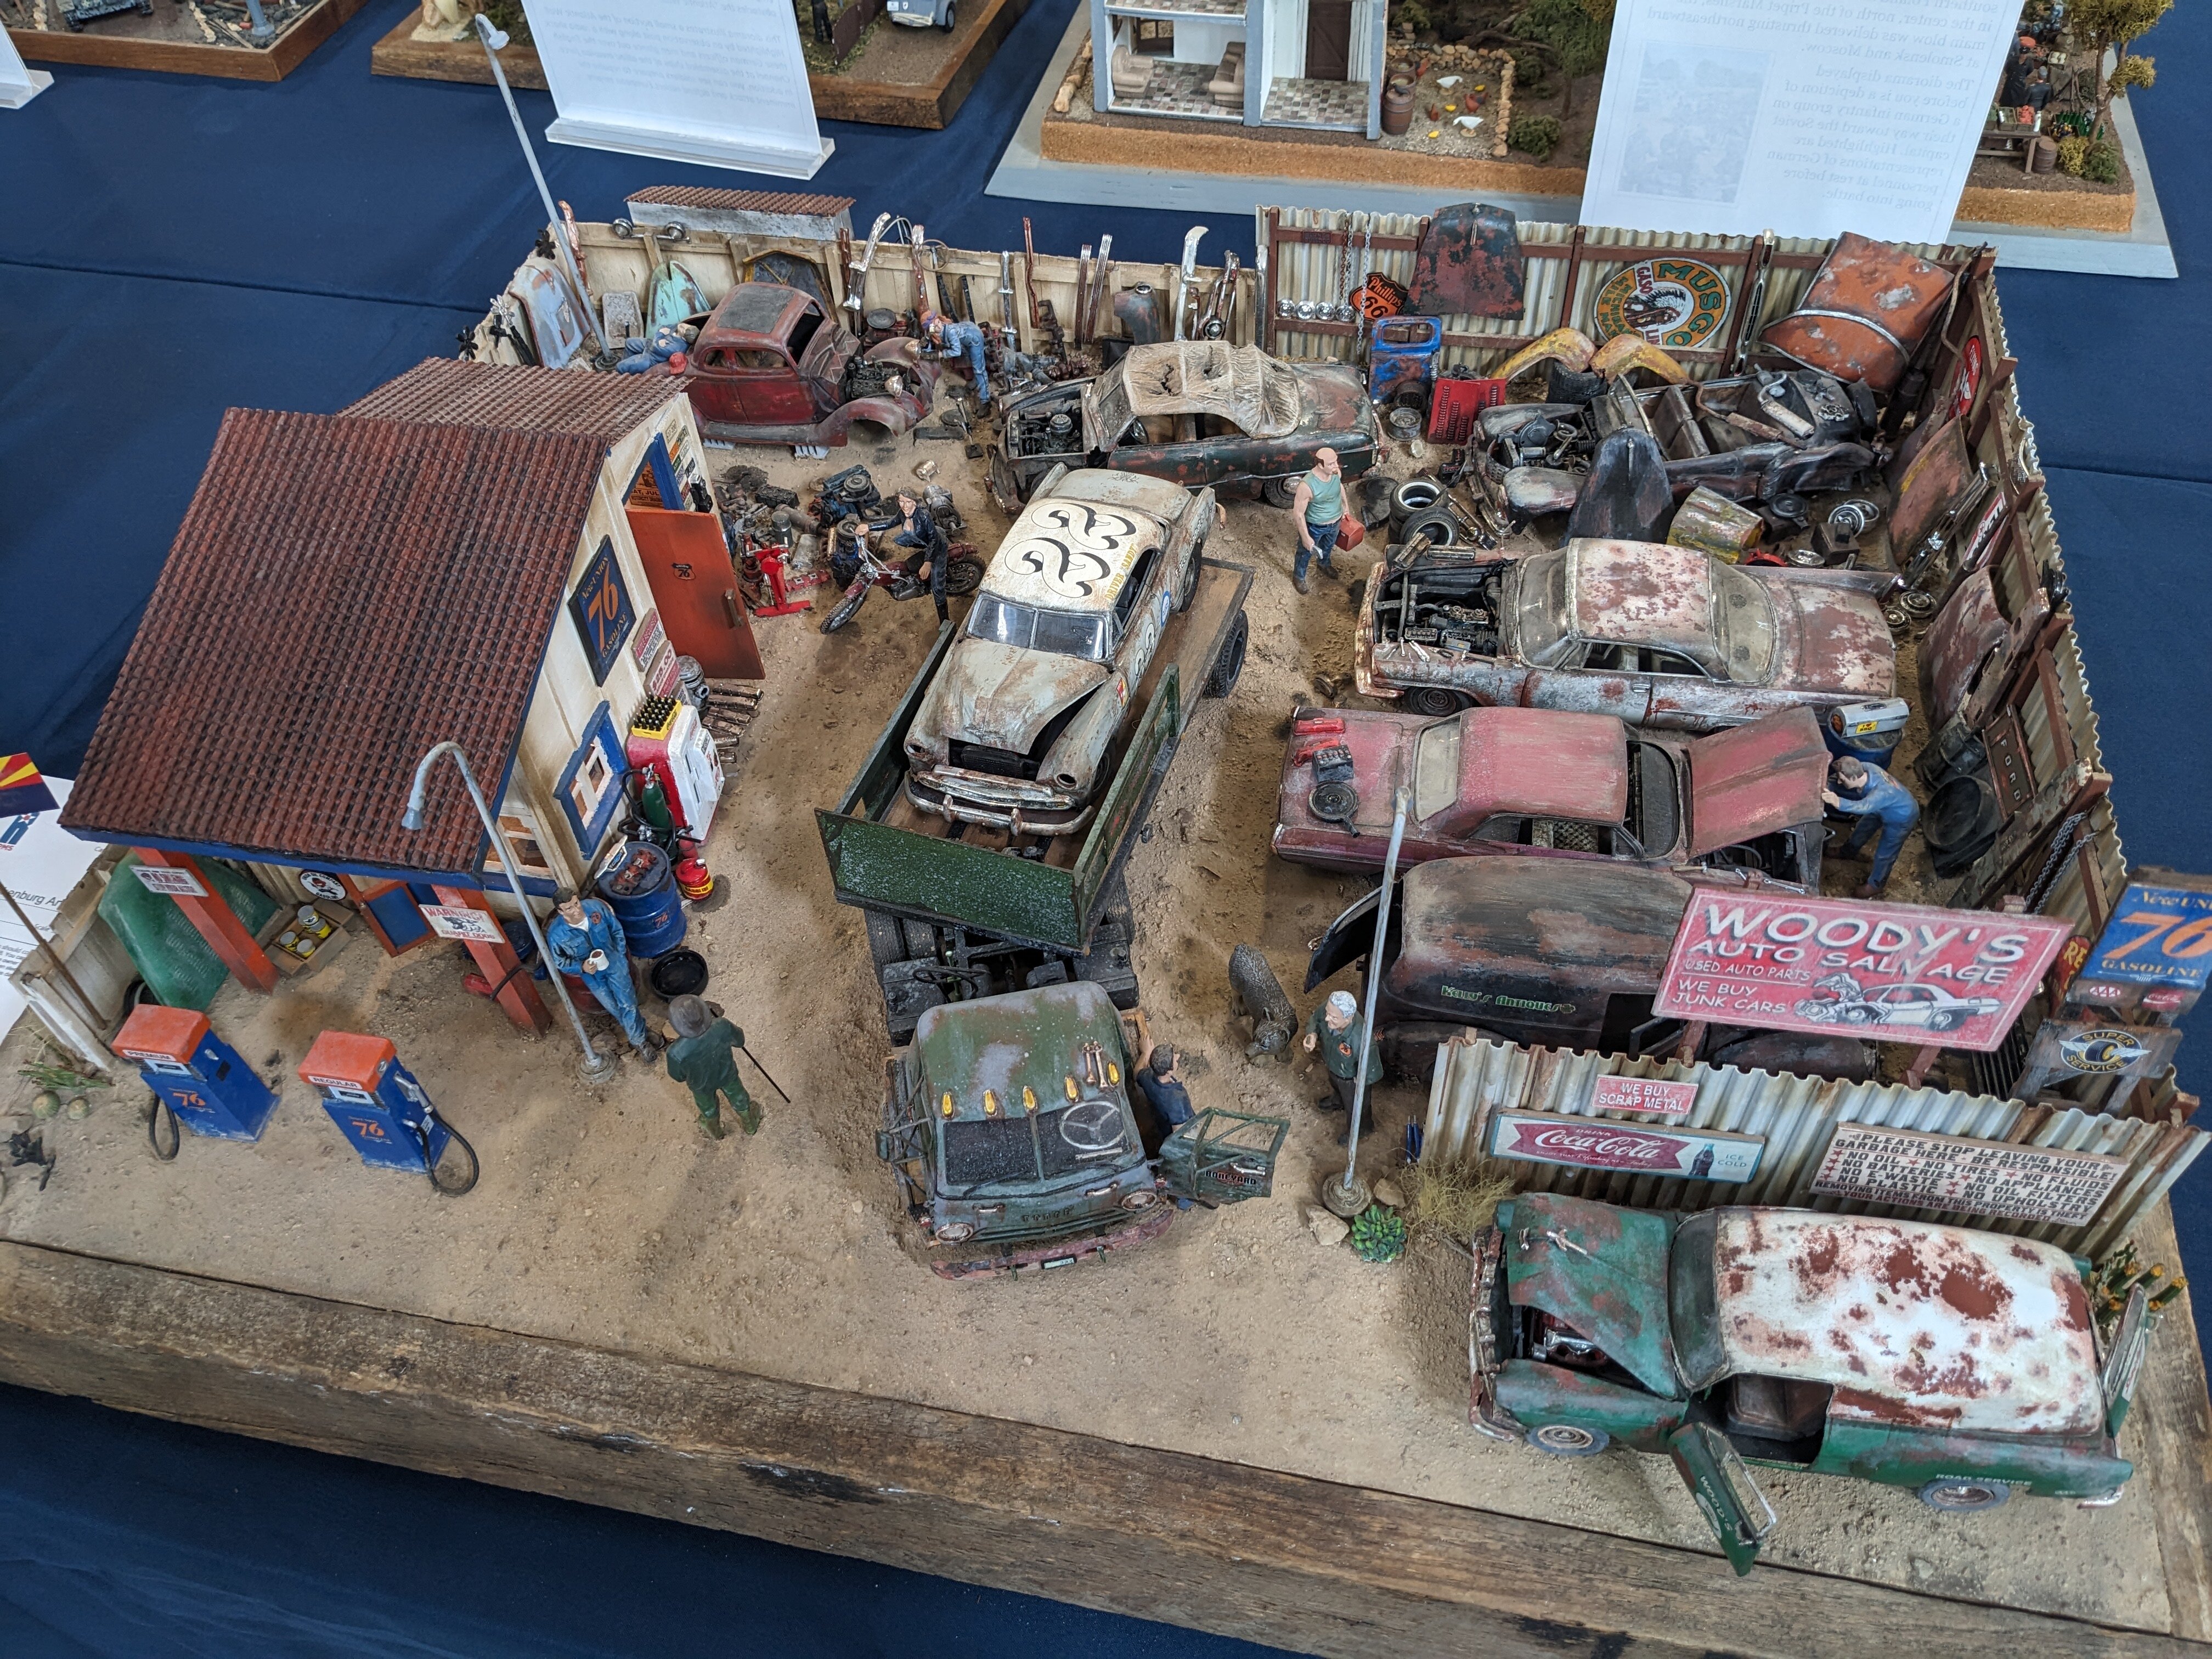
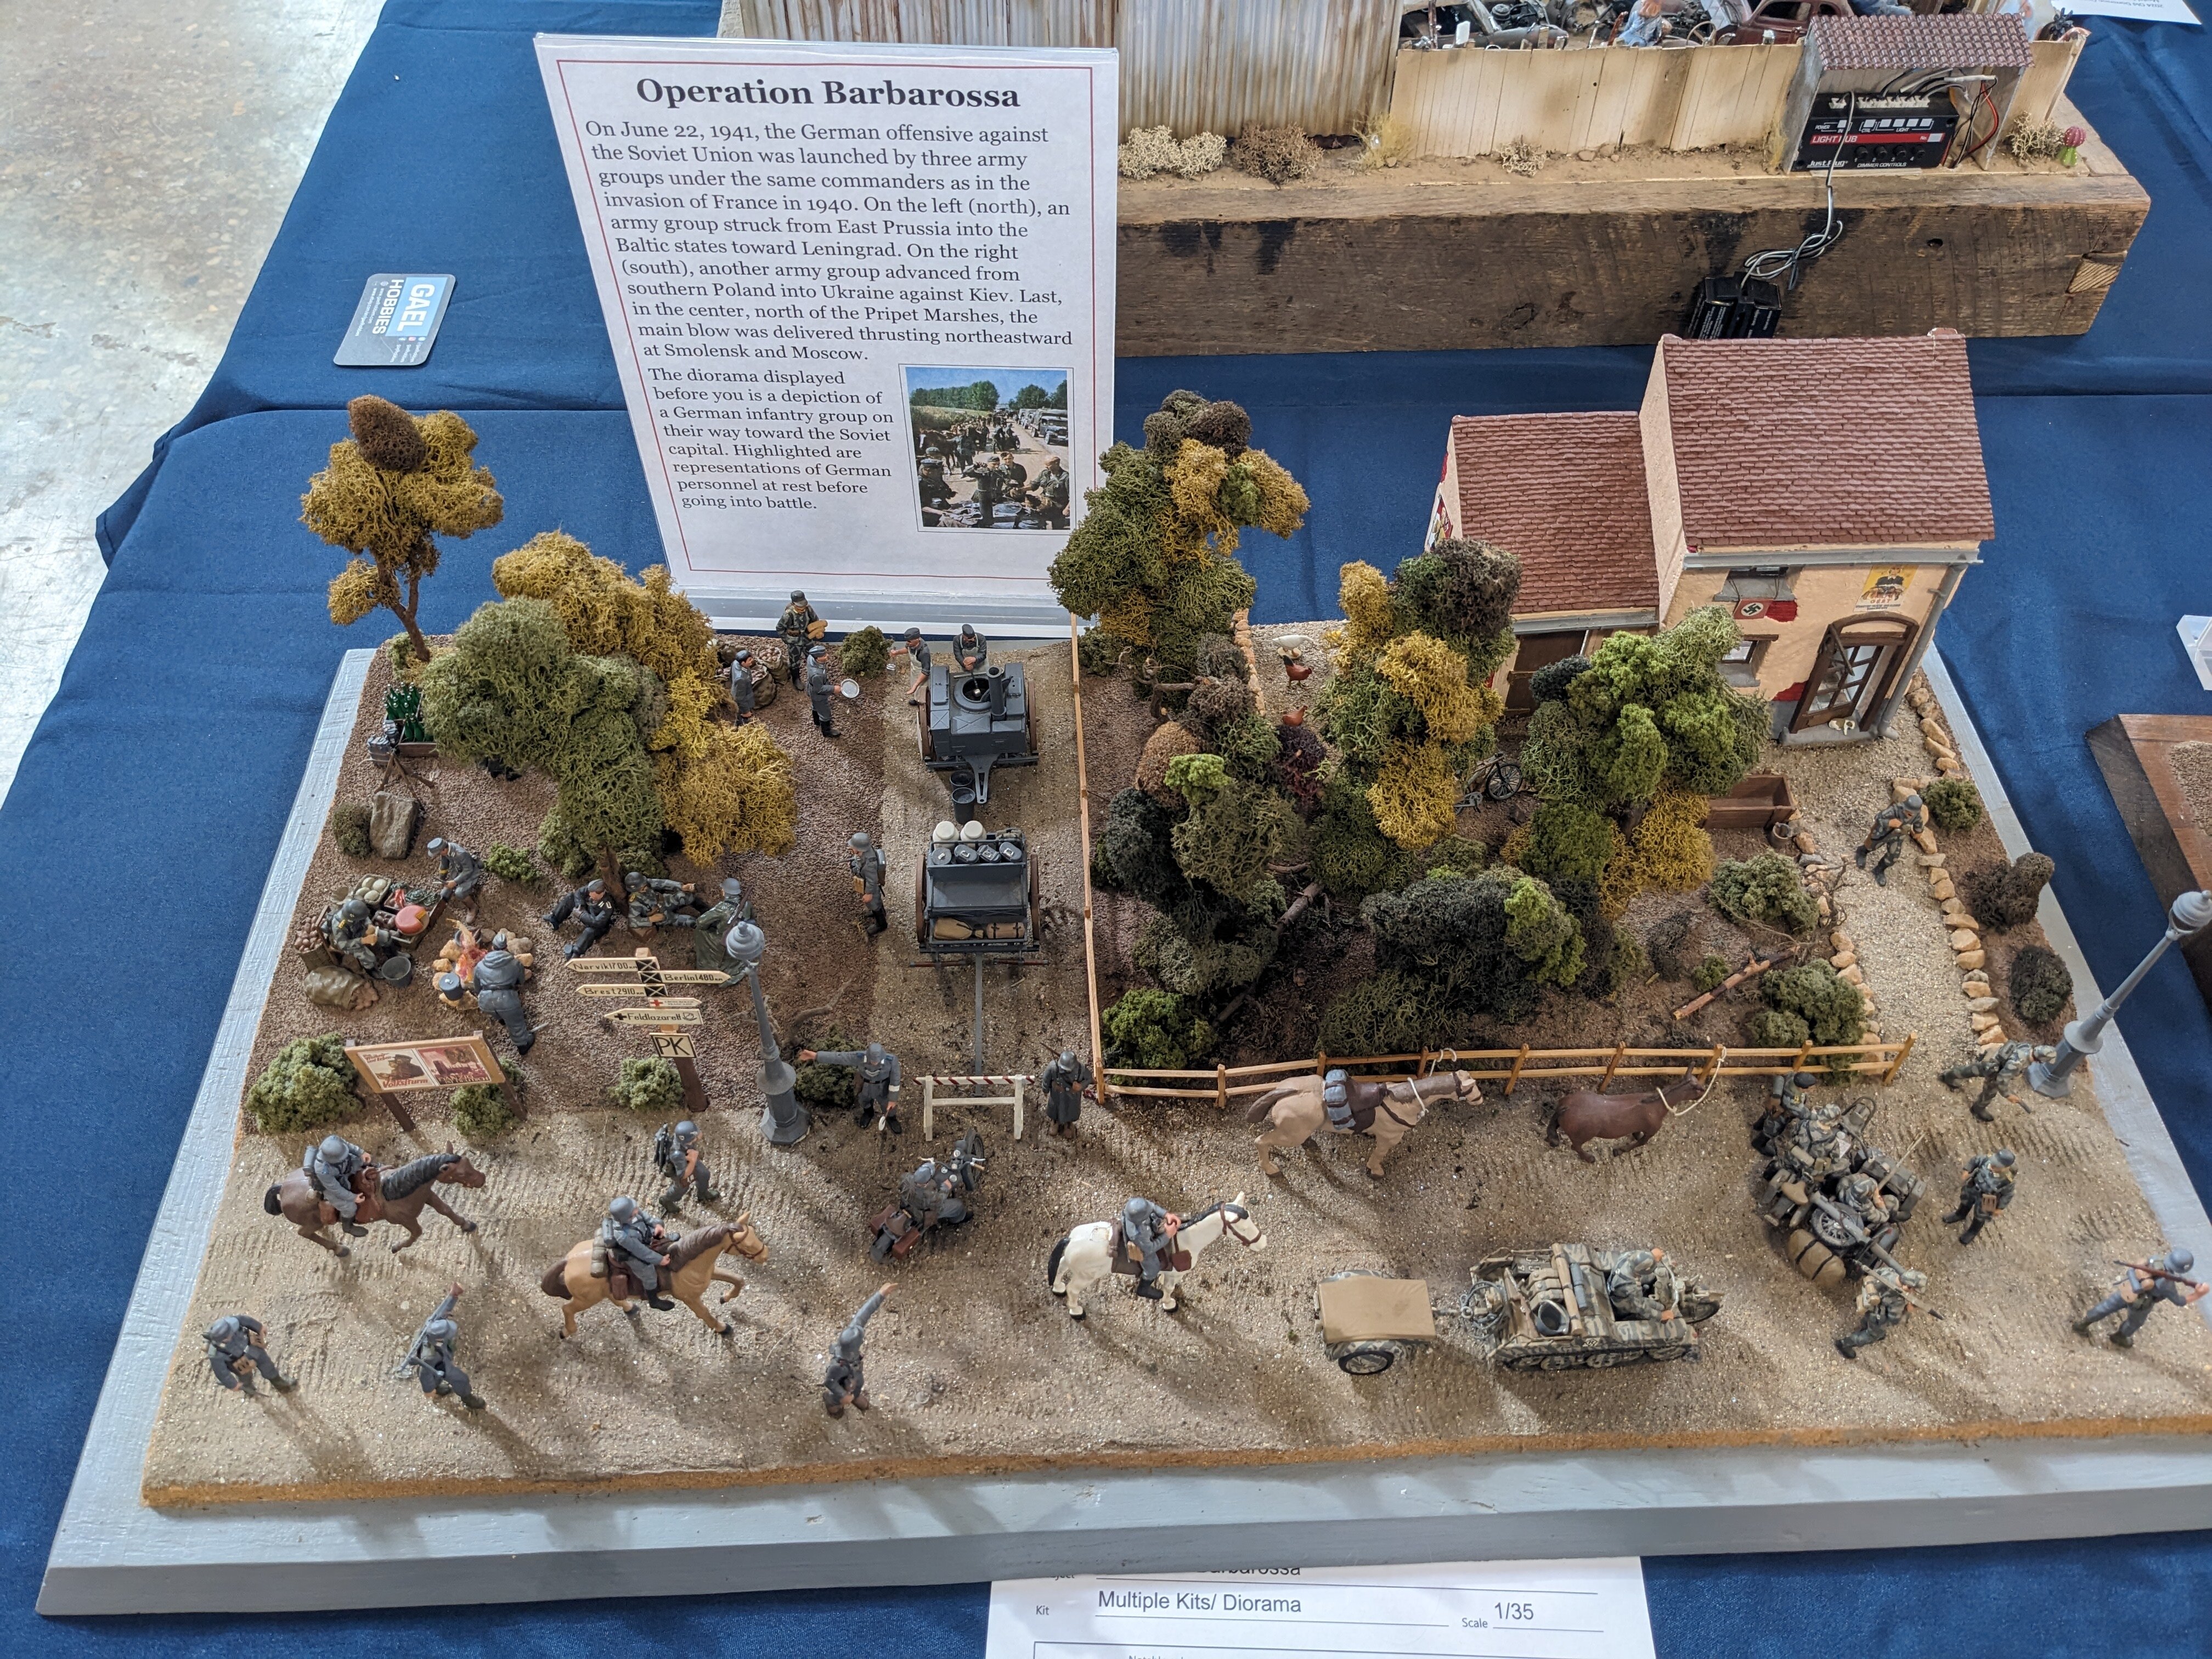
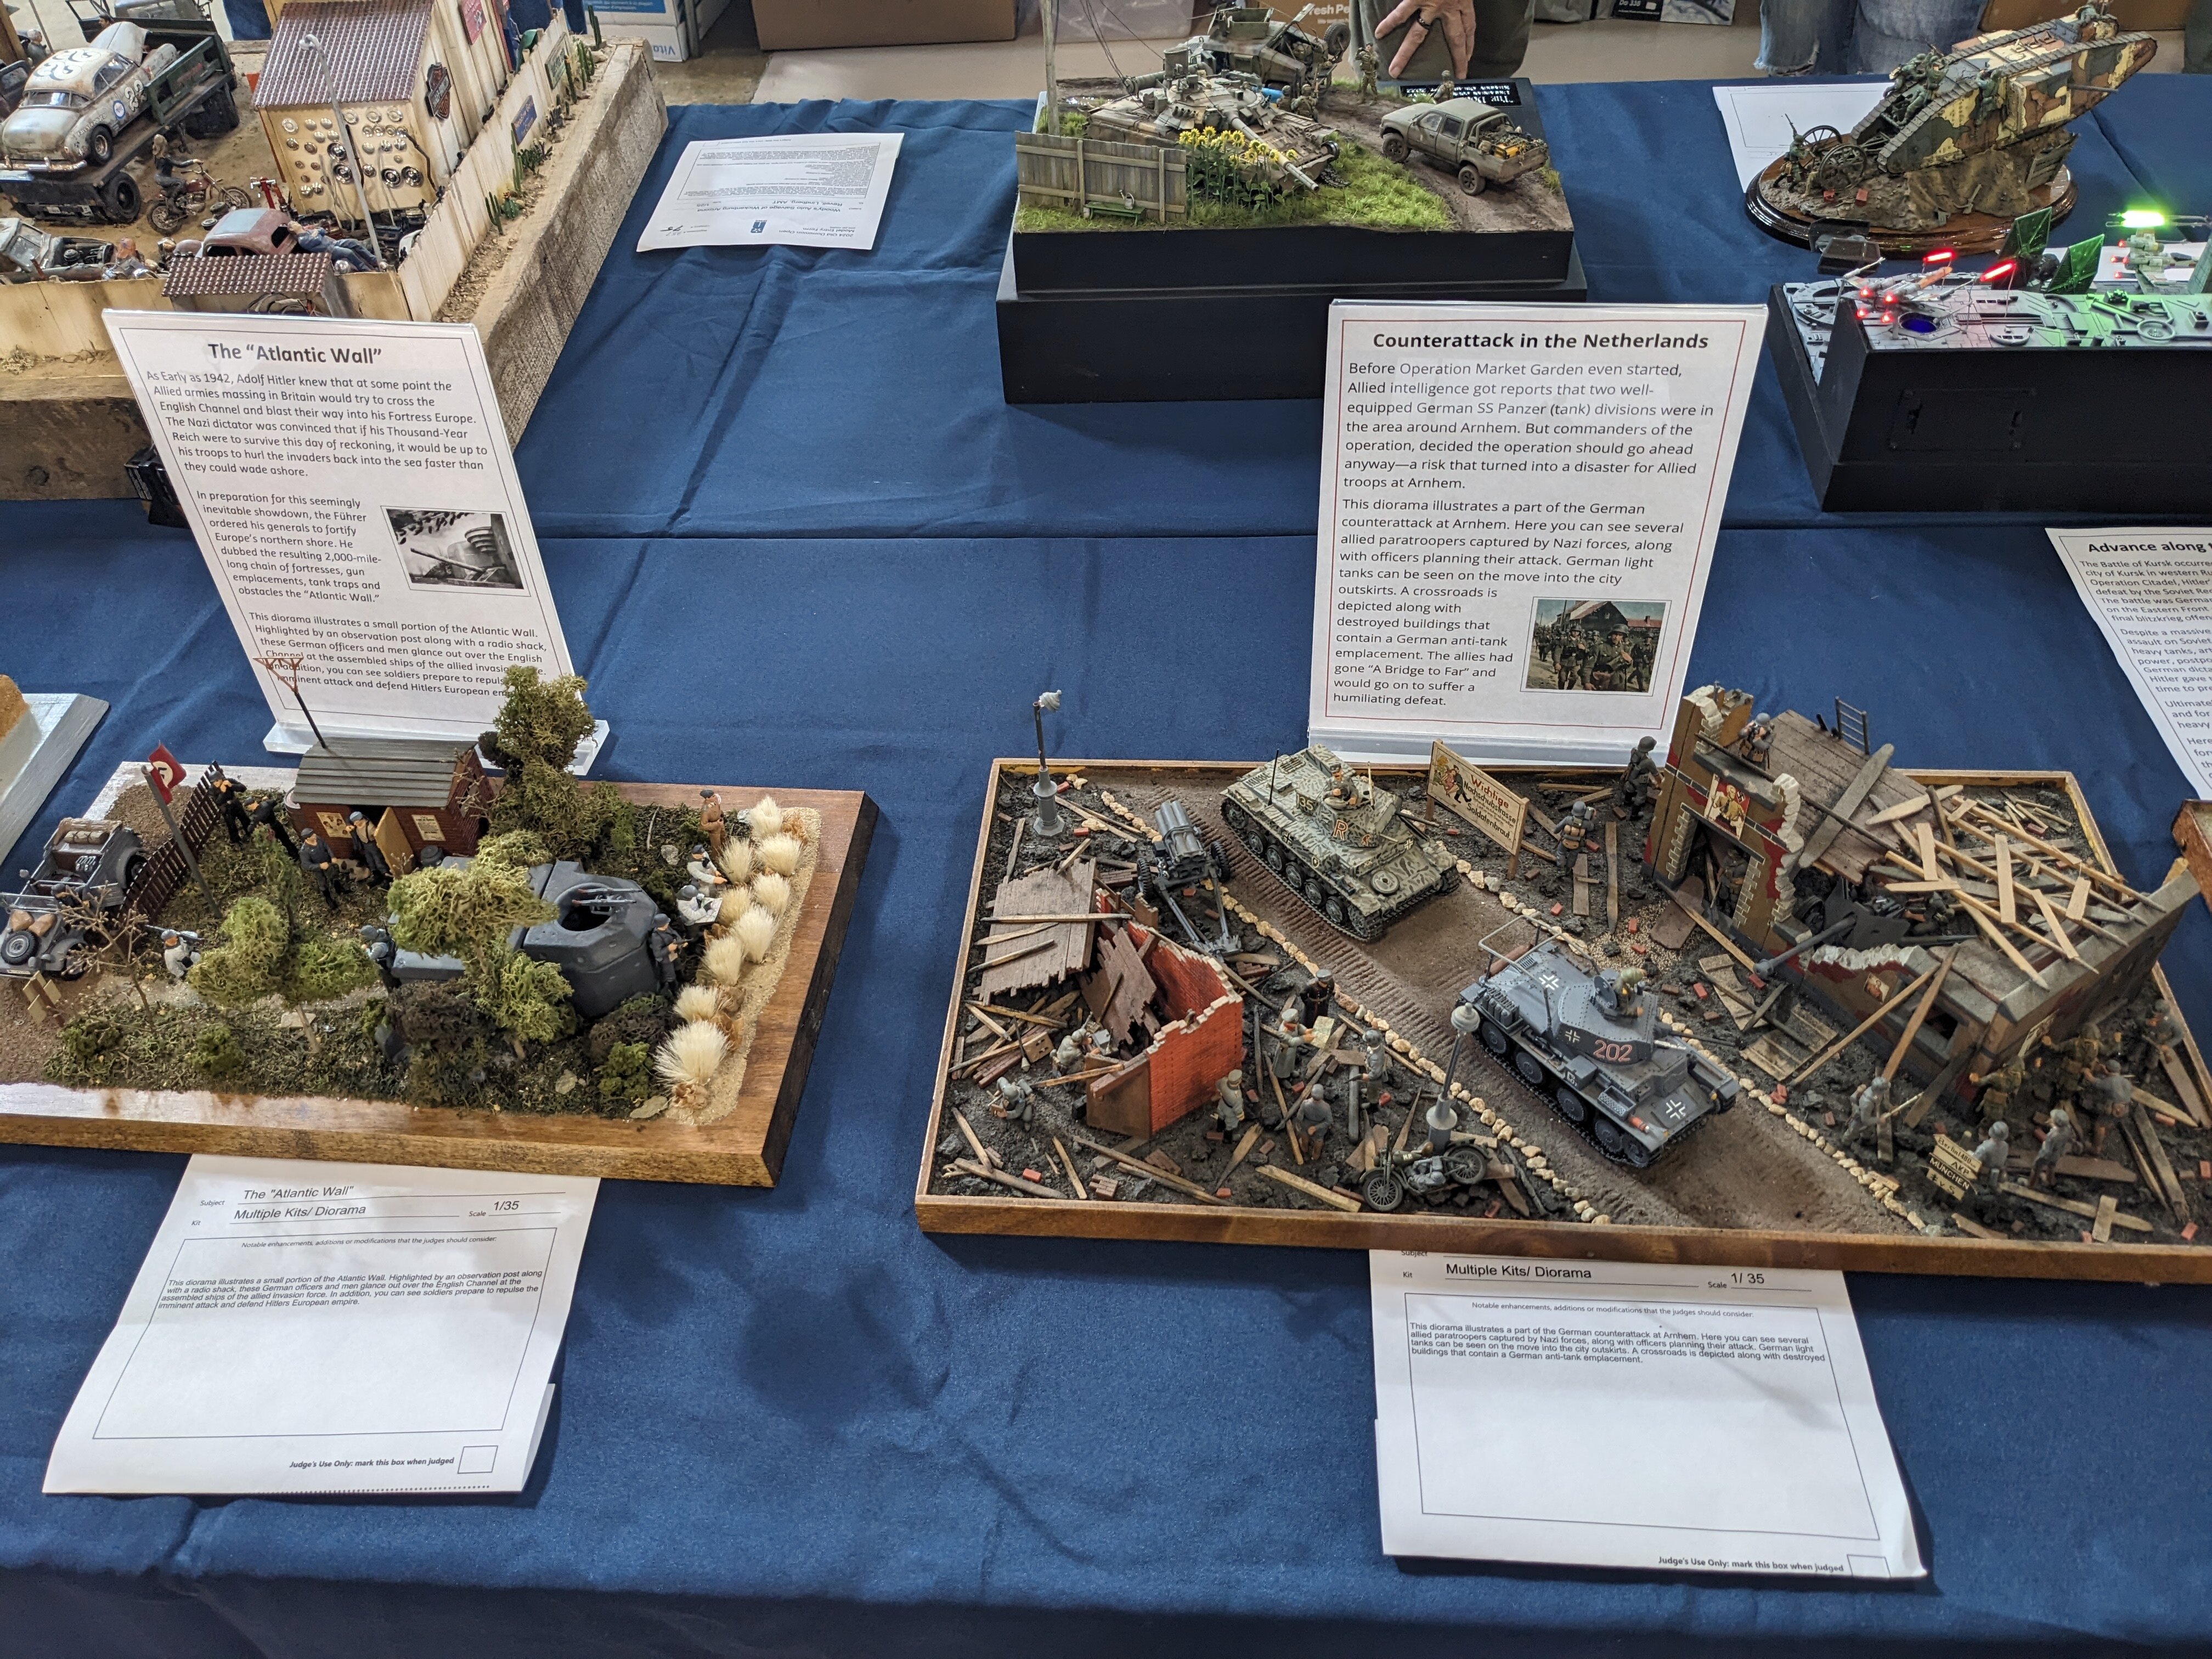
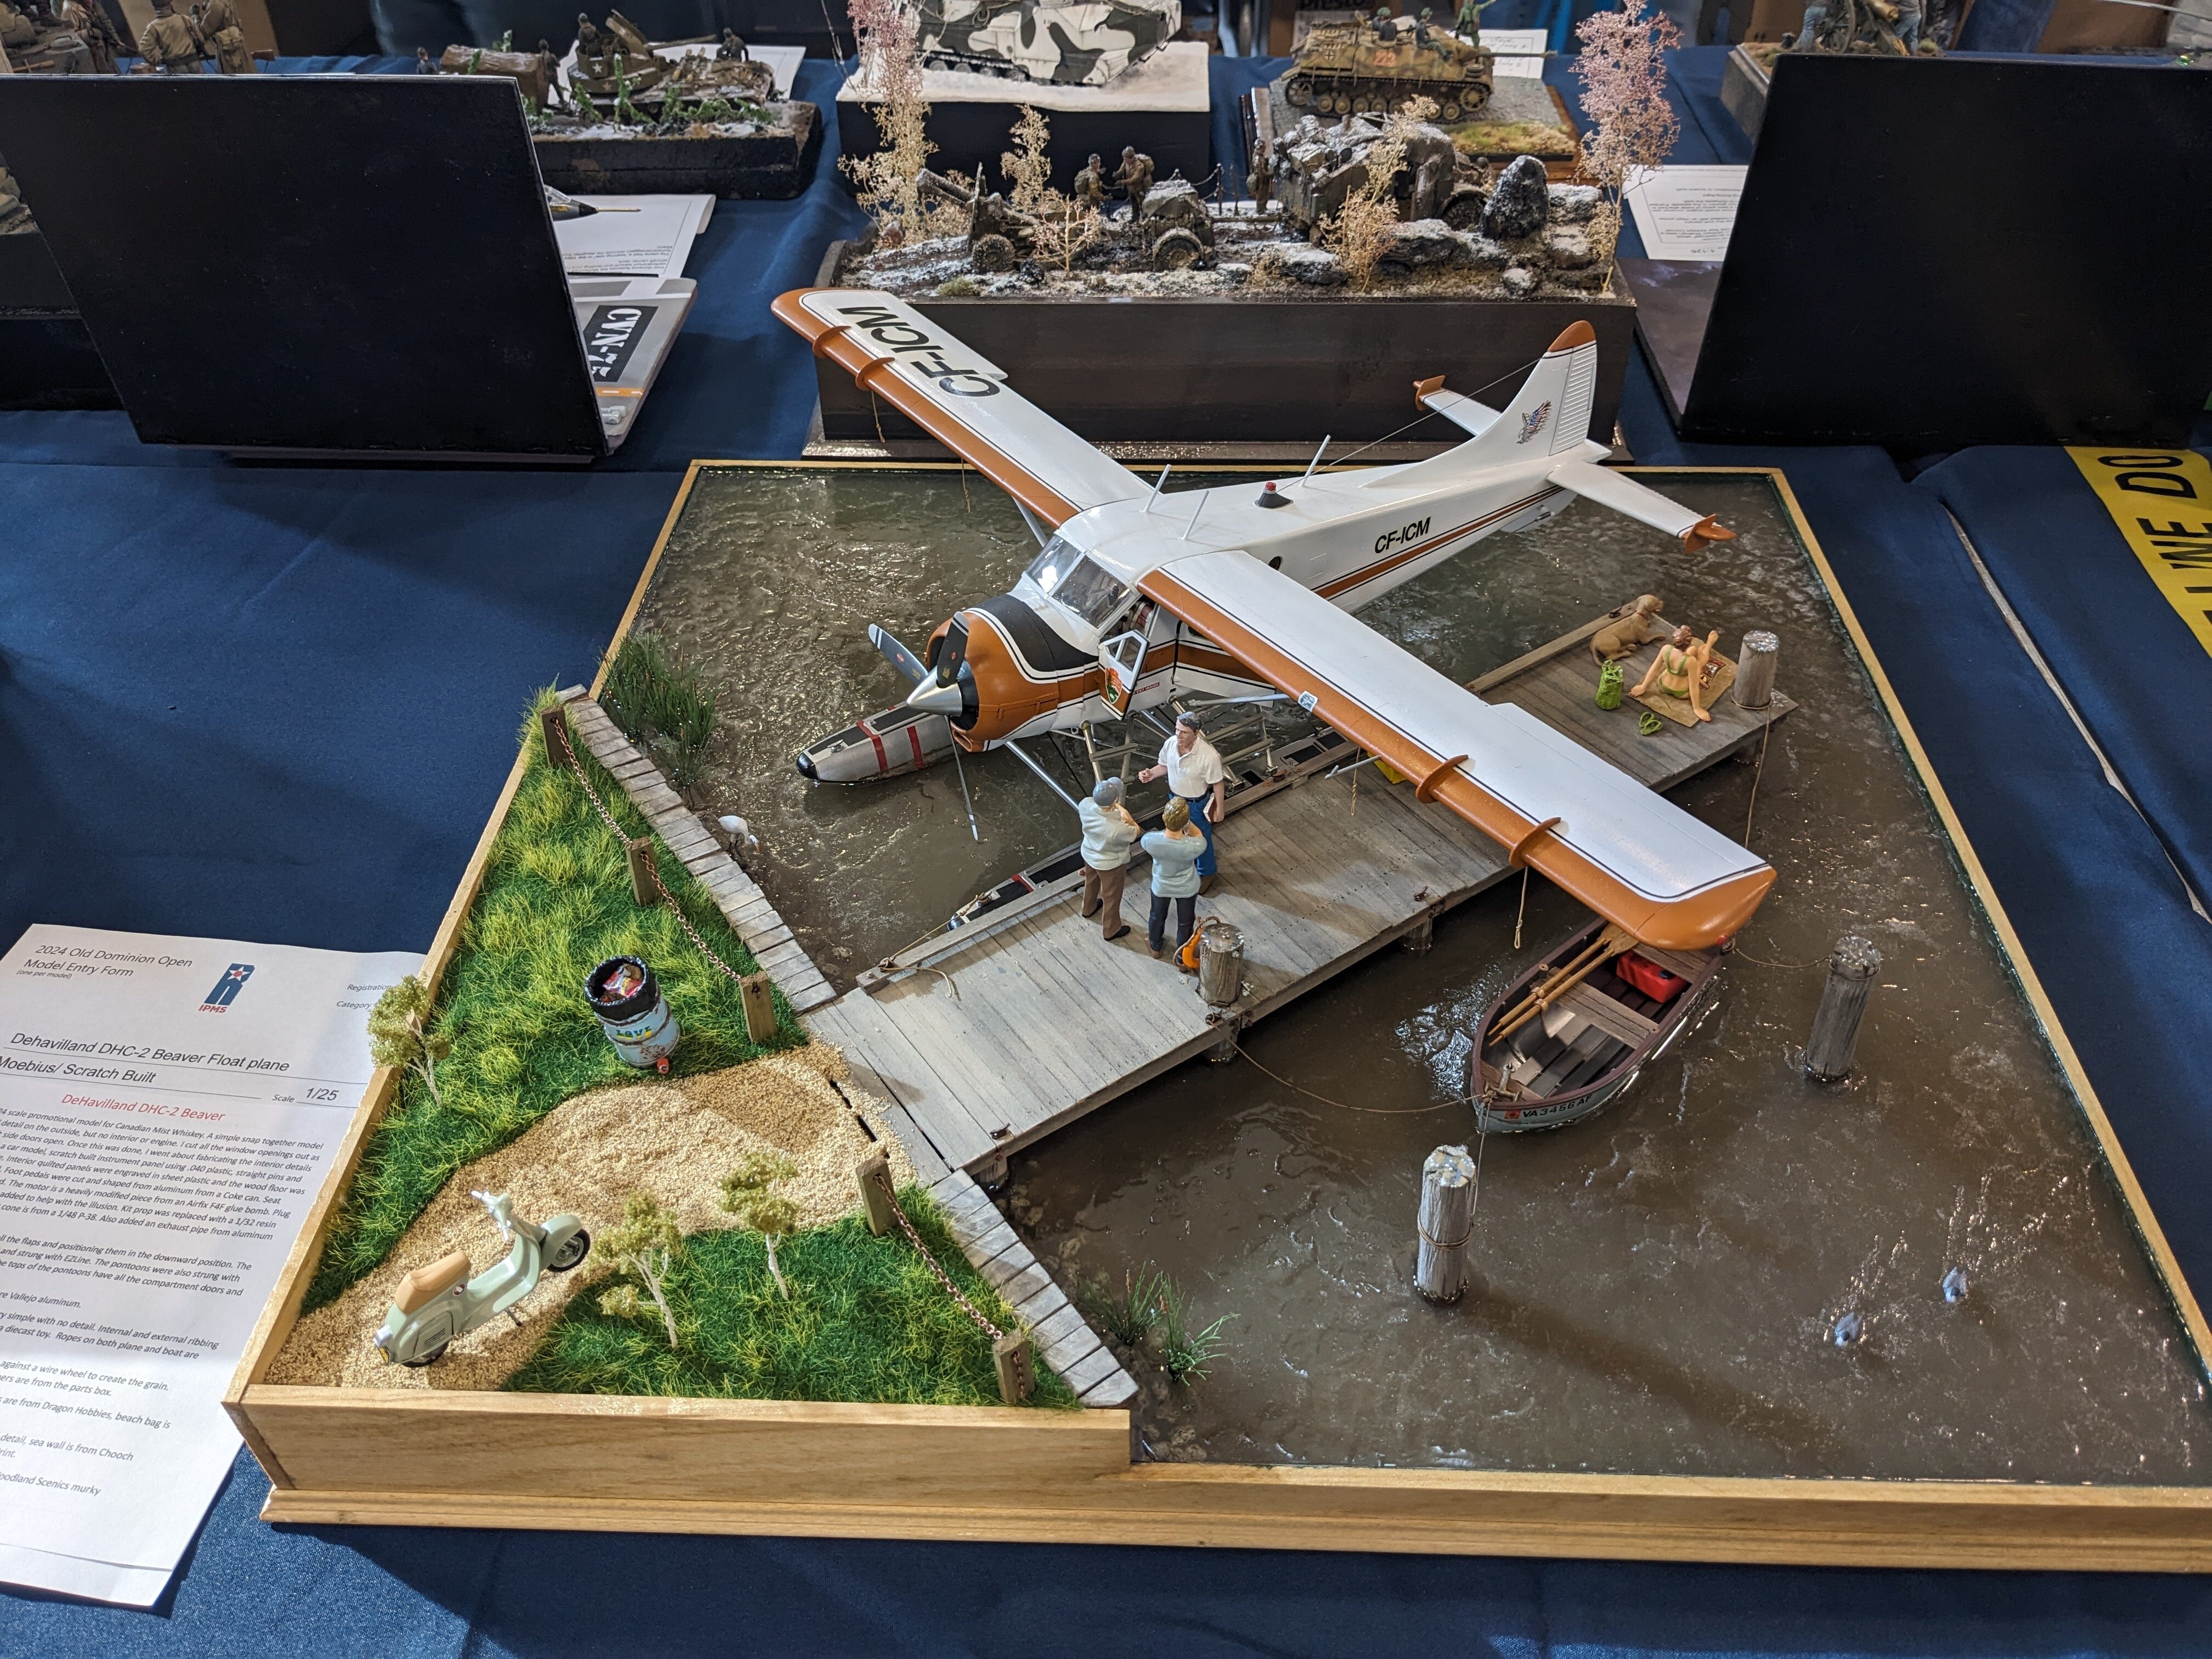
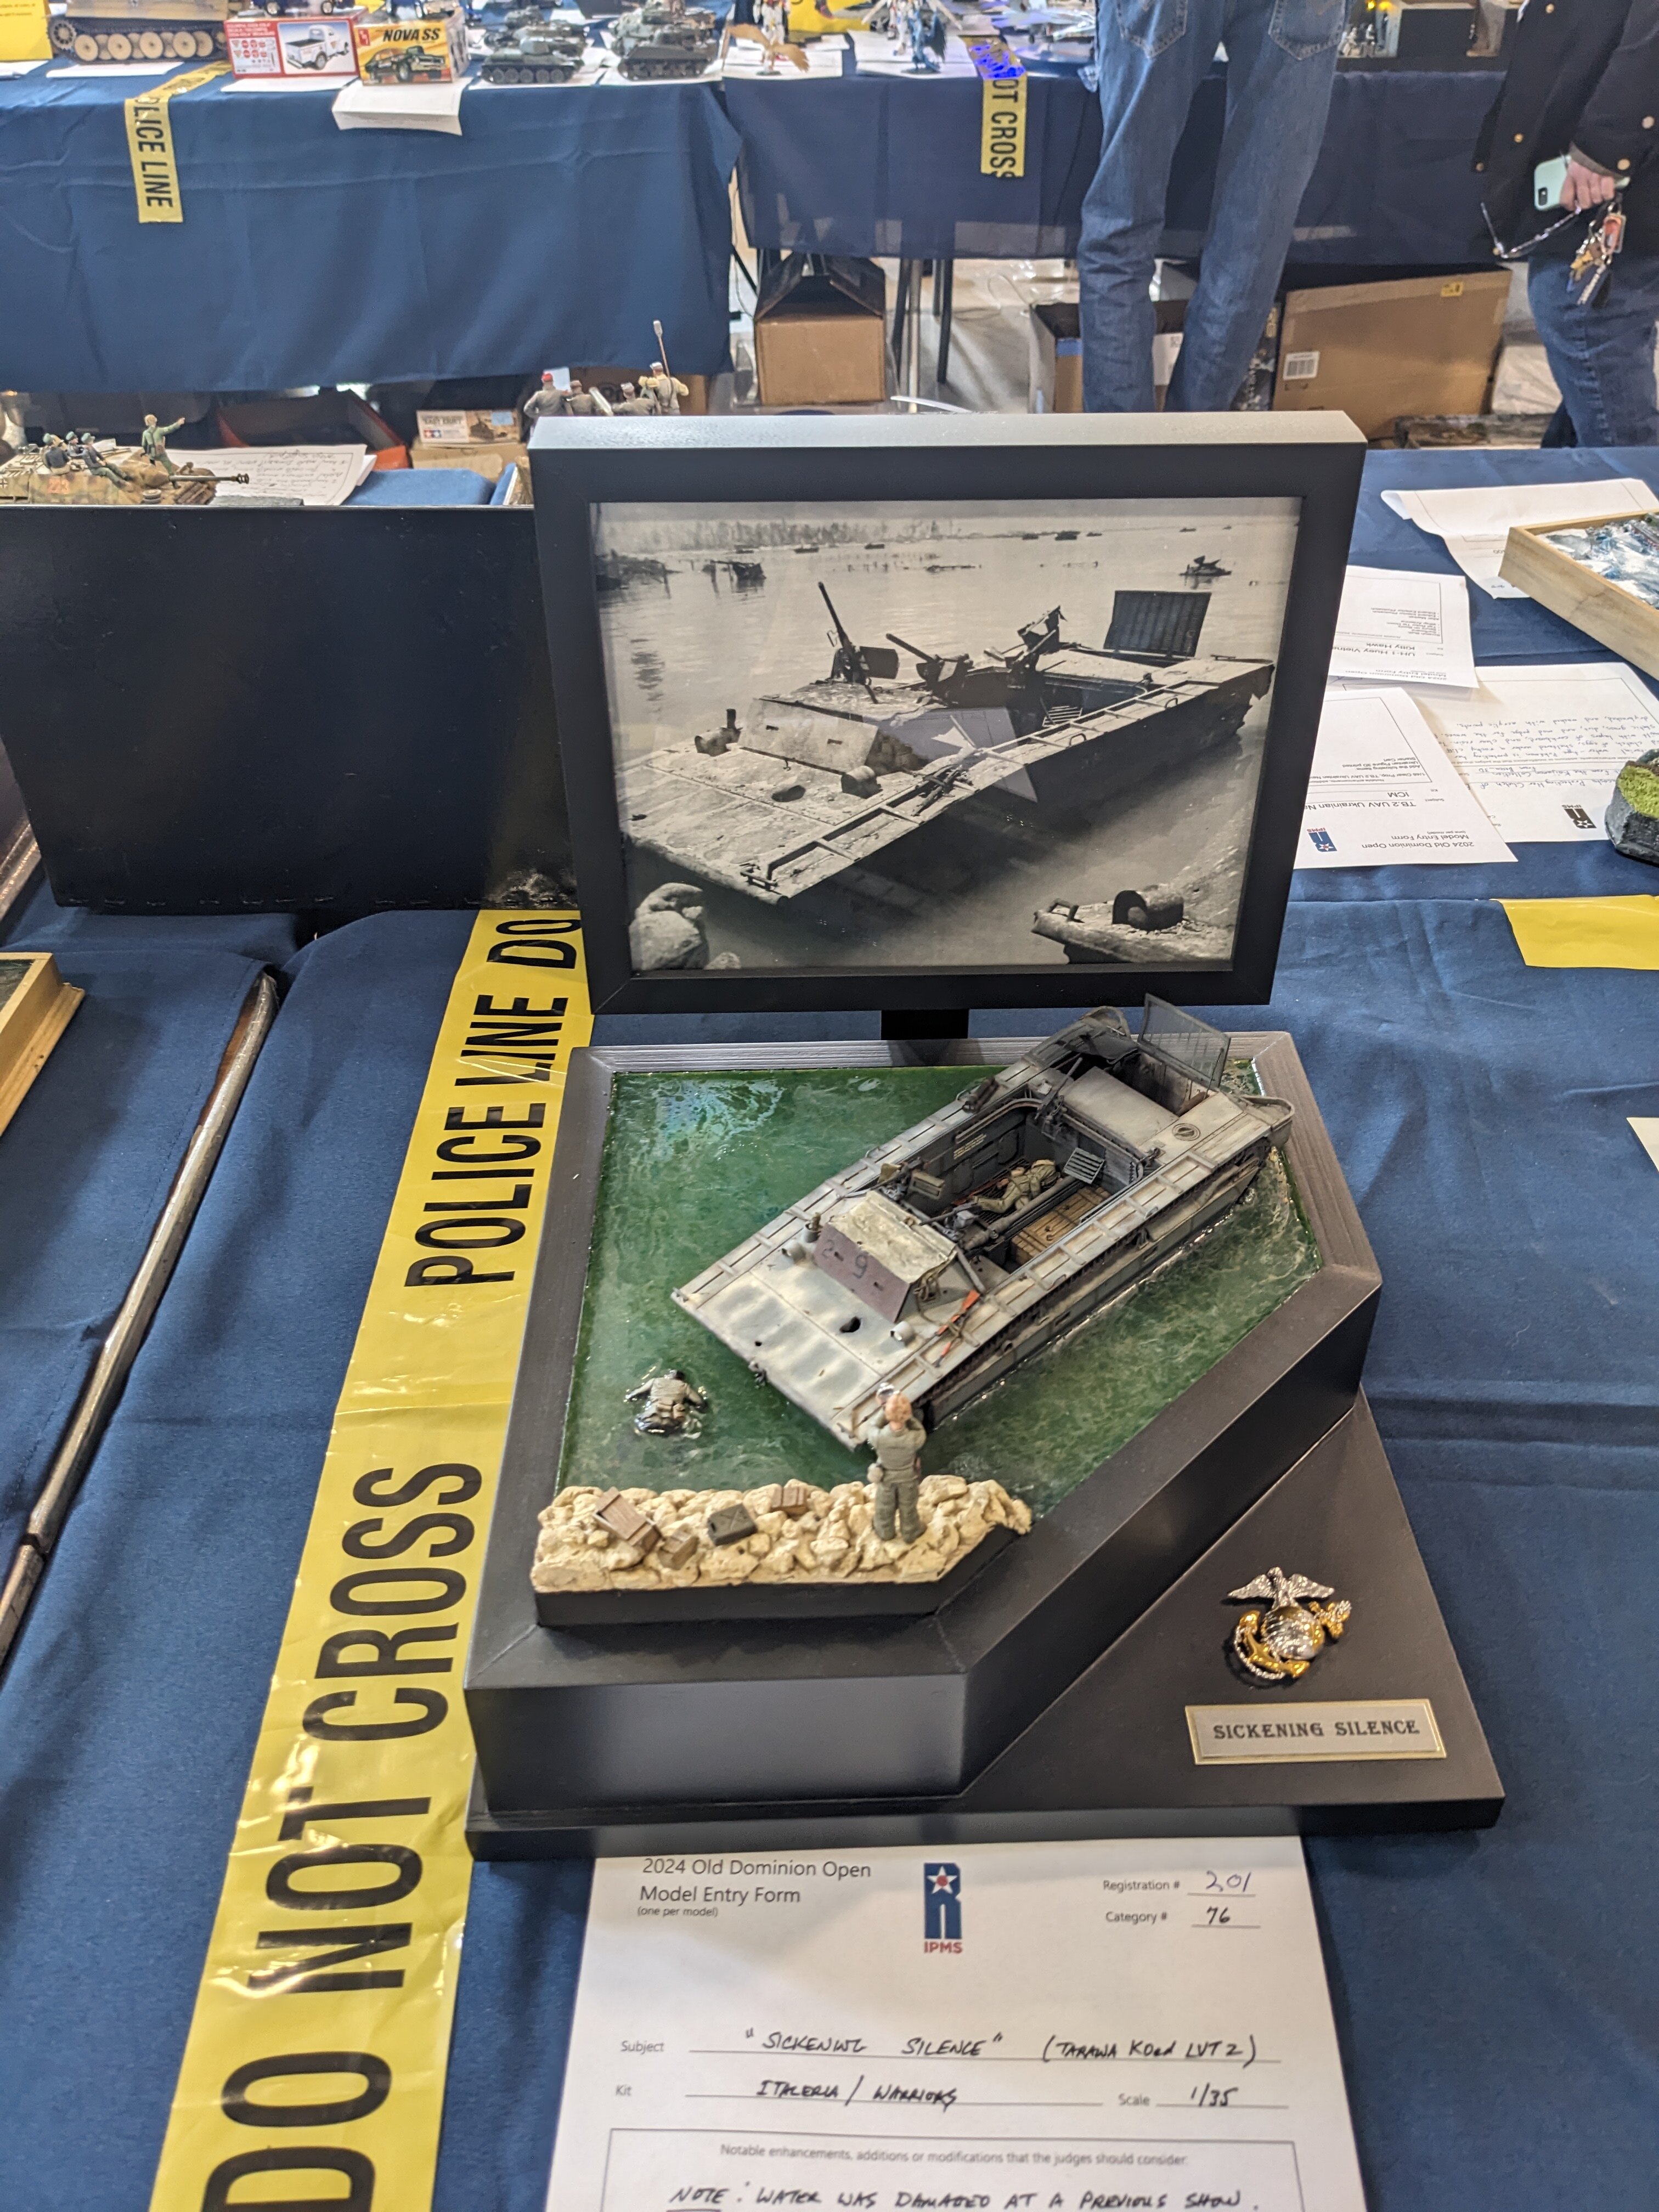
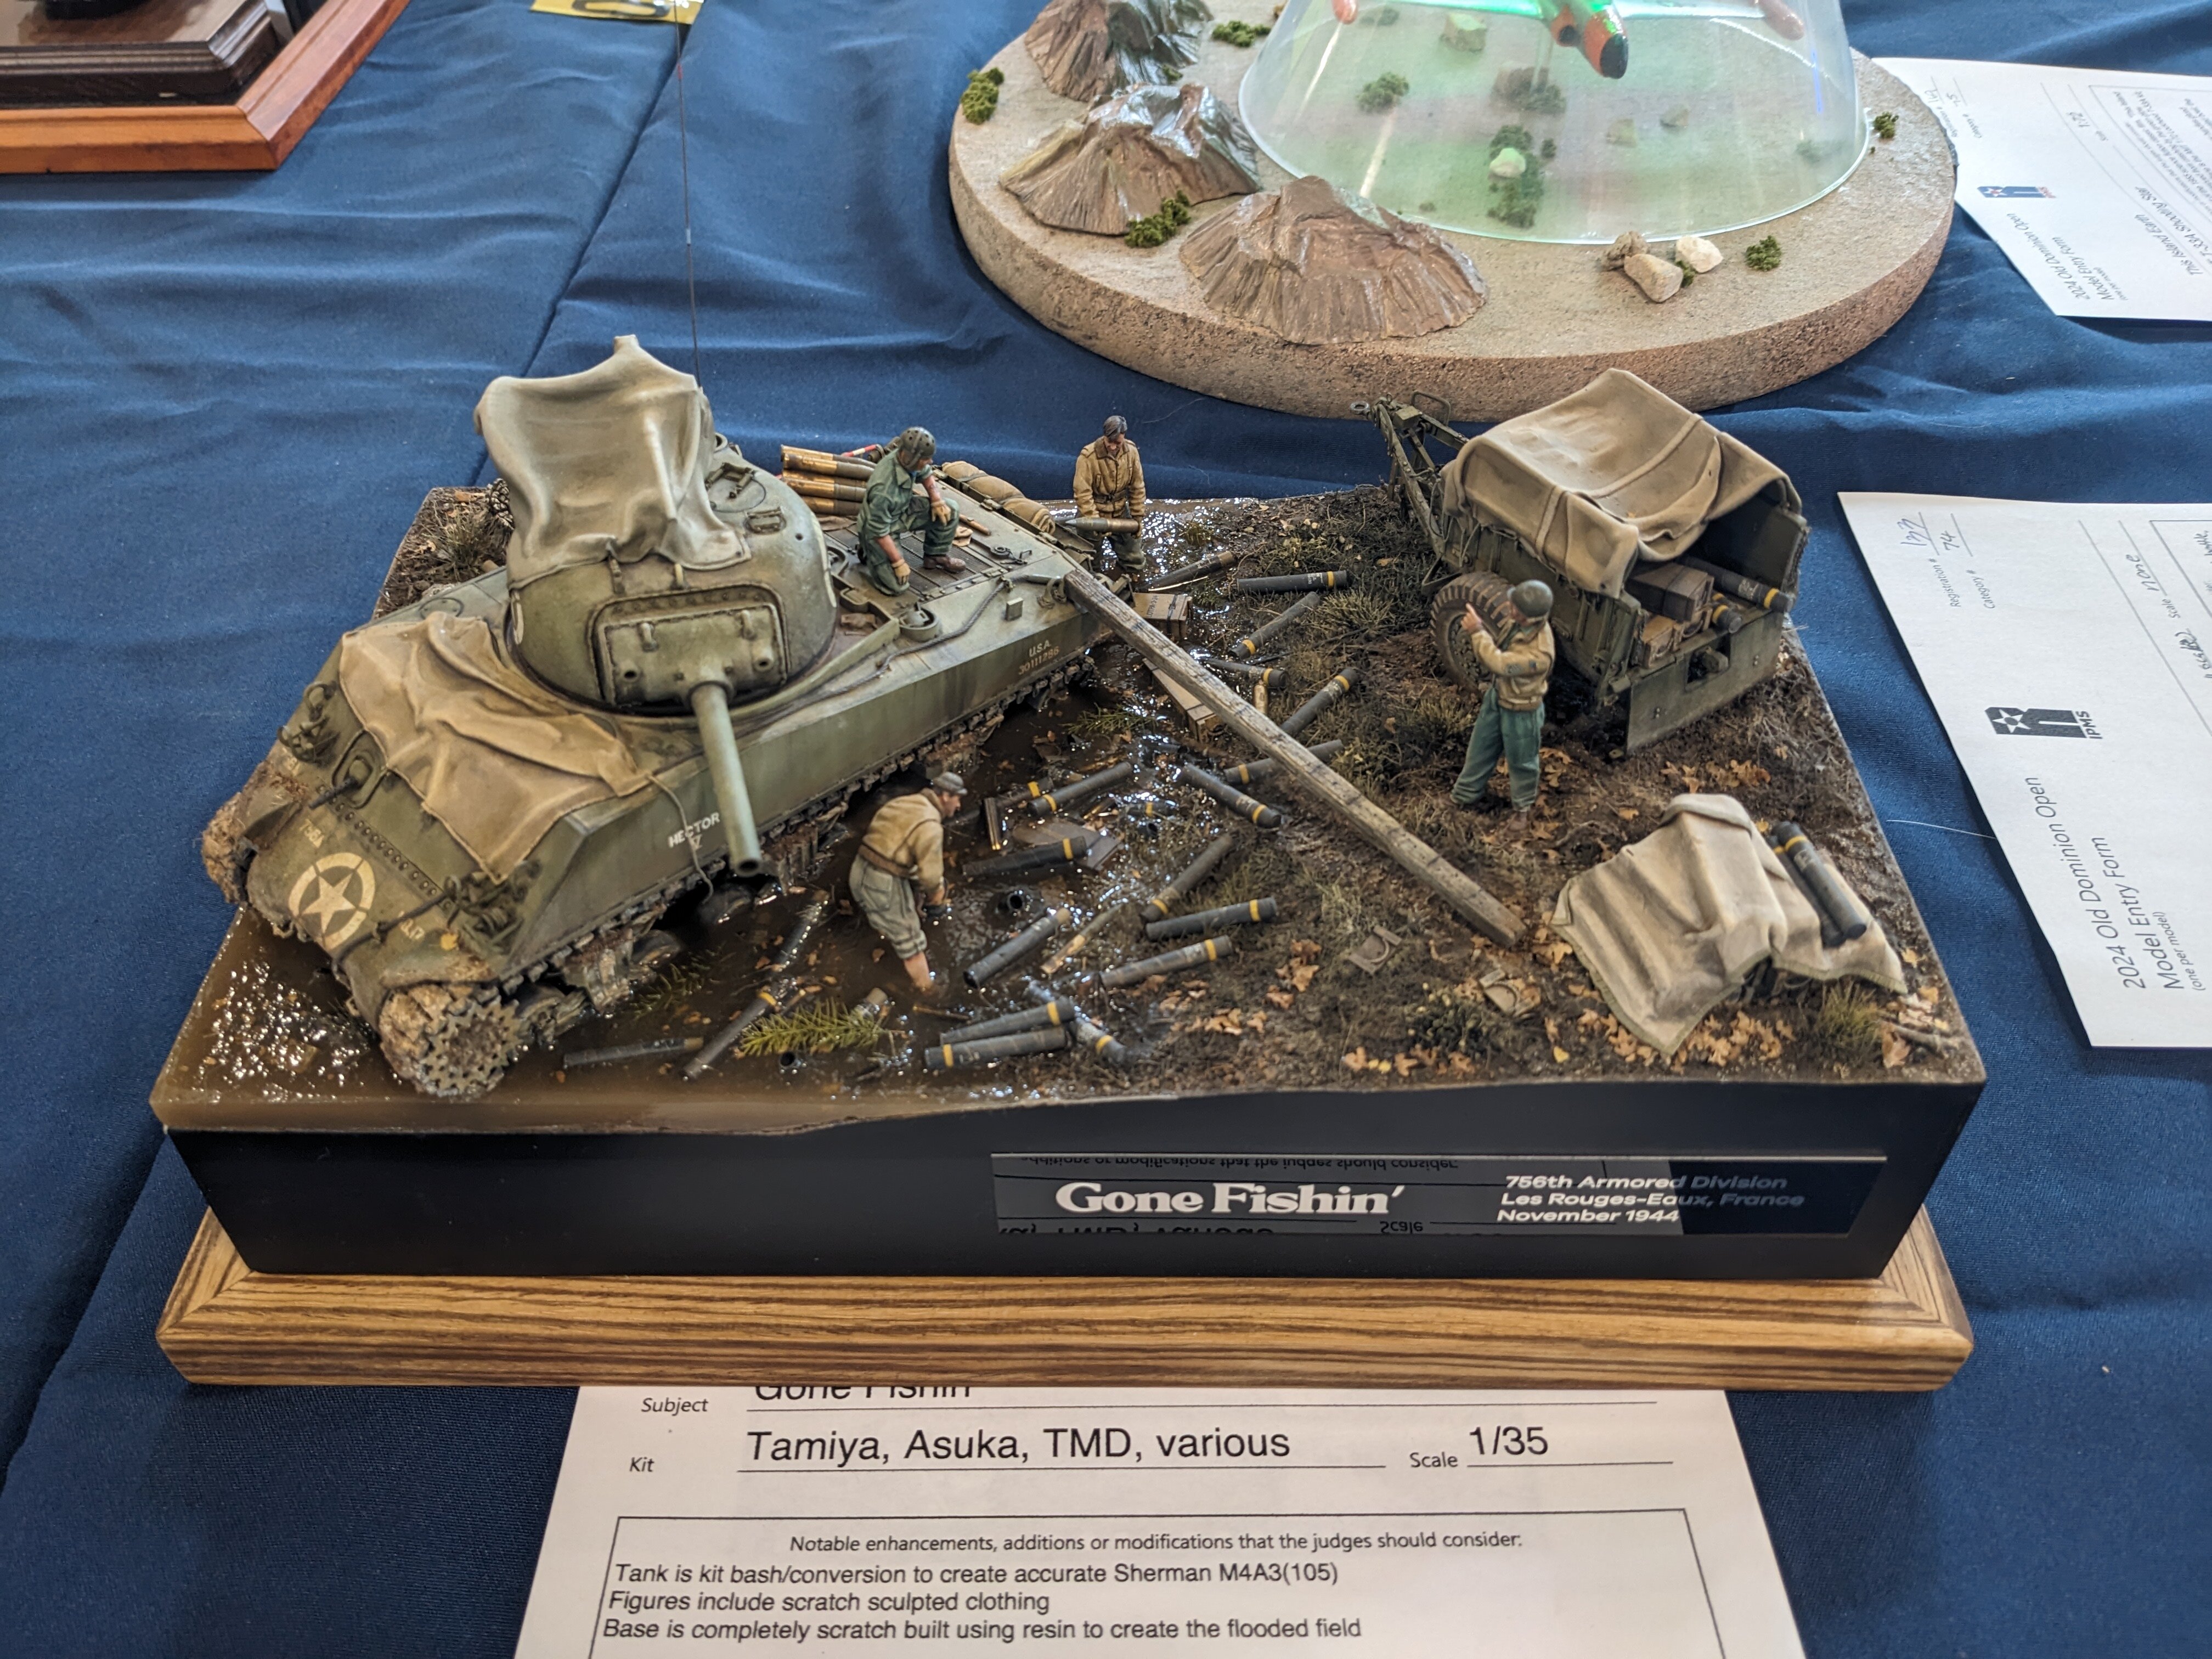
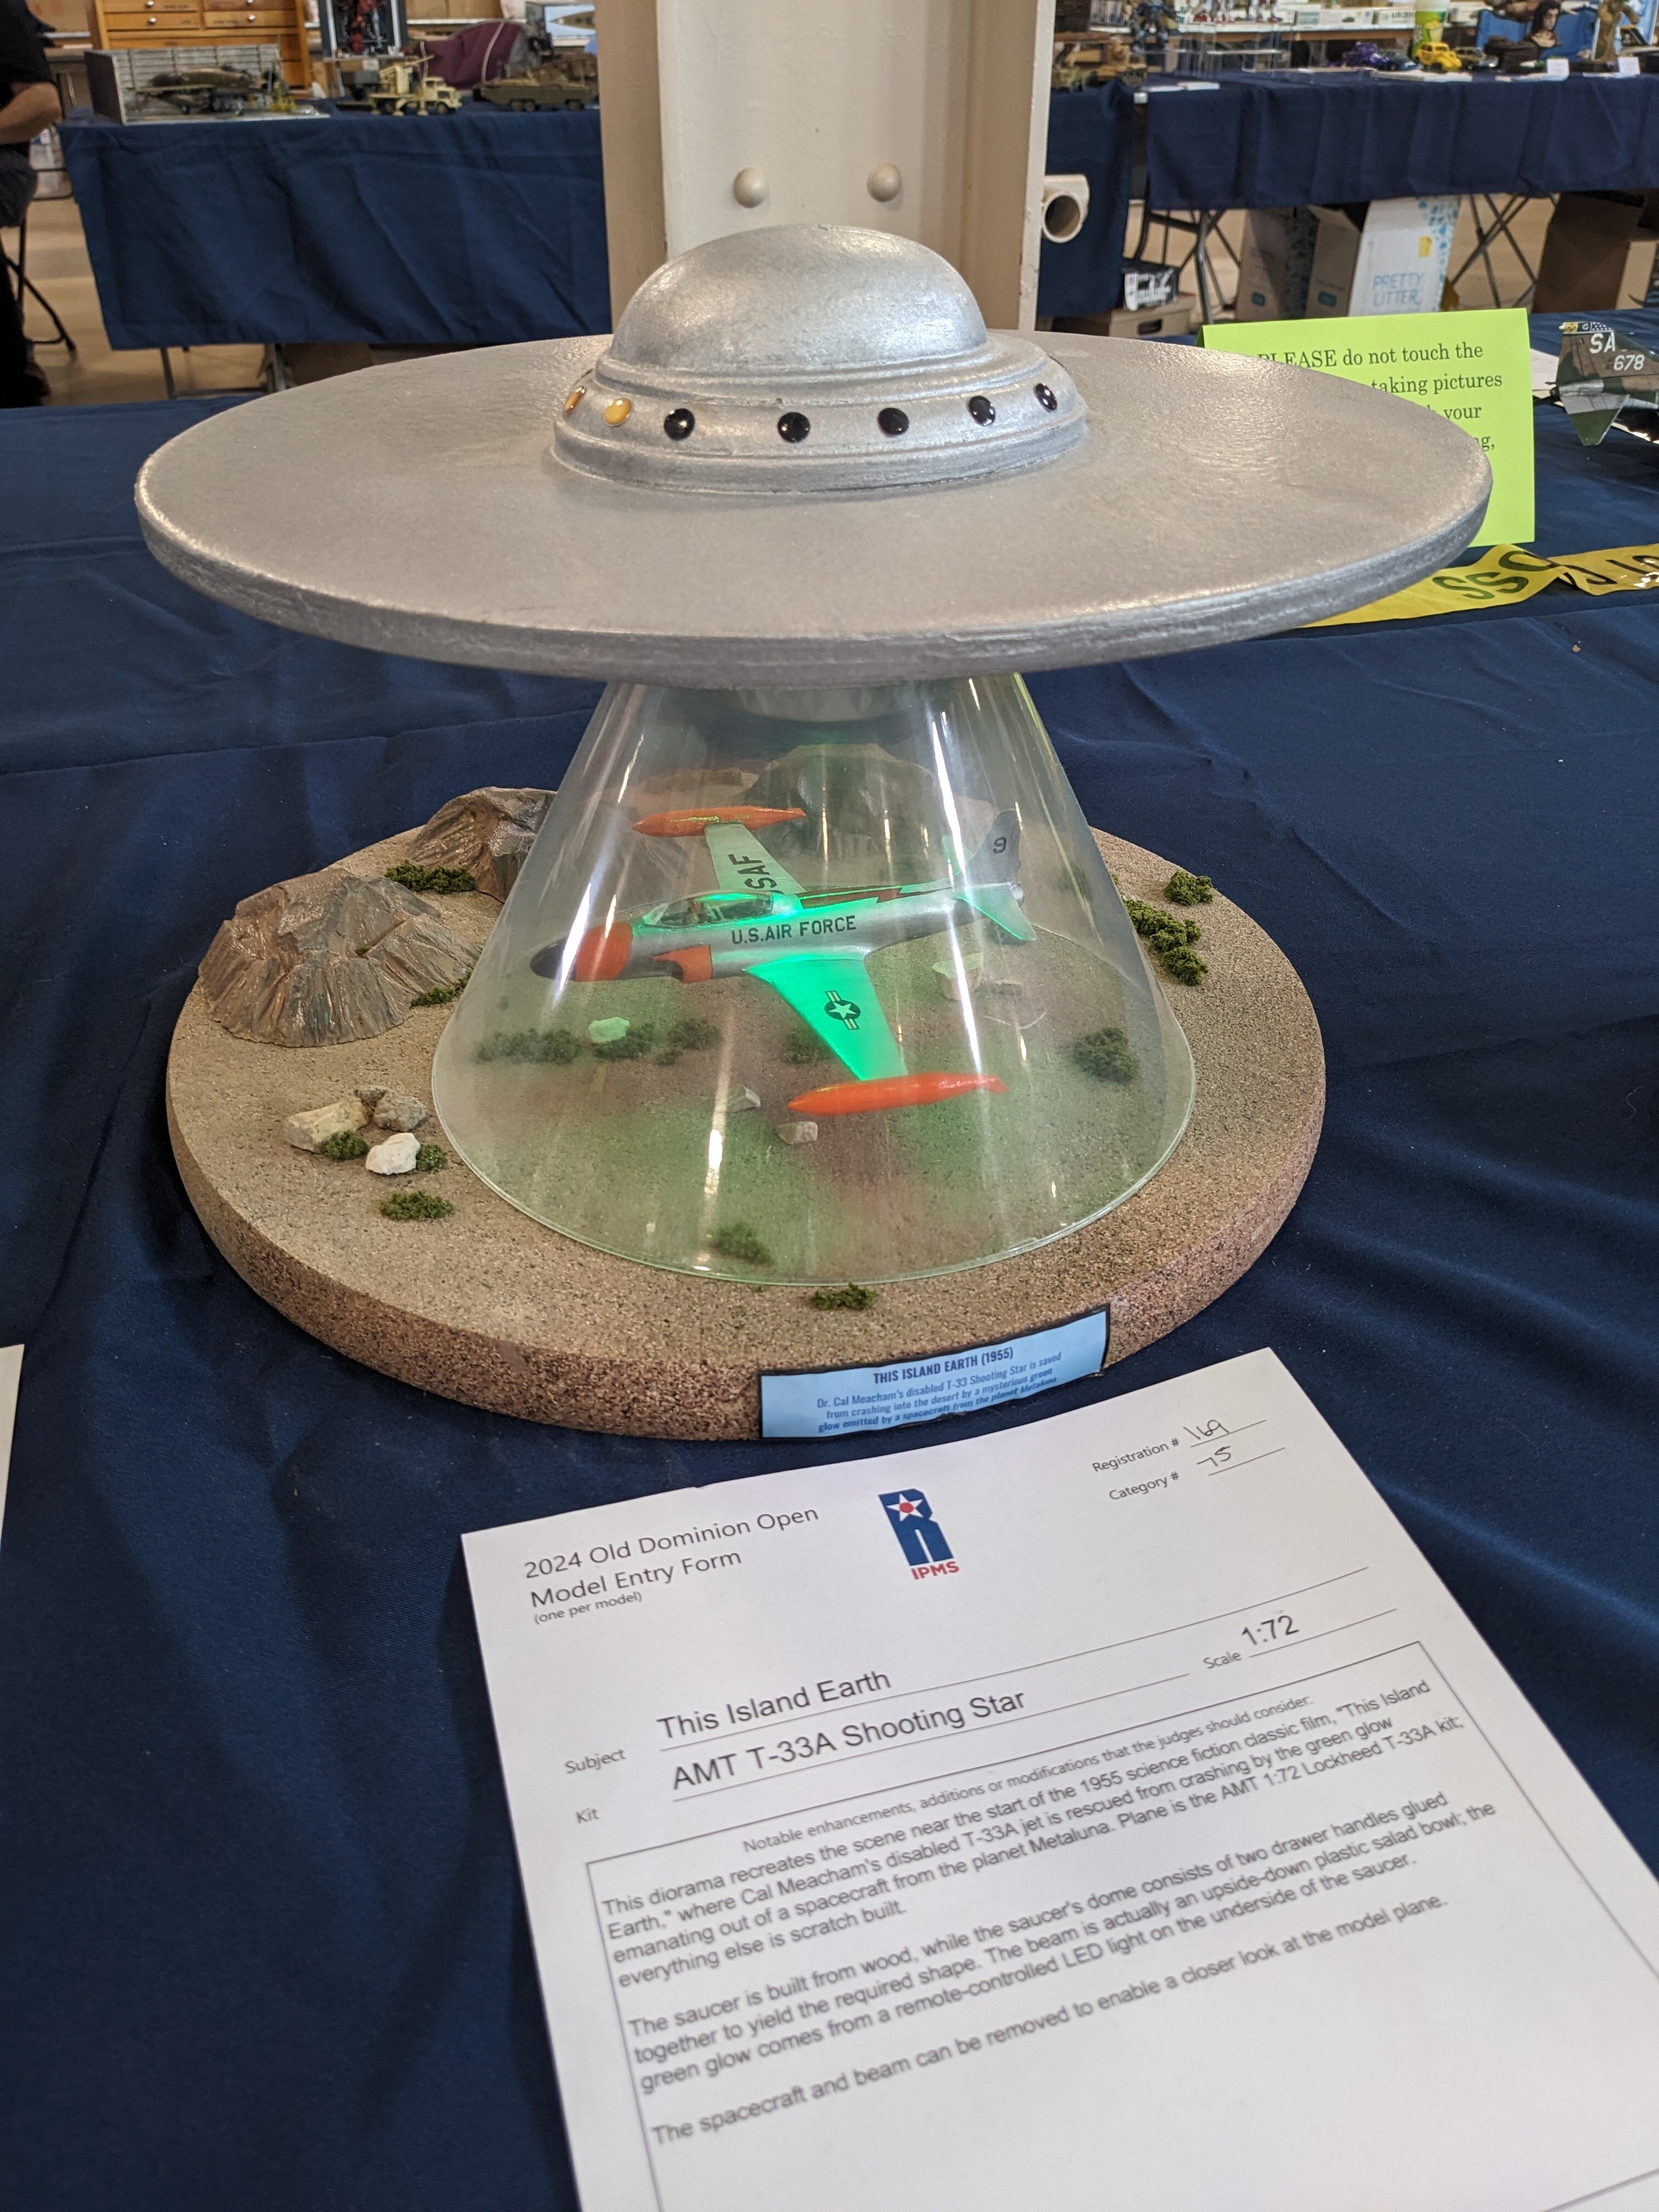
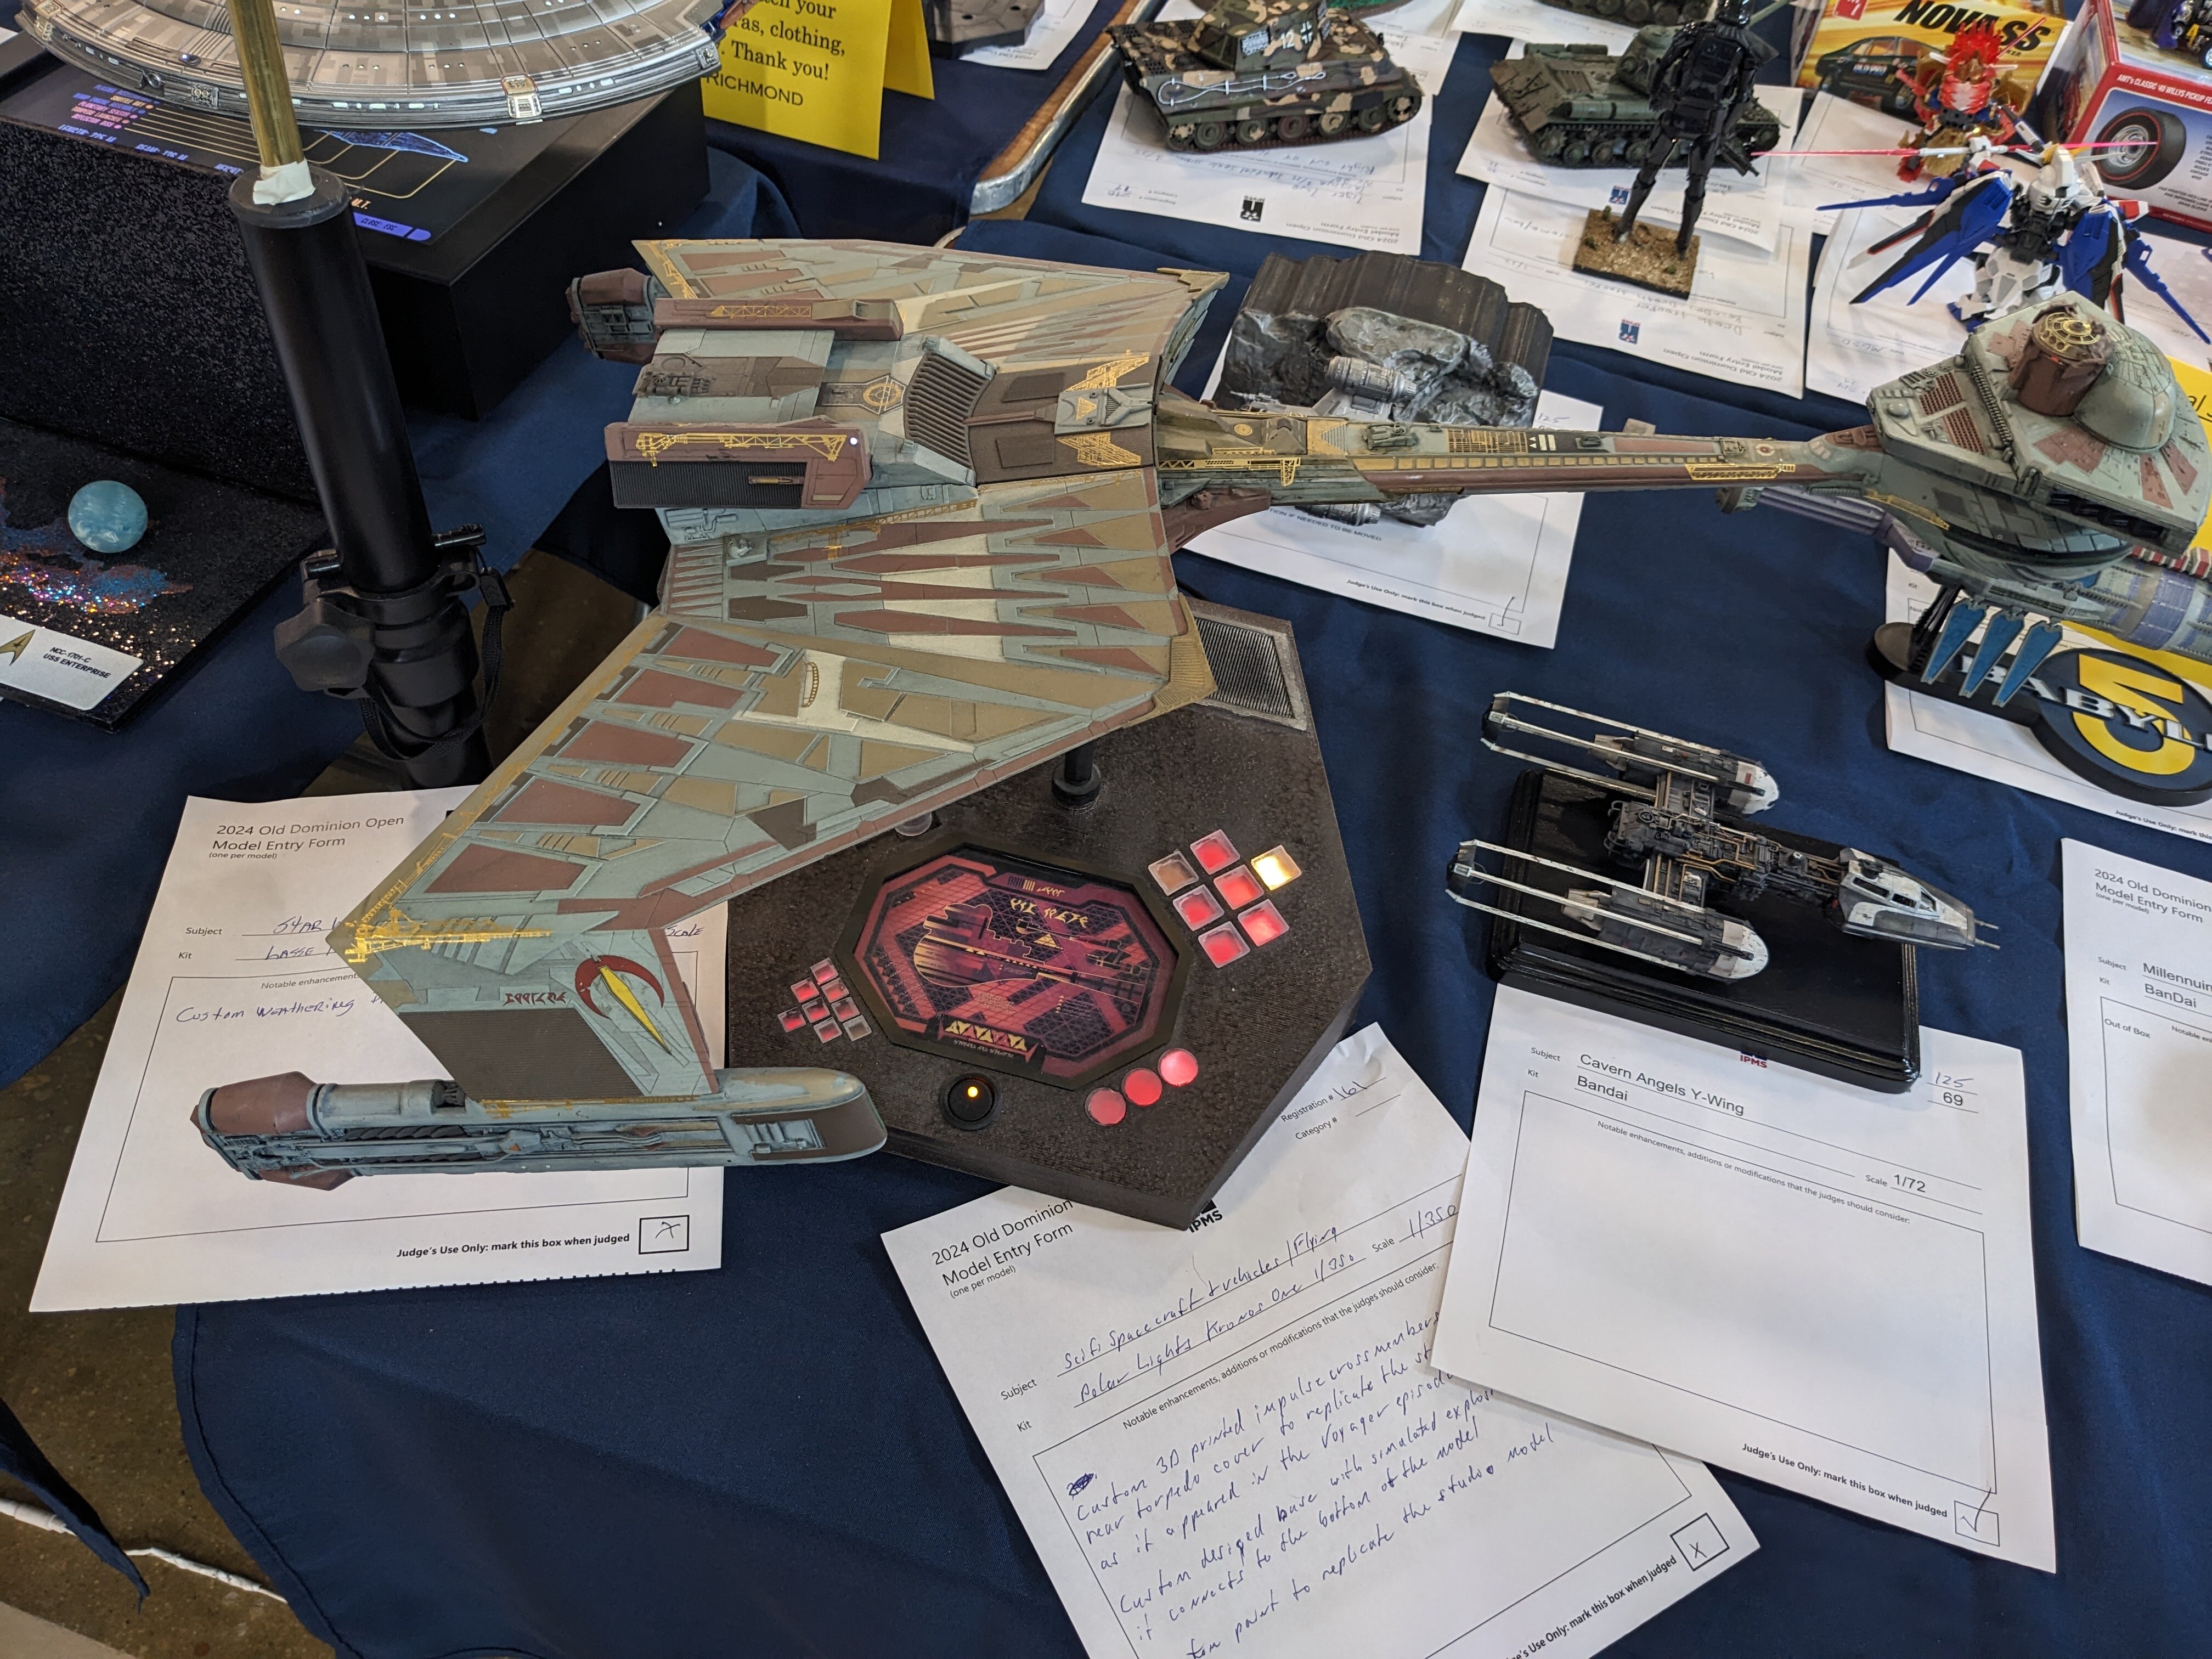
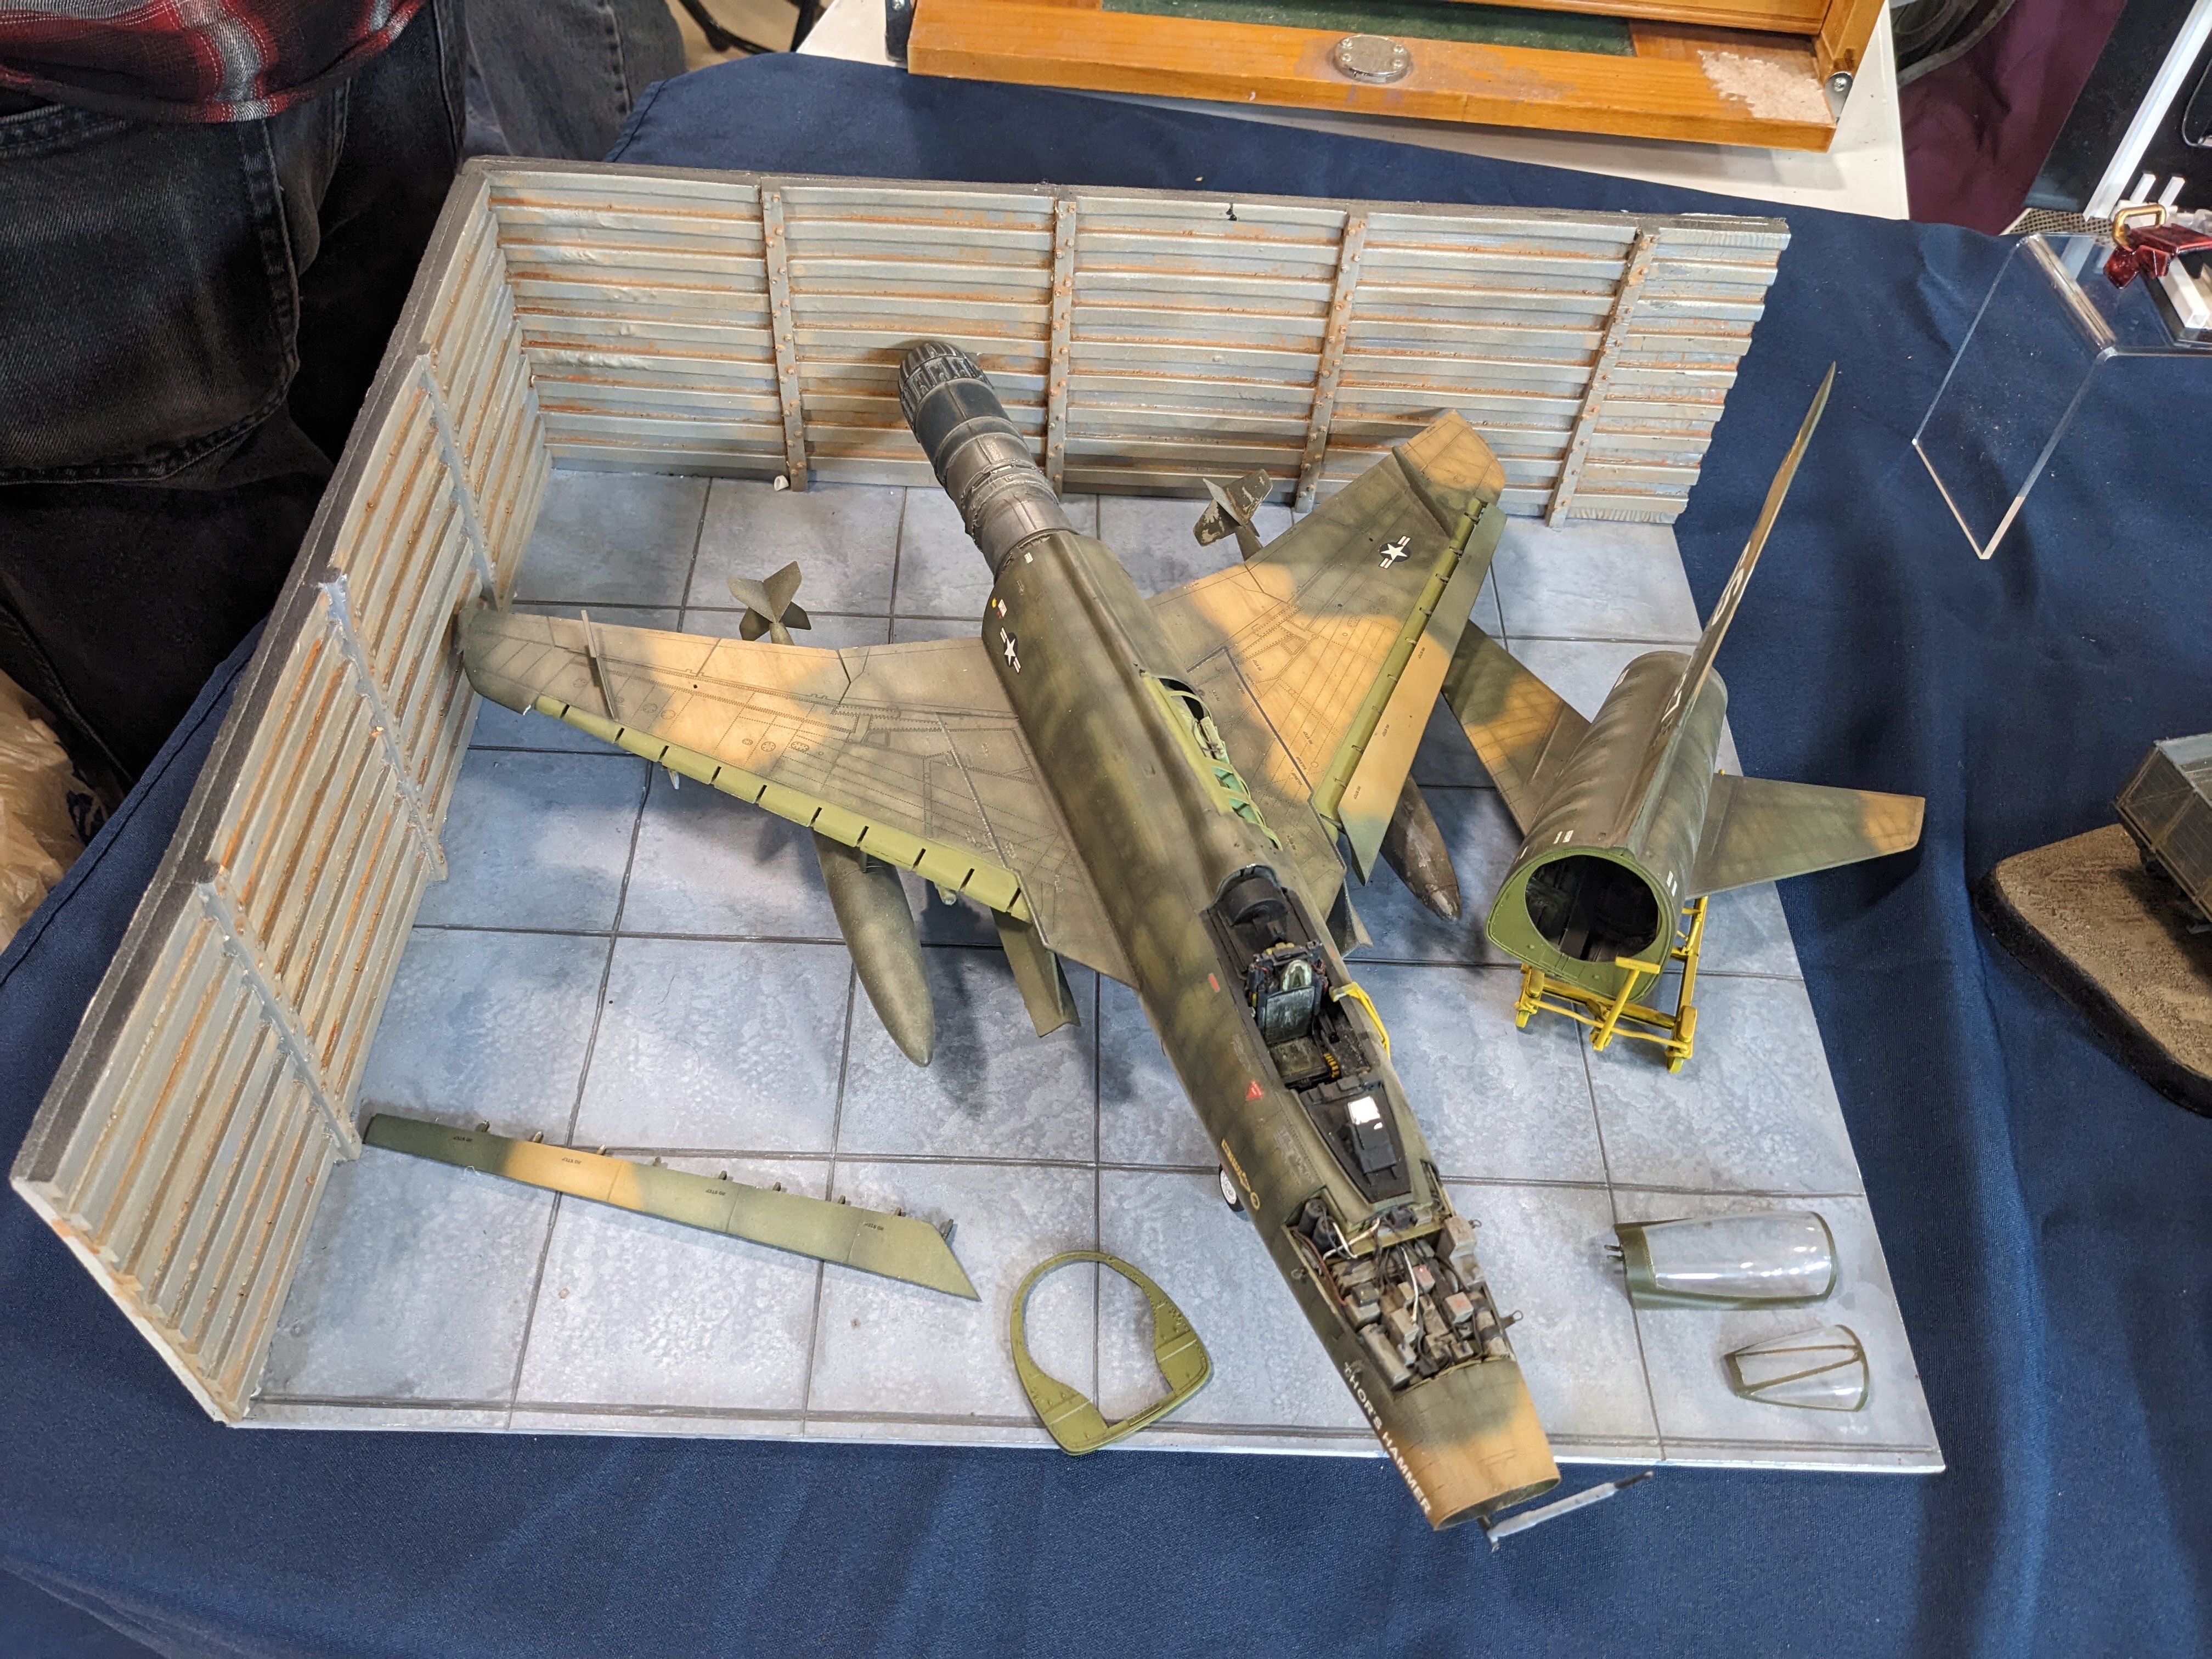
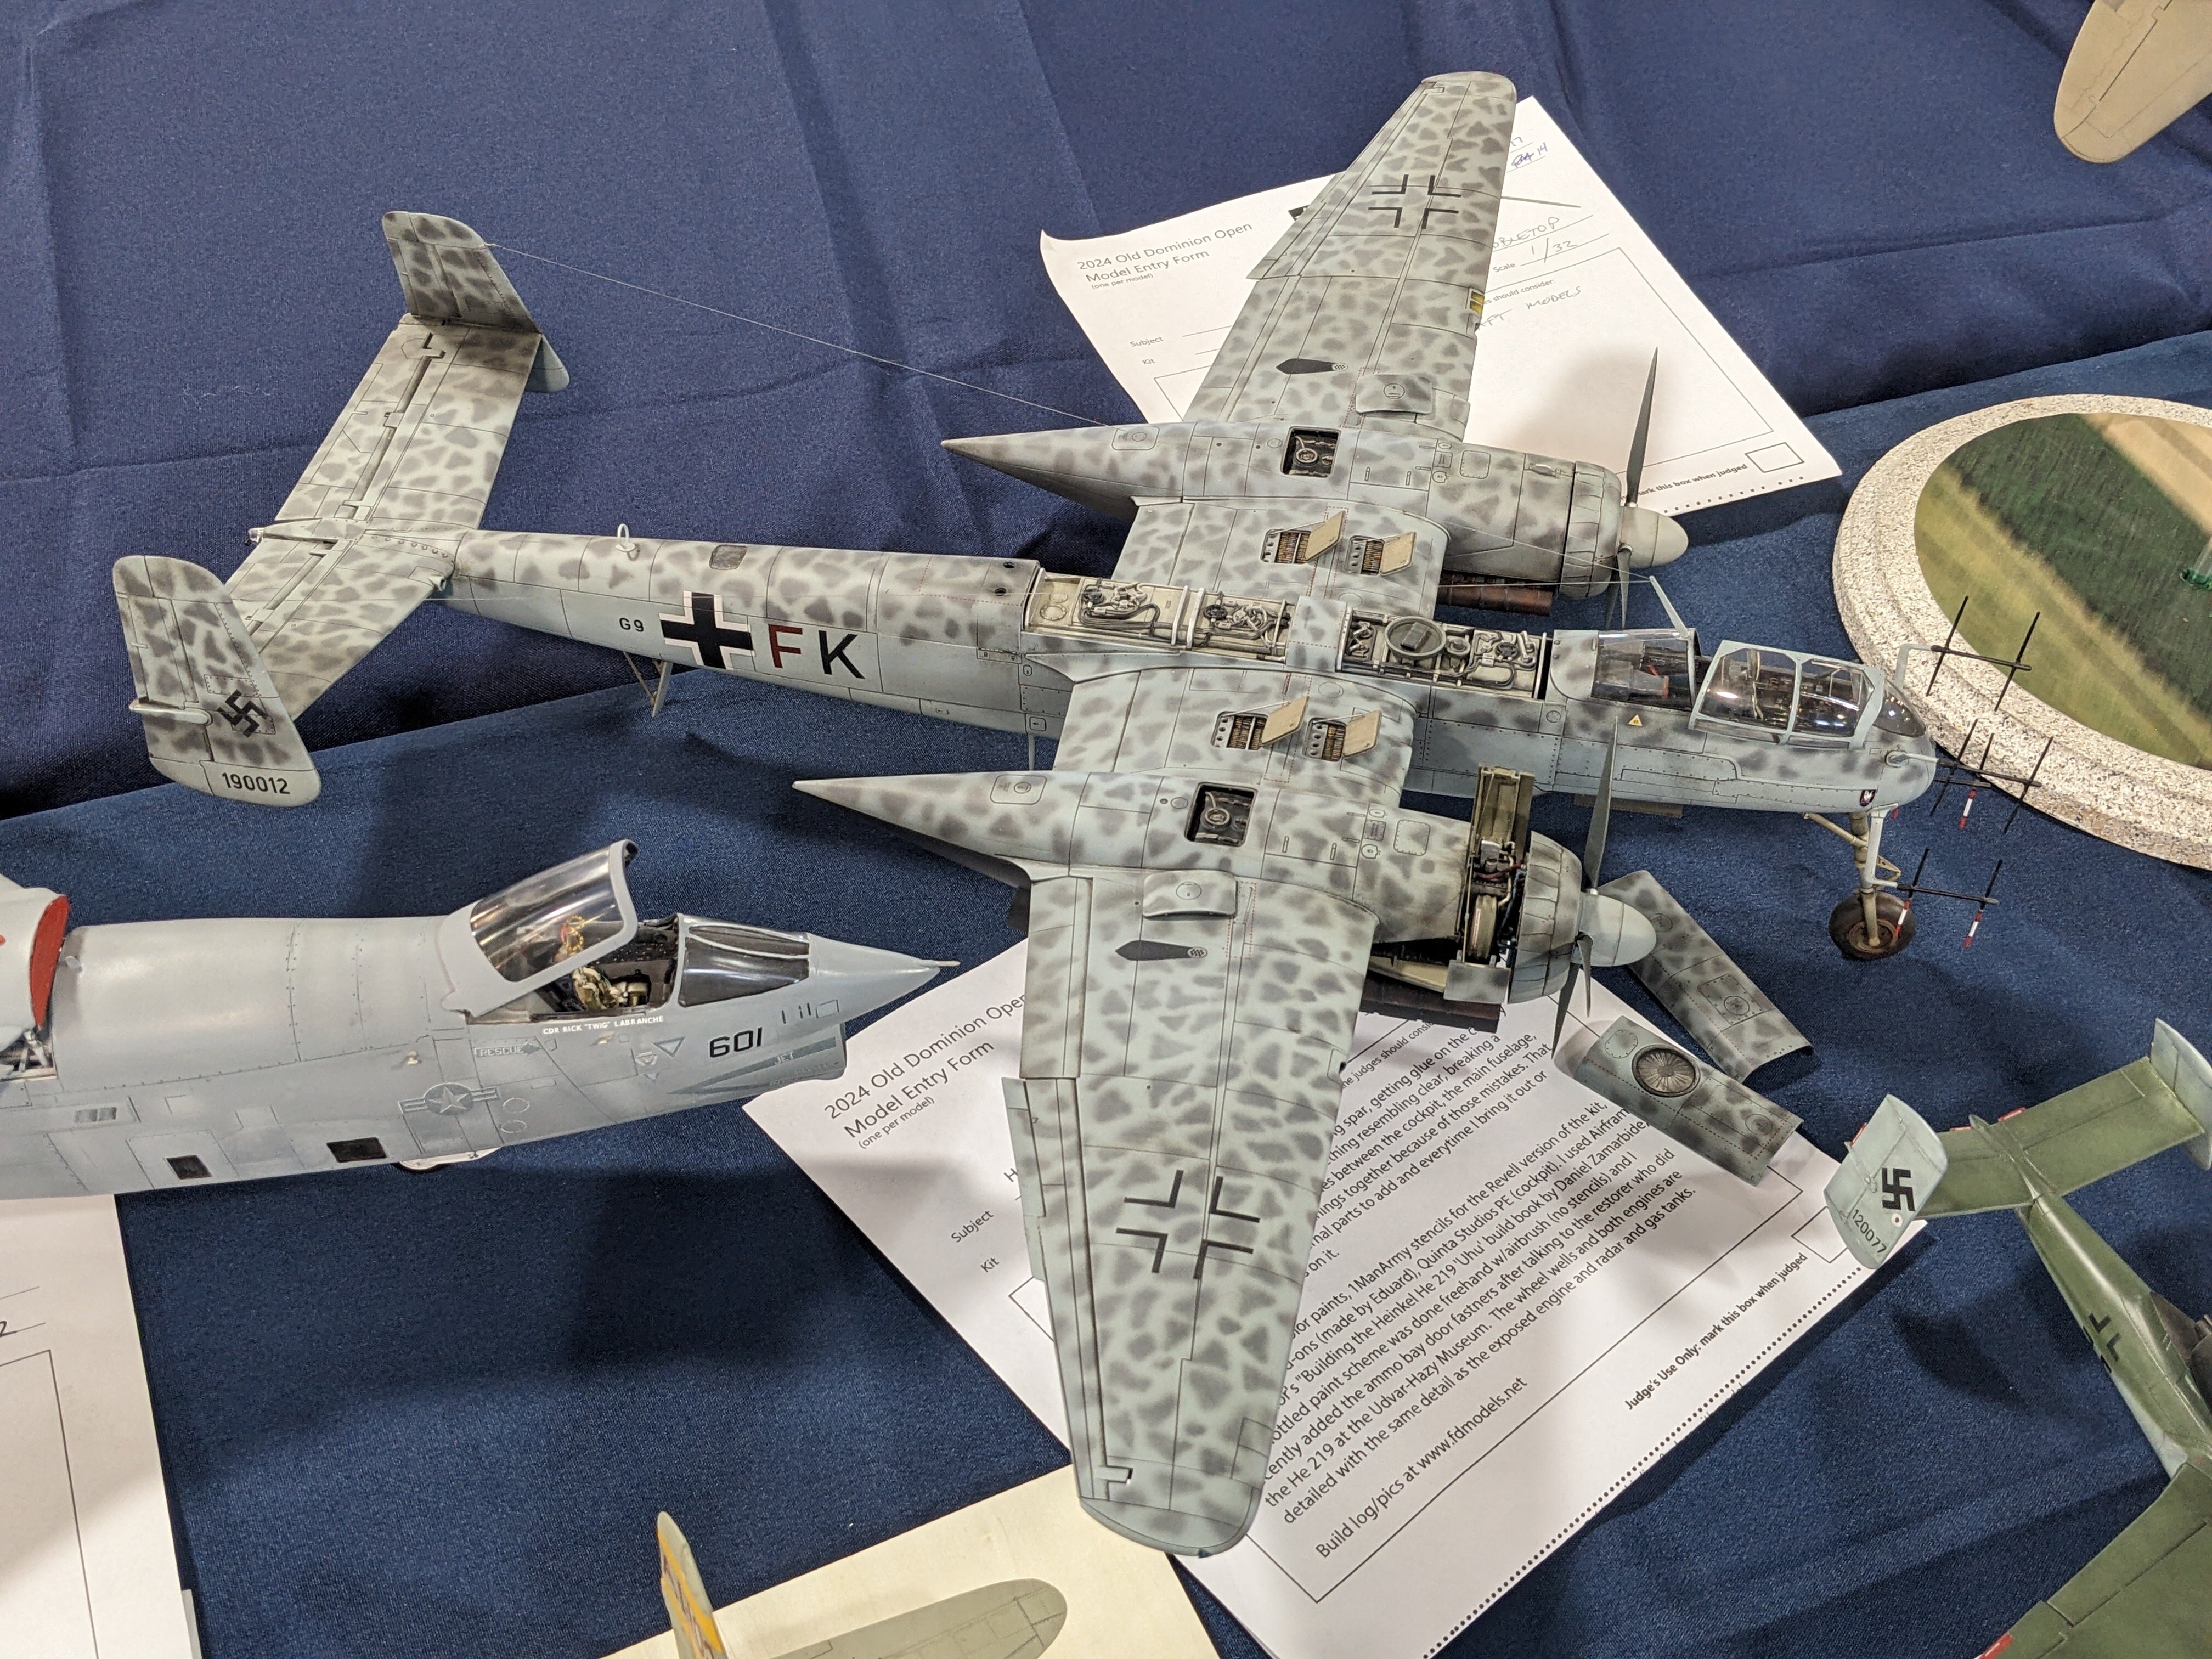
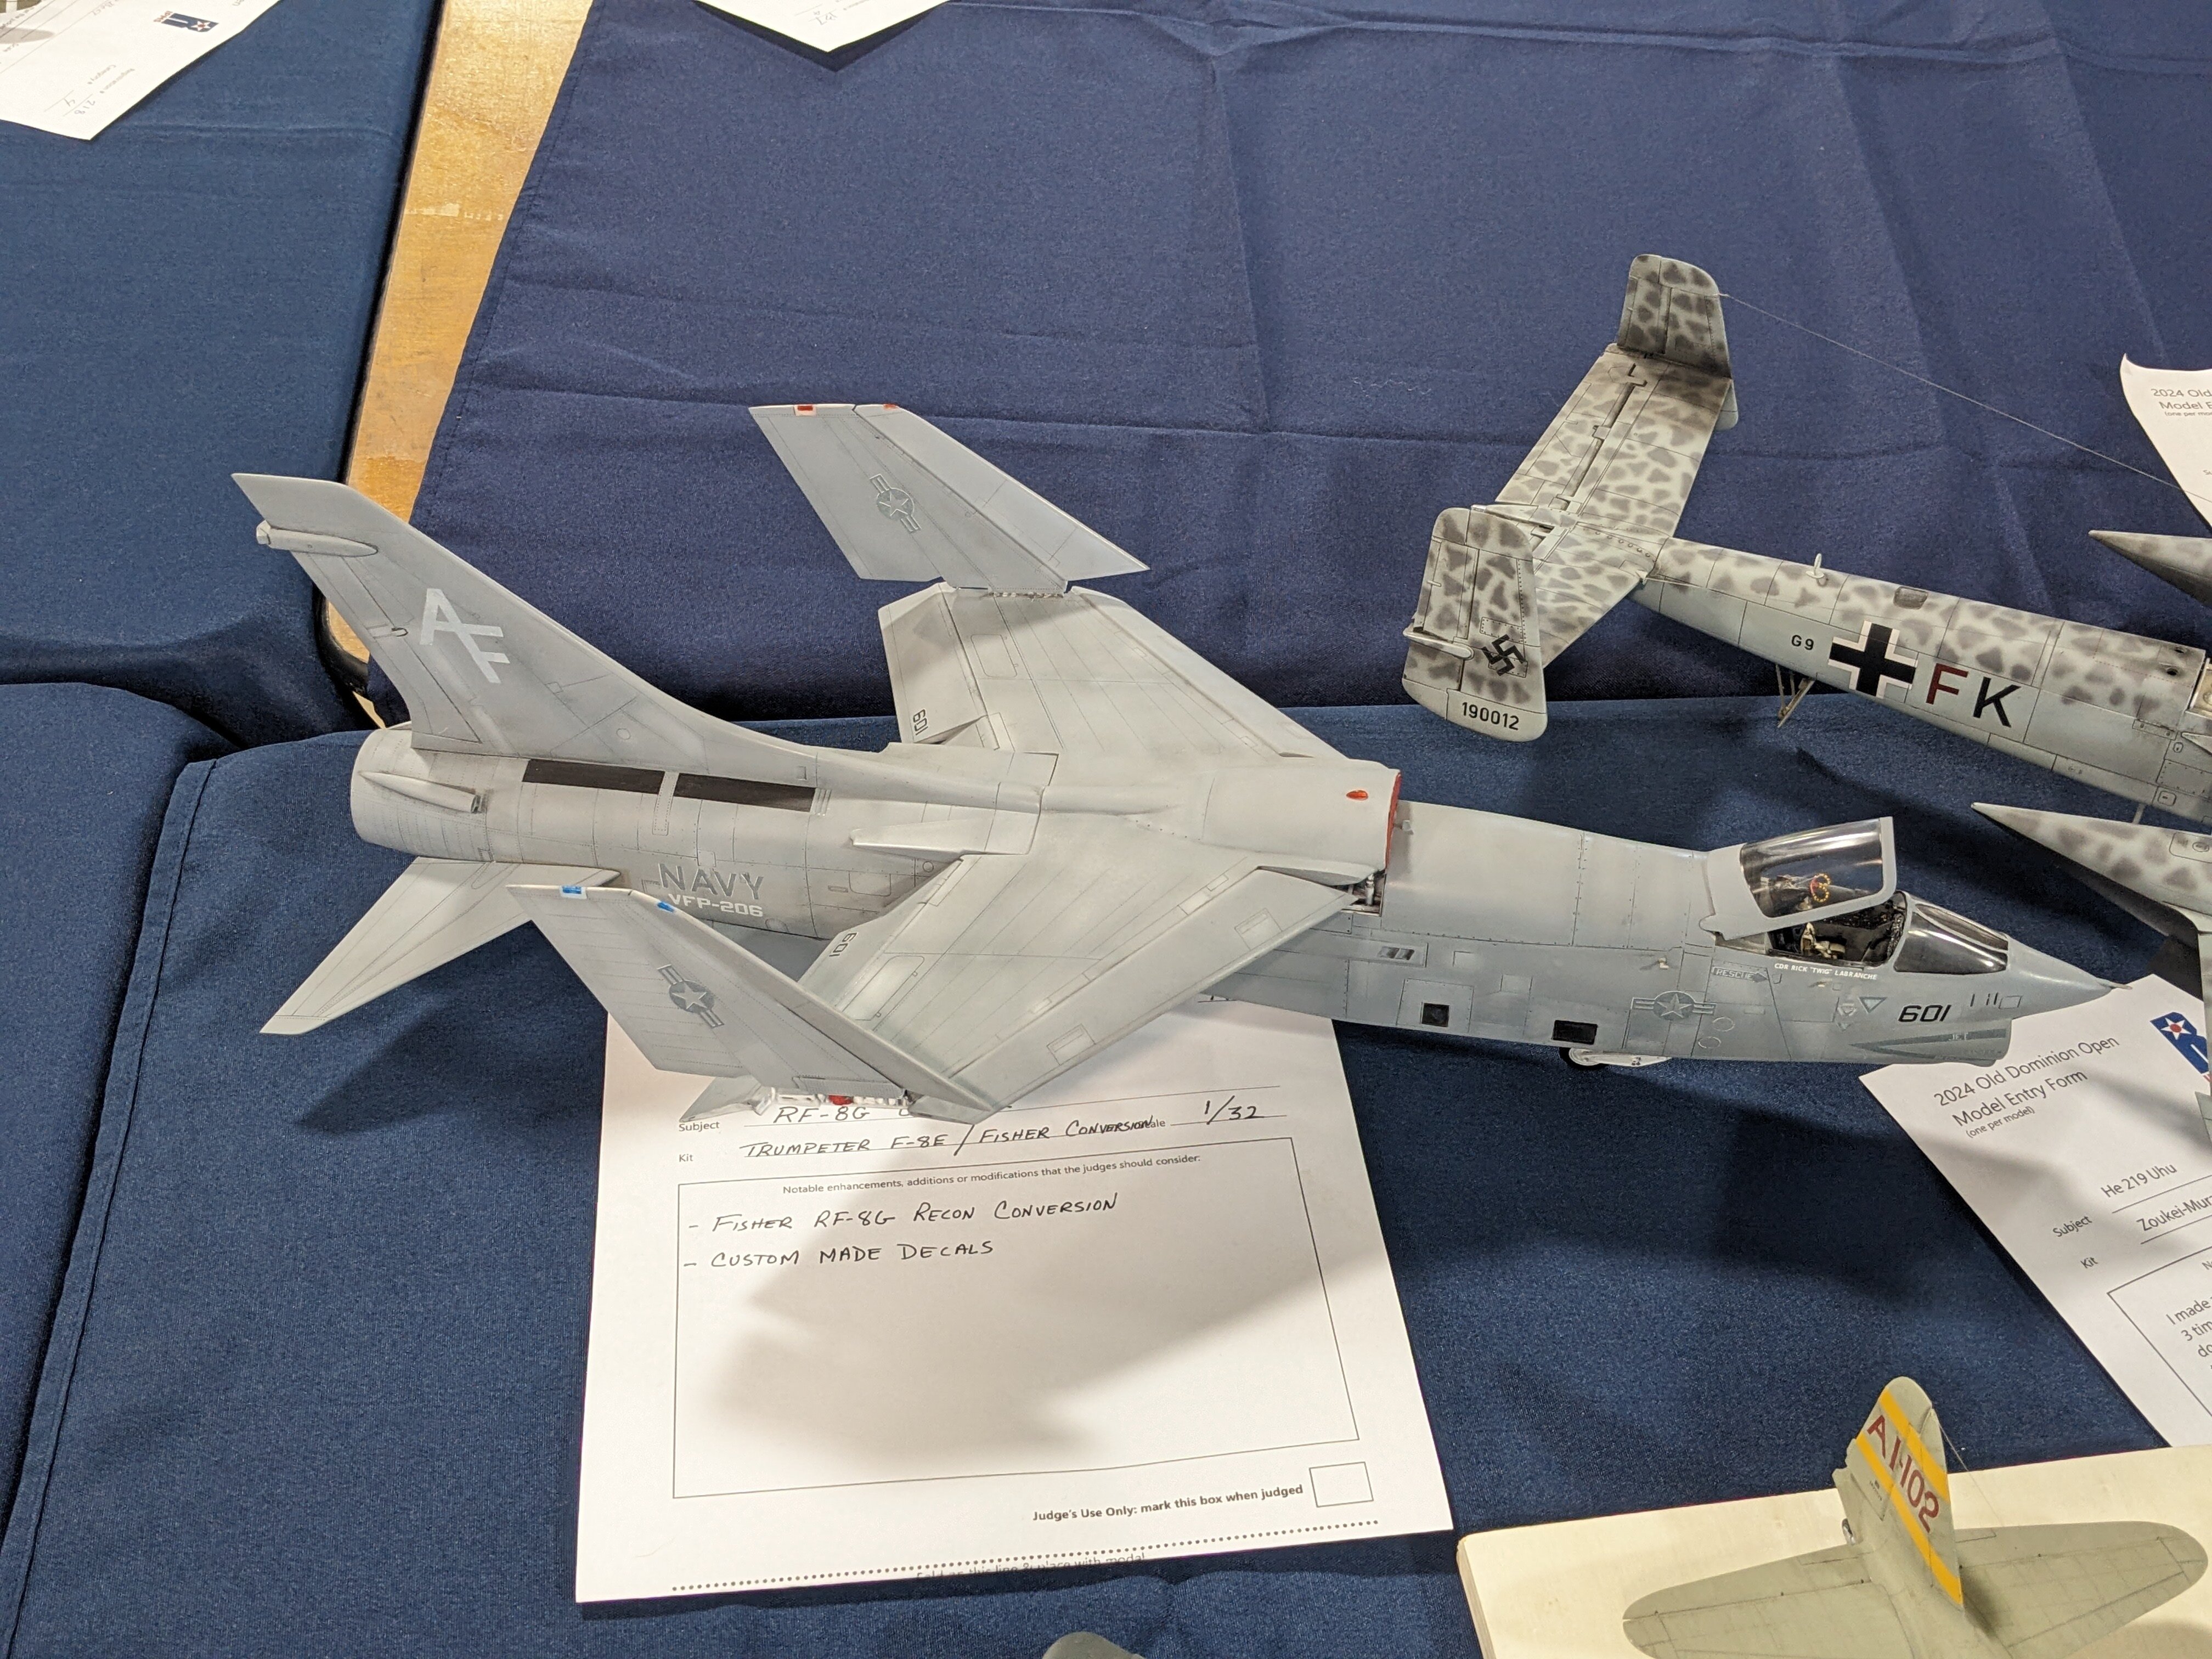
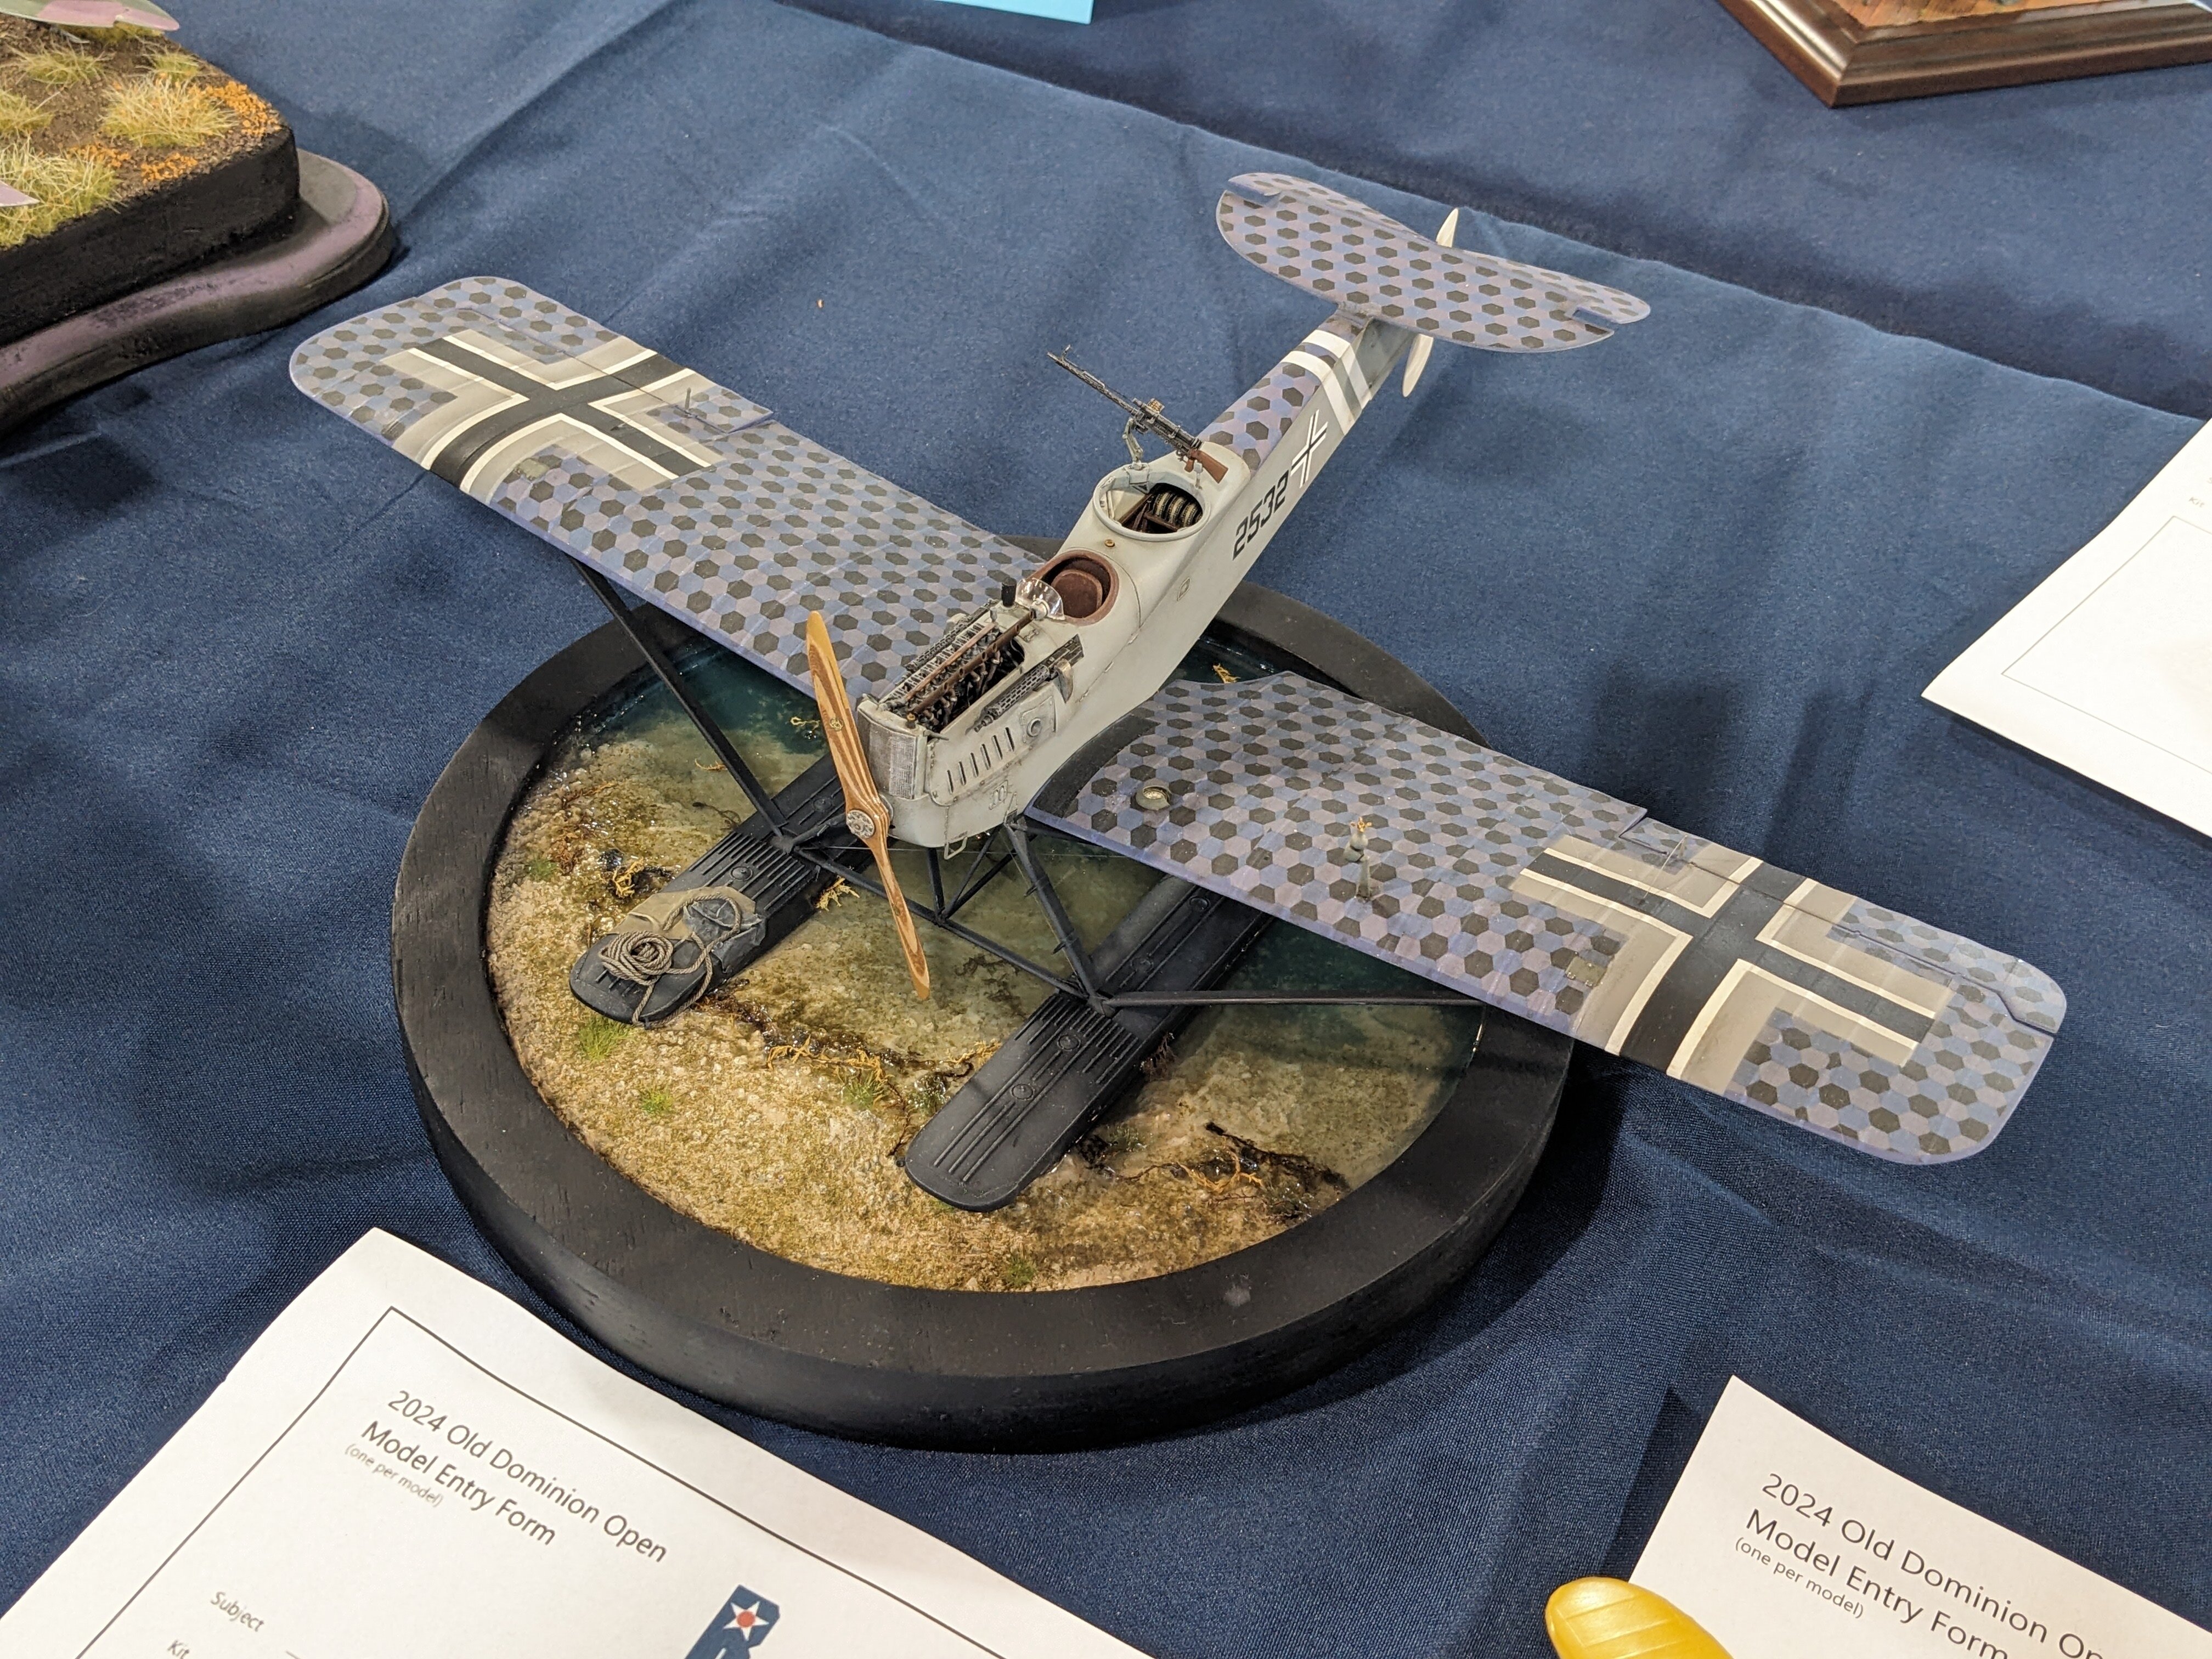
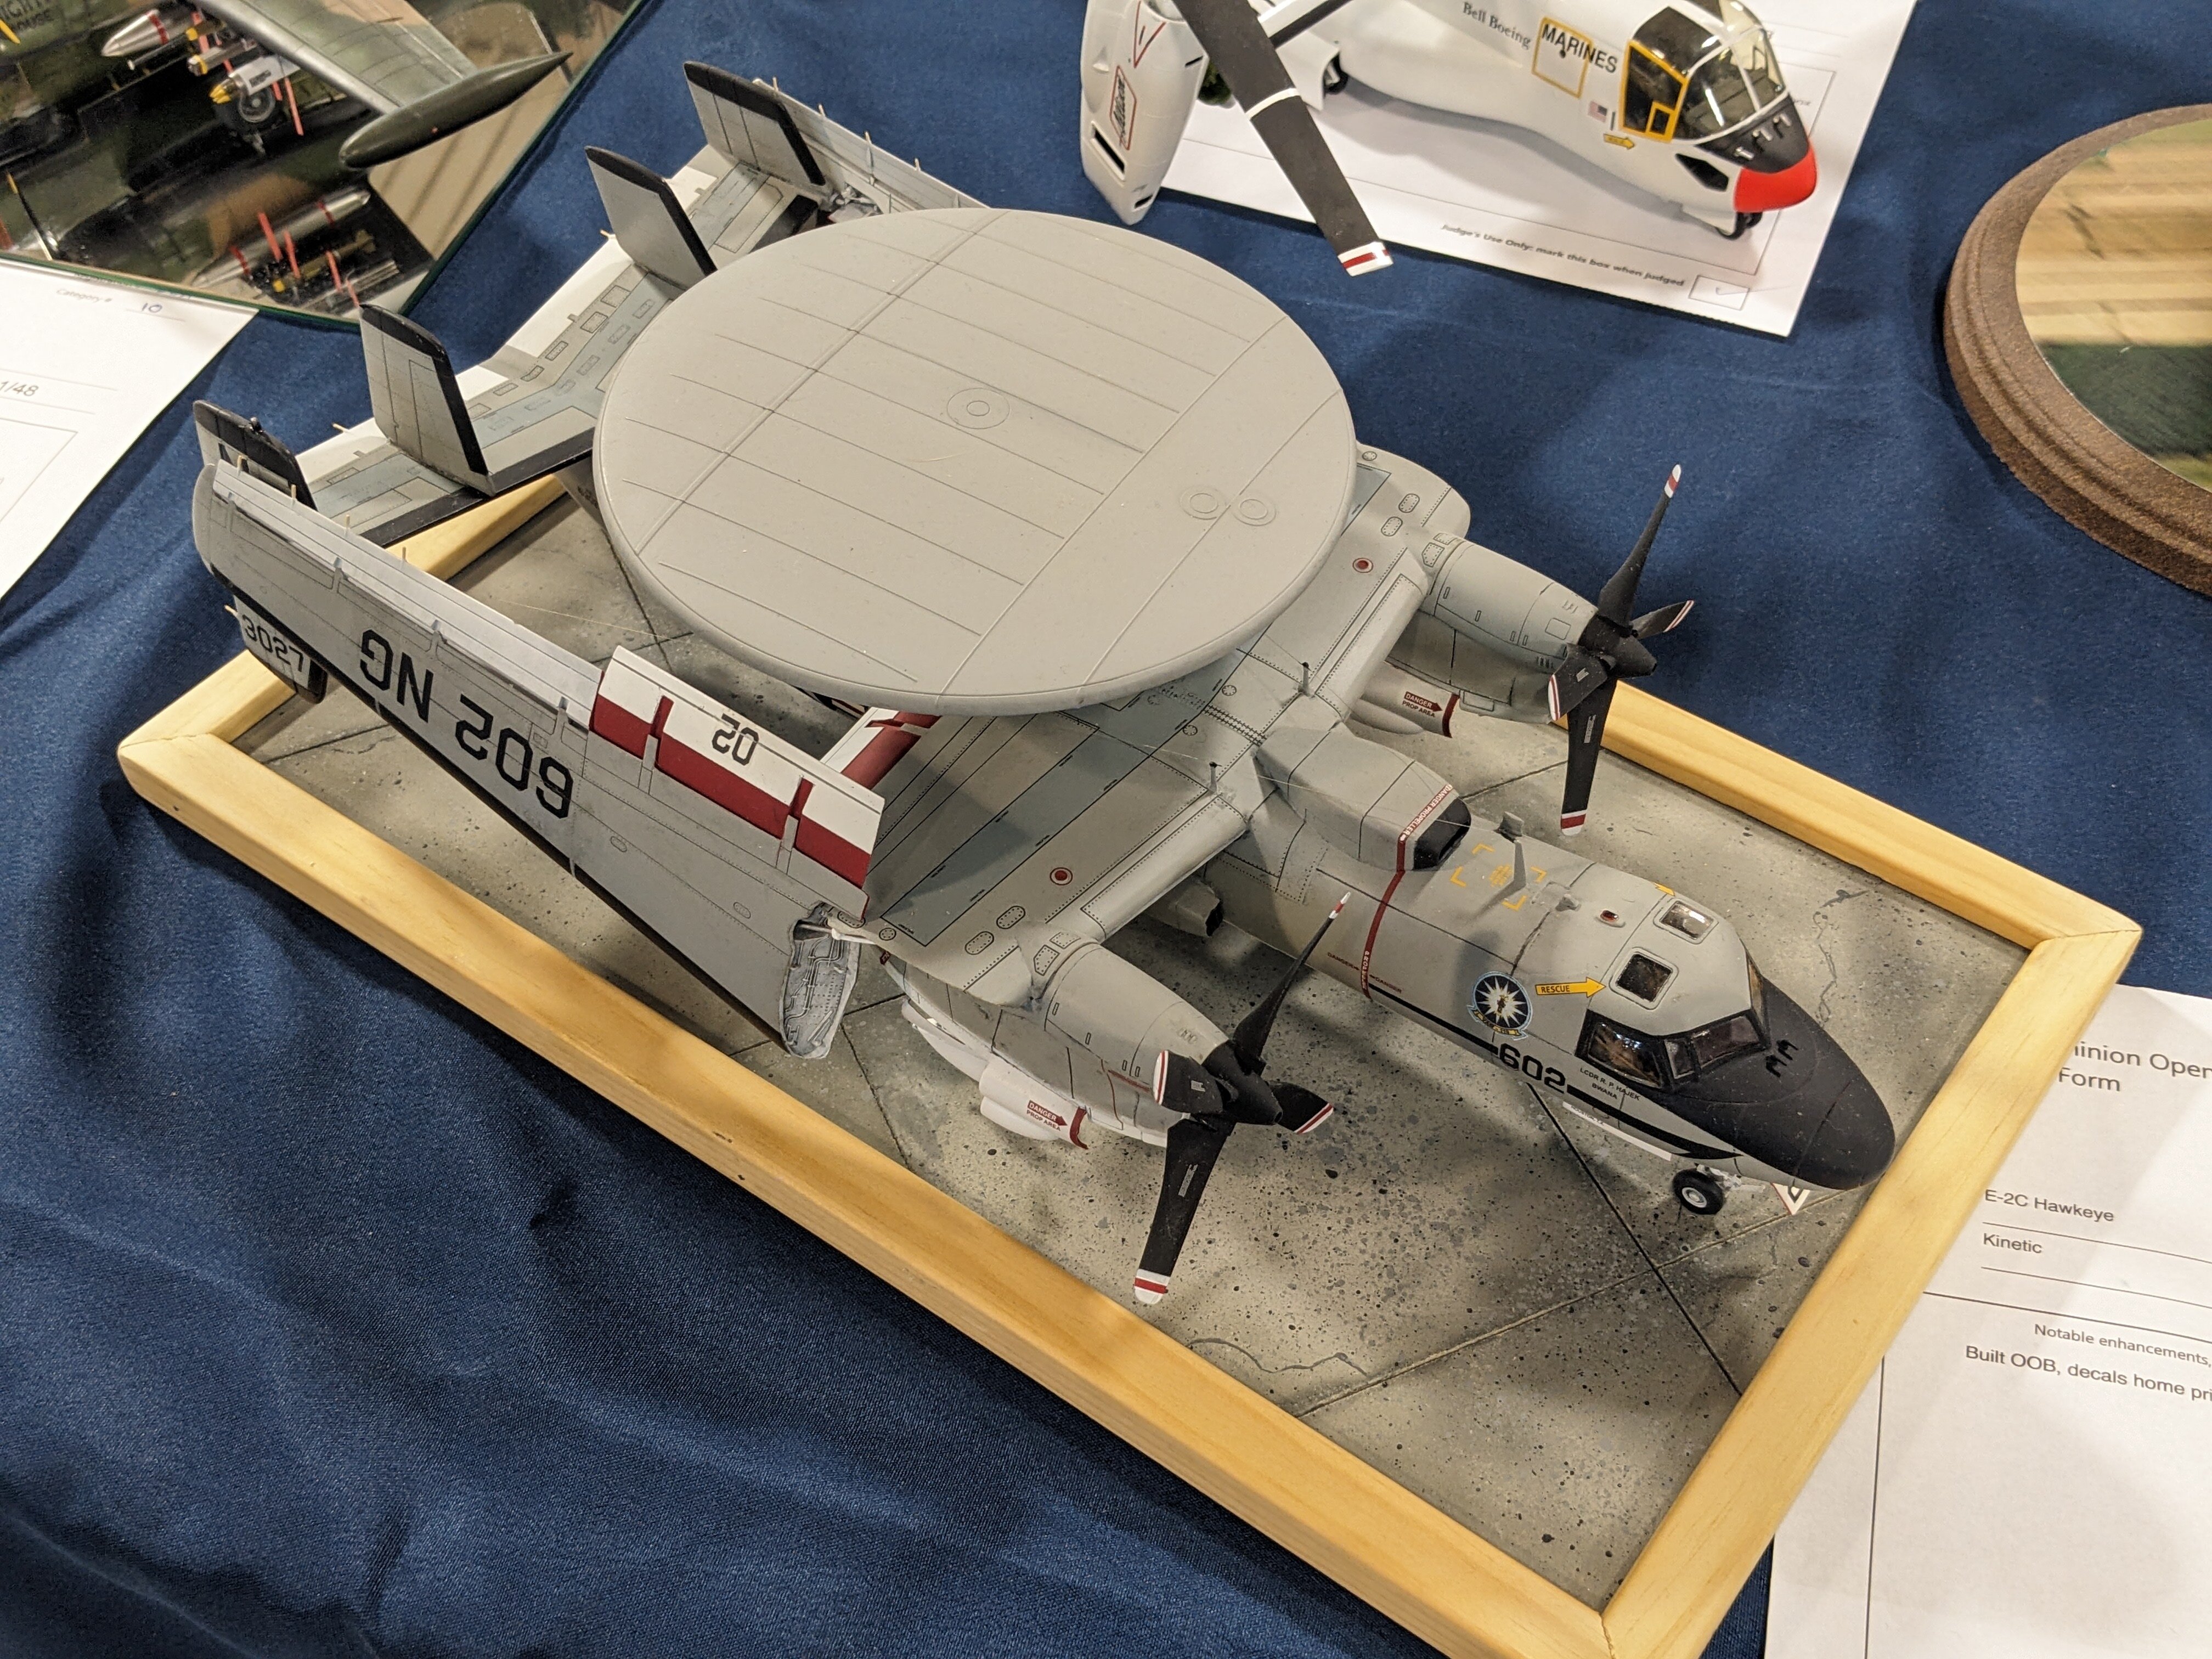
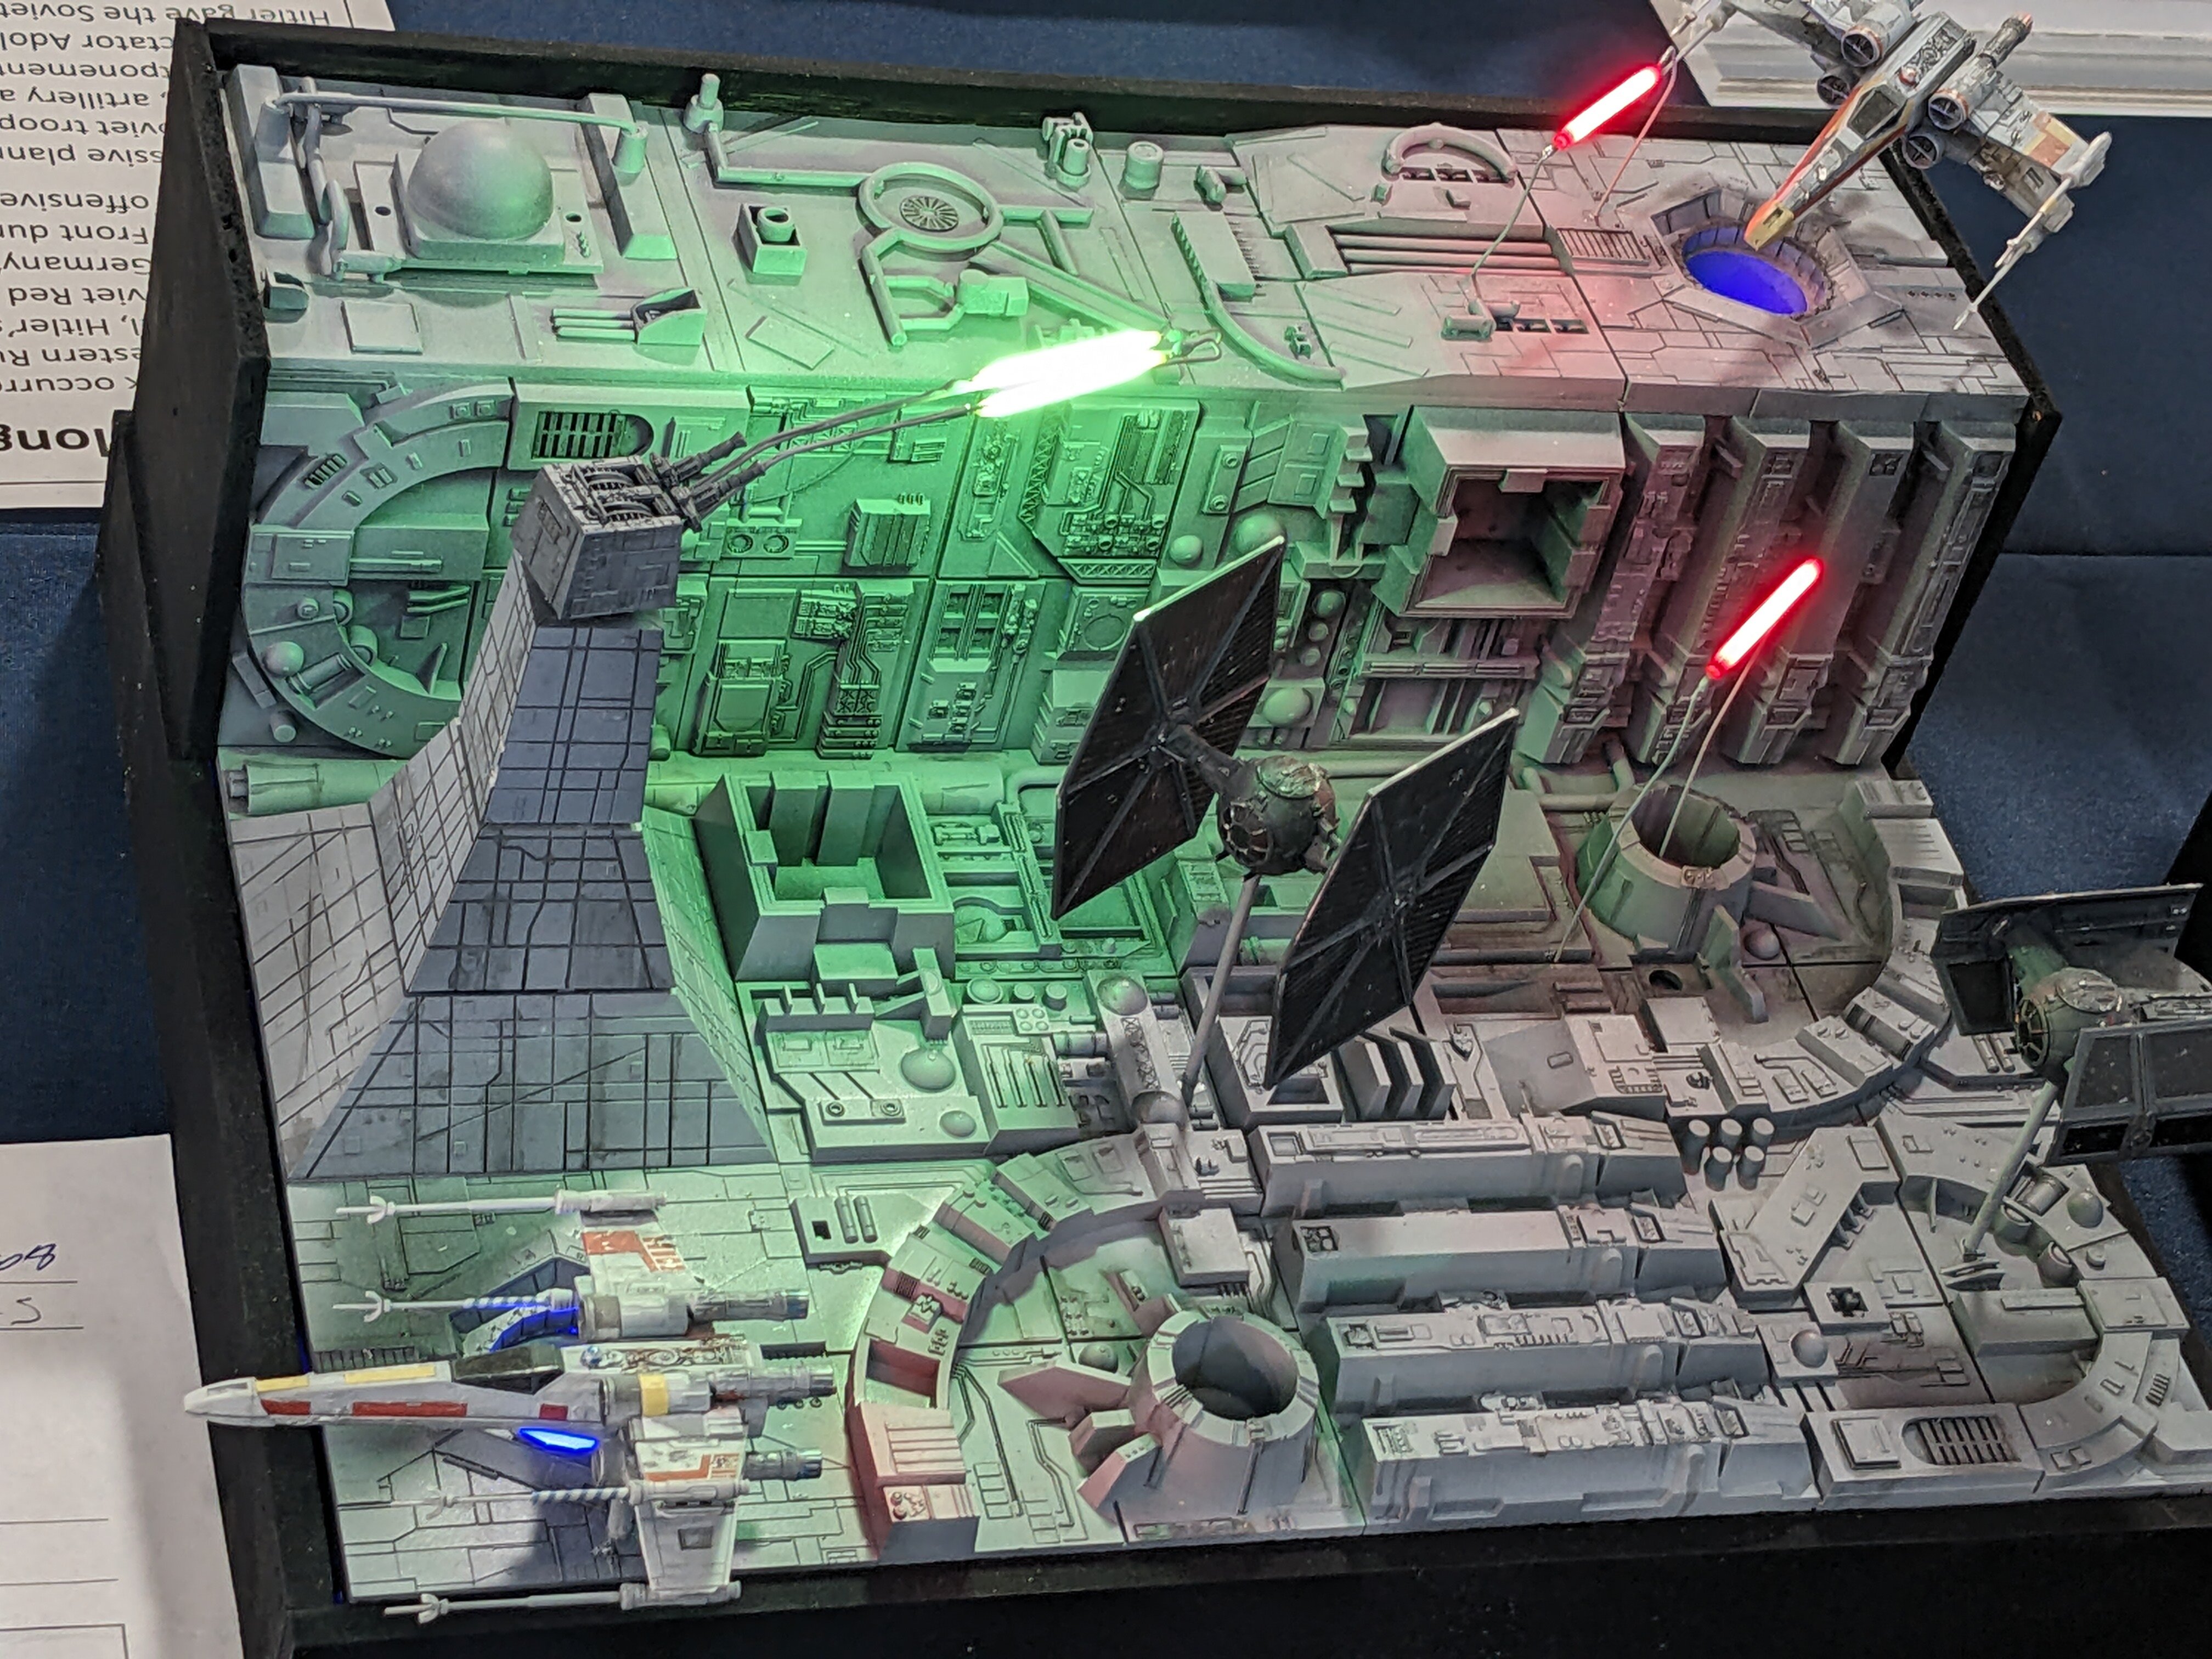
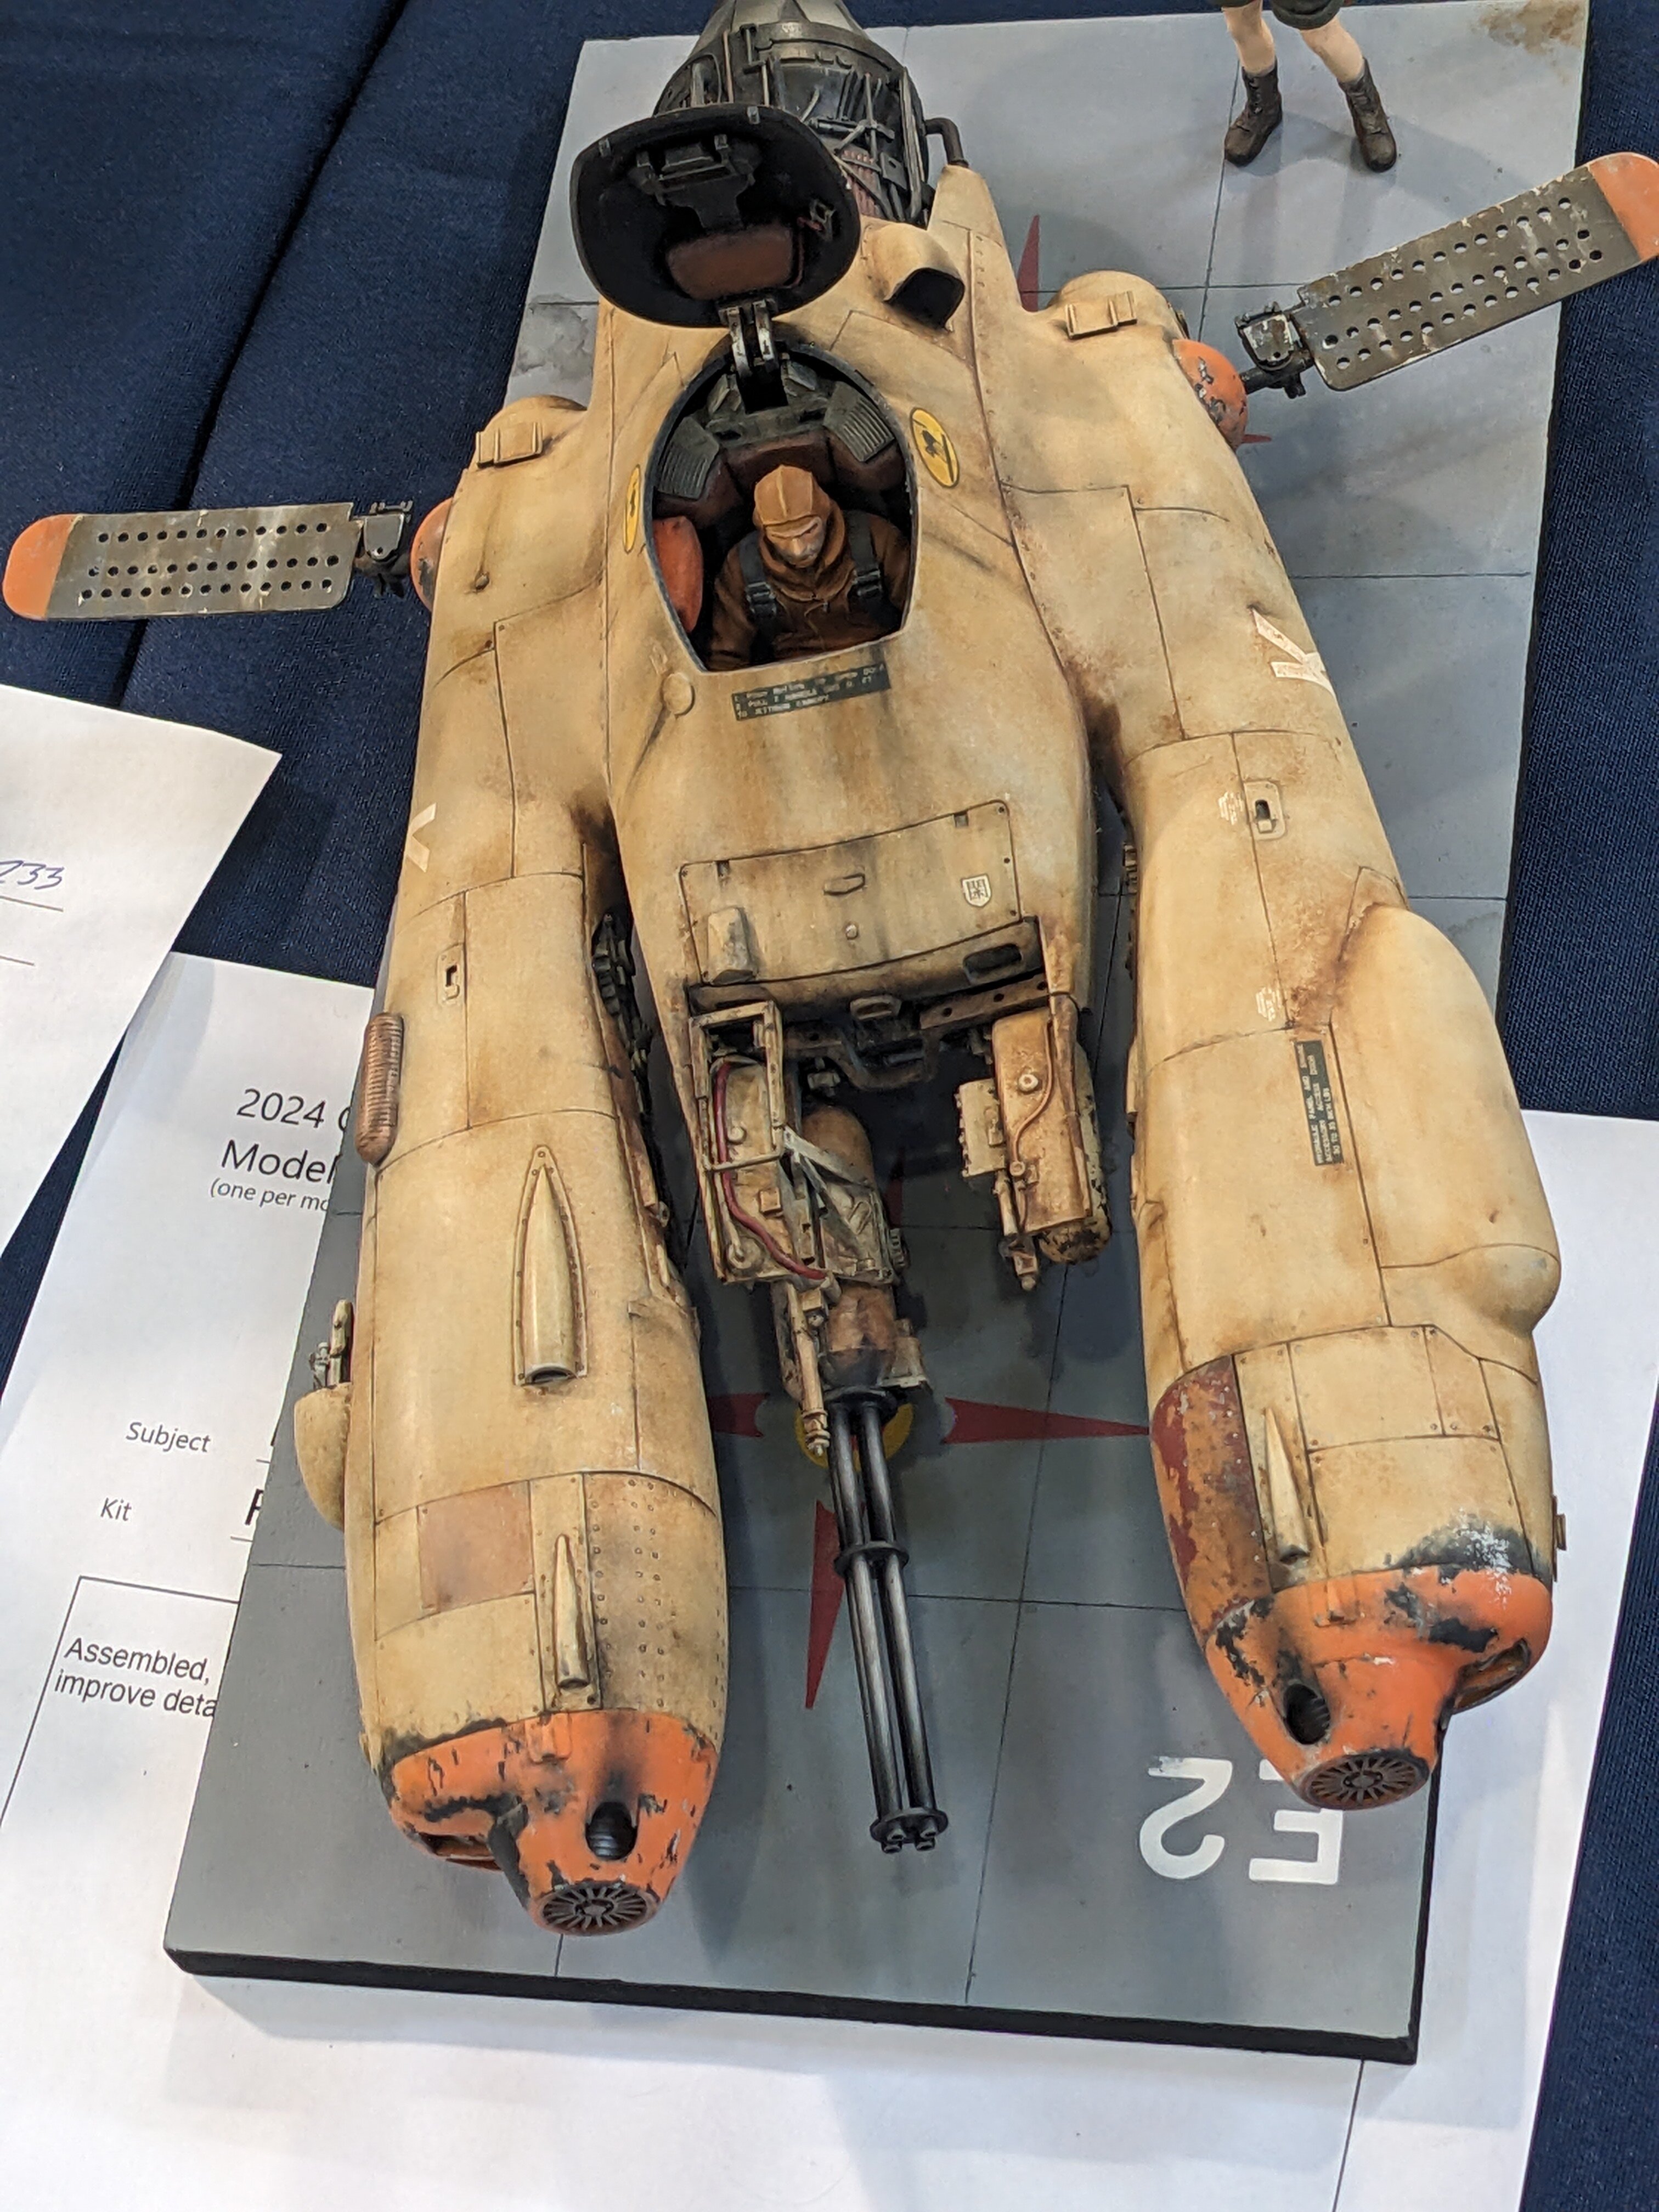
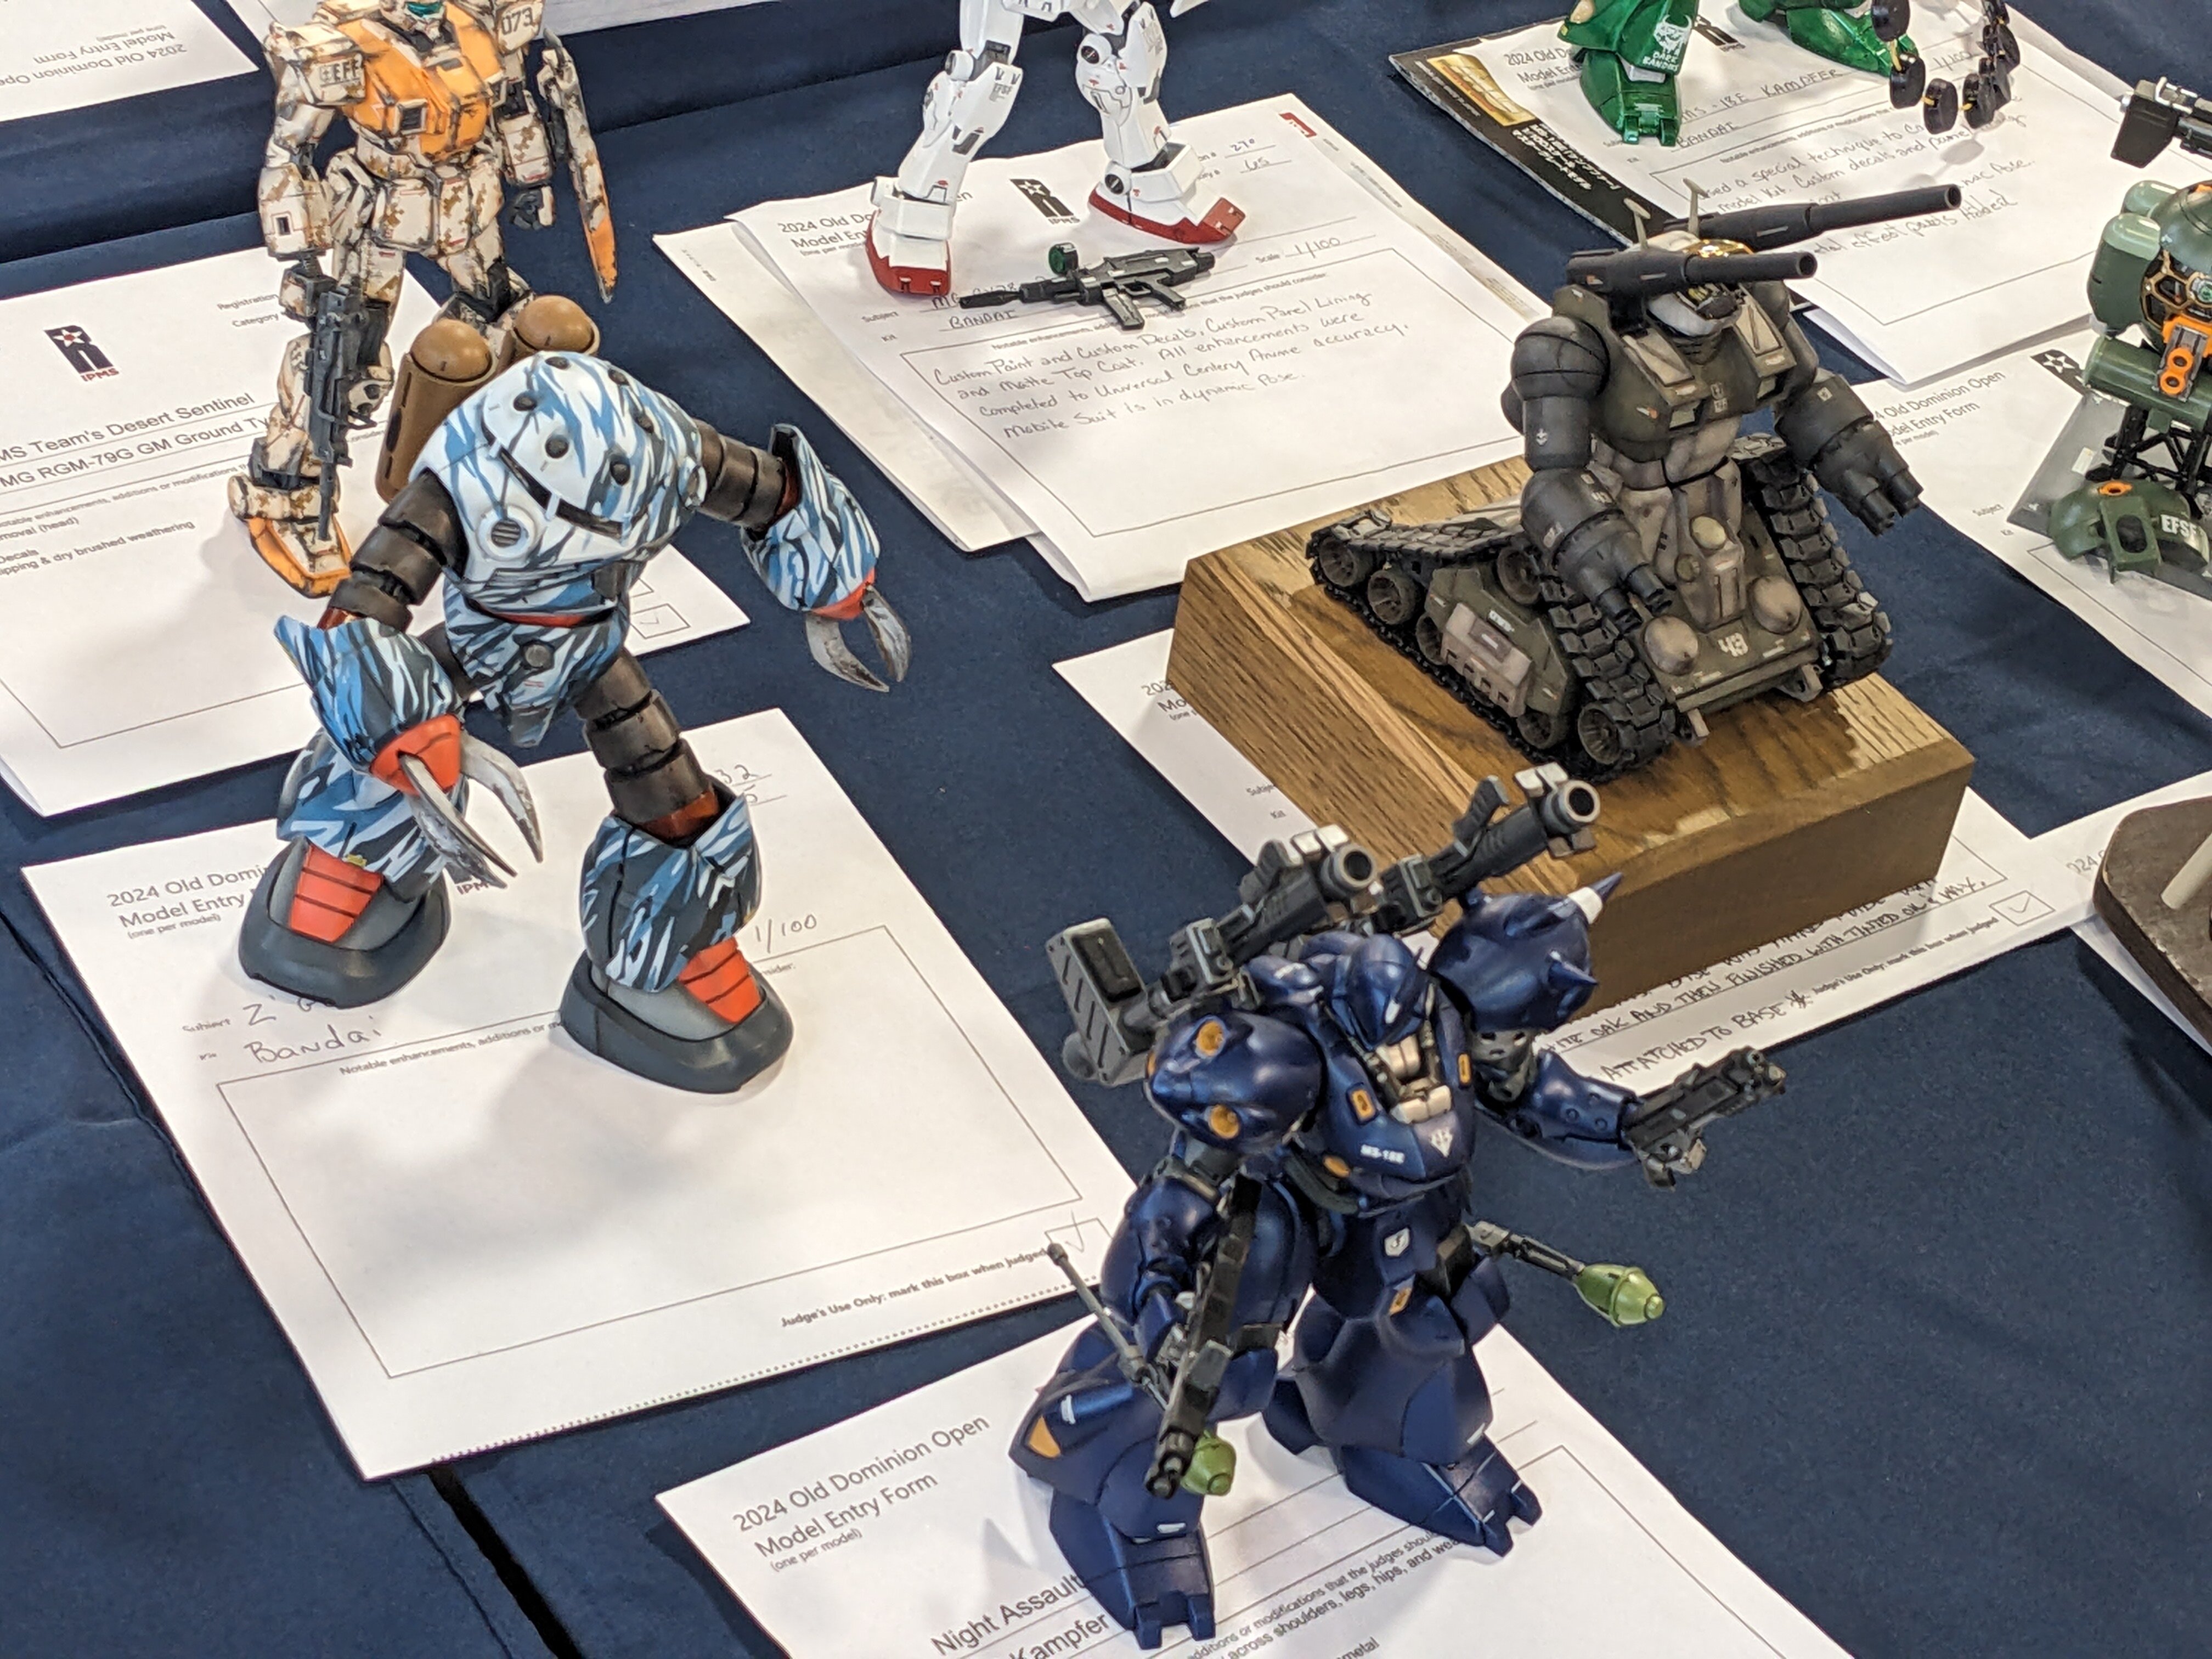
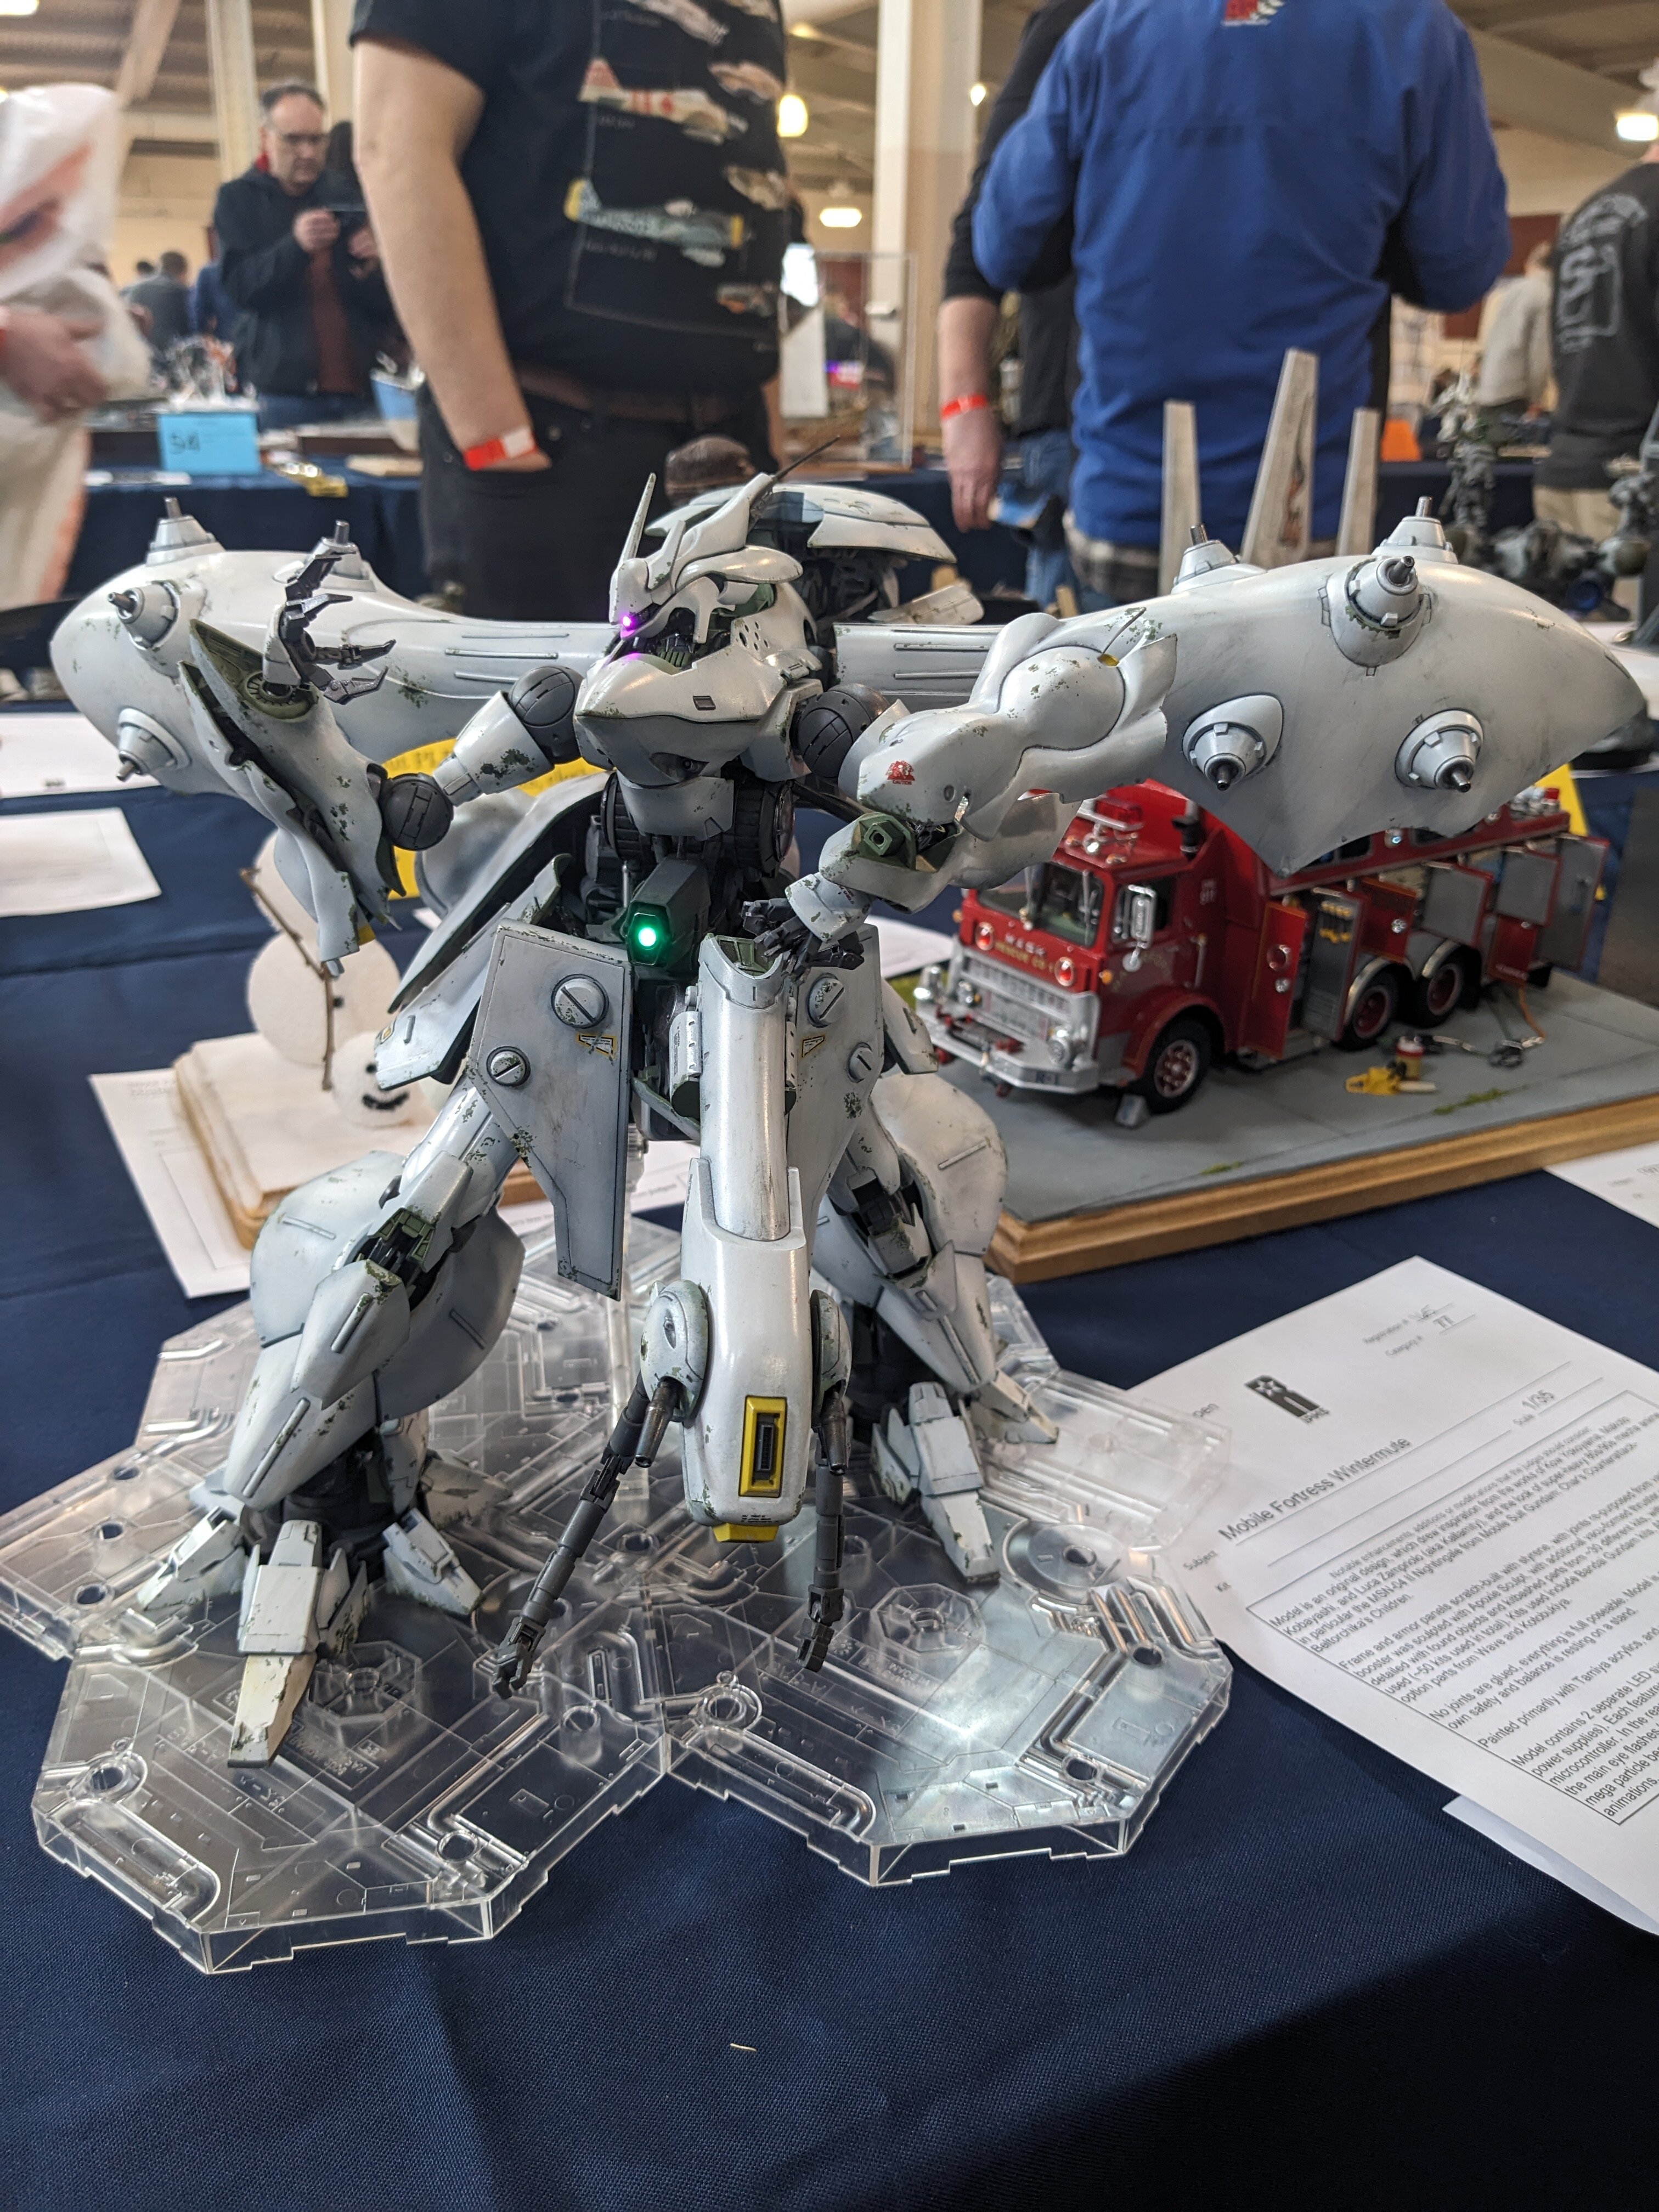
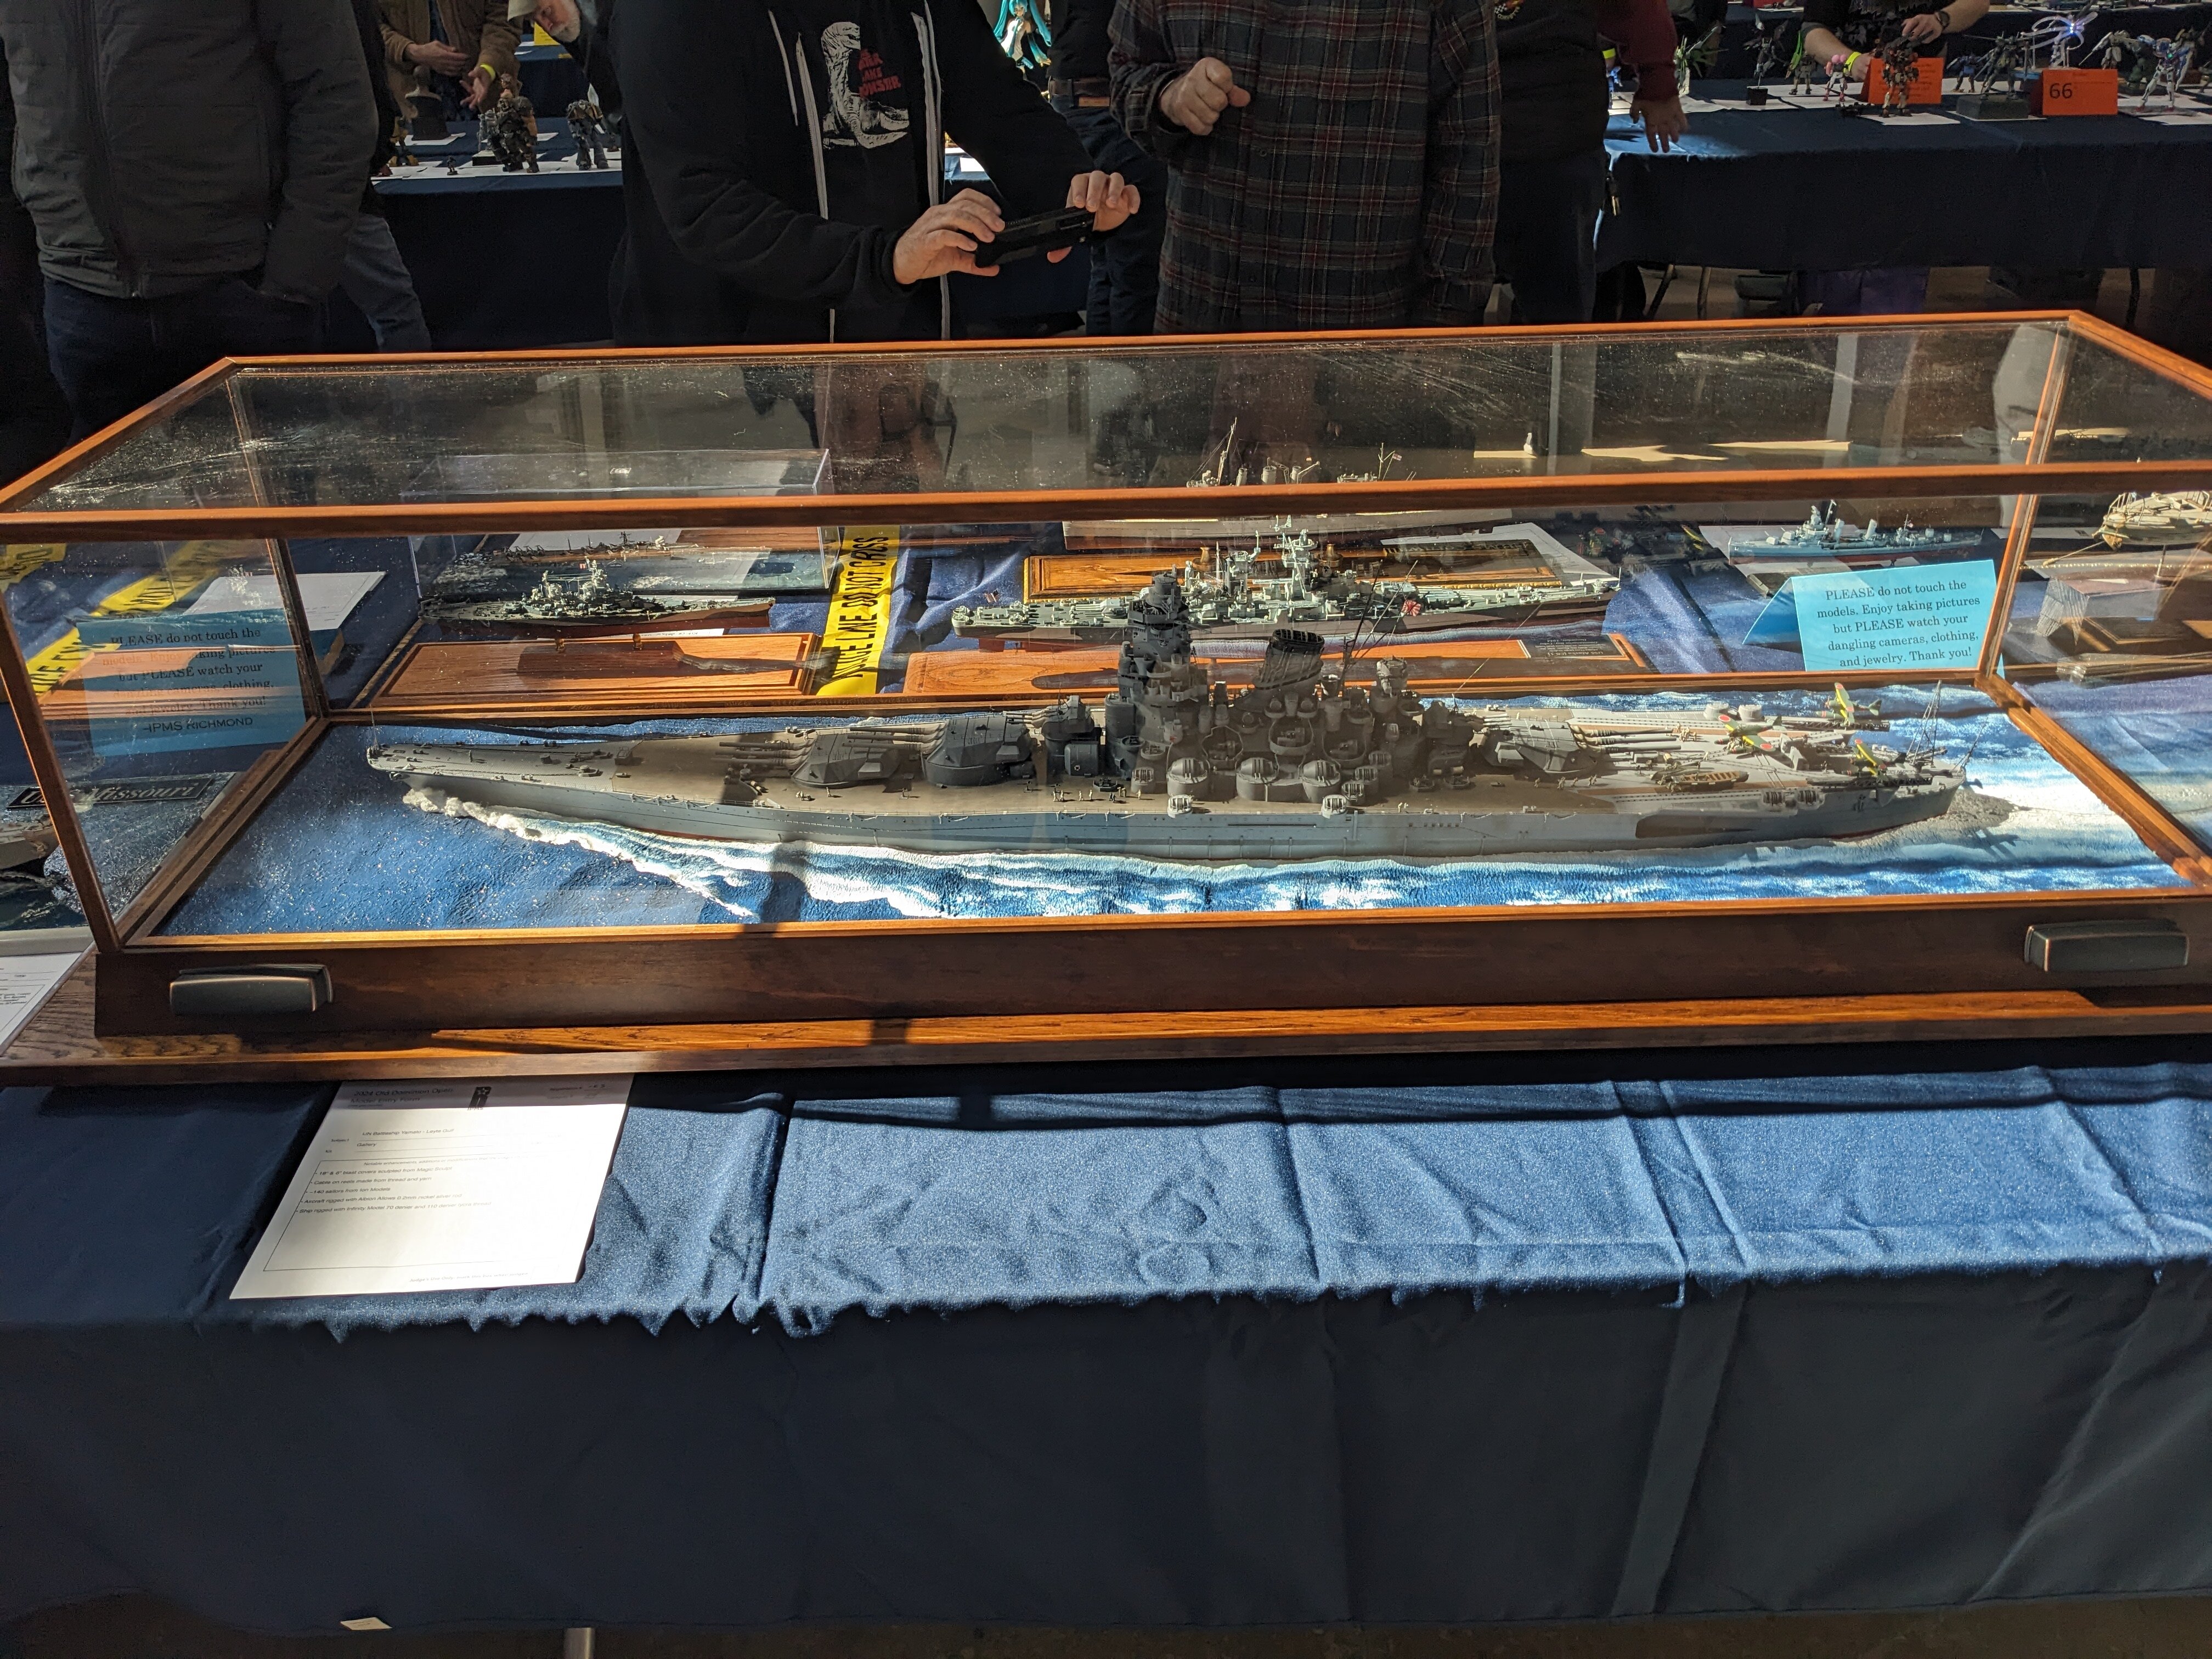
For those of you who don't know, the model show season has started. If you haven't gone out to a show, you are REALLY missing out on: the contests, the vendors selling great models and supplies (often at CHEAP prices), and all the great models on display and in competition. IPMS branches usually hosts these contests. They also have branches in Canada, Germany, and other places world-wide. Do a search for them. NO - you DON'T have to be an IPMS member to enter the events or competitions. I FINALLY made it to the IPMS Old Dominion Open in Richmond Virginia this past weekend. It was a GREAT experience! There was about 80 different categories and over 900 models on display! I can't post the whole thing, but here are some highlights. I hope you enjoy the photos; I left them full size so you can zoom in on them. - MT


-
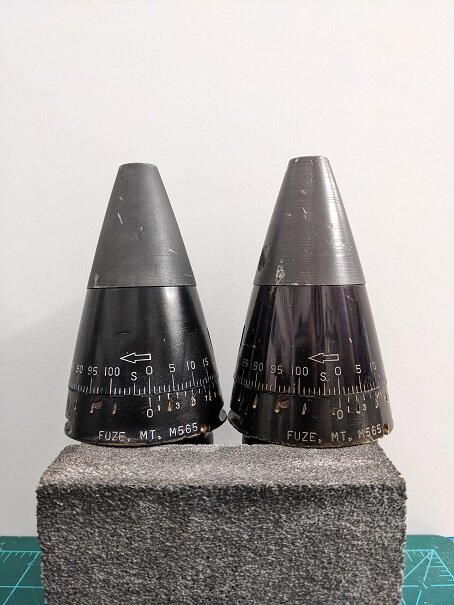
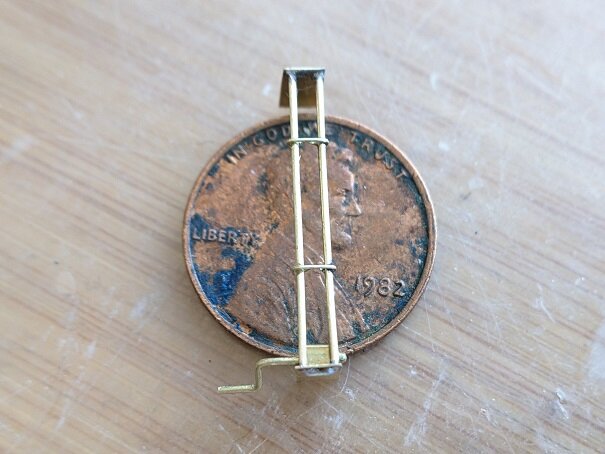
@wm cheng Thank you, I am VERY honored! Sorry, this is just for me. Our local museum is an air museum, so no surface warfare stuff. It is 1/1 scale and 1/72 scale. I have two other fuses (from WWI) and they make GREAT paperweights for holding down parts that are drying too! The original and cast for this one are below. At least they are stamped what they are, vs a lot of other old fuses. @Thom Thank you very much! @Big s Thank you very much! Yeah, I only heard about water colored pencils through my modeling club. They are an AWESOME and cheap tool! @derex3592 Thank you very much! @pengbuzz WOW! I am sorry to hear about your Superman figure! That REALLY sucks! On the other hand, it looks like you're gonna make a princess out of that pumpkin! You TOTALLY have the skills to do it too! - MT
-
Hah! That looks cool! - MT
-
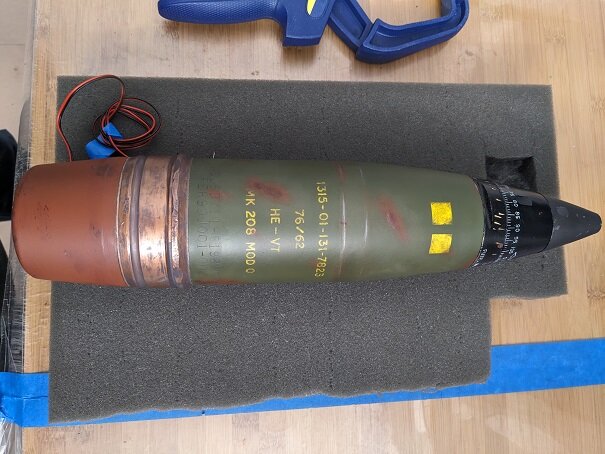
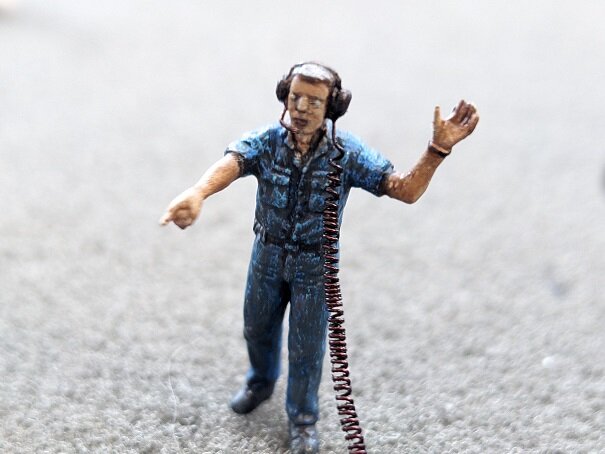
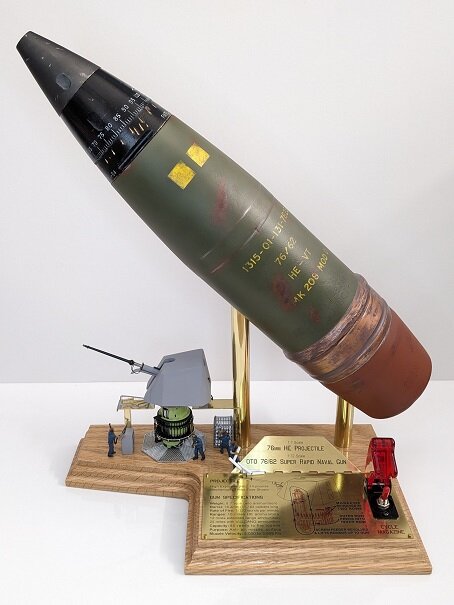
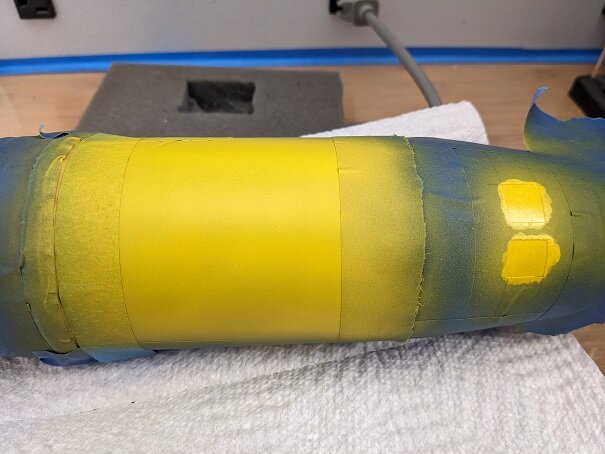
OK, FINALLY calling this thing DONE! Sorry for all the photos, but in case anyone wanted a better view, it's there now. I COMPLETELY redid this build from what you may have seen before. It was just the projectile and the gun. Now its the equipment and base to go with the gun plus the crew. Even the gun mount has parts that were redone. For those that get disappointed or frustrated with your builds, EVERYTHING on this build has been redone MULTIPLE times! So don't give up on what you're doing. SORRY, my camera made many of the photos (especially the figures) look like they were paint by numbers - it got TOO digital! The projectile completed and weathered. I stripped and repainted the driving band on it several times too - just in the past couple of weeks! Getting that metallic look was tough. I wish I could do better. The top number on the projectile is real. You can go and order it in the U.S. DoD supply system.😉 Last piece completed for the gun mount (it's the black part that sticks out on the lower left side now). The gun chief, or, "Little Orphan Annie" with those eyes🤣 and gun crew. Figure painting is NOT my strength! By the way, use WATER COLOR colored pencils! They're awesome and beat a tiny paintbrush any day of the week! Water can be used to blend or clean off what you did. They also smear/blend nicely too. And everything running. EVERYTHING runs off one "D" battery (1.5volts). The motor (to give it the right speed) and the LEDs run a a "joule thief" circuit to up the voltage. One LED is a color changer, the other is a tealight candle LED. Nothing fancy. Thanks for checking in guys! - MT

-
@Urashiman You get BONUS points for being a GOOD dad and also building models for/with your son!😁👍 @arbit Great sculpt! You even caught his constant looking angry looking face🤣 @Kurt That's a nicely detailed interior! - MT
-
@pengbuzz I'm sorry to hear that! Urashiman has a good idea, even though you hate A-wings. Make it crashed.😉 @Urashiman At least your airbrush is not pink like in that booklet 🤣 No way! I KNEW those A-wing lines looked familiar!!! Now I know why! thanks for posting that - I'll never get it out of my head! - MT
-
@Thom Ha ha! I was thinking, "Since when does an F-14 have throttle quadrants and a jumpseat for the pilot!?"😁 BEAUTIFUL interior though! @pengbuzz Sorry to hear about your Tomcat woes! I KNOW you can work it out - you can do it! - MT
-
@arbit Yeah, that's a great looking sculpt! @Rock Are you fixing surface flaws, or sculpt model? @Chas I NEVER thought I'd say that a plastic model looks good on 'roids, but there's a first time for everything!🤣 That is a REALLY COOL diorama! - MT
-
Thanks for sharing! The transport will be COOL in 1/35th! - MT
-
@505thAirborne That is a GREAT looking Widow! I like the decal scheme you chose for it too! Too bad that plane never made production. @pengbuzz Cool! Time to put the Top Gun soundtrack on build again😁 - MT
-
@electric indigo That cockpit looks cool. The pose of the pilots talking to each other makes it look more realistic. I know a retired pilot who has over a 1000 traps in the Intruder. He was smart and tape recorded his audio over the helmet headphones during the Vietnam war. There's a couple of missions where SAMs were fired at him. They got his recordings and made them available at the Naval Air Museum for visitors. You can hear the warning tone go off and then the crew take evasive action. It's cool to be able to hear what actually happened during those missions. @pengbuzz That's cool! So the question is, set to kill or set to stunning!?😁 - MT
-
It's cool to see a classic getting some love! Your paint scheme sounds cool too. This was one of those cool deals I got back in the 80's. We found an old comic book shop that had a TON of Macross and Mospeada kits up in there loft collecting dust. They marked them down to sell so I was a able to snag a couple of each mode. 👍 - MT
-
@wm cheng Thank you for posting that link regarding using acrylic inks! I actually bought a couple colors in green to try and color the tiny 1/72 scale projectiles. I had to settle with paint; but like you said, the ink pigments are finer and more scale looking. Even some of the best paints can still chunk up. The inks didn't work for me (they don't stick to metal😎), but in testing, I could tell right away they have potential for other effects. @nightmareB4macross That is going to be a Super Chunky Monkey (with less chunky - more SUPER)!👍 @Chas Thank you, I appreciate it! I never thought you'd hit the 'roids!🤣 Seriously though, that is going to be a COOL looking diorama! @Urashiman Thank you! They are Plastruct letters used to make a "shadow" or reverse stencil. Thankfully, they sell them all over the world: https://www.plastruct.com/search?q=letters @F18LEGIOSS2 It's great to see another old figure get some restoration! @arbit To keep the motor running at the correct speed, I had to use a 1.5v battery. The Joule Thief enables me to keep the same battery AND run the LEDs. I don't need a bunch of separate batteries. They have to be left out anyhow when not in use to prevent leaks ruining things, so the less the better. Isamu's bike (and babe) look awesome! You must be on a Macross Plus kick😁 AWESOME looking sculpt! - MT
-
Thanks guys! Right now it looks cool hanging up in the living room until my wife finds something more "decorative neutral"😁 I got it for my son's room. - MT
-
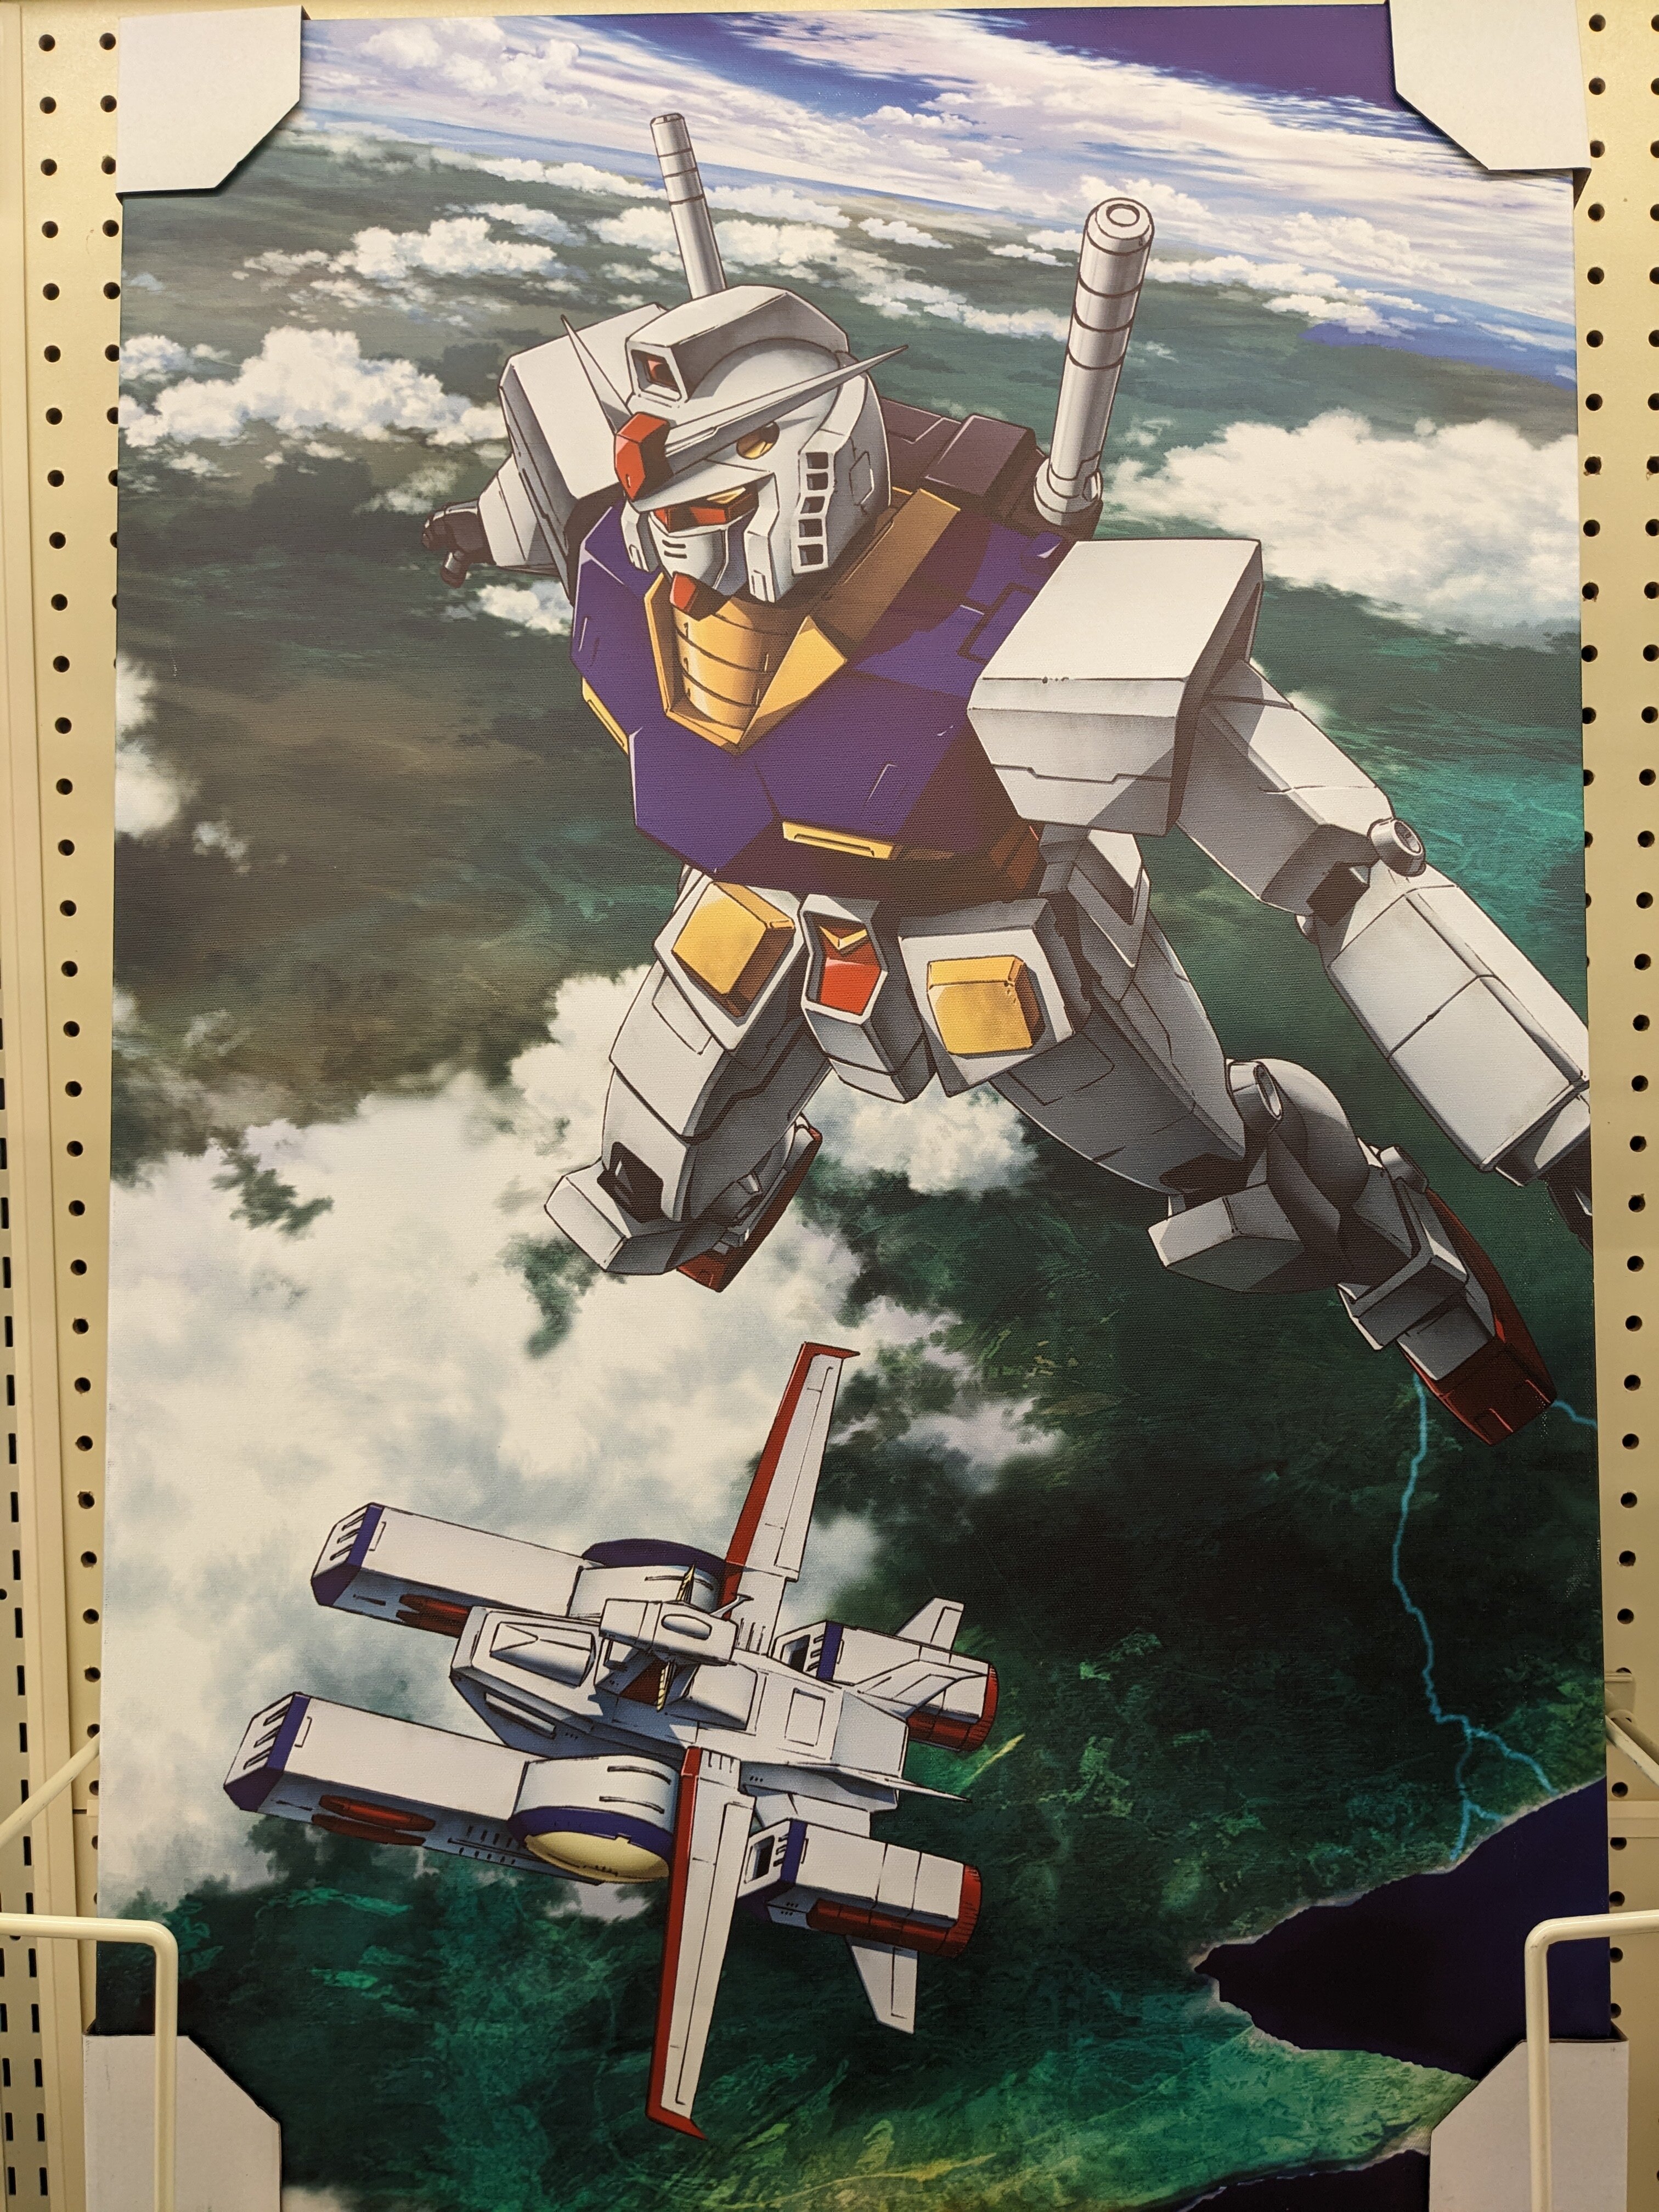
Sorry if I got this in the wrong thread, but Hobby Lobby has these canvas prints for about $25-30 (full size photo for detail). The print wraps around the edges. - MT
-
Thank you for the kind words everyone! "You begin to think you might just have some modicum of talent...then @MechTech posts an update....then you crawl back under your model table and begin to re-think your life....😂" Thank you @derex3592! You're toooo funny! You've also been putting out some great looking models too - like the Hornet! @pengbuzz NOBODY can beat your masking tape skills - NOBODY! Thank you and that is a COOL meme (and accurate) too! Thank you @Thom! Thank you @Urashiman! If I could make them that small, I would!😎 Sorry guys, for those that are interested, I forgot to tell you about this (full size so you can see detail): About $25-30 at Hobby Lobby! They've had other Gundam stuff there too occasionally. It is printed on canvas with overlapping edges. Ready to hang too! - MT

-
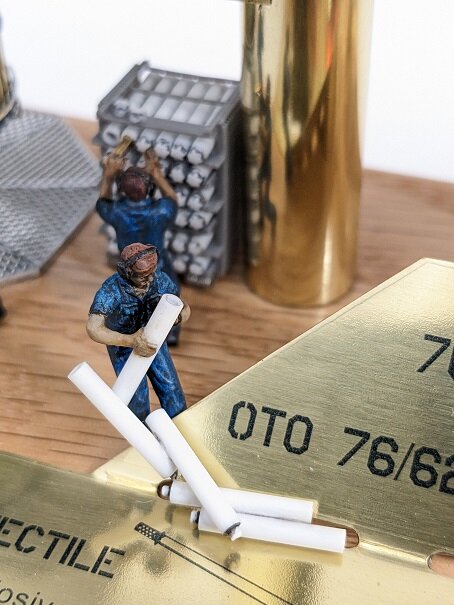
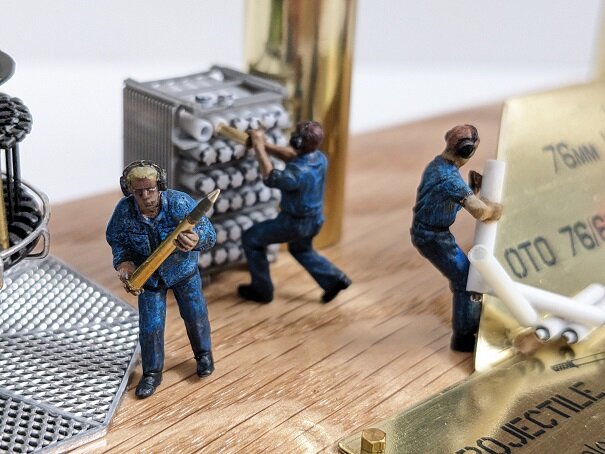
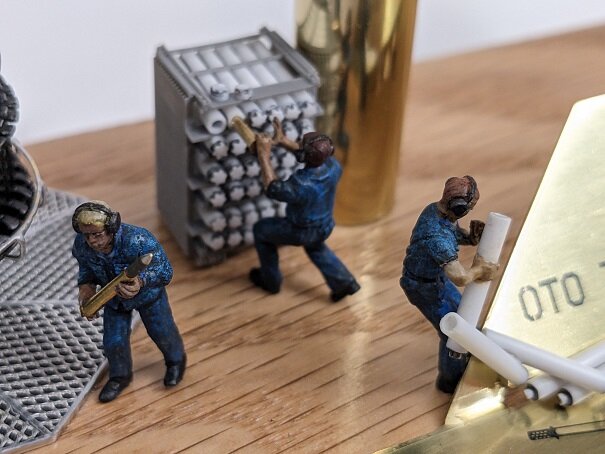
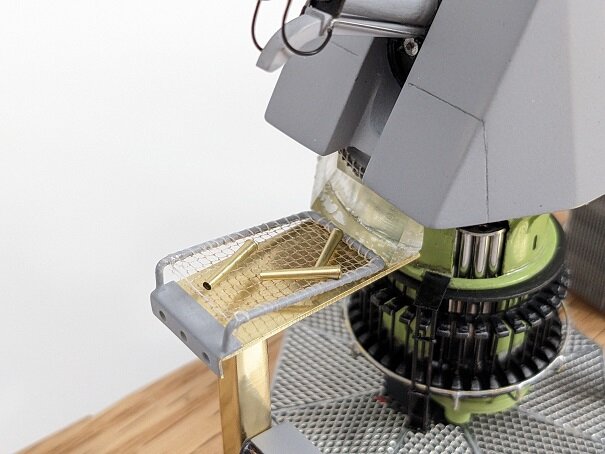
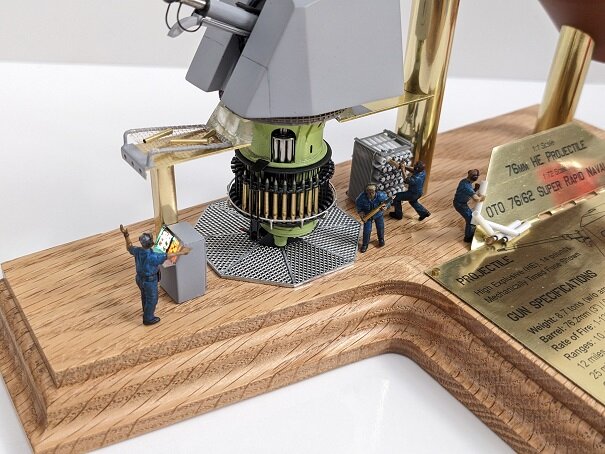
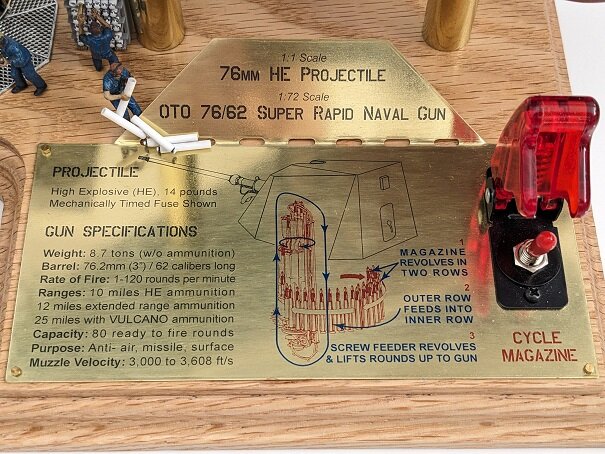
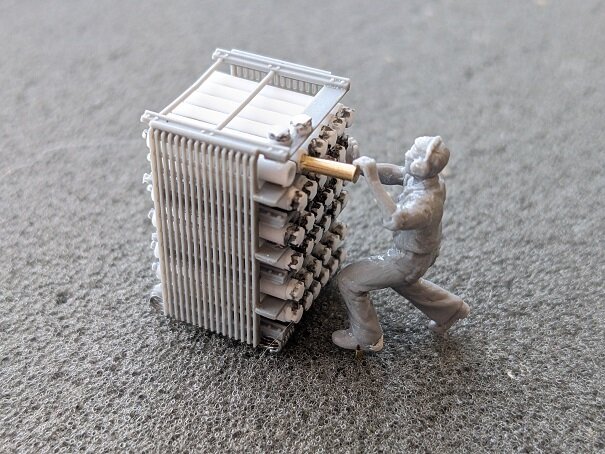
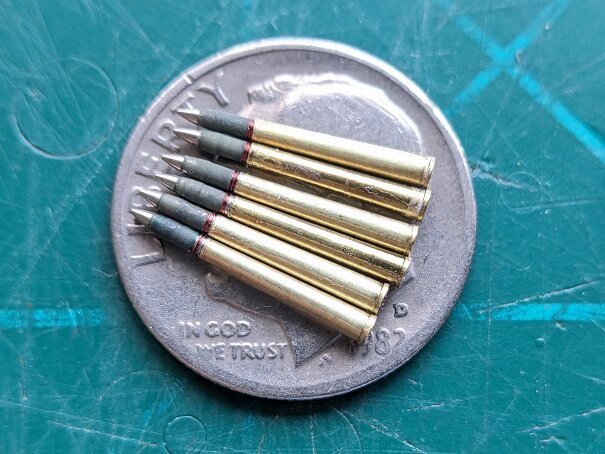
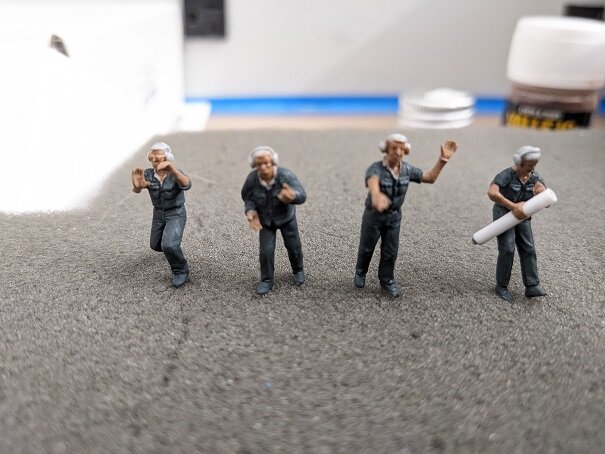
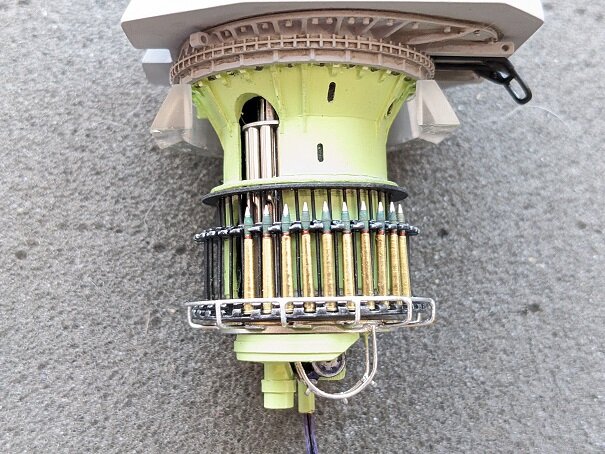
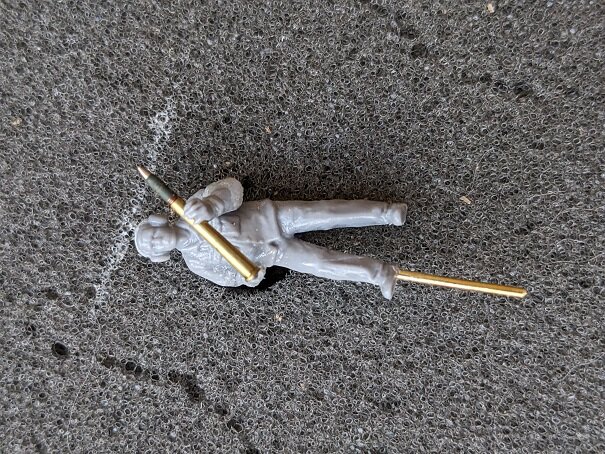
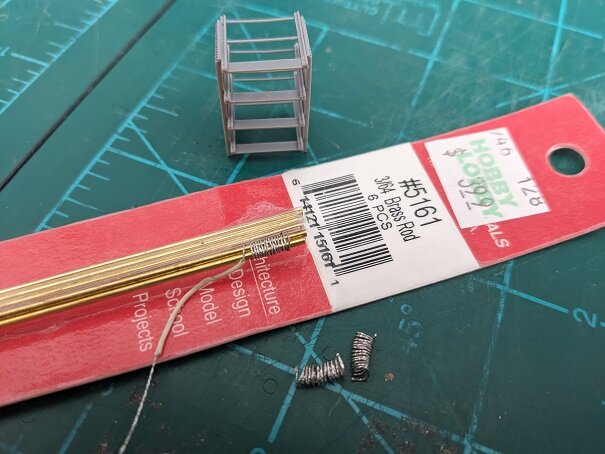
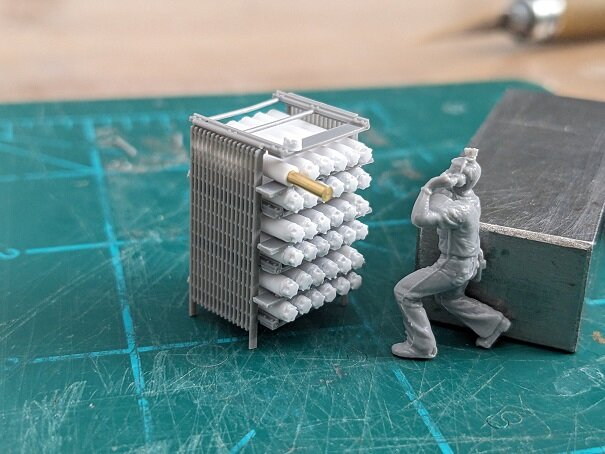
@arbit THAT looks like Isamu!!! Smooth too (no pun intended 😁)! @Chas You did "The Ole' Girl" justice! Great weathering on it too! @nightmareB4macross Your "fixes" look much better than stock. Having it transform closer to the canon version will be worth all the effort! @Rock That Tomcat is looking SWEET! I actually know one of the pilots that fairied those over there. Interesting stories😎. @Mr Jones Good to see you back on the boards! PE is FUN to work with (note sarcasm in voice). It makes a difference though. FINALLY making some progress on the 1/1 - 1/72 Oto Melara canon diorama. It's weird working on the "real thing" and a model with it in there. First off, the 1/72 complete rounds (brass propellant case with the projectile as one ready-to-fire piece). Projectiles were turned on a Dremmel to mark the copper driving band (orange Sharpie) and then painted OD green. They were then glued into the brass cartridges with G-S Hypo Cement. The brass was coated with thinned nail polish (you can see a scratch in one). And one of the gunners that carries one. The brass rod are how the figures will attach to the base (better than just glue). And another gun crew member taking the rounds out of the storage rack. The rack is ready to go too. And ten rounds loaded into the rotating magazine of the canon's turret. All of the gun mechanisms below deck are controlled through this panel on the actual gun. The model has two LEDs. One is a color changer and the other is a tea-light candle LED to flicker. All are soldered to a 1.5V "Joule Thief" board to run them. LOTS of blackout methods used to control the light leakage. And now back to the 1/1 scale 76mm resin projectile. I wanted to add the stenciling on the projectile, but had no way of making a custom stencil. I DO have Plastruct 1/4" letters though! So I reversed stenciled and used them. I used little dabs of contact cement to make them stick. You can see where the glue also masked the paint, but added to the stenciled effect. And finally starting the base coats for the gunnery crew. They all look like they had to much to drink 🤣 That's it for now. Thanks for checking in everyone! - MT
-
@pengbuzz "MECHTECH INC. FINALLY FINISHES REPLICA BOAT" - THAT - WOULD be a headline!!!🤣 Gott finish my ship! The water on the papers actually adds realism besides making them less hand-made. REAL newspapers outdoors would be subject to rain - or whatever falls from the sky in that dump of a city😁 @arbit The only thing that doesn't make Isamu look like himself is the hair hanging down in his face. Other than that, I think he looks GREAT!!! @505thAirborne Don't know if you did it yet, but if you gloss coat that model, the decals will melt into it like butter! @derex3592 And you can longer whip a pilot out of the Hasegawa ground set. The helmets and uniforms are VERY different now! SORRY! I agree with you though. - MT
-
@pengbuzz WOW! I finally made the papers (hopefully for something good, it's kinda hard to read). Your vignette looks AWWWWESOME! I don't know what you were worried about. The first head TOTALLY looks like Peter Weller! Like "Honey, I Shrunk Peter Weller" and he's wearing robot action figure clothes now! That is definitely worthy of a model show! You even got props from WM Cheng on it who worked the movie!!!👍😎 @nightmareB4macross Your Valk modifications make it look WAAaaaaaay better! It's hard to get that Chunky Monkey look out of that design, but you're making work out great! @derex3592 That Bradley is looking sharp! It's too bad it needs to be weathered for realism to cover up that clean finish! @arbit Great sculpt as always! I can't speak to proportions, but the only two things that stood out (because you asked us to look) were the belt buckle, the belt pockets(?) and the chest piece. 1). The belt buckle looks like it's a triangle pointed to the upper left hand side, vs a box as you've shown. 2). I'm not sure how big the print is intended to be, but it looks like the belt pockets, almost look like fanny packs on the side could be softened on the corners. 3). The chest piece has vents on it around the edges on the left side. It looks like you have them cut into the front of the sculpt vs on the beveled edges. The far right hand of the chest piece has an indented circle on it. It looks like you made it spherical and protruding. I hope that helps. I only found those points because you asked😁 Again, great work as always! - MT
-
@nightmareB4macross Lots-o-putty! Sanding that ABS must be a pain! Sometimes the only way to get a smooth finish on it is to wet sand. I started the Nichimo 1/200 Battleship Yamato years ago. ALL ABS. I sold it after only a few assemblies, it didn't want to cement easily or cleanly sand. If you haven't heard, the BEST glue for ABS is straight Acetone. Unfortunately, I only found that out years after selling the Yamato😕 - MT
-
@pengbuzz Looks like Robo is "Takin' out the trash!" 😁 I'm glad you didn't give up and was able to make his face work! @Chas That gunship looks nice-n-clean! I love that model (the original and Bandai versions)! I started one with folding wings. I gotta dig it out some day and finish it. Nice touch chroming the letters too. @derex3592 No snow day here😕, just a delay. Your Hornet and Bradley are looking REALLY good! @Rock I've never tried that technique before. I'll be watching what you do to see how it works out😉 It's always fun learning new things! - MT
-
Thank you everyone for the positive feedback! @neptunesurvey1 Looks like you had to get another account working. I'm glad you had more pictures to share! That thing is a printed brick! LOTS of plastic in that print. Thanks for sharing the additional COOL photos! @pengbuzz Looks like Robo made the headlines again!😁 COOL looking paper! @derex3592 That is a SMOOTH paint scheme. Are you going to dust or muddy it up (almost sad to). - MT
-
@Kurt AWESOME detailing and figures man! Those 1/35th figures look 1/12th at least and the uniform camo is spot on. You could definitely get some metal at a model contest with that baby! @pengbuzz FANTASTIC scratch building of the backdrop! Your mods to that figure are next level and also AWESOME! Like Kurt, I think you could get a trophy at a model show with that build! - MT And sorry, it took me so long to post my stuff, I missed your guys stuff😁 - MT
-
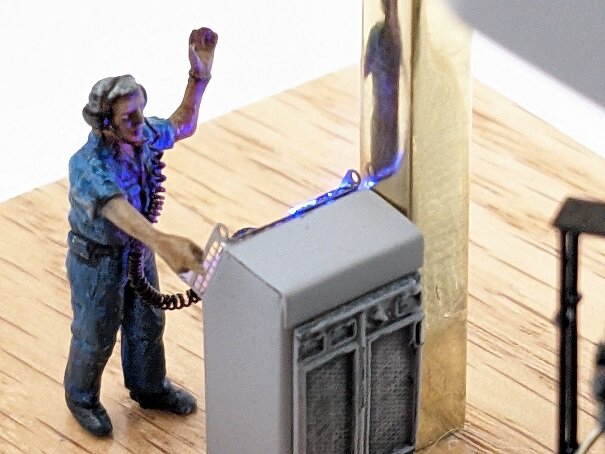
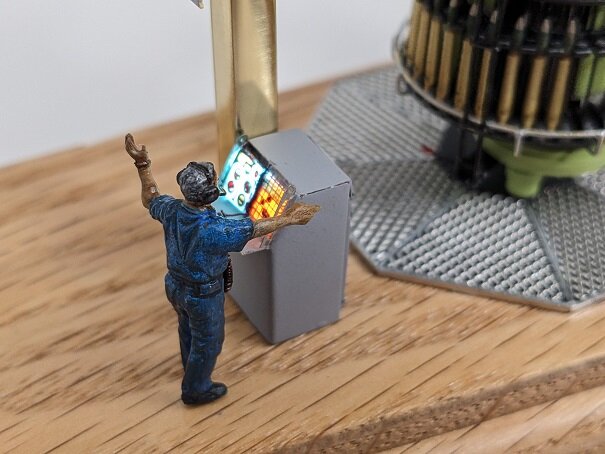
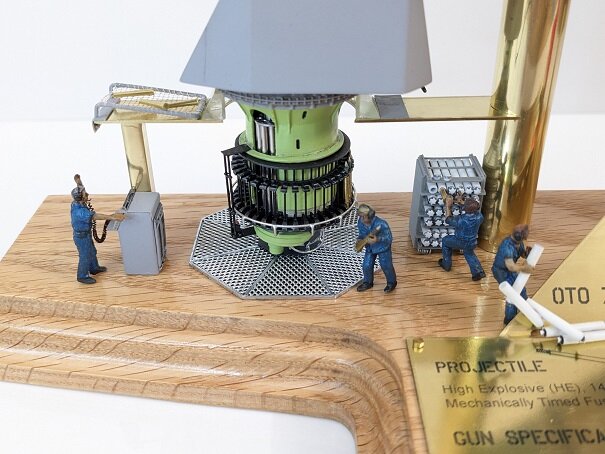
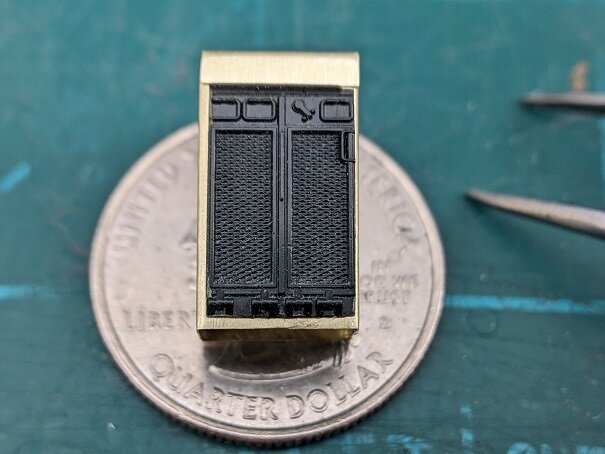
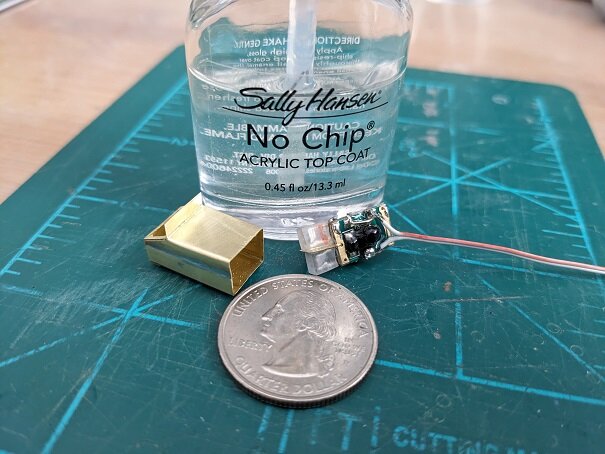
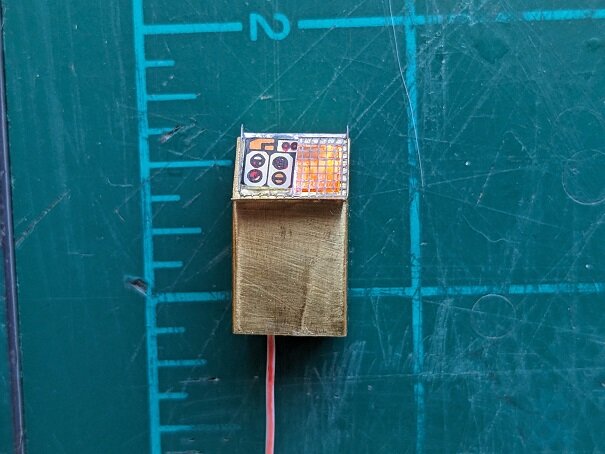
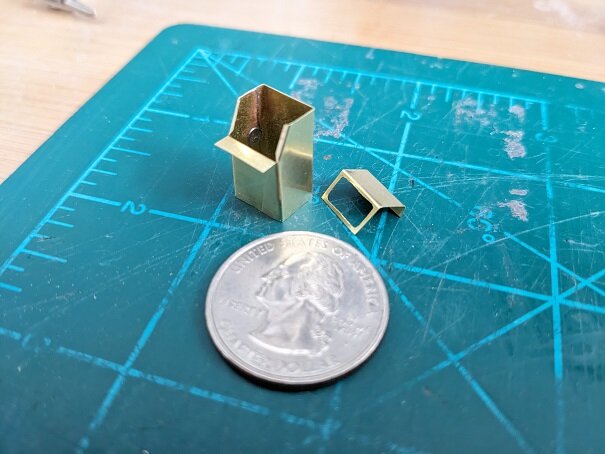
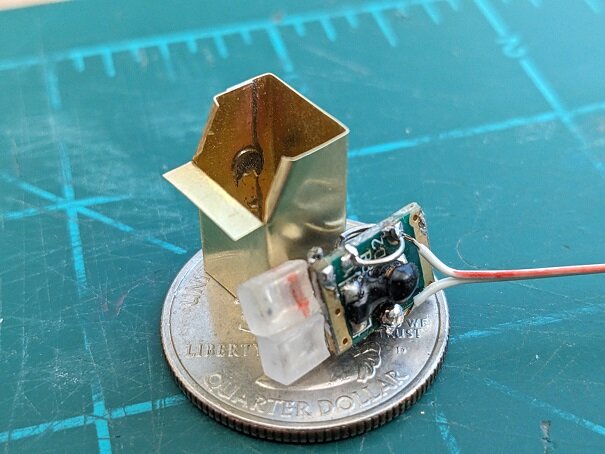
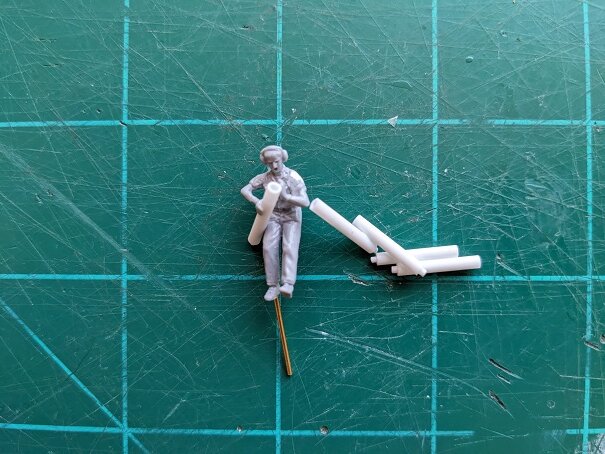
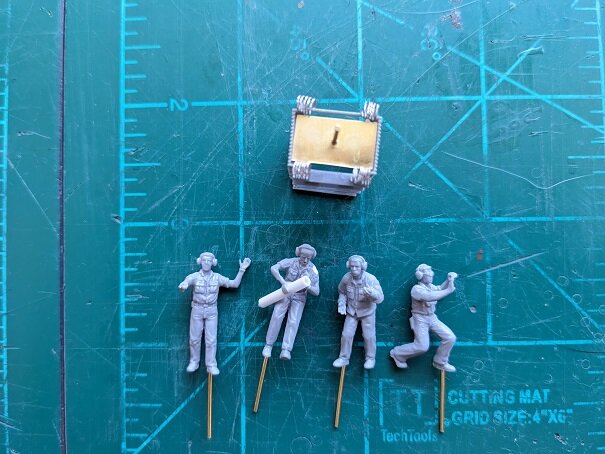
FINALLY posting some slow progress on my OTO Melara diorama build. The canon has a control panel below deck adjacent to the gun mount. I wanted to light it, so it had to shield the light and be small. That meant plastic would be bad to use to make it. That left brass as the best candidate. A smart man would have used photo etch, but I didn't have that option, so I had to use scissors and thin brass. Backside cooling screen from old tank parts. The motor only uses a single 1.5 volt cell to run and adding more batteries for lights would be a pain. So I got a flashlight circuit (A "Joule Thief") to use 1.5volts for the 3volt LEDs. One LED uses a color changing LED (the monitor) and the other uses an LED "candle" light to flicker under the buttons side of the panel. EVERYTHING got coated with nail polish lacquer to insulate it. The LOOSELY fitted control panel before painting. You may remember this from last post. Most sensitive equipment on board ship has some type of shock absorption system due to the pounding ships hulls can take. Those shock absorbers are usually simple loops of heavy cable. I tried SEVERAL ways to do this. The best resolution was THIN wires soldered (tinned) and wrapped around a couple of brass tubes. Here's the ammo rack with the loops added and a brass rod to "invisibly" attach it to the base. The figures are the 1/72nd Hasegawa ground crew HEAVILY modified to to look and pose to fit the equipment. I screwed up on the brass name plate. The guy dropping empty plastic cases will cover that up.😉 I also had to re-sculpt his face to look surprised. That's it for now. Thanks for checking in! - MT
-
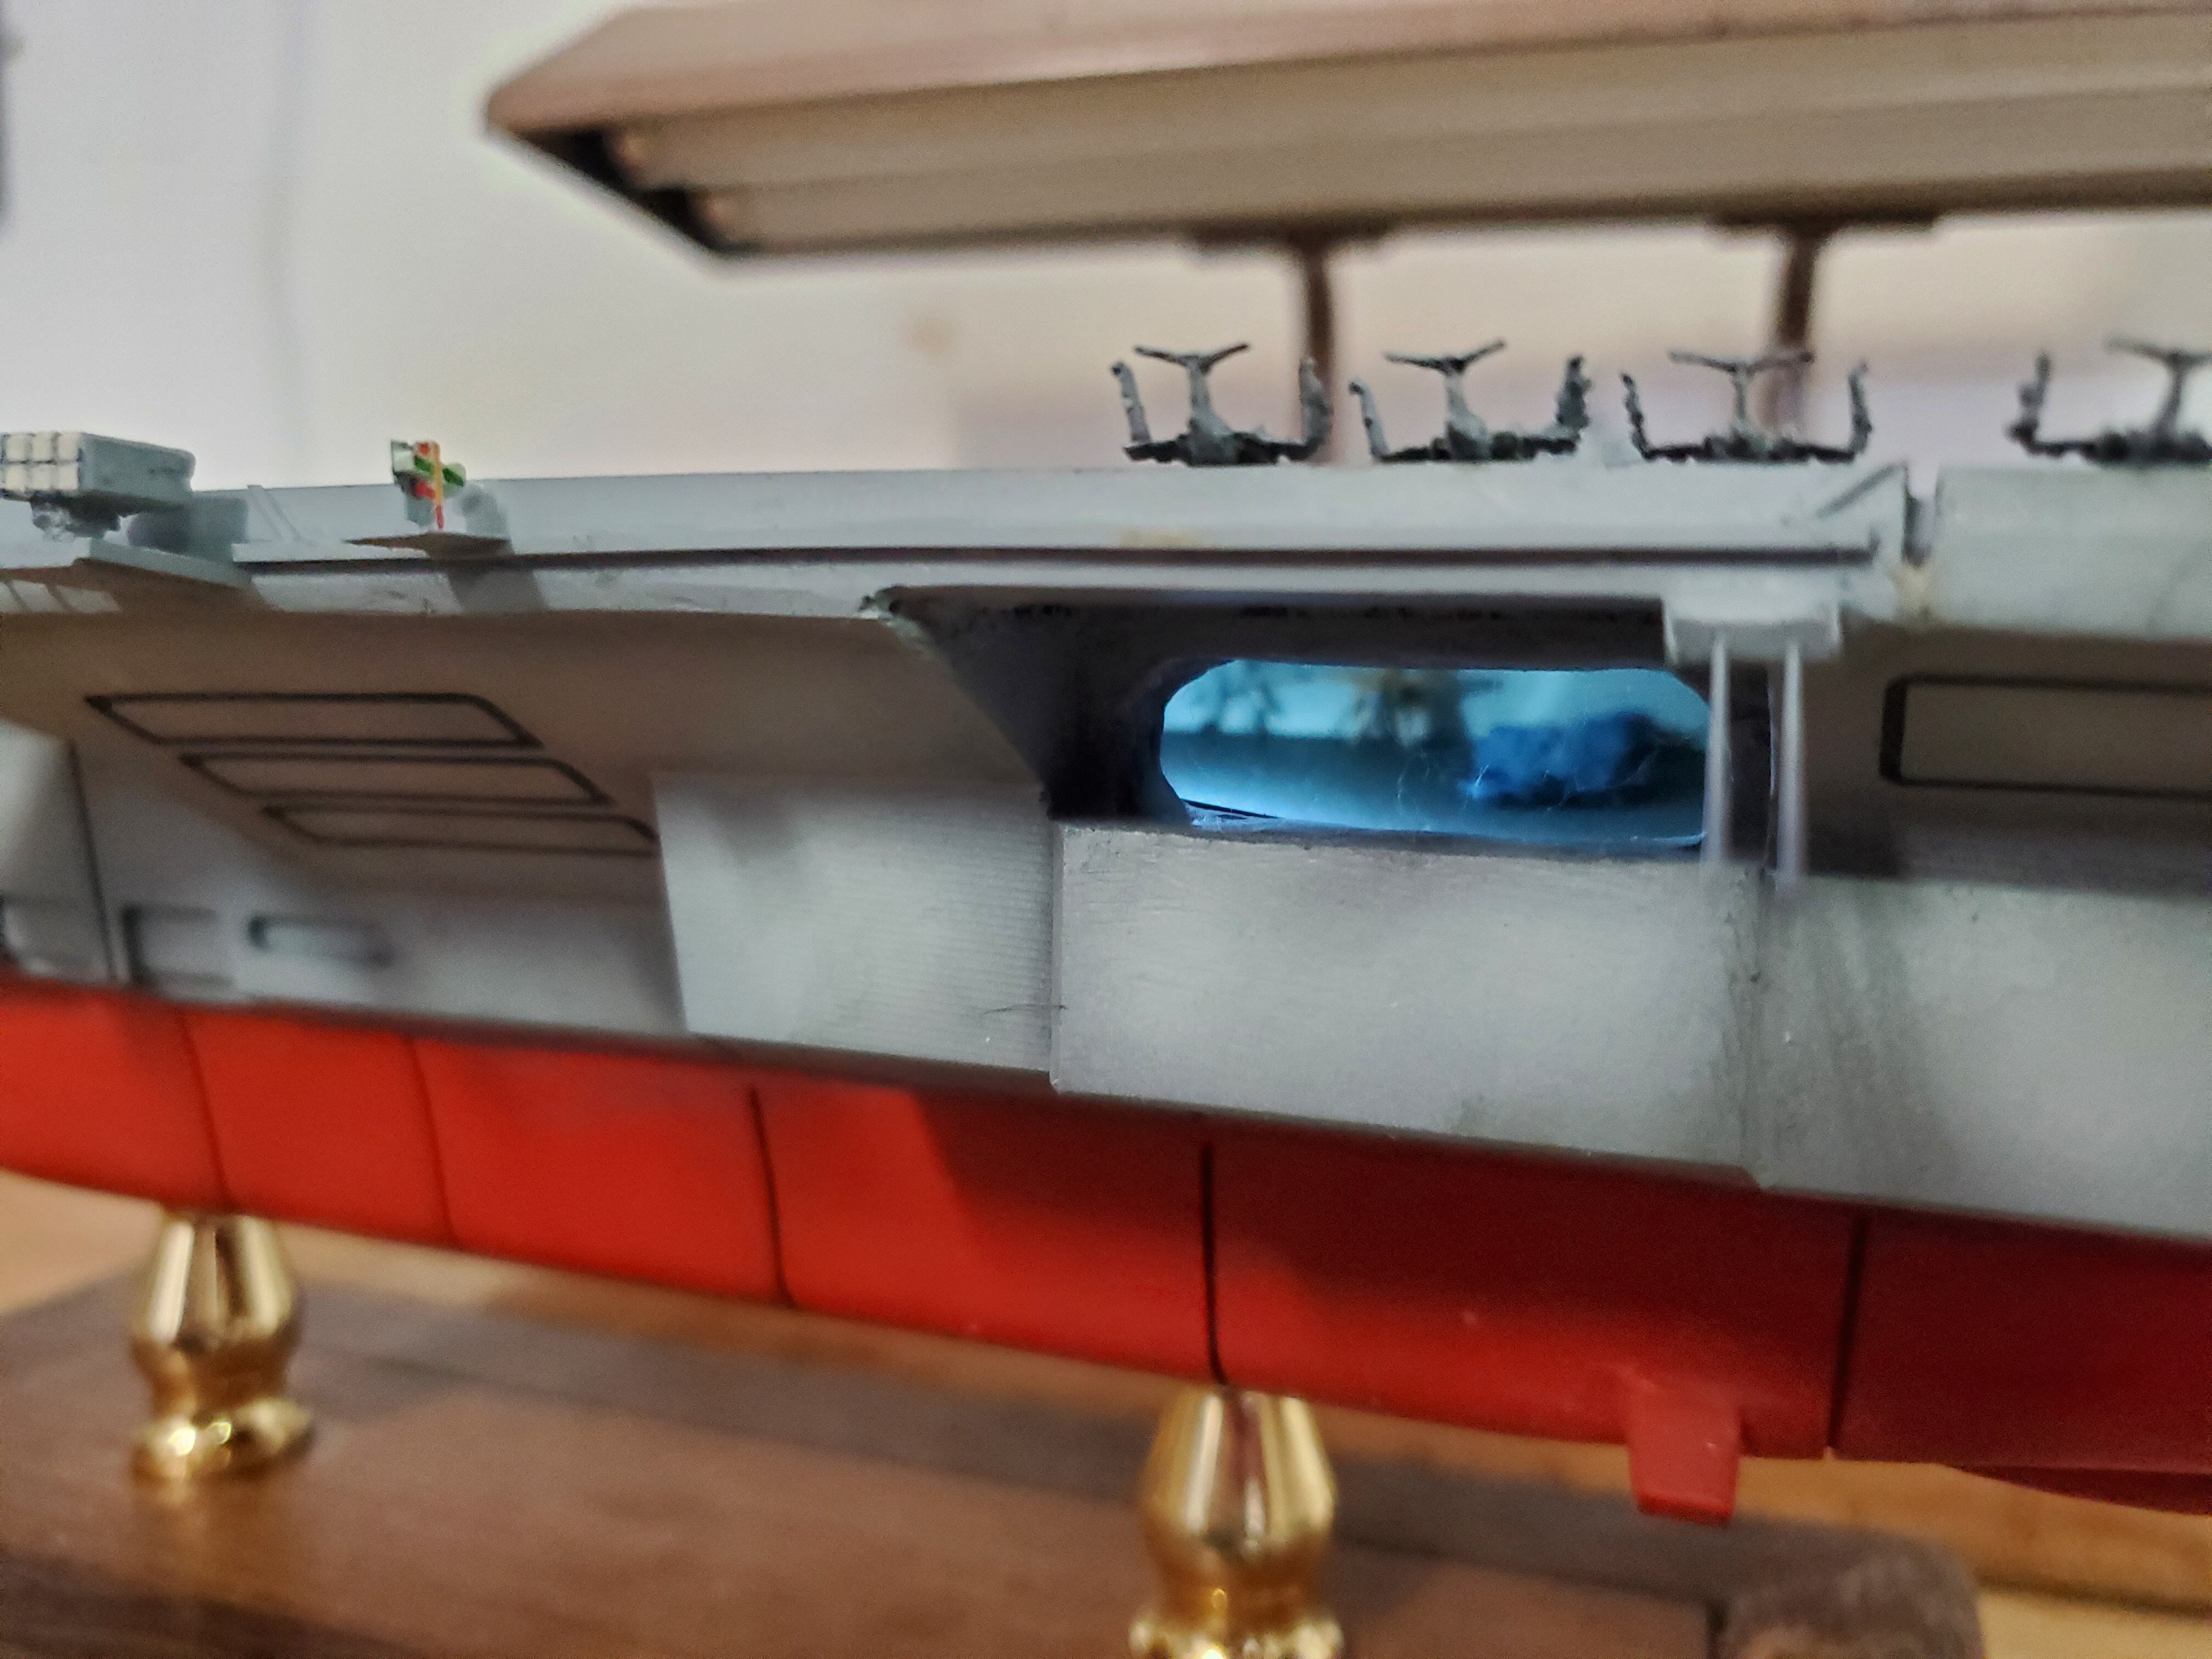
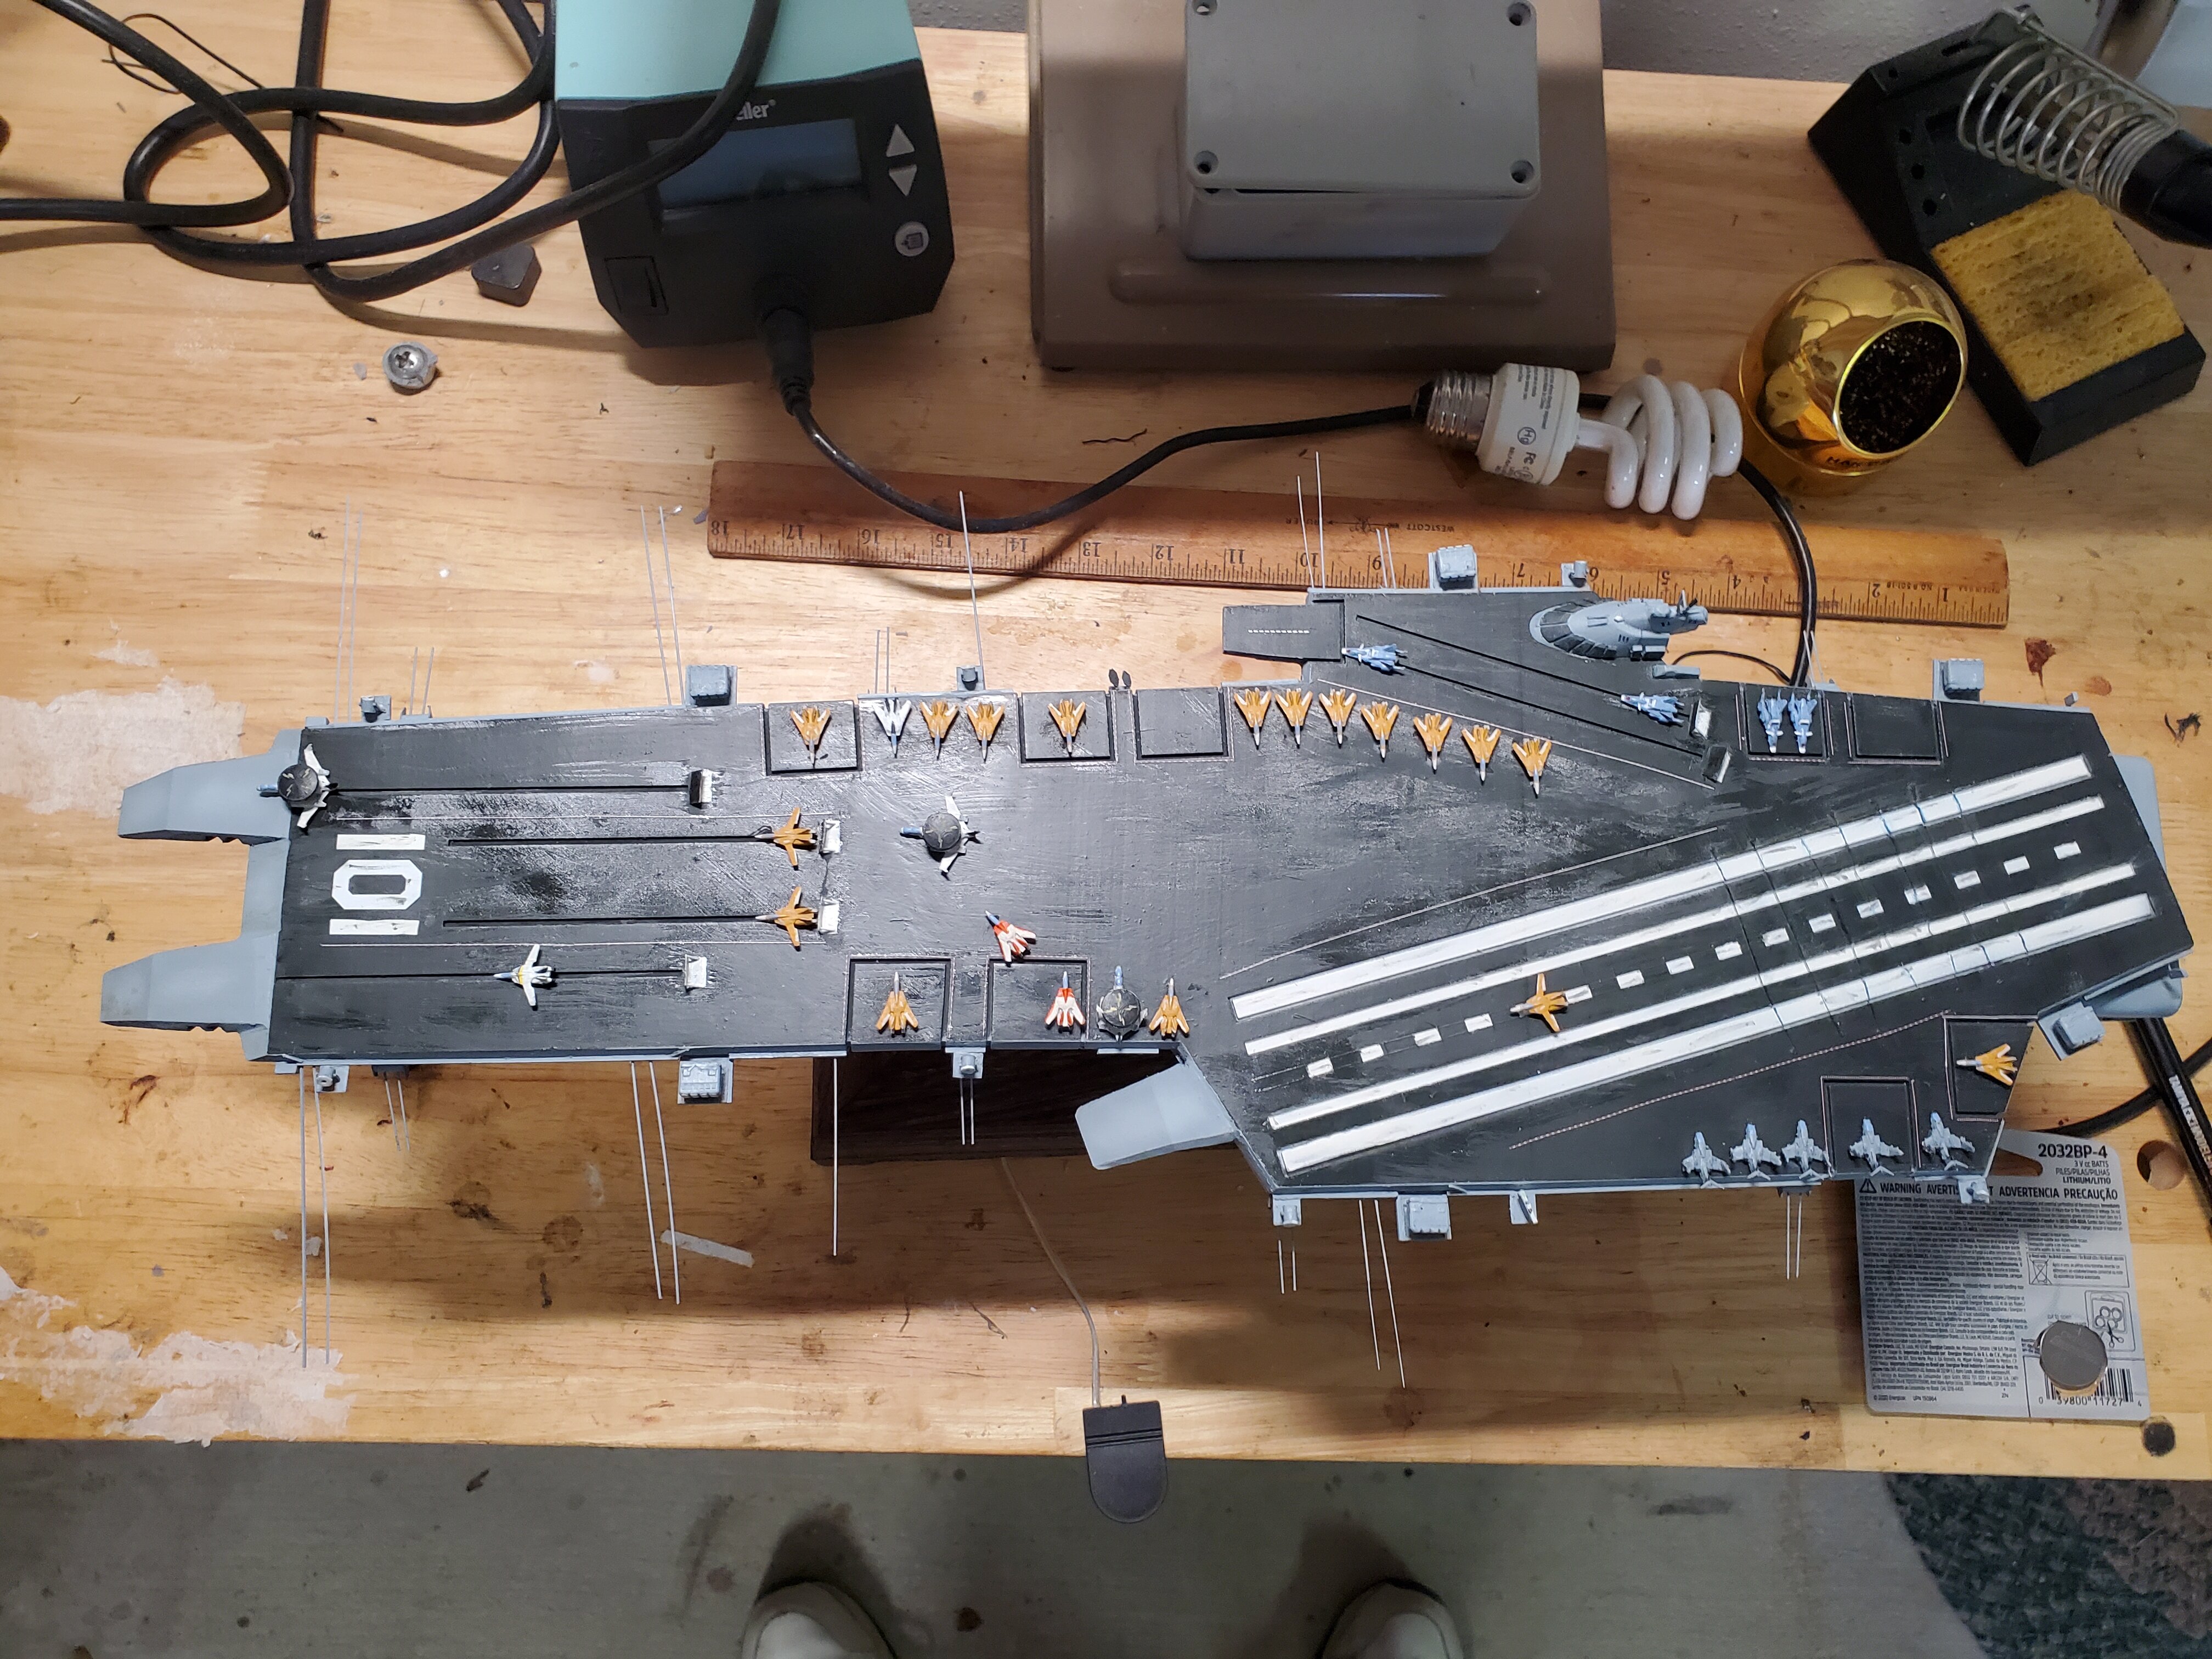
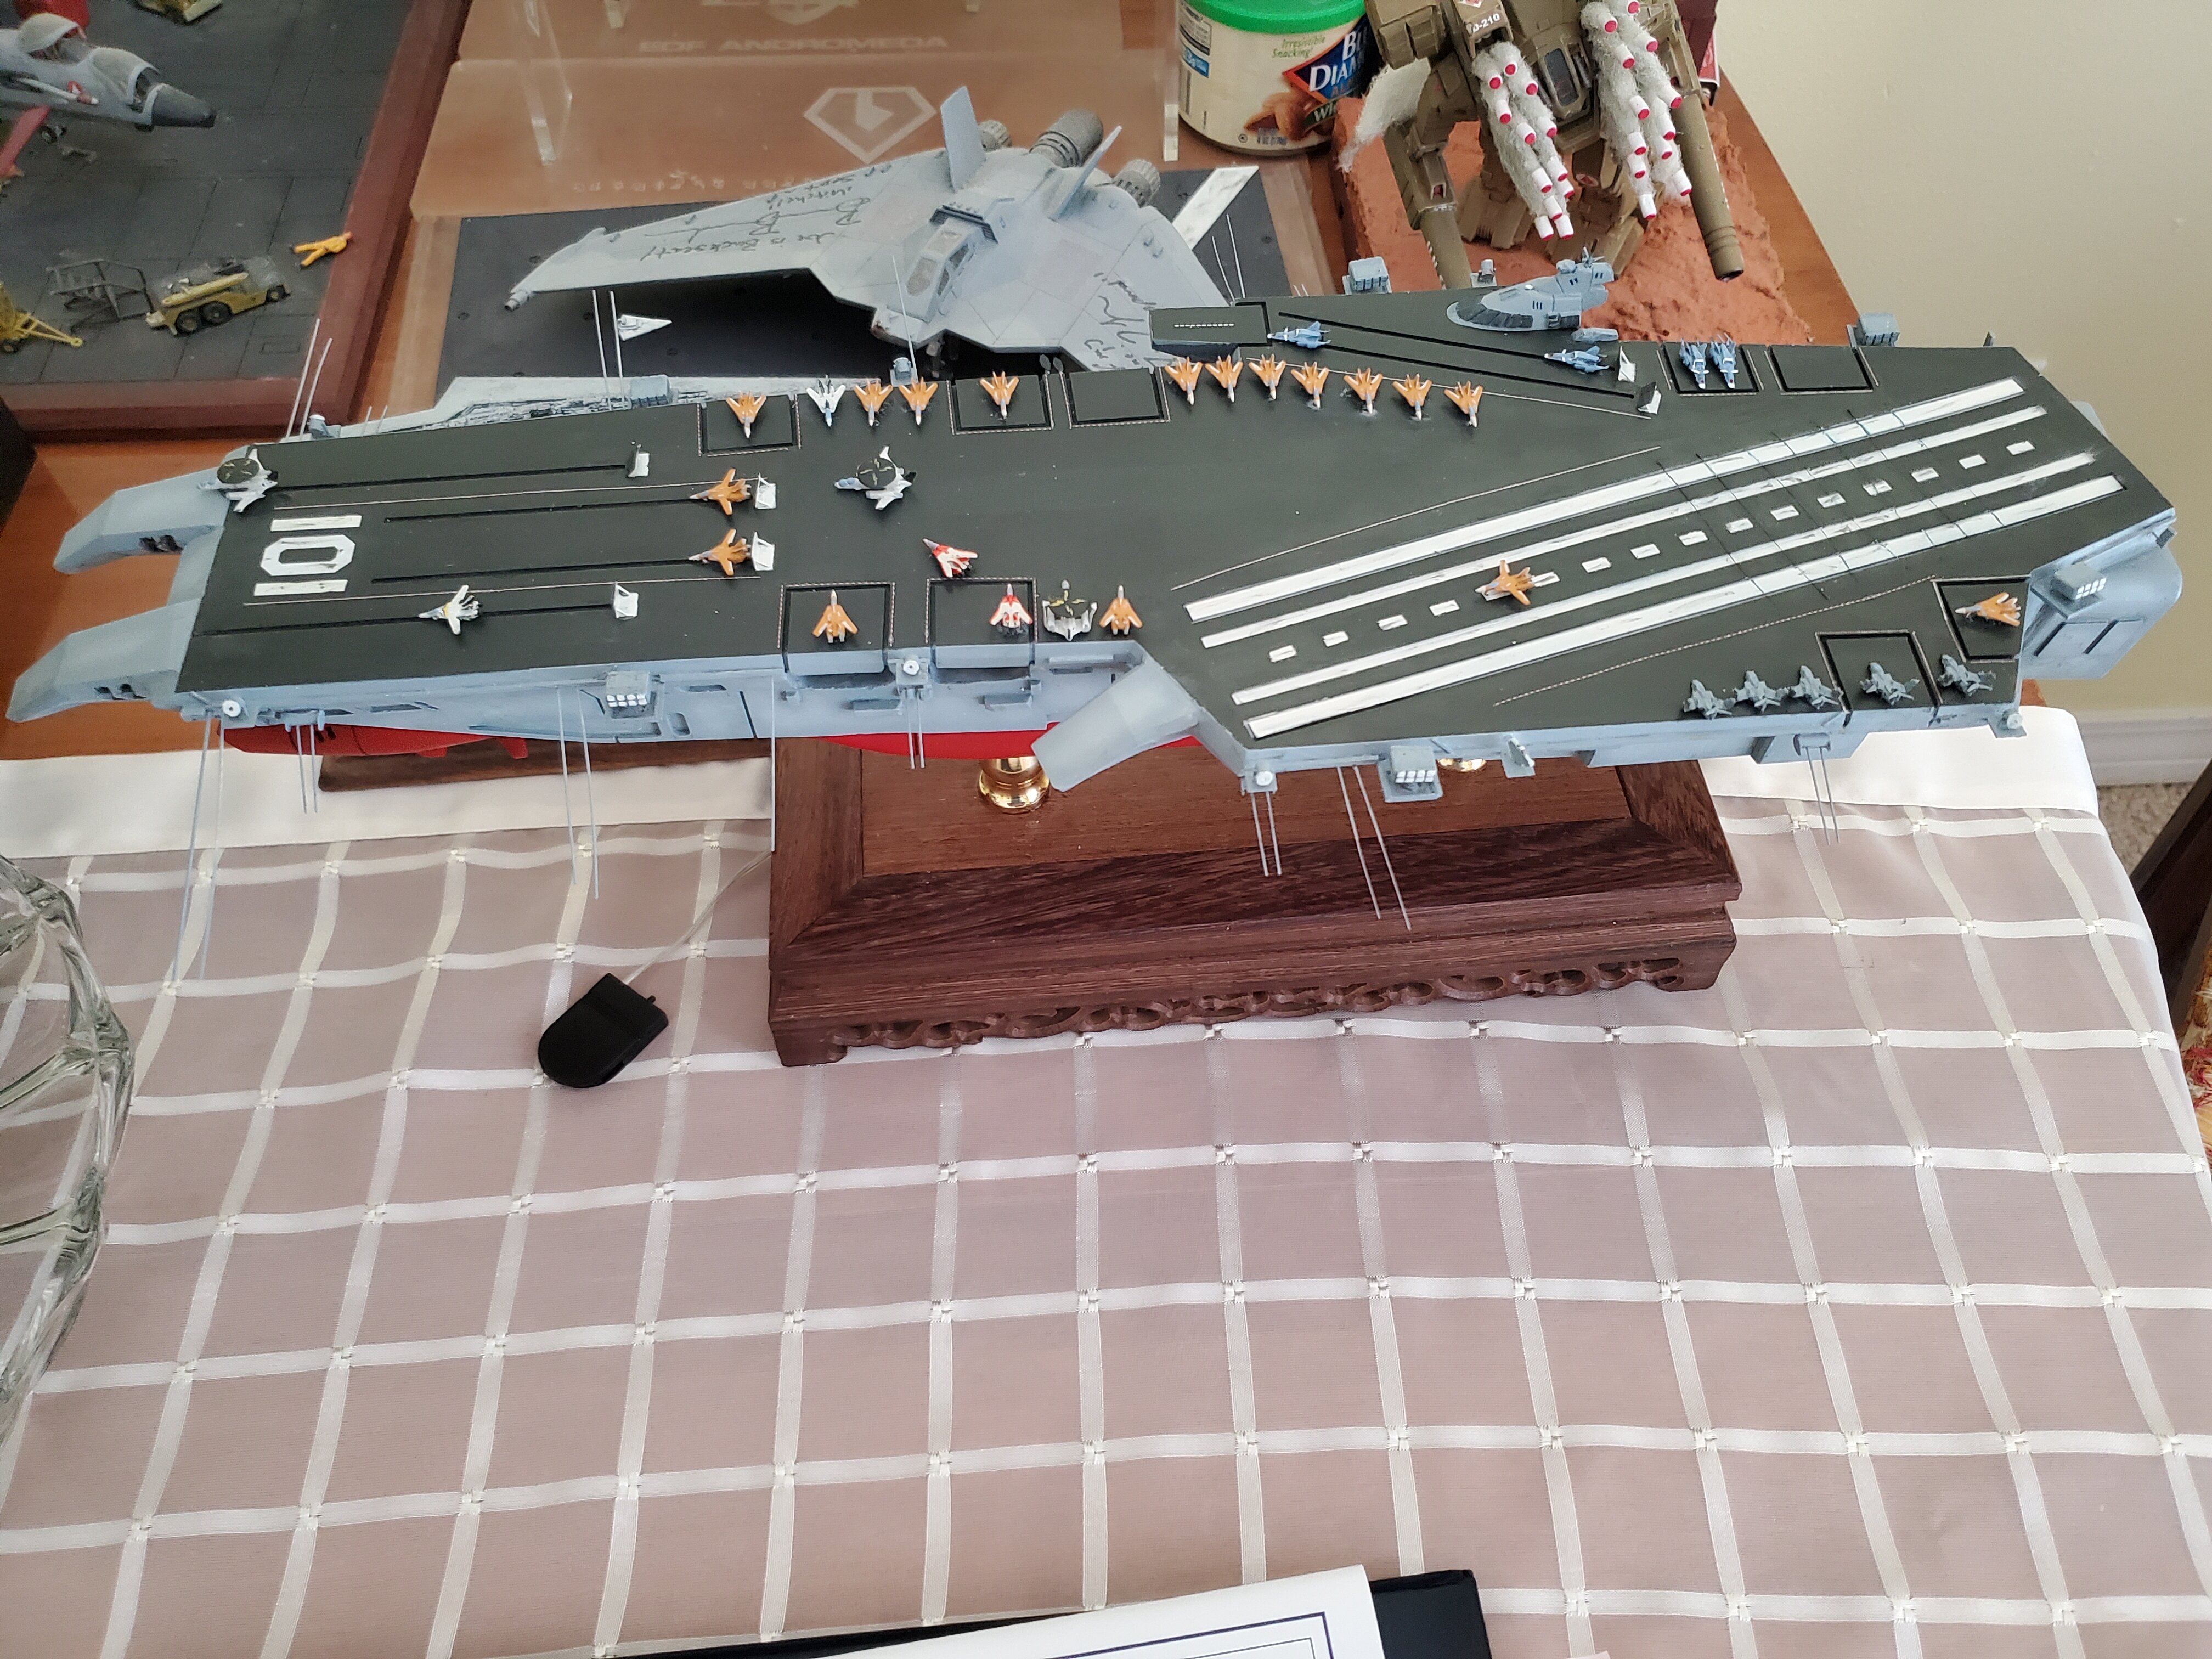
Posted on behalf of @neptunesurvey Mods, he's having problems logging into his account, and has no reply to his email. Can a mod message him and unlock his account? Thanks! These are my words, not his😎. Neptunesurvey completed this BEAUTIFUL Prometheus, build in 1/1000 scale. It took him about a year. It was a 3D print; some of you may recognize the sculpt. I'm posting full size photos so you can see all his details. We usually only see the carrier, or the aircraft. Now we get to see BOTH together. And even some RARE birds on deck too - look carefully! Even the stand helps bring it all together with class! Enjoy! If you like his work, please send @neptunesurvey your comments directly so he'll eventually see them. If you "like" it, only I get the credit for what he did. - MT