Cent
-
Posts
806 -
Joined
-
Last visited
Content Type
Profiles
Forums
Events
Gallery
Everything posted by Cent
-

Macross variable fighter/mecha pose thread
Cent replied to Wicked Ace's topic in Hall Of The Super Topics
? that's not even close to nearing the scale of annoyingly big. And it wouldnt even be all that big... Would take about 2 seconds to download for most. -
I'd be interested in purchasing a spare decal sheet for the VF-25F as well. Anyone willing to part with theirs?
-
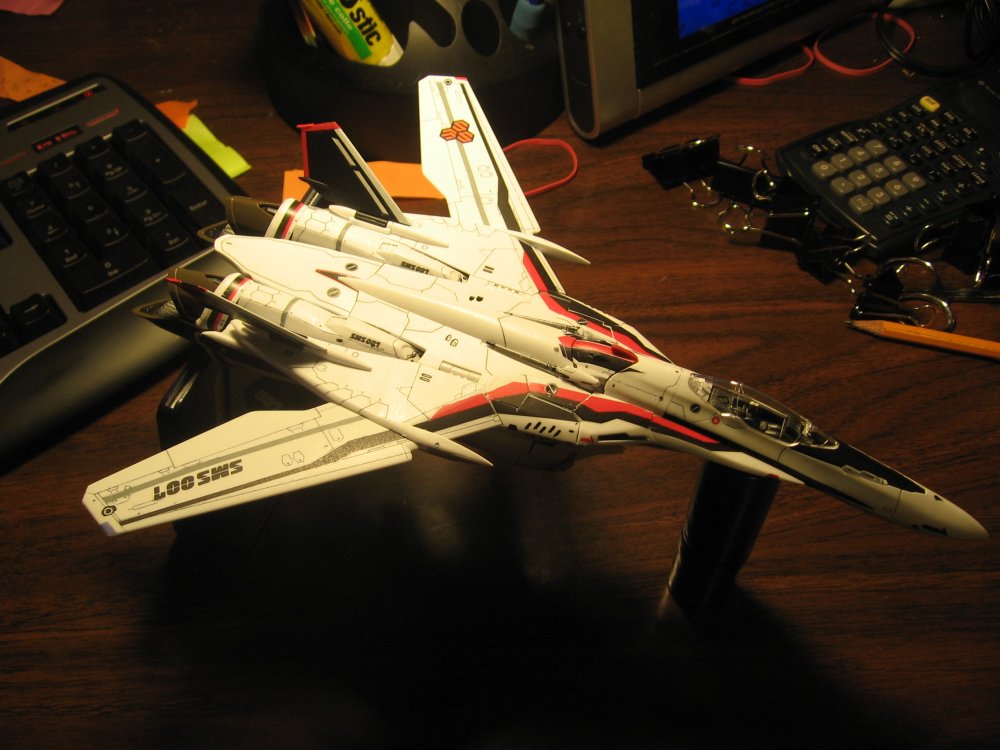
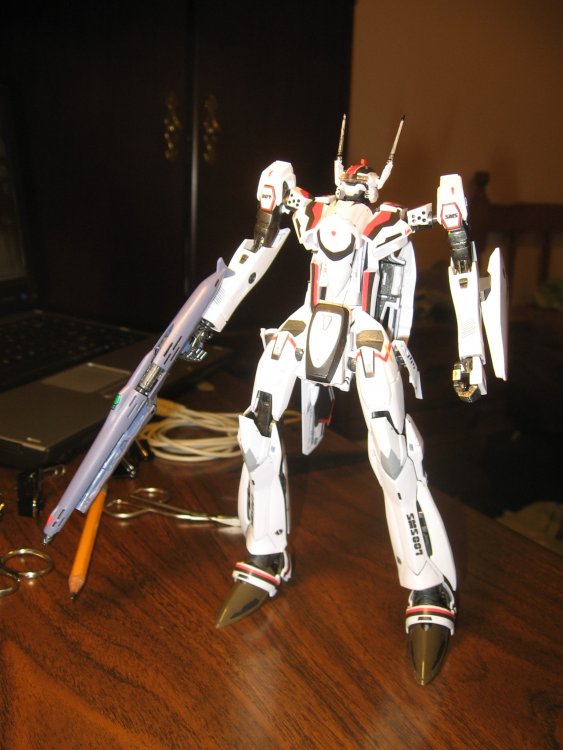
I don't know. I went to my local hobby shop and asked for acrylic thinner, and he told me that water would work just fine... So I didn't end up purchasing it. *shrugs* maybe someone here can enlighten me. As for pegs... You mean the runners? I cut, shaved and sanded them before assembly. After assembling and disassembling, I shaved a few internals as necessary, but mostly all I did after that was just wet sanding and buffing.
-
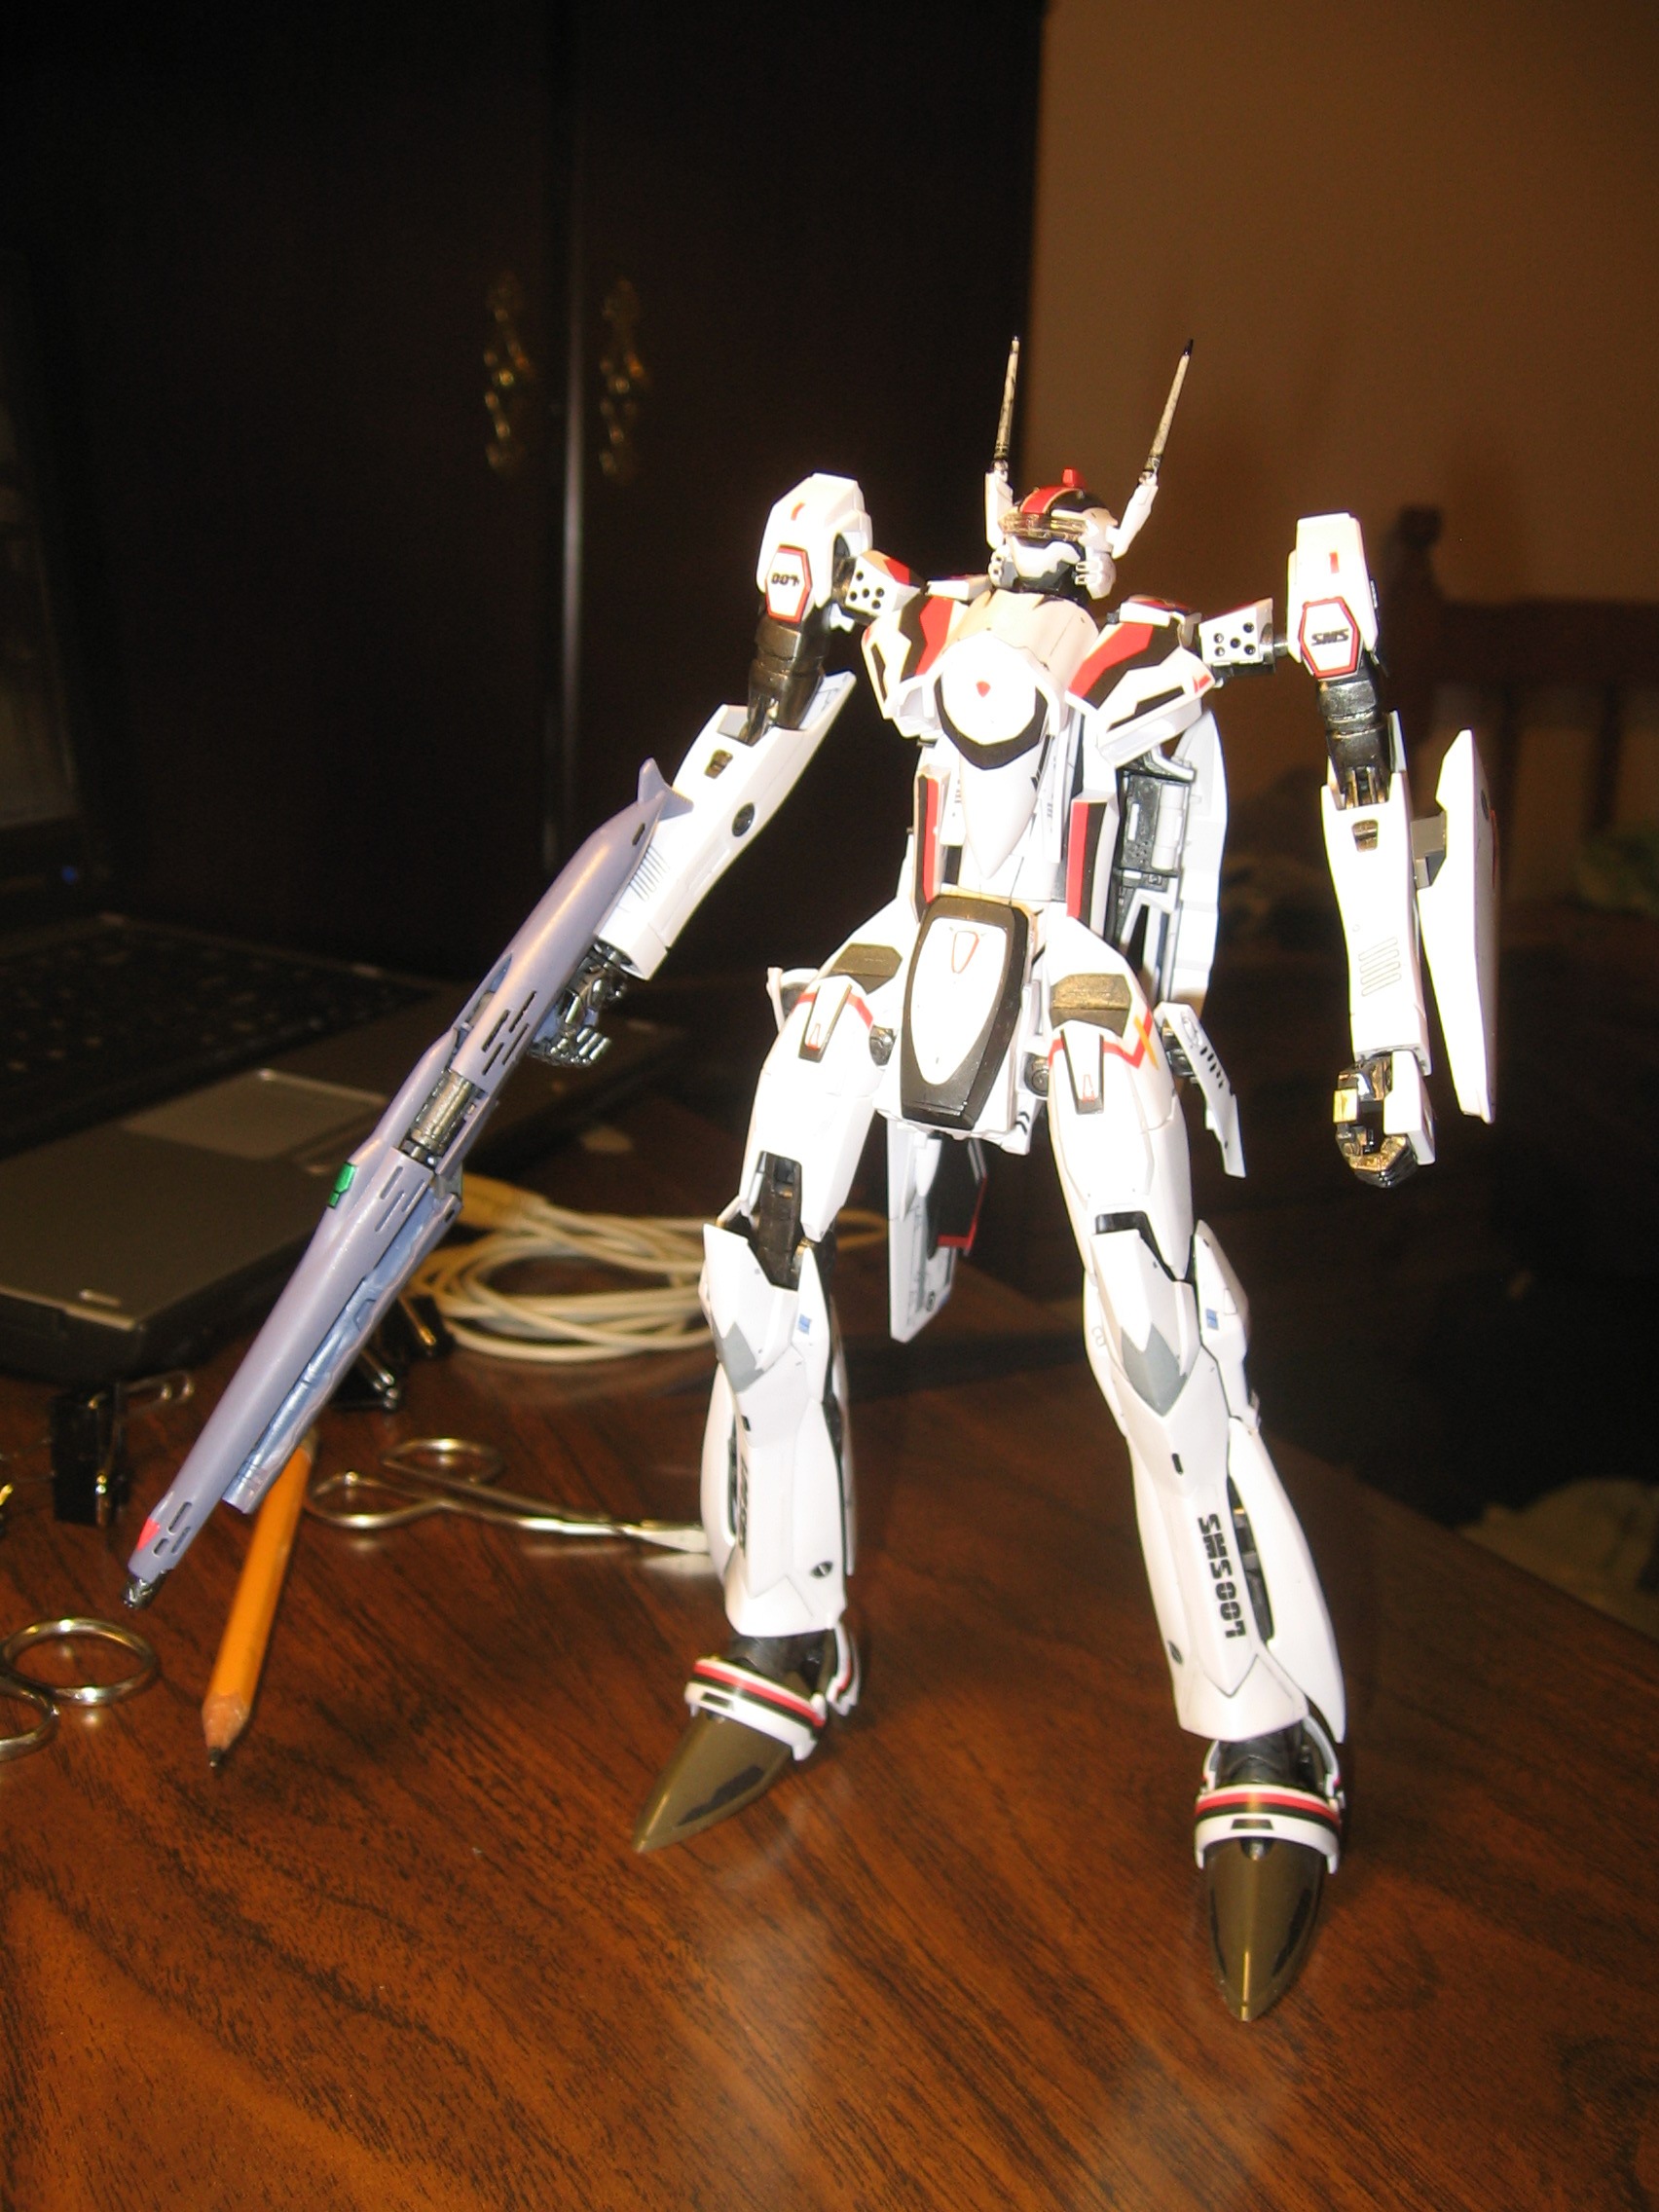
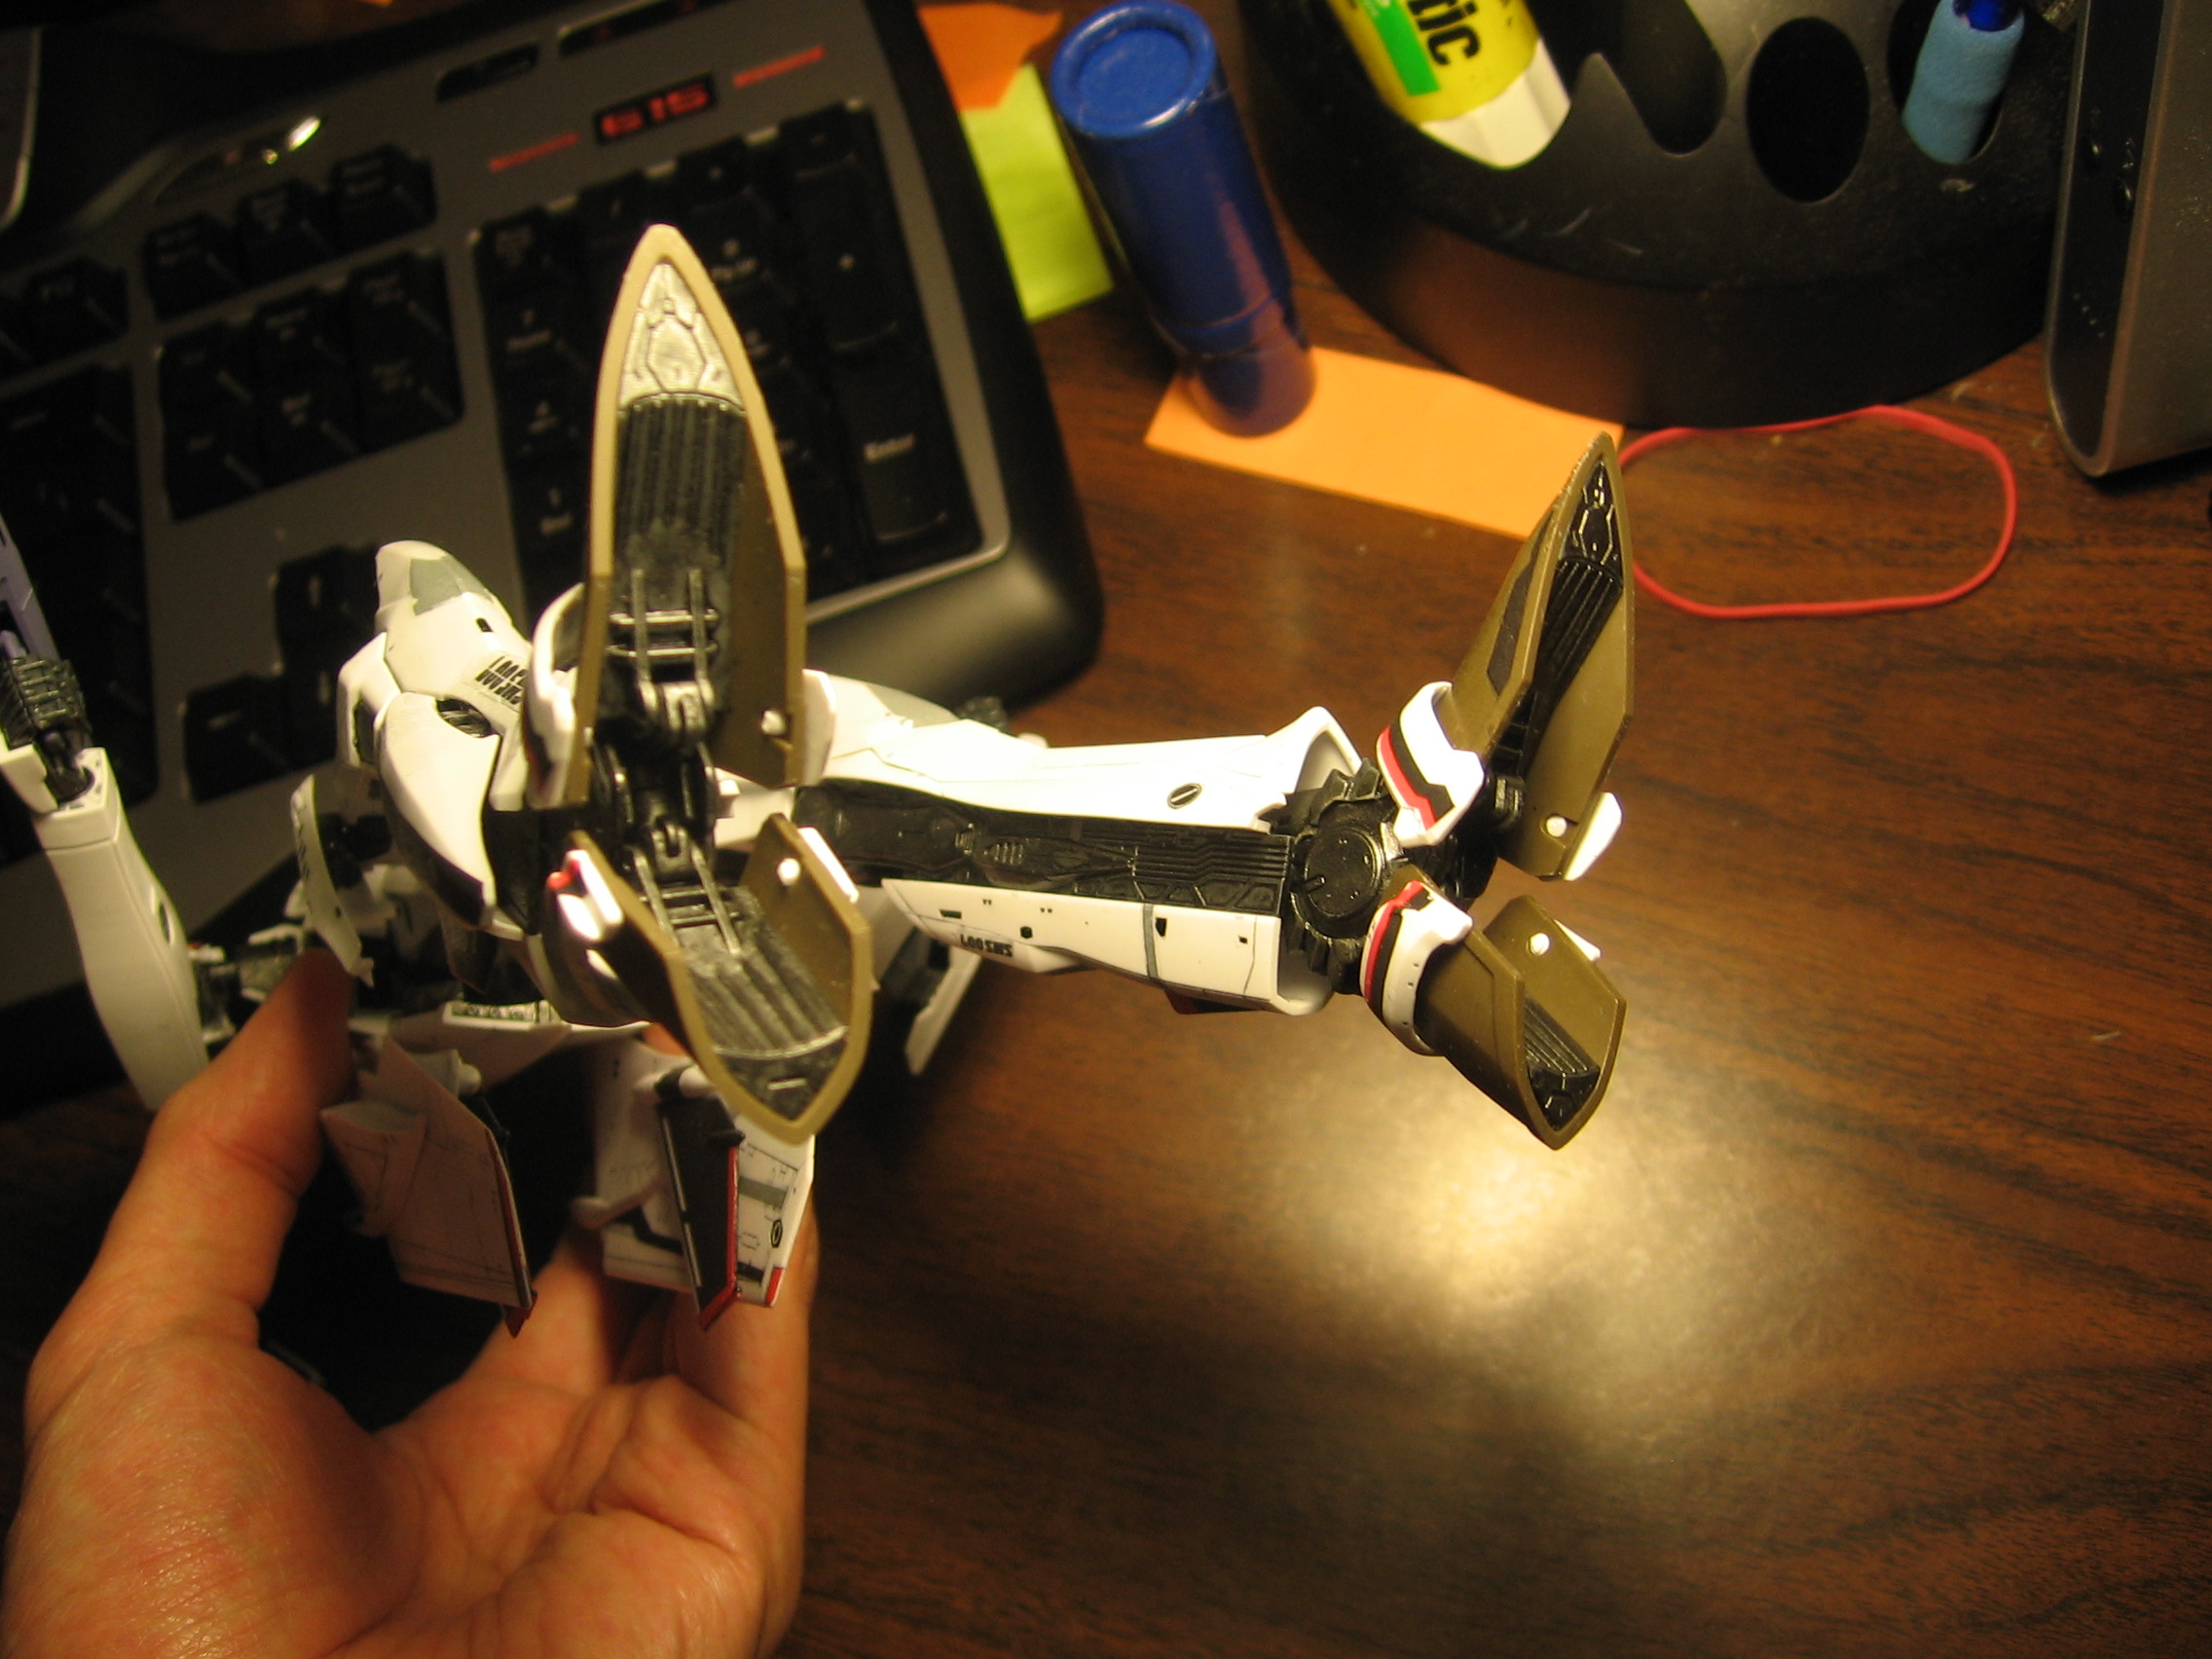
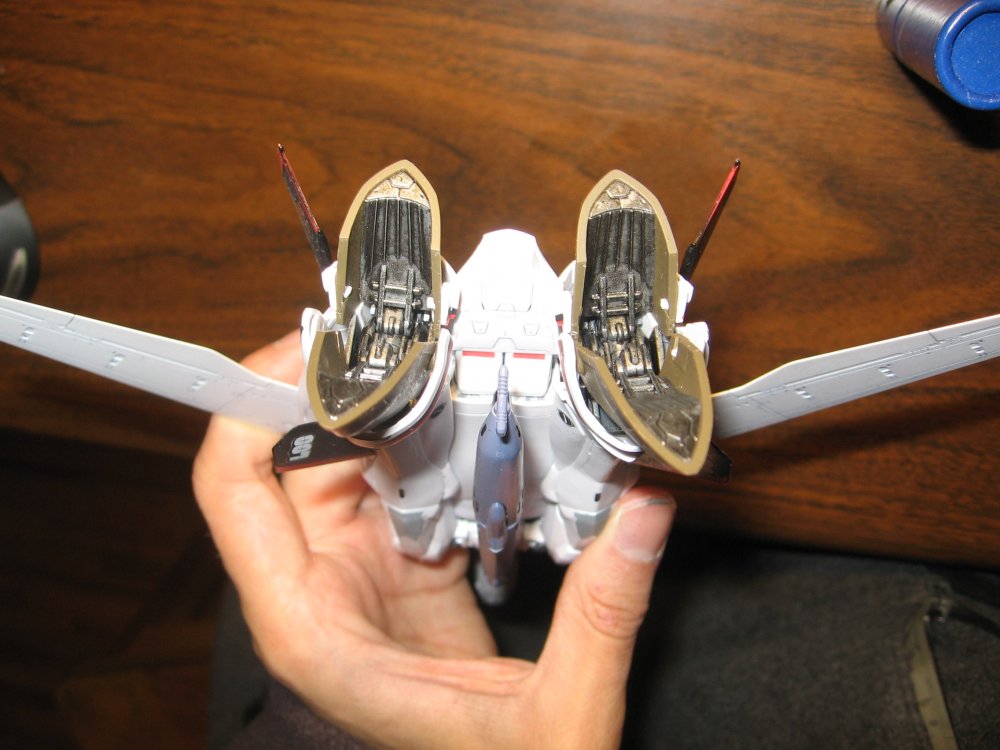
In some of the pictures, I used the camera flash... and it made the gun metal look far too bright and glossy. The consistency is more easily seen in the battroid expanded feet picture, where flash wasn't used. I did have issues with mixing too much water with the gun metal though, although you can only notice whats left of that on the back of the shoulders. Everything else I recoated with a properly mixed layer, so you can't tell anymore. Also for the ankles, I tried to make it a slightly different grey, and chose Tamiya Metallic Grey... But the difference is pretty subtle unless up close. If I was trying to make something like that lighter next time, would I do it by mixing it with some white paint? Diluting it seems to not work so well. As for the part fitting, I assembled and disassembled my kit 3-4 times (before adding decals) taking time to shave down certain areas to make sure they were flush. I think that was mostly what contributed to an overall good fit. Just some time and patience. I was working on this kit on and off for about 2 weeks or so.
-
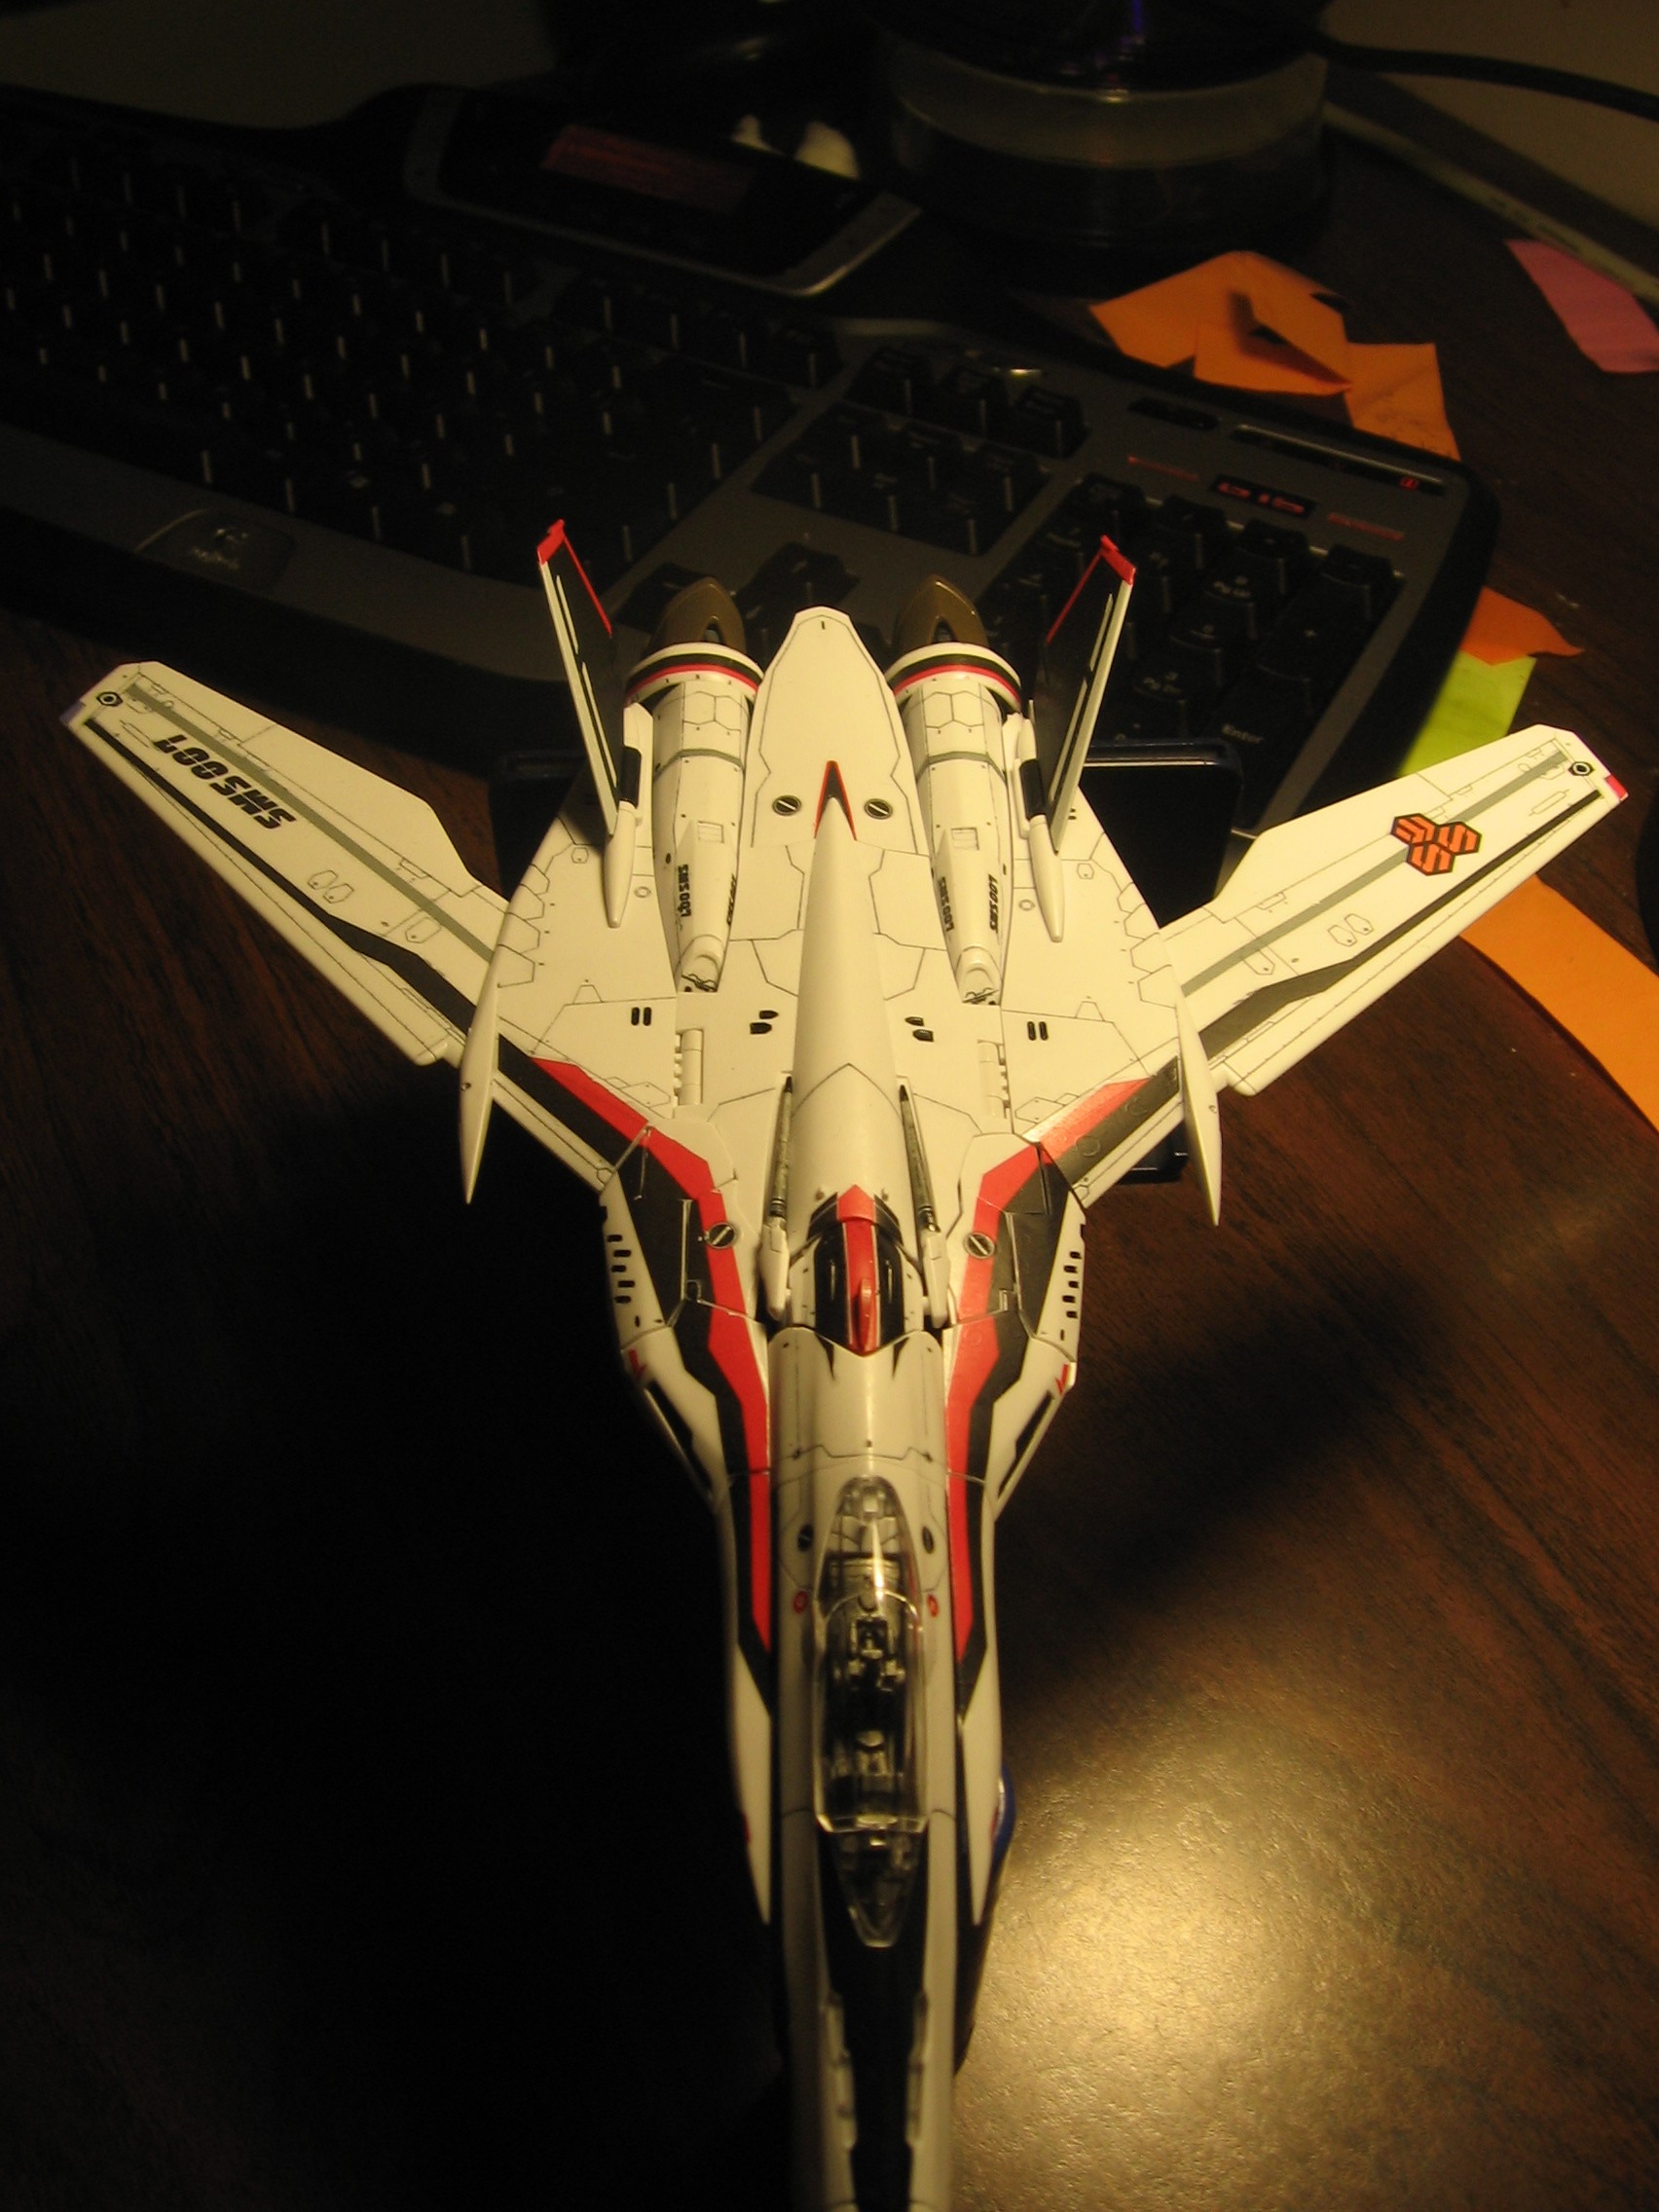
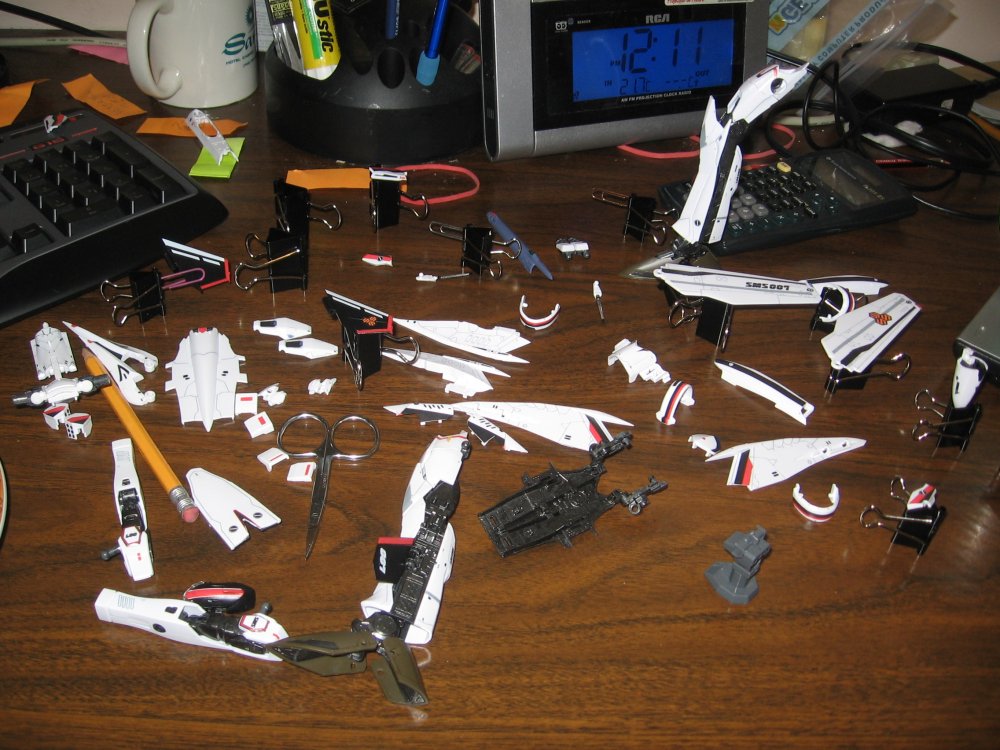
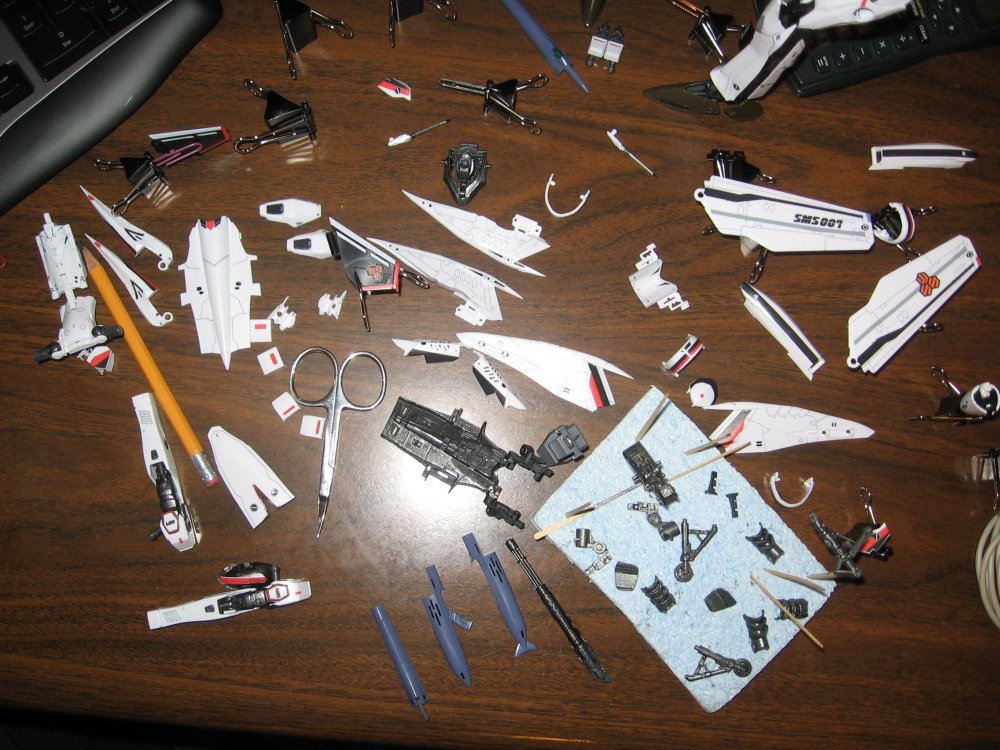
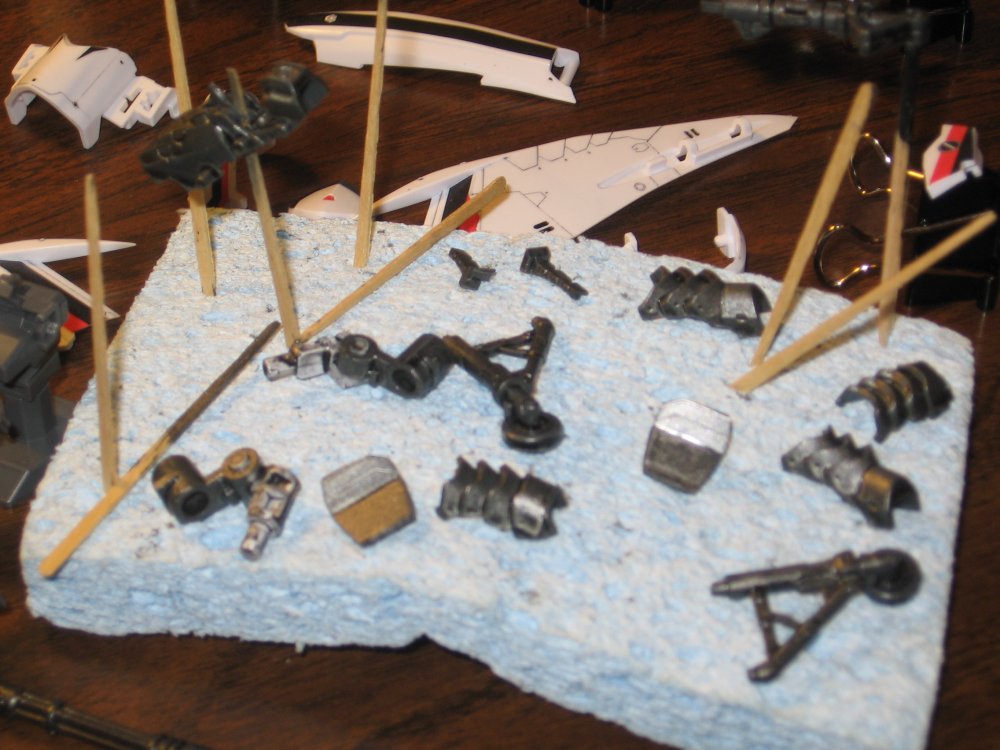
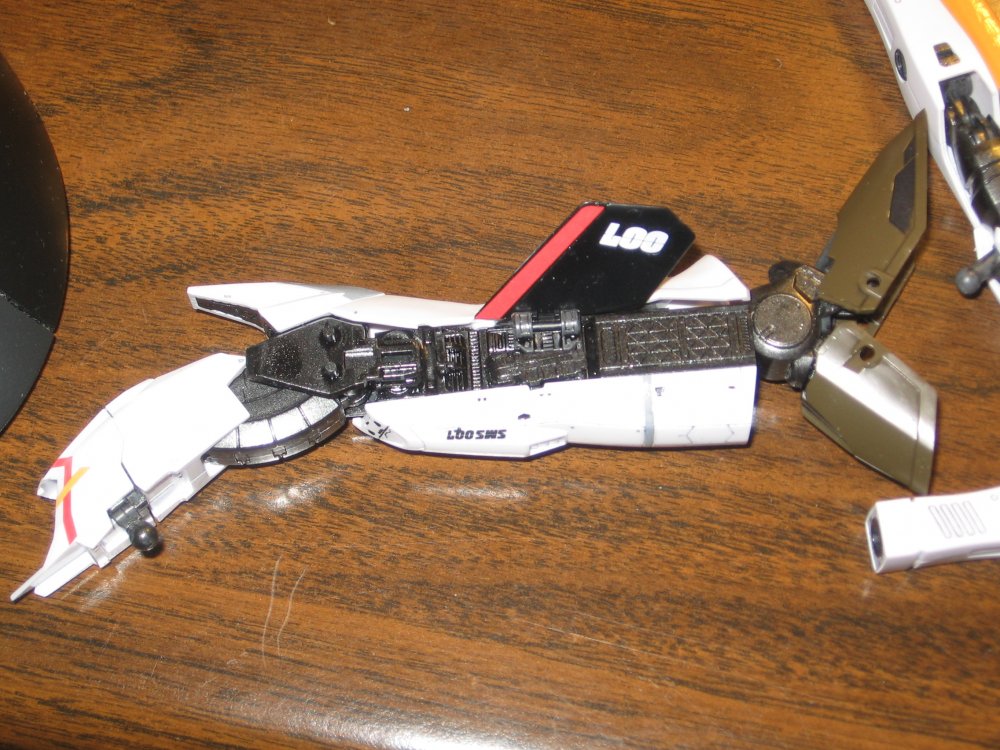
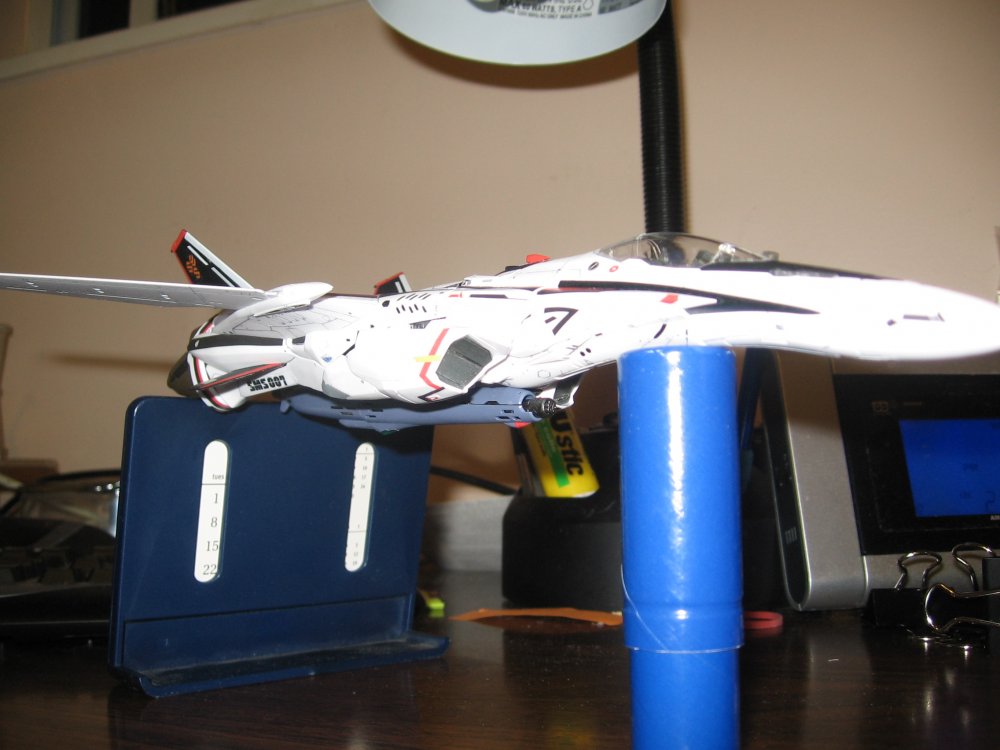
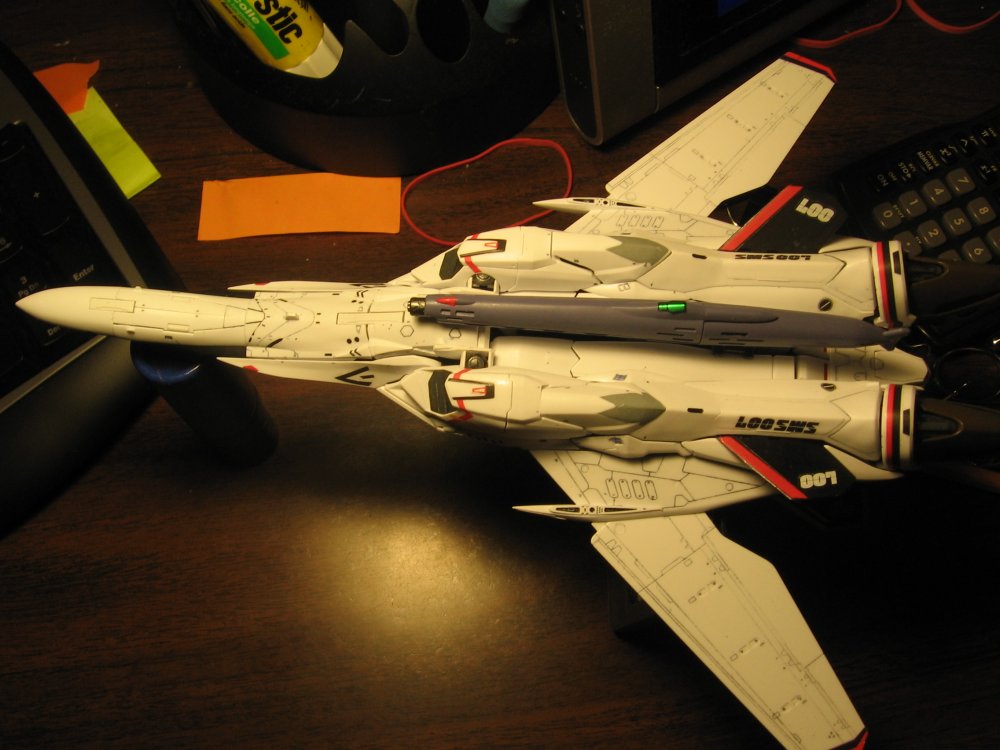
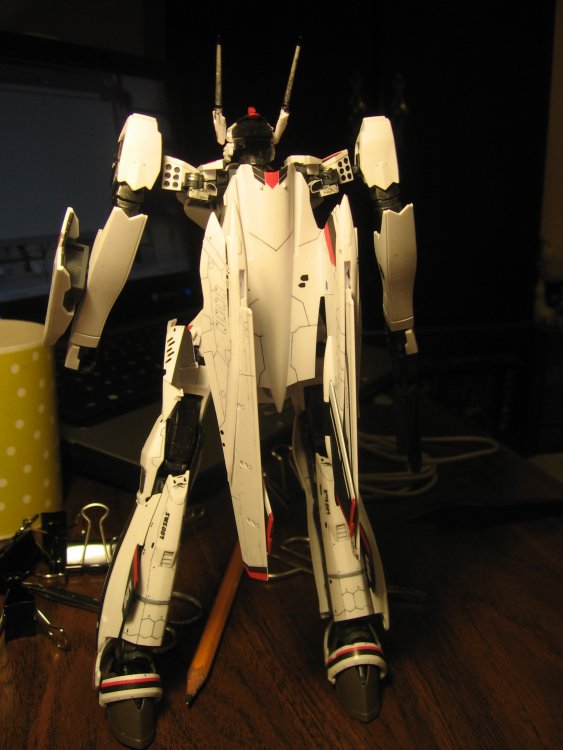
I recently finished my VF-25F, largely thanks to the help I received on this forum. I'm still new to model building, as this was my first model, but I thoroughly enjoyed building this, so I'm looking for some criticism, tips and advice for future kits I may attempt. Sprue cutting was pretty easy, using a wire cutter, then shaving away with an exacto, and then wet sanding it flush. I airbrushed all of the internals with Tamiya Acrylic Gun Metal and mixed it with a little bit of water, instead of acrylic thinner. For a comparison of colors, you can look at the first picture, where you'll see the center stand-stump that goes underneath the belly of the plane is unpainted. After partial assembly, I placed on the decals, and used Mr.Hobby decal softener to get them to meld entirely. This worked amazingly well for me for the decals along the edge of the wings, as the decals would smoothen along the edge, and even the transparent decal carrier edge smoothened out. This was before I started cutting off the carrier edges completely though >_> Although the decal solvent worked, even after drying, decals were very easily scratched during the transformation, and I have to be extra careful handling it. I did notice some small dried water marks over top of the decals. These were less noticable after the Dullcote layer I put on top of the externals. I also took a toothpick and dabbed small drops of acrylic flat black paint onto large depressions (like the bolts on the edges of the wings, and the depressions on the back) and then used my fingernail to scratch off the excess after it semi-dried in about 10 minutes. In retrospect, I think it was a better idea to just paint the other screw/bolt locations, rather than decal them. I didn't paint the visor, as I wasn't sure how to approach the translucent color appearance. If I used the stickers, they would have been a flat, unappealing green, and if I painted it, I was worried it would give me similar results. Am I supposed to thin a green paint or find some sort of color dip for that part? Thanks again to the people who helped out on the many different threads here!


-
Well I tried it out. Testors Dullcote Lacquer on top of Tamiya Acrylic and Gundam Marker panel lines. On the test sprue, I found that very thick, heavy coats of Tamiya Acrylic would show some slight bleeding when overlayed with a close spray of Dullcote. Otherwise, there were no issues after drying, and everything else was fine. On my VF-25, there were no problems applying Dullcote to any of the paintwork. I did notice however, that the panel lines would become softened, and that touching any of it would smear it. After knowing that, I sprayed the rest of it without touching any paint or the panel lines, and there were no further issues. Your panel lines don't bleed, they just become wet and susceptible to smearing until the lacquer coat dries. The acrylic paint will not bleed either unless you have a very very thick coat. I was spraying the dullcote about 6 inches away with light sweeps.
-
that's stretching it...
-
uhh... weird... i asked other modelers about it, and they told me it'd be fine o_o. Maybe I should just test on the sprue. What am I supposed to see if it's going wrong?
-
Tamiya Acrylic airbrushing on my VF-25F seemed to be just fine... A question about lacquer though, I have a lacquer matte Testors Dullcote, and I'm planning to spray it overtop of the Tamiya Acrylic... Is that going to be a problem?
-
Macross variable fighter/mecha pose thread
Cent replied to Wicked Ace's topic in Hall Of The Super Topics
Just keep your fingers on alt-f4 and check your back frequently. Besides, I agree; there's nudity in the series, where there hasn't yet been anything like that here yet. On most imageboards, this is still within safe boundaries! I would like to join in, but I never purchase revealing figures. Maybe we could satisfy Ghostkiller's demands if we use the VB-6 Ranka figure? Thats a macross toy, and belongs in this forum! XD -
Hey thanks Jardann! Exactly the info I needed Now I can finish ^^
-
you can find all sorts of wire cutters at a dollar shop even.
-
I've gotten most of my VF-25F buildup completed, including airbrushing all the internals, and am about to move onto matte top coating the model. Most of the decals have been applied, except for the ones that overlap separate pieces (and require the joint to be assembled). A frequent issue I'm running into with decals though is that: 1. I notice that the decals that came with the VF-25F have a transparent thin border around the decal, which gets in the way when they are applied to the edge of a fin. I could trim these borders off before applying the decal, but that would leave my tweezers no room to grab onto the backing of the decal while pushing off the slide. I'm planning on trimming off these borders carefully after the decals have dried, but I'm wondering if I'm doing it right. I also have no MicroSol or any other decal solution, I'm just using water with a few drops of detergent. 2. Im having a lot of difficulty applying the shoulder hexagonal decal. Seen here on both shoulders: http://www.macrossworld.com/mwf/index.php?...st&id=62418 It seems that the decal itself is too big for that hexagon, and refuses entirely to stick, especially with the transparent trim mentioned above. Should I start cutting it up? Because its having difficulty folding around this part, as has a curved surface.
-
Official Bandai 1/72 Scale Macross Frontier Model Kit Thread Ver.2
Cent replied to Graham's topic in Hall Of The Super Topics
What? I was busy looking at the pretty planes. -
Cute cat! :3
-
Official Bandai 1/72 Scale Macross Frontier Model Kit Thread Ver.2
Cent replied to Graham's topic in Hall Of The Super Topics
lol... jeez. That mounted gunpod in fighter mode has such low clearance. How would it even take off without dragging a trench through a runway. Oh well, more than I can say for the DX Mikhail. -
Official Bandai 1/60 Scale DX Toy Thread Ver.3
Cent replied to Graham's topic in Hall Of The Super Topics
I think even the clear coat would eventually come off. Graham's method should work though... But this is starting to foray into the 'we have to be gentle playing with it cause it's a like a yamato' territory. -
Official Bandai 1/60 Scale DX Toy Thread Ver.3
Cent replied to Graham's topic in Hall Of The Super Topics
I would play with them, except that I'd be wearing off the paint... Thus making them unsuitable for display afterwards. People talk about being afraid to play with the Yamatos in fear of them breaking... But I'd be afraid to play with the DXs in fear of them rubbing off the paint! Paint durability is durability too. -
I'm not a fan of the DX, but I can understand that young children don't really care for the qualities this forum demands. I would not be so harsh on the shoulder screw issue either... Then again, when I buy toys for kids under 13, I would expect them to be under $60.. >_>
-
Arent those still the same clearance prices since before Christmas?
-
Bandai/Tamashi Nations 1/100 lineup. 2009 takeoff!
Cent replied to UN Spacy's topic in Hall Of The Super Topics
didnt grace also fly a VF-27 at some point? I'd rather have that than breras. Say no to the bisho pilots! -
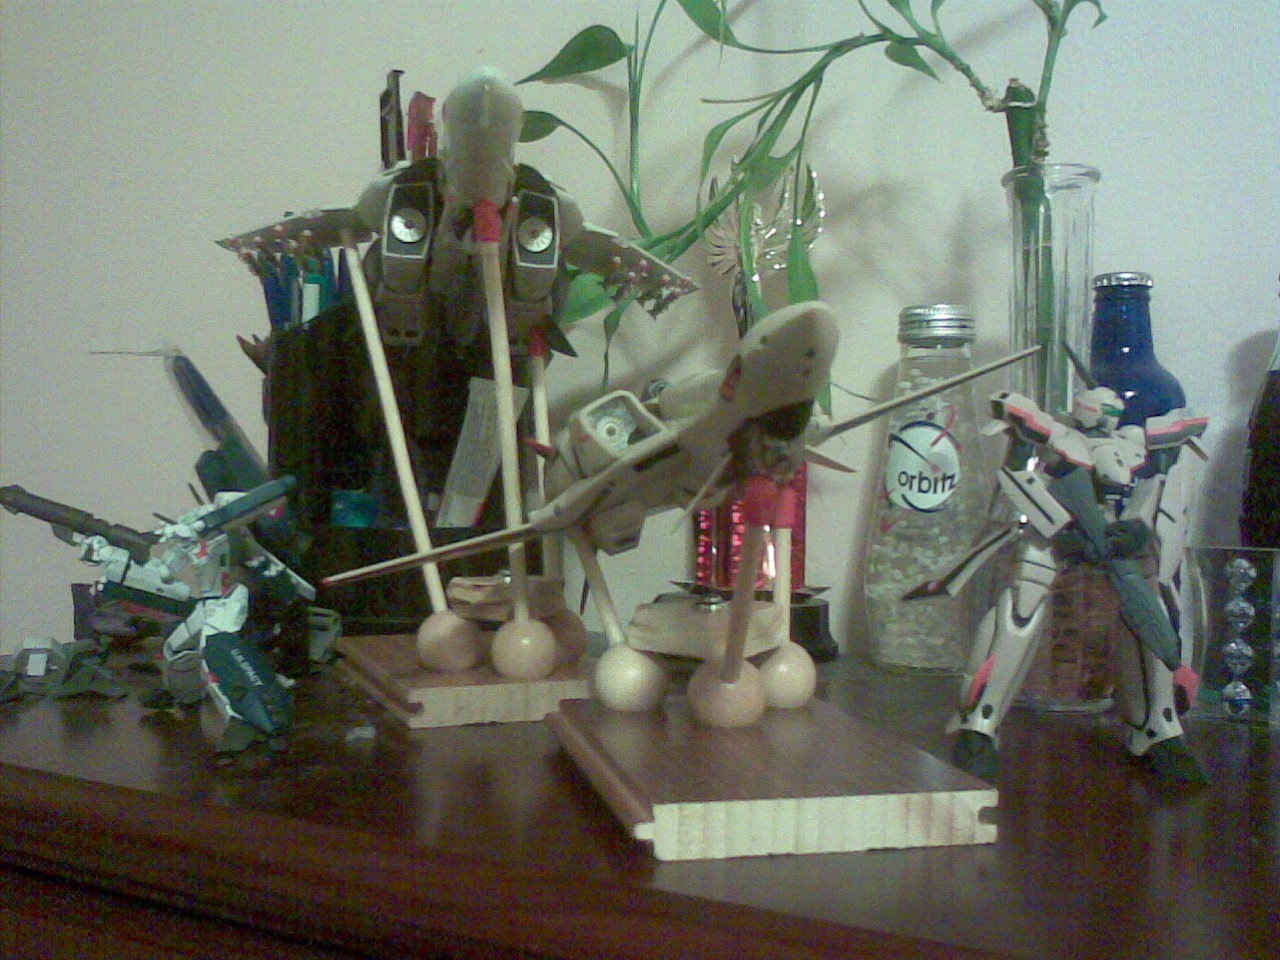
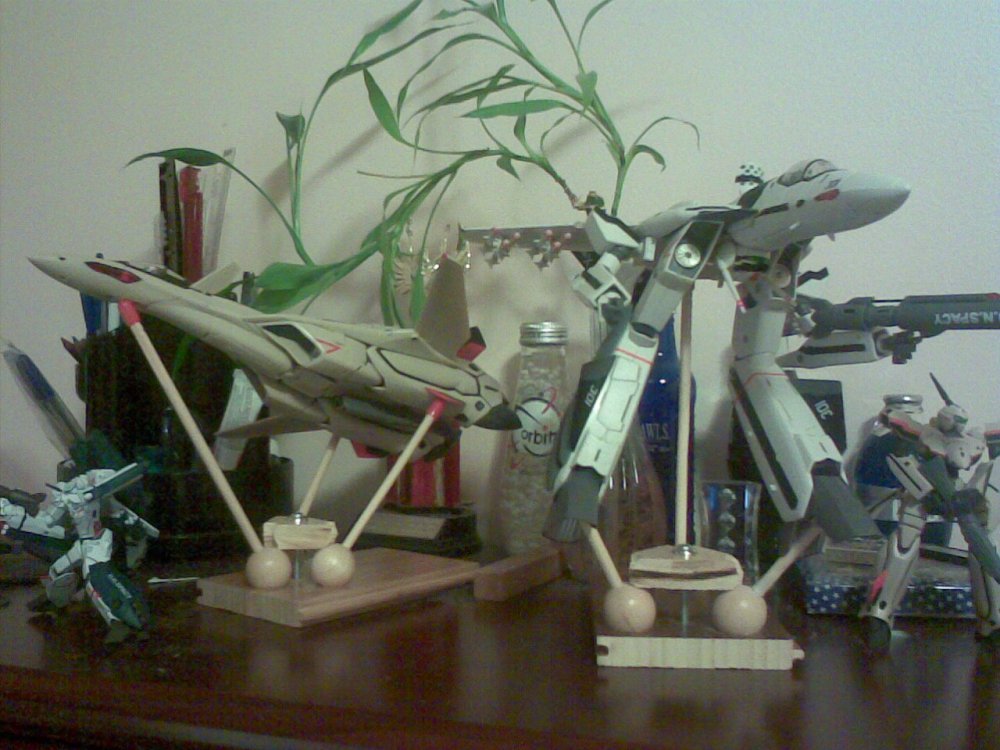
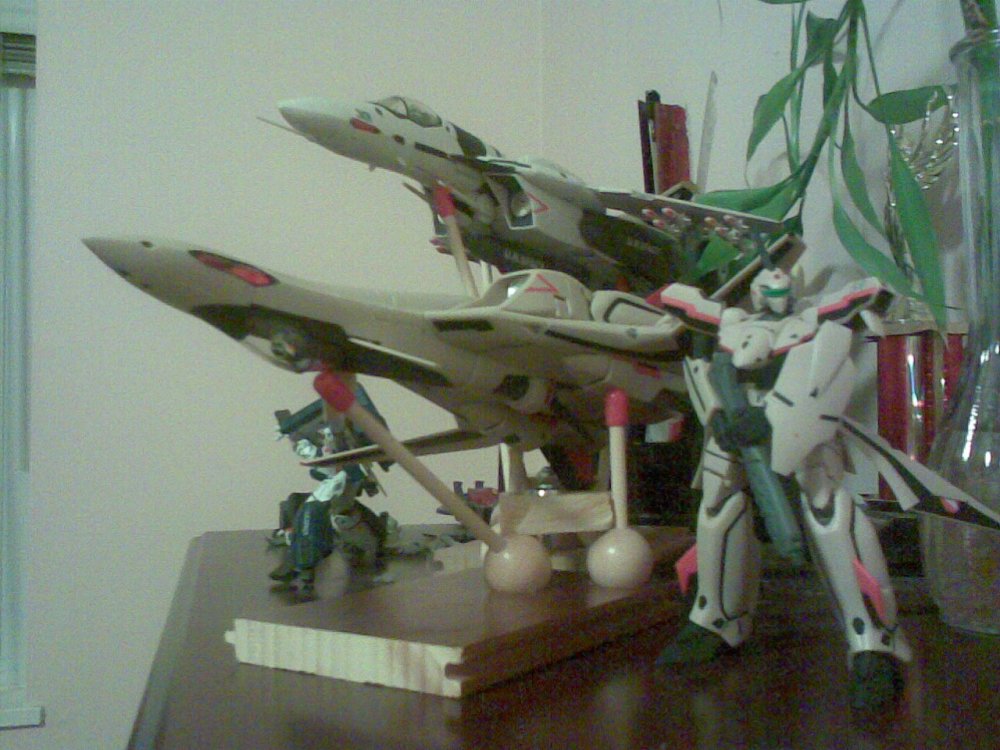
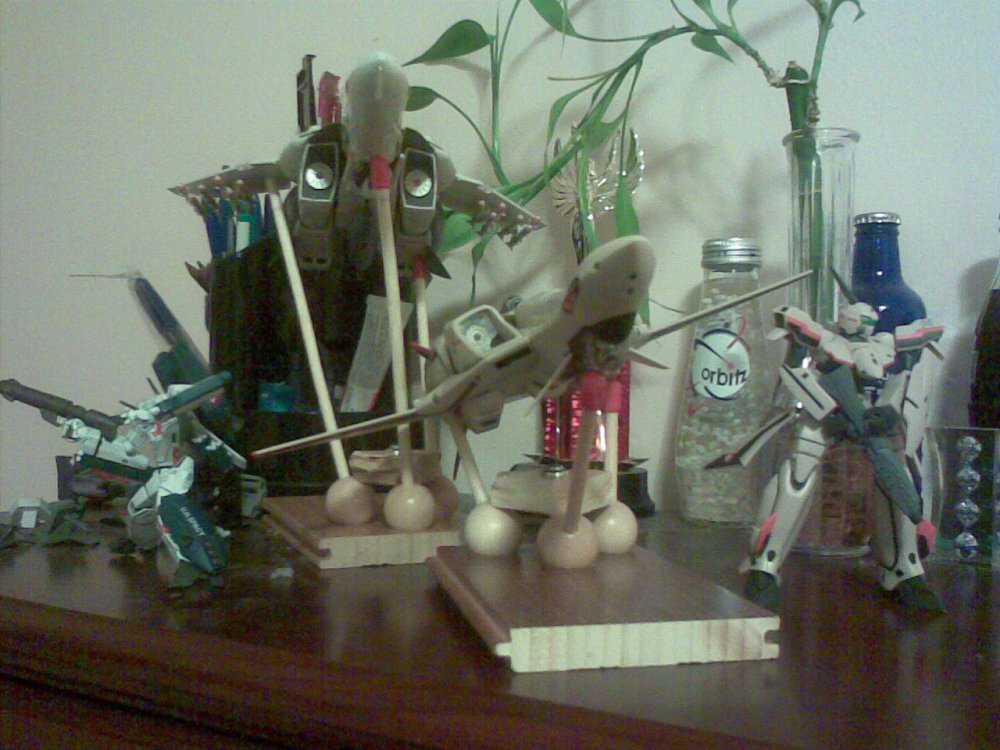
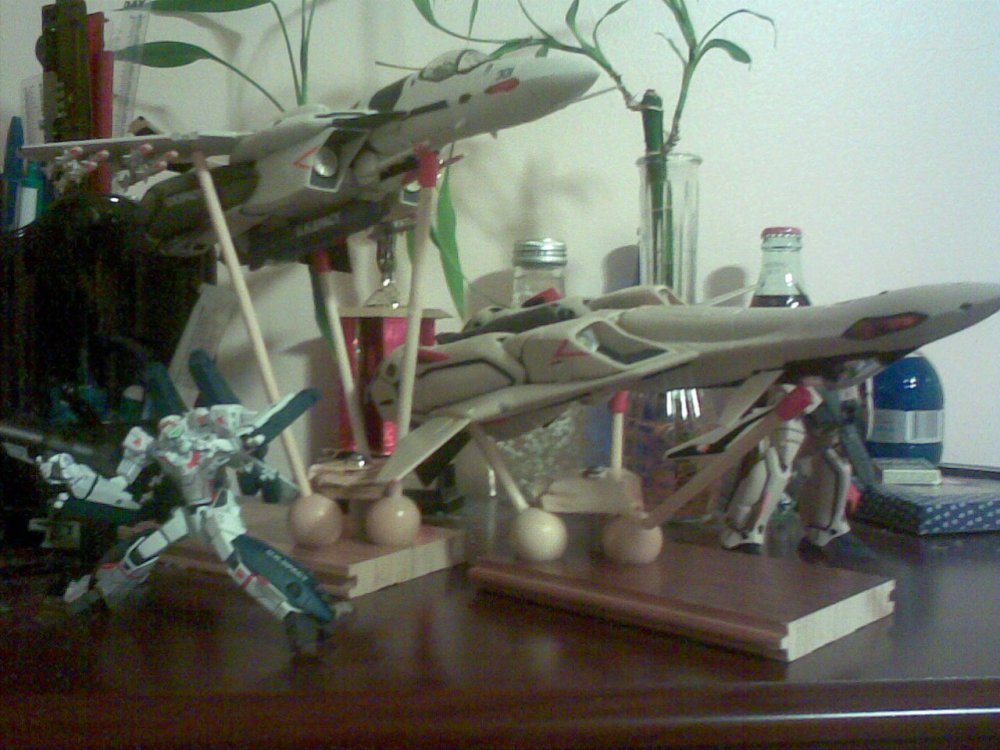
Actually... The base is a synthetic hardwood floor panel. The Home Depot and other renovation stores practically give these things out as samples (for color/pattern matching. Its a small panel at least 6 inches long, and serves as a very steady base, even if the model's center of gravity is off center. The triangular piece that grips down from the top is taken from the same panel. It has a circular slot cut into it to wrap around the surface of the ball joint. The ball joint was taken from a cheap foot massage roller (like the one here http://www.blackpearlbotanicals.com/produc...massagers2.jpg). I cut out a socket for the joint in the base as well as the top triangular piece, and screwed it together. Works pretty much exactly the same way as a flexidisplay, except with just 1 screw.
-
I meant to upload these in early december when they were taken. I had some spare time and I was still waiting for the flexidisplay V2s to release and get shipped to me XD. I went and made my own with spare materials around the house. The one good thing about them though is that the arm lengths are easily adjustable... Cause they're really just the chopsticks you get from takeout. Lol
-
Hopefully Bandai's MacF VB-6 will be better than Yamato's attempt. Needs more gerwalk posability, fewer giant gaps, better detailed arms, and some badass lineart-accurate armor! Although at this rate, we're all going to have to build it from a model kit if they try to DXify the Koenig. lol.
-
Couldn't find it either... But honestly Nanase served 2 roles... 1 to jumpstart Ranka's confidence, while ironically being an adversary (the anime uses Nanase's bust to intimidate Ranka more than once) at the same time. And second, to unconvincingly push Luca into seek vengeance against the Vajra. Anyways, this topic is getting seriously derailed. Ranka figure looks like it was done well, but I think Klan's figure was better I wouldn't get this figure, but I wouldnt mind getting a VB-6 with Ranka tampoed on the side.