drifand
-
Posts
1305 -
Joined
-
Last visited
Content Type
Profiles
Forums
Events
Gallery
Everything posted by drifand
-
Official Bandai 1/60 Scale DX Toy Thread Ver.3
drifand replied to Graham's topic in Hall Of The Super Topics
No I am not calling anyone names for not liking what Bandai did. Complaints are entirely valid, but just like on other Yamato threads, there comes a point when it's pointless. We all know where Bandai failed on the DX, so what ELSE are we going to do about it? Am I happy? I voted 'Meh' in the DX poll! But I chose to enjoy the DX in whatever way I can... and it's certainly MORE than I could with any other-brand Macross toy in recent history. -
Official Bandai 1/60 Scale DX Toy Thread Ver.3
drifand replied to Graham's topic in Hall Of The Super Topics
Yes, well, OK. BANDAI SUCKS for not making the DX VF-25 the way some folks would prefer it to be done. Anything else to add to this discussion? -
Official Bandai 1/60 Scale DX Toy Thread Ver.3
drifand replied to Graham's topic in Hall Of The Super Topics
Let's NOT get started on this sh!t again. Anyone who wants some kind of 'perfect' 1/60 VF-25, wait another 10 years. Or buy a Bandai. I know *I* am not buying any Yamato products for a long, long time. -
Thanks, Todd. My measurements for the CM's is 17.3 cm to the top of the antenna (if the head is tilted slightly down). So I guess the WHAM is taller/larger. Still wouldn't deter me from getting the Helldiver, if only to enjoy the better finishing compared to CM's all-plastic Mecha-Action series. :-)
-
Official Bandai 1/60 Scale DX Toy Thread Ver.3
drifand replied to Graham's topic in Hall Of The Super Topics
On to the DIP... What price, perfection? So there you have it... When/If I get the Ozma version, I would definitely do the thigh mod and heel mod, but as for the knees... forget it. Way too much bother and worry. -
Official Bandai 1/60 Scale DX Toy Thread Ver.3
drifand replied to Graham's topic in Hall Of The Super Topics
Feet Mod Pix Even if you decide to do the thigh mod, it is not enough because in Gerwalk, the feet cannot swivel enough to help balance the toy. The following op will improve the situation somewhat. If you observe the heel pivot, you will notice a built-in 'limiter' on the gray ABS section that is sandwiched between the diecast. Cut that away, along with the protruding upper portion of the heel, and... ... the heels can now assume a wider spread. This can help stabilise not just for Gerwalk but also other action poses in Battroid mode. Not the best example perhaps, but my toy is still highly functional. :-) -
Official Bandai 1/60 Scale DX Toy Thread Ver.3
drifand replied to Graham's topic in Hall Of The Super Topics
(Failed) Post-op Pix Here are a couple of detailed pix to share with the curious. I didn't take any disassembly pix, only the key external areas. Close up of area cutaway under knee-caps Not pretty, folks! To get access to this area, you have to unscrew the halves to get some wriggle room for the knee-caps to be removed. Why would anyone do this? Because with the existing design, the knee-caps would only rotate down to this point, no further. And... ... With the cutout, the knee-cap can go much further in. However, you must also widen the sides of the walls in order to gain clearance for the tapered shape of the knee-cap. In the end, I find this part of the op to be of dubious value. The structural integrity of the leg is definitely compromised. During play, I can feel the torsion of the click-joints working against the innards... and in Gerwalk mode, yeah, it dips but the stance is NO LONGER STABLE. To Bandai's credit, the toy is still pretty sturdy. In fact, after my frustration with the un-cooperative screw-caps, I threw caution to the wind and treated the toy really rough: picking it up by one leg dangling as I worked on the other side, pushing and pulling the various joints out of the way... etc. This thing is BUILT. Far more useful to the Gerwalk-Dipping fetishists is the following mod: Cutting out a portion of the flat panel of the lower thighs. This will allow the upper knee joint to angle the legs forward a lot more than the mostly useless knee-cap hollowing mod. -
Hi Todd, Glad to hear that you're enjoying the WHAM Ingram. All quibbles aside, could you do a side by side size comparison with the CM's? That's because the CM's scale was never officially stated, and I'm sure many fans would be considering getting the WHAM Helldiver if the relative sizes weren't too far off.
-
Official Bandai 1/60 Scale DX Toy Thread Ver.3
drifand replied to Graham's topic in Hall Of The Super Topics
Hi Graham, I'll take some post-op pix when I get home (yeah, no long weekend for our tiny studio). Regarding your question about modding only the thigh panel, yes, I think it is definitely doable - structural integrity will NOT be compromised, unlike the knee-cap op where 2 connecting pegs for the leg halves had to be cut away. Although the op was not a success, the toy is still 'fine'. Fighter mode is rock solid, as is battroid. However, gerwalk is a bit less stable now. Not sure if I want to get Ozma's DX which has just arrived in Singapore. -
Got this last year (Dec '08, haha) when I was in Tokyo... it is a beautiful book. Some of the commentaries are pretty funny, like Miyatake groaning over his lousy English tech-terminology :-) Toward the end of the book, they even included 1/6 scale scratch-built renditions of the base armor suits plus the various 'power up' add-ons. Great stuff!
-
Official Bandai 1/60 Scale DX Toy Thread Ver.3
drifand replied to Graham's topic in Hall Of The Super Topics
Well... after 2 hours of grinding, cutting and sanding, my advice is: DON'T DO IT To achieve a good dipping Gerwalk posture, the trick is NOT to increase the freedom of the kneecap... it is the upper knee joint that's connected to the thighs. In other words, you've to to cut away some of the flat detailed panel at the end of the thighs. That's easy to do if you can separate the thighs. Unfortunately, the screw caps on the thighs are glued down. Now I have great candidate for DX Battle Damaged™ Alto -
Official Bandai 1/60 Scale DX Toy Thread Ver.3
drifand replied to Graham's topic in Hall Of The Super Topics
That knee-mod pic is very inspiring. I'm right now in the midst of taking apart my DX Alto's leg... The bad: after prising off the screw hole cover (it's the gray painted long ovoid detail piece), there's still the back piece that's glued down tight to hold the halves together; I'm not gonna risk cracking a visible part of the toy! However, after some pushing and shoving around, I found out that the kneecap piece can be separated first by one half, then the other. That allows the lower leg to be pull off at last! Examining the area under the kneecap, it looks like the modder used brute force to wrench off the offending 'limiter piece' and ALSO hacked off some of the underlying plastic to allow the kneecap to rotate further back inside. I'm going to try cutting/sawing the inner surface first before deciding to pluck off the 'limiter'. If I fail, at least the damage is hidden under the kneecap. Wish me luck! -
Megazone 23 Garlands: Aoshima vs. Yamato
drifand replied to RavenHawk's topic in Anime or Science Fiction
Yup. -
Please don't misunderstand my comment. I think Y-fans and B-fans have legitimate reasons for their pet dislikes of the other company's products. I have always admired Yamato's beautiful designs, and CAD has only made them look even more incredible. And yeah, Bandai didn't do a great job for the VF-25. Take Yamato's passion for intricate design and back it up with solid production experience + 1st-tier factory respect and we could all be winners.
-
Megazone 23 Garlands: Aoshima vs. Yamato
drifand replied to RavenHawk's topic in Anime or Science Fiction
IF you are SURE those two are the only ones you want then go ahead (no serious problems reported for either EXCEPT for a few unfortunate cases of snapped handlebars on the Proto). Just make sure you experience the Factory Garland first, so that the Proto G will bowl you over with its better execution... like the optional vehicle mode clip-lock, flip out rear-view mirrors, detented shoulder joints, non-floppy wrists, and smarter weapons-grip with peg/hole design in fists and grips. Do it the other way round - like me, with the Army G as 2nd purchase - and you're far more likely to feel cheated. Good luck! -
Oh OK, and of course, all the 'iro iro' sounds 'ero ero' now... But I can definitely see it: Fun loving Sheryl hamming it up in the studio next to Bobby and sending out a special live dedication to Mr. 'I am a MAN' Ozma over the Macross Broadcast System, lol
-
Official Bandai 1/60 Scale DX Toy Thread Ver.3
drifand replied to Graham's topic in Hall Of The Super Topics
Belated thanks too, M.O.P. My DX Alto is doing the twist now. :-) -
Hi Jenius, I just got my Fuke's floppiness fixed up by about 80% :-) 1. Swap out swing-arm lock retaining screws with those from Stick or Ley. Metal locks now DEFINITELY slide further and function correctly; swing arms no longer flop in armor mode. Also, the slightly larger screws on Stick/Ley's plastic locks don't seem to affect them at all. 2. Deepened the 'pinholes' on the chest-halves with my Tamiya pin vise + 1.0mm drill bit. Now the tiny pegs on the diecast chestplate can fit more securely onto the halves. Upper torso no longer wobbly. 3. Used 'cowgum adhesive' residue from Macross Chronicle cover spines for non-destructive tightening of hip and upper thigh joints. Lubricated the groin area with lighter fluid, then pushed small blobs of the gum inside thru the 'seat attachment' slot. Disassembled thighs and wedged gum blobs around upper swivel. (Left out lower swivel because it looks waaay too delicate.) Legs no longer flop around the hip joints. 4. Used cowgum residue for the forearm guards. (Blutack is fine too.) No more parts leprosy. Couldn't fix: Ankles can't be disassembled as they are glued shut. That means no free-standing Armor mode poses unlike the previous Stick, Ley and Yellow versions. At least now the toy is worth my time to detail up. i just hope the knee joint holds up over time. Maybe I should look into simpler replacement joints from the Revoltech series or something.
-
Megazone 23 Garlands: Aoshima vs. Yamato
drifand replied to RavenHawk's topic in Anime or Science Fiction
If you desire to own just one example of a Garland, get the Yamato Proto Garland – it's the best QC'd version of the toy and has lots of improvements over the original breakage-prone red/white Garland (which has not been re-issued with the fixed shoulders AFAIK). No personal insight for the Aoshima kits... but if it breaks, at least it's your own fault. :-) -
Official Bandai 1/60 Scale DX Toy Thread Ver.3
drifand replied to Graham's topic in Hall Of The Super Topics
Thanks for the link.. HIDDEN WAIST JOINT!!! :-) -
Easy... their Macross design team should be purchased outright by Bandai. QC solved (mostly).
-
Mine's 'good', thanks.
-
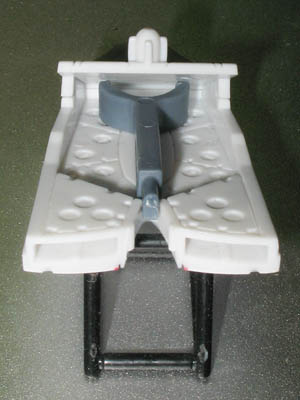
Official Bandai 1/60 Scale DX Toy Thread Ver.3
drifand replied to Graham's topic in Hall Of The Super Topics
Gunpod accessory kludge:
-
OMG... I C@ME
-
Official Bandai 1/60 Scale DX Toy Thread Ver.3
drifand replied to Graham's topic in Hall Of The Super Topics
RE: Overhaul of DX Toy Mmm, first thing I thought of is to replace the problematic wrist ball joints, but met with failure when I tried to prise off the screw caps on the forearm. Anyone else tried it? BTW, I managed to kludge the gunpod attachment into the shield hollow. U-shape goes inside, align stalk with the V-gap, pointy-side squared-off end of peg 'clips' into the vee. Try it. As for photos... post-Christmas workload is already piling up. Hope to shoot some on the weekend.