warpaint22
-
Posts
486 -
Joined
-
Last visited
Content Type
Profiles
Forums
Events
Gallery
Everything posted by warpaint22
-
You should have no problem with doing a head swap, it should just be a matter of popping of on head and adding the other. You may want to use a neck piece on the A head if you are going to swap back and forth as this would make it easier to have the neck on both heads but it's not necessary.
-
Looking good so far, nice to see a build up I was unable to do one for mine but this should be fun to whatch. You can build this model to be able to remove the armour and there should be no modding needed you just need to have a few extra parts to put on the kit when the armour comes off. First thing is you need to make the normal legs so you can take the armoured ones off at the knees and add the standard legs, next you need the standard pieces that go onto the chest, the ones for the armour have pins on them to attach the armour to the chest just don't glue these on so you can swap between them. Same goes for the shoulders pieces. The only part that needs a little modding is the parts around the top of the legs that cover the intakes. basicly it become a part swap model to change between the two types but very doable. Can't wait to see how you go keep up the good work.
-
Need advice, tips on Hasegawa VF-0A/S Battroid kit
warpaint22 replied to Mr. Anderson's topic in Model kits
I should consider building a gerwalk wouldn't be hard. The models in that pic where for a client they turned out nice IMO. -
Thank's for adding the picture I was to lazy. Nice model too.
-
When I saw these stands I thought the same thing, what do you use dubble sided tape or what? I find these bases great for VF-1 valks the gun pod sits in the top nice and the give a better option for posing your model. http://www.hlj.com/product/KBYMB-12 pretty good price to.
-
Looking good. With these kits it's best to complete all the sub assemblies fill, sand and paint them. It's almost impossible to pait these models well if they are full assembled. Keep up the good work as I said looking good.
-
Great Job, you've done very well, congrats and thanks for showing your work.
-
You became a Macross fan because of ...
warpaint22 replied to Macross007's topic in Movies and TV Series
I'm with the rest that had their intro into Macross through Robotech, I remember getting up at 6:30 in the morning to watch robotech before school and I remember only being about 8 years old and going to school it was the topic of choice on the bus. I still to this day remember some girls sobbing over the death of Roy the morning that epesoid showed and to this day I don't think any anime had the same impact that it did. Then as time went on I found a video of DYRL for sale at a video shop and had to buy it, from that day on it's been Macross all the way. Long live Macross. -
Looking nice PeterB, I like the version you went with looks really good. As for the Mr Surface try the Mr Surface resin primer it works really well. Looking forward to the completion of this model, awesome work.
-
stroke stroke stroke stroke stroke
-
All hail the mighty Thunder Hammer, this is a work of art and I concur stuff the 1/60's nothing will ever beat the 1/48's. You coworker EXO is truely an amazing modeler, have to pick myself up off the floor now.
-
Looking good Mr Anderson and a good idea to start on a nice simple little kit. For removing seem lines you just need a little model putty and a few different grades of wet and dry sandpaper. A sculpting tool is great for applying putty but you can use anything handy to apply it, an ice-cream container lid cut into small rectangle pieces works well.
-
Need advice, tips on Hasegawa VF-0A/S Battroid kit
warpaint22 replied to Mr. Anderson's topic in Model kits
Thank you guys for the kind words, if you need any help feel free to send me a PM anytime. -
Need advice, tips on Hasegawa VF-0A/S Battroid kit
warpaint22 replied to Mr. Anderson's topic in Model kits
First welcome to the boards Mr. Anderson A handy hint for the hip joints is a small amount of cooking oil on a cotton swab and wipe it into the sockets on each leg where it attaches to the hip. Don't use much but this will stop the joints breaking. I thought I'd throw in a few pic's, each one is a different model.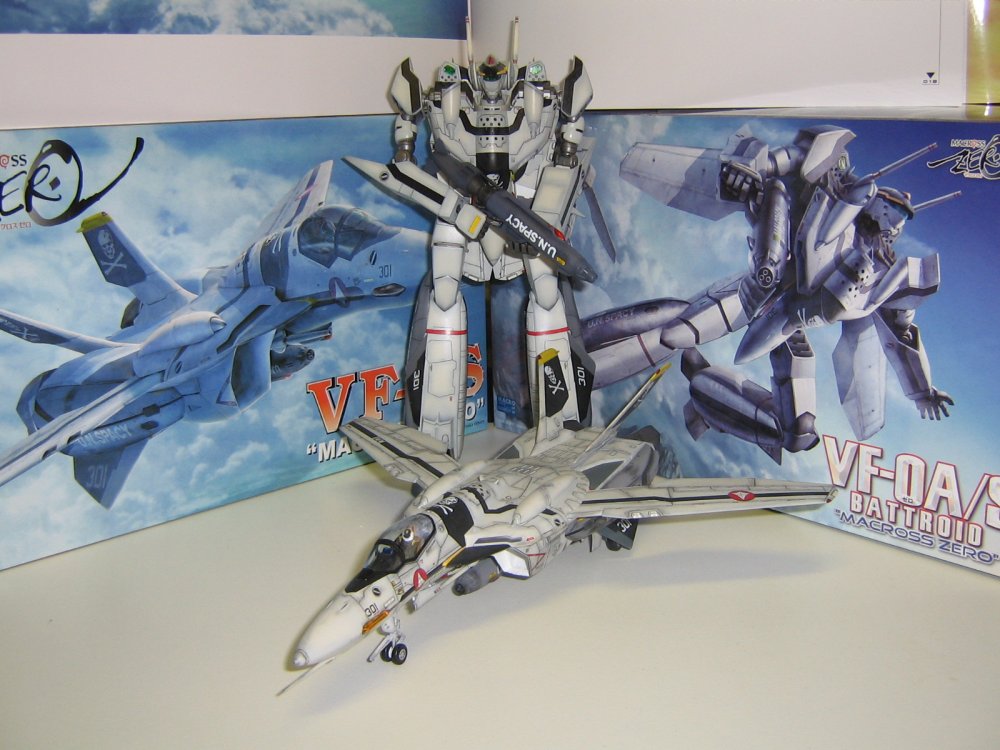


-
VF-0S Battleroid Weathering. Second time around.
warpaint22 replied to Sonic's topic in The Workshop!
Nice work sonic turned out great and happy to help. You can see the improvement between the two, congrats on a job well done. -
Display Your Collections...
warpaint22 replied to bryan_f_davis@yahoo.com's topic in Hall Of The Super Topics
Collection looking really good ruskii, love what you've done in a small space, looks awesome. -
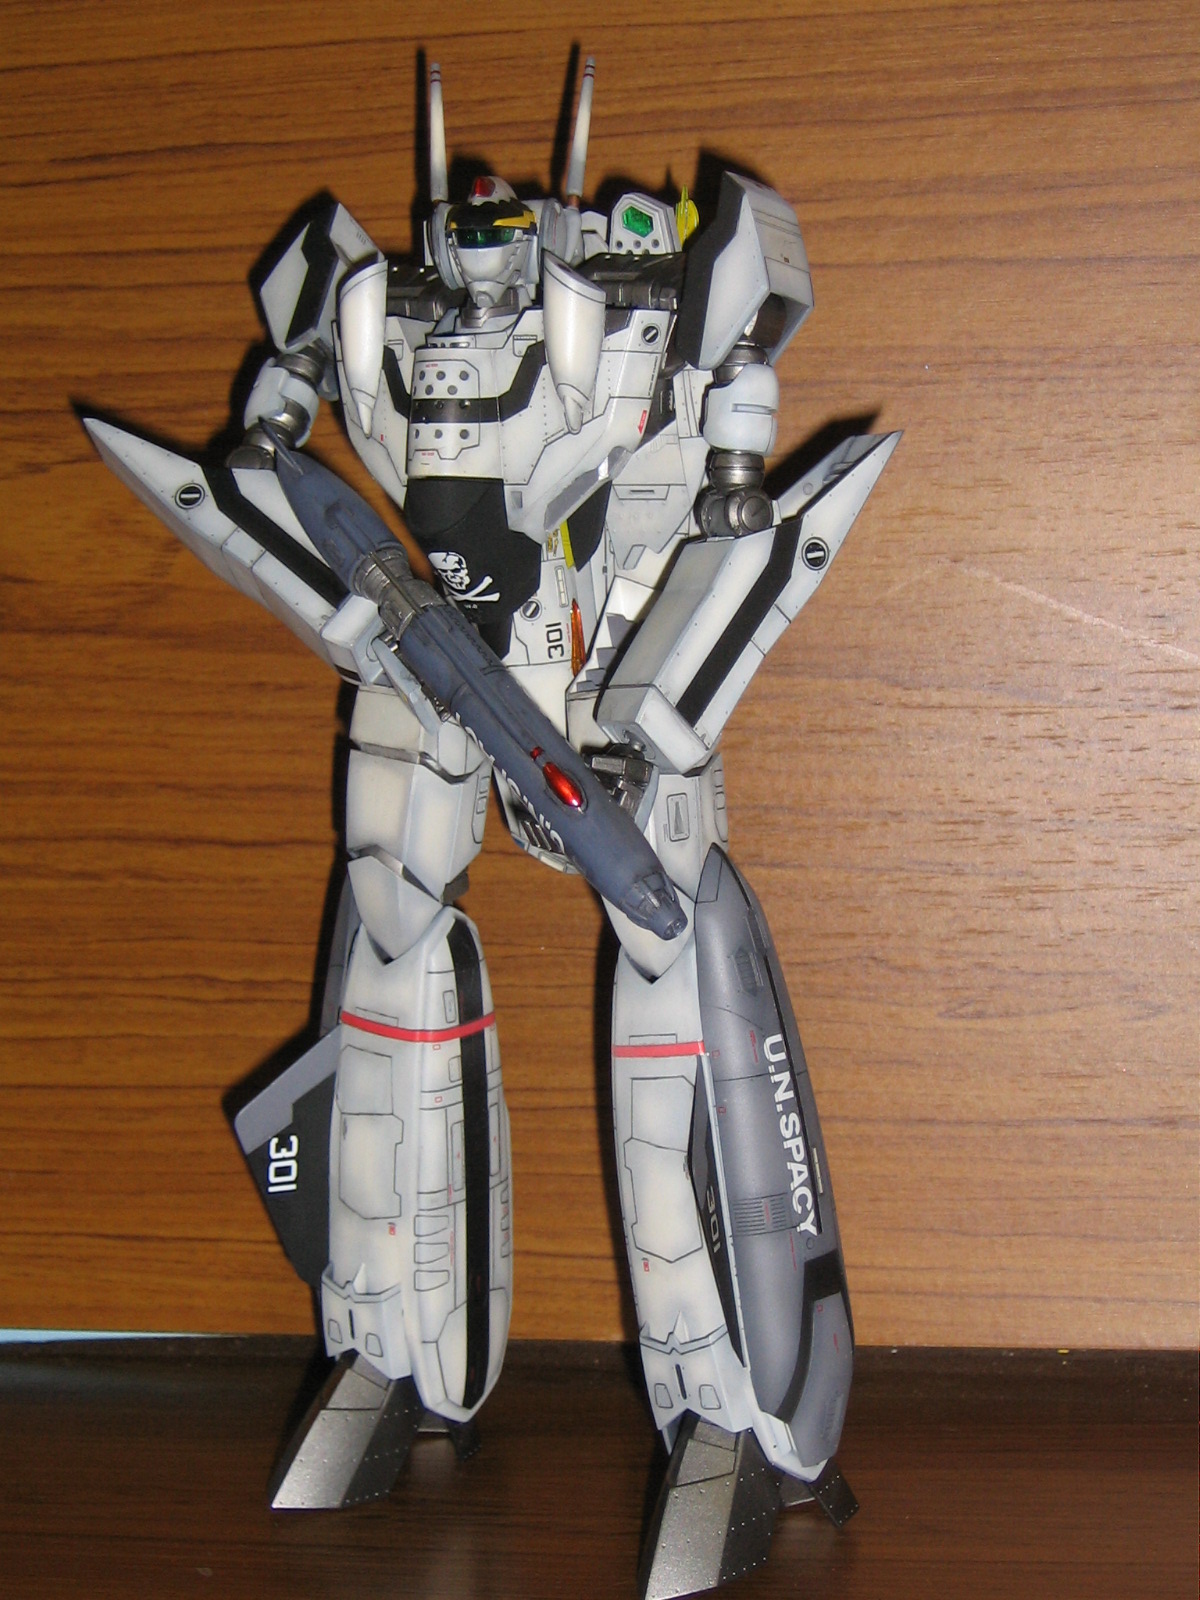
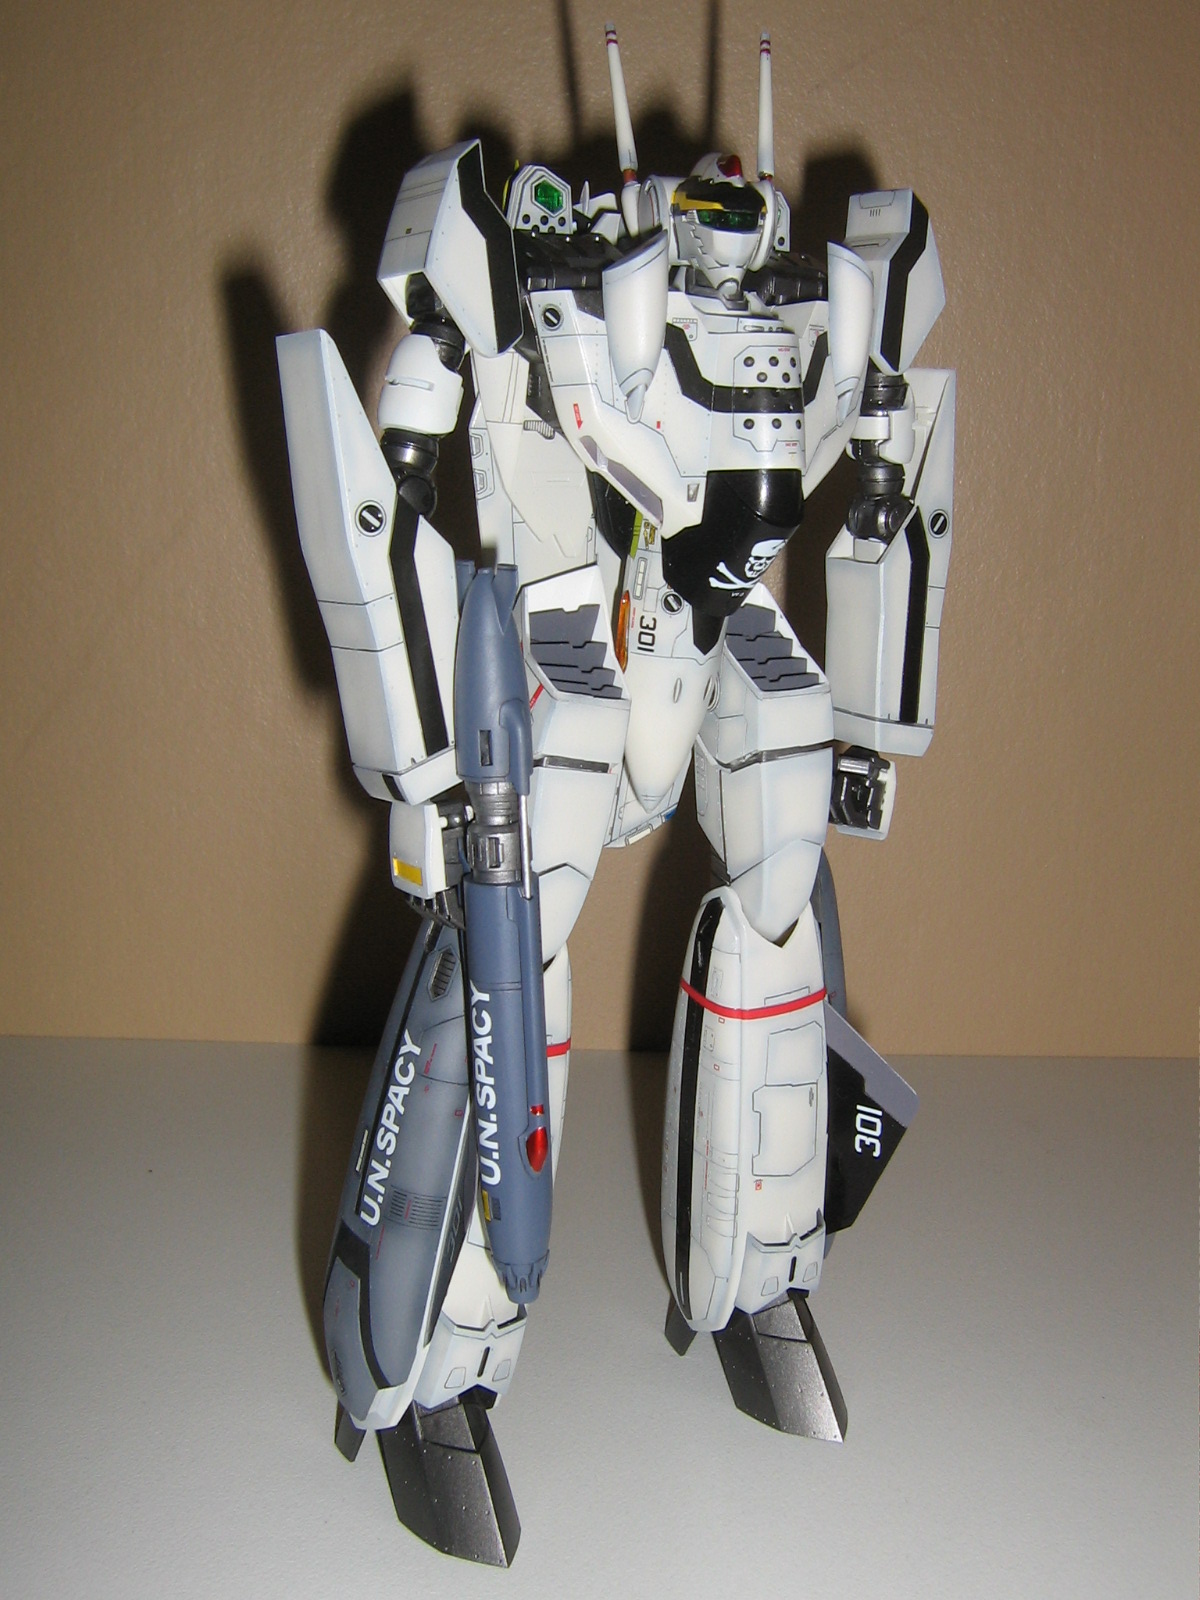
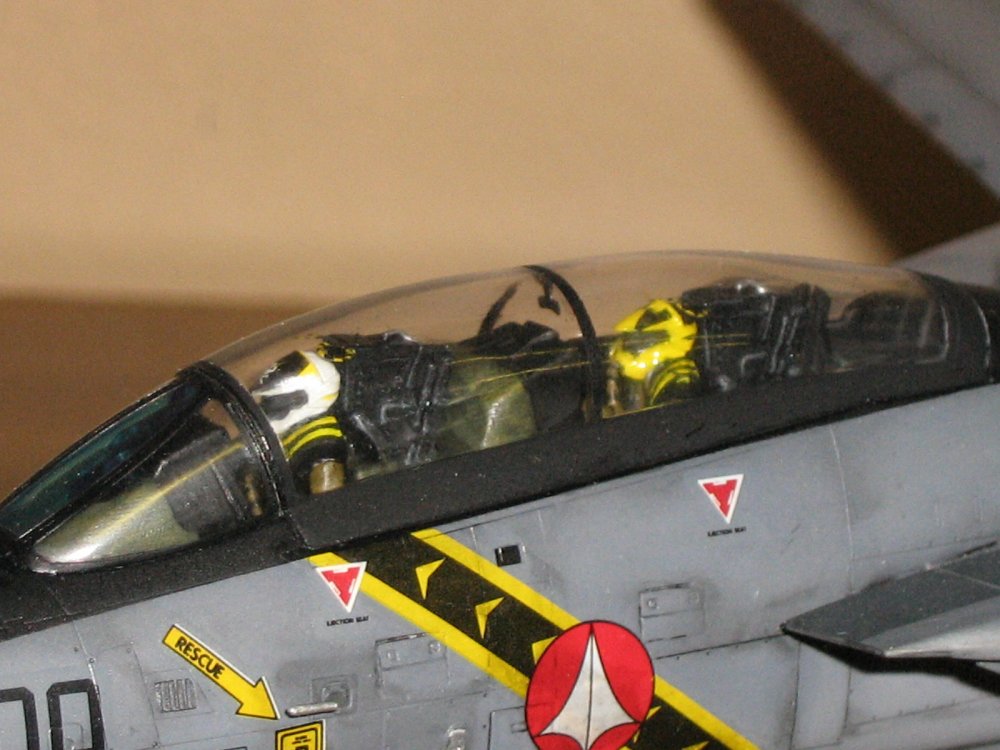
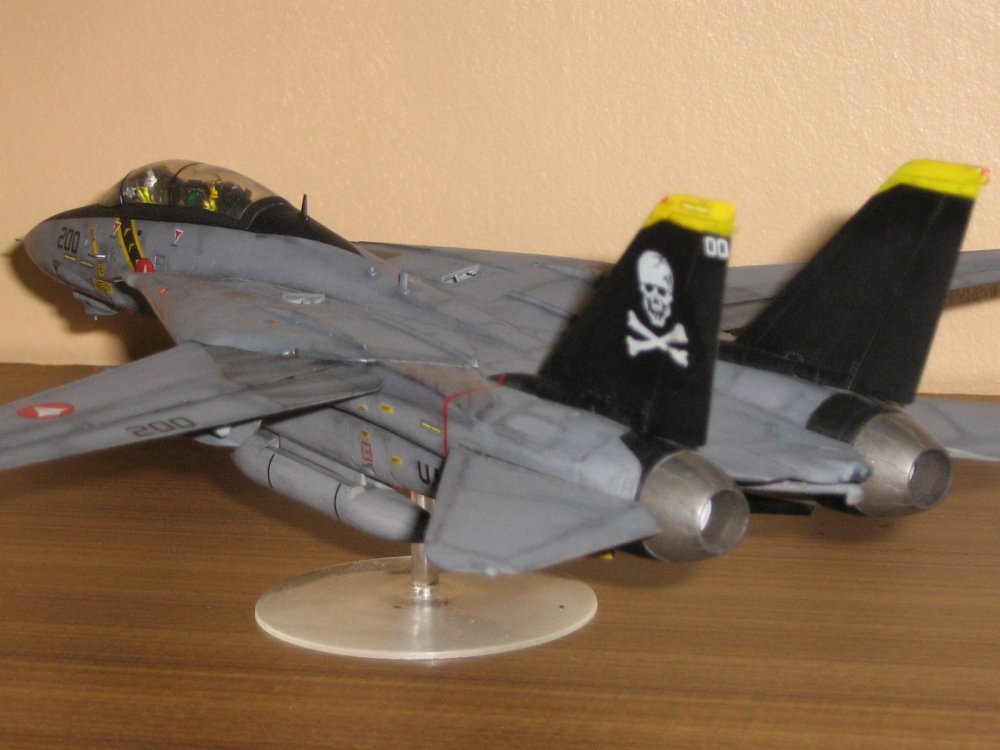
Thanks Mark, the decals are the ones that came with the kit all I had to do was leave the US insignia off and add some UN Spacy kites left over from other macross kits, VF-1 kit I think they came from. I was pretty happy with the pilots the back seater is a little low.
-
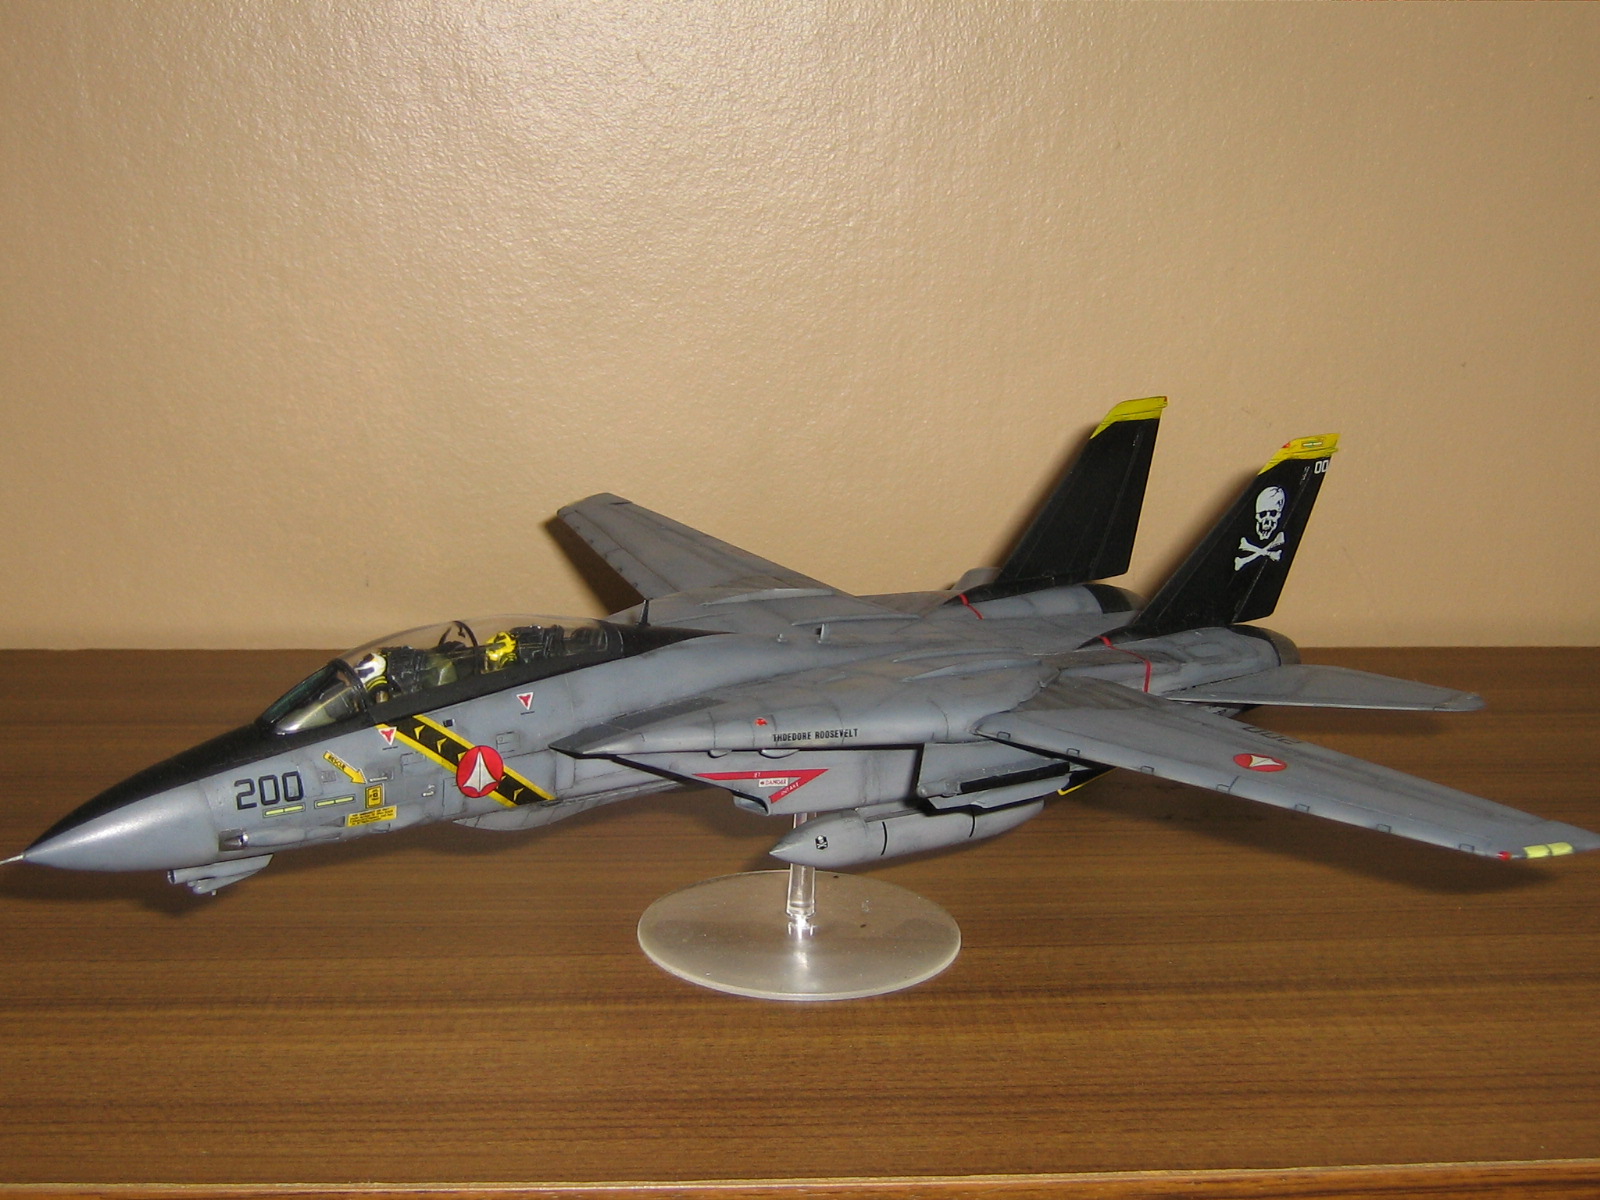
This is the updated Hasegawa kit, I built this as Roy Fockers F-14B. I used Hasegawa Macross pilots however they needed about a 6mm extension in their waist to make them tall enough to fit. Much better kit with photo etch parts, the only draw back for some maybe that it doesn't have swing wings as you build either fully swept or full extended and the kit comes with no weapons or pilots. Still a lot nicer kit of the F-14. I'm really looking forward to this release of the VF-1D as I missed the first one, the same goes for the minmay guard.

-
-
How about that the 1/72 Minmay Guard chest decal of Minmay is the same size as the leg decal supplied but looks much better, thinner. It's also not as dark in colour and has a little more detail. So I'd use them if you got em.
-
Now that's comedy GOLD!!!!!!!

-
The more I see of the cat's eye the more and more I love the design and cool8or has done such a fantastic job. I'd love to see what the Captain could do and even though it would be big 1/48 would do this bird great justice.
-
Not just the VF-1D but the VF-1D with metal etched parts and it's not in the macross list how did you find that? Nice find I preordered 2 so thanks for that.
-
Well we got to see a whole three episodes, and what a supprise it's gone from the airwaves. Australian TV sucks so bad.
-
Now that would be ideal, add in a couple more companies and we'll have macross toys out the wazoo. Now that would be compitition.