Valkyrie
-
Posts
1120 -
Joined
-
Last visited
Content Type
Profiles
Forums
Events
Gallery
Everything posted by Valkyrie
-
Nope. It's a custom. Someone kitbashed the 1/100 fighter with a Frame Arms kit to make it. Very impressive job!
-
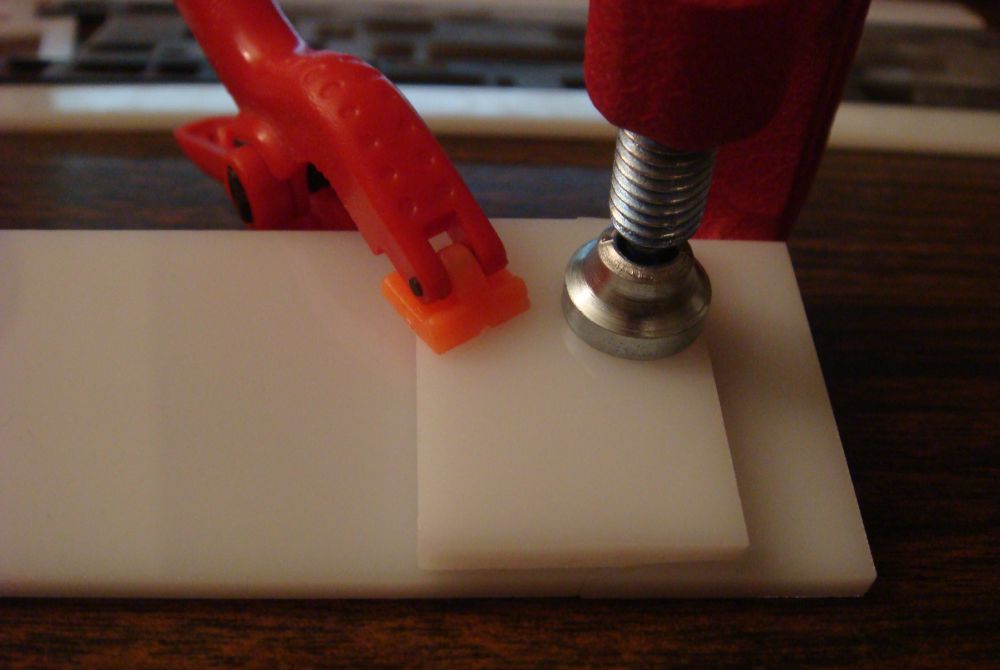
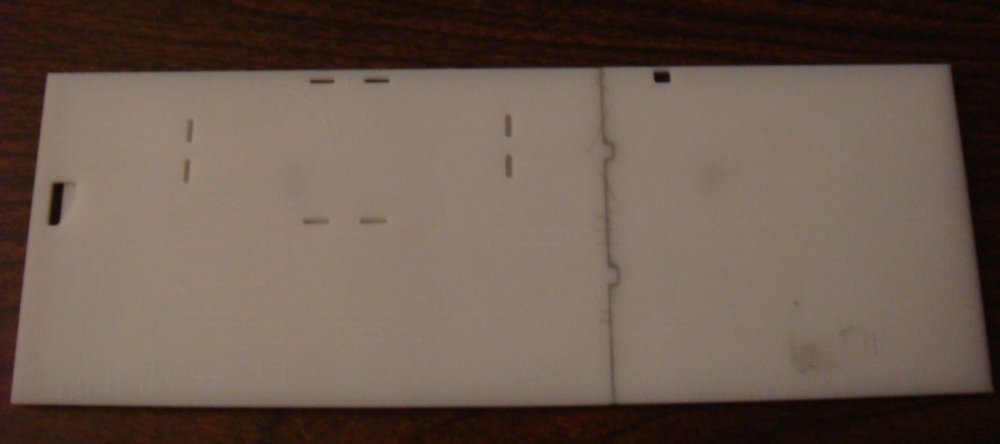
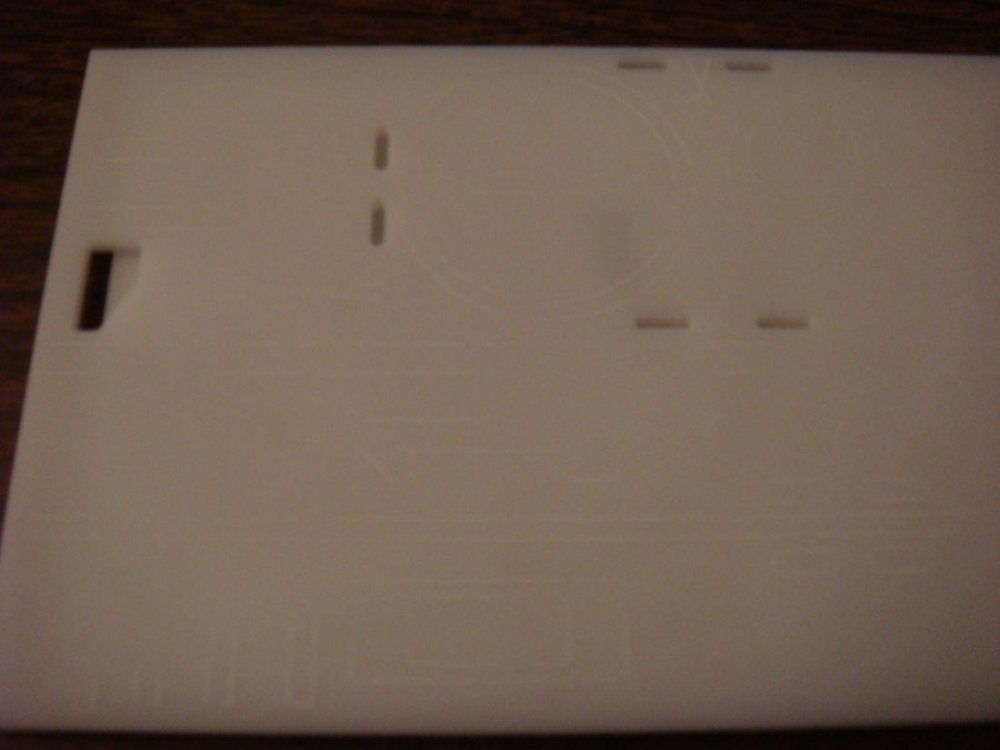
Things are coming along, but slowly... I got most of the doors done on the center panel, but I had a few breakage issues that slowed me down. And the whole process is way more tedious than I had anticipated. I'm using literally the only software possible with this laser, a piece of crap called NewlyDraw. As I think I mentioned earlier, if it didn't accept .DXF files from AutoCAD, the machine would be almost completely useless to me. All it does is take the lines I've drawn in CAD, and draw with the laser. In the process, it vaporizes about 0.01" of acrylic as it cuts. So I need to manually adjust the drawing of each individual door to get it to fit the opening. And I still usually need to tweak the size one way or another to get a good fit. Like I said... tedious.
-
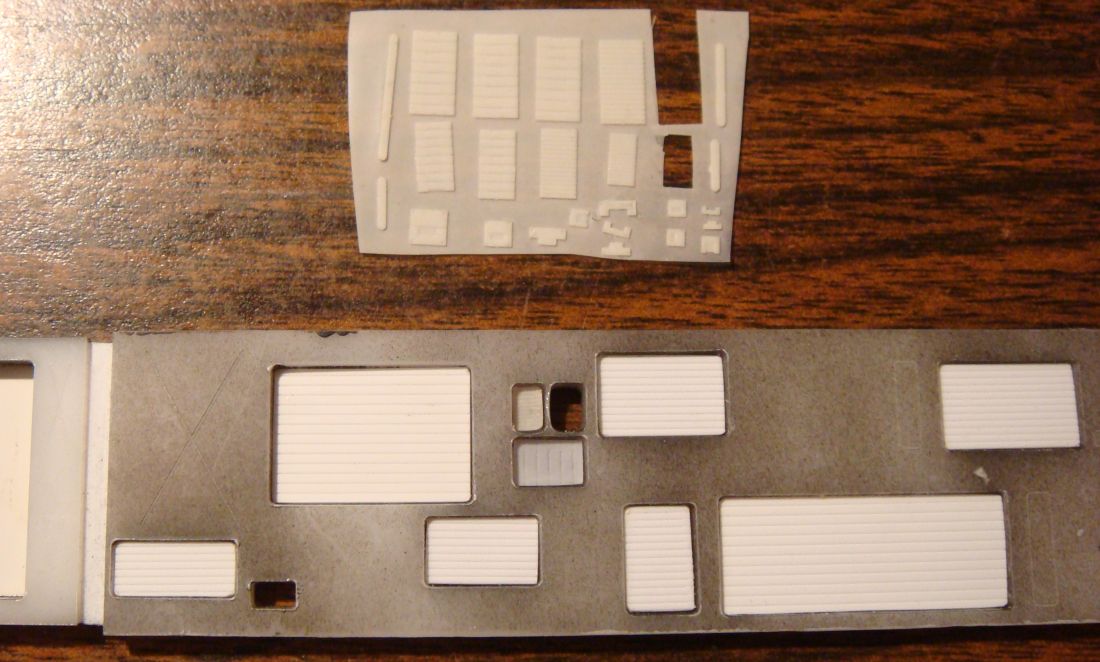
Minor update. I got some of the finer V-groove paneling today and worked on cutting out and skinning a few doors. It's coming along well, but I'm thinking I need a couple more door designs to vary it up a bit. For the smaller ones, I'm trying to skin them with resin copies of one of Kaiyodo's mecha detail photo-etch sets. I'd use the real thing, but they're out of production now.

-
Regular plastic cement seems to work ok for gluing styrene to PETG. But I suspect I'd need to use my Weld-On acrylic cement to bond PETG to itself. It's really great stuff, but it was hard to find. And it's super runny, so it tends to get everywhere if you're not careful.
-
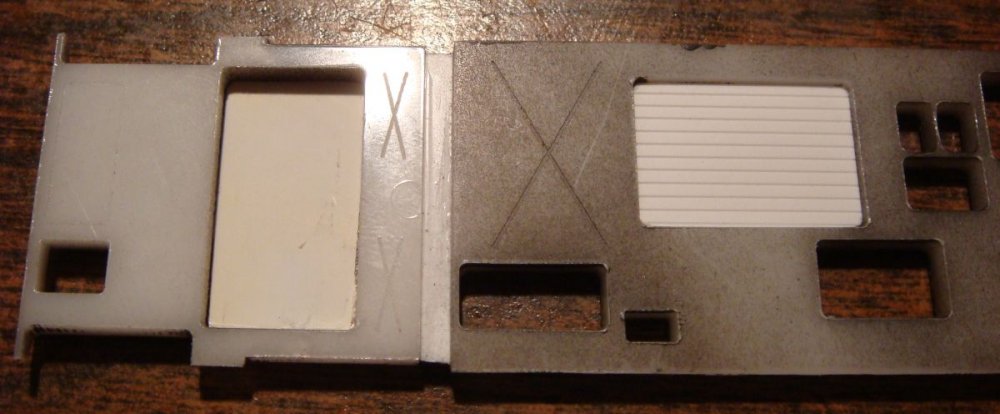
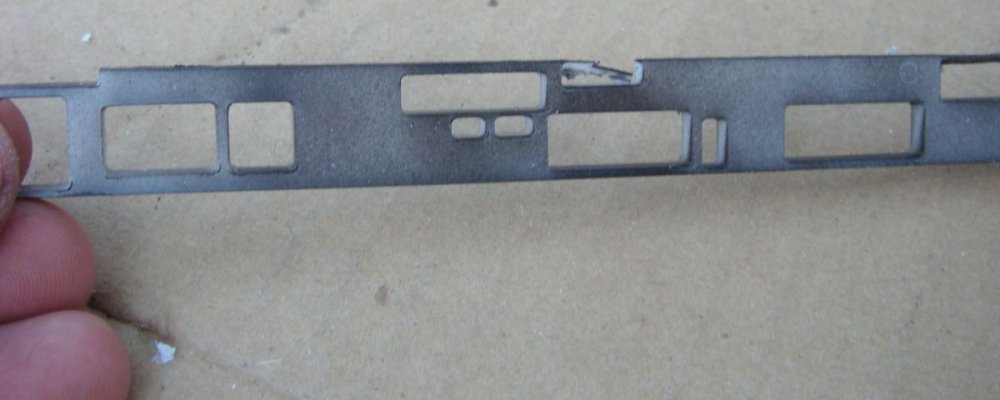
Thanks for the advice, Mech. I still need to do some experimenting with that tape trick. And styrene cutting, also. But I've been finding out that my laser cuts PETG plastic cuts way cleaner than it does acrylic. And it's not as dense as acrylic, so you can still cut it with an xacto. If I wasn't so far along, I'd be tempted to start over, switching materials. I haven't made too much progress the past few days. Most of the time put into it was spent fixing geometry mistakes that was preventing one of the side pod's panels from going on correctly. I glued on the bottom piece, and puttied the seam, giving it more rigidity. And I did some experimenting with the bay door paneling. I cut the doors out of .060" PETG, then skinned them with Evergreen's V-groove siding sheets. I tried them with both types I had, .040" and .050" spacing. I think the 040 looks good for the larger door, but too big for the smaller one. I need to pick up a sheet of the .030" stuff tomorrow


-
I'm afraid this is all my fault. I'm casting them for SSM, but I've been too busy with other stuff to make new molds and get it back in production. I'll do my best to get some of them cast in time for Wonderfest.
-
Great stuff! But actually, the launch arm was mastered by Gundamhead, if I remember correctly.
-
Of course, it'll be a kit when it's done
-
Good tips, thanks! My laser is 40 watts, but it still takes 2 or 3 passes to cut through the acrylic completly, so it's kind of a pain. The biggest problem I'm having is that the cuts don't always end up perfectly perpendicular to the work surface. So, for example, those bay doors will seem to be cut from a bit of an angle, and I'll have to file them down to get them to 90 degree angles. I'm assuming that the laser is eroding more of the material on the top surface than the bottom because I'm cutting it in multiple passes. But I don't know how I could work around that. Do you have any good tricks for cutting styrene? Every time I've tried it, the laser seems to melt the plastic, rather than erode it, so I end up with really wide cut lines, and I'd need to sand down the edges afterwards.
-
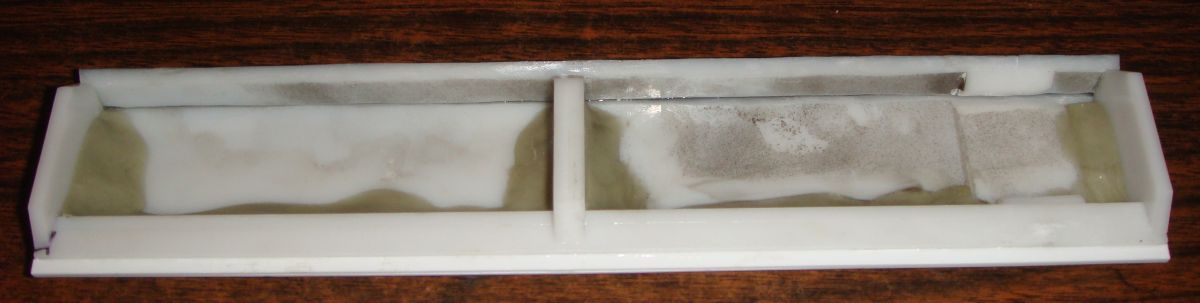
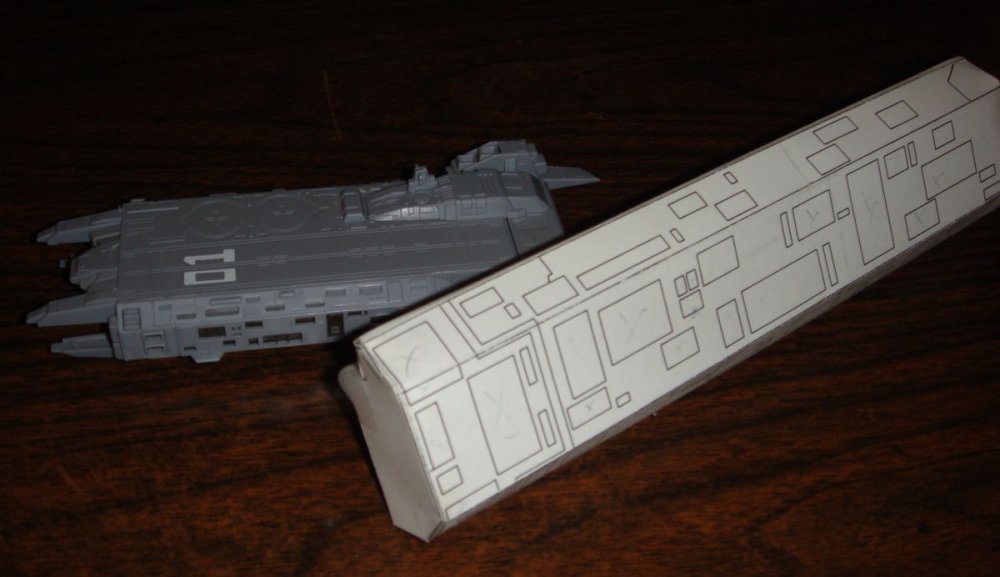
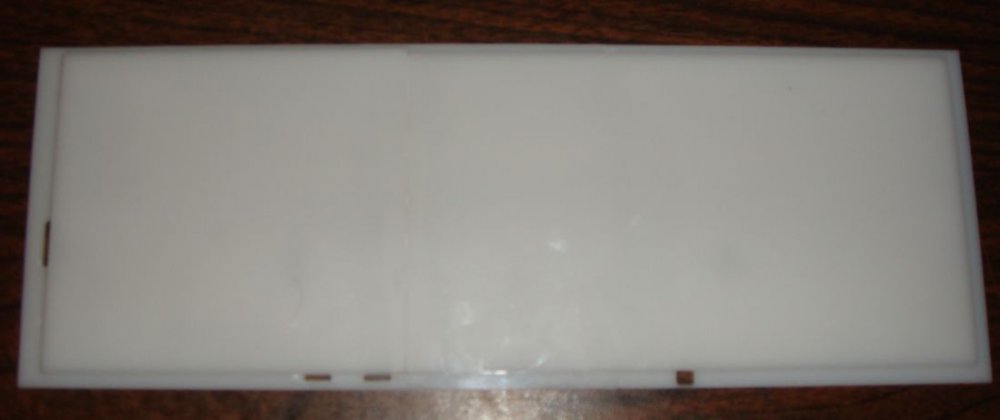
Yep. Whatever I have finished will be at Wonderfest And while I'm posting, a bit of an update. I put a few hours into it today. But instead of installing the bay doors, I got started building up the basic shape. Pretty much everything except the panels with recessed detail are now assembled. I started with the largest piece, and glued some laser cut supports to it. That let me glue a couple more panels to it, making alignment way easier. Then I backed the joints with some Avees Apoxie Sculpt to give it a bit more rigidity (I'll probably be making it solid by the time I'm done, anyway. And finally, I glues a couple Evergreen strips together, and replaced the smallest panel, which came out of the laser all warped. And to finish the day off, I glued some Evergreen strips to the bay panels, which make up the little trench that runs behind the forward vernier clusters. That's it for today. More tomorrow, I hope!


-
Well, crap... Let the manhunt begin!!
-
Next, the real fun begins... I'm going to close up all the openings in the side pods, and add some detail to them. Door shutters and the like. I'd rather do all of that later, but I think it'd be way easier to do it now than after the whole pod is assembled. I've got some V-groove styrene sheets from Evergreen that should do nicely as bay door shutters. But I'm not sure I want to detail them all the same way, and I'm not sure how else to do it. And really, I'm not sure how many of them are Valkyrie launch bays, or what the rest of them would even be. Missile launchers? Shuttle bays? Any ideas?
-
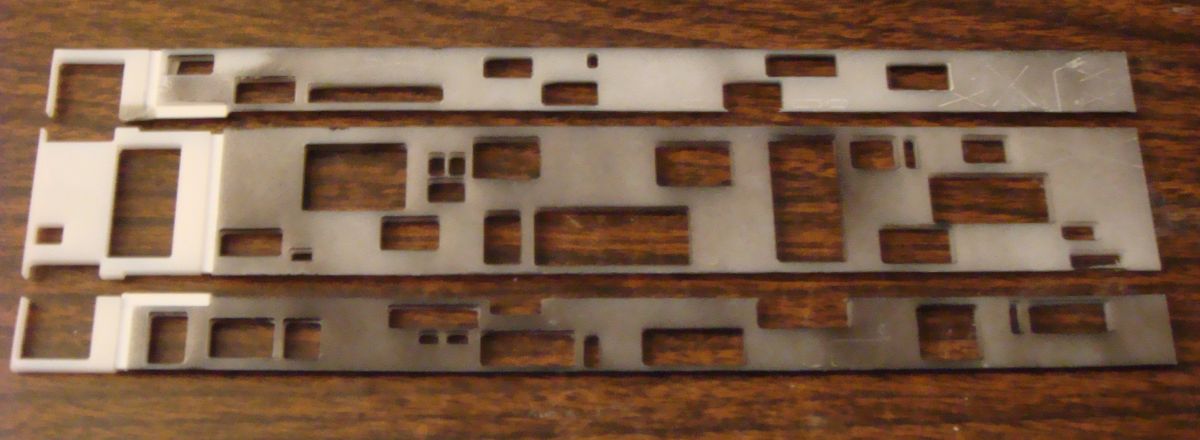
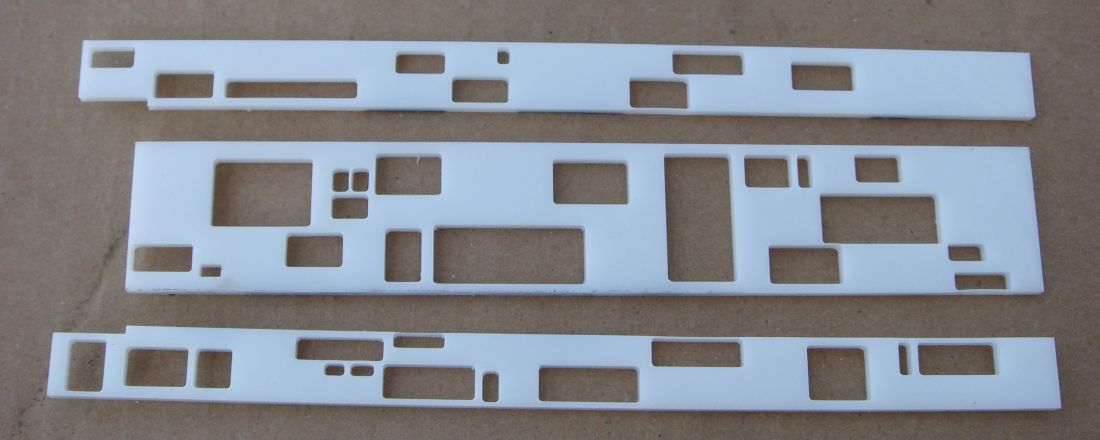
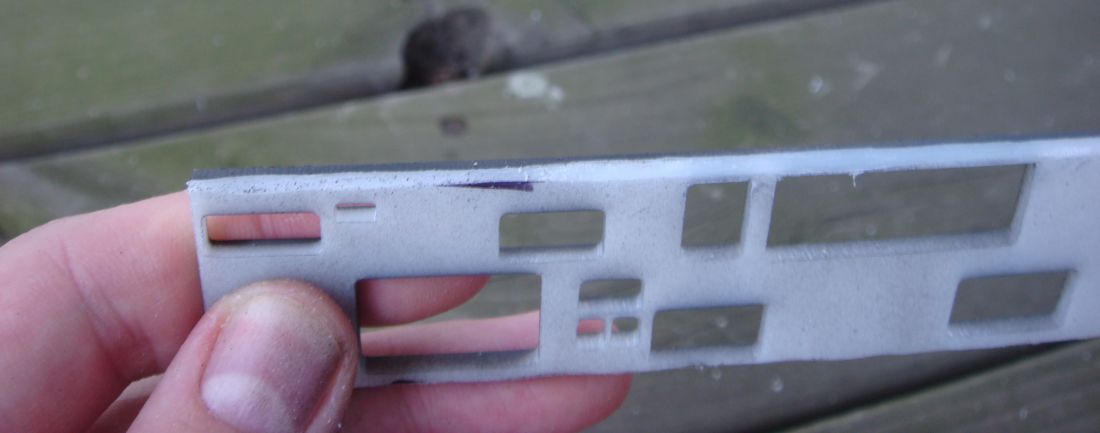
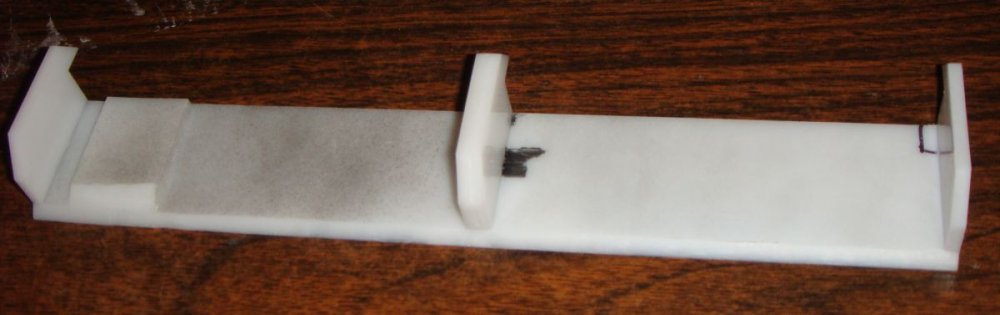
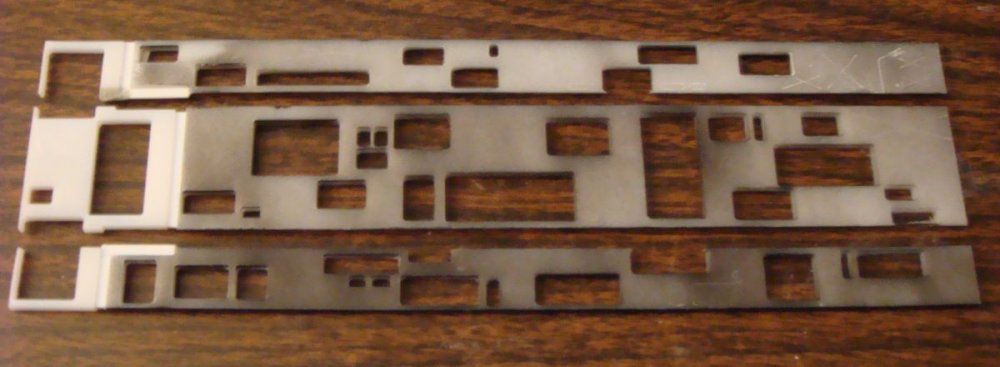
The next order of business is the side pods. I needed to make them out of several flat panels, so I drew them up in CAD (based on the 5-view drawings in the DYRL Gold Book), printed them out non-scale, and built one papercraft style as a test. It worked well, but building it out of acrylic is much more complicated. I started out by cutting 3 of the main panels. And then started dremeling the edges to a 45 degree angle. I shot the edges with some black paint so it would be easier to see how far was too far A couple of the walls were too thin, and the dremel tore them out. No biggie, I'll just repair them with sheet styrene later. Next, I cut the rest of the parts for the port side pod. Once again, some of them had to be split in half. The thin one on top got severely warped during the cutting process. I'll just be replacing that one with Evergreen styrene strips. Once again, I'm gluing the sections together with scrap acrylic backing the joints to add support.


-
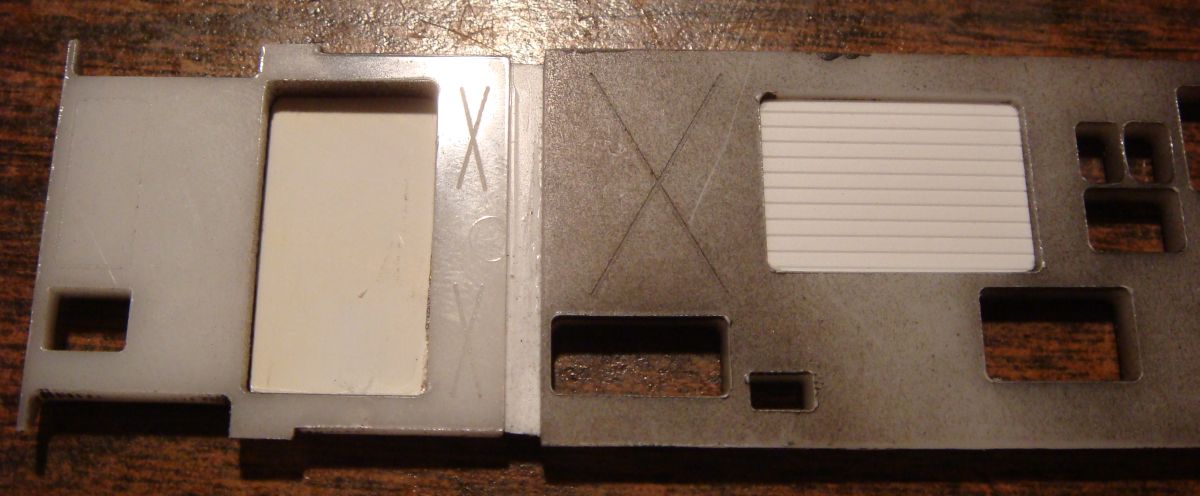
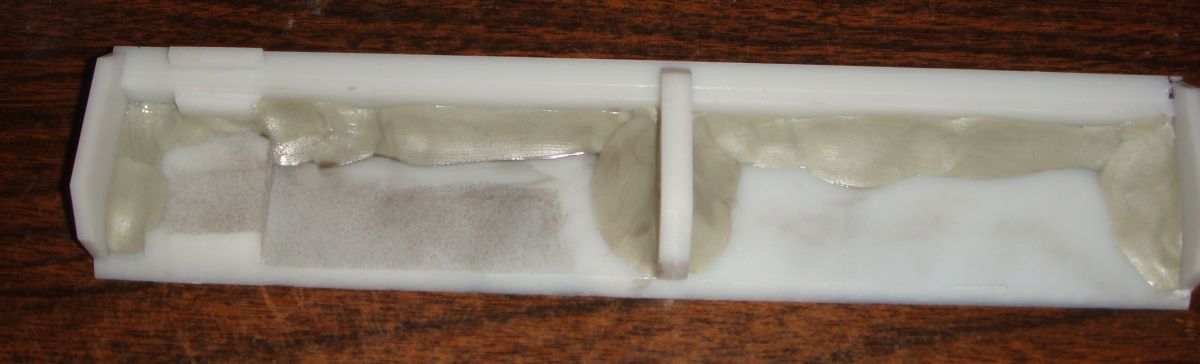
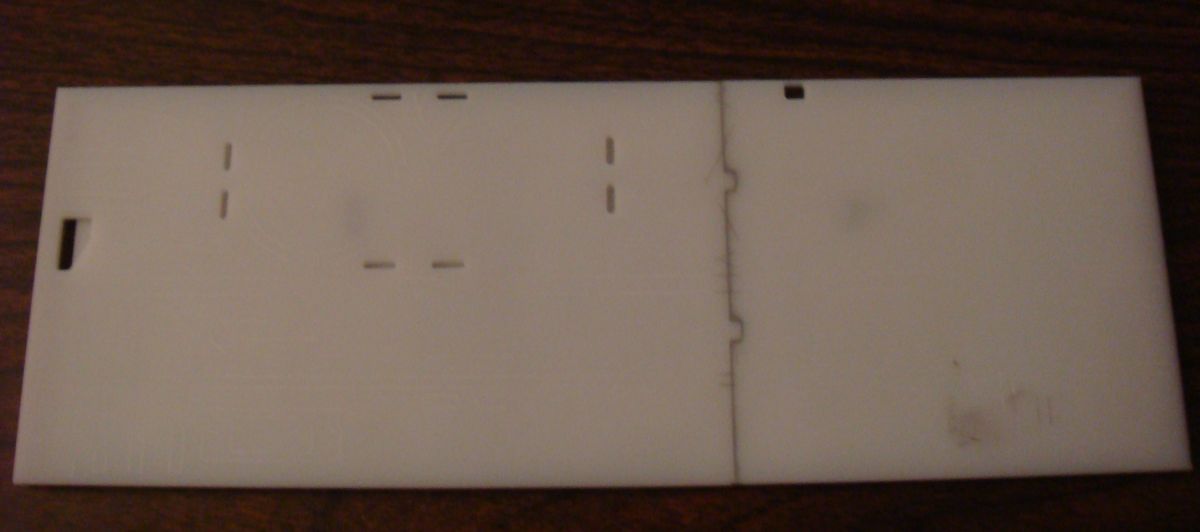
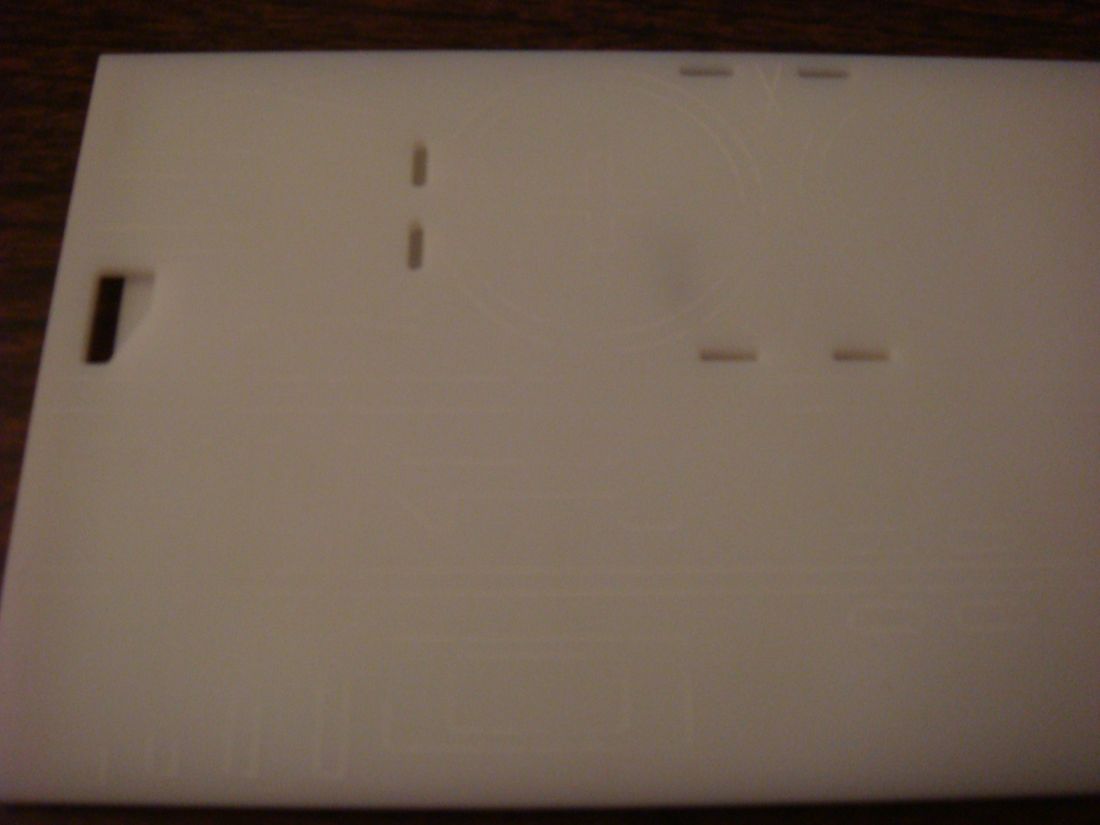
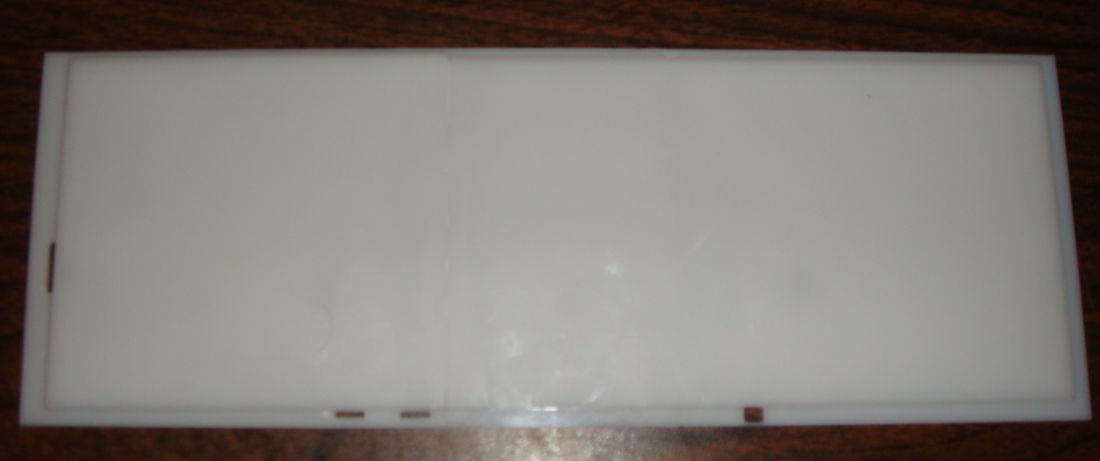
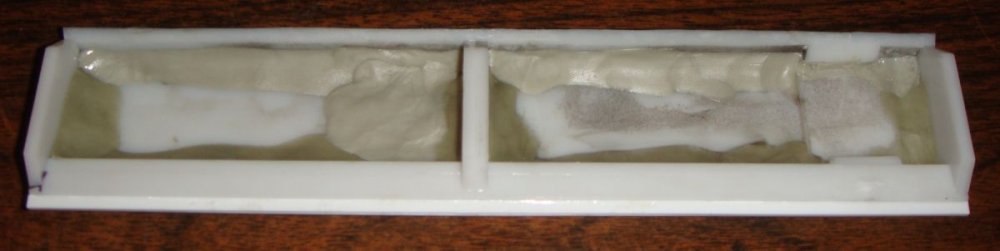
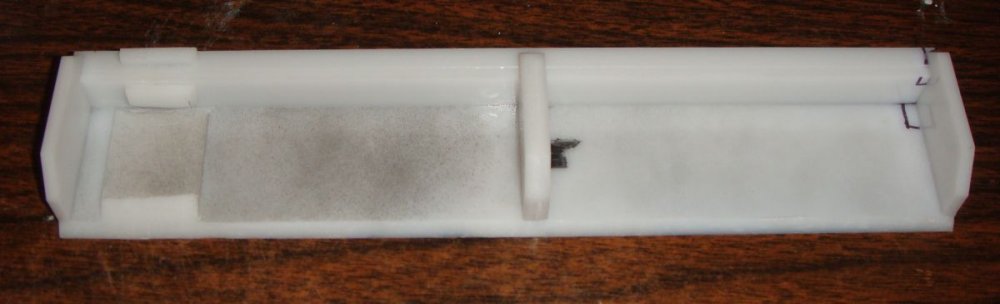
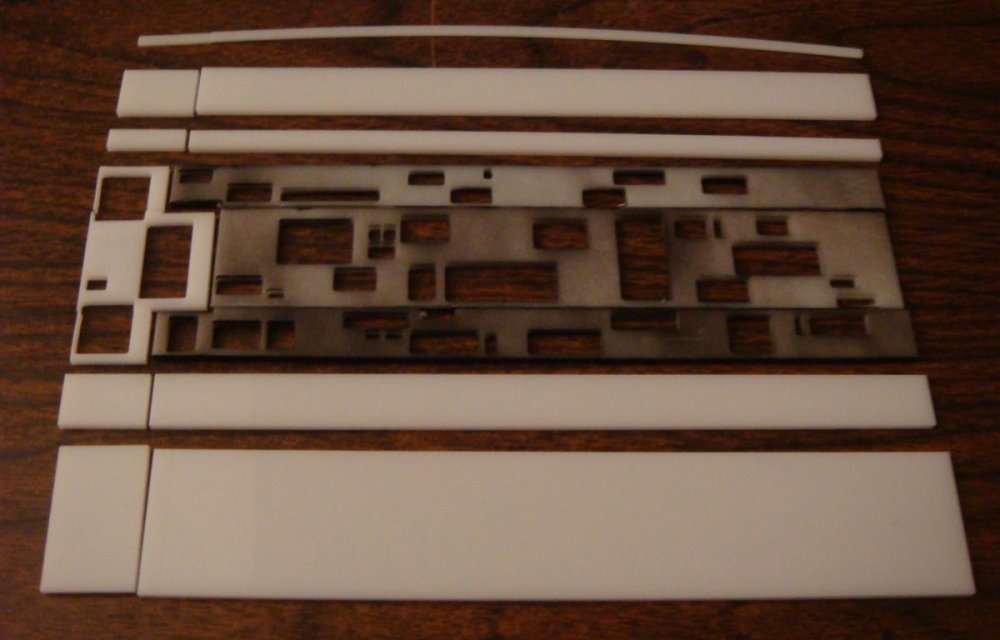
This is a project I've been wanting to do for many years now... And I've finally gotten it off the ground! I'd wanted to wait until I had something more significant to show before going public with it, but I figure the sooner I put it out there, the sooner I'll be able to get some feedback on what I'm doing right and wrong. And this way, you all can keep me in check when I start slacking off! This project is only possible because of the laser engraving machine that my cousin gave to me last year. As far as lasers go, it's a chinese made piece of crap, that'll only run on one (rather flaky) program. But it'll import .DXF files from AUTOCAD, and it's certainly better than nothing! So I'll be using it as much as possible during this build. To start with, I cut and engraved the deck from .118" thick white acrylic. I had to do it in halves, since my laser's work surface is too small to small to do it all at once. The deck detail is pretty faint in the photos, but it's definitely there. The holes are where recessed panels will be. I'm going to cut those shapes out of a slightly thinner material, and glue them in the holes. I could cut the recess with the laser, but the result would be pretty rough, and I'd just have to spend more time cleaning it up. I cemented the two sections together, with a couple more panels on the back to help keep it all flat and rigid. And I need to build up its thickness, anyway. I'm gluing it with Weld-On 4 acrylic adhesive. It works similar to regular model cement, in that it sort of melts the plastic, then bonds them as it re-solidifies. But it's water thin, so you just clamp the parts together, and flow a little of the cement through the joint.
-

Wonderfest 2012 in Louisville KY
Valkyrie replied to tundrayeti's topic in Conventions and Local Gatherings
I'll be there this year also. And I've got a suite with a few friends, so I might even be able to host a room party. And if all goes well, I should even have a work in progress of my current scratchbuild with me -
The text is pretty small, so I can't read a lot of it. But from what I can tell, that's definitely a custom build. The kit info box on the first page is for the Thunder Focus kit, not a Jamming Birds kit. But if they're going to keep milking the VF-11 (which I'm totally in favor of!), why not just put out a FAST Pack version already?
-
Yep, Unbroken Arrow. Came out in 2009. Still hoping it'll get translated...
-
I suck at HTML, but I've got tons of pics saved from yahoo japan auctions, and a closet full of resin kits that I'm totally willing to contribute!
-
This is pretty huge news! I did a bit of digging, and found MEF's blog http://teamstrike.blog90.fc2.com/ The top post is an announcement that they've been liscensed to product Macross goods in honor of the its 30th aniversary. Ghost and Lancer garage kits are officialy announced, along with a promise of more to come. No scales, dates, or prices are mentioned. Even though I have resin kits of both of them in 1/72, I'm pretty excited!
-
Musasiya, actually. The Retppu was the crappy vinyl one.But yea, looking real good!
-
Yamato 1/3000 SDF-1 modification and paint up...
Valkyrie replied to wm cheng's topic in The Workshop!
Very cool! Glad to see the masks worked so well for you! -
Yamato 1/3000 SDF-1 modification and paint up...
Valkyrie replied to wm cheng's topic in The Workshop!
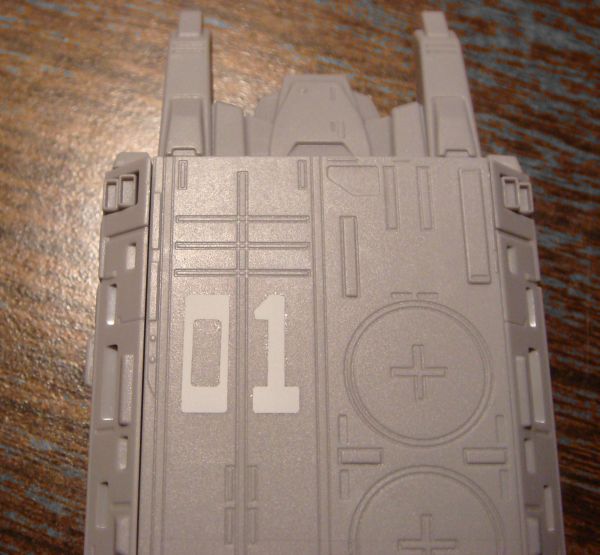
They're reddish-orange on the decals. But definitely more orange than the big circle markings for the deck. ARMD-01 is docked on the port arm of the Macross. It's the one with the bridge on the starboard side (so I put it on the correct ship in my pic ) PM me your address and I'll get a set shipped out to you in the next couple days -
Yamato 1/3000 SDF-1 modification and paint up...
Valkyrie replied to wm cheng's topic in The Workshop!
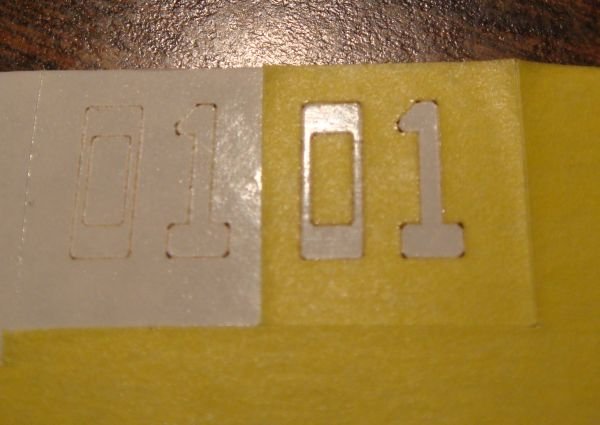
Wow, very cool! That city looks amazing! If you're still looking for a solution to doing the 01 and 02 lettering on the ARMDs, I think I've got one. I've been working on making painting masks with my laser engraver, and just tonight I did a test of my first prototype. Let me know if you want to be my guinea pig on this one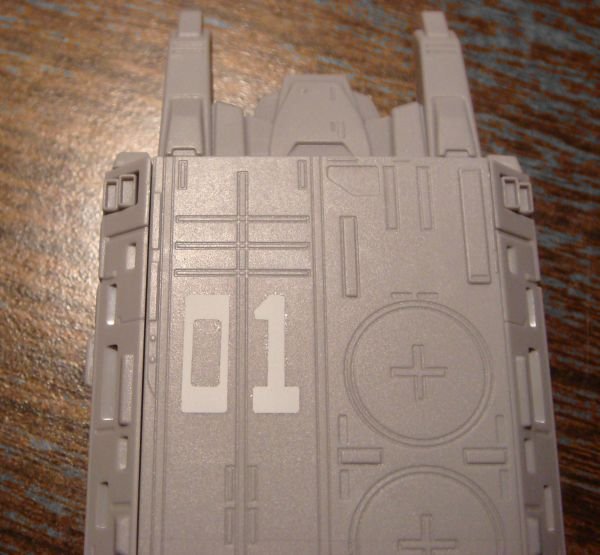
-
SO glad I got in on this thing! But now I'm not sure what mode I'm going to build mine in! I was thinking fighter all this time, but now I'm not so sure! As for the next project, I'd love to see some of the lesser-known VFs get some love in 1/72 scale. A VF-5000 would be especially awesome.
-
Wow... very cool. It looks like that's the same build that's in the Jan. '98 issue of Model Graphix! I've been wanting that kit for years... And even back when I searched Yahoo Japan Auctions on a daily basis, I never did find one for sale