Mintox
-
Posts
439 -
Joined
-
Last visited
Content Type
Profiles
Forums
Events
Gallery
Everything posted by Mintox
-
I adjusted the angle of the gap in the parts J4 and J10, as an example, and used some plastic shims to wedge into the gap to push it straight once it is pushed into parts G1 and G5 (or G8 and G4). I did toy with trying to adjust part Q1 but that seem a little trickier to do as I still needed to widen the gaps in parts J4 & J10. Looks good huh? I dont know what possessed Hasegawa to cock it up.
-
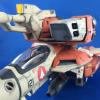
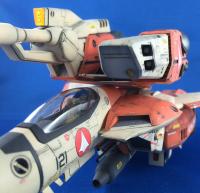
If you try and fold the 1/48 fins they will actually sit flat. Look carefully at the placement of the hinge lines on the stabilisers. One side is actually higher up than the other allowing it to actually fold down and the other side to fold over it. The 1/72 kit lacks this same detail, its fold lines are the same both sides. One other difference to the 1/48 kit that I really like on the 1/72 kit is on the right side (kit turned onto its back) there is a long door that looks like a refuelling arm in its stowed position. This is missing on the 1/48 kit and I cant find any reference to it in line art. Anyone else notice that? Mr Hobby H308 as called out for in the 1/72 low vis kit they did years ago. I sprayed it all over with H308 then went back over it with a mix 90/10 of 308 and 1 (white) in the centre of the panels. I could of gone to town on this weathering using different greys and using the salt method to weather it but I'll reserve that level of detail for a 1/48 version I'll do later.
-
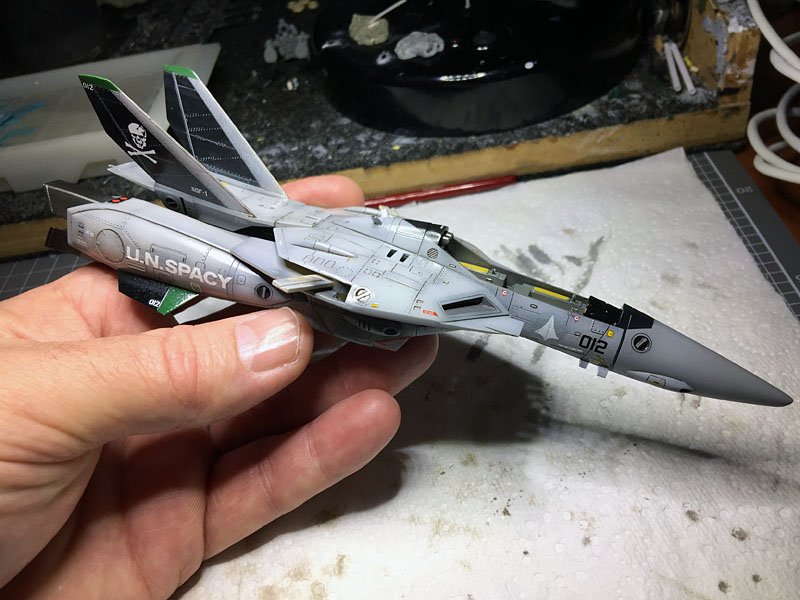
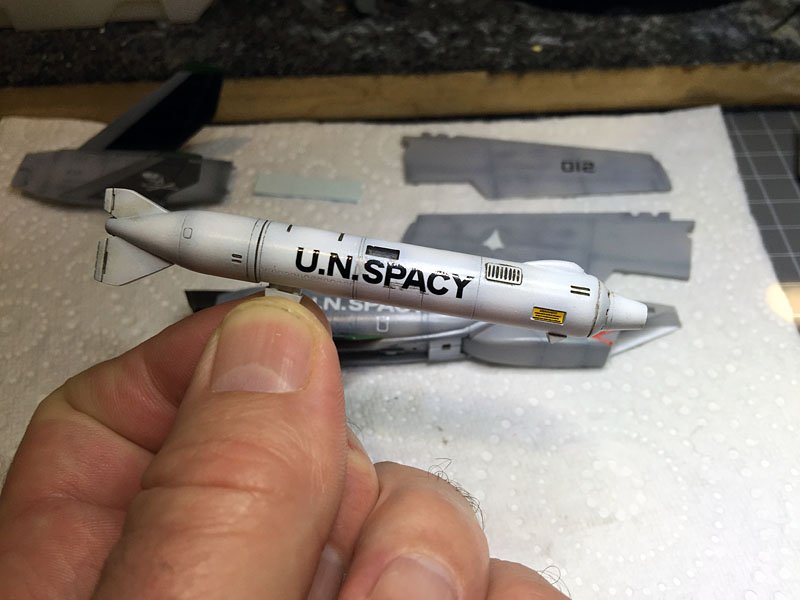
More progress shots. Finished all of the pin washes. I've got a few small items to paint like the wheels and pin wash the AAM-1 missiles and then its onto some weathering with pastels and then its done.
-
Very nice. Love the wheels in the feet. Now get cracking and finish it!
-
Im liking the white GU-11 gun even more as I start the weathering process on it.

-
Starting the decaling now. The gun in white with the black letters for some reason reminds me of the UN vehicles and with their white and black markings.
-
Two on order cant wait since I missed out on a Milia in 1/48.
-
I'm with you on this one. I stood there at my workbench in two minds and thought if it doenst look good I'll just spray it another colour. As it turns out I think it'll work in white, especially once the decals go on and its dirtied up a bit.
-
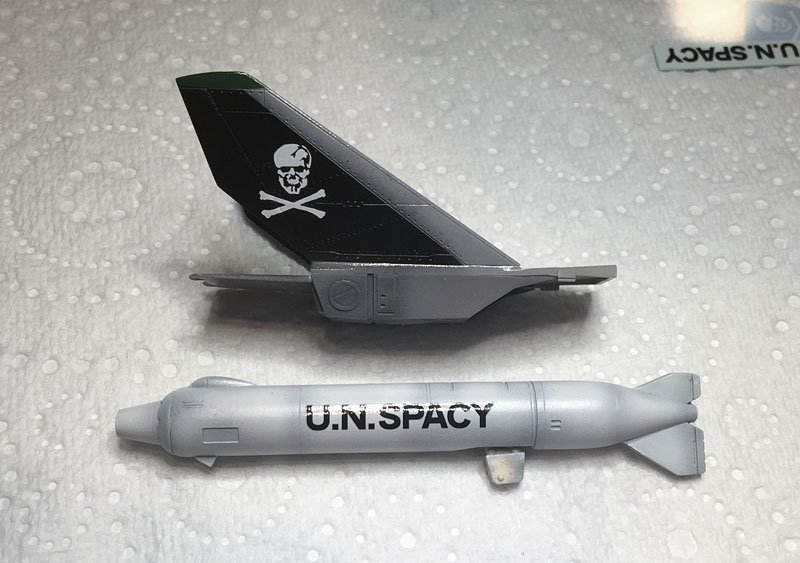
Quick update. Base colour done. Anti glare and vertical stabilisers done. I've decided to do Green Skull colours on this but they'll be restricted to the very tops of the vertical stabilisers and the forward part of the stabiliser fins on the legs. I've also painted the gun pod and AAM-1 missiles in white with a few drops of H338 to take the 'white' out of it.
-
I would normally paint my aircraft in the same way as you mention but with the VF's because the arms and legs etc are separate and articulated on the (supposed) real thing, when fitted to the main body there are gaps, sizeable gaps that would be hard to get paint into so I leave them off. The trick is to mask those areas you need to apply paint to or scrap the paint off so the glue can penetrate to the plastic.
-
Nice VF1. I'm toying with doing something similar with a build I am doing now of a VF1. Its a pity there isnt anything in 1/48 ground crew and vehicles for these.
-
I love this VF. Great diorama idea. I love the BBQ.
-
$400, $500 I'll be picking one up for sure.
-
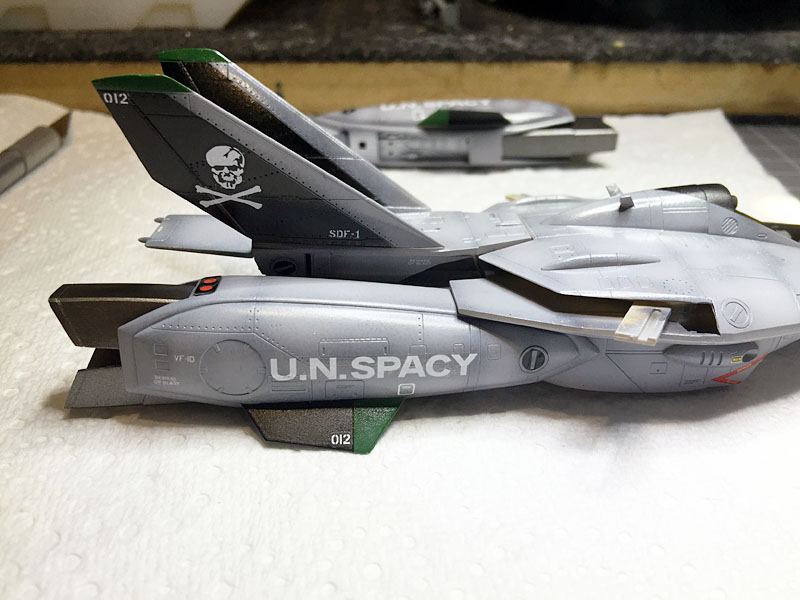
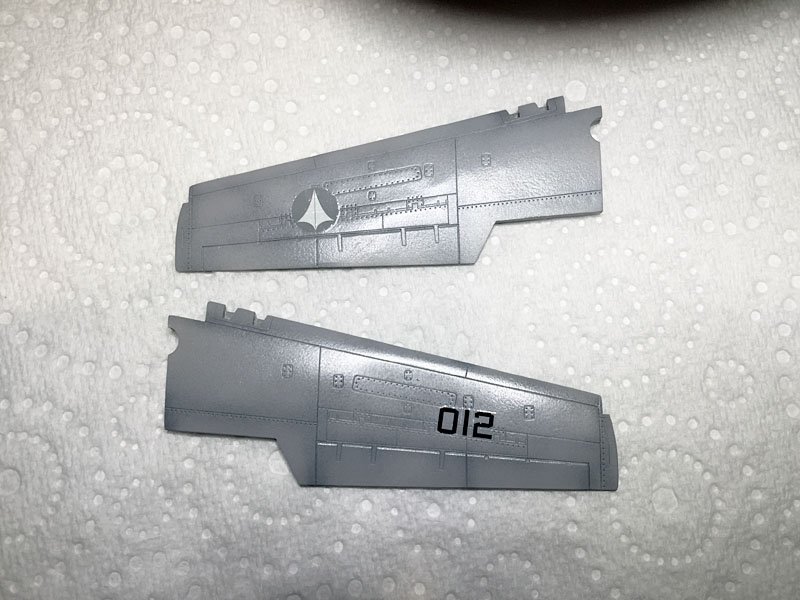
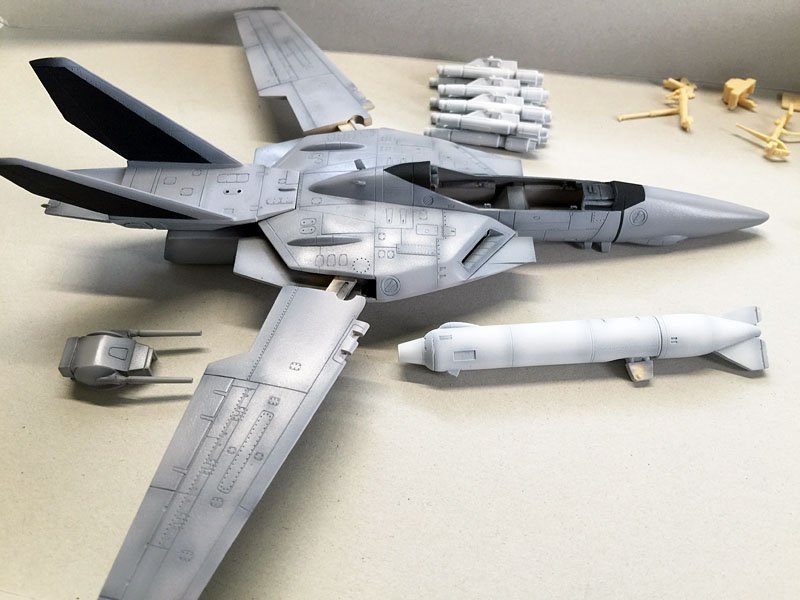
More progress shots. All parts are now ready to be primed and painted.

-
Billiant sculpt there mate. Please continue we're all excited to see this finished.
-
Yes very similar indeed. Well its worst than that - I dont have any!! I'll have to fudge some markings. I've got some old Zentradi (Zentran?) decals I'll use plus I'll cut my own painting masks for the larger Zentran markings.
-
Great stuff Kwan. I'm about to do mine so this has inspired me to continue to build my version of it. Its not the greatest kit, the plastic is thick and hard but the details on the kit are pretty good for what it is.
-
Cheers for the help. I've figured how it all goes together but I seem to be missing the pivots for the legs. They must be on a separate sprue or maybe they were poly caps or something so I'll need to fabricate them. Easy enough done.
-
Yeah I just found that today. Very nice build. I'm going to keep it pretty close the line art but change the door and sensor bay as per the drawings but keep everything else as original as possible.
-
Hey that looks great. This is the first time I've seen one built. Yeah if you can scan the instructions that would be very appreciated.
-
Its finished! Yay! I've put picts up in the model section.
-
Thanks Derex for the encouragement. Yeah I test fitted some parts and they seem ok fit wise. The plastic on mine is actually very brittle but I dont mind that so much. I think I can make my own decals or markings so not bothered by that but I cant find any instructions for it not that it should be too hard to work out. 1/700 of course this thing is huge. Just read the specs for it. Great design though. Thats not a bad idea :-( now where to find one! Oh for a laser scanner and a 3D printer)
-
Hi has anyone built this kit? Is it even worth attempting? I got it off a friend. No box cover or decals. Seems ok as far as looking like a Quel-Quallie.

-
Thanks everyone for the kind words. Yeah I had to do the same Enrique. I had to cut off my pilots feet too. They just wouldnt fit in otherwise.
-
Great news. cant wait for this one.