Mintox
-
Posts
439 -
Joined
-
Last visited
Content Type
Profiles
Forums
Events
Gallery
Everything posted by Mintox
-
yep I'll take one too.
-
Wow that is clever. Looks great as a smoke effect.
-
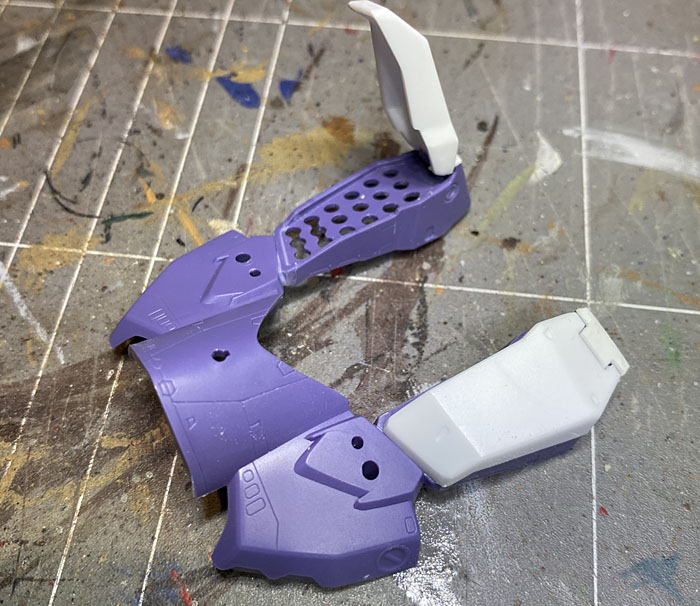
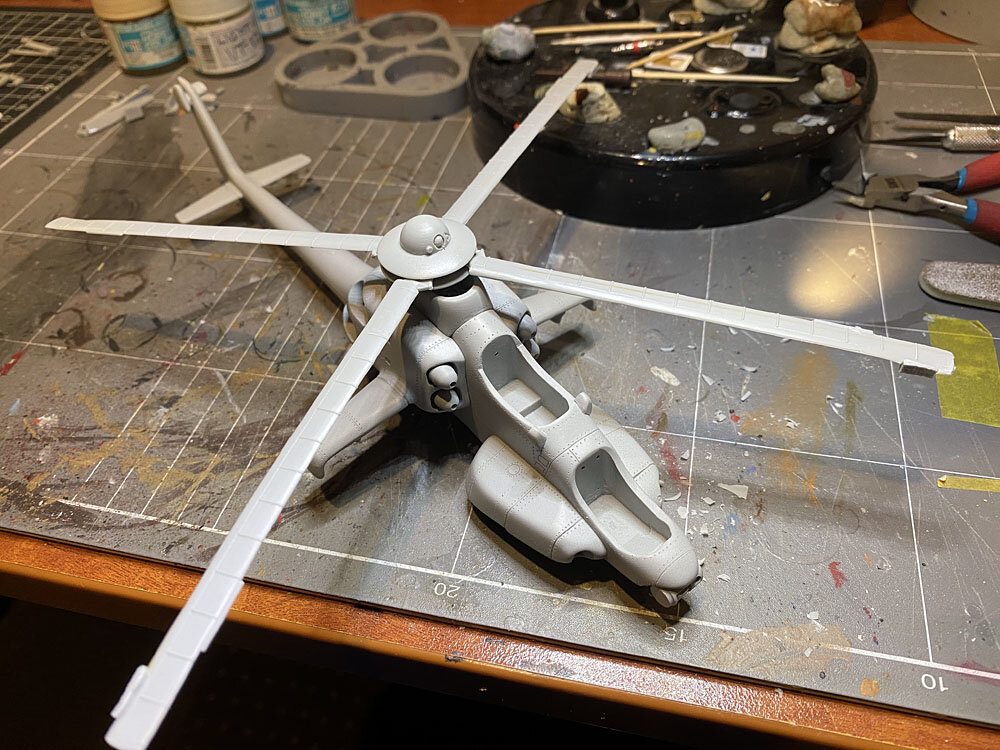
Quick progress update. Added a new tail wheel and main gear landing doors.

-
Thanks John. Im just happy to be able to touch and build one. Ill resist asking you nerdy questions as I have your original build diary of the kit to follow which has been very handy especially being able to know what some of the donor parts you used were, like the Hind rotor blades. I just wish I had the patience to do what you do. And you keep up the great work too!
-
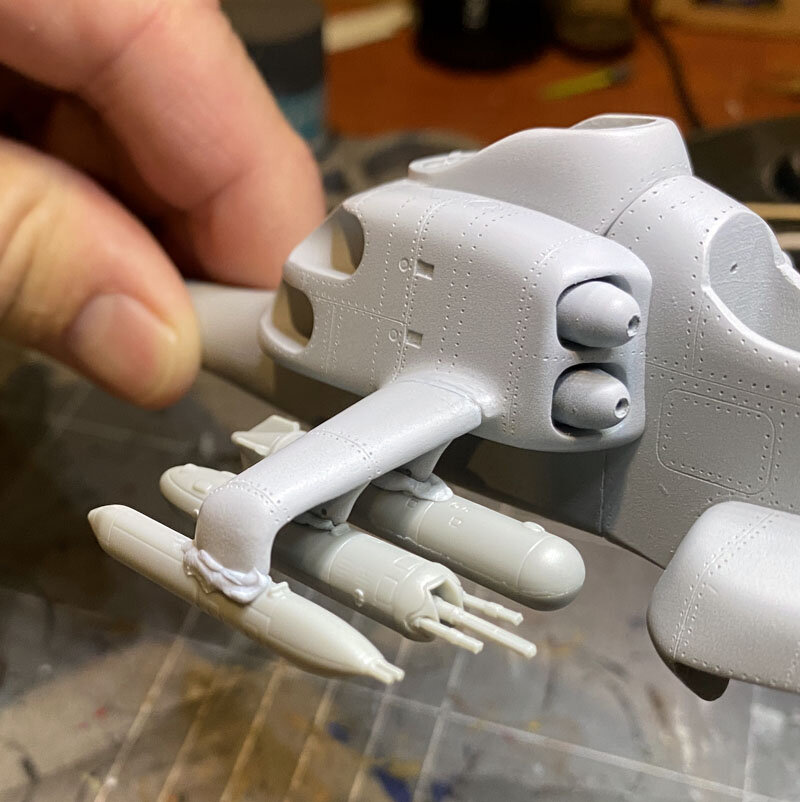
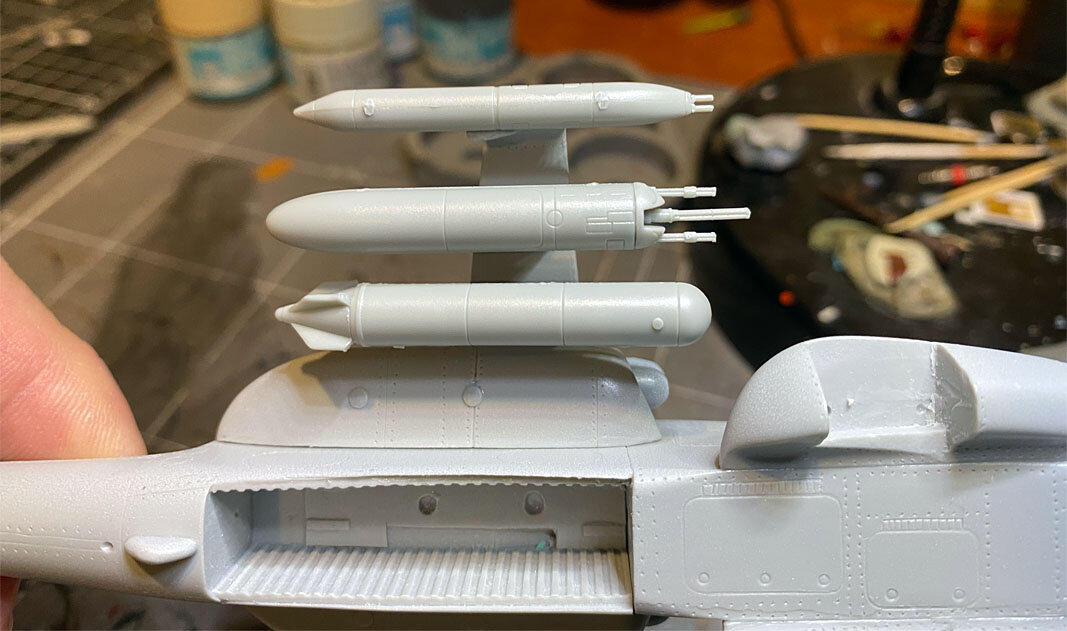
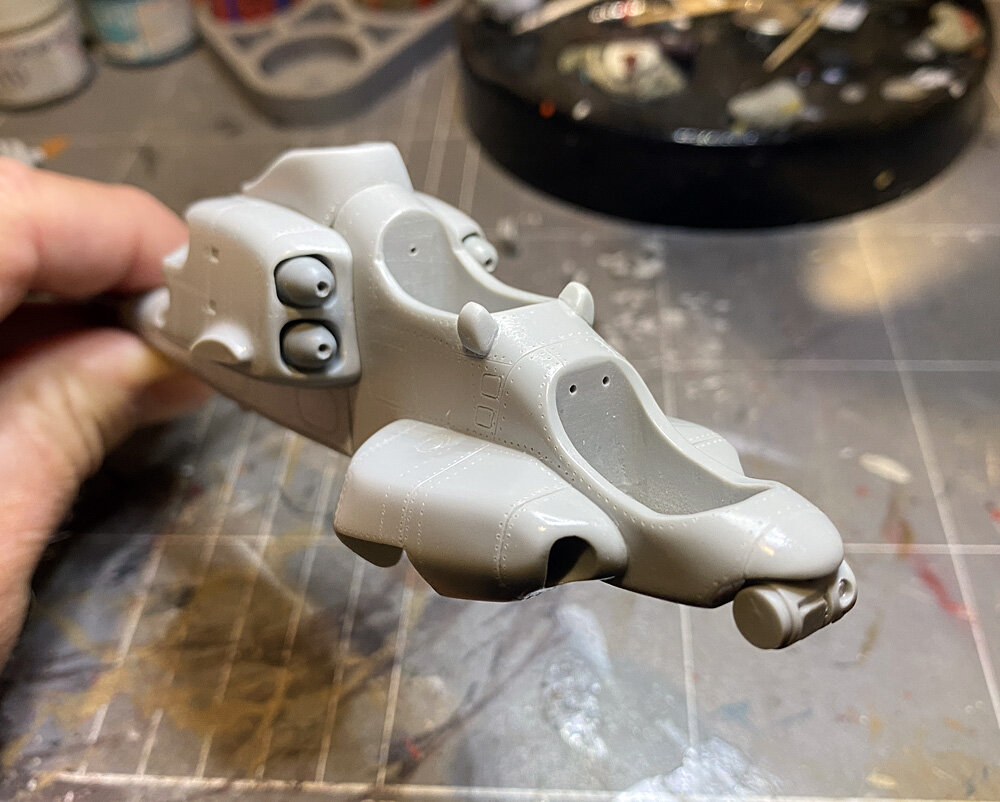
Client has asked for alternate weapons load outs. Ive put some of the funky HIND weapon pods together. The inside is a large bomb (I think), the middle one is a gun pod with three Gatling guns, two of one caliber and the center one a larger caliber? and then the outer one is a twin gun pod. The internal weapons bay will receive some attention soon. I plan on putting two bombs inside this bay once I've added some extra detail.
-
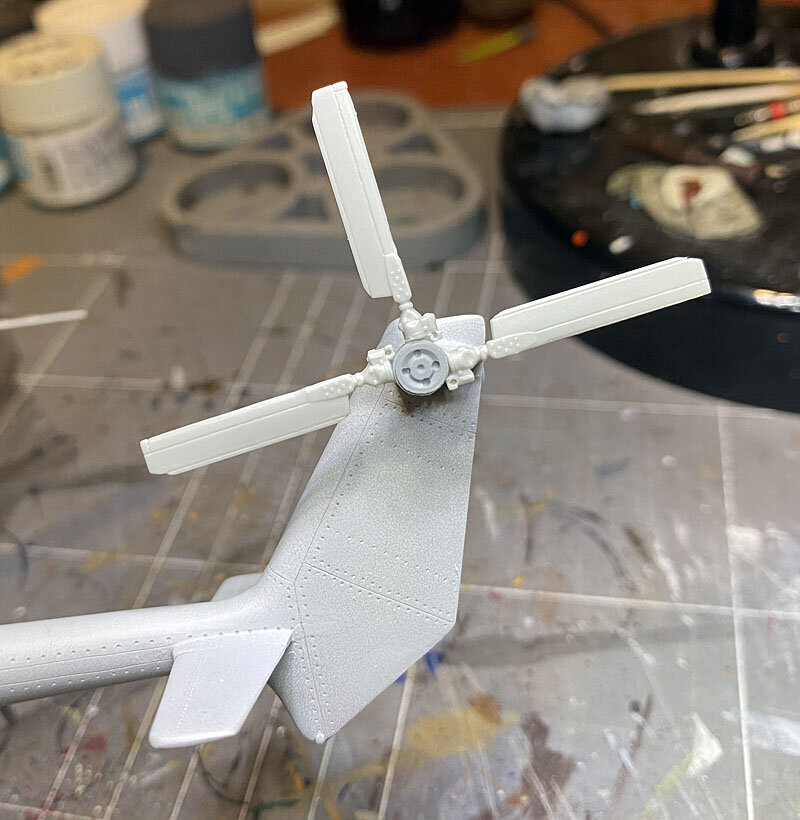
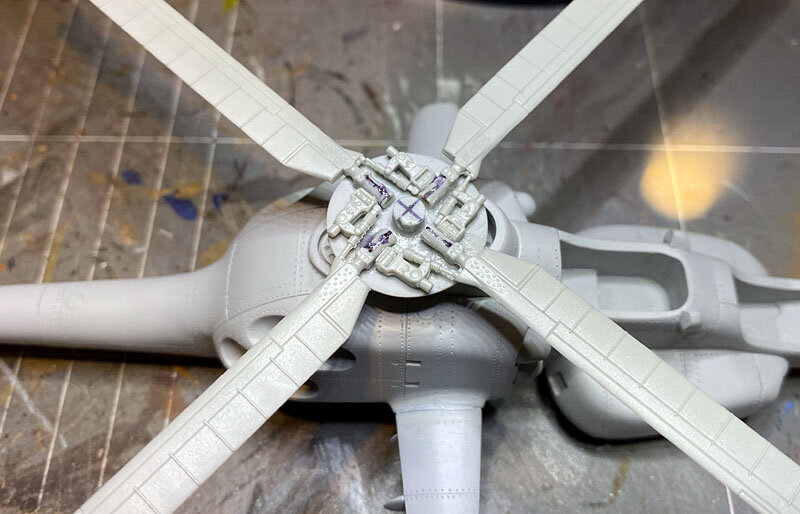
The tail rotor has gotten some attention. Kit blades replaced with HB HIND rotors using Johns hub to mount them on. Im waiting for the second kit to arrive to get the fourth blade as the HIND is a three blade tail rotor and I need 4 donor blades.
-
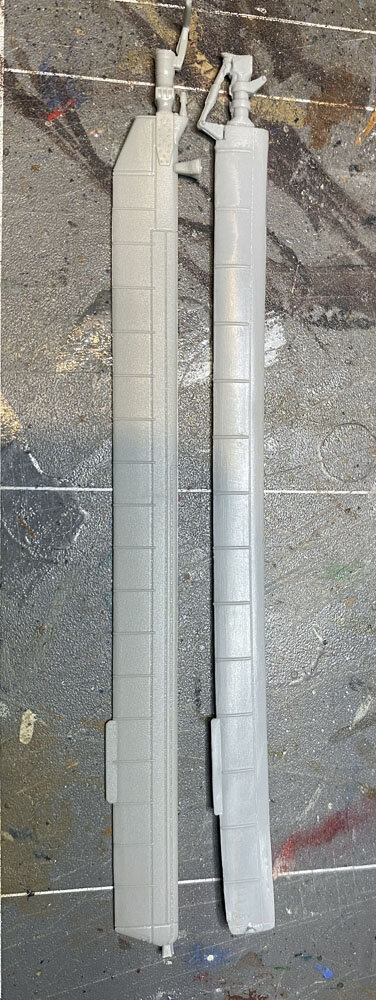
Ok picking up pace again. After reviewing the main rotors in the kit I decided to swap them out for newer kit versions. I used Hobby Boss 1/72 MI-24V HIND-E blades. Nicer and crisper and I dont need to worry about straightening things out. And they look more 'modern' than the ones John used. See the side by side comparison below. I also took the liberty of adding some rotor hub detail even though you'll never see it once the sensor mast top is glued in place.

-
Progress has slowed a little. Filling in some gaps, redoing some of the rivets that were sanded off etc. Here Im messing around with the main rotors. Again pretty good fit and only a couple of pour tabs to cut off and sand. This is temporary and I'll need to clean up the blades and straighten a couple of them.
-
I know right? Im amazed there isnt a ton of them on the net but I could only find the one example completed. Now it'll be two!
-
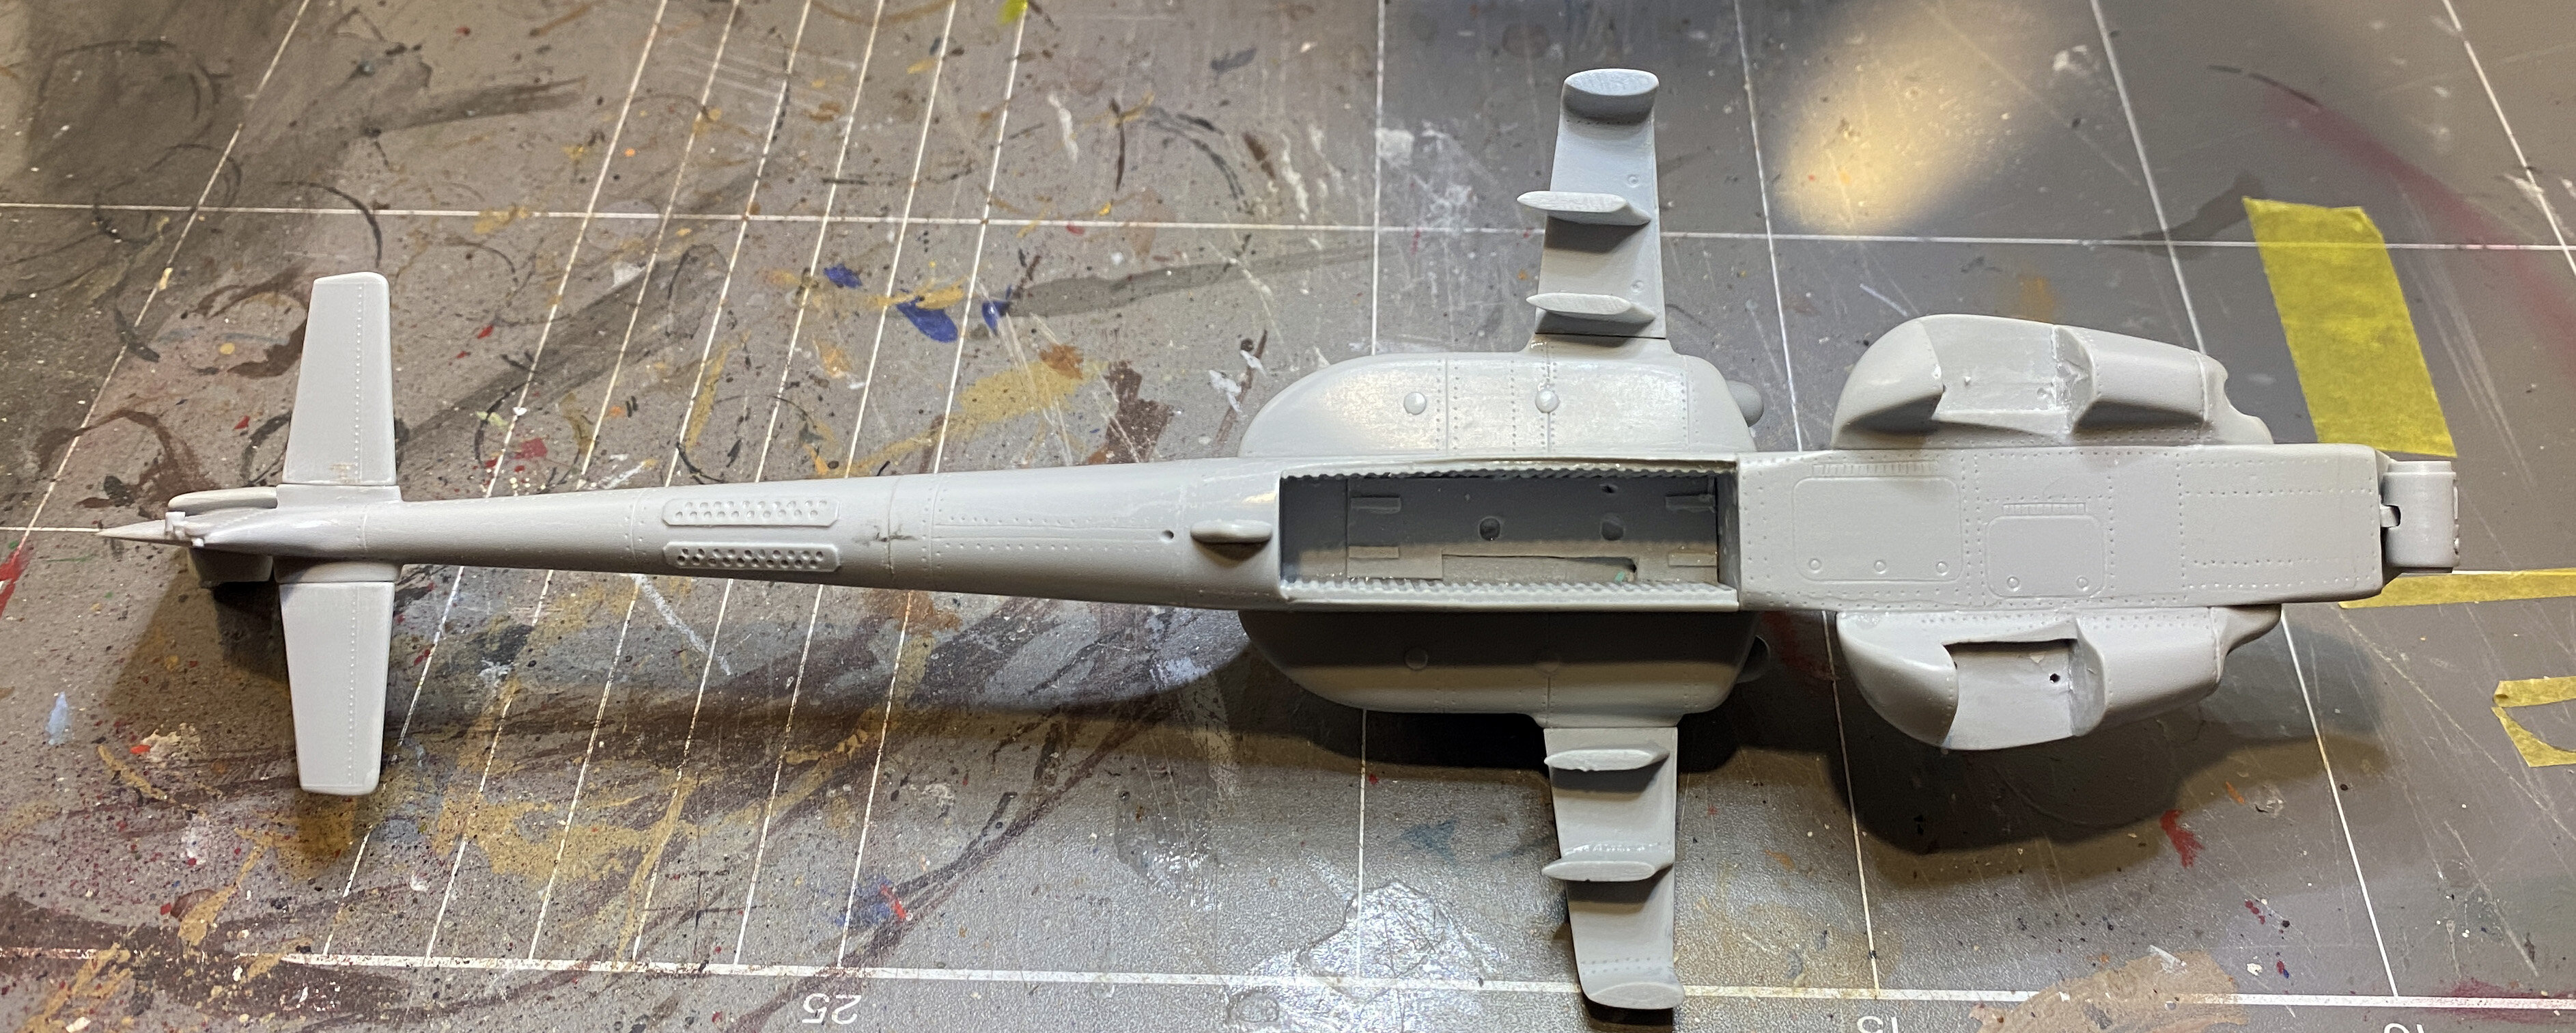
A shot of the underside showing the internal weapons bay. Its a bit spartan so I'll need to add some detail to this and find some suitable ordnance. Wings are on but need some filling and sanding to make them sit flush against their mounting points.
-
Yeah Ive always loved the "other" designs in Macross that dont get much love. This is one of them and am excited to be able to build one for a customer.
-
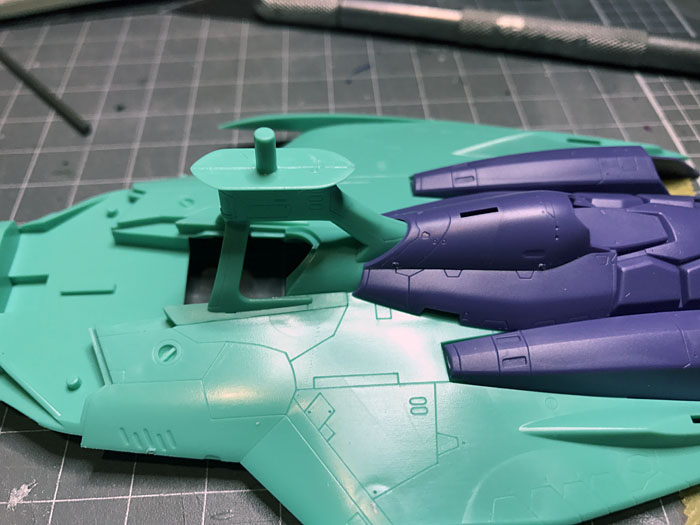
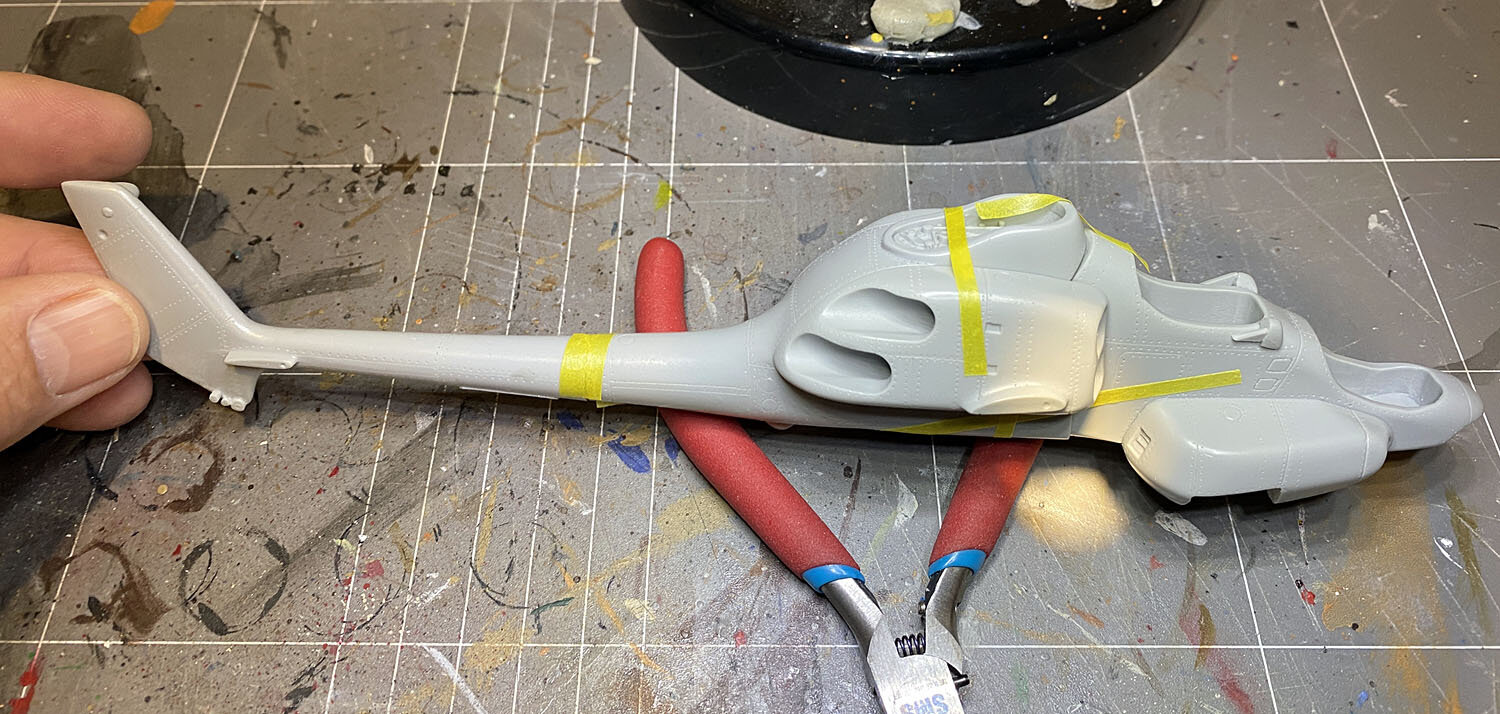
More progress shots. Fuselage is now all together including engine pods and forward sensor and rear tail mounted sensor dome.
-
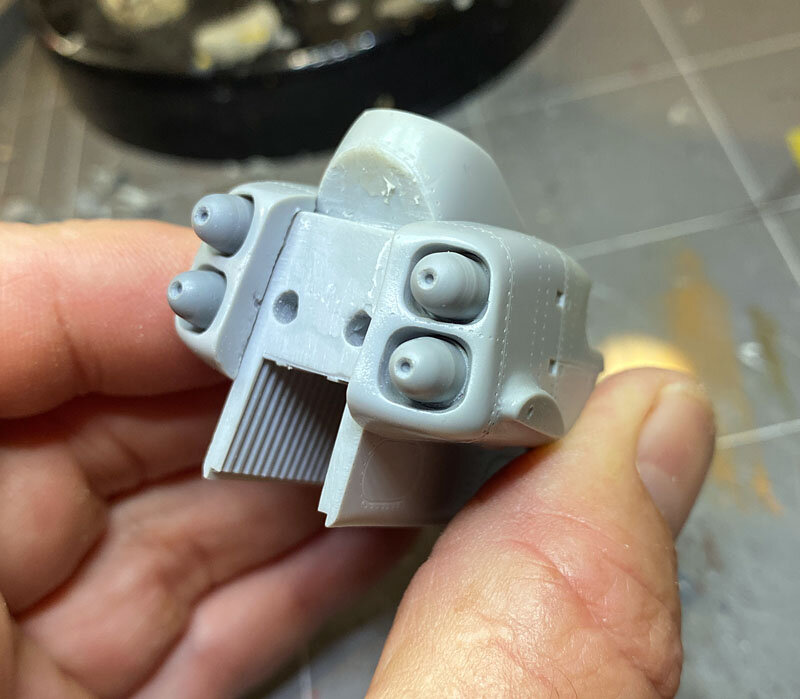
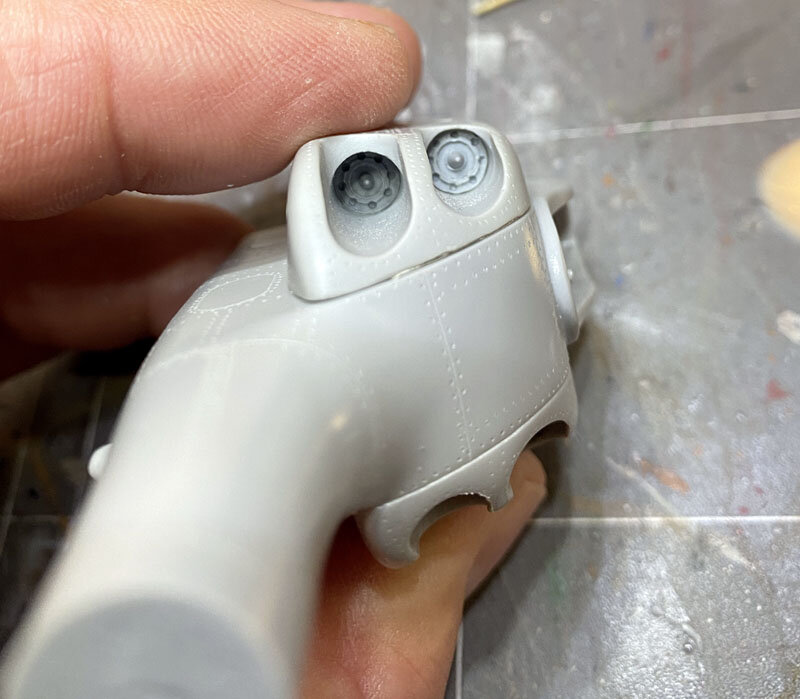
More progress shots. Here Ive fitted the engine intake thingies and exhausts. In the top picture you can see the internal weapons bay.
-
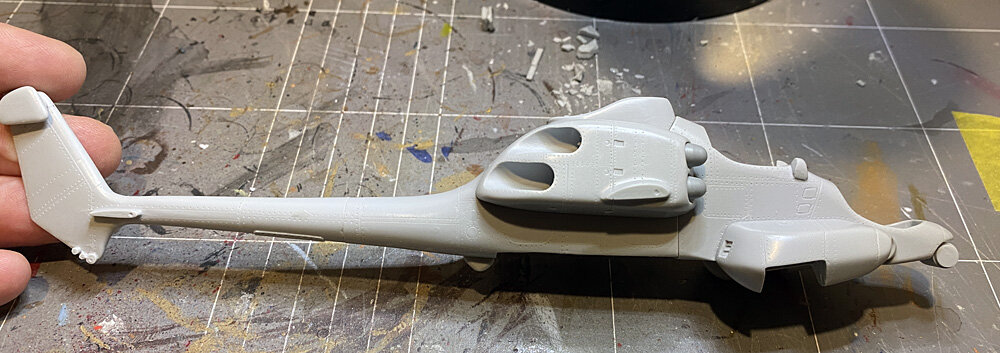
A quick part fit of the main fuselage halves, the engine pods and tail. You can see some of the fine detail on this kit. Very tasty.
-
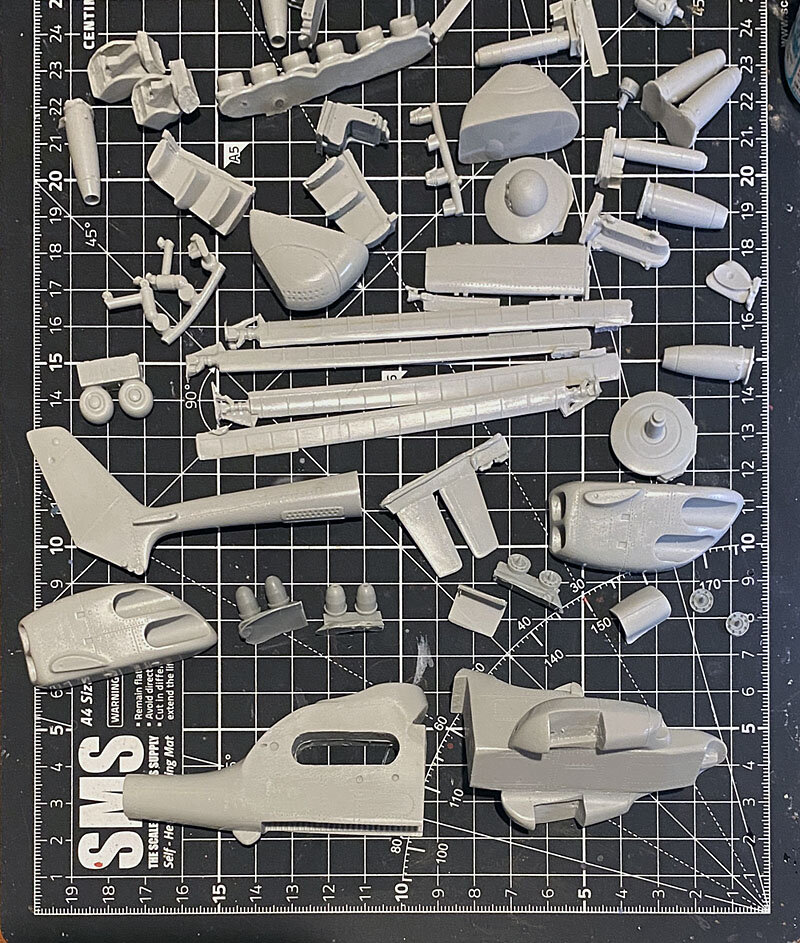
This is a commission build for a customer. It is Moscato 1/72 XV Commanchero Gunship. This is the initial parts breakdown of the kit. Most parts are very well cast, have some very fine details e.g. rivets and other little panels and fit is very good - so far. Customer wants it in the US Navy low vis grey. Interestingly John put a bomb bay in the middle which is kind of a nice touch. Customer wants the model displayed with the landing gear retracted. Some parts such as the gun barrel will need to be replaced as it is lacking in detail to my eye. Likewise the the rear rotor blades aren't very well done (very thin and floppy) and will need be replaced with a 1/72 Russian Hind rotors as this is what John Moscato used on the master.
-
wow I didnt think of that mod but it certainly works for me. Great finish on this. love it.
-
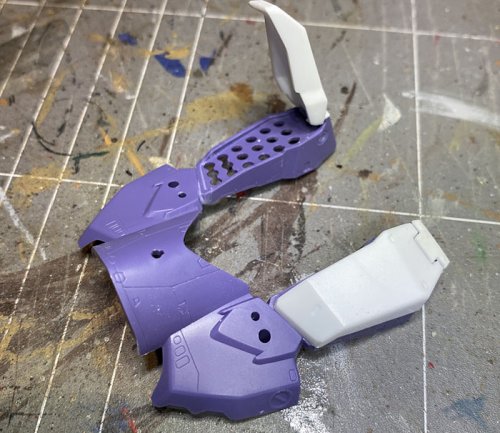
This part caused me grief with the VF-25S. The two white parts are plastic squares cut and glued to the top of the launchers where the hatches will hinge. Having sanded them down Ive sanded them too much such that there is no holes either side for the hatch to clip in and hinge. Anyway easy fix and Ill redrill the holes for the hatch hinges so should be better than the kit part was. And it looks like this...

-
Cheers Skull Leader. Im doing two of these, one with the booster packs and another without but in a grey sort of low vis scheme.
-
Can it be moved back into the core thread? Happy to follow any rules.
-
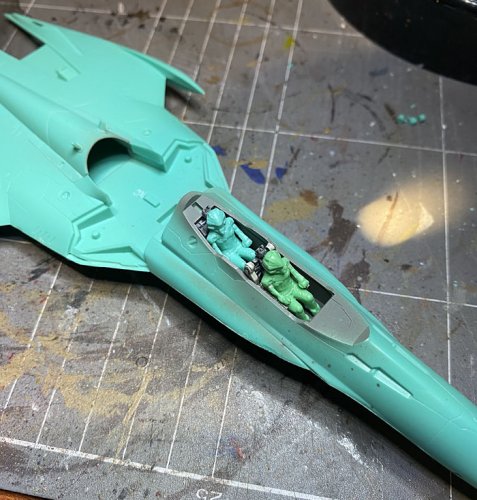
I started this thread some time ago but I think the site has undergone a change and the old thread is gone. Anyway, ive decided to get back into building Macross so here is where I left off with my RVF25. Test fitting the radar mount and basic fuselage done. Im adding two pilots as Im making this the dual seater version.

-
I'd probably do as Kajnrig says and spray the kit white and mask those areas off first and then spray your solid colour (blue or red depending on who you are modelling). The only time I wouldn't bother is the round Macross emblem (too fiddly to cut round masks then again I have done it so if you want a challenge go for it).
-
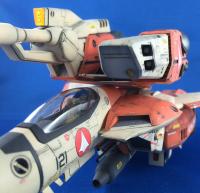
1:72 Hasegawa Ace Combat ASF-X Shinden II 'Ridgebacks'
Mintox replied to Mintox's topic in Model kits
Damn another kit I'm going to have to buy! Cheers for the review. I like the design alot and it kinda is Macross-ish. -
I was wondering if anyone has brought this kit and what did you think of it? Not Macross I know but it is designed by Shouji Kawamori so I'm thinking it kind of is Macross as it shares the same creator. http://store.spruebrothers.com/product_p/has52116.htm
-
I'm spewing I missed this. Now they are like mental prices on ebay. Just got to hope Hasegawa re-release them.
-
Hasegawa 1/72 VF-19EF/A Isamu Special *March pre-order*
Mintox replied to slide's topic in Model kits
I got two on the way now and cant wait to build them.