Mintox
-
Posts
439 -
Joined
-
Last visited
Content Type
Profiles
Forums
Events
Gallery
Everything posted by Mintox
-
I do but Im not sure theyd look 'right' on these pilots. Plus Ive discovered 1/72 is a loose scale for figures.
-
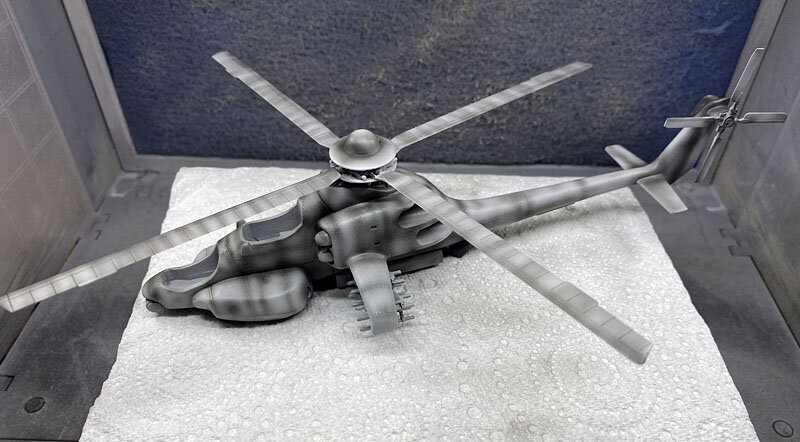
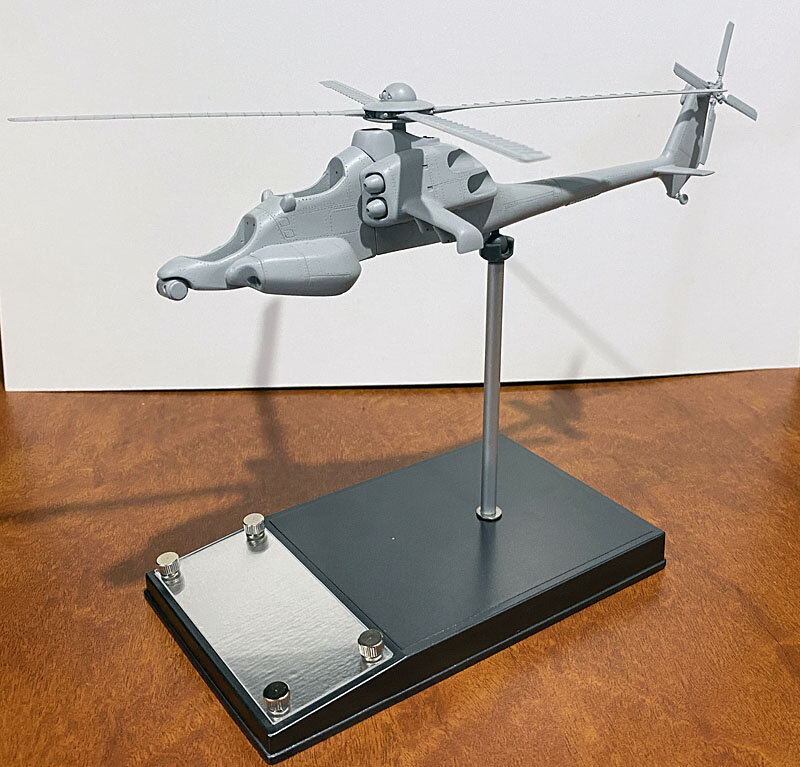
Its been awhile since my last update but work and life in general have been taking priority. Now the weather is a little warmer Ive been able to start the painting. Here Im adding some shading on all the panel joins. Im using Mr Hobby Tire Black, a very dark grey colour but which looks black. Once this dries I'll start with the lighter grey colour, something similar to the US Marine Corp colours they use on their choppers. The customer has asked for the tail (vertical stabiliser) to be painted black with Skull Squadron livery.
-
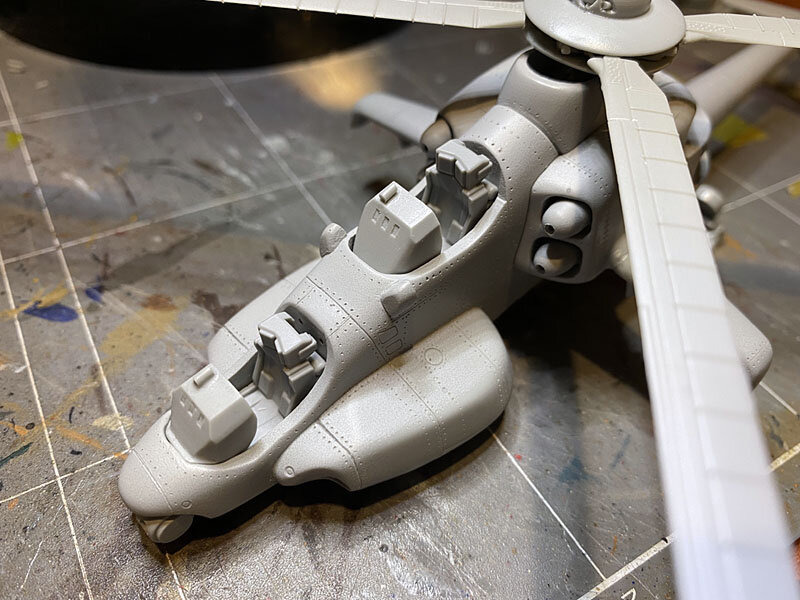
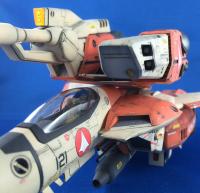
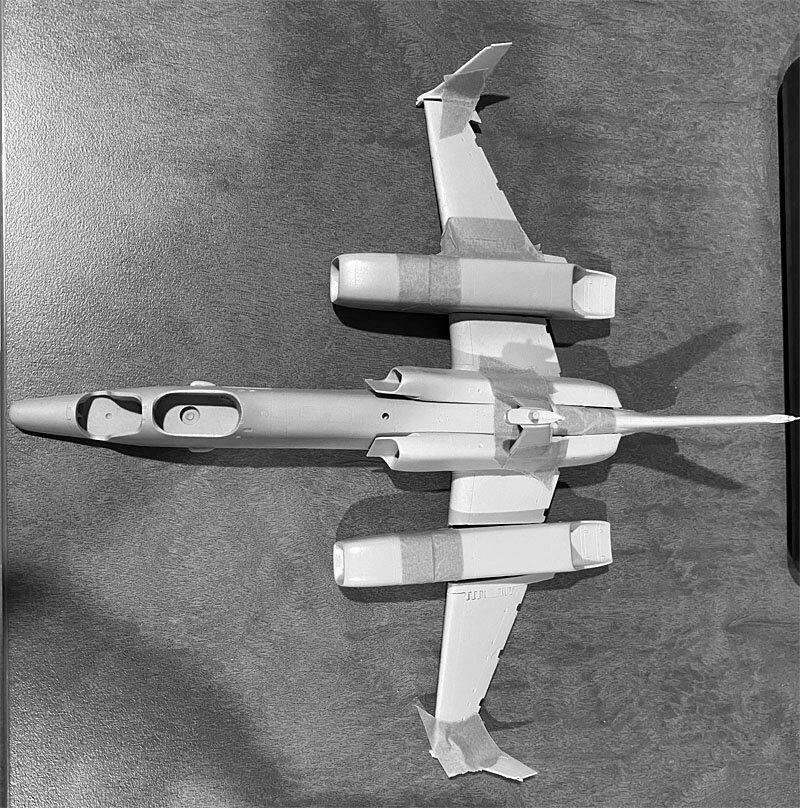
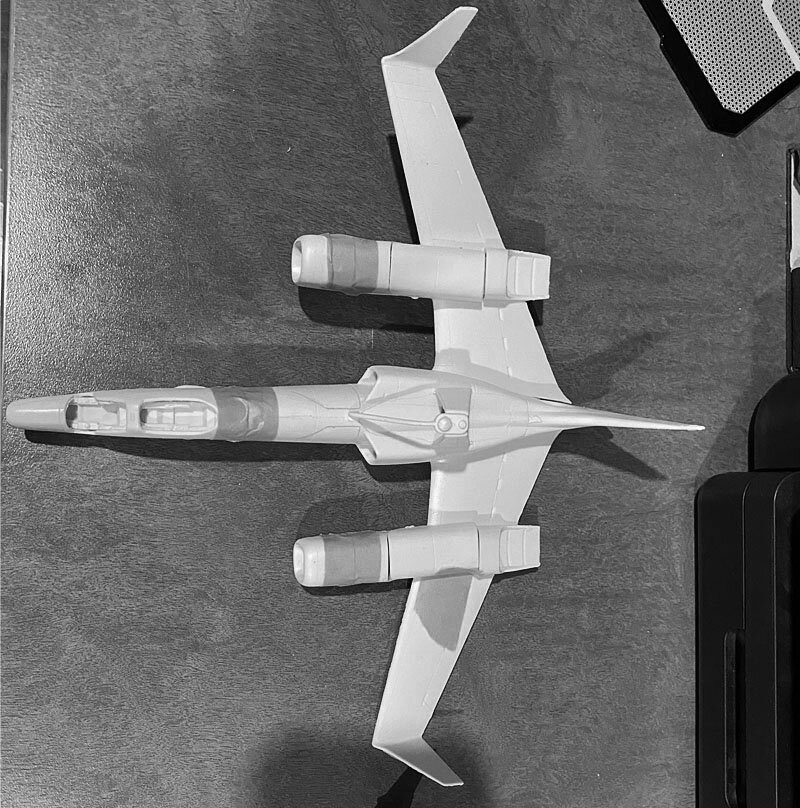
Final shots of the bird before I start painting it. The AGM racks are fitted and glued on as is the bomb bay doors.
-
Tell me about it. His stuff is great. I did manage to get one of Johns 1/72 Tactical Pods. Great model.
-
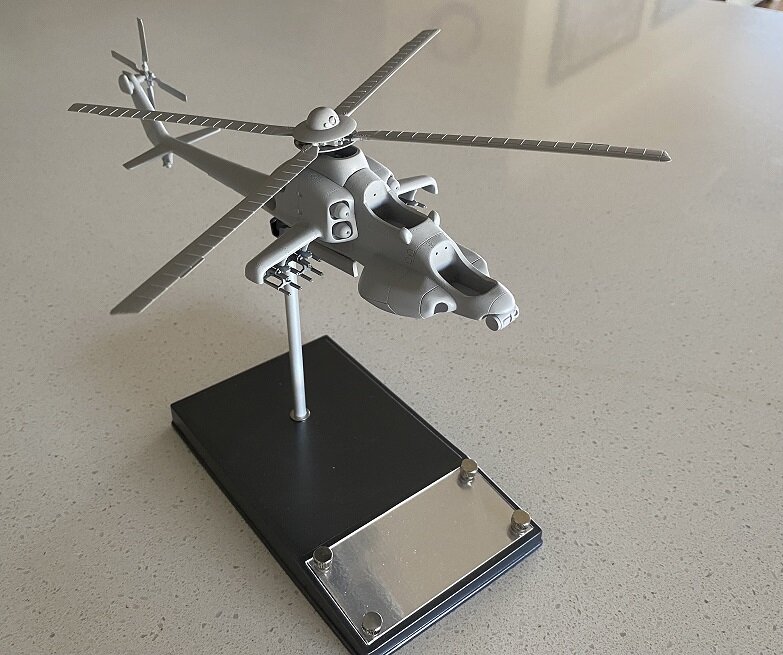
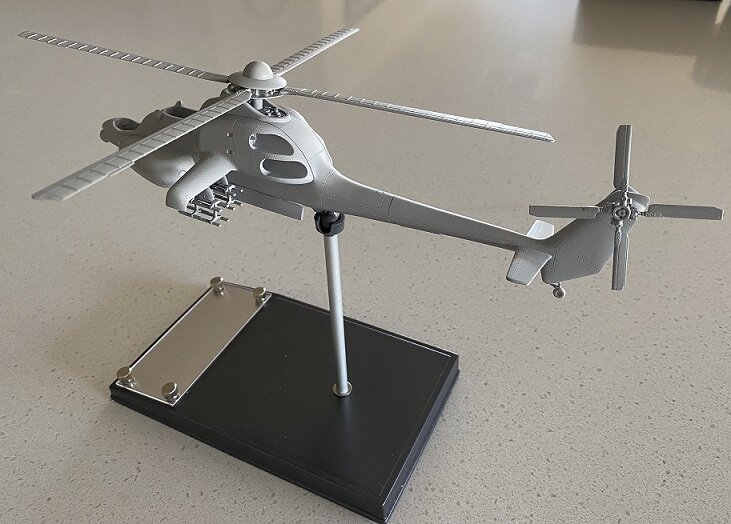
good advice. I have some 1/72 Bandai VF weapons winging their way to me so I'll do some fit outs and see what I think. Update: Testing the custom stand the client has sent me to mount the Commanchero. This was a bit tricky because of the bomb bays being displayed opened I had little choice of places to mount the stand. Ideally in the exact center (inside the bomb bay) is the exact middle but since that is out I had two choices, immediately forward of the bomb bay or immediately aft of it. I chose aft as the weight tends to nose the model down looking more aggressive. Forward and it would want to tilt back. I may need to use super glue on the stand to set the angle as the weight of the model out strips the resistance of the ball joint on the top of the stand. In this photo the whole model has been sprayed Tamiya Surface Primer Fine.
-
A question, what sort of weapons do people think would look good on the wing pylons? The kit ones are accurate to the line art but are all the same weapon, rocket pods. Im wanting to add some flare to it and have tried some of the Russian weapons from the Hinds. What about something like US Navy or Apache weapons? Should I stick to Hasegawa's 1/72 VF weapons for a more authentic Macross look?
-
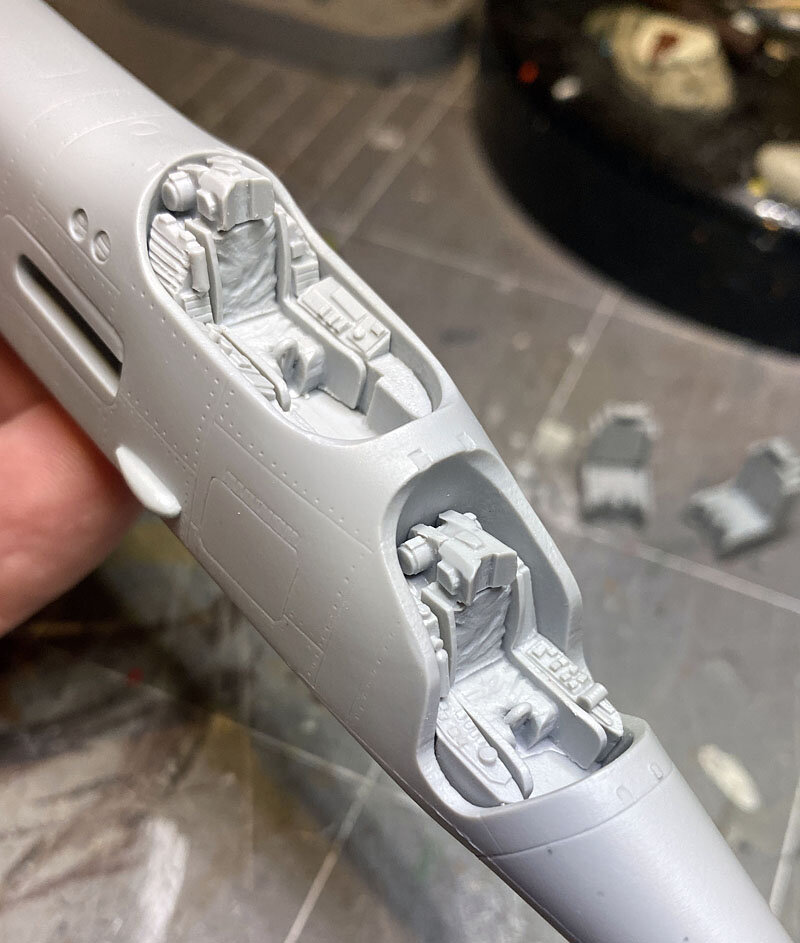
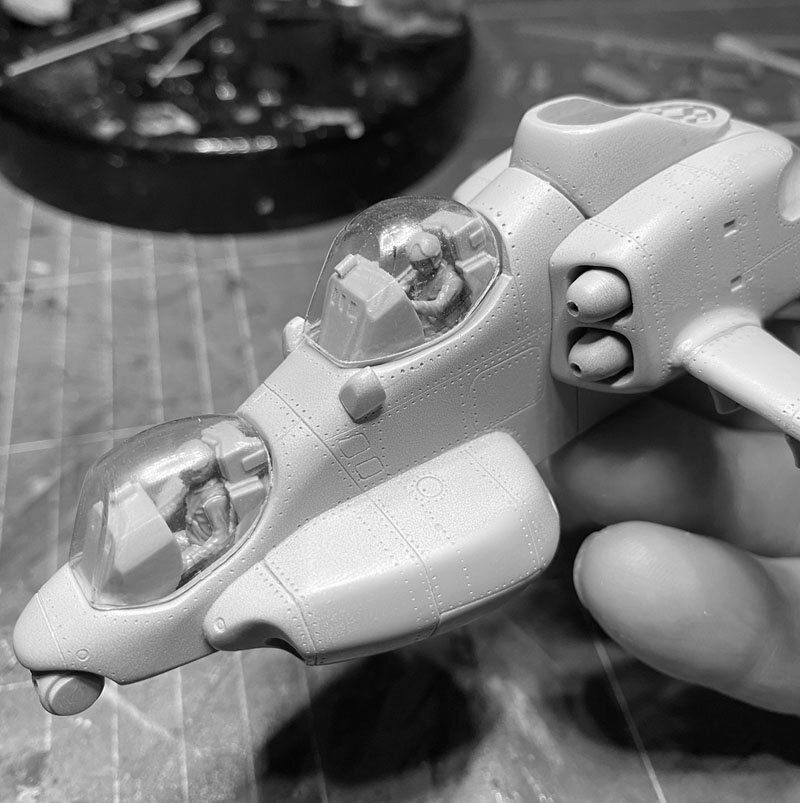
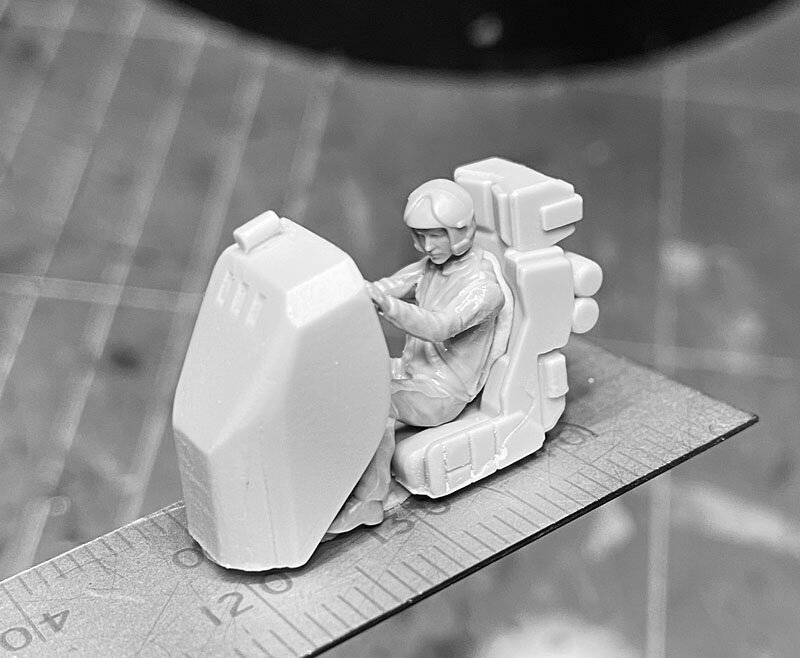
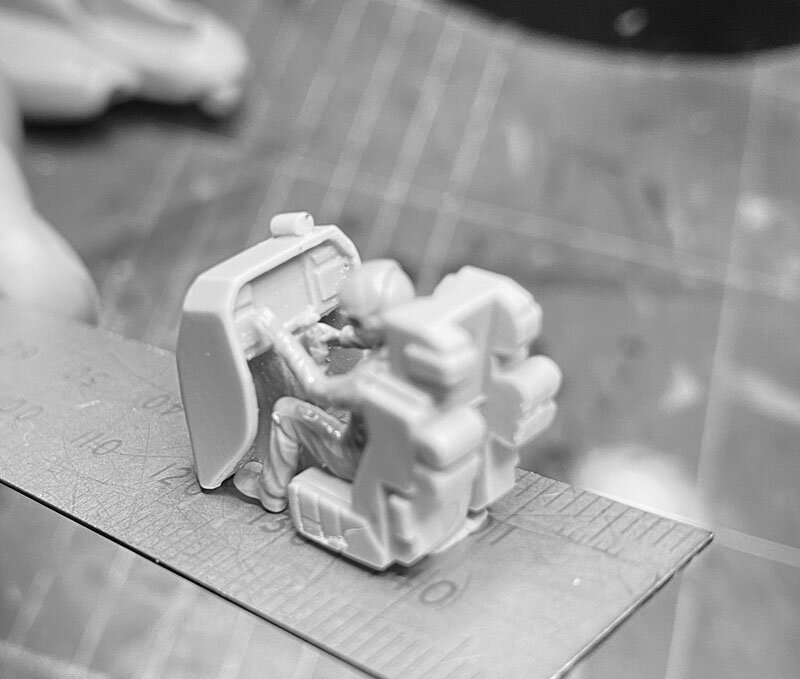
Minor progress. Trying to shoehorn the pilots, seats and cockpit dashes was more challenging than I thought it was going to be. These are rough tests of how things will sit. I still need to sand a little here, grind a little off there, but so far they all fit.
-
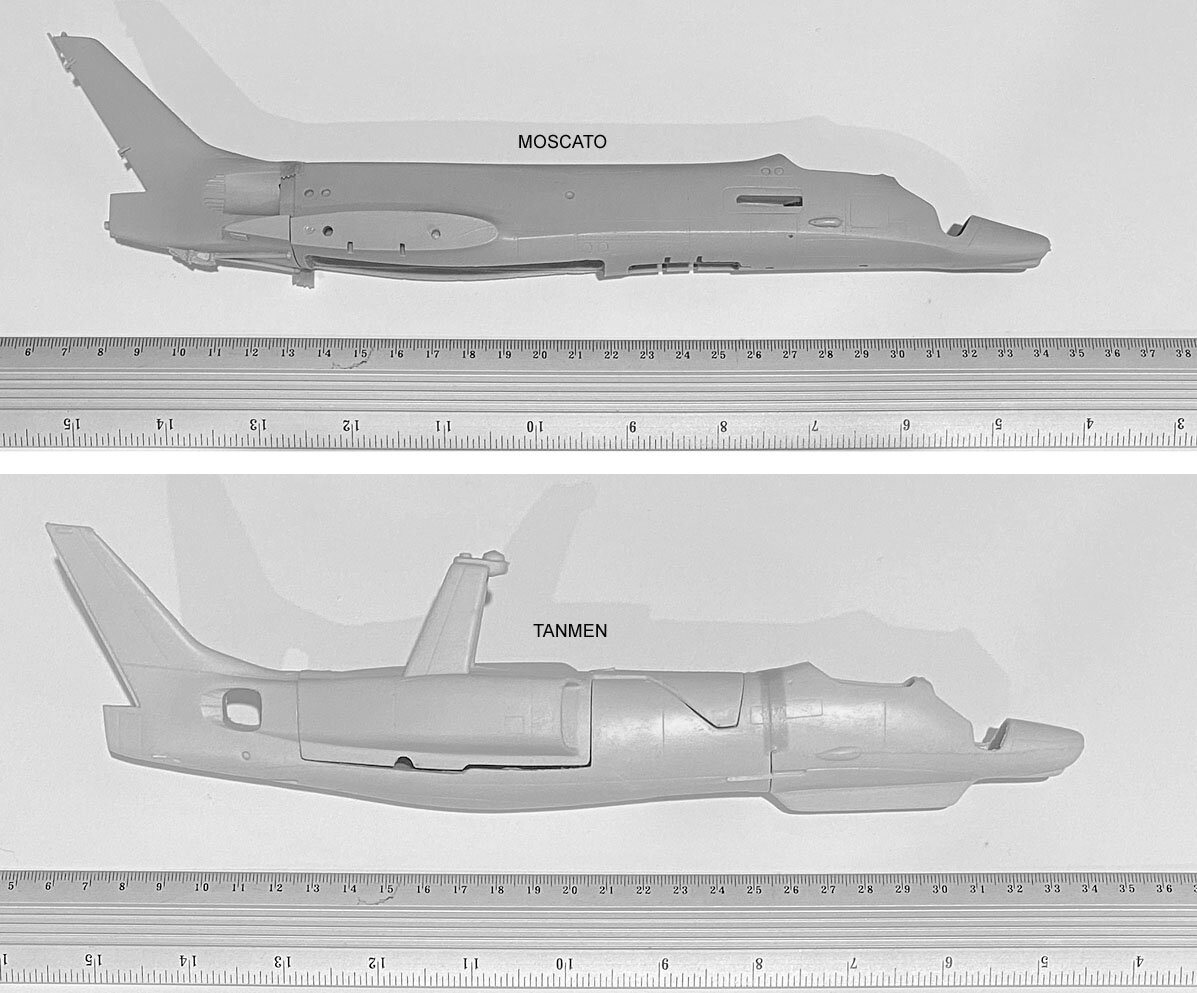
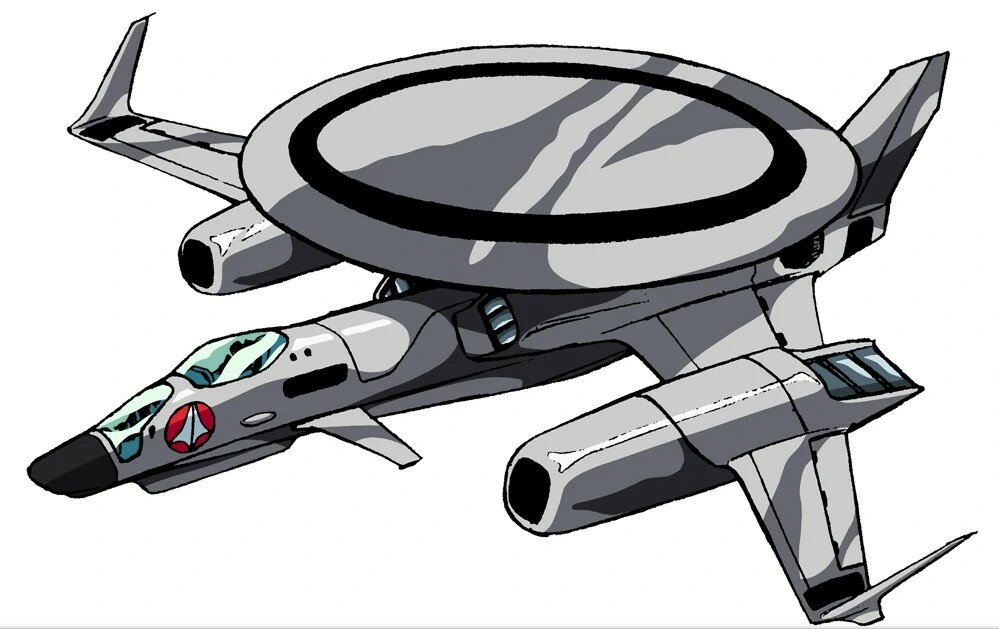
First up, apologies for my rubbish photos. I'll attempt to rate each part out of 5, 1 being poor while 5 being excellent. My ratings will include things like accuracy, detail and fit. I will of course try to remain objective in my assessments. Let me know what you think. Fuselage Side View Both kits are roughly the same length. The Moscato kit is sleeker from the side than the Tanmens, while the Tanmens has a more pronounced bulge on the belly. The Moscato wing joins the side of the fuselage in a more traditional plastic kit style while the Tanmens wings have a rounded stub on the end of the wing that fits into the semi circular hole on the side of the fuselage. Having played with temporarily fitting the wings on both kits, the Tanmens would require more work to fit flush to the sides. The Tanmens also has the upper part of the fuselage as a separate piece that includes the rotodome mount (missing the forward leg of the mount as I have removed it as it had cracked from its bottom mount so to avoid potentially damaging it more). Tanmens forwarded fuselage is a separate piece that is hollow and allows the cockpit 'plug' to be inserted before affixing the forward part to the main body. The Moscato fuselage is one solid piece of resin with the tail being a separate part that plugs into the rear of the fuselage. The rotodome mount is also separate made up of two parts (not shown). The Tanmens engine intakes and engine housing are also part of the main fuselage and taper towards the rear while on the Moscato kit these parts are separate and are also of a uniform shape and length. Other differences are: Tanmens doesn't include a refueling probe although the position for where it would mount is present. Moscato refueling probe is a separate part that will need to be glued into its mounting slot. The long, chin mounted side looking sensor is molded on the Tanmens while on the Moscato it is a separate part. The Tanmens has the join on the top of the fuselage behind the rear cockpit that looks like a large hatch as per the line art. Moscato kit is missing this detail. See the line art image below for reference. Fuselage exhaust ports differ slightly. The arrestor hook on the Moscato kit is molded on the rear bottom of the tail section. Tanmens is a separate part that neatly folds into a recess and is much longer than the Moscato one. The Moscato kit also has a nice crease that runs the length of the sides to the wing root. The Tanmens fuselage is an overall more rounded shape. Moscato cockpit is molded as two hollows that accept the separate cockpit instruments and seats. Cockpits of both kits seem to be very close in size and shape. Ratings Moscato: 5 - I like the fact John did the crease along the sides. This is shown on the line art. Admittedly it could be interpreted to be a simple line on the fuselage side but I reckon he nailed it. John also added a lot of panel line detail, some of which you can see below. Tanmen: 4 - I like the fact they captured the hatch behind the second cockpit (its on the line art) and I think the engine housings are probably closer to the line art design. They loose a point on making the rotodome part of the fuselage as there is a nasty mold seam under the mount that will be a bitch to fix. (cant be seen in the photo below). Tanmen also molded the forward canards on the body but these have broken off the kit and will need to be replaced.
-
Yeah I think ultimately the client wants both built. The Tanmen will be the first one off the rank but its interesting to compare them.
-
I haven't had much of a chance to sit down and do a parts comparison and breakdown on both kits as promised but its coming. What I did get a chance to do is tape together quickly the basic parts of both kits to get an idea on their relative size to each other. They are very close in length to each other but where they differ is the Tenmans is slightly wider in the wings with a more pronounced outer wing sweep and the obvious taper on the fuselage engine housings as they go towards the back. The Tenman kit is the second image.
-
The Zvedza Hind came today and the pilots didn't disappoint. The actual kit itself is ok, for a 1/72 aircraft kit, but the pilots are something else. Not the normal blobs you normally get in most 1/72 kits, the pilots actually have really defined faces and hands, something sorely missing from the Hasegawa 1/72 kits. The photos below are of the rear pilot. I've used bluetack to help position the pilot and get the arms into the pose I wanted. Much easier than putting it in the cockpit and trying to glue things. Check out the face on the pilot. HE. HAS. A. FACE. In 1/72!
-
I didnt want to go all the way down that path!
-
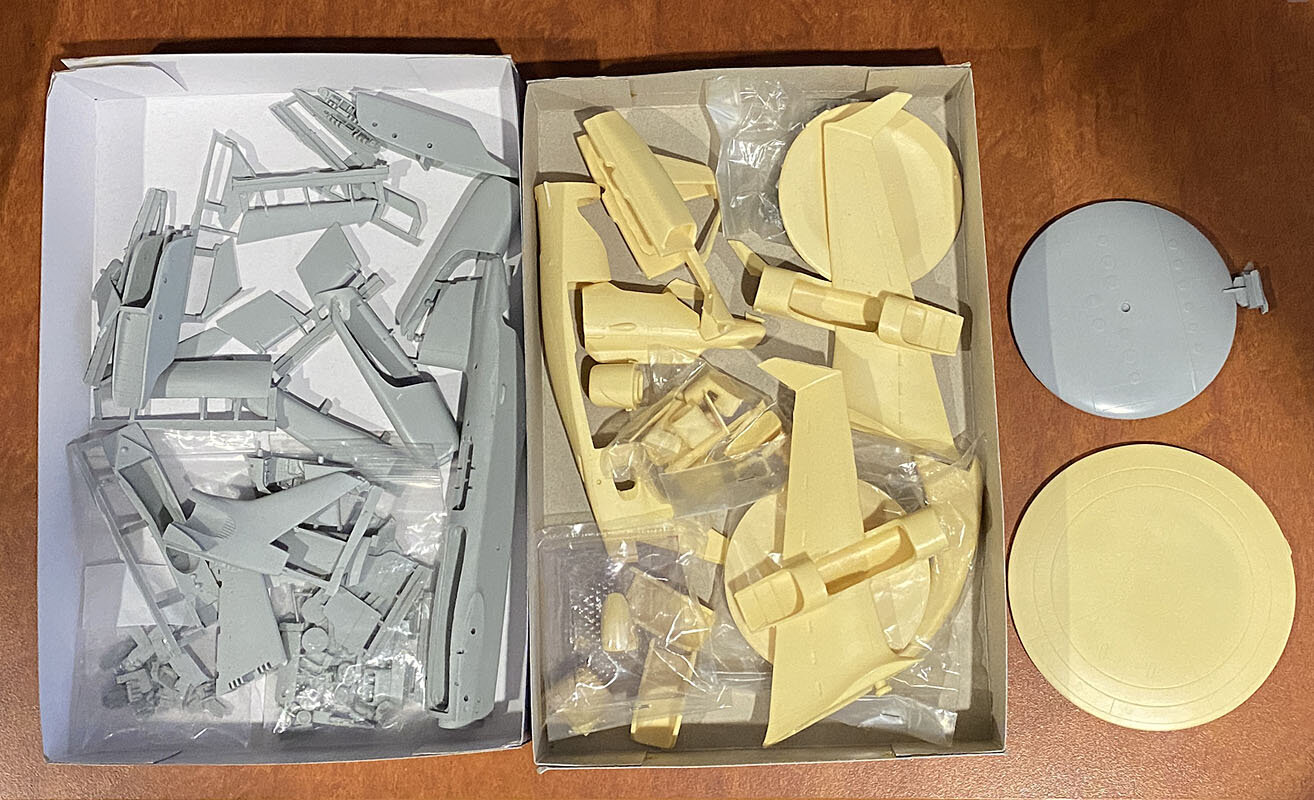
In between waiting for some parts for the Commanchero, Ive decided to start and review the two Cats Eye kits the client has sent me to evaluate and build. One is the John Moscato kit and the other is from (in yellow resin) Tanmen. I will do a proper parts breakdown comparison but the most obvious difference straightaway is the size of the rotodomes.
-
Looks bloody brilliant. Well done.
-
Aye I did eye those off but they're like 50 quid down under so they'll be expensive pilots.
-
I have toyed with scratch building seats and I may still do that as Im running out of options for pilots.
-
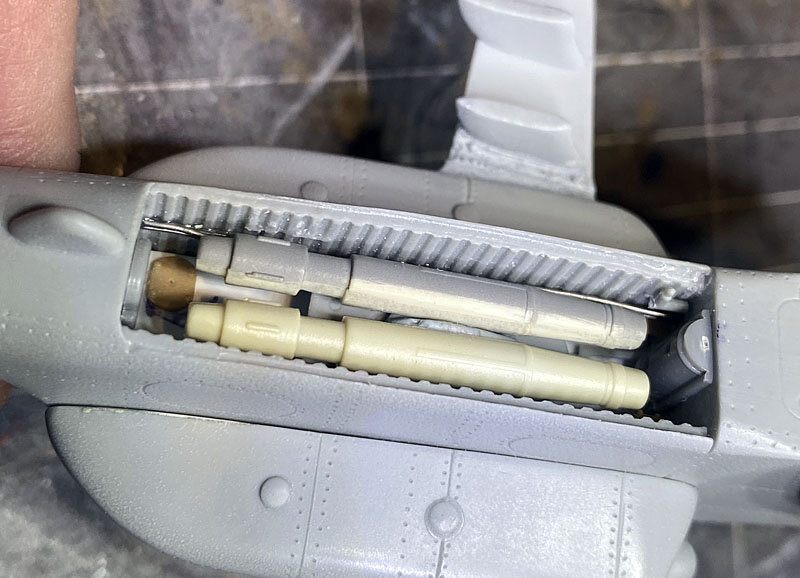
I managed to fins some old Bandai missiles from a VF-1A kit to use as bombs. Ì still have lots to do inside the bay with cleaning up some mold lines etc. Ive added some greeblies inside to make it a bit more interesting but most of it will get covered up by the bombs.
-
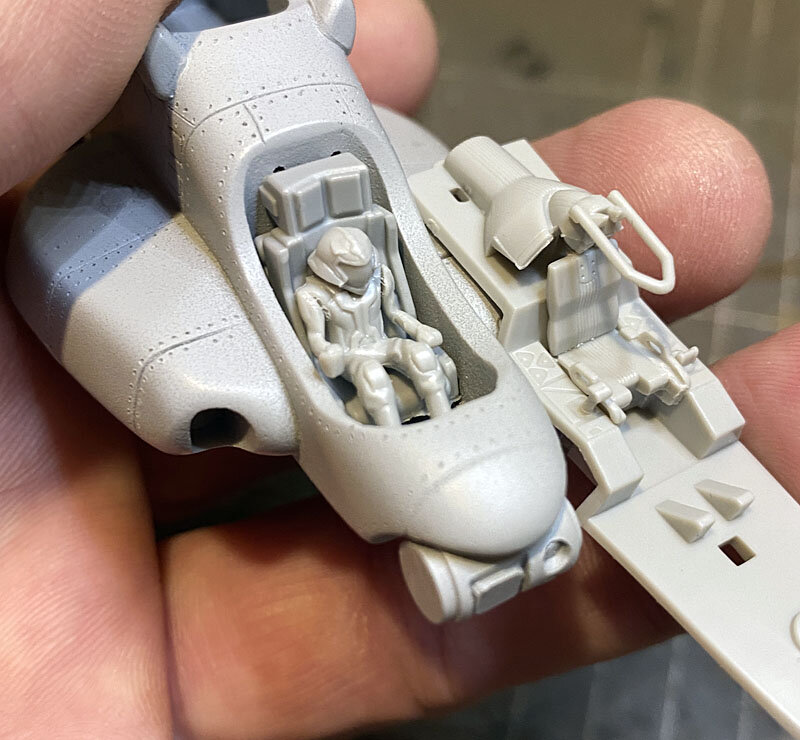
So we have a slight issue with scale or I should say a pilot scale issue. The below is a comparison between the SV-51 cockpit and the Commanchero cockpit with the SV pilot sitting in it. Either the SV is small or the Commanchero offers lounge chair rides for its pilots! Note Im not going to use the SV pilot just messing around at trying to get something that fits the Commanchero cockpit. I could pad the seat so the pilot sits higher but Im thinking that might look a bit naff.
-
I didnt know they released a small NX. Now I must have one!
-
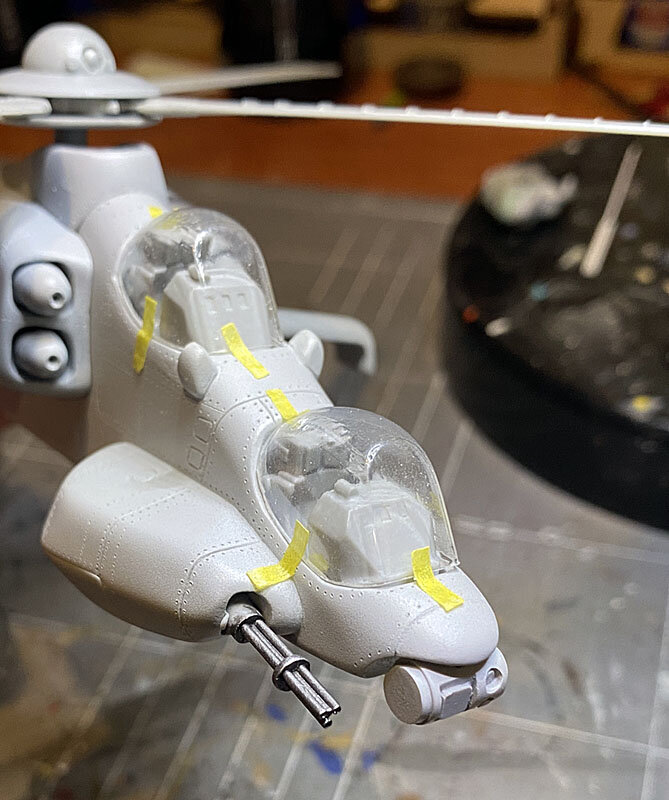
Cut and test fitting the rear - Pilot? - canopy. Also messing around with a scratch built rotary cannon.
-
Nice. Johns stuff is pretty awesome. He captures the lines of the design well. If there is something specific you want to ask please do so. Just PM me.
-
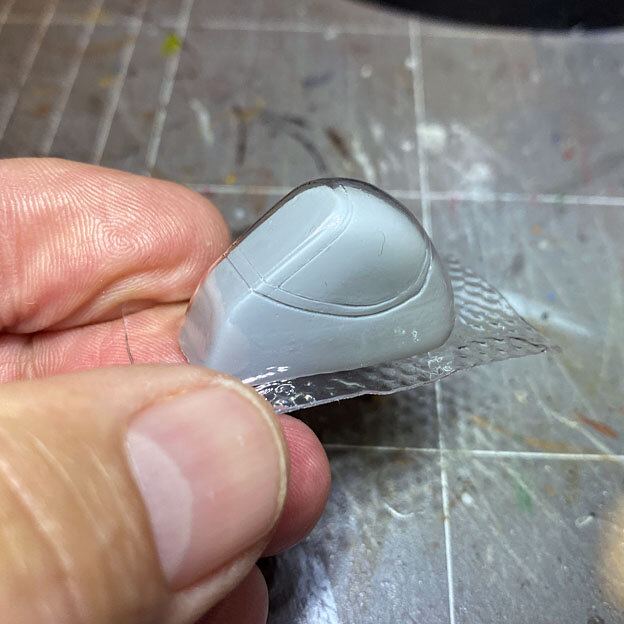
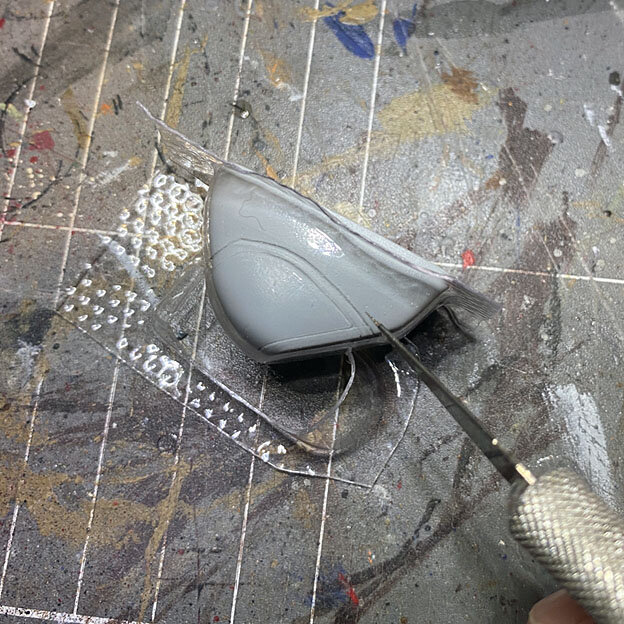
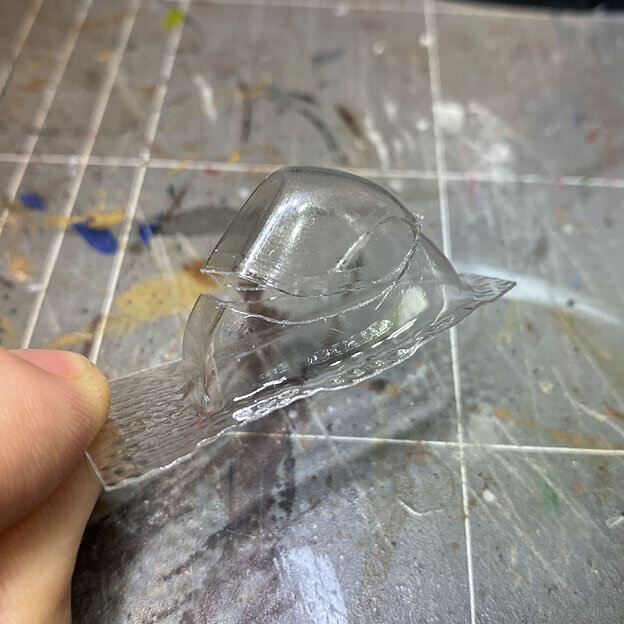
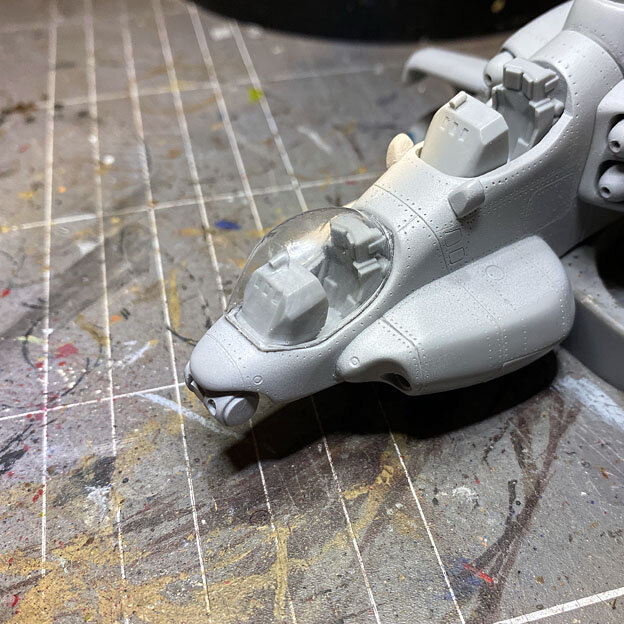
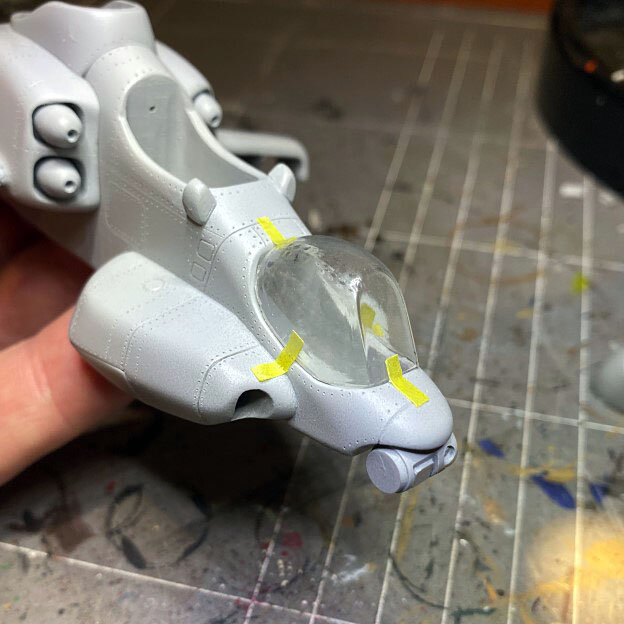
Ok here is my process for cutting the vacformed canopy for the Commanchero. John supplied solid versions of the canopy (Im assuming these are the molds used to vacform the canopies). So I started by inserting the mold into the vacform part: Then using a new blade I starting by cutting as close but not ON the canopy edge line to give me some room to sand the canopy to shape. I probably left about 0.5mm clearance to use to shape and sand and test fit. Partially cut canopy: ...And you should be left with something that will kind of fit in a crude way: After what seemed like hours of VERY careful sanding, this is the fit I managed to get. I still need to polish the canopy to try and get it clearer than it is. and to smooth the edges a bit more.
-
Ill get one when I can get the rest of the VF with it!
-
More than happy to help out. And yes its a little sleep loss inducing process as there is no room for error. Which kit of the CatsEye do you have?
-
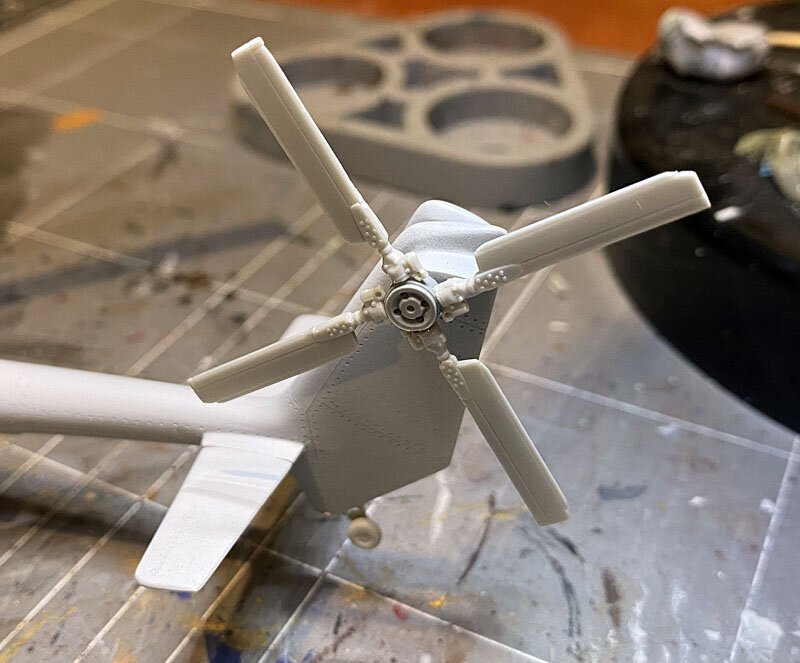
The second HIND arrived today so I was able to finish off the tail rotor Also swapped the seats from another kit as they were a little more detailed. I may need to alter them slightly to sit a smidge lower in the cockpit but I wont know until I finish cutting the canopies and test fitting them. The surprise kit donor. This will be another client build later on.