MechTech
-
Posts
4567 -
Joined
-
Last visited
Content Type
Profiles
Forums
Events
Gallery
Everything posted by MechTech
-

1/55 Bandai "J" Head Laser Recast - Anyone Doing Plastic?
MechTech replied to Skull-1's topic in The Workshop!
Did you guys try the brass rod thang? Or just use brass tubing? Try breaking that! Besides, I know you're not playing with your toys . - MT -
Nice custom! Yeah, I could see AMD sponsoring mech racers. Hmmm.... - MT
-
Awesome work guys! I know you got lives and everything, but it's about time!!! - MT
-
Nice BIG FSS kit! I had the Led Mirage with flame thrower in 1/100. Those designs got style - MT
-
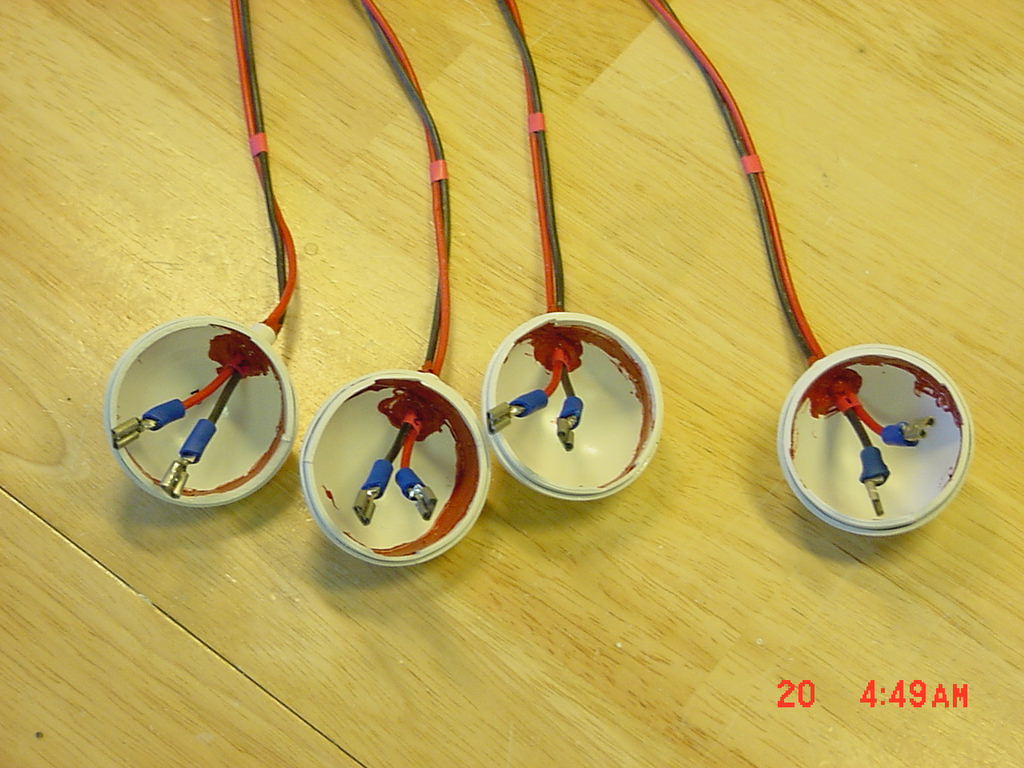
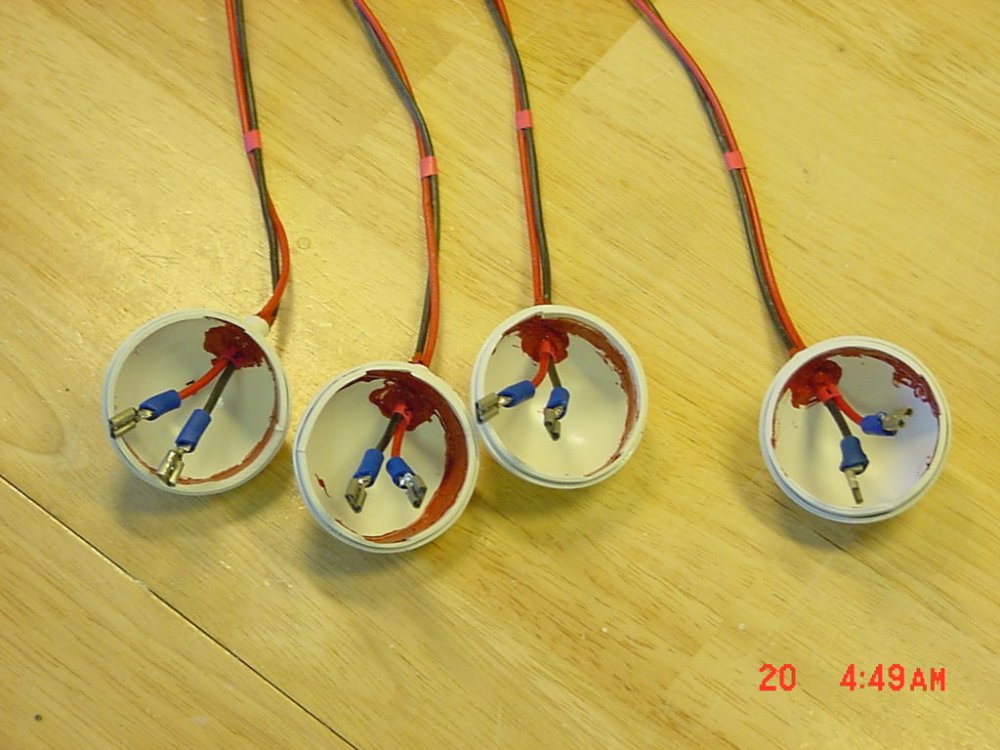
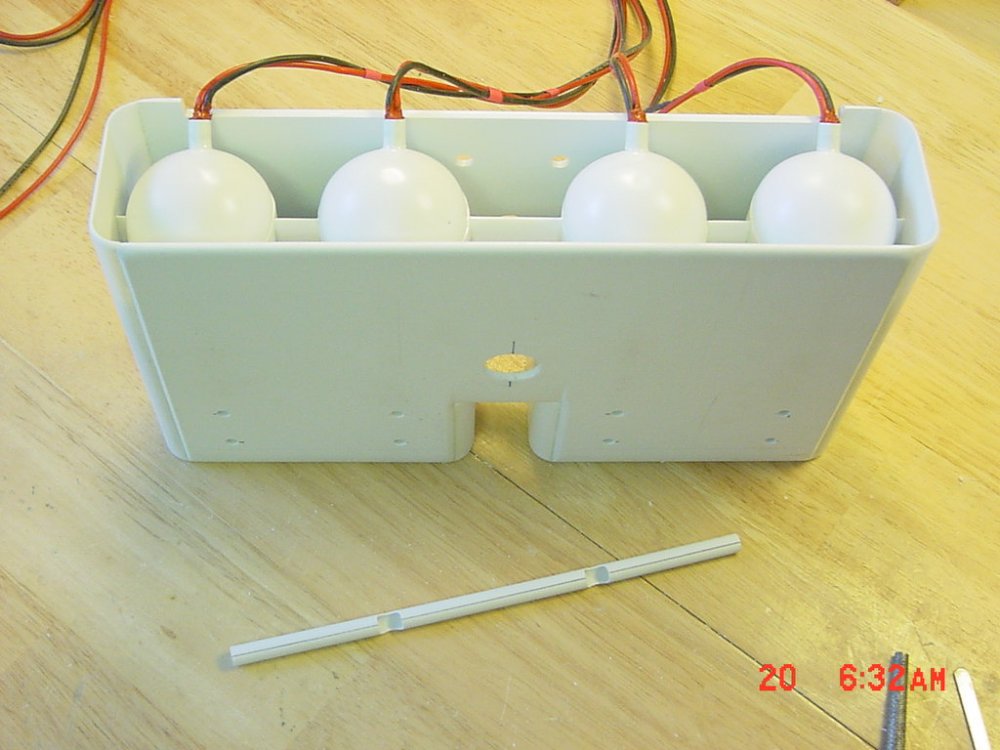
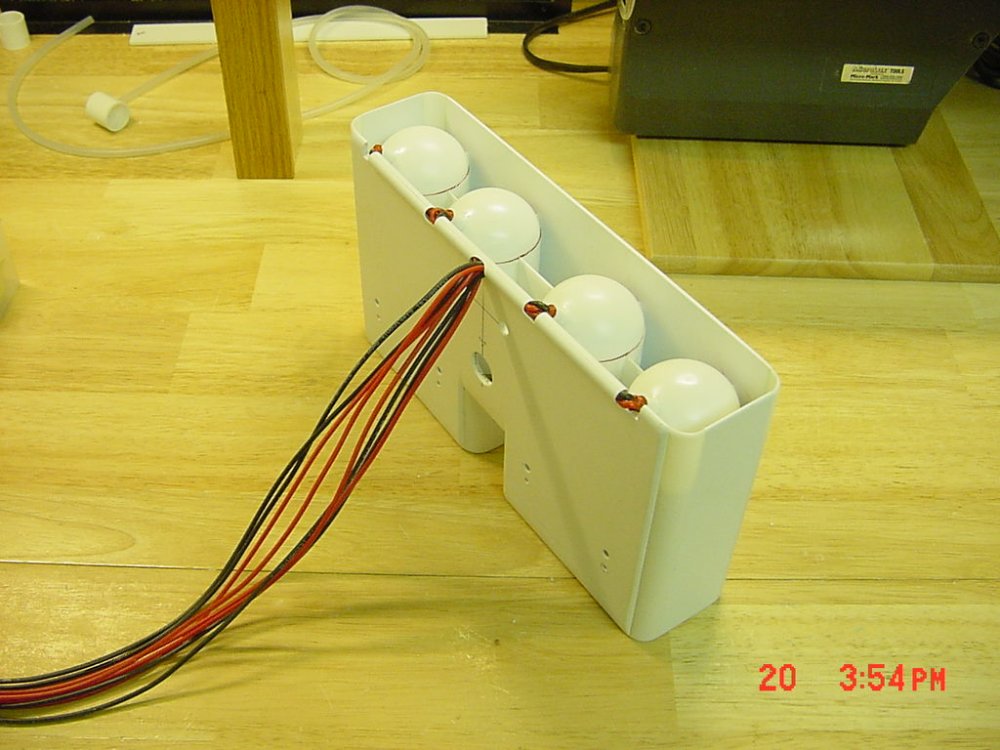
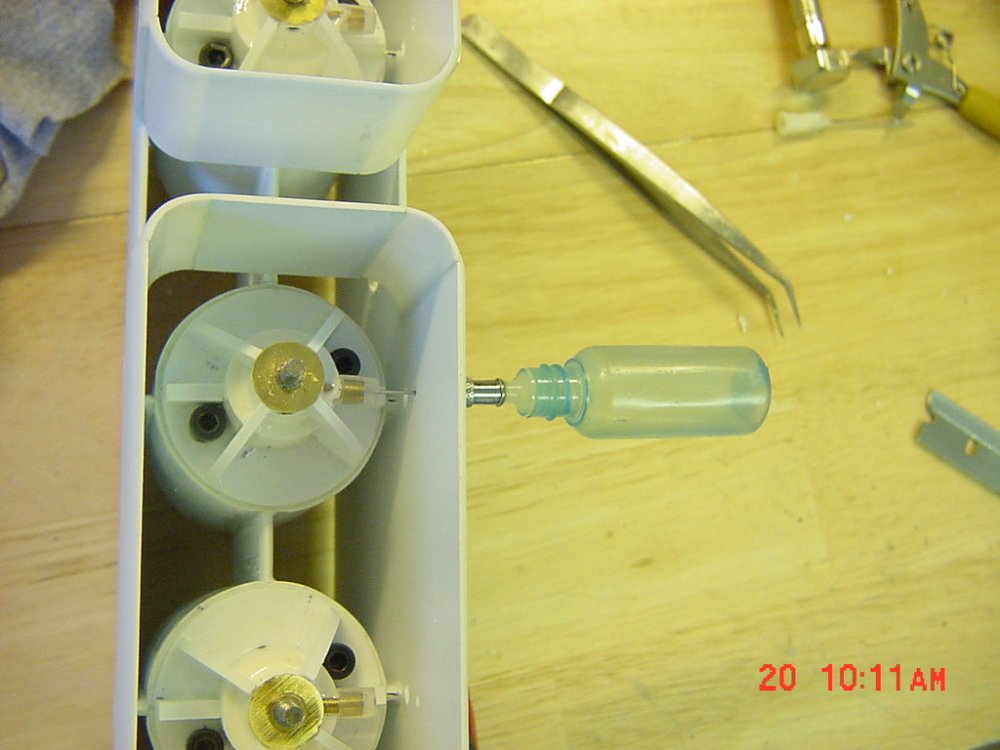
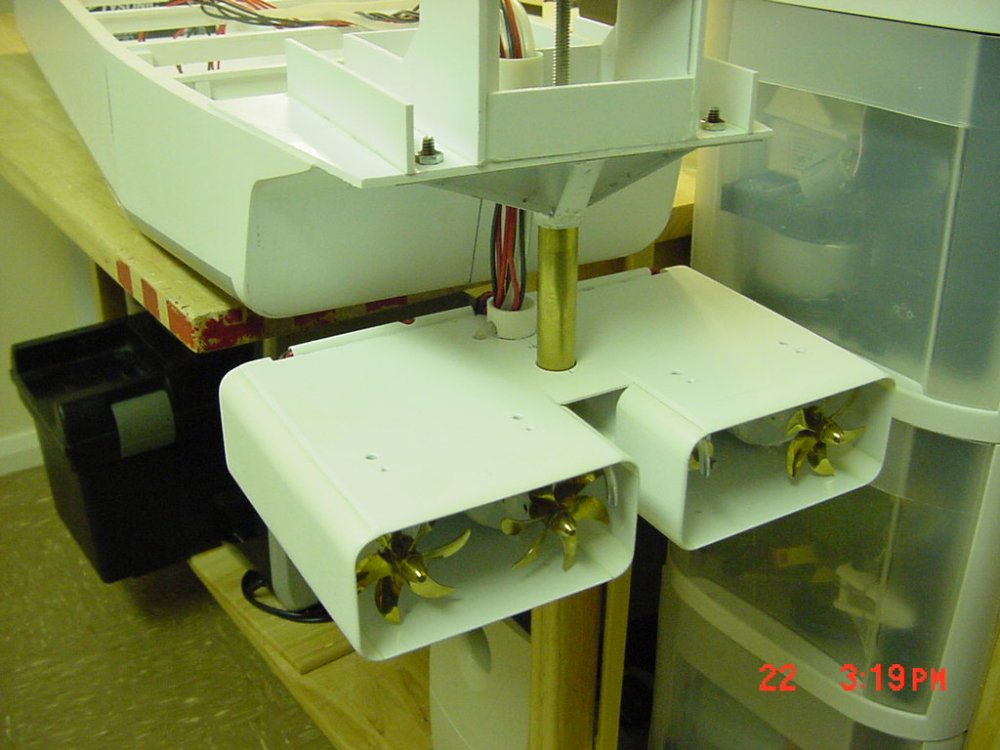
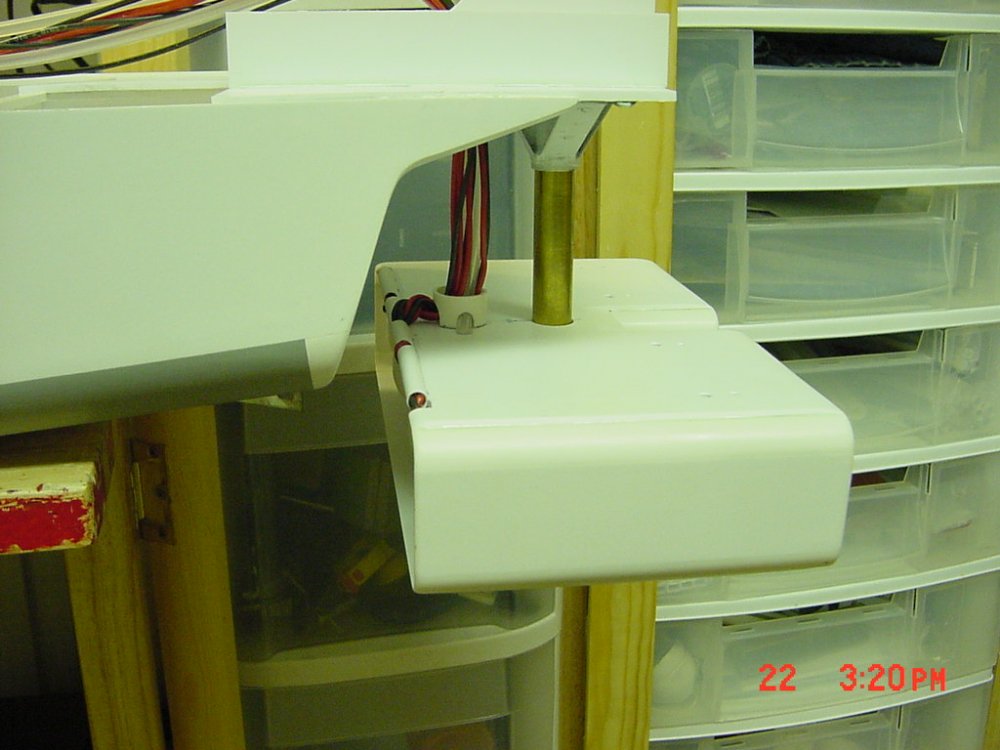
UPDATE 16 Nov 06 Almost done with the motor pod! [attachmentid=38391] Sealing the wiring connections. [attachmentid=38393] The wiring harness. [attachmentid=38394] Completed wiring of motor pods and ends sealed up with silicone RTV(note red rings). [attachmentid=38395] Oiling points (clear silicone tubing sealed with clear silicone RTV) Insert an oiling needle and you still have a seal (this way I won't have to keep pulling off the cowlings). [attachmentid=38396] Embilical chord and support shaft (one propeller is on back order). The silver rods just visible on the insides of the two boxed ends are water pick-ups to cool the speed controlls. [attachmentid=38397] Here's another angle. The wires come in from the back, and the water tubes on the sides. They all slide up and down freelly through the embilical chord pass through. NOTE: this is only a test fit, not finally assembled, it still needs paint before completion. [attachmentid=38398] The embilical chord pass through. All the cables and tubes will be bundled together with a sleeve to make passing through here easy and smooth. (my children's work area - my tablesaw - in the backround). Back to work! - MT
-
I was wondering if someone was going to post that link. Thanks Dave! - MT
-
So far it's about a tie. A lot of help you guys are . I'm still on the fence about this one... - MT
-
That rocks! It makes me wanna sing the Canadian national anthem. Oh Canada... - MT
-
Gerwalk Mode Shoulder/Arm Position - What is anime accurate?
MechTech replied to Skull-1's topic in The Workshop!
Do these help? [attachmentid=38315] [attachmentid=38316] Hopefully these official drawings will clarify things. - MT

-
Gerwalk Mode Shoulder/Arm Position - What is anime accurate?
MechTech replied to Skull-1's topic in The Workshop!
Do these help? -
Nice work! I used to think it would be cool to be a member of thunderbirds, until you see a GIANT Tachikoma looking into your windshield! - MT
-
Thank you everybody for the compliments and comments! Please keep the suggestions coming! - MT
-
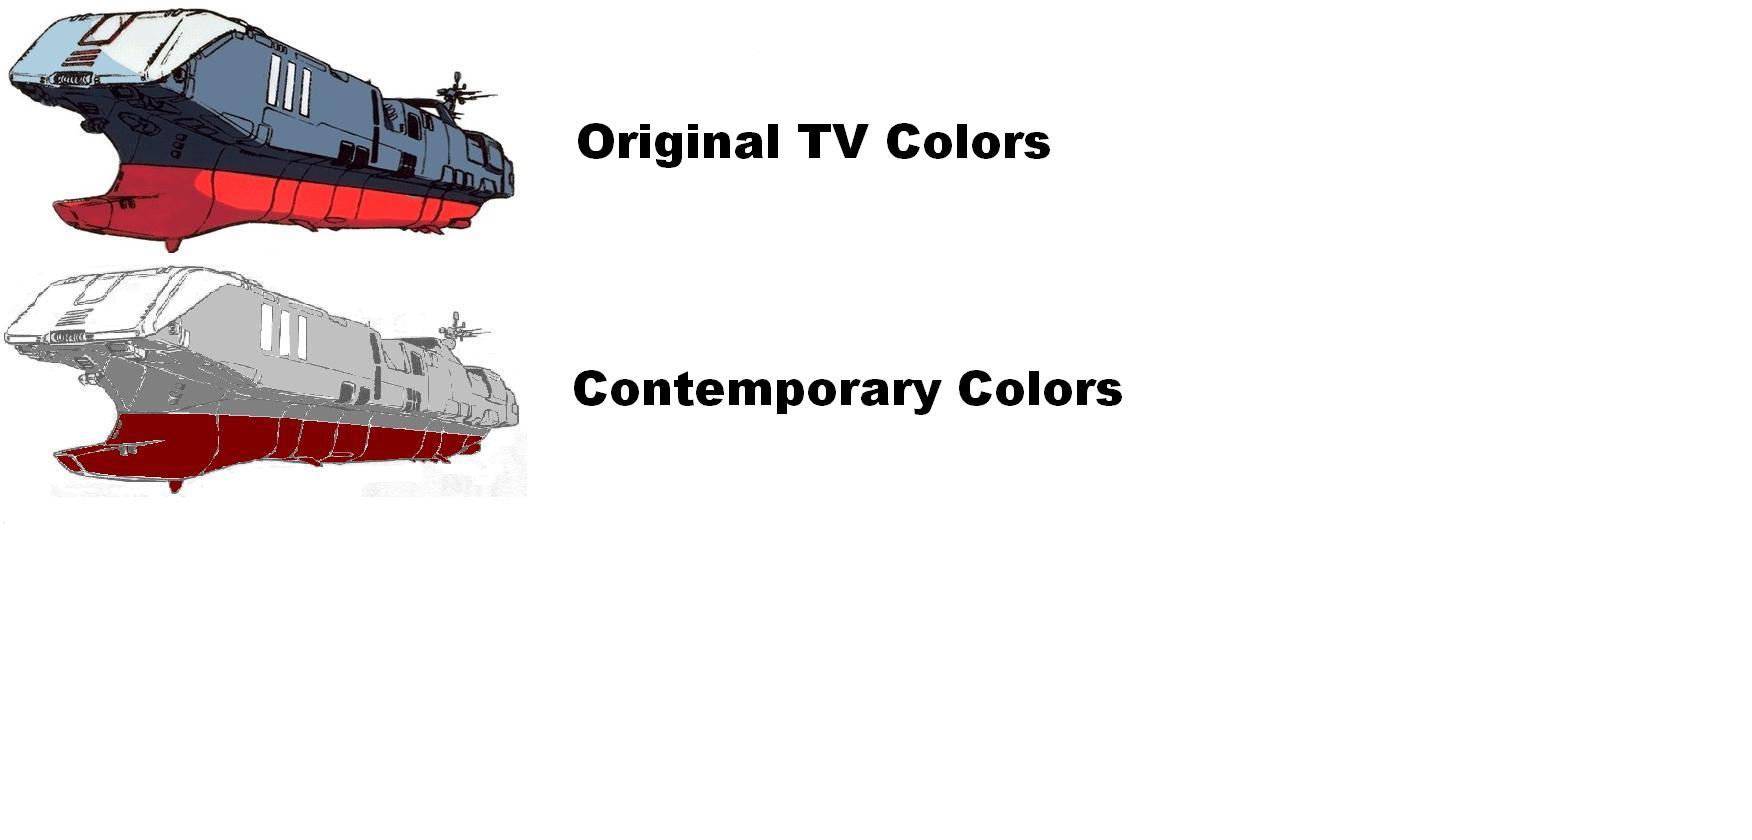
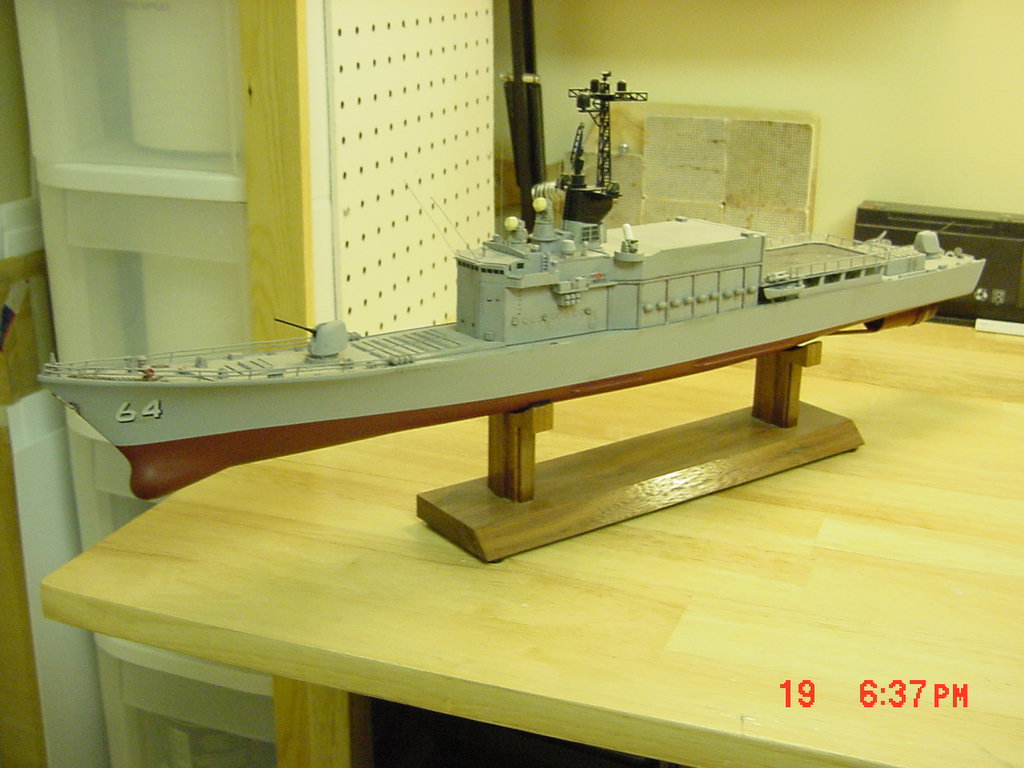
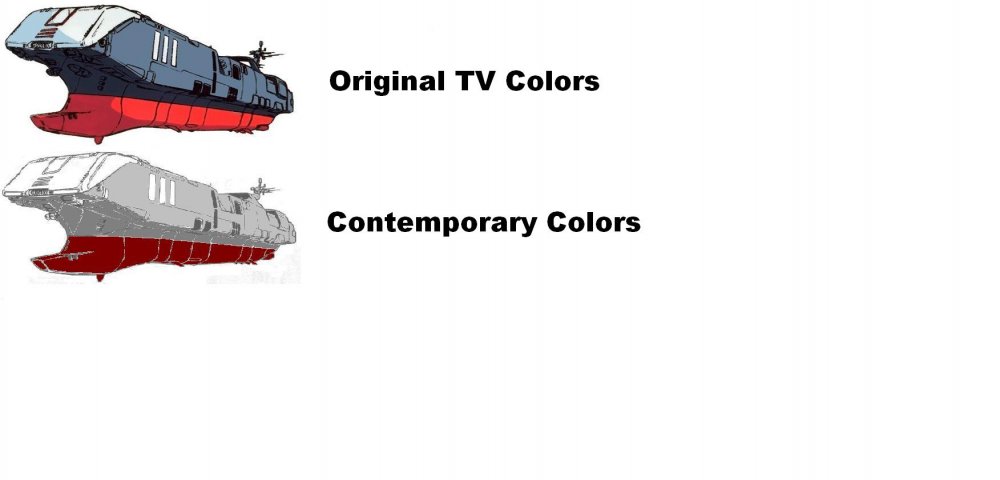
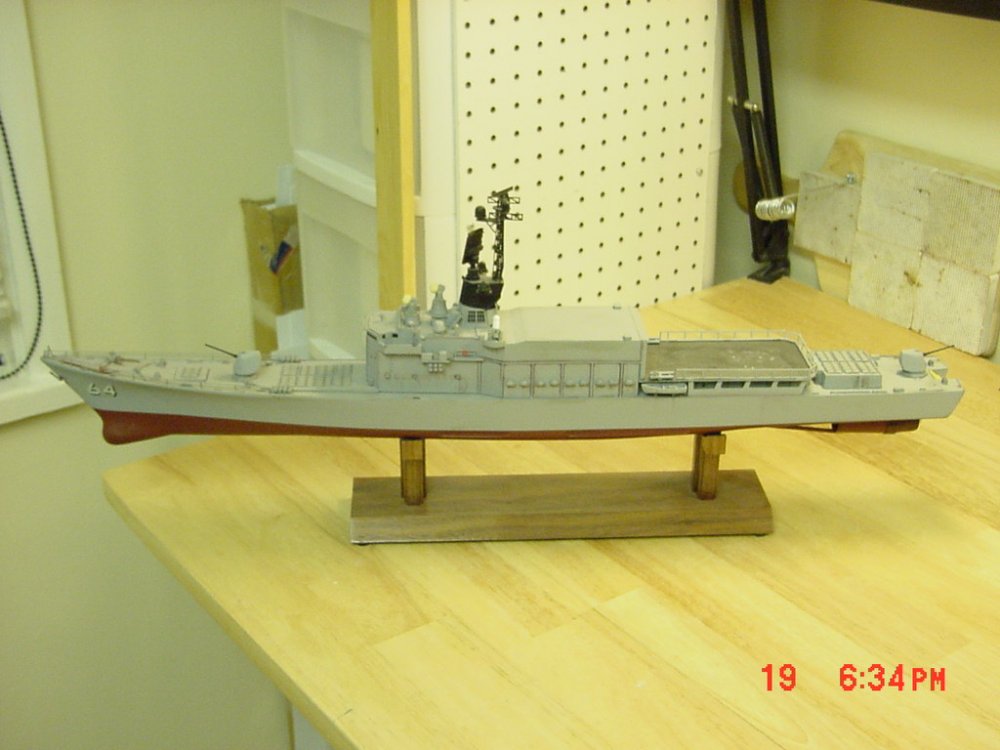
Hey EVERYONE, I need your help! All you artists out there that have been studying Macross art, (some of us for years now), I'm finally getting to the point where I need to start painting the LOWER portion of my 6 foot long Daedalus model: 6 Foot Daedalus Build Up IF the polling buttons work, (the polling buttons didn't work) the choices are: 1) The traditonal Blue/Red/white scheme from the TV series ------------------------------ OR --------------------------- 2) A contemporary naval scheme (like the low viz schemes on the valks, not canon, but cool). The attached picture has a ROUGHLY colored in contemporary naval version for color comparison. [attachmentid=38294] ROUGH color comparison of the two. Here's a 1/10th scale model of the IJN Battleship Yamato to give you more "contemporary" colors that I'd use for that scheme. Battleship Yamato Colors [attachmentid=38296] [attachmentid=38297] Same actual colors used before - light gray and ruddy brown. Either version will probably have an asphalt/dark gray colored covering like on most ship flight decks. Feel free to post other visual aids or suggetions. I'm really stuck on what color scheme to use. Thanks for your time and inputs with helping me build this project! - MT

-
Lookin' Good! You might as well go all the way and put a colored lens in with reflective backround like that one guy did a couple of months ago, can't remember the name. Keep it up! You guys seriously got me thinking about gettng a 1/55. Can't beat the classics! - MT
-
I'll never look at a box of sugar smacks at the store again ! - MT
-
I really love the fast pack portion of the 1/170 kits, they're perfect for 1/200, but are stretched on the 1/170 bodies. Hey Bushy, you might want to get some "N" gauge figures to go with your kits. Find a good train shop/hobby store. The ones in the factory sets are actually 1/100 (TOO big). The vehicles are too big, but perfect for 1/100 stuff. - MT
-
Thanks guys. I'm actually waterproofing some potential week spots and finishing a couple of others not finished yet. I'm hoping to at least put it on the water soon! Hooking everything up will be the easy part. Sailing to America, well, let's just say it's not a Coast Guard registered vessel. - MT
-
That is what you call "multi-media" modelling. Tree huggers call it recycling, and I call it an EXCELLENT model and great engineering work of art. The trees didn't die in vain for this project! - MT
-
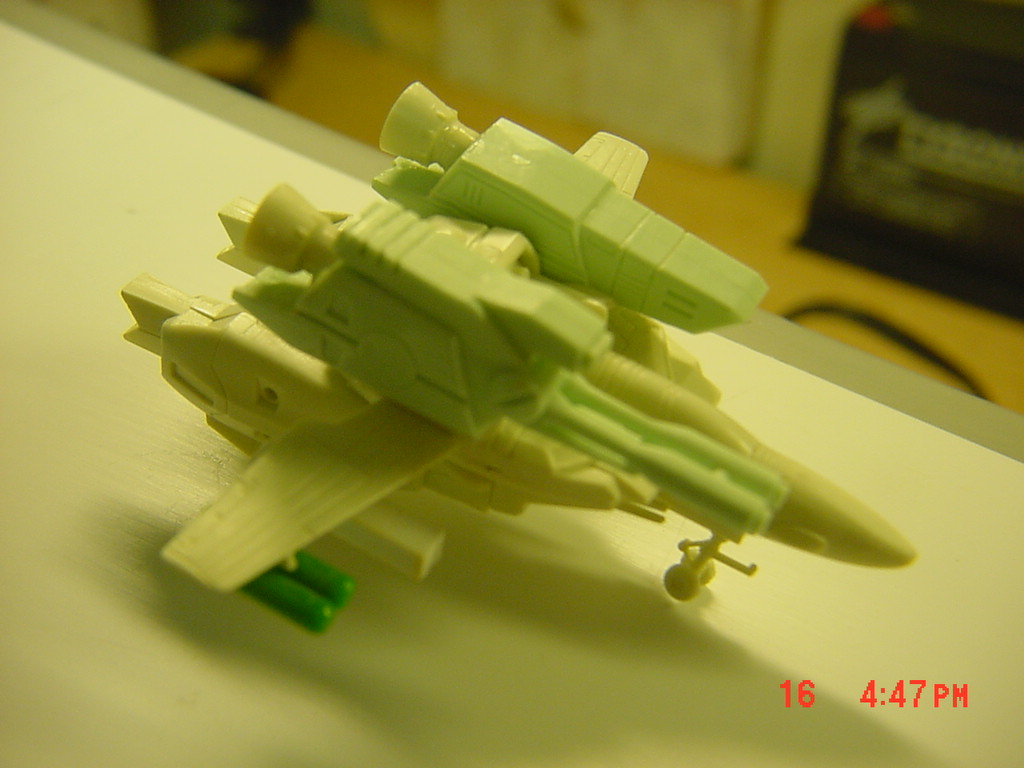
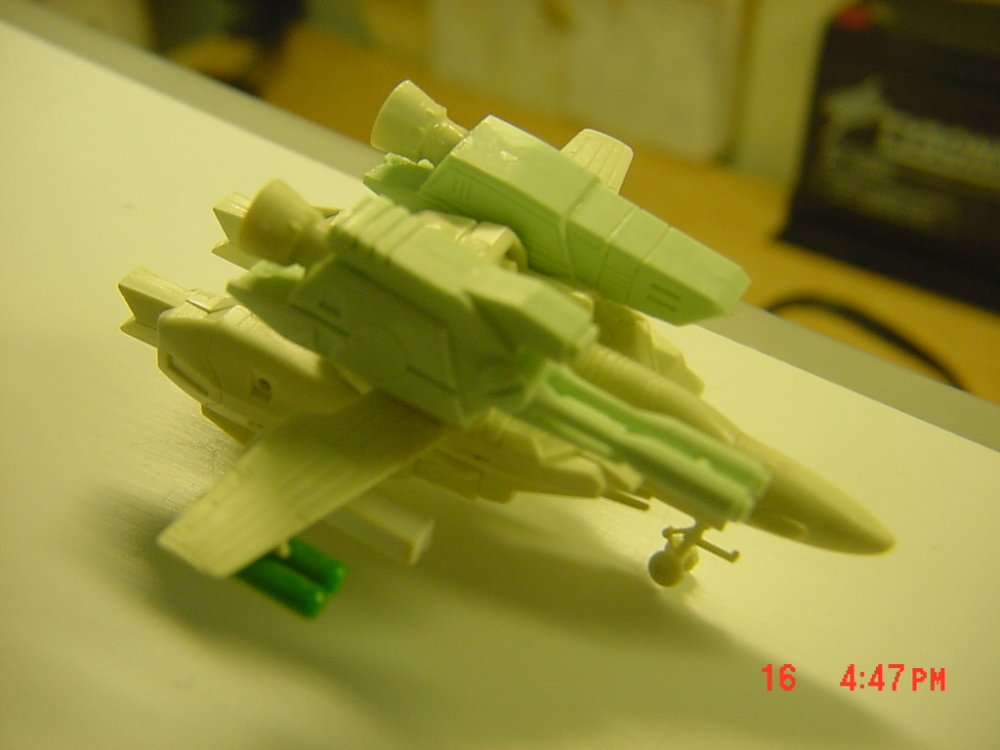
Don't tell Bushy I did this, but... [attachmentid=38218] I combined these parts (HEWAT) 17 years ago or so with the 1/200 basic body!? It was just a TEST, but with new underwing armament, it will rock! The fast pack components (legs not on) are the light green of course. (Ignore the dust). I remembered this years later and bought several from "The Galactic Trade Commision" for more Nichimo upgrades! You can guess on which ship they will be stationed - MT
-
Sounds like some cool 1/144ish scaled valks!? Pictures please! - MT
-
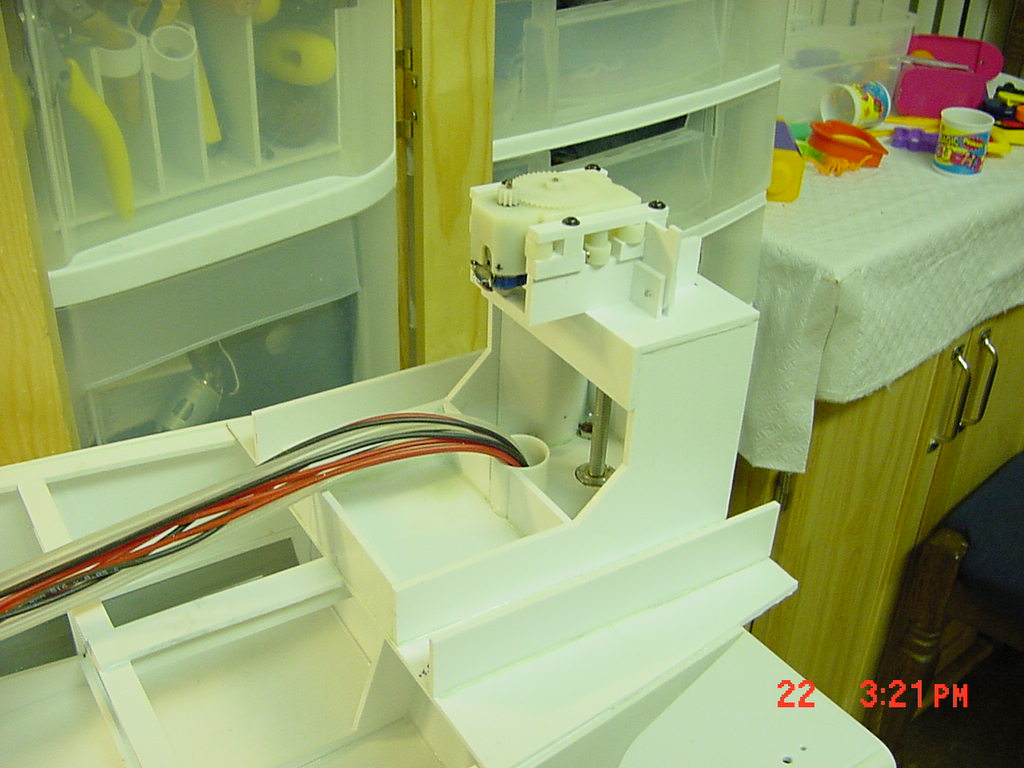
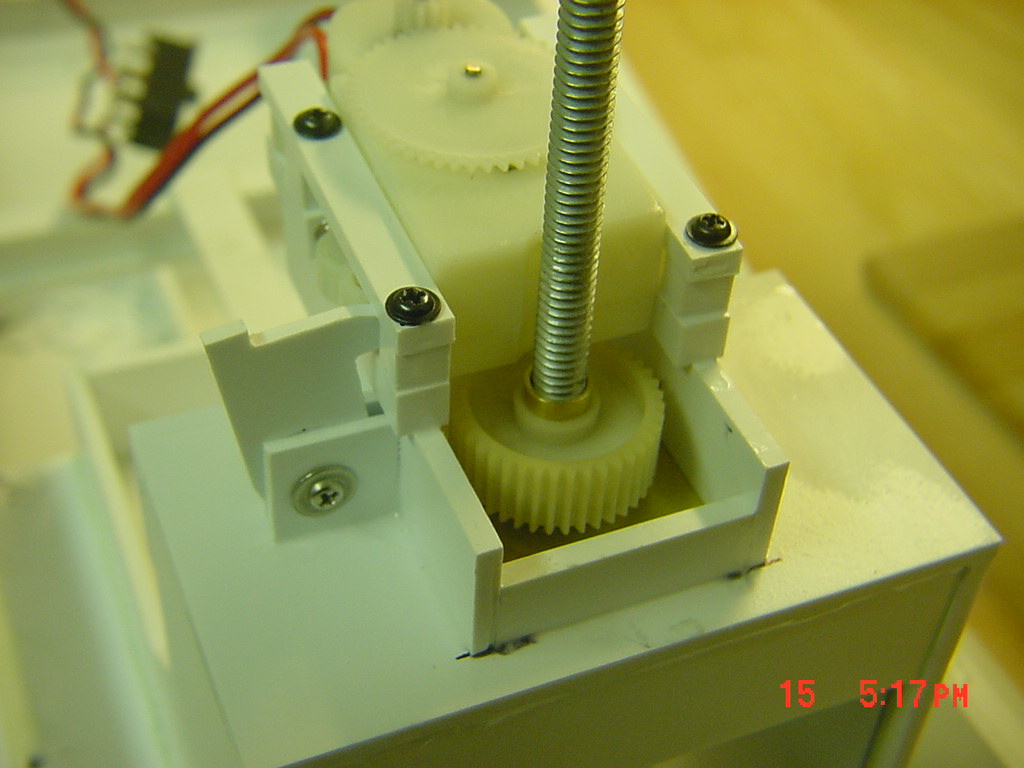
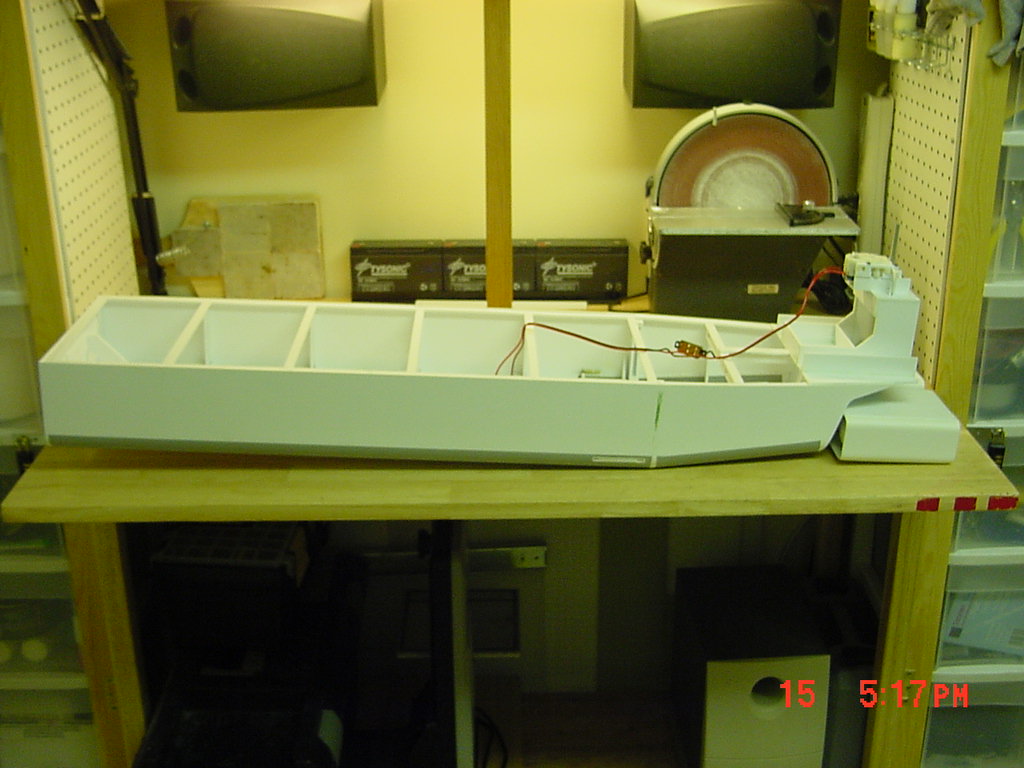
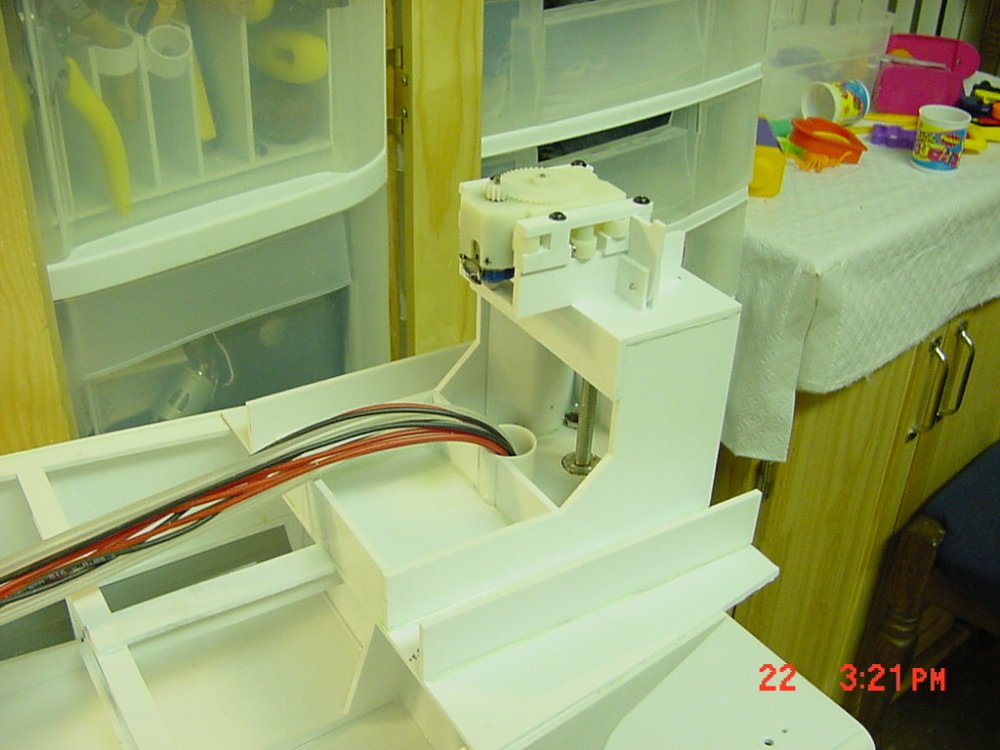
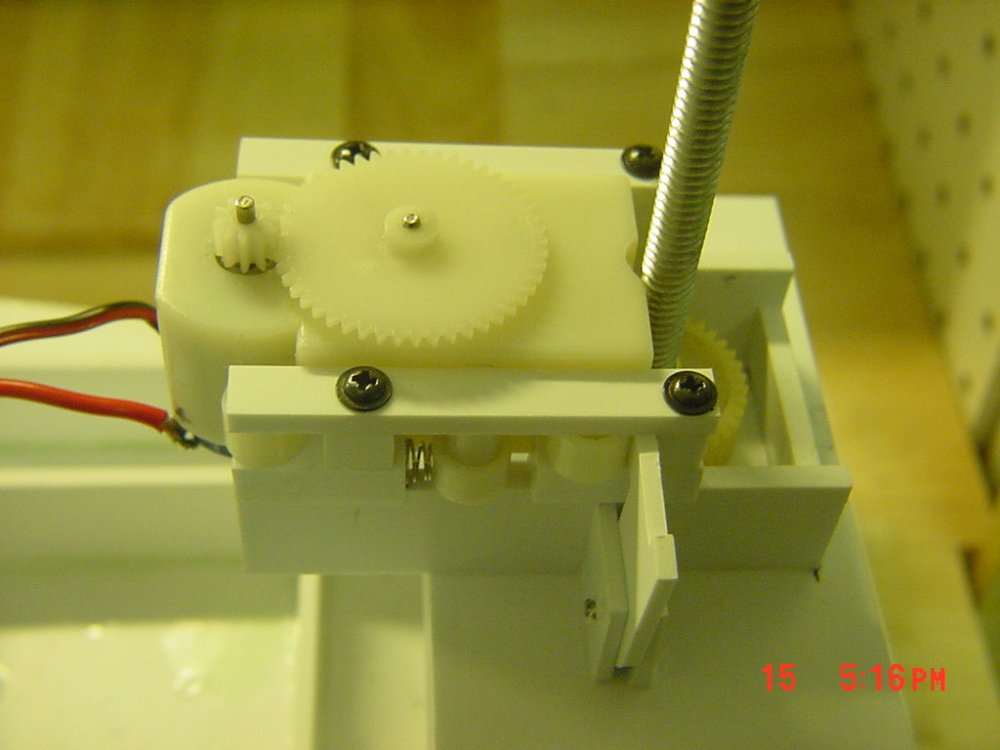
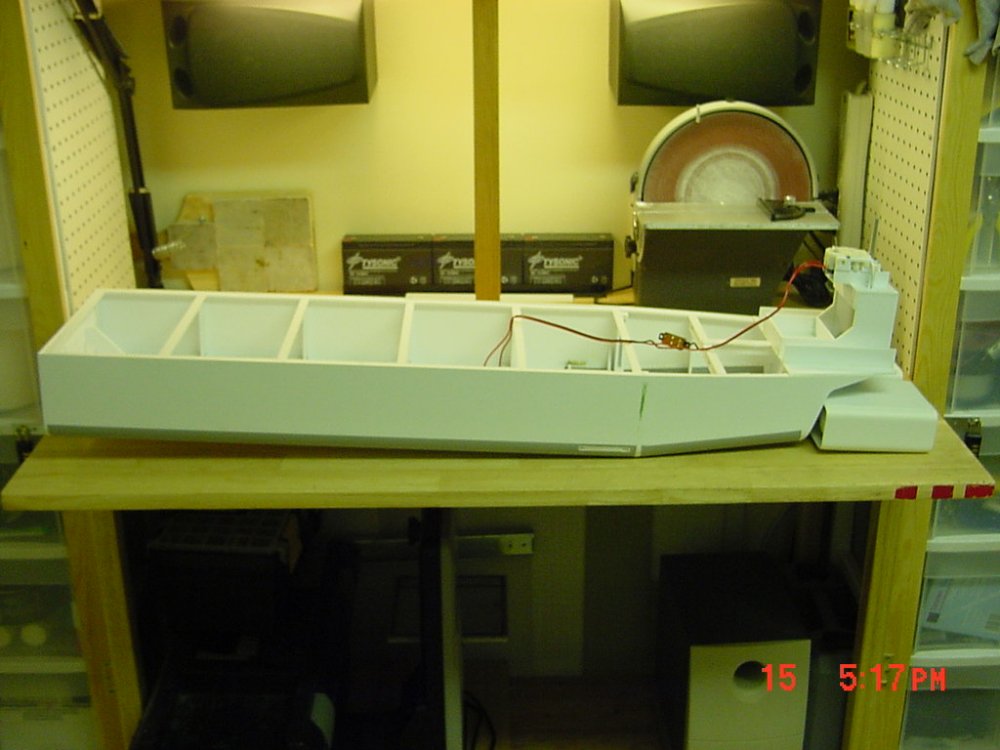
UPDATE 15 NOV 06 Thank you to everyone for your comments. It helps keep me motivated for what is dragging on longer than expected, but worth it! FINALLY finished the gearcase to raise and lower the pod assembly. It takes two minutes and is terribly slow to watch (turn on, go to the bathroom, come back and it's almost done). I used a small gearcase and motor to keep weight down since it sits high and I've gotta keep the center of gravity as low as possible. The video would put you to sleep if I took some . [attachmentid=38183] Here's the gearcase from the side, it came from an old toy tank (don't tell HWR). It sits in rails (under the black screws) and slides a litlle to engage or dis-engage from the main gear/thrust bearing assembly. There is a spring on either side (under the left hand screw) that keeps it pushed up into the gears normally. When the pod is either fully up or fully down this gives it a safety ratchet so it won't strip any gears. [attachmentid=38184] From the stern you can see drive gear better. The threaded rod goes through a nut and bushing in the center of the gear. The gear sits on a thrust bearing that makes gear rotation and steering smoother. The funny looking part on the left side of the box engages or dis-engages the gearcase. The gearcase is dis-engaged to make steering smoother after lowering. [attachmentid=38185] How heavy is the motor assembly? Yeah, a picture's worth a thousand words! It only takes one of the 6 volt gell cells to counter balance it though. On to hooking up the motors and steering... - MT

-
As somebody who owns a lot of 1/100th stuff, the 1/100 variables with strike cannon on the box come with the strike cannon packs (which are larger and molded in a green color) and slightly smaller standard booster packs. They also come with the box DYRL missile packs and heavy missiles. The kit of course comes with the standard missiles. Honneamise is right. Not bad for the average prices they go for. - MT
-
I have a friend in the Navy who always keeps a knife on him just in case the lights go out! He says you gotta be wary of the "ether bunny." - MT
-
Color matching everything the same is near impossible. There are so many variables that affect it. I've been doing it for years and only to cut back on coats of paint and help reveal seams and flaws better. Excellent work by the way. If I just didn't blow $100.00 on propellers, I'd be in. I miss my GBP set . - MT
-
Thanks! Still working on the gearcase. The best combination of gearcase and motors equals two minutes exactly to raise or lower the motor assembly. But it's lightweight and small. I'm working out the clutch mechanism too so it won't strip gears. - MT