wm cheng
-
Posts
4305 -
Joined
-
Last visited
Content Type
Profiles
Forums
Events
Gallery
Everything posted by wm cheng
-
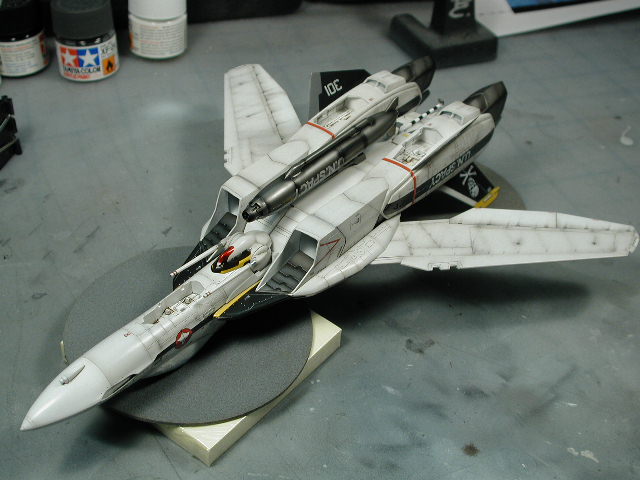
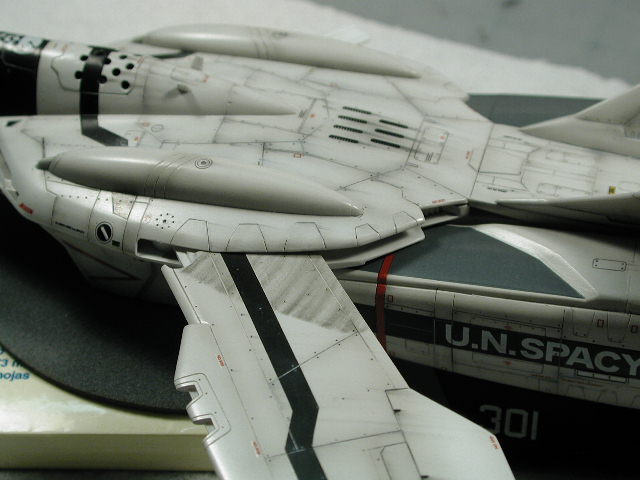
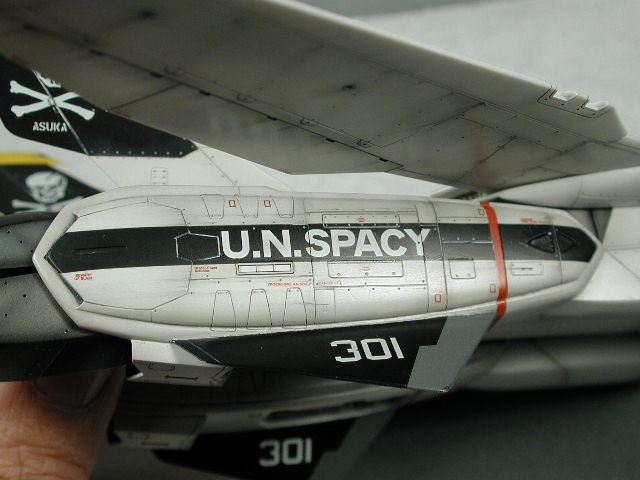
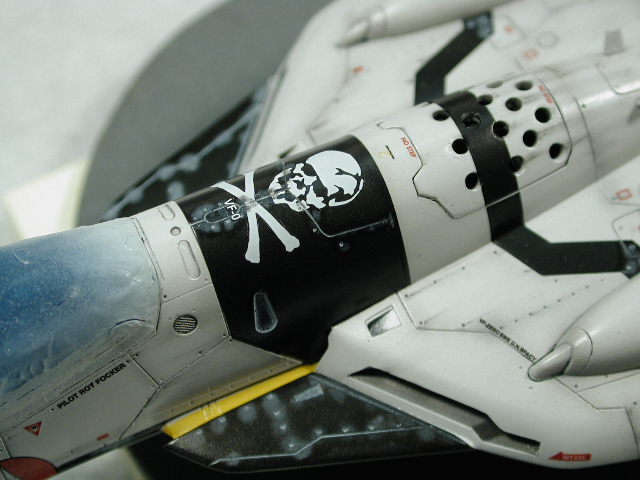
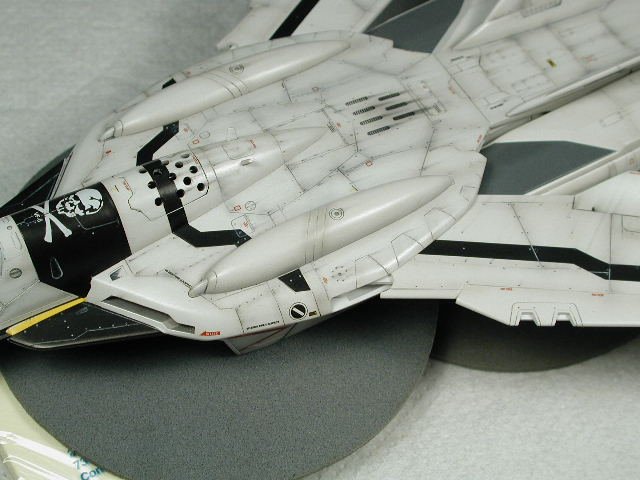
Yaay! I finally glued the head on - I waited till I was finished with all the clear-coats and dustings until I put the head on, since I did the red nav light in an ultra gloss clear red, I didn't want anything that might dull it down. I also airbrushed a thinned black on the gun pod's lettering to tie it into the panelling and blend it in more. I still have the silver and clear red to do on the gun pod, but I will wait until the landing gear is in place to protect it - right now the plane rests on this gun pod. and and red I do would be damaged. I love the arresting hook - god bless Hasegawa's hearts to even include the white and black striping for this piece!

-
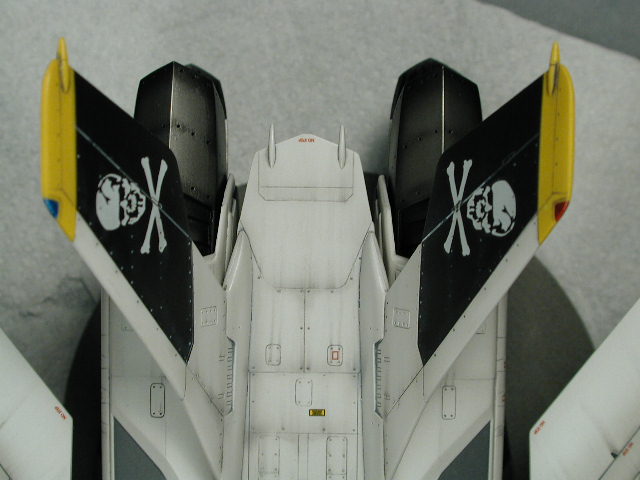
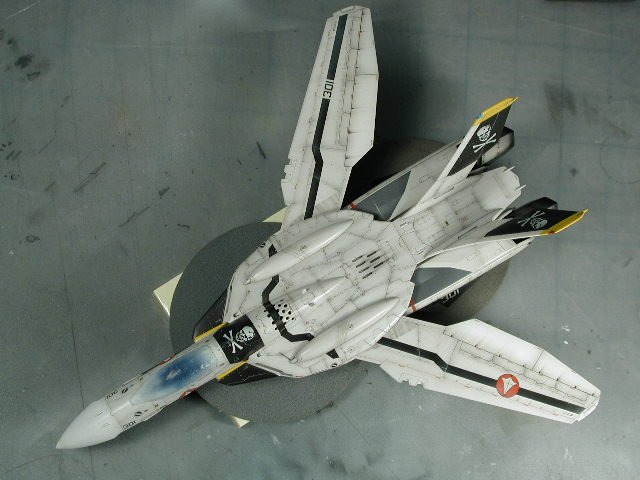
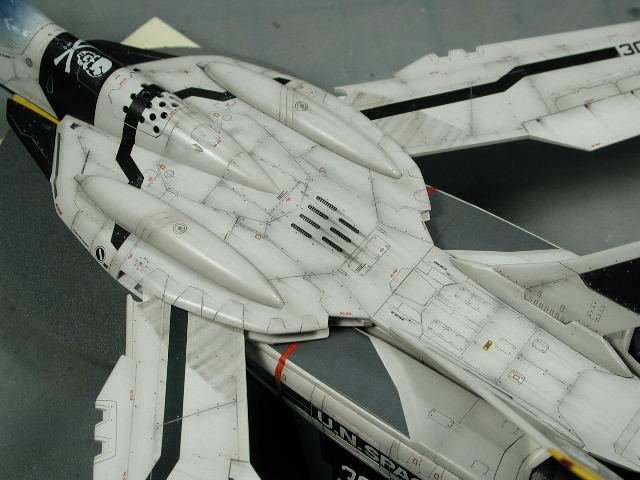
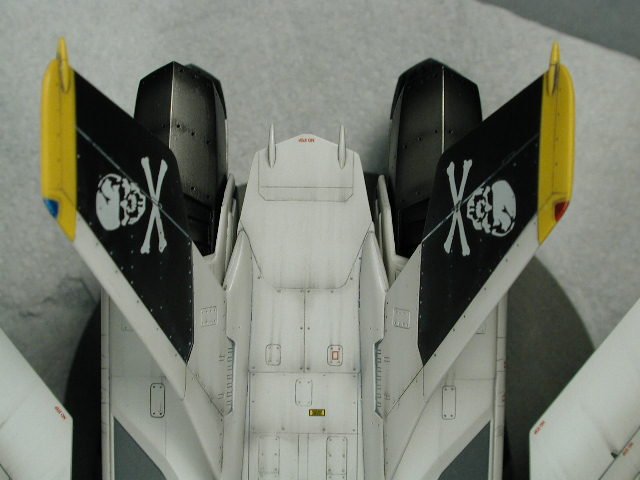
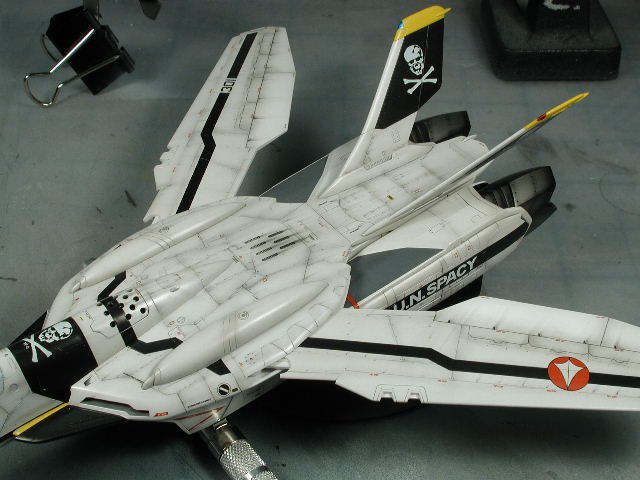
Overall shot from above.
-
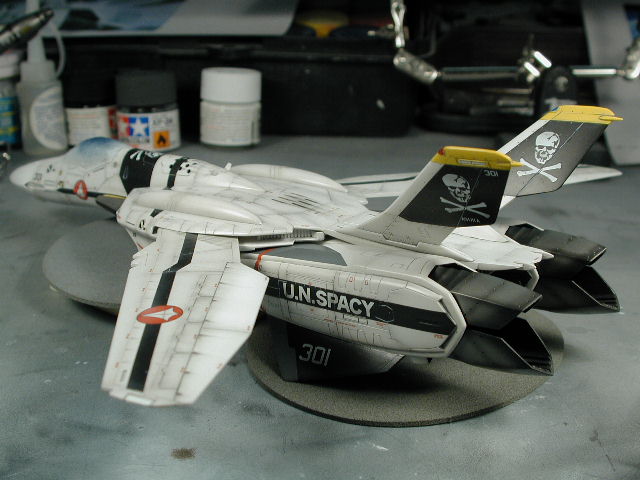
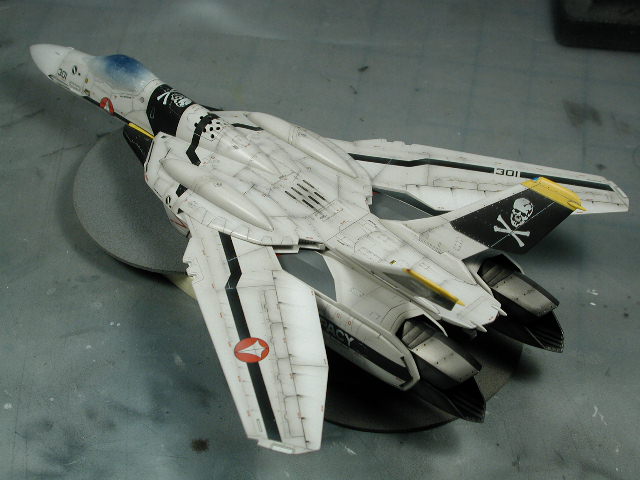
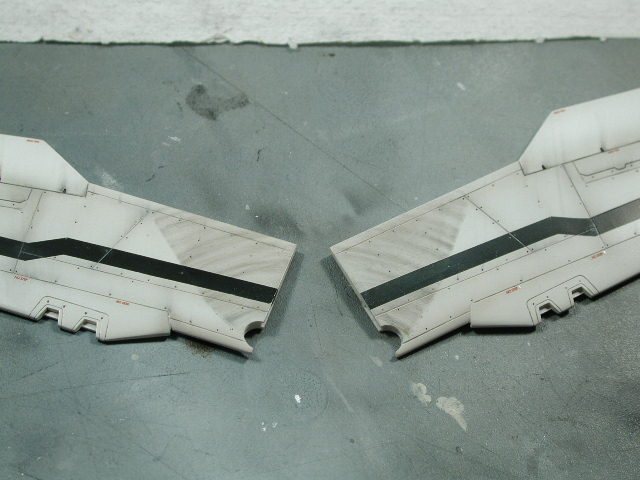
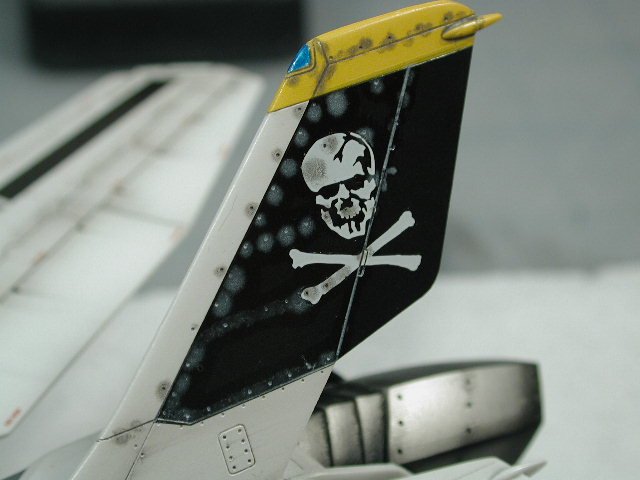
I've given the black areas a very light dusting or shot of the light grey body colour to lighten it up just a tad and all the leading edges of the black gets another shot of this light grey. It just blends in the decals a bit more so they look a bit worn and not so "black" against the body of the aircraft. I also took a few shots of thinned black and hit the white skull and lettering on the black so that they were toned down a bit too and tied into the weathered nature of the overall paint scheme. The light grey shots also toned down the red UN Spacy kite symbol so it doesn jump out at you to much. This is a very important step to tie the overall decals into the paint finish. Once I was satisfied, I clear-coated the entire thing again to protect this light dusting, since its very fragile and this light dusting scratches off easily if not protected.

-
In the swept back position - they are completely hidden. Hmm, I might change my mind on doing my future F-14 with the wings swept forward...

-
Ahh, I just can't wait, I pushed the wings right in (I hope I don't have to remove tem again)

-
I am pretty happy with them - it does make the bird look dirtier though. Note, I haven't pushed the wings all the way in yet (I want to make sure I don't need them out again - its pretty hard to take them out afterwards - its a really tight fit)
-
This shot shows both sides of the wear. I will spray a thicker coat of clear-coat to protect these sweep wear areas once I am satisfied with them.

-
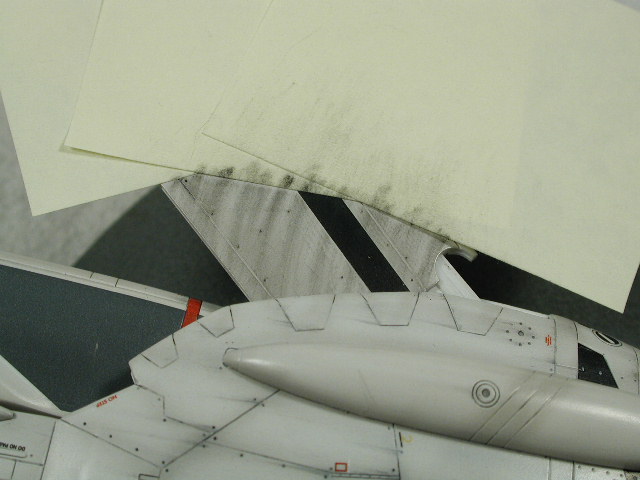
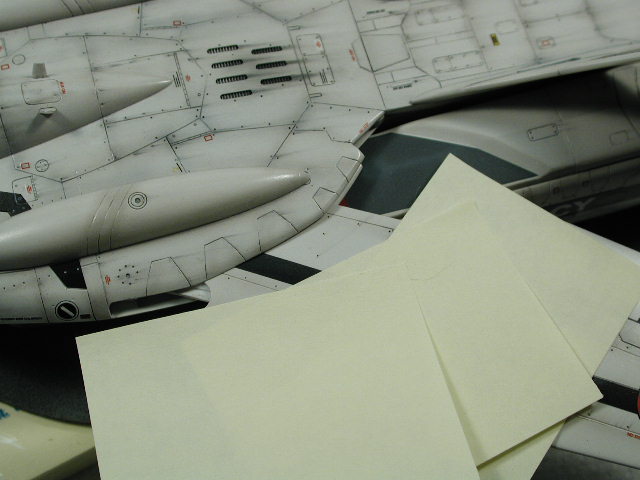
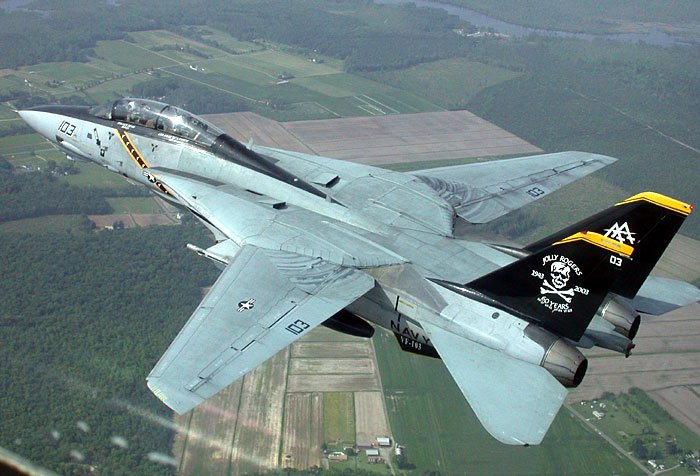
Here's one of the shots of a real F-14 (thanks David H.) showing the wing sweep areas, its a little too pronounced here in my opinion, but I like the tail insignia
-
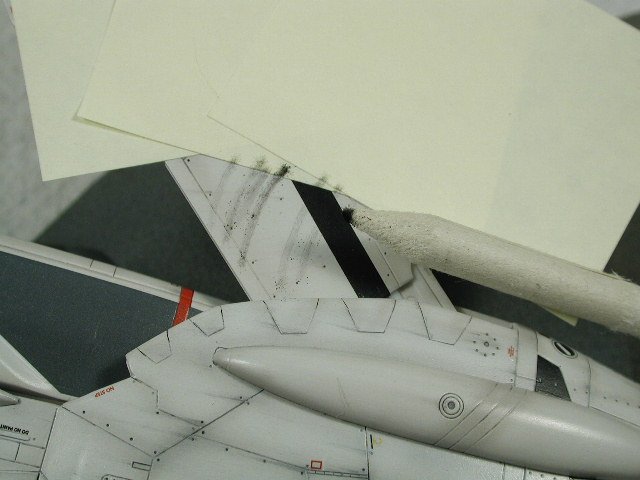
This looked pretty cool - but I decided it was a little too dark, so I lightened it a bit more with a eraser.

-
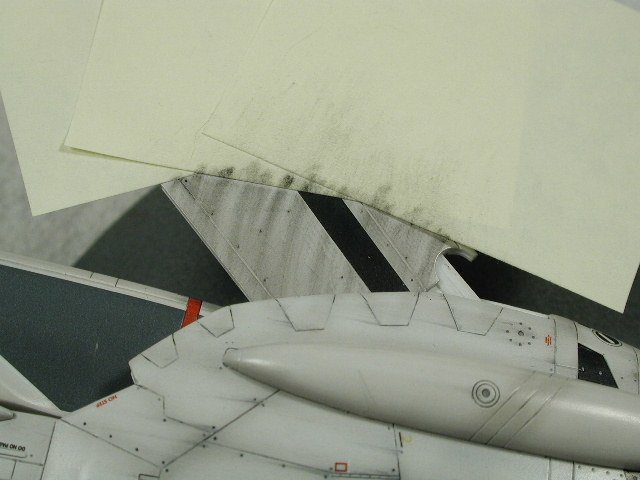
Then I smudge it a bit more with the stick and some paper towels, always trying to work with the curve of the arc from the post-it side towards the fuselage.
-
Then I took some of my conte/pastel chalk and created some shavings which I used the blending stick and dipped a little into the filings. Using the blending stick, I "drew" some arcing lines from the post-it note edges towards the fuselage.
-
After "talking" with David - he convinced me to create sweep marks on the wings just like the F-14 Tomcat. He sent some amazing photos that shows what these sweep marks look like - so I thought I might experiment here on this bird before I do it on my future F-14. Since I have already decalled this section and clear-coated. I would have to be very careful when masking, I used post-it notes to try and trace out the contour of the fuselage when the wing is fully swept.

-
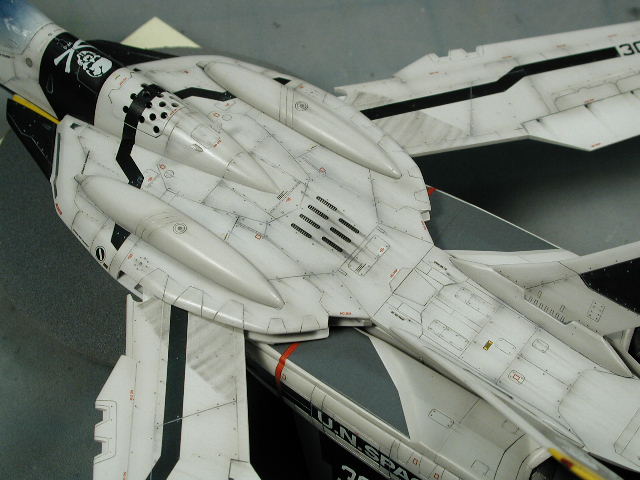
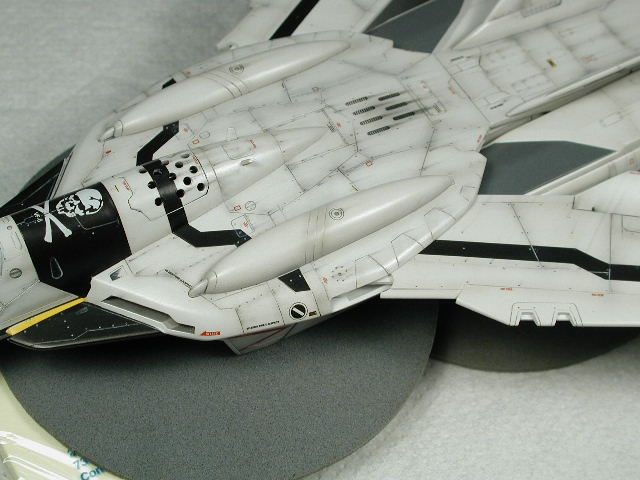
Here's a shot showing the leg decal integrated into all that nice panel details with the various white and grey/black wash process completed. Funny, the instructions call for several of the small red data stencil decals to be placed right in the black stripe - but the red is not backed with white. So the red stencilling dissappears against the black stripe. So I took a bit of artistic licence and put some of the stencilling above or below the stripe. The "Beware of Blast" should be below the stripe - it will look better next to our other Valks.

-
With these high-contrast decals, I feel the weathering ties in better. Although still overly weathered for an 1/72 scale aircraft - it does look like the CGI model though.
-
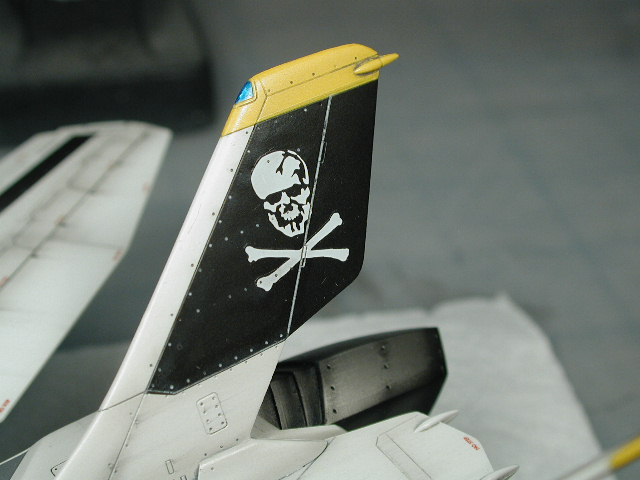
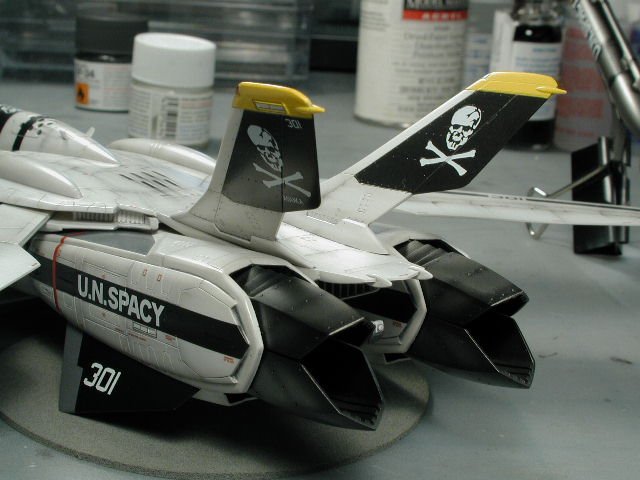
Here's the finished rudder - I didn't wipe the white off too much - unfortunately you can't see it in the photo, but I left some of the white around the revits - it makes it look a bit sun faded - but its too subtle to be seen in the photograph, but you can see it in person

-
Here I have wipped off the excess oil paint (after allowing it dry for a few hours) you can see that it picks out the details in the pack areas better, paying careful attention to access panels that cross from the "white" areas into the black stripe.
-
A white oil wash on the black areas as mentioned before, and a grey oil wash on the lighter areas. I tried to highlight the rudder control surface with white on the black background, and were it its the white cross bones, I place a dab of dark grey so you can always read the separation. I kind of like the little splots around the revit holes, if this was a dirtier bird in 1/32 scale, it would look pretty good as it is without wiping it off later
-
Here's a white oil wash over top of the black decals to pick out the revits and panel lines. This breaks up the decal and ties it into the overall aircraft a bit more.

-
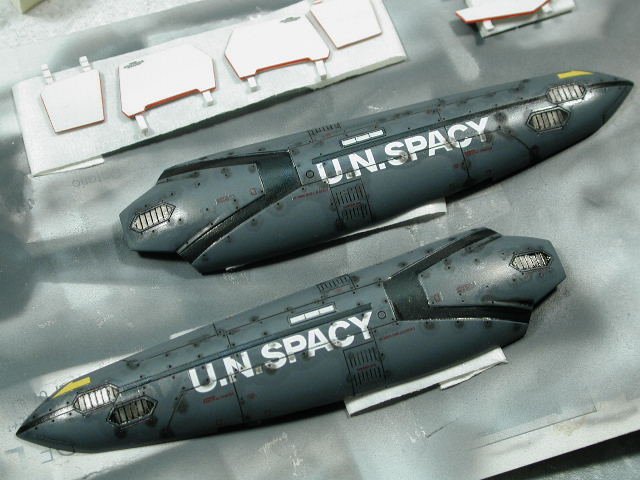
Here's a black oil wash on the fast packs after the decals.
-
I cut the decal along the panel separation lines once they were dried, and re-dabbed some more MicroSOL onto the cut edges, I find that in simple cases like these, to actually cut the decal makes them look so much more realistic.

-
Man! finally done all those data stencil decals - boy was it worth it - I love all that tiny writing all over the plane, it really gives it a sence of scale. It was probably 20 hours of decalling spread over a week!
-
Here's a shot of the tail decals in place - becareful to make sure you press the decals into the light engraved details, since those details has to read through at least two layers of decal.
-
Great job Chris!! Wow, your brush skills are fantastic!! Did you mask then hand brush, or did you do all those sharp corners freehand? Truely admirable, my brush skills have gone down the crapper since I rely too much on my airbrush now - I only brush the smallest of parts . I break out the airbrush for even some really shamefully stupid parts - but I just can't get the paint even and thin enough on large surfaces. Too bad to hear about your panel line problems. There could be one of two reasons or a combination of both. What are you brush painting with (what type of paint?) and did you apply a clear coat (with a different solvent base) to protect the paint before you panel lined? I essentially sandwich my paints with different solvent based layers to protect each other from interacting with each other. The Tamiya Acrylic base coat (acrylic), then a layer of ModelMaster Acryl clear-coat (which is laquer based dispite the name), then artist oil wash (thinned with low odour varsol - mineral spirits). You see that all these three layers have a different solvent base and therefore do not interact with each other. You can go on layering them - I usually use a clear-coat layer to seal in every step of the way. It allows an "undo" to the previous stage should I need to strip anything away. Looking forward to more posts.
-
You da man Solscud007!! I just got my set on Thursday (8 days to Canada - pretty good) - and I love them!! They arrived all safe and sound with no customs or duty woohoo! Thanks again for letting us know of this deal. Now if only they would sell the CMS figures (both sets) at similar prices!
-

F-14 kits, reviews, comparisons, and Shin's
wm cheng replied to David Hingtgen's topic in Model kits
Have you or anyone else ever used this stuff - it looks neat, it has an interior set (which is the hardest to mask IMHO), and exterior set, so you can paint the interior black and exterior grey (hard in 1/72) plus a slightly undersized set to paint a very thin rubber gasket around all the frames (I don't think I'm that ANAL at this scale - but useful at 1/48!) Plus it includes circular mask for the wheels.