wm cheng
-
Posts
4310 -
Joined
-
Last visited
Content Type
Profiles
Forums
Events
Gallery
Everything posted by wm cheng
-
-
-
Walk around.
-
-
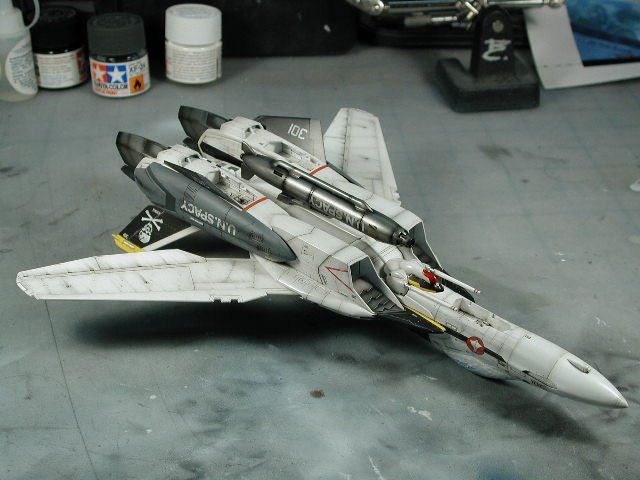
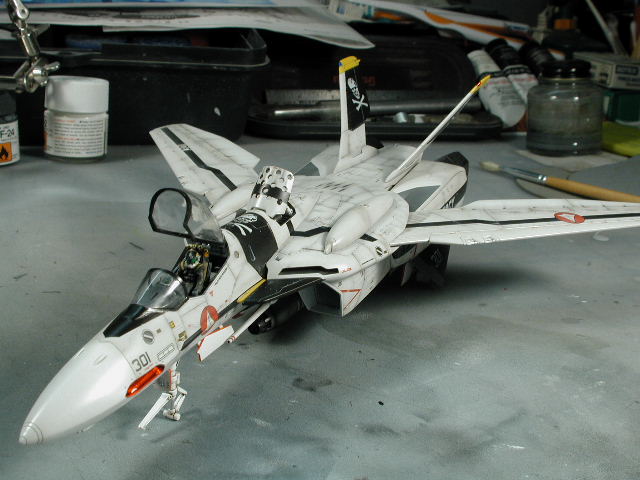
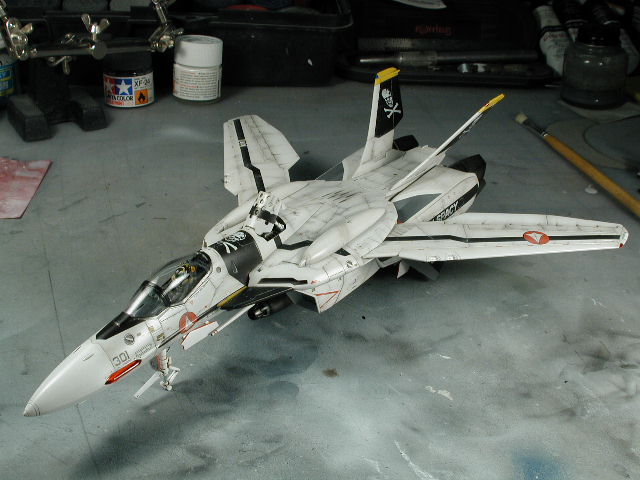
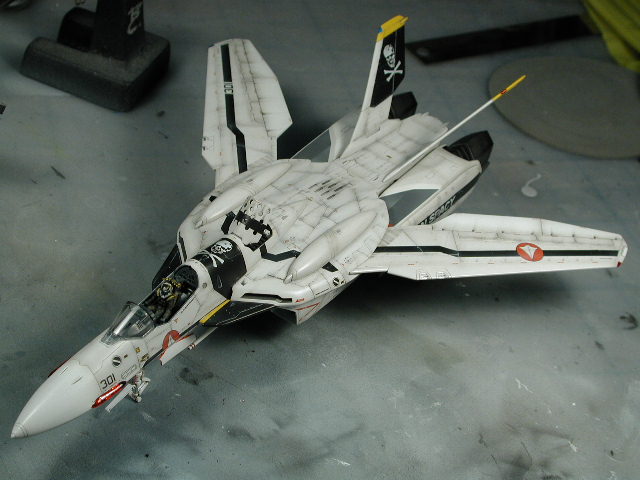
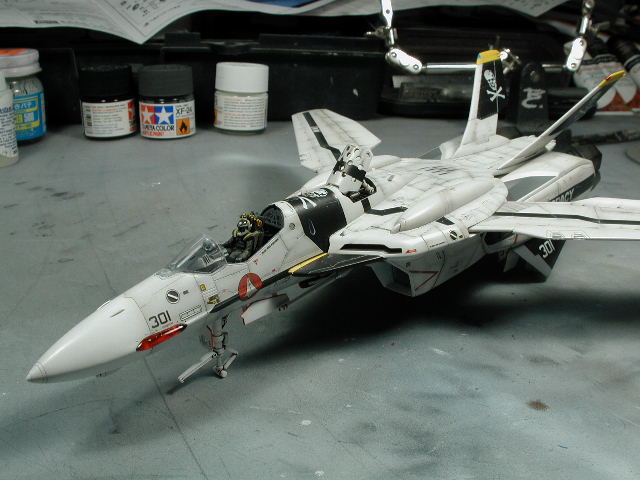
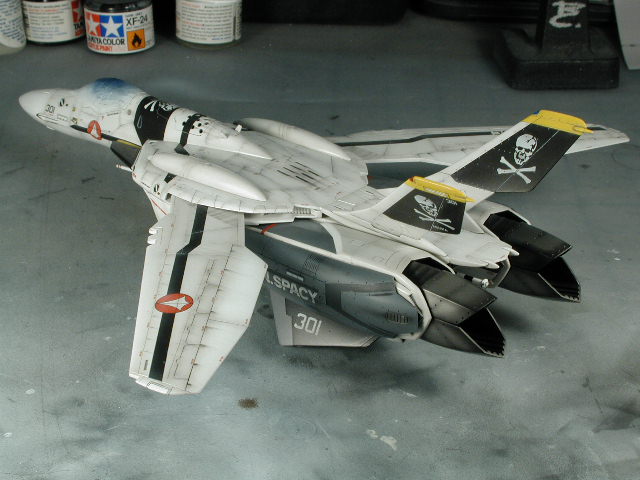
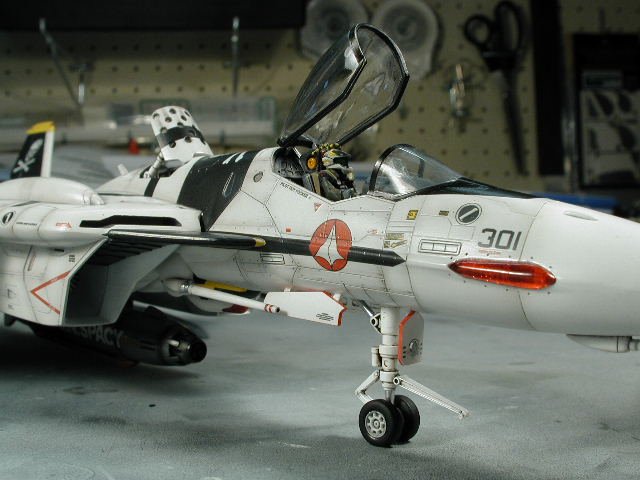
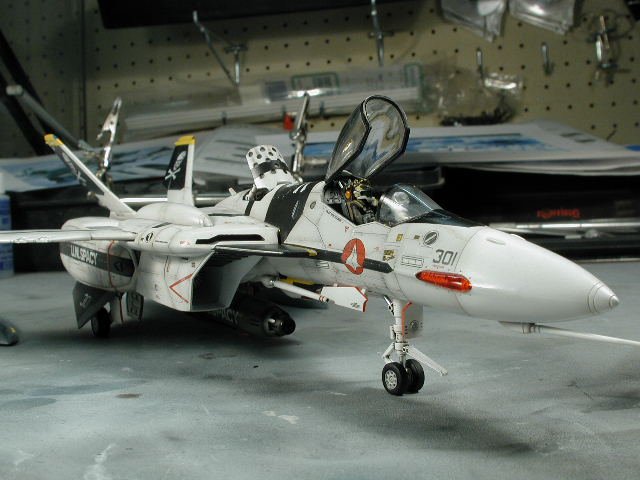
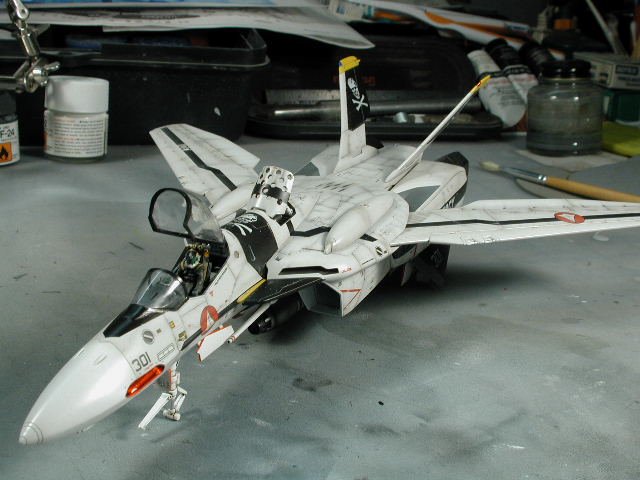
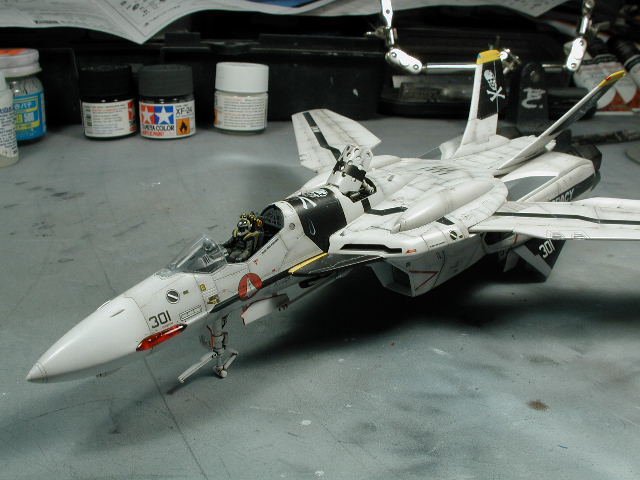
Hey everybody, finally finished!! Woohoo That's a rather long explaination tetsujin - thanks, but some diagrams or pictures would be more helpful Actually, what would be better is if you can make a few tiny double hinges - I would be glad to buy them off you (seriously though). I think it will be a while before I can graduate to building small canopy hinges - I think metal is the way to go for such a small scale, but I don't have a proper machine shop yet. I am just looking for a double jointed hinge 1/16" wide by 1/8" long - is that so hard?! Thanks for the tips on the wheels, I did sand them down a bit and it looks good (at least I am happy with them). As I feared, the sanded down surface isn't perfectly flat, but close enough. I don't tend to use the melting method on jet aircraft, like David has said before, the low PSI tires may bulge on older WWII prop aircraft (that may land on fields), but newer jets are high PSI tires and do not bulge appreciably when the plane sits on them. They do flatten out a bit though - see how you guys like my interpretation of it on the VF-0. Here's a series of shot I took on the work bench for now to close off this thread. I will post better pictures to the Model thread (higher traffic ) as before when I get a nice sunny day around here.
-
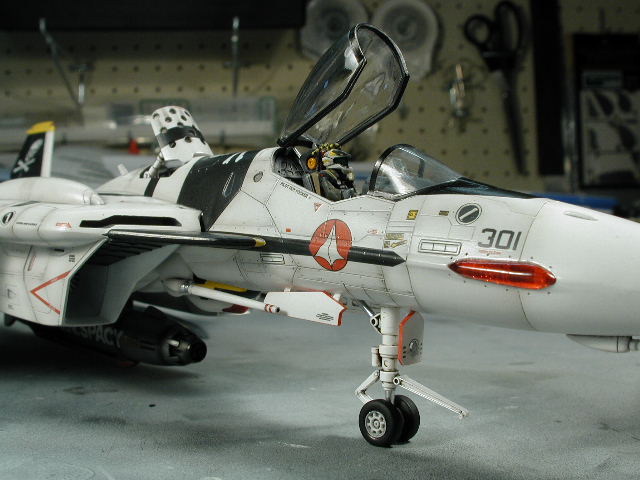
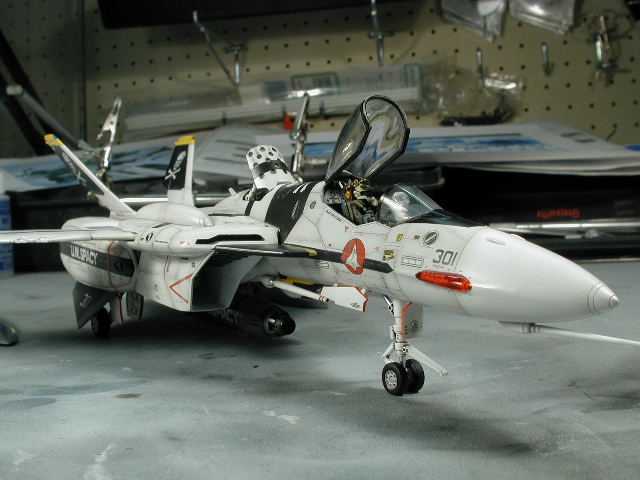
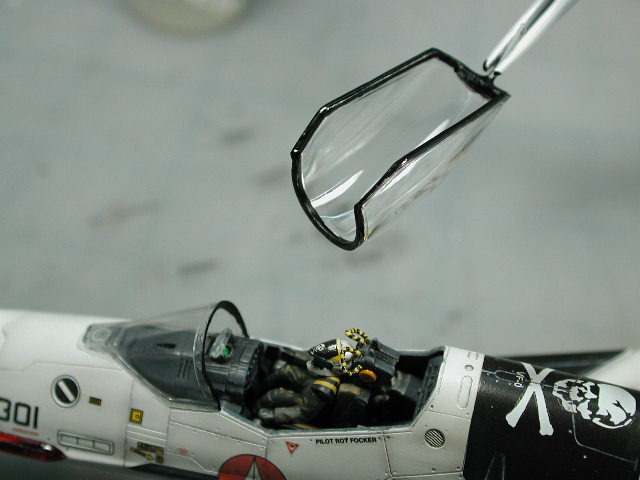
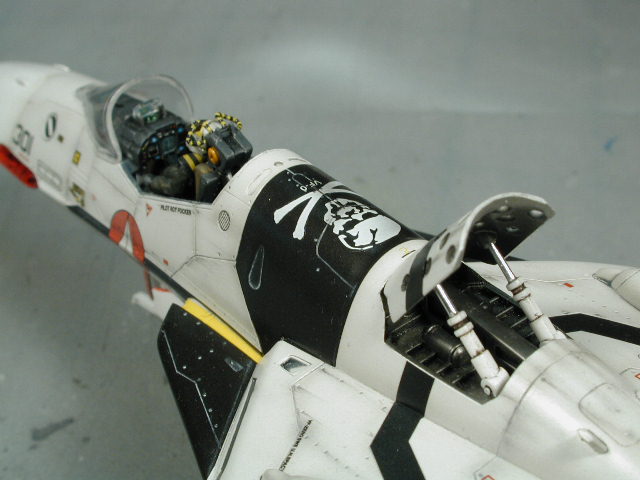
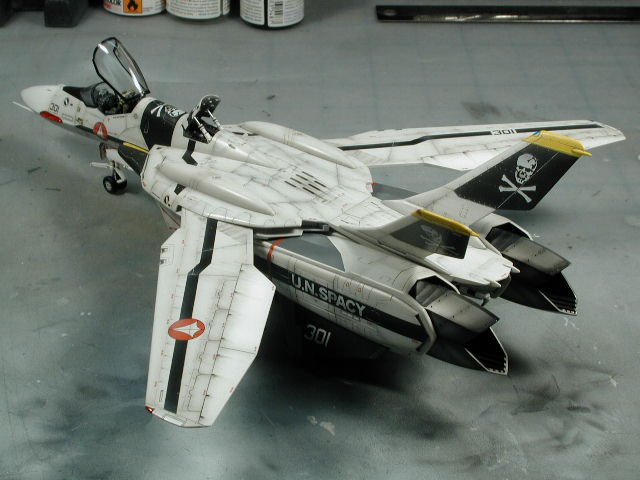
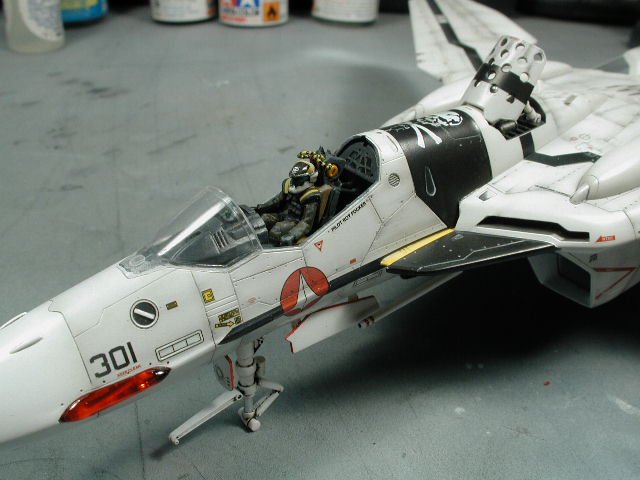
Here's a closeup shot. I ended up needing to build a "prop" to hold the canopy up in position. Luckily there was so much "gak" in behind the pilots seat that I could just jam a piece of wrapped wire (you know those twisties that hold a toy in its packaging) and it stays wedged in. I stripped the top portion of the wire, so it looked like an hydraulic actuator. It looks kind of cool, but I'd need a tweezer to remove it whenever I decide to have the canopy down. Man, I must work in a really dusty environment (my basement) - I am starting to notice a few little tiny fibres or dust that got trapped under my clear-coats (current count is 3 small fibres about 1/16-1/8" long). Luckily its not in the obvious places. Better not look too closely I hate it when I am almost finished, when I start to really inspect the hell out of it - and you start noticing little flaws.
-
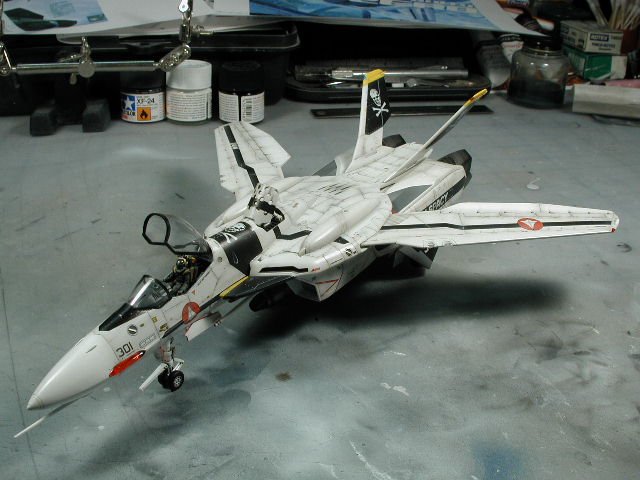
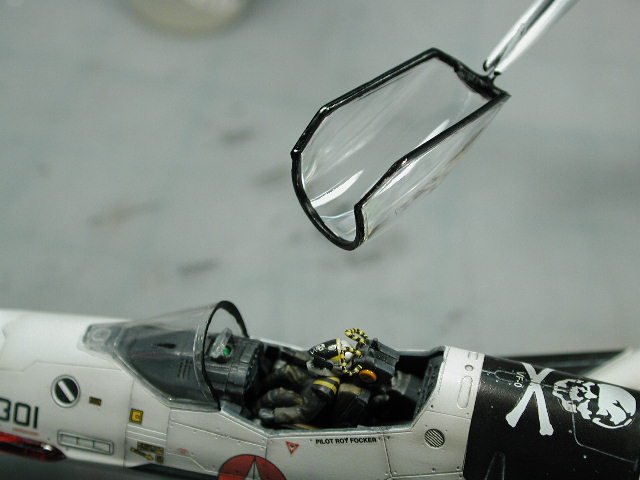
Okay, here's a shot with the canopy open. Just ignore the first part of this thread about making those damned canopy hinge - ahh, it just doesn't really work. The metal pin just doesn't have enough of a contact area to the canopy so the joint is just too delicate to take any serious force. As a result, the two pressure plates hidden behind the cockpit bulkhead needs to be pried apart so that it doesn't exert too much pressure on the metal rod to cause it to snap off the canopy. But since there is little or no pressure, the canopy doesn't stay up on its own. It looks like you should just decide early on whether to build this bird with the canopy up or down (Man I hate this!!) If anyone knows of any way around this - I'd really like to know. Does anyone make any really small hinges. This and doing the plane with the gears up or down is always a problem for me every time I approach a model!
-
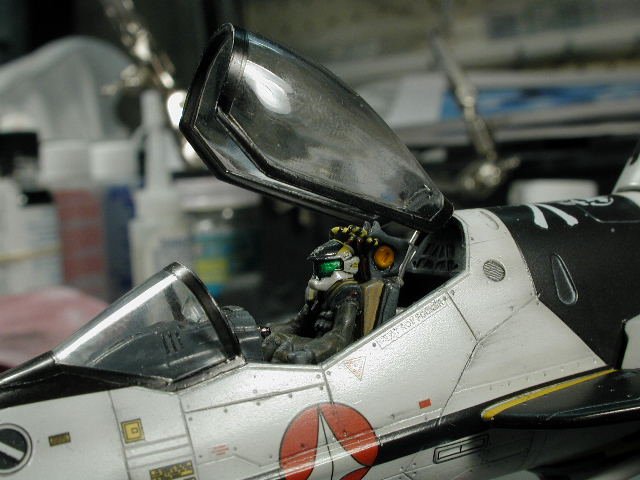
The canopy is done! I'd suggest not using any MicroSET or SOL or any decal setting solution - and getting the entire area really wet - since you need a fair bit of play time to get these intricate shapes into place. Luckily for us and thanks to Hasegawa - they fit perfectly. I'd wish they do it for all their kits - I've been spoiled - I've never been very good at painting these canopy frames. The way they broke down the pieces is perfect - otherwise it would be too difficult to get one big piece to lie down properly. I just can't get over how happy I am with these canopy decals.
-
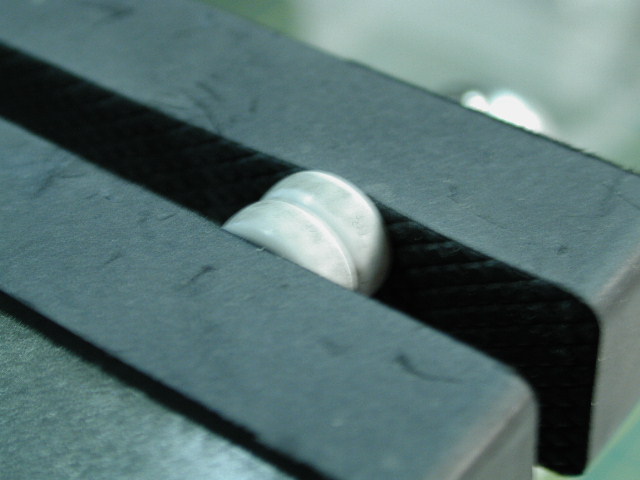
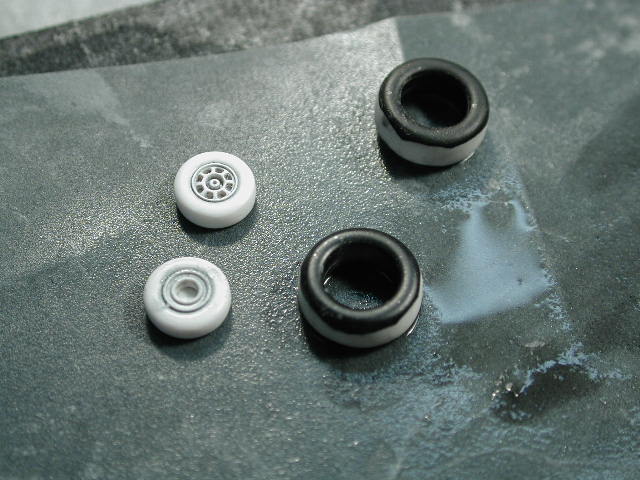
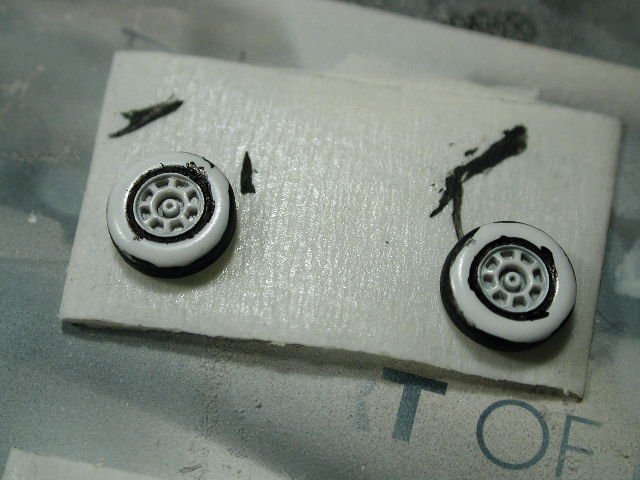
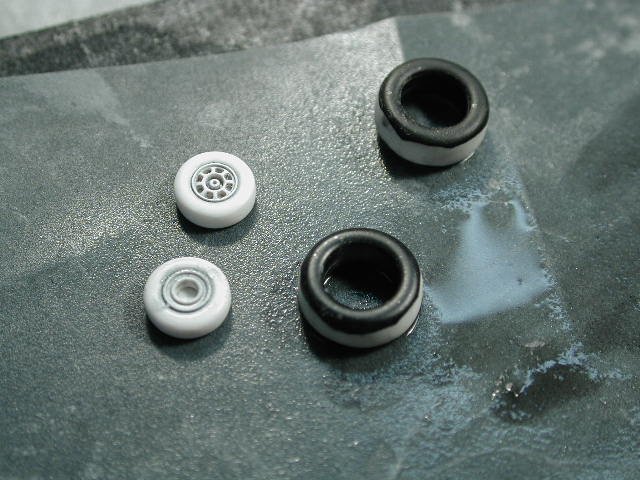
Argh, my brush painting skills suck! The black on the tires didn't turn out as smooth as I thought it would - so I stripped it and plan on redoing it. While its naked again, I thought I'd try my hand at flattening the bottom of the tires. My biggest worry before is that the flattened bottoms won't sit perfectly to the ground. I don't think that running the entire model on a flat piece of sandpaper with the wheels on will do it either, since I think the landing gear struts will just snap off due to the lateral shear forces. The best way I can think of is to sand the tires while they are off (pictured here in my vise), with a hard/rigid sanding block (to get it perfectly flat) then put the tires on and rotate them to land flat once they are on the gears. This assumes the rear tires don't have much of a camber (unlike F-16s). If there's a better way to do this than I would really like to know. And of course - re-paint

-
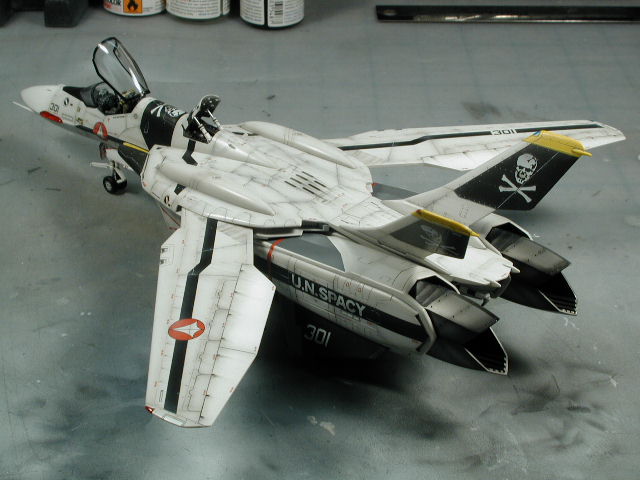
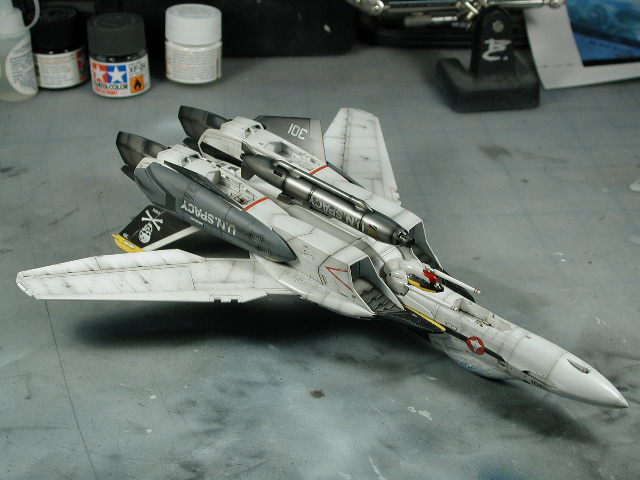
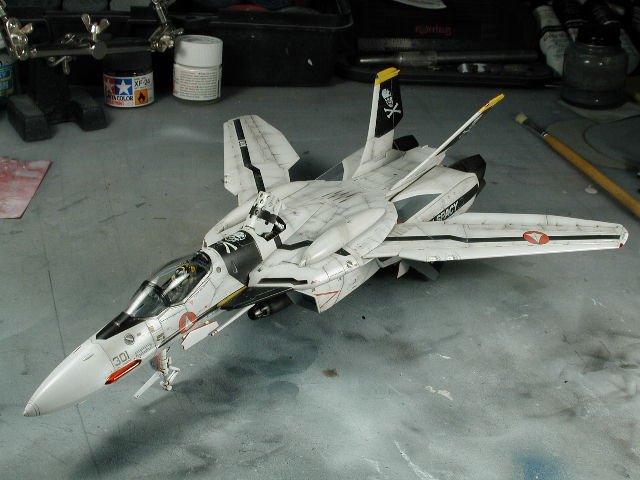
A parting shot till tomorrow.

-
I dipped the canopies in future floor polish and let it dried. I then painted the edges and inside rim in flat black. Since I was going to display this bird with the canopy up sometimes, its pretty important to paint the interior flat black, only the exterior frame is provided in decals. Which would be one of my last steps tomorrow - along with glueing that lower pilots tube back on (arggh )
-
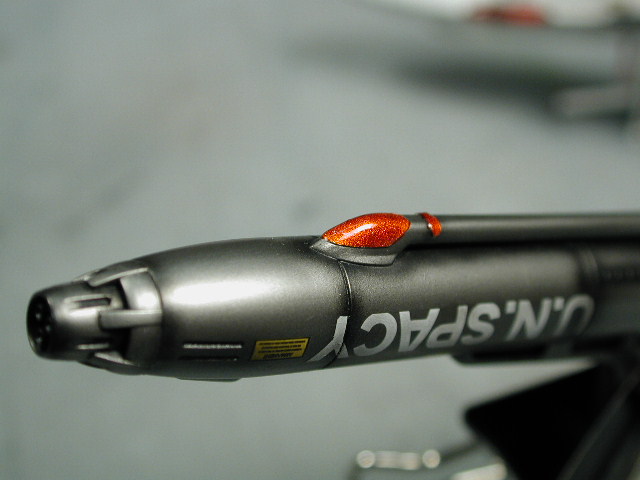
I also hand painted the lighted areas silver first, then after that was dried, I painted over that with clear red - the silver makes it reflect better.

-
Here's the shot done with the flat black paint. Once its dried, I rub it a bit with my fingers to get some of my natural oils on it, it gives the flat black a bit of a sheen that really looks like rubber - plus it blends where the marker and flat black separates - the marker is a bit glosser.

-
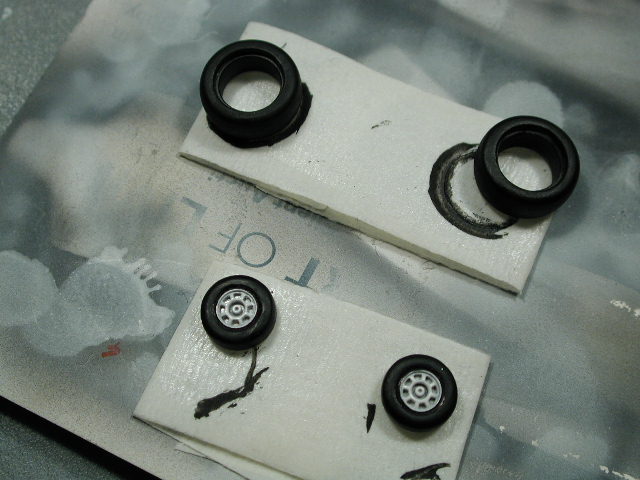
Everyone always ask how to paint the tires with a good separation between the hub and rubber. Well, a lot depends on the molding of the kit and whether they molded a strong line separating the hub and rubber. I usually paint the hub first, and do a light grey oil wash to pick out the details. Then I use a black gundam marker and trace the line separating the hub and rubber - usually if the seam is deep enough, the pen (or you can use a Micron 005 pegment fineliner) tip just falls into the groove. Now when you paint the flat black, you don't have to paint right up to the hub, just paint up to the black. All the blacks blend together anyways.
-
Okay the wheels. I needed to give the edges of the wheels a good sanding, there is a seam running right down the tire portion of all of them.
-
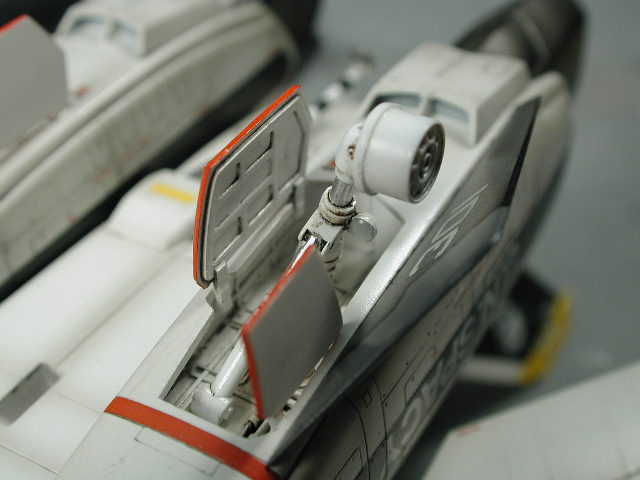
Funny, when I removed the brake, there was all this dust and debris that had blown in through the holes. I had to give that area a good scrub with an old toothbrush before I glued the actuators in. I just love that Tamiya marker on the bare metal portion of the actuators, I just wished it came in paint form.

-
I also positioned the airbrake - I glued it in with this WeldBond white glue, its somewhat elastic when it dries, and it dries clear. It gives some work time unlike crazy glue, so I can properly position the brake to make contact with the two actuators.
-
I finally took off the mask and canopy. I carefully sliced the mask and fuselage all the way around to break the seal first - this helps eliminate any chance that removing the canopy can tear away at the paint.
-
I added a drop of white glue to the landing lights - it should dry clear, and I would dab it with a bit of future once dried.

-
I also glued the gears in, paying careful attention that the forward gear is perpendicular, and that the rear gear hubs are perpendicular (the rear gears should splay out a bit).

-
Here's a shot of the landing gear doors crazy glued in. The forward doors fit really well - almost snaps into the indents Hasegawa provides. The rear doors don't really fit that well. The big square holes are nice, if only there were equally big square pegs to go into them! Unfortunately, the gluing surface is only at the edges of the body panels, so not too much holding them on there. We'll see if the crazy glue is any better than normal glue at these doors - its faster though, but I doubt that they would hold up better.

-
Ahh, Stamen beat me to the punch. Hope thats okay with ya HelloHikaru - I don't have the SV51 kit.
-
Hey thanks all for the kudos! It is always appreciated. Please, I want to see as much modelling going on as possible (of all skill levels). It will get me through the dry patches when I work and can't model (I can live vicariously through you guys ). If anything, I would like to encourage as many people to start or start up again - its a lot of fun especially when you try something out for the first time and it works! I learn so much from all of you - thank you. Part of the reason I share my build ups here is to get feedback - I find I wouldn't of thought of new things to try or details to emmulate if I were to work on my own. Sometimes I find that I get into a rut and like to stay safe (don't want to ruin the precious model - especially when your nearing the end) and only advance when there are problems or errors that I have no choice but to try and solve. I need to see your stuff and learn from you and others - I don't function well as a hermit Especially post problems, maybe we can all help out, but we can certainly learn from them and either avoid them or use the solutions. I love my models so much more after I incorporate all the input I get here on these boards. For those of you following my work, I found that with each model I have improved my skills, if any of you remember my first foray back into Macross (or modelling after a long University/Work break) was that resin VF-2SS which now I am a bit ashamed to put next to my sucessive pieces of work. This VF-0 is definitely my proudest. I love to sketch and paint, so now I feel as though I am doing both on the models I build! Argh!! your right Mule!! @$%! I didn't realize. Well, the wings ARE in - I don't want to risk it by taking them out - its a really tight fit. I would suggest (maybe in my next round when I build another VF-0 again - doubles are really low on my list) at a stage before I glue the top/back fuselage in, I place the wing in the proper position, and lightly trace out the profile/edge of the sweep in both positions (flight mode fully swept and battriod mode full swept) it would be interesting to see a division in the sweep marks. I am definitely going to do it on my next VF-1 (I might do Roy's VF-1S to put beside this baby). Hey Grayson72, I used around 75:25 (Dark Grey: Neutral Grey) - just eyed it. Knowing that I will lighten it up at the end after the decals with a thin coat of the light grey/white I used for the fuselage. The final effect should be closer to the decal grey of the forward part of the ventral fins and the grey patch where the swing wings sweep. Hey David, I don't really do anything special gluing the landing gear parts. Although I am going to try using crazy glue (instead of cleaning off the paint and using regular glue) this time around. I just hold the gears straight until they set. I usually wait till the gears set before I glue the tires on - that way I glue the tires and set the plane on them - it kind of self levels. I put something up against the front double wheels against each wheel on both sides so that they don't splay out due to the weight. Well, I'm off to do the landing gears, and maybe if there's time, un-cover the canopy!! yaaa!
-
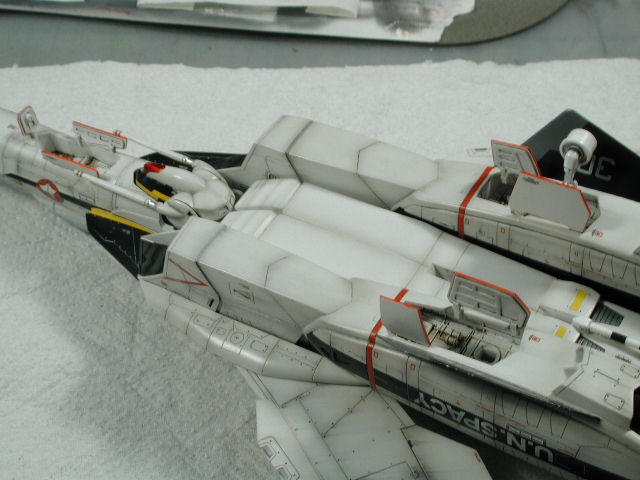
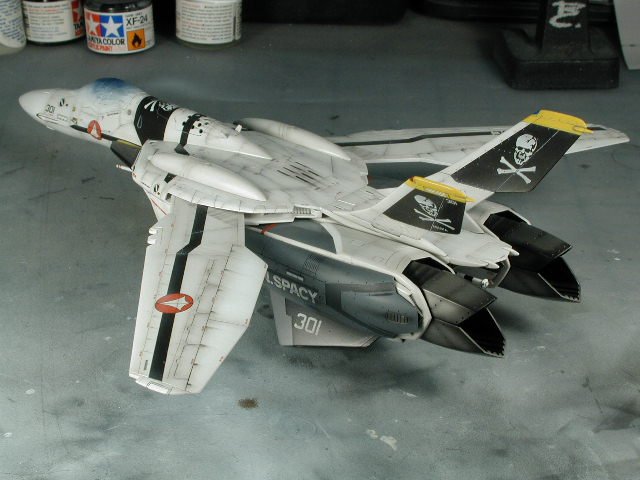
Its funny the packs don't have the perfect contour to fit onto the legs - its notched out for the ventral fins, but doesn't quite make contact properly. Its hardly noticeable though. Maybe I get to peel back the canopy tommorrow or the landing gears and doors, I don't know which yet.
-
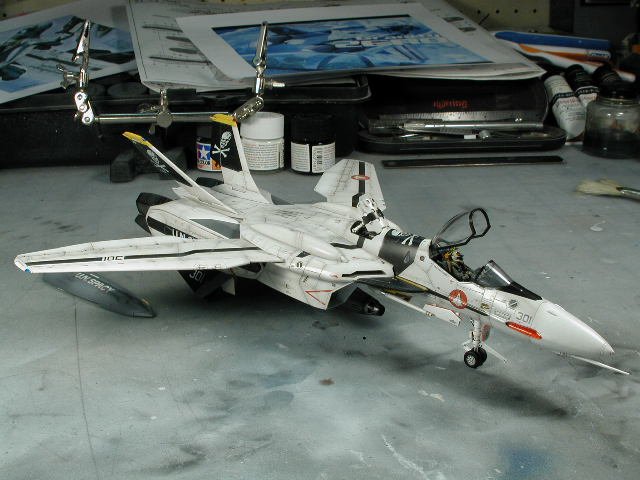
Glad I used those magnets!! Hmm, in flight mode looks better all the time - excuse me while I zoom it around the room a bit