

wm cheng
-
Posts
4294 -
Joined
-
Last visited
Content Type
Profiles
Forums
Events
Gallery
Posts posted by wm cheng
-
-
That is amazing @tekering - such fine detailing, is it a resin printer that you're using?
You guys are so industrialist and have built so much! All of it looking so great.
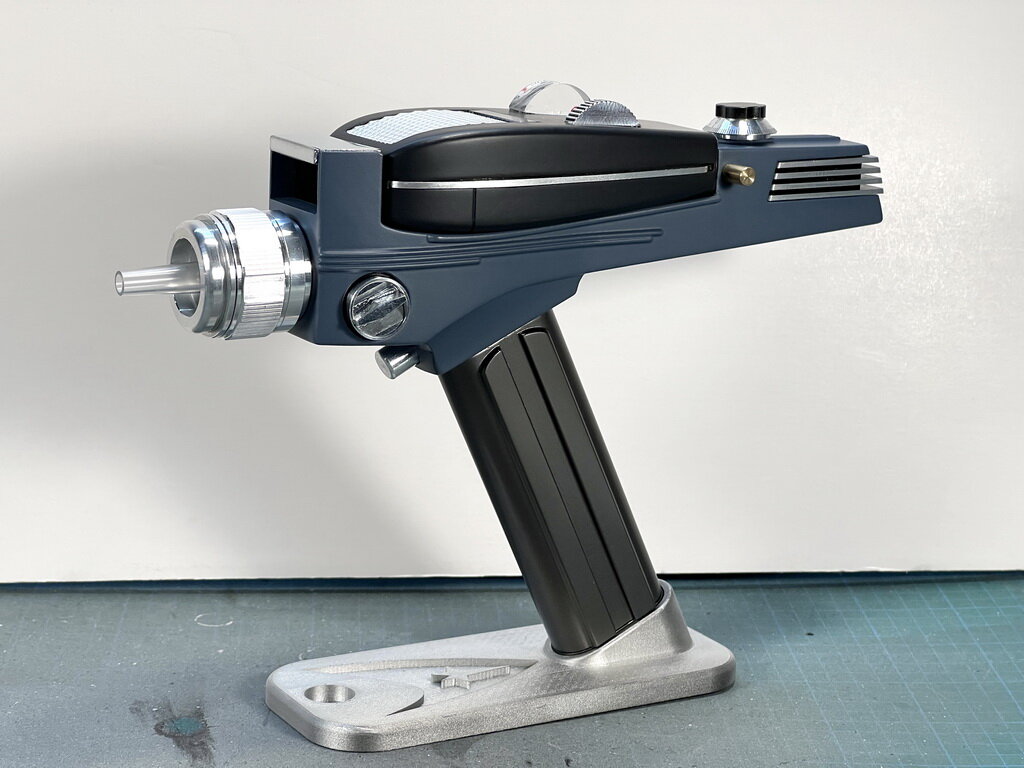
I've just learned to use our PLA printer at work and that's this 3D Print of the TOS Phaser. It's finally finished, the thing I hate about PLA prints is the thing I hate most in modeling... SANDING. It's so much sanding which is the part of modeling I hate, and there is so much sanding to do on PLA prints. Your paint finish is only as good as the surface you've prepped for it and I learnt the price in my youth of speeding ahead to painting when I've not properly prepped the surface.
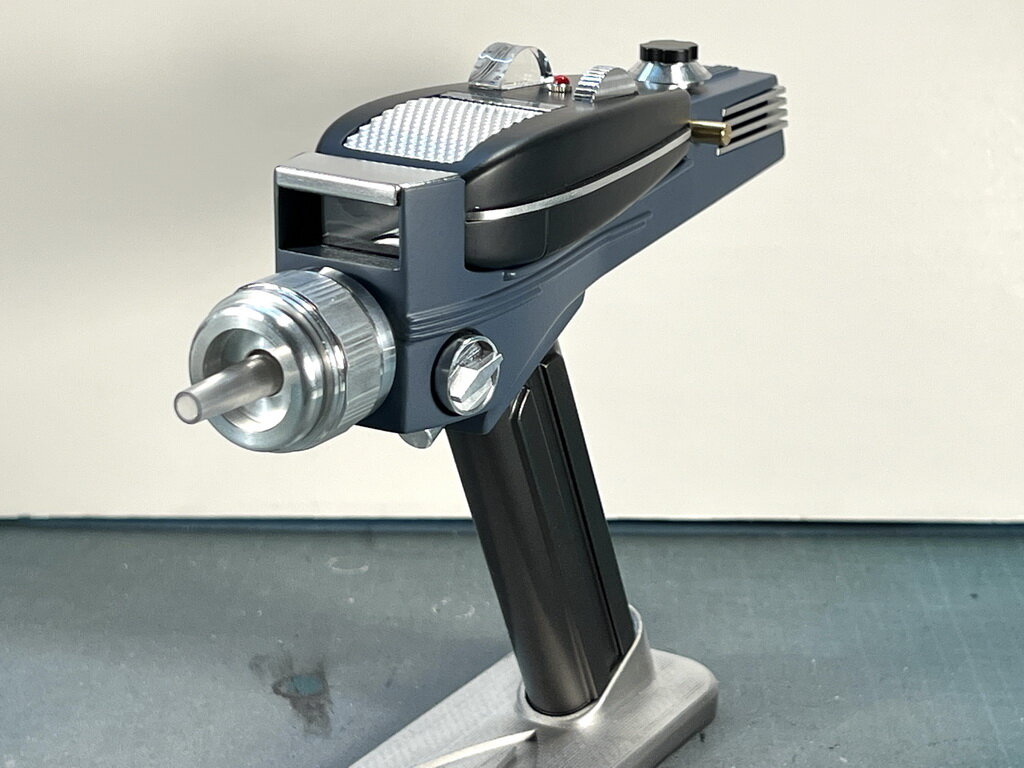
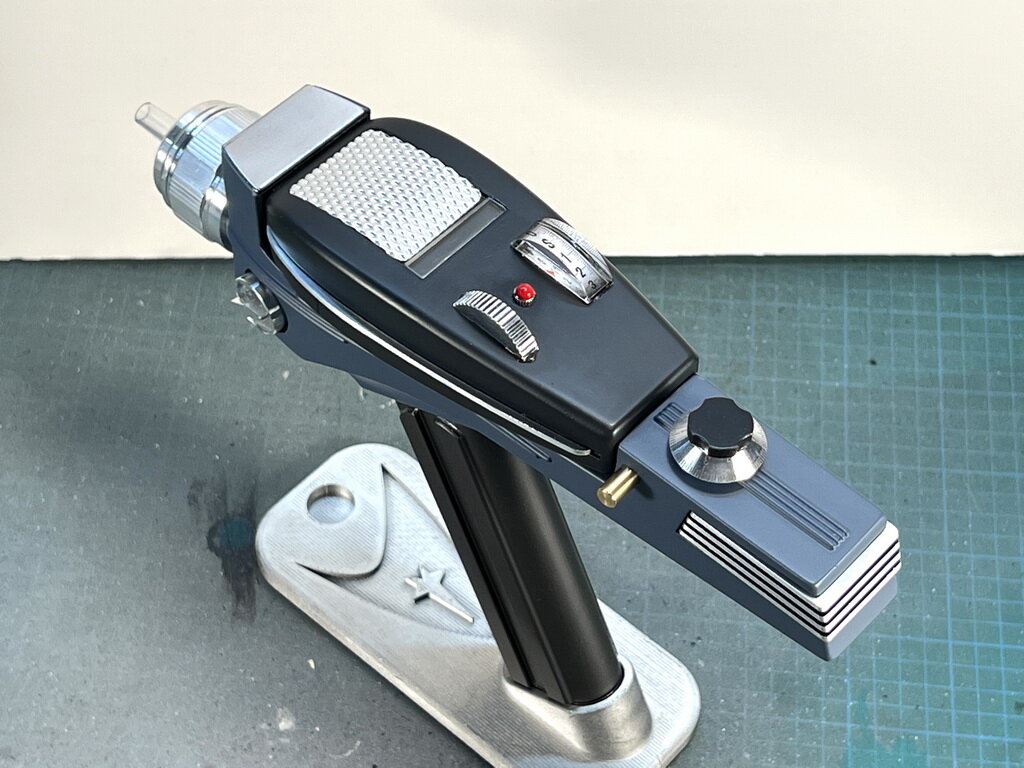
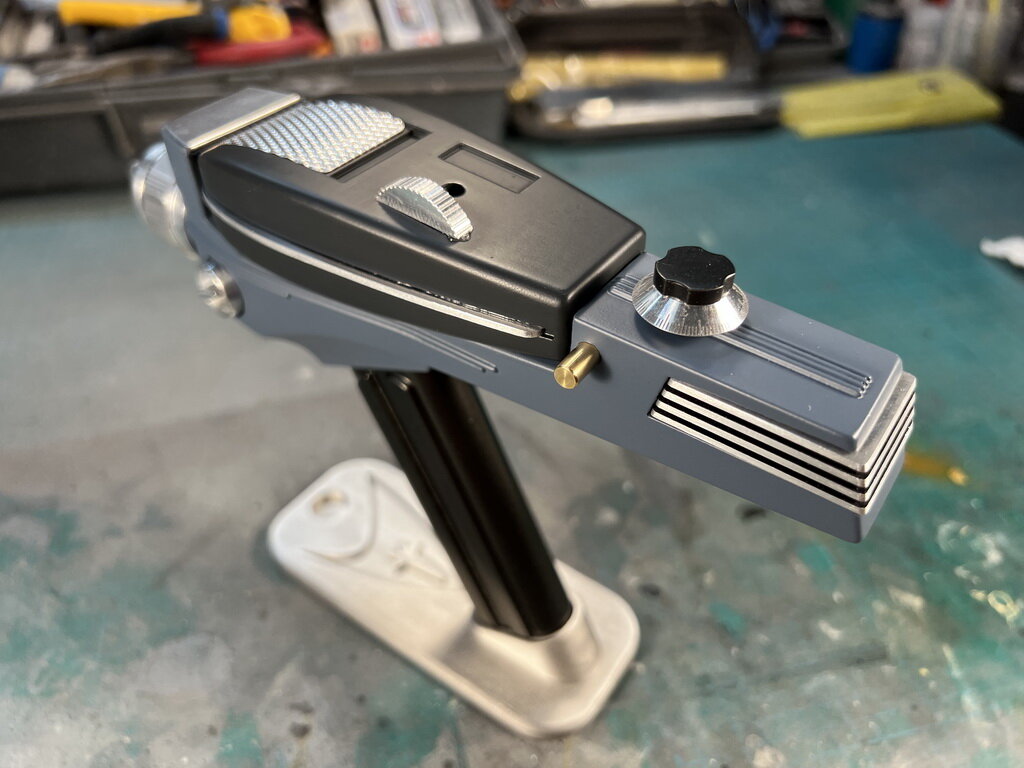
Anyways, I can finally call my 3D Print TOS Phaser finished with the metal parts I got from eBay. I missed out on the Wand company phaser back then, now that I got my Wand company Tricorder, I felt I had to complete the trifecta of the Tricorder, Communicator and Phaser. It's too bad this is just a static prop and nothing lights up and I have to make pew pew pew sounds with my mouth 😛
-
omg @pengbuzz - THAT'S AMAZING!!! I can't believe the stuff you create from scratch/masking tape! It's especially nice to find out about your Dad and the background behind your masking tape creations (I've always wondered why you chose that particular medium). It's so much more meaningful. How did you get the clear parts for the canopy to follow such good profiles?
-
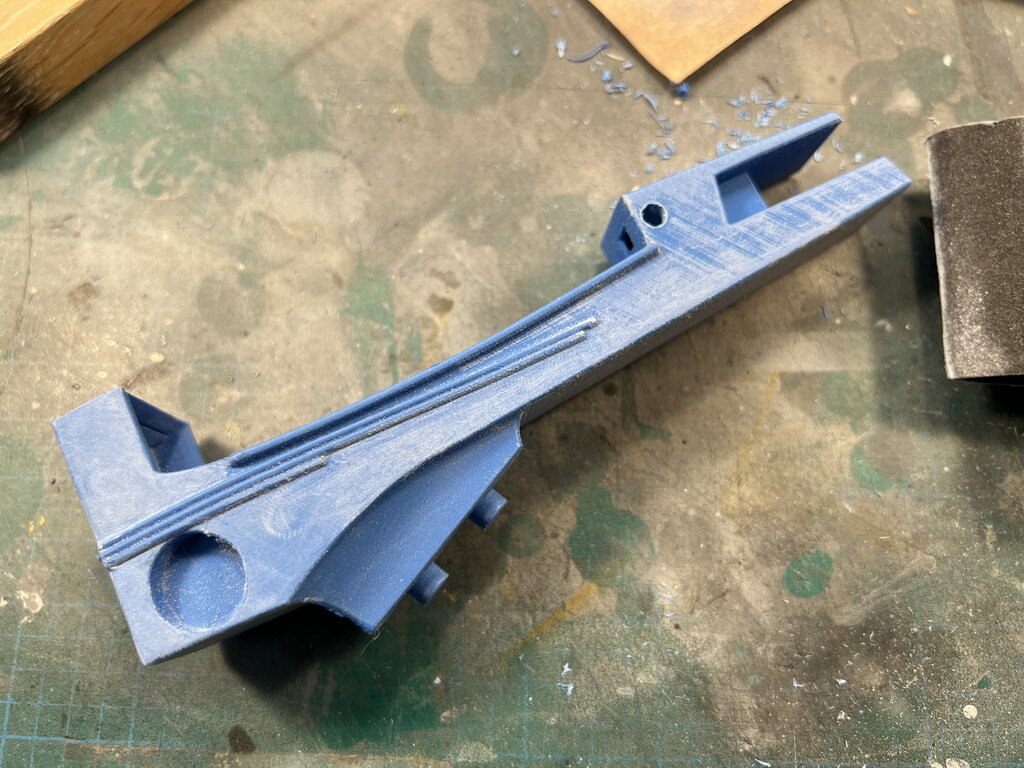
Since I have a bit of time in between shows now, after the VT-1 I decided I would try my hand at a 3D printed prop. Just before we finished my last gig, I had a little time to learn how to 3D print with our printer at work and downloaded and printed a Star Trek TOS Phaser. I just got the amazing Wand Tricorder and I had their Communicator from before, but I didn't learn about them till after their Phaser was sold out and now they are going for crazy prices on eBay. So I thought I could learn 3D Printing and get some decent metal aftermarket upgrades for $150 and get a half-way decent finish to my landing party toys. Unfortunately they don't light up and I have to supply all the pew pew pew sounds

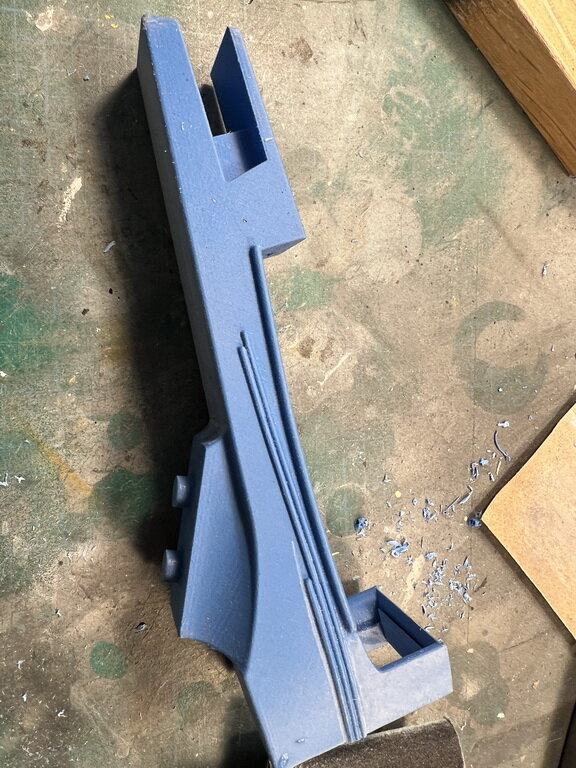
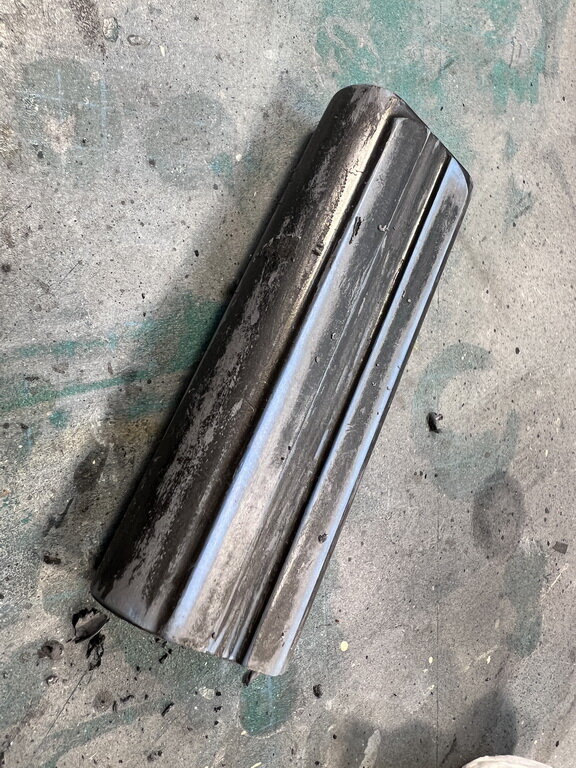
Someone mentioned earlier about 3D prints - this is my first try and its a PLA printer that I used (A decent one) but not a Resin with are much better but much more involving in the finishing and drying of the print. Unfortunately, with PLA prints, there are very fine print lines / kind of like stepping which you have to sand away. I HATE SANDING - its the worst part of modeling for me. But I have enough experience to know that the final paint job is all about surface prep - the more time you spend prepping the surface, the better it turns out in the end painting stage. So here are the bits and pieces...

Even though the print looks great to the naked eye, I know there's a tone of sanding to be down even before the primer!
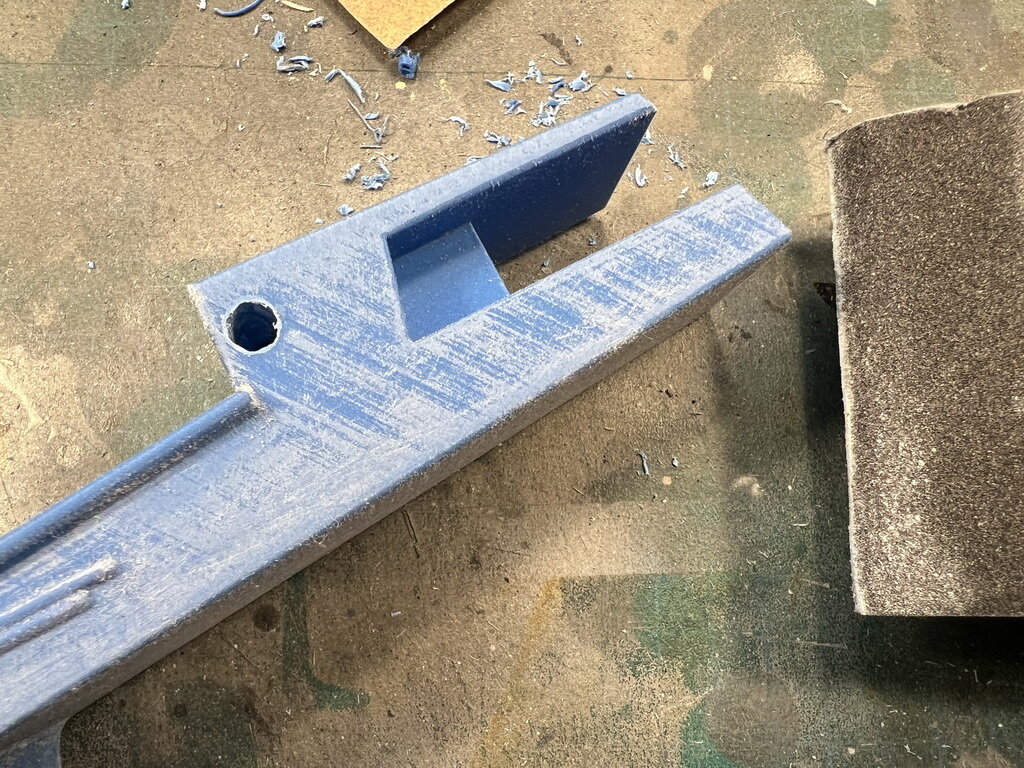
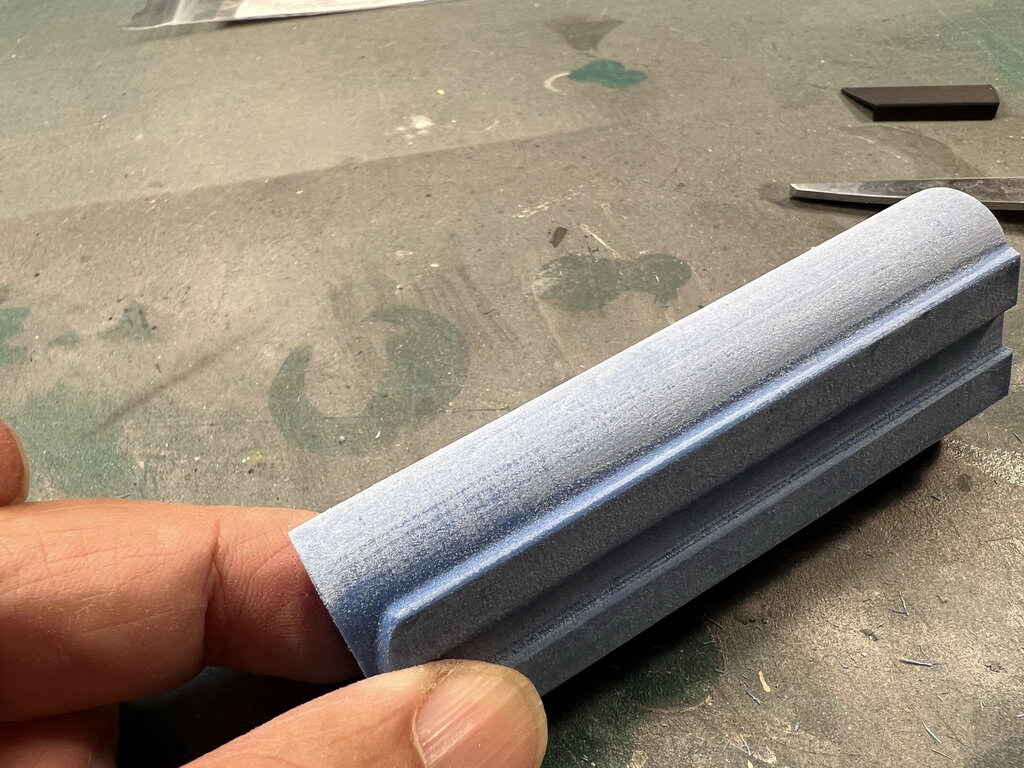
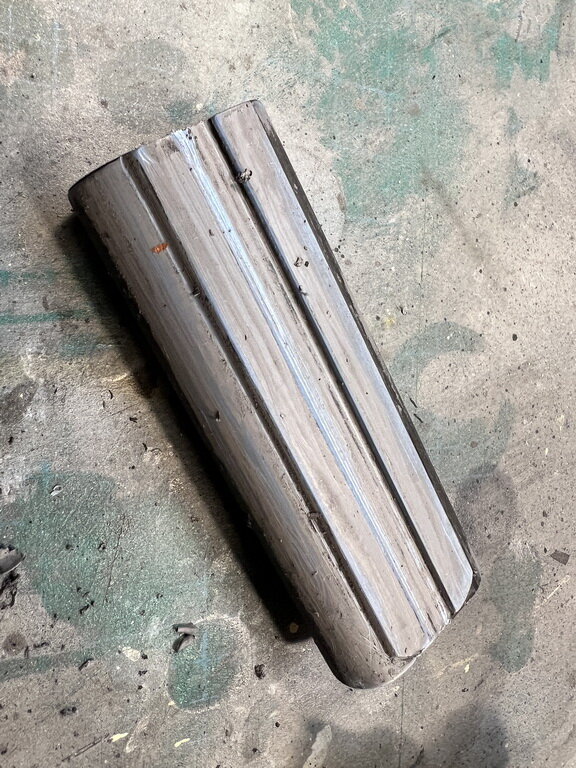
I find PLA material harder to sand than modeling Styrene plastic, it needs a harder bite and goes through more sandpaper than the softer Styrene/ABS plastics. It does leave a fine dust everywhere that you need to vacuum up (or you'll get killed spraying and having it pick up onto the paint surface) and you should wear a respirator paint mask to make sure you're not breathing this (probably toxic) stuff into your lungs.
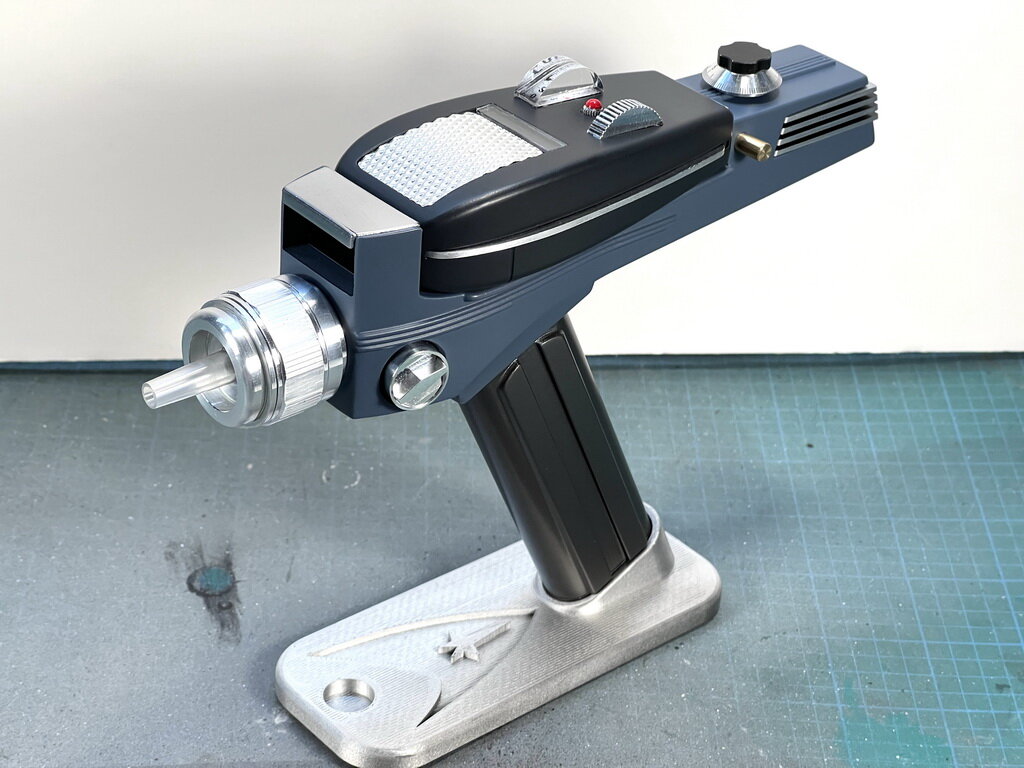
Here it is primed, I used a Krylon spray can hoping to get something more substantial and robust than my modeling primers because I'm probably going to be handling this more like a toy and looking at it like a model. I would spray, then sand down any blemishes with 2000 and working my way up to 6-8000 grit to get a nice smooth finish and spray again. Hardest part is leaving it alone overnight or a few days to make sure the primer cures before touching it again.
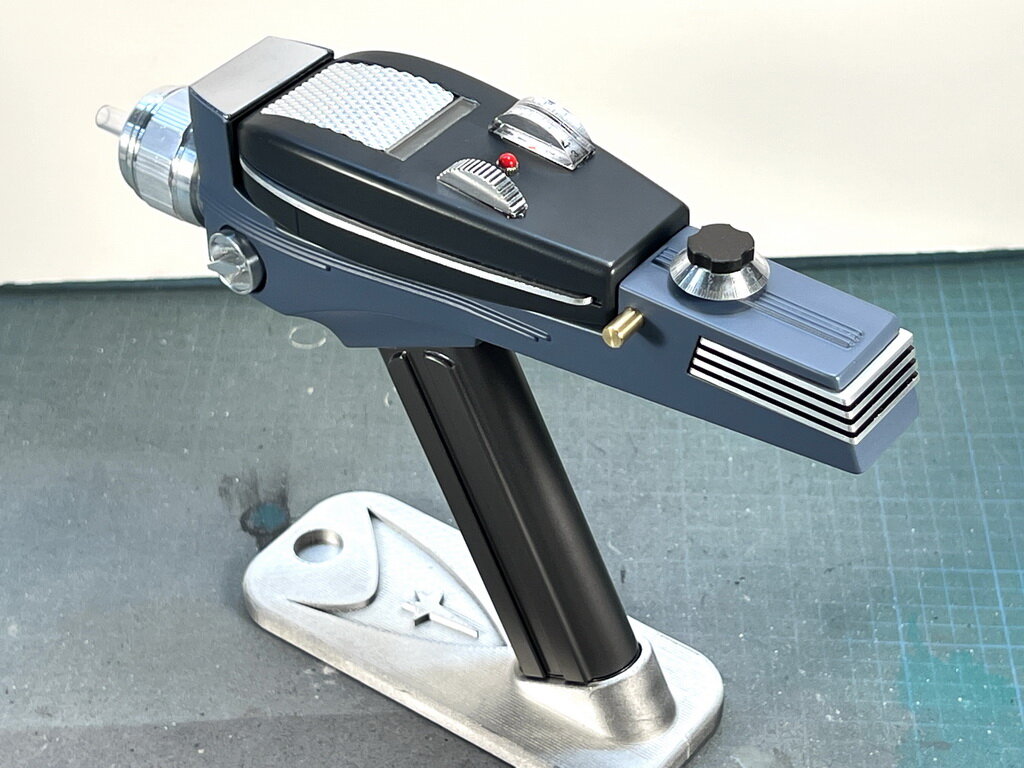
Unfortunately, there was another painting disaster where my final clear coat (Mr. Color lacquer) went over top of my Aclad metalizer (phaser handle) which was over an Aclad enamel black gloss which was over Krylon grey primer where the final clear coat, reacted to the enamel black gloss under the Aclad metalizer (I though the Aclad metalizer lacquer was enough of a barrier but it wasn't). I tried to sand it all off to start again, but someone the grey primer underneath it all also was affected and turned gummy and clogged up all my sandpapers and couldn't be removed. I spent days at it and it was still a gummy mess. I ended up starting from scratch on the phaser handle again with another one of my 3D PLA prints, but this time I didn't use the enamel gloss black undercoat!
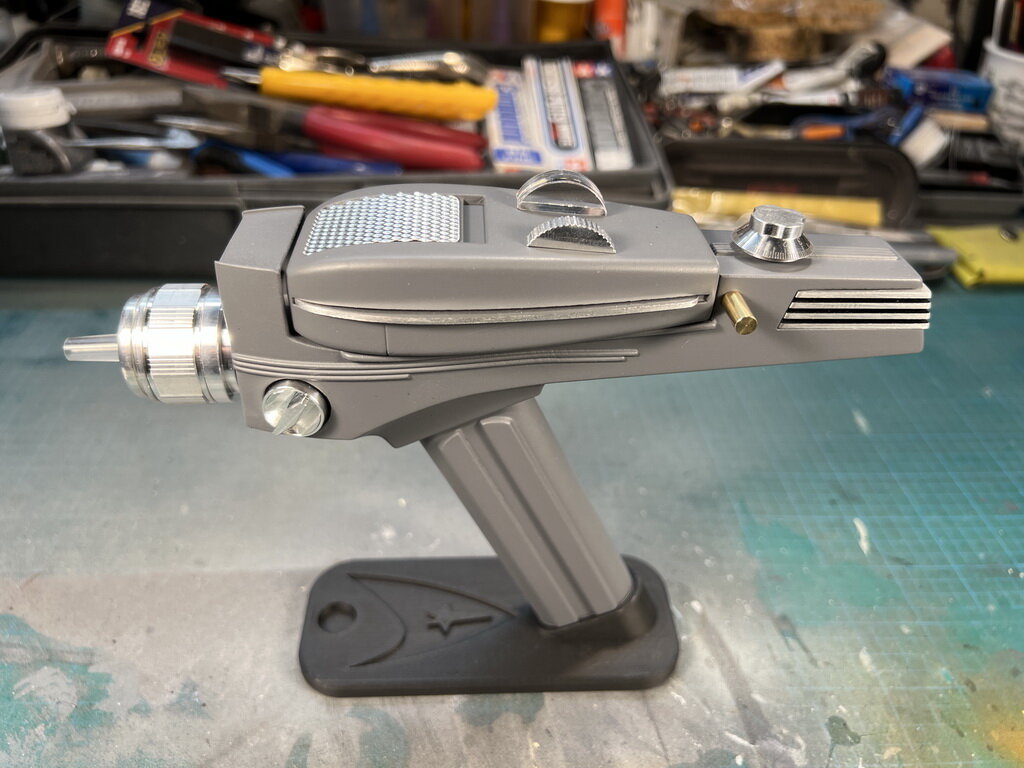
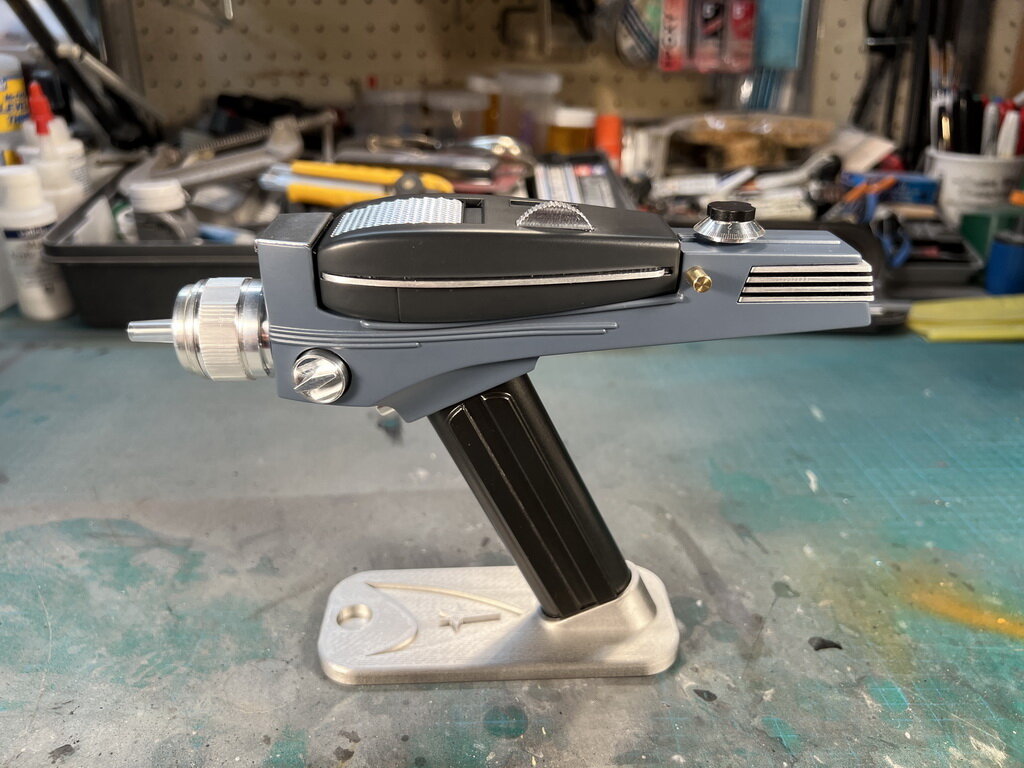
What a mess!!! The weird thing is I used the same colour and when I re-sprayed it without the black gloss undercoat, it turned out too dark. I put in magnets to hold the P1 phaser onto the P2 body and magnets at the base of the stand and base of the phaser handle to I can take it off the base.
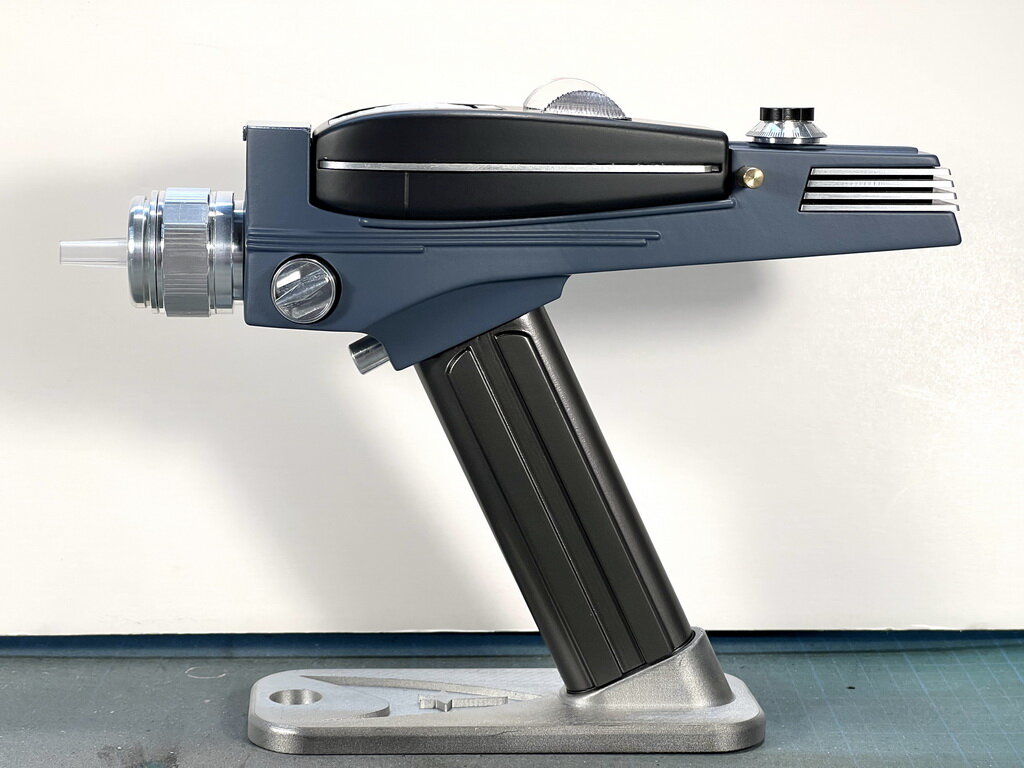
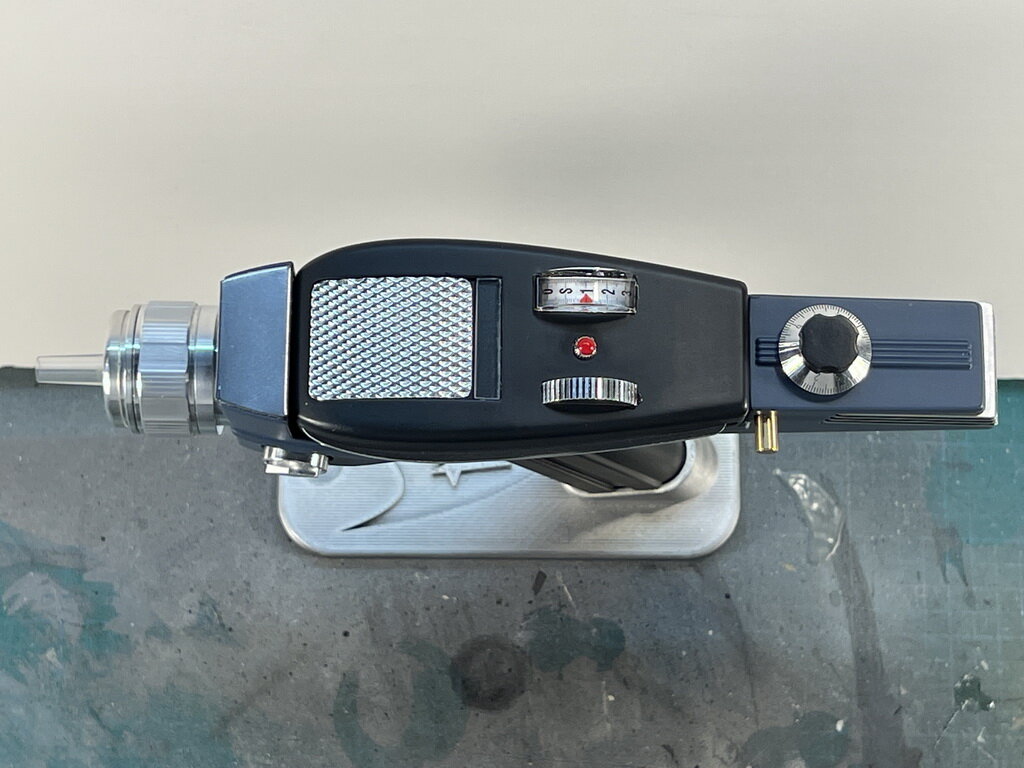
Here is where it is for now, I am going to have to re-spray the handle with a lighter steel Aclad metalizer colour and I'm missing the top jewel in the watch crown and the acrylic half-moon until I print a scale with power settings graphics to glue on top. It's also missing the darkened plexiglas front which I have to find somewhere and cut into place, but its 80% there after 2 weeks.
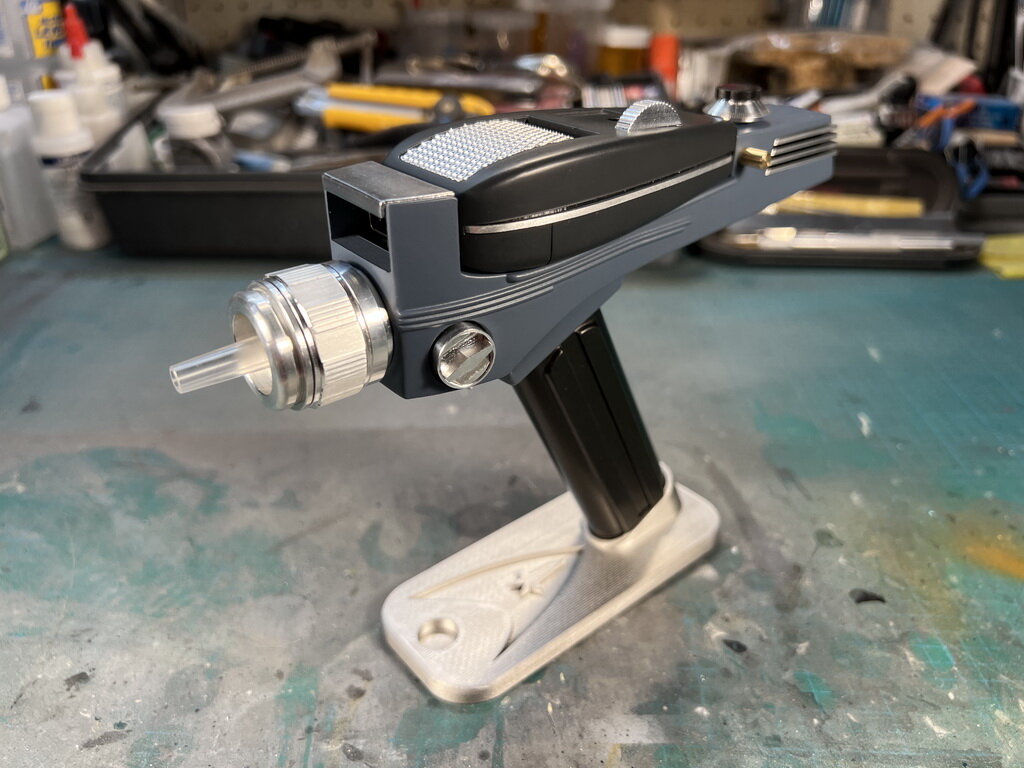
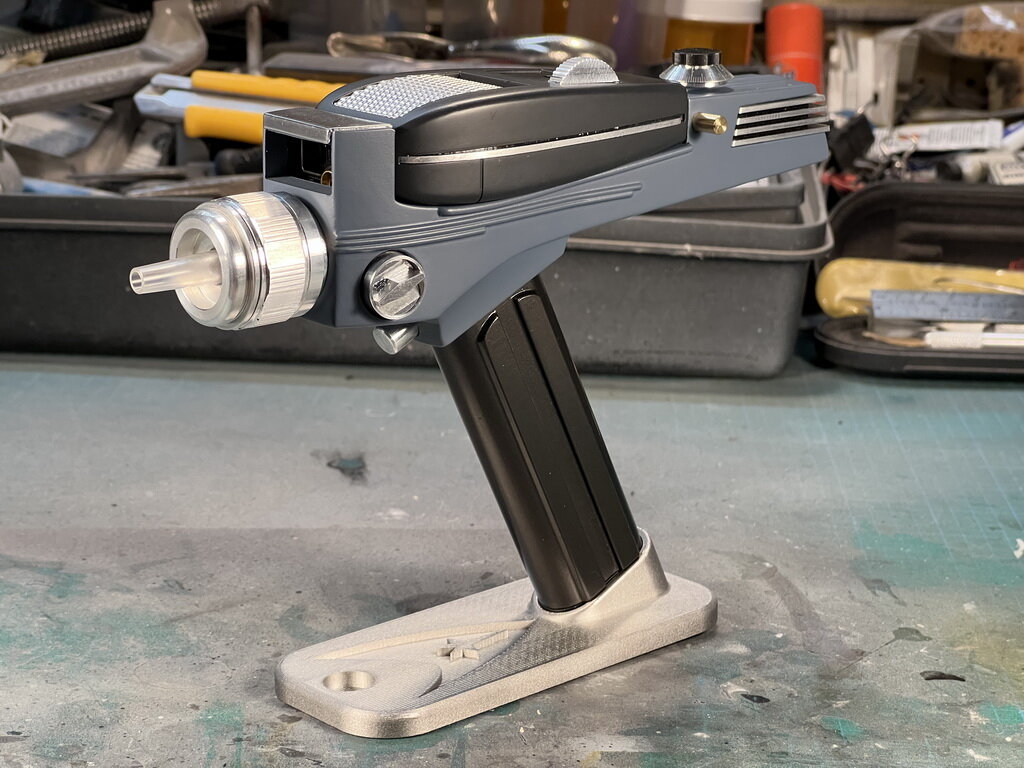
Oh, I didn't work on the base at all, that's just a straight PLA print and I just sprayed directly onto it without primer or sanding.
-
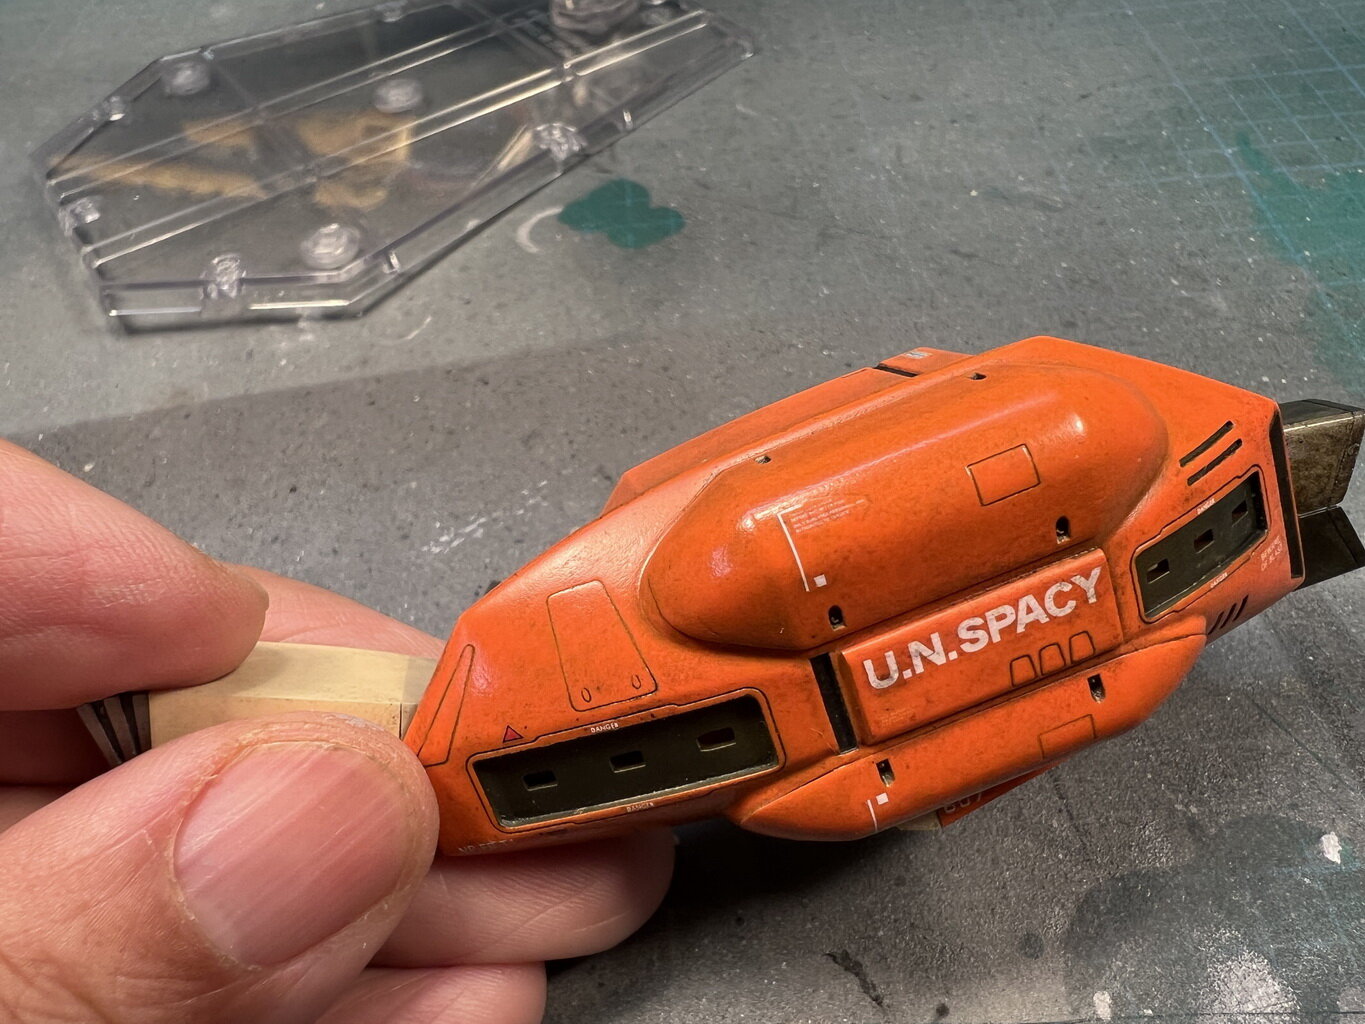
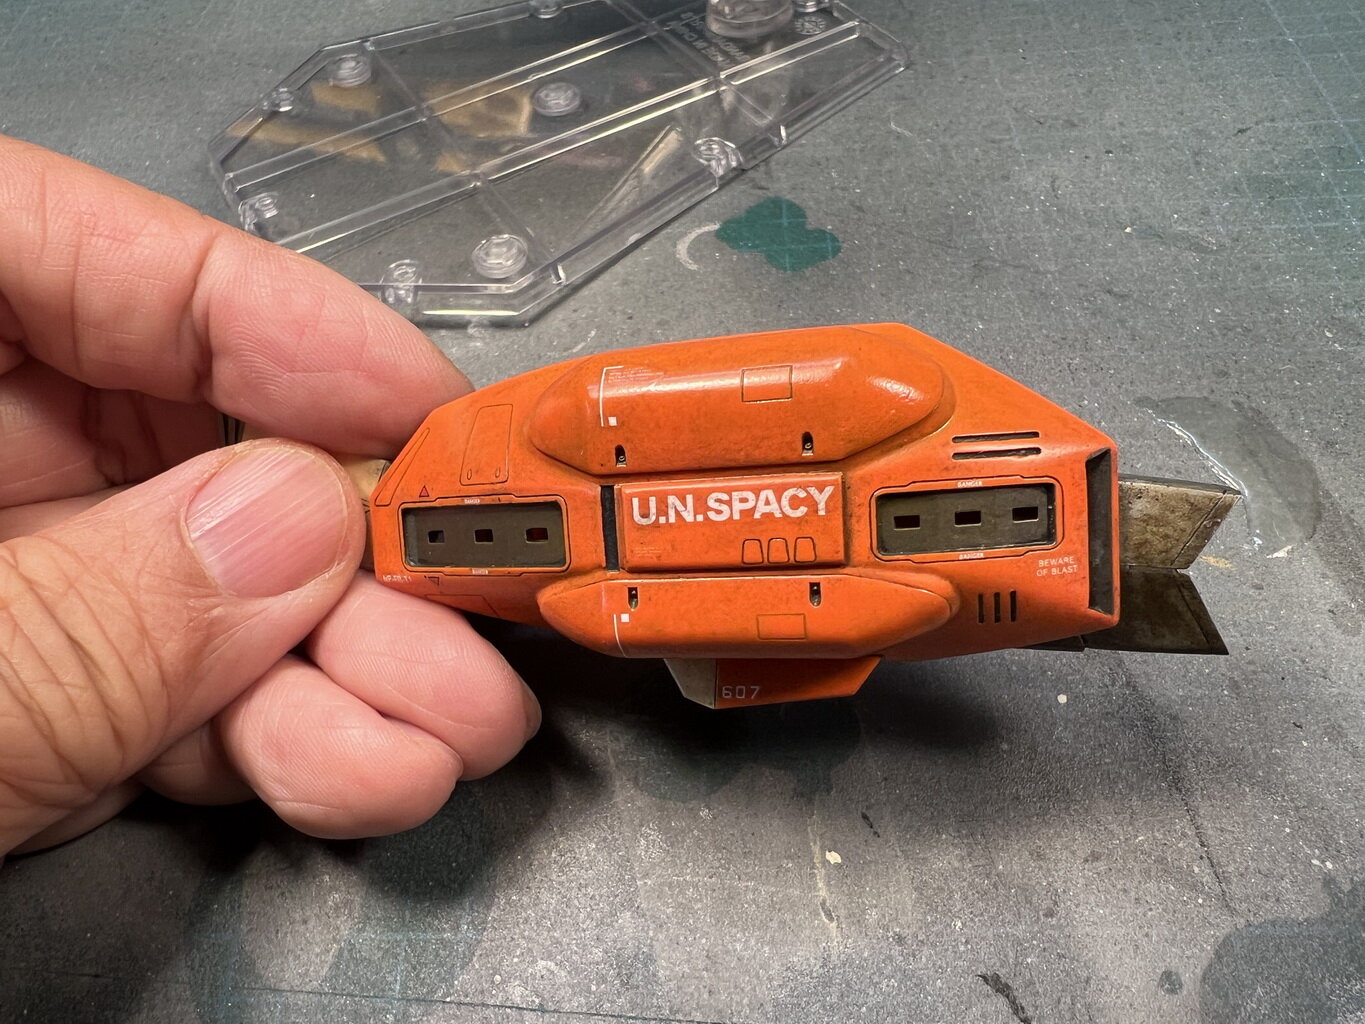
Wow that looks amazing @Papa Rat! Congrats. You might want to do a bit of a lighter dry brushing around the edges of the plates/panels and a silvery chipping in the edges to compliment your excellent darker weathering. (The Zentradis weren't known for their upkeep :P) I love the look of these old kits and they really captured what was in my mind as a kid.
I love Interstellar @Thom - can't wait to see what you do with that kit! It looks to be a bit of a bear - American kits tend to be gappy (I think we've been spoiled with Japanese kits)
-
Wow! That looks amazing @Papa Rat Great weathering too!!! Might be a good one to test out that Acrylic Ink stippling technique.
-
4 hours ago, Gabe Q said:
Thank you @wm cheng for the lesson in perseverance! The VT-1 looks great! The canopy is crystal clear. You'd never know there was a huge moldline there. The paint job looks amazing. 10/10 After all these years you're still the master model builder around here!
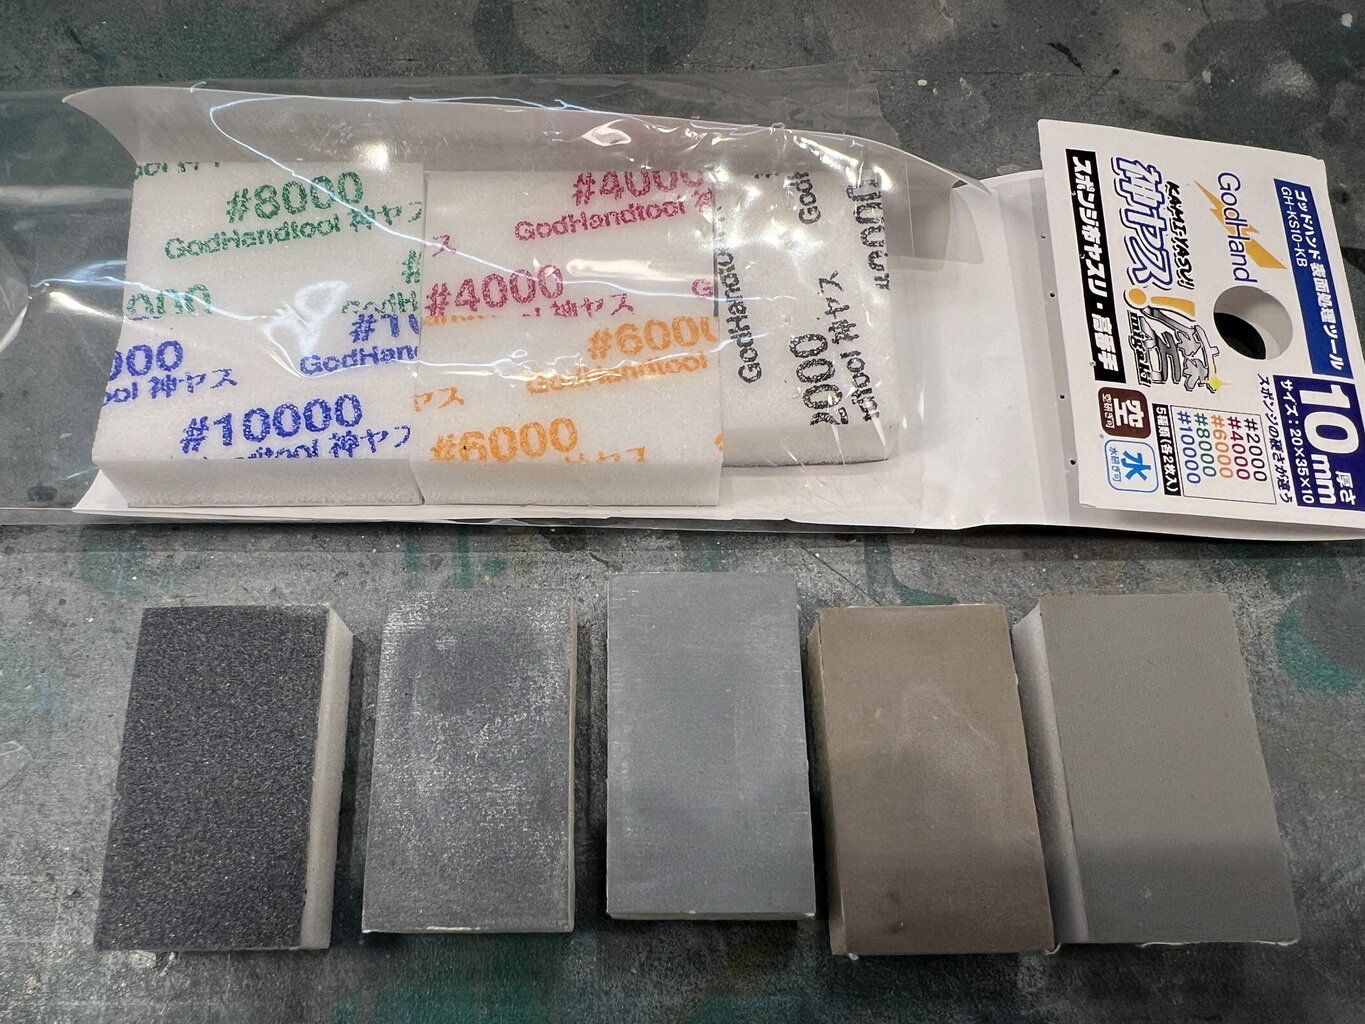
Hey @Gabe Q, there's a much easier way to remove that moldline now (I used to scrape it with an exacto, then sand, then Tamiya Polish and clear coat by dipping it in Future). I found these GodHand sanding sponges and you work from 2000, 4000, 6000, 8000, 10000 lightly sanding the seam and it dissappears crystal clear! I still dip my canopies in Future to make them extra shiny though, but its not to hide any scratches from the sanding anymore.
Hey @pengbuzz that Klingon Battlecruiser turned out amazing!!! Great paint finish on it too! Thanks for the colour info, I have to bookmark those for future reference.
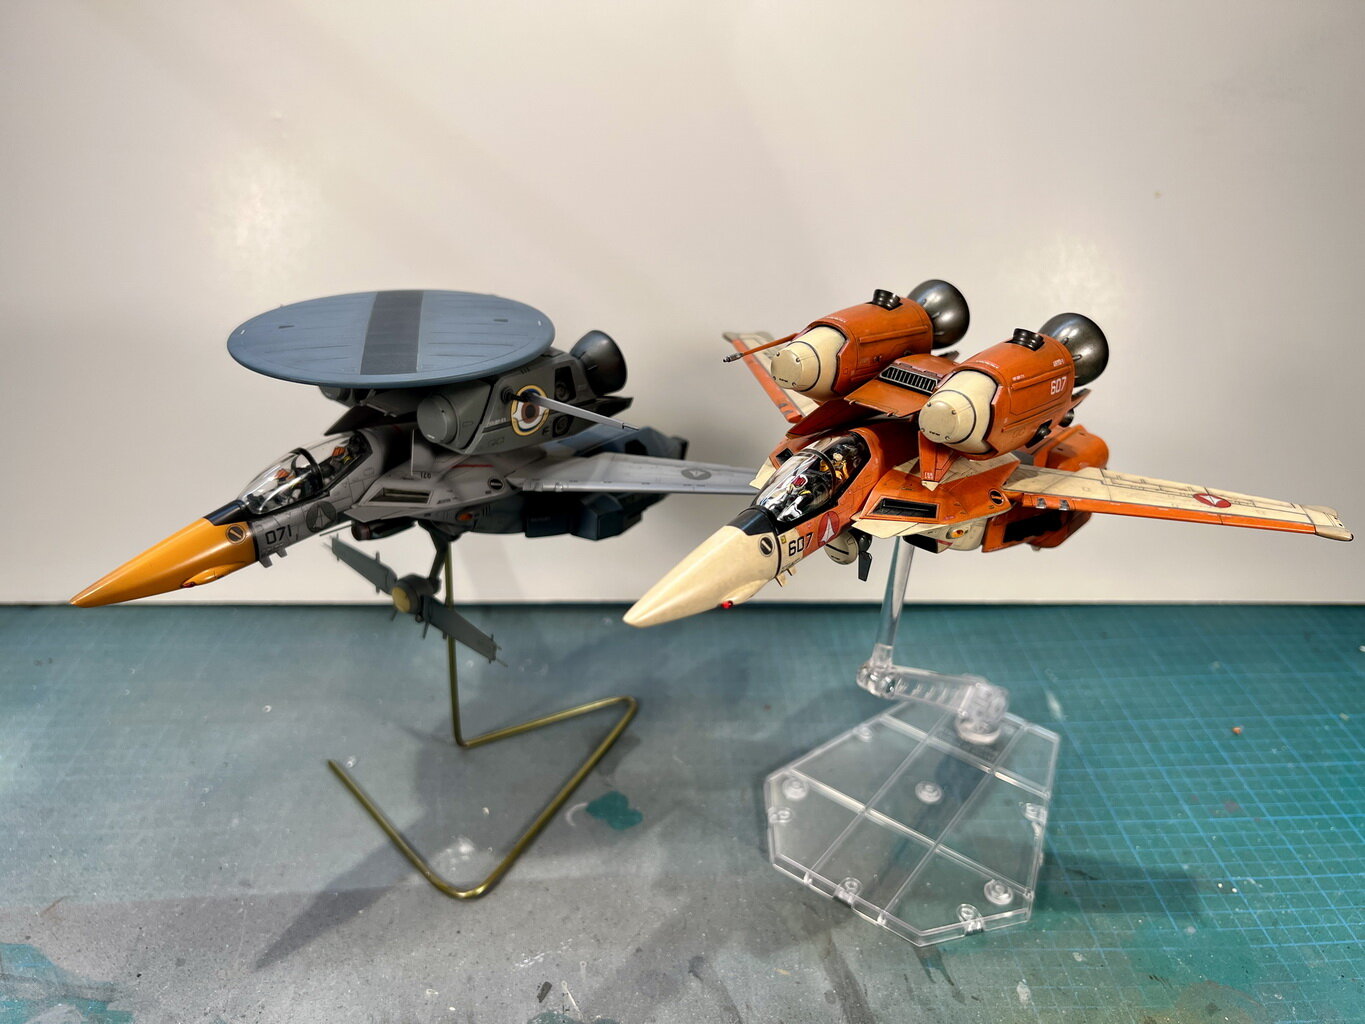
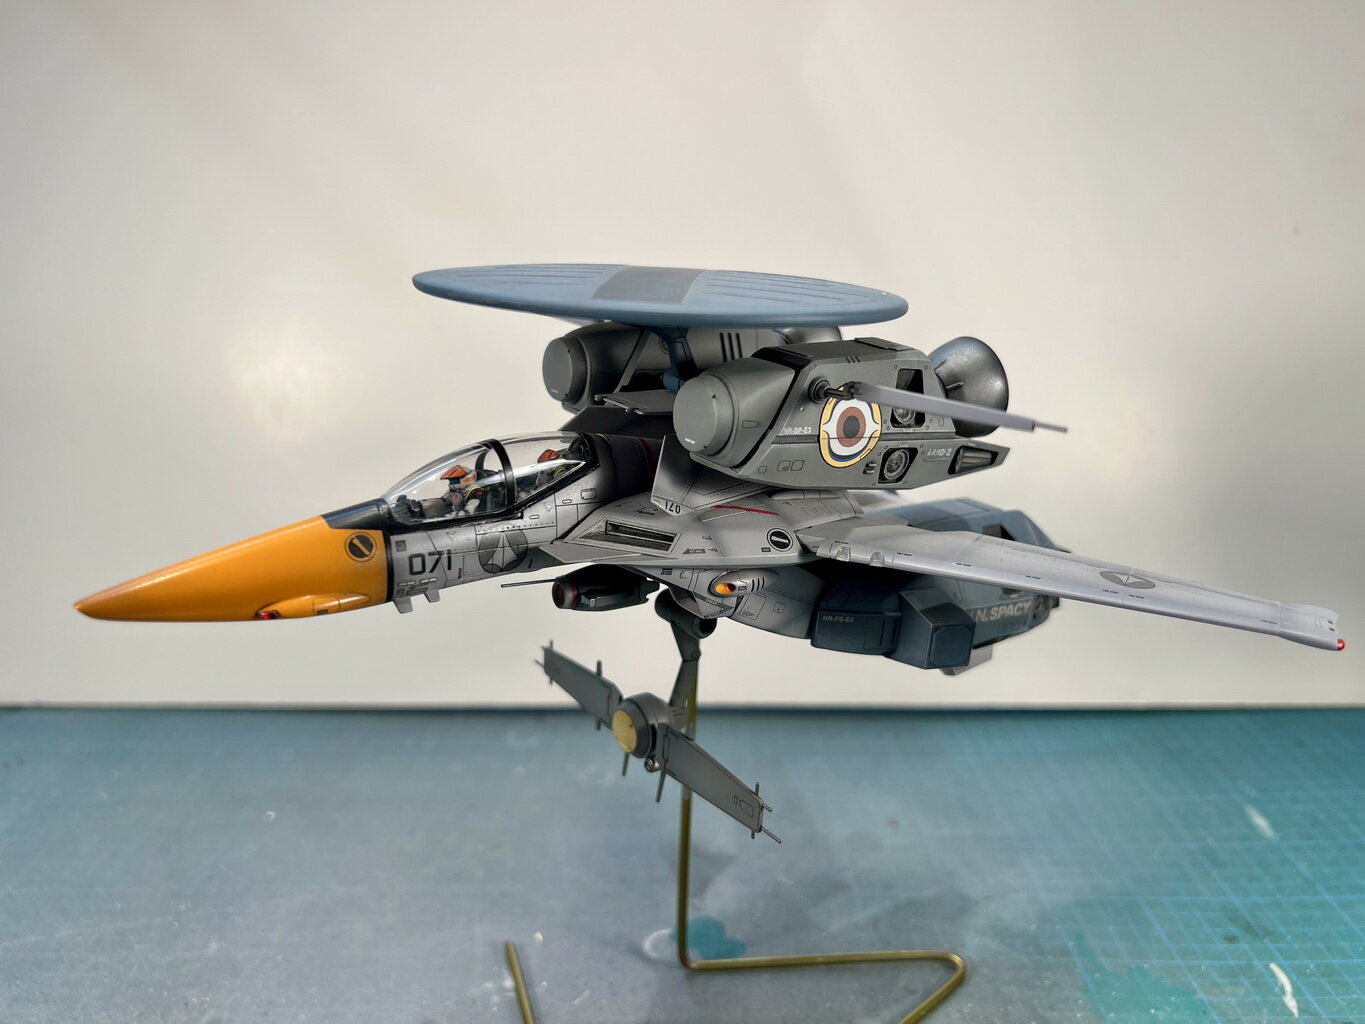
Hard to believe it's been 20yrs since I bought this kit! Here's the VE-1 I did 18yrs ago for comparison when I was trying to do the smoothest coat of paint I could and weathered everything (post shading) with an airbrush - it looks too clean and slick (although I purposely tried to restrain the weathering on both of these as I thought they'd be better kept than something in used in war). Not that I've been building consistently for the last 18yrs, I've taken many years off but I like seeing the progress.
-
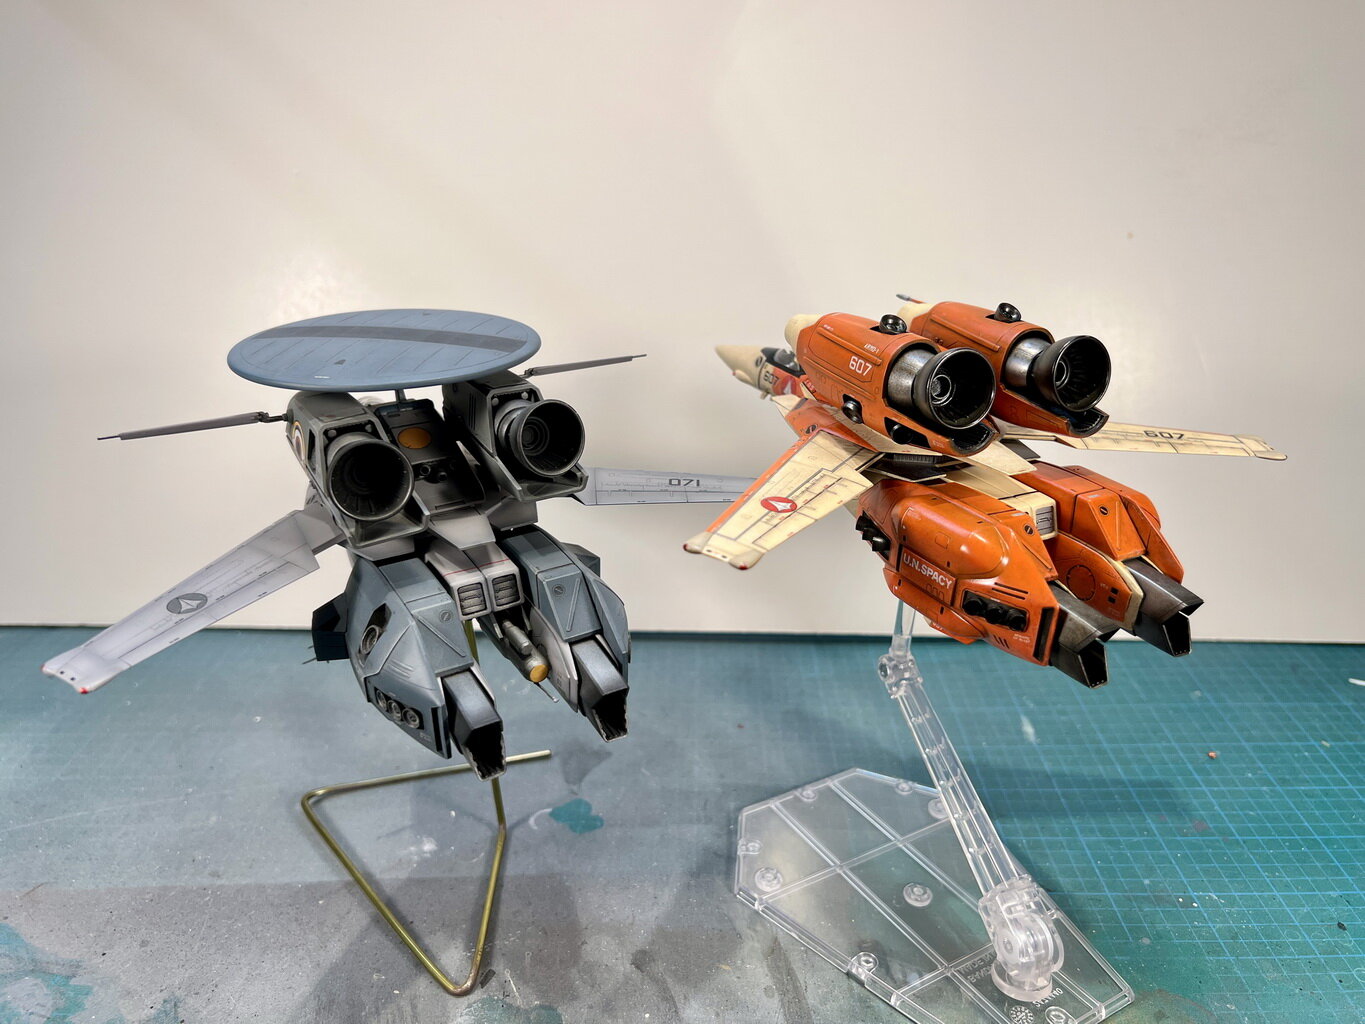
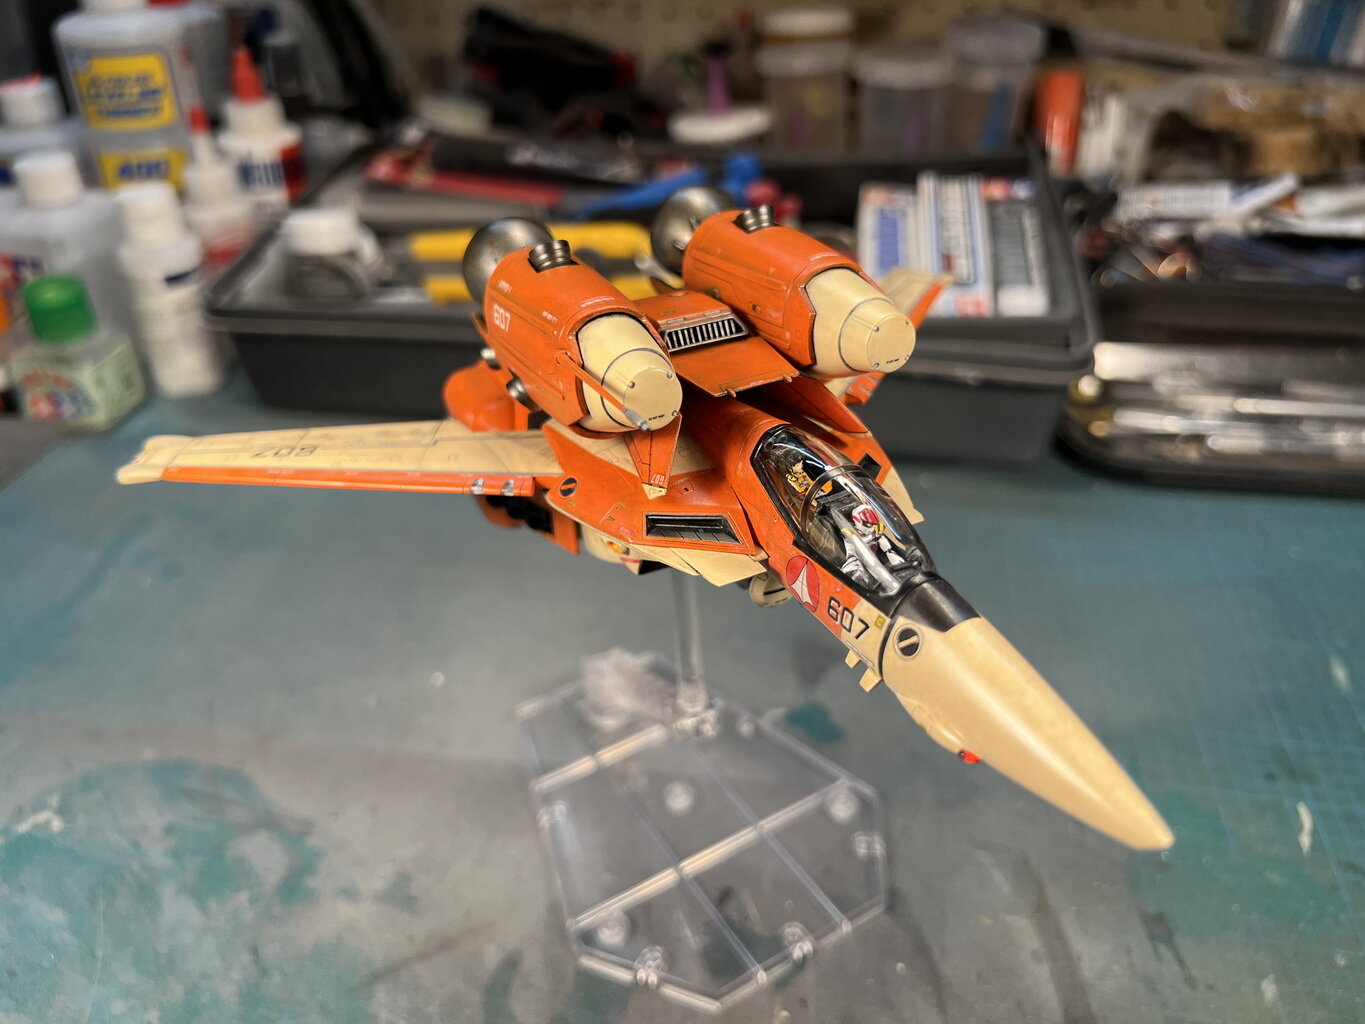
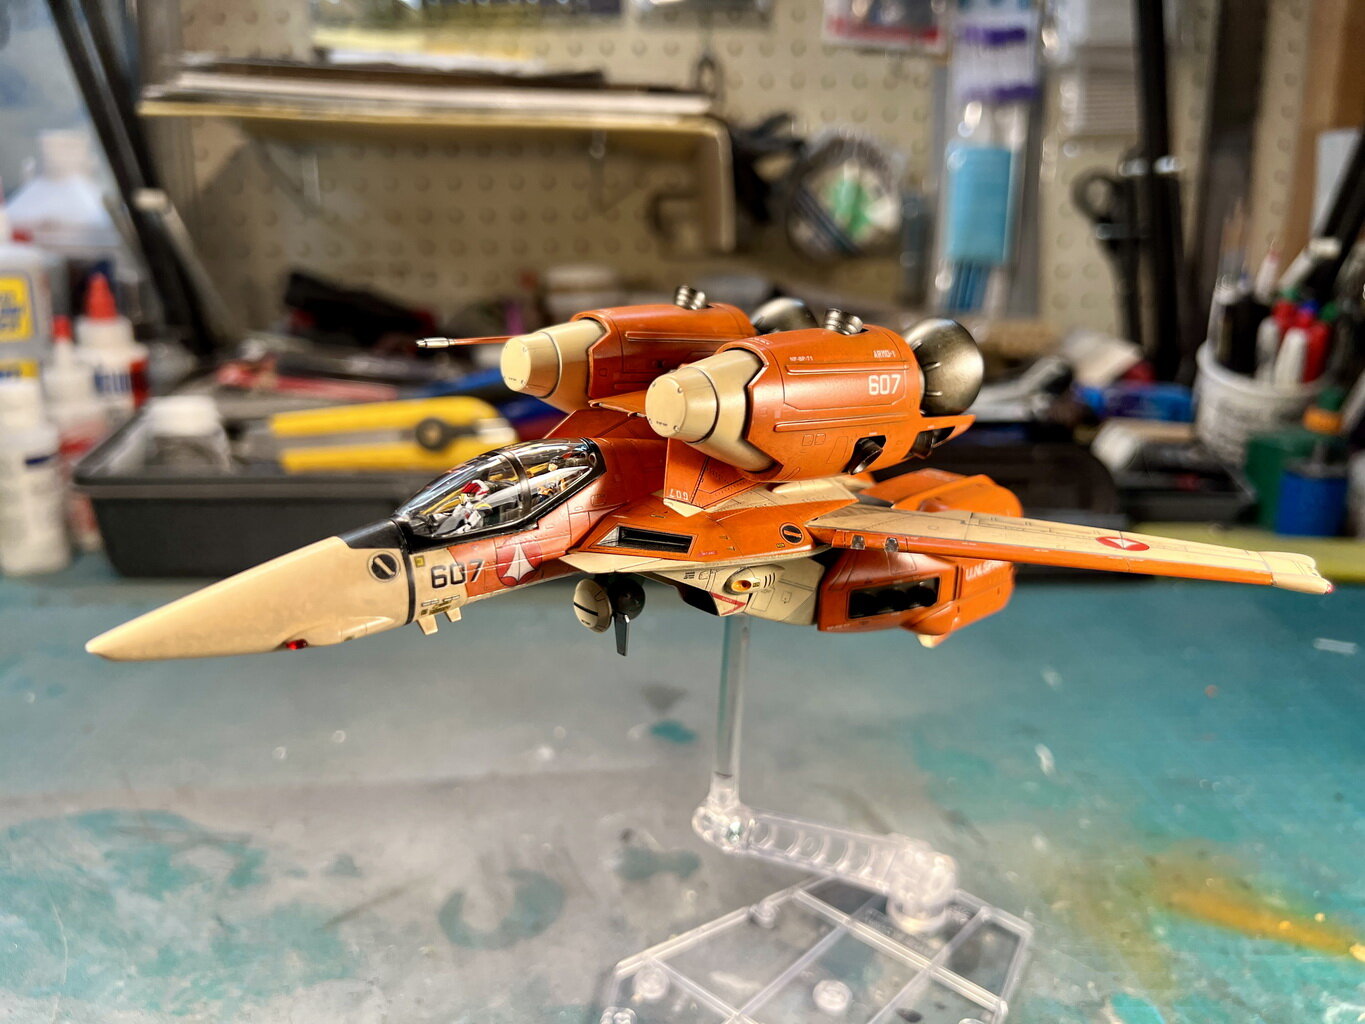
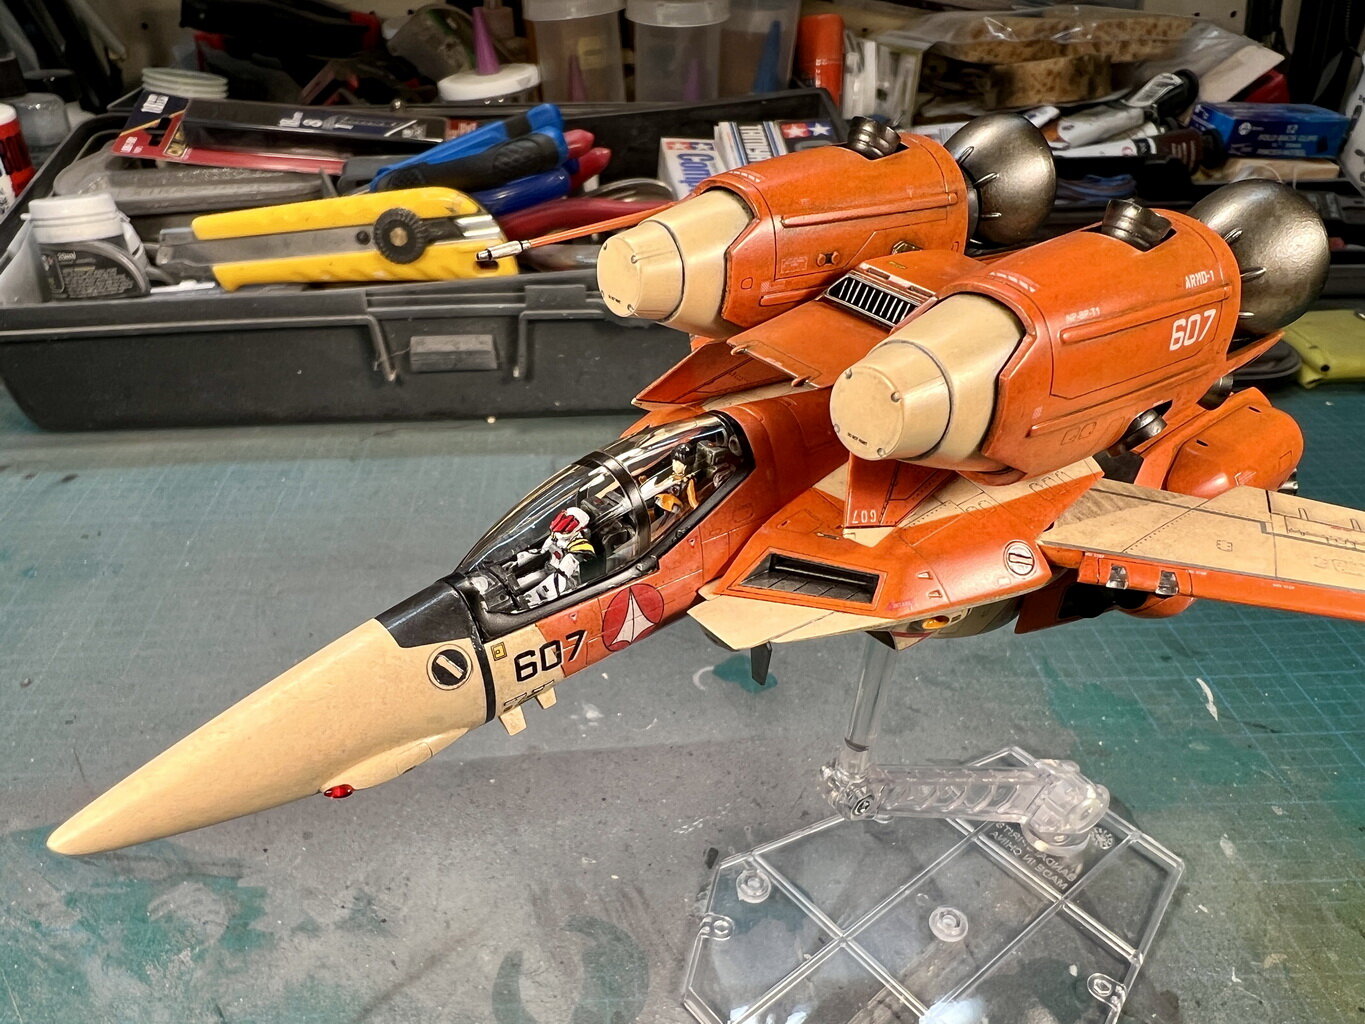
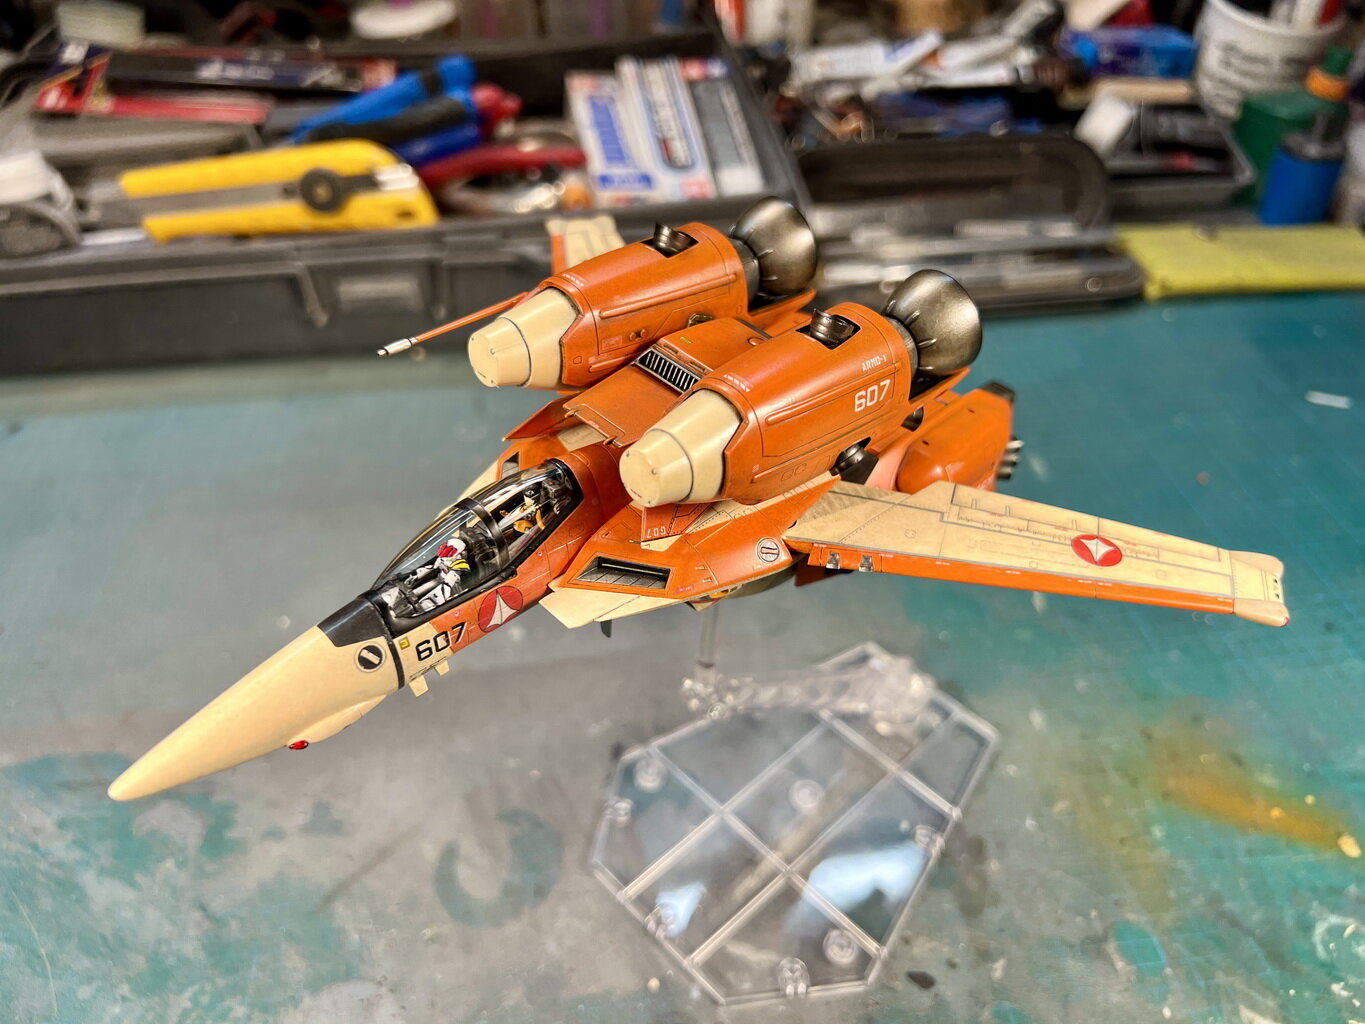
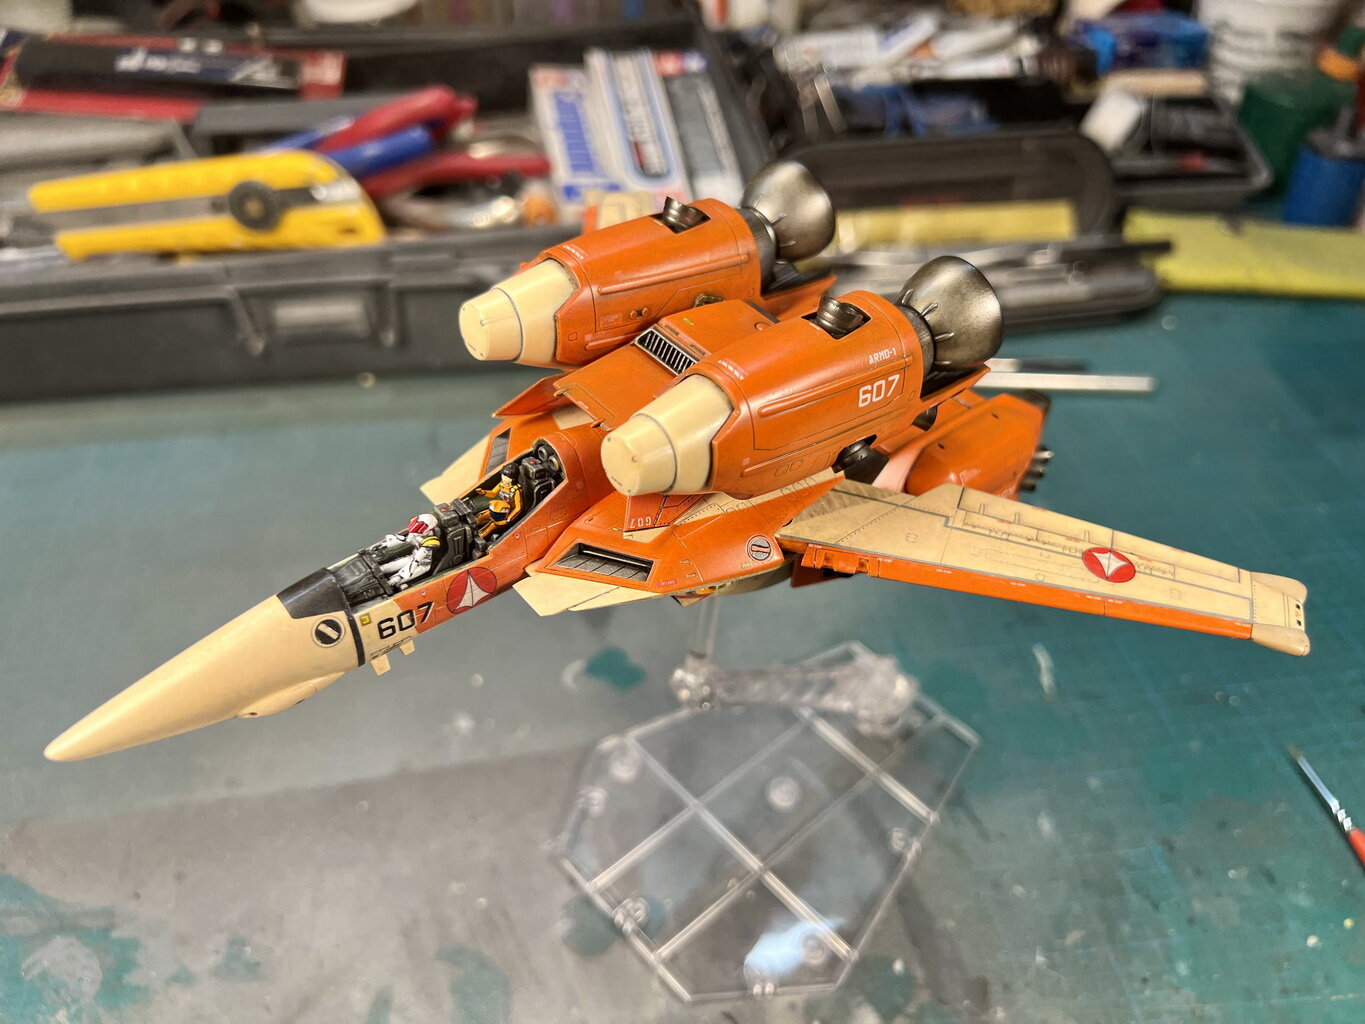
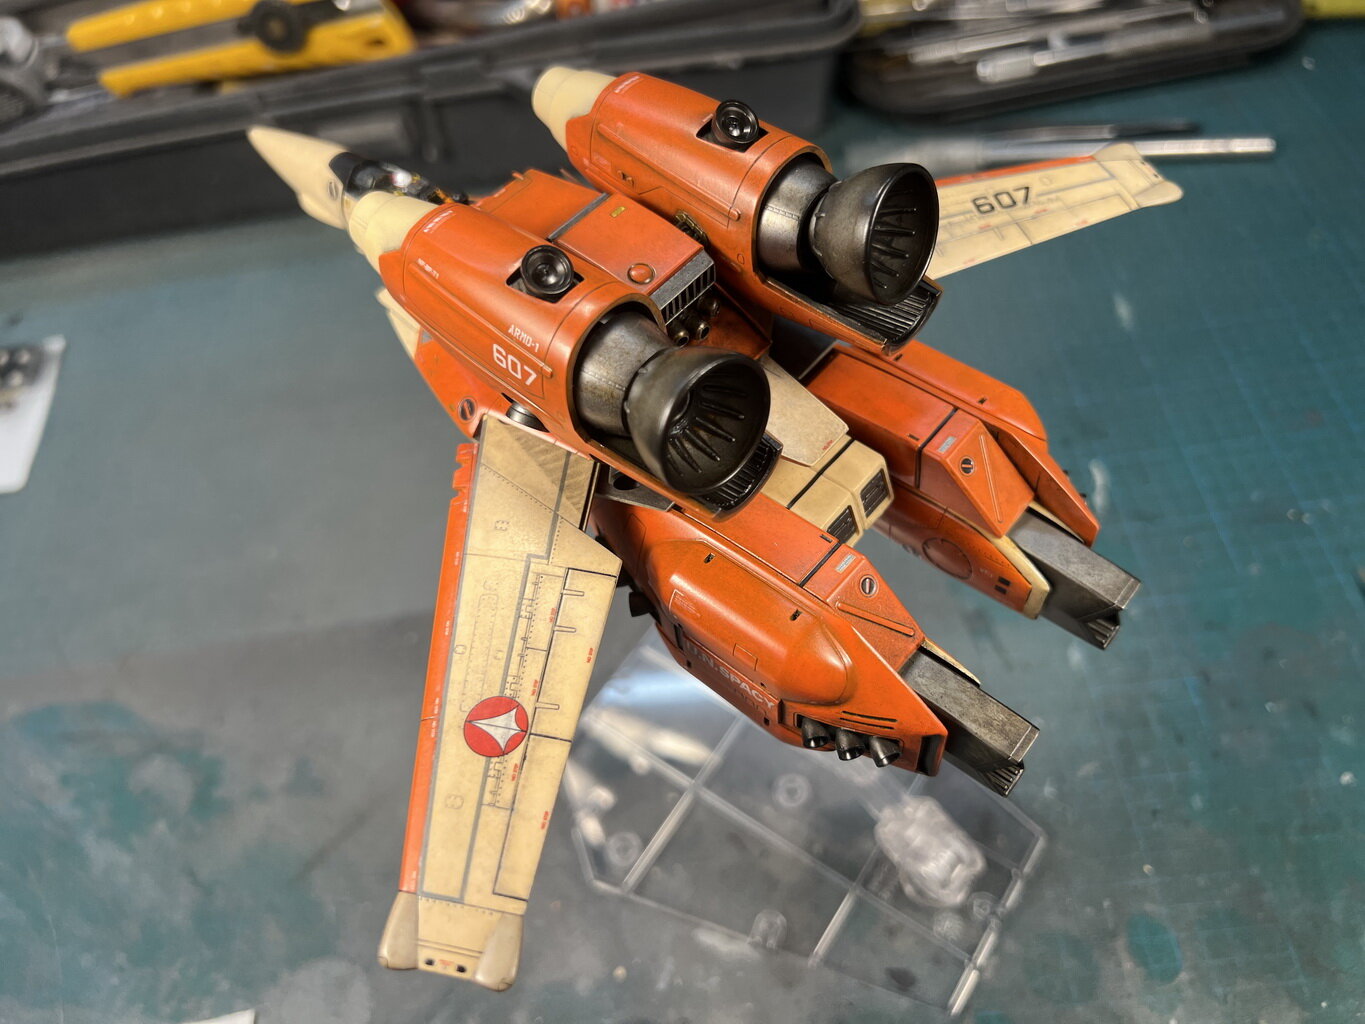
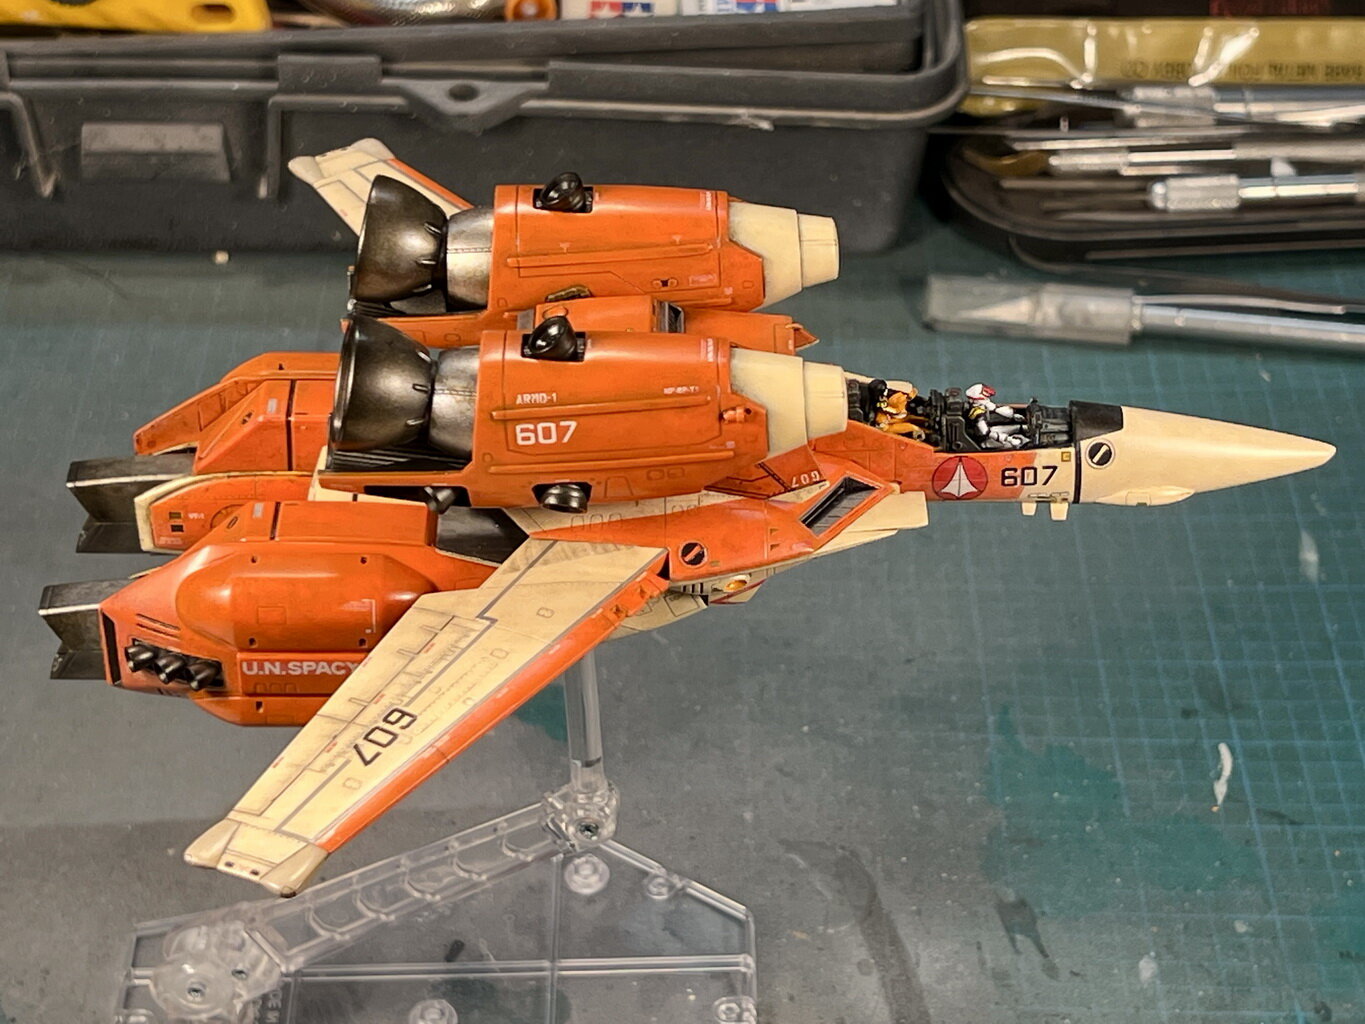
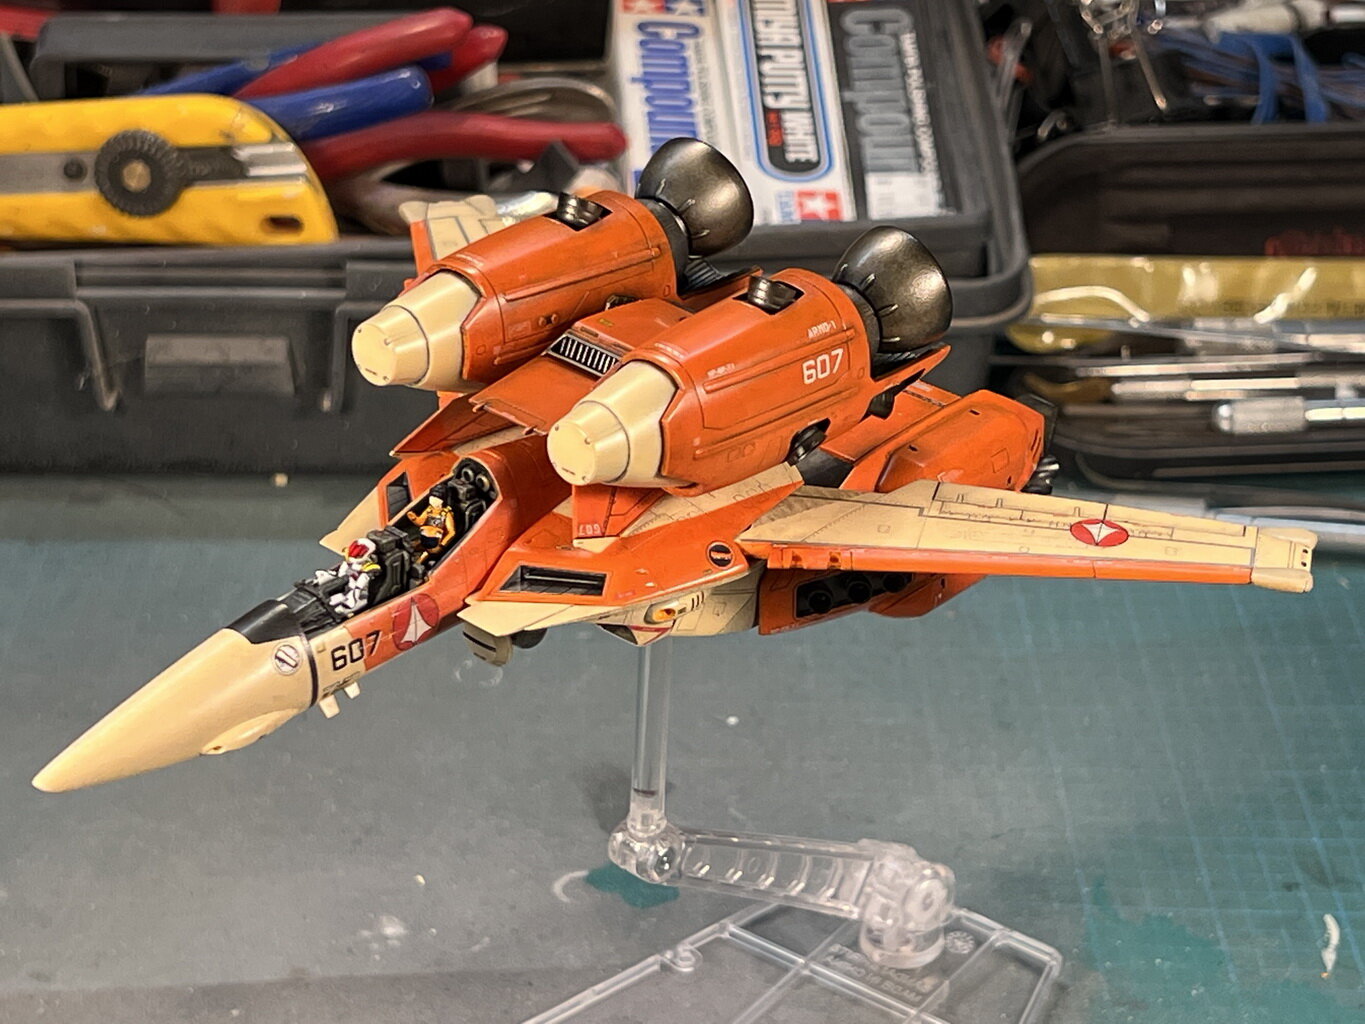
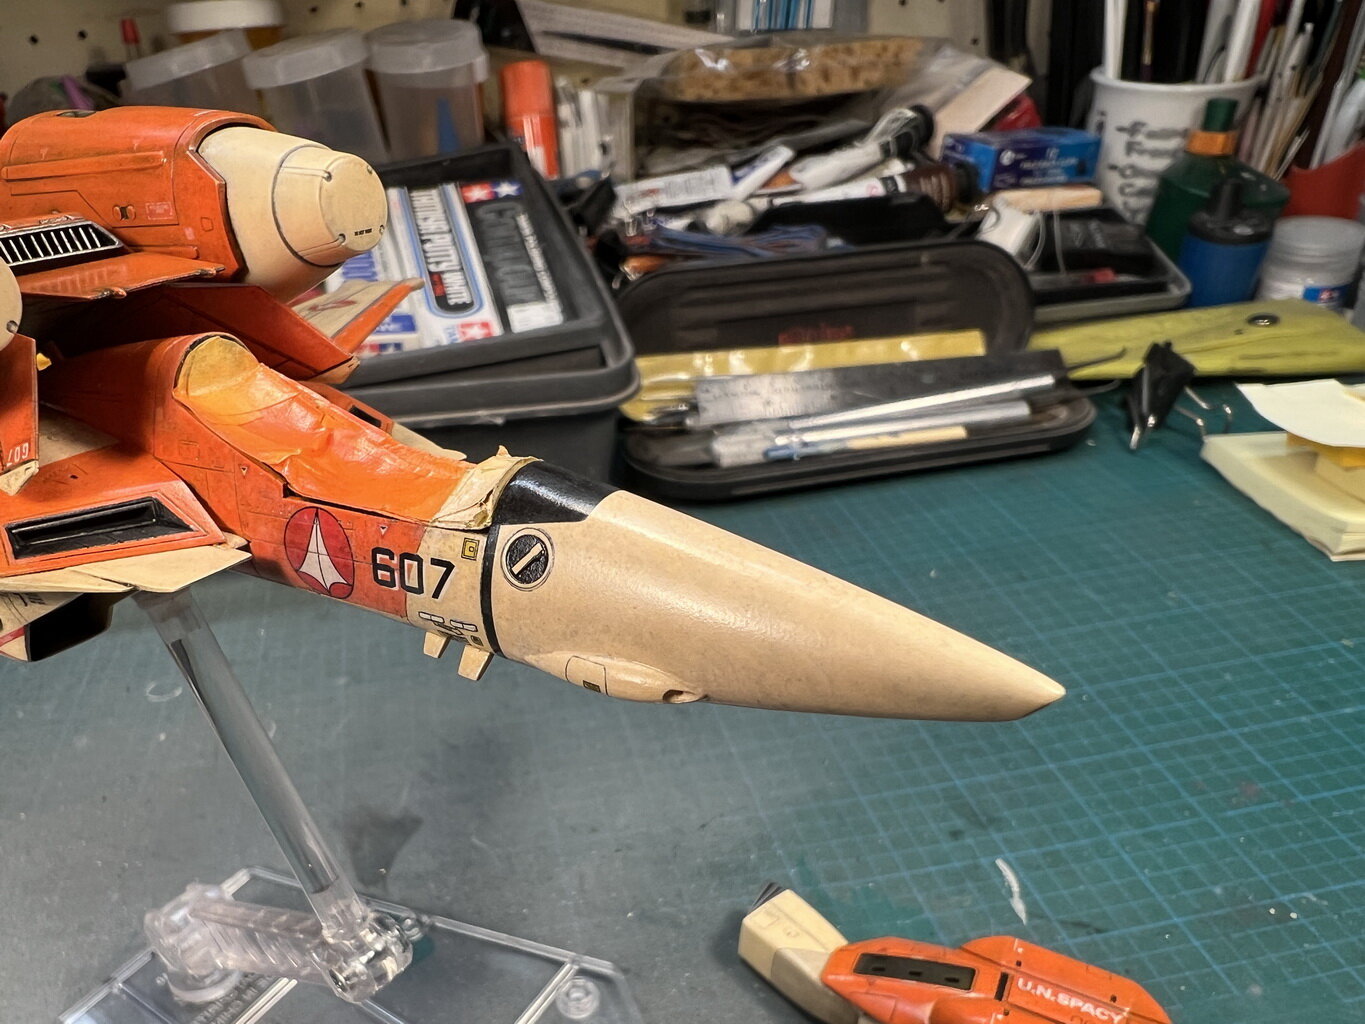
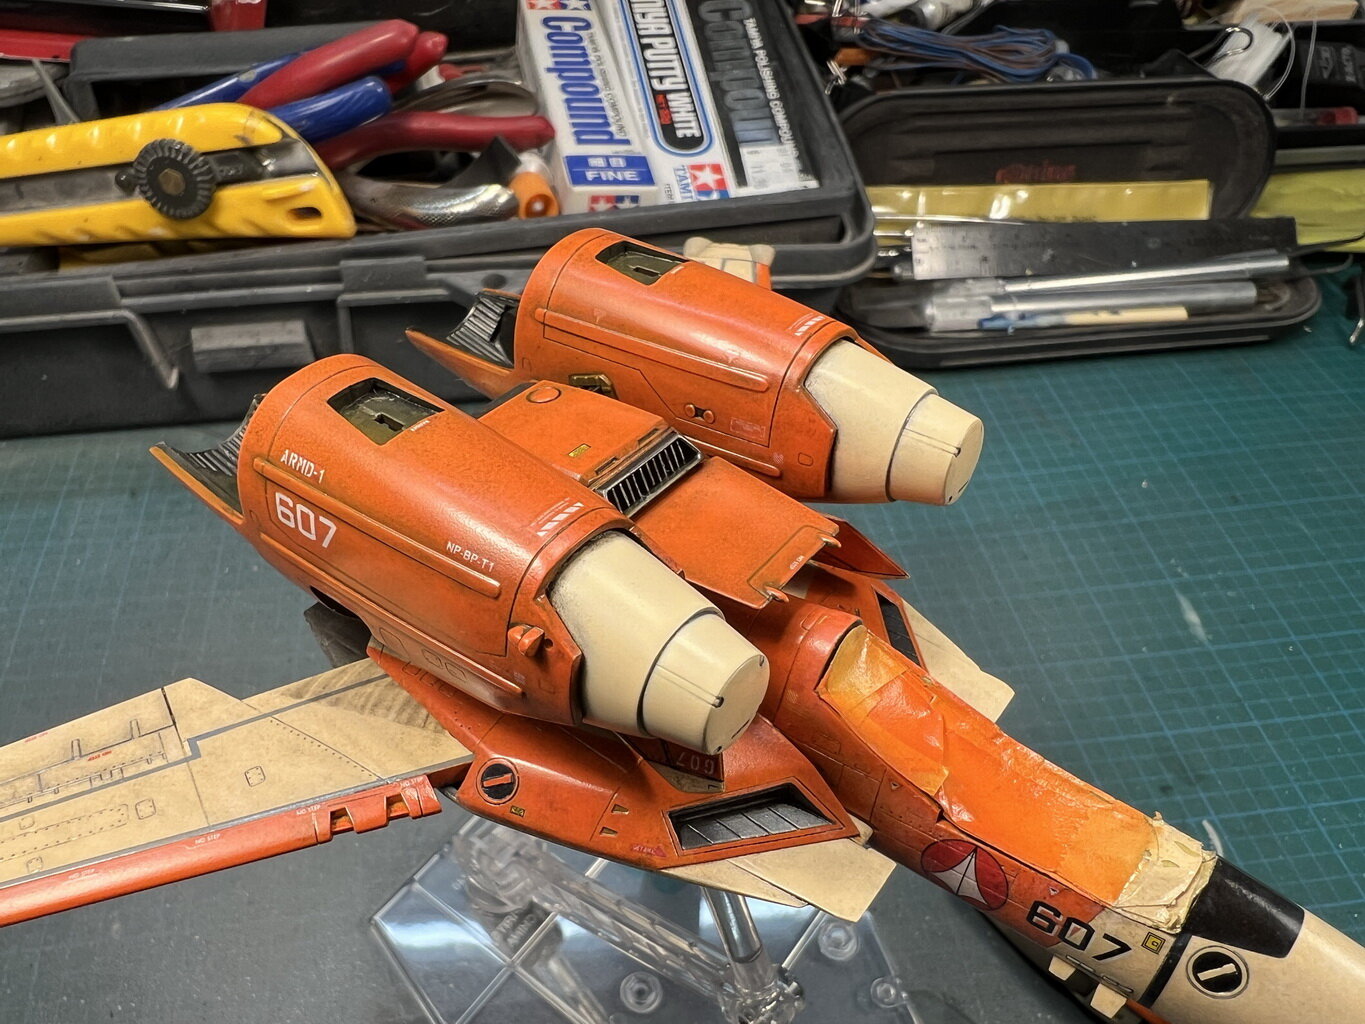
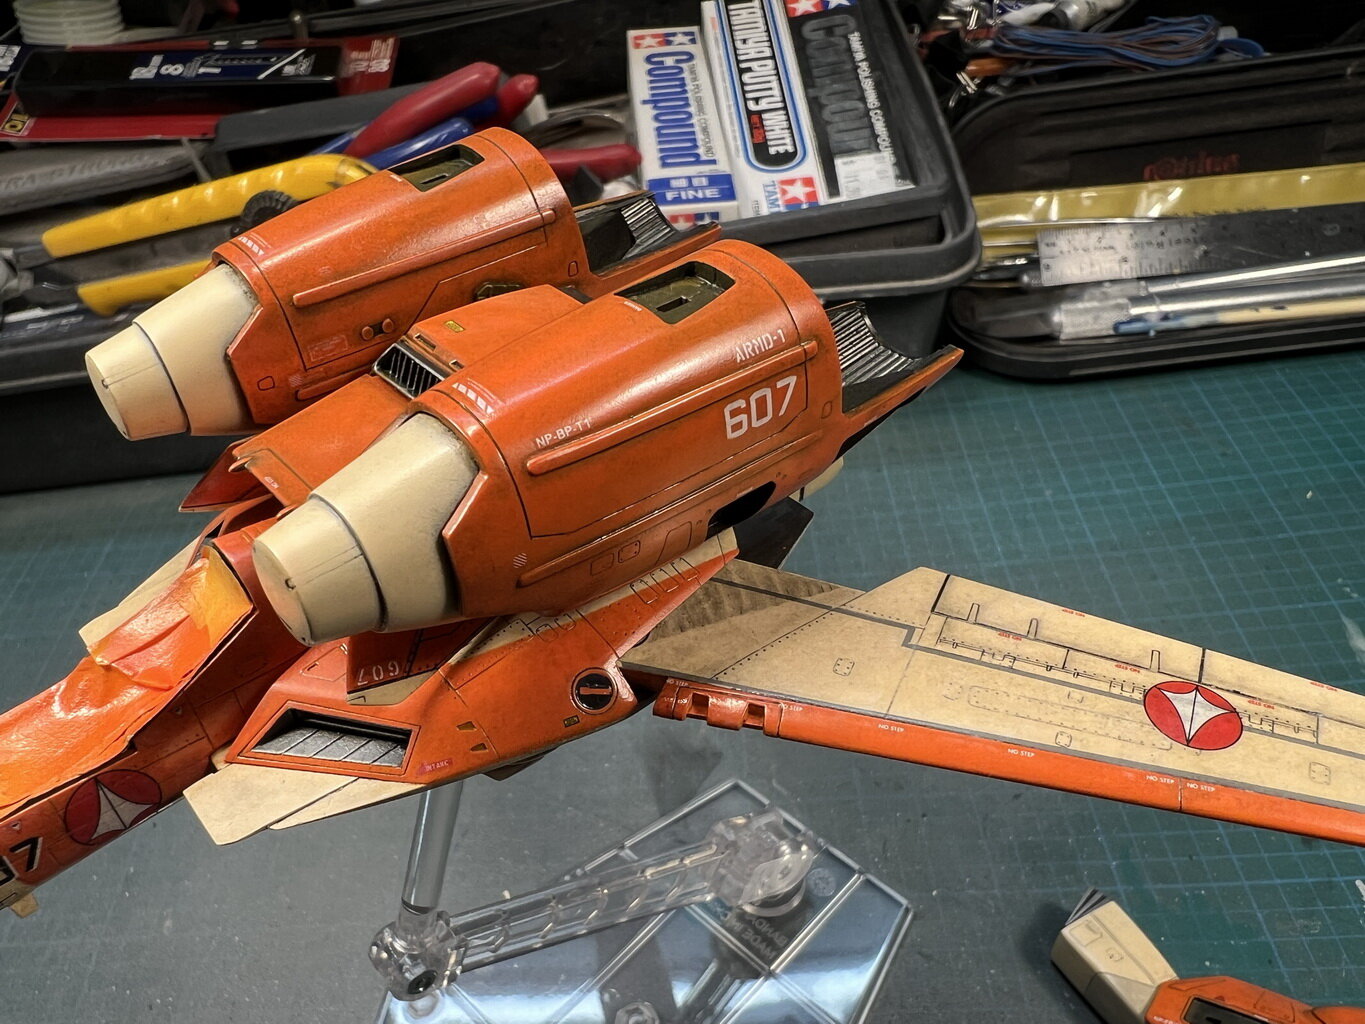
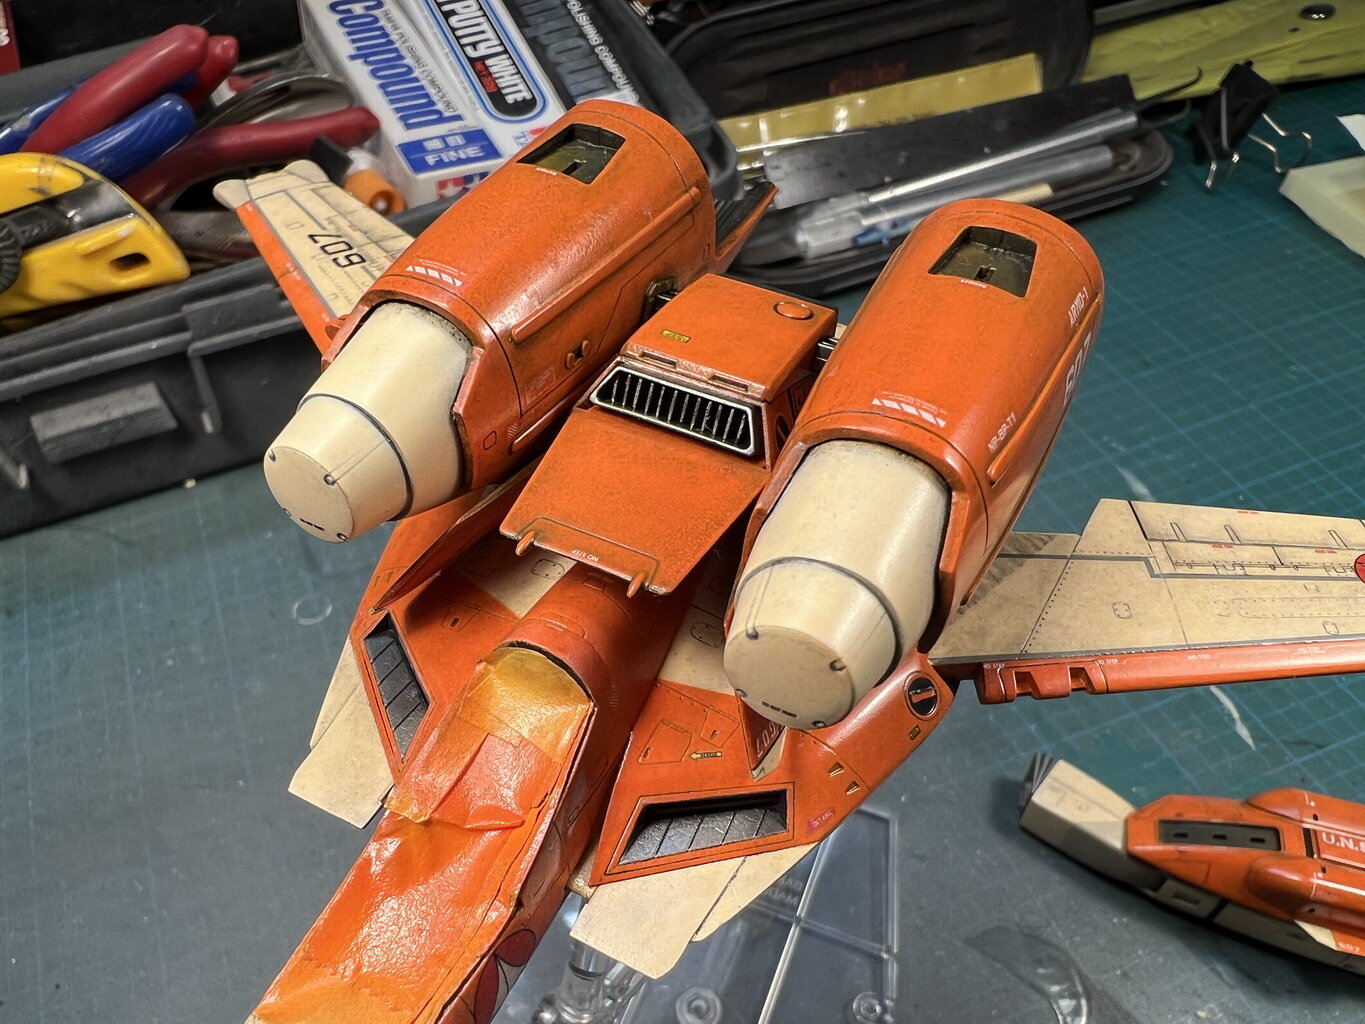
Finally finished! The canopy decal didn't fit properly, the left side did, but the right half was a tad too long, wierd, the VE-1 decals fit perfectly, it also crumbled into 4-5 pieces - probably due to age, but I noticed some of the round vernier thruster port decals didn't fit the engraved details perfectly too. That serves me for having 20yr old models to get to in my stash! Funny some of the weathering paint mottling didn't show up on my iPhone photos as much. I will take some better photos of them, but you can see @arbit amazing Minmay sculpt so well in the those huge bubble canopies.

-
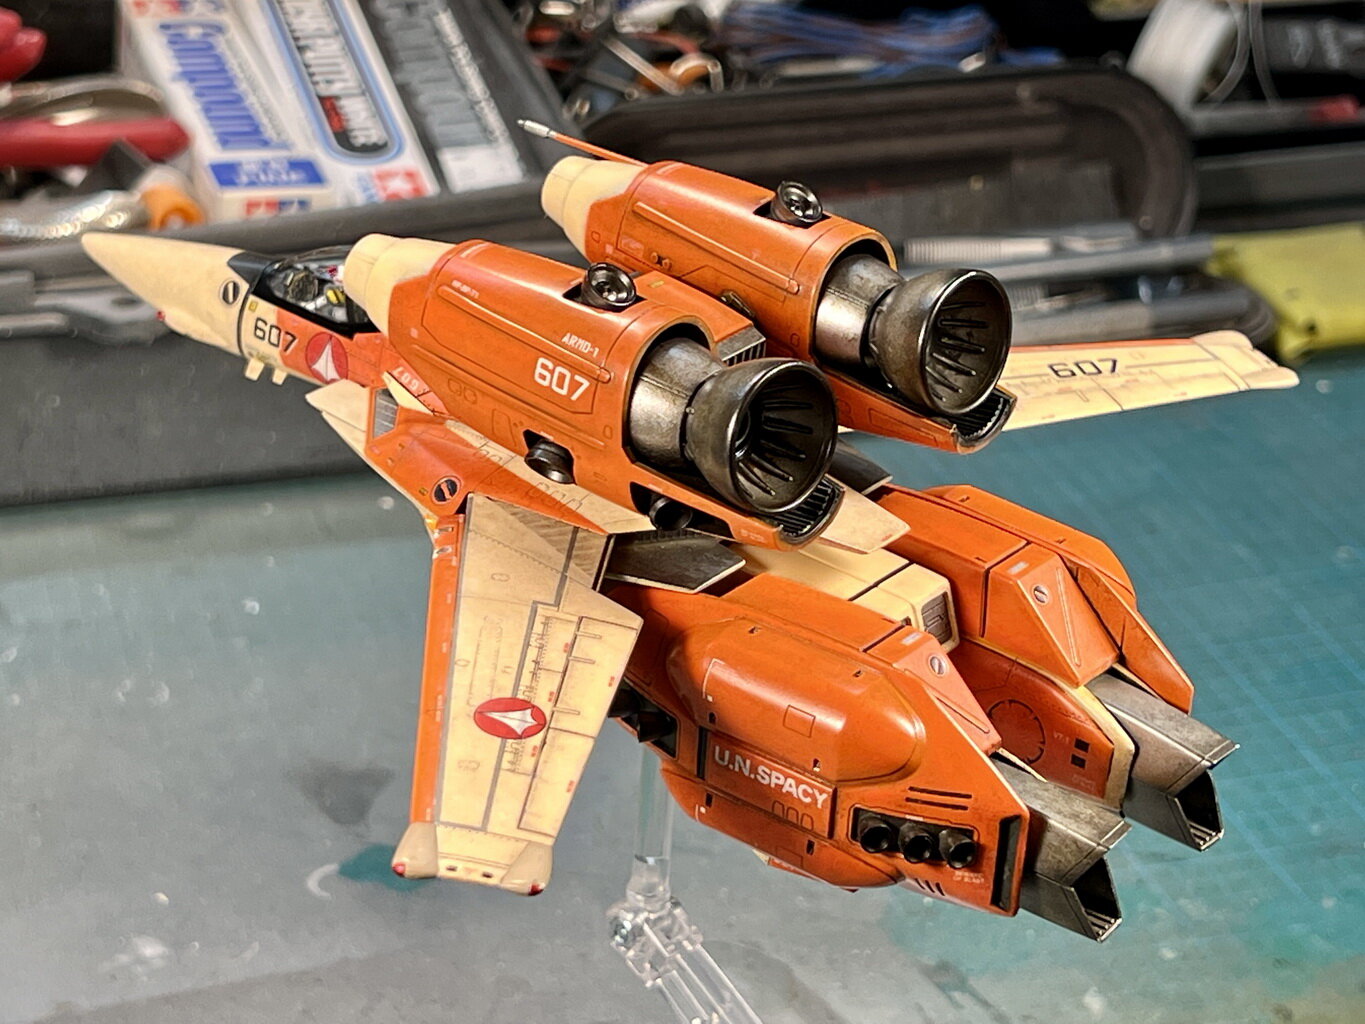
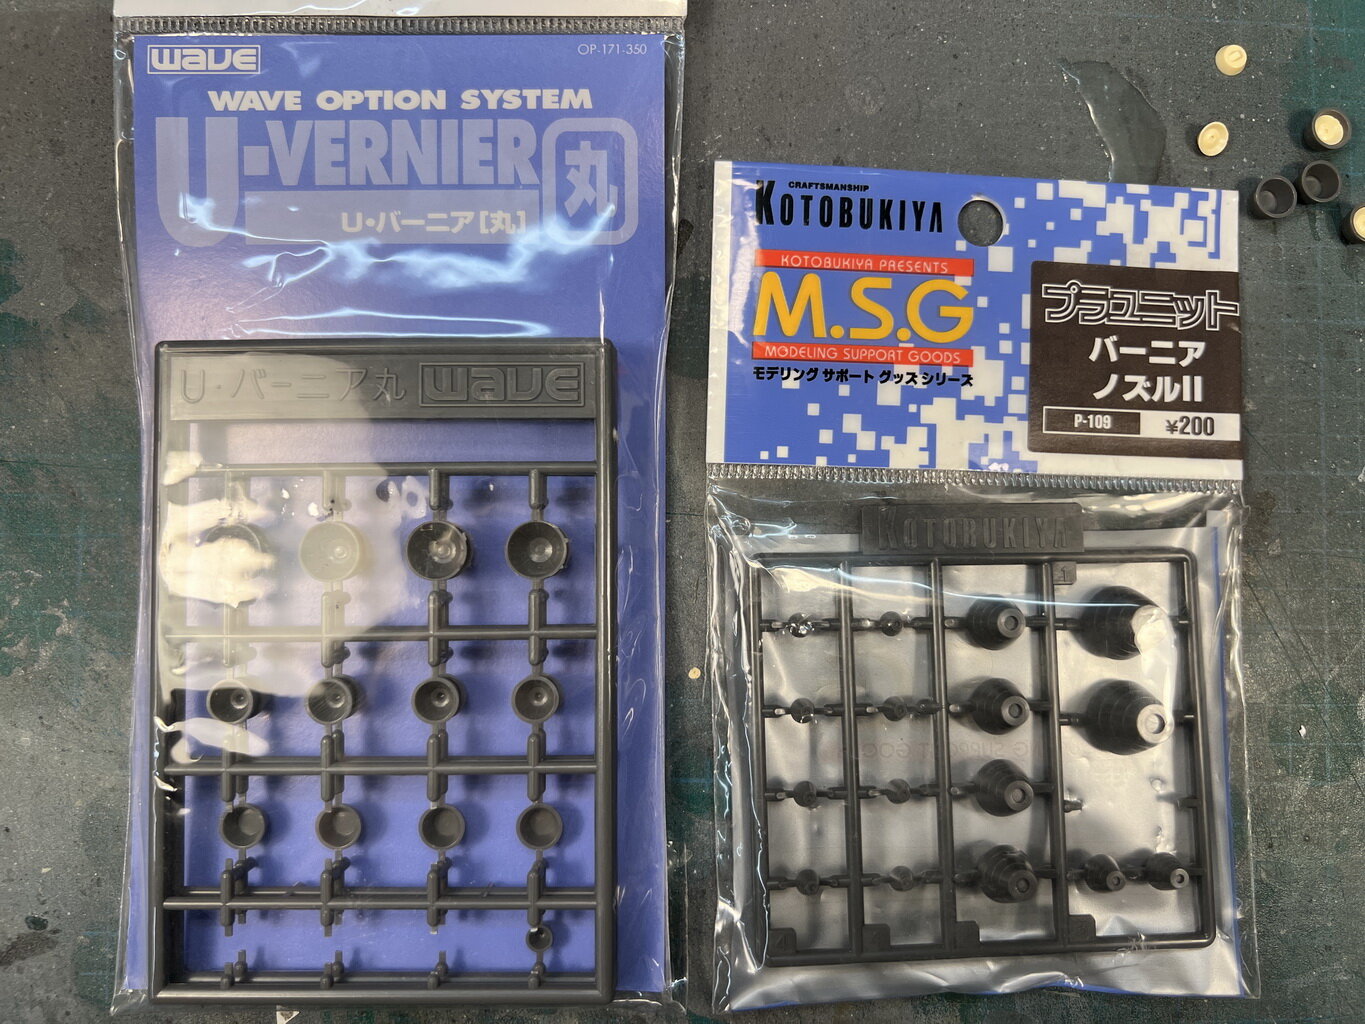
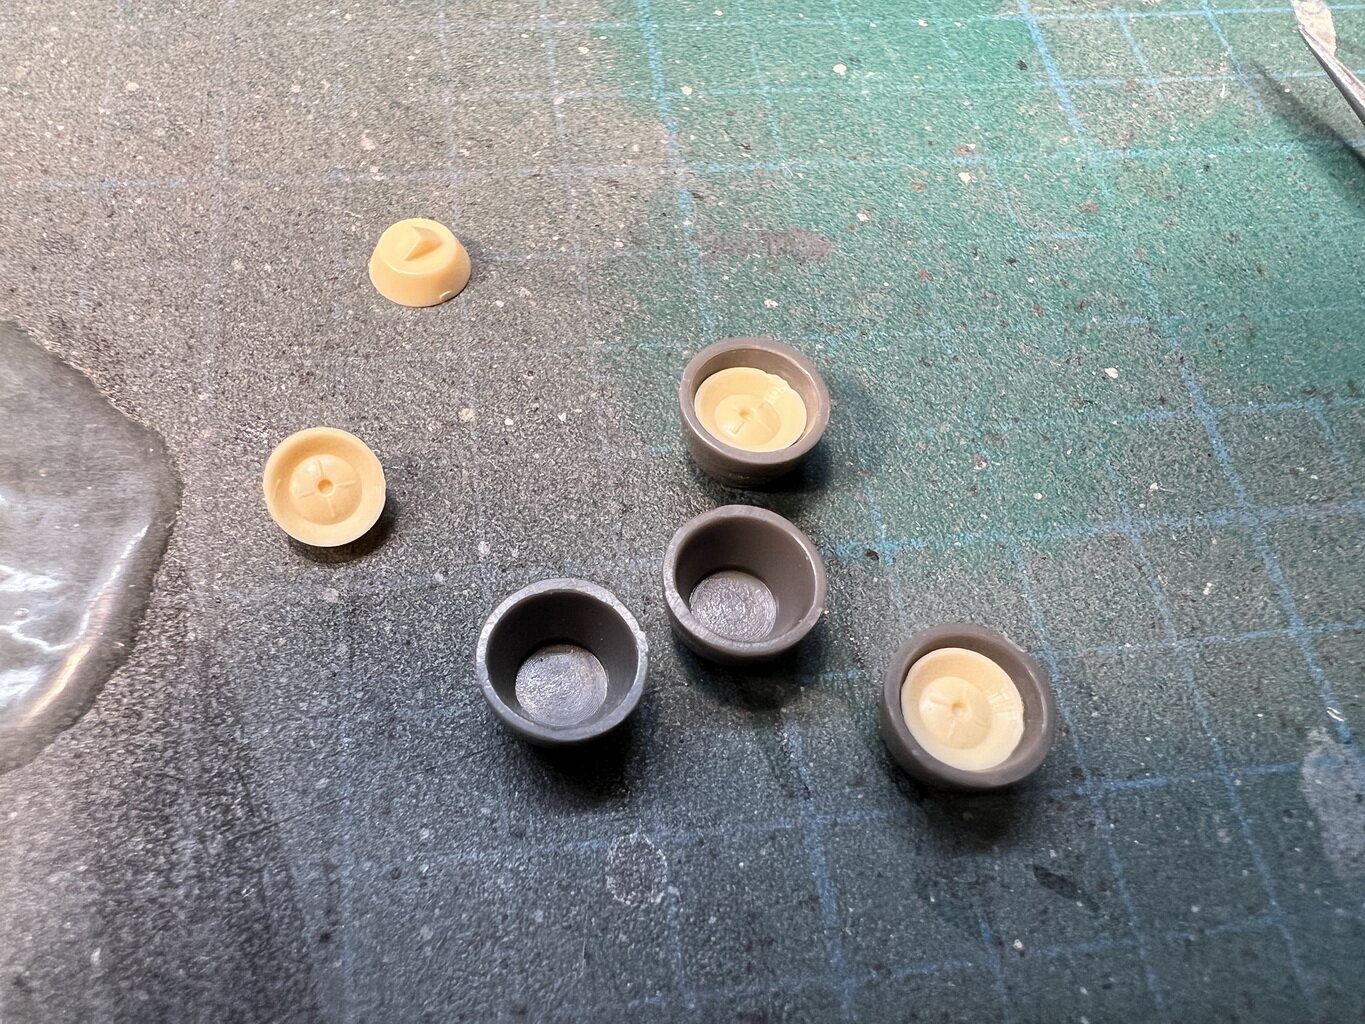
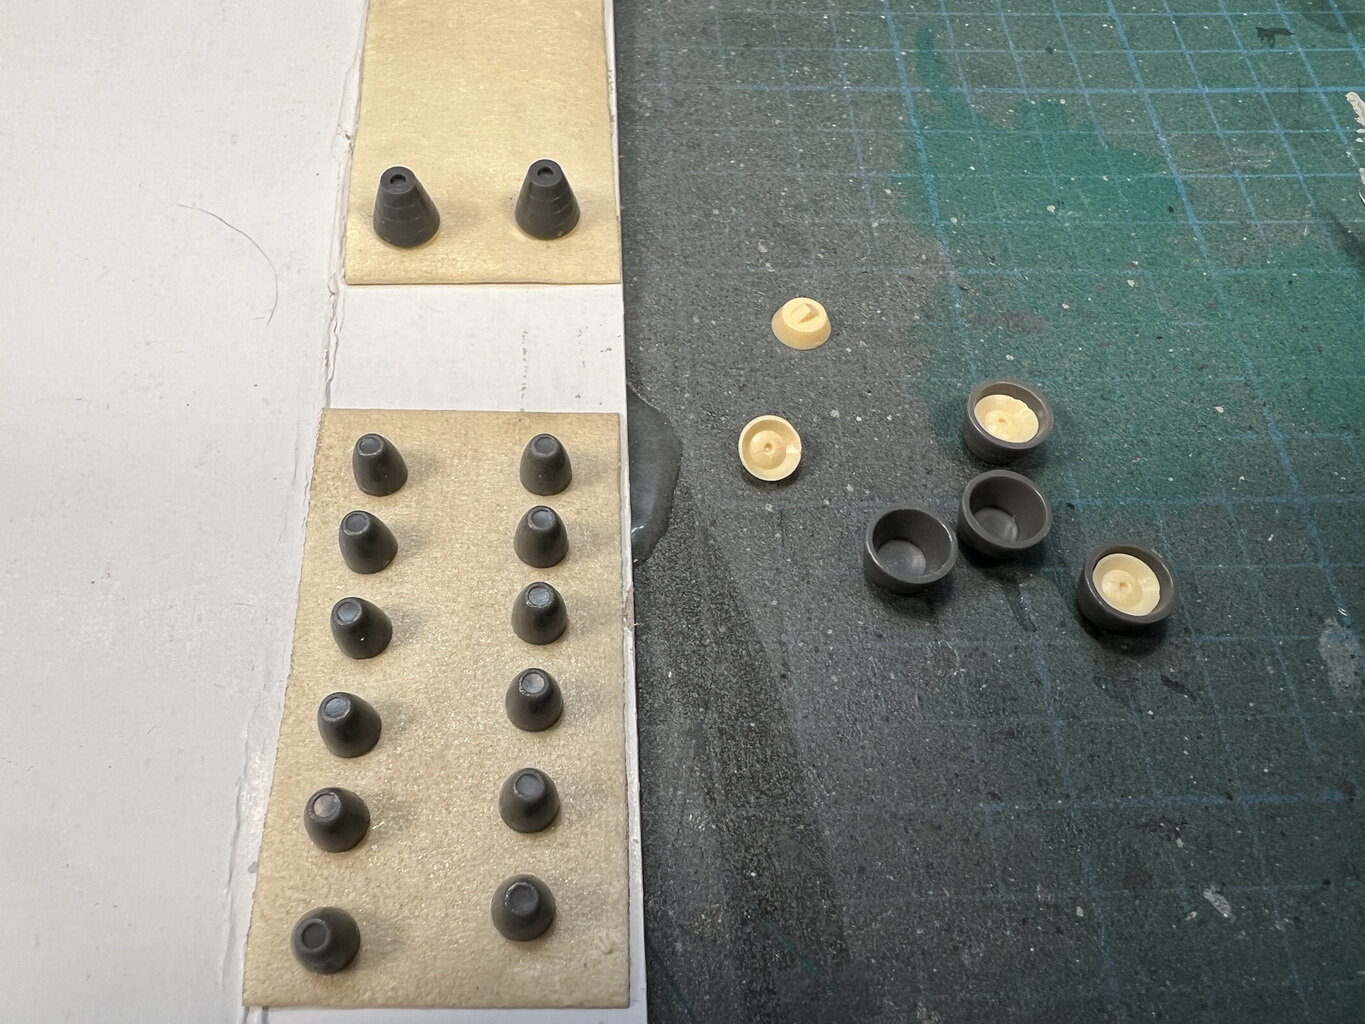
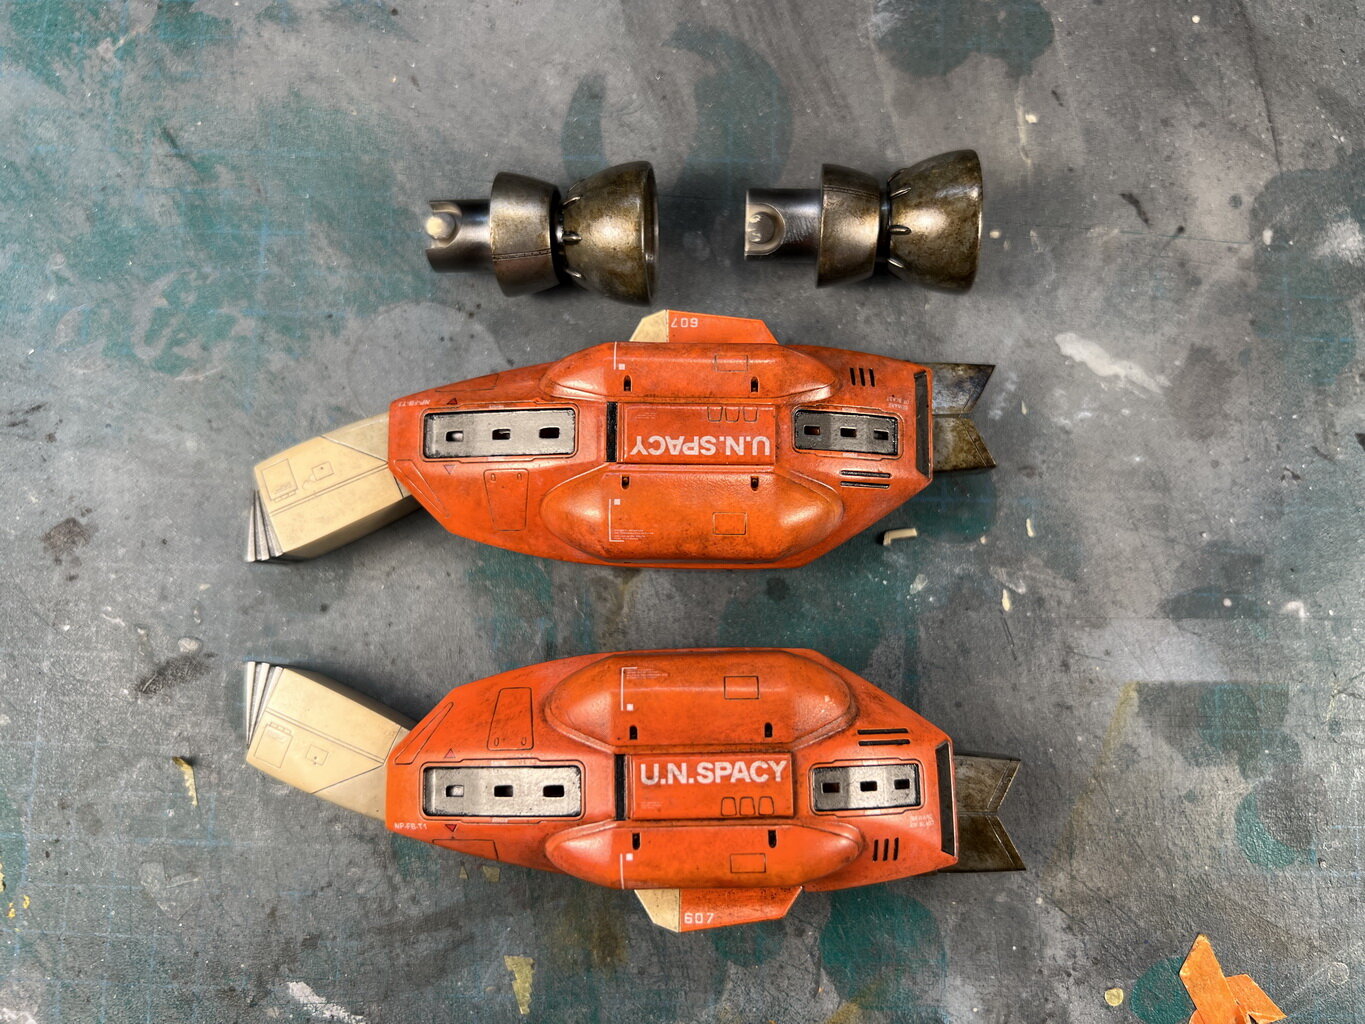
I replaced the smaller thruster exhausts with these aftermaket "vernier" add-ons (they were bought 15yrs ago from HLJ but I think they should still be around). I reused some of the kit parts (the original nozzles) as detail inside the larger ones.
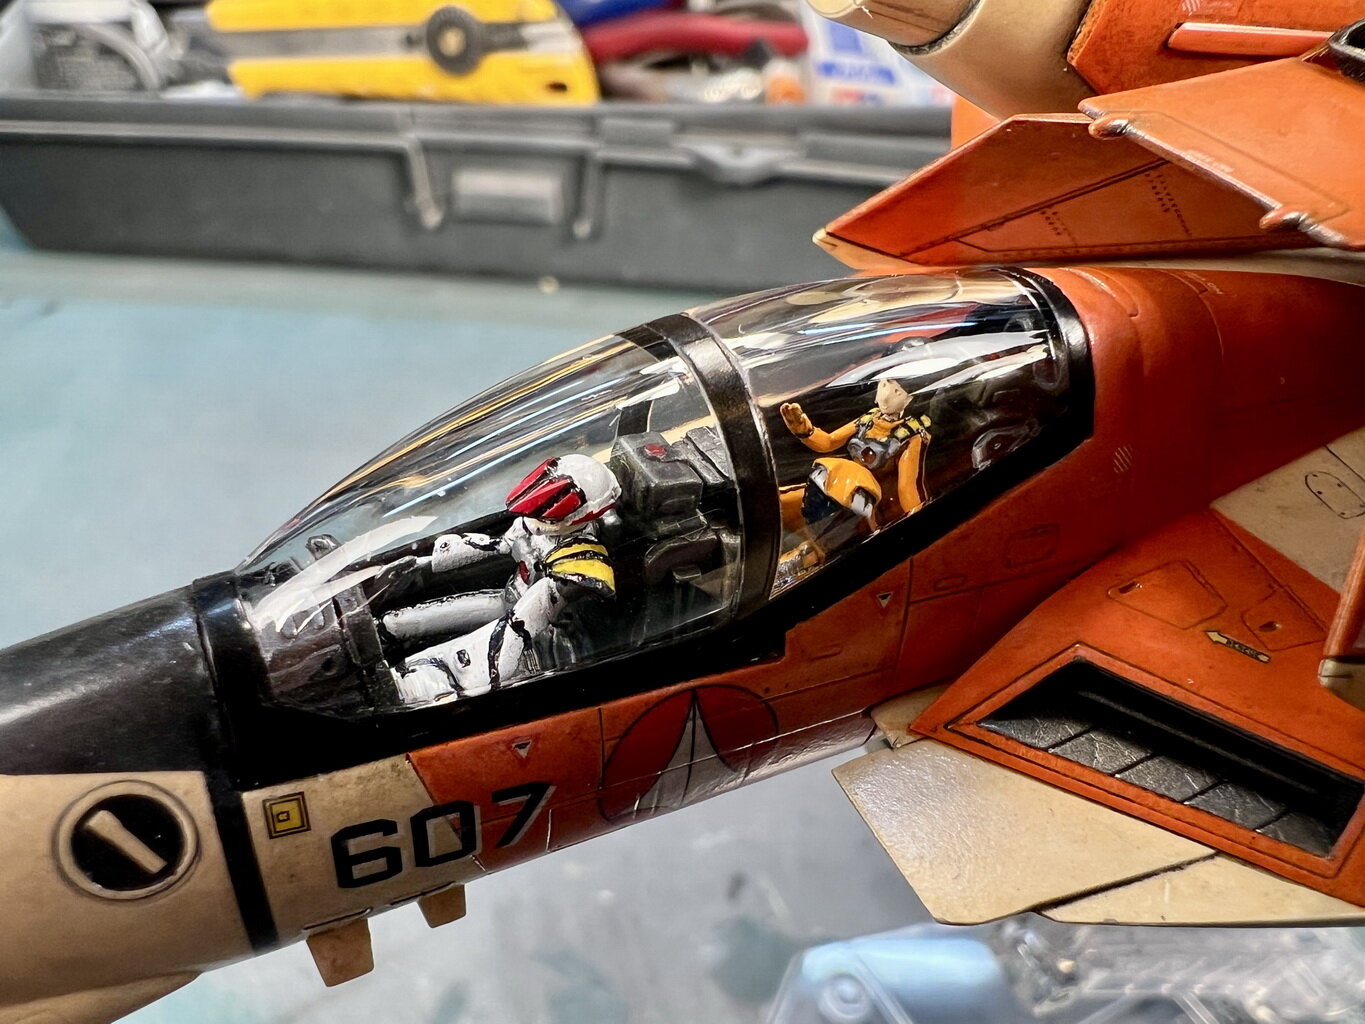
I started this kit Nov 2023, so its really nice to actually have it all together again. I have to thank @arbit for sculpting that amazing Minmay in the back seat with her helmet off. I bought this kit 20yrs ago in 2003 but was so disappointed that there never was a Minmay in the back, so it sat on my shelf all these years. The pilot is also sculpted by him and 3D Resin printed as well and its what's got me back to finally finishing this model - even with all the crap that has happened on this long journey.
-
I finally got back to my cursed VT-1 after 9 months off the hobby. A lot of stuff had happened, my basement hot water tank exploded and wet the bottom layers of my workbench, then when it was beyond repairs, they replaced it with a on-demand boiler but had to drill two holes for the intake and exhaust. Instead of drilling the holes right close to the boiler, they went across my basement ceiling to drill in the opposite side - right over my hobby workbench covering it with a layer of very fine brick dust over everything (including all my brushes and airbrushes) - ARGH!!! I tried to shop-vac it but it was so fine that it went through the filter of the shop-vac and blew it everywhere in my basement - it took days for the cloud of dust to settle! That pretty much killed any interest I had in completing this model for a while.
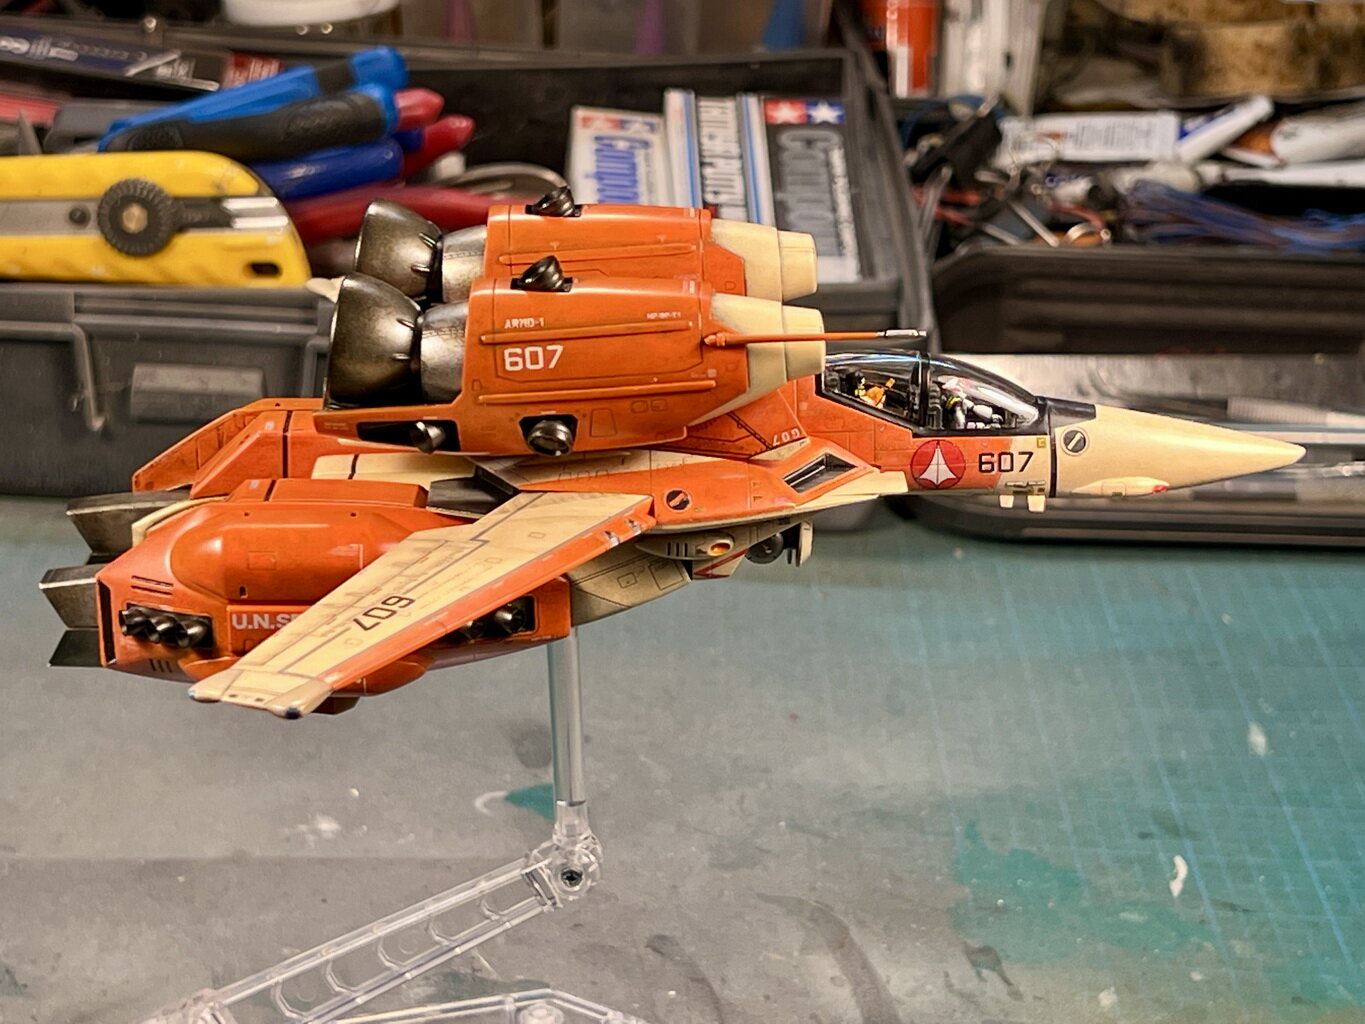
Then I found out about a new technique using acrylic ink to mottle the paint surface for scaled weathering that I thought I'd try out and learn something new - its mostly more appropriate for the TPS Navy planes like F-14s. It's funny that I spent most of my modelling career trying to paint a smooth finish colour only now to lean ways to make the solid smooth paint look mottled and distressed! Unfortunately again it didn't turn out as I hoped. I hope to let everyone know so many things went wrong with this build, but don't loose hope, whenever I swore off of it, after a few months off, I was able to figure out ways (probably my OCD thinking about it before going to sleep) to fix it (easier when you don't care about it as much anymore and it no longer becomes as precious and I was more willing to experiment). Unfortunately, I was in the middle of also experimenting with new paints (I almost always used Tamiya acrylics because of the easy clean up) but with all these new techiques, I needed a stronger/hardier paint, and started to look at Mr. Color lacquers now. But with this mix of paint (and repaints because of that horrible Alclad clear coat wrinkling eating away at the Tamiya undercoat that I had to re-sand down everything) the Acrylic Ink using the Tamiya X-20A thinners attacked some of my paint underneath again. I was so discouraged that I didn't even take any photos of that, I wished I had.
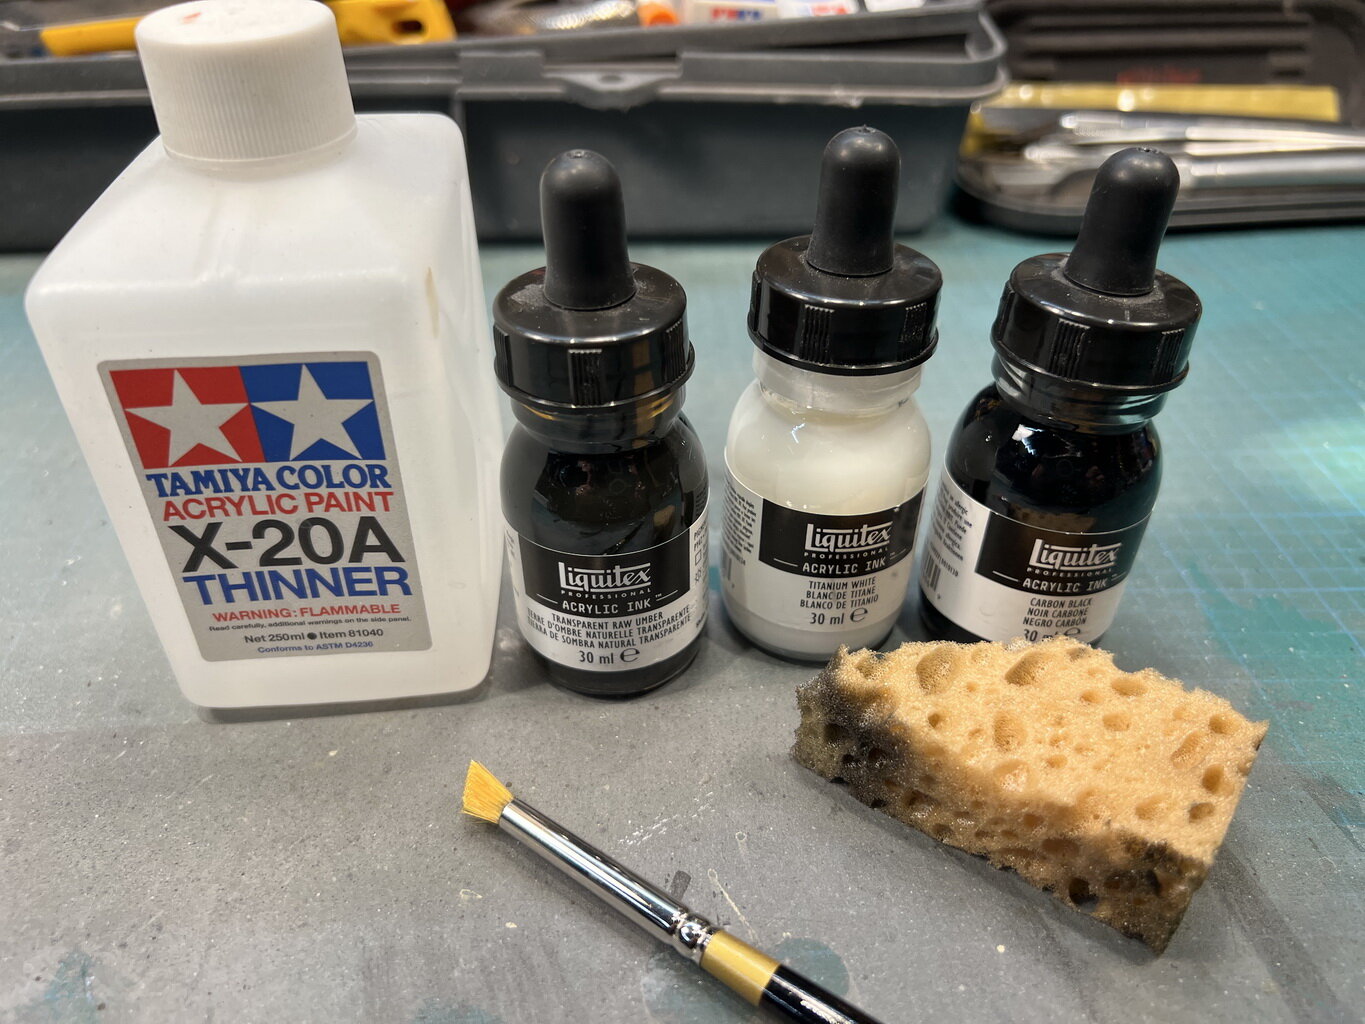
When this technique is done properly, the effects are phenomenal!
https://luftraum72.com/layered-ink-patina-technique/
I do urge people to try it - I'm starting to get the hang of it after a few false starts, luckily you can undo a lot with the X-20A thinner (except when it started attacking my older Tamiya paint - you should only do this over top of Mr. Color lacquers) Except I kind of over did it - too heavily weathered for a trainer!
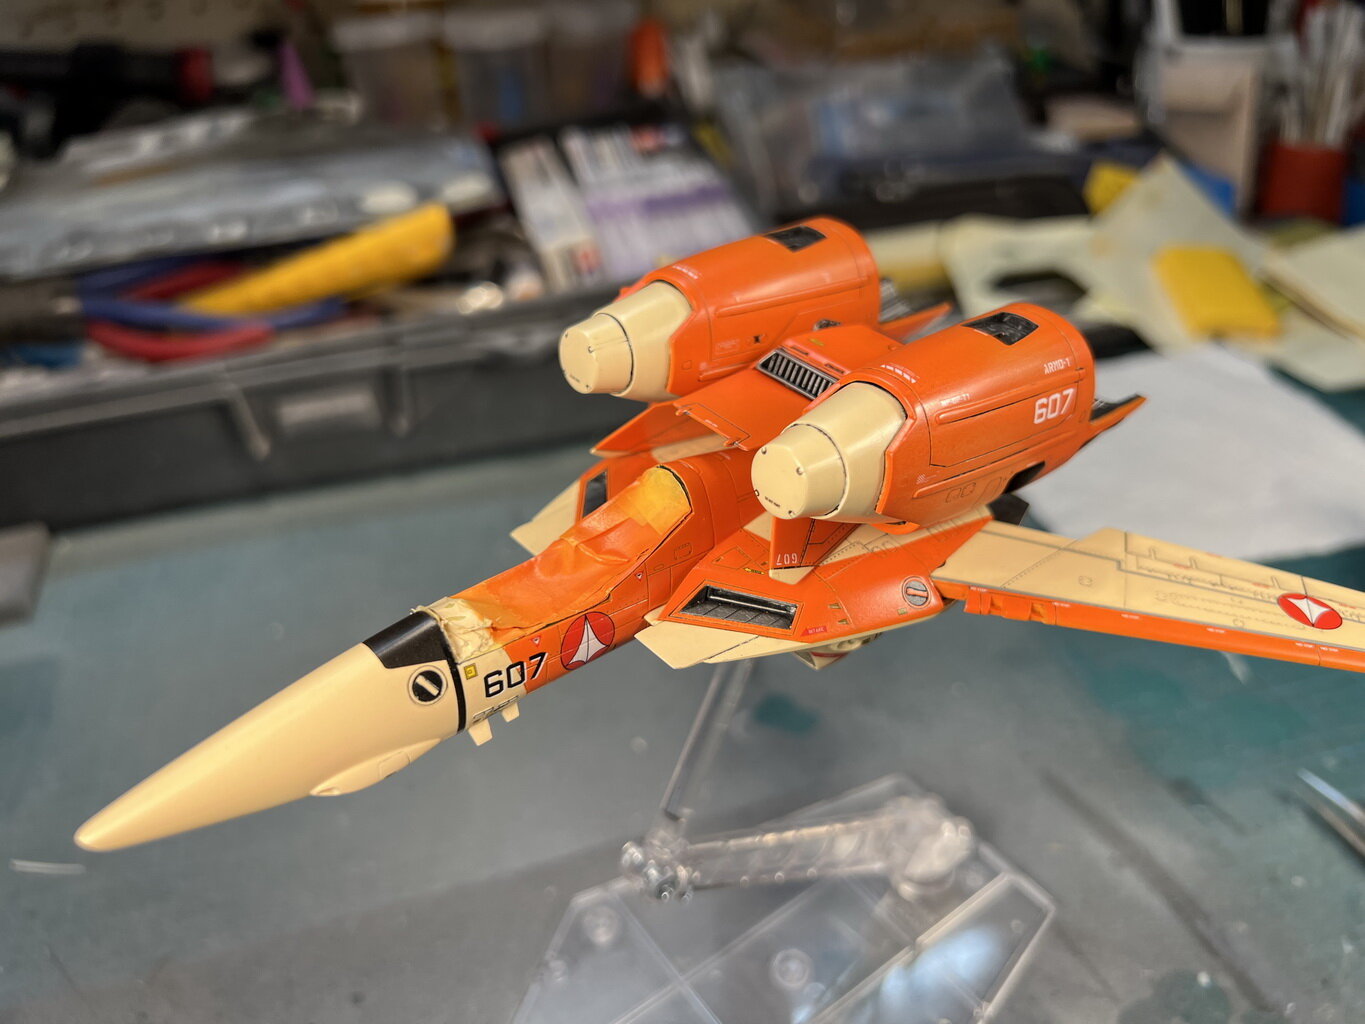
So I masked up everything again, so spray the original colours over top of all the weathering lightly so you can still see the mottling underneath but it toned down the effects. I think this is the 4th or 5th time I've had to carefully re-mask everything and respray everything on this model - I felt like I've build 3 or 4 of these now 😛

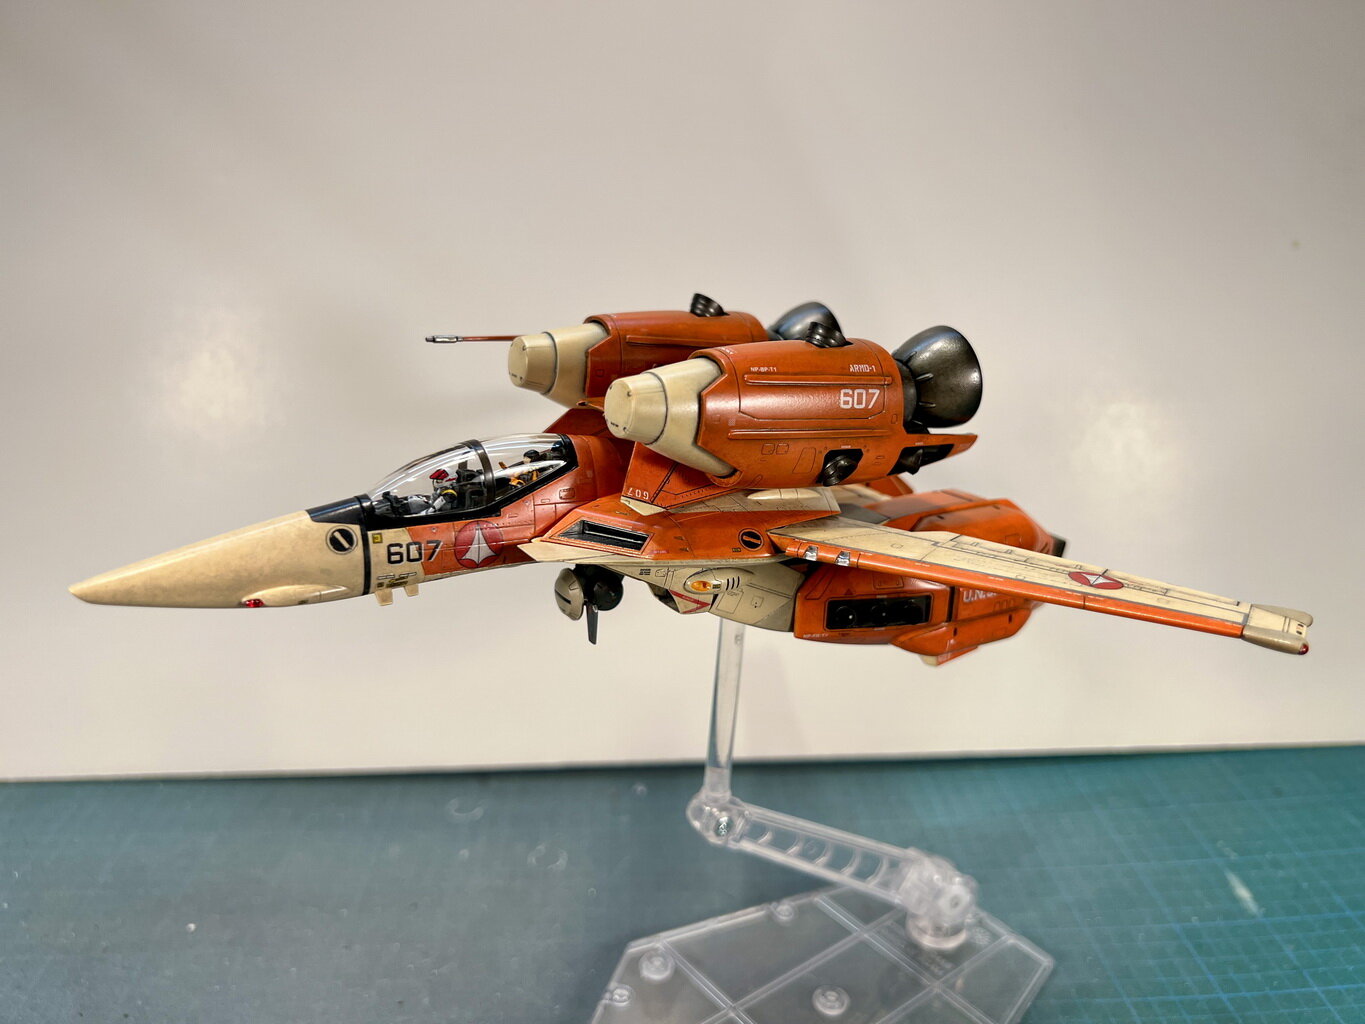
The final stretch is in sight! I'm finally happier with the finish, its still a little too weathered for a trainer, but I do like the weathering patterning, I will keep the semi-gloss sheen instead of going flat matte to keep it looking a little "newer" or better kept.
-
Wow that's amazing!!!
-
2 hours ago, Thom said:
Will be cool to see it happen. I just hope they keep the modern aesthetics for the ship.
And I haven't seen the new episodes yet, but those are some great designs! That last looks like a modernized Crossfield!
Yes, the last one was a Crossfield saucer section mixed with my own original design for episode 1 of the second season where there was a rogue fraction building their own "look-alike" Federation Starship to start a war. This was an initial design option, we ended up with an inverted secondary hull and downward nacelles version in the actual episode and there was actually a TrekYards video
discussing it and an article talking about how this fixes so many things wrong with Discovery :P!!! (they asked me to work years ago on Discovery but I refused)
https://www.giantfreakinrobot.com/ent/did-star-trek-just-fix-discoverys-biggest-mistake.html
I wished they had done a little research and asked me about the design instead of guessing on their own articles.
The script called that we were to shoot the scenes on the Discovery Set (for budget they didn't want to build a new ship interior for just 1 episode) so they scripted a call out that it looks like a Crossfield class (not my favourite saucer design) but I had to follow script! I'm glad they took an older option and made it real/canon in the opening sequence now.
-
3 hours ago, sh9000 said:
Hey I'm glad someone noticed! If you mean these extra ships in the opening credits...
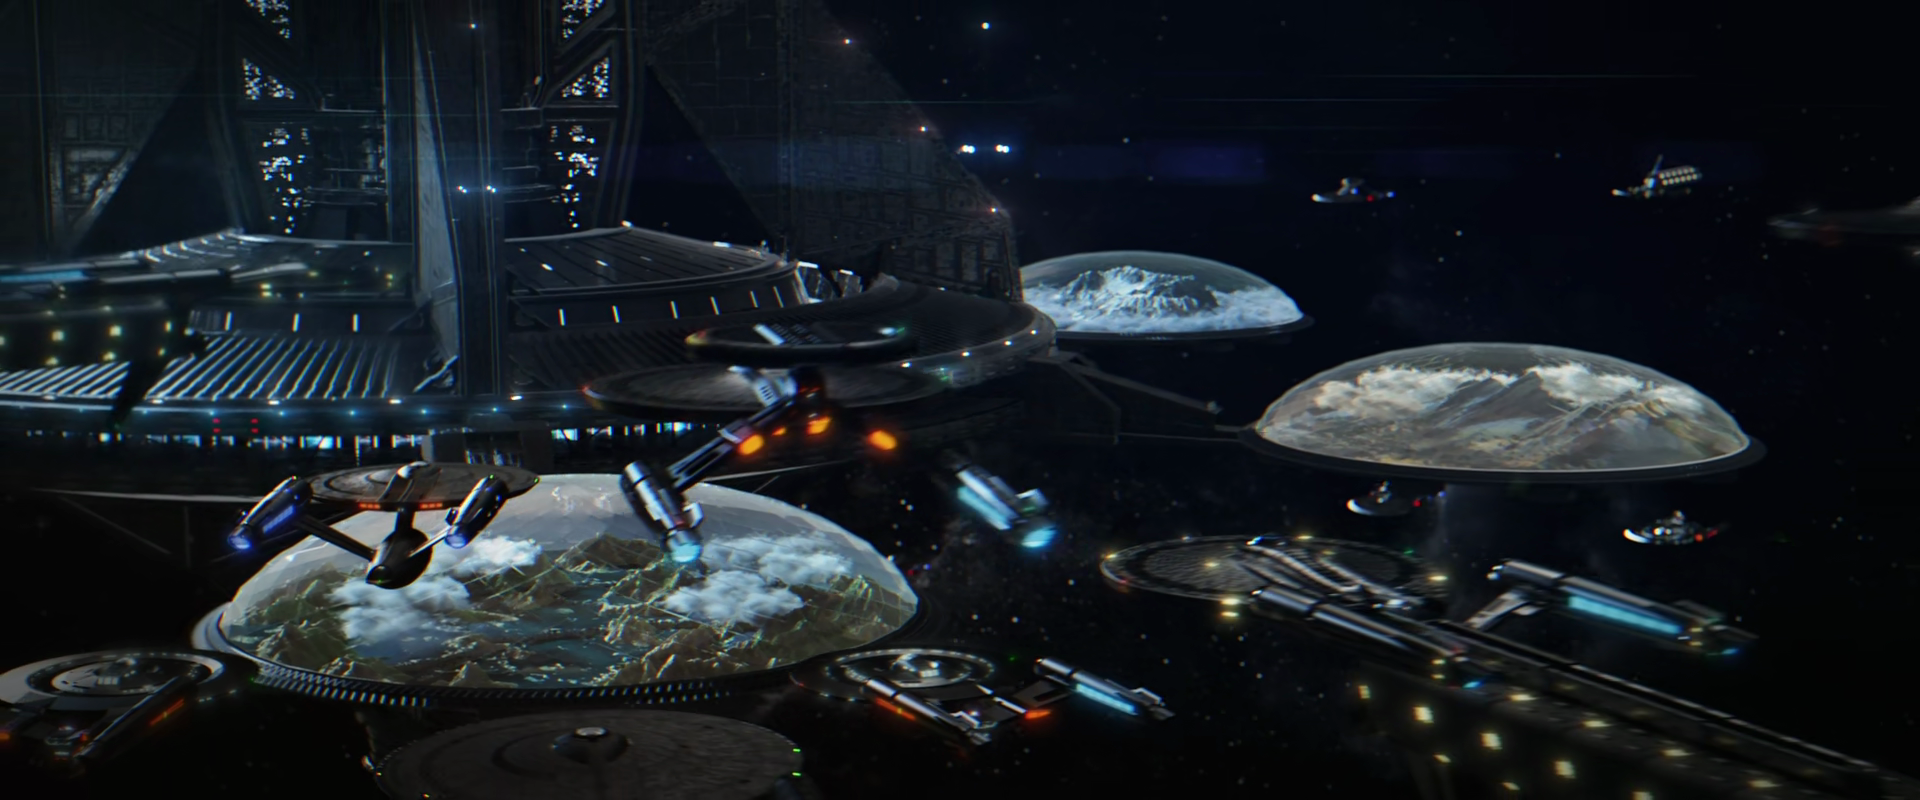
I designed those in the 2nd season, but it never made it to screen due to budget, but I'm sure glad to see them now!
That's why I haven't been building too many Macross models lately, I've been busy in this world 😛


-
Does it include decals for the eyes?
-
I don't get why they don't just do magnets for all these fast pack attachments. Is there some rule against using magnets in toys?
-
On 5/27/2025 at 7:32 PM, Chronocidal said:
Little late, but I think it was in LDD. I know there have been some custom part update packs for it, since LEGO stopped supporting it.
Downside to the update would be the lack of actual windows, but I'm absolutely not upset by not having a cockpit with minifigures in it. It's cool that sometimes they work out in the correct scale, but I'd much rather focus on a having as accurate a shape as possible, rather than being shackled to the existing stock of clear elements.
Since it hasn't been brought up here yet, I'm just going to say I'm really torn about this new set.
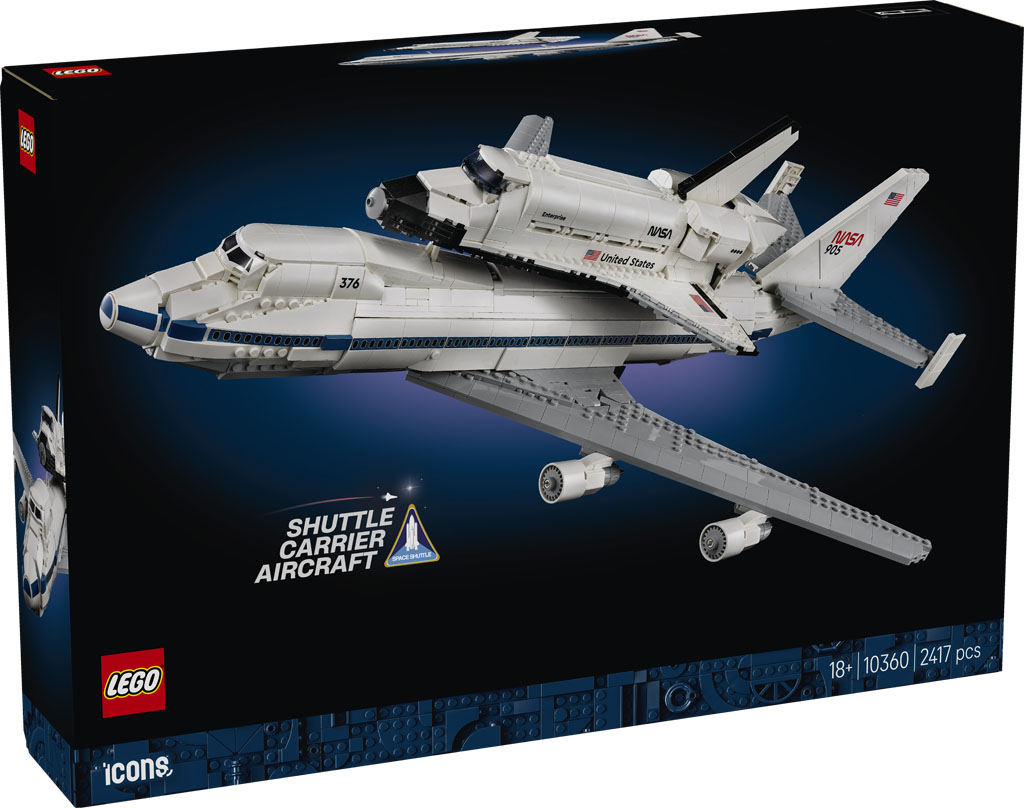
On the one hand.. I want to get it. On the other.. the primary reason would be to rebuild it, because this design just upsets me in so many ways.
As a starting point, I'm not nearly the airliner aficionado that I know some folks here are, but this 747 has so many serious flaws that I can't look at it without cringing. Primarily, the cockpit absolutely needs a redesign, but the placement of both the wing and stabilizers relative to the fuselage just bother me.
But the shuttle.. this hurts. Mostly because it's almost dead on 1/110 scale, same as the Saturn V, and more importantly, the Ideas shuttle that got rejected.. and this design is so much worse than that one. I do like how they used some ball and socket joints to angle the main engines, and I might steal that design for mine, but the rest is just a painful downgrade in so many ways. It doesn't even look as nice as some of their City-themed minifig scale ones, and even using one of their old single-piece molded noses would have been an improvement over the weird half-octagon cone they designed.
I have gradually made a lot of tweaks and modifications to the original KingsKnight design, especially the nose and tail (the feature I'm most proud of, that thing is a SNOT jigsaw), but I also redesigned the wing to use the old-style notched wing plates, which let me give the wing a proper gray leading edge both on top and bottom. Those pieces sadly aren't made anymore, but I'm certain something could be worked out using all of the new angled tiles they've made..jpg.2d0bf831f7867971e0f084929ea81d4c.jpg)
.jpg.f6ab64d740a608aa611ba2b786e1bc1e.jpg)
Funny enough, the original Ideas design was closer to the Enterprise anyway, since it left out the upper nose markings that I rebuilt it to include.
In terms of the set though, I know it's not historically accurate, since they just decided to replicate the Paris Air Show scheme carrying the Enterprise, but it feels like a lazy cop-out not to include the parts or stickers to pick one of the other shuttles.

They even missed a stupidly easy detail by not adding the upper windows on the cabin, or even a sticker for them.. which is specifically what that notch in the upper cockpit panel was used for in previous shuttle sets. I know the Enterprise had those windows covered, but they were still there, and it would have made a very low-effort detail.
I don't know. Maybe I'll use the points I racked up during the Star Wars sales to discount it and pick it up later this summer, but it's definitely a fixer-upper. I could even use the stickers (yes they're all stickers) from the shuttle on mine, since the parts involved are mostly the same.

I feel exactly the same way @Chronocidal - I feel they just phoned this one in. I was so excited to hear about this one, I love official Lego sets especially their space stuff but there's so many bad shapes that I can't seem to support this set. The 747 shape is so wrong, and my KnightKnight Shuttle is so much better than this one.
-
6 hours ago, electric indigo said:
Were these strips even shown in the animation? I was always under the impression that they were added by Hasegawa (under Kawamori's supervision of course).
IMO the VF-11 looks better without them (and the warts), so I sanded them off.

Gorgeous!!! Love that splinter scheme!
-
WOW @nightmareB4macross!!! I absolutely love it, I remember the poster that cutaway came from, can'wait to see you finish it!
-
That's amazing! That's almost all my only criticisms of the original Pod!!! (how did they read my mind)
-
4 minutes ago, sh9000 said:
Season 3 Teaser Trailer.
❤️❤️❤️😁
-
Sorry to be late to the party, but which toy/manufacturer is this?
-
Glad you're building the 1/72 @electric indigo - you don't see many of those built. What are you going to do with the cockpit? That's one of the reasons I can't think of ever starting mine.
-
Thanks so much, you guys are bad for my wallet, looks like I need this release. I just got burned with Oblivion 4K which is worse than the 1080p Blu-Ray
@treatment I just got a brand new JVC DLA-NZ500 laser 4K projector with 100" screen, a new Denon AVR-X-4800H receiver and Panasonic DP-UB820 4K Player and my old 7.2 Paradigm Studio SEs.
-
Damn it! Won't ship to Canada.
So is this 4K transfer worth it? I have the previous release and it wasn't too sharp and I've noticed a lot of 4K transfers lately aren't very sharp and not a noticeable improvement over the 2K blu-rays (ie; Oblivion). Is it actually sharper or higher resolution and a noticeable improvement over the previous blu-ray release? I saw a Japanese review on Amazon.jp that said it was blurrier/softer than the 2K release - is that true?
-
Wow! That looks really great @electric indigo - you made such an ugly duckling look so sleek!
Whats Lying on your Workbench MK IV
in The Workshop!
Posted
Looks amazing! You have me a little scared for this, its in my stash (although its even older and its the first release without Khan's ship - I wished I got that version) and nothing I hate more than sanding. I think it will continue to be relegated to the back of the stash. But yours looks so good - congrats!
So sorry to hear about your burns @pengbuzz - take good care of it.