Ido
-
Posts
847 -
Joined
-
Last visited
Content Type
Profiles
Forums
Events
Gallery
Everything posted by Ido
-
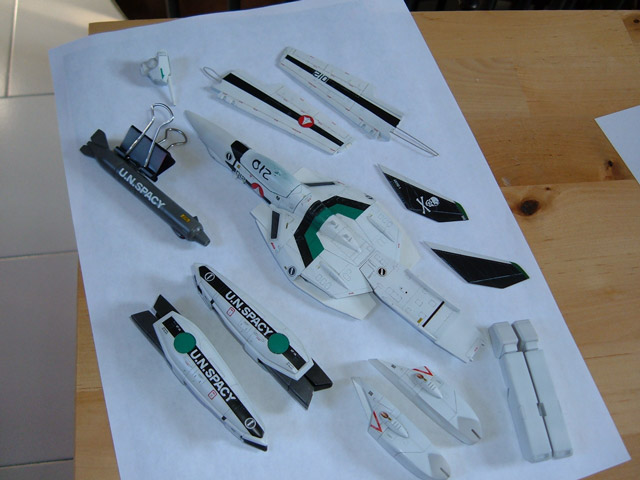
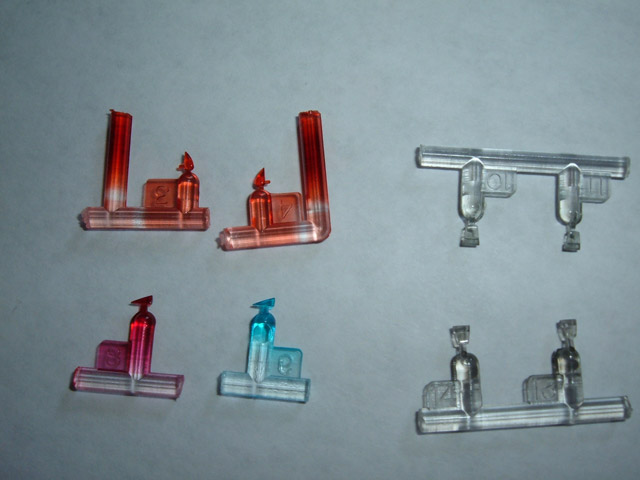
Not yet weathered, semi-gloss valk Here the clear parts, classic red/blue for the light and a mix of red/orange for the sensors, I tinted the wing's root lights with smoke like in the boxart illustration. (see also tenjin book cover) What I'm doing right now.


-
Yes, there is his pic on the box.
-
Yes, it comes with a macross7 vf-22 flight suit version one, so not suitable for Millia or VfX versions.
-
Wave 1/100 battroids looks nice, I also own a vf-11 jamming birds, but unfortunatly the directions are missing, a soon I receive the copy of them from Less than Super Ostrich I think I'll take some pics of my kits for macross world. I Absolutely love the wave -vf-11b model I hope to get it someday.
-
It's just ep 19 animation that sucks or even the next episodes are so crappy, budget problems?
-
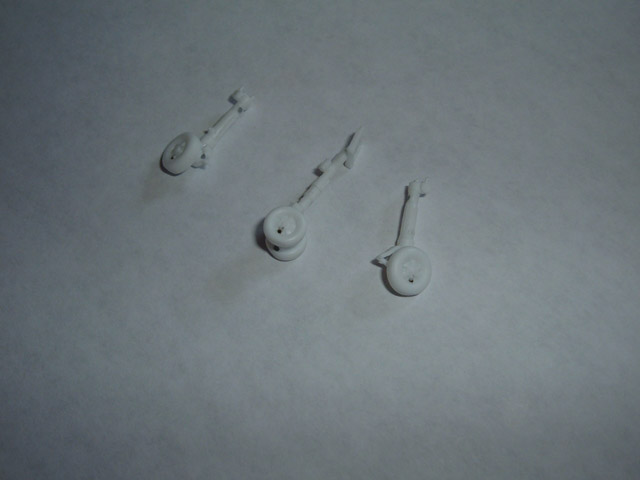
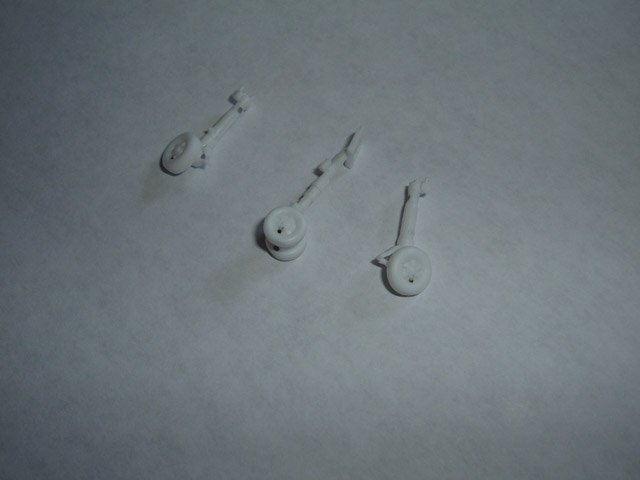
With the winter its even tougher taking pictures, argh!! So instead of taking crappy pics I prefer don't waste time, as soon I get a sunny day I'll do some pictures. The valk itself its all decaled and washed, I also tinted the clear parts. After Open the cockpit I noticed the HUD black part come out crappy looking, luckly It will be covered by the canopy, must really take more care of the cockpit area. Currently I'm assembling the landing gears, the tires and doors have a lot of injection marks in weird places, how boring... Today I'll let the putty dry, must get some mori mori putty next time I shop from Raibow ten.
-
Probably soon or later we'll see a Hasegawa vf-11 cause its one of the major fighter in Macross. Really doubt about the vf-4.
-
It can bomb me anytime.
-
Really nice one.
-
Finally finished with applyng decals, I didn't apply the ones really close to the cockpit seal, I'll apply them later. Still have to apply microsol on what I have just placed and leave them be a night. The decal on the airbrake its a little ruined, I'll touch up it after the seal coat with a brush, its shouldn't stand out a lot in the end. About the annoyng NO STEPs, they are easy to apply but very boring: 1- they are all in row on the paper so with a ruler you can trim a lot of useless film in a moment. 2- Apply 2-3 of them at time, its not hard to do and You'll finish in less then a couple of hours without become crazy. Forgot to mention a thing: Tough this model kit includes both kakizaki and Max numbers and name decals it doesn't includes their colors guide and decals, I have taken them from my Super VF-1A kit.
-
UPDATE! I placed almost all the decals, after this I will protect them with a semi-gloss clear coat (after the decals a gloss coat its pointless...) then its time to assemble the landing gears and doors.
-
From the dirt look of the thing looks like you don't use capillary action but just paint over the panels, isn't it a bitch to wipe up the excess after? About the vf-1 decals, they are thick but they got no problem in conform to the panel lines with some solution, but they really have tough times in conforming to irregular surfaces like the airbrake piece, the best thing its to do some pre-cutting on the paper before appling or cut them in more pieces. I also saw that some decals are too long, how is the canopy frame decals fitting?
-
Don't even mention to go overboard in masking, overspray is a bitch I perfectly understand why you did that, "better sure then sorry" we say in Italy The gray/white vf-0s looks good so I suppose the vf-1 will look good in the end too, personally I will do the postshading freehand for a more subtle effect.
-
Personally I don't like very much that colour scheme but technically its wonderful. Yes, lacquer paints sand better cause its a tough film, the acrylic layer its samewhat soft, one of the many reasons I like better modeling lacquer over modeling acrylics. I don't suggest to clean your airbrush sprayng alchool cause its not the paint thinner, it doesn't thin the paint but make it soft and weak, its works great for cleaning stains on your stuff but I fear it can glog the airbrush. ps Thanks for the decal tip, it worked like a charm.
-
PMed you! Still, if someone has them in digital format especially the vf-22s directions please let me know.
-
Mr.color paints also clean up nicely with 92-95° alchool if you don't want to use lacquer thinner, just don't use it to clean the internal of your airbrush. Let me know, cover better mr.base white 1000 or tamiya acrylic white? ps I'am currently decaling my vf-1A, any tips about that damn thin long decals like the wings one?
-
Hello, somebody has/can do clear scans/pics of the directions for those kits? wave 1/100 vf-22s or yf-21 wave- vf-11d or any vf-11 type Any help is greatly appreciated.
-
There is something odd with the legs, they look so blocky.
-
Cloudy weather here, so taking good pictures its hard. The first wash its done, now I have to clear coat and apply decals. I didn't used the large decals for the tailfins and stabilizers, I prefered to just airbrush the base colors.

-
Base white shouldn't be a primer, it's supposed just a white lacquer that cover better, use it at a low pressure and don't thin it so much. You are absolutely right about white over gray, if you followed my build-up: that is the first and last time that I use mr.surfacer on a white plane Ever tried Hasegawa rivet scriber? Its great as starting point to drill a hole, it scribes rivet as you see them on your hasegawa kits. http://www.hlj.com/product/HSGTL11
-
I suggest to glue them before prime-paint, I also poured some tenax in the gaps to ensure strenght, unluckly the chest pieces falled from my hands and one of the fin snapped cause the piece landed on it.... D'oh! I glued it on place with CA now I hope it will not show up too much. The antennas on the front fuselages leaved a gap so I had to apply some putty. Surely these pieces are really thick, so if you don't use the photo-etch parts thin them at least a little. I think that the main advantages about gluing them before are: 1- easier to paint 2- they look actually part of the fuselage 3- You can use liquid glues = more strenght 4- easier to sand and thin Next time I want to use the photoetch parts, if you use them you must place them before paint, cause you have to drill 0,5mm holes and fill the gaps. Today I plan to apply a thin coat of clear to protect the thing before airbrushing what its left to airbrush and do the wash.
-
-
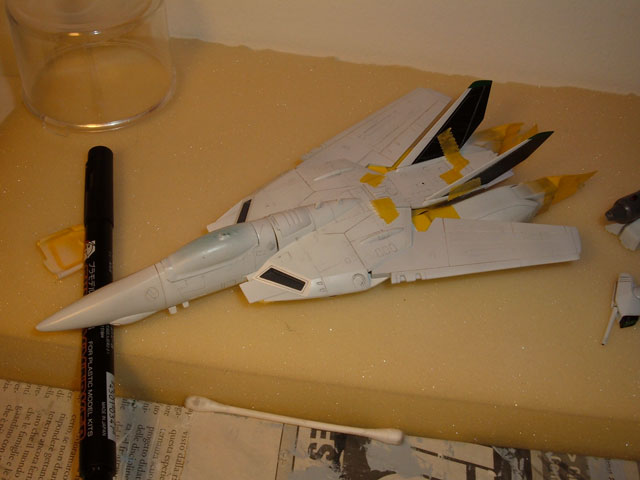
Hi guys, I started to paint the base colors, surely paint white over gray its a pain, I got two little accidents that slowed the things too. Aniways the most its done, still have to paint the legs and gunpod then I'll paint the other shades. Have you some suggestions about how to place long and thin decals like the wing ones?
-
http://www.macrossworld.com/macross/magazi...il-hj-page8.jpg http://www.macrossworld.com/macross/magazi...2004-page-2.jpg http://www.macrossworld.com/macross/magazi...ge-2-jun-04.jpg http://www.macrossworld.com/macross/magazi...e-11-jun-04.jpg http://www.macrossworld.com/macross/magazi...e-12-jun-04.jpg http://www.macrossworld.com/macross/magazi...e-13-jun-04.jpg http://www.macrossworld.com/macross/magazi...e-14-jun-04.jpg http://www.macrossworld.com/macross/magazi...e-15-jun-04.jpg http://www.macrossworld.com/macross/magazi...2004-page-2.jpg http://www.macrossworld.com/macross/magazi...ly-04-page1.jpg http://www.macrossworld.com/macross/magazi...ly-04-page2.jpg http://www.macrossworld.com/macross/magazi...ly-04-page3.jpg http://www.macrossworld.com/macross/magazi...-apr-2004-1.jpg
-
I read that GSI(gunze) should release a new mr.cement called "Mr. cement Limonen", probably similar to gaianotes "Limo-chan" cement, I wonder if they are the same as Microscale "Micro-weld" non toxic orange smell cement. http://www.gaianotes.com/index.html