Anasazi37
-
Posts
2061 -
Joined
-
Last visited
Content Type
Profiles
Forums
Events
Gallery
Everything posted by Anasazi37
-
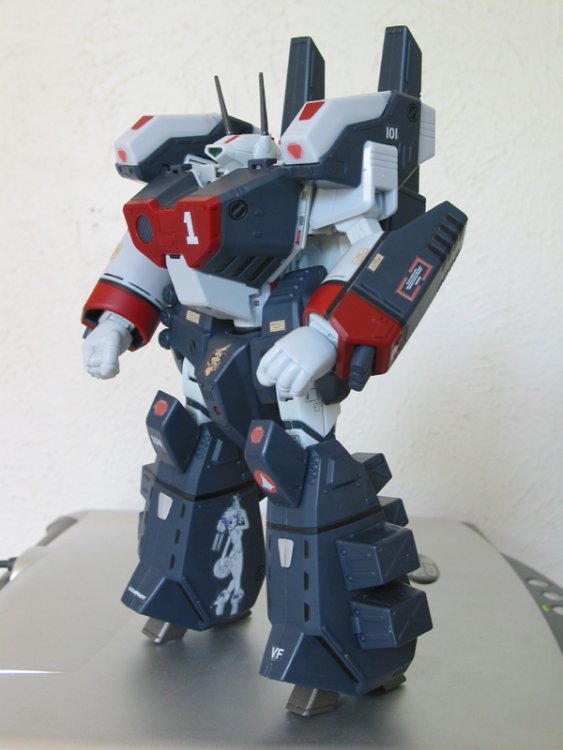
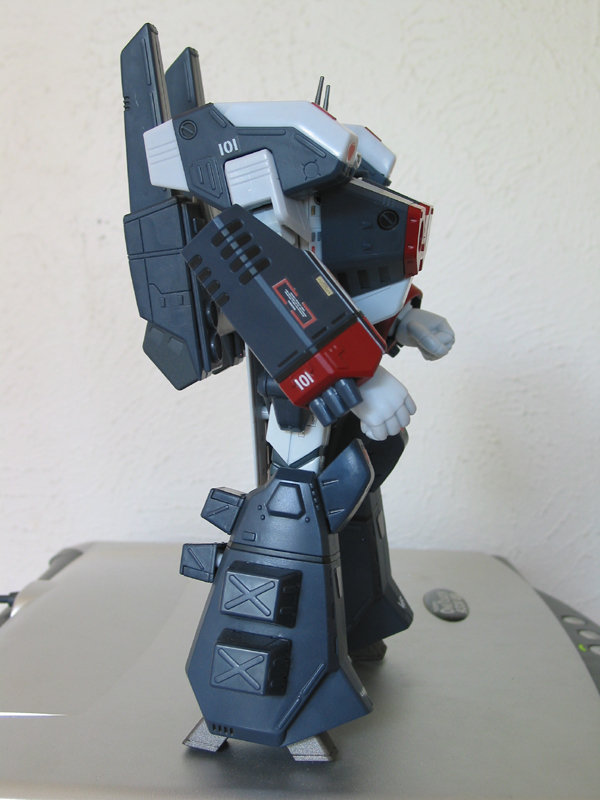
This custom was commissioned by Vermillion One, who has to be the most patient person I know. He's been waiting about six months for this.... Battroid
-
I'm glad that you found the application guide useful. Enjoy the decals.
-
I'm willing to donate the time and materials necessary to create Dragon decals for everyone who ordered the kit. No charge. All you guys would need to pay for is shipping. We can work out those details later. Goodness knows when I'll be able to create them (maybe a month or two....), but it's the least I can do considering what you all have gone through. I was lucky enough to get my Catseye and Fanracer in the first shipment and have watched this nightmare unfold ever since....
-
I am still selling them and the versions online aren't good enough to print. The site is online--I just checked. What made you believe that I had stopped? I offer them for sale at least 4-6 times per year. I also sell them when people directly PM me about the sets. In fact, I am working on several right now for various people. TMP Anime also sells the 1/48 sets (and they're in stock right now).
-
Here's the link to my Club-M 1/48 sets: http://www.netwiz.net/~dwhite/decals/decal_samples.html
-
Some of those changes won't be easy to make because of how the set is designed, but they are possible. I have the Valk Minmay already sized for 1/48 Yamatos, so that's not a problem.
-
I have a white version of the Minmay Guard set in 1/48 and it includes the optional decals to extend the theme onto an armor set. The Minmay and sponsor logos are still purple and blue, but everything else is white. There's no need to ask my permission. It's not like I own a copyright on the designs. They first showed up in Model Graphix about two years ago and all I did was recreate them for 1/72, 1/60, 1/55, and 1/48 valks. Making them on your own would be a big headache, though.... Here's the set (shown in black for ease of visibility):

-
Welcome to Macrossworld (and to collecting the toys)! And thanks for the interest in my set MG set. The Minmay Guard set was designed specifically for a completely white 1S (i.e., stripped, primed, and repainted for customizing). The decals wouldn't work with either the Max or Miriya 1J. I made these particular designs semi-translucent so they'd blend into the white paint job REALLY well. As a result, if you try to put them on a darker surface the bluish purple wouldn't show up correctly (perhaps not at all). I can make an opaque set for you, but I am not sure how it would look against the paint schemes on the 1Js. My aesthetic gut instinct says it's not the best idea, although definitely a creative one. If you're looking to trick out your 1/48s with some custom decals, drop me a PM with what you have in mind and I'll what I can do to help.
-

Digital Camoflage schemes in 1/72, any tips?
Anasazi37 replied to AchtungMacross's topic in The Workshop!
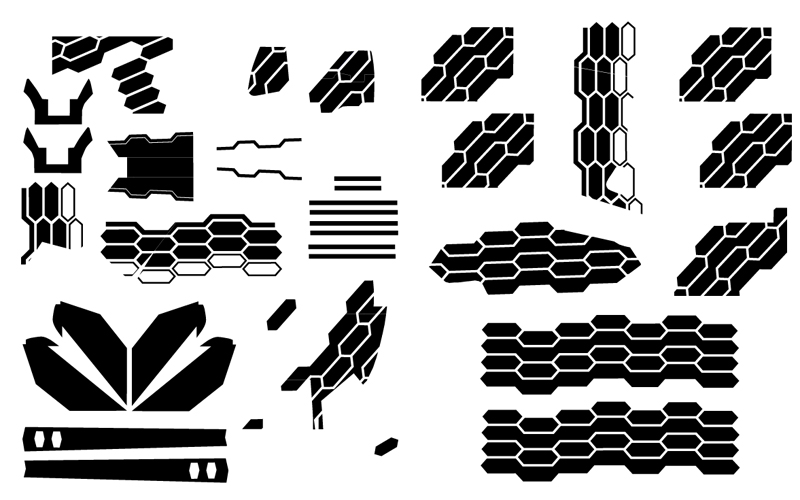
Check out the second page of this thread: http://www.macrossworld.com/mwf/index.php?...ic=7037&hl=camo Jung, a customizer and model builder, made both the blue and desert digital camo valks in 1/48 scale. He came up with an ingenious way to mass produce the hexagons. -
Have you tried applying some of them to see how they look on light and dark surfaces?
-
Yes, I was looking for some high res scans so I could start work on JM stickers and decals. I'm not sure exactly when I could begin work on them, though. I have a lot on my plate right now. Probably a few months....
-
Ranger565, The designs are looking good so far. My one concern revolves around how you are printing them and coating them. Are you using an inkjet? Color laser? ALPS? Each printer carries with it a different set of advantages and disadvantages. For example, while inket printers are widely available, the designs look great, it's cheap, and easy to use, the inks are translucent. Unless you print the designs on white paper, you can't use the decals on dark surfaces (like boosters). This should be okay for the more simple designs (booster circles, zentran logos, etc.), but the more complicated designs won't look too good because you will have to cut away any excess white paper around the designs and that will be difficult on, let's say, the booster kill markings. You'll end up with decals that have lots of white around the edges. Laser printed decals, except for black, are also translucent and the ink tends to flake off the decal paper. As a result, you end up with the same issue using white paper. It's not cheap, the quality is limited to 600 dpi, and the halftoning is very noticeable on large designs. ALPS printing, while probably the best option for the do-it-yourselfer, can be a royal pain in the @ss. The printers and supplies are expensive and it takes a long time to learn how to use it and master its quirks. If you're using an inkjet, you will have to coat the decals once they've dried because the inks are water-based. There is also a problem because of how glossy inkjet decal paper works. Just like glossy photo paper, the ink is not absorbed into the paper, but is instead trapped on the surface by a series of chemicals. That's why the designs look so sharp. When ink is absorbed into paper, it gets a little fuzzy. However, the trapping makes them easy to smear and hard to work with. Depending on the humidity in your area, the drying process can take days or weeks. I live in very dry, high altitude Colorado and inket decals take several days to dry. I remember waiting upwards of two weeks for a few sets. If you try coating them before they are dry, the ink runs all over the paper and the decals are ruined. The coating solution you use is also important. I'd steer clear of decal fixative sprays and acrylic spray can clear top coats (like Krylon Crystal Clear). They'll work in a pinch, but the coating can crack and it makes the decals hard to use. Something like Microscale's Liquid Decal Film (LDF) will work, but if you're not careful when brushing it on, you'll smear the ink. You do not need to coat laser and ALPS printed decals, but it never hurts. LDF works here, too. Sorry to download on you like this, but I've spent several years making decals, trying pretty much every process imaginable. I don't want to see someone else reinvent the wheel, wasting time and money in the process. As you start printing, please feel free to ask questions and I'll help as much as I can. Good luck.
-
I made a full set for that valk in 1/48 as a commissioned project for chowyunskinny. They turned out really nice.
-
Yeah, the stock stickers that come with the 1/48 aren't very good. Both Takatoys and I spent a lot of time designing markings that would fit better and look better than the originals. Twin Moons carries my more popular sets: http://www.tmpanime.com/advanced_search_re...azi37&x=71&y=15 Here's a link to the full list of sets available for each scale: http://www.netwiz.net/~dwhite/decals/decal_samples.html
-
It helps if you spell my MW name correctly. I've been traveling a lot these past few months, but I'm back now. PM me.
-
I designed sets of waterslide decals specifically for the low vis 1/48. You can get them through Twin Moons Anime: Low Vis Standard Set Low Vis FAST Pack Set They blend in well with the paint job and look far more realistic than the stickers Yamato provides. I'm way too backed up with other projects to help you out, but I'd suggest contacting Kurt. He does excellent work--especially with the type of "upgrade" you're looking for.
-
In a word, definitely. Anyone who's done a few 1/48 customs will tell you that disassembly is the only way to ensure a good-looking valk. And if you think the number of parts on the 1/55 is mind-numbing, just wait until you see how many the 1/48 has. On top of that, there are many parts that could potentially rub up against each other and cause paint scrape. You'll have to do a lot of sanding and modifying--especially around the knees, chestplate, backplate, backpack, etc.
-
I'm still down for making the decals, btw. Just give me a heads up before you're done so I can set the necessary time aside to work on the project.
-
Beautiful work as always, Jung. It's great to see what my decals can do in the hands of true artist.
-
Very true, especially since he spent A LOT of time trying to find something I might like. It now has a place of honor in my collection, right next to my 1/55 GBP-1S.
-
Thanks for the info!
-
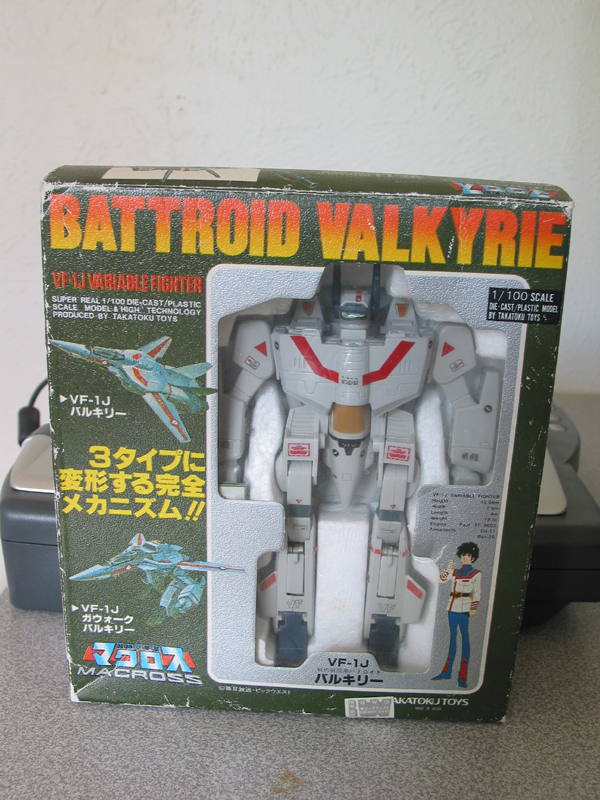
My best friend just gave me this as a thank you for helping out on some work projects of his. Knowing my Macross addiction he went hunting in the Bay Area for something special. He said he found this 1J hiding in a vintage toy store in Alameda. It's seen better days, but I've never come across one of these before. The MW toy section only has the 1S variant listed. How rare is this toy?

-
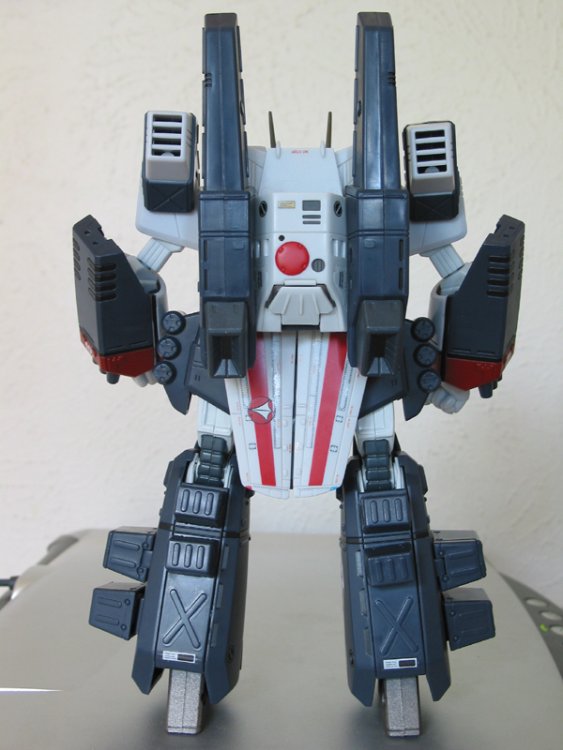
Back:
-
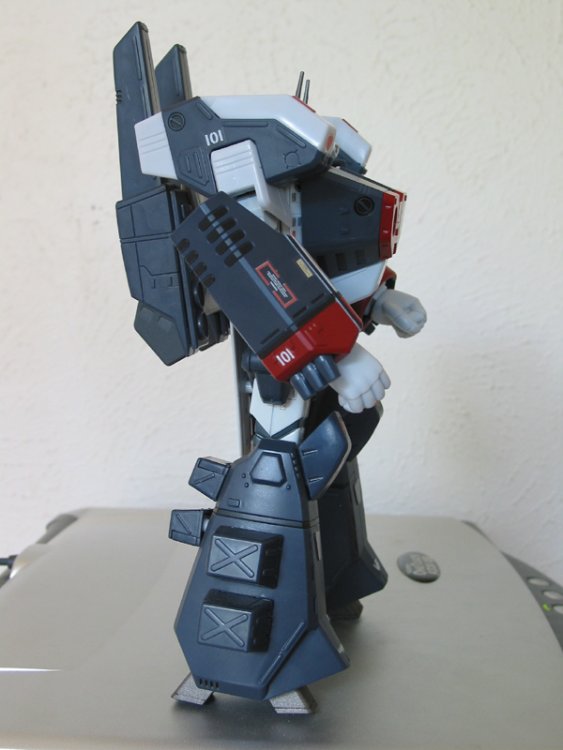
Right Side:
-
Left Side (note Minmay Guard 2 on right leg):