

wm cheng
-
Posts
4316 -
Joined
-
Last visited
4 Followers


Recent Profile Visitors
24588 profile views


wm cheng's Achievements
")
SMS Squadron Leader (11/15)
535
Reputation
-
Nice! I just ran out to pick up the Delorean myself! It was getting sold out at a few local Lego stores and completely backordered online, so I was lucky to find it at a physical store. The figures are better than the big Delorean!
-
Hey @derex3592 - it has happened to me before, but it usually lightens back up once you've clear coated it over with a super flat clear coat again. Super flat finishes scatter the light differently than glossy surfaces and often appears lighter. It might not get you back to exactly the lightness you had, but it should get you back at least 85% to where you were. Very nice pre-shading BTW!
-
On the lego site it says coming soon Jan 1st?
-
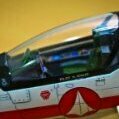
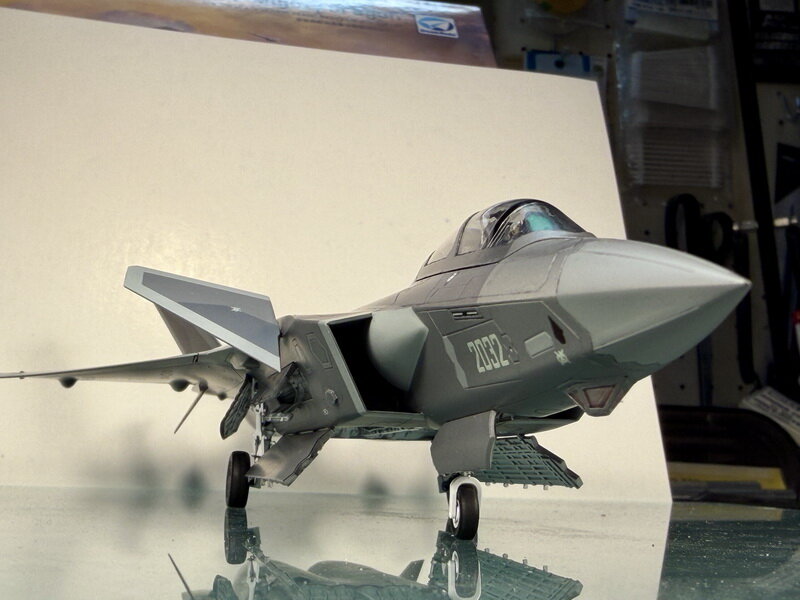
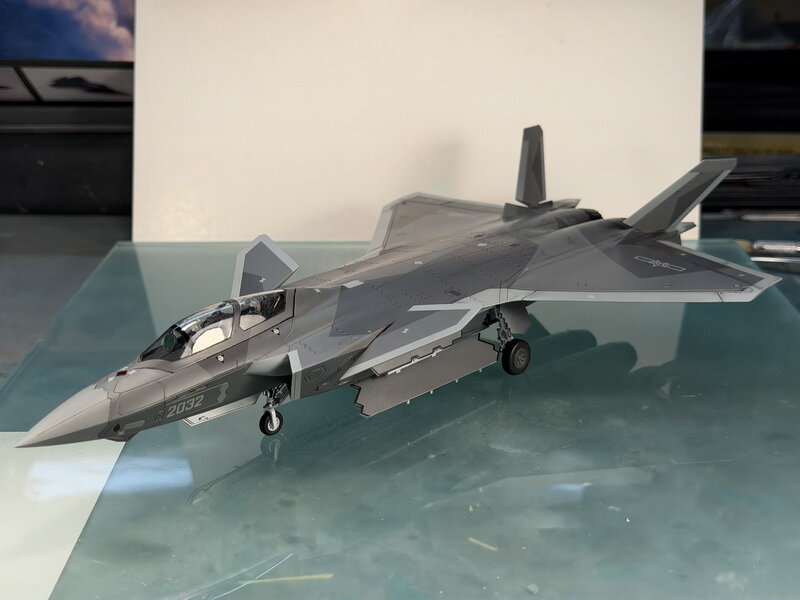
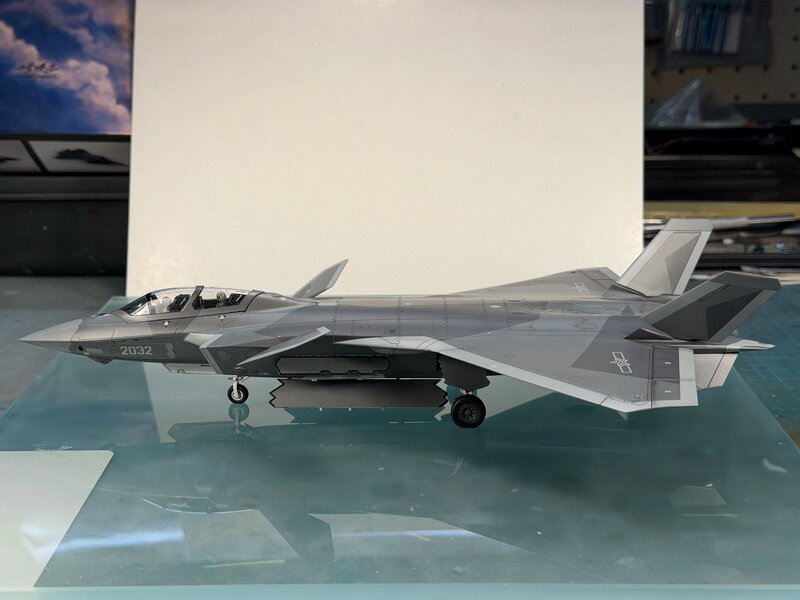
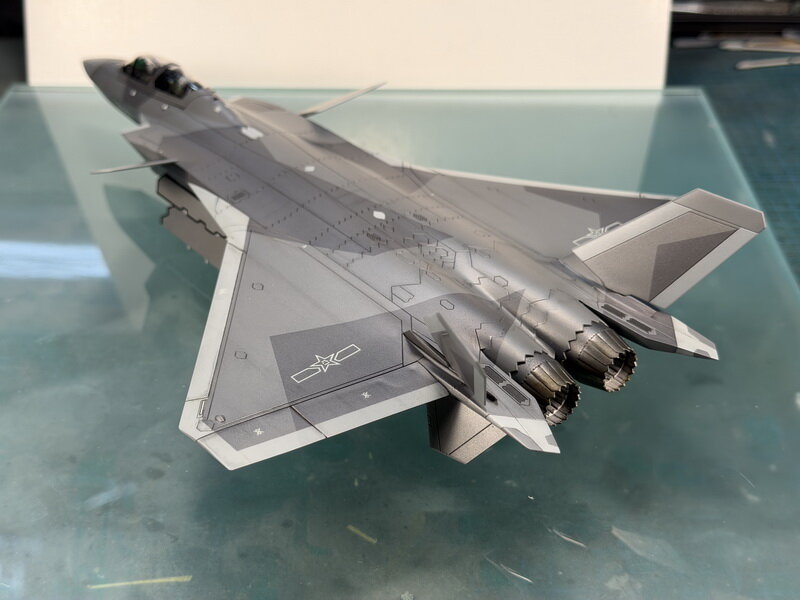
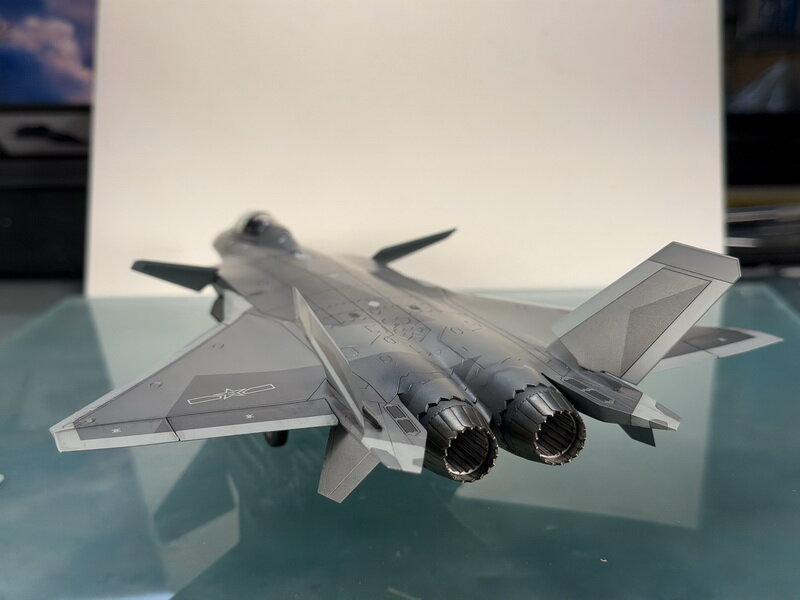
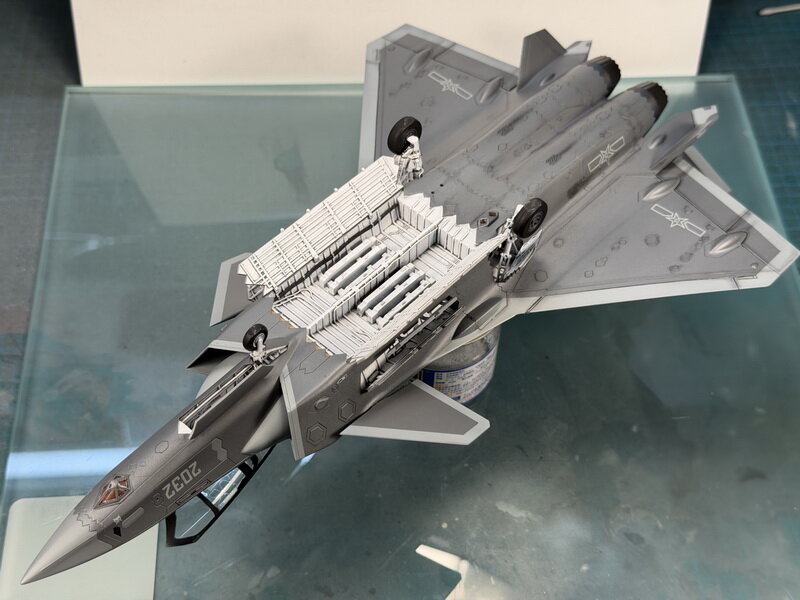
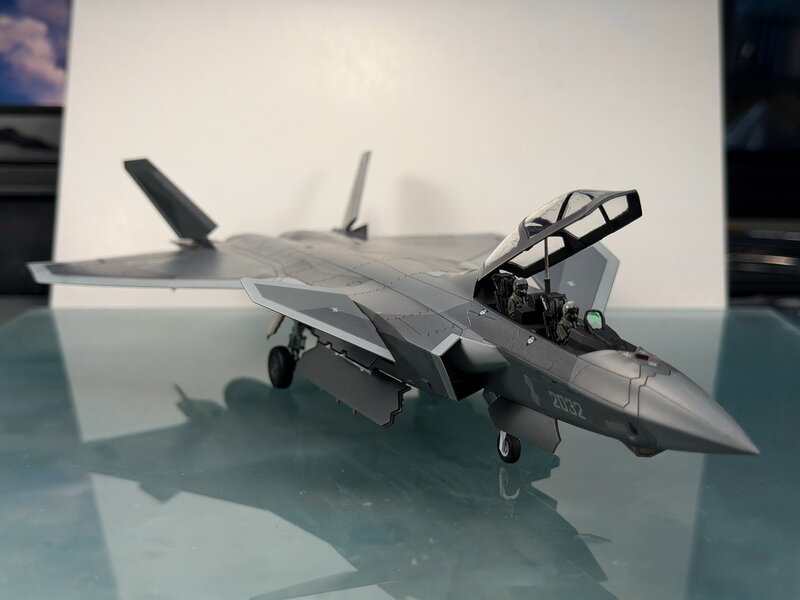
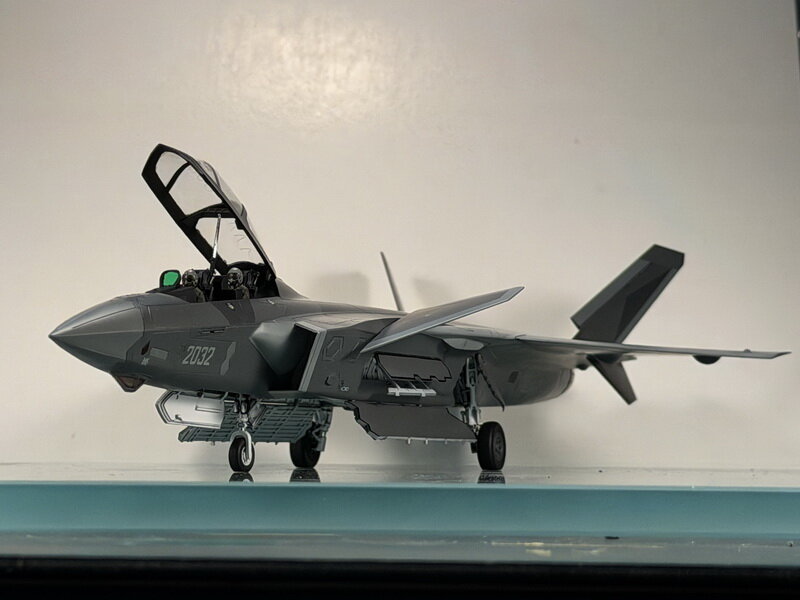
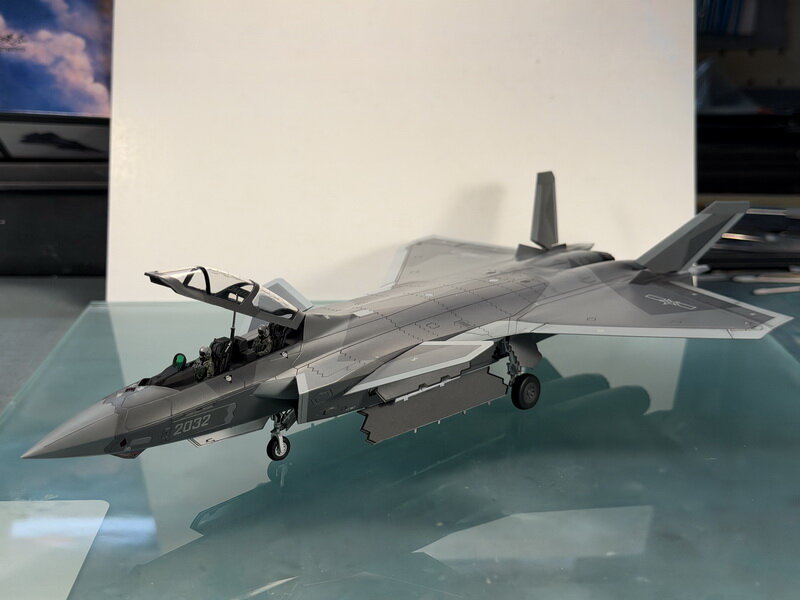
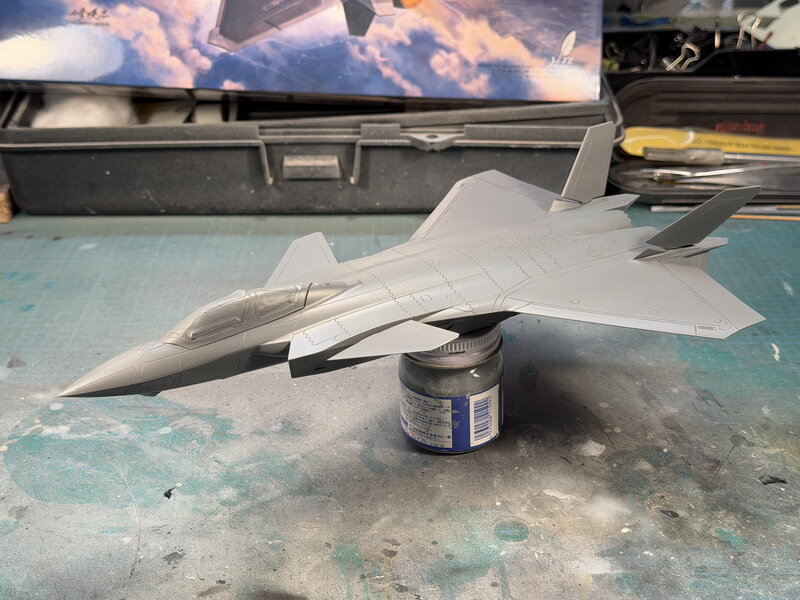
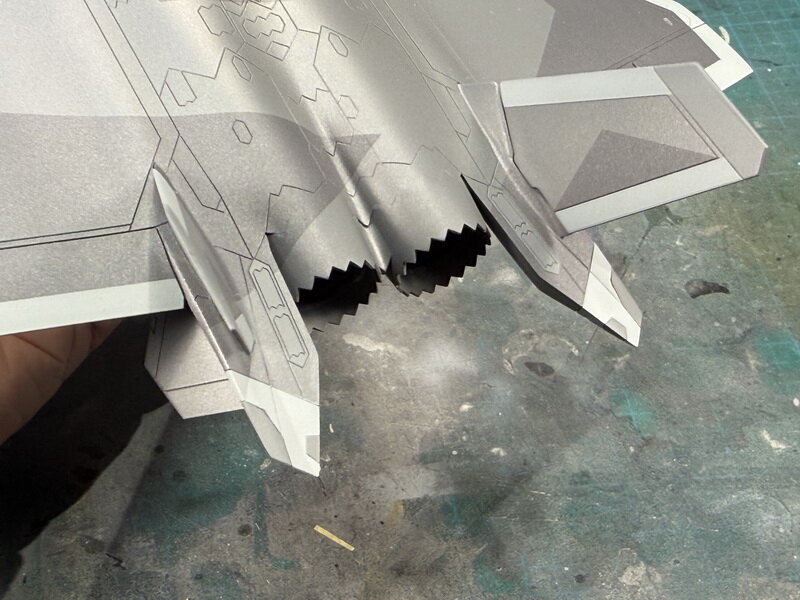
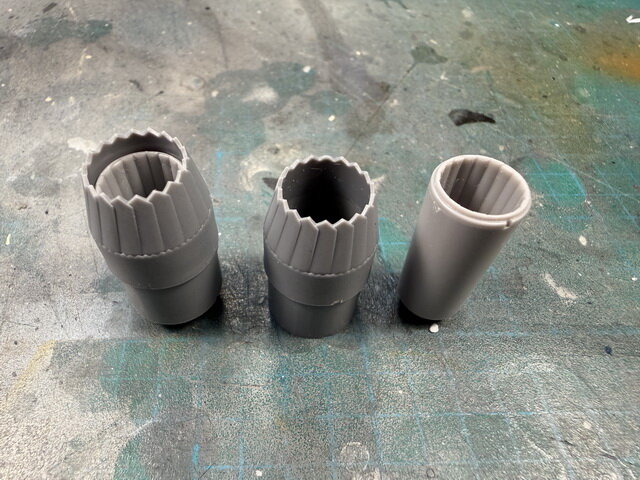
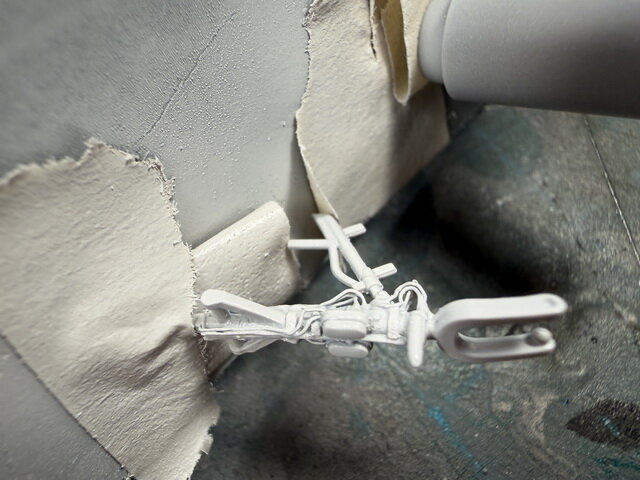
@Urashiman I can't believe there's no paint, it looks great and a lot of fun! I might have to pick one up to finally get my bug of just a straight forward build for fun right out of the box out of my system! My current J-20S started out with that intention but my anal self didn't let it go that way 😛 @pengbuzz So glad you are doing something to take your mind off of things. How's the Enterprise kit fit wise (I have that but don't know what to expect from PL kits) and the Reliant because you can't just have one?!?! @derex3592 That B-52 is looking sweet - crazy you got that seam. You must have a pretty cool 1/144 bomber collection going on there (I've always wanted a 1/144 US bomber collection but I'd have to have the B-58 and the XB-70 in there, are those next?) Got a little bit of time to myself after everyone went to sleep and I stayed up letting all the food settle. Got to unmask the canopy finally!!! Man this jet is pretty sleek... I don't get why I always get a tiny chip off the edge of the canopy on my last few builds lately (luckily its small enough for a hand painted touch up). Oh yeah, this is the reason I couldn't just simply enjoy an Out-Of-The-Box build - there were so many exposed internal bays, but they all had so many many ejector pin marks all over and including the doors that I had to either get rid of them or cover them up with detailing. The landing gears were also so simplified that it would have been embarrassing; they didn't even have the torque links on the oleo structs (I've been noticing this detail being omitted from more and more 1/72 scale kits lately). Luckily I had these links to use from my VT-1 Super that was built in flight mode so I had the spare landing gears to use. The hydraulic hoses were added (a first for me but it wasn't as bad as I had feared - painting them was another matter though) and they really did bump up the realism. I think I'm getting old, as something always happens when I build, that's 2 steps forward and one step back! I had to touch up some overspray and I re-masked after I had decaled, even though I had used MicroSOL on the decals and clear coat gloss over them, and then clear coat matte over them. The Tamiya white flexible masking took off my 4 white outlined triangle ejection seat symbols - argh! I had to search through all my extra decals to find another 4 identical white ejection seat triangles. Finally I found a black and white set from a Super Hornet that was the right size, and the english writing on it wasn't so clear so it didn't look too obvious it wasn't in Chinese - oh well. I don't have the last bit (horizontal fold) of the bottom doors glued in yet (gotta let these big doors dry first). Weird for a kit so devoid of internal details and bad profiles that I needed all the internal bracing to prop up the fuselage, it got the slight twisted wing structure bang on from the photos! It does make a cool imposing front view! The rear engines were totally devoid of detail as well. Funny enough, the kit provided these serrated exhausts (for the WS-15 engines) as an option to the Russian AL-31 engines, but both lacked any internals. I'm normally not a stickler for the entire afterburning section but some interior petals/detail would have been nice. Luckily, I had some leftover Phantom afterburning sections from a FindMolds F-4J kit that I used the resin 3D print and these kit cans fit perfectly inside the kit part and provided a pretty realistic opening for the WS-15. You are probably getting the sense that I'm a pack rat, and I save every little un-used scrap/option from every kit I've ever built - the trouble is storing and finding them again to use. I would spend hours going through spare decals and parts sometimes. With so much internal bays exposed, I'm glad I spent the effort to detail them and fill in most of the ejection pin marks. Now which colour scheme for the missiles should I use? All the photos show a light blue missile body with white fins in these bays - what I would suspect to be training missiles or dummies. I think it might make a nice contrast to the grey and white bird. Or do I use live ammunition rounds with just an overall white missiles (which I think might get lost in the bay). There no photo reference at all with this J-20 with live munitions - only blue dummies. I opened up the canopy for these final round of shots for now. I'm missing these two white round tubes (Cartridge Activation Device) at the front of the inside of the canopy that I'll have to scratch build (or scrounge from my parts to find two hydraulic cylinders) as well as the missiles. Weird that they would have these CADs and also canopy det cords at the same time (I guess the PAAF is a belt and suspenders kind of outfit :)) Good night for now... (I'm loving the slight metallic sheen to the grey, really looks light and dark at the same time depending on the lighting - weathering not really showing up though). It was refreshing to paint something so new and very lightly weathered for a change. Don't know how I'm ever going to paint he F-22 😮


-
ABSOLUTELY GORGEOUS!!! @MacrossJunkie, glad to see you are continuing the tradition with such excellent work!
-
Wow! Just incredible, thanks @M'Kyuun never knew about these guys - simply amazing. Thanks @Scyla I wish these get made into real sets at some point!
-
Wow! The PAAF certainly doesn't have many markings on them - I'm kind of in shock decaling mine (I tripled checked the photo references and they are clean!) since my last model was a 70s Phantom and I couldn't believe how many data stenciling there were!
-
@electric indigo What do you mean you do the light areas first and mask those out to do the camo afterwards? That seems harder, because the lighter greys don't get the metallic sheen only the camo areas does. So it kind of makes sense to do the lighter areas on afterwards, then you don't have to protect the flat grey areas from the metallic mist. I'd love to see your J-31! (weird that I couldn't add anything after the original post after the @electric indigo tag - I had to make a separate post - sorry)
-
@Thom That F-35C looks amazing! Can't wait to see more and now I'm looking forward to this ugly duckling. I guess they don't highlight the ram tape anymore on the latest F-35s? That will make painting easier? @Urashiman That Shinden looks sweet! I have the earlier one with the grey and orange markings, does this one also come with a huge sheet of decals for all the grey lines? I think this might turn into a Star Trek model with wallpaper decals where almost every square inch is covered 😛 @electric indigo
-
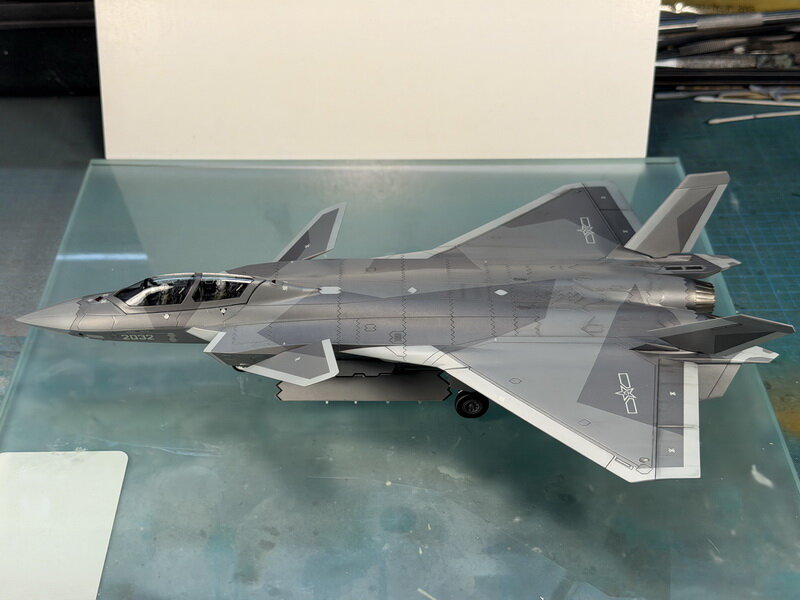
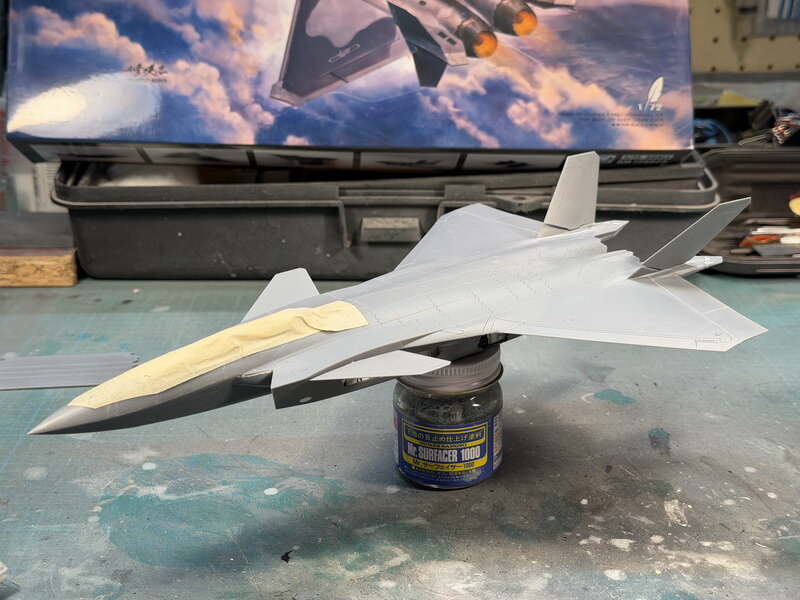
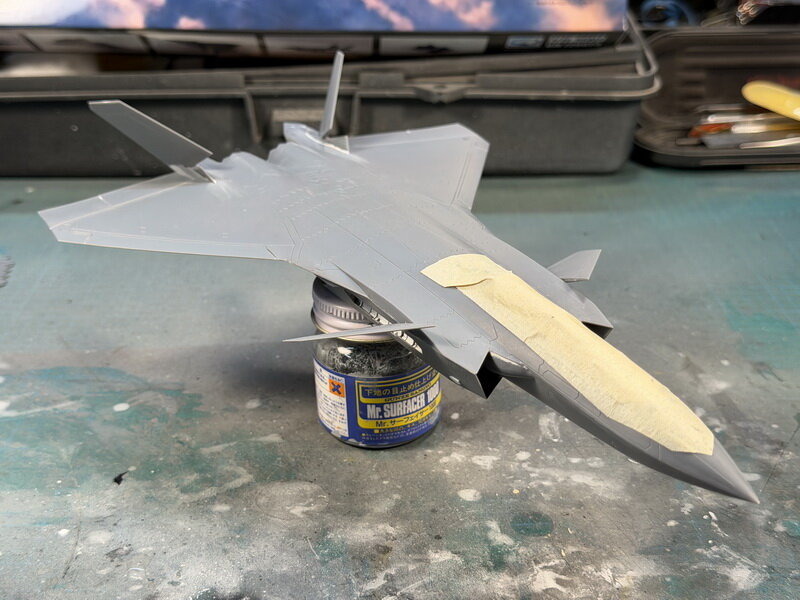
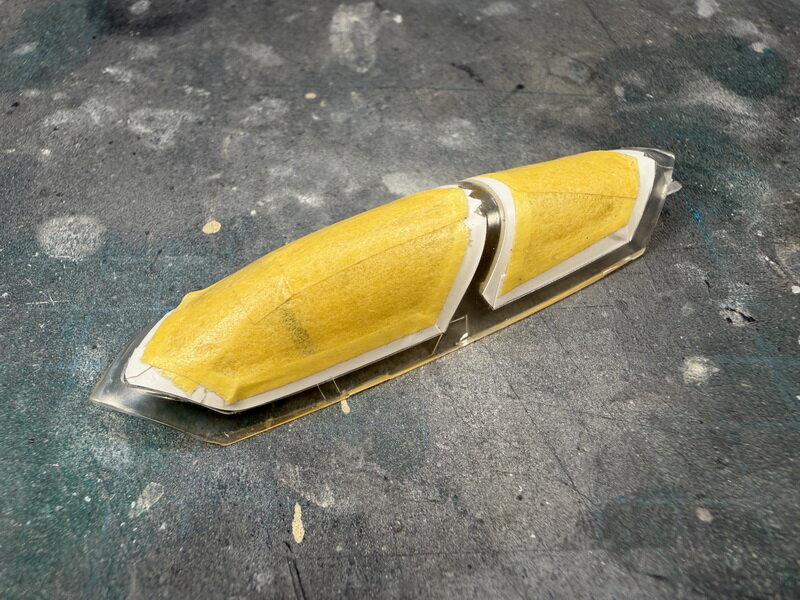
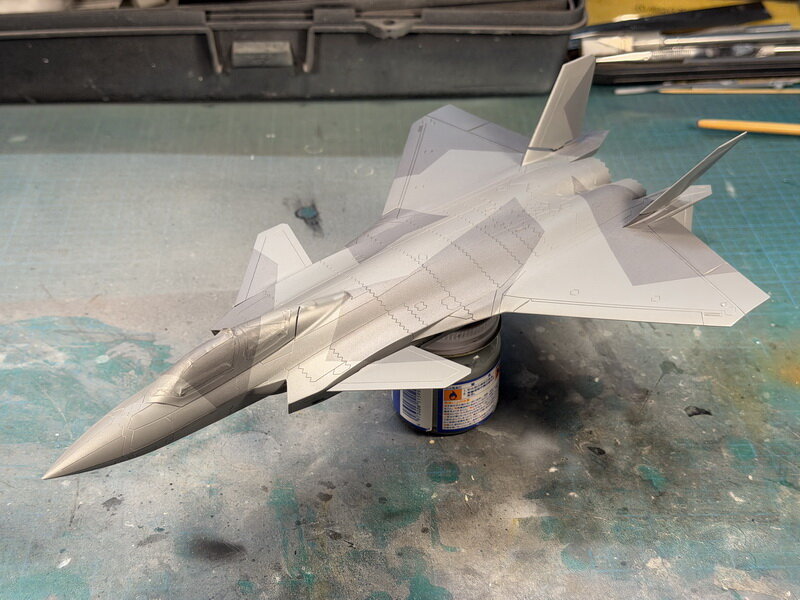
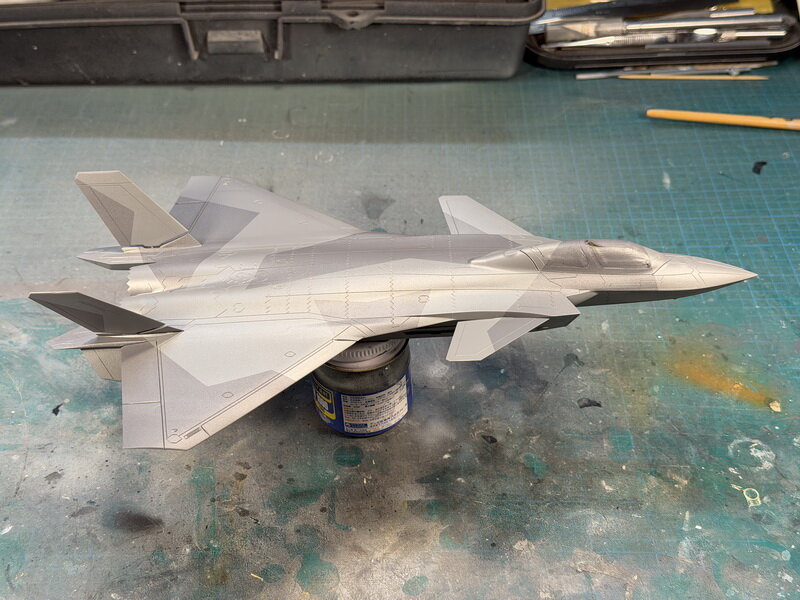
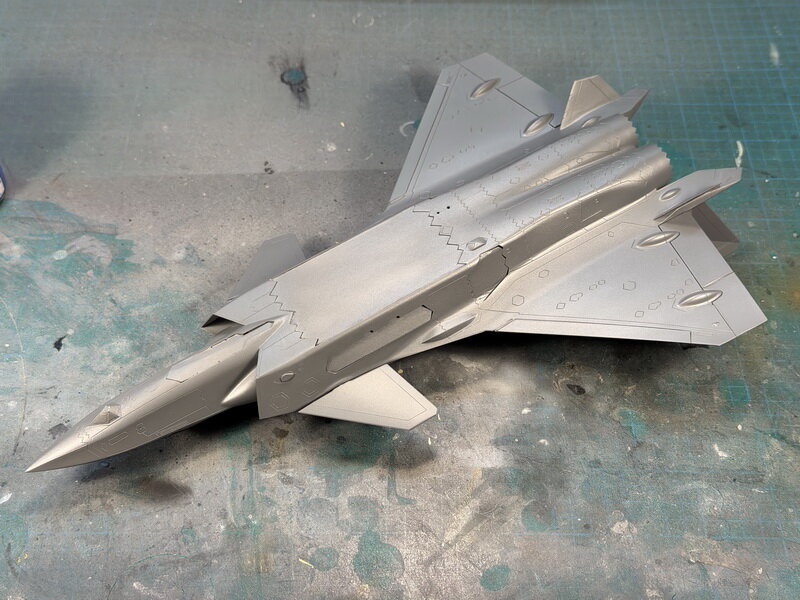
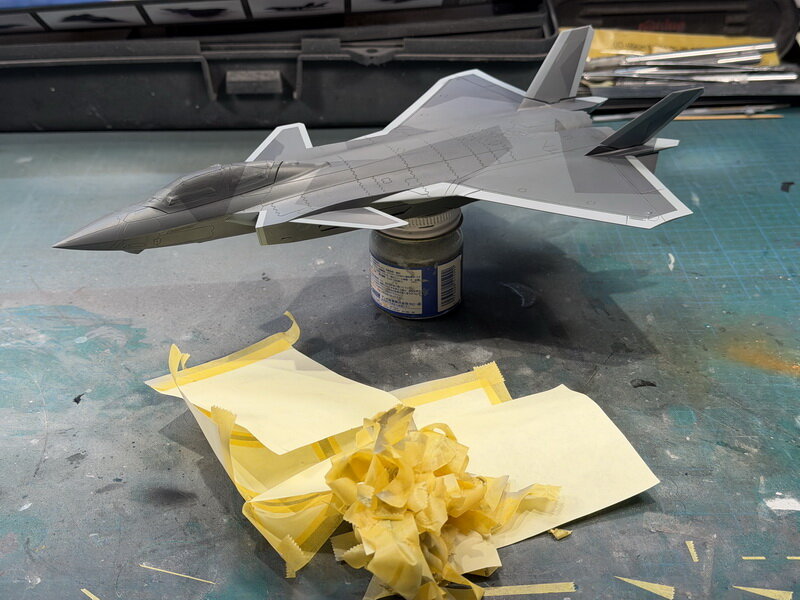
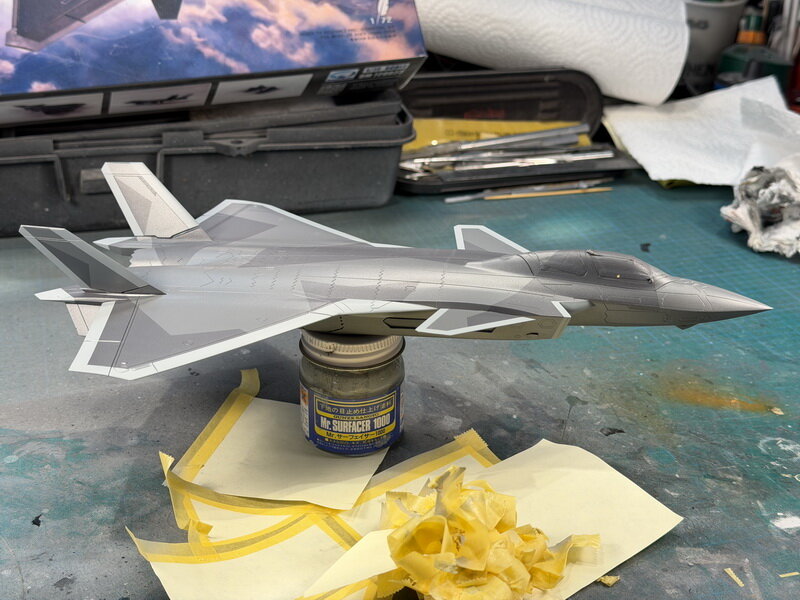
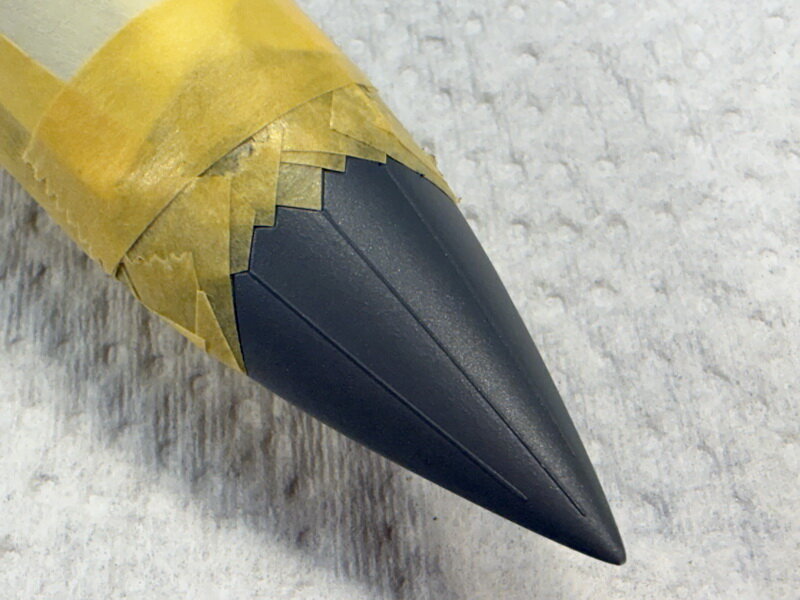
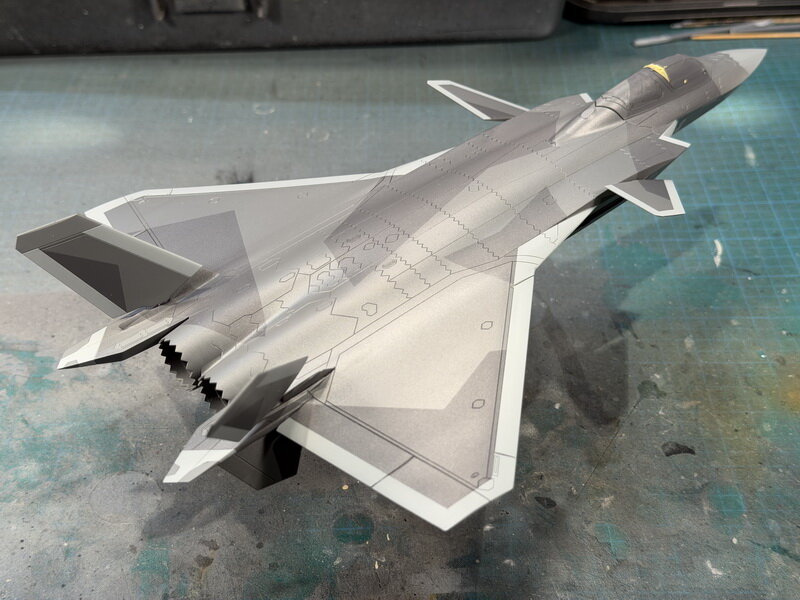
Our thoughts and prayers to you and Mrs Pengbuzz! Good things happen around this time of year, so I hope you get your fair share. Thanks for the update. Some more slow progress (it will slow even more as the holiday activities pick up I'm afraid). So much pre-prep work on this kit before I can even to the fun part of painting! Ended up having to cut off and rebuild all the canard and rudder pins as they are so weak and don't go very far inside, so I had to glue up some solid plastic inside the holes to re-drill the holes so they go deeper and can grab better. So many little things to do like internal braces because the kit just "squashes" the middle of the airframe when glued together or leveling up pieces so they sit flush, I hate work that you never even see when finished! Looks kind of cool with a much lower profile canopy or as a drone unit 😛 So many gaps to fill and sand! masking the canopy inside and out (has the same internal black brace as the F-35 uh). More tiny masking! Sanding around the intakes and getting that tail serrated engine area to fit was a bitch. But its starting to look more like a plane. After a lot more sanding with the spot Mr. Surfacer primer highlighting all the spots that still need more work, after a few tries/days, I get it pretty smooth to a point ready for paint. This is my most hated part; sanding and more sanding, but I've learned the hard way that if I skip out this step and race towards the paint, the next step highlights all the mistakes. After I thought I had addressed all the seams and I sprayed everything with the primer - it showed me there were sink marks all over the place in areas not even close to the seams. I hadn't seen sinks marks on models for 20yrs or on non American kits 😛 I don't even normally primer the entire model, but I am glad I did with this kit. I ended up filling all the depressions with Mr. Surfacer 1000 brushed over and re-sanded smooth. I think I got most of them. They have the colours reversed in the instructions, the light grey is called out as the Mr. Color number for the dark grey and vice versa - luckily I caught that before I started to paint. I should own stock in Tamiya Masking tape, I'm going through quite a lot of it - it really is the best stuff for not pulling paint up with nice sharp lines. I then masked the Spinter Camo pattern which I love. Ended up a bit dark (a little too contrasty for my tastes from all the reference photos), but this ended up working out even better than I had hoped. The next stage I was going to try to replicate that metallic sheen you see in all the newer stealth F-22 & F-35 greys. This was going to be my test bed to lightly mist Alclad Dark Aluminum over the camo so both the lighter grey and darker grey gets the metallic sheen. It ended up lightening the entire model and tying together the two greys really well. Now I know to exaggerate the camo pattern on my F-22 & 35s. The Alcad was the smallest metallic particles I could get in paint, and its not bad, works better on the lighter grey than dark, but really changes with the angle you view and with the light source. Sometimes it looks too light, and sometimes it looks too dark - weird but its more like the photographic references. I was worried that the masking tape might lift the really fine misting of the Alclad, but luckily it didn't - again this Tamiya stuff is worth every penny! Again more masking for the lighter carbon edges of the scheme. Can you tell I'm paranoid with overspray 😛 I'm learning masking for these 5th gen stealth fighters are going to be a bitch! I'm trying to paint most of the details on as there's a very limited decal sheet that was supplied, but also all the photo references has shown me a very clean aircraft with very limited data stenciling. After 2 weeks, here's where I'm at. I've sprayed everything with a gloss coat in prep for decals. I'm really liking the sleekness and lines of this aircraft, I thought it was kind of awkward but maybe because I've been looking at it for too long.


-
WOW! The weathering and rust on that is phenomenal!!! Congrats to the lucky customer.
-
Hey, I just bought that at my local hobby store on Black Friday for 40% off, looks like an amazing build, but I was very disappointed that it didn't have the internal missile bays as an option to be opened up. The fit and engineering looks top notch as well as the crispness of the molding! I thought I'd use the J-20 as a test bed to try out the metallic grey paint scheme that I will later use on this F-35C and I have the older Fujimi F-22 to look forward to eventually.
-
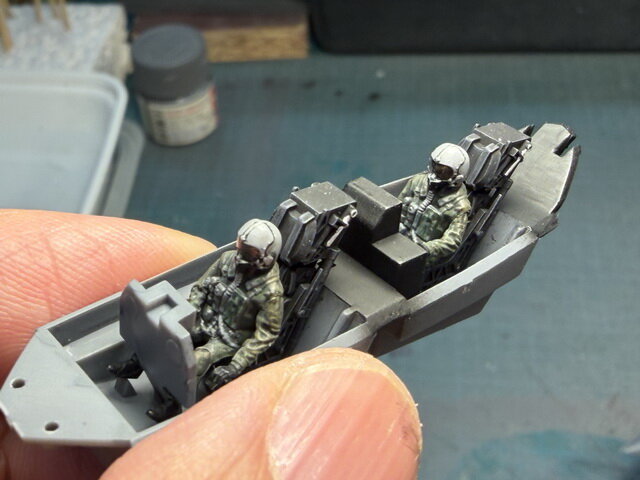
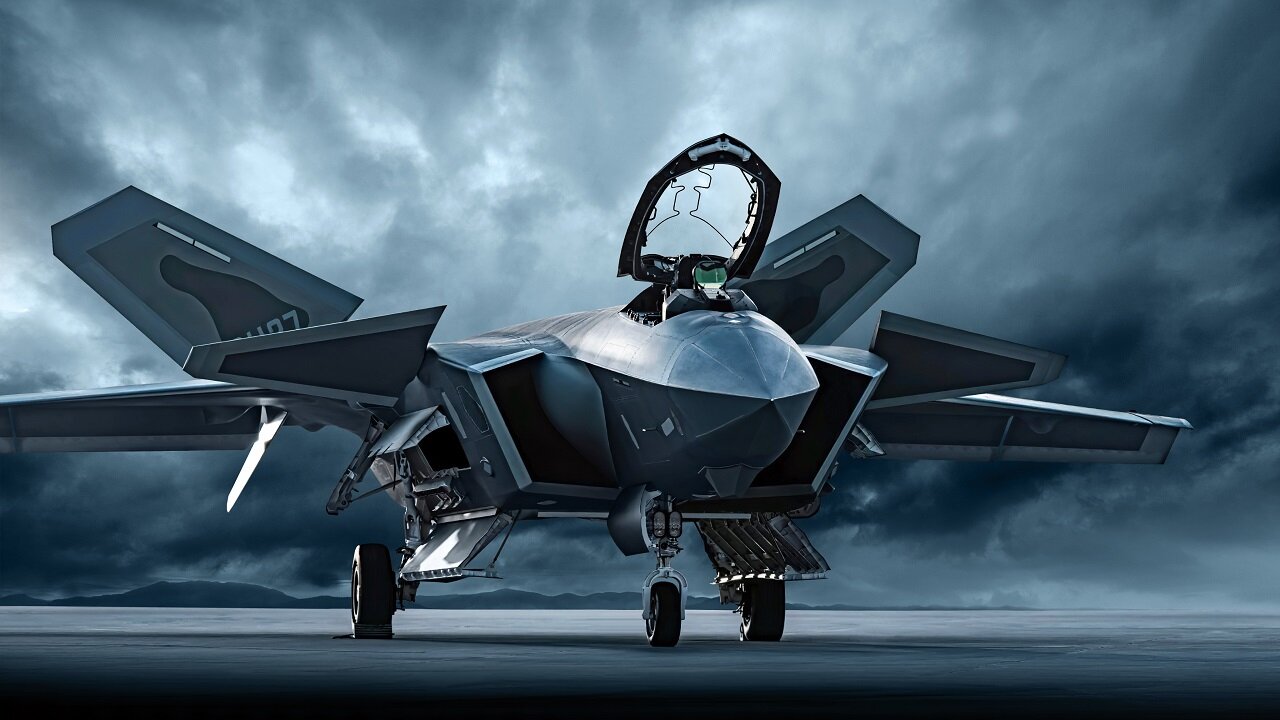
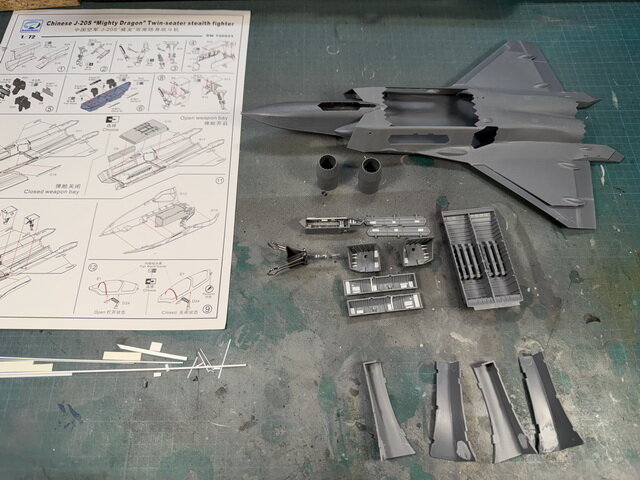
Unfortunately, the DreamModel 1/72 J-20S (only dual seat model so far - and anything but a dream!) doesn't come with any pilots @505thAirborne. Luckily, I have a pair of excellent pilots from my FineMolds F-4J that I didn't use because I wanted to show off the cockpit - I don't think I'm going to sweat the wrong survival gear or helmet in 1/72 scale (at least that's what I will tell myself to let me sleep.😛 Had to shave down their butts and back to get them to fit though. Strangely, it comes with a nice set of 3D printed seats though as the box is filled with trees for the single seater (and only includes one seat in styrene) and only the top fuselage was different to accommodate the longer tandem canopy. The grey helmets convey the PAAF more than the actual gear on them. The plastic really sucks, its soft and brittle at the same time! The tiny pegs for the canards broke just test fitting them into holes way too small for them, but the way they need to be installed prior to closing the fuselage up means I had to cut them anyways to change the build order so I can sand and paint. The entire thing is not engineered to ease painting in logical steps. I liked that the dual tandem seating of the 2-seater fills out the forward fuselage aesthetically over the single seater J-20. Hey @derex3592, it WAS my original intention for a fast, quick build; "no good intention goes unpunished..." BUT, the ANAL me won out again.... 😛 If I had closed her all up to put in flight mode like I had intended when I bought the kit, I could have succeeded. Unfortunately, when I was researching for images online, I came across this one and it really sold me on trying to get it all splayed out like this (reminded me a bit of Yukikaze)
-
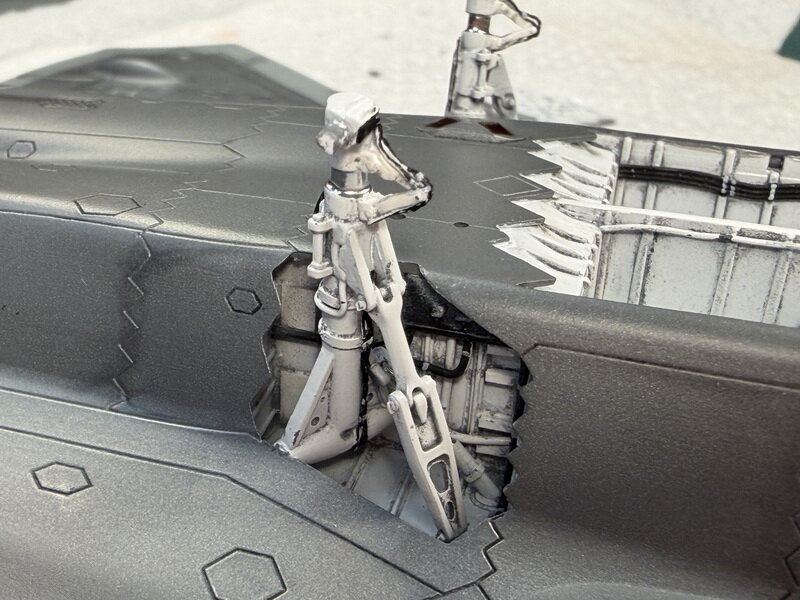
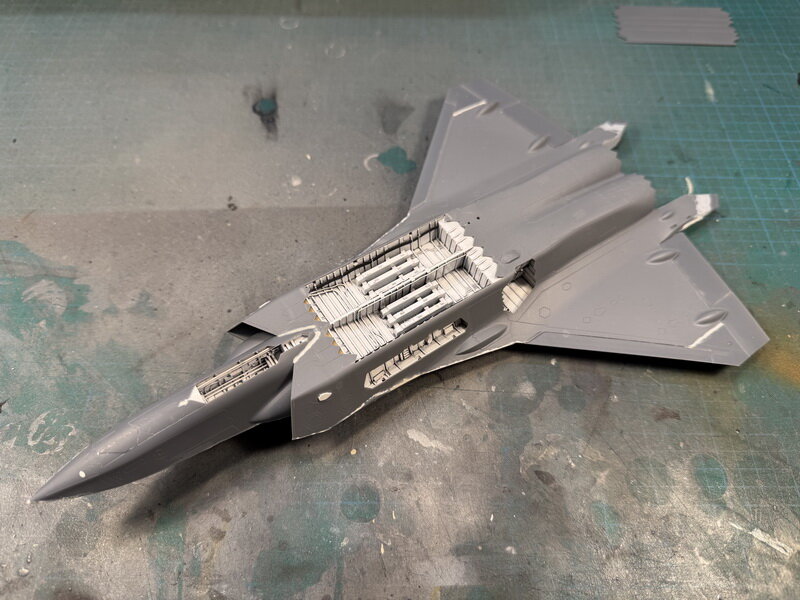
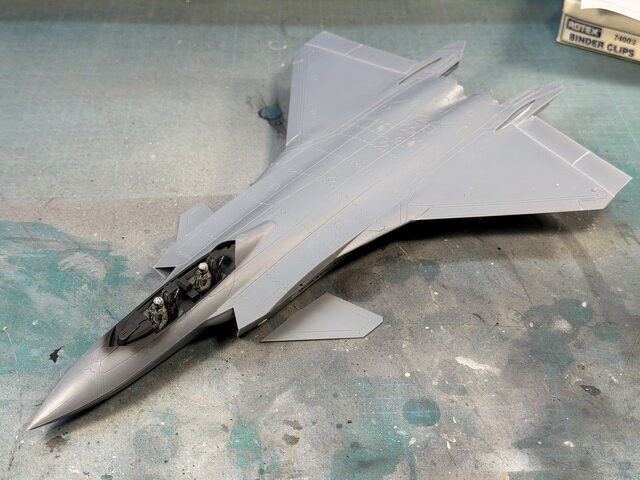
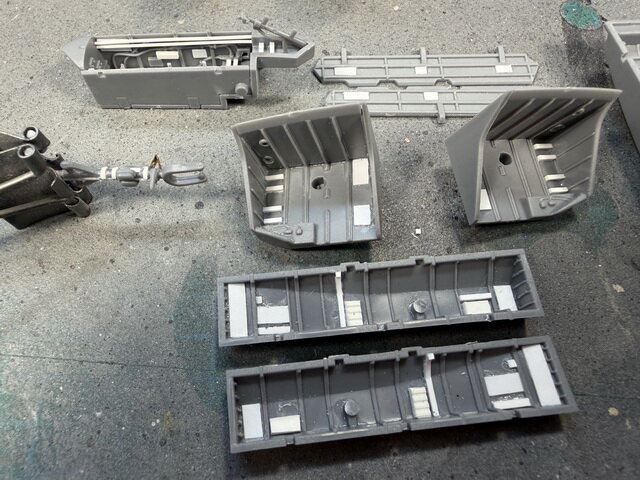
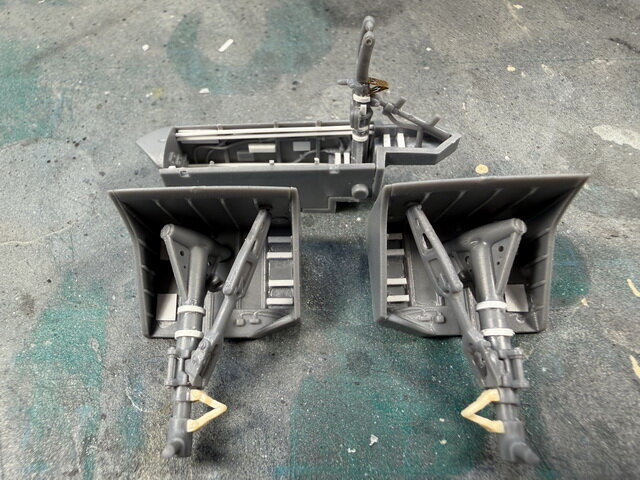
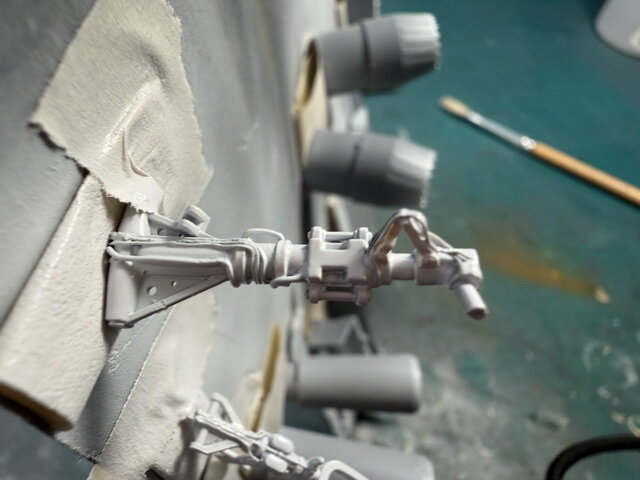
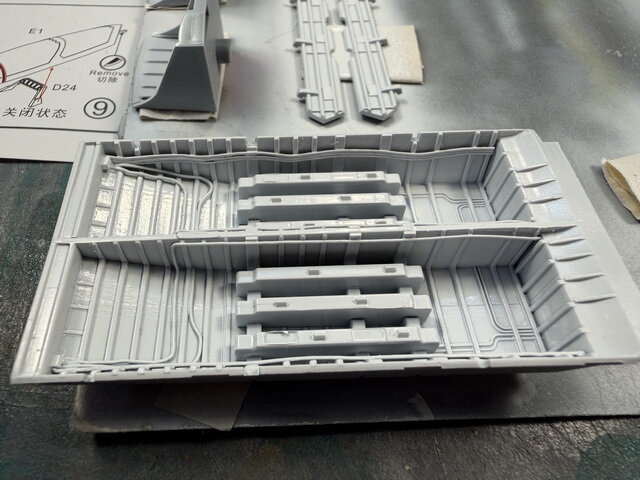
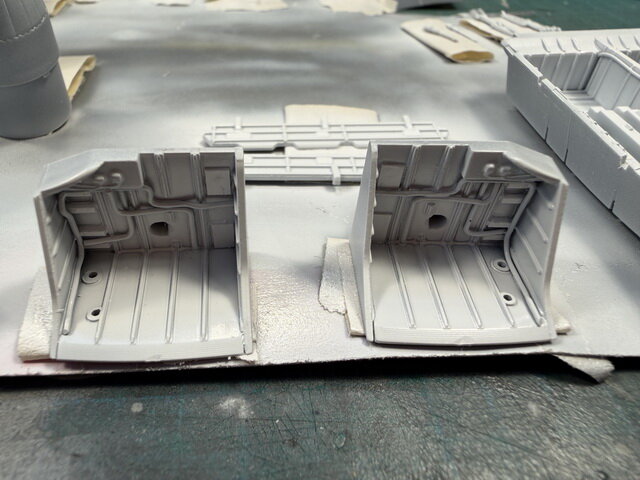
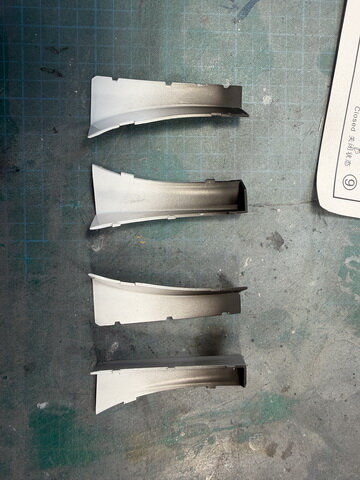
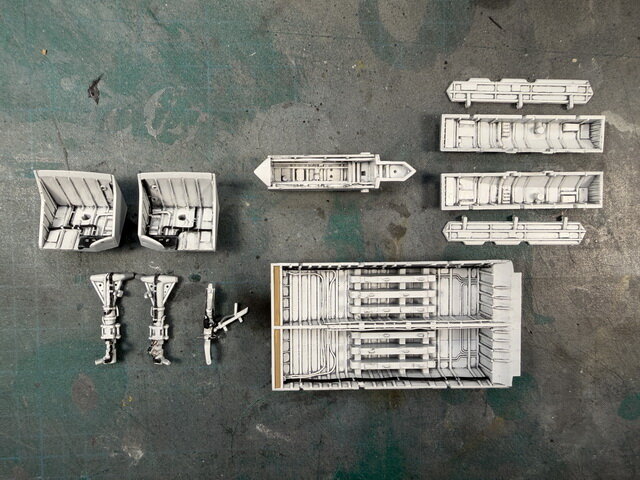
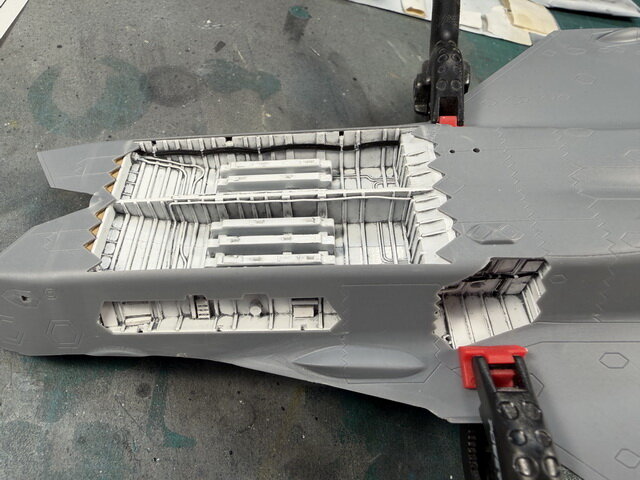
Well, I had a little time so I thought I'd get back to basics to enjoy the hobby again and build one straight out of the box! I love the shape of the J-20S but there weren't much choice in 1/72, knowing it was not a great kit, I thought I'd close it would be a perfect candidate for the OOB. Unfortunately, the anal side of me saw all the injector pin marks all over the place, I'd either sand (which I hate) or cover them up (the lazy choice!). There's so little photographic reference for this bird out there that I felt I was freed to make up some "business" in the opened internal bays. There was no internal support and the fuselages flattened out into a pancake, so I had to add some internal support to get the cross section up to snuff - so much for the straight forward build! The engine nozzles were pretty bare, luckily I had some leftover (FineMolds F-4J) burner cans that fit pretty well inside for a little more detailing. The landing gears were such a poor/simplified representation that I ended up getting carried away with detailing them up and decided to learn how to add some small lead wires. There wasn't any fan face in the intakes, so I took the lazy way and had it disappear into darkness - so hard to see that far back anyways Finally able to start to close her up. There's going to be a lot of filling and sanding on this one unfortunately before I can get to the more fun painting stages.


-
The Chuck with the orange supers are just amazing! Is it too late to give up hope that they will release them separately instead of a bundled box?

