Jackie_Chan_Fan Posted November 4, 2004 Share Posted November 4, 2004 hmm now that i've made the legs bigger... the tail section that has to fold up in gerwalk mode. isnt right.. does it just fold? or does it fold and slide back? Link to comment Share on other sites More sharing options...
DatterBoy Posted November 4, 2004 Share Posted November 4, 2004 I made mine double jointed so I have a lot more control over where it sits on the back. If you have a single joint you'll have little to no control. In my opinion, the height of the pack and the wings on the back is very important. :Dat Link to comment Share on other sites More sharing options...
Aztek Posted November 5, 2004 Author Share Posted November 5, 2004 Dat, I like the views you used to show off the hasegawa refs. I noticed you had to fatten up the nose (like me), but did you fatten (widen, from top down view) the chest/backplate assy? I did a little, I can't remember how moch, but I think it was like 7 percent on the x axis. This made the chest look more anime in battroid mode, and also set my legs whaen in fighter mode farther apart. This gave me the flexibility to fatten the legs and arms, hopefully to avoid valkanorexia. Link to comment Share on other sites More sharing options...
DatterBoy Posted November 5, 2004 Share Posted November 5, 2004 YOu know, I didn't even really fatten anything since I didn't use the HAS scans as the ref. My actual ref was the 1/60 Yamato. Over time all I did was try and make it more 1/48 like so the fact that it is close to the HAS scans is kind of lucky on my part. The nose was modelled based on those blank sheets people have been using for the valk color schemes and the wings were done straight off HAS as the old wings I had that were based on the 1/60 didn't look quite right. I am considering remodelling the backplate as I like the HAS one better, but I do want to stay away from making it exactly like the HAS or the 48 as I feel my model has it's own flavor. :Dat Link to comment Share on other sites More sharing options...
Jackie_Chan_Fan Posted November 5, 2004 Share Posted November 5, 2004 Check it Here's a top and side view of the valk... how does it look. Pretty much like this.. it transforms into the robot in the right proportions. Link to comment Share on other sites More sharing options...
DatterBoy Posted November 5, 2004 Share Posted November 5, 2004 Gorgeous. Got shots of the other modes? :dat Link to comment Share on other sites More sharing options...
BlueMax Posted November 5, 2004 Share Posted November 5, 2004 Check itHere's a top and side view of the valk... how does it look. Pretty much like this.. it transforms into the robot in the right proportions. Beautiful... eagerly awaiting the finished product Link to comment Share on other sites More sharing options...
Jackie_Chan_Fan Posted November 5, 2004 Share Posted November 5, 2004 Here's the gerwalk mode. No hands yet The tail wing section really hasnt been worked on yet, and some of the details of the chest panel arent modelled. Feet arent modelled really, just simple stand in objects. Its getting there... I cant wait til i have to do the cockpit Gerwalk01 Gerwalk02 Gerwalk03 Link to comment Share on other sites More sharing options...
DatterBoy Posted November 5, 2004 Share Posted November 5, 2004 Truly beautiful. Still loving that toon render. Looks to me as though you still need to do the backpack itself. Let me know if you need some scans of the battroid. I have that too, but I would assume you'd use it as an eyeball ref as a lot of those pieces are not proportionate for transformation. :dat Link to comment Share on other sites More sharing options...
Jackie_Chan_Fan Posted November 5, 2004 Share Posted November 5, 2004 how do the tail wings fold over each other? I remember from my jetfire so many years ago... that they overlap.. but is one slightly higher or shorter on the bottom so it can fold over the other? Or is there an indent in the back pack part? Link to comment Share on other sites More sharing options...
DatterBoy Posted November 5, 2004 Share Posted November 5, 2004 I believe one folds at a higher pivot than the other so they have slightly different crease points. I take it you have nono of the toys? :Dat Link to comment Share on other sites More sharing options...
Jackie_Chan_Fan Posted November 5, 2004 Share Posted November 5, 2004 nope... I used to have jetfire etc. I still have the robotech jet. The one from mospeda i beleive. Not the traditional valk. I have 1 peice left of the jetfire one red leg armor peice. hehehe I do plan on getting one of the newer toys eventually. Link to comment Share on other sites More sharing options...
DatterBoy Posted November 5, 2004 Share Posted November 5, 2004 get a 1/48, any of them, and a fastpack, all you need. Maybe a reissue bandai, but that should do you for life valk wise. :dat Link to comment Share on other sites More sharing options...
pandaren Posted November 6, 2004 Share Posted November 6, 2004 wah!!jackie chan fan!! u're good~~ did i ask bout u wat software u use... b4? Link to comment Share on other sites More sharing options...
Jackie_Chan_Fan Posted November 8, 2004 Share Posted November 8, 2004 Dat asked me to toon render his valk, and so i did. I am so jealous of how good it looks I will be making changes to mine now that i have a good reference for shape. Dat's valk really captures that swoopy/curve form of the cartoon valks. I think the biggest problem with my valk currently is the canopy/cockpit shape and tail wing size. Anyways.. here are the pics. Dat's Valk from below Dat's Valk at an angle.. AWESOME shot My Valk, similar shot... i like dat's better Btw i'm using mental ray to render. Link to comment Share on other sites More sharing options...
DatterBoy Posted November 9, 2004 Share Posted November 9, 2004 (edited) More work refining pieces, adding detail... blah blah blah. :Dat Edited November 9, 2004 by DatterBoy Link to comment Share on other sites More sharing options...
Jackie_Chan_Fan Posted November 9, 2004 Share Posted November 9, 2004 btw Dat, you had a lot of inverted normals that made it quite a nightmare to get into softimage. Run normals/conform on some of the objects. For example the hatch for the chest plate where the head pops up. Some of the normals on that peice are all mixed up. Otherwise.. very nice. Also some of the wing has mixed normals too. Link to comment Share on other sites More sharing options...
DatterBoy Posted November 9, 2004 Share Posted November 9, 2004 DOK tried to explain that to me once... what are normals and how did they get that way.. what a noob question... Can I just run it on all the objects at once or will that totally mess up my model? Thanks again, man! :Dat Link to comment Share on other sites More sharing options...
DatterBoy Posted November 9, 2004 Share Posted November 9, 2004 (edited) JCF: I think that what you have right now is quite good. I think the tail wings I have on my model right now are bigger than they are supposed to be, but I found that when it goes to batt and ger mode, it looks better at that size when folded. At the same time, I also have a wide backpack things so a more narrow one could have made smaller fins. The nosecone was one of the hardest parts for me and I ended up making a cone, cutting out the cockpit and modelling through the cut out to make a better cockpit, even then, it still looks off on mine too... very sharp and incorrect, I'll have to address that one myself. Thanks for the toon renders and hopefully I can get you a model where you can do some of the batt and gerwalk as well. :Dat Edited November 9, 2004 by DatterBoy Link to comment Share on other sites More sharing options...
Jackie_Chan_Fan Posted November 9, 2004 Share Posted November 9, 2004 Normals are basically a vector (direction) that faces out from a polygon. The normal tells the renderer how to shade each polygon. Lets take a single polygon as an example. a 3 point polygon (triangle) in 3d... by default for speed purposes... renderers only render one side of that triangle. That is unless you specifically define the object as "double sided" So the normal is a way of telling the render... which side is the side you want facing a certain direction. If our triangle was to represent a peice of paper.. then we would want both sides rendered (double sided) But in most cases.. such as your valk peices... they're enclosed... so you never see the "other side of the polygon" which is why renderers default to single sided shading of polygons. Again this is a performance issue. So since your enclosed parts of the valk only need to have their normals facing outward.... you should make sure they are. The reason being... is if the normal is inverted.... your objects shading will be inverted as well. A normal is reprsended by a line coming from the center of a polygon. lets say that this "---->" represents the normals direction.... and * represents the light source. your scene looks like this.... * ------> That means your polygon normal is facing away from the light source. Now if MOST of the polygons on that object are facing TOWARDS the light source.... the 1 or 2 that arent... will not light properly. The normals are a key element to the shading model used in 3d. SO in our example... our ----> polygon... is facing away from the light.. which means the renderer figures it to be dark.... where as all of the other polygons facing <----- are being lit up by the light source. On your mesh... some parts of your mesh have mixed normals... but you apparently render double sided so you do not see the errors. Also in the maya viewport.. its rendered double sided... so you do not see the errors until you turn on "show polygon normals" under the edit polygon menu.. there is an option to conform normals. That will unify all of the normals to an averaged facing direction. So if most of your normals are facing <------- and only a few are facing -----> then it will turn all of the normals into <------- And if that is the wrong direction... you can use "reverse" under teh normal menu... that will simply flip them all. you can apply the command to single selected faces... multiple selected faces, and of course entire objects. Link to comment Share on other sites More sharing options...
DatterBoy Posted November 9, 2004 Share Posted November 9, 2004 The Jackie Chan Fan school of Modelling. I love it! So I went ahead and selected all polygons and said Normals - Conform. I would prefer to do whatever I need to to speed up render time and makes sense so is there a way I can set the renderer to only render outward faces? Like you said, I have all enclosed polys. :Dat Link to comment Share on other sites More sharing options...
Jackie_Chan_Fan Posted November 9, 2004 Share Posted November 9, 2004 Not sure about maya. Link to comment Share on other sites More sharing options...
Chronocidal Posted November 10, 2004 Share Posted November 10, 2004 Hmm.. if it's too much work, I guess you could just make sure all the materials used are double sided, but that does up the rendering time. I remember many a time making a polygon mesh for a game where I had to literally go through the entire mesh polygon by polygon and manually flip all the backwards faces.. took forever.. then I finally learned how to draw them the right way in the first place so that never became such a big issue again. Lol.. vectors.. normals.. sheesh, we're covering those in my calc class, and my hobbies finally helped me understand something in math class. Oy.. see, you can calculate face normals manually if you want to.. you basically need the three points of the polygon, and turn them into two 3d vectors in space.. then you can find the normal vector by taking the cross product of the two edge vectors... umm.. yeah... I'll shut up. But I was thrilled to find out something in calculus that's useful for modeling. Link to comment Share on other sites More sharing options...
Jackie_Chan_Fan Posted November 10, 2004 Share Posted November 10, 2004 heheh i started to explain that a normal was based off the verts vectors but didnt want to confuse the issue anymore Link to comment Share on other sites More sharing options...
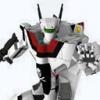
KingNor Posted November 10, 2004 Share Posted November 10, 2004 is anyone doing good rigging besides me? i've got a few issues i'm working on, like getting the legs to bend both ways at the knee and still have good ik handles. any maya 6 users out there? i've got Dat's rig about 90% done but it needs to be redone from the ground up. Link to comment Share on other sites More sharing options...
DatterBoy Posted November 10, 2004 Share Posted November 10, 2004 So far, King Nor's the only real animator here. maybe we should start considering where this Mass CG project is gonna end up. Other than King Nor, we got Dok who rigs but we'll need to get em all rigged to make this happen unless we really are doing nothing more than a poster.. which aint a bad thing to be honest, but an animation feature woul dbe so frickin sweet! Who's gonna get this train back on it's track! King Nor's Valk Rig :Dat ANIMATION ATTACHED Link to comment Share on other sites More sharing options...
Jackie_Chan_Fan Posted November 10, 2004 Share Posted November 10, 2004 Actually i'm a character animator and director. I know cinematography and editing as well. I wasnt aware that this was a mass cg project.. I thought it was just a long thread where fans post their art. Link to comment Share on other sites More sharing options...
DatterBoy Posted November 10, 2004 Share Posted November 10, 2004 Yeah, it's a long thread I know, but there was a purpose. That's why they call it the Mass CG project. :Dat Link to comment Share on other sites More sharing options...
Doktor Gonzo Posted November 11, 2004 Share Posted November 11, 2004 is anyone doing good rigging besides me? i've got a few issues i'm working on, like getting the legs to bend both ways at the knee and still have good ik handles.any maya 6 users out there? i've got Dat's rig about 90% done but it needs to be redone from the ground up. Got a pretty crazy Frankenrig going in Maya 6 for my Valk - rigged for transform, battroid-mode IK, and various other bells and whistles. I'll try to get some samples up here soon. Very nice job on Dat's Valkyrie, by the way. Link to comment Share on other sites More sharing options...
Gammera Posted November 11, 2004 Share Posted November 11, 2004 Long time no see guys. Damn a lot of good work. I started on my "low" poly valk again here is some wing work since it was a recent topic. Link to comment Share on other sites More sharing options...
Gammera Posted November 11, 2004 Share Posted November 11, 2004 .. Link to comment Share on other sites More sharing options...
Gammera Posted November 11, 2004 Share Posted November 11, 2004 .. Link to comment Share on other sites More sharing options...
KingNor Posted November 11, 2004 Share Posted November 11, 2004 :drools because low poly is SOOO sexy: god i love low poly, you rock. Link to comment Share on other sites More sharing options...
DatterBoy Posted November 11, 2004 Share Posted November 11, 2004 GAMMERA: That's sweet. You gonna make it transform? DOK: When we gonna see some dancing? :Dat Link to comment Share on other sites More sharing options...
KingNor Posted November 11, 2004 Share Posted November 11, 2004 is anyone doing good rigging besides me? i've got a few issues i'm working on, like getting the legs to bend both ways at the knee and still have good ik handles.any maya 6 users out there? i've got Dat's rig about 90% done but it needs to be redone from the ground up. Got a pretty crazy Frankenrig going in Maya 6 for my Valk - rigged for transform, battroid-mode IK, and various other bells and whistles. I'll try to get some samples up here soon. Very nice job on Dat's Valkyrie, by the way. dude, i've got a set driven key transformation with fk'ed arms and ik'ed legs. I'm trying to get the ik legs to work in gerwalk and batroid mode, i'm sure you can tell thats a nightmare and a half. Ik's are basicly designed to only allow a "knee" to bend one way so trying to convince maya i want the knee to swing 180 degrees is like telling rocks to float. i got the entire transformation to work on ONE locator with a set driven key slider on it. goes from fighter to batroid in 30 "frames" 0 = fighter 10 = chicken valk mode 15 = gerwalk 30 = batroid. the idea i have is that an animator won't have to wory about animating transformation and can focus on animating the pilot inputs in each mode ie: the arms and legs are pretty standard stuff. Joints and Ik handles with the usual controllers attached. but these arms and legs are all attached the the body, which is ......... INSANELY complex and not something an animator is gonna want to touch on a regular basis. so far the arms and the transformation are the parts that work. the legs make me want to kill kittens. cute baby kittens. i can't find a good way to attach the parts to the bones and make everything work properly... oi vay. well thanks for lilstening, more of a rant and blowing off steam than actually hopeing to get pointers, but if you have any let me know. rigs make stuff happen!! Link to comment Share on other sites More sharing options...
Recommended Posts