Search the Community
Showing results for tags 'bandai'.
-
From the album: sh9000's collection
-
From the album: sh9000's collection
-
Here's a review of the old 1/144 VF-11C from Bandai.
-
From the album: sh9000's collection
-
From the album: sh9000's collection
-
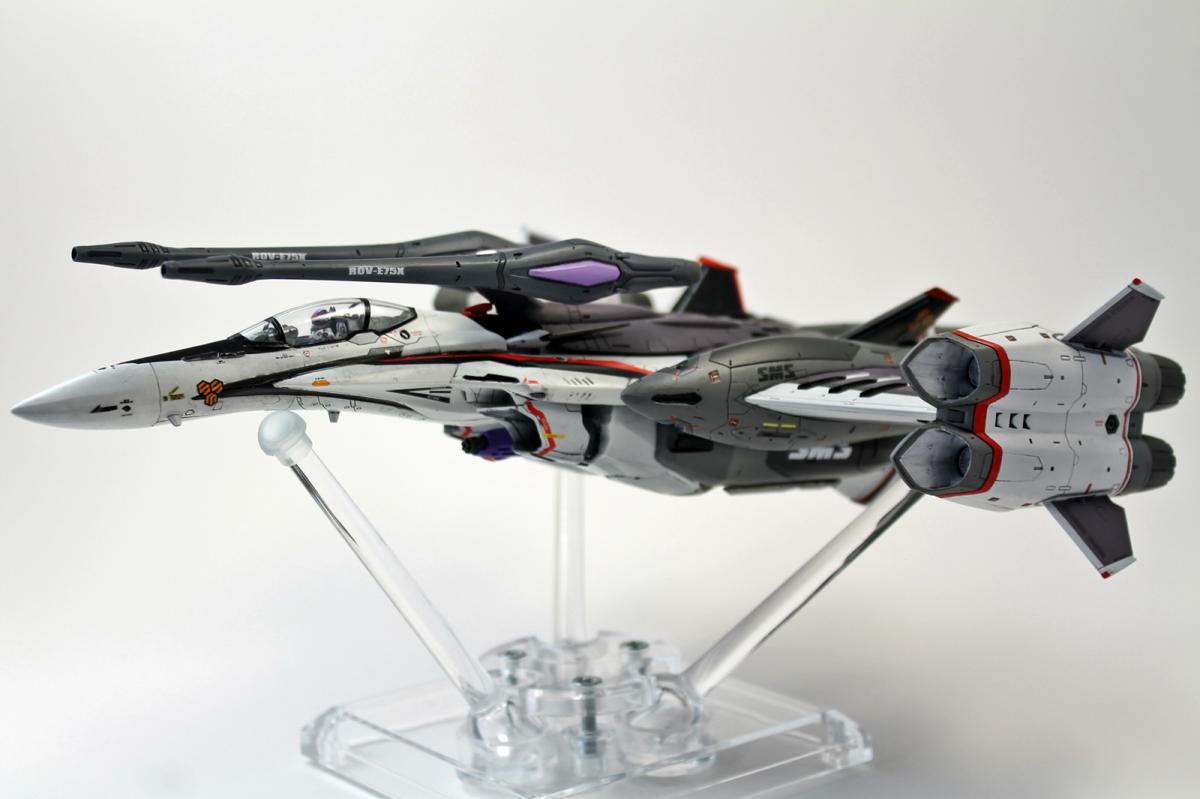
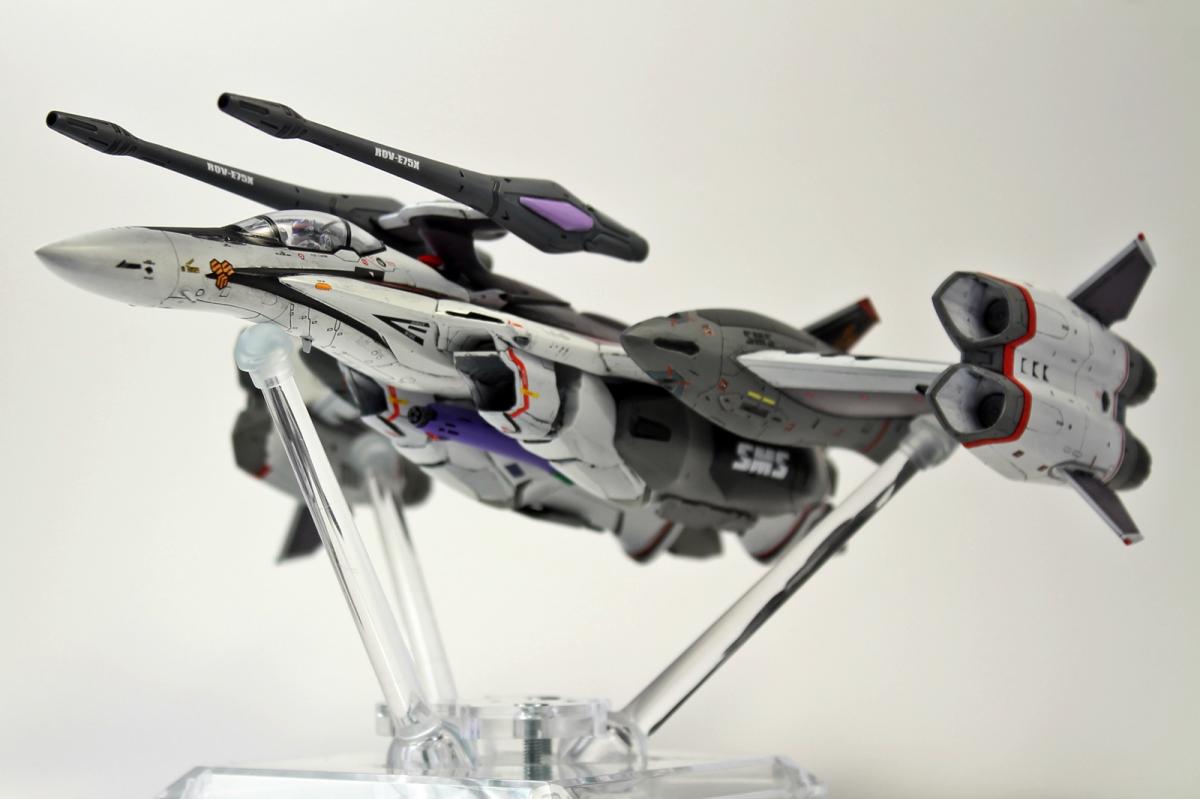
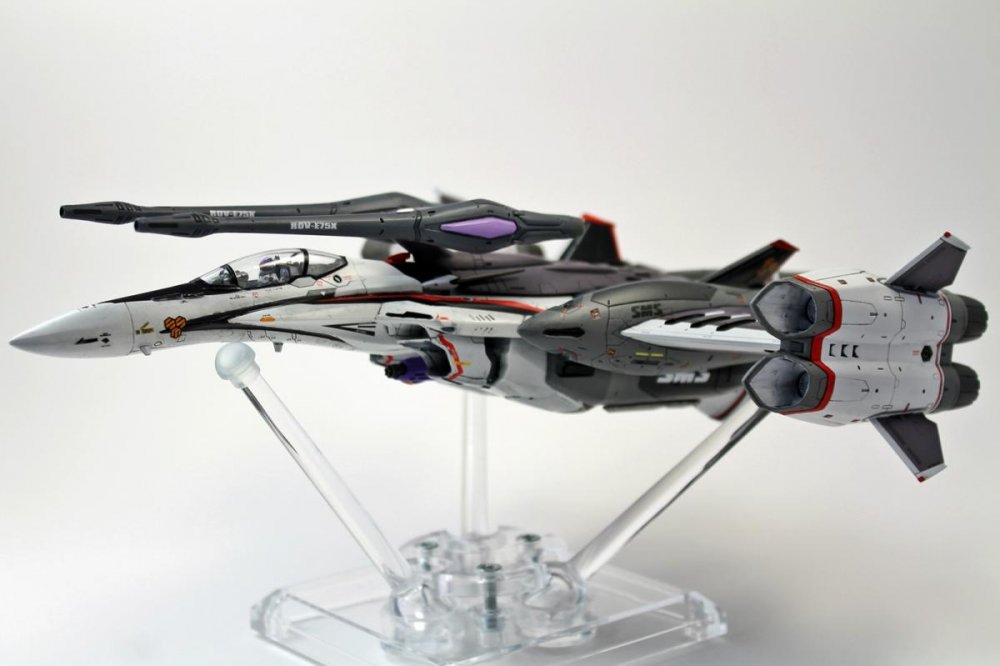
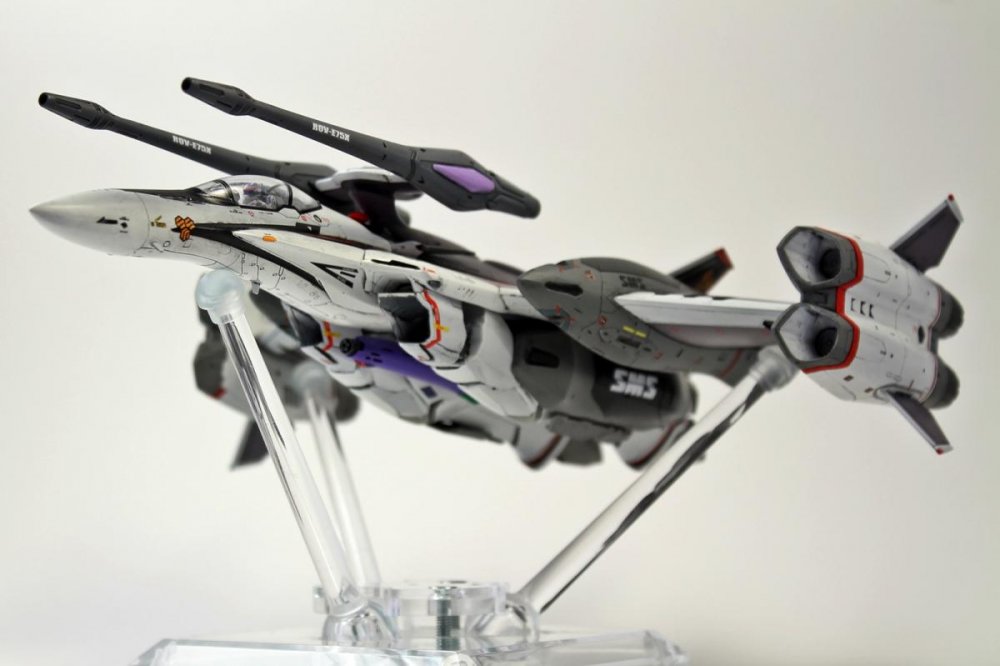
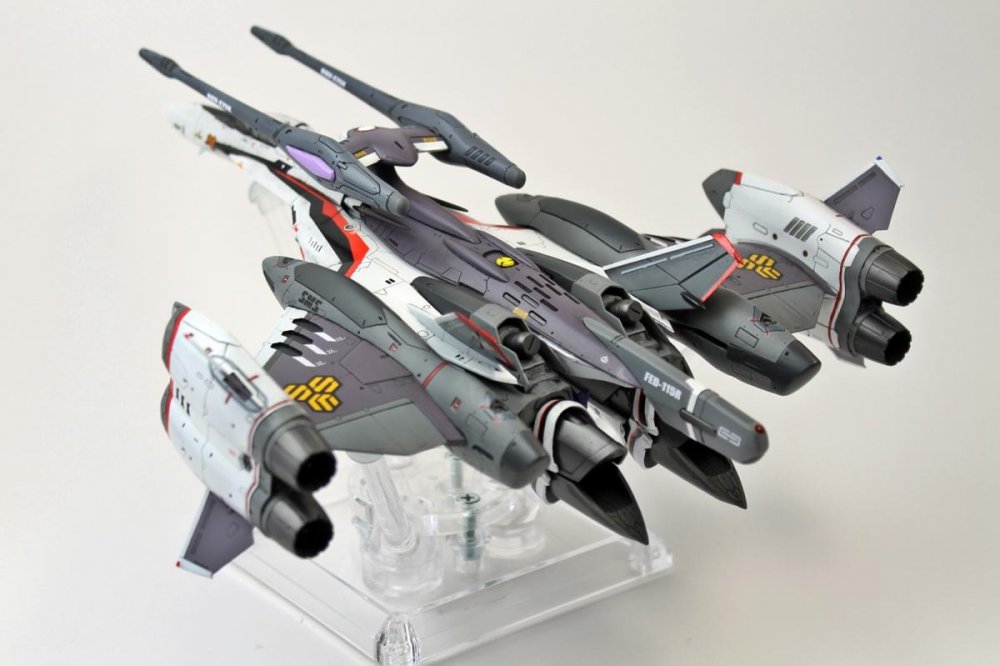
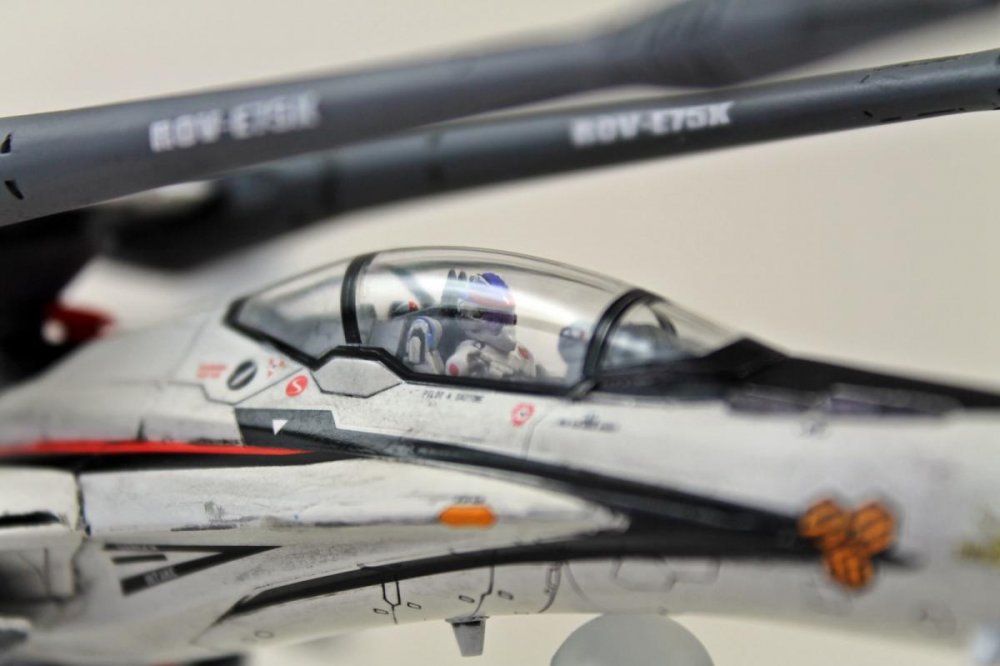
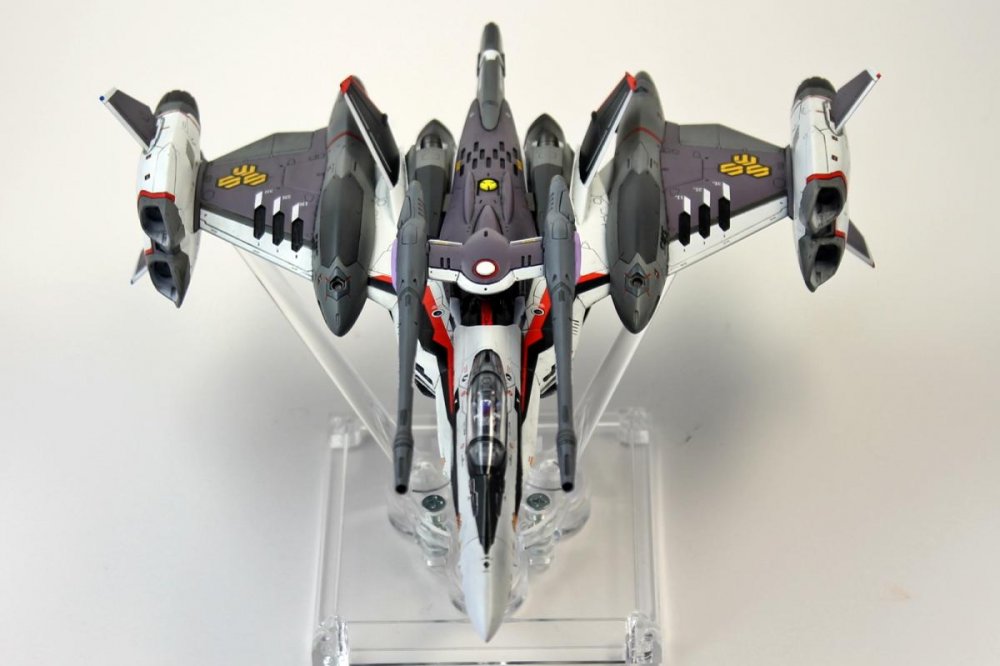
So, I talked about building it, now I've finished it. Alto's VF-25F Tornado Messiah from "Macross Frontier - The False Songstress". Base kit is the Hasegawa Super Messiah, everything else is from Bandai's (horrible) transforming Tornado kit. And yes, I am planning on bringing this with me to Shizuoka in May.
-
From the album: sh9000's collection
-

From the album: sh9000's collection
-
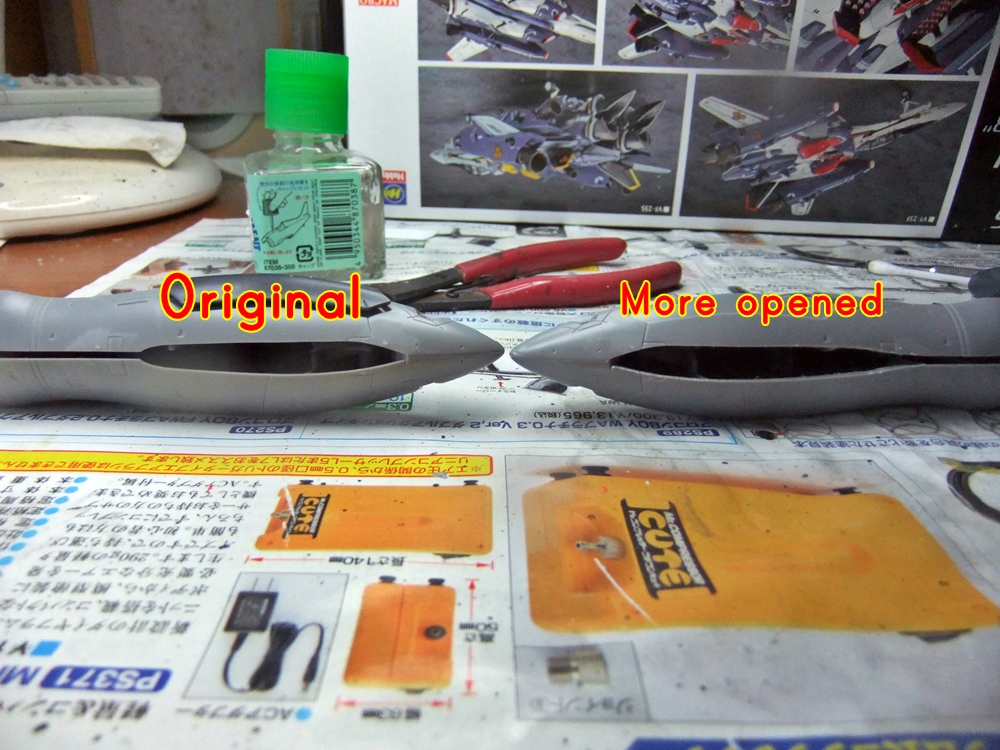
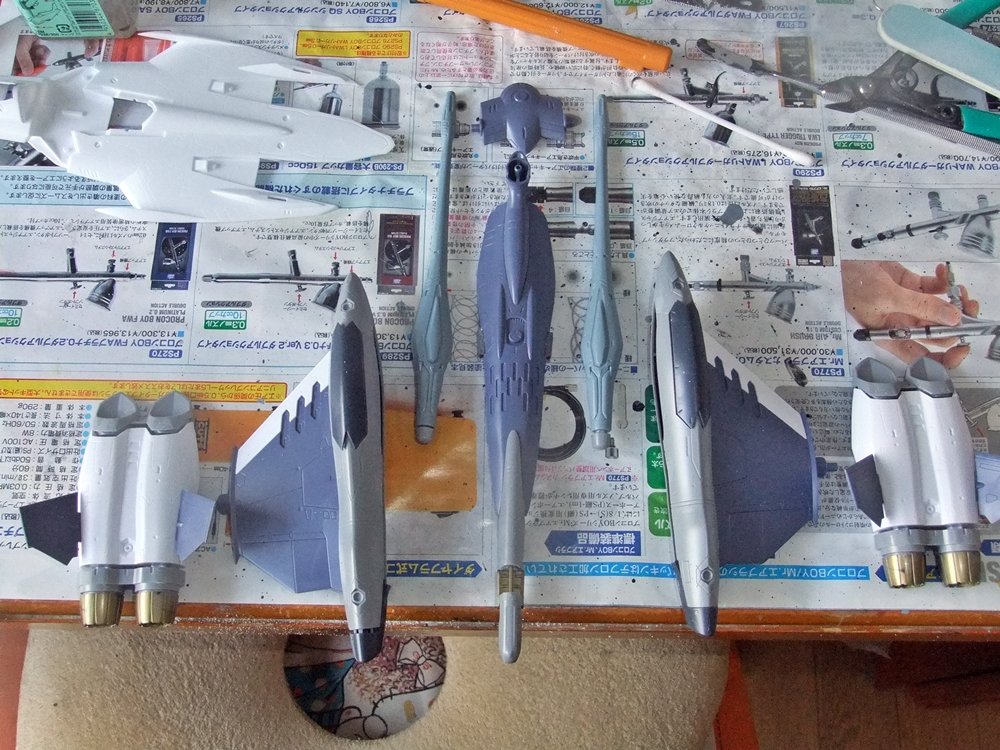
Hey, my first kit-bash! Thought I'd share what I'm doing here to those who might not as yet taken the plunge in combining two different company's kits. For the main base kit, I'm using Hasegawa's VF-25 Super kit, since that way I don't have to futz around with trying to fit on the leg armor. You will need to separate these parts out, though. The middle portion is not needed. These are the Tornado parts you'll need from the Bandai kit. I despise the Bandai Frontier line, that's why I'm putting these parts onto a Hasegawa kit. Wings? You won't need them. You can also skip the part where you put in the wing mounts/swing mechanism, since you're going to keep the wings fully swept anyways. On the Tornado wings, you'll need to open the opening up a bit more to fit over the Hasegawa kit. That's where I'm at right now. When I come to more modifications, I'll update.


-
 Rather than post separate threads about newer individual series, here's the super thread for tokusatsu TV series past and present, from Super Sentai to Kamen Rider, Ultraman, and more. To begin, here's the current lineup of tokusatsu shows in Japan: Shuriken Sentai Ninninger (手裏剣戦隊ニンニンジャー) is the 39th Super Sentai series, having premiered on February 22, 2015. It is the third series to use a ninja motif (after 1994's Ninja Sentai Kakuranger and 2002's Ninpuu Sentai Hurricaneger). It looks so much better than Ressha Sentai ToQger, but that's not saying much. The series is scheduled to be replaced by the 40th anniversary Super Sentai series this February. Fuka-chan... https://www.youtube.com/watch?v=KIcpISHtnLk Kamen Rider Ghost (仮面ライダーゴースト) is the 26th Kamen Rider series, having replaced Kamen Rider Drive on October 4, 2015. Attempting to capitalize on the popularity of Yo-Kai Watch, Kamen Rider Ghost uses a ghost and supernatural motif. The suit looks like leftovers from Kamen Rider Wizard and Kamen Rider Kiva. Ultraman X (ウルトラマンX(エックス)) is the 24th in Tsuburaya Productions' Ultra Series, having premiered on July 14, 2015. It is the first tokusatsu series to have a worldwide simulcast, with U.S. viewers accessing it through Crunchyroll.
 -
http://www.animenewsnetwork.com/interest/2015-10-29/bandai-teases-giant-26-inch-sdf-1-macross-14-inch-vf-1-valkyrie-toys/.94775#gallery_top In its larger 1/60-scale DX Chōgōkin line, Bandai will offer: Macross Plus: YF-19 please dont let this be a joke or a misread!
-
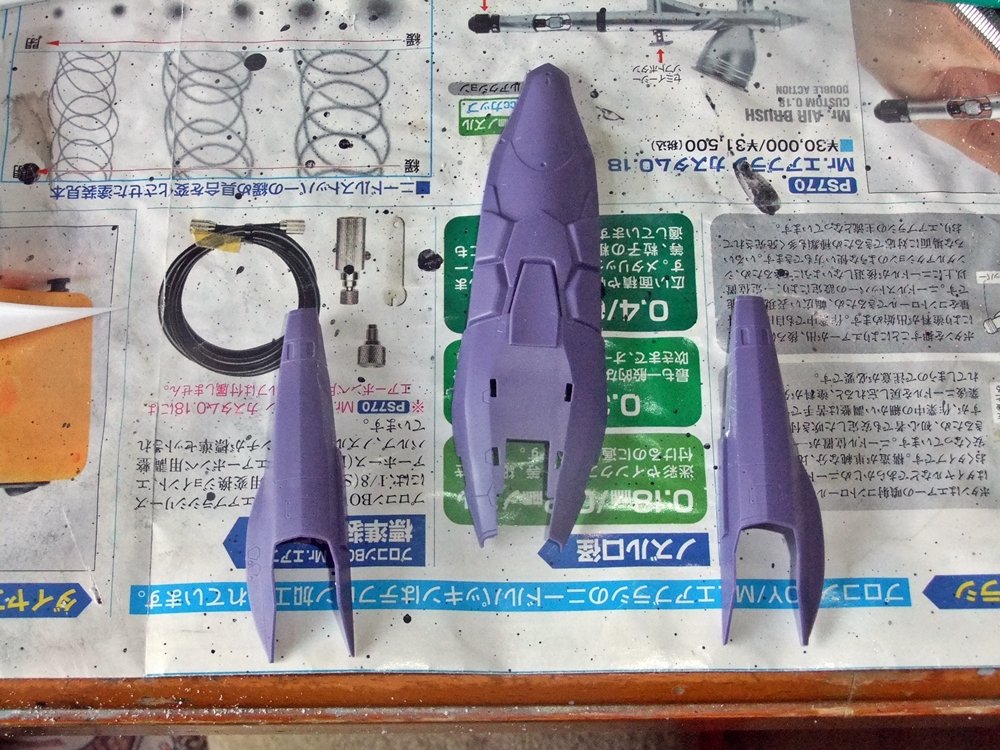
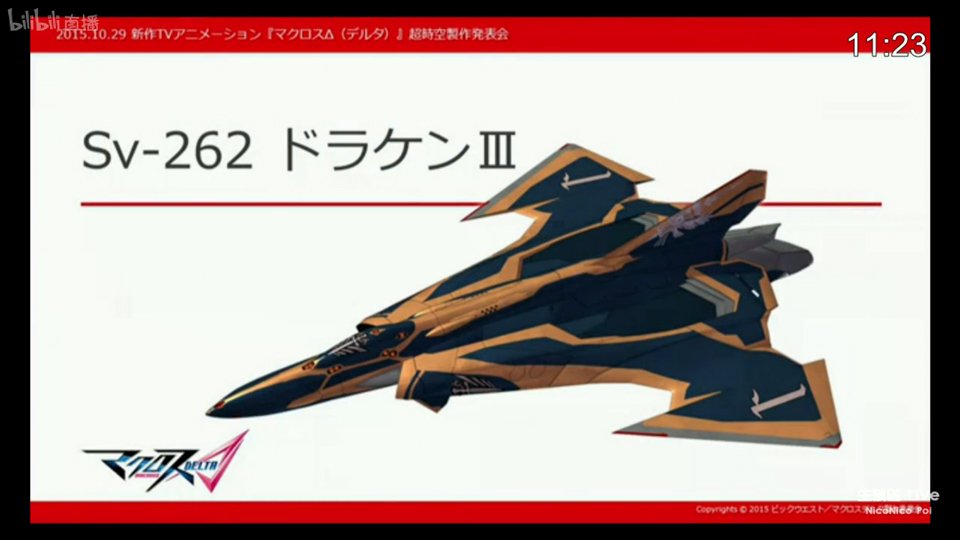
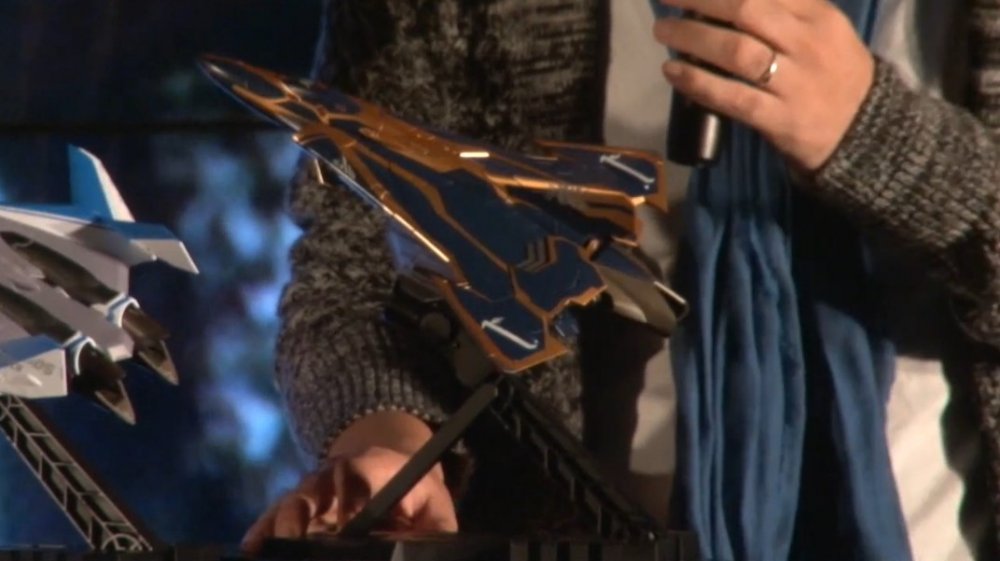
Since the unveiling of the SV-262 what are the tots abt it? like i mentioned in the delta annoucement thread, the legs seem to be more aligned to wing-facing rather than top/down thrusting...which may mean more of a built for speed valk. Am not sure abt the size of the tyhruster protrusions tho...it seems quite ok in the lineart but from the model its a bit elongated? However the color scheme is a quite fetching...
-
![IMG 6180[2]](https://www.macrossworld.com/mwf/uploads/gallery/album_801/small.gallery_30818_801_307726.jpg.5c7550eda6b336589d06cee6ce69e07e.jpg)
From the album: Custom bandai 1/8000 sdf-1
-
From the album: Collection Sale
-
From the album: Collection Sale
-
From the album: Collection Sale
-
I've been meaning to do a quick and dirty review of these guys for a while now and finally had time to take a few photos to go along with it. So without further delay, here's my introduction to the answer to the problem of the (otherwise) wonderful Bandai VF-171 toys. After seeing Macross Frontier, I was smitten by the new VF-171 and actually liked it even more than the VF-25 that was central to the story. Something about the lines, the colors, the shimmery way it often exploded... Sadly, a toy or even a model of this thing seemed to be nothing more than a pipe dream. There were model companies hinting at it (Experten, I believe) but we never saw anything real materialize. And then, out of the blue, Bandai announced the VF-171EX and there seemed to be hope! The "normal" version arrived a bit later but finally, we had a toy! I waited until after the armor parts were released before I jumped on the 171 bandwagon and really had no idea what I was getting myself into. Like most of you who own this toy, I was shocked to find out how terribly made some of the black parts were; like many here, my shoulder pieces had some serious issues. Look no further than this topic: http://www.macrossworld.com/mwf/index.php?showtopic=37652&page=1 for similar stories. Broken shoulders, broken legs, broken internal pieces. This thing has grown into almost legendary status for how unreliable it is. But for most, the shoulders remain the real issue. Until now... Resident Macross World member Xigfrid provided the answer, in the form of a Shapeways produced part. He offers a few variations, which I'll describe in more detail shortly. But suffice to say, for those of you with broken shoulder triangles, there is now a solution! I purchased a few sets from him as a "just in case" measure. But also in the hopes of spreading the word about this little fix and hopefully providing other 171 owners with a means of enjoying their little green (and sometimes white) engineering marvels again. The parts I'll be showing you are the basic versions, printed in one solid color. Two types are offered, a "no triangle" version and a "with lower triangle" type. Click the links for a look at the Shapeways site for more details and to place your order. Xigfrid also offers a pre-printed logo version, where the NUNS logo and stripe are represented by two colors of printed plastic. I didn't opt for these because they were more expensive, the colors weren't "exactly" right, and I wanted to experiment with painting myself. I asked Xigfrid a lot of questions before ordering and this guy is a top bloke. Very helpful, very patient, and very easy to deal with. So, here's a look at what you get: The parts come printed as one "tree" with only the end bits anchored. Both left and right triangles are on the one tree. It's quite an impressive thing to see the inner parts just sort of hanging on the spindle down the middle and understand they were printed like this. The parts I chose were finished in "White, Strong & Flexible, Polished" material (WSFP). They're very strong, but there is some printing edges that are obvious when looking closely at the parts. The surface reminds me of velvet. You'll notice in the image above, there's a slight difference between the left and right parts, with the left side being the "without triangle" and the right one being "with lower triangle" type. The only difference is a notch cut into the bottom of one of the parts, for each side. I'll show why this is important a bit later. Here are some close ups: The parts assembly is very easy, and the only advice is to cut down on the post that attaches the two outer sides together. If you use it as is, the fit is a little too tight. Trimming a few mm off the end is advisable so the post doesn't bottom out in the hole. So, what exactly are we replacing? Here's an old picture I took of the part in question: And a typical shot of the damage one is likely to see when it breaks (if you can remove all the pieces without losing anything): Now, for some irony... I fixed this part with super glue a few years ago. I then promptly put it back in the box in disgust and didn't even look at it until I saw these new Shapeways parts were available. And when I did look, it was purely to figure out if I needed "with or without triangle" type parts. Imagine my surprise when I got the replacement part in, dismantled the part to do a test fit, and discovered the fix was still in place! And to make things even more surprising, the other seemed to be fine, with no signs of stress or breakage. Seems I got very lucky with my sample. Moving on, here's the lower triangle, so you can determine which type of part you should order: The thin, black, hinged in the middle thing in the bottom of the wing root. It's easy to forget about when going from any mode back to fighter and WILL be the thing that prevents you from popping the legs into fighter position, because you forgot to fold it back into position beforehand. Ask me how I know... See those little white lines coming from the pin? That's not hair, those are cracks. Both of mine have this but for now they're still intact. If yours are broken, you may do well to remove them entirely. They're held on by that screw through the teal colored piece, just next to the triangle in the above image. They don't really do much, and honestly, they're annoying. They never sit right, they're always in the way, and even if you do get them perfectly aligned, they look like they weren't designed to be the right shape to fill the gap they're there for. Here's what's behind the part when you swing it out of the way: That notch (notice the repair marks on my example) allows the pivot pin hinge in the triangle to sit up against the top triangle. If you don't have the bottom pivot triangle, don't get the replacement part for the "with triangle" type. It'll have a hole in it and it'll be noticeable. Instead, opt for the standard type. Simple. I haven't fit my parts because I didn't need to, as mentioned. But disassembly is fairly straight forward. You can pry the whole shoulder open and pop the arm out, followed by the triangle. If you're very careful, that is. Otherwise, there's a screw cover that will most likely be glued in, hiding a small screw that keeps the shoulder together. Removing this will allow the shoulder to come apart much easier. One side on mine was easy, the other was glued in so completely that I wasn't able to remove the screw. Your mileage may vary. Prep of the parts is up to the person doing the installation. But note that none of the parts are terribly smooth unless you opt for the much more expensive translucent material. And even then, sanding is recommended. I'd planned to prime, sand, smooth and then paint these things black. The intention for the NUNS lettering was to print a mask or maybe do some decals. Given my part is still OK, that's a decision I'll leave for somewhere down the track. Check out Xigfrid's store. He's got some great stuff on offer: http://www.shapeways.com/shops/xigfrid3dshop If a mod happens by this, mind adding that missing 'w' to the end of my topic title?
-
hello dear collector today i will share my collection who took 22 years to compose enjoy
-
Completed my 1/72 Bandai VF-1S Hikaru kit. This kit has been controversial from the beginning and now that I’ve finished this kit, I figured I’d give my own viewpoint. I’ll try to be fair and balanced. J I built this kit without painting much. The parts I painted were - - the tailfins - the foot thrusters - the gunpod - some minor details here and there - the black stripes on the arms, legs, and wings I had to paint the black stripes because the Bandai decals were terrible and generally a pain to work with. Those areas are also heavily touched during construction. Decals can be easily scratched even with a clear coat on top. Paint is a bit tougher (esp the lacquer & enamels I use). Painting them was also much easier. A couple of mods were made. The main one being the wheels for the landing gear. The wheels included with the kit were way too small for my liking. I thought about using the wheels from the Hasegawa kit but those are small too. I’ve always felt that Valks should have big meaty tires. So anyway, I cut off the wheel attachment point, drilled a hole, inserted a brass rod, and attached F/A-18 Hornet wheels from an aftermarket resin set. This does however mean that the landing gears no longer goes into the bays. But that’s okay since I don’t plan on swooshing this around like a toy or transforming it to any other mode. Another mod was to the gunpod attachment. Since the model is staying in fighter mode, I cut the ugly gunpod holding strap and simply glued the gunpod to the attachment point. The final mod was an attempt to fix the inward slant of the lower legs. Fellow MW member, Budokhan, seemed to have come up with a easy fix and I tried it out. It’s not perfect, but it’s a heck of lot better than it was originally. In general, the buildup of this kit isn’t that hard. Most of the parts come together decently. There is however, one section that I had trouble with Despite following the instructions, I simply could not figure out a way to firmly attach the shoulder rotation point to the socket. After numerous tries, I gave up and gutted the whole shoulder linkage section. Which is just as well as I had no intention of ever taking it out of fighter mode anyways. There’s probably a better way to put that shoulder section together but I really don’t care about transforming so I’m not going to bother. In all honesty, it’s not a bad kit to build into fighter mode. Since I glued many of the moving parts, it’s all nice and tight. Another thing that is nice when it’s all put together is the heft of the model (at least in fighter mode). The quality of plastic Bandai uses and all the mechanisms for transforming gives this model some weight. It’s not important but it feels nice. As for the general “look” I find it to be just fine (at least in fighter mode). It’s not my favorite fighter mode model (that belongs to the Wave 1/100) but it’s looks well enough like a VF-1. If I had to complain, I think the tailfins are a bit on the small side. I guess this is the compromise for battroid mode. In the future, I might replace them with Hasegawa fins or something. That all said, I’m pretty happy with the end result. The mods I made help. Actually, I’m pretty chuffed with the Hornet wheels. I took the pics with a phone camera so some things are not correctly in focus.
-
For all Bandai VF-1 enthusiasts - a speculation thread to post your hopes and dreams! -b. *image taken from http://mazikanon.blog102.fc2.com/blog-entry-352.html
-
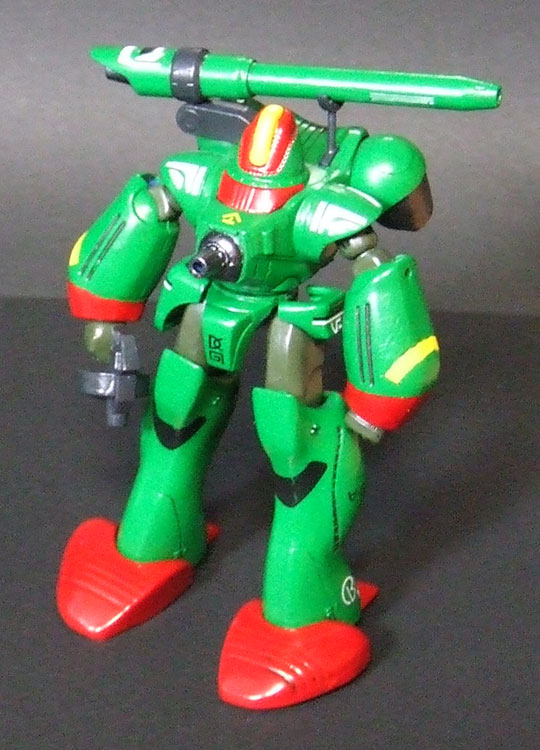
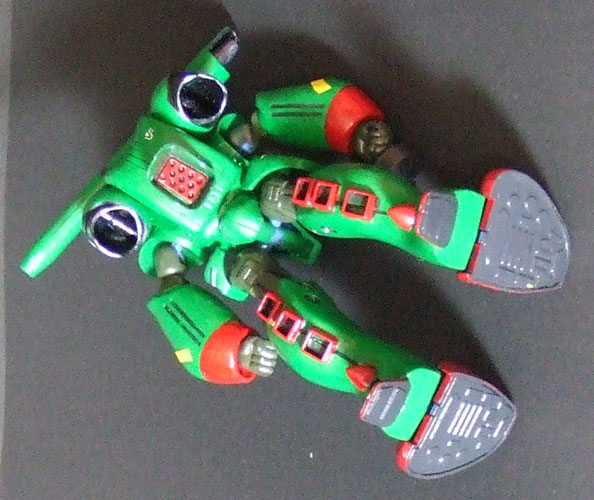
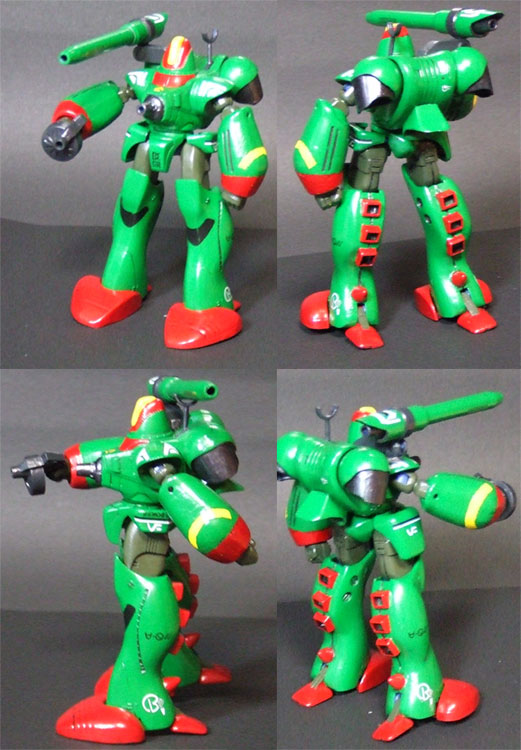
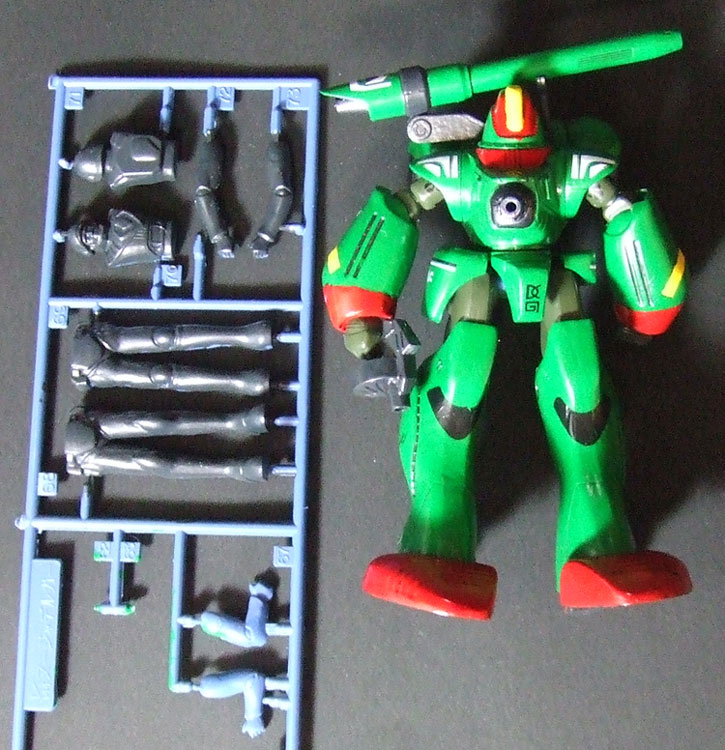
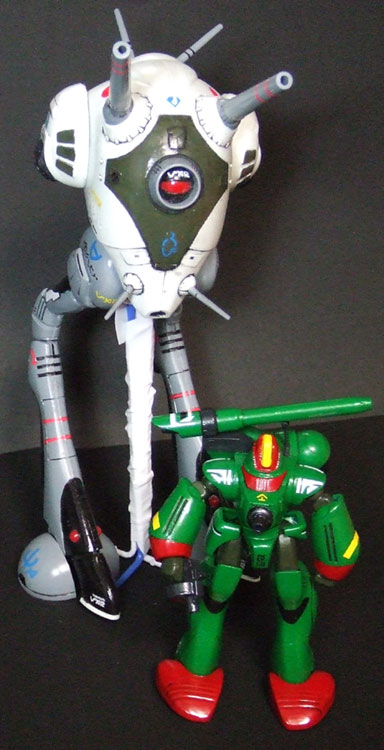
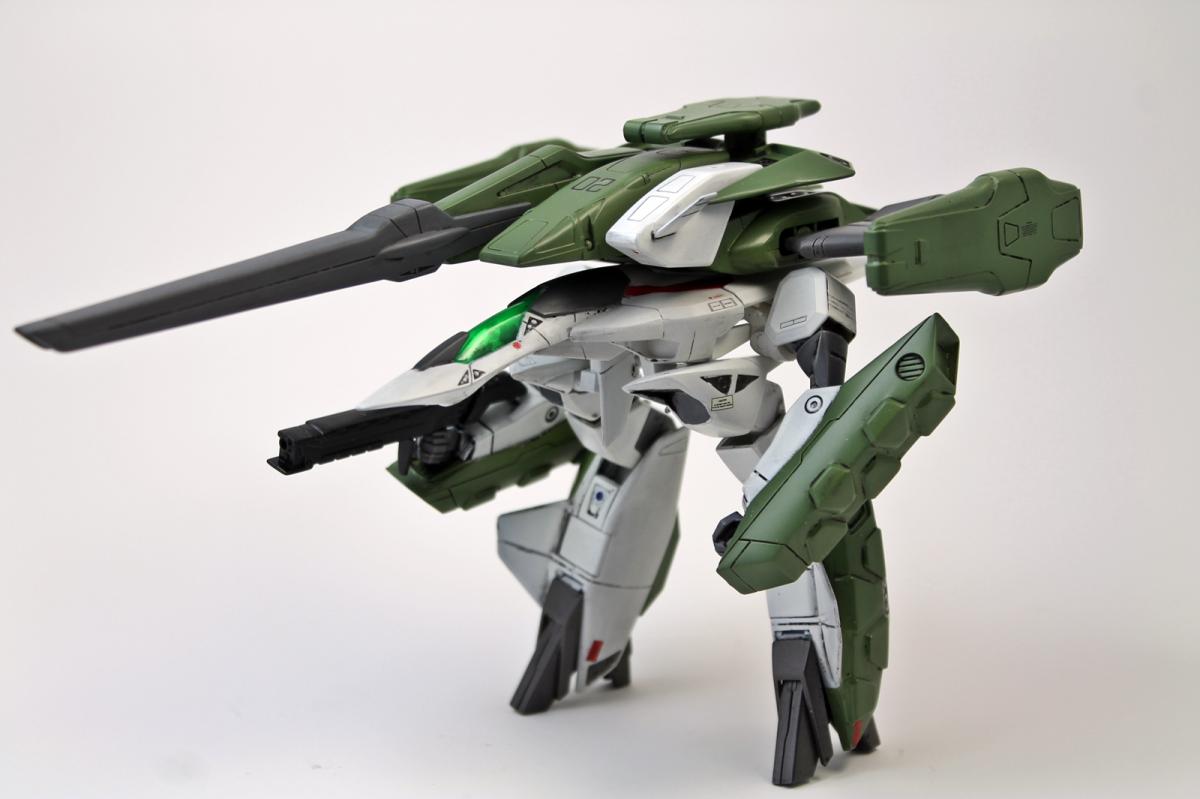
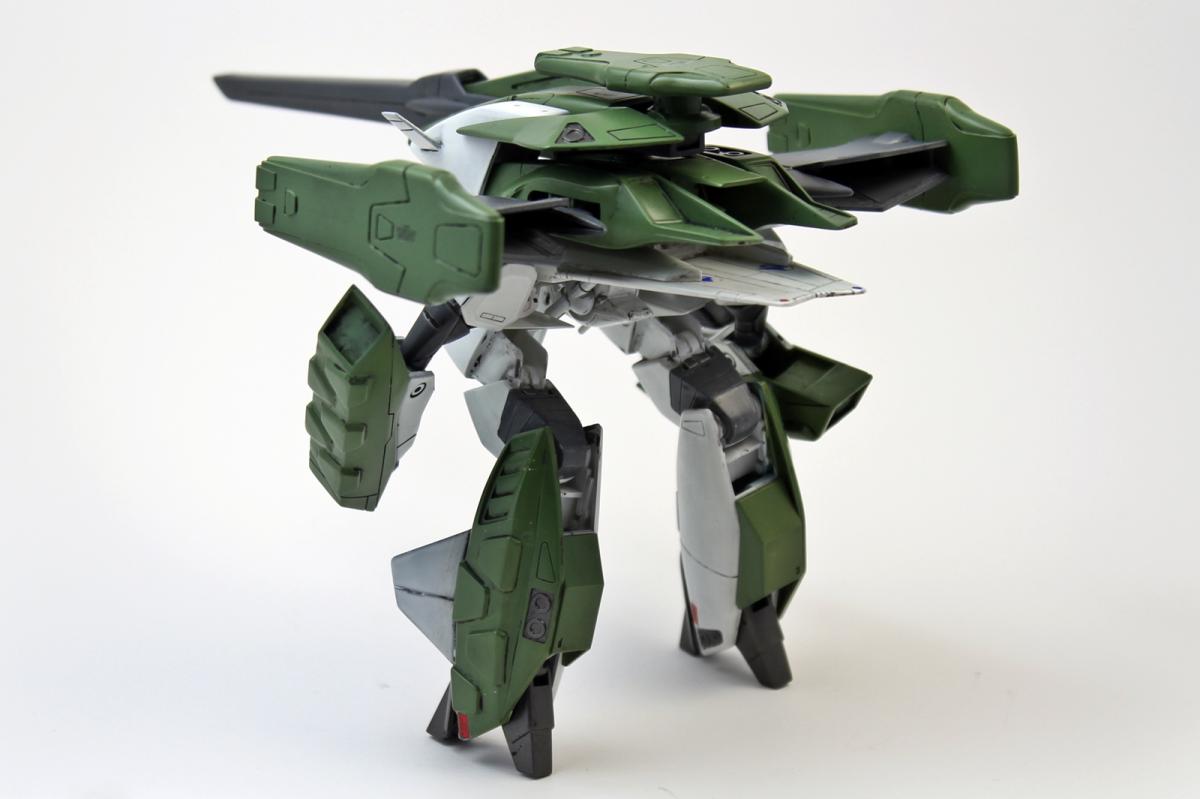
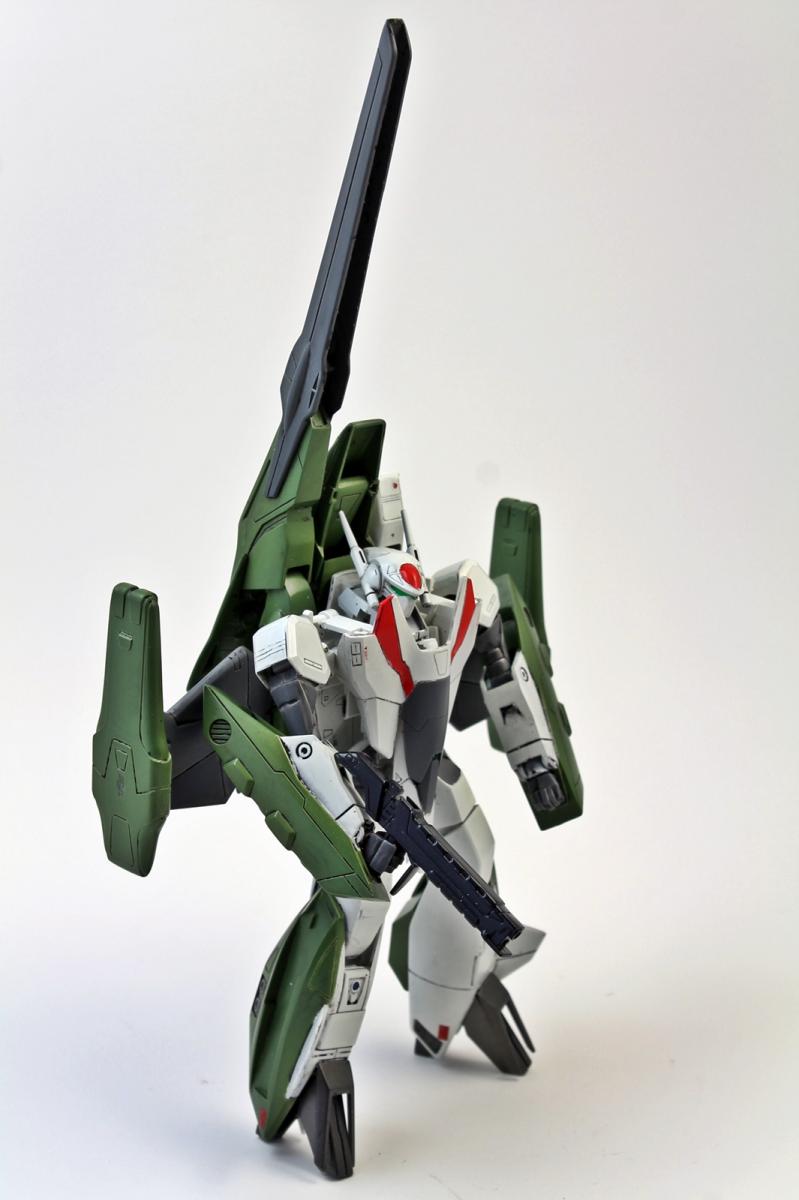
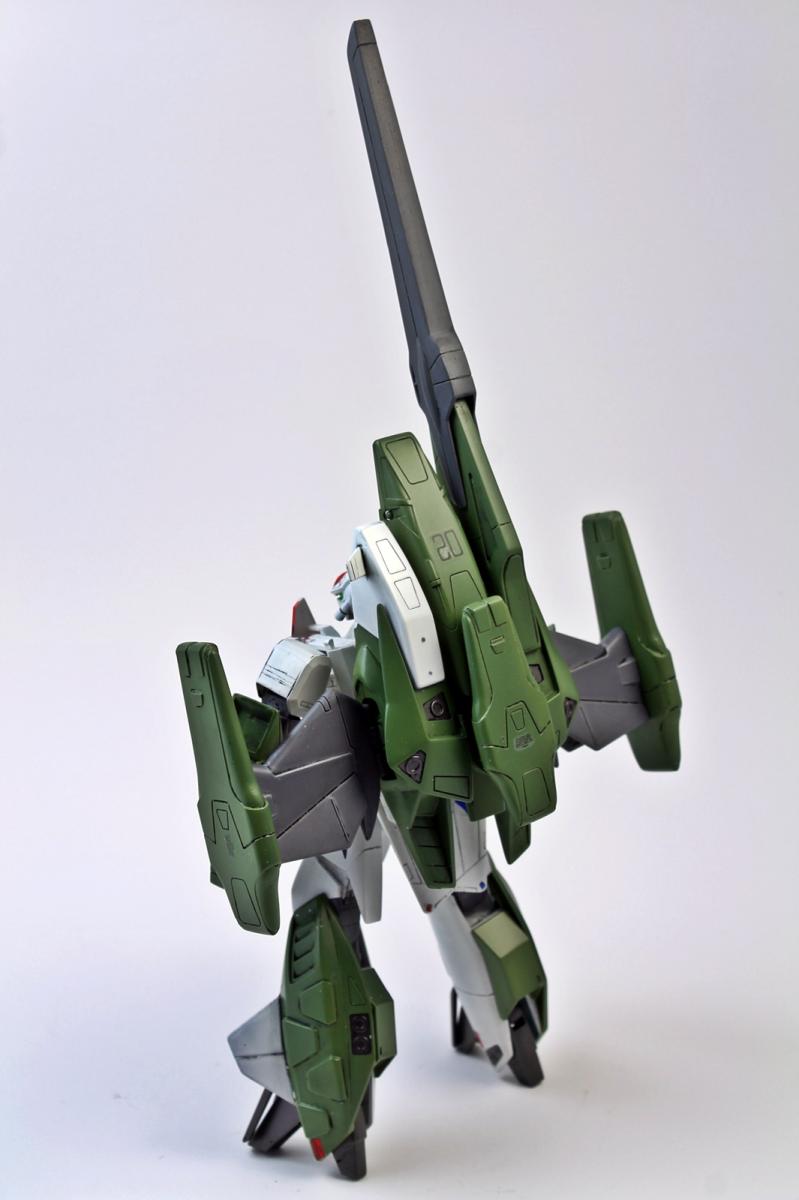
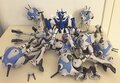
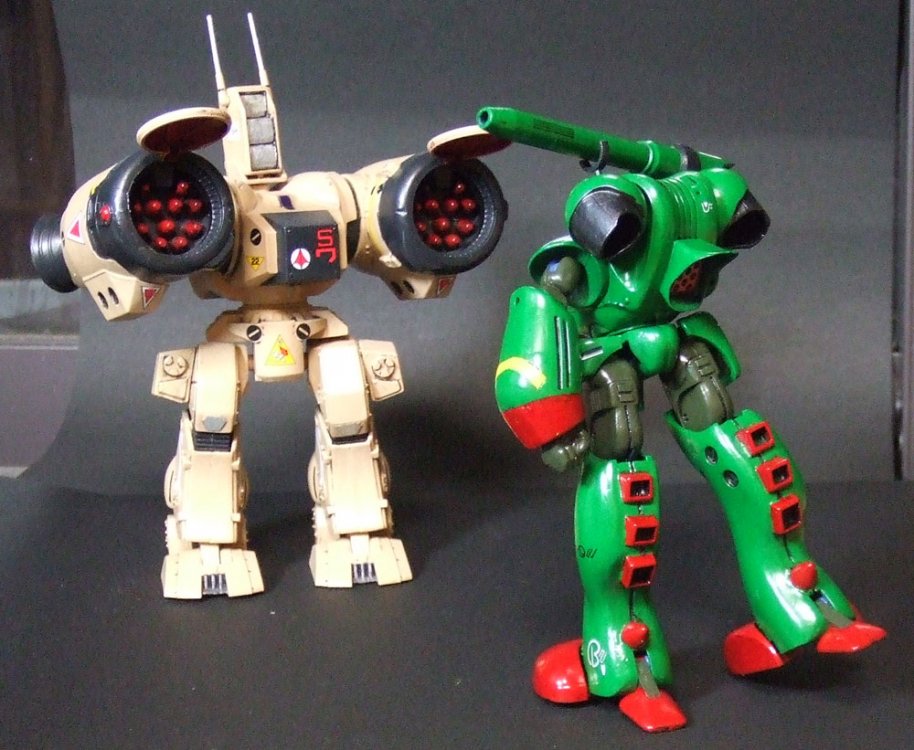
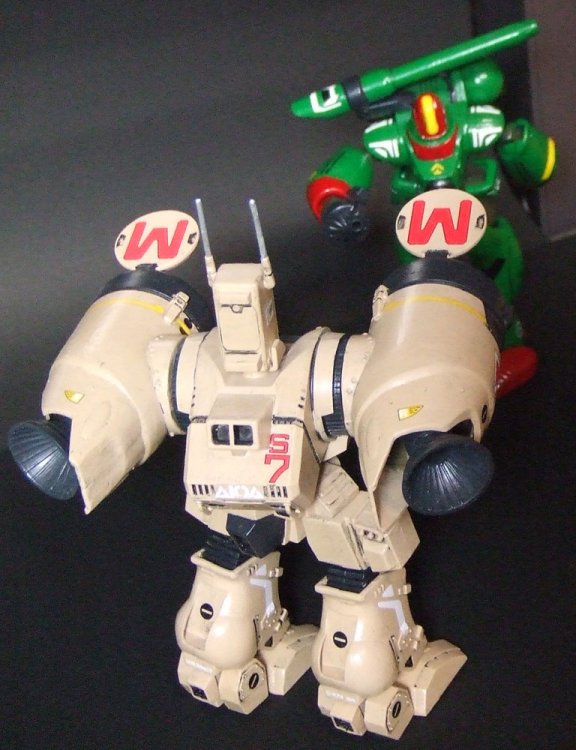
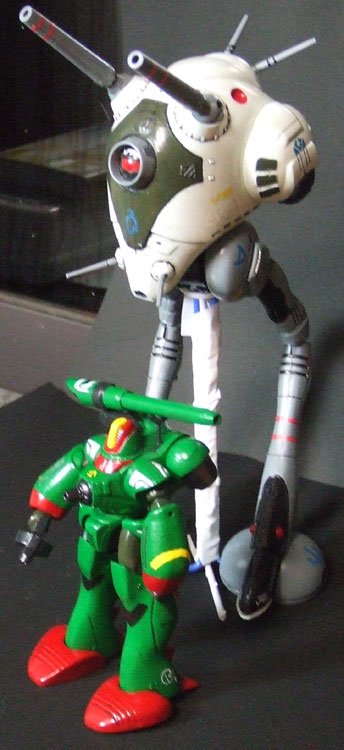
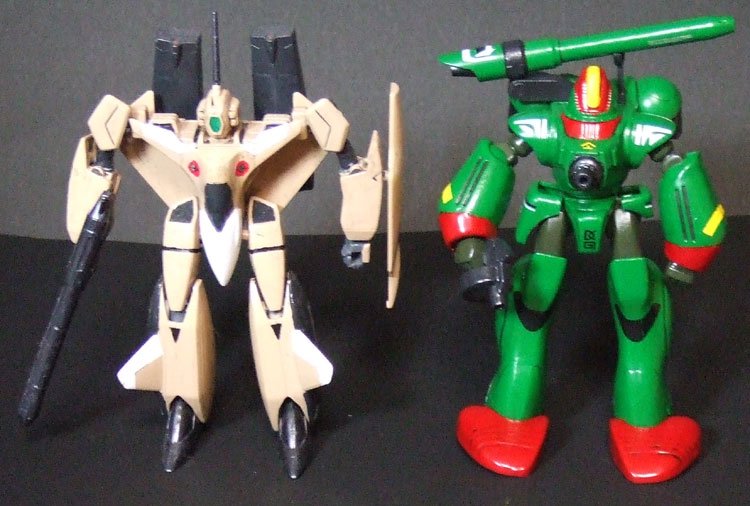
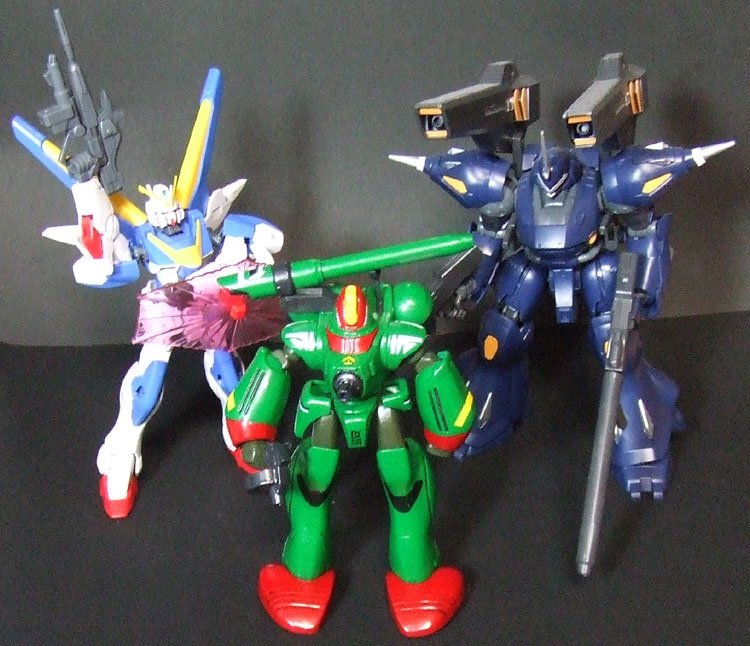
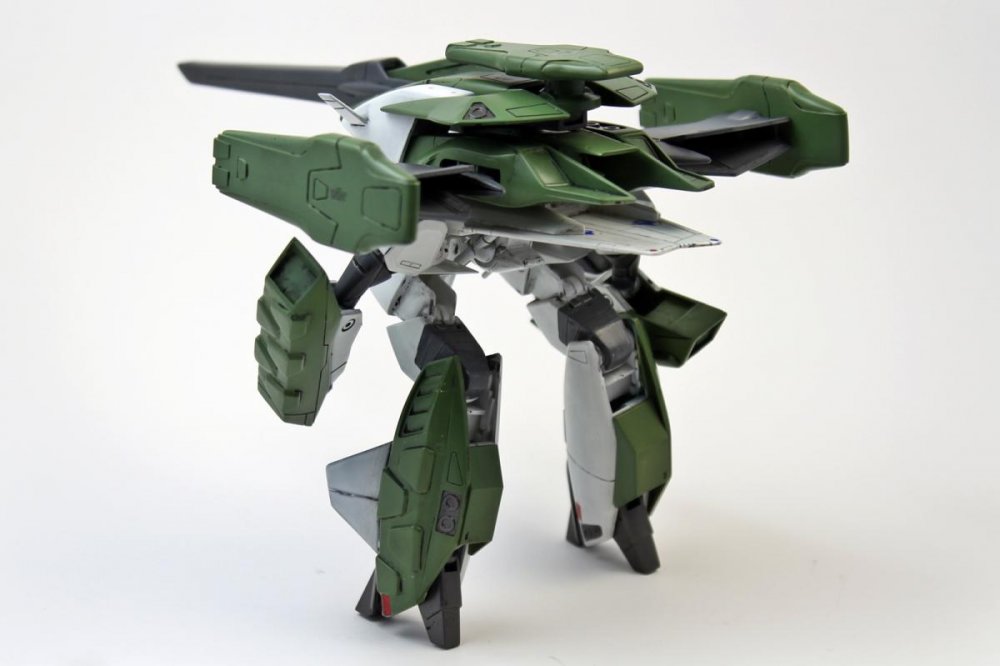
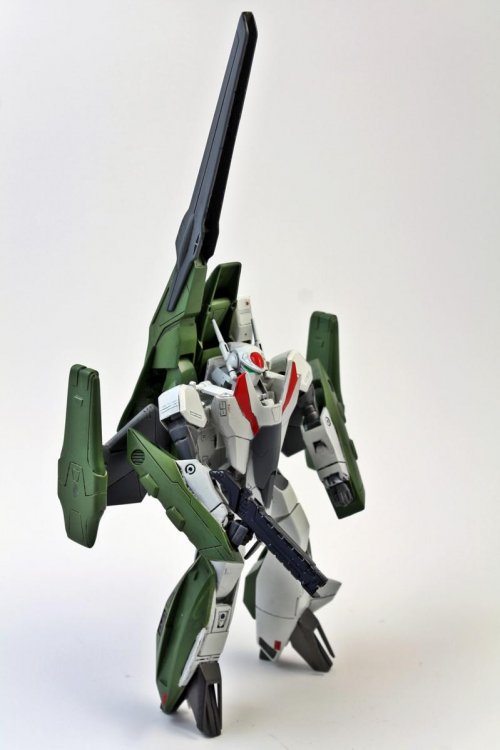
This kit didn't go together very smoothly - despite starting to lay down paint still on the sprue! For starters, the kit is molded in dark blue, and any light colours on top of that required multiple coats. I ended up losing some of the finer details due to that. The upper arms are extremely fiddly. I ended up having to permanently glue the upper arms, as the pieces kept popping apart when the elbow joint was rotated! Some of the other joints are stiff, but that might be due to the aforementioned paint problem. I ended up using super glue to affix the thrusters on the back of the legs and backpack, and the gun and its support. Only the backpack thruster went on smoothly. And once everything was finished painting and so on, I realized that there aren't decals for the stripes on the forearms! So, another round of masking, painting, and cleaning up. >.< At least the panel lining went smoothly (though most of it didn't remain in the grooves in the feet). What are your thoughts on the Christmas colours? The green was much brighter than I expected (though, it should be perfect for the Sound Force VF-17 I'm working on). I'm still working on the Zentraadi figure that comes with it (the kit's gimmick is that you can either make it either stand alone, or only the upper half of the figure inside the torso of the Nujaderu Gaa. Here he is reenacting one of the famous scenes in SDFM. Not quite a good match for the Bandai 1/100 Battle Pod... But a good match for the Bandai 1/144 VF-11C, and HG Gundam!


-
Well, between bad painting weather, being sick, and my growing disdain for all things Bandai Macross transformable, this spent WAAAAAY too long on my bench. However, finally finished it. Yes, it does go into fighter mode; however, it's so poorly designed that it's actually resting on the arm armor, not the landing gear. There's no way to properly tuck the arms up high enough. Also, they use some type of soft crappy plastic for arm and leg attachment points. Good luck changing positions or modes without a litany of curses.


-
Hey guys, I am wondering who has experience with this kit: https://www.google.ca/search?q=BANDAI+1/100+VF-19+Variable+Model+Kit&hl=en-GB&biw=1280&bih=685&tbm=isch&tbo=u&source=univ&sa=X&ei=5tI9VN7nOtCuyATjgYLIAQ&ved=0CBwQsAQ I am wondering if it is on par with their YF-29 snap fit kit as far as details go. This is a transformable kit, as far as I can see, and so it would be a huge bonus if it was detailed nicely to go along with the gimmicks. I would like to do a conversion for the 1/72 Hasegawa YF-19 model kit, and I want to use a VF-19Kai kit as the basis. Thanks for any comments.
-
Bandai will be releasing 1/48 and 1/72 Star Wars models. I would love to see Star Wars kits with Gunpla MG/RG color separation. They also showed a 1/1700 scale Star Destroyer with lighting effects. Don't know if that will be an actual kit. http://www.actionfigurefury.com/band...toy-show-2014/
-
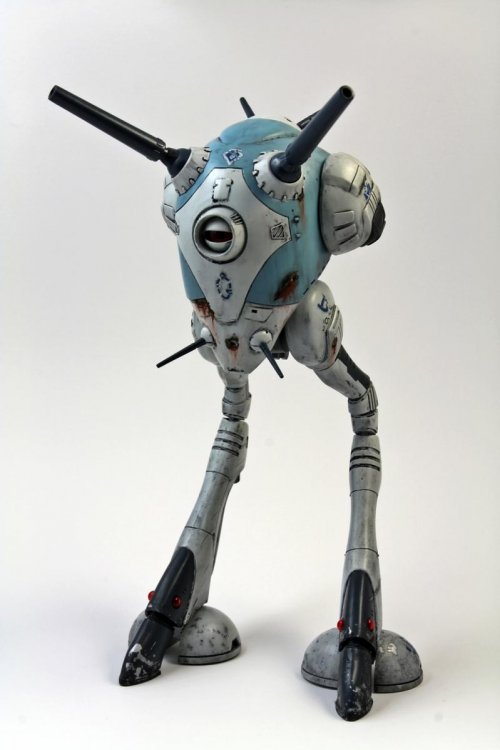
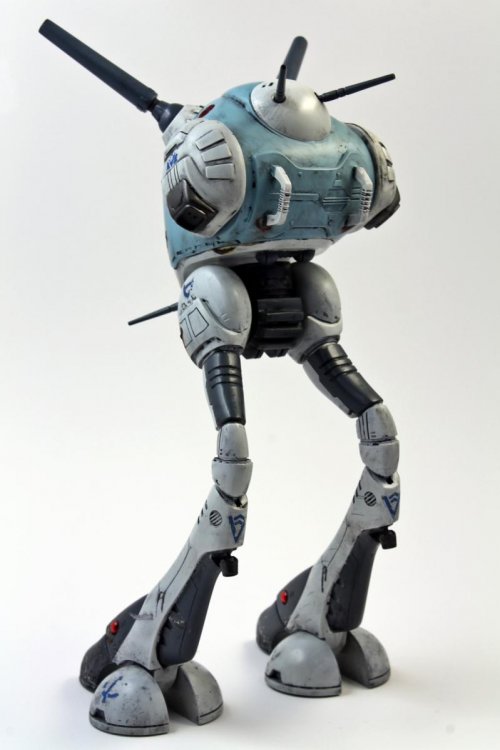
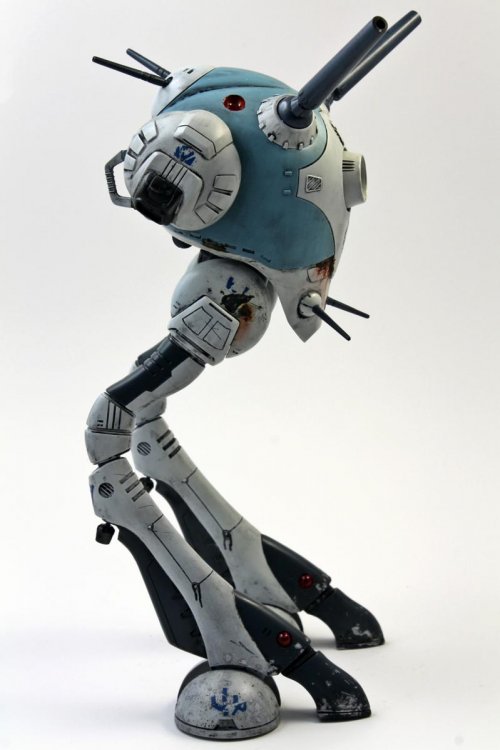
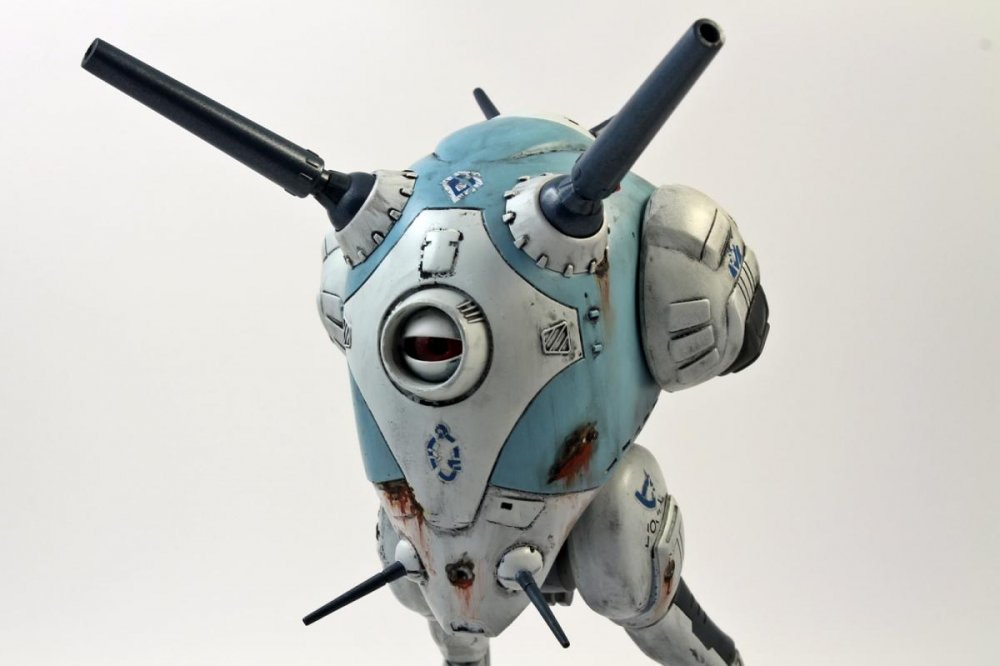
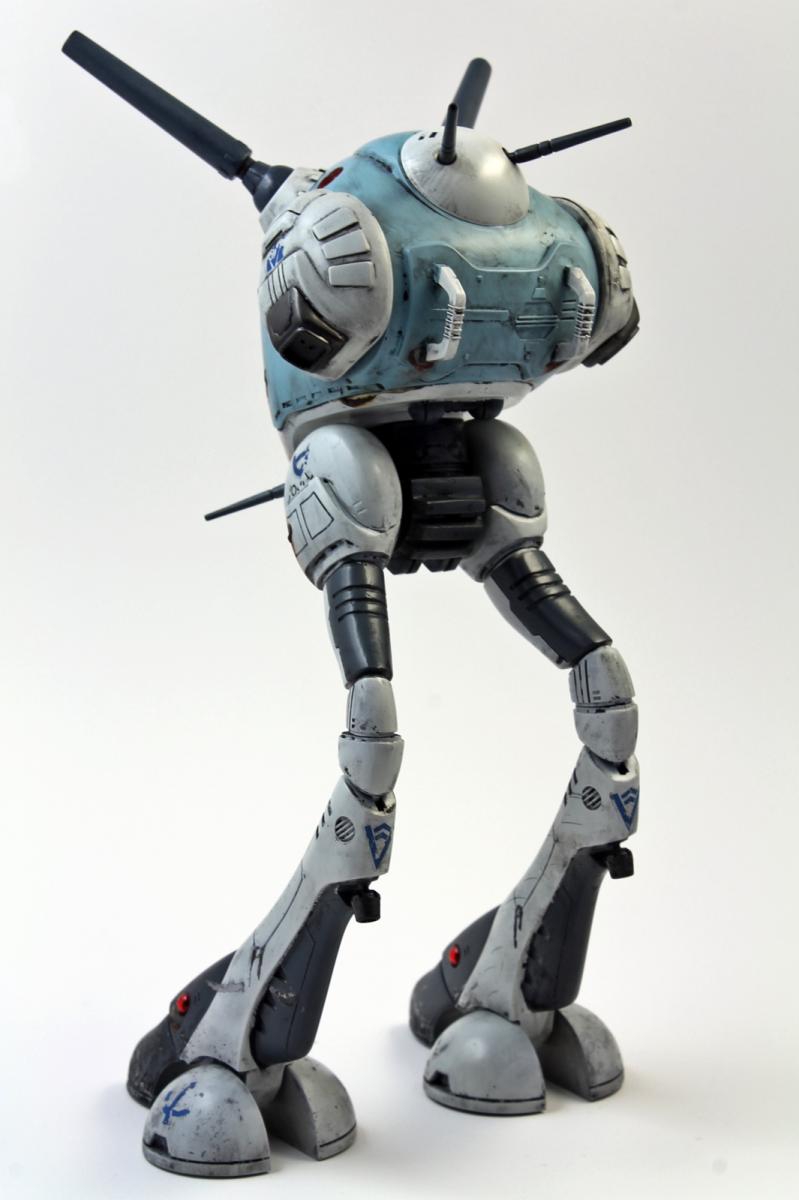
Old school kit, with new school tooling. This is the Bandai rerelease of Imai's old 1/72 Regult kit. Even though it has new tooling, it's still an old school kit. Be ready for a lot of puttying and sanding!! Since the Zentradi didn't know anything about maintenance, I wanted to make this look like it's been in action a few hundred more cycles than it should have been. More to be seen at the regular place.