tundrayeti
-
Posts
570 -
Joined
-
Last visited
Content Type
Profiles
Forums
Events
Gallery
Everything posted by tundrayeti
-

Upgrade parts for Beagle 1/10 Mospeada
tundrayeti replied to EXO's topic in Anime or Science Fiction
Shapeways has definitely gone down in terms of quality.That and they keep changing the material thicknesses and now you can't print multiple parts. If you do multiple parts, they all have to be connected with a sprue. Just another way shapeways is trying to get more of your money and make it harder to get around paying that $5 setup fee for each print. I have found some waesome 3d printers that do WAY better quality than Shapeways and aren't that much more expensive. I will post pics of some of the parts for the VC-33 I had done for comparison later today. -
That can be done, all i have to do is incorporate them into the CNC program. the engraving bit does all the work! I also highly recommend getting one of those rivet tools. I'll post a picture of what I'm talking about later.
-
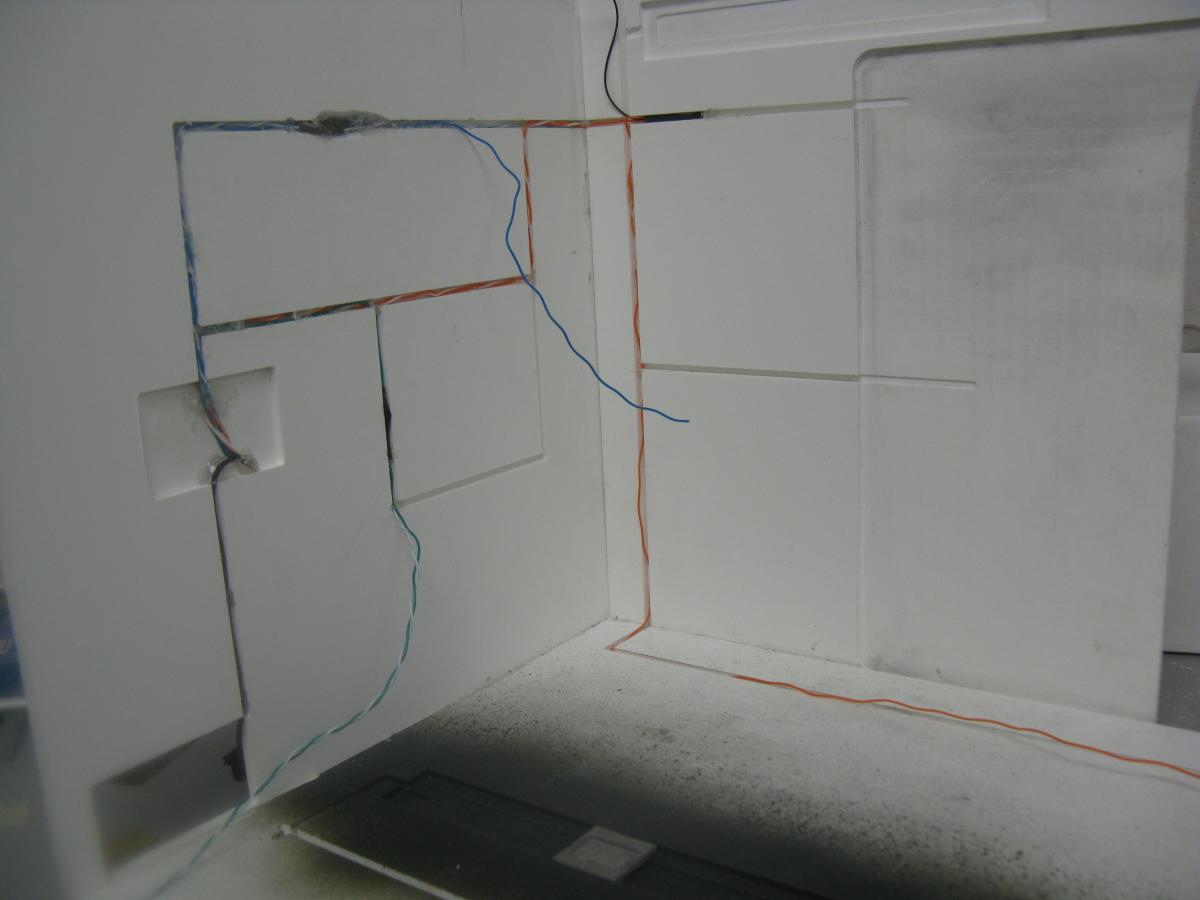
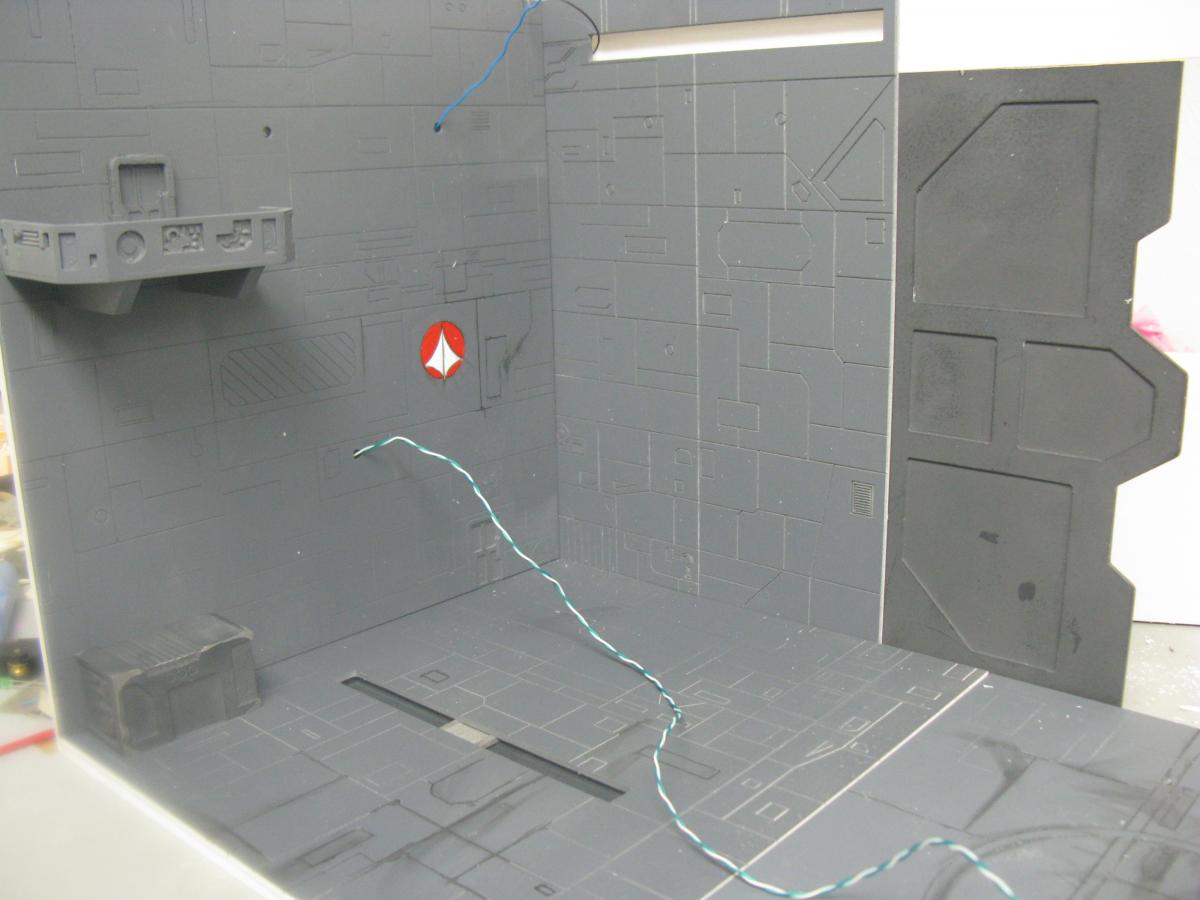
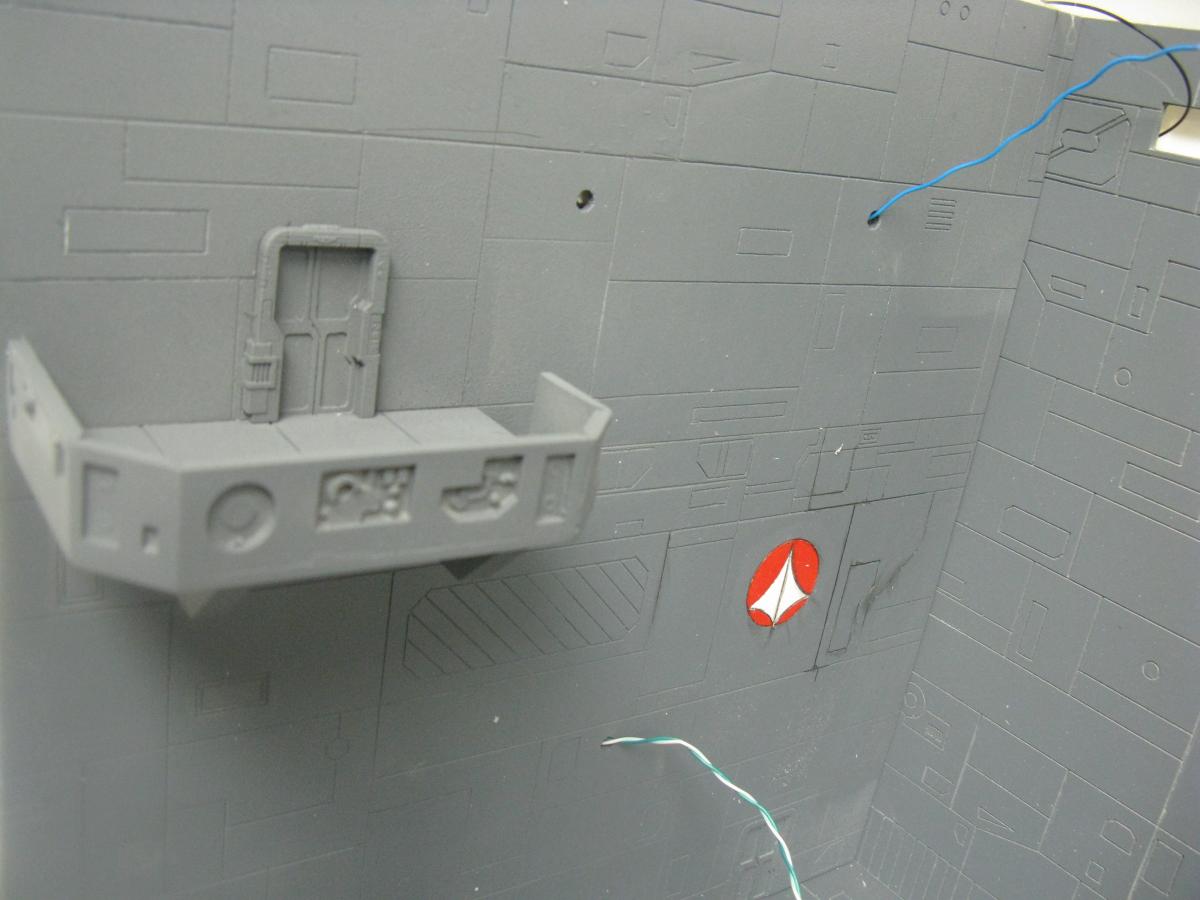
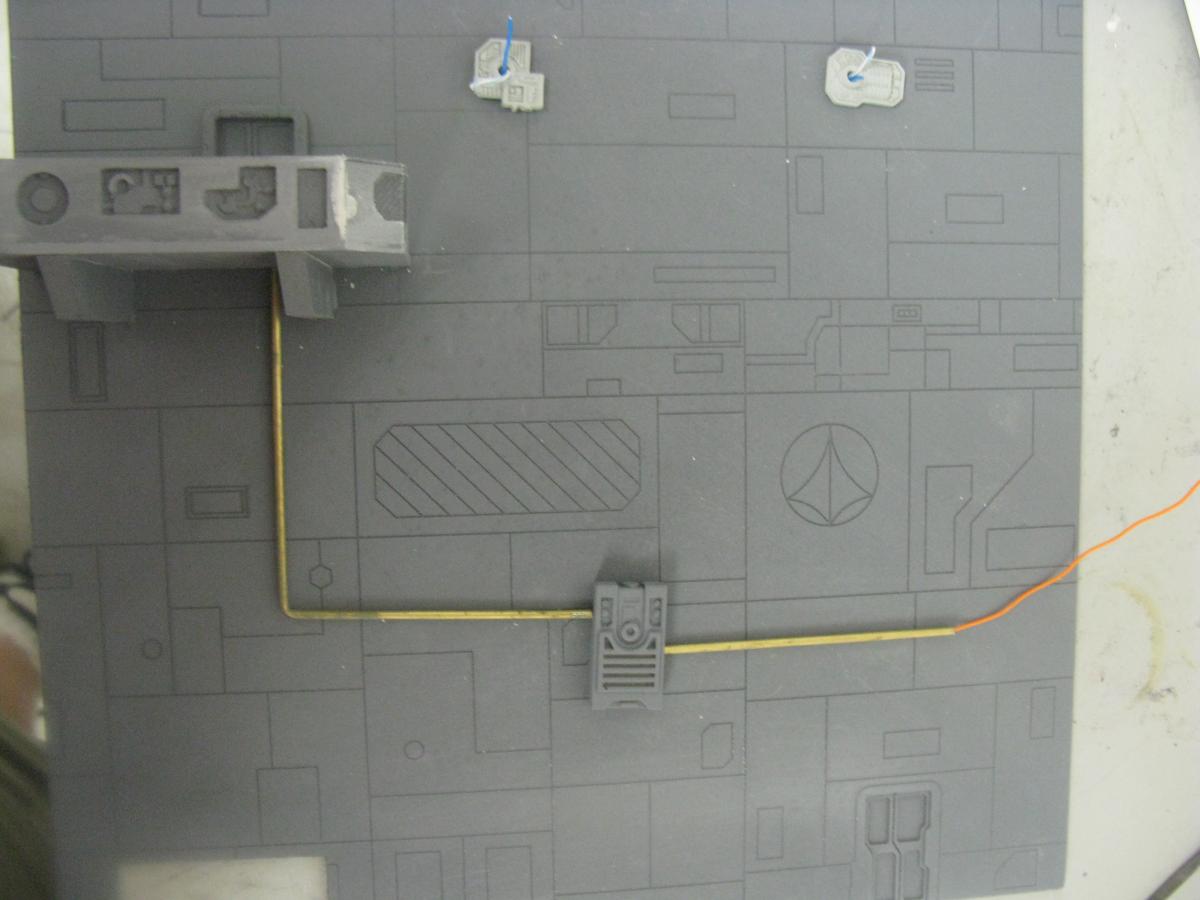
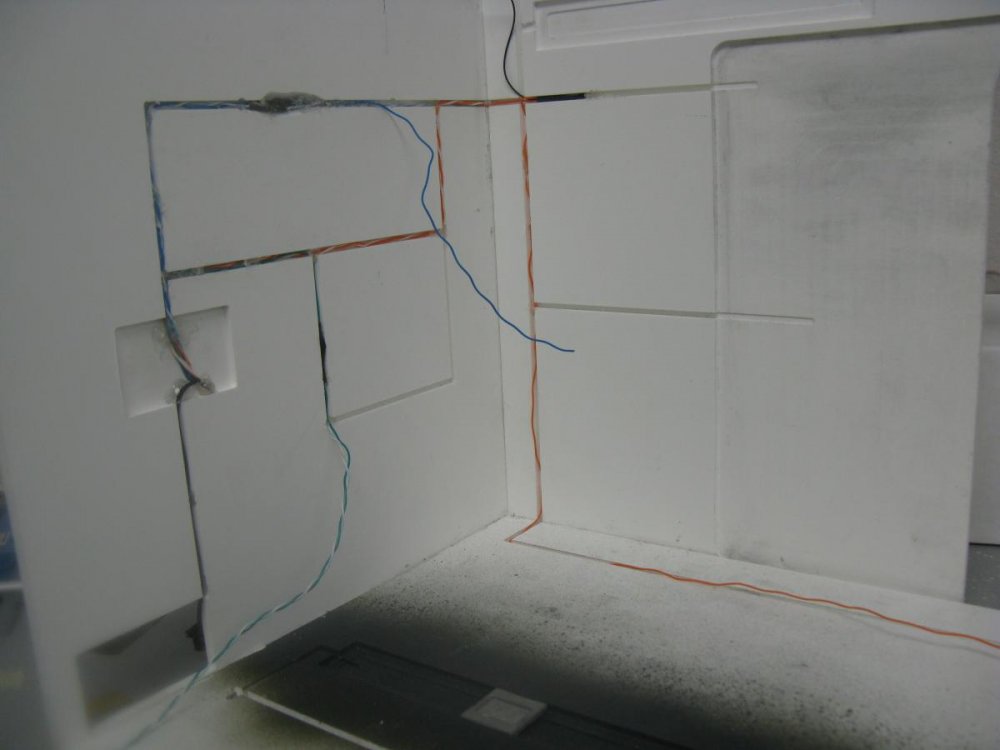
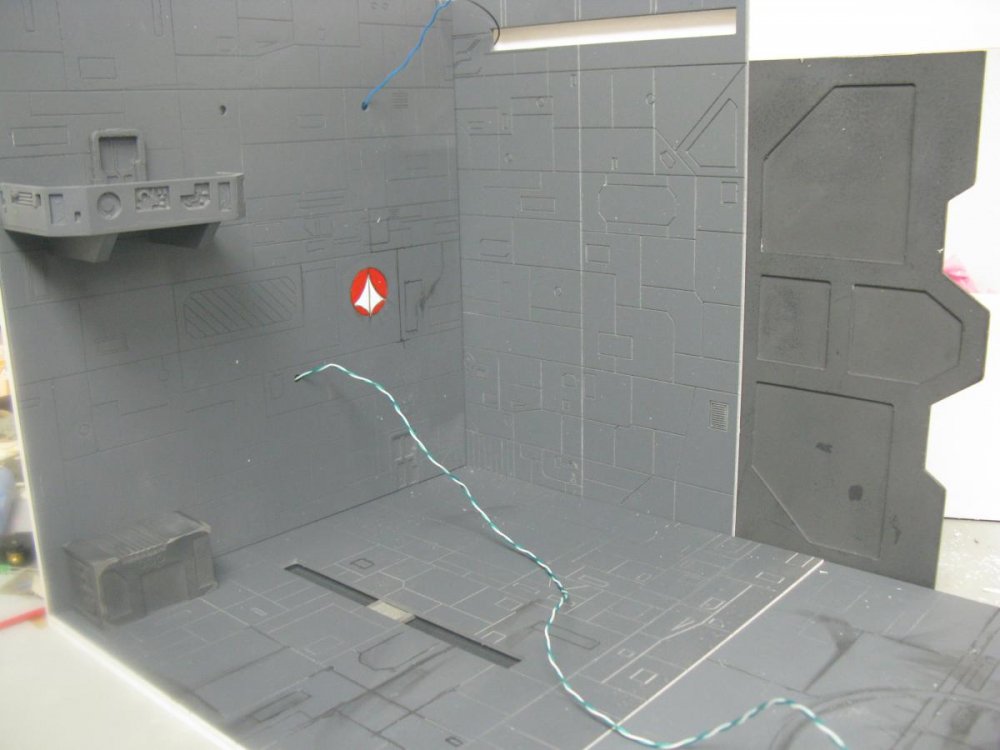
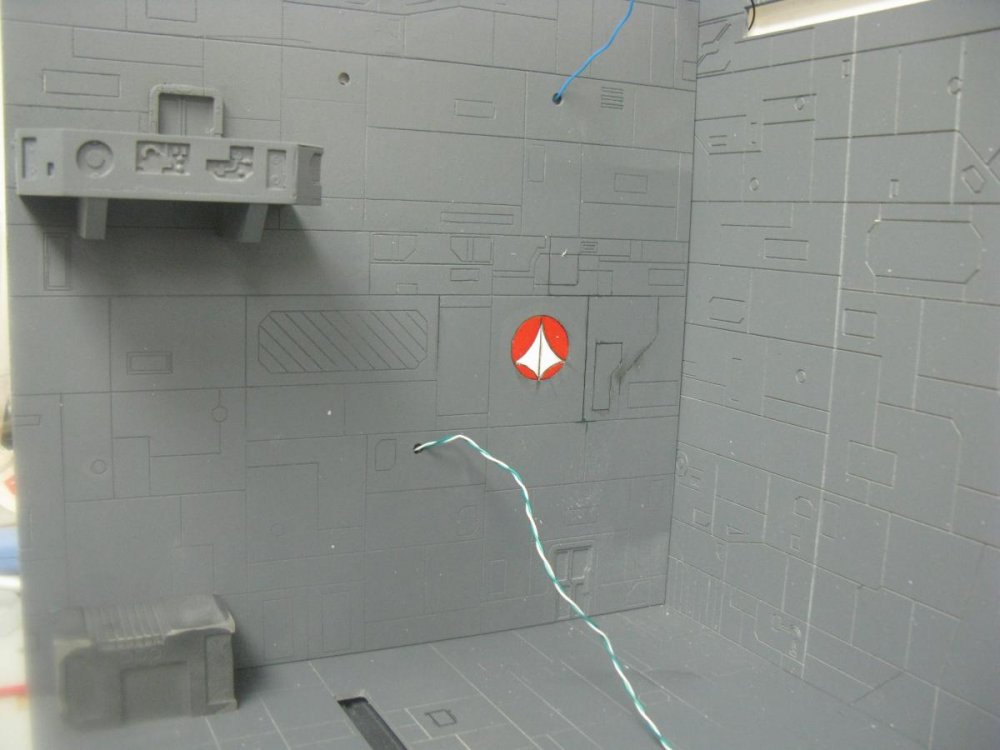
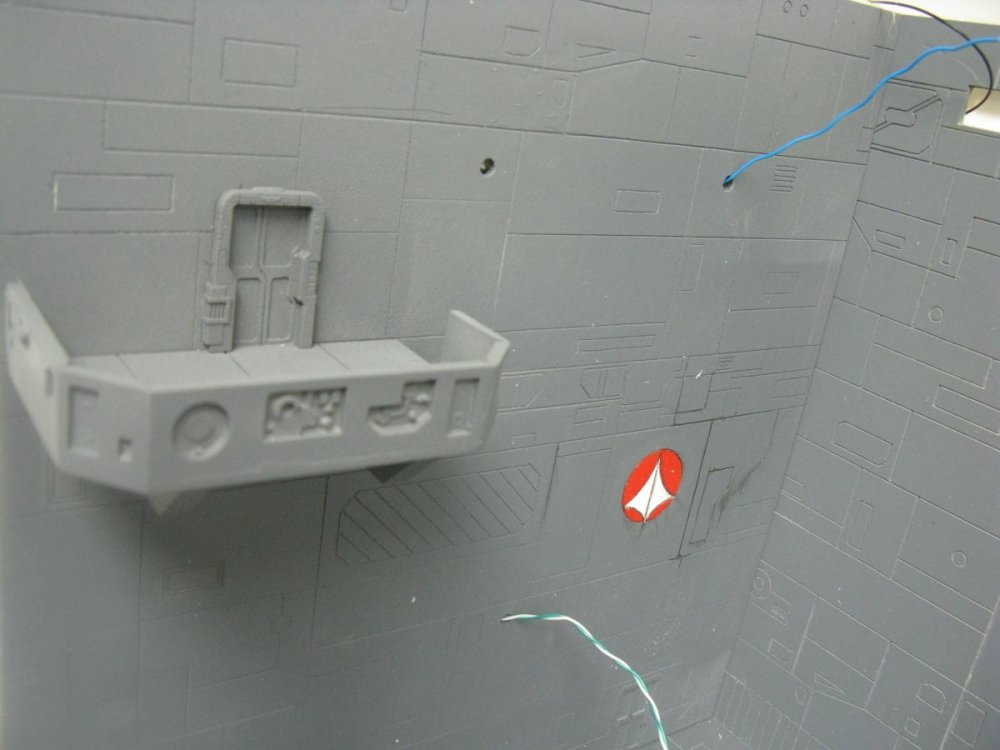
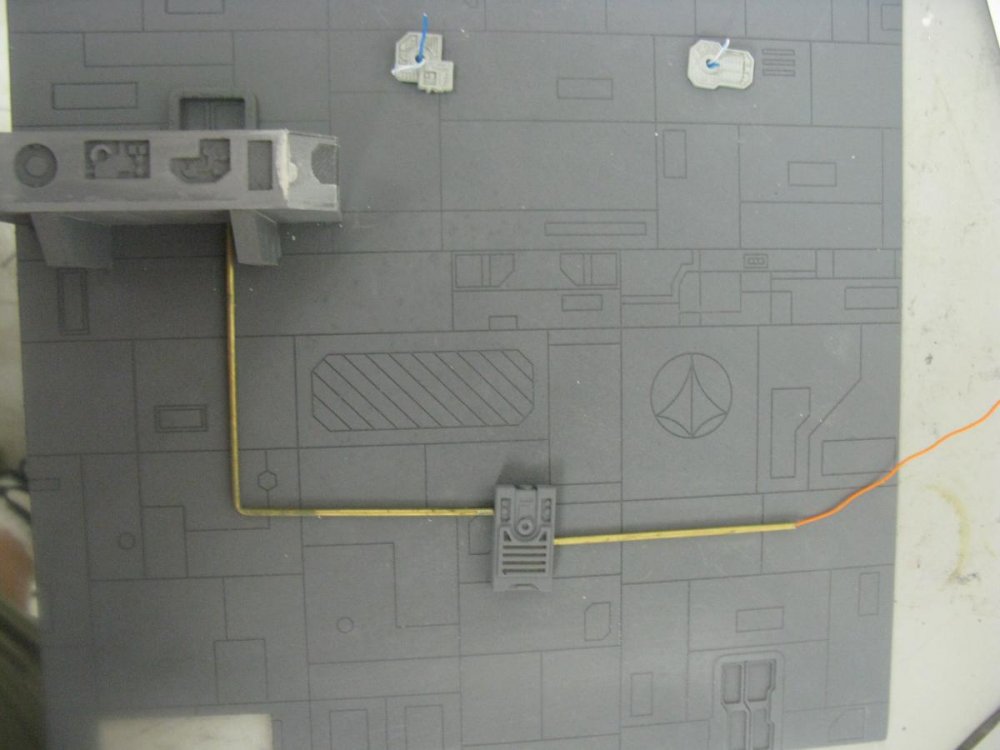
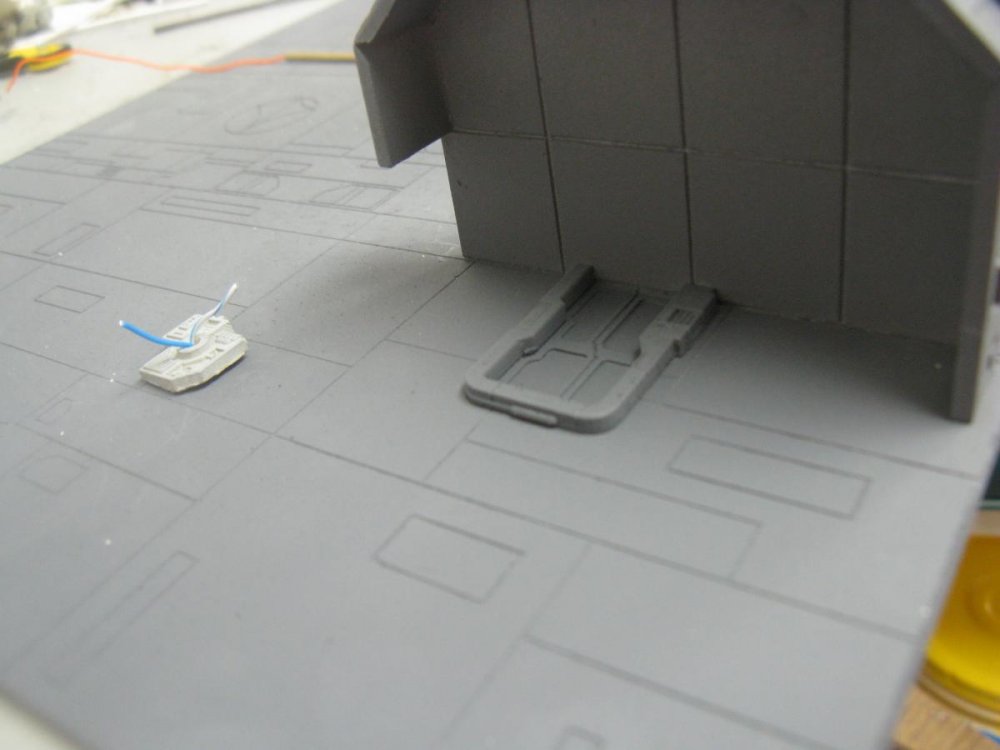
Okay everyone, here is a long overdue update. The owner of this hangar decided to go with a wall plug option vs the battery method. I think that it will work out better in the end. At any rate I had to find a suitable power supply and recalculate some of the resistors and other elecronics to accomidate the new voltage of the power supply. So I got the new design done up, and since there is some extra juice with the wall plug, I decided to add some more effects. Not too much just some lights to the control panel. I have spent the majority of time running wires and adding new electronics. As you can see in the picture, I cut channels in the support boards so that I could run wires in them and glue the wires in place. I have show a pic so you guys can see what I mean. This takes a lot of careful time and planning, hence the lack of updates. Now that the main wires have been run to each of the section they will power, I can start putting some of the finishing touches on this bad boy. I glued the floor lighting and wires in place. also got the UN SPACY kite done. Did a little bit of panel lining as well, I'll clean it up later, or maybe leave it to give that dirty look. Anyway I included some beauty shots. The wires hanging out of the sides will be run through aluminum hobby tubing to add detail, and to power the LED's that will be in the greebles. I'm sure you guys will like the end result. Some of the details are quite small so I had to use 1/32 tubing that I will attach the LED to directly. To prevent any electrical hazard, I am coating these small tubes with the greatest invention ever, Spray on electrical tape. I would say that this baby is at about the 83% complete point. Now that the electronics are close to being done, It will go faster now providing My job keeps me home. Thanks!
-
I fell out of my chair i was laughing so hard! Would that be considered cheating in the Olympics?
-
The only reason to see this movie would be the three breasted hooker. The actress they got to play the part in the new movie is totally hotter than the original. Other than that... well okay the flying cars look cool.
-
I agree. The humidity has been horrible! these problems started showing up when Summer came early and the humidity shot through the roof!. The slower curing stuff came out okay. Just Okay.. At any rate I don't think folks will object to waiting a little longer to get a better product.
-
Yes his gunstar kit was very impressive. I'm gonna see how the vacform looks and go from there. I know Blappy is pretty busy right now
-
It has been posted before. Some of the folks are trying to get me to make his into a kit in 1/60 scale. It's still cool as hell though.
-
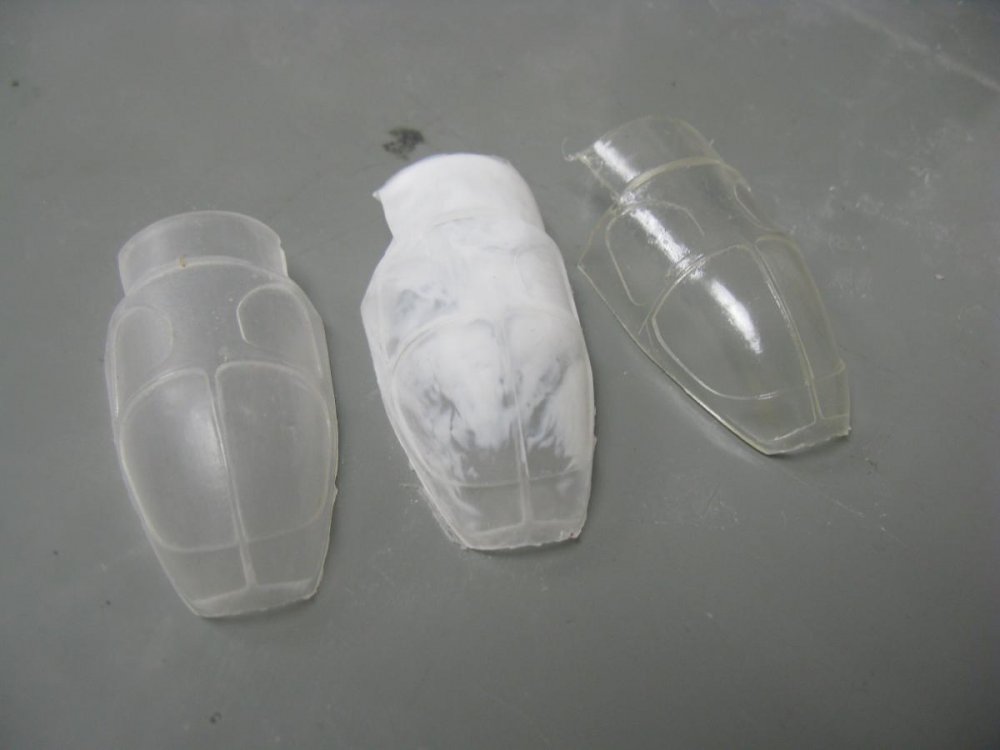
Thanks for the advice PetarB, The part was printed in clear material and I threw it in my vibration polisher till it was crystal clear. I think the problem was with the resin. Alumalite doesn't like Moisture and it as it was my first time using it, I could have possibly done something wrong. At any rate I agree vacforming will be the way to go, so lets see how it turns out. This shouldnt be too much of a delay, but I'm sure that everyone will prefer the vacform canopy.
-
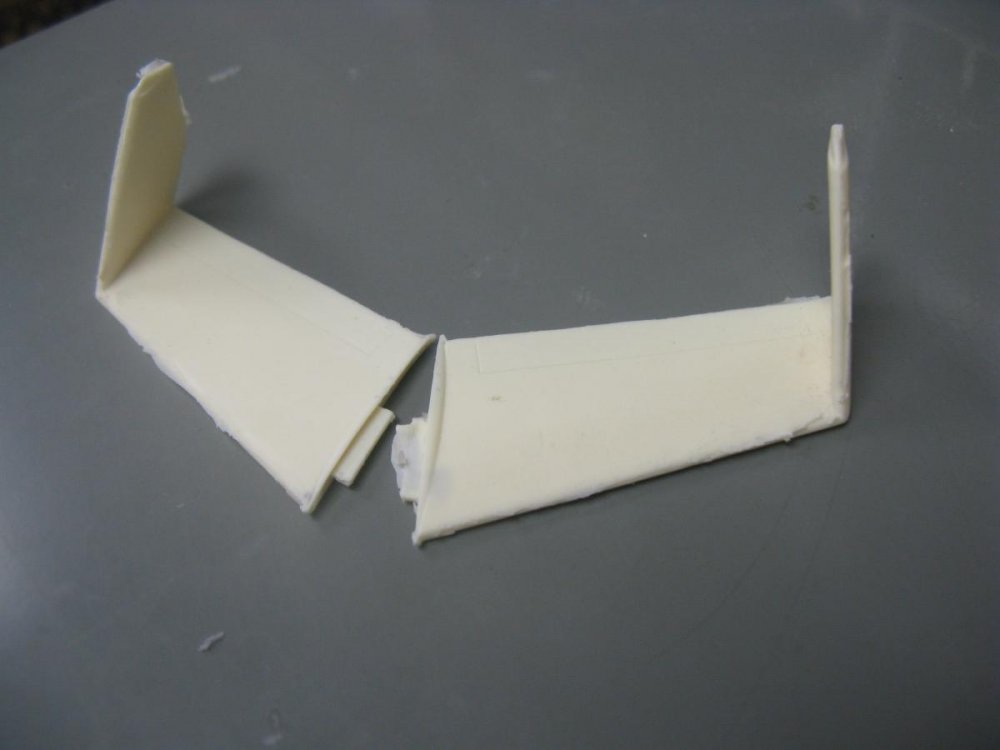
Hey everyone, Another Update. As promised here are the pics of the canopies. The one on the left is the alumalite clear I have been trying, If you spray a layer of clear gloss on it it's not too bad, but still I wasn't happy with it. The middle part is what I have been getting recently with the alumalite clear. It's been really humid around here, and that's tghe only thing i think could have gone wrong with this. The result on the right is the slow setting clear resin. It looks much better. it just takes forever to cure. Well one of the folks who purchased one of these, has offered a solution. I would like to give a shout out to TERR-OR who has graciously offered to vacuform the canopies. I am going to let him work his majic and lets see what he comes up with. In the meantime, I will still continue to cast in the slow clear. This may take a bit guys, Sorry for the delay, but I do want to put the best kit I can out there.
-
Thanks Jardann. Yes you can still get in on this, They will be available for awhile. I also plan on having a few at Wonderfest next year. I am building the kit up myself, and will be posting pics of my build. This will hopefully be displayed at mine and Thor's table. Please PM me. The clear castings are definitely slowing things down because of the cure time (18-20 hours to set and 2-3 days for full cure), so be patient everyone. All the other parts are finished, so this is the only hold up. I will post some pics of the differences in the 2 clear resins. I'm sure everyone will agree with my decision. So again thanks for the support and your patience everyone!
-
Mike that still looks AWESOME!!!
-
Quick update guys, Got the first couple kits out this weekend, it will be going a little more slowly. The reason for this is because I am casting the canopy in clear resin. I tried something new and used a clear resin that sets in an hour. Not happy with the results. So I have to switch to the slow curing stuff. It looks much better. So my apologies, but i'm sure everyone will want the better quality cast
-
Always ready to do casting. As this was a custom job, I had some of the details 3d printed specifically for this customer. All of the greebles, the light fixtures etc are already casted. The rest of the hangar is CNC machined. I use PVC sheeting for all of my hangar bays. It works out pretty well. The control room/outcropping was also CNC machined. I was going to cnc machine the controls and displays but I'm thinking of printing them out for more detail. This will also allow me to cast them in resin to make them avaliable for everyone.
-
I'll try to cast the doorways up before i attach the last one. As for the control room, there has been a lot of interest is this so maybe I'll have some 3d printed and cast those up as well. Dorge, if you want the doors though, i did have to machine those during the machining process. Pm me and we will discuss options. So folks Looks like the doors will be added to the list of options/goodies for my custom hangars. The greebles are also avaliable
-
Okay here is a long overdue update. Started on some of the details, added some greebles, started getting wires run. Big thing is the addition of the door details and the control area. Enjoy!

-
New generic multipurpose Photo-etched mesh grilles and anti-skid floor
tundrayeti replied to newca's topic in The Workshop!
Hmmm I am already contimplating all of the evil things I can do with those... -
Not yet they are packed up, I just need to print labels. And this is the 4th week in a row that my company has sprung a surprise trip on me! Ugh! anyone know who would be interested in hiring an experienced electrical engineer with a background in green energy?
-
Thanks Alex!
-
Hey everyone. I have had another delay. I am finishing up gettint these boxed up and ready to go. But i have had to turn my attention to another matter. My birthday was also this week so I had to spend time with the family. I will be issuing tracking number to those folks who have paid over the course of the weekend. I also have to go out of town again on business on tuesday. They are coming though!
-
The cost per kit is $115, plus shipping. I ship inside the US using flat rate shipping. It makes it very easy to calculate costs. If you are outside the US, I can get a couple different shipping quotes. Please drop me a PM with the details. The first few kits are shipping this weekend, I still have plenty on hand. The clear canopy takes the longest due to it's curing time. Thanks to everyone for your patience.
-
Just finishing up packaging. Should be shipping them out by this weekend. Had to go out of town on business unexpectedly last week and this week so it caused a few delays. As usual. I will be posting my own build of this kit as well. Should be home tomorrow. I will be sending pm's with tracking numbers soon. I'll send you a pm later
-
I have three of these One the original Macross kit and 2 of the "robotech" factory. I used them in my own diorama. I was lucky and got them pretty cheap, but It's nice to see this kit come alive again
-
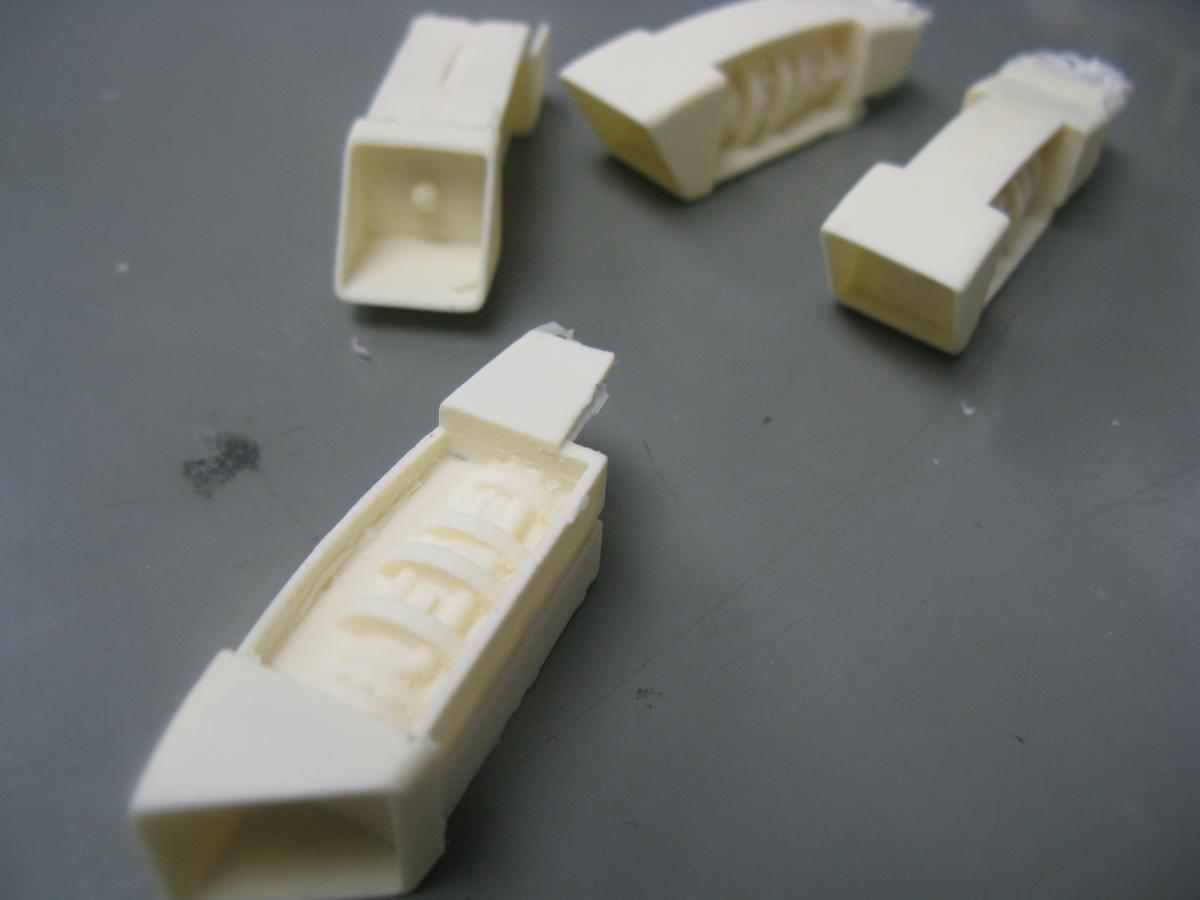
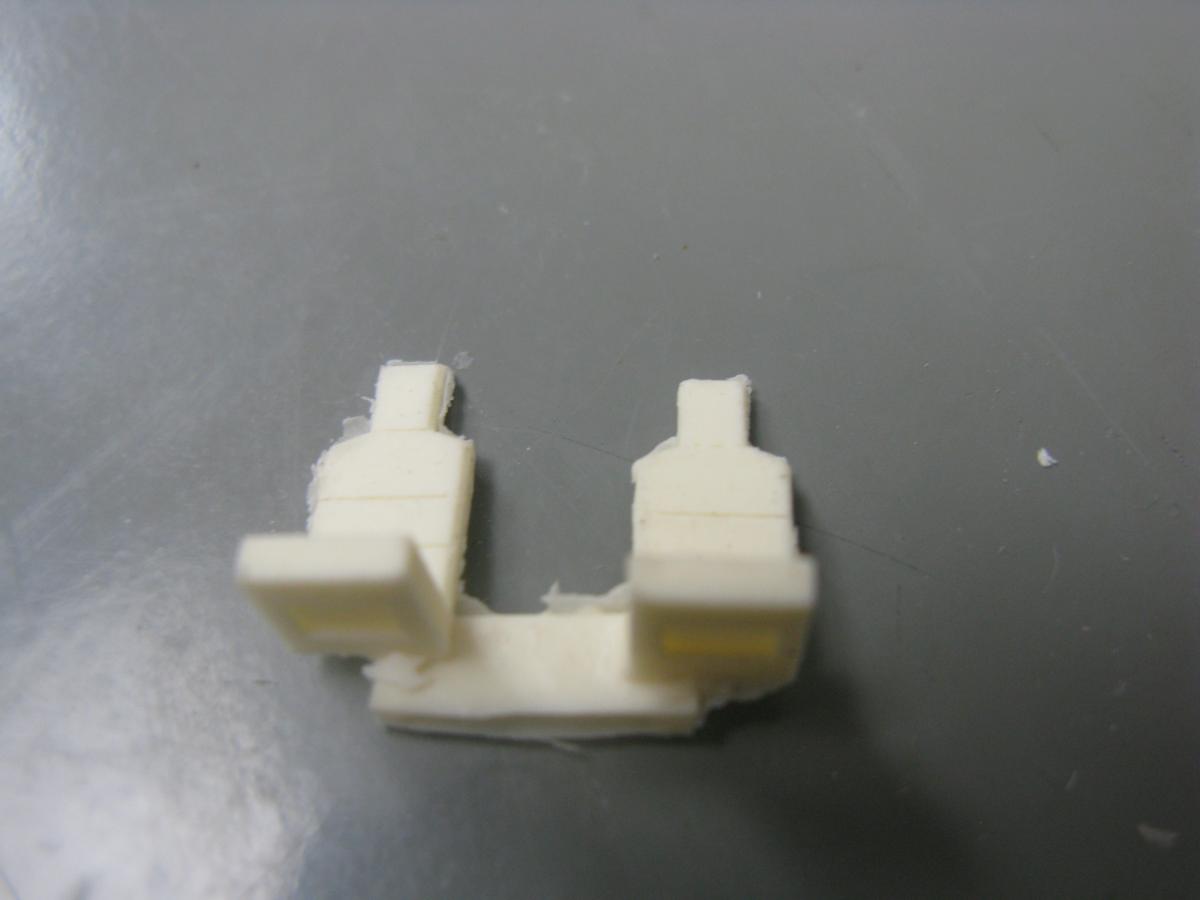
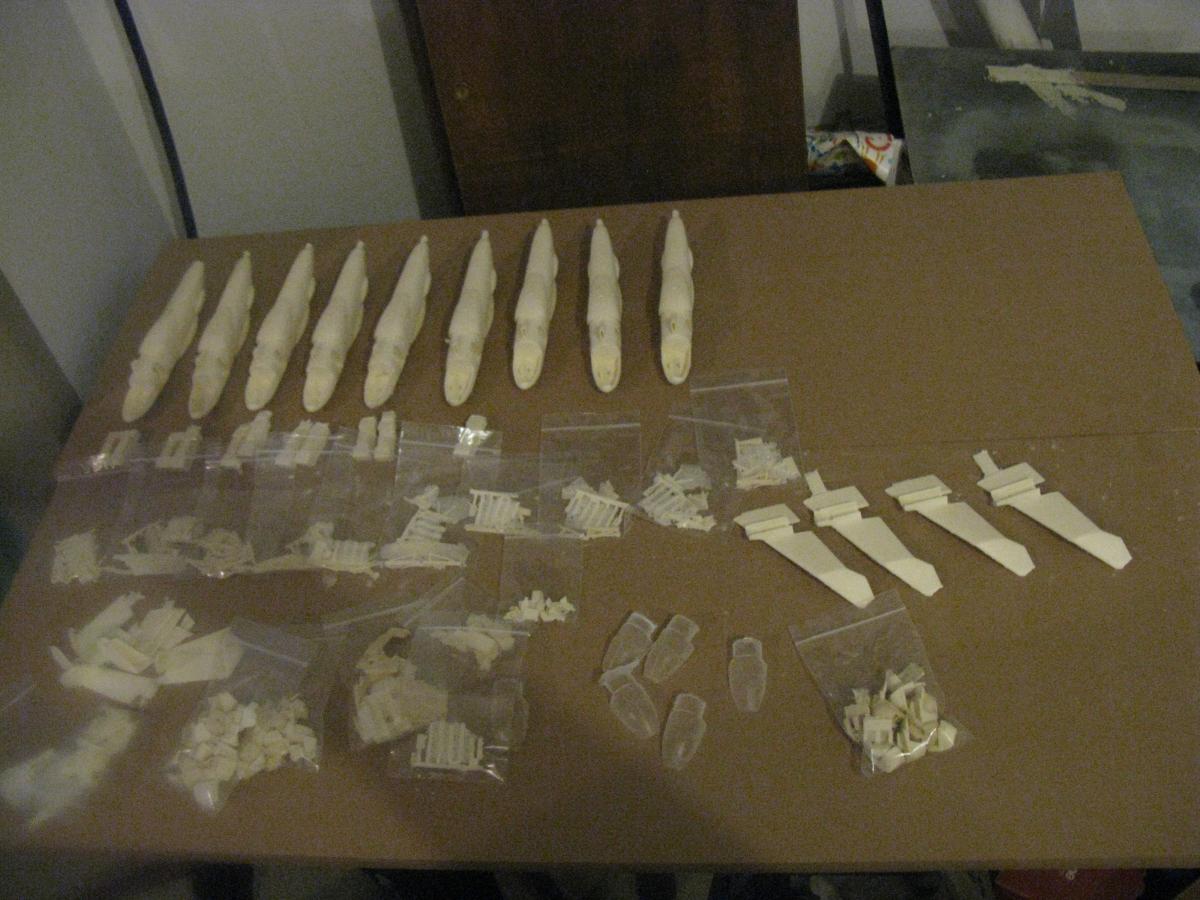
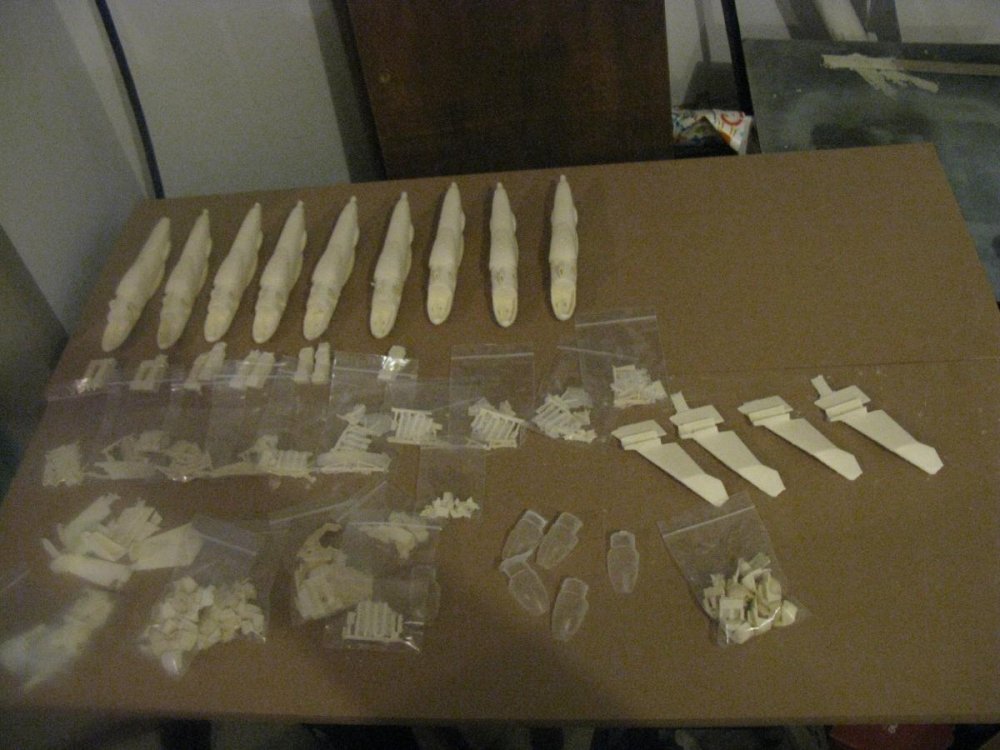
Okay Time for an update and some eye candy. Some more pictures of the other parts. The door details, the rear stabilizers, and the engines. Also have an overall shot of the assembly area. Got quite a few almost ready to go. I have to redo one of the wing molds as the current one is just not working out. I forgot to add a close up pic, but if you look at the assembly area you can see the canopies. They came out great, I'm going to throw them in my polisher for a few hours. a little future and these will be clear as glass! wing mold should be done this weekend, so hopefully, i will get the first kits out by Monday.


-
Still clearing my schedule up and then i have paople who have been waiting patiently for me to make them hangars as well. We will see. I should be ready soon.