Lolicon
-
Posts
7371 -
Joined
-
Last visited
Content Type
Profiles
Forums
Events
Gallery
Everything posted by Lolicon
-
What are you talking about? HG's given us such awesome shows like Robotech Plus, Robotech Zero, Robotech Frontier, and the totally awesome but non-canon Robotech II. I lol'd IRL when I typed that last part.
-
Hey Roy's Blues, where did you get the Rei and Asuka motorcycle figures from? Those totally rock. That's probably the best Asuka figure I've ever seen.
-
Robotech is an awesome American show, not that Japanime crap!
-
The same way people are sure that Amelia Earhart was abducted by aliens. Or the famous Bigfoot footage is real (despite the person who filmed the footage recanting on his deathbed and admitting it was a hoax).
-
Your model looks so awesome I went and ordered some of that wash myself. What can go wrong?
-
That's from the ending to Gunbuster, one of the few shows I've seen that actually deals with time dilation while traveling at light speed.
-
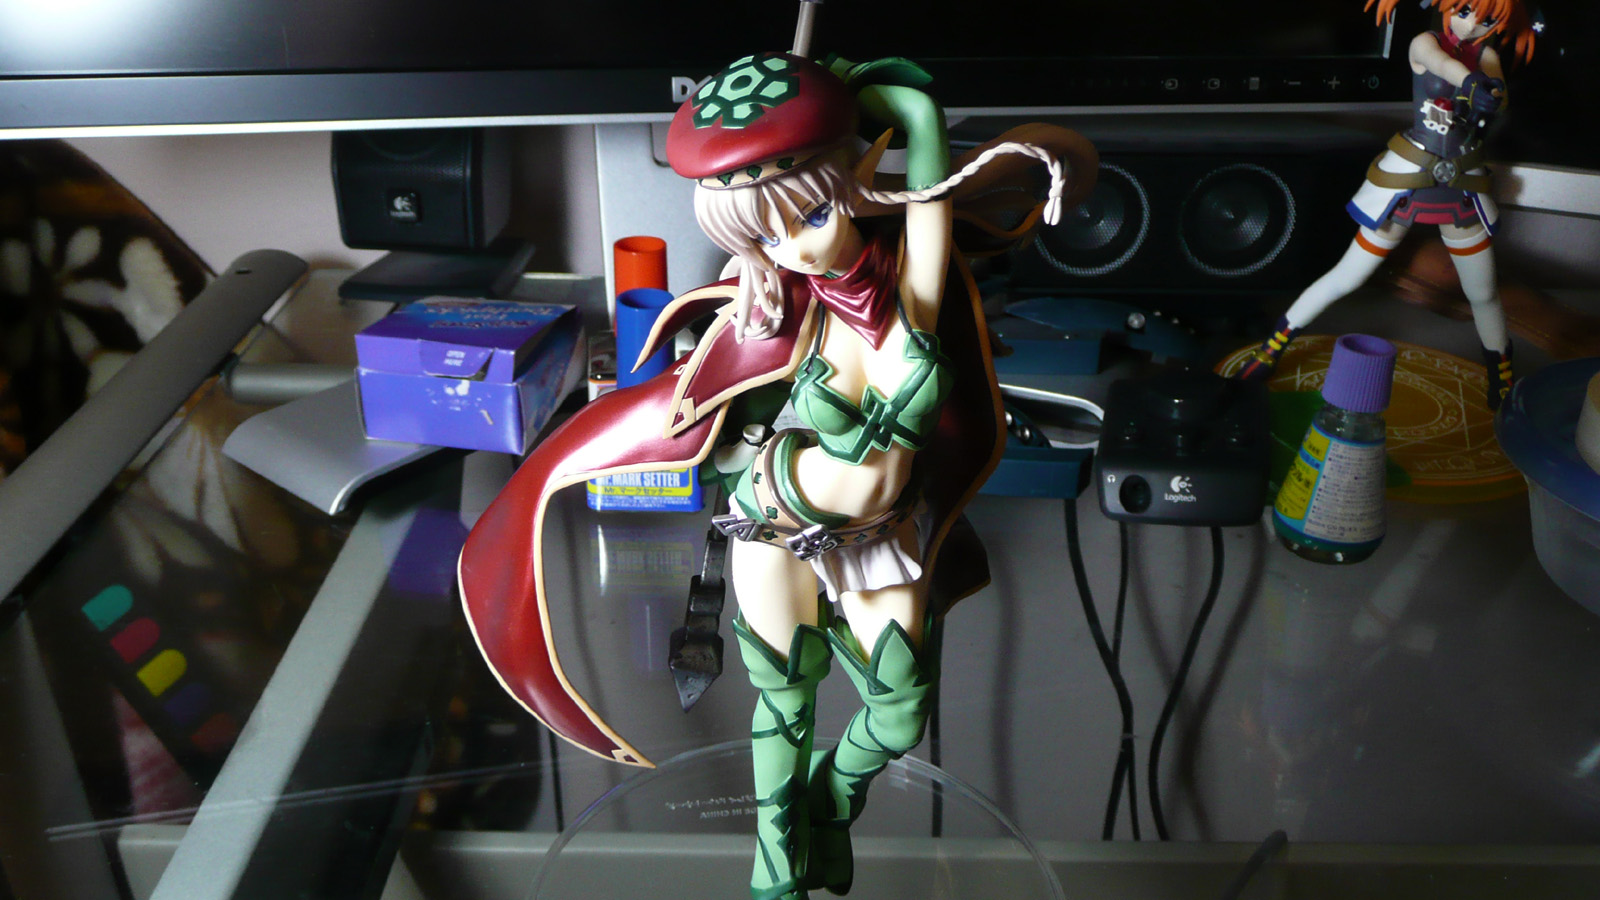
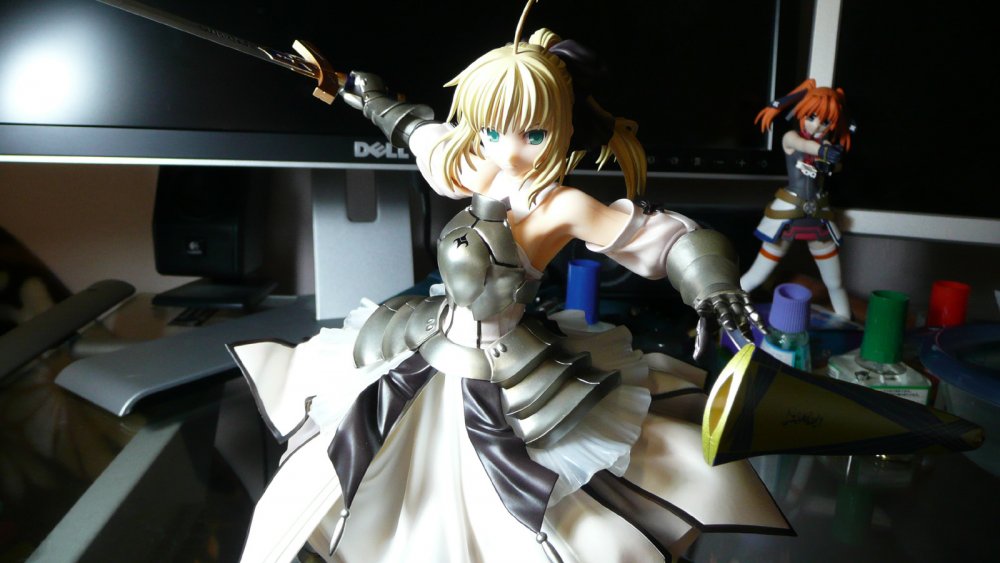
I started picking up PVC anime figures on a lark after starting to collect Yamatos and now they far outnumber them. I'm probably going to stop very soon due to lack of space, cutting into my Valkyrie funds, and worst of all the huge price increases. My first figure ever was Alter's 1/8 KOS-MOS which was only 3900 yen and is still one of the best figures I've ever bought several years later in terms of sculpt and painting. Now I see PVC figures retailing for over 12000 yen?? The upcoming Ranka is nearly 7000 yen??? WTH... My latest purchases: GSC's Saber Lily, probably the best Saber figure ever, for you Fate fans. And Allean from Queen's Blade, because I dig elf chicks.

-
I nearly shed a tear at the end of the original Robocop. "Nice shootin' son. What's your name?" "Murphy." *smiles and walks off*
-
HLJ is super slow. Even for in-stock items I've waited as long as two weeks between the time I put in an order to the item actually shipping out. I really only use HLJ as a last resort when I can't find something elsewhere. Apaprently HLJ is so slow they can even retroactively cancel shipped orders. The week before I ordered a bunch of clearcoat aerosols from them to take advantage of their free shipping offer. I received a shipping confirmation with an EMS tracking number letting me know my stuff was on the way. Five days later I received an email stating they could no longer ship such materials and then canceled my order. WTF?
-

Bandai 1/72 Scale Macross Frontier Model Kit Thread Ver.3
Lolicon replied to azrael's topic in Hall Of The Super Topics
It's always about selling more merchandise. There are a trillion different Gundams for a reason. My favorite is the Chipotle Gundam. It's a delicious design with a kick! -
Why would Kawamori copy a design from a bastard series made without his input and/or blessing? And being insulted that Macross Frontier is "stealing" the Macross II designs is hilarious, seeing as the Macross II designs are just poor ripoffs of the original SDF Macross designs.
-
Bandai 1/72 Scale Macross Frontier Model Kit Thread Ver.3
Lolicon replied to azrael's topic in Hall Of The Super Topics
Looks like something from the upcoming spinoff series "Mobile Suit Messiah." -
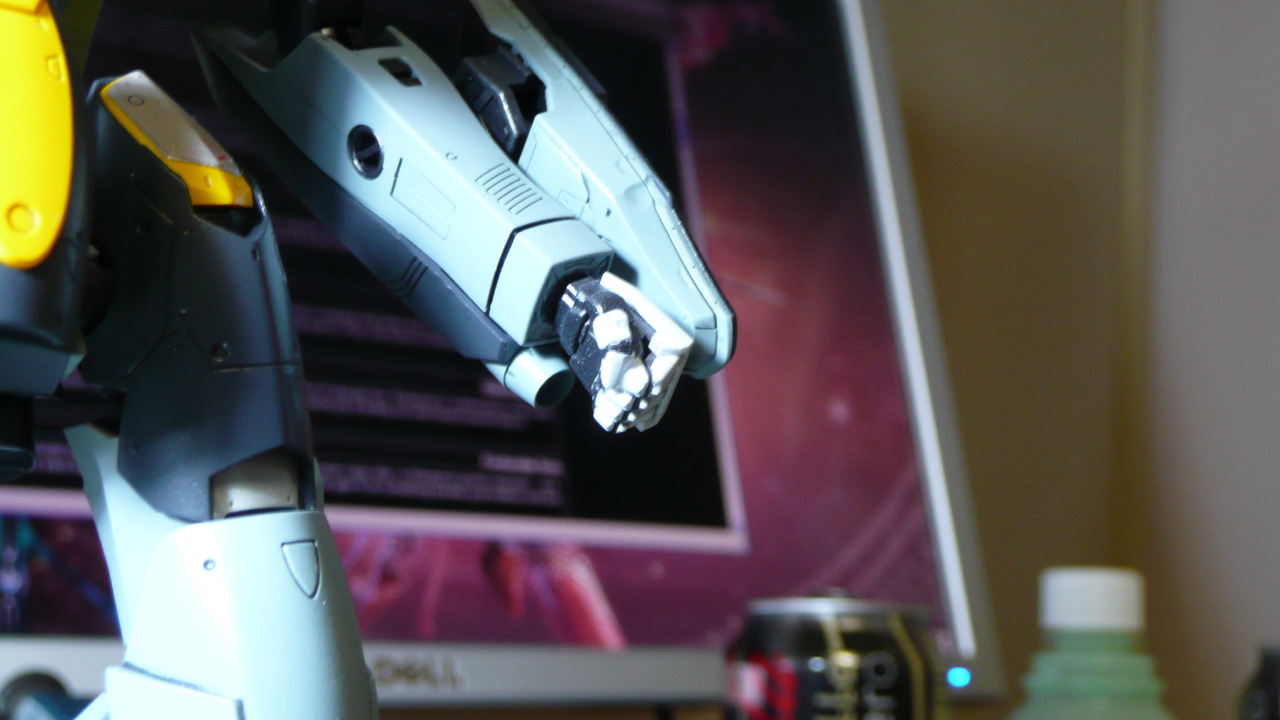
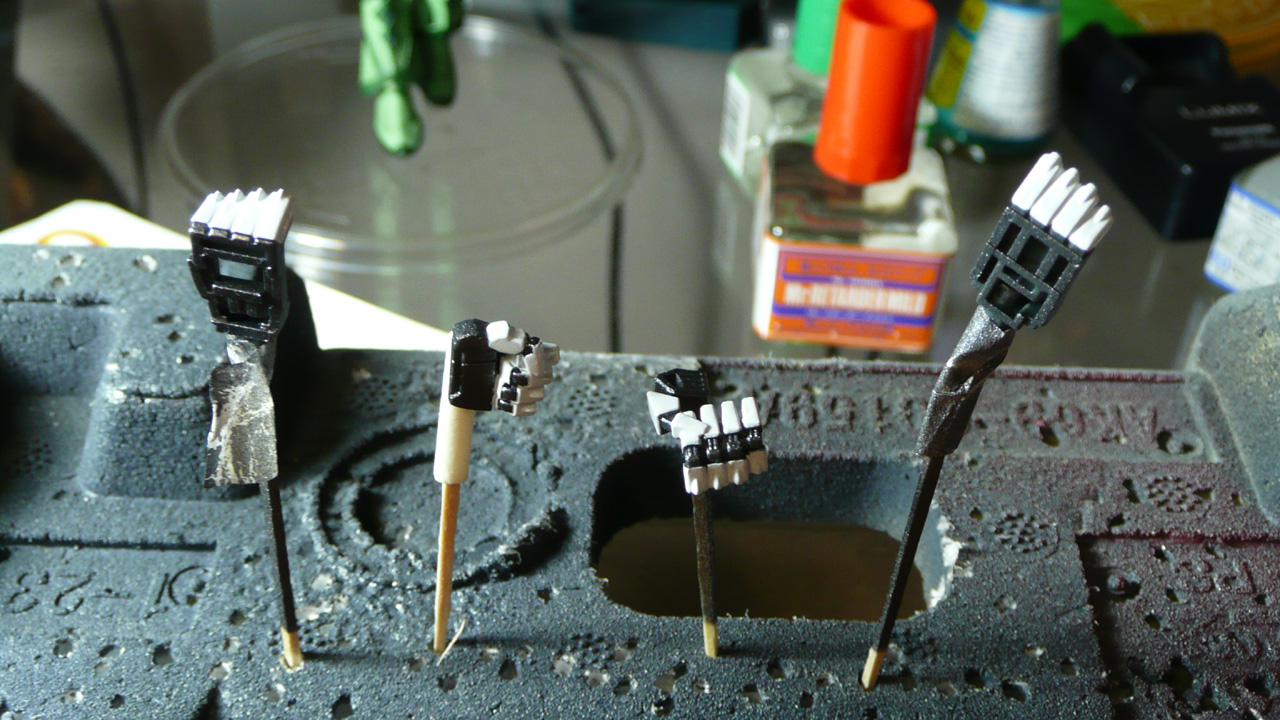
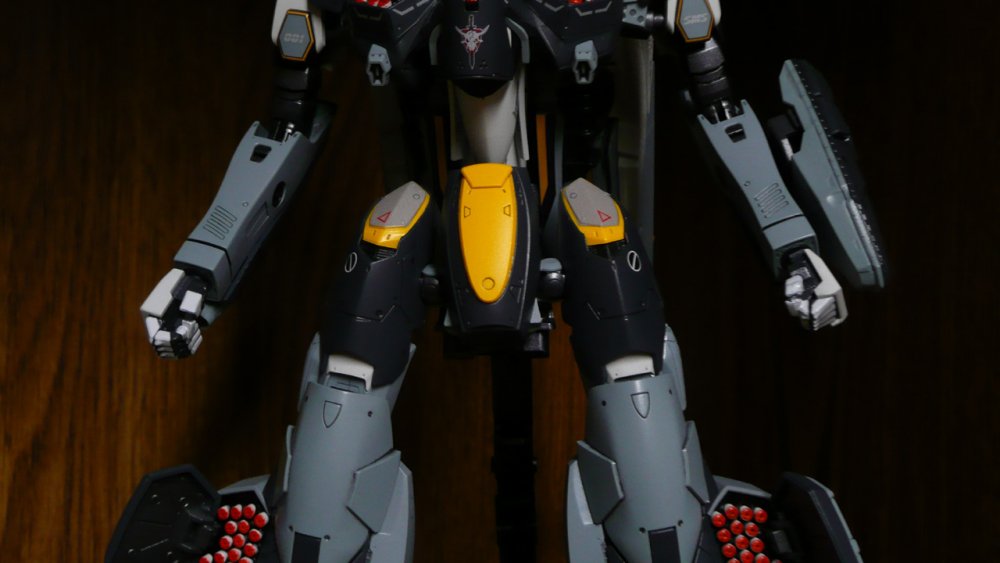
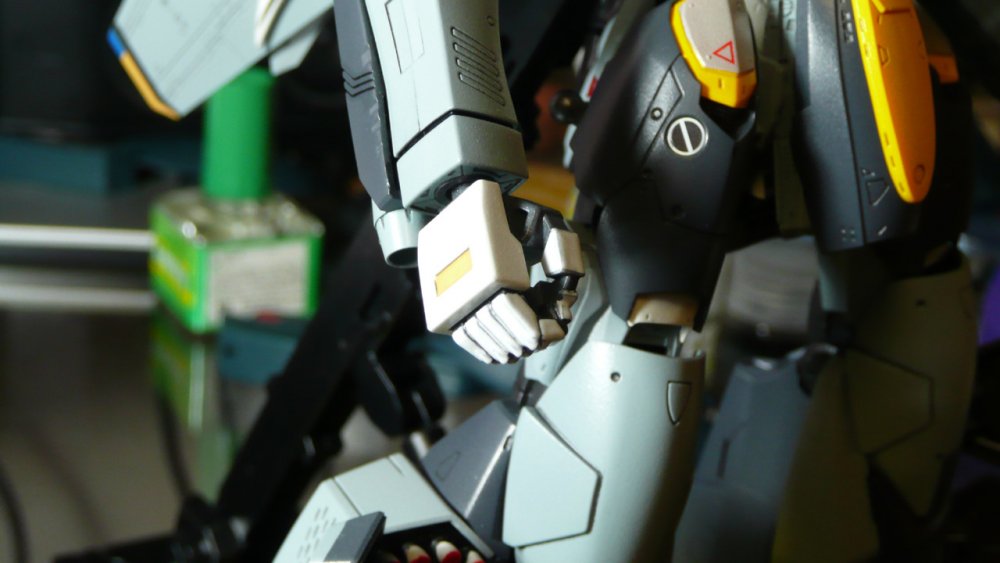
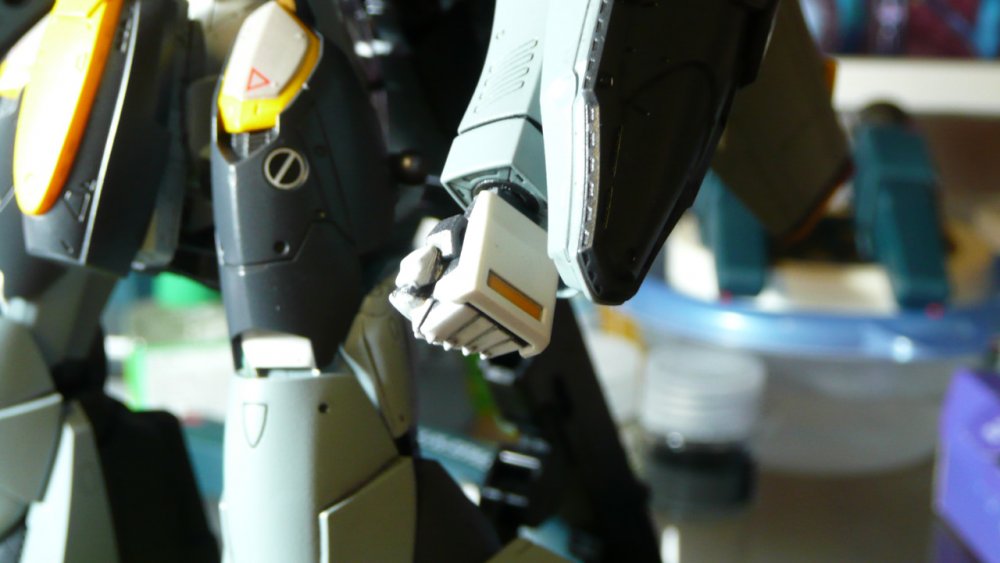
DOH! So for some reason I decided to push my luck with the GSI clearcoat tonight and instead of my usual super thin coats, I applied a thicker coat on the hands... the result was a slight melting of the acrylic paint underneath. I pick very poor times for experimenting... Luckily it only affected the paint slightly (much less than I would've expected for lacquer on acrylic) and after doing a wash, it just ended up making the hands look worn out, which actually works for me, so I won't have to repaint... not that I wanted to paint the fingers again! The first pic shows (pretty closely) how the grey appears in person, rather than the duck egg blue color it looks like in the other lighted pics.


-
You know, I have no idea what Mr Retarder was designed for. I use it in Tamiya acrylic and it works fine. I assumed it was for use with Mr Color paints, but I didn't know those were lacquer! (I have no means of obtaining Mr Color atm.)
-
The Doctor was the only good character on Voyager.
-
Nothing special on the hands. Gloss coated the hands first so I'd have a smooth surface to work on (I don't think it really mattered though). Then I just used a Tamiya acrylic mix with a little bit of Mr Retarder Mild added to slow the drying process. I read that the recommended amount is about 10% of the mix, but don't quote me on that. Anyway, that stuff is great. It slows the drying process and causes brush strokes to vanish completely, so it was easy to take my time with a fine brush and just carefully paint away.
-
Thanks honkhet! I still have the big wing boosters to finish, but that's more time-consuming than it will be difficult. For yellow I just used Tamiya chrome yellow. It's kind of a glossy finish, but I then covered it in semi-gloss clear, so it dulled the finish down to what you see in the pics.
-
Damn that's a nice haul! I wish I had more stuff I actually wanted to take advantage of the free HLJ shipping. I ended up just buying some more clearcoat. And it's a good thing I did, hearing about the aerosol ban. WTF? I have a small supply stockpiled, but where the hell am I going to get more GSI clear? That stuff gives a smooth finish and is the best clearcoat I've ever used; no orange peel at all! They were 700 yen at HLJ... gonna be hard pressed to find that kind of price elsewhere... Mr Mark Setter is awesome stuff. Be sure to shake the bottle of Mr Mark Setter periodically, as the white adhesive will eventually settle to the bottom of the bottle.
-
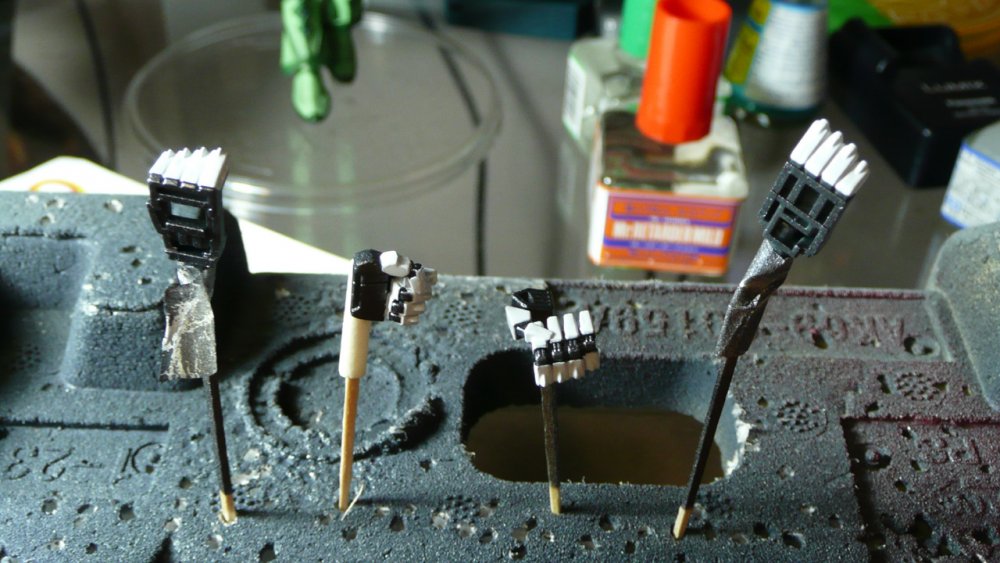
Finally peeled myself away from Aion long enough to actually make some progress. Well, really, aside from the hands, I can't do anything until additional supplies arrive. Painted the hands and whew! That was both challenging and kinda fun. I was dreading it since I'm really bad at hand painting (no pun intended). Still need to clean them up and do a wash, but they turned out far and away better than I expected, given my previous hand paintings. I wonder why the models in the manuals never have painted hands?
-
What wm cheng (William?) said is accurate as far as I know. The paint pecking order is lacquer > enamel > acrylic. By some freak accident caused by the alignment of the planets and an ancient leprechaun curse, in defiance of all logic the GSI clearcoat does not react with Tamiya acrylic, at least not from what I've observed. Most of my painting is lacquer, but some of it is painted with Tamiya acrylic, and so far I've had no problems whatsoever when applying GSI lacquer clearcoat over it. GSI does eat micron pen ink though, as I found out when the clearcoat dissolved my panel lines. Luckily I was just able to draw them back in, and I now only apply micron ink lines prior to the final acrylic topcoat. Most of my panel lines are done with mechanical pencil or acrylic wash, and so far there have been no problems with the GSI clearcoat eating it. It also does not eat Gundam marker, though I think Gundam marker is lacquer-based too (not 100% sure on that). I used Model Master lacquer clearcoat back in the day and was never happy with the results.
-
That doesn't change the earlier statements that Shadow Chronicles was pooped out with a miniscule budget. And it shows.
-
Oh right, you have the sniper rifle. What the hell am I thinking? I don't have any Alclad, but I did try the purple Future mix I had for the canopy... it didn't work out so well for me. Ah well back to the drawing board with that...
-
They are? Dammit I shouldn't have reenacted Roy's DYRL death scene with my Matchbox Roy "Fokker".
-
I like the masking and painting you did for the missile covers. That's both insane and awesome. Hey, have you decided what color you're going to paint the gunpod? I'm at an impasse at how what color to paint because the default color is so seemingly... festive. The armor pack fins are the same color, which is why I haven't finished those either.
-
Bandai 1/72 Scale Macross Frontier Model Kit Thread Ver.3
Lolicon replied to azrael's topic in Hall Of The Super Topics
Does anyone know what the proper mixture for the gunpod color is supposed to be? The manual says: 85% purple 10% bubble 5% dark blue What the hell is bubble??