Lolicon
-
Posts
7342 -
Joined
-
Last visited
Content Type
Profiles
Forums
Events
Gallery
Everything posted by Lolicon
-

The Macross Quarter. DX Chogokin
Lolicon replied to 505thAirborne's topic in Hall Of The Super Topics
I think the difference between the CG model and the DX is Bandai trying to reproduce the "actual" colors (since no physical filming model exists) over the low lighting model seen in the TV show. They did the same thing with their Enterprise model, based on data provided to them directly from Paramount. I'm pretty sure Bandai got the exact coloring data from Satelight as well. Actual colors Low lighting Whichever one you prefer is a matter of personal preference of course. Just throwing that out there as to possibly why the DX colors differ from the anime. Or it could just be that Bandai wanted to make the colors stand out more to make it more noticeable as a toy? Because, you know, it is a toy... Besides, the coloring of the Quarter is way less problematic than the craptacular design, engineering, and QC that went into the VF-25 DX line. -
Wowzers! Now that you point them out, they really stand out. It really does look like the clearcoat is still a little soft, as I get problems like that if I don't leave it out to dry long enough. I dunno if you're anything like me, but I press and rub the tape down pretty hard around where I'm masking to prevent paint leaks, so that might be why the Tamiya tape leaves more of an impression than the standard tape. I forgot what brand of clearcoat you were using. Can you apply another coat to eliminate the impressions?
-
What kind of impressions are they leaving? I use Tamiya masking tape as well, but haven't had any issues except the adhesive coming off a little because I'm such a lousy masker and have to shift the tape so much. Though now that I think about it, I don't believe I've ever used masking tape over clearcoat. I usually do all painting first before applying any clearcoat.
-
The Macross Quarter. DX Chogokin
Lolicon replied to 505thAirborne's topic in Hall Of The Super Topics
The smartest thing that anyone has said in this thread in awhile. -
The Macross Quarter. DX Chogokin
Lolicon replied to 505thAirborne's topic in Hall Of The Super Topics
I prefer it over big red blocky messes that carry samurai swords, yes. -
The Macross Quarter. DX Chogokin
Lolicon replied to 505thAirborne's topic in Hall Of The Super Topics
There is no available model. I was just being a dick. -
Ohhh! I like that they have the custom decal VF-25s!
-
The Macross Quarter. DX Chogokin
Lolicon replied to 505thAirborne's topic in Hall Of The Super Topics
I know too well the pains of an unsatisfactory DX. Just get the model kit. -
Bandai 1/72 Scale Macross Frontier Model Kit Thread Ver.3
Lolicon replied to azrael's topic in Hall Of The Super Topics
Anime magic strikes again! Thanks for the pics. Can't wait to get mine. -
Monthly cycles, childbirth, Robotech... truly women can endure far greater pains than us lowly men.
-
Maybe it's just my eyes playing tricks on me, but I swear it looks like Basara with guitar! http://www.amiami.com/shop/shop?vgForm=Pro...amp;set=english
-
The Macross Quarter. DX Chogokin
Lolicon replied to 505thAirborne's topic in Hall Of The Super Topics
That actually makes a lot of sense. I know that back in the days of motion control photography, ships in Star Trek were painted primarily in duck egg blue, but once lighted and filmed, they appeared grey. I have the Bandai Enterprise model which is supposed to be a faithful reproduction of the studio model, and as such has areas painted in shades of blue and green... just like the Quarter. -
The Macross Quarter. DX Chogokin
Lolicon replied to 505thAirborne's topic in Hall Of The Super Topics
Probably the same way they managed to turn this into this

-
Nice. I can't wait to own Southern Cross on DVD.
-
The Macross Quarter. DX Chogokin
Lolicon replied to 505thAirborne's topic in Hall Of The Super Topics
What happened to Klan's hands?? -
I know the truth about the Sun. The Sun revolves around the Earth. I've had a running battle over at Nasa.com on the subject, and I'll be just as glad to have one here, which will not be stopped until Galileo himself settles the argument.
-
The Macross Quarter. DX Chogokin
Lolicon replied to 505thAirborne's topic in Hall Of The Super Topics
Anyone wanna buy my Takatoku "SDF clone" for $200? Be warned, it's cute skiddle-colored red, white, and blue. -
I'm currently reading a little known Jane Austen novel called Dense and Densibility.
-
This may come as a shock to some Robotech fans, but there are some people who don't live in the United States. They're not even US citizens! And they don't speak English! And they have their own TV shows! Those aren't in English either!
-
There's a saying that I've heard among people I know who like to watch bad movies which I think is relevant here: Never remind the audience of a better movie. So yeah, I'm sure Robotech fans hate seeing homages to things they've seen in "The Macross Saga" and knowing (or maybe not knowing?) that those moments really belong to Macross, and they'll never be able to get such homages in their precious Robotech; all they get is The SHATow Chronicles (not my name for it). It reminds them of a time when Robotech could simply steal better material than anything HG could produce. Oh, and I also watched Robotech: The Untold Story for the first time tonight. My god... how can anyone like that POS? And then say it's better than DYRL? It's utterly incomprehensible, the change in film stock between Southern Cross and Megazone is painfully obvious, I actually became physically ill about 30 minutes into it and wanted to vomit, and the hero defeats the main villain by... yelling really loud???
-
I can't tell from the photos, but will there be a pilot figure of Basara with guitar? If so, I'm sold.
-
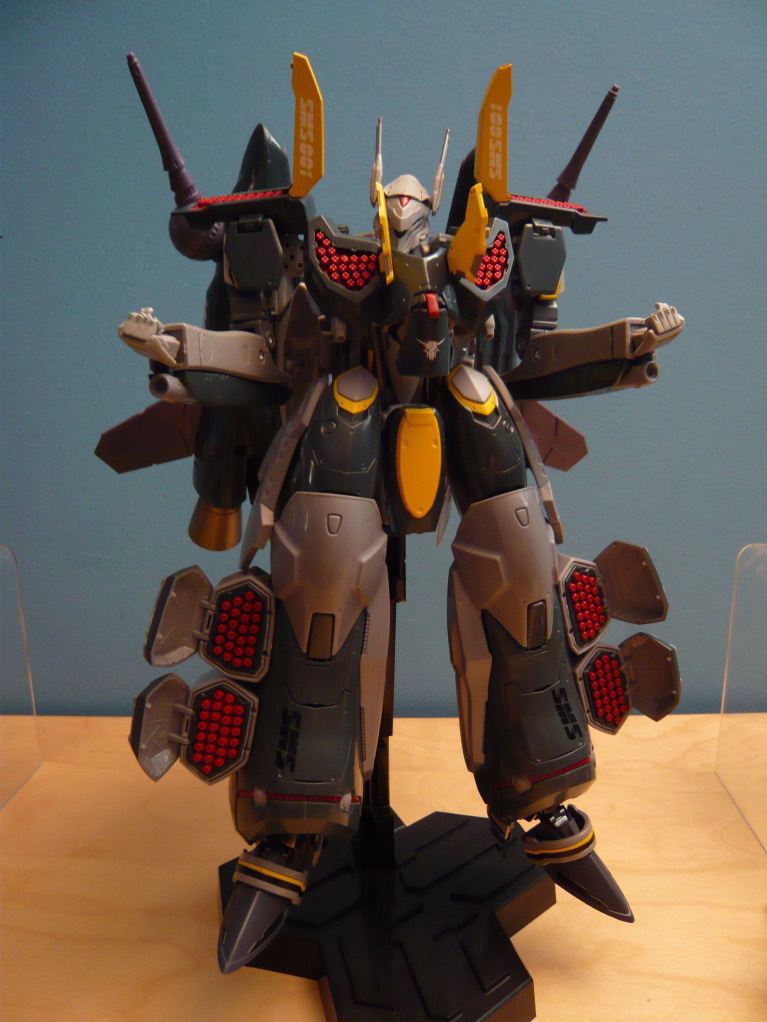
So many excellent VF-25G builds. I'm going to assimilate all your techniques.
-
Bandai 1/72 Scale Macross Frontier Model Kit Thread Ver.3
Lolicon replied to azrael's topic in Hall Of The Super Topics
Those are stickers. Or "marking seals" as Bandai calls them. -
I was about to ask where the heck all those little nozzles came from, but I remembered the super packs. Nice paint job, especially the gold section of the ankle armor. No wrinkles!
-
Bandai 1/72 Scale Macross Frontier Model Kit Thread Ver.3
Lolicon replied to azrael's topic in Hall Of The Super Topics
It's usually pretty arbitrary as to what they decide to throw in a foil sticker for. Inexplicable stickers like Alto's visor (seeing a foil sticker for Alto's clear green visor makes me weep), the crotch, Ozma's head sensors, forward nose sensors, the green gunpod sensor, etc. Took a quick gander at the color sheet (kinda sketchy surfing Hobby Search pages at the office), but here's a few colors (my Japanese is limited)- Column 1 (first color scan, looks to be the main fuselage colors) 1. wine red 85%, clear blue 10%, clear red 5%, little bit of white 2. wine red 80%, purple (i assume that's what "sumire" is) 10%, clear blue 10% 3. purple 65%, wine red 20%, white 10%, clear red 5%