anime52k8
-
Posts
12534 -
Joined
-
Last visited
Content Type
Profiles
Forums
Events
Gallery
Everything posted by anime52k8
-
a Turkish F-16D trainer was shot down by a Greek Mirage 2000 in 1996, and before that Pakistan lost one in 87 over Afghanistan, but Pakistan says it was shot down by a friendly F-16 on accident.
-
minus the color, the MAXL fighter mode is at least more coherent than the 2SS. and dammit I like the SDP-1, now that's something we need a toy of.
-
the 1/48's are outmoded, just accept it.
-

1/48+fp's, 1/60, And 1/72 Picture Gallery Pt 4
anime52k8 replied to VF-18S Hornet's topic in Hall Of The Super Topics
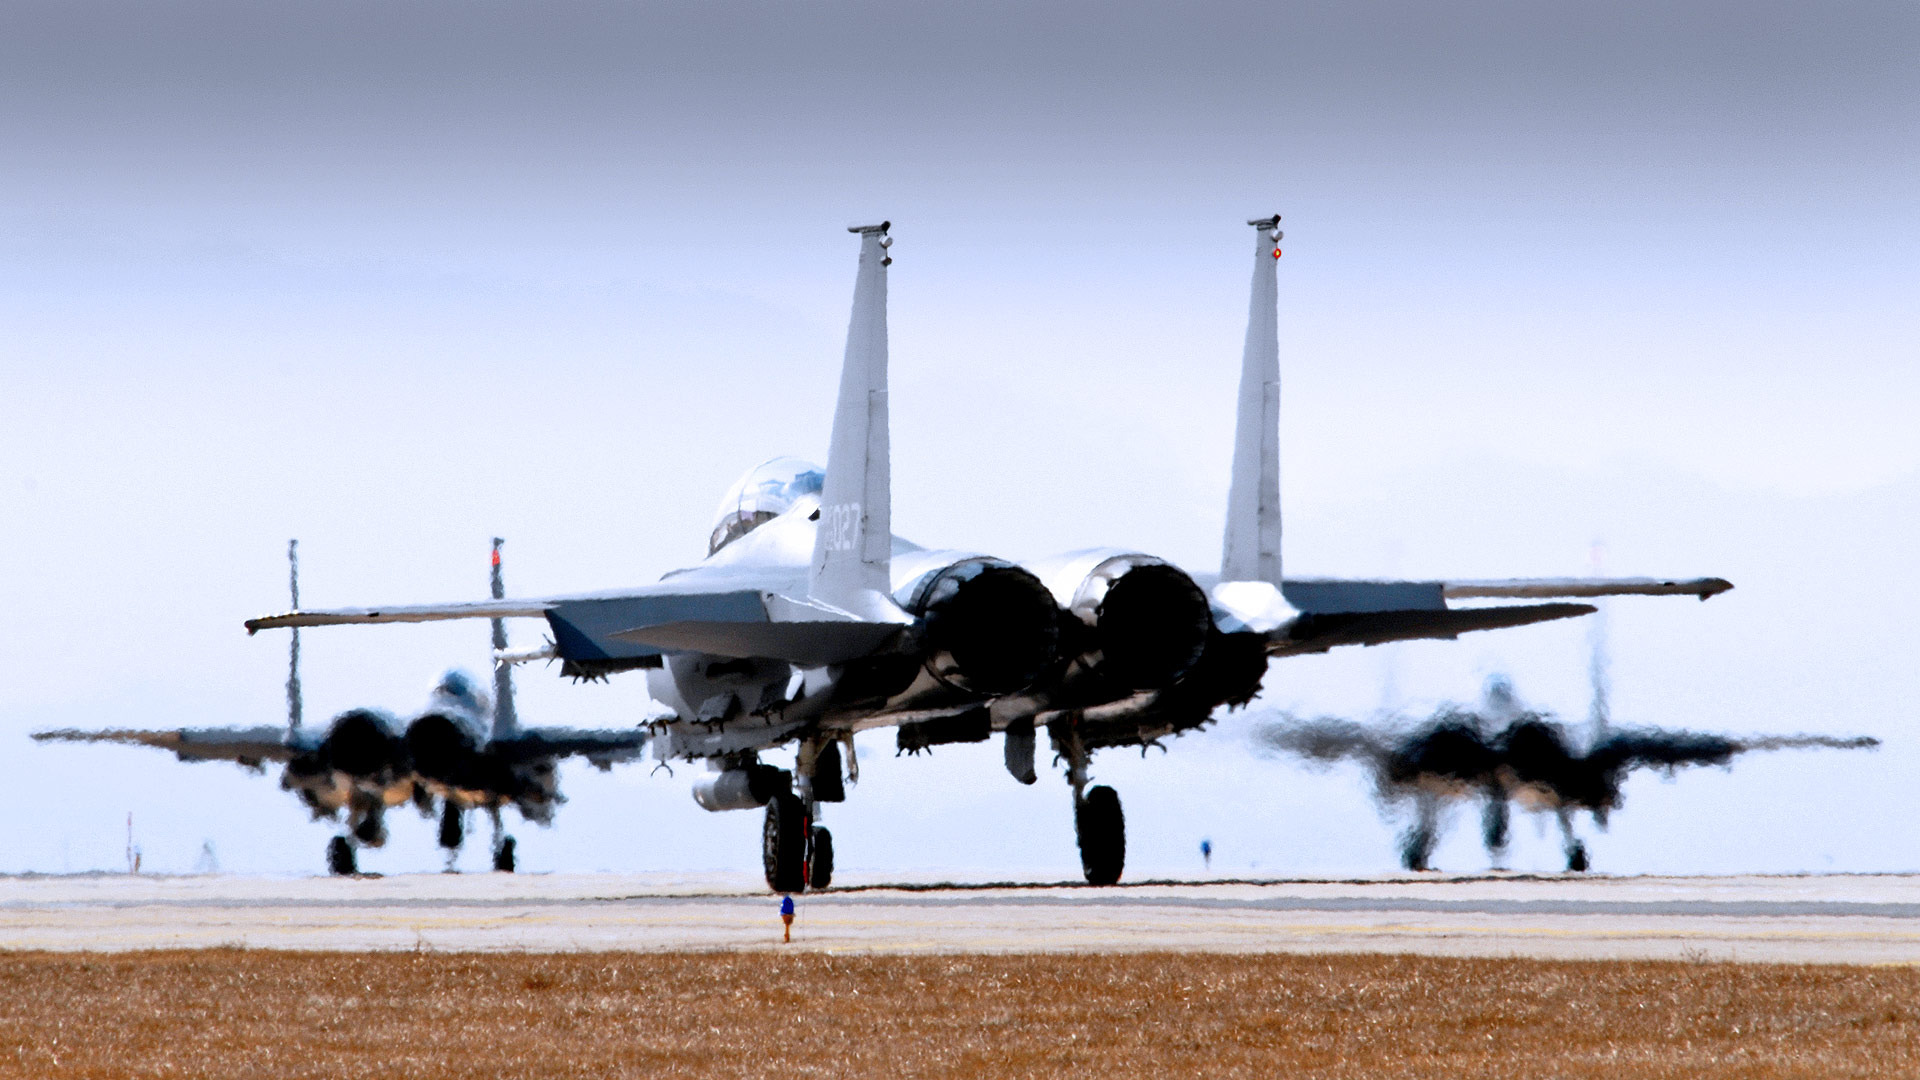
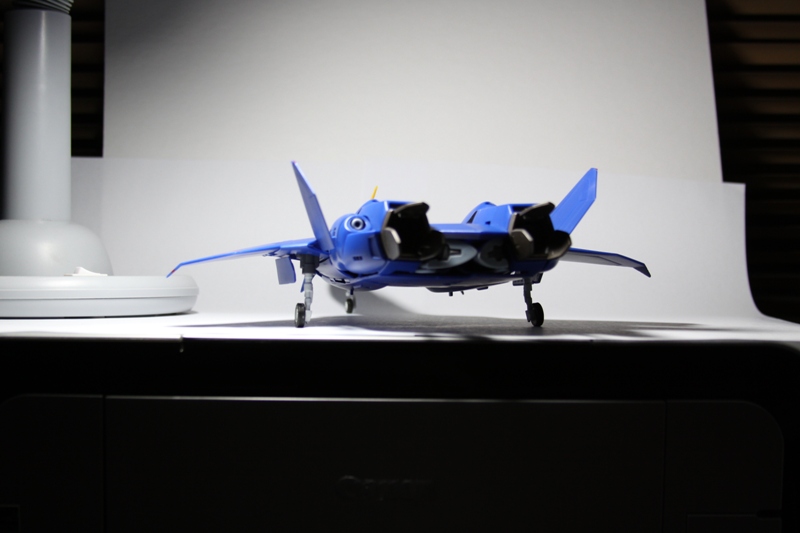
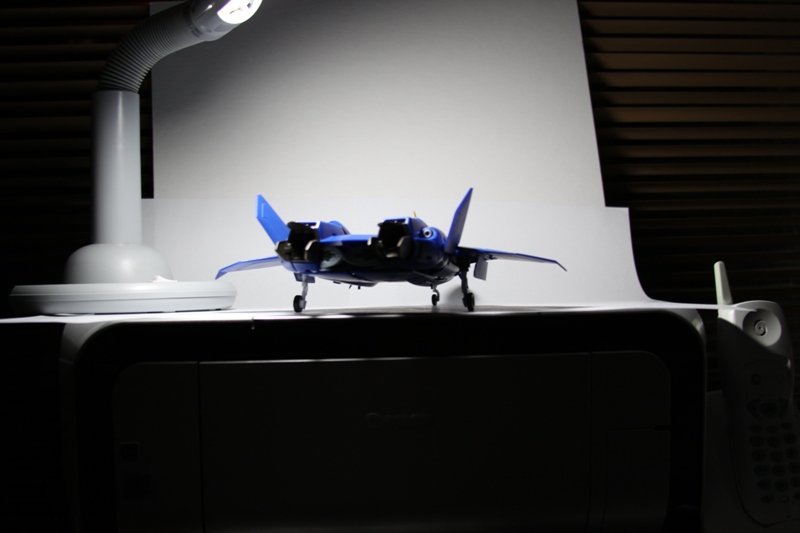
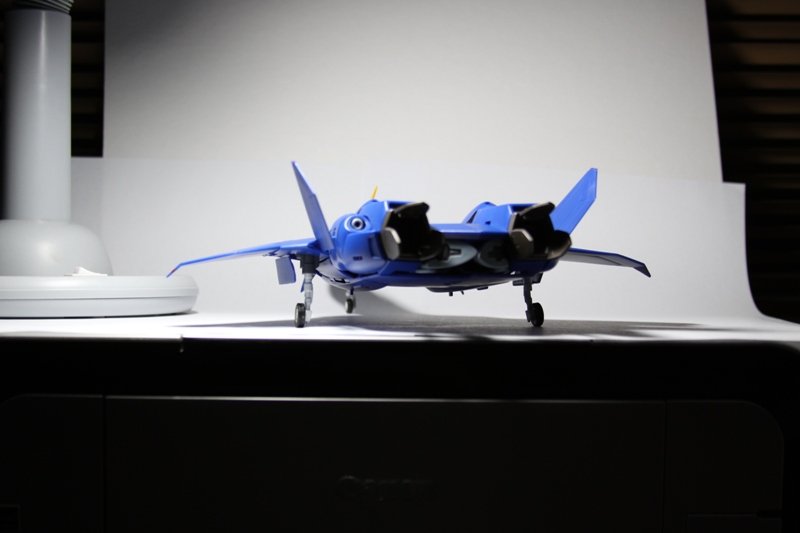
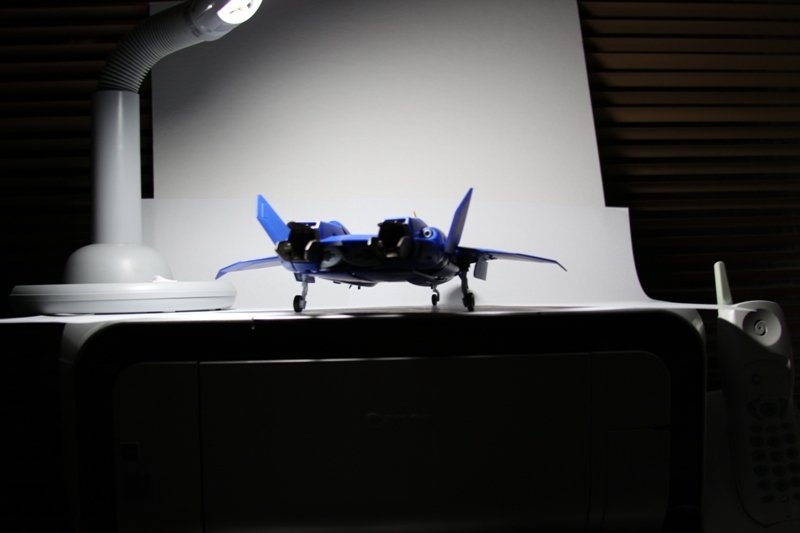
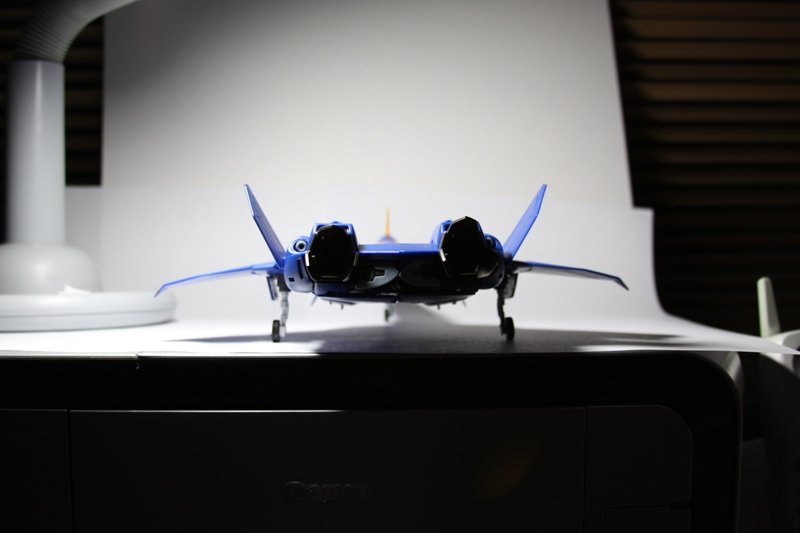
yeah, share the knowledge, man. ...will i need to buy a tablet for this lesson? I was wondering if/when someone would ask that. OK, first I'll say that while I do use a tablet, 90% of what I did can be done just as easily with a mouse and that remaining ten percent just require a little bit more patience and practice when using a mouse. Also I use Photoshop CS3; if you have CS2 or CS4 just about everything should be the same. If you use GIMP or some other software, I've got no experience with them so you'll have to experiment yourself or ask someone else to figure out what the equivalent options are on your software. Ok, so first off I started with the background. I found this shot of some F-15k's on google: Since the background has real planes in it, it makes things much easier because I can use them for reference for setting up the lights and stuff when I take pictures of the toy. I took pictures of my YF-21 form angles that match the jets in the pic, and used a craft lamp to match the angle of the sun and the harsh lighting. One of the things most people fail to take into account is does the lighting on the object mach the lighting in the background. having an object in the frame to reference helps, but it really comes down to practice and having an eye for it. (sorry I don't have many process pics, but I didn't think to make screen shots while I was working, maybe next time) I used the pen tool to extract the each of the toys. The pen tool is slow but the most precise method of selecting objects. It can be done with a mouse, and you don't need a perfectly uniform background. I'm not going to go into how to use the pen tool in this post as it's a whole long subject in of itself. Someone else posted a good tutorial on it a while ago, but I can't for the life of me find it. If someone else can find it please link to it, otherwise I'll just make one up and post it in the photography/photoshop thread. Anyways, one trick that really helps make the cut out object blend better is to use the "Refine Edge..." option. a lot of times when people do these kind of things, they do too good a job of cutting out the object, and it ends up looking like a cut out sitting on the background rather than a part of the final picture. use the refine edge menu to mess with the feather and smoothness of the selection so that the edges aren't too crisp. that will make them blend better with the background. so I pasted each plane into the picture (each one in it's own layer) then I scaled each one down and rotated them a hair so they line up with their corresponding F-15. For the two in the background, I needed to replicate the heat distortion, add the out of focus blur, and also replicate the image noise. First I did the heat distortion using the glass distort filter, then I used the Gaussian blur to make it look out of focus then finally I applied an add noise filter. Noise is another important thing to keep in mind, an added object will look out of place if it's image quality is different from the background it's added to. for the plane in the foreground I used levels to make it look a bit washed out and to give it the really blown highlights the original pic had, then I used the polygonal lasso tool to select the underside of the plane so that I could adjust the levels of that part only and make it darker. I used a really high feather (something like 20 pixels) so the selected edge blended in better and so I wouldn't have to be precise while make the selection. then I went in with the burn tool and darkened a few spots by hand (this is where a tablet comes in handy). then I made a big square selection of the lower half of the plane and used the refine endge option to get a feather of about 40 pixels so that I could apply a light glass distort filter to get the slight heat distortion that's stronger closer to the ground. finally I added a little noise, erased a few spots here and there (again a tablet makes this easier but it can be done with a mouse) merged everything down, and touched a few spots up with the blur tool. Whole thing (including setting up and taking the pictures) took about 2~2.5 hours.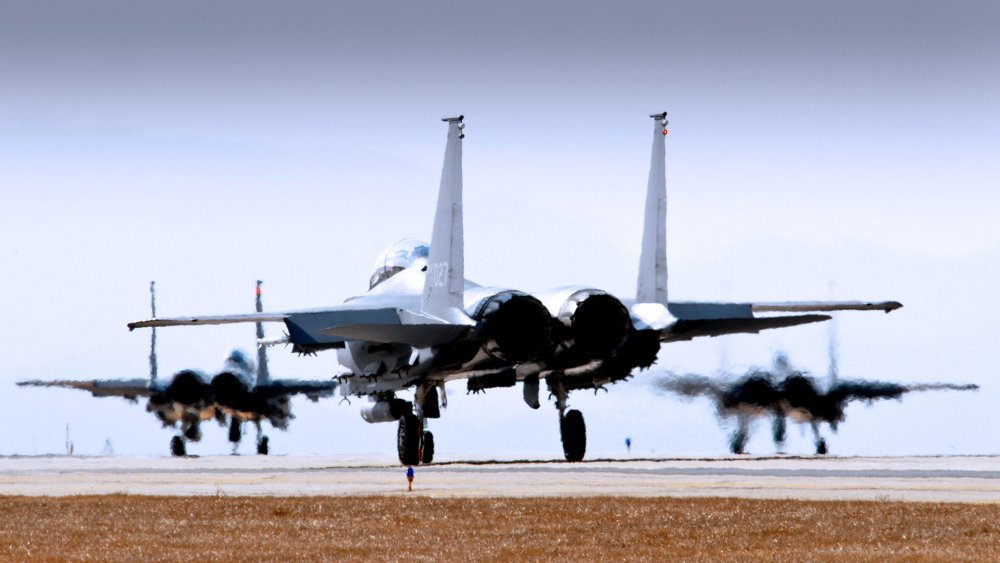

-
Hehe, good one. Just one valk... that's what they always say, but you'll see once you get one.
-
Considering Yamato is making destroids I'd be less than surprised if they did come out with one. I'd still not buy it though. the regult is a chicken walker rip off only more egg shaped. now what yamato REALLY owes us is a v2 Q-Rau seriously, since the original Q-Rau was released we've seen 2 generations of improved VF-1's; radically improved Mac+ valks; and a whole line of DESTROIDS; and they have the nerve to reissue the same old Q-Rau with no improvements and fewer accessories (not that it hand any to begin with) for as much as a brand new destroid or VF-1. A Q-Rau that matches the design and build quality levels of the current destroids and that include a good looking (preferably articulated) pilot figure for the same price the current destroid line is going for; that's what they really owe us.
-
1/48+fp's, 1/60, And 1/72 Picture Gallery Pt 4
anime52k8 replied to VF-18S Hornet's topic in Hall Of The Super Topics
thanks. I not sure what was worse, finding convincing looking grass at that scale or installing the miniature lights. -
series yes, DYRL? no.
-
you'd acutually be much better off using the pen tool rather than the magic wand or any of the lasso tools. much more acurate and you don't have to worry too much about what background it's on
-
1/48+fp's, 1/60, And 1/72 Picture Gallery Pt 4
anime52k8 replied to VF-18S Hornet's topic in Hall Of The Super Topics
A CHALLENGER APPEARS! -
1/48+fp's, 1/60, And 1/72 Picture Gallery Pt 4
anime52k8 replied to VF-18S Hornet's topic in Hall Of The Super Topics
But if you have a better camera you can take better pictures of valks. But If you buy the better camera you can't afford valks to photograph. But if you've got lots of valks you just have to take pictures of them to make people jealous. but you need a camera to take pictures of valks. -
that reminds me, what is with the crazy origami transformation going on with the 2JA. Were illustrations released showing how it transforms?
-
sounds like they've there going to be improving the QC for this run at least.
-
http://www.macrossworld.com/mwf/index.php?showforum=13 we have a whole where to buy SECTION... (this place needs a dieing from exhaustion emote, I need sleep so bad...)
-
ugh... there will be much spamming of klan pictures to come, I can feel it.
-
Not really, I could explain why but I'm way too sleepy right now.
-
Dude, that sucks. Think about all the poor Macross starved people in North America who desperately need Macross toys
-
alright, that was random. congratulations in any case.
-
oh yeah, and NO PICS IN SIGS!
-
actually, if you want to get technical the parts forming of the old v.1's is actually closer to how Sk designed the transformation mechanism than the single swing bar of the 1/48's and 1/60 v.2's. (the v.1 lacked the hydrolic plates the the principle of the intakes being attached to the back of the chest plate then detaching and plugging into the nose cone is fairly similar) anyways, no VF-1 toy is perfect, but the v2 is closer in every mode than any other so far. the v.2's fighter is about as close as you're ever going to get with the exception of the pilot sitting (IMO) too far farward in the cockpit. In battroid the 1/48 is a little stronger, the head placement is correct which is a big plus and I've never found the chest overly wide and the arm's don't look any skinnier to me. but the 1/48's nose hangs down to it's knees which llooks awkward to say the least, and I think the legs are too boxy on the 1/48. oddly enough, I've never heard anyone else bring this up, but the first thing I noticed after seeing the v.2 battroid mode for the first time was that the lower legs and feet looked truer to the line art than any other VF-1 toy I'd seen before
-
Megahouse Sheryl comes out in August. more likely end of August so 3 months, but I'm trying to be an optimist. It's cheaper and marginally better looking than the Banpresto but I hate waiting and the pics are making it harder.
-
2 months... 2 months god damn it...
-
Doesn't make the MacII valks any better looking. Design wise, the Gunbuster was really more of a super robot; Koichi does fantasy and super robot designs much better than real robot and comparing gunbuster to the VF2SS I think proves it.
-
so much good stuff, so little money. I want this, but Overdrive has the OD tomahawk for almost the same price... then there's the sheryl figure coming out...TO MANY CHOICES!!! CAN'T TAKE THE PRESSURE!!! *dies of head 'splody*
-
because yamato decided to call the black orange and white recolor of the YF-19 "bird of prey"?