Salamander
-
Posts
310 -
Joined
-
Last visited
Content Type
Profiles
Forums
Events
Gallery
Everything posted by Salamander
-
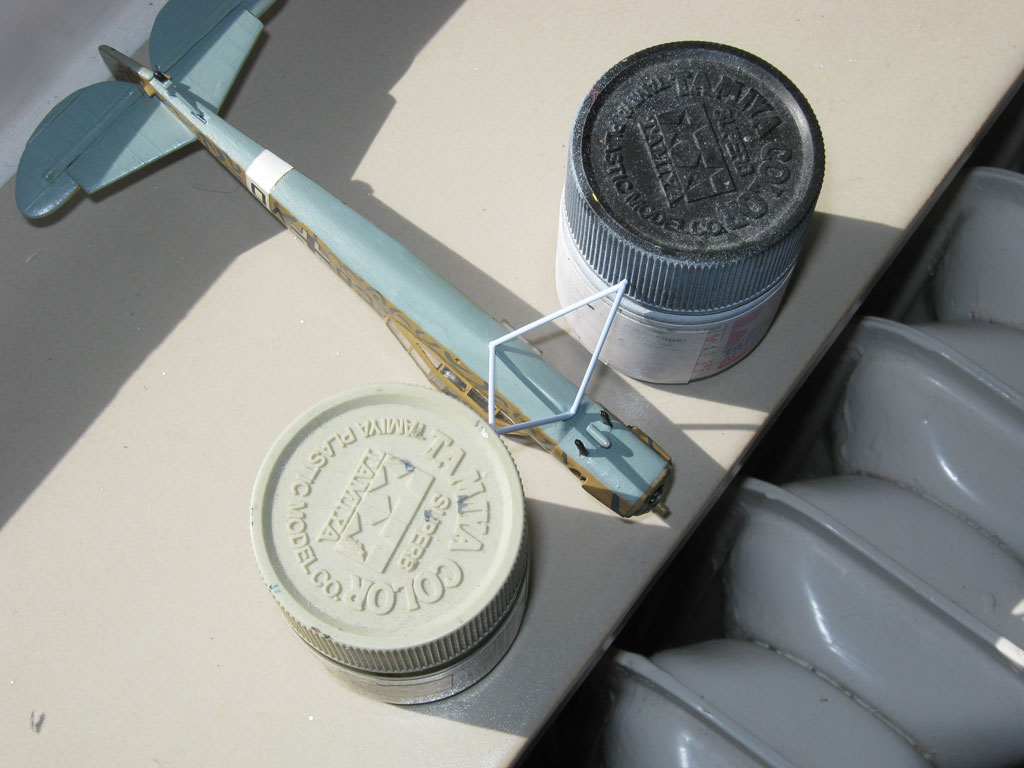
It's going a bit faster than expected: Got both the main landing gear legs on, as well as some of the finer framework (0.5 mm diameter rod ). I'll need to retouch the paint a little bit later.
-
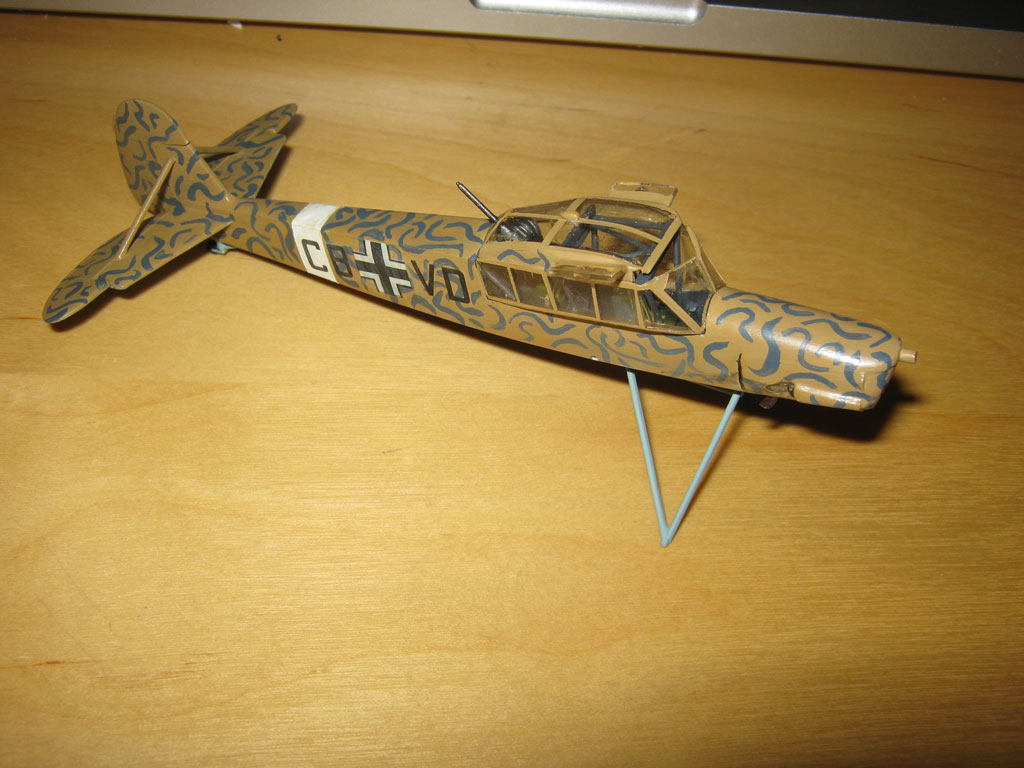
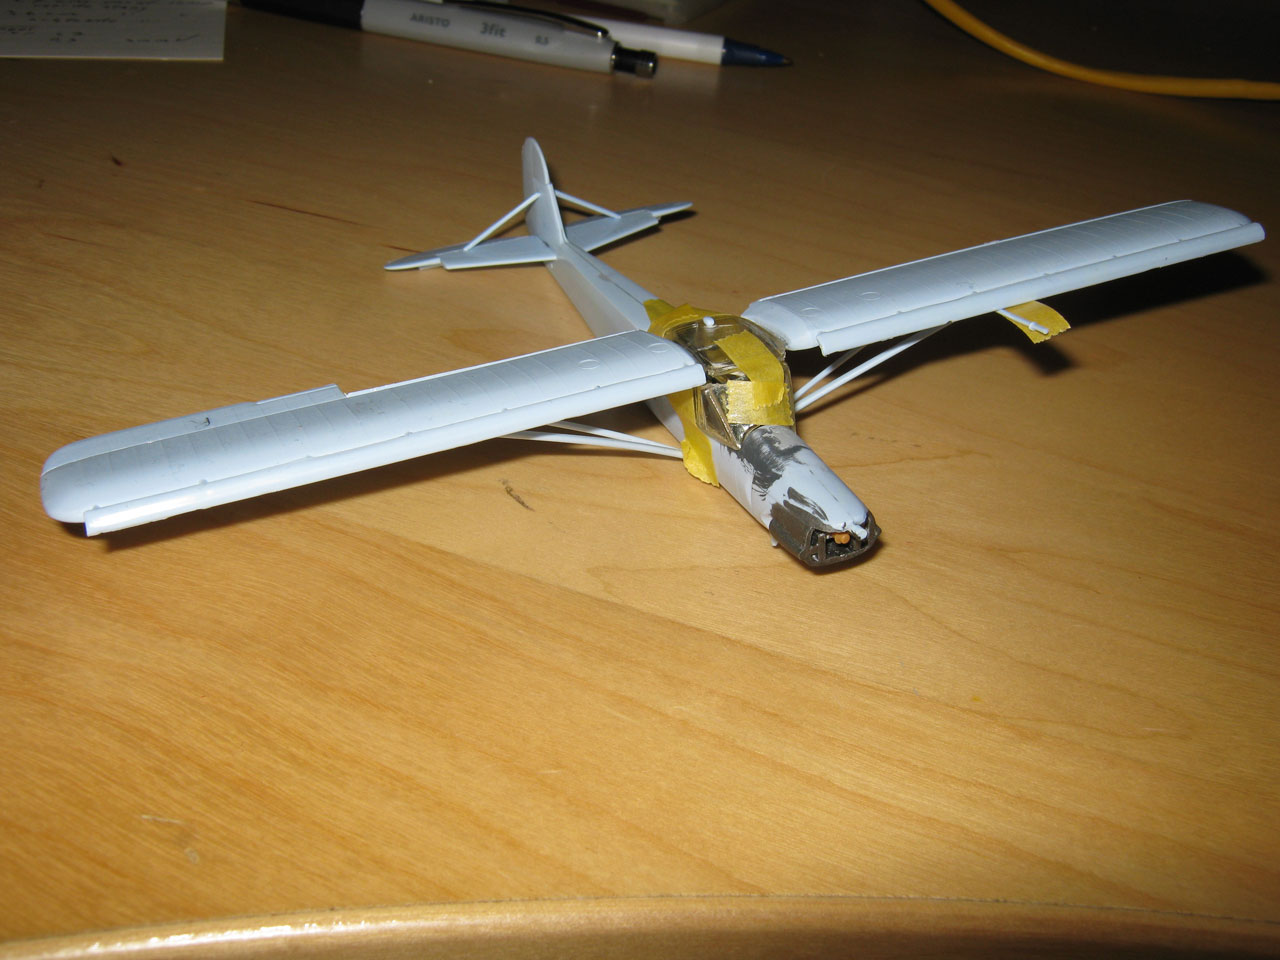
The Storch now can stand on half its landing gear (painted, too): Now to attach the remaining bits of landing gear (2 days drying time/gear leg), then add some very fragile additional framework (4 days drying time), then add wheels and propeller and last window (x days drying time), then finally add the wings (2 days drying time/wing) - I'll be at the end of the month before I'm done .

-
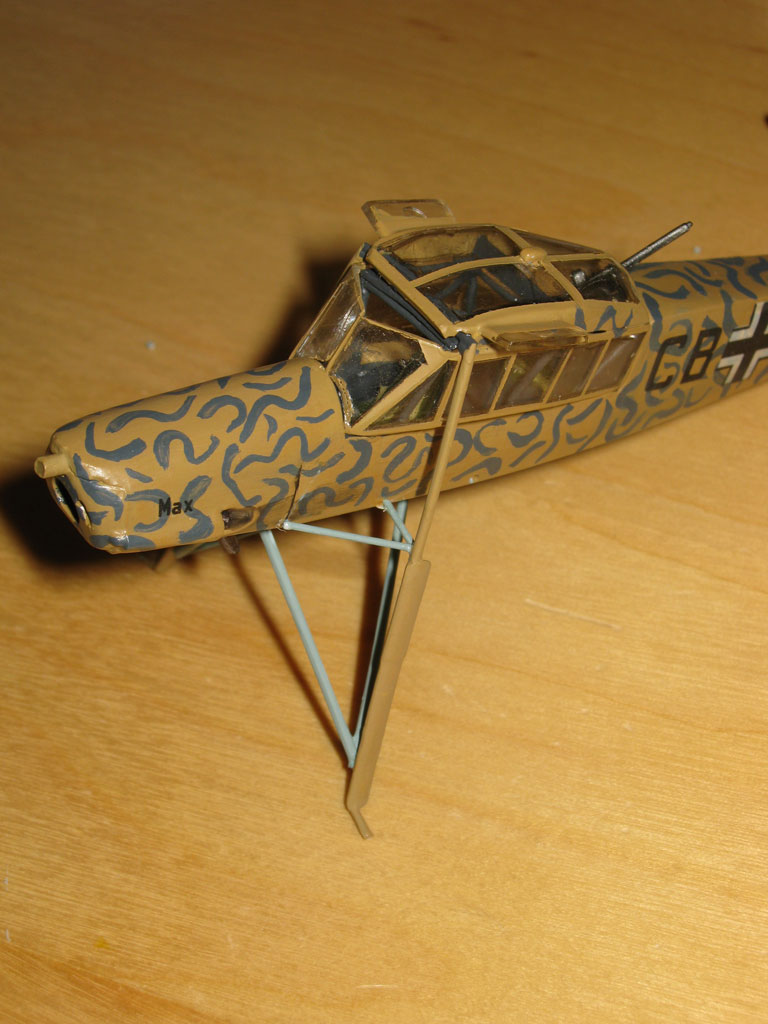
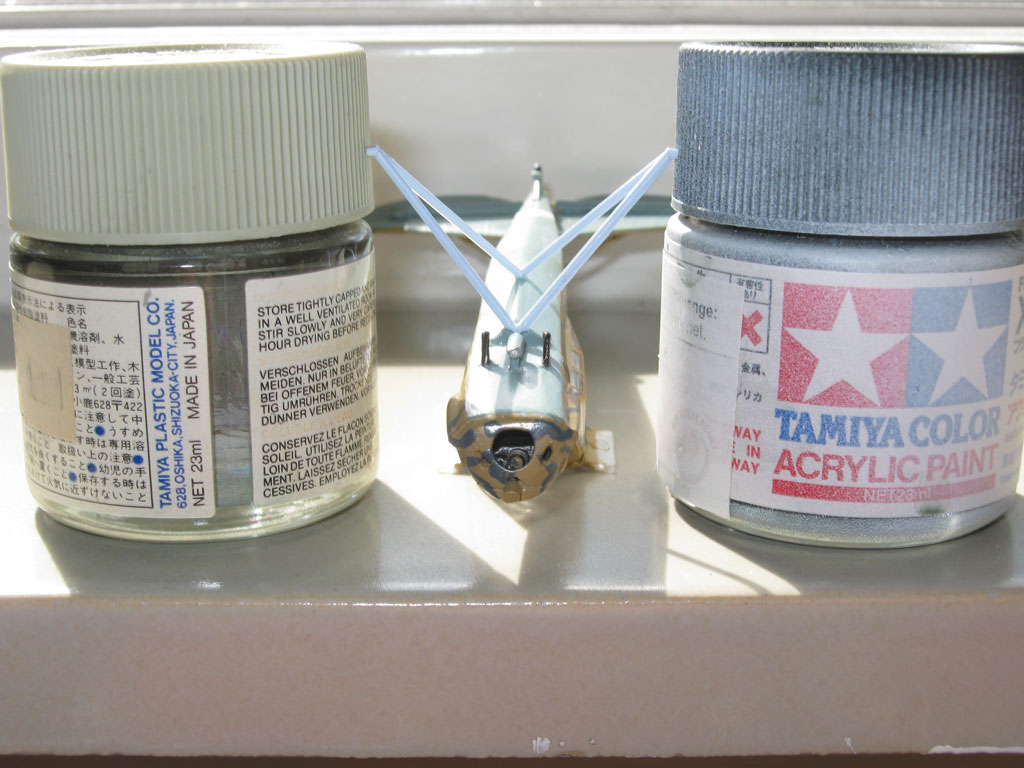
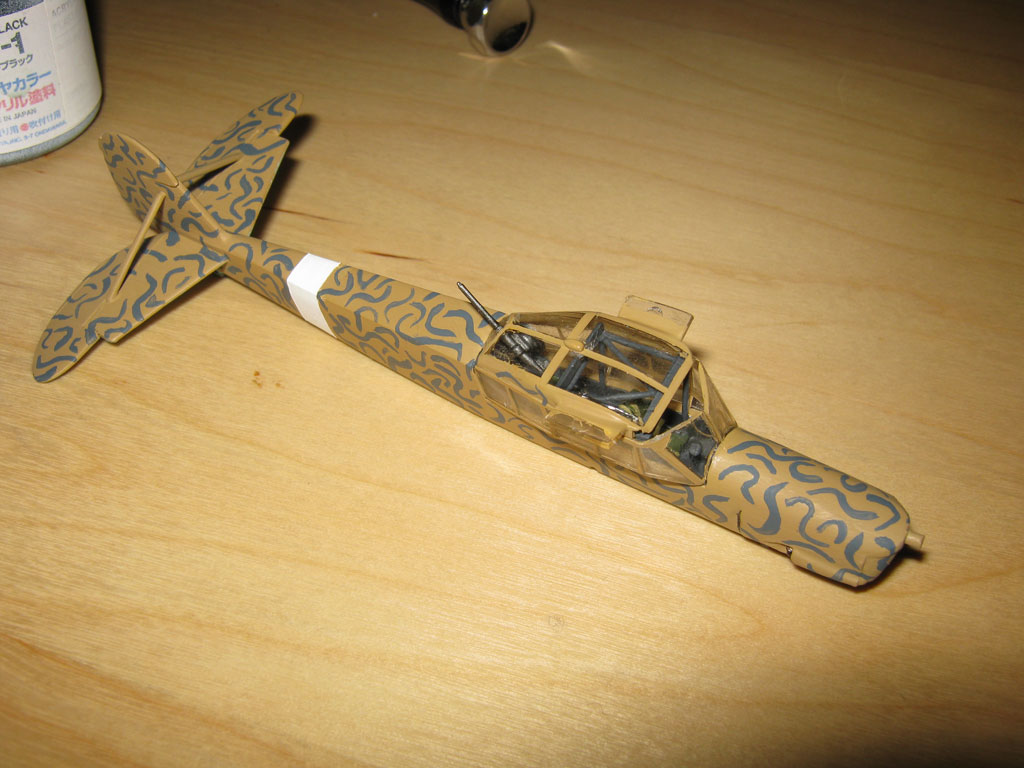
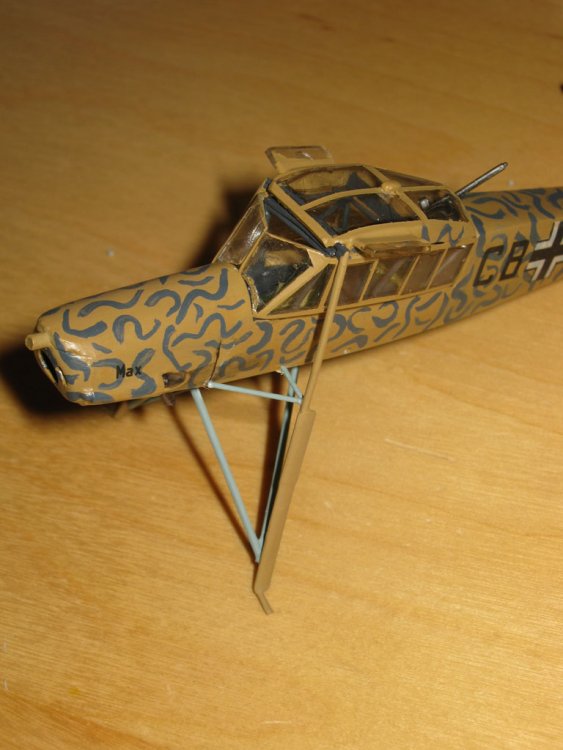
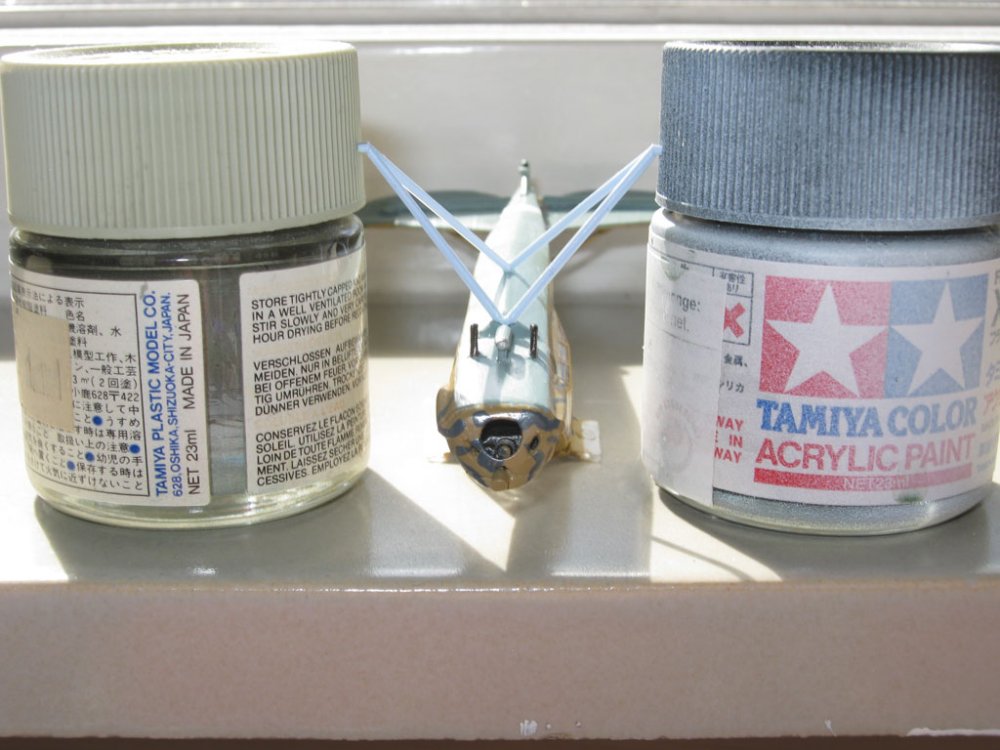
The decals were a bit painful to apply. The white ink seems to have aged badly, and had a tendency to tear/crack when applying the decals. Strangely for 1970s decals, they reacted properly to MicroSet/Sol. Then I clearcoated everything with Tamiya semigloss clear to protect the decals and discovered that too thick a coat dissolved my slate gray paint mix I had used for the camouflage pattern Anyway, after some frantic repainting of the pattern on a few places, and a second thinner layer of semigloss clear, the decals are all done. I also added a bit of dirt near the exhausts. Next, I cut the missing window from some clear plastic sheet. I haven't attached it yet, I'll do that later on. Then I set out on the next daunting task: get the landing gear attached without breakage. First, the frame underneath the fuselage: Two old bottles of paint to keep it centered, and let it dry for two whole days because the plastic Airfix used remains soft after gluing for quite some time.
-
Thanks. It's a 1970s Airfix kit that's pretty good (I've built a lot worse), except that they left off some details that can be clearly seen in the box art (of all places). They also seem to have used a mirrored picture for determining where the door went...didn't feel like fixing that one.
-
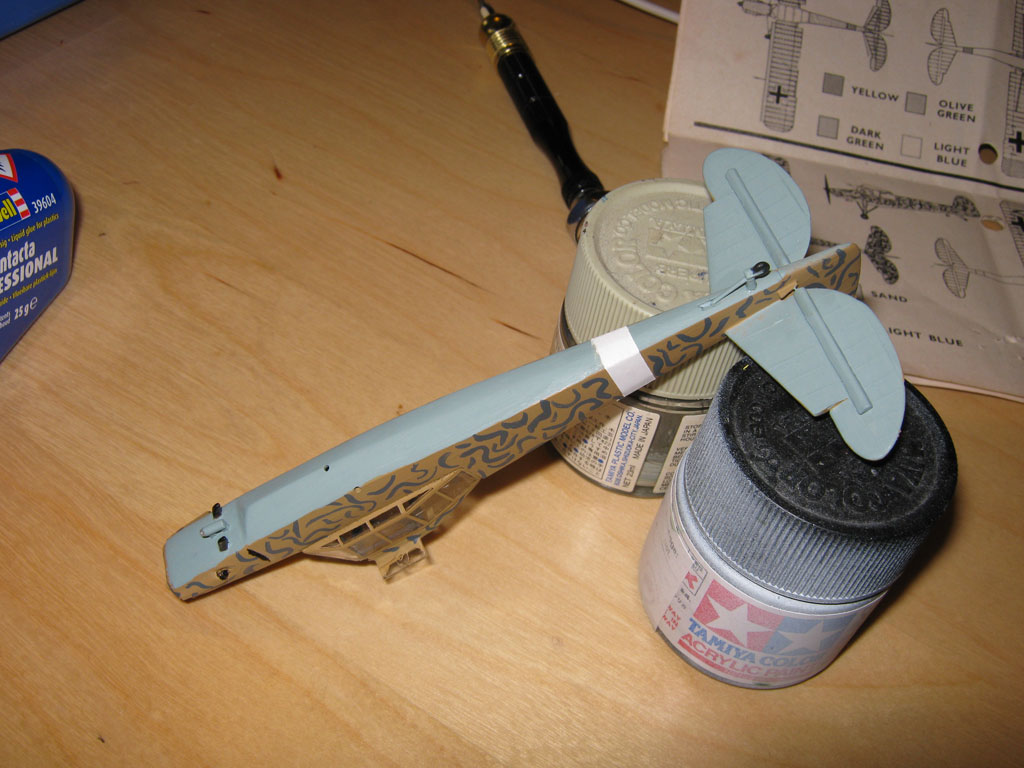
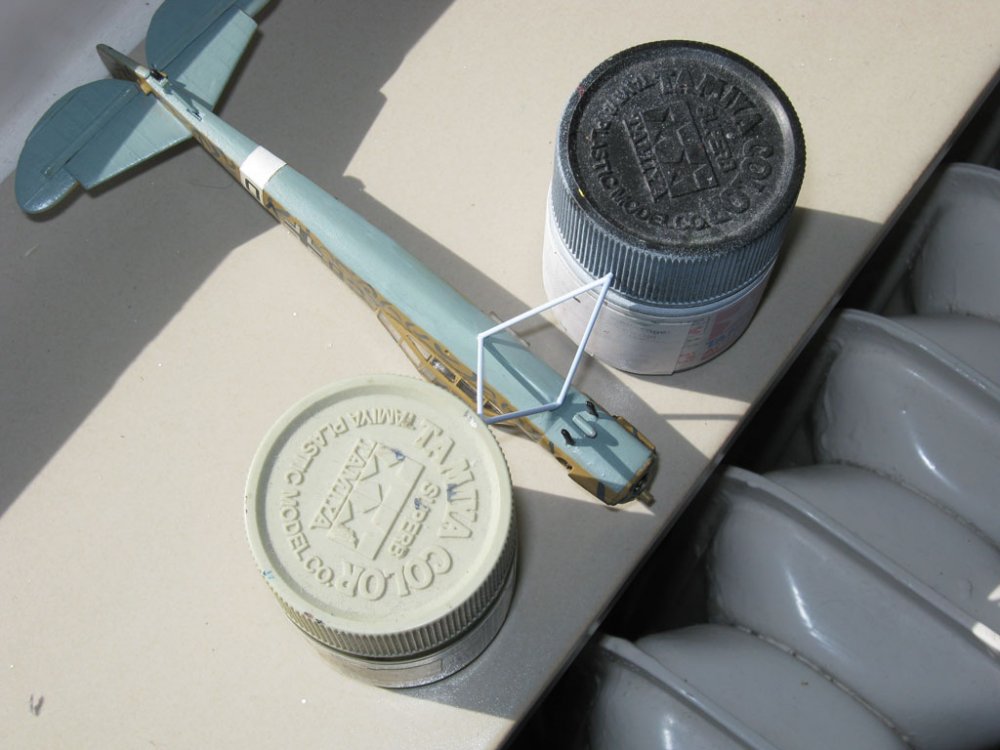
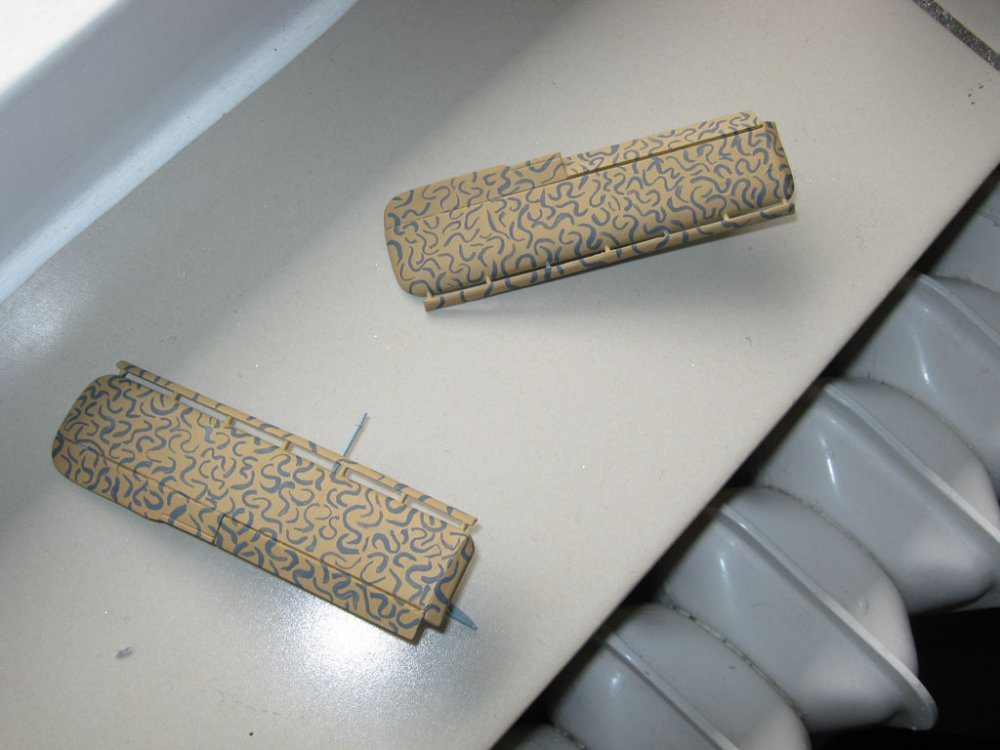
The wings and fuselage with the camouflage pattern and all other painting done: I also glued the tail wheel to the fuselage: Because the main landing gear is a fragile affair that will need very careful handling, I think I will first apply the decals to the wings and fuselage before continuing with the main landing gear and other remaining details...


-
Toothpick or other sharp object + a very little bit of paint.
-
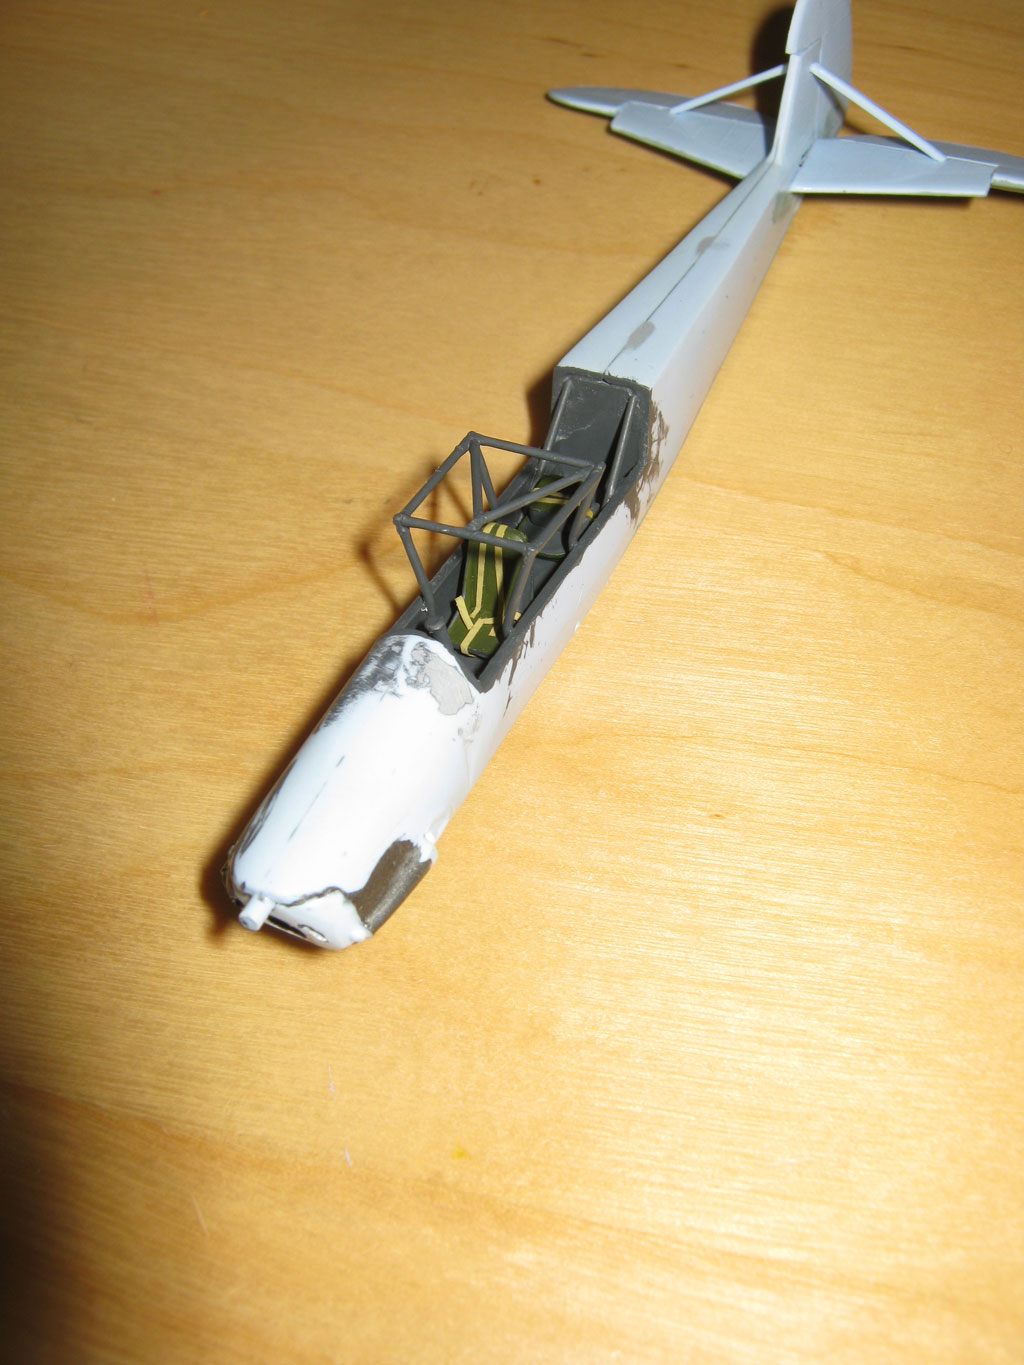
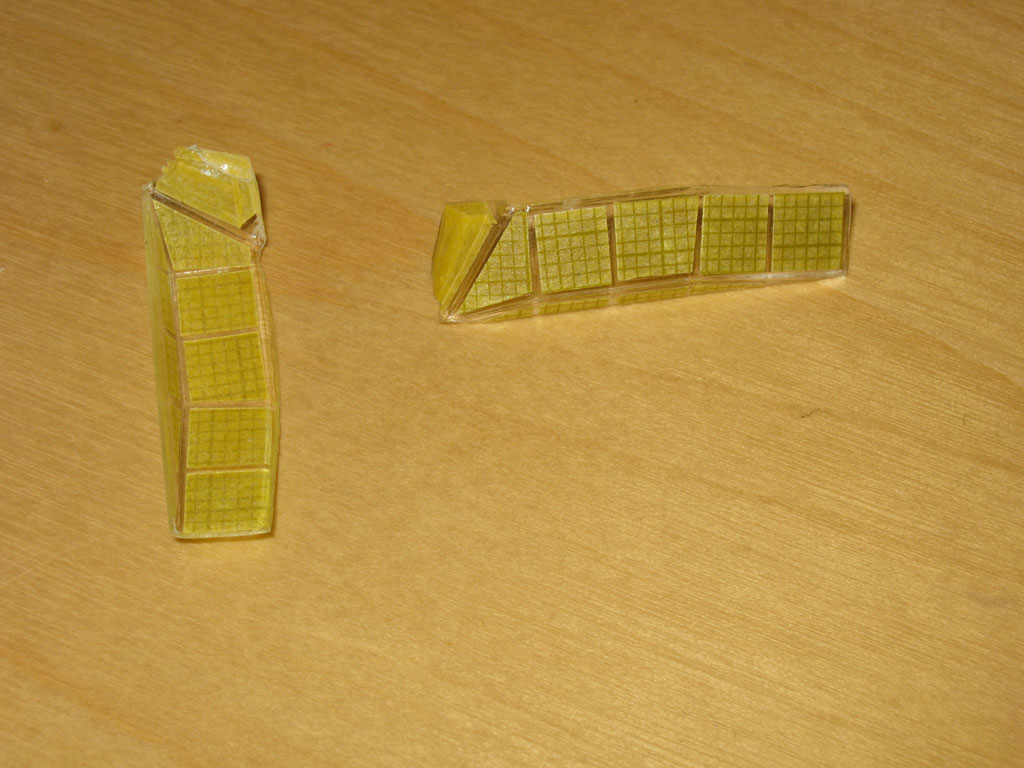
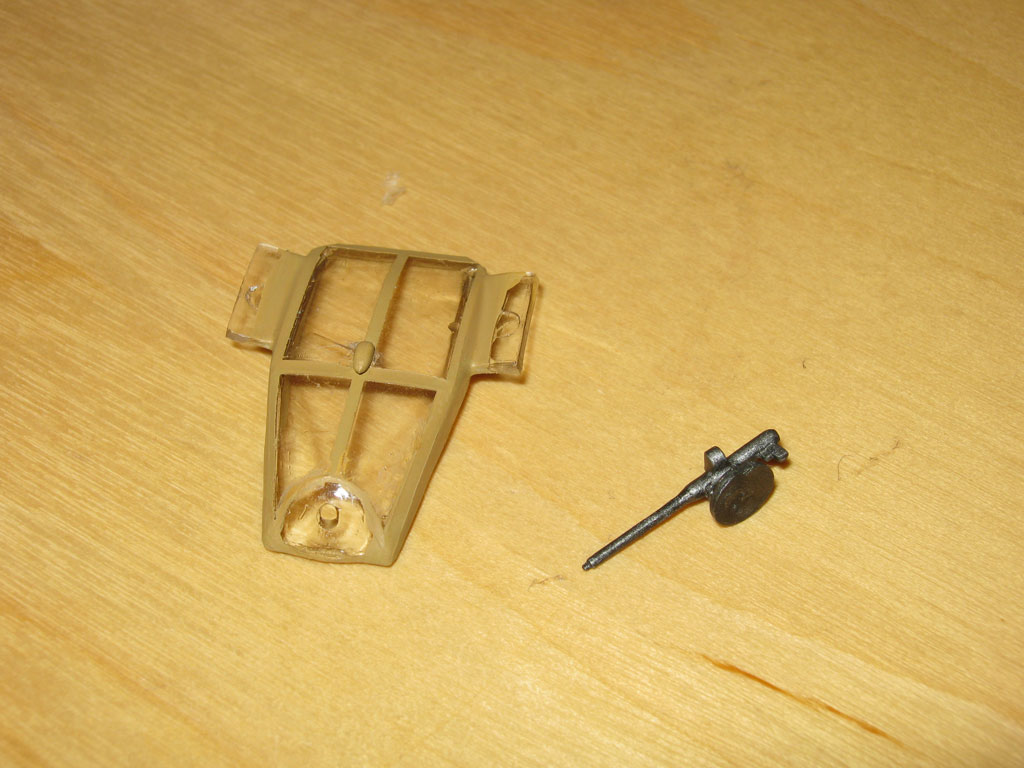
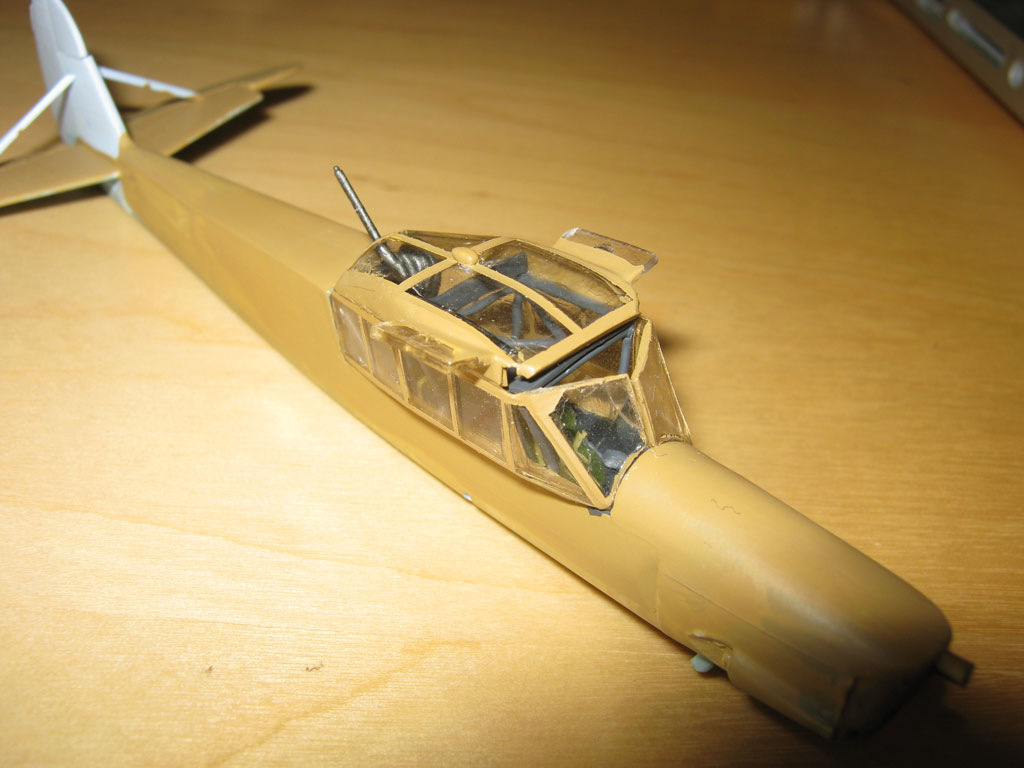
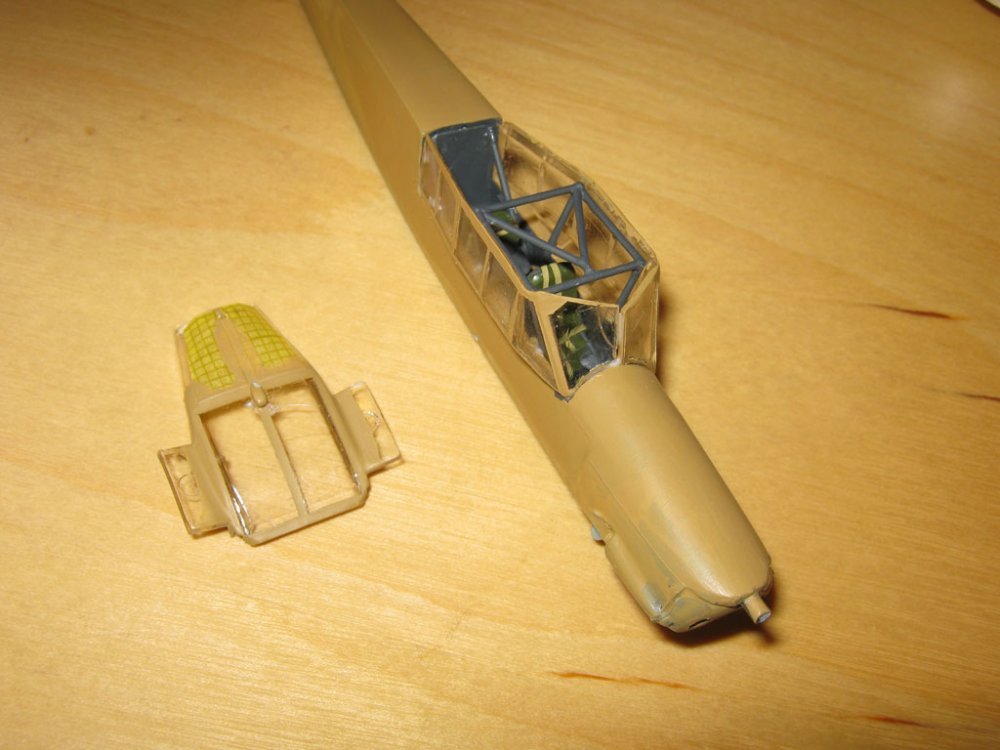
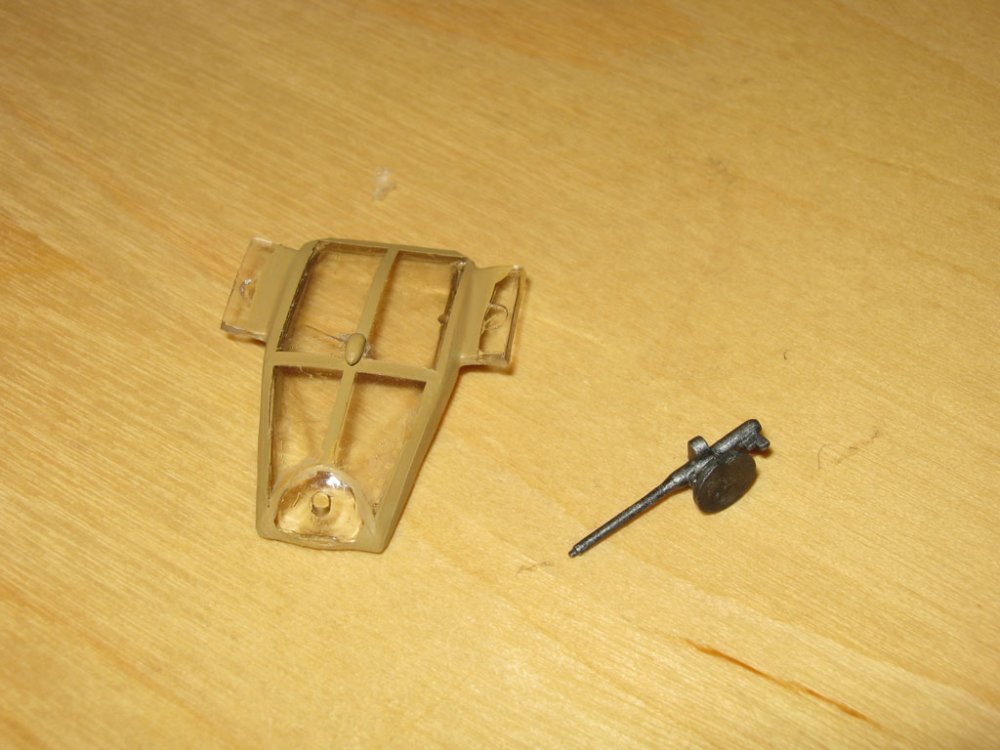
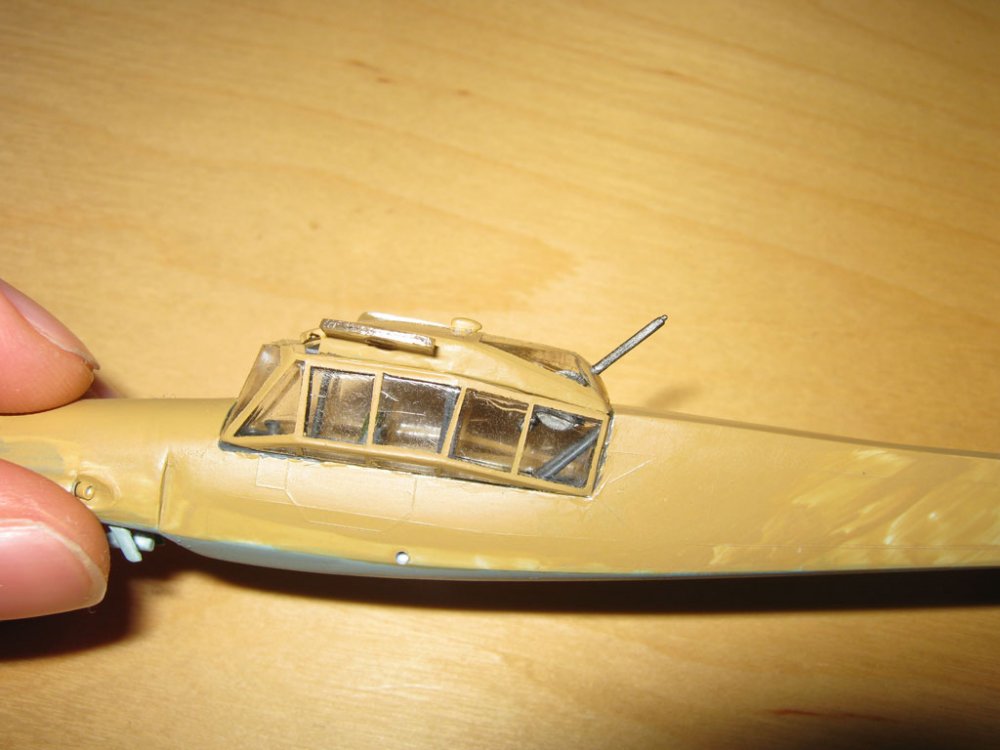
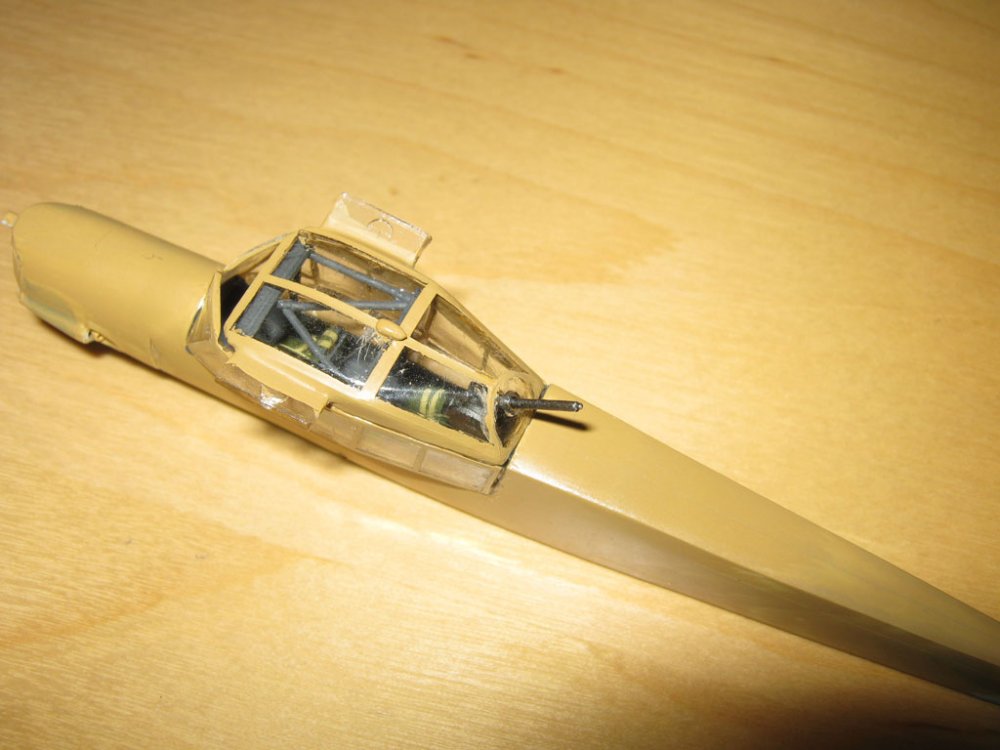
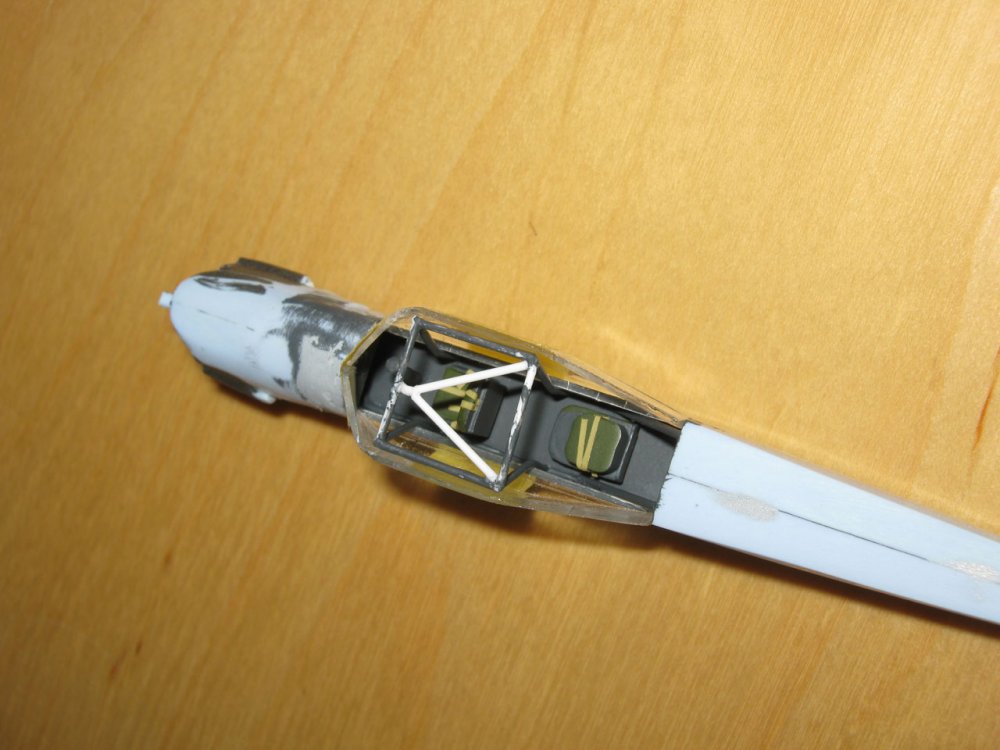
Some updates on the Fieseler Storch. Got the internal cockpit frame done and also added seatbelts (painted masking tape cut to size): Masked the side windows, which was a pain in the behind because Airfix managed to make the windows different heights and also swapped the position of the intermediate window edges front-to-back on one of the clear parts (both are errors): I unfortunately managed to crack one of the front windows while masking (really fragile plastic). Then, once those had been unmasked and glued into position, I started on the roof windows, which had to be painted in steps and partially without masking because some of the rounded window edges were impossible to mask: Also painted the machine gun after adding a magazine. Then I glued the machine gun to the roof and the roof to the side windows: I will add the missing top window later. The original top window was molded as part of the side windows, which would have left an ugly seam right in the middle. Some views: The windows are pretty clear. Right now I'm busy with painting the camouflage pattern, which is all made up of swirls and pretty tiring to paint.


-
Ah yes, Volks and their excellently cast kits (except for the molding lines that show up in the most inconvenient of places). I would be interested in seeing how you tackle that.
-
Thanks. Not sure I'll be able to keep it up while painting (I'm not so good at that).
-
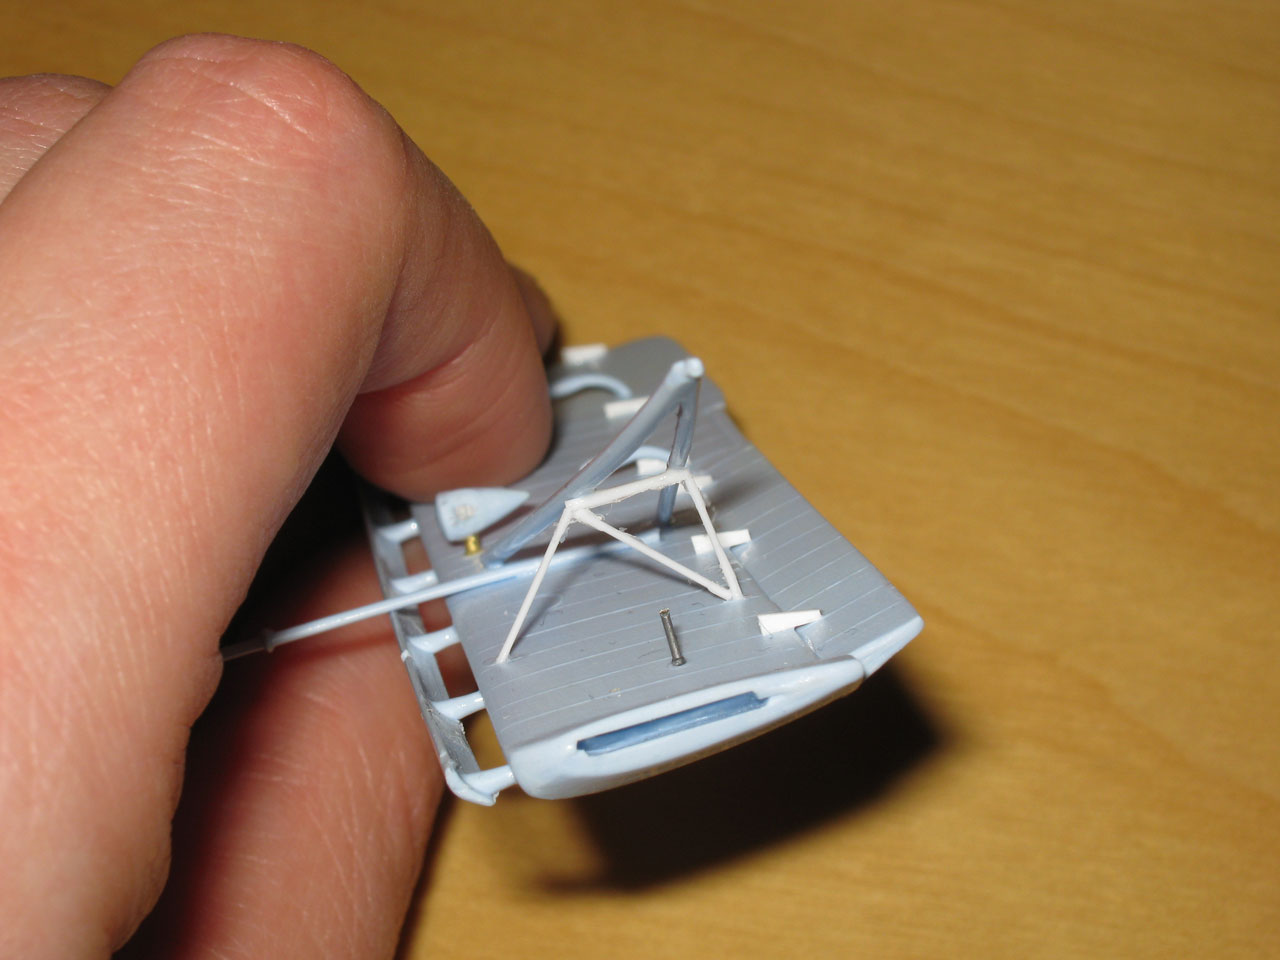
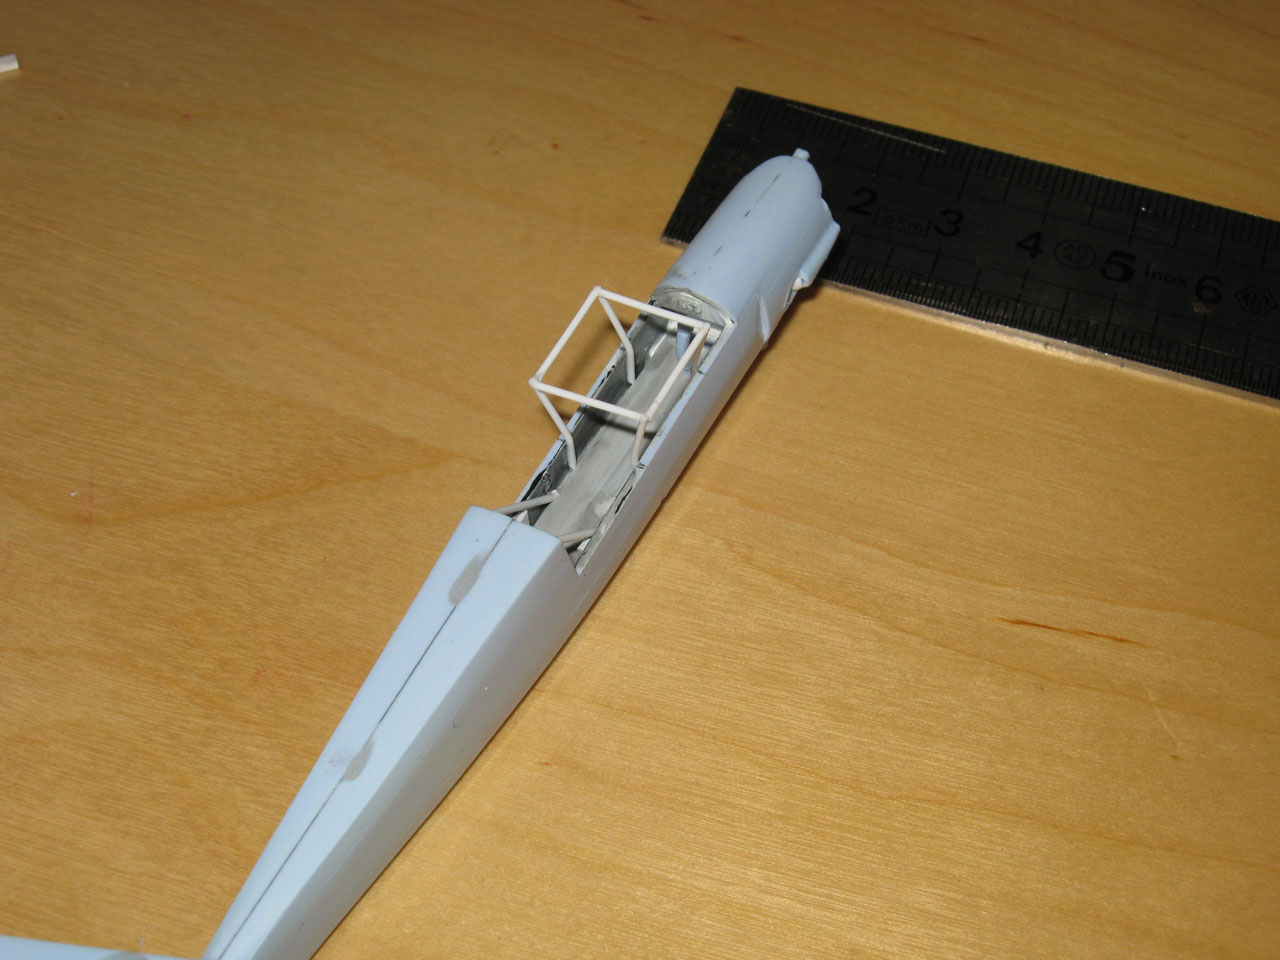
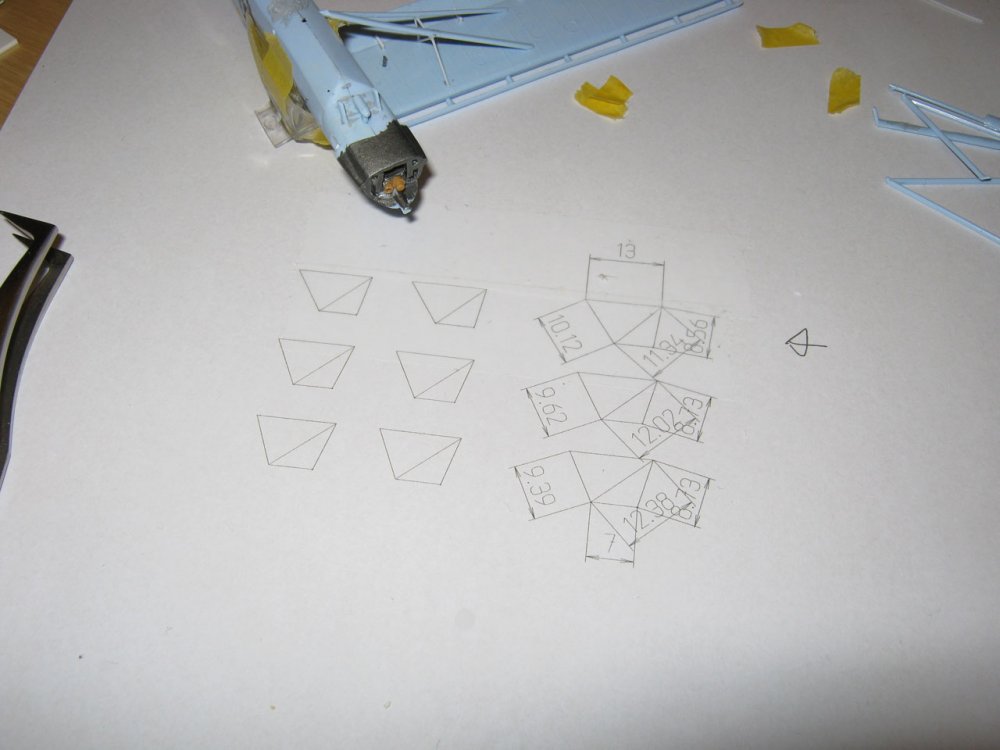
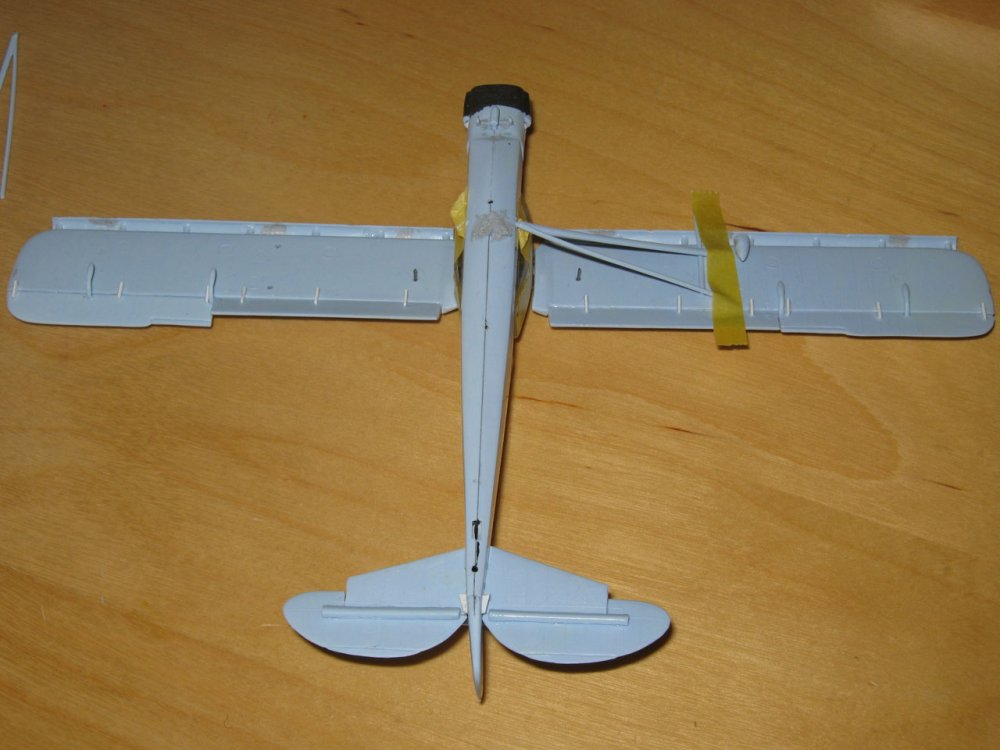
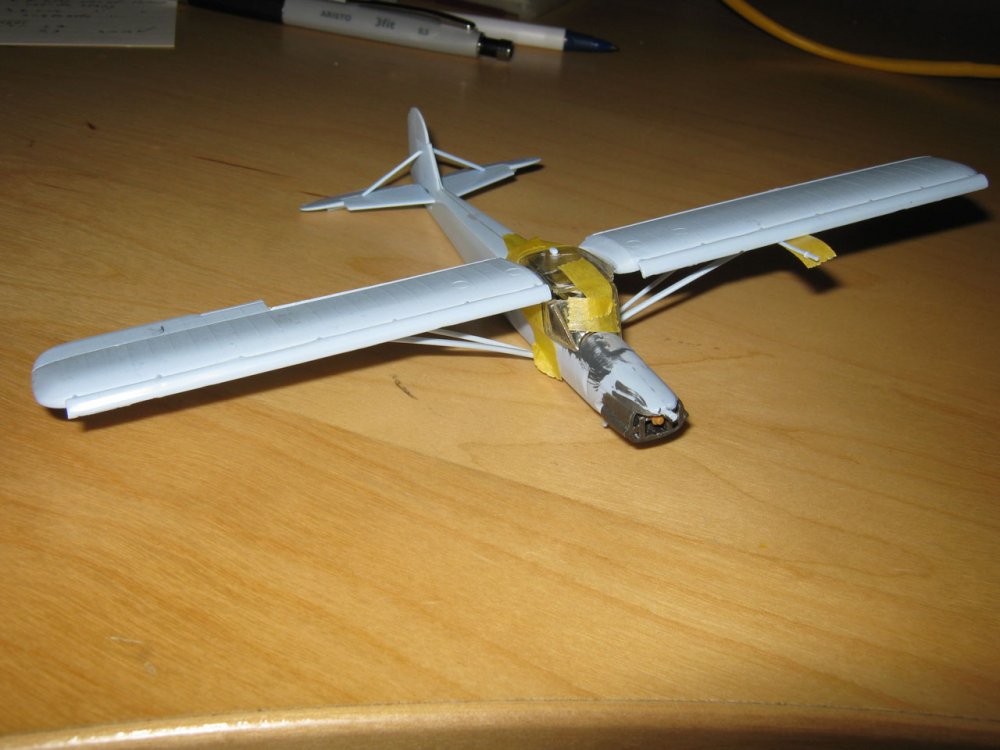
Finally finished the additional small wing struts. What I thought would be a half day job turned into two and a half days. I had measured everything on both the model and pictures of the real thing, then made the fatal error of assuming that since the measurements matched between the real thing and the model (after correction for scale) the proportions would, too. BIG MISTAKE. Made a first prototype freehand based on a little sketch I made...that didn't fit. I actually expected that one, the correct proportions were kinda hard to see in all of the pictures I found due to various bits of plane obscuring key attachment points. Made corrections, made a second prototype using the same method, didn't fit either. Switched to an actual scale line drawing to use as a model while assembling the struts, and that again resulted in something that didn't fit. I then had a good thorough look at the model, and concluded Airfix had misproportioned the main wing struts, making them attach to the fuselage 1mm too far back, which screws up the proportions of the small wing struts that fit halfway the main wing struts. Finally whipped out the CAD program, drew up various versions, added accurate measurements, and printed that out in 1:1 scale (on 1/72 scale of course). Then used that to build fitting small wing struts. Of course, one of the ones I build broke when I tried to install it (it's only 0.5 mm plastic rod after all), so I had to make a replacement. Phew.

-
Here's what I'm currently working on...Airfix 1/72 Fieseler Storch (1960s-70s kit). Stuff done up to now (besides filling quite a few ejection pin marks): Rotated cockpit floor 180 degrees and lengthened it. Modified instrument panel to fit new lengthened cockpit floor. Added rear wall and internal frame. Modified rear seat to be more accurate and in position for gunner to use machine gun. Modified front seat so seat is placed at correct height. Added seatbelts made from masking tape. Glued control stick in correct position for wing control surface position. Modded side cockpit glass parts to prevent really ugly seam right in the middle of a window that should not have seam (need to make new window later). Narrowed edge that is glued to cockpit sidewall to fit better in combination with internal frame. Drilled out holes through which exhaust pipes fit, added exhaust pipes (still need to drill out exhaust pipes). Opened up engine bay on the front, added simplified mock engine. Modded engine cover to be more accurate as hole in stock part is too large (not shown). Separated all control surfaces from tail and wings, glued them back in slightly angled positions. Added hinges on rudder and wing control surfaces. Added vertical metal tubes missing from wings. Replaced landing light mount because it was too short. To do: Fix bad fit of upper cockpit glass section, add missing window. Add missing wing support struts and missing landing gear support struts (only half of the struts are included in the kit; the others are shown on the box illustration but were left out of the model). Paint in North African scheme.

-
You could call it the...VF-1! Valkyrie Fortress-1!
-
Hobbylink Japan's "Playing With Plamo" Competition
Salamander replied to kajnrig's topic in Model kits
I ended up making an Excel sheet of my kit stash, so I know quite precisely what I have and what I lack. Of course, with several hundreds of kits in my stash... -
Hobbylink Japan's "Playing With Plamo" Competition
Salamander replied to kajnrig's topic in Model kits
I find it funny how only airbrushing is seen as an advanced technique, and hand-painting is seen as some backwards thing only suitable for beginners... Tempted to prove them wrong. -
If you feel adventurous and have a kit with a lot of fine panel lines (or other detail), you can try putting down a fairly wet (but not dripping) coat of your clear color (well thinned, leveling agent not required IMHO, but depending on the paint you may want to add some retarder). The paint will pool in the panel lines, drying up darker there than on the surfaces, resulting in parts with translucent panel lines a shade darker than the main candy color.
-
Just in case there's some confusion here: With pearl sprays I meant (for example) TS-58 Pearl Light Blue. I had hoped to be able to use it for some subtle effects on a bazooka barrel (for one of those "impossible" Kotobukiya Evangelion resin kits), but had to use way less than expected to get the desired effect. The Tamiya PS sprays for polycarbonate R/C bodies are meant to be used on the inside of polycarbonate bodies, so the shiny plastic is visible on the outside. When sprayed on the outside of an object they give a satin (semi-gloss) finish. What's nice about them is that they create a flexible layer of paint, so they can also be used on flexible parts. However, I've found they do not create an impermeable layer of paint on e.g. rubber parts, so plasticizers can leech through the paint over time. They also are sensitive to solvents in any paint you add over them, and may dissolve again and mix with the paint covering them. The best polycarbonate paint I've ever used are the old spray cans by US manufacturer Parma, who have loads of interesting colors including very rich candies. That one etches into the plastic and is almost indestructible (but reacts with Humbrol oil paints). Short version: Try on some scrap plastic before putting it on the model.
-
The base layer is really important, AFAIK. Any defaults in that layer will show through the translucent top layer. It's possible to get a variety of finishes by using different base layer colors, e.g. using a base layer with an obvious metallic grit will give a finishing that's less smooth looking than the examples above. And before you get caught out by it, Tamiya makes a bunch of pearl sprays, but unlike other manufacturers' pearl paints those are opaque (except obviously the Pearl Clear).
-
Just a late, late reply to this post, but I think that's one of the soft vinyl kits. The Club-M resin kit was 13,000 yen and looks way better than that.
-
Guess we'll have to wait for the next hobby show for more news then.... (I have the Club-M version, but that's the kind of kit that I somewhat fear building)
-
The error I get is: You are not allowed to use that email address on this site. Can someone please help me out?
-
So...is this kit dead in the water like the Monster Destroid they showed a few years back that never materialised? Or is there more recent news of it?
-
Please post Bugs and Forum Feedback here
Salamander replied to Shawn's topic in MW Site News & Member Feedback
Not sure this is the right place, but the MW Legacy forums are down. Getting this error (so no checking out my old post count for me): Ikonboard CGI Error Ikonboard has exited with the following error: Can't connect to mySQL database. Access denied for user 'macrossw_arch01'@'localhost' (using password: YES) This error was reported at: Sources/iDatabase/Driver/mySQL.pm line 60, line 64. Please note that your 'real' paths have been removed to protect your information. -
Hi, I've logged into here for the first time since seven(!) years, I was very surprised that I could reactivate my account after such a long time in the first place. My reason for logging in is to change my email address, as my old email account is hosted on a free email host that has been in the news lately because of security compromises (and a sale to Verizon). And I may want to post some stuff, too... However, when I try to change my email I get an error message that I'm not allowed to use my current email address here. What can cause that? Edit: Just checked whether I might have created another account in the time in between using my current email address and then forgot about it, but the boards don't recognise my current address at all. So I don't understand
-
Official Bandai DX Chogokin VB-6 König Monster Thread
Salamander replied to Funkenstein's topic in Toys
Since it stands as tall as the VF-25 DX it can't be 1/60, as has already been said... -
Actually, it is possible to get replacement parts, since my Armored Ozma came with wrong parts and I was able to get replacement parts from Bandai through HLJ. So perhaps you could buy replacement parts for broken parts too.