MechTech
-
Posts
4577 -
Joined
-
Last visited
Content Type
Profiles
Forums
Events
Gallery
Everything posted by MechTech
-

Planning customising/weathering 1/48 VF-1J and GBP
MechTech replied to winterdyne's topic in The Workshop!
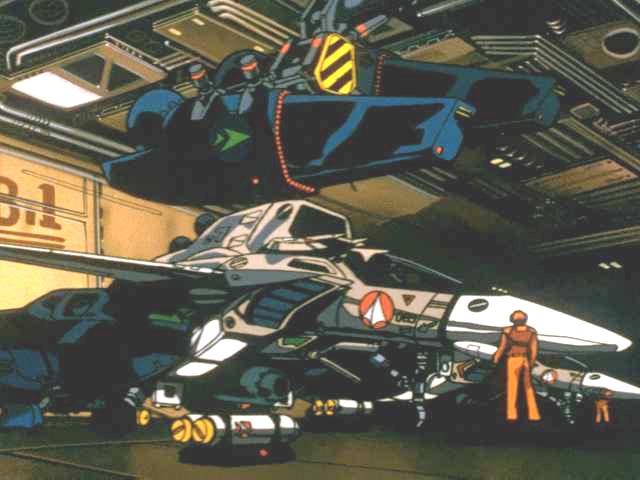
Dude, my avatar! [attachmentid=41306] And these guys too (they're not as cute) [attachmentid=41307] [attachmentid=41308] [attachmentid=41309] Can you say orange? Does this give you any ideas? Hope that helps! - MT


-
Thank you! That looks really interesting! I'm tempted and sure I could do it. It'll be post Daedalus though! - MT
-
Looking shaweeet! - MT
-
Ah ha. Now I'm in the know. I never saw the Q-Rau, unless that was in one of the mission sets they did. I have one, but it's too small. Try to get the Nichimo 1/200 kits if you still can. They had all three regults. I have the DH Phalanx and Defender. The Defender was a bit hokey in detail. At least I have all of the Nichimo kits and the Imai 1/200 monsters. I get to build them next . Talk about a big project. - MT
-
When to throw out the kit you're just not enjoying...!
MechTech replied to cowie165's topic in Model kits
Don't throw it away, recycle it. Your Valks always need something to make them feel better, like a burnt out SU-22 in a diorama. You don't really have to burn it, but then again... . - MT -
Thanks guys! Destroid Defender, I actually think others destroid "donations" would be cool. I've got lot's of 1/200 kits, but this has been a MW group effort from the start. Nanashi did some critical translations that kept me in the right direction. A slew of others (including BigF) helped with filler and other chemical suggestions. Not to mention other members ideas or suggestions. If sponsorship stickers were common place on warships, I'd have to slap a giant MW bumper sticker on it ! JasonC, Out of curiousity, what is the Phalanx made of? I actaully got the Dark Horse top, and slapped it on the Nichimo Tomahawk bottom with the generator units on the legs. I cast some, but with bubbles galore! I even did the missiles and parts in color. Looks great - with bubbles ! I dropped sample plastic off with the engraver to mess with power and speed settings. Now I have to finish drawing it in Corel. I figured the upper part will be 7.5"/19cm in height (not including the crane/sail). The two upper decks will be about 3"/7.6cm in height. The decks and walls will be 4mm carbon fiber extruded tube. VERY stiff and strong. That will be sandwiched between .020" styrene which will be engraved / cut where needed. I have just enough room to put the LED's in for ceiling lights. - MT
-
That's interesting. Do they work well? A basic CNC desktop unit is about the same price though. - MT
-
Lookin' great (without possible annoying legal holdups). Are you going to make TV monitors like the other sets had. The admiral always has a message for the troops . - MT
-
Jasonc - The ducks didn't stand a chance where I did the trial runs. When I'm packing some defensive systems (water gun and air-soft "cannon"), I'll rule the park hah ha ha ha (evil laugh). Ahem; sorry about that. UPDATE 11 MAR 07 STABILIZERS ARE FINALLY DONE! [attachmentid=41093] An earlier picture showing the stabilizer out. Note the slot is filled in nearly flush. [attachmentid=41094] A movie of a few stabilizer cycles. Normally these will just stay in or out. [attachmentid=41095] Here's an old movies of how the mechanism works. I refined the mechanics now. The stabilizers are spring loaded and normally out. The spring takes the brunt of hitting an object or the operator forgetting about them being there and potentially breaking them. The servo merely pulls the string connected to the arm on them. The anchor well is in on the bow and I forgot I have to do the torpedo tubes in the front. I bought some carbon fiber square tubing to begin the upper half! Yes, the top begins soon! - MT Stabilizers_In_Action.MPG Stabilizer_In.MPG
-
It looks awesome man! Keep up the great work! Just think of it, no threat of copy right infringement either! The profit is all yours. I think everyone will be happy giving their mecha a good home too . - MT
-
The Robographics guys said he'd do customs. That might be your best bet. Probably cheaper than $400! - MT
-
Are we sounding desperate yet or what!? Yeah, color the TREAD too pleeeease . Yeah, the chest area DOES need missiles, lot's of missiles (have I said that before?)! - MT
-
Alright, get rid of the toothbrush chick and back to the TREAD ! Thanks Graham for the pictures. Some of us can only dream of making such trips! - MT
-
Anybody with a 3-D scanner could scan the parts and mill them out. Expensive and time consuming. While digitized, the parts could be corrected or altered accordingly. I blew my chance to get both for $2000.00 a while back. Yes I kicked my self in the butt, multiple times. Then there's the old fashioned way. The 1/100 Monster I scratchbuilt built was mostly based on the 1/200 kit. I just doubled the measurements for everything. Especially since I didn't have good line art at the time. It made life a lot easier not having to guess as much. - MT
-
Laser and inkjet come out about the same opaqueness(is that a word). I have experienced when printing on white, the heat yellowed the paper slightly (could have been scanned ghost smears too). You definitely have to clear coat it with a decal coating like Solvaset decal coat or the like. They are extra brittle from the heat. Advantages, better solid and vivid colors. Better small details. You're hard core if you buy one. Then again I'm one to speak . - MT
-
Sorry man. Major bummer! If using cans, keep to the same brand/line if possible. I'm learning the hard way to test on scrap first. I had that happen to me too! Beautiful wooden instrument with crinkles in it!!! It will also happen in humidity or if the paint is not fully cured underneath (though I doubt the latter is your case). Don't give up! - MT
-
I have Canadian friends, I'm sure they would not like it . I AM working on the Navy and Air Force thang. My destroyer is in the build up section, and I have a 1/200th Yamato battleship waiting in a box under my bed. Plus I have to build all the mecha and aircraft to go with the Daedalus. No time to invade Canada anyhow . No progress reports because I've taken a step backwards. Through a freak accident, I blew up two servos working on the stabilizer actuators. Fuses are your (and your radios) friend. All that work just to make four fins pop in and out! I'm getting some parts to fix the problem. I'm also looking at using carbon fiber extuded shape strips to make the supports for the hanger decks. High tech all the way. I'll be bringing some plastic to the engravers to do test cuts. In .020", the laser should go through "like butta." I'll be posting soon. - MT
-
You guys are REALLY trying to convert me to 1/72nd scale aren't you! I think it's anawesome idea! Where were you guys 20 years ago when I was doing one ! I can't wait to see the finished product! - MT
-
Thanks Graham! Although everytime I see the pictures I start drooling! What's up with that!? - MT
-
With all the money you're getting Valk, you could finish those ground vehicles . I can see the monster going for that much. The 1/160th's are rarer evidentlly. I don't have a problem with missiles, I can stop anytime I want to! I'm just not ready yet ! I'd love to go with 1/72nd scale. There's so much you can do with it - if you have space. If I built my Tunny VTOL in 1/72 scale, it would have been HUGE. Imagine the Daedalus in 1/72nd scale. I'd throw the remote away and just drive it! You gotta love the destroids though, ALL of them. - MT
-
Cowie; you ain't kiddin'! Talk about making a profit. I'm gonna sell an old Gundam 100 Shiki that's like 20 years old! I'll never see that much "profit." BigF, the missile fetish IS outa hand!!! problem is there's no "missile annonymous" branch in my shire. You should see what I ALMOST finished before moving here and starting the Daeadalus. - MT
-
DO NOT boil your parts (unless your gonna serve them up with mash potatos and gravy). Boiling WILL warp the plastic, and alcohol will probably do nothing. Most glued parts use a solvent to dissolve/melt the plastics together. That means plastic is holding plastic together. IF you are very CAREFULL (safety wise), you may be able to slit open the seam with a razor blade. Wiggle the blade into the seam, don't shove it straight in. I've had to do several repairs/fixes on other kits. Use a WIDE and thin piece of metal like a stiff spatula or putty knife to pry the seam open. Screwdrivers will work, BUT will leave pry marks in the seam. When you get the parts apart note where glue will NOT interfere with the parts moving. If the parts are painted, that's a whole other story, but start here first.
-
I agree with that. I build in 1/200th mostly, but would seriously consider buying if they did the whole line. I'd get the Captain's excellent 1/72nd resin kits, but most of my current funds are going to the Daedalus (or sprucing up my workshop since our move). Even the old kits you can still find fetch a high price. I'd love to see details like gun bays and ammo feed belts too. Oh yea, gotta have missiles - lots-o-missiles. - MT
-
Congratulations on the casting of Rex! Hopefully you'll have a good run. - MT
-
Ah common. You're making me drool on the keyboard. If I had one of those I could take over the world too (Dr. Evil pinky in mouth )! My goal is either a CNC table or a laser engraver. The problem is the cost for a good sized table or laser engraver. You'd think they make them out of gold or something By the way, the VC-33 side view is a direct trace over the lineart. I drew ovewr it to clean it up and make it transparent. I pretty much take a side profile and glue it on to the plastic stock and start cutting around it. - MT