wm cheng
-
Posts
4312 -
Joined
-
Last visited
Content Type
Profiles
Forums
Events
Gallery
Everything posted by wm cheng
-
Using the Captn's scribed rings as a guide, I sprayed varying patterns as I moved forward - I masked the next section, trying to make a random plated pattern.

-
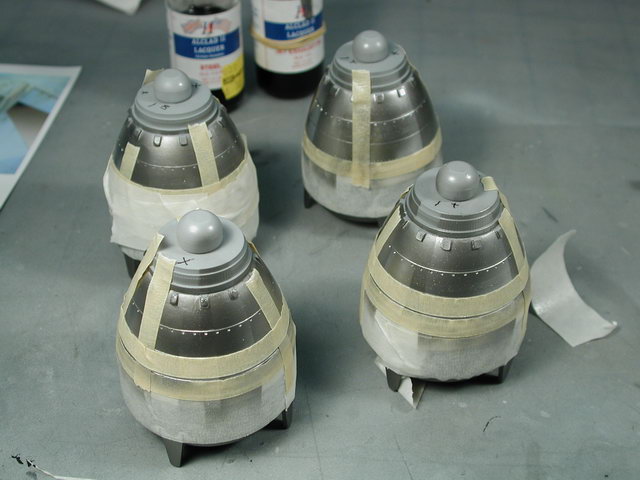
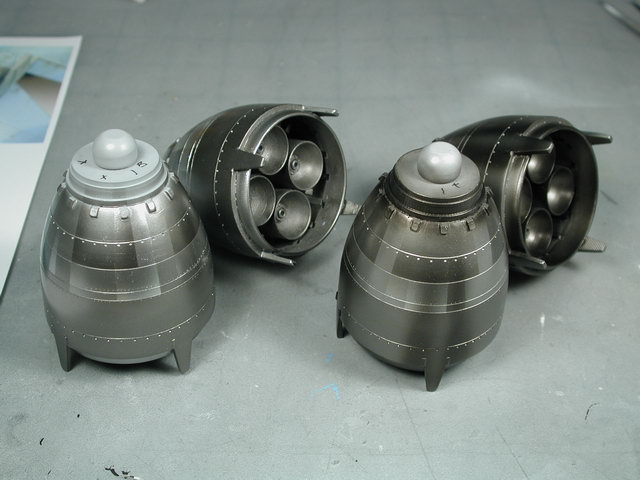
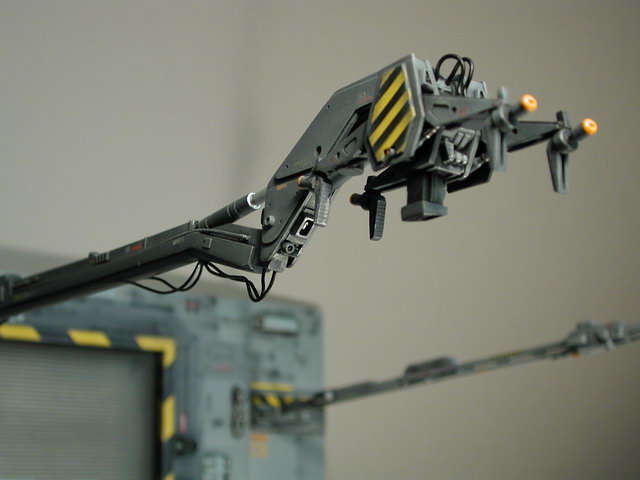
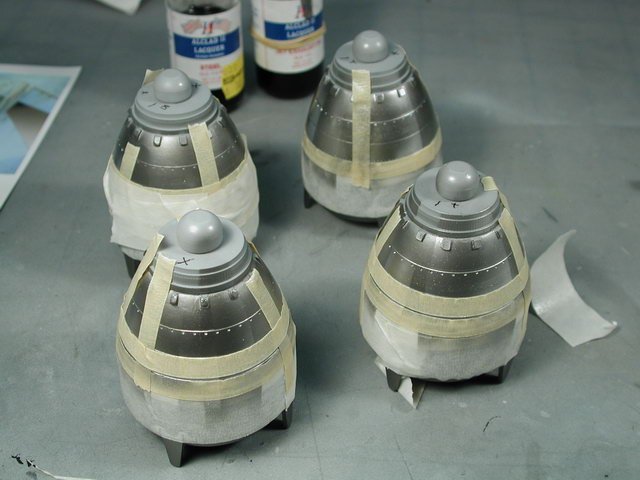
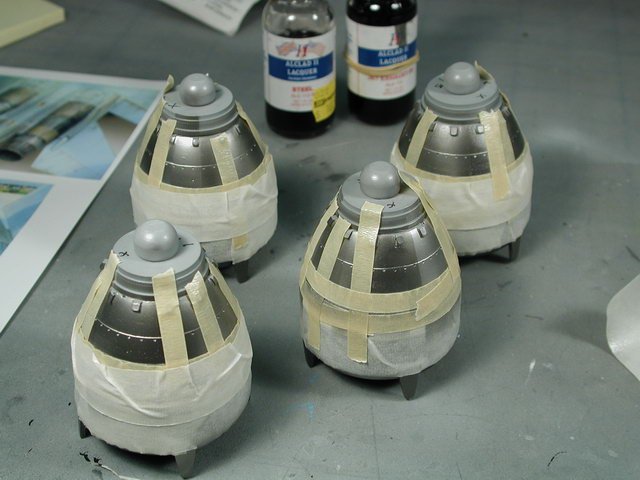
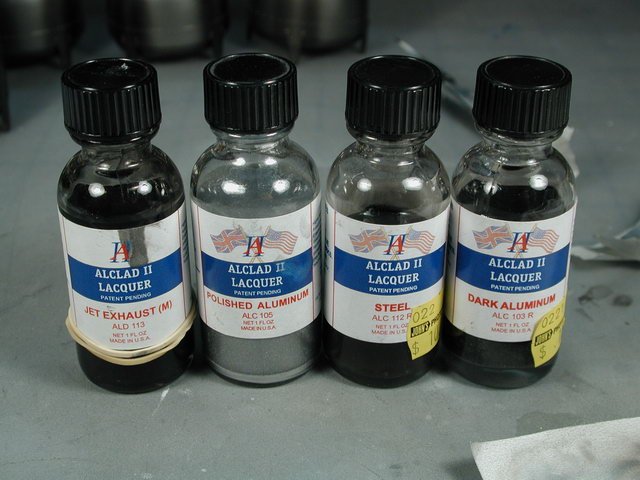
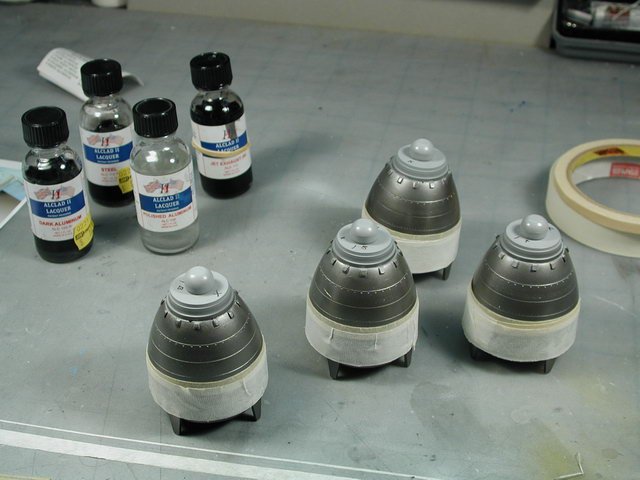
That looks great Brett! Well, got a little time to get back to work on these Boosters. I wanted to experiment - learn to age/weather the booster nozzles like the SU-27 references I got from the tips section of ARC (Aircraft Resource Center). So I started to layer up the multiple shades of metallics I had lying around. First I masked off the nozzles starting with the bottom working my way up towards the front. I only had on hand four Alclad colours.
-
Yay!! May I be the first guinea pig!
-
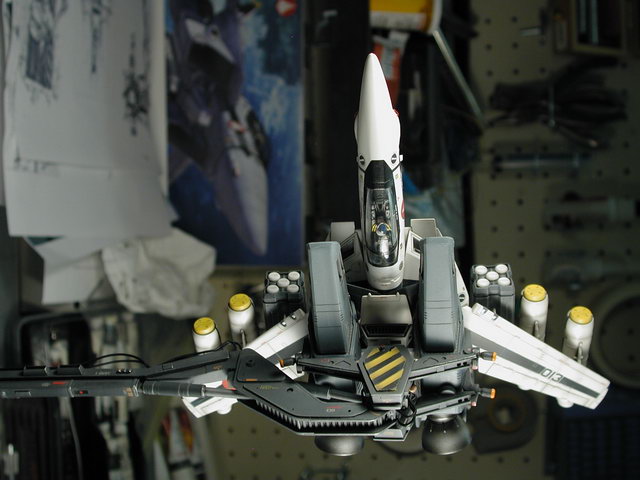
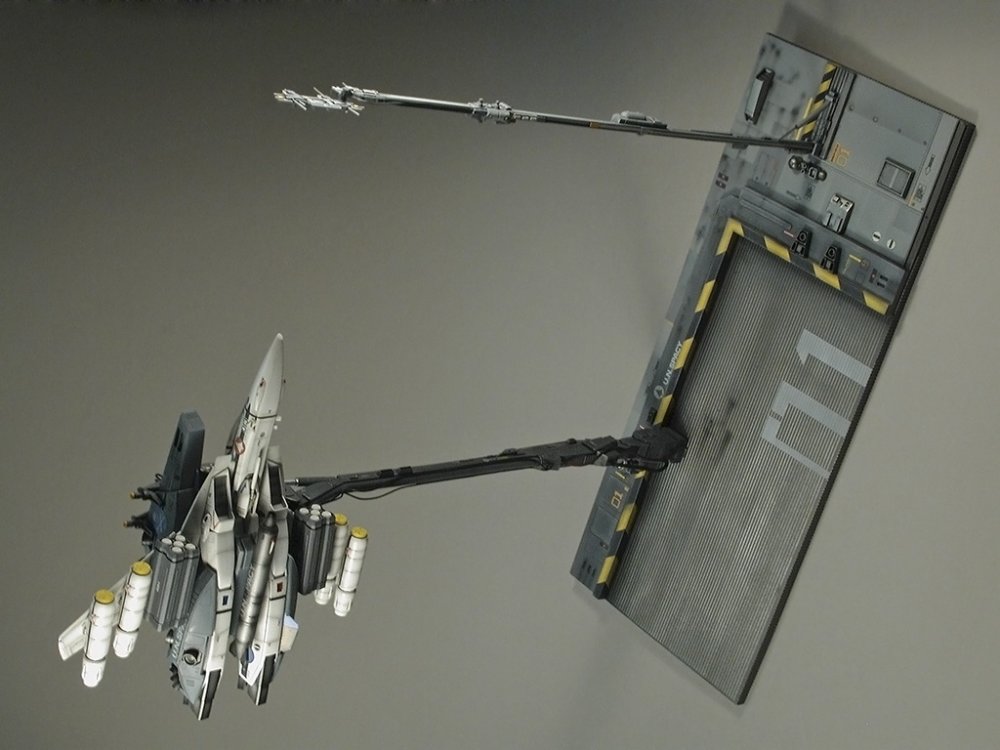
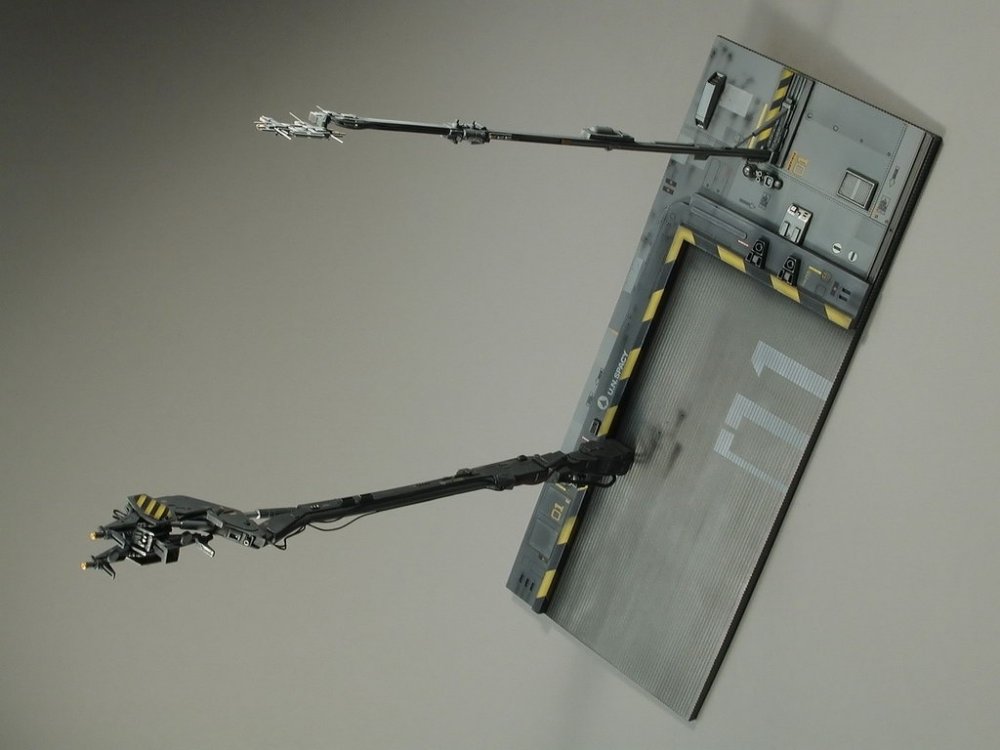
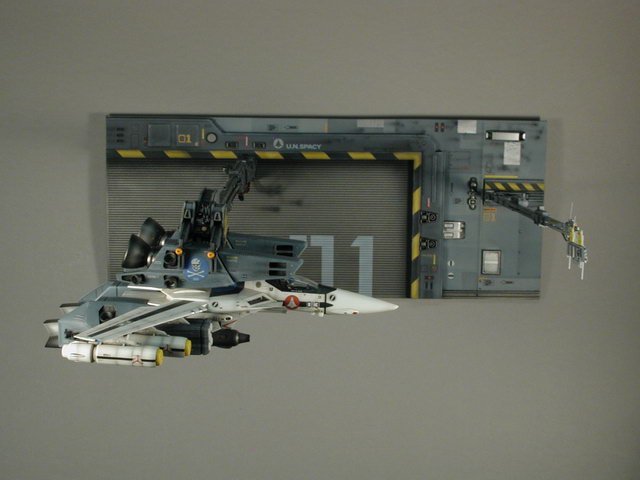
Back finally... in keeping with tradition, I have posted the finished pictures of this model in the Model forums; http://www.macrossworld.com/mwf/index.php?...&st=0&p=364161& Please visit there and leave me your comments. Now I want to see your launch arms, don't be shy and post them - there must be someone else who have finished thier's too.
-
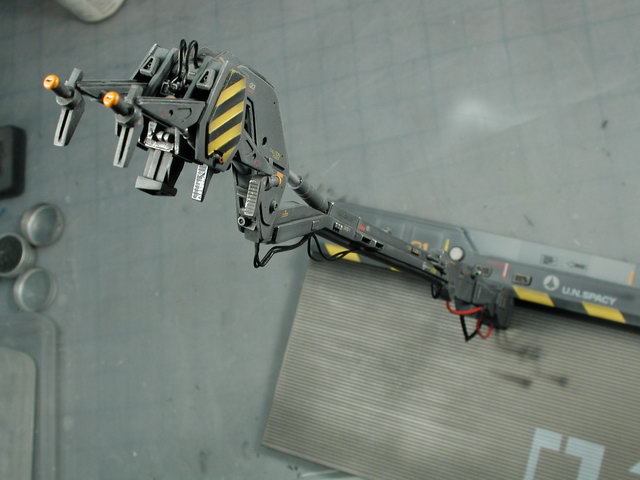
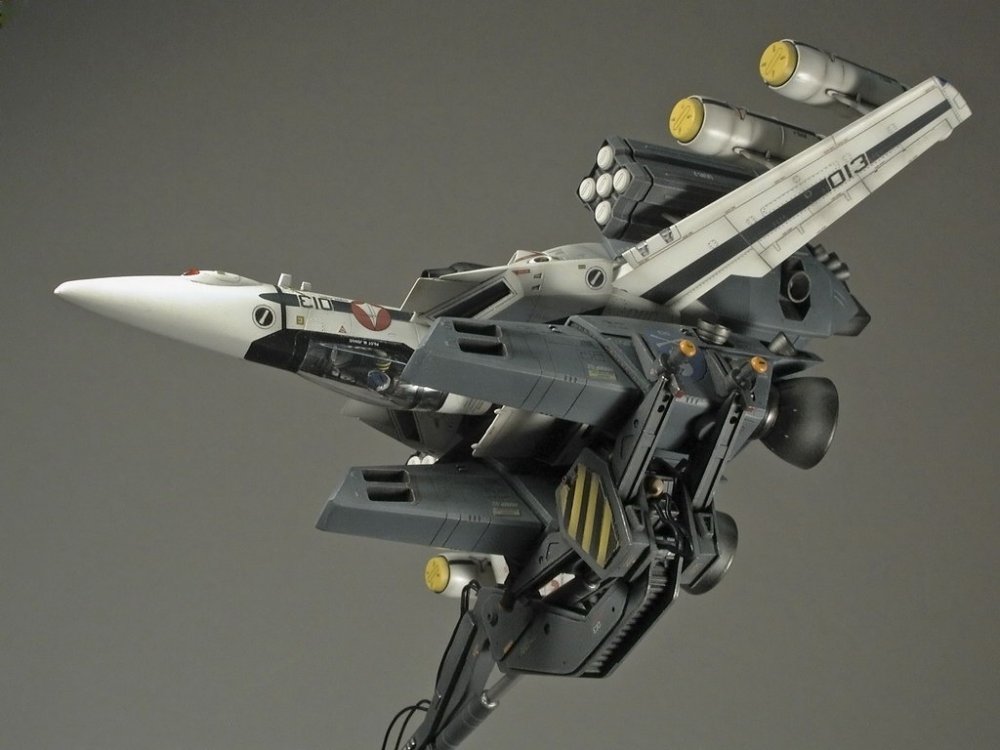
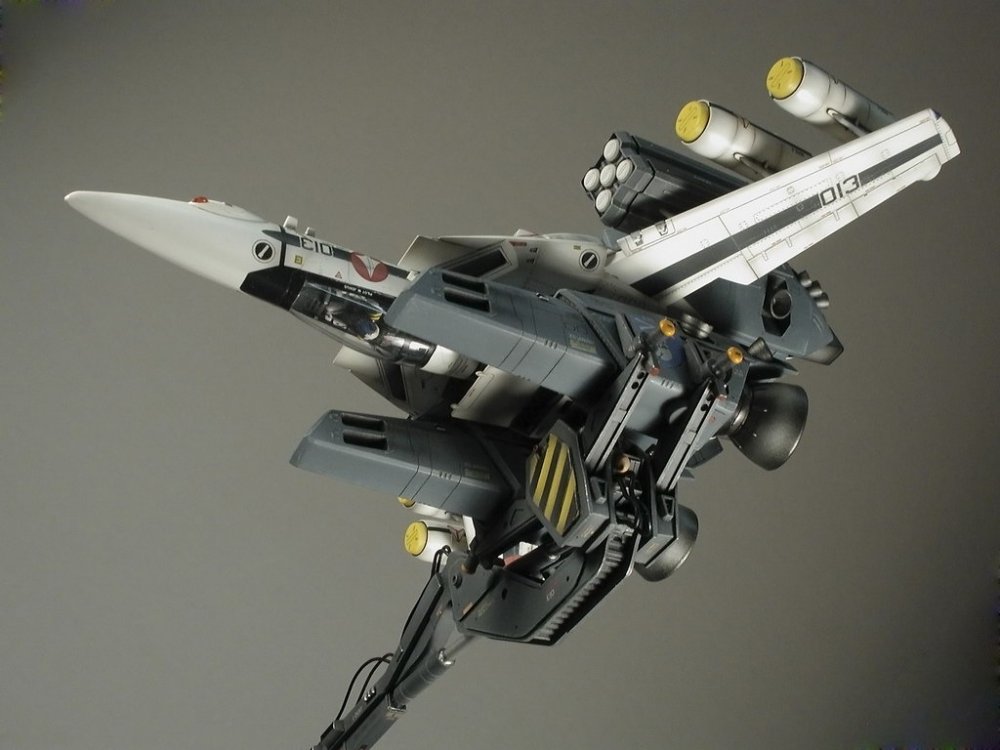
And finally some closeups against a dark background. Thanks for tuning in... now I want to see what you guy all do with your launch arms! The no-brainer would be to scratch build a full hanger interior and put the launch arm on a retractable rail (like a kitchen drawer bearings) but I was too anxious to get this built to go into all that scratchbuilding. But I know someone here is crazy enough... Now its back to the Boosters...


-
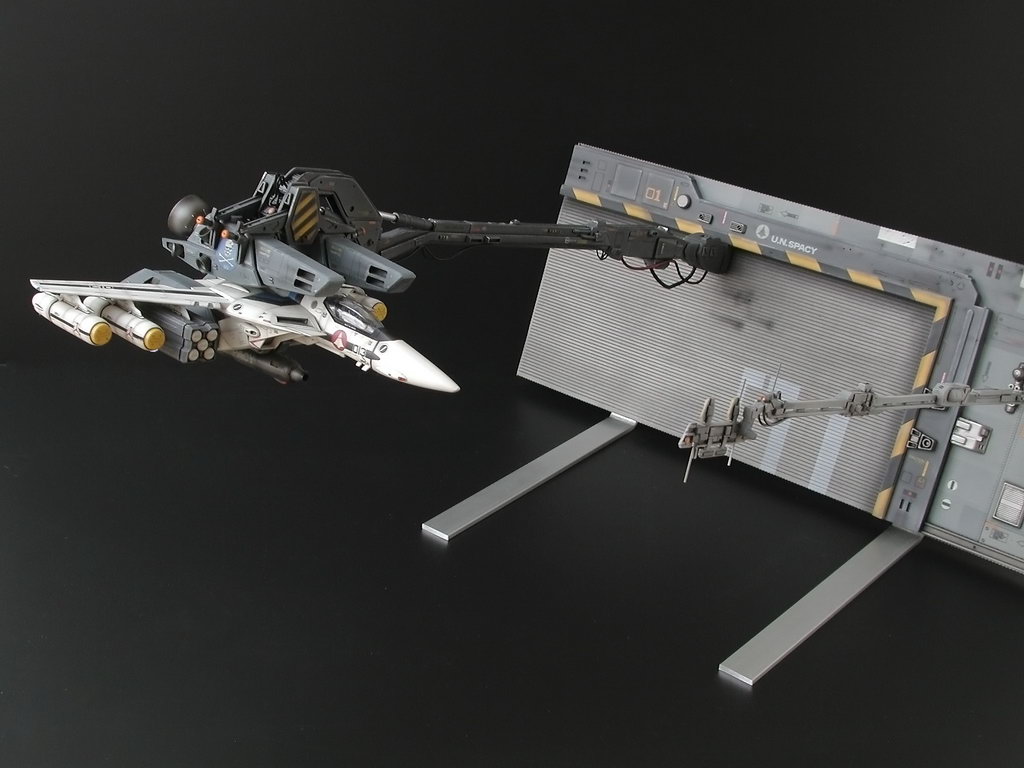
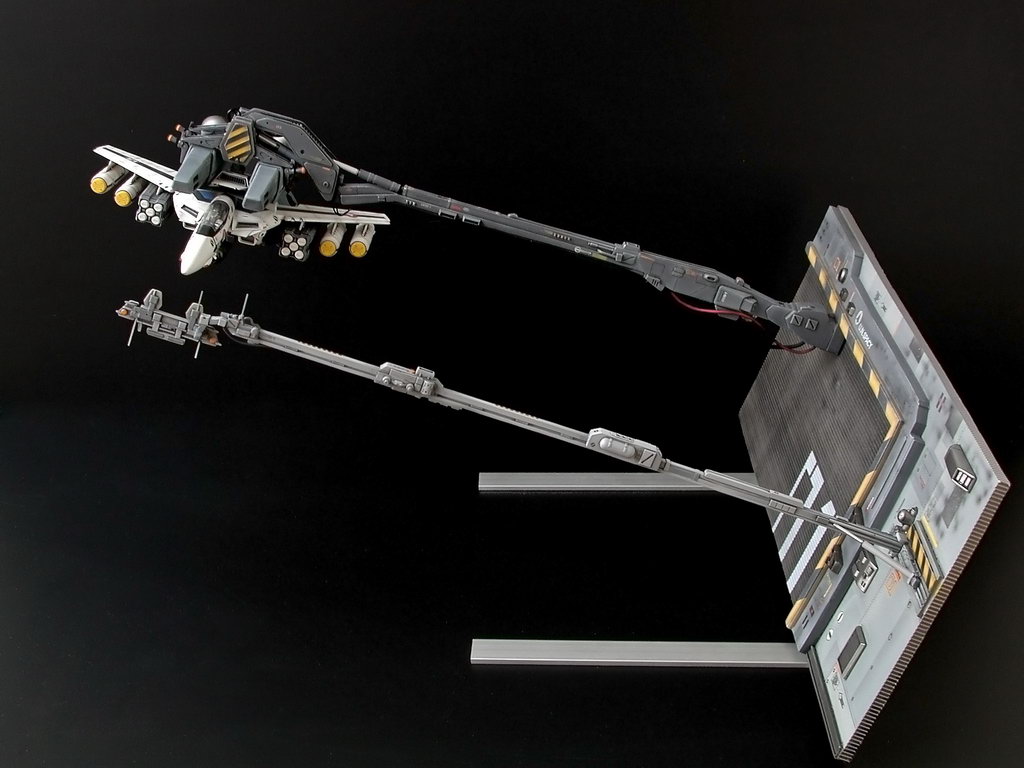
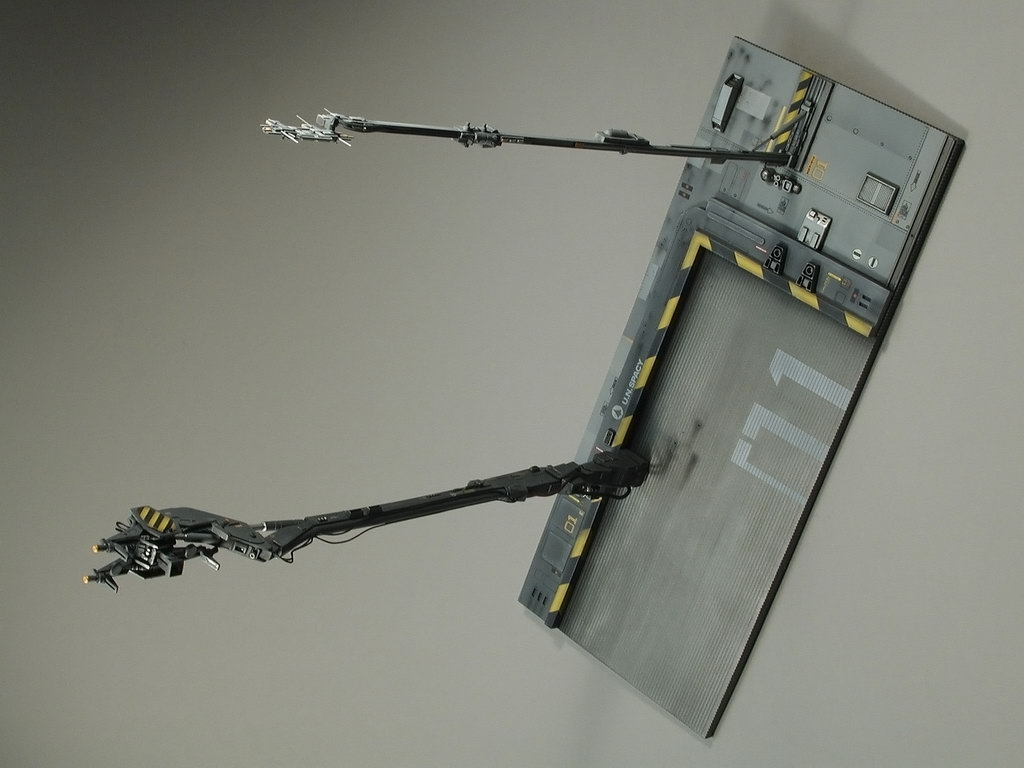
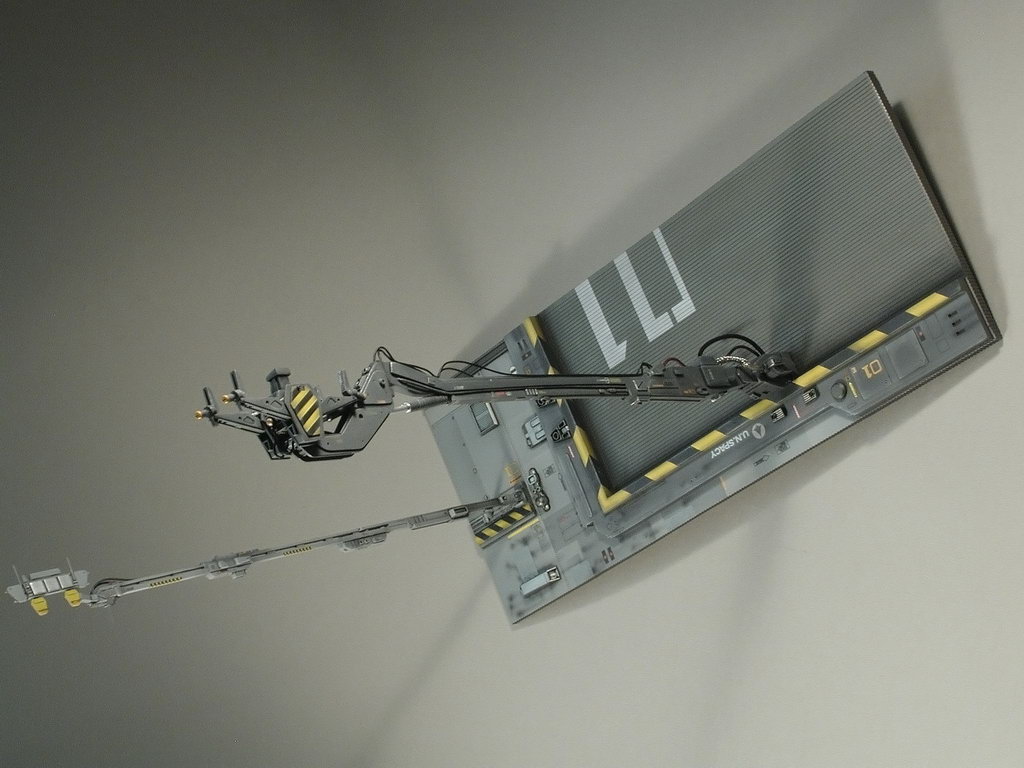
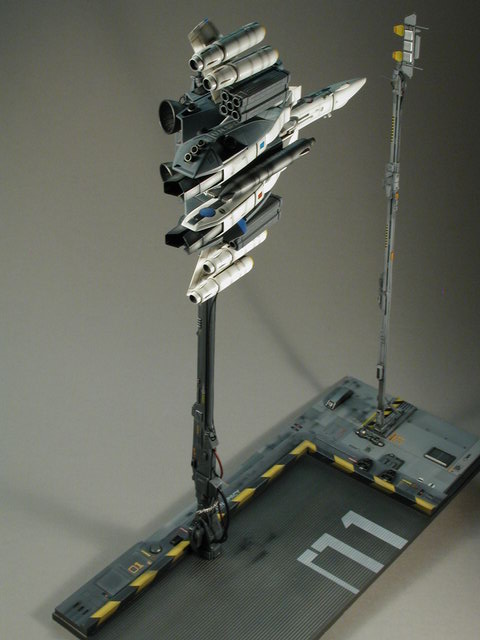
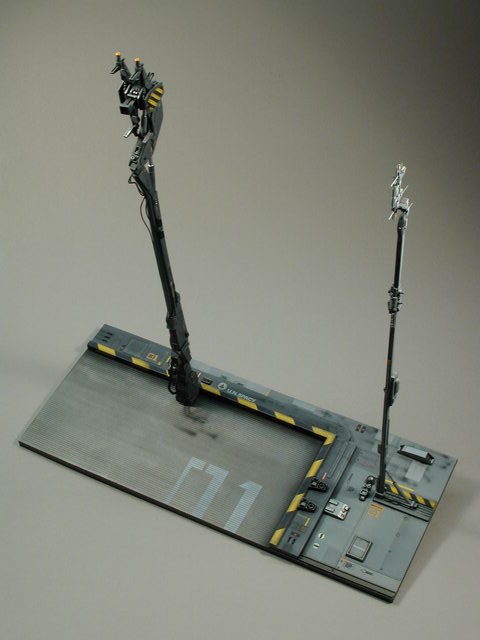
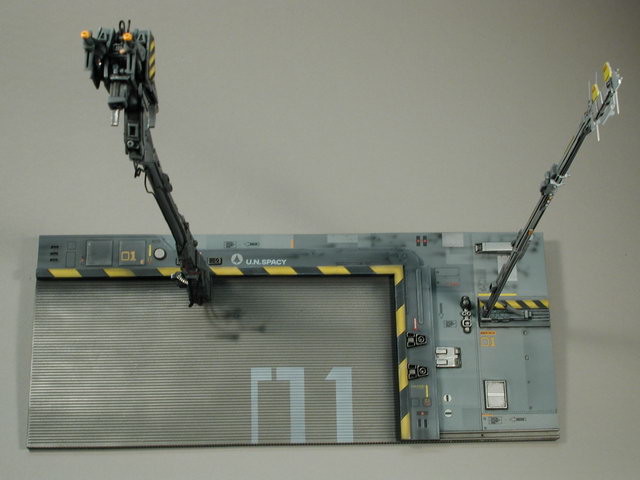
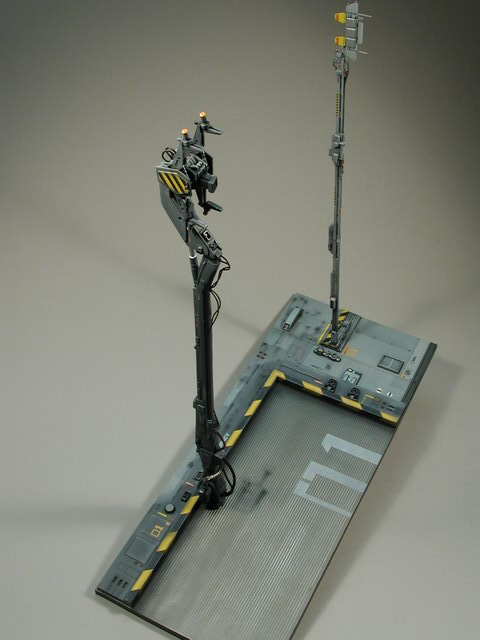
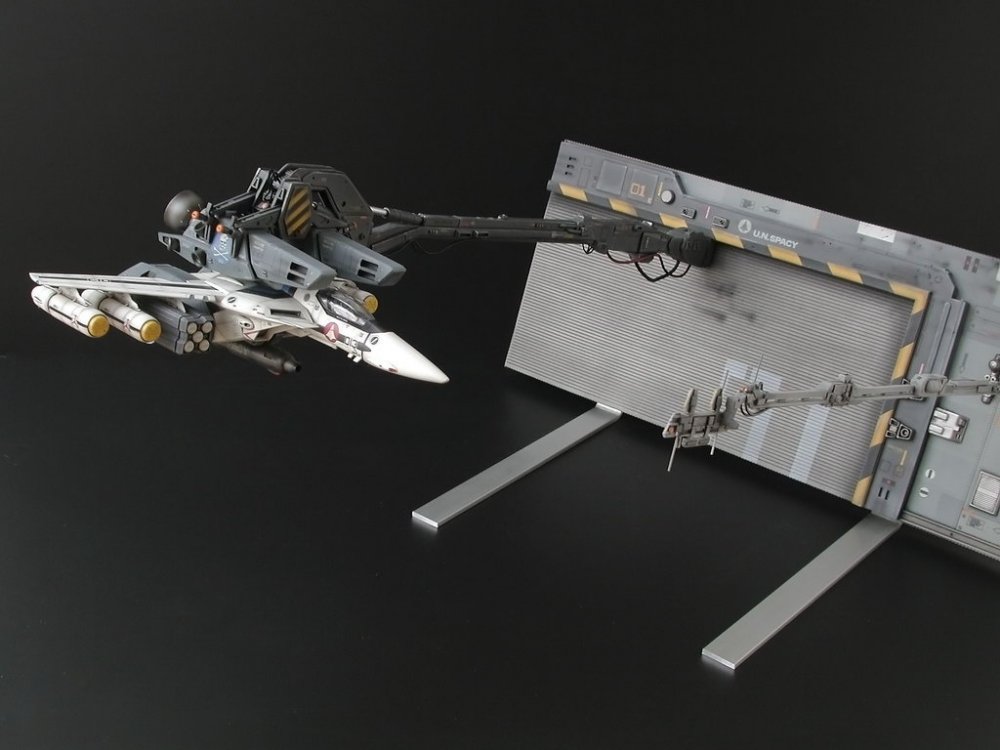
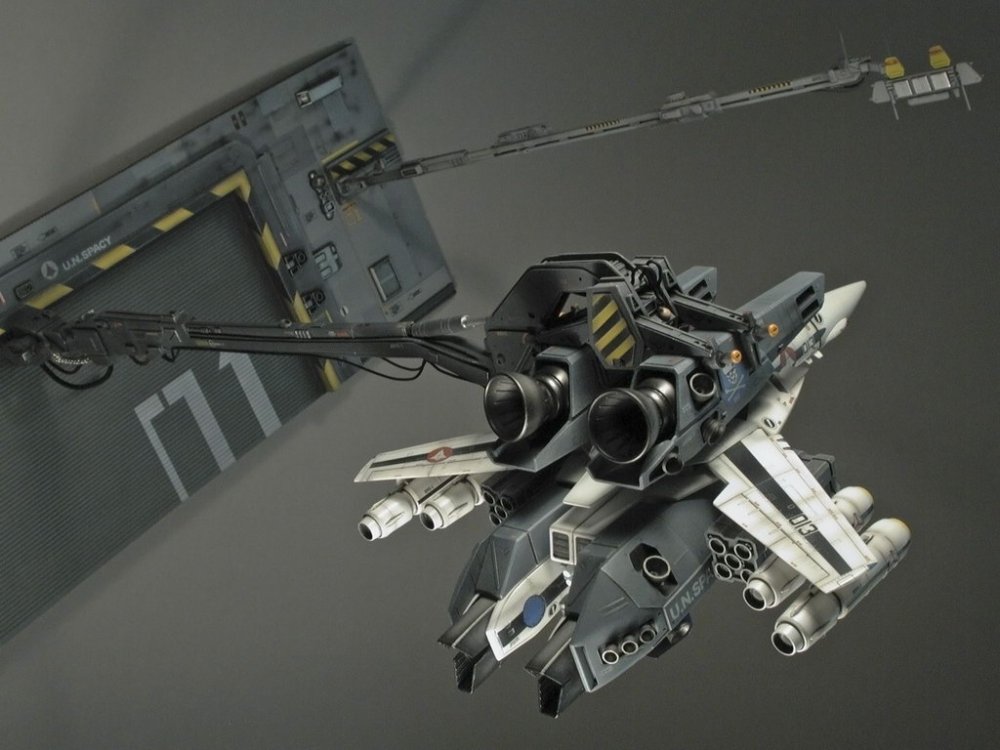
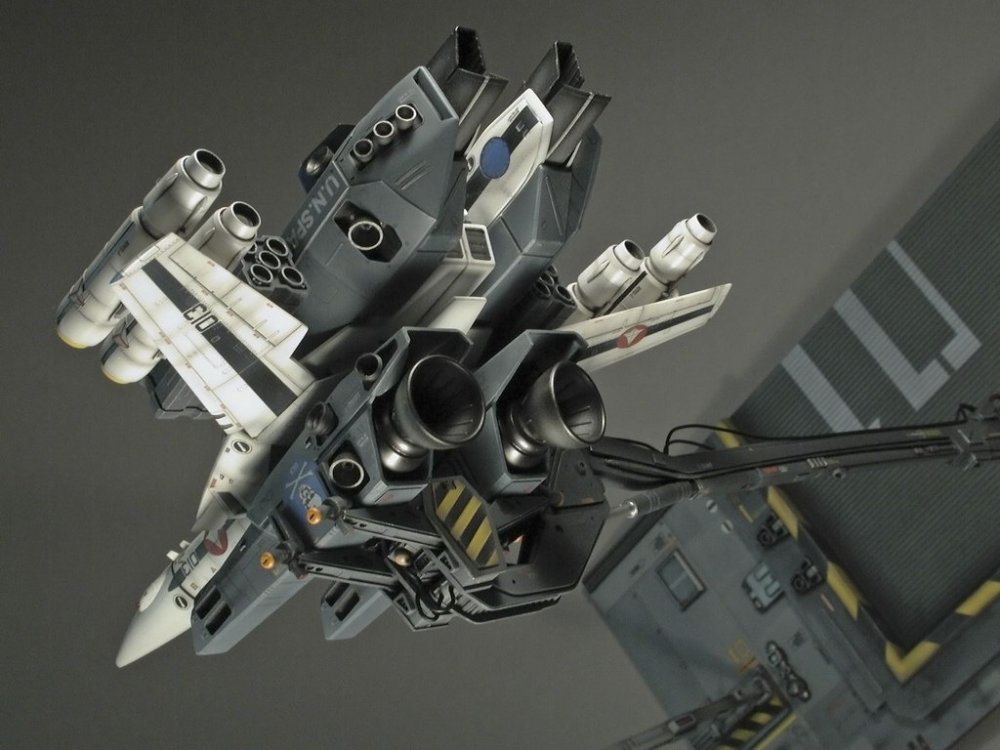
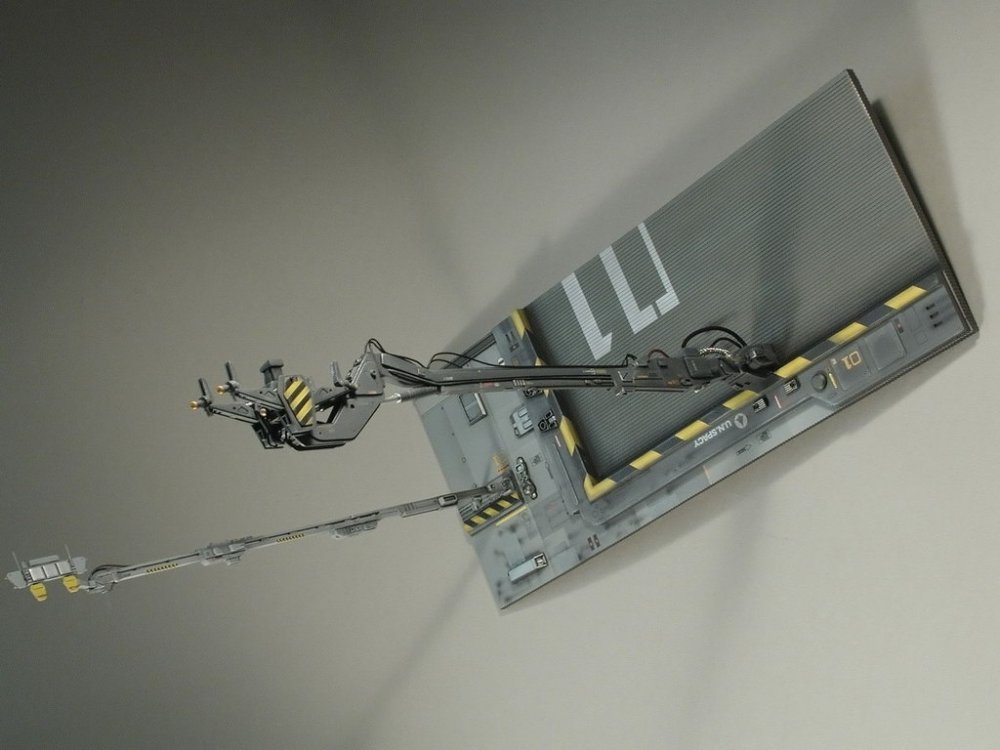
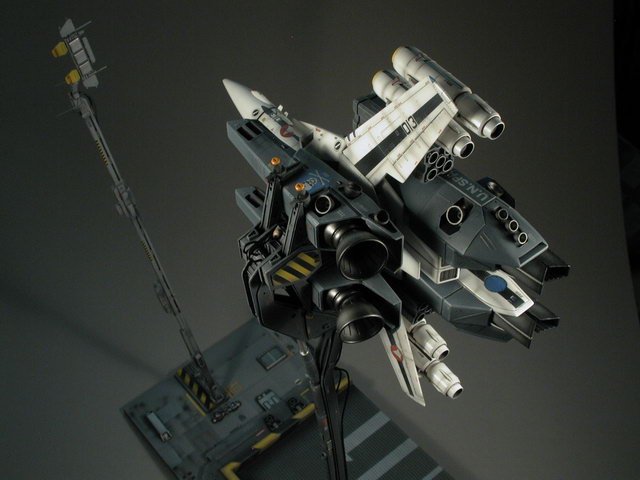
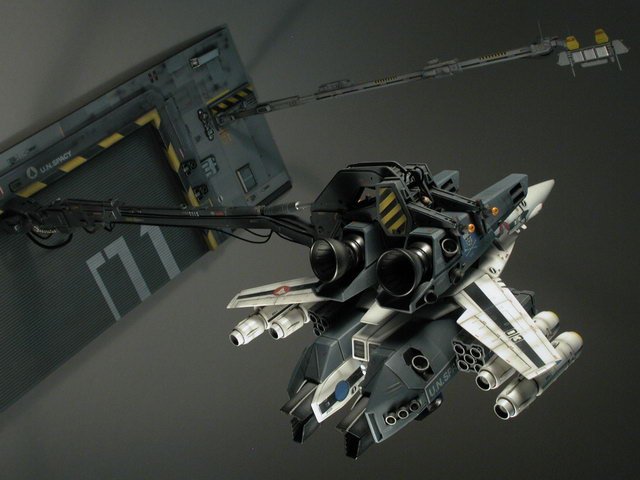
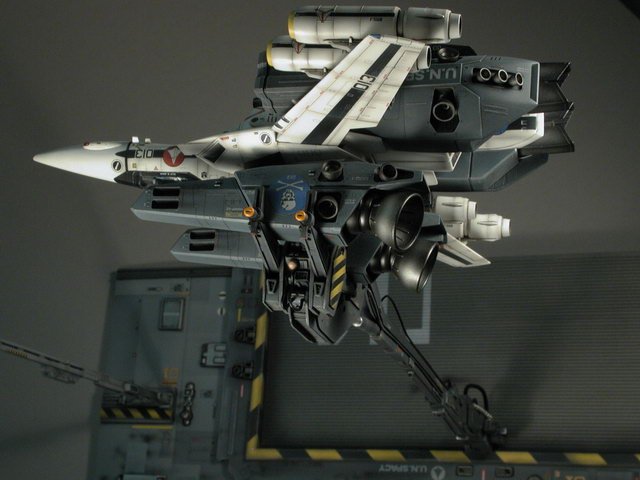
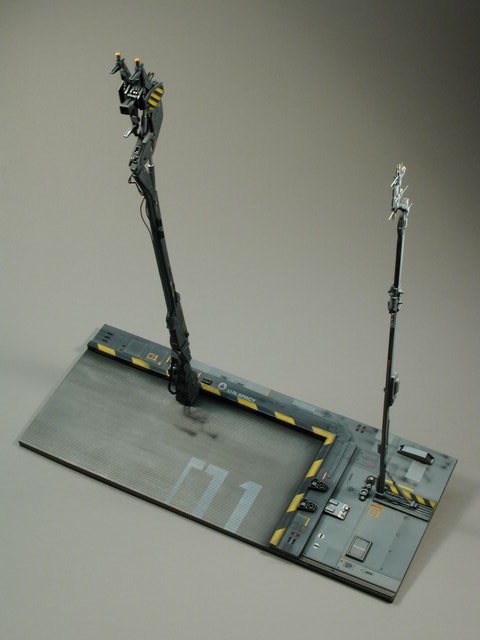
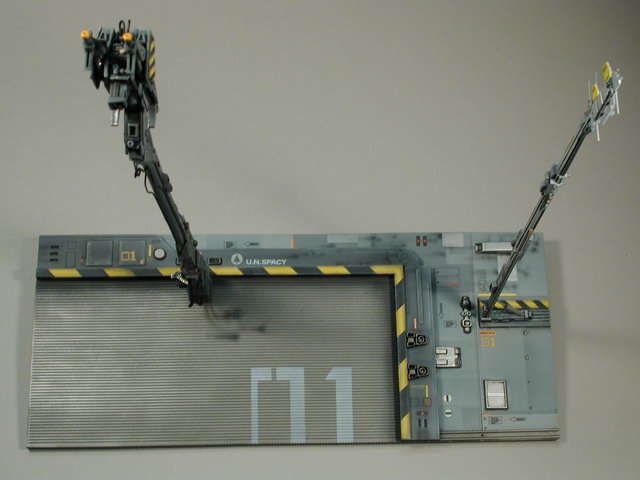
Okay here are the stand pictures I took today. Its very simple, I went to Home Depot and bought a 1/8" thick aluminum flatbar. Aluminum is a good metal to use since I can display it bare finished without having to paint it, also its a non-ferrous metal (without iron) so its soft enough to use woodworking tools on it. I used a chopsaw to cut the flat bar down and a drill to drill out the back to allow two screws through to attach to the resin base . You can see in the photo behind, I have four washers between the flatbar and screw, basically I didn't have screws short/shallow enough to not poke through on the good side of the resin base, so I used the washers as spacers to back the screw out so they can't been seen from the front. I also put the flatbar in visegrips between two blocks of hardwood to get a nice clean bend at the desired angle. And thats it!! The new photos were taken with available diffused/cloudy daylight against black foamcore boards (everyone wanted a black backgound!).


-
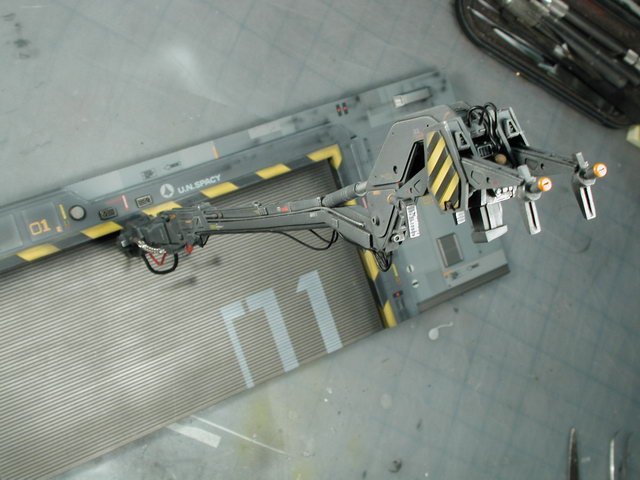
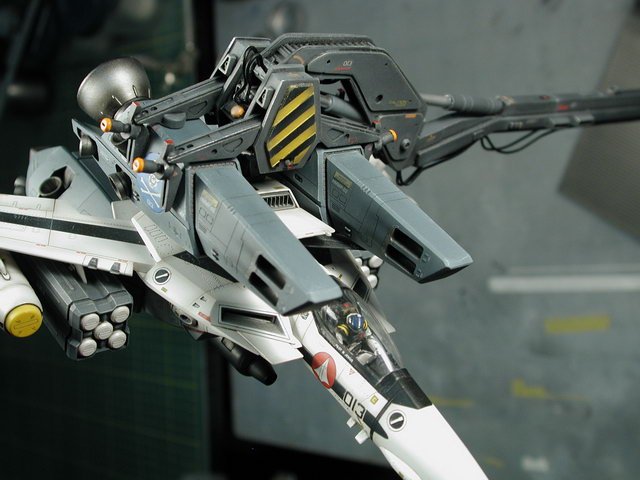
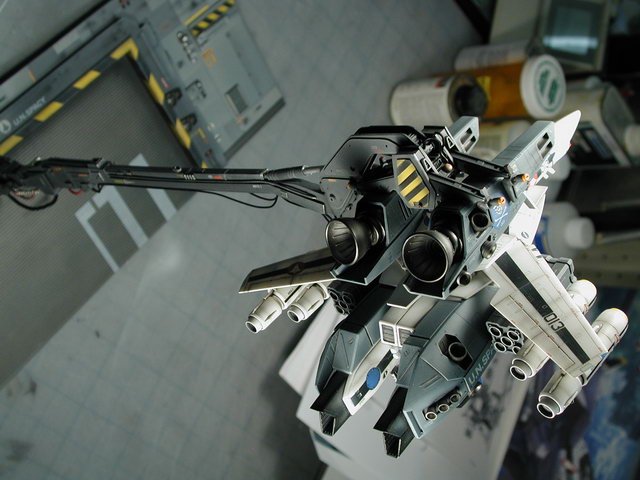
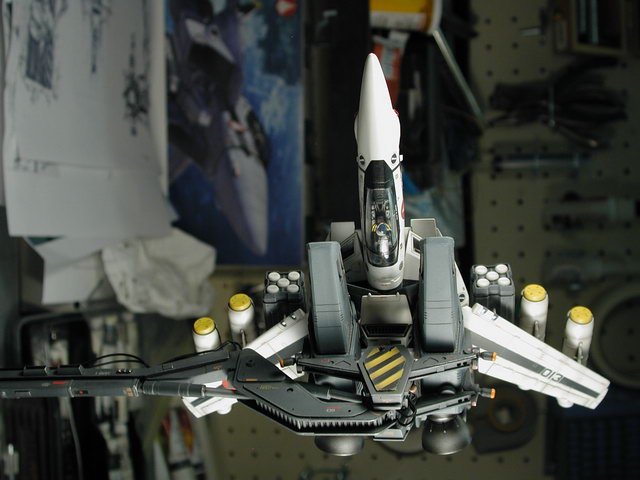
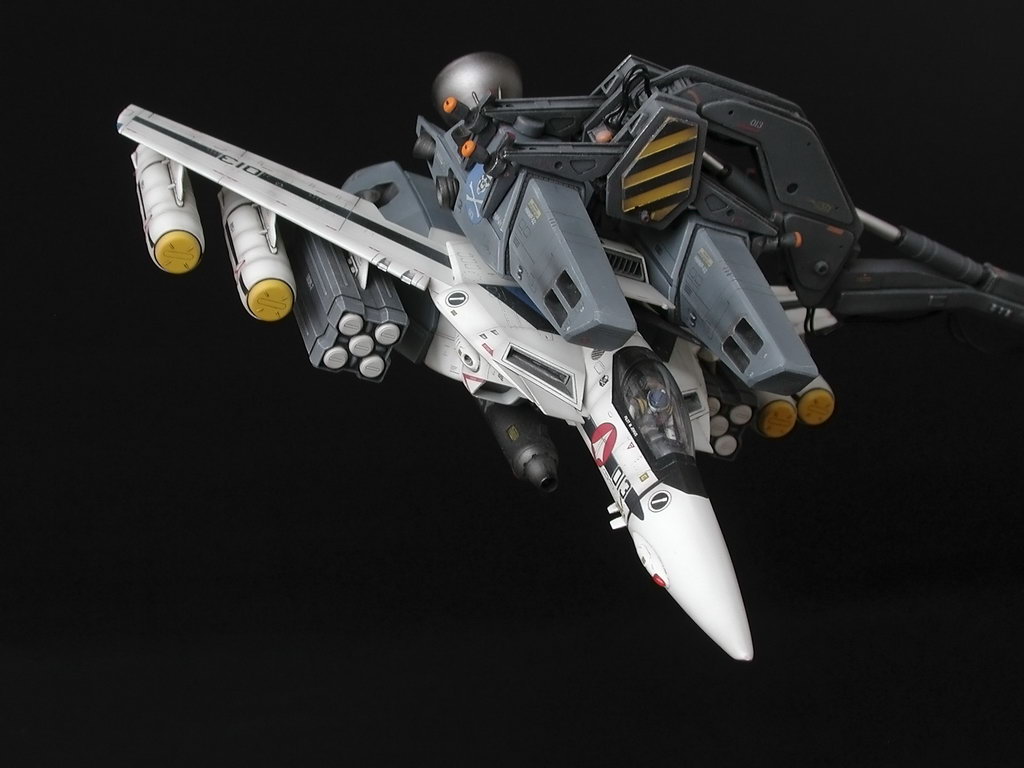
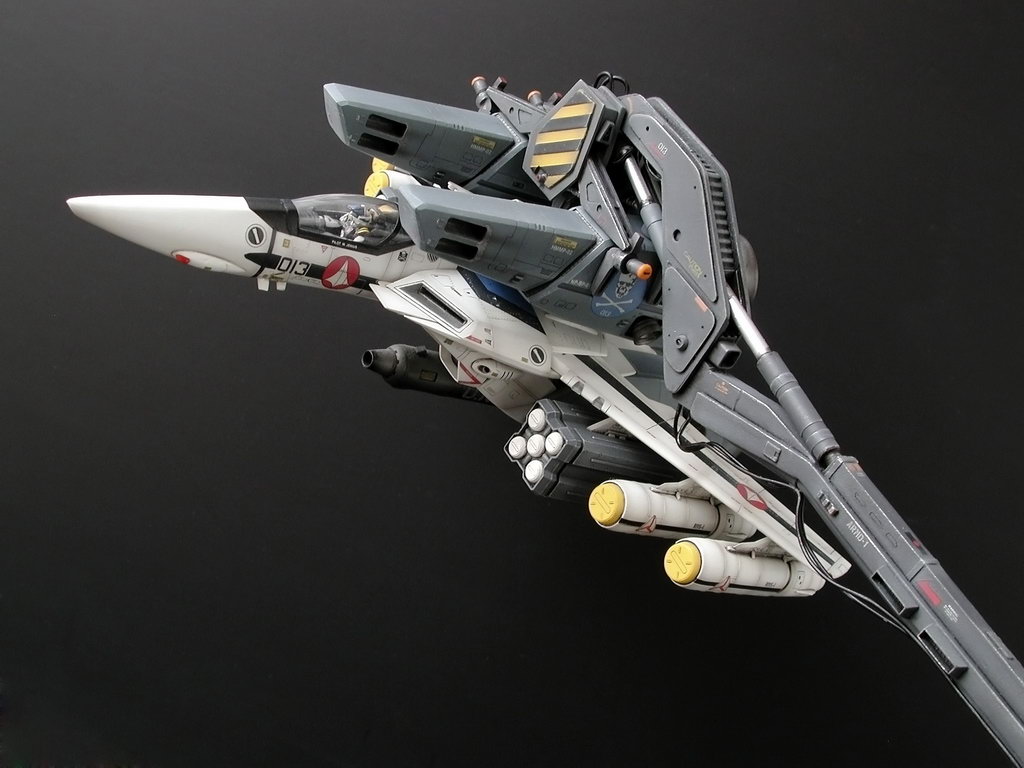
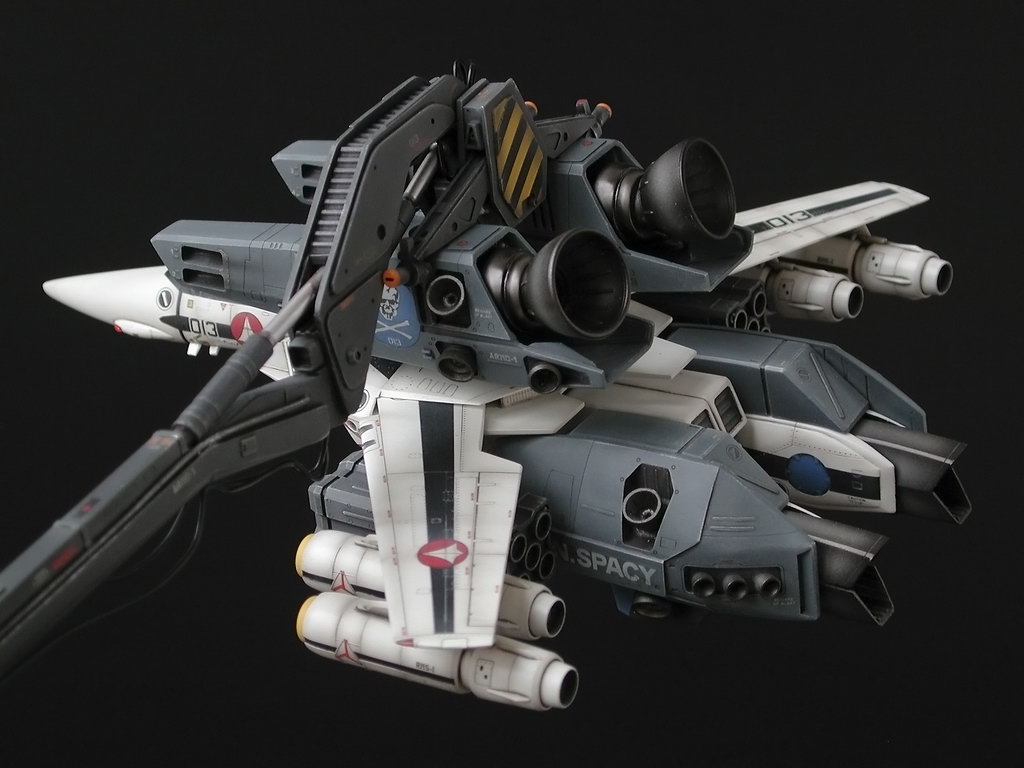
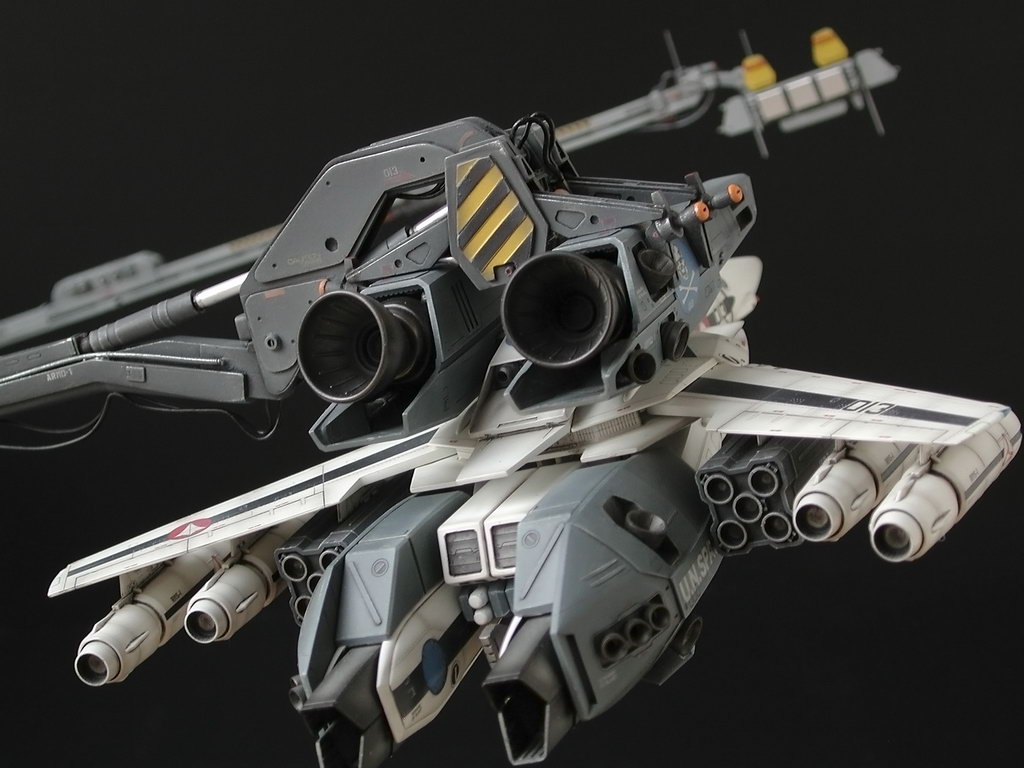
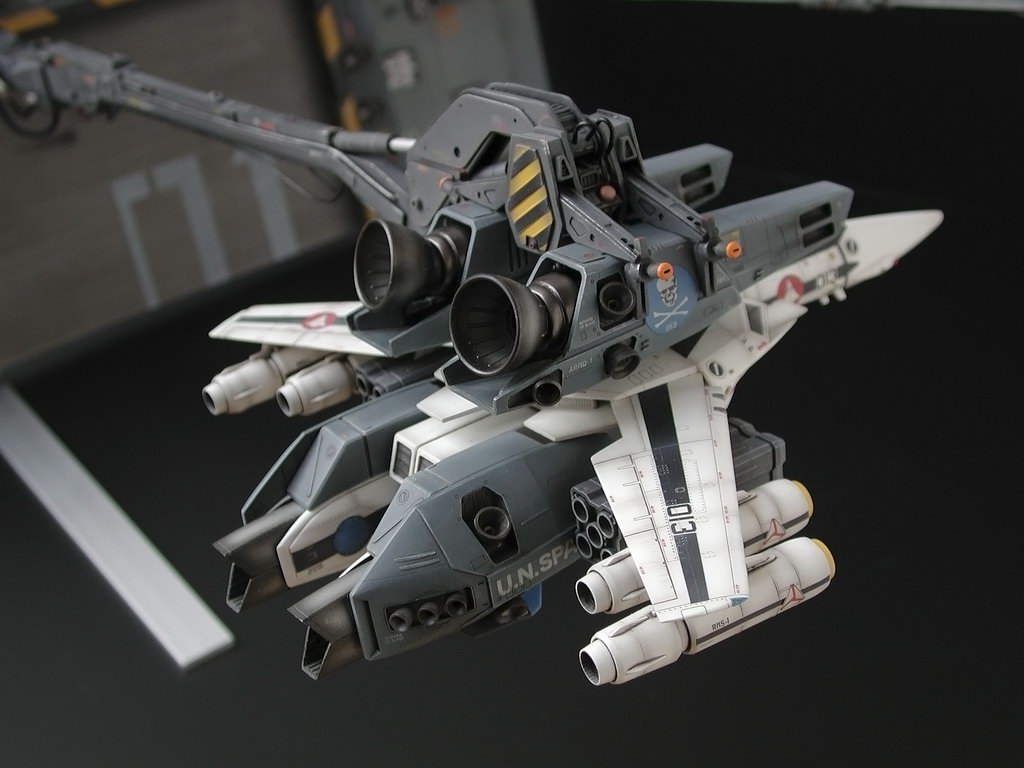
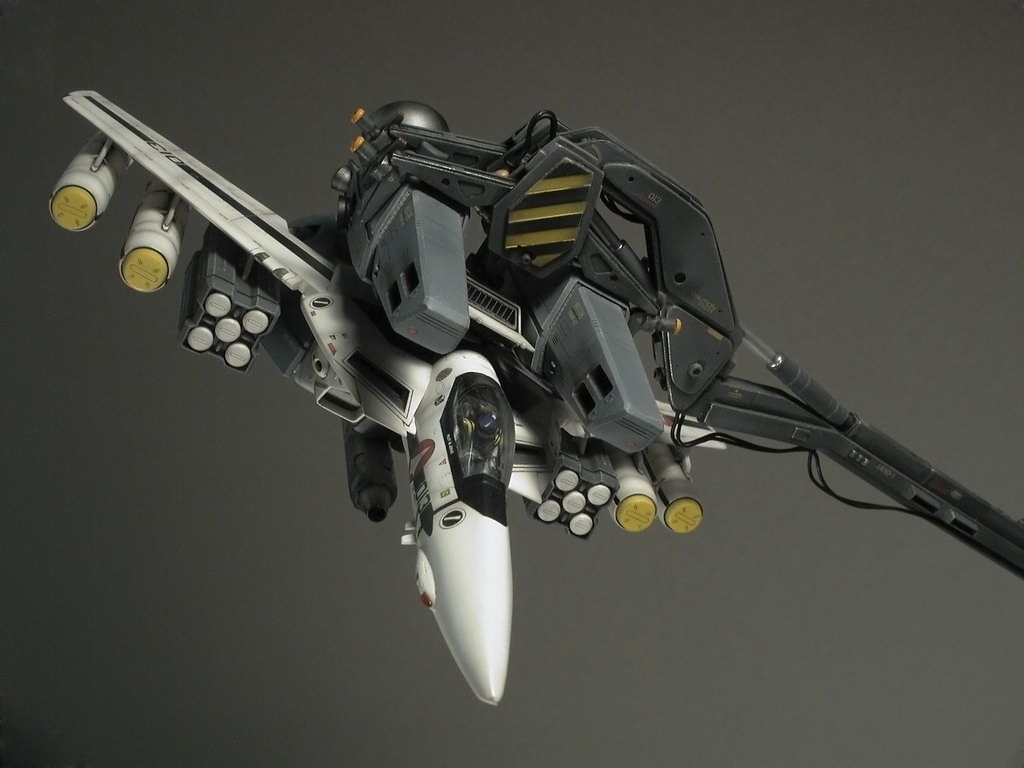
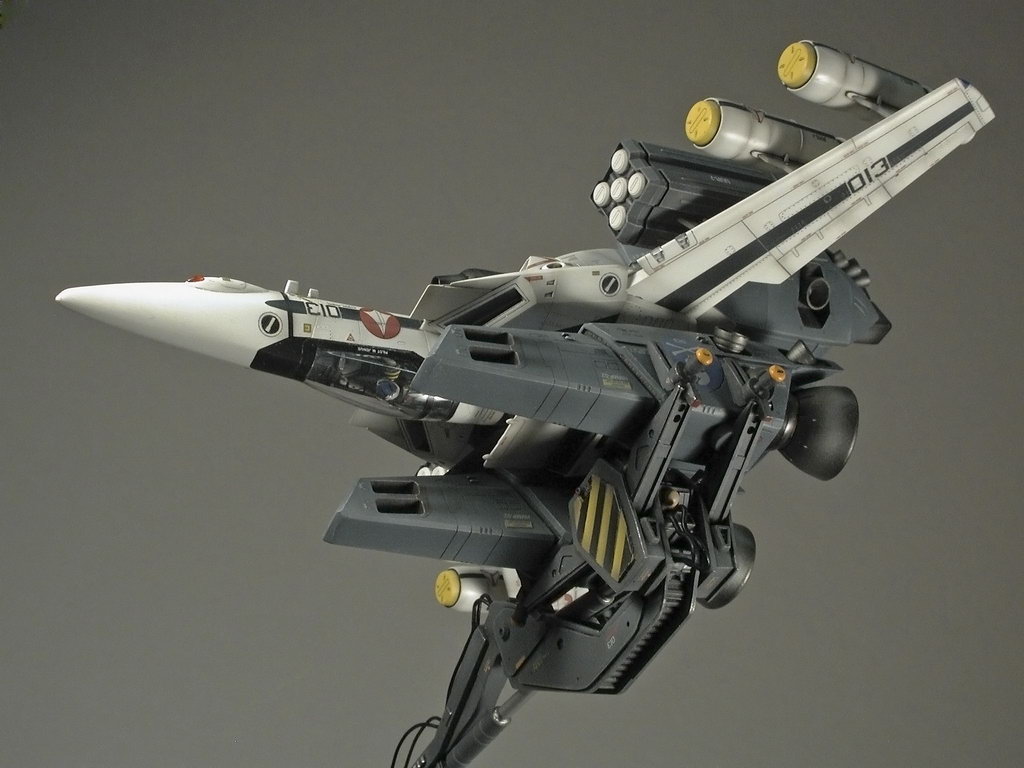
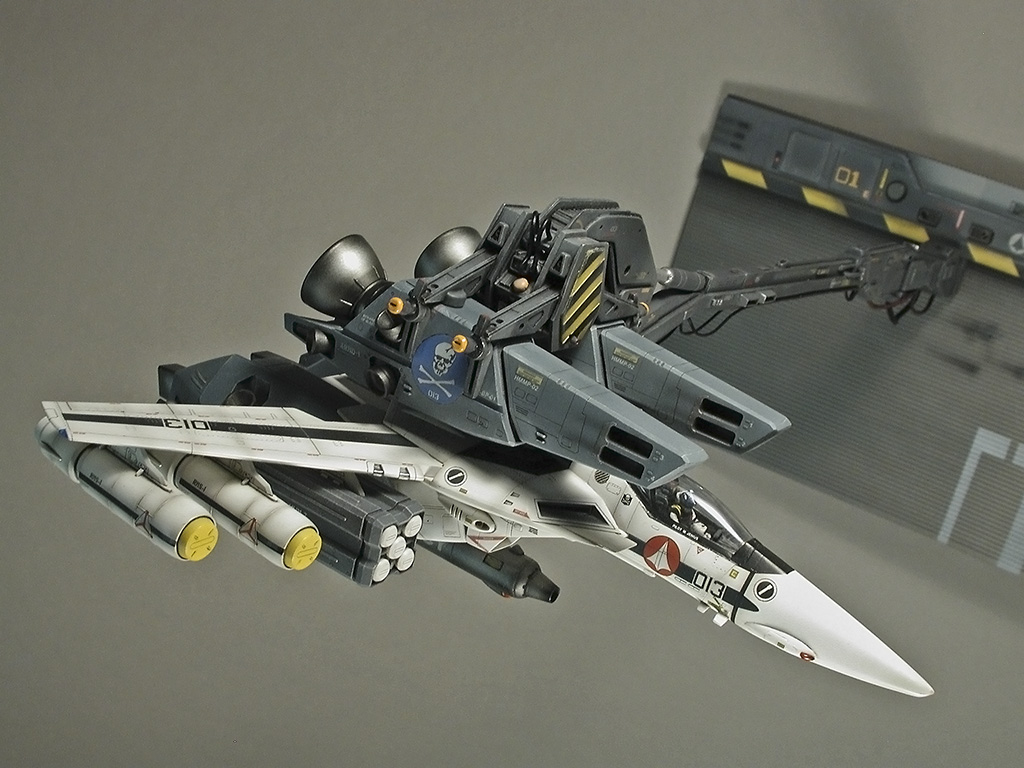
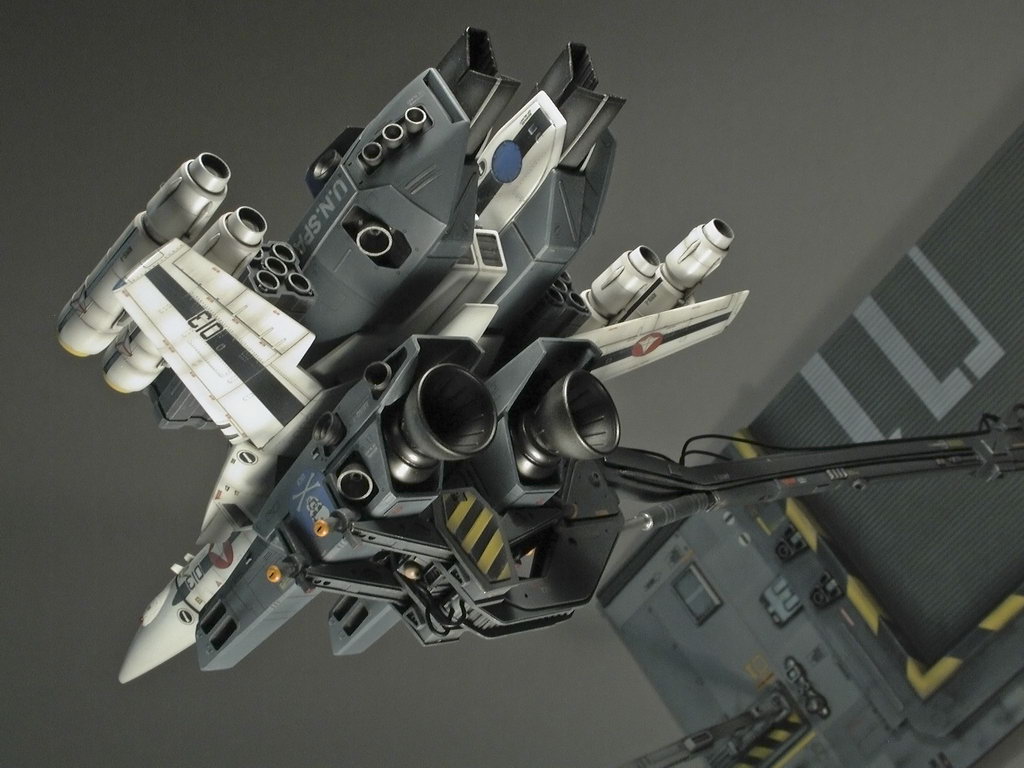
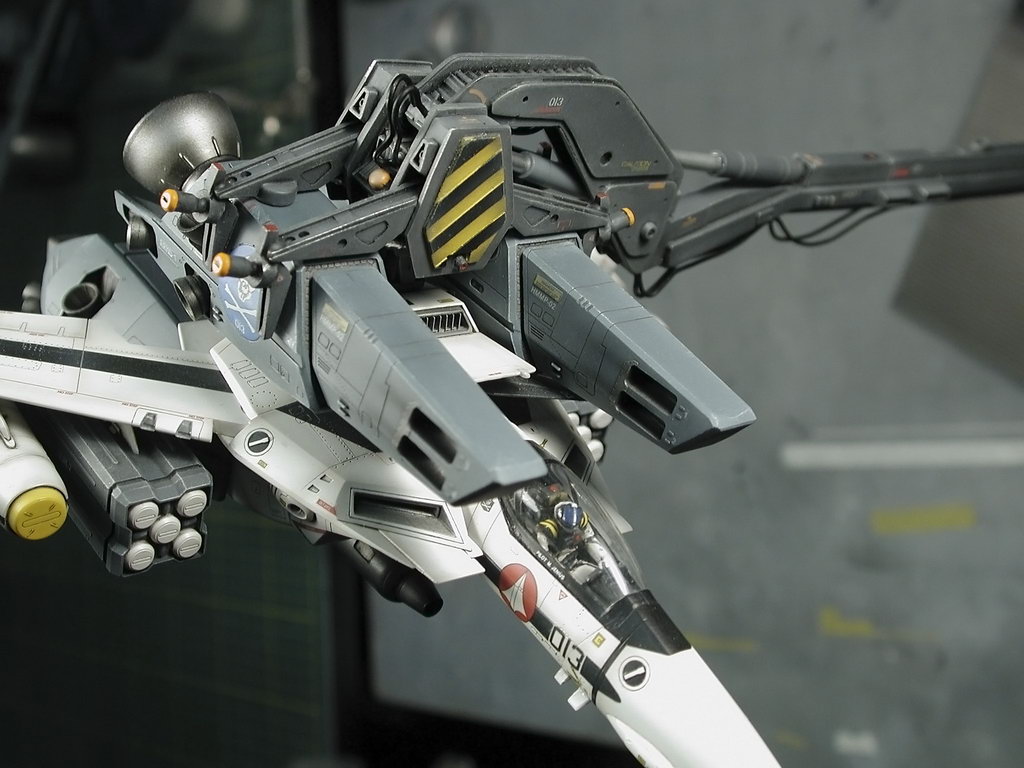
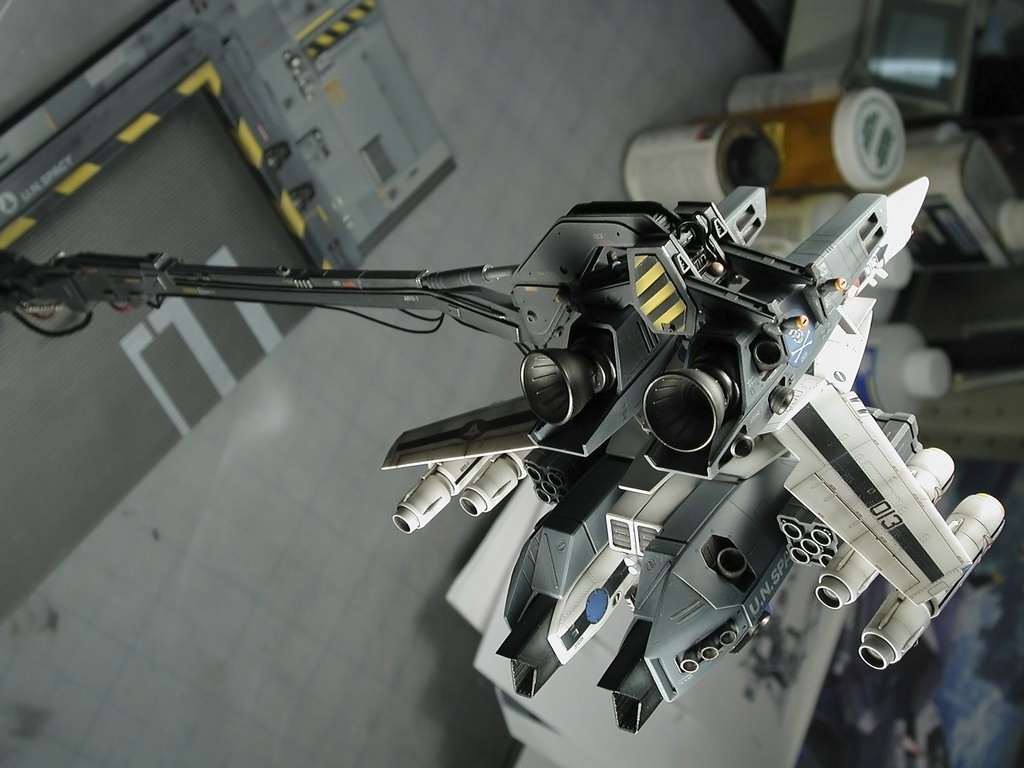
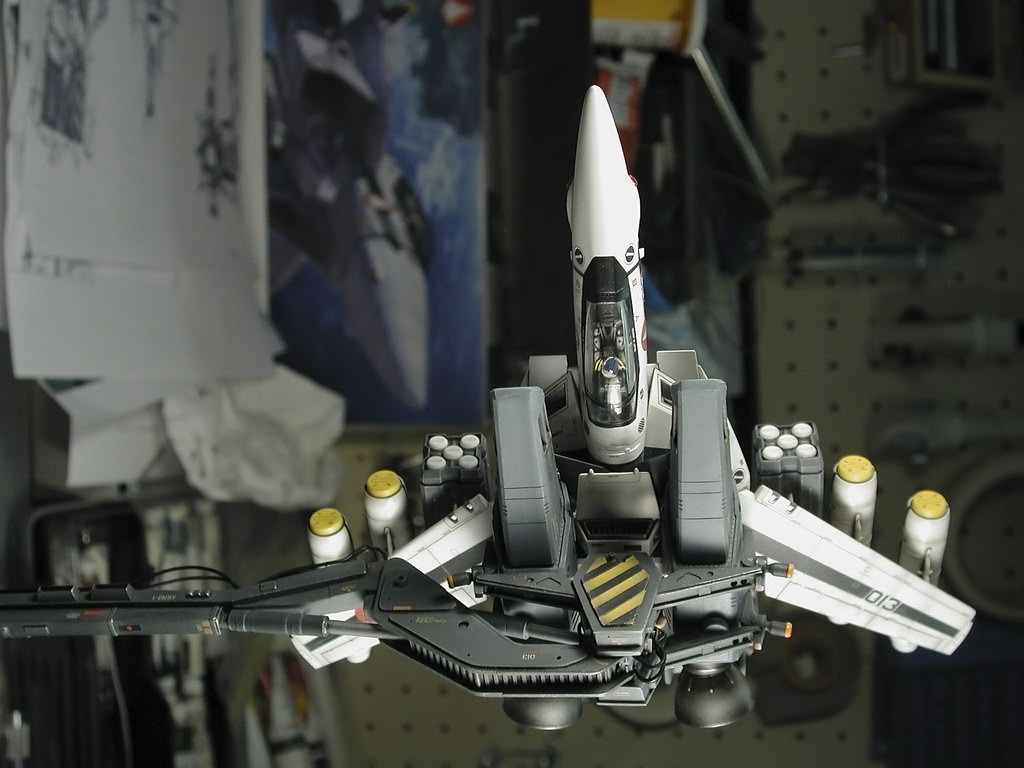
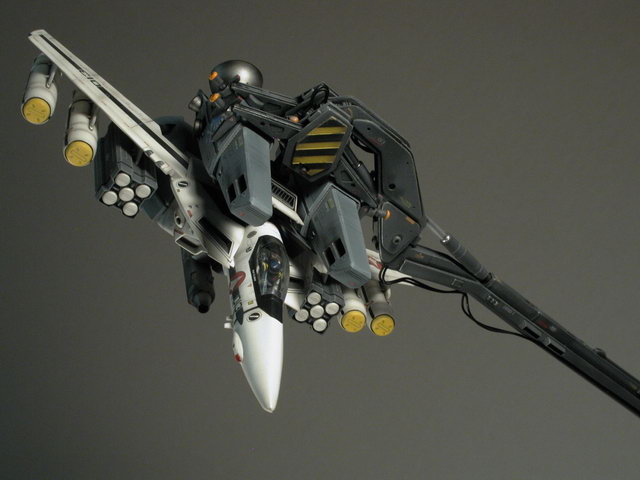
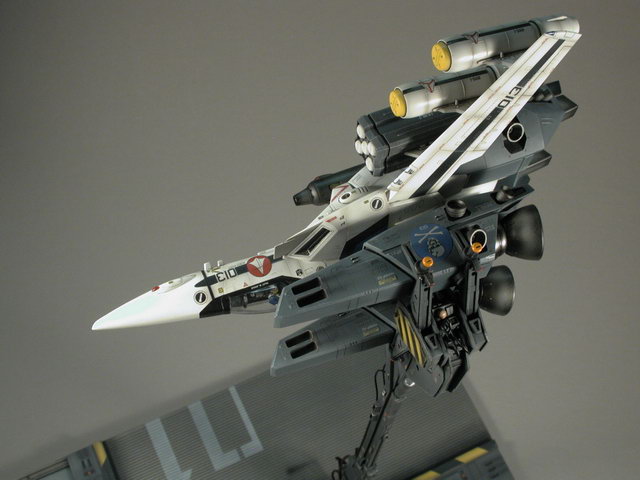
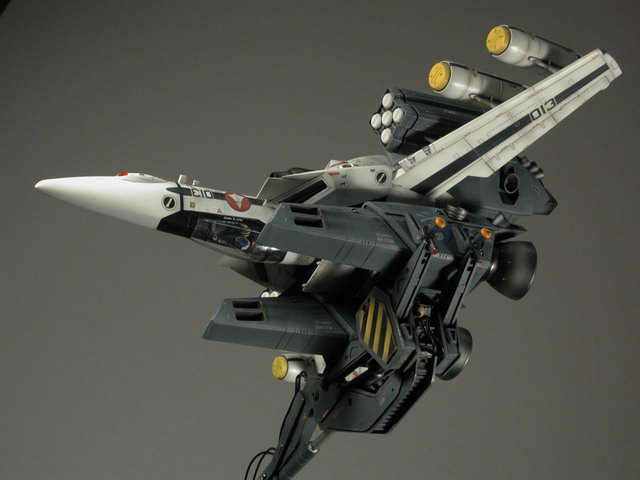
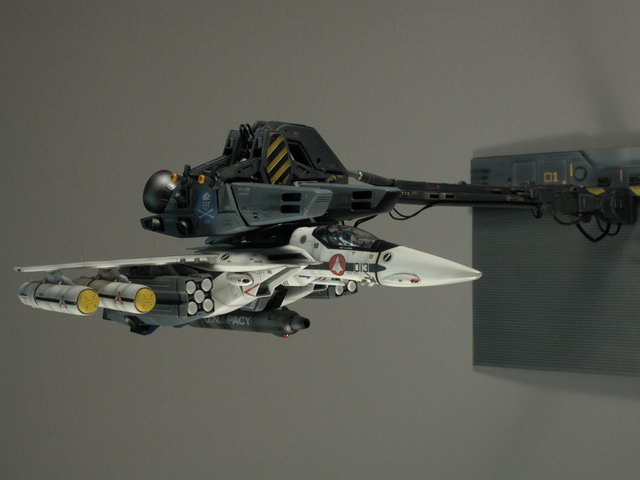
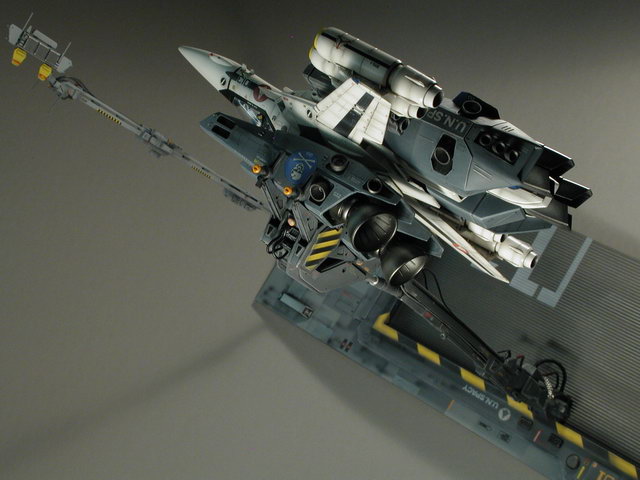
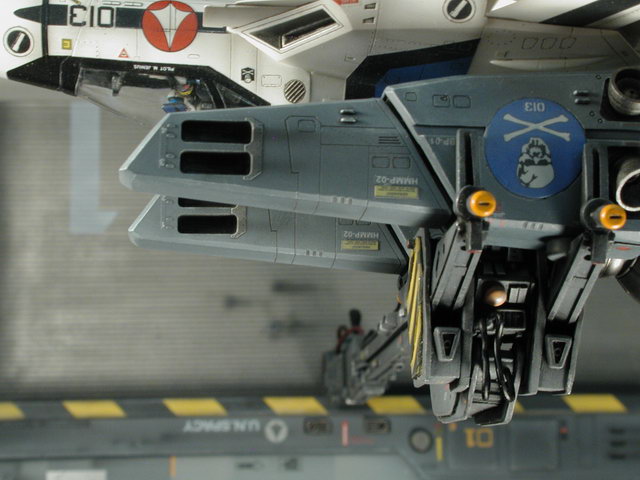
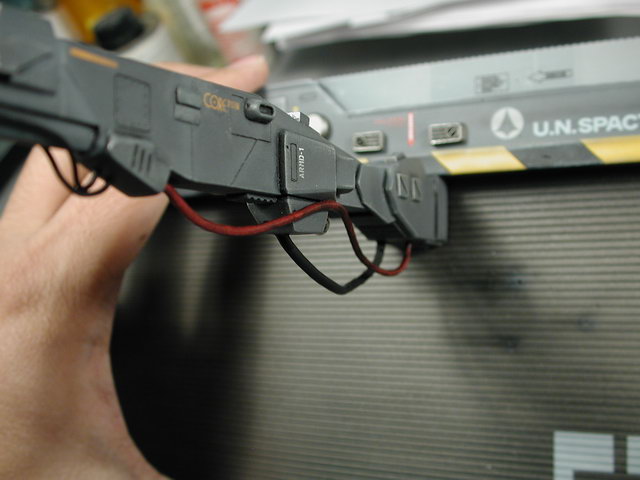
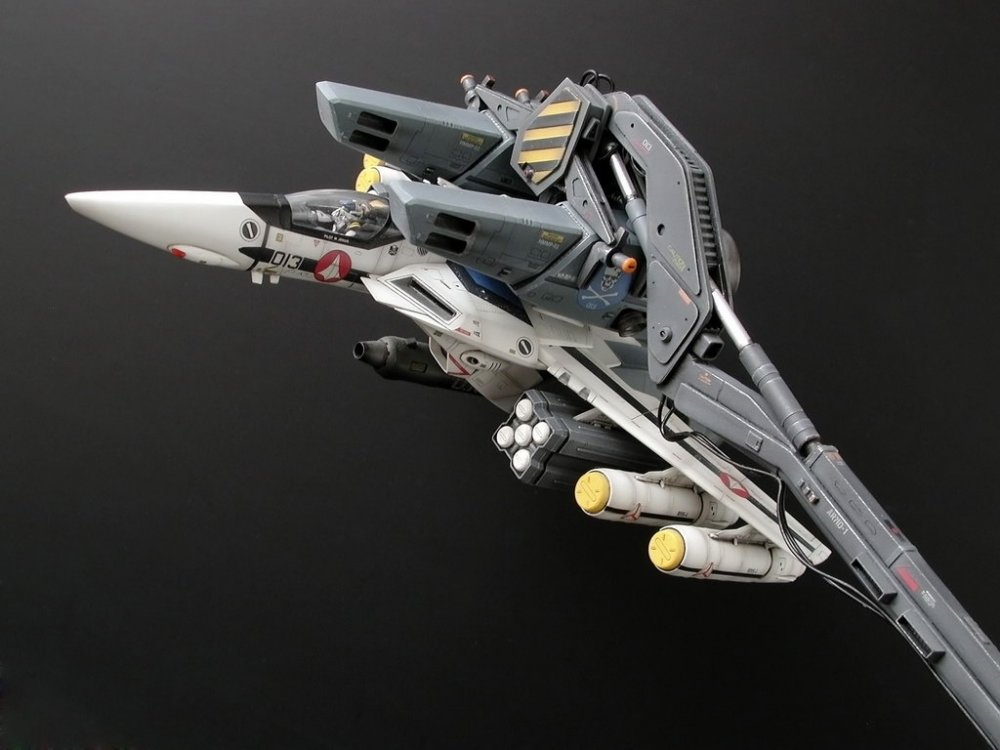
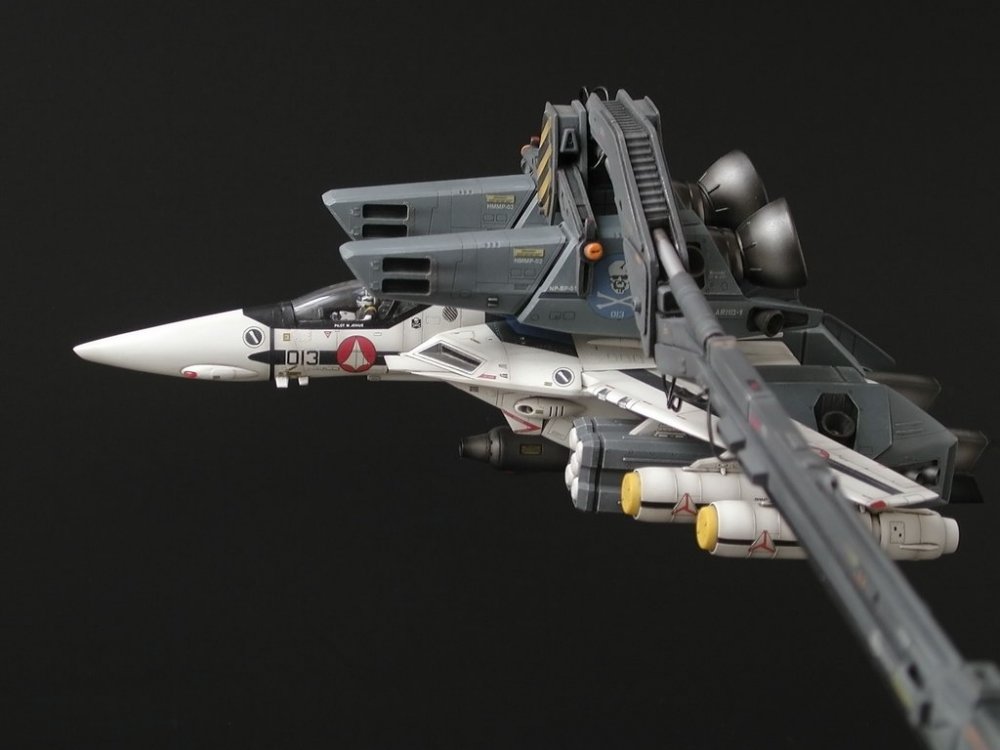
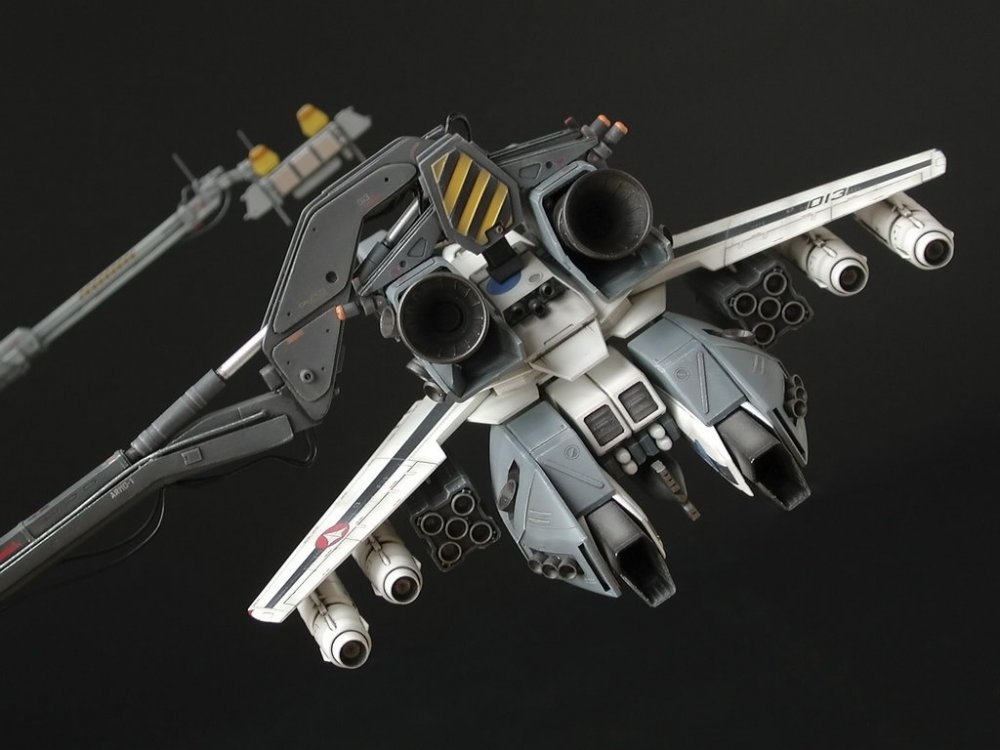
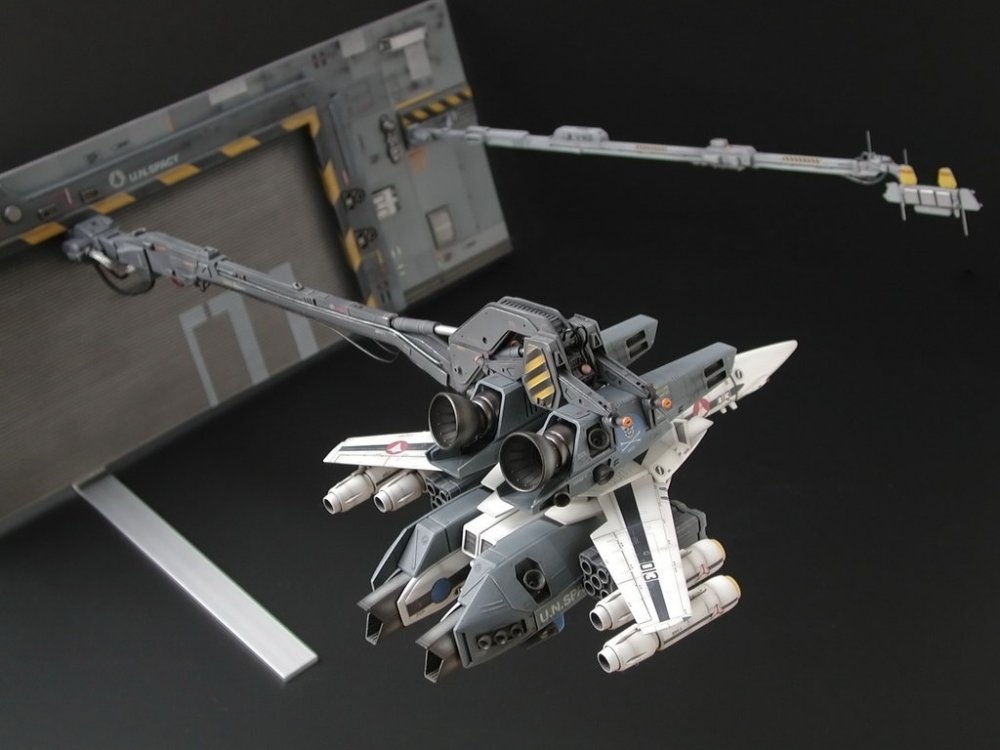
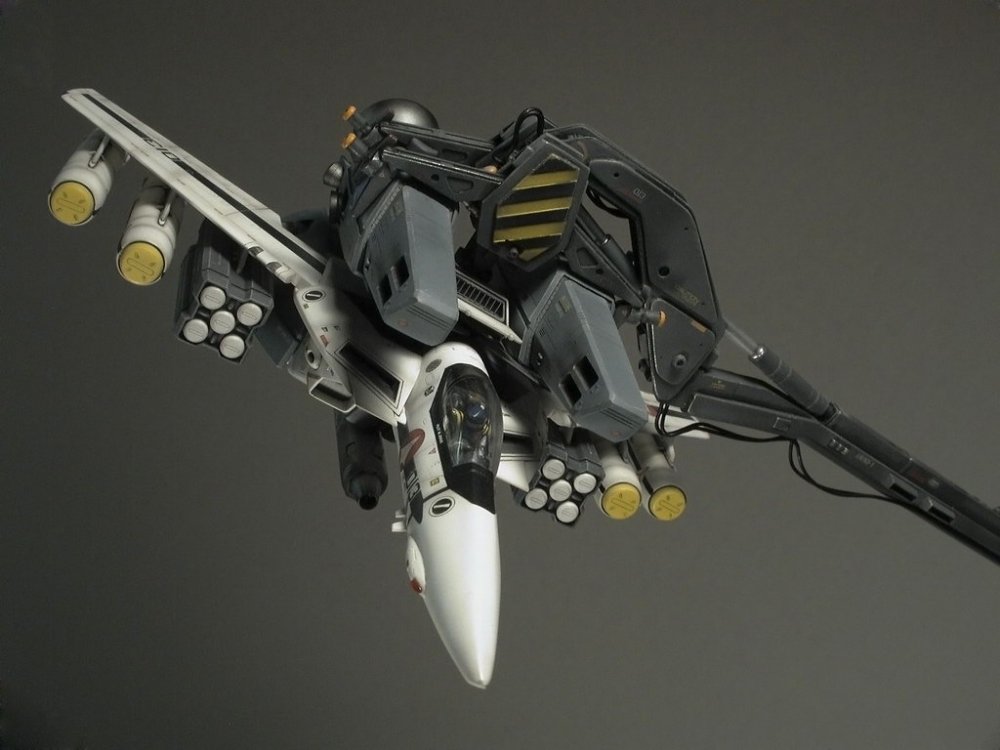
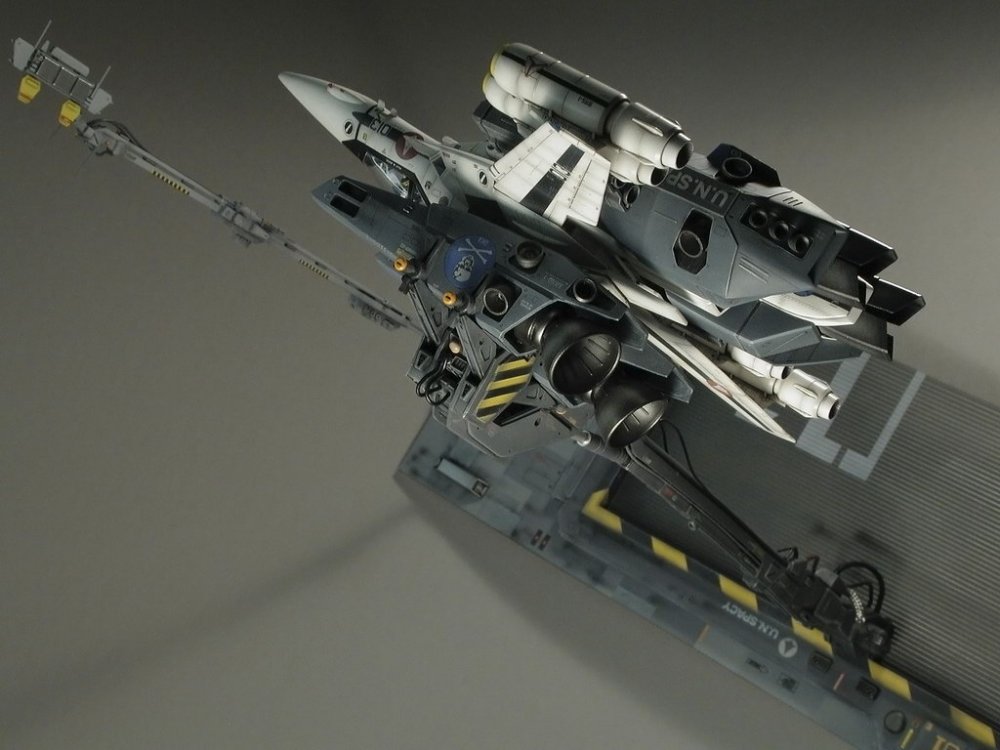
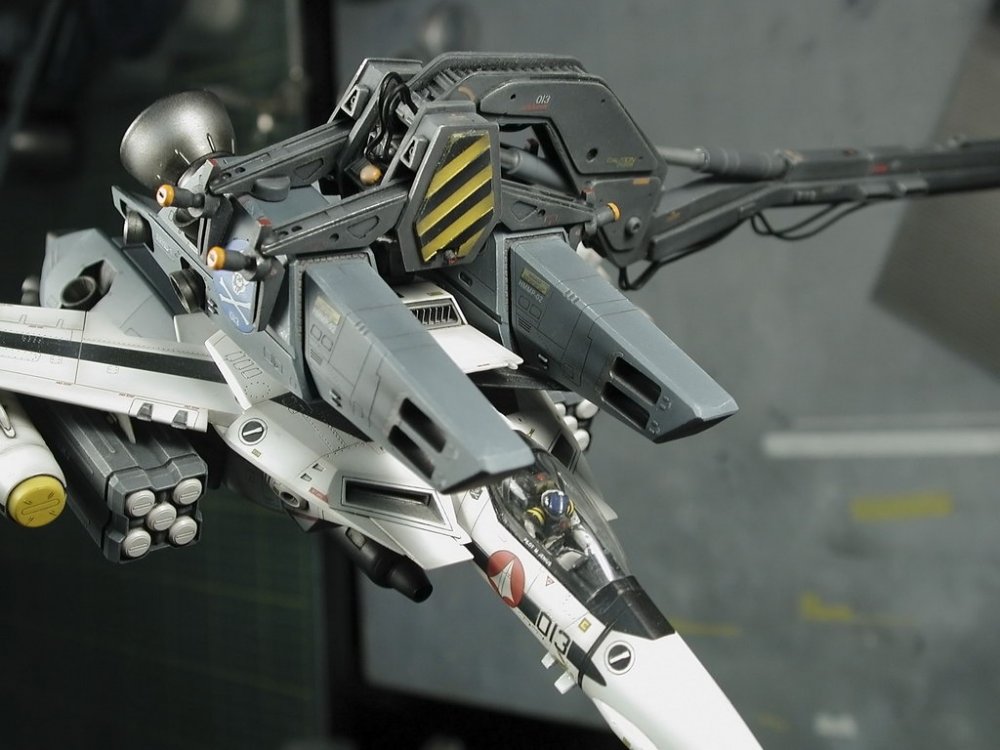
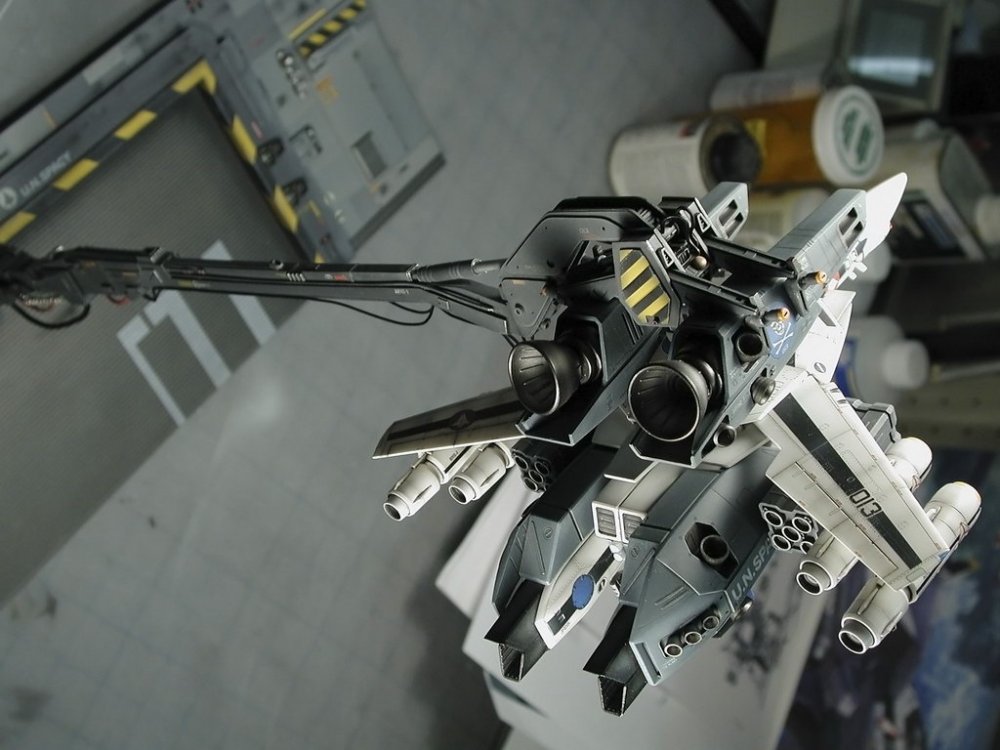
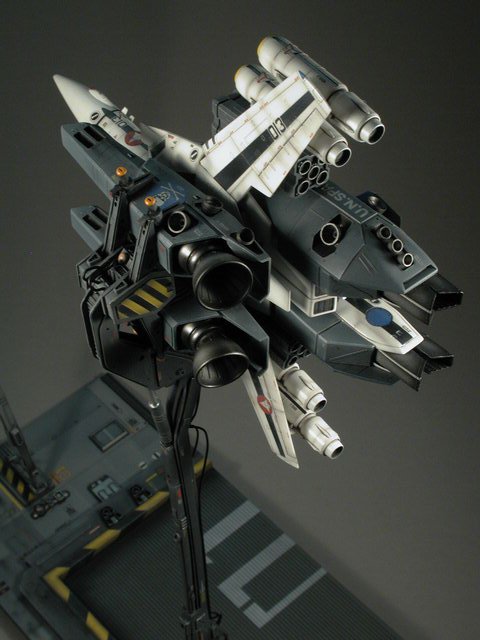
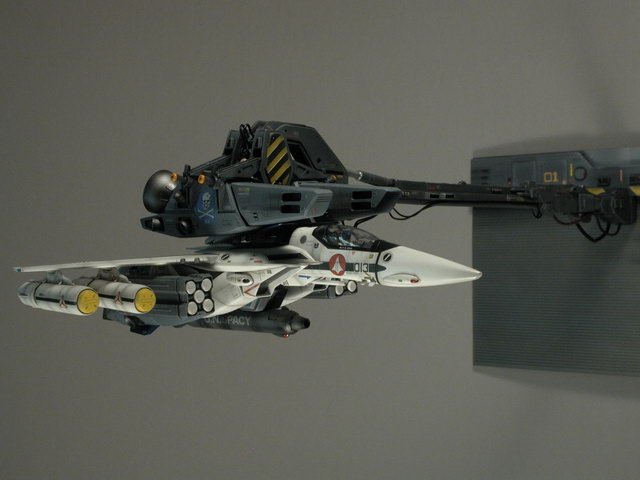
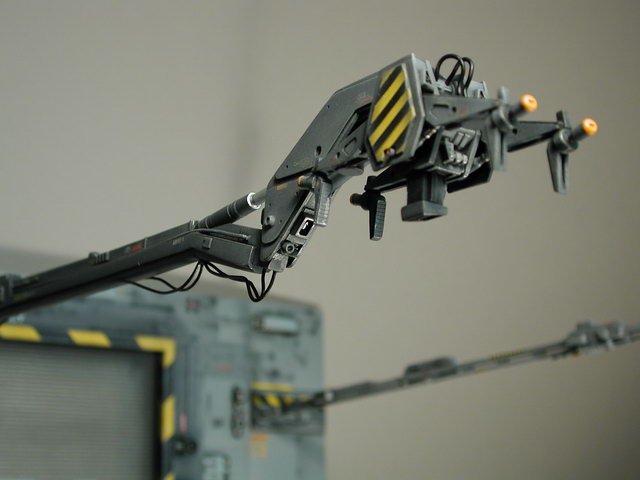
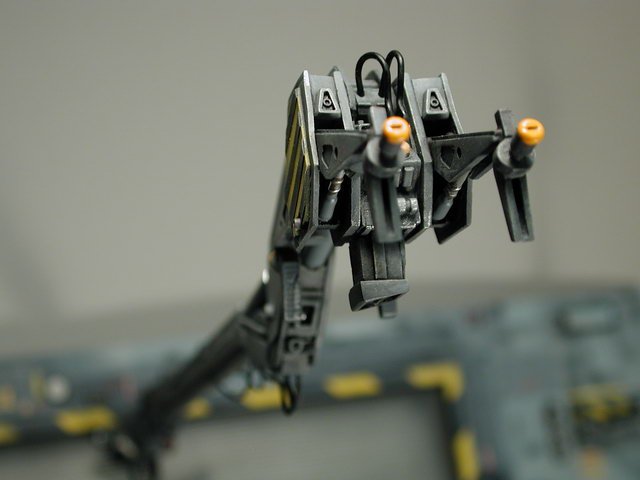
Here are some close ups of the Valkyrie itself and the launch arm claw release mechanism.

-
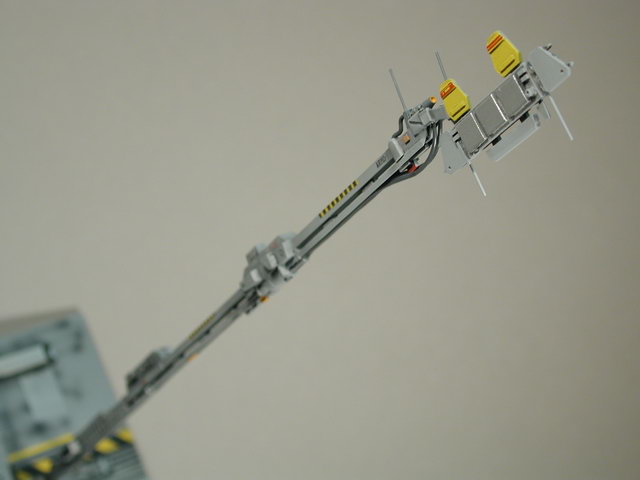
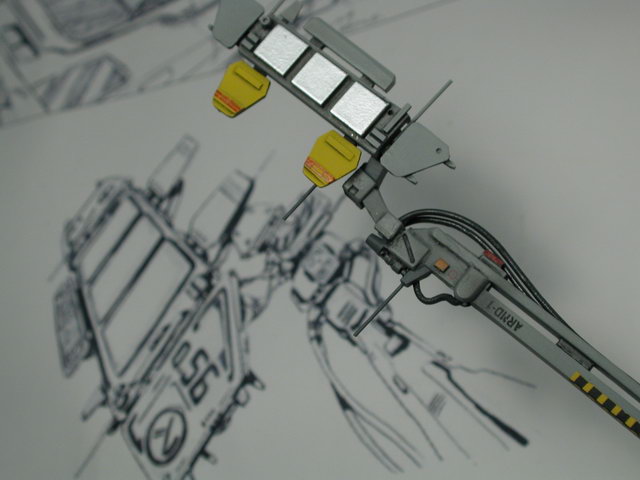
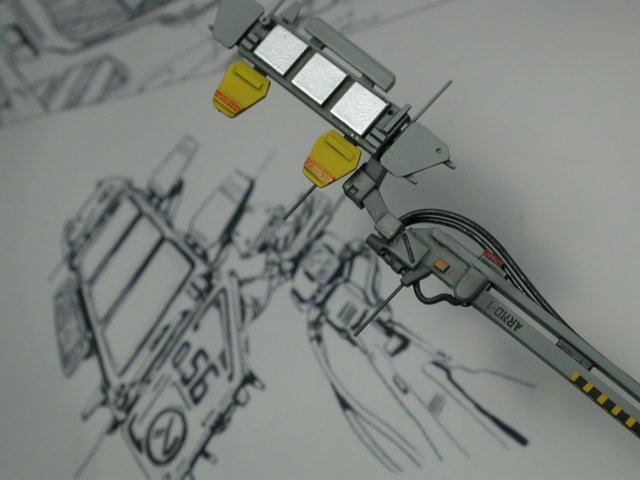
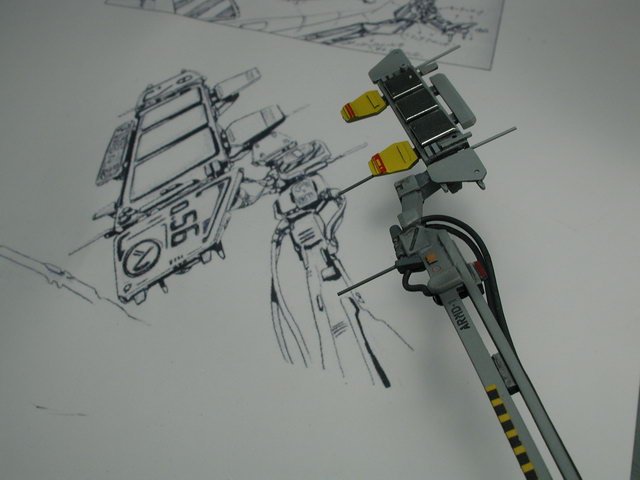
I did say finished... sort of... You may notice that the signal lights themselves are not done yet, I have the silver undercoat for the three big squares, which I will finish with a blue clear coat over top and cover it with windex for a lens effect. However, I am still going to try to replicate all the little red and white graphics on the side paddles of the signal lights at some point with decals - but that may be a bit away.
-
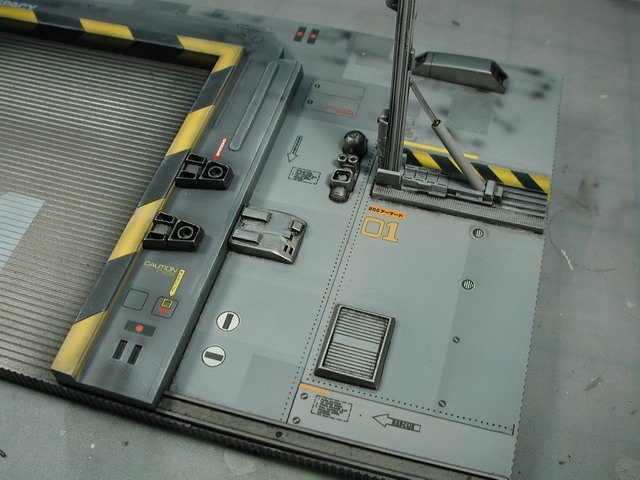
Hmm... those small click to enlarge thumbnails doesn't seem to have the old impact of the old boards where you'd see the large post (although I've resized them down to 1024x768). Here's just the resin kit (this is what you get without the Valk) - minus my work of course !
-
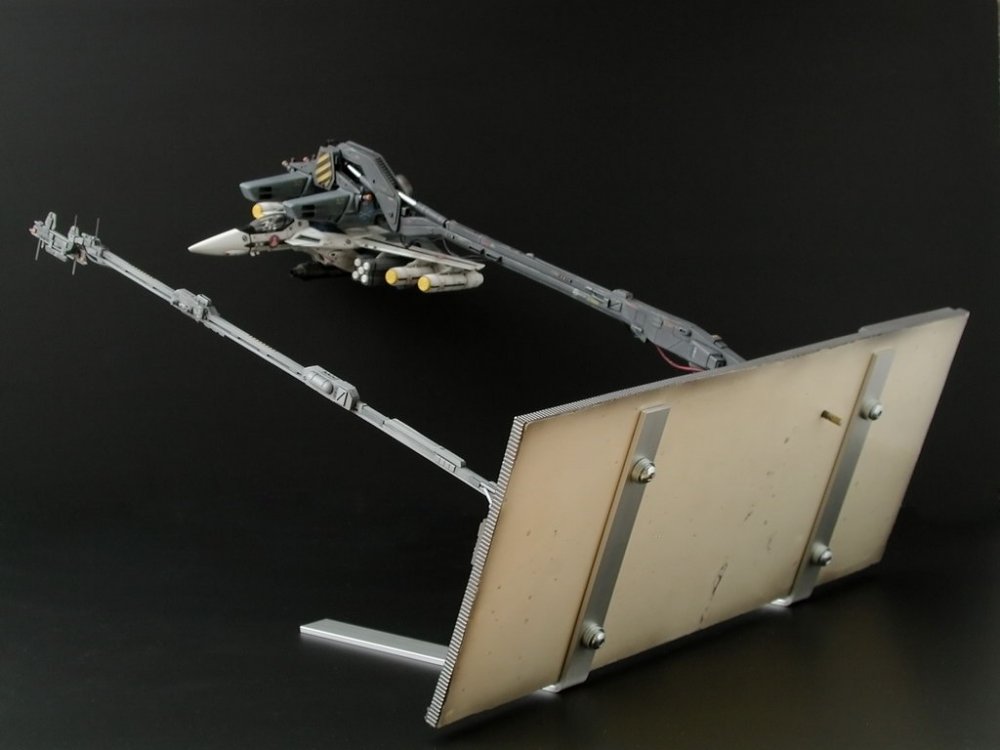
Hi all, Well... Christmas/New Years holiday craziness has finally subsided. After a little hiatus, I finally got back to finishing up this amazing resin Launch Arm and base by our very own Gundamhead & Myersjessee. If you haven't bought yours yet, then hurry up; http://www.macrossworld.com/mwf/index.php?...3&hl=launch+arm I also created a buildup thread here; http://www.macrossworld.com/mwf/index.php?...6&hl=launch+arm that outlines my process with this baby! I wanted to make a stand for it so that it would be free-standing instead of being hung on a wall or placed flat on a table so that the arm and valkyrie are perpendicular. I'll start with a few final workbench photos that I'm pretty proud of - unfortunately, I never got these cool angles again when it was time to properly take photos of the completed kit. (The Max VF-1A super was completed a few years ago, and that build up thread unfortunately is locked away or lost on the old MacrossWorld boards for the moment)

-
AHH!! no wonder! I loved Equilibrium... very much underrated film. I will definitely see it now. Fantastic facist visuals!
-
Good review, I can see your points - but I did enjoy the film. I didn't think I was going to like it as much after seeing the trailers, but I did thoroughly enjoy the first outing that I couldn't let this one pass. I have to admit to being a rabid Kate Beckinsale fan though, and that black suit is inspiring. Also being an art director for film, I found the art direction quite good in the film - although the final battle castle was very much over the top I(but hey, its a fantasy - everything else is over the top!). However, it would not of been the same set as the first film - sets are always wrapped immediately after shooting - its just too expensive to tie up studio space to keep any set up for longer than the shoot schedule dictates. (They had to completely re-build the Millenium Falcon between the first and second Star Wars). However, the part I liked best about the first movie was the idea that these Vampires had co-existed in our society right under our noses for all these centuries - and established themselves in our societal structure (ie; bloodbanks). I like the urban settings (even though they stole every set out of the excellent German photography book "Underworld") which unfortunately was missing in this second film. With all that said, did I mention that Kate looked amazing in that black skintight leather corset?! and guns... p.s. anyone catch the trailer for "UltraViolet"? talking about another genre stealing KillBill/Matrix/AeonFlux film!
-
Its been a few months now... any word on a subtitled version of OVA5?
-
Hi all, Got a small contract job over the break and Christmas/New Years stuff! Yep, its pretty much finished, I do want to do a proper photoshoot of it when I get the time and post it to the model section as I normally do. But I want to attach two legs to the resin base so that it will stand on its own and get some darker background paper first. In the meantime, I'm itching to get back to the booster.
-
Thanks for the great pictures Hayao - I can see the great efforts you took to put all that amazing stenciling stickers on, it looks great!! All you need is a little dark wash to pick out the recessed details and a light dry brushing with a little chipping here and there to pick up the highlights and you've got an amazing looking toy (no need for an entire re-paint!) - possibly a flat coat over the entire armoured pieces to tie the stickers into the background a bit. I love how the missles are painted and the little nozzles behind the foot areas are even done in a dull red. I can't believe Yamato didn't tempo print the stencils after all this time (see the Gundam FIX figurations) - well Anasazi... you've got your work cut out for you to get us some water slide decals for this beauty - and I volunteer to be your first ginuea pig customer!!
-
OMG!! Just a little Christmasing and New Years frivolities with the family and I miss this thread!! Wow, when was this available?! Where would be the best place (cheapest) to get both the GBP & a VF-J set? Amazing... thanks so much for the pictures!
-
I feel that I must remind everyone that I had attempted on two different occasions to kick-start the Launch-vehicle preorders, but that on both occasions, the interest level had come up short. This vehicle would be the largest, most labour and materials-intensive project among all my previous releases. Knowing that, and knowing that for every project I took preorders for in the past, roughly 10% of preorders fail to translate into sales (what I call the flake-factor.) Had I undertaken the project without reaching a minimum-safe number of preorders, I would most likely have lost money. Though many times I don't mind going the extra mile to offer a project that I love, even if it isn't very lucrative, there are limits to what I can do; particularly when bills need to be paid. 354649[/snapback] Thanks John & Rob for bringing us this far! I really appreciate your efforts. I really love this booster/launch vehicle assembly - and I too was very dissapointed to find out that the interest level failed to reach minimum requirements. I just couldn't understand why not everyone who had a booster and launch rail would not want the vehicle as well?! It could be the high costs associated with such a large cast (+$300 could be large chunk of change). How big would it be? - without working it out, it seems like its going to be a 14"X8"X3" hunk of resin! Is there any other materials to make the body out of? I've also seen these small toy tanks that when flipped upside down with the turrets removed could make convicing treads for the vehicle. If anything changes, let me know - I am still very interested. Count me in (not one of the 10% fake factor!! ) I sincerely hope this project is not dead and that either you guys or someone picks up the torch and proceed to its natural conclusion (without losing money on it of course)
-
HEY?!!
-
Thanks for all the kudos everyone, I am going to take a little break from this (mostly just photos left) since the Christmas stuff is really piling up and I got a short 4wk production (YAY!) Hopefully to post and finish up on the Booster in the new year. Thanks for tuning in!
-
Wow Dobber, fanastic work! Keep posting... I love seeing this work - I can't wait for the F-14. I need my model fix (since I can't build right now, Christmas & got a short 4wk production) I can't believe you hand brush - I can't hand brush to save my life!! I didn't know the Ghost was removeable - how does it attach on? I must get one of these kits now! Great work on the scheme, it looks great - keep up the fanastic work!
-
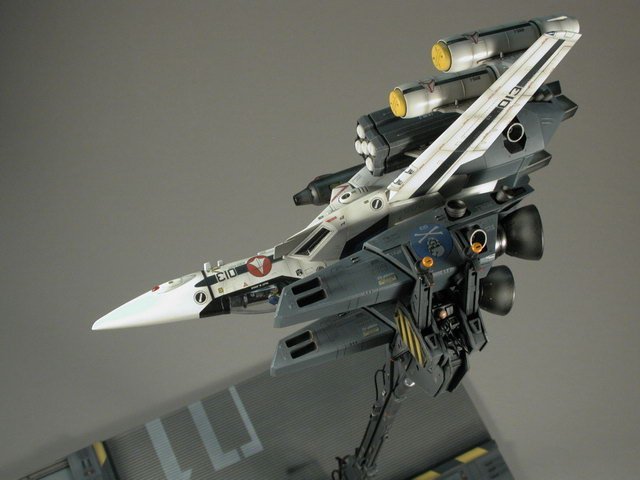
I get some dark grey or black mat board or paper next week to try again. Oh, I forgot one thing, the red and white lettering on the signal arms. I might try to do my own artwork to get my inkjet printer to create something. Here's a few shots with the Valkyrie attached. If I get around to a better photo shoot next week with a proper background - I'll post larger sized photos on the Models forum like I used too and link it to this build up.


-
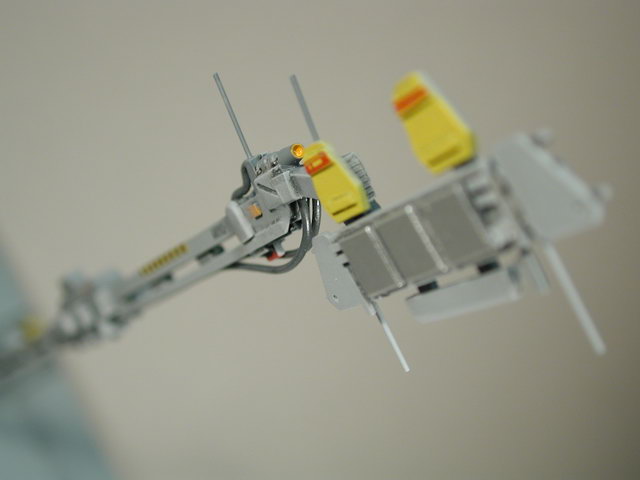
Well, here's a tease of some pictures I took... I'm not very happy with them; firstly, I don't have any solid background big enough (its a tough shape to photograph), secondly all the photos are somewhat blurry (or at least not as sharp as they could be) because its been so dim lately, and the model has such odd dimensions that I need to stop down to try and maintain any sort of depth of field to keep as much of it in focus - however by doing so, I don't really have enough light to keep the shutter speed as high as possible to avoid camera shake at these low lighting conditions. Lastly I can't go outside - its too cold now to photograph in natural daylight. I'll see if I have anytime next week to try again (or I can get back to work on the Boosters! )


-
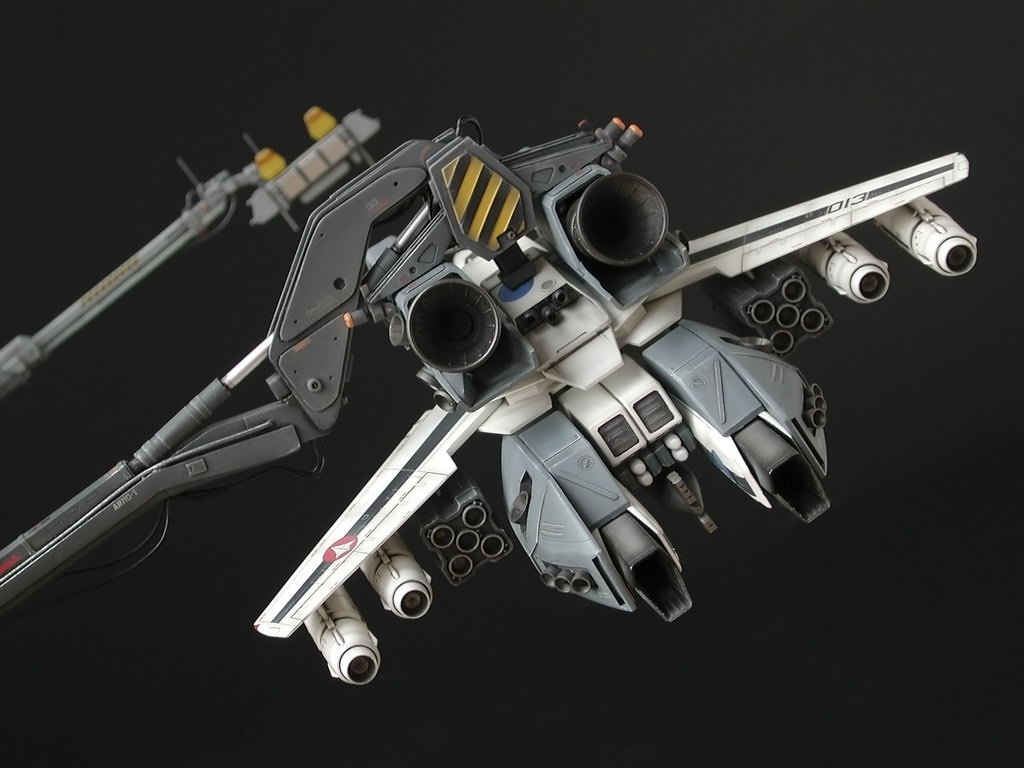
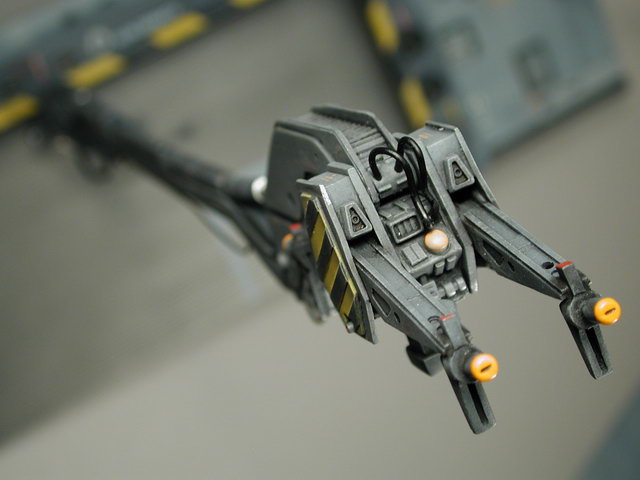
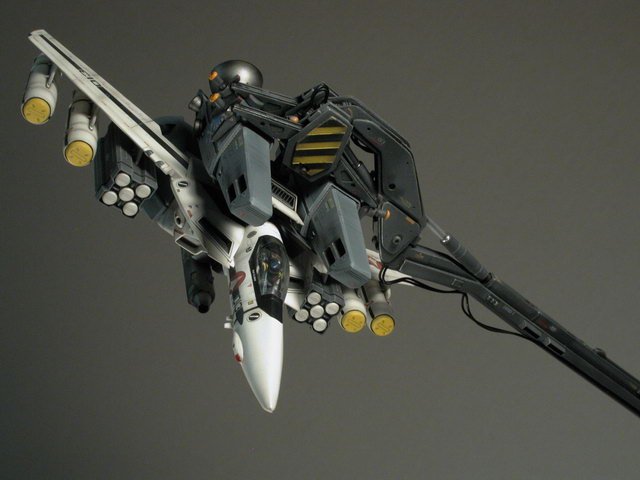
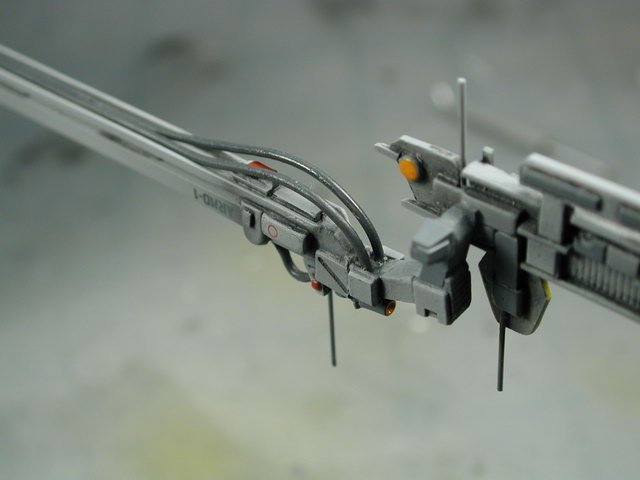
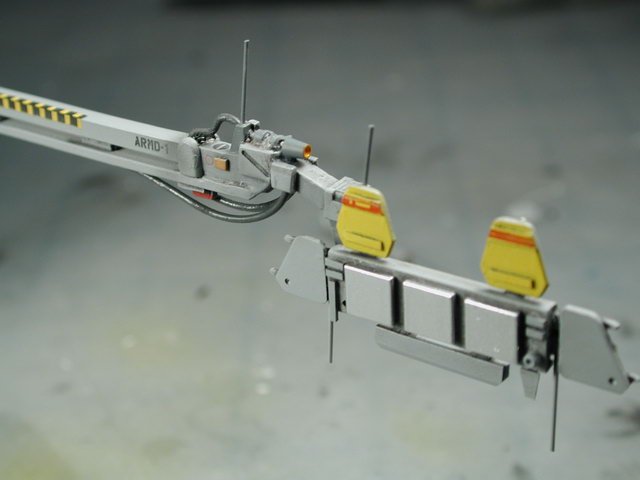
I added some small wireing/hoses to the signal arm today as per the lineart. I had to paint the wires dark grey before I glued them down with crazy glue. Again, I drilled little holes so that the wires had something to seat itself into. I also darkened and weathered the red hose - thanks for the reference pictures and suggestions, I agree, the red hose is nice in there - and now that its weathered and darkened, it doesn't stand out so much. I also did an dark oil wash over the newly added surface optional parts to pick out their recessed details. I also added a brown wash to the hydraulic cylinders - a word of caution here, the thinned down oil/varsol mixture actually attacks the Tamiya silver marker. I forgot about this (I actually learned it doing one of the intake fans on an earlier model - some of you might of remembered the ?!@#$@ incident) of course I forgot and watched it attack the silver on the cylinders. Its not too bad, luckily I didn't add too much. Remember what I said about the fact that there are never any perfect models?!

-
Fantastic - clean and simple - I love Hasegawa... now how much? Since the last top pieces seems like its could be ball-jointed, I think they might work as flight display stands for the Valkyries with the gears up!!
-
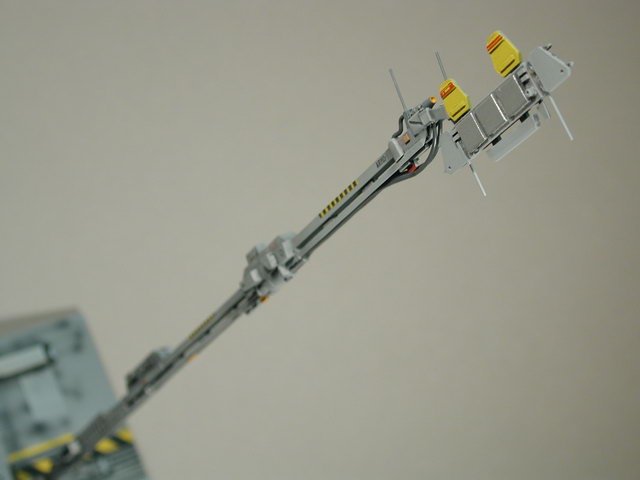
I think I'm about 98% done... just a bit of a oil wash on the newly added optional surface detail pieces and some hydraulic oil leakage on the actuators and some clips to look like they are holding the newly added hoses in place. What do you guys think about that red wire/hose near the base? Does it stand out too much? Does it look too much like a red wire? I can't decide whether I should paint it out dark grey to match everything. Then it will be off to a decent photo shoot against a dark background...