Xigfrid
-
Posts
2608 -
Joined
-
Last visited
Content Type
Profiles
Forums
Events
Gallery
Everything posted by Xigfrid
-
I don't understand, I used tamyia "fine white" primer first then brushed the fluorescent paint over it. So before the paint it was white. The paint itself is fluo pink, much like a stabilo/highlighter pen. If you light it with uv light, it goes bright pink then in the dark it glows dimmer and dimmer orange.
-
I can't wait to see one finished and fully tampoed
-
I could tell a lot of things were going on, keeping you busy. Take your time and enjoy being the first to handle the kit!
-
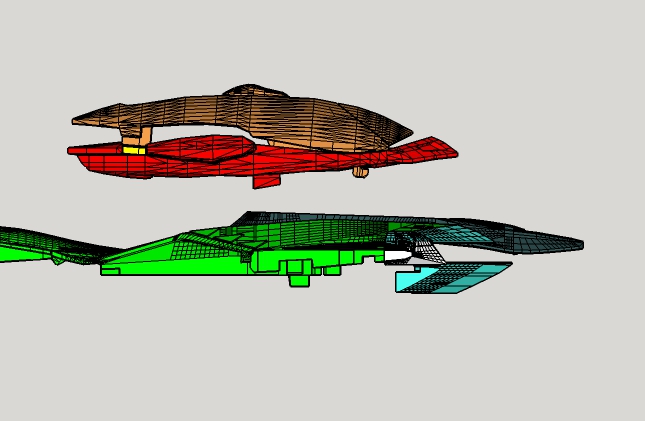
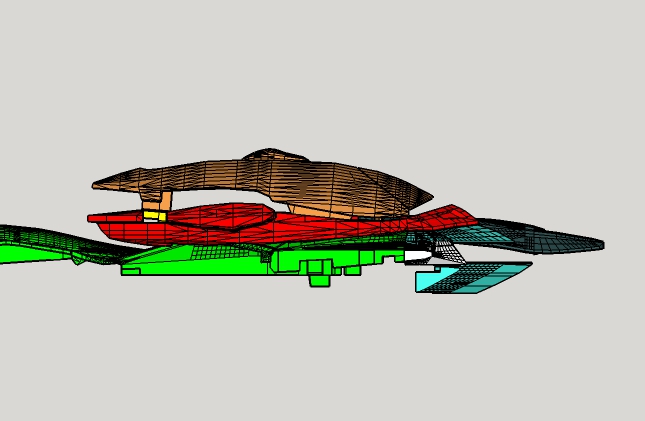
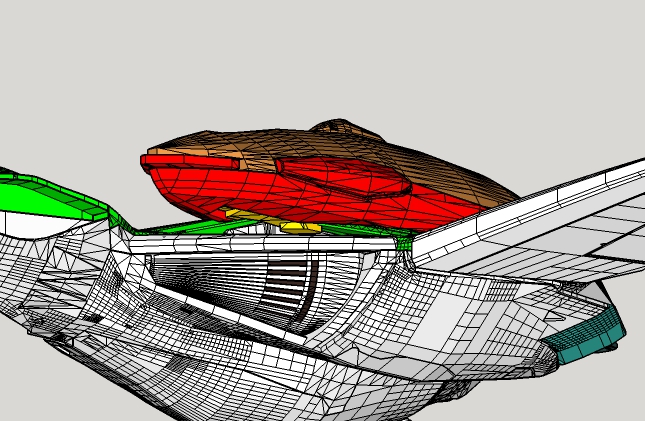
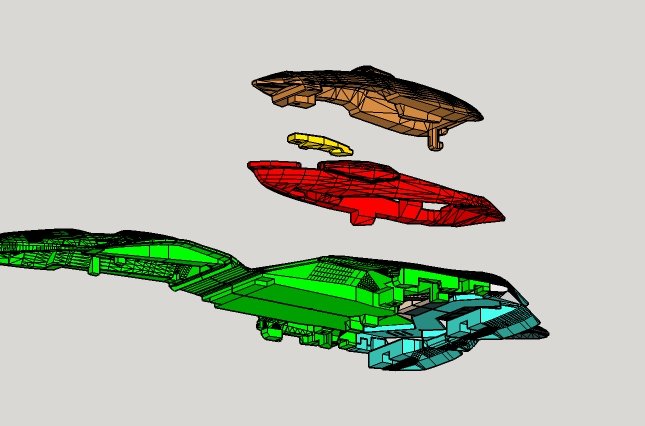
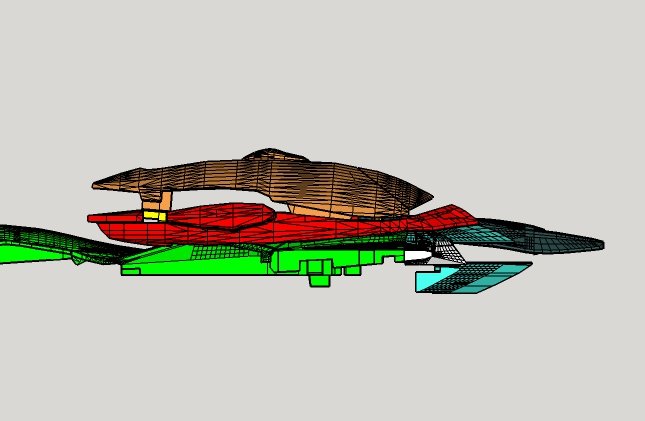
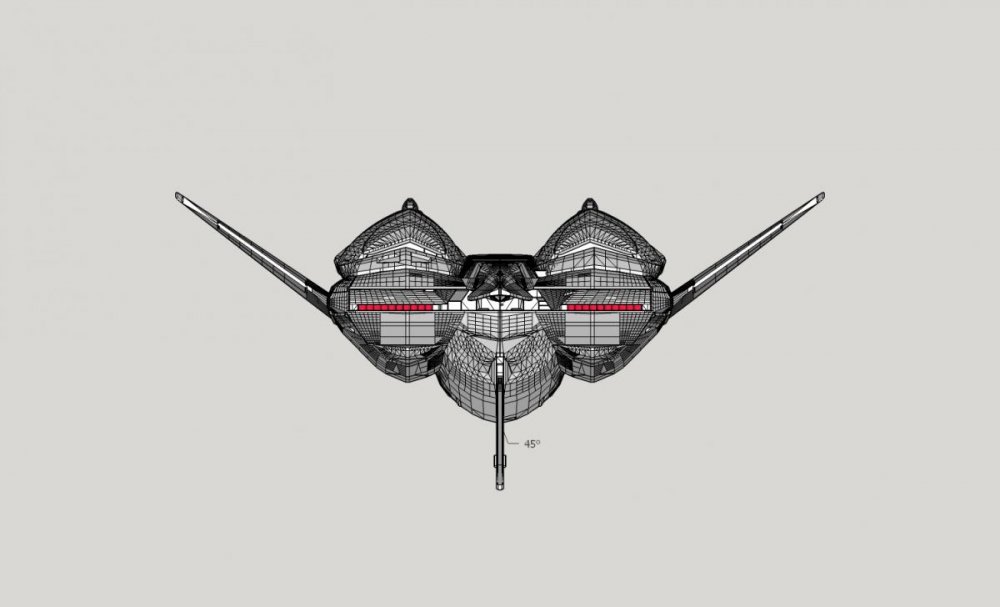
I used a basic system. Each super parts is made of 3 parts: the red and brown ones will be recasted in resin and the third (yellow one) needed to be highly flexible then it would be 3D printed directly from shapeways. I made this part partly hidden so it can even be printed in white. But it can also be printed in red. To assemble the super, you just got to screw the small yellow part into the brown (top part), with the red in between the two. The super should not be able to be snapped in two once they are assembled and if they do, that won't bother me either that much. But the top part would be slightly able to move and rotate to make the hooking lever enter into a hole, then you close the front of the super part, with the yellow tab moving inside the air intakes. To remove the the super, that would be as simple as 1) pull up the front of the brown part, 2) then let it rotate to free the backside hook 3) then pull out the super.


-
I had to tell you that the 12-knobs pack design have been rejected by Shapeways team in Netherlands. You can still update it and double check using the integrated 3D tool that everything is bright green. If you update it soon Then everyone could make a new order and add it to the original order to still have shipping free. If you can't no worry, that would be for next order!
-
In fact the VF-4G comes with 2 sets of hands: the one which was mounted was tiny and could fit into the forearms BUT they are fixed in closed fist position. The other set is fully articulated and is comparable in size to the VF-1 hands BUT this set cannot be folded into the forearm for the trnasformation back to Fighter mode. The difference is that the VF-4G hands come with a ball attachment compared to the VF-1 tab.
-
I recently made a new version of these VF-4G hands (V5) and would probably have them recasted if they are great.
-
I was speaking only about the prototype, i don't know yet how that would scale as a finished product/kit. I hope not that high though.
-
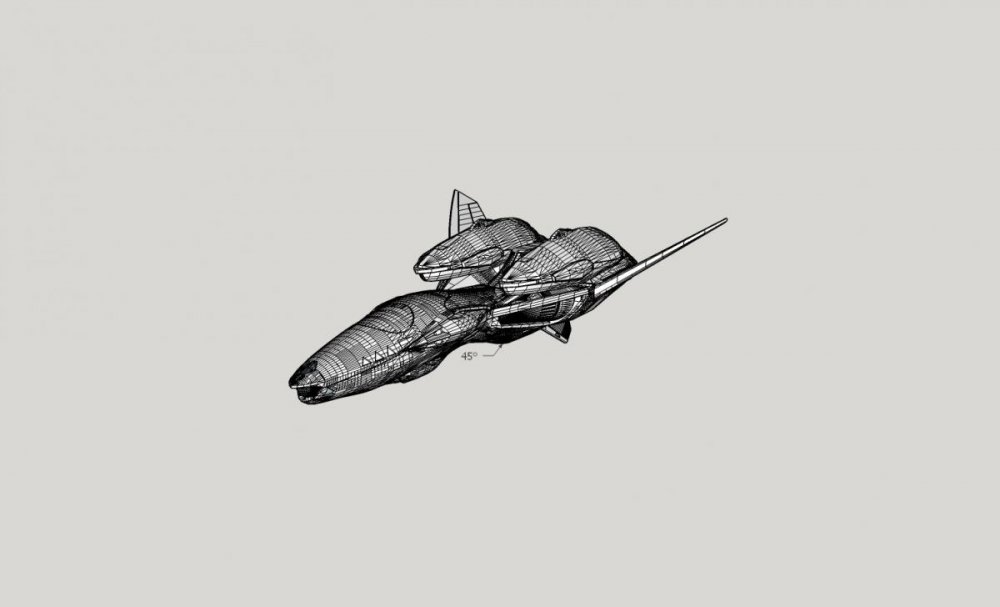
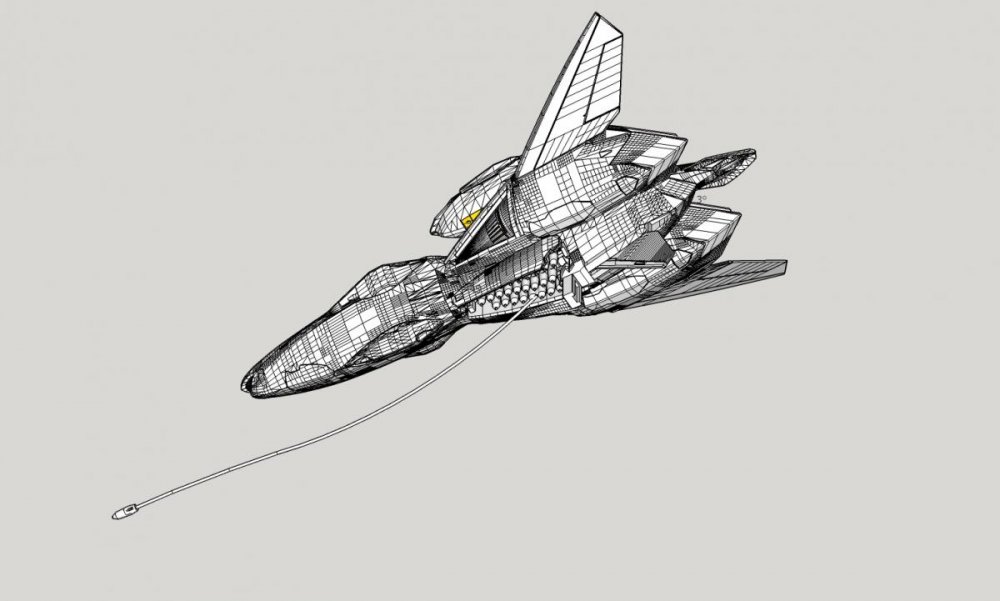
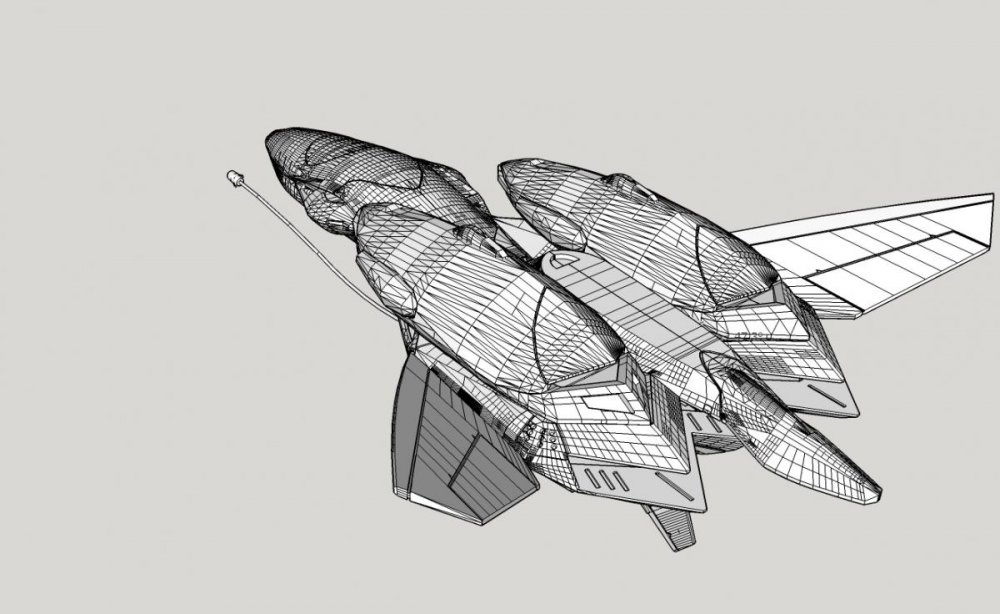
I have been working on this project non stop for 2 weeks to get the prototype 3D printed, I am now resting a bit from this project. To let you know, It is about 2 and 2.5 more expensive to print than the fighter drone. That means that making a more complex or bigger thing than this X-9 would be very difficult using this process (shapeways for validating prototype, printing in higher resolution resin, recasting, then painting) ! Anyway, the prototype is coming in the next weeks, so if everything is right from this step I will look into the next ones.
-
Thank you guys!
-
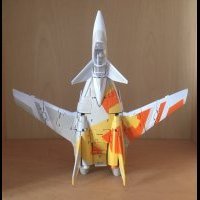
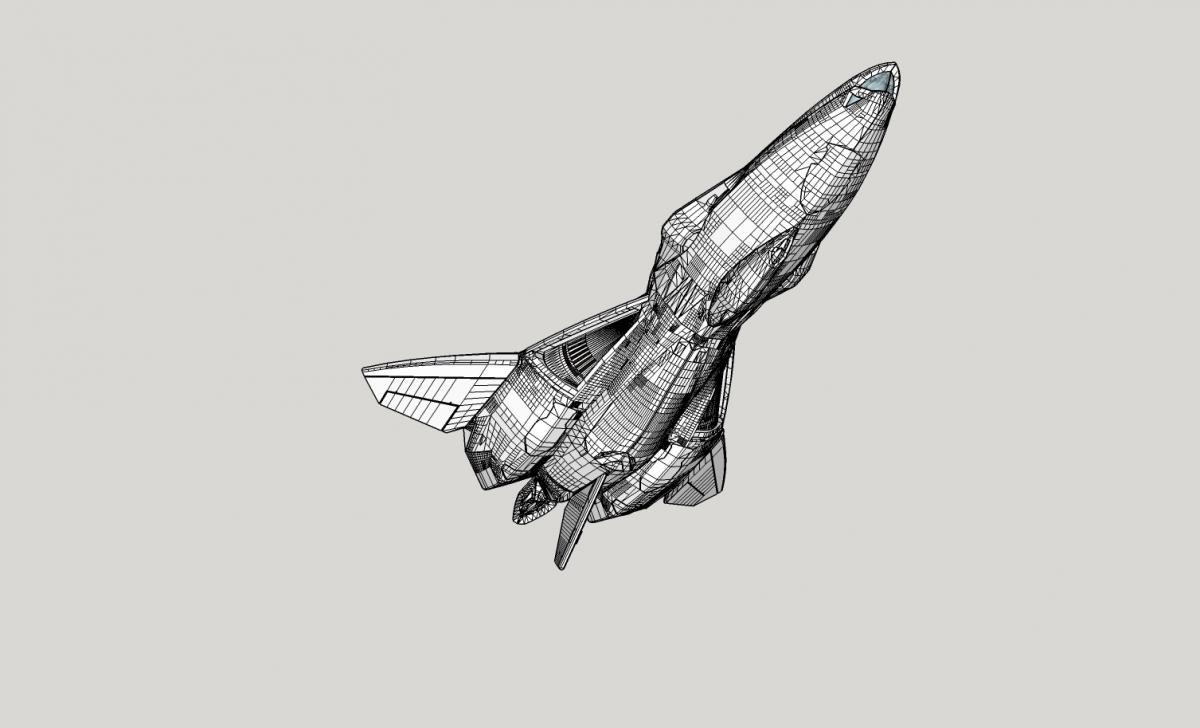
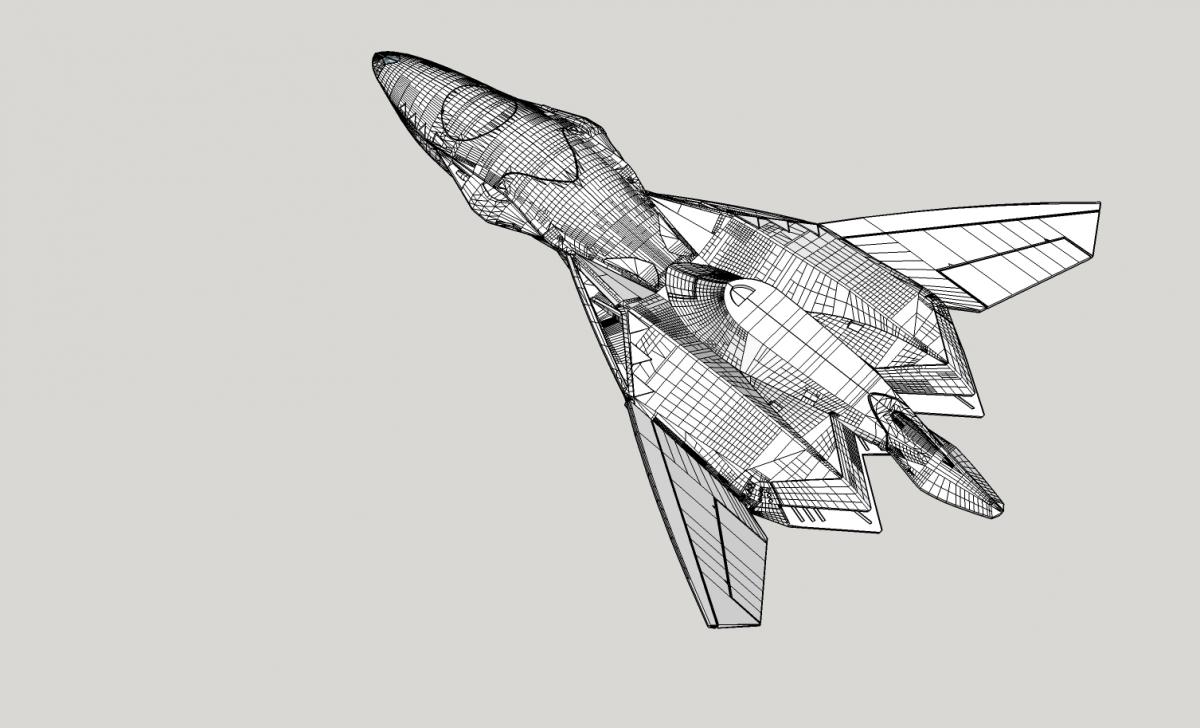
exciting update, the model is finished and in its way to 3D printing!


-
Fabulous !
-
The handling is expensive on small models. So if you can put 2 or 4 nubs in one model that would shave a LOT of the price. But the model needs to be 1 only part, so you got to somehow link each nubs together (with 0,8mm diameter wires by example). I don't know if you can use one side of the nubs to get them linked. As this side, where we will cut the wire, would have to be un-perfectly sanded, it must not be a key form. Just tell me if you can do that so I can hold a little or not
-
Last time I checked, the shapeways's link was down, Now, I will grab a few, do we need 2 to repair one battroid ? Thanks for the guide !
-
I see a leg in the green+blue+grey parts, pretty much like a VF-117. Then the tip of the wing can either fold into the inner of the leg, or retract in the back of the battroid mode ala VF-25.
-
almost finished the gears, what a relief!
-
You should check http://www.shapeways.com/shops/unicornfairyshop
-
I have no definitive plans for the 1:72 scale, but at 90% it won't have the landing gears, then bottom wing can be fixed, that means a larger bottom part. No way it would be cheap, but cheaper than the 1:60 yes
-
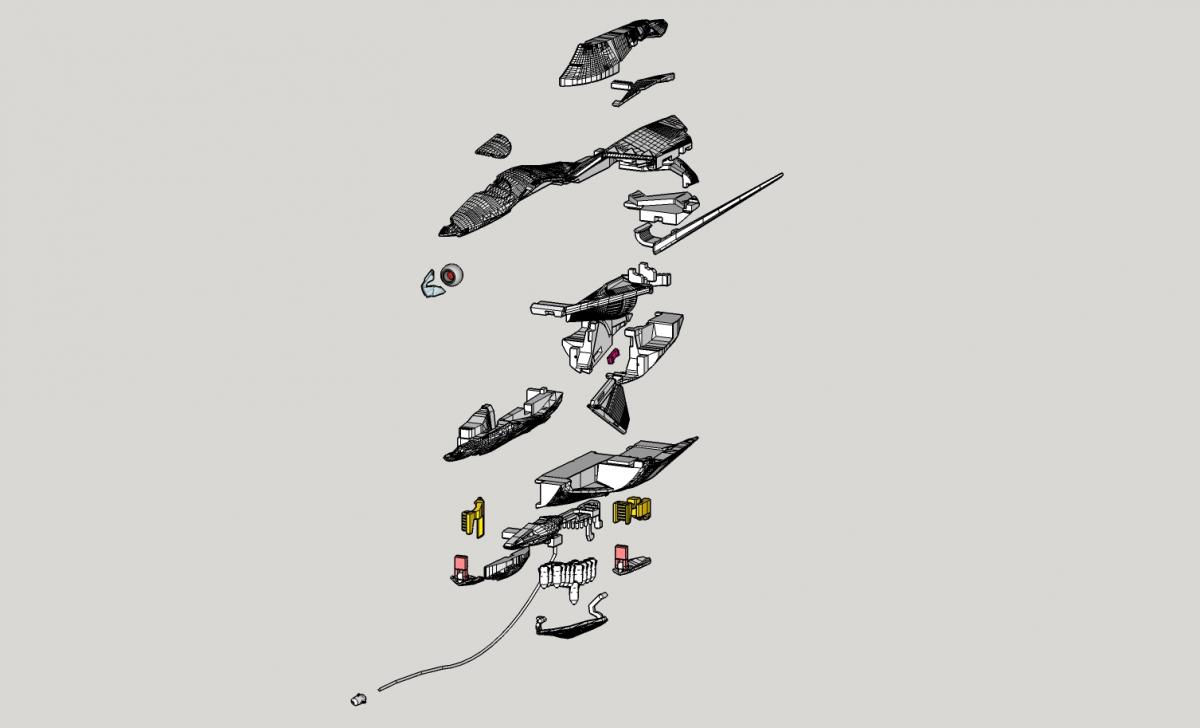
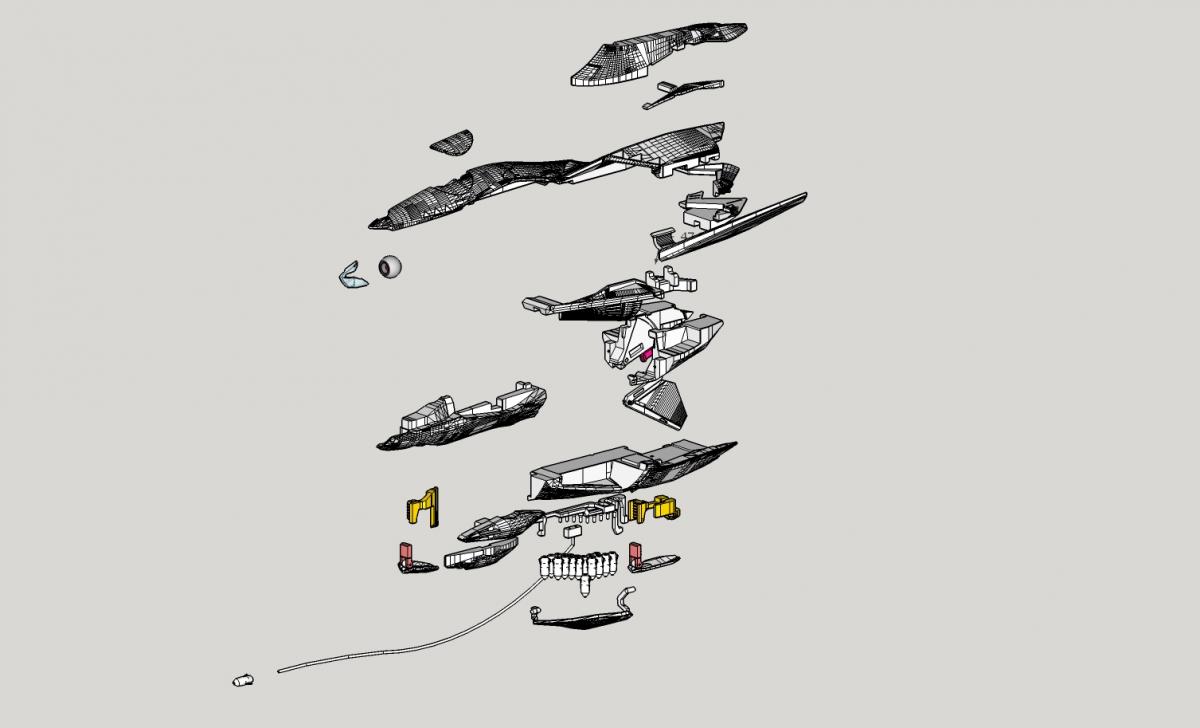
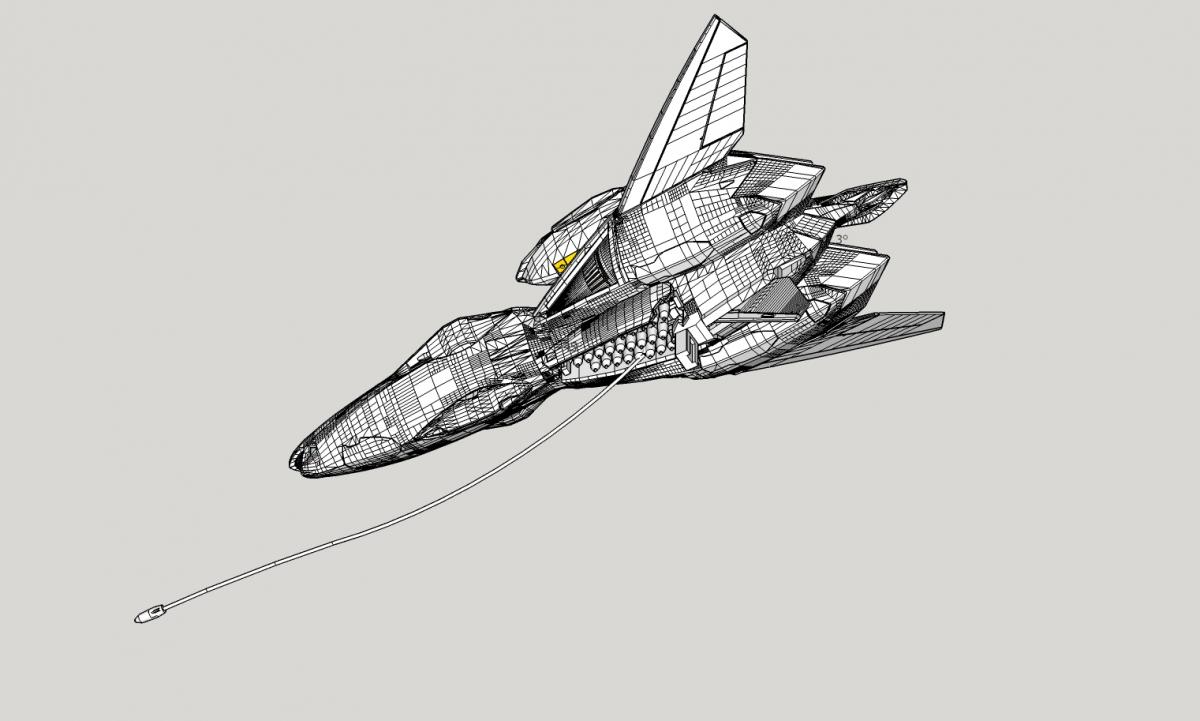
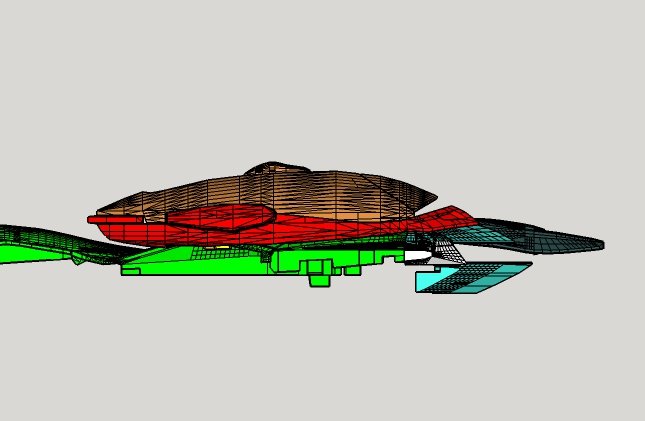
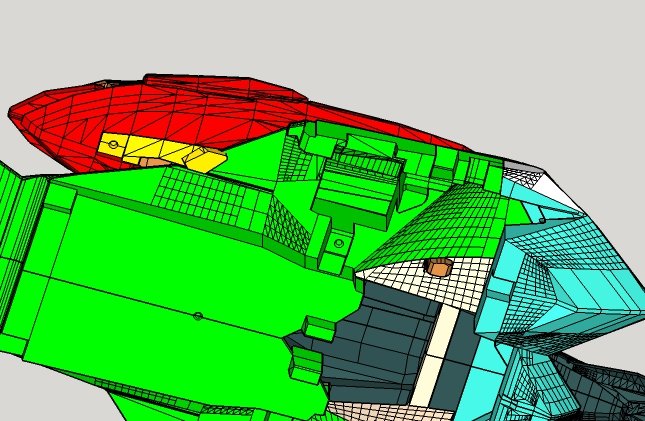
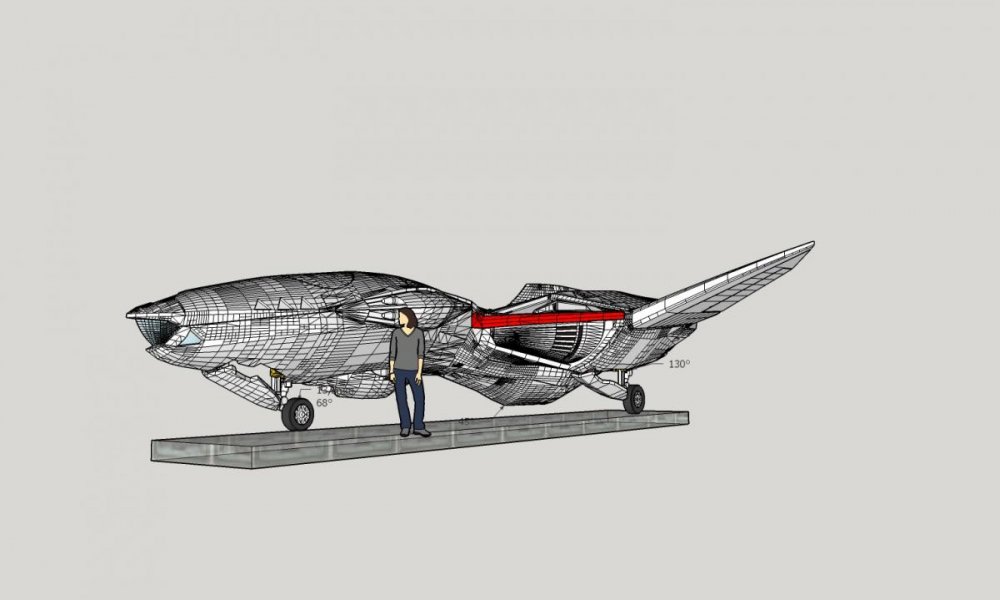
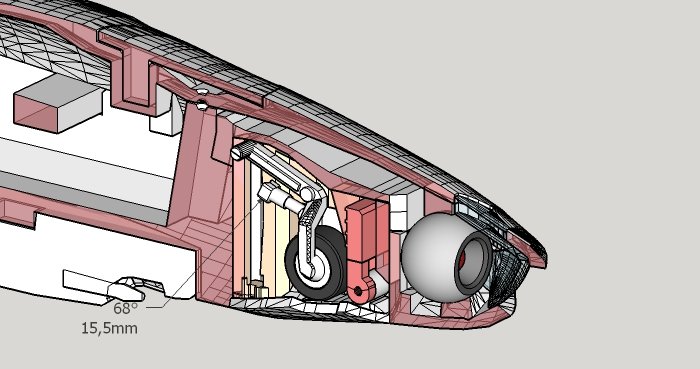
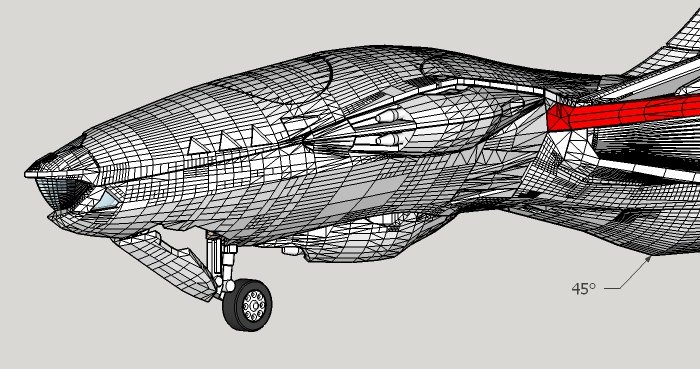
The optional gears are a very complex part of the design, this is why I study it last. So far, everything is clear for the moment: the main body comes with cavities, the cavity is closed by the gear traps, everything is so far recast in resin. The traps however would need some nail vernish to stay in place or just power glue them in place to close the cavities. Then for those how want the optional landing gears, things go pretty wilde, for the front landing gear you will need: -a 3D printed part would be glued to the resin trap -this is going to be articulated with another plastic 3D printed part to make the trap movable. There goes the rod between the two parts. -the landing gear main body is 3D printed in stainless steel -cover it with the rubber tire -assemble the landing gear into a third plastic part that perfectly grip to the cavity sides, this part is in yellow. and voila you got a complicated mechanism, but keeping things pretty cheap.
-
Sometime we think that we got plenty of space... the truth is often the opposite!
-
This one is super clean! All the more considering that it comes from the smaller scale! Nice job
-
Did you meant the sprues? The 3D parts are entirely designed, even the sprues
-
Yes, still working on it, I still deciding on details for this one
-
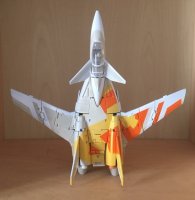
Thats great, I really like my proto copy but these will be nicer, I can't wait
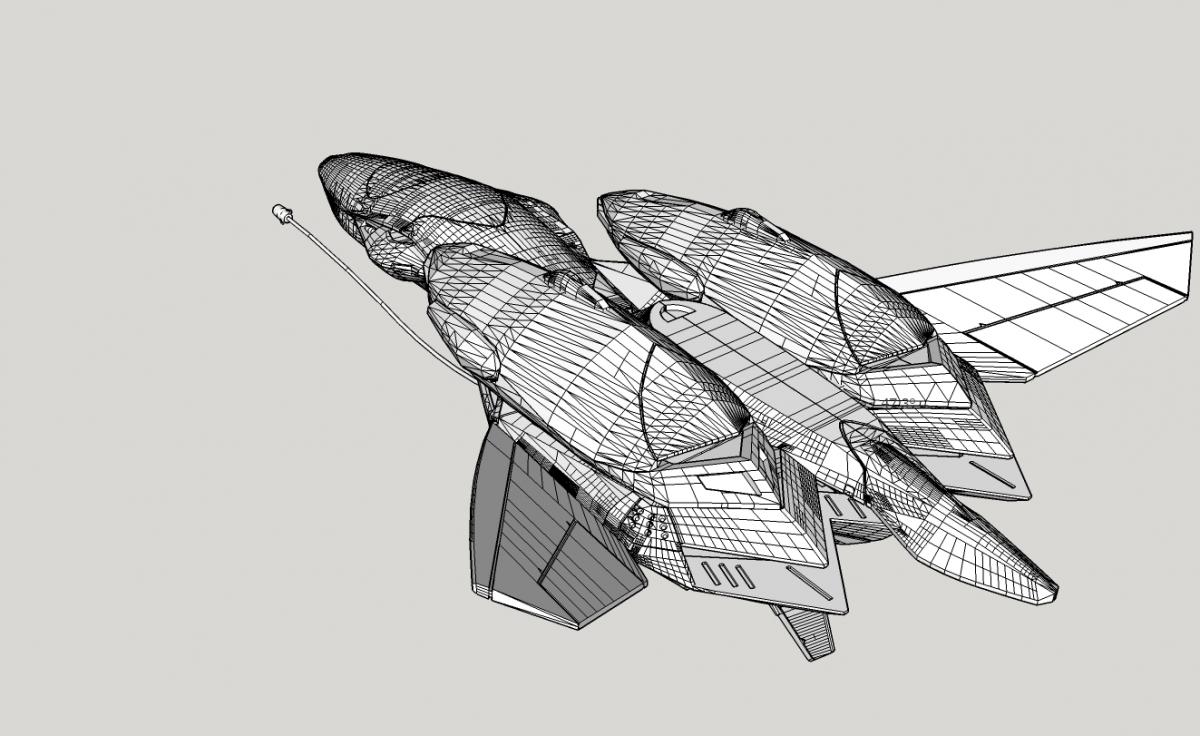
-
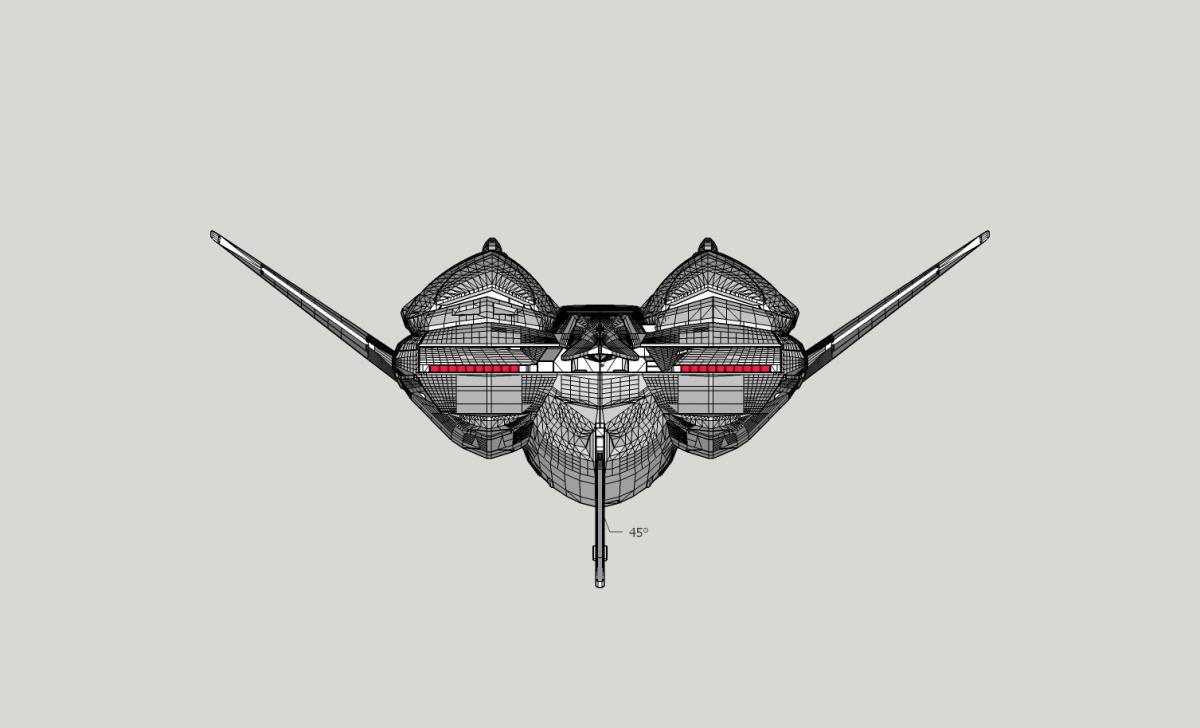
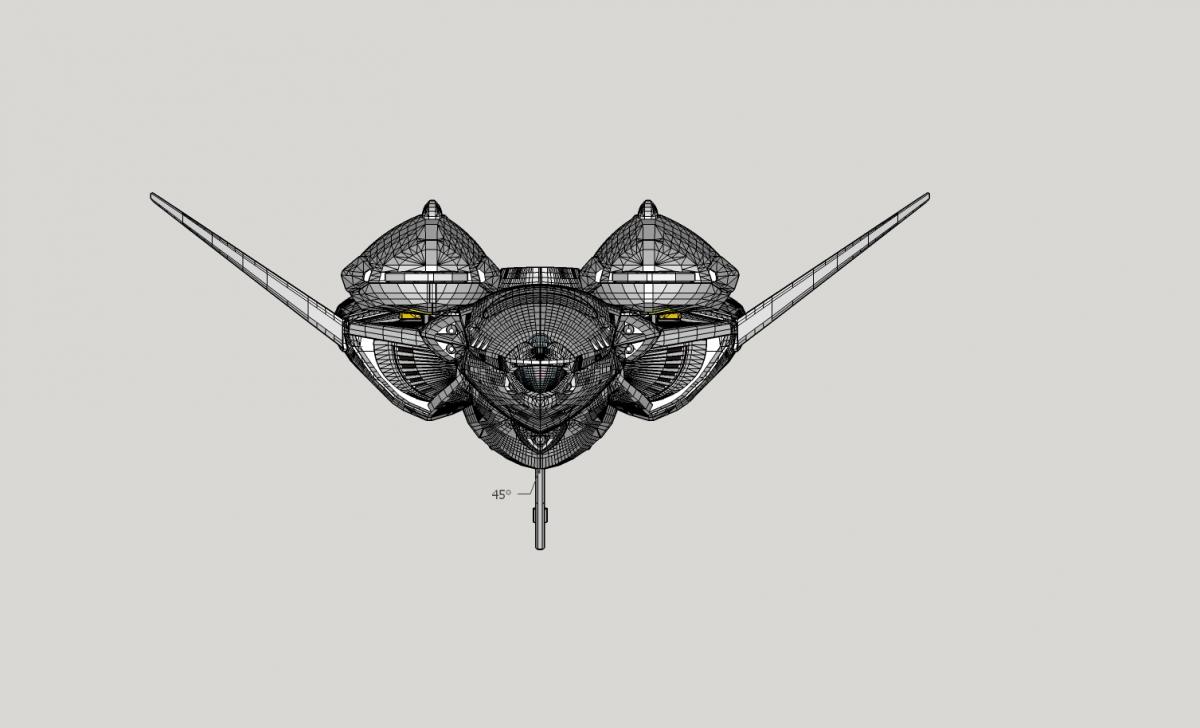
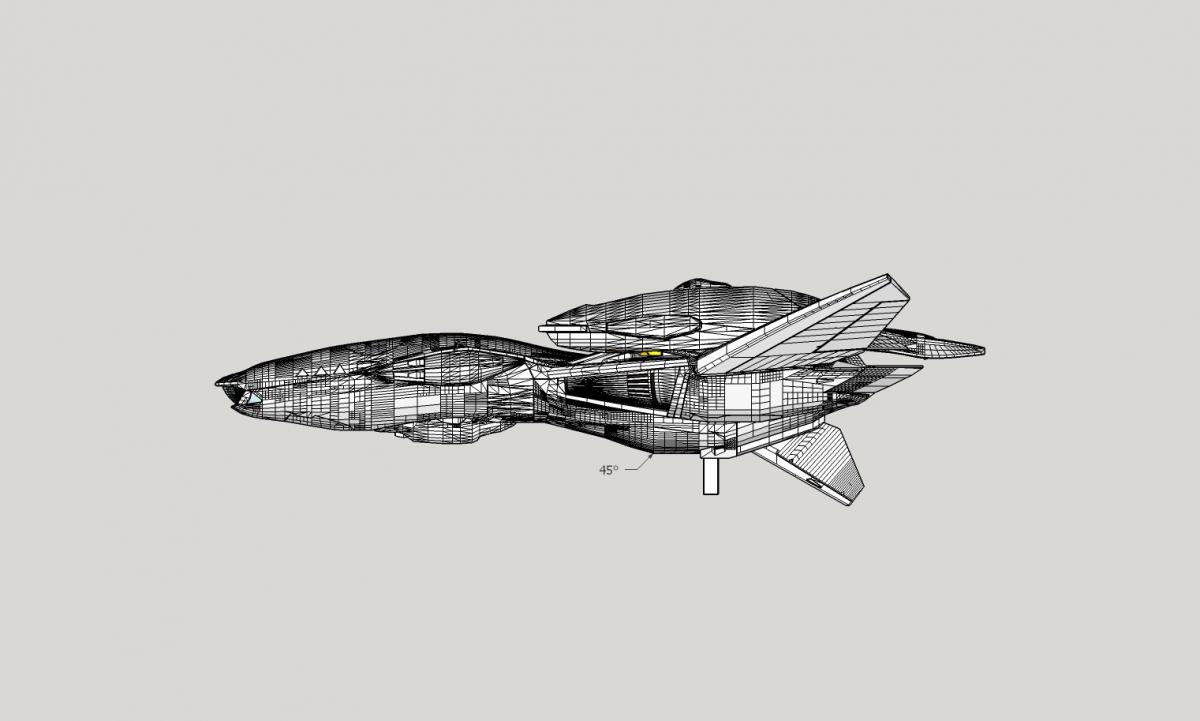
Thanks Lets resume all the features that have been implemented at this point: -materials, the model is planned to be casted in resin, a few moving parts would be directly printed in plastic for resistance. They will be hidden, so no painting. -metal! some use of metal rod for the landing gears trap movement (optional), and ...screws! -NO glue needed for assembly, everything is tightened by 4 screws. The screws are hidden (in the landing gears, missile compartiment and under the top/front circle cover) -retractable wings, they "clip" in deployed position -rotating eye so that it can look trough the 3 windows -But I don't know how to move if the clear canopy is installed- -the eye is large enough to receive a red tritium vial if desired (3mm diameter recommended) -clear canopy to cover the eye -retractable bottom wing so that the X-9 can realistically land. The bottom wing "clips" in deployed and retractable position -opening missile traps: they "clip" in closed and open position so more display options! Still working on: -optional retractable landing gears, should have rubber tires, but not rotating -a first in macross story if I succeed to make a directional front landing gear -missile scaffolding for mini-HMM + numerous HMMs -I will probably make another scaffolding for the standard HMMs from Arcadia YF-19