

Chronocidal
-
Posts
10872 -
Joined
-
Last visited
Content Type
Profiles
Forums
Events
Gallery
Everything posted by Chronocidal
-
I never have worried that much about shipping speed, but I only ever use registered eco airmail from NY, since it tends to get to me nearly as fast as EMS, for much less. Still prefer to get Fedex, but only HLJ offers that at less than the cost of a kidney, I think
-
Something that size from Shapeways would be insanely expensive.. but I'd still love to see it done.
-
I sort of want to agree, but this is why I'm curious what changes they'll make. I only bit on the VF-0D because it was never done before, and grabbed a VF-0S since my old one wouldn't fit the reactive armor. The Sv-51 doesn't have those points in its favor, and while the VF-0s were redesigned to fit the armor, the 51 doesn't have that issue, so assuming they have the original CAD from the Yamato, there's very little reason to make any changes to the design proportions. Even if they replace a ton of the internal mechanisms, it's really not going to look any different, because the shape and detail of the original was fine. If they offer up some sort of new unique scheme, I'll likely be convinced to grab one, but given the massive size of these, and the upward trend of Arcadia's prices, I'm easily expecting these things to be far beyond what I want to pay for something I already have.
-
I'll be really interested to see what (if anything) they change about this release. It's not like the first version actually had any significant issues like the VF-0..
-
Yep, it was the prototype for his eventual 1/60 custom. There might have been a few small changes, but I think he just converted the Hasegawa paintscheme directly to his Yamato.
-
Tell you what Arcadia... if you make this Sv-51, I'll happily buy two.
-
They're not actually ball joints, just slightly wobbly pivots, if I recall. It's been years, but I remember disassembling the entire forearms to get at those pivots, and never really got very far. In the end, I think I wound up settling for a few drips of thin CA superglue on the pivots, rotating the tails while I let the glue dry. This can definitely fog up the plastic somewhat though, typical for CA glue. I'll see if I can find my original post on what I did, and link it here, but I'm not sure if I took any photos or anything.
-
There are enough really rare Yamatos that I wouldn't mind seeing any number of things re-released, especially the VF-11s, VT-1/VE-1, VF-1D, or M&Ms. As much as I love the Sv-51 though, I'd put that in the same category as the VF-0. Sure, it's nice seeing the design refreshed, and maybe I'll buy one if it's a new color, but like the VF-0s, there was nothing really wrong with the originals. They're a little floppy, but nothing nearly as bad as the early structural problems with the VF-0. Sure they're outdated, but the thought of how much a new version of something that big would cost makes me think I'll stick to my originals. I'd much rather see something entirely new than a rehash of something I still own a bunch of.
-
Man, I would love to see a VF-17T sooo much.. I want the trainer version from Macross Plus though, so unless they decide to milk the mold, I'd need two Ray/Veffidas valks.
-
That's exactly what I mean though.. that one's not the model head, it's something else. It looks nothing like the one here. Is that some early prototype, or a custom someone made to make Messer's valk out of Hayate's before the official kit came out?
-
Is that a custom made head on the left? Because those look really nothing alike, and the eyes look painted on, instead of clear plastic.
-
If it's anything like the VF-0D poster, it's probably just lineart anyway. Sadly, that mosaic is pretty much completely unreadable, just have to wait for more info.
-
I'd happily pick up another VF-1D or VT-1 if they ever get around to them. Fortunately, those two are a unique color that I don't have to worry about matching to all my other VF-1s. Know what I really want for a VT-1 though? Duty uniformed Hikaru and Misa figures. Bonus points if they include the tent.
-

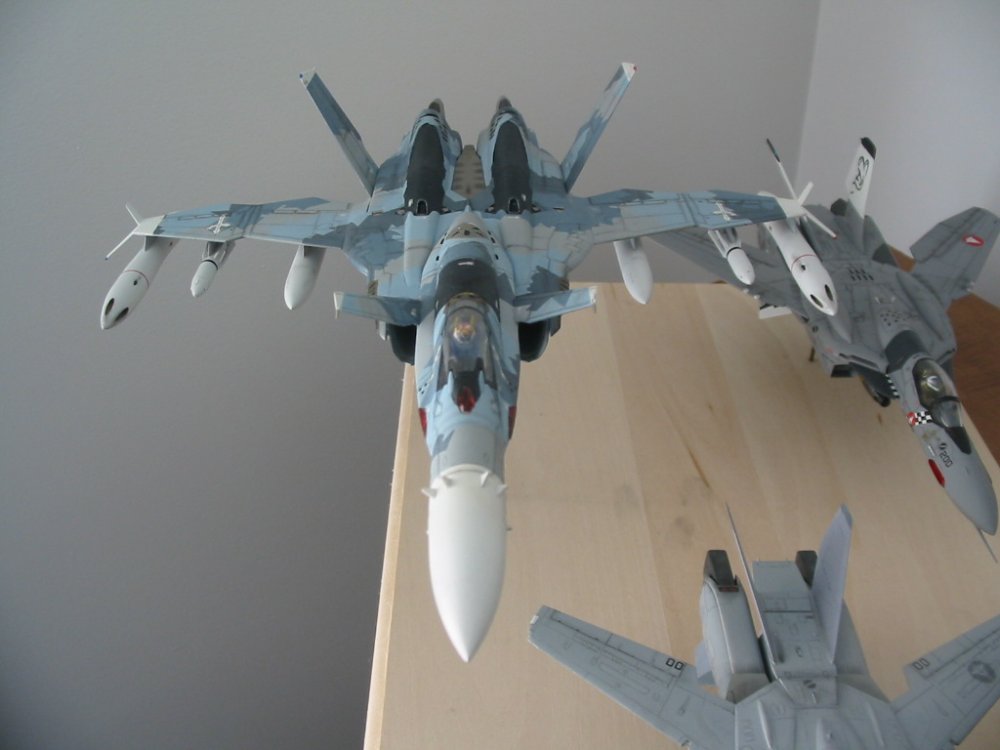
Your most recent Macross or toy purchase! General thread.
Chronocidal replied to Gakken85's topic in Hall Of The Super Topics
Definitely be careful with the legs, it's not so much that they'll explode if you look at them funny, but the twist function in the legs has an excessively complicated locking mechanism to keep the legs from rotating unless they're in one particular position, and it's not something called out very well in the instructions. They don't offer reverse transformation instructions to begin with, which is where the problem lies. Just as a rule, never twist the lower leg in either direction unless the knee is perfectly straight. The lock is sloppy going from fighter to gerwalk, and will let you twist the leg with the knee down one notch, but it won't go back the other direction. Make sure to drop the legs all the way, and straighten the knee before twisting, and you should be ok. That's not to say the knee joint might not still explode into a dozen shards of cheap metallic plastic, but not twisting the leg incorrectly will help reduce the stress on that joint. If the gerwalk twist joint goes floppy though, it might already be broken internally, and your best bet is to leave the thing in fighter mode forever. -
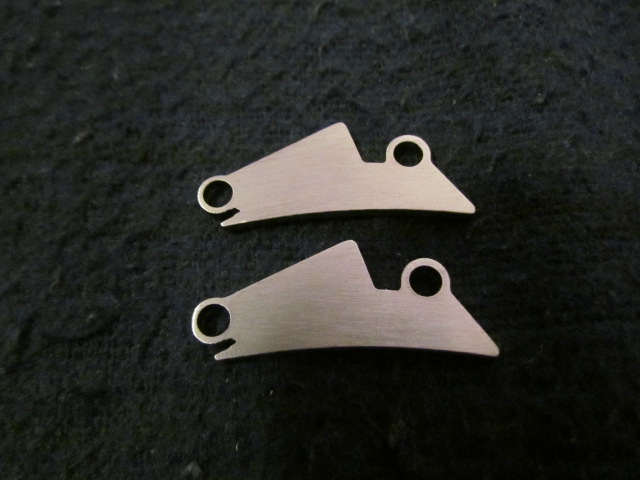
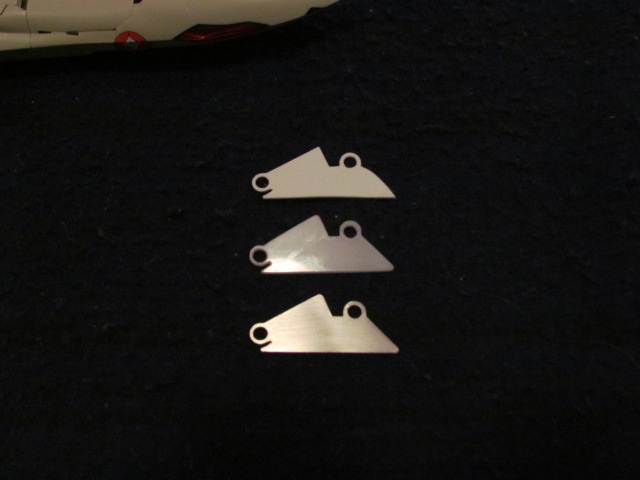
Ok, so, far as I can tell, these replacement brackets are ready to go. Got my reworked metal ones in the mail yesterday, and after a little deburring with a file, they work great. I wound up making two versions. The first is my original bracket that let the wings pivot slightly to bring the weapons parallel. The second is the accidental change I made, shifting the pivot forward, and locking the wings in place against the legs. This gif shows how much wiggle room the original bracket leaves for the wings to move. The second bracket locks the wings in the rear position, leaving the weapons permanently canted outward like a superhornet's. So, you can choose. Have the wings entirely locked in one position, with the hardpoints slightly offline, or leave a little wiggle room for the wings, and let you push the wings forward to keep the weapons straight ahead. If you do choose the ones that let you move the wings to line up the weapons, keep in mind that the ease of moving them is entirely up to how tight you make the screws in the wings. They'll move, yes, but I was able to tighten the screws so that it took a decent push to move them out of line. For now, I only have the metal versions available, since they cut to actual size. The POM is much cheaper, but I need to add thickness around all the edges to account for what the laser cutting process will remove. A pair of either type in stainless steel will run about $20, which seems to be the base price to cut them. I'll put the links here for anyone to order if they like. Just be prepared to overpay through the nose for shipping.. the site can't seem to comprehend that I don't need these things shipped overnight by UPS.. Also, if the materials goof up, you need these cut from 2 mm thickness. Here's the longer bracket that lets the wings move to align the hardpoints: https://www.sculpteo.com/en/print/metal-bracket-update-2-1/jmPr39Zc?basket=1&noclickredirect=1&uuid=MVA2TH4a3WGG36Z0ZEb3Qb Here's the one that locks the wings in position with the hardpoints canted outward: https://www.sculpteo.com/en/print/metal-bracket-update-short-1/J5du2hTx?basket=1&noclickredirect=1&uuid=PQH9GYtSc2tocNP1ML9EFe It'll take some work getting to where these can be installed, but I'm enjoying having at least one YF-19 with wings that don't slop around.
-
Ok, that paint is just gorgeous. What color is that?
-
You know, I never really thought much about how to go about fixing that permanently, but drilling the piece out and doing a chunky-style bic pen mod seems like it could go a long way. I'd think any number of readily available joints could work there though, if you ever felt motivated enough to do a full repair.
-
Yeah, the DX is better in general, but what's bad is that they recessed the rivets, and since mine have gone floppy, I can't even squeeze them to tighten them. It's worse than my Arcadia now. I've got a design in mind for a replacement swingbar that adds detents to hold it steady, and it's really just a slight variation on the stock one, but it's something that would take a similar level of manufacturing. Also, to clarify, the wing glove will hold without glue, but I wouldn't go popping the two halves of the wing apart all the way, if you can avoid it. It's only screwed at the pivot point, and I don't know if it'll hold just from that.
-
I do like the option, if only for the smaller space it takes up with the wings folded back. I only bit the bullet and modded this one since it was my sloppiest copy. I saw at least one person break an original swingbar, and a few more expressed interest in just permanently removing the feature, so that's all this fixes. I'm fairly certain a completely functional replacement could be made, but it'll take some fancier machining processes. Even pressing a sort of dimple into the original swingbars might help, it just needs something to lock the wings in place. Now the trick will be finding a way to fix the Bandai one..
-
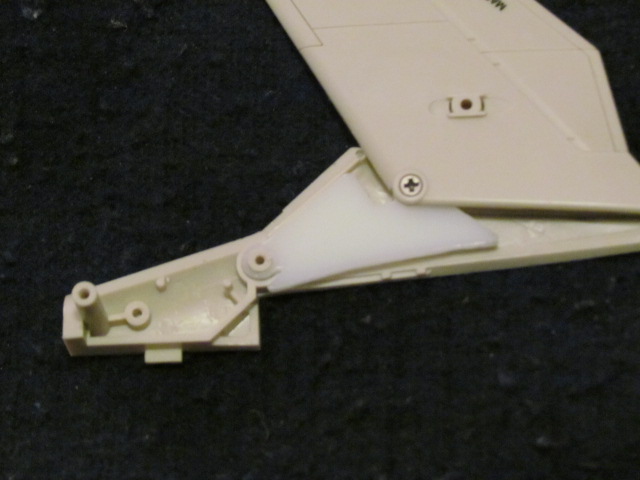
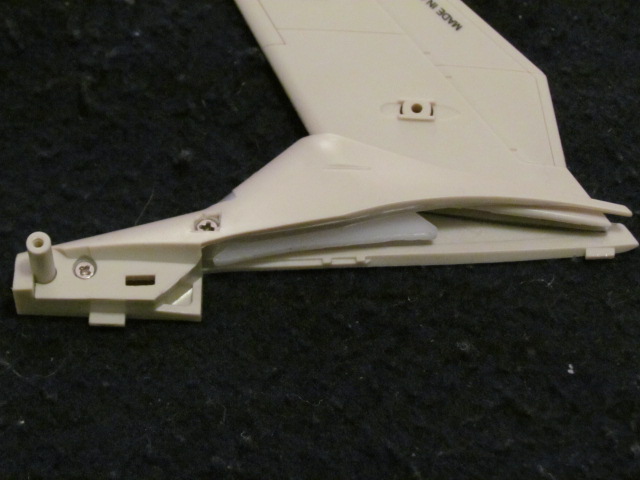
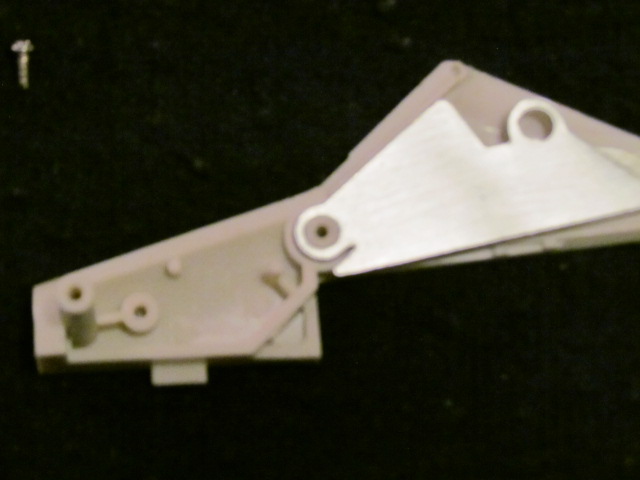
I should be clear, this part removes high speed mode as an option. It just mounts the wing on a stationary pivot, returning it to the way the Yamato YF-19 and VF-19s all had the wings. Still trying to wrap my head around how to retain that, but I was just sick of my wings flopping all over from sloppy hinges. As for your other questions though... 1. The new part is cut to pretty tight tolerances, and fits in place of the original swing bar, so it slides inside the wing, and doesn't contact any painted surface. It might however take a bit of force to push it over the plastic posts in the wing glove and wing, and might scratch them a little. 2. The screws to remove the wing gloves from the hips are relatively easy to get to. It's the tiny screw cover on the underside that's a trick to get out. Then you have to remove the original swingbars from the wing, which was easy on mine, but only because the leading edge of the wing wasn't glued down, and they popped out when I spread the wing a bit. I'm not going to say the process isn't risky. 3. Like I said, the entire point of this part is to remove the high speed option, and make the wings stay put in fighter. I hope to figure out a full replacement mechanism someday, but I don't think the sort of manufacturing capability I'd need is easily accessible.
-
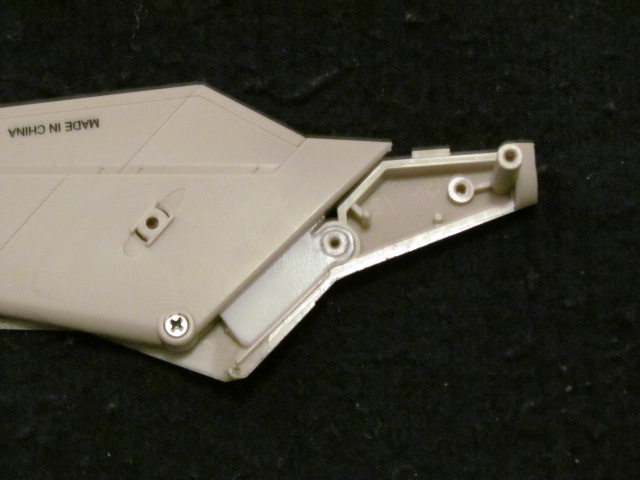
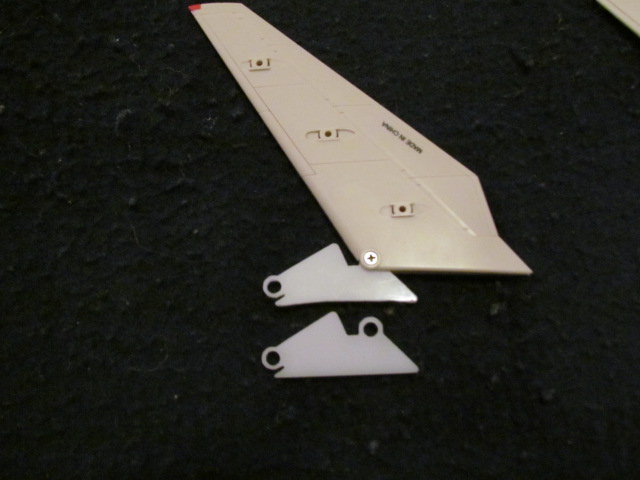
I'm not doing the lasering myself, but I've been working on a CAD model to get these parts easily reproduced. It's a replacement wing mounting point for the Arcadia YF-19 that removes the high-speed mode, and keeps the wings much more solid in fighter mode. Top is handmade out of 1mm styrene, bottom two are laser cut from 2mm POM and stainless steel sheet. My first test batch came out almost perfect, but the lower edge needs adjustment to not collide with the sides of the legs. The POM works, and is much cheaper, but has some variability due to the laser cutting. The metal came out nearly flawless, and just feels sturdier all around, so I ordered a second set of those with the necessary adjustments.

-
Not quite a model, but my workspace has been covered in bits of YF-19 for the past couple weeks. Working on getting these new wing pivots set up for laser cutting. Takes a little work to get the original swingbars out, but the wings are rock solid with the new pivot points.
-
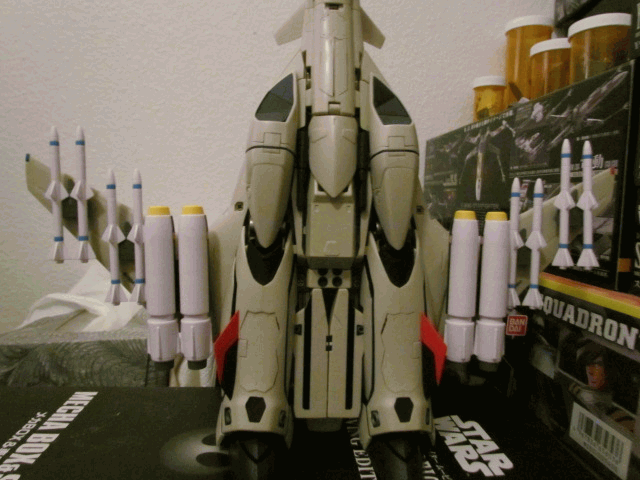
At this point, all I want is for them to release add-on super packs with stands so I can load up Hikaru and my brownie squadron.
-
Reworking this post a bit, since I fiddled with some of the parts, and got them installed. So, bottom line, the parts came out almost perfectly. Only minor cleanup was needed on the plastic pieces, and the stainless steel came out extremely nicely, with only a couple small burrs to file away on the edges. Top is my original, middle is POM, bottom is stainless steel. Sadly, they came out slightly different from my handmade patterns in two ways. First, the wing pivot somehow shifted a fraction of a millimeter between my pattern and the CAD file, so the wing pivot is slightly too far forward. However, I'm not sure if that needs to be fixed. The new location does seem to place the wings at a very slight angle backward (the missiles are barely tipped outward). But it also caused the wings to be permanently lodged directly against the sides of the legs, leaving them almost entirely without any wiggle room. Second, my patterns were made of more flexible material, and didn't interfere with the legs. But when I mounted one of the metal brackets, it collided with the side of the leg, causing the wingroot tab not to seat correctly. I cut away a bit of the inner edge on one set of the POM brackets, and that fixed the problem, so I need to make that change to the Sculpteo files and order a new set of the stainless steel ones, since I don't have the proper tools to make that change on metal parts. On the brighter side of things though, these parts came out nearly ready to use, and fit very nicely in the wingroots. I very much prefer the metal, since they feel quite a bit more solid than the POM version, and the pivot point inside the wing seemed to work more smoothly. The metal is just a much cleaner cut than POM. The parts fit nicely inside the wing, though again, the only way to get it in there is to pry the front edge of the wing apart, and hope it stays glued around the other sides. It rotates back into a slightly different position from the original swingbars, but I think it's not too far off, and doesn't look bad to me. You can also see here why we never got clear lenses on those lights.. there is really no room in there for them. If anyone wants to give the existing POM parts a shot, I can post the link, but I'm going to upload a fixed version for the metal brackets soon. The stainless steel was definitely more expensive, but I think the weight, strength, and fit was just much better feeling compared to the POM copies. Edit: Also tested the fast packs with these brackets installed, didn't cause any interference with the leg packs.


-
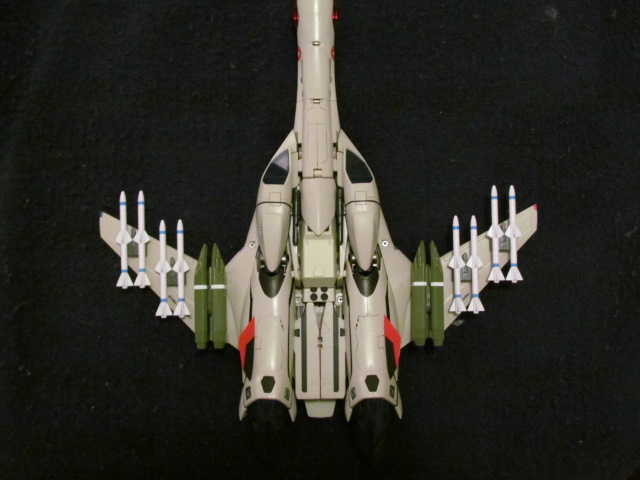
The reaction missiles each used a single pylon that mounts directly on top of where there are two dark recesses on the arm shields. I'm guessing they've already designed them able to mount the missiles, they just haven't revealed that they're making them yet (or are expecting fans to make their own, which seems to be a growing trend). Would be nice to see some red-tipped ones for a change though.
