kyekye
-
Posts
619 -
Joined
-
Last visited
Content Type
Profiles
Forums
Events
Gallery
Everything posted by kyekye
-
Yamato announced a kit version of 1/3000 with Photo-etched parts and resin parts + decals. Yamato!! You could have told me earlier!!!
-
Yamato just announced that they will release a model kit version with possible photo-etching parts and decals. Now i feel really stupid going through breaking the parts apart... Probably it will be a lot cheaper as well....
-
Work is getting crazier I'm still trying to squeeze in some time before going to bed, but it's getting difficult until the crunch is over (hopefully soon) still adding grill, hatches, metal parts details here and there I guess you know which part these are
-
Yamato 1/3000 SDF-1 modification and paint up...
kyekye replied to wm cheng's topic in The Workshop!
I gotta steal that Aztek Digital Camo technique!! I love it, master! -
It took me a while to recover my eyes.. Actually still recovering from all Sunday madness. It's amazing that my wife didn't kick my ass that day! Anyways, many thanks for keep checking my super-slow progress and many thanks for nice comments (mostly about me being sick, crazy, insane..etc ) I'm still staying away from City block. Thou i need to prepare the soldering the switch and the battery pack as well as making holes on the base parts for wires and cables. Meanwhile, I worked on the chest block details today. I totally forgot they had better close up scenes of SDF-1 in Macross Plus! Here are some nice reference images. I guess it's O.K. to use these since the same artist (Mr. Kazutaka Miyatake!!) did all designs for SDF-1. So I tried to get the details where they are more visible. Drilled some holes. Smaller ones are for the clear red lenses, and bigger ones are for 1.2mm metal tube frame for color lenses. Separated the vernier boosters to get rid of connecting pieces. Added some panel details with Plastic strips and left-over parts Carved out some vent holes (need to clean up the edges, but my tool got dull while working on these..)Time to get a new tip. I can't run airbrush compressor at night, so I'll have to wait for coming weekend for more painting
-
Spent almost all day on 5" X 1" City block most of the painting on the city block is done. Still need some touch up here and there. Added some trees Connected Fiber-optic cables on various spots Added some color lenses (0.3mm marble or beads) at the tip of some Fiber-optic cables Added some giant LCD display feel to the 'Transform Warning' background print out. The blue light shows up on the photo, but orange and red lights look like white light in the photo. They are actually pretty nice Working on these tiny pieces all day is seriously doing some damage to my eyes. I need to NOT look at this for a couple of days
-
Thanks for the suggestion, but I'm not really a convention guy Also, every time I bring Toys/model kits outside, I end up lose some parts or break someting Typical butter finger....
-
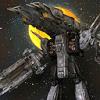
Finally it's weekend! I can spend some extra time on this slow process! I needed to set up the lighting unit before going any further, so I went to RadioShack and bought a battery pack, new LED and an on/off switch. The first place I was going to put the switch didn't work (you can see the empty hole ) . The only place i can put it was outside center area where the cover parts has some space. So, I cut out to fit the switch shape and it fitted nicely. Also painted the thruster nozzle parts with dark silver and airbrushed clear orange on top to give it a burned metal feel. Since I had some extra time today, I went ahead and finished surfacer/primer painting on all parts (except for ARMD main parts). I used Mr Surfacer (Grey for most parts, black for darker parts) After sanding/re-surfacing, I went to the next step - pre-shading. This will bring out the metal panel feel after painting colors on top later. These are parts that went through the process. (Boy! that took a lot more time than I thought! ) Parts Group A (Mostly upper torso/main body + Nozzle parts) Parts Group B (Mostly Legs and Feet + City) Parts Group C (ARMD + Diecast main frame. A bunch of other parts) Tomorrow will be Masking/Color Painting on City! That probably will take me 3-4 days
-
Thanks for the info! I think I've seen them from AKO website as well. Those are very nice and reasonably priced, but that will make the thruster nozzle a bit taller, I think. Since this is my first time using LEDs (or any electronic parts) on my build, I'll just settle with city lights for now. Foot Thrusters are something that can be added easily later since those have batteries installed inside already.
-
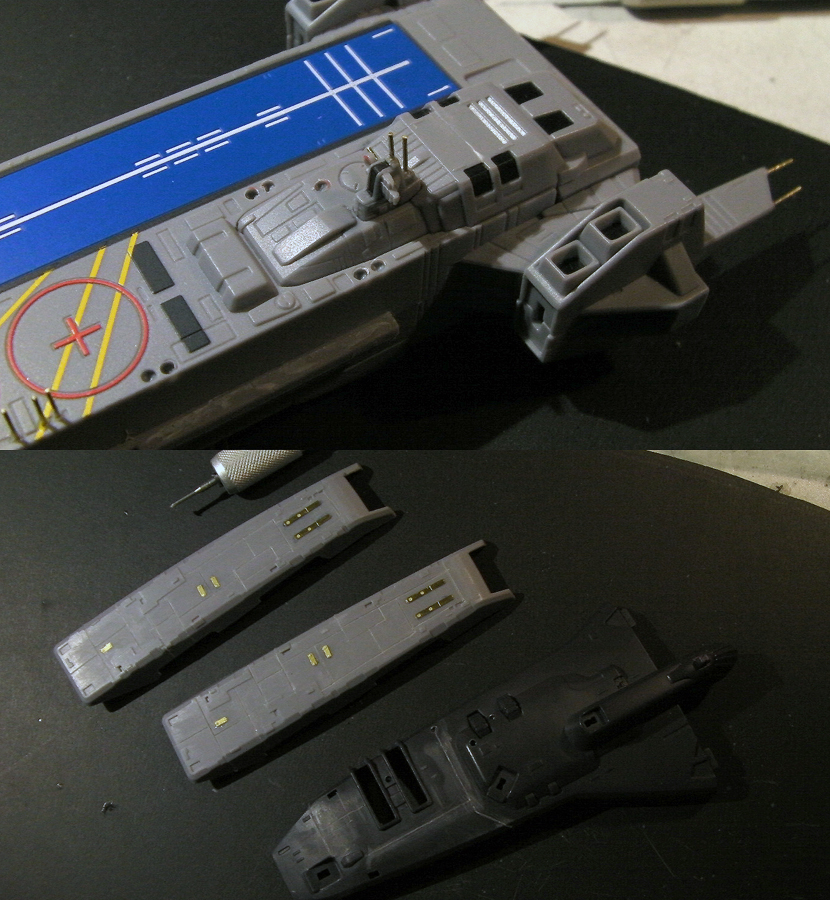
Another crazy day at work ..still squeezing out some night time to work on SDF-1... (A Man's gotta do what a man's gotta do ) Before surface work, I wanted to add some details on the city block using photo-etched parts and various metal parts. Also I tried to figure out which part of screen shot I should use for which part on the city block. * added bridge steps detail, added traffic signal on the side of bridges * added window and shop front details * detail up the concert hall * added random city details here and there I would say back half is done. Front half is for tomorrow. Hopefully the painting will bring out these details later!
-
That will be better than going in the looney bin!! Thanks for your kind(?) words I'll re-write that on my will Your name and address please.. The cars are about 1.2- 1.3mm on the part - which makes it about 4m in real life - so it kinda makes sense? Though in the Anime, Hikaru's VF-1 flew from one end to the other to rescue Minmay for 25 sec! Even with less than half speed, he flew like about 5km! So, I believe the buildings and Stadium are out of scale, but..it's Anime... Also I received 2 more detail up parts. Below is fitting test. They are a Miracle fit!!! I'm impressed! They are very shiny machined aluminum parts, but I'm gonna paint it like burned metal and it will end up looking like the sample pic on top-right corner
-
I did an additional light test with color marble lens to see if I can add some colors to the city lighting. It seems like it will work. Also changed the main Bridge antenna from Photo-Etched parts to metal rod - closer to original design now. Next, I designed the City background image from various screen shots from the movie based on the original city concept image and printed out/cut to fit the shape. Here are the images I used. Please feel free to use it/modify it for your own custom. I made 2 variations with small differences. Please note that these are 300DPI images - so you will need to set the printer accordingly to get correct size.
-
Started putting masking tapes on parts for primer/Surfacer. Since this SDF-1 parts are made of a bunch of different materials (ABS, POM, Diecast Metal and other plastic types), it might be risky to use any Lacquer based paint (It might be O.K. if surfacer can protect the material ). I'll try sorting out parts by material types. I'm still waiting for the mini LED light (Beam Saber), but I was curious to see what it will look like. So i did a small test using fiber optic cables. The size is huge compare to the cars, but I think it will work out somehow. I think either I can paint the tip with clear color or put colored glass lens to get colored light I will need to glue it after painting is done. Later today or tomorrow, I'll start painting once surfacer coat is done. Below is reference image for city block painting.
-
That one, I believe, is from old Mecha-Skunk webshop and actually not part of new parts I got . I don't think it's around anymore this year . This shop might have some from Mecha-Skunk or other alternatives.
-
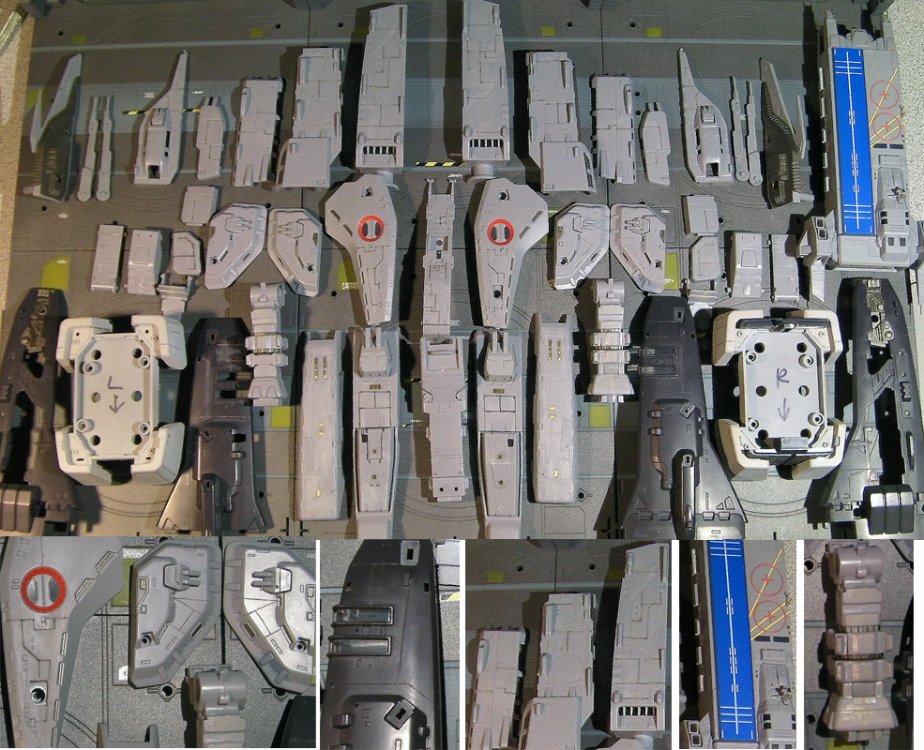
Yesterday was crazy busy + 3 hours driving. Also progress was kinda boring ( - meaning just more panel lines engraving) Good news is that I'm almost done with panel lines now, and also got the first batch of parts delivered. The parts that received panel line (+ photo etched parts) treatment. Also added a bunch of holes for signal light placements and filled seams with putty. First batch of parts delivered *A bunch of micro decals and one with Numbers I can use for ARMD ( height is good, but little wide, so I'll have to cut and trim) *Micro beads for signal light lenses *0.5mm stainless steel balls and casings. *metal parts for Vernier detail up. *fiber-optic cable (hopefully for city lighting )
-
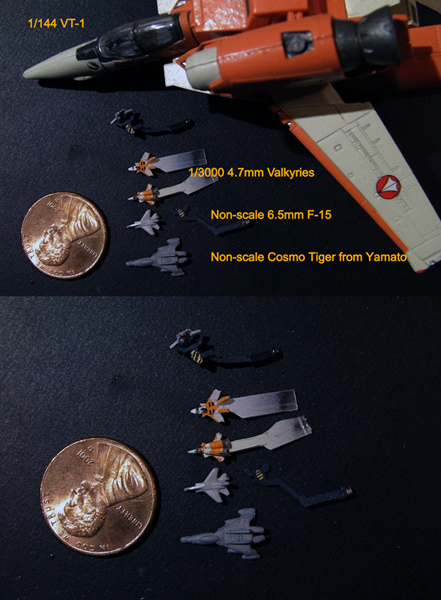
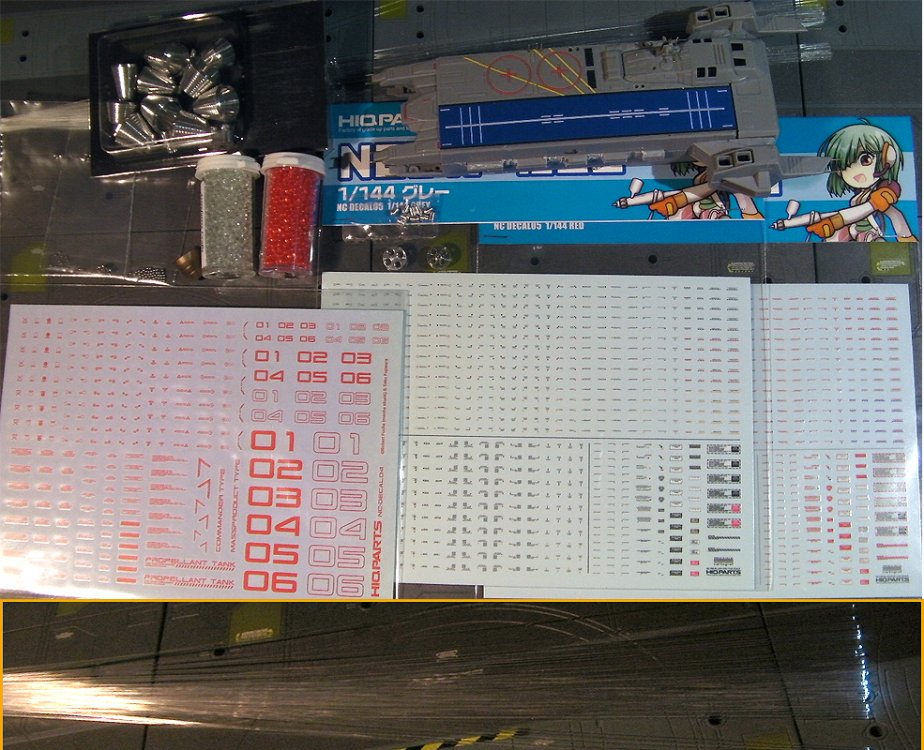
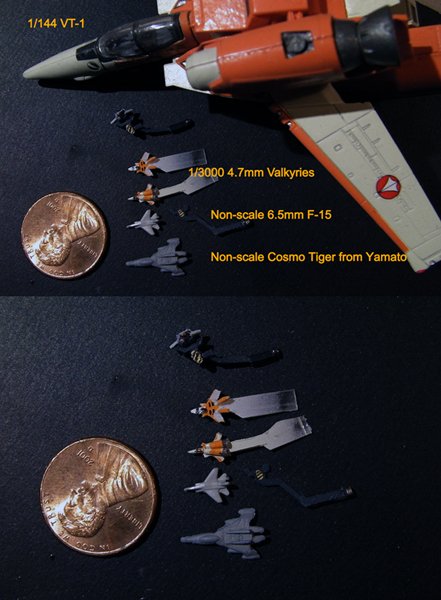
Actually it took me a while to find a penny. Where are the pennies when you need one! I also got the candy toy part that I was going to use. vf_1s was right. It is slightly bigger than scale. I put another candy toy 1/144 VT-1 next to them. Frankly though, you gotta see the nail artist doing my kid's nail. Maybe i should have them do my Valkyries!! Another slow post. Today was kinda busy day...doing non-SDF-1 work. Doing more panel lines engraving and some prep work for red-light signals.

-
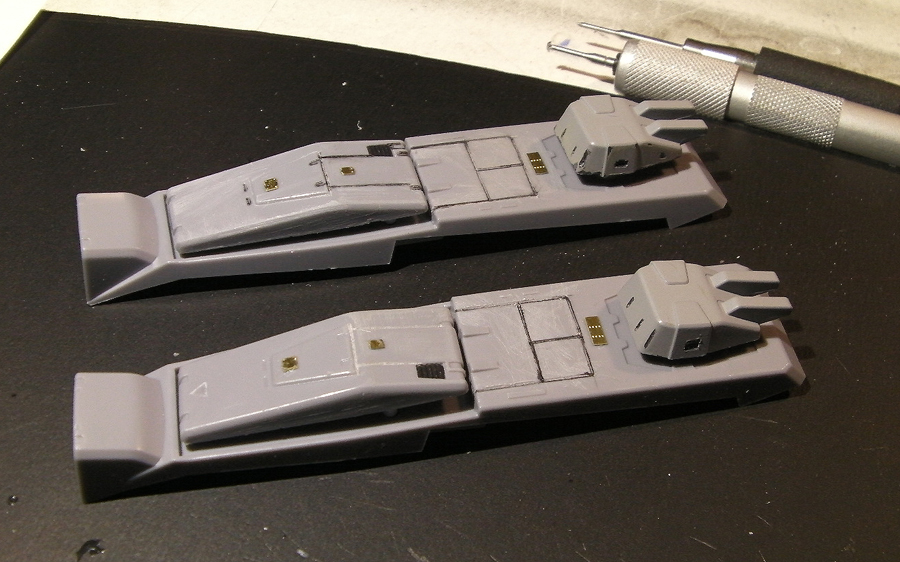
Thanks for checking out my slow post. I'm trying to post daily progress, but it becomes kinda jumpy because there are some detailing parts I'm waiting for the head-bridge and other areas. Also I'm out of floor polish (Future Shine! Where did you go!!) for clear shield part. So I jumped back to the feet and legs for the time being.. Feet primed and getting sanded. Will need to prime again after that. Leg Top parts - adding more panel lines, small vent holes and photo-etched parts.

-
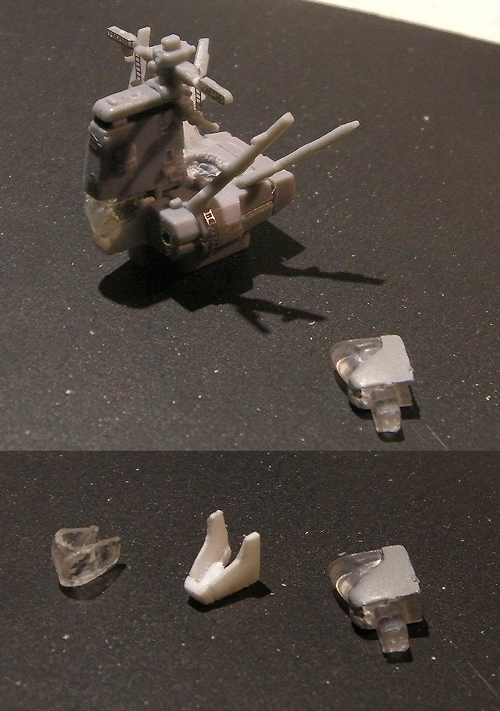
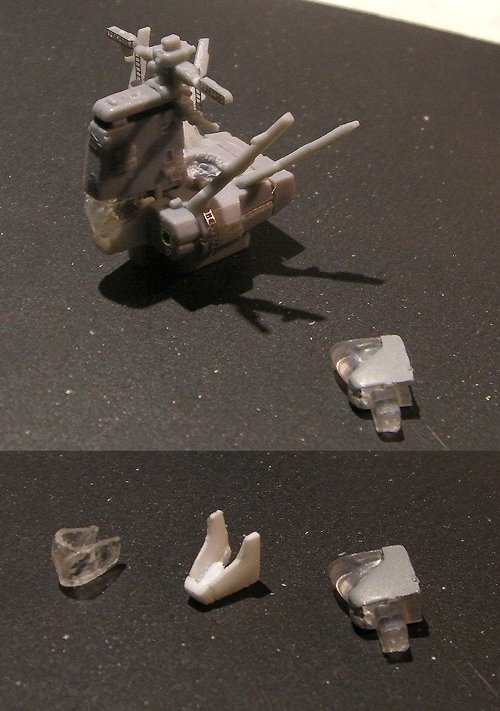
Today was mostly spent on putting magnets on the rest of ARMD panels and making the new bridge parts. Made a mini bubble to replace the glass shield chunk, and also made the bottom (jaw) structure with plastic sheet. Size-wise, it's same as the original part, but I can now see the actual bridge details inside Also took out the photo-etched parts from the head to prepare for painting.
-
Haha I'm not even 10% done yet! This is very slow process because I can only work on this at night for a couple of hours each day after work. I'm also still waiting for some parts delivery.
-
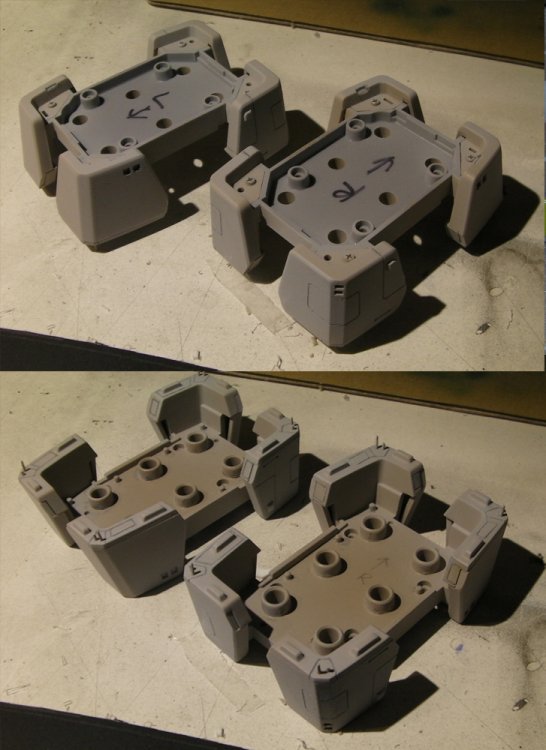
Yeah. I think only the 2-3 'bigger' gates are for Valkyries and the rest of them are for Destroids or other purposes. Oh, and I lost the signal arm last night! Probably because of the magnet attached to the tip....I'm sure it's stuck on some metal surface sending me signals... I guess I'll have to make new smaller ones when I make VF-1S! Thanks for the reference image. I was looking at the other screen shot, and it didn't show where it's attached. Oh, You bet I will! Otherwise, I wouldn't be putting magnets here and there.
-
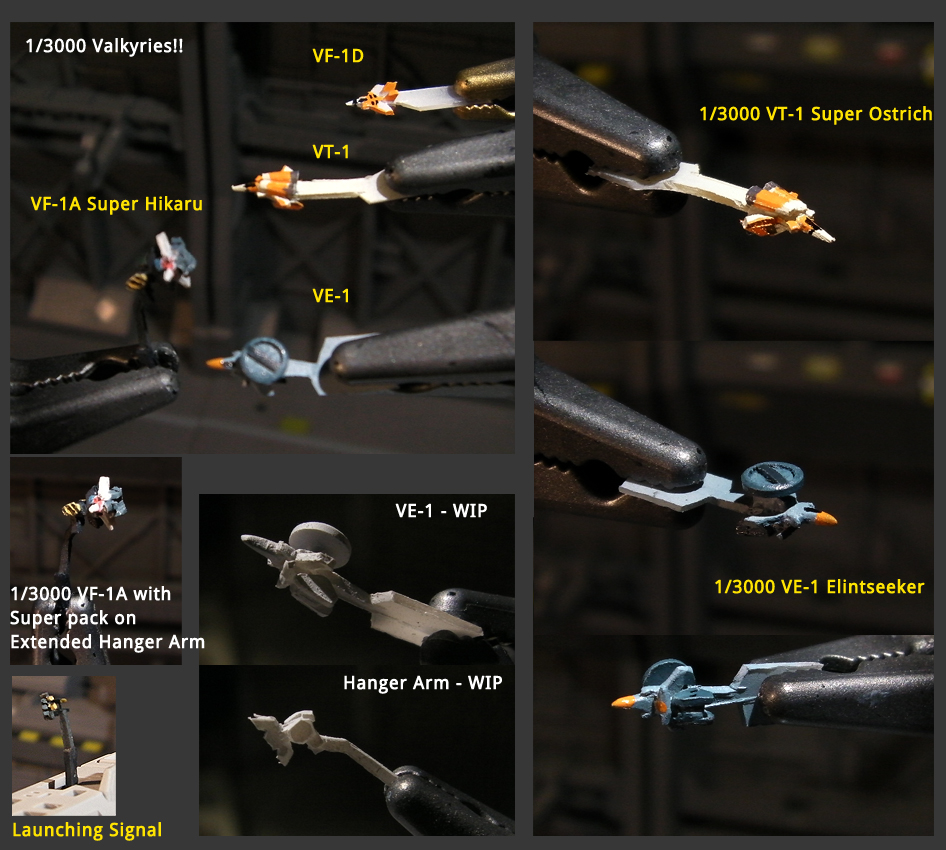
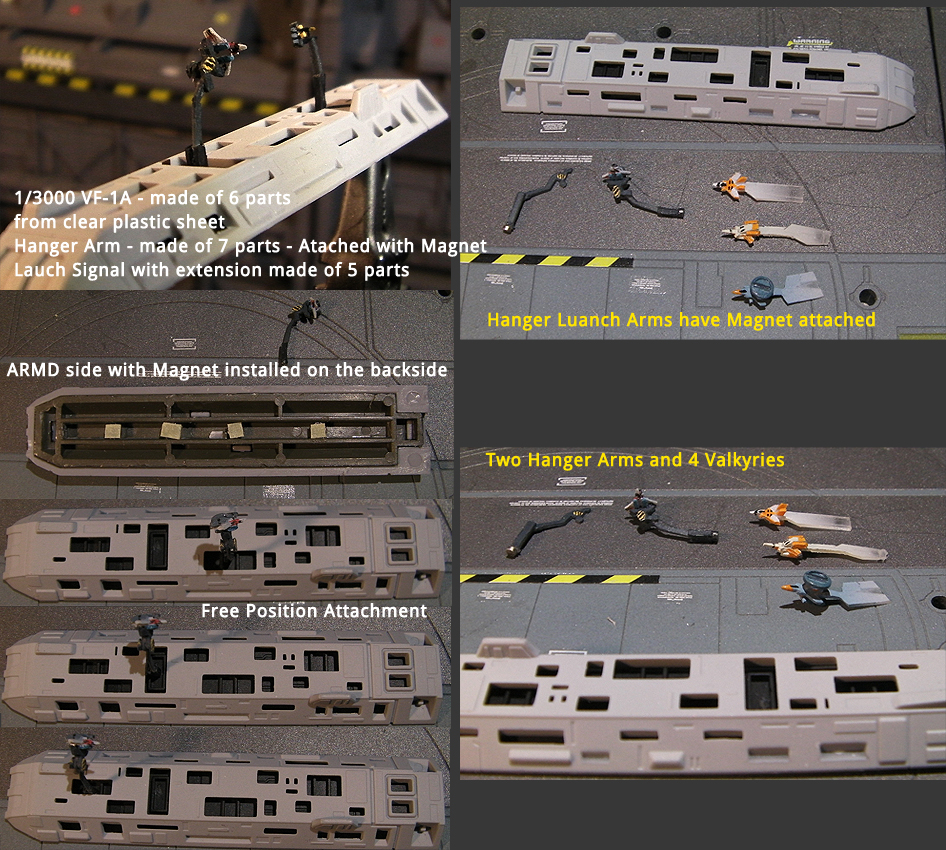
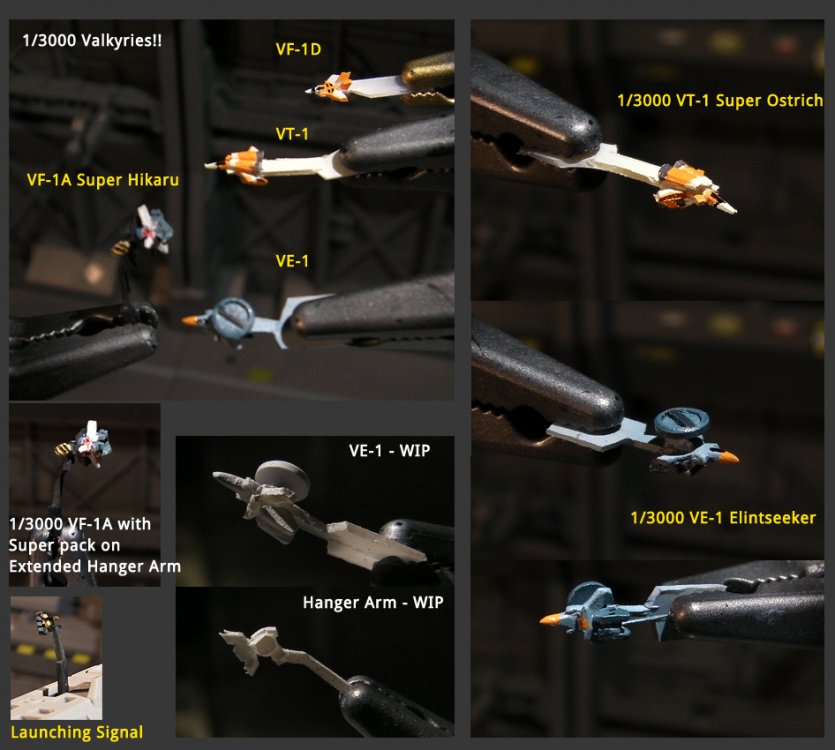
So.. after struggling with 0.3mm thick parts, I put out something resembles Valkyries As I make more, I got better at it. And the first one I made (VF-1 Hikaru) looked worst. So I glued it to the Hanger arm. Then, primed them, sand them and painted them. I decided to use magnets to attach the launch arms to ARMD. I tested on and it worked great! So I installed 4 each on the backside of ARMD Side panels. The ones on the Launch arm is 1/16" X 1/32" N50 Magnet disks (D101). The ones on the backside of panels are the same ones i used on the head bridge. ...And I'm saving VF-1S for the last!

-
I was afraid of making wings as separate parts, also I was able to put it on top of print out to trace the shape. I've spray the primer and started painting them, so I'll post images later today. I also have VF-D and VE-1 now Ostrich would be same shape as superpack - just different painting. I received the fiber optic kit. The battery box is using 2 X AA batteries and too big. So I'm waiting for LED beam saber 'vf_1s' recommended for the light source (Estimated delivery: February 03 - February 16... ). So far, it looks do-able. Still need to figure out how to put switches Sigh..If I knew how to make this tiny cast, I wouldn't be making the same things by hand 3 times. I've tried, but I wasn't able to make a clean mold or sand out the edges. As for the eyesight....I'm getting there as well.... It's really inconvenient for modelers like us.
-
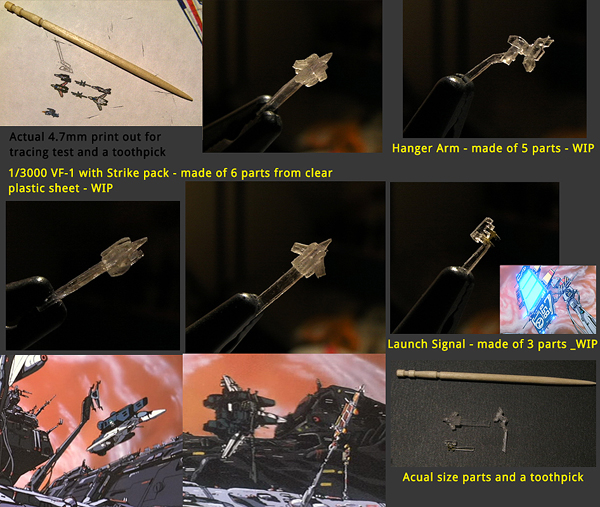
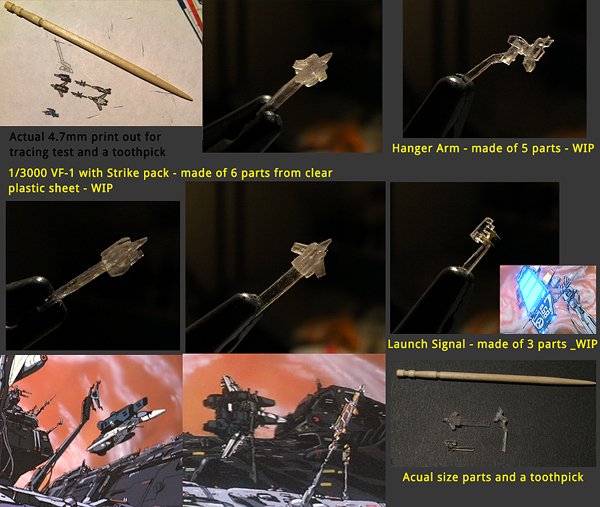
Well, I can't sit around and doing nothing after your cheering comment! So here is take-2 on 1/3000 VF-1. I used clear plastic sheet to trace parts over it. So it's all there (6 parts total including Super pack and gunpod!), but kinda hard to see. I'll have to spray primer to see what it actually look like. And some more cutting and sanding. If I like it, then I'll make 2-3 more. VF-D, VT-1 and VE-1 for sure! Gotta have those!
-
1/3000 SDF-1 lightly weathered vs. 1/2000 SDF-1 customized
kyekye replied to vf_1s's topic in Model kits
Wow! The fun never ends with SDF-1!! It's so awesome to see both scales side by side! Always great inspiration! Both you and wm cheng! -
Sigh.... I thought it was too good to be true....Sigh Nothing is easy in this world!! Arrggg! I should have seen it because I went through your pictures many many times. It was one of those 'Oh very cool angle!' shot - except for I skipped the Enterprise ship sitting in front of SDF-1 - kinda blended in! Every time i see something and say, 'wow this is tiny, I might be able to use it!' and bring next to SDF-1 only to find out it's too big for scale.