kyekye
-
Posts
619 -
Joined
-
Last visited
Content Type
Profiles
Forums
Events
Gallery
Everything posted by kyekye
-
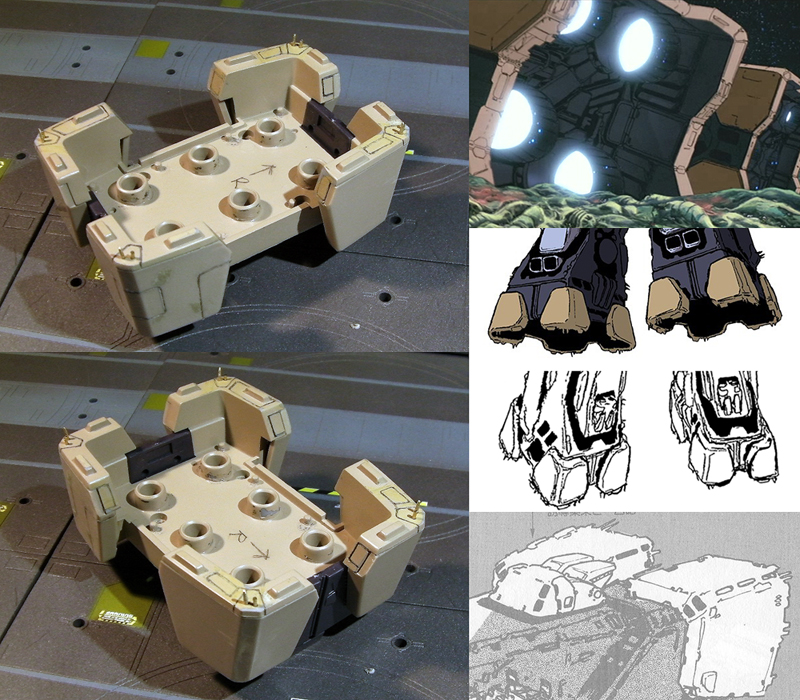
I got faster on the other foot, and finished the feet detailing today. It's not much noticeable for the time I spent on them yet, but I believe it will show up later as I start painting them (hopefully)
-
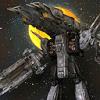
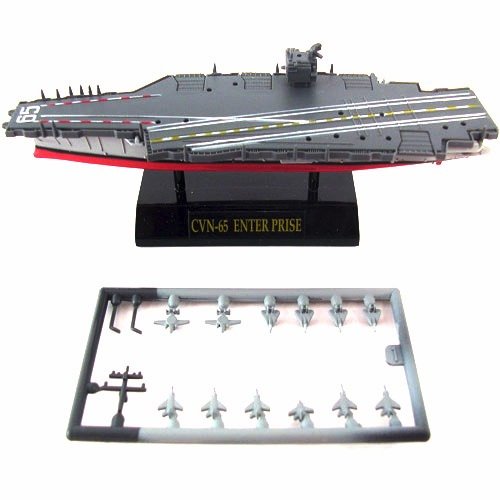
Oh, I forgot to add! I found one of these at the local hobby store. It's Some kinda Japanese candy toy from Furuta (Furuta Battleship Collection. This one is CVN-65 Enterprise) It comes with 4 types of modern jet planes (12 total) and the scale is something like 1/2400. I guess you know what I'm thinking
-
Today is 'Foot fetish' day Adding Panel lines with engraver and antennas on each foot. I spent some time on it, but ended up with only 1 side bottom.. One note, the bottom sole material is softer and kinda easier to engrave panel lines. However, the top has very hard material and takes multiple strokes to get good panel lines engraved. So..at this rate, it looks like it will be another 3 more days with foot fetish for me..
-
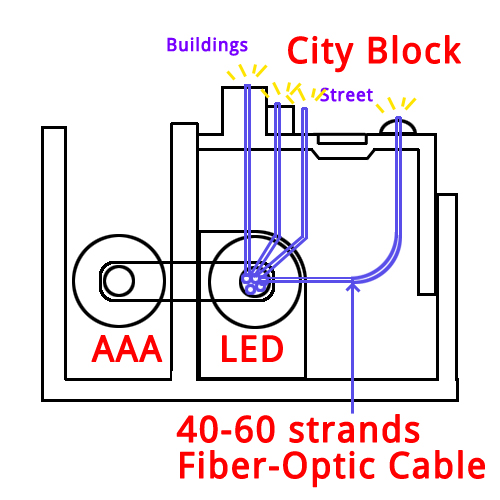
Thanks! I've ordered both - so that I can use fiber-optic cable and choice of LED light. Lighting is still just a plan. Since I have 0 experience with electrical parts, There is a big chance I might just skip it. For the parts, I'm done separating for now. At the time, I was stuck and desperate so I searched web in Japanese, Chinese..etc for clues. Somehow I got the info I needed. Probably I might need some help again when I put it back together later
-
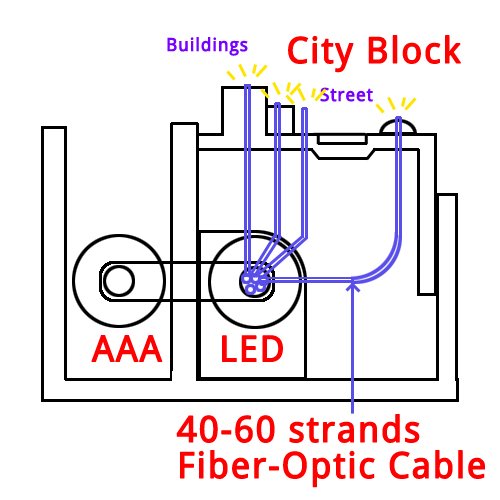
Wow! Thanks!! That looks awesome! It seems like it's sold out almost everywhere. After some more search, I found other one at G-System shop. Although my first idea with that fiber-optic light one was slightly different. Here is a section view of my crazy idea but I can't tell until I see the product, so LED light saber will be a great back up plan!
-
Oh Boy.. I've done it now I would still say that 'parts separating' was 90% luck and 10% skill.. every time I got to the 'glued' parts, I closed my eyes and prayed...to Captain Global!! I use just regular small wire cutter for brass rods (.020-0.51mm - got it from floral/craft shop! ) Drilling holes on the edge with pinvice was quite a job itself. For small scratch build parts, I use Mr. Epoxy putty (strong) or MoriMori. I prefer Mr. Epoxy Putty for easiness, but takes 6-24 hours to full hardening while MoriMori only takes about 30 min.
-
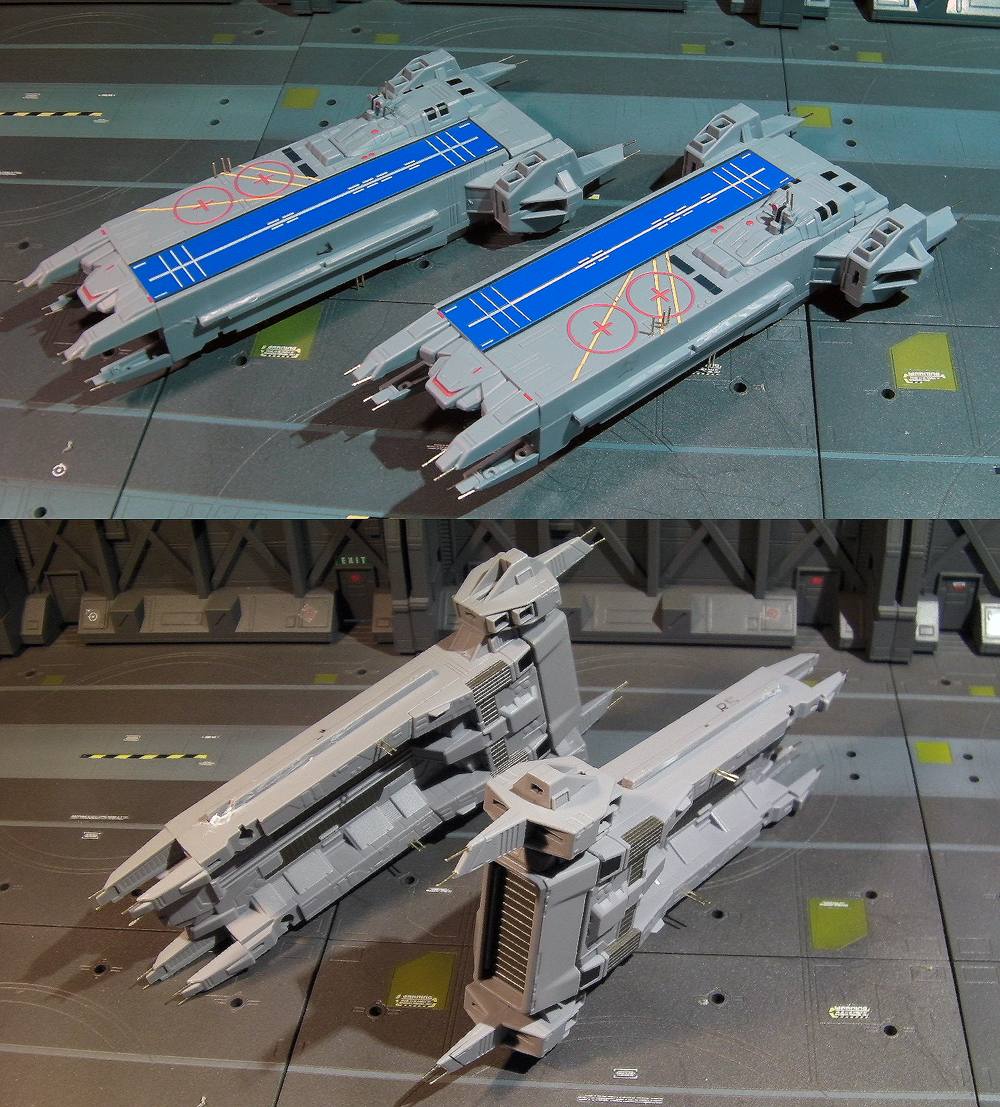
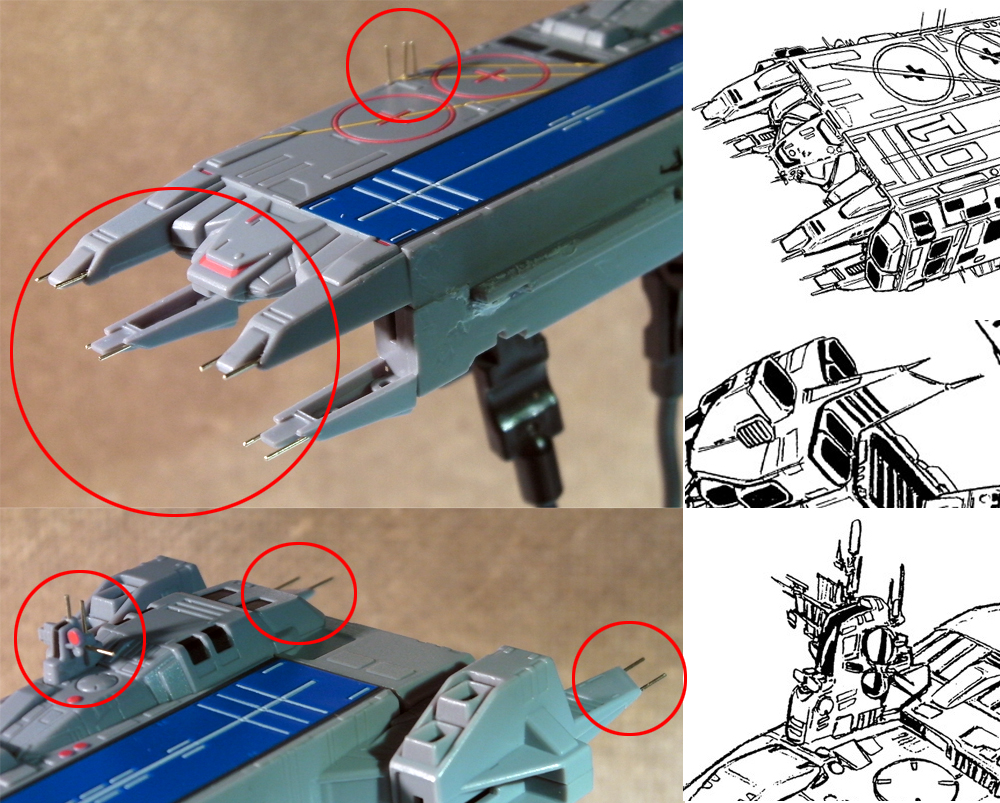
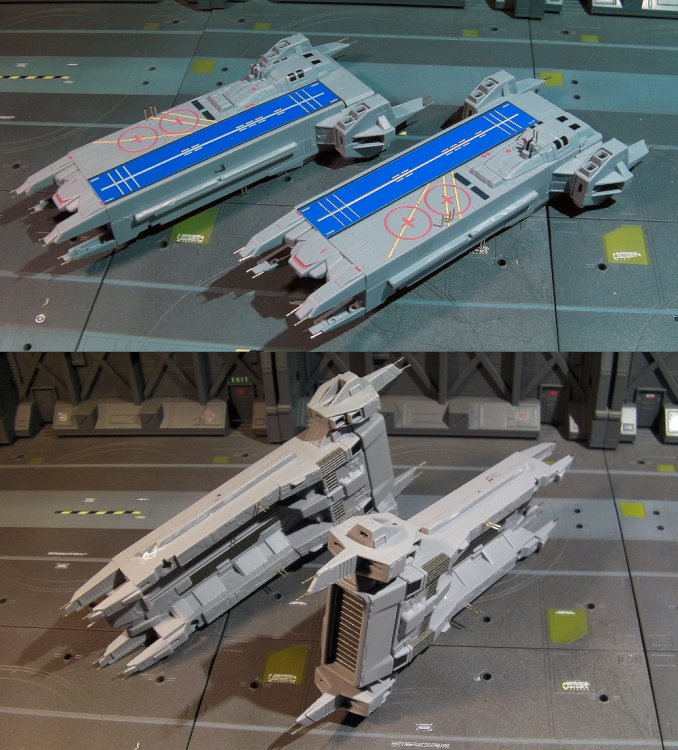
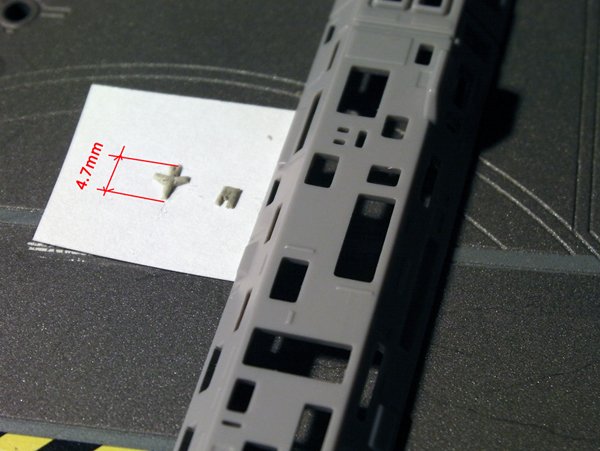
Not much to post today because I repeated the same thing I did yesterday on ARMD-2 Thou I still managed to prime the metal parts and glued them on both ARMD 1 & 2. All the metal tips are rounded - to protect my fingers . Also added some more antennas on the bottom as well. While I was waiting for the metal primer to dry, I made a dummy VF-1 with putty to check the size. 1/3000 of 14.23M = 4.74mm Hmmm...That's too small . I'm not sure what to do about it yet.
-
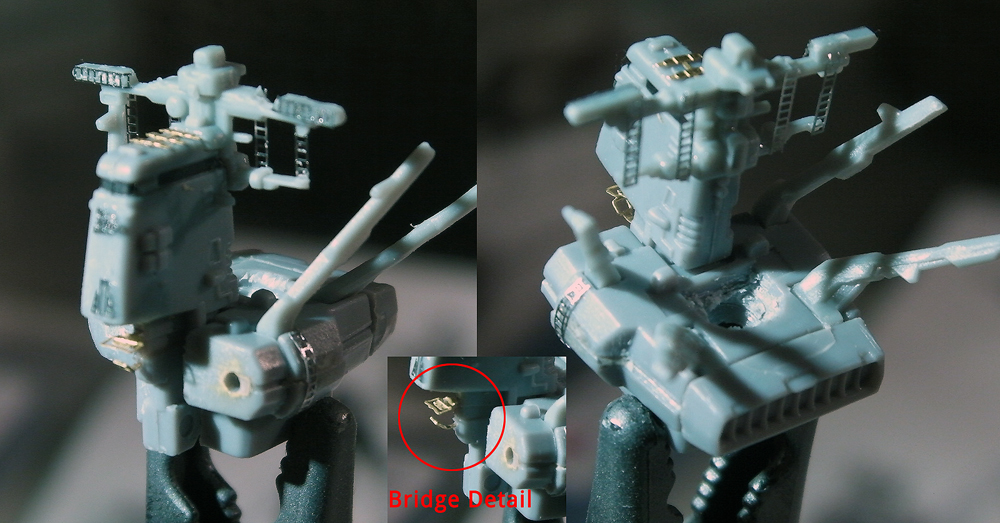
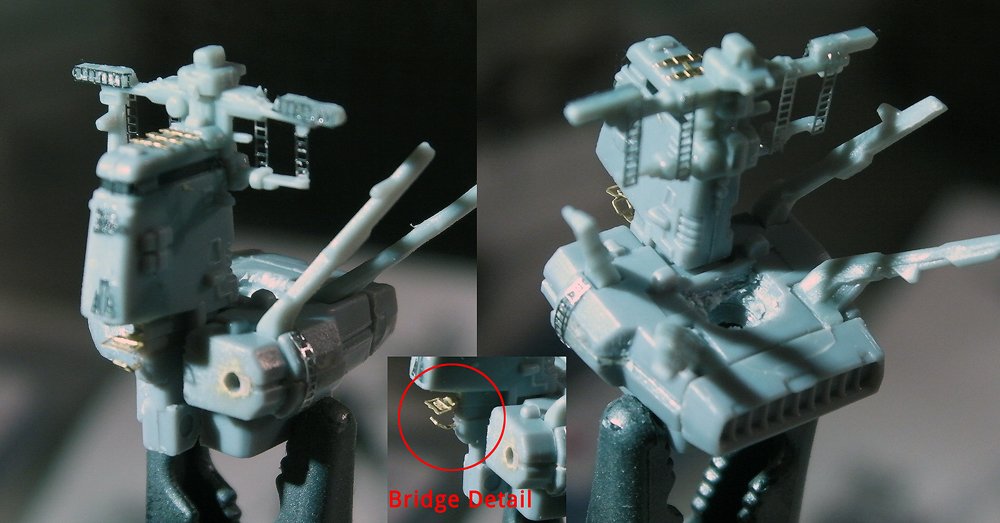
Thanks for your nice comments. I'm using "whatever photo-etched part I think will fit". some are from 1/700 scale ship, but others are something else. For example, the bridge detail part I'm using is some German pilot belt buckle.
-
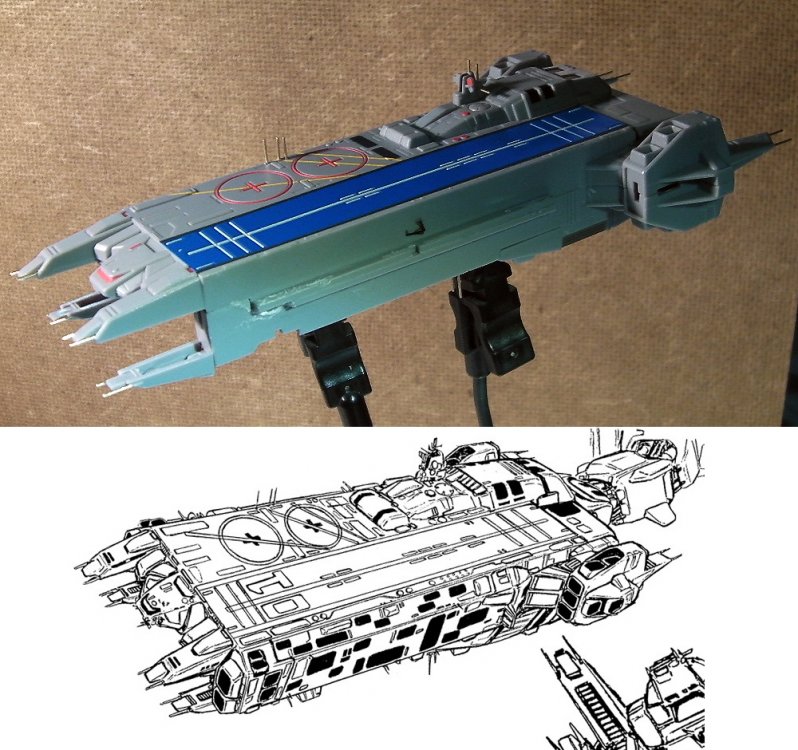
Adding details to the ARMD. Actually Yamato did a pretty good job with all details and panel line on ARMD. Things missing are mostly short antennas and Numbering on the panel. ('01' and '02' decal would've been a nice touch. Yamato?) I think I have left over decal from somewhere though. So I drilled pinholes with pin vice and added a bunch of 0.5mm diameter rods. I thought about tapering the tips, but I will end up getting poked by it. So instead, I rounded the tips with a file. Circled areas now have antennas. The lengths are not in sync yet. I'll need to cut them in better lengths, prime them and glue them tomorrow. Going to bed now..

-
Just checking possibilities for now. Never used the lights in the models, but 1/2000 model by 'vf_1s' sure looked nice! For 1/3000 model, there is some space under the city and behind city just enough for 1X AAA battery. It doesn't hurt to get one light kit and check the size and flexibility of optical cable. If it doesn't work, I can use it somewhere else later.
-
I know exactly what you mean. Now that I think about it, I must have been possessed or something. What was I doing with $400 toy.. I had a number of chilling moments while I was doing it. BTW, Check out what I found! Link Probably it's not that bright, but it might work for me since I have 0 experience with these kind.
-
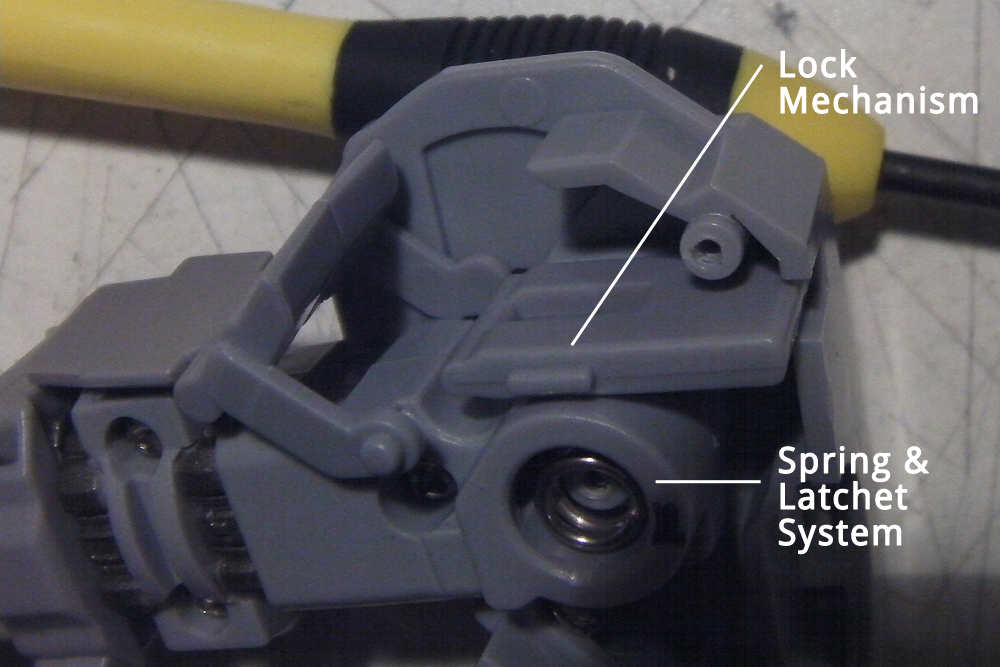
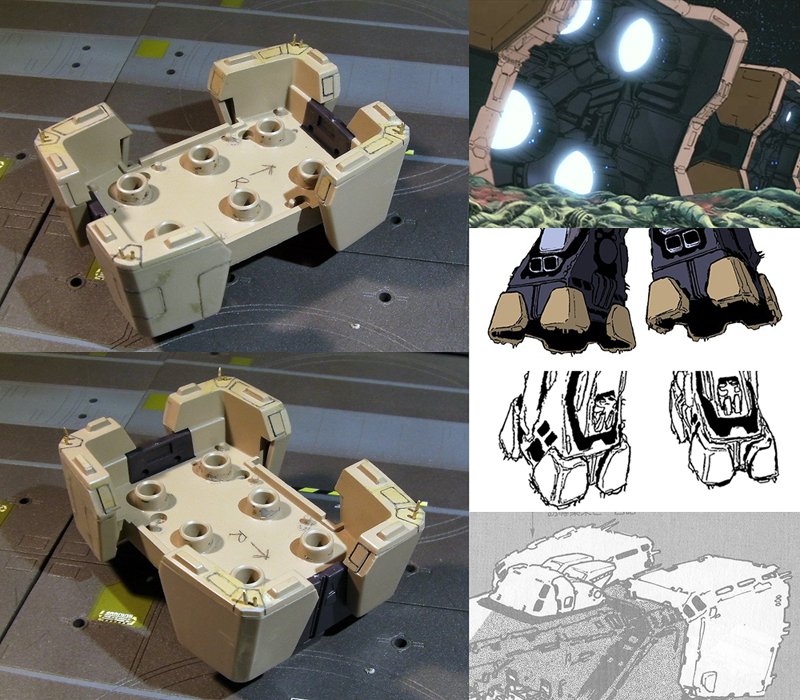
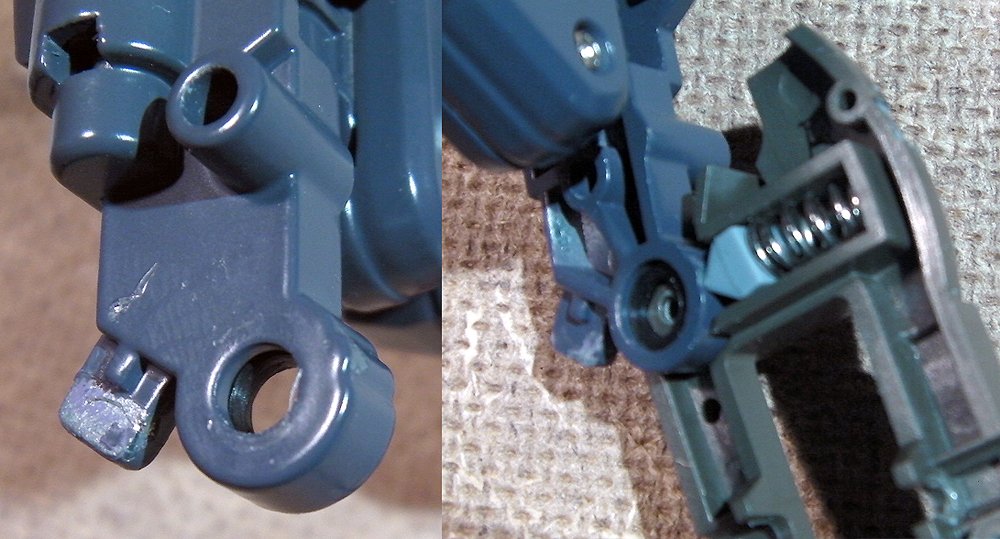
Thanks for nice comments! -Mom! Crazy people are telling me I'm crazier!! (jk ) Originally I was planning to only work on weekends, but I got carried away and lost some sleep during weekday nights... Not good. BTW, someone asked me about knee ratchet joint area - inside view. So here it is. You can see 2 lock areas on the ring (left image) and triangle peg is pushed by strong spring (right image). You can see the front/back direction by the knee cap position (the area with glue stain)
-
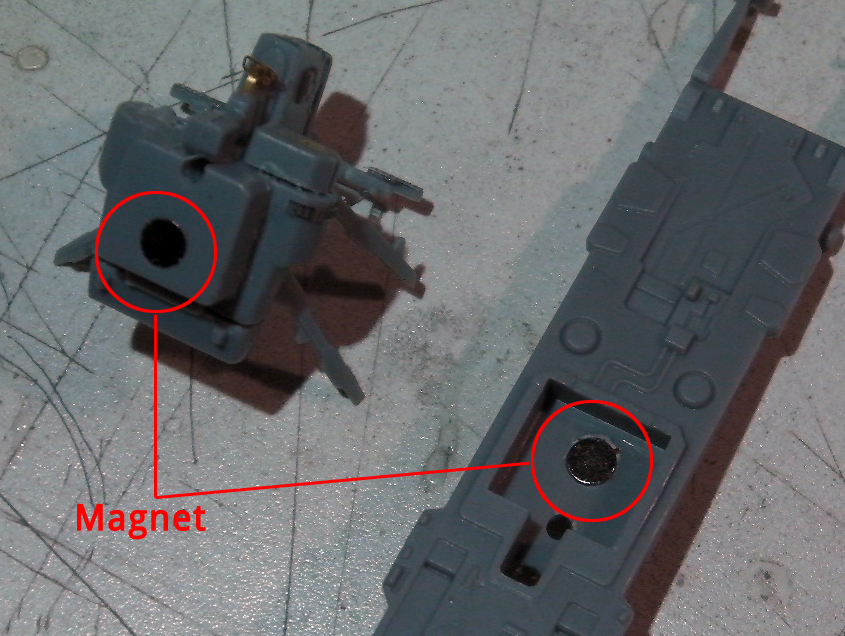
Thanks! Mine got delivered a little late and I took a couple of days getting familiar with transformation and moving parts. Even though I separated head/bridge without damage, I decided to add magnet so that I can remove the head during transformation. So I ended up drilling hole on the head anyways
-
Since I'm adding photo-etched parts on the head, I would be afraid of touching it during transformation. So I decided to use magnet on the neck/head joint. I can remove head while transformation and put it back. Neodymium Magnet Grade N52 (part name:D21B-N52 from K&J Magnetics) Now I can work on the head details. *Adding antenna lines and small panel details. *Filled portion of side gap with putty *adding metal rod for yellow disk antenna and sensors on both side of the head. *I think I'm gonna cut out the glass shield and replace with thin clear plastic. So I added main bridge details using Photo-etched parts. *photo-etched parts placements are temporary. I'll need to prime them before paint. Some minor gaps will be also filled with primer later. Again, my camera is not doing a good job getting focus on MACRO

-
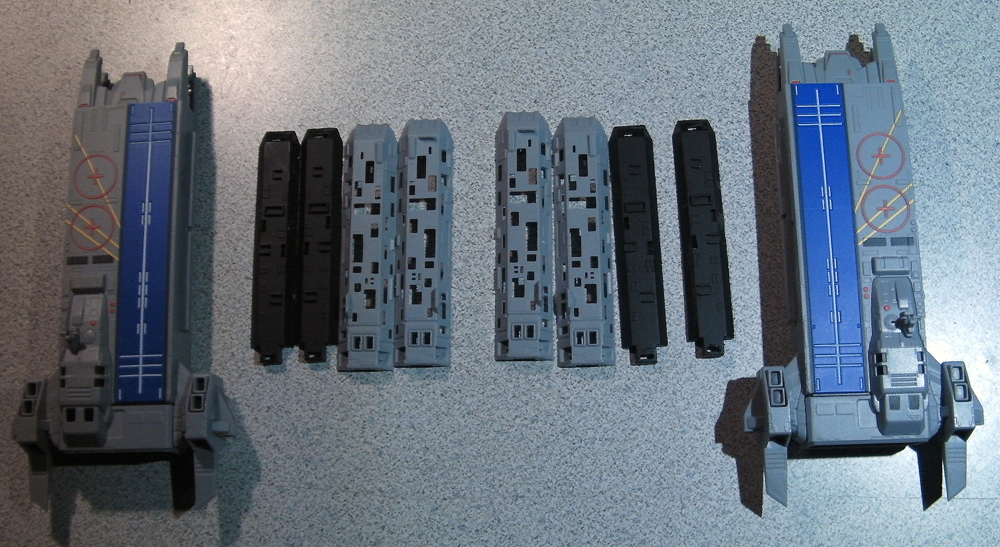
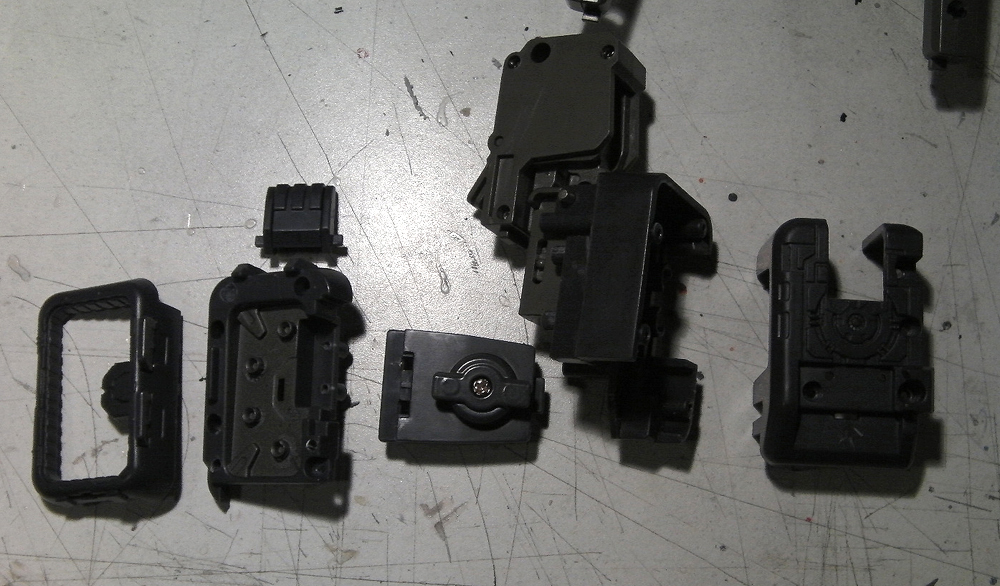
I just wanted to separate the black-painted inside parts. The rest (blue and other markings) is printed, I'll have to work around it Now the fun begins! Next step is adding details and cleaning up.

-
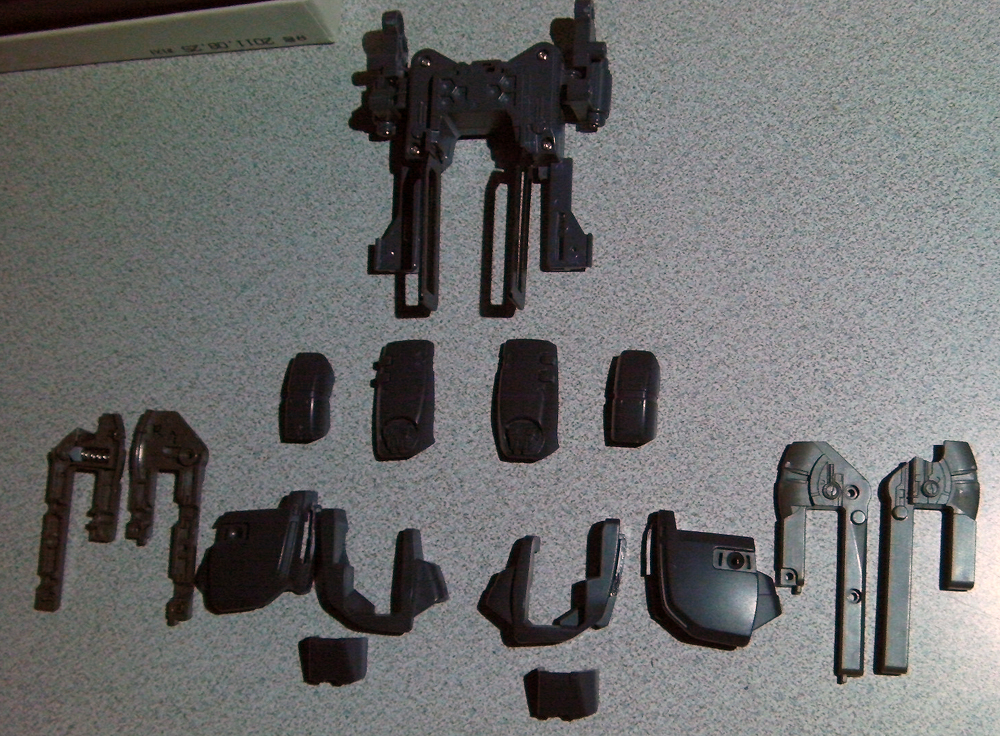
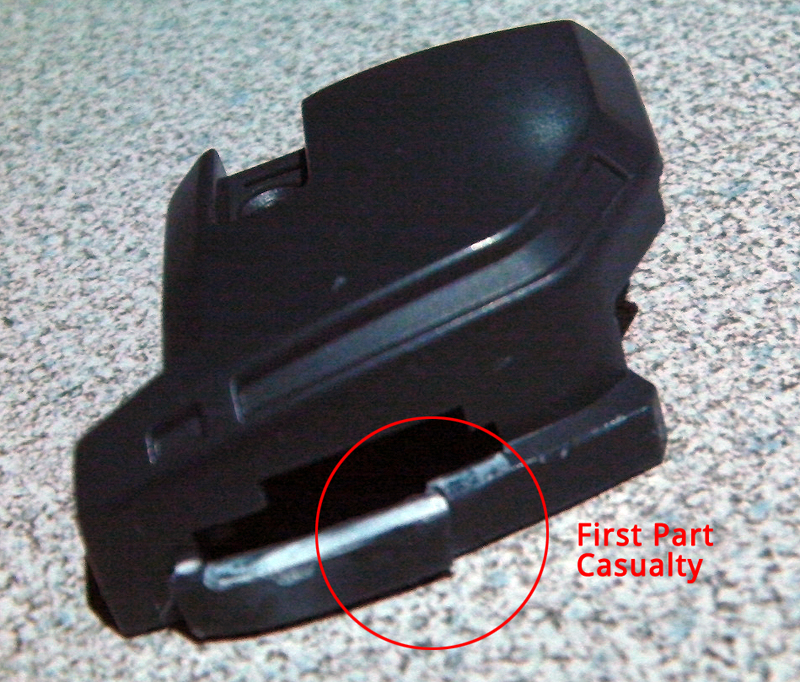
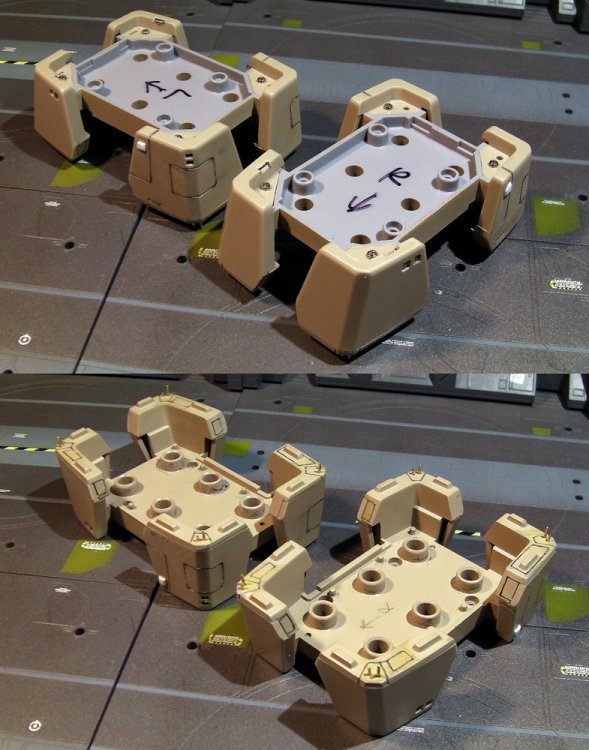
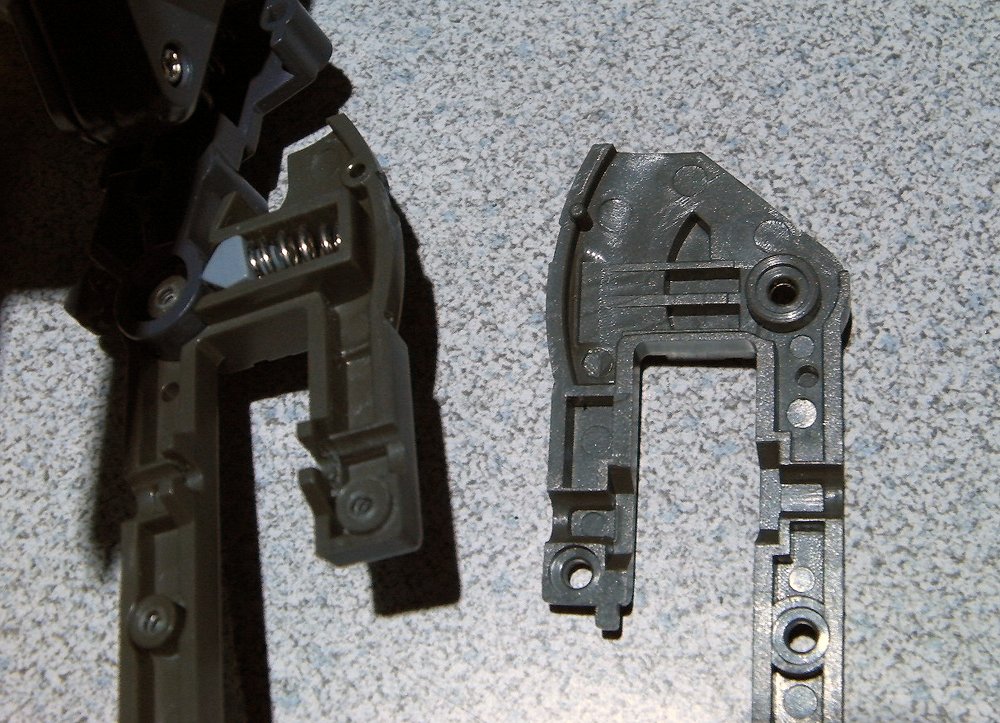
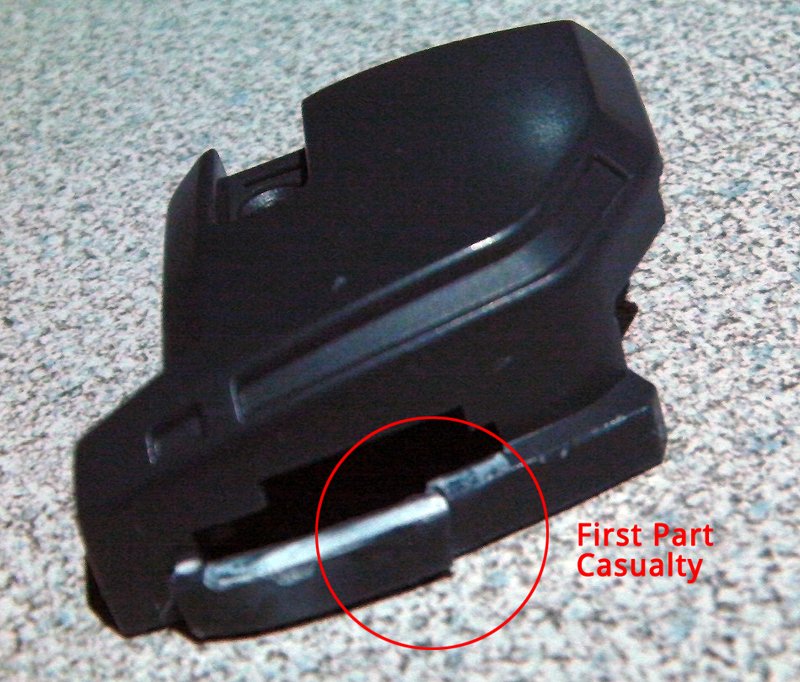
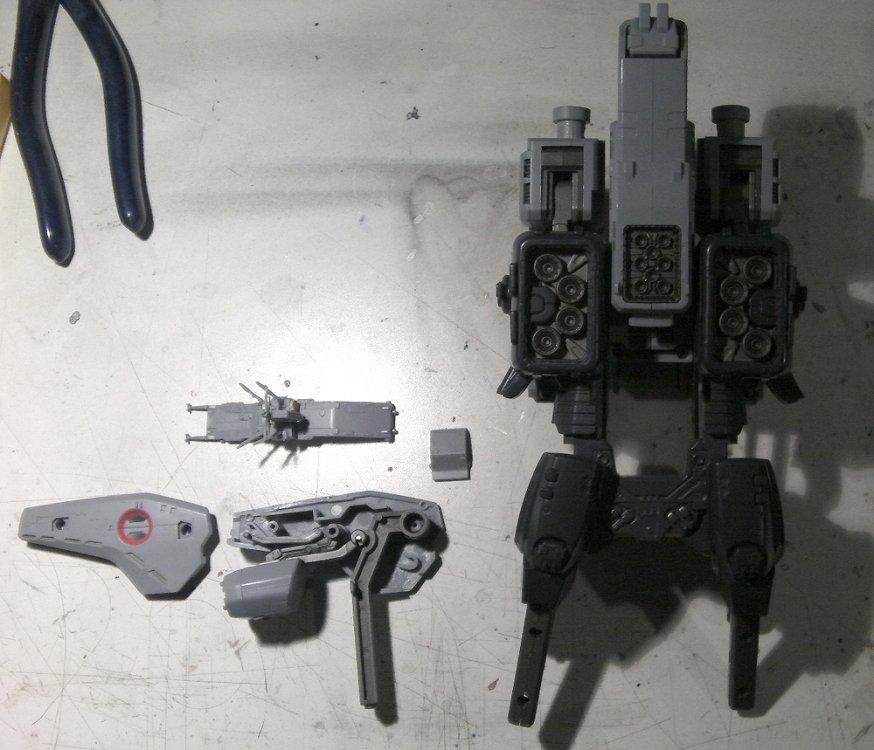
Finally i got the Thigh disassembled!! Yay! It was just glued very tightly. No Mystery there. Here are some pics of parts. Finally got one part broken, but it's not gonna be visible. So I'm saved! Now to the ARMD!
-
I found a web page showing all 1/2000 SDF-1 parts, so I'm gonna try to get to the knee.
-
Oh I found a web page showing all parts and assembly instruction of 1/2000 SDF-1 here. The page is in Japanese, but it doesn't really matter. It appears that the Thigh parts came in pre-assembled... But it still shows the parts assembly for the Thigh.
-
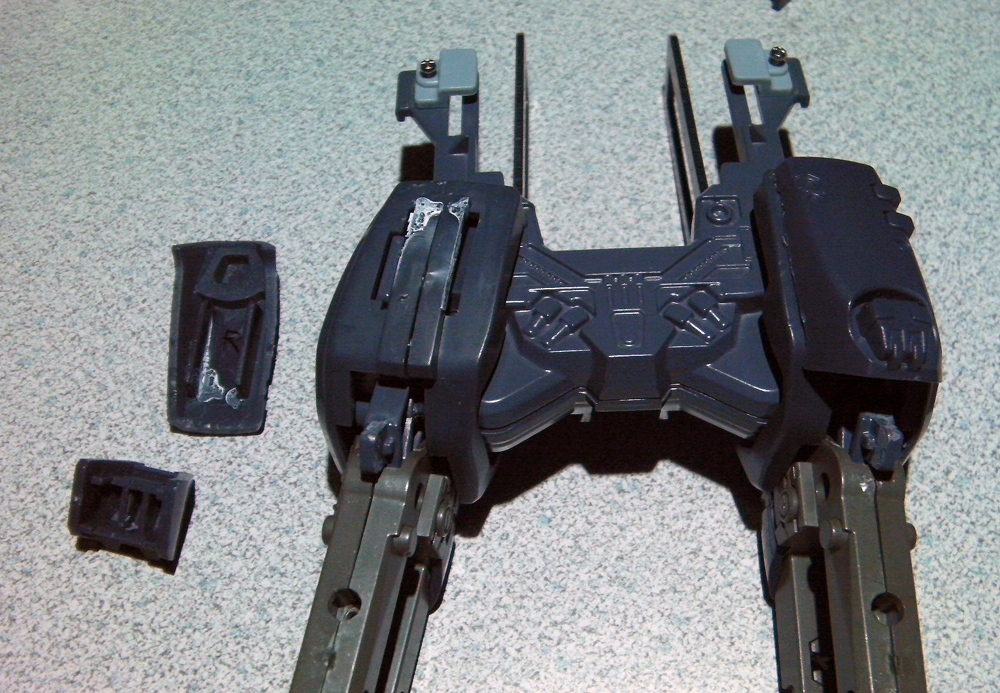
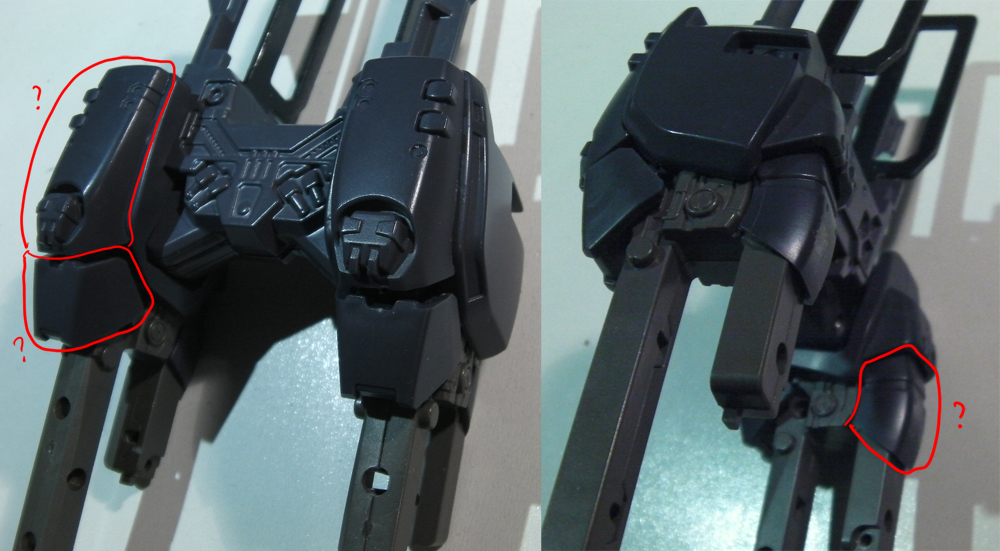
Hmm. I'm kinda stuck at Thigh/hip area. I can see the front cover should come off first to get to the rest of parts and to split the main thigh. but the knee cap is the mistery here. Does it need to be removed first before the front cover? So far, there were some hidden screws inside unexpected spots, so I'm afraid if this might be one of those. In worst case, i can still just do masking, but really want to remove the grey metalic part to paint separately.

-
Oh hi, I'm kinda doing it here My camera isn't that good (compare to these days standards, that is) and I didn't take step by step pics (too many parts) - so i got lazy and took photos only after I'm done with each area. I'll add the photo of the area I'm having trouble with now.
-
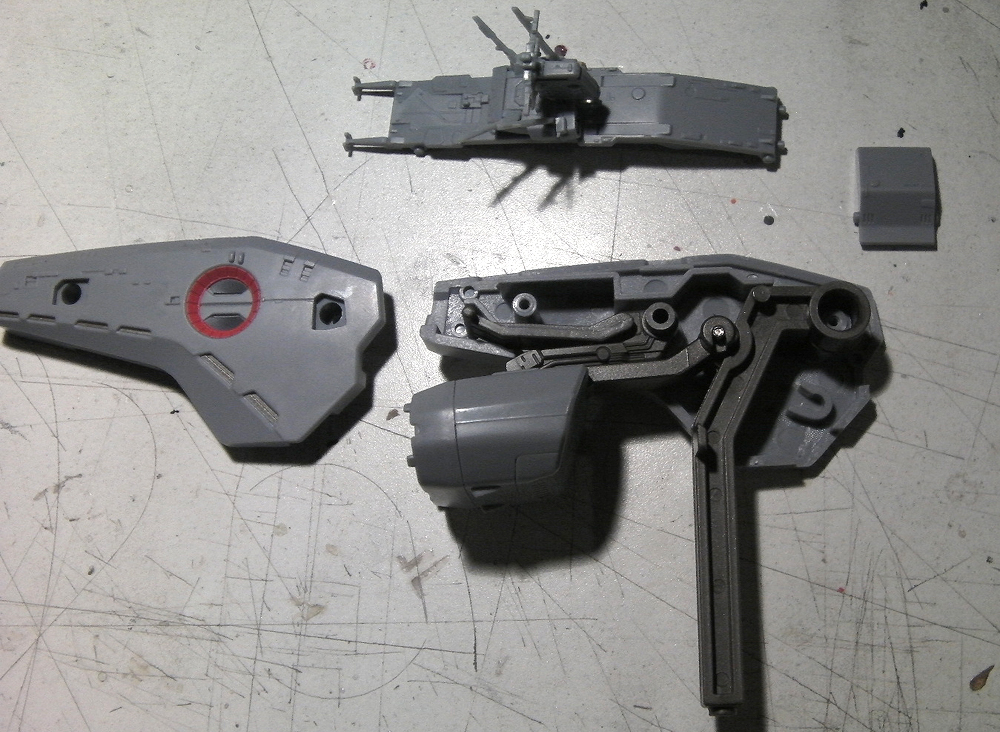
I'm almost done with separating parts for paint job, but I'm stuck at the thigh with knee joints. It will be great if you can tell me the order of the thigh/knee assembly. (backward or forward - doesn't matter) I can't figure out if the thigh front cover comes off first, or knee cover. Basically I'd like to separate the Leg frame from dark blur parts. Thanks in advance!
-
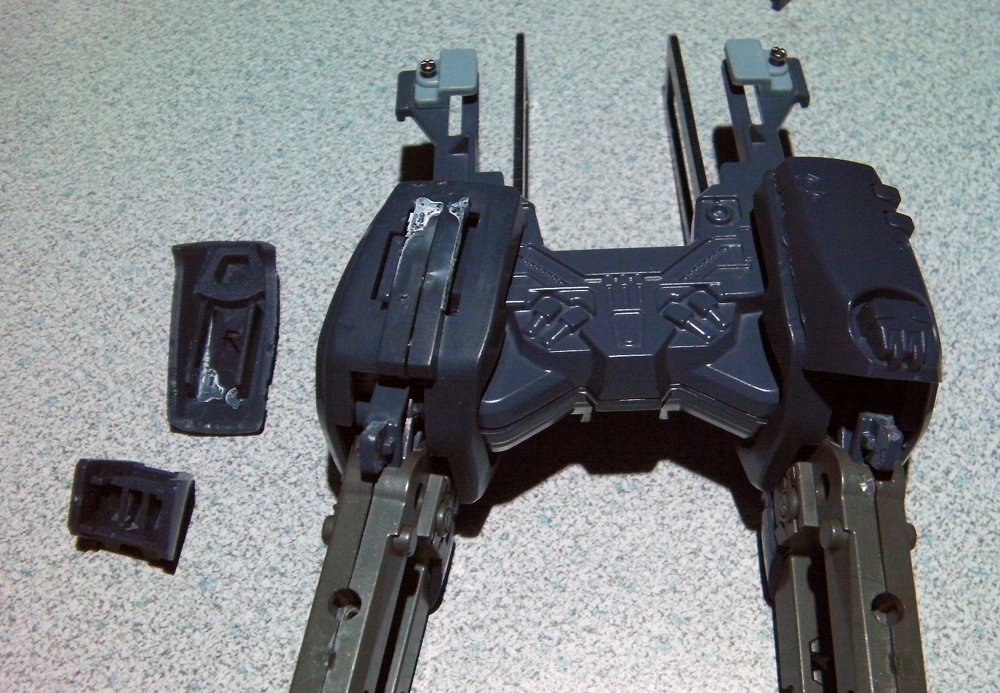
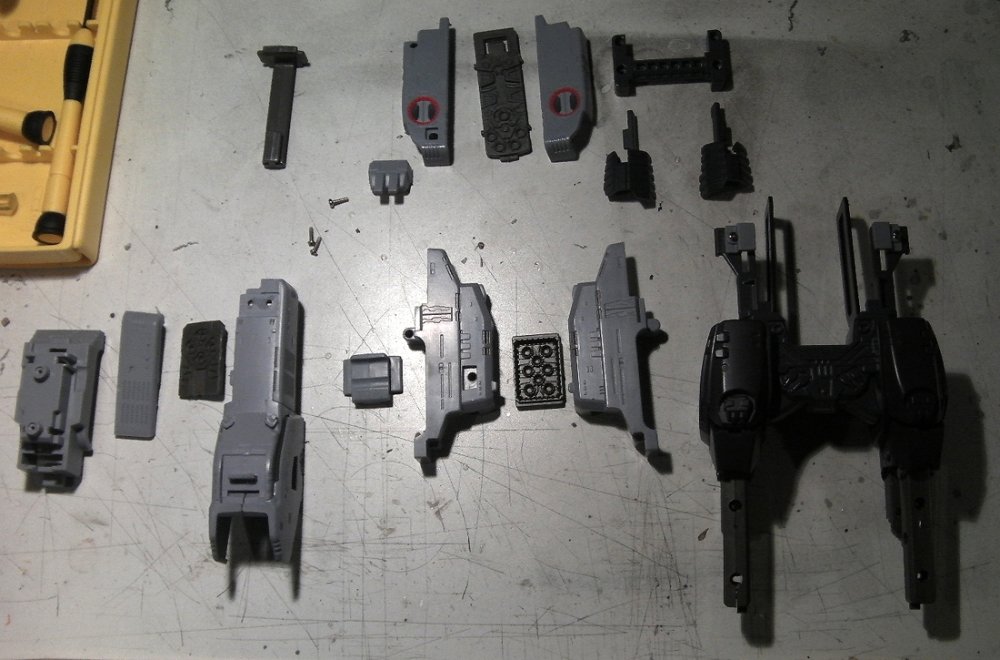
Disassembling Engine side (?) of chest block The front panel was glued somewhat tightly, so took me a while to open it to reveal screw holes. After that, the rest was easier. Started showing some metal parts (shoulder joint and cannon joint) Main Body completely disassembled - This part was the most difficult so far. As getting to the center, Yamato used more glues and longer plastic pegs to put together parts. I want to work on the remaining leg parts, but I can't figure out how it's assembled. I might end up using some masking for the knee joints to paint. That's it for today. took me about 4 hours for today's progress. Tomorrow, I'll get to the ARMD-1 and 2 if i have time. Oh. please pardon me for separating posts. I'll need to use this to back-step assembly later.
-
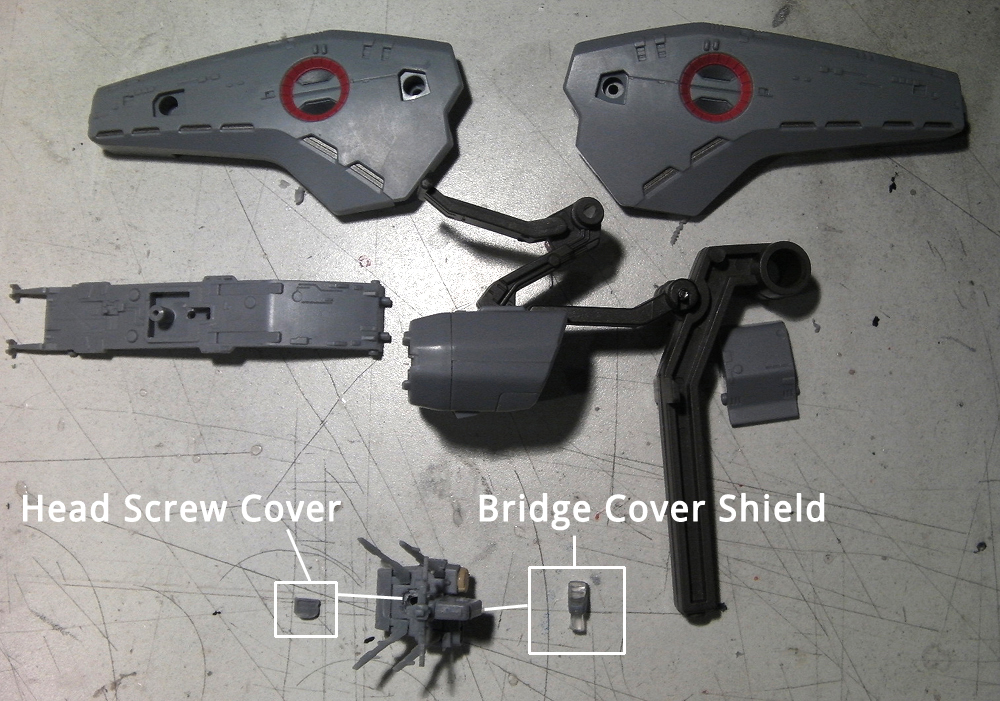
Moving to the main body. First, chest block and head area. This one came off easily. Separated Chest block and the remaining body. Separating head was a bit tricky. There was a tiny part covering the screw on the back of the head (bridge). Carefully removed it and unscrew to remove the head and bridge cover shield. i might need to separate small parts from the head, but I'll leave this for now. I need more planning before that.


-
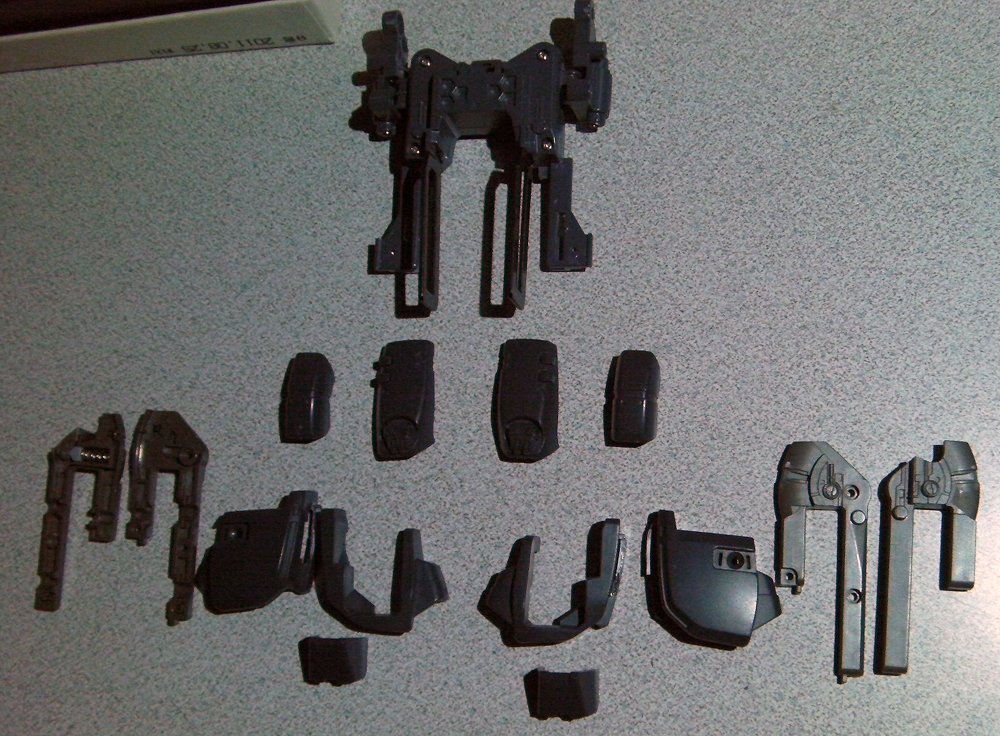
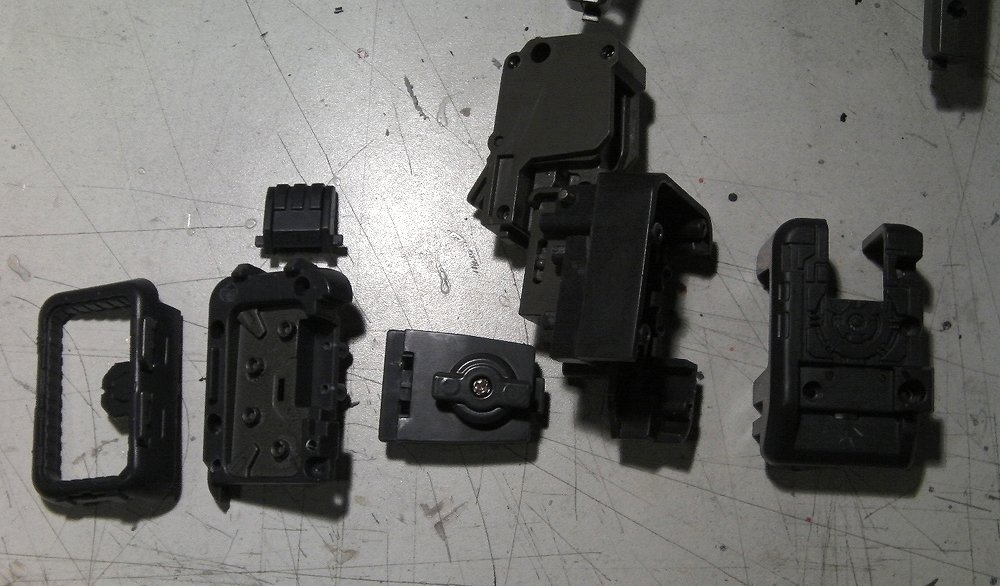
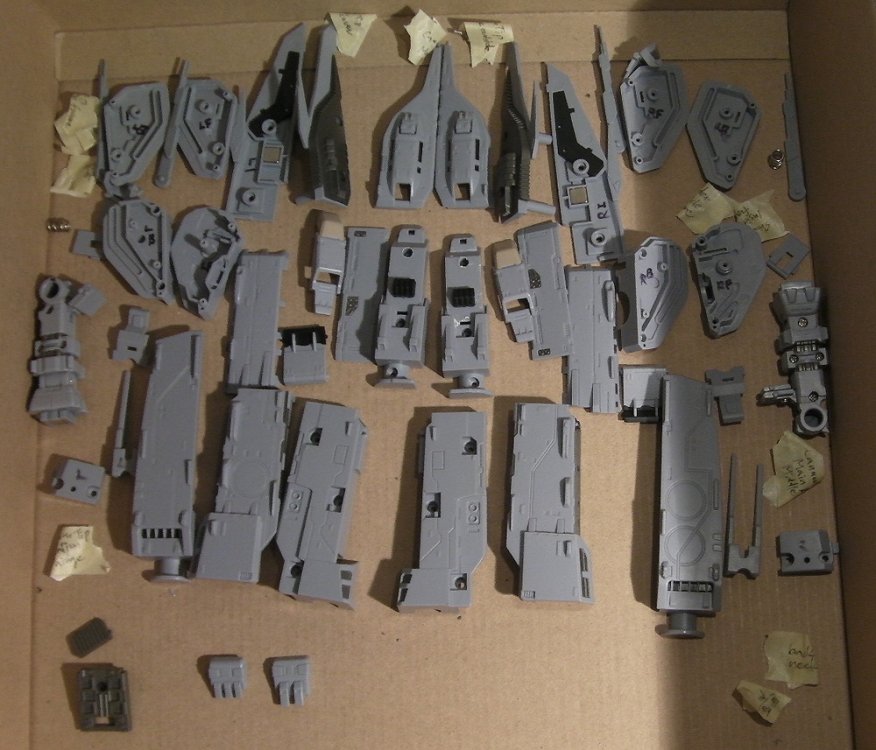
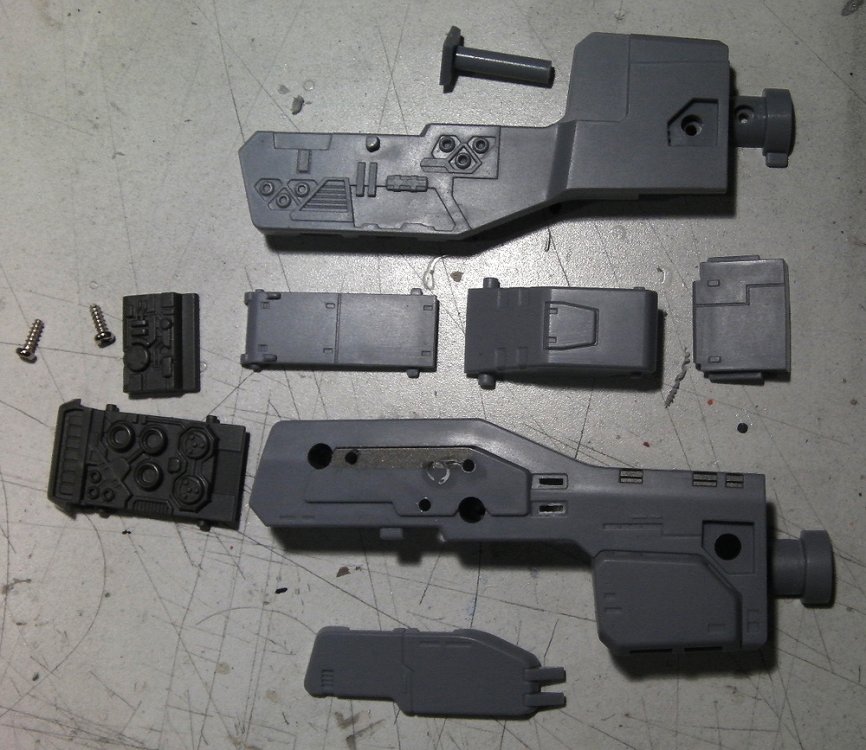
Getting to the Cannon. This took me a while. So many parts and Yamato's ingenious parts separation!! I was very impressed while working on the parts. Putting labels for easier assembly later. Most of Dark metalic grey parts are actually separate parts Parts of Cannon Base. Again, some parts were lightly glued - and used to cover up the screw holes. I had to remove them to separate the Dark metalic grey parts. It's worth it because I can do cleaner job while painting them.
-
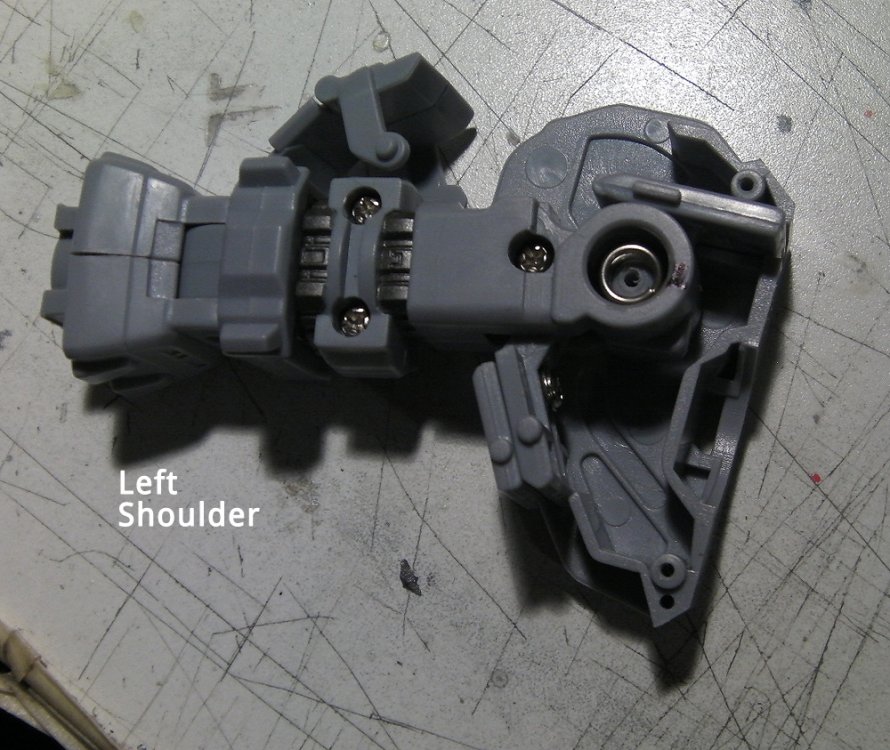
Today I'm moving on to the rest of the body as much as I can before going to bed.. From this point, it's total adventure without seeing manual. Luckily still no damage to the parts so far!! First disassembling the shoulder. It has spring and click joint. Understanding the shoulder cover and lock mechanism. (so that I can put it back later)