Berttt
-
Posts
659 -
Joined
-
Last visited
Content Type
Profiles
Forums
Events
Gallery
Everything posted by Berttt
-
Very cool pics man. Photography of any kind is not my strong point, but you mangaed to present some very inspiring images. Cheers, Berttt
-
C'mon! I know you said initially that decals were only for the new run, but is this still the case? I have been patient for an answer, and it doesn't take much to tap in a few words that say" "Go away freako we said decals are for the new run only." or "Oh all right we'll make a few extra sets if you just have to have them!" Cheers, Berttt
-
Looking good as always WM, the blue on the booster should prove to be a good looking scheme.
-
Very cool man. I love how you made it more dymanic, looks better tahn stiff looking pose, I'll bet that took a bit of work to get right. Are you going to try 1/72 scale stuff?
-
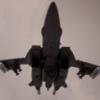
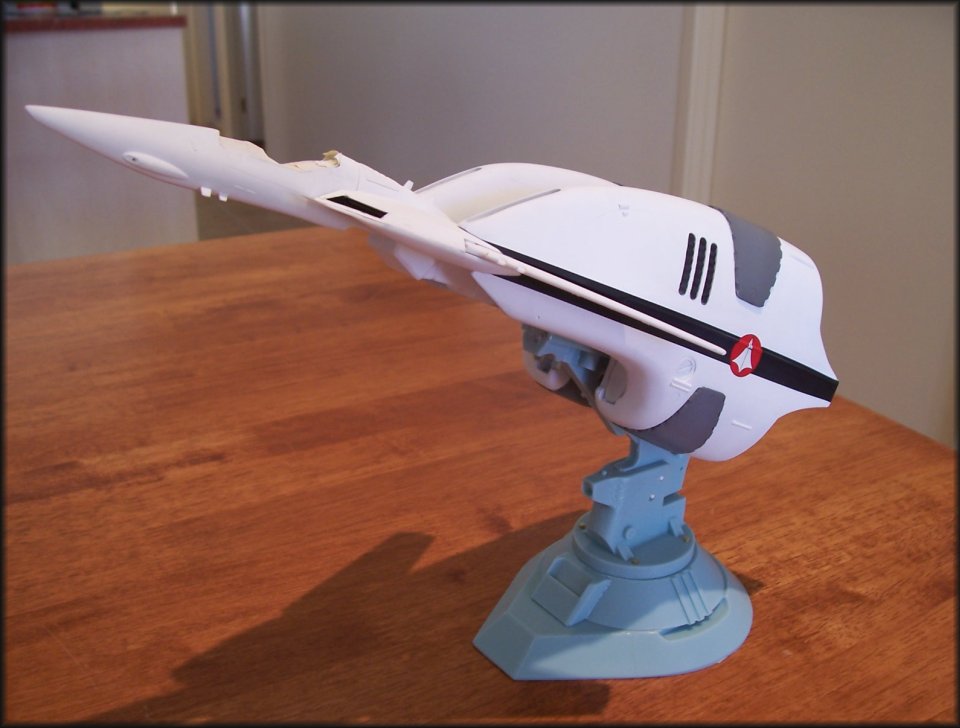
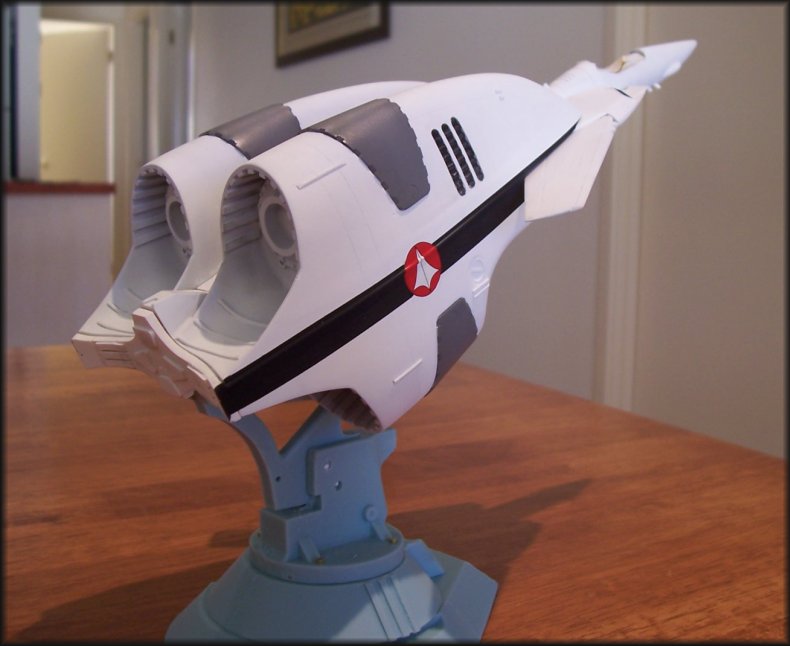
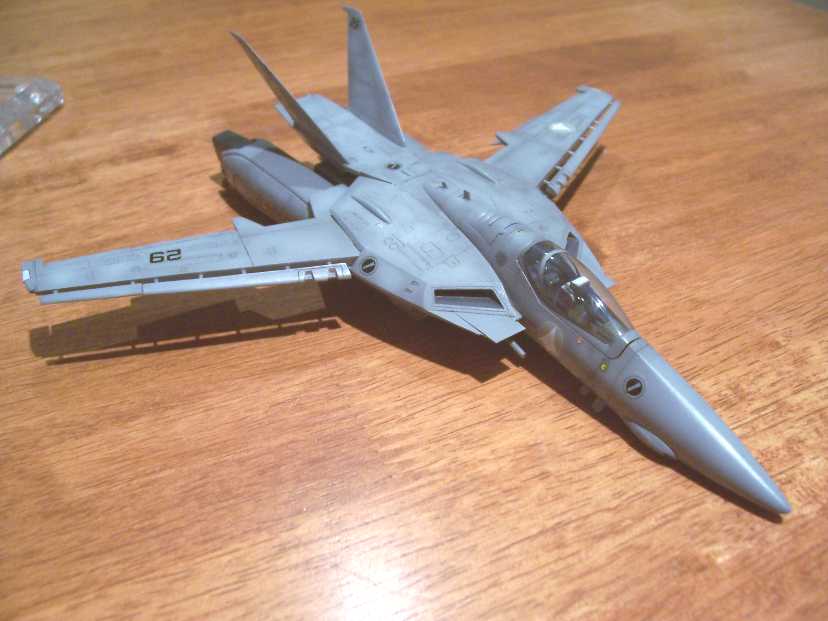
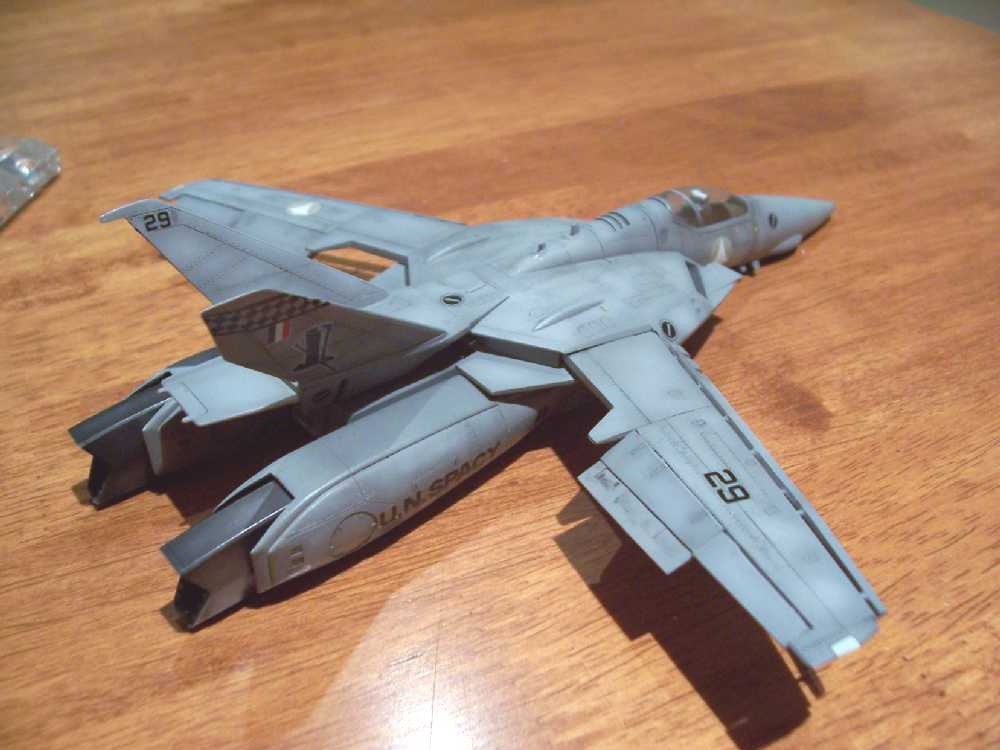
Well I made some time again this weekend and put the base coours one. After considereing WM's idea of FastPack Blue I decided to go with the white. But that's a whole load of white so I masked and sprayed those raised sections of the engine shroud with some neutral grey with a bit of desert tan mixed in until it looked right. Ther are still some touch ups to be done on the white on the valk and booster, and the wings aren't permanently fitted, however I really wanted to see this start to take shape so I sprayed on the black stripe and stuck on the Kite decal. It's a little small but I don't have anything else, and once it's done I am sure it'll look okay. I began needing a place to put this thing when it's drying etc so I broke open the launch arm and dry fitted the main parts. i think this is going to be the showpeice of my collectio once done, it certainly has a presence about it. Only a few more weeks and it may be finished...........now where have I hread that before?


-
So whats the word a decal run for those that already have the booster?
-
I noticed you haven't put the Vertical Stabilisers on yet, so here is a question to the masses. Do you glue things like the vertical stabilisers, antenna and side intakes ( the ones on the outside of the main engine intakes - the ones with the round dent in the front) before or after painting? Personally I put all this stuff on first. Looking good by the way. And yes painting white over grey bites, as I am finding out on my booster. Berttt
-
For the love of god man use some punctuation marks! My brain hurts after reading that post. Berttt
-
Very coo '21 there man. Inspirational stuff. No must finish current projects FIRST! Berttt
-
MMM can't say that I know. In these pics the legs aren't permanently attached, just kinda stuck there with blu-tack. Maybe that and the camera angle combine to give an optical illusion. Other than that it is just a bog standard Hasegawa VF-1A.
-
It has alerady been talked about here: http://www.macrossworld.com/mwf/index.php?showtopic=16307
-
Surely if enough people were interested you could do a run for those that have one of the original kits. I know I'm not the only one interested. Who's doing the decals anyway? Berttt
-
I Thought I would add some progress pics of the MMM Project. This low-Vis valk is coming along nicely, and I have some ordinance for it like 500lbs bombs and AAM-1's. Also I had toyed with the idea of a pallet for AAM-1's or the big nukes as a replacement for the gunpod, but the Hasegawa sculpt does not allow any room for the pallet and any type of pylon with out hitting the ground (or close to it)when the ordinance is fitted so there's another idea scrapped (along with the Hase Gerwalk I was working on).

-
I agree, I'm getting one so that I can have an armed VF-0S and then build the ghost on it's own parked next to the valk. Berttt
-
you know I was following the whole ghost line, and the one thing that is annoying is that all the models are called the Ghost. Not QF 2100 Ghost, QF 2200 Ghost II, QF 3000E Ghost III etc.
-
I think G72 was referring to that one pic. The RHS landing gear is fully down with a somewhat vertical leg, while the nose and LHS gear seem to be only partially deployed. Personally I think it's just a sque-if drawing. Whilst I don't like the half deployed look of the gear as inferred by the drawings, it would seem the panel is split on what is the correct configuration. Berttt
-
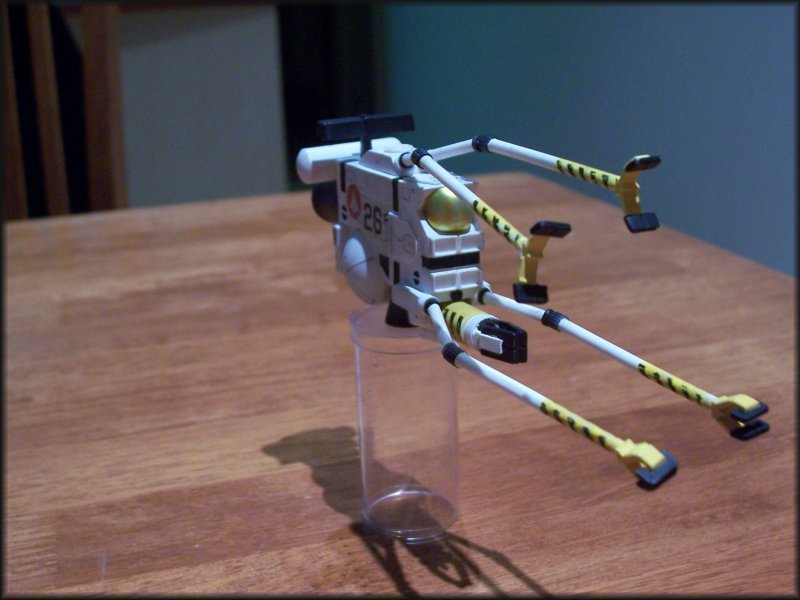
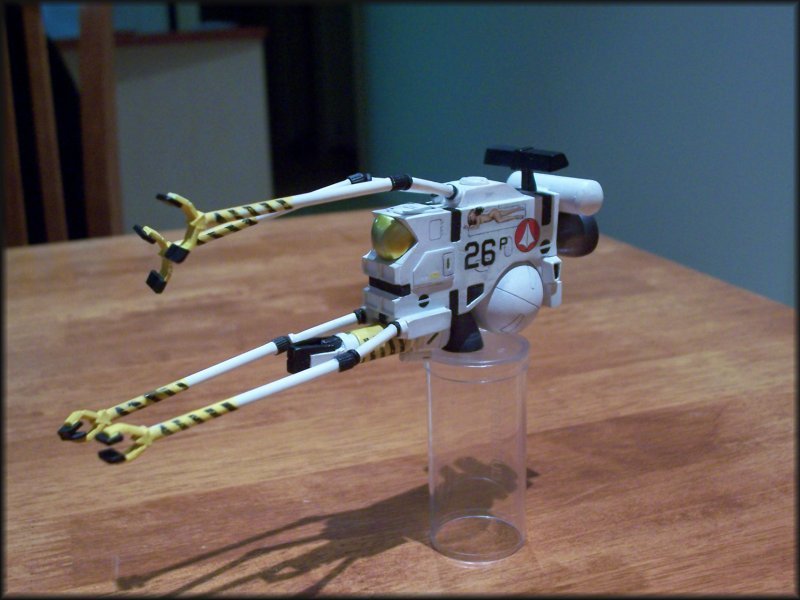
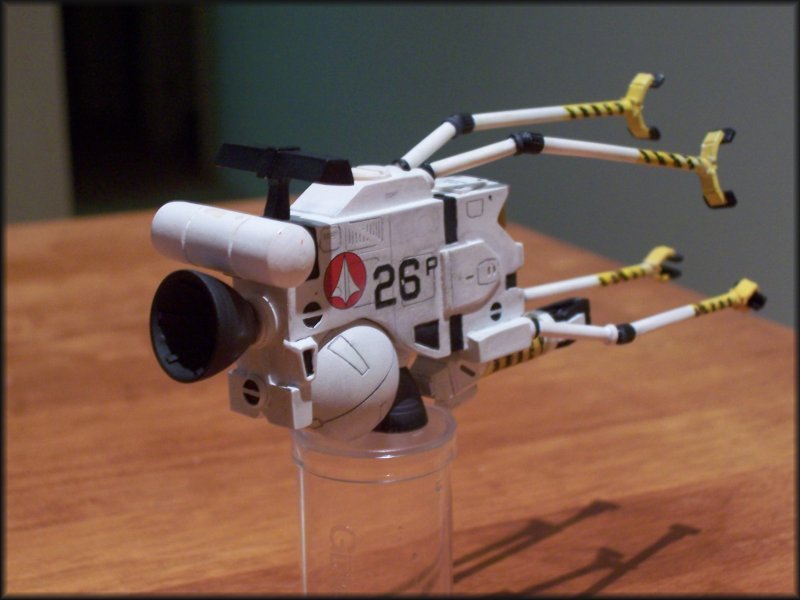
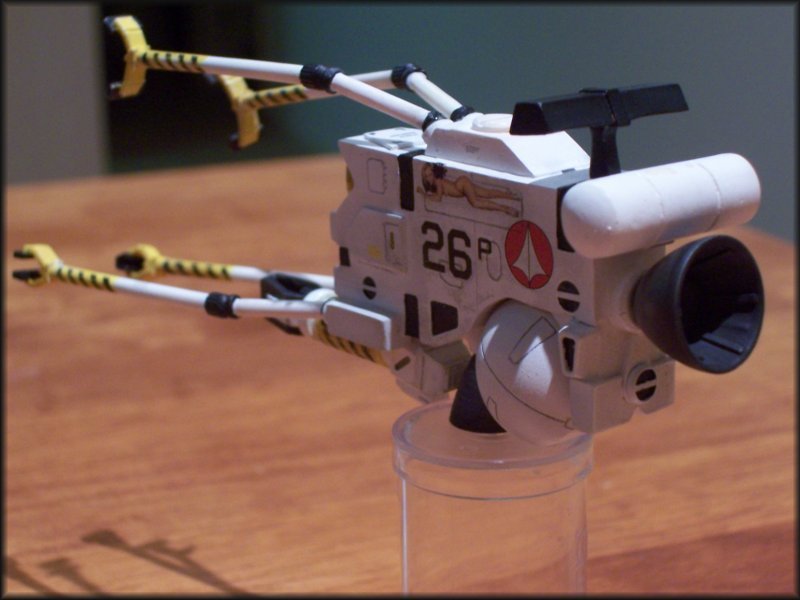
I thought I'd add some progress pics of the Bug. She's almost finished. Grayson: I painted the sections yellow then wrapped thin chart tape aroungnd the arms at the right angle. Masked off areas to remain yellow and presto, black stripes.
-
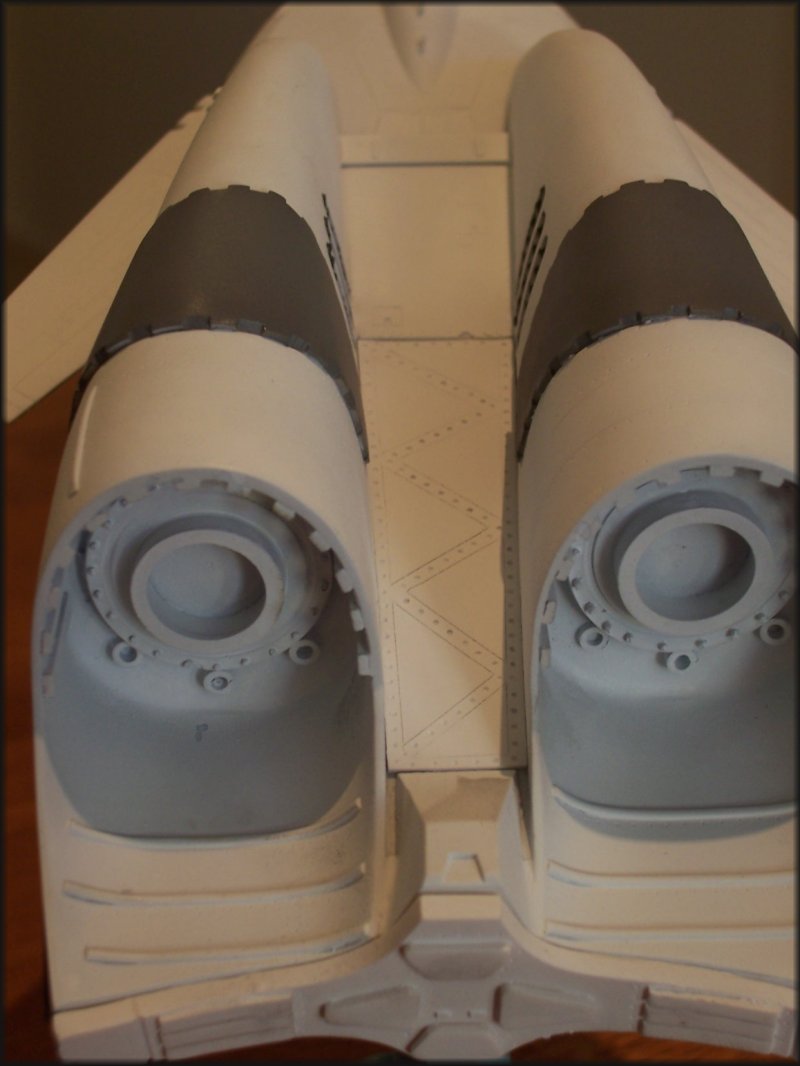
I had a chance to finish up some prep and prime the main parts on the weekend, although a couple of areas still need attention. I added some ribbing between the two engine humps, and now that the primer is on I'll scibe some rivets and such on there. Same with the ngine bells wehre I made some collars to hide the join to the engine mount, as my mounts were full of holes and I got lazy.


-
Nice work so far WM. I am hoping to get mine primed this weekend now that I have most of the mods that I wanted done. Man I haven't been this motivated to finish model in a long time! Thanks man. Cheers, Berttt
-
I don't have any of the artbooks, so I have only a couple of lin art drawing for reference. Can I ask why the landing gear is not in the vertical, or near vertical? I can't think of any plane that has gear like that as it would be prone to collapse. Cheers, Berttt P.S. I'll put my name down for one once I have an idea of cost.
-
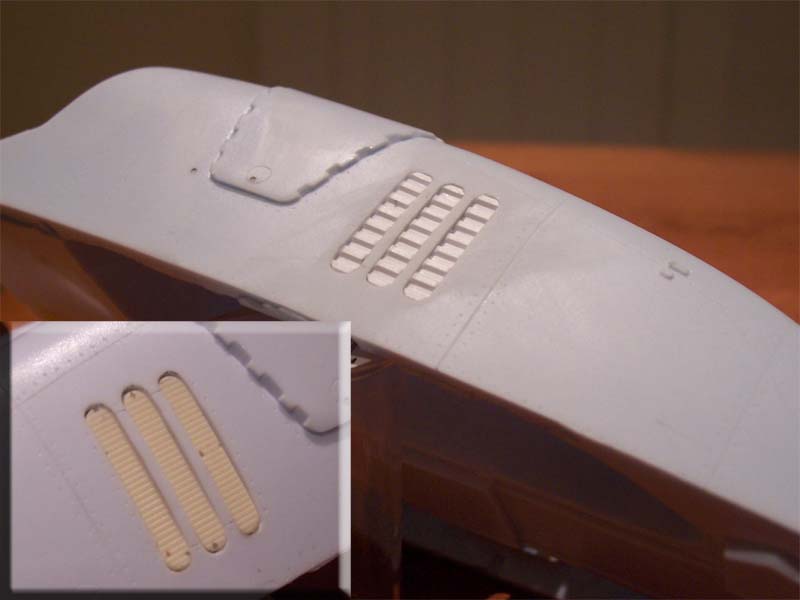
Well after a week of swapping between day and night shift, I finally found time to re start this project. So far I have been cleaning up the engine bells and fuselage, with attantion to the vents on the fuse, and raised detail on the bells. I fixed up the holes and filled them with some textured styrene. I think it looks better that the bubble filled ones that came with the kit. Kind of like some sort of radiator or something.They'll be painted plack and inserted just before the fuse halves get glued. The raised detail on the engine bells was molded a little soft, so I sanded it off and replaced it. Here is the first bell primed but before sanding. Just three more bells to go. After that I'll work on a few little details on the fuse and I'll be able to start painting. Cheers, Berttt

-
Don't forget that German tanks (Panzer III's) used a 50mm gun as their main armament. The GU-11 is both larger caliber and probably uses a more advanced type of ammunition. I would consider that it would be a very effective weapon against a range of threats. It needs to be big to deal with firing such a big round. After all you can't get a .50 AE handgun the size of Derringer now can you? Berttt
-
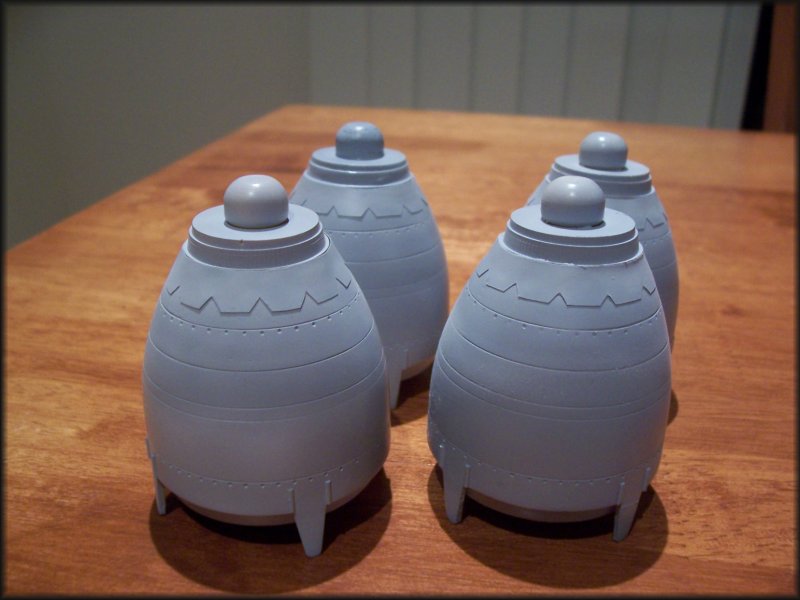
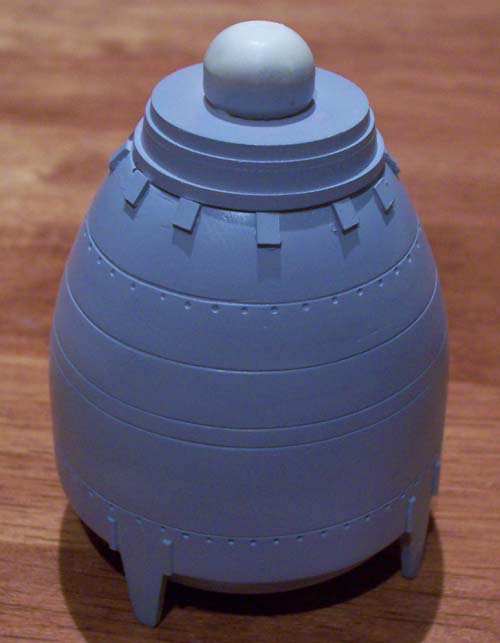
CRAP! When you said engine detail a little light went of in my head as I said to my self "Hmm I have some landing gear bays left over........" As it is I will be shamelessly copying some of your ideas, but I'll have to draw the line here. I think I will fill the vents with the same ribbed styrene I used on the tyres of my Macross vehicles. The mesh idea looks very cool. I have re started work on the Booster and found I wasn't as far along as I had thought. still the valk is almost ready for paint and I have begun filling bubbles in the booster halves. Berttt
-
AH HA! Thanks man. Although it looks like not all of th pics are up there, they won't get away this time.
-
Someone on the board has purchased the Booster masters from SM. I don't know who, but they are at least out there.