Skull Leader
-
Posts
2131 -
Joined
-
Last visited
Content Type
Profiles
Forums
Events
Gallery
Everything posted by Skull Leader
-
macross: Skull Leader, Love Stories, and Remember Me
Skull Leader replied to Skull Leader's topic in Games
It's *always* an option! (and I agree... I'm the same way when I play Final Fantasy IV on my PSP, I opt to use the original soundtrack usually.) I've kinda stepped off for a few weeks just so I don't get burned out on it... but I'll be digging my heels back in as soon as I finish this next commission build model! -
It would fly perfectly fine. It just wouldn't be maneuverable (seriously, like... at all) and would bleed energy like it was going out of style in a turn, but it could get from the ground to orbit.
-
Christmas present from the wife arrived!
Skull Leader replied to Skull Leader's topic in The Workshop!
Actually, I believe the HCM was optimized with the fighter mode in mind... as my only real gripes about it have ever been the small head and the fact that the backpack sits way too high. To this day, it's the only valkyrie kit/toy to depict the dual tailhooks used during carrier landings (although I don't know if those were ever "official"). And thank you... I've had my HCM for a long while now, and it's condition is a testament to the craft that went into making it... I haven't been brutal to it, but it HAS been posed and transformed a lot over the years. I still have the box and everything too. -
I used to have that kit... that detail is crazy!
-
macross: Skull Leader, Love Stories, and Remember Me
Skull Leader replied to Skull Leader's topic in Games
Funny man! -
macross: Skull Leader, Love Stories, and Remember Me
Skull Leader replied to Skull Leader's topic in Games
I employed a pretty low-tech method, lol. I ran the game in through the ANEX86 emulator and recorded a video of each track of music. I extracted the audio from the video and looped it, lol. I've compared a few of my own rips to his, and they sound almost identical (his are a little clearer), so at least the emulator is reproducing the sound faithfully. Ultimately I'd like to get someone to remix the music tracks... since I'm modernizing everything else about the game, running the original music seems a little anachronistic. Still, I'm using the originals as a placeholder until I find someone who can do some remixes. Small update: I actually have functionally recreated the game up to the point where the player takes control. It's just dialogue, so it really isn't a big deal yet, but it's a huge step for me. I've been using the Fungus plugin for Unity3D to do the story dialog, and there's been a small learning curve to tackle. It's a little rough around the edges, but it's a start! I've taken a small break from the game to keep from getting burned out and to work on other hobbies, but I'm going to dive back into it this week I think. -
any updates, man? I'm jonesing to see this one finished!
-
Christmas present from the wife arrived!
Skull Leader replied to Skull Leader's topic in The Workshop!
It comes with them, but I figured I'd give the stickers a shot first and see how they do -
Christmas present from the wife arrived!
Skull Leader replied to Skull Leader's topic in The Workshop!
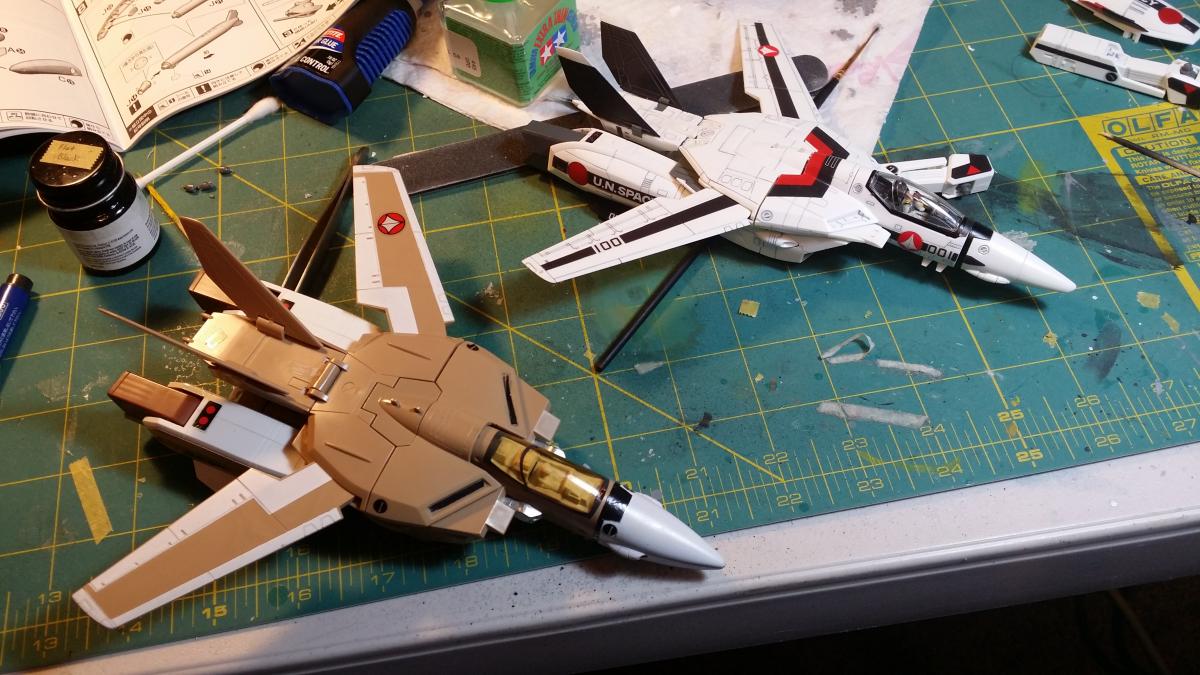
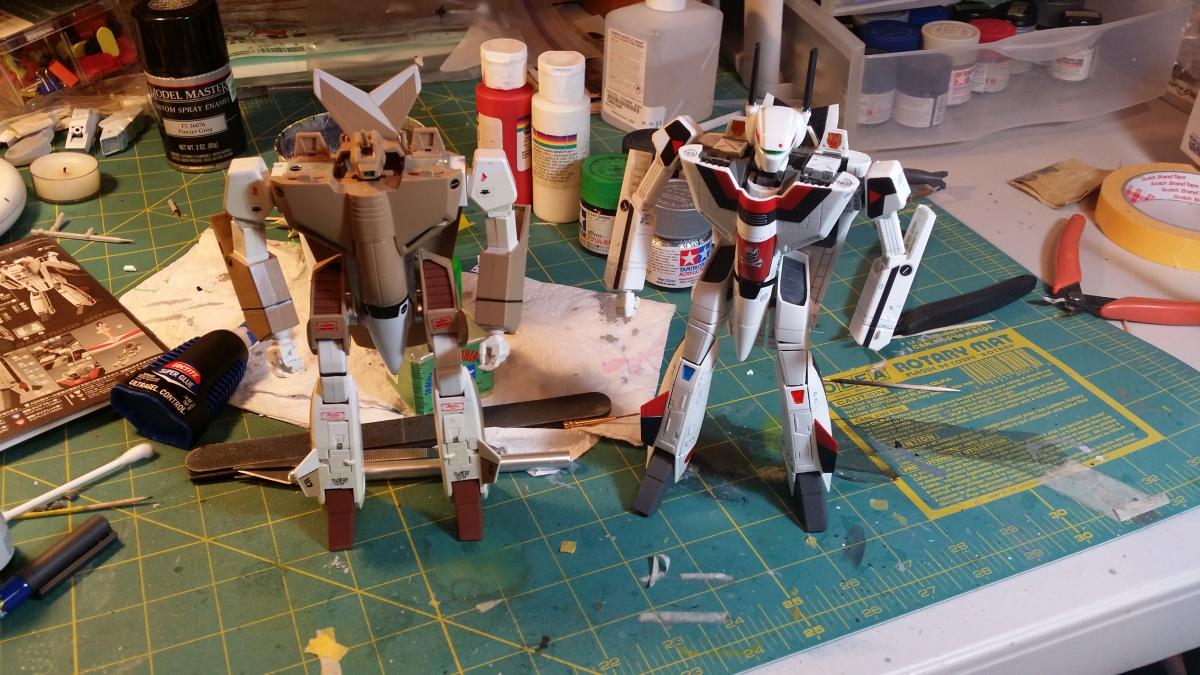
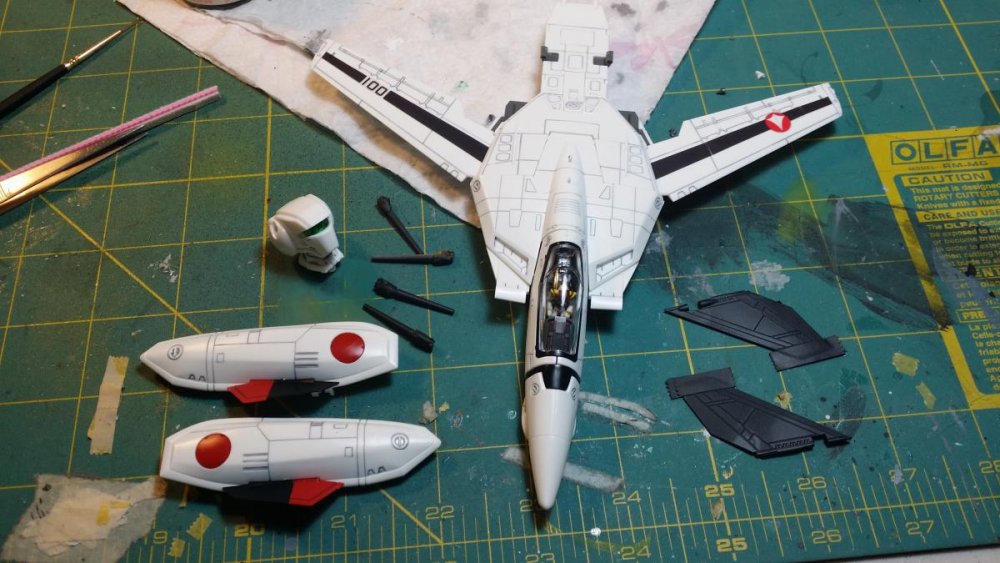
The bulk of the work is done! Just gotta finish decaling it now and she's all set. With most of the process complete, I'll share some of my observations: Pros: - man, this thing is DETAILED. Even parts of the model you likely won't see (the interior of the legs) have detail! - none of the joints seem to be loose - the vinyl "stickers" burnish down nicely like decals... they can be pushed into panel lines and made to look "painted" on. - the construction is pure genius... a *lot* of thought went into the layout of this model. Cons - omfg the hands... who came up with these? Who came up with this assembly process/parts layout? Easily the weakest point in the model for me and they will be replaced. - while the joints feel very stiff, the entire upper body in Battroid mode is very "fiddly" due to it being not very secure. I know they took some measures with the Roy version to fix that (I'd be interested to see pictures of the modifications... maybe I can scratchbuild those mods into mine) but it definitely means you won't spend a lot of time working on the poses...find a good one and leave it there. -the arms are scrawny. I think the FAST pack armor will help this a *little*, but it is what it is - the price of all that fine detail is that parts of the model are just damn fragile... I could see the leg actuators being victimized after repeated use... and my backpack swivel has already broken twice (still need a replacement), you definitely don't muscle any part of this into place or you *will* snap it. - the leg and nose "hatches" (to actuate the legs and waist) are damn hard for me to open without using a sharp object These may seem like major gripes, but overall I'm very pleased with the model! It's highly detailed and looks great. I'm past the age where I fly these things around my room much,so it's gonna sit on a shelf in a pose and maybe get changed once or twice a year. Bandai has come a long way since their earliest imai reissue entries. I took a pic or two next to my bandai HCM 1/72 for reference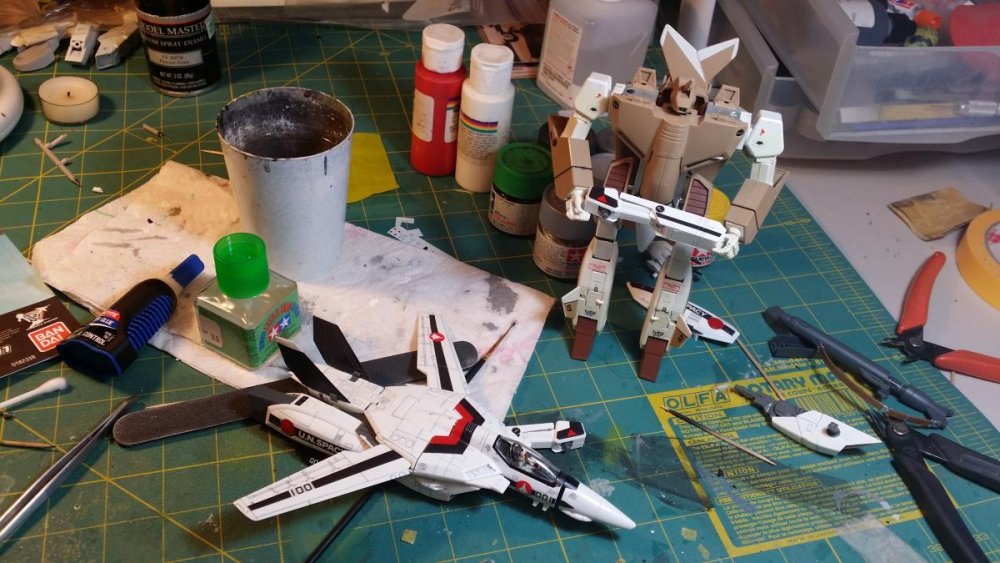


-
There are ways around this... although you have to be a little savvy about how you lay out your decals. If the decal shape isn't a complex one (say, like noseart for example), I'll trace a thin black border around the decal and print it on white decal film... I can trim the black border away to nothing and boom, you have your white decal Also, there is this transparent decal paper that dries white here: http://www.modeltrainsoftware.com/decalpaper.html, although it's really not any different than printing on already-white decal paper
-
Christmas present from the wife arrived!
Skull Leader replied to Skull Leader's topic in The Workshop!
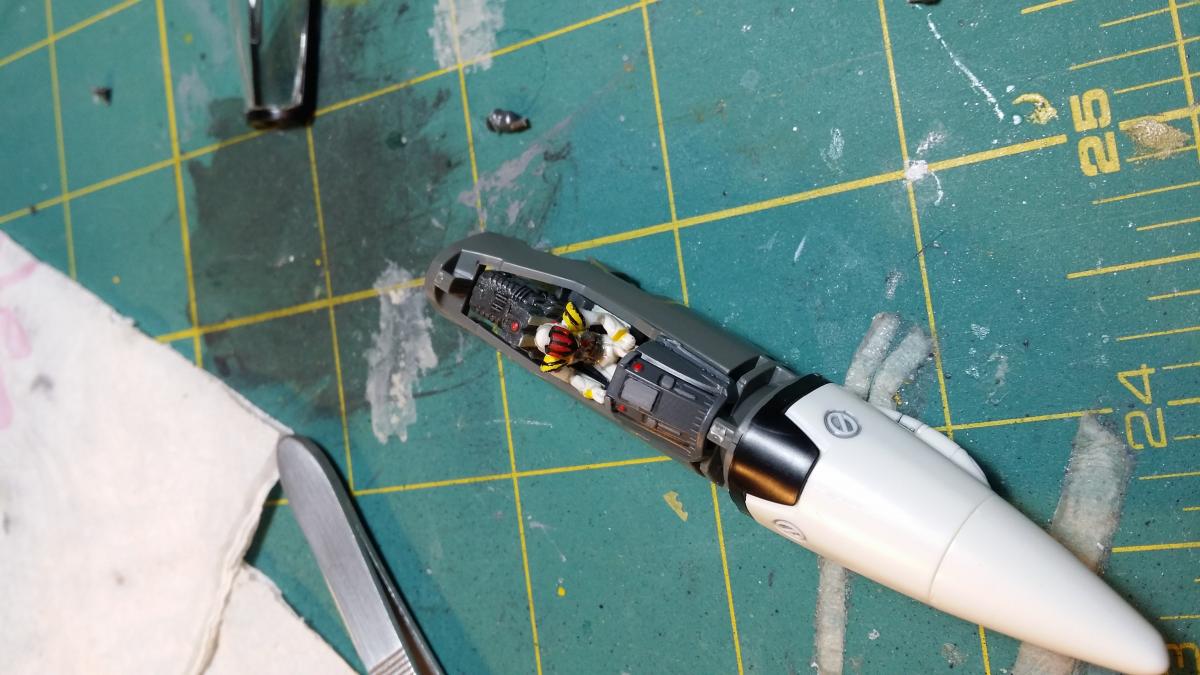
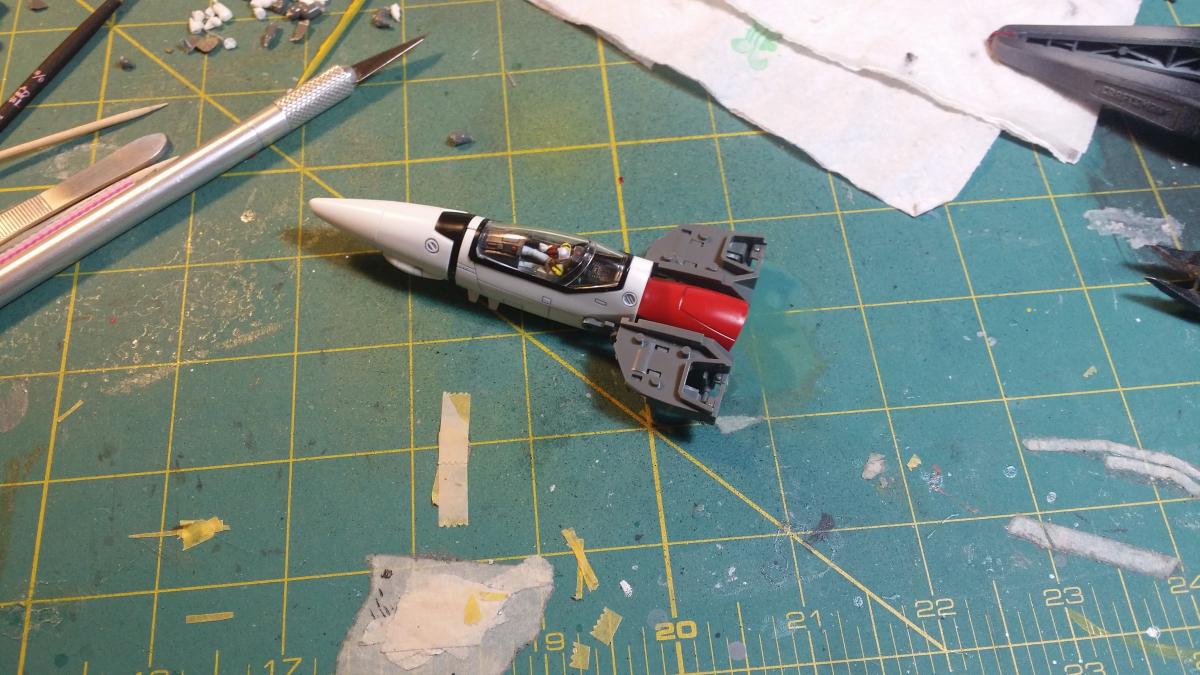
It's been a pretty pleasant build so far... lots of detail packed into a very small space. I've already snapped the backpack hinge in two... I glued it back together but it's structural integrity is questionable. I'm trying to find someone with a junked kit I can salvage their hinge from. I've glued some assemblies for stability... and all transparent parts are receiving glue to keep them from falling out. It's a little fragile but I like it so far!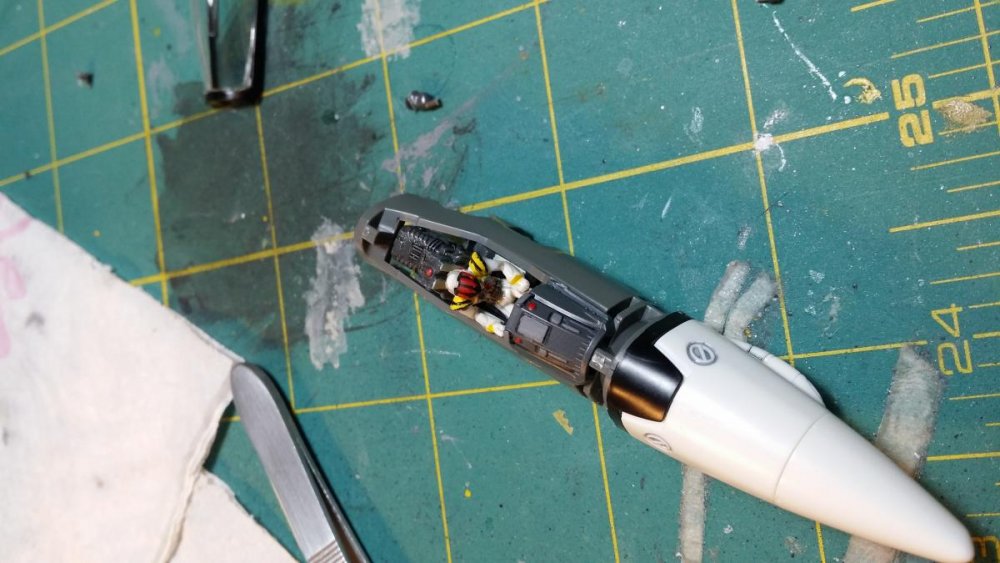


-
Skull Squadron TOMCAT 1/32 tamiya Paint Experiment!
Skull Leader replied to nostromorolls's topic in The Workshop!
FYI they call those "Vegabond" stripes... they're holdovers from when the VF-84 "Vegabonds" assumed the jolly rogers identity during their F-8 Crusader days! -
If you can't get Mechtech's stuff, don't discount the Testors decal paper... I've won contests with decals printed off of it, so don't think it's useless, and it's probably cheap and easy to find.
-
macross: Skull Leader, Love Stories, and Remember Me
Skull Leader replied to Skull Leader's topic in Games
SOB *still* won't tell me how he ripped the audio. It's cool, I've found my own method... -
Skull Squadron TOMCAT 1/32 tamiya Paint Experiment!
Skull Leader replied to nostromorolls's topic in The Workshop!
If you still have some of the decals left, spraying some Testors decal solution on them will rejuvenate the unused decals and prevent them from shattering -
Illustrator is what you want. Drawing decals is easy, especially if you're sizing up pre-existing art. I got my first knowledge in Illustrator sizing up 1/72 decals to 1/48. Microscale and cartograf both have a minimum requirement of 500 sheets I believe (they're the two biggest) so you'll have to find a smaller distributor
-
macross: Skull Leader, Love Stories, and Remember Me
Skull Leader replied to Skull Leader's topic in Games
To each their own... for what it was worth, I briefly considered just porting over the original graphics.... they just don't look as good on today's bigger monitors I think. It's an aesthetic choice and I can understand why you feel the way you do! My translations right now are good up to the first mission I think... you're welcome to send yours over though, as I'm always happy to have something to compare them against. Shoot them to jhousdan (at) Hotmail.com. I can send you the game files. Give me an addy and I'll put a package together. You need the emu too? -
macross: Skull Leader, Love Stories, and Remember Me
Skull Leader replied to Skull Leader's topic in Games
I haven't had much time or energy to work today... I've been down with the flu. But I did manage to get some of the soundtrack ripped (enough to get me to the first mission) though the method I had to use to get it was a little unorthodox, I got what I needed. -
I think you have it reversed... on the TV version, the Bridge was offset to the side until the ship transformed into storm attacker mode... in DYRL, the bridge remained centered regardless of the mode.
-
macross: Skull Leader, Love Stories, and Remember Me
Skull Leader replied to Skull Leader's topic in Games
Spending some time working out how I wanna code all of the story and dialogue... I think I'll be using the Fungus plug in for Unity to do this, they seem to be pretty straightforward, and it should interface well with other plugins when I get to working on the combat/strategy sections. -
macross: Skull Leader, Love Stories, and Remember Me
Skull Leader replied to Skull Leader's topic in Games
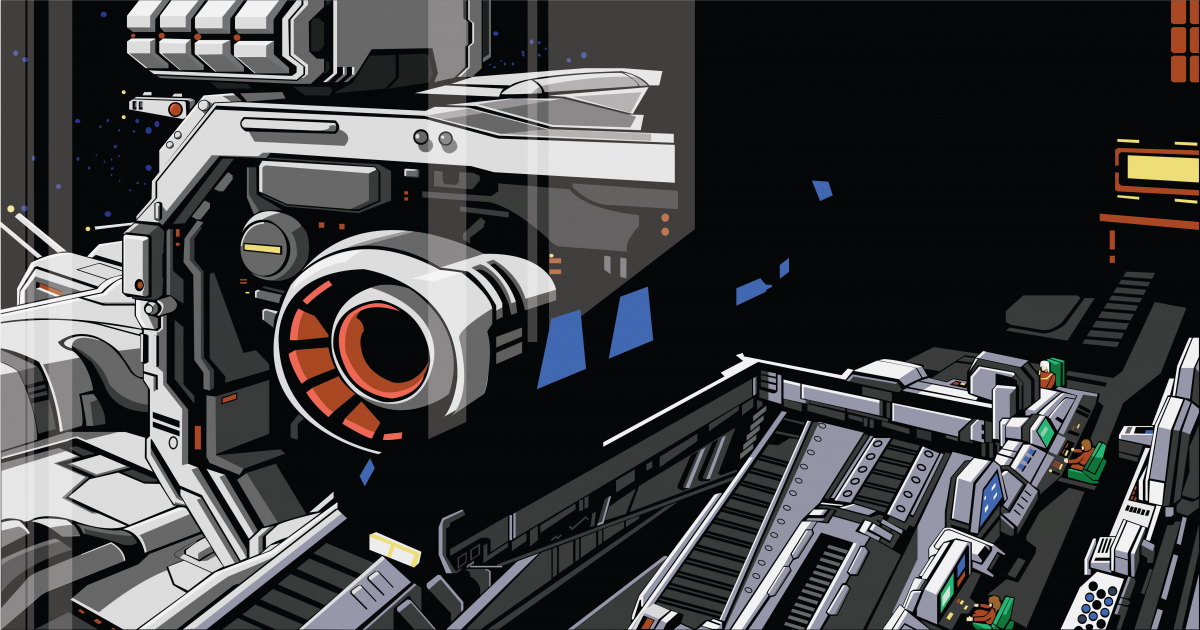
The background is almost completely done! I just need to do the lens-flare effect from the spotlights and this one will be all set. I had to "invent" some detail behind the lens flare just because I don't know how well the new effect will cover it, and I didn't want to just leave a blank space. I at least tried to make surfaces meet each other. Not a perfect pixel-for-pixel translation, but I think it's damn close, and pretty good considering... probably 35-40 hours of work went into creating this. Someone more knowledgable in illustrator probably could've knocked it out much quicker, but I've been learning as I go. I also included the original beneath it for comparison Story Background.bmp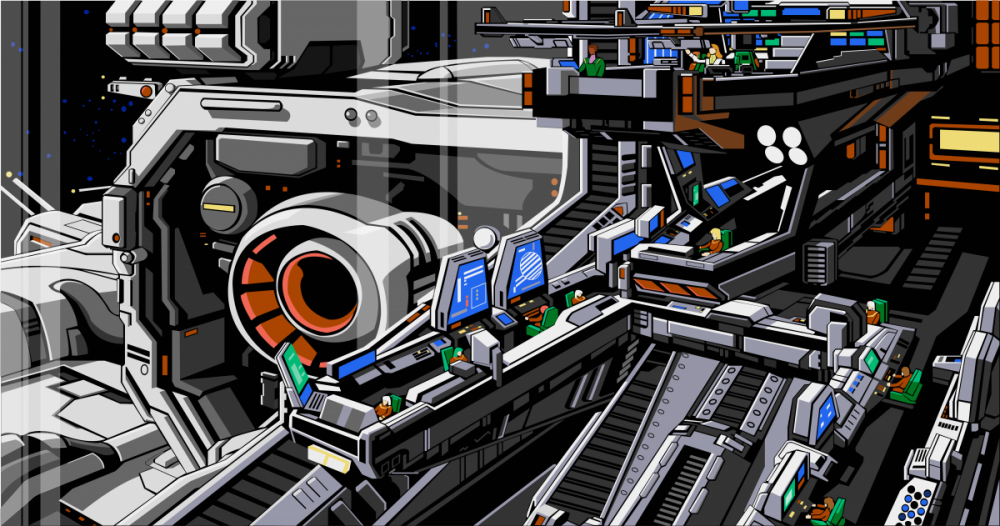
-
I'm in the process of remaking the old PC98 game "Skull Leader" that I plan to have available for Mac when it's finished.
-
Brain.... hurts.... stop it!
-
macross: Skull Leader, Love Stories, and Remember Me
Skull Leader replied to Skull Leader's topic in Games
So here's a more high-res example of my progress so far..... it isn't super hard, per-say... just very time consuming.
-
Beginner's Model Building Construction BASICS
Skull Leader replied to MechTech's topic in The Workshop!
*most* printers on the market today will handle 80% of decal printing reasonably well... Laserjet printers can make them a little more crisp if they're really small. A couple of things to bear in mind: 1. 98% of readily available printers in the world don't print white. They rely on the paper to provide any white areas. 2. There are printers by a company called ALPS that DO print white ink (they require special ink cartridges) but these printers are hard to find, painfully expensive, and may not even be commercially available any more, I don't know. Testors decal films come in white and transparent, so if you're careful about your decal layout,you can work around the whole "no white" thing. The Testors stuff is readily available and works pretty well... I'd recommend starting with that.