JNordgren42
-
Posts
23 -
Joined
-
Last visited
Content Type
Profiles
Forums
Events
Gallery
Everything posted by JNordgren42
-
Great build and a nice save from a near disaster! That looks like a fun little kit.
-
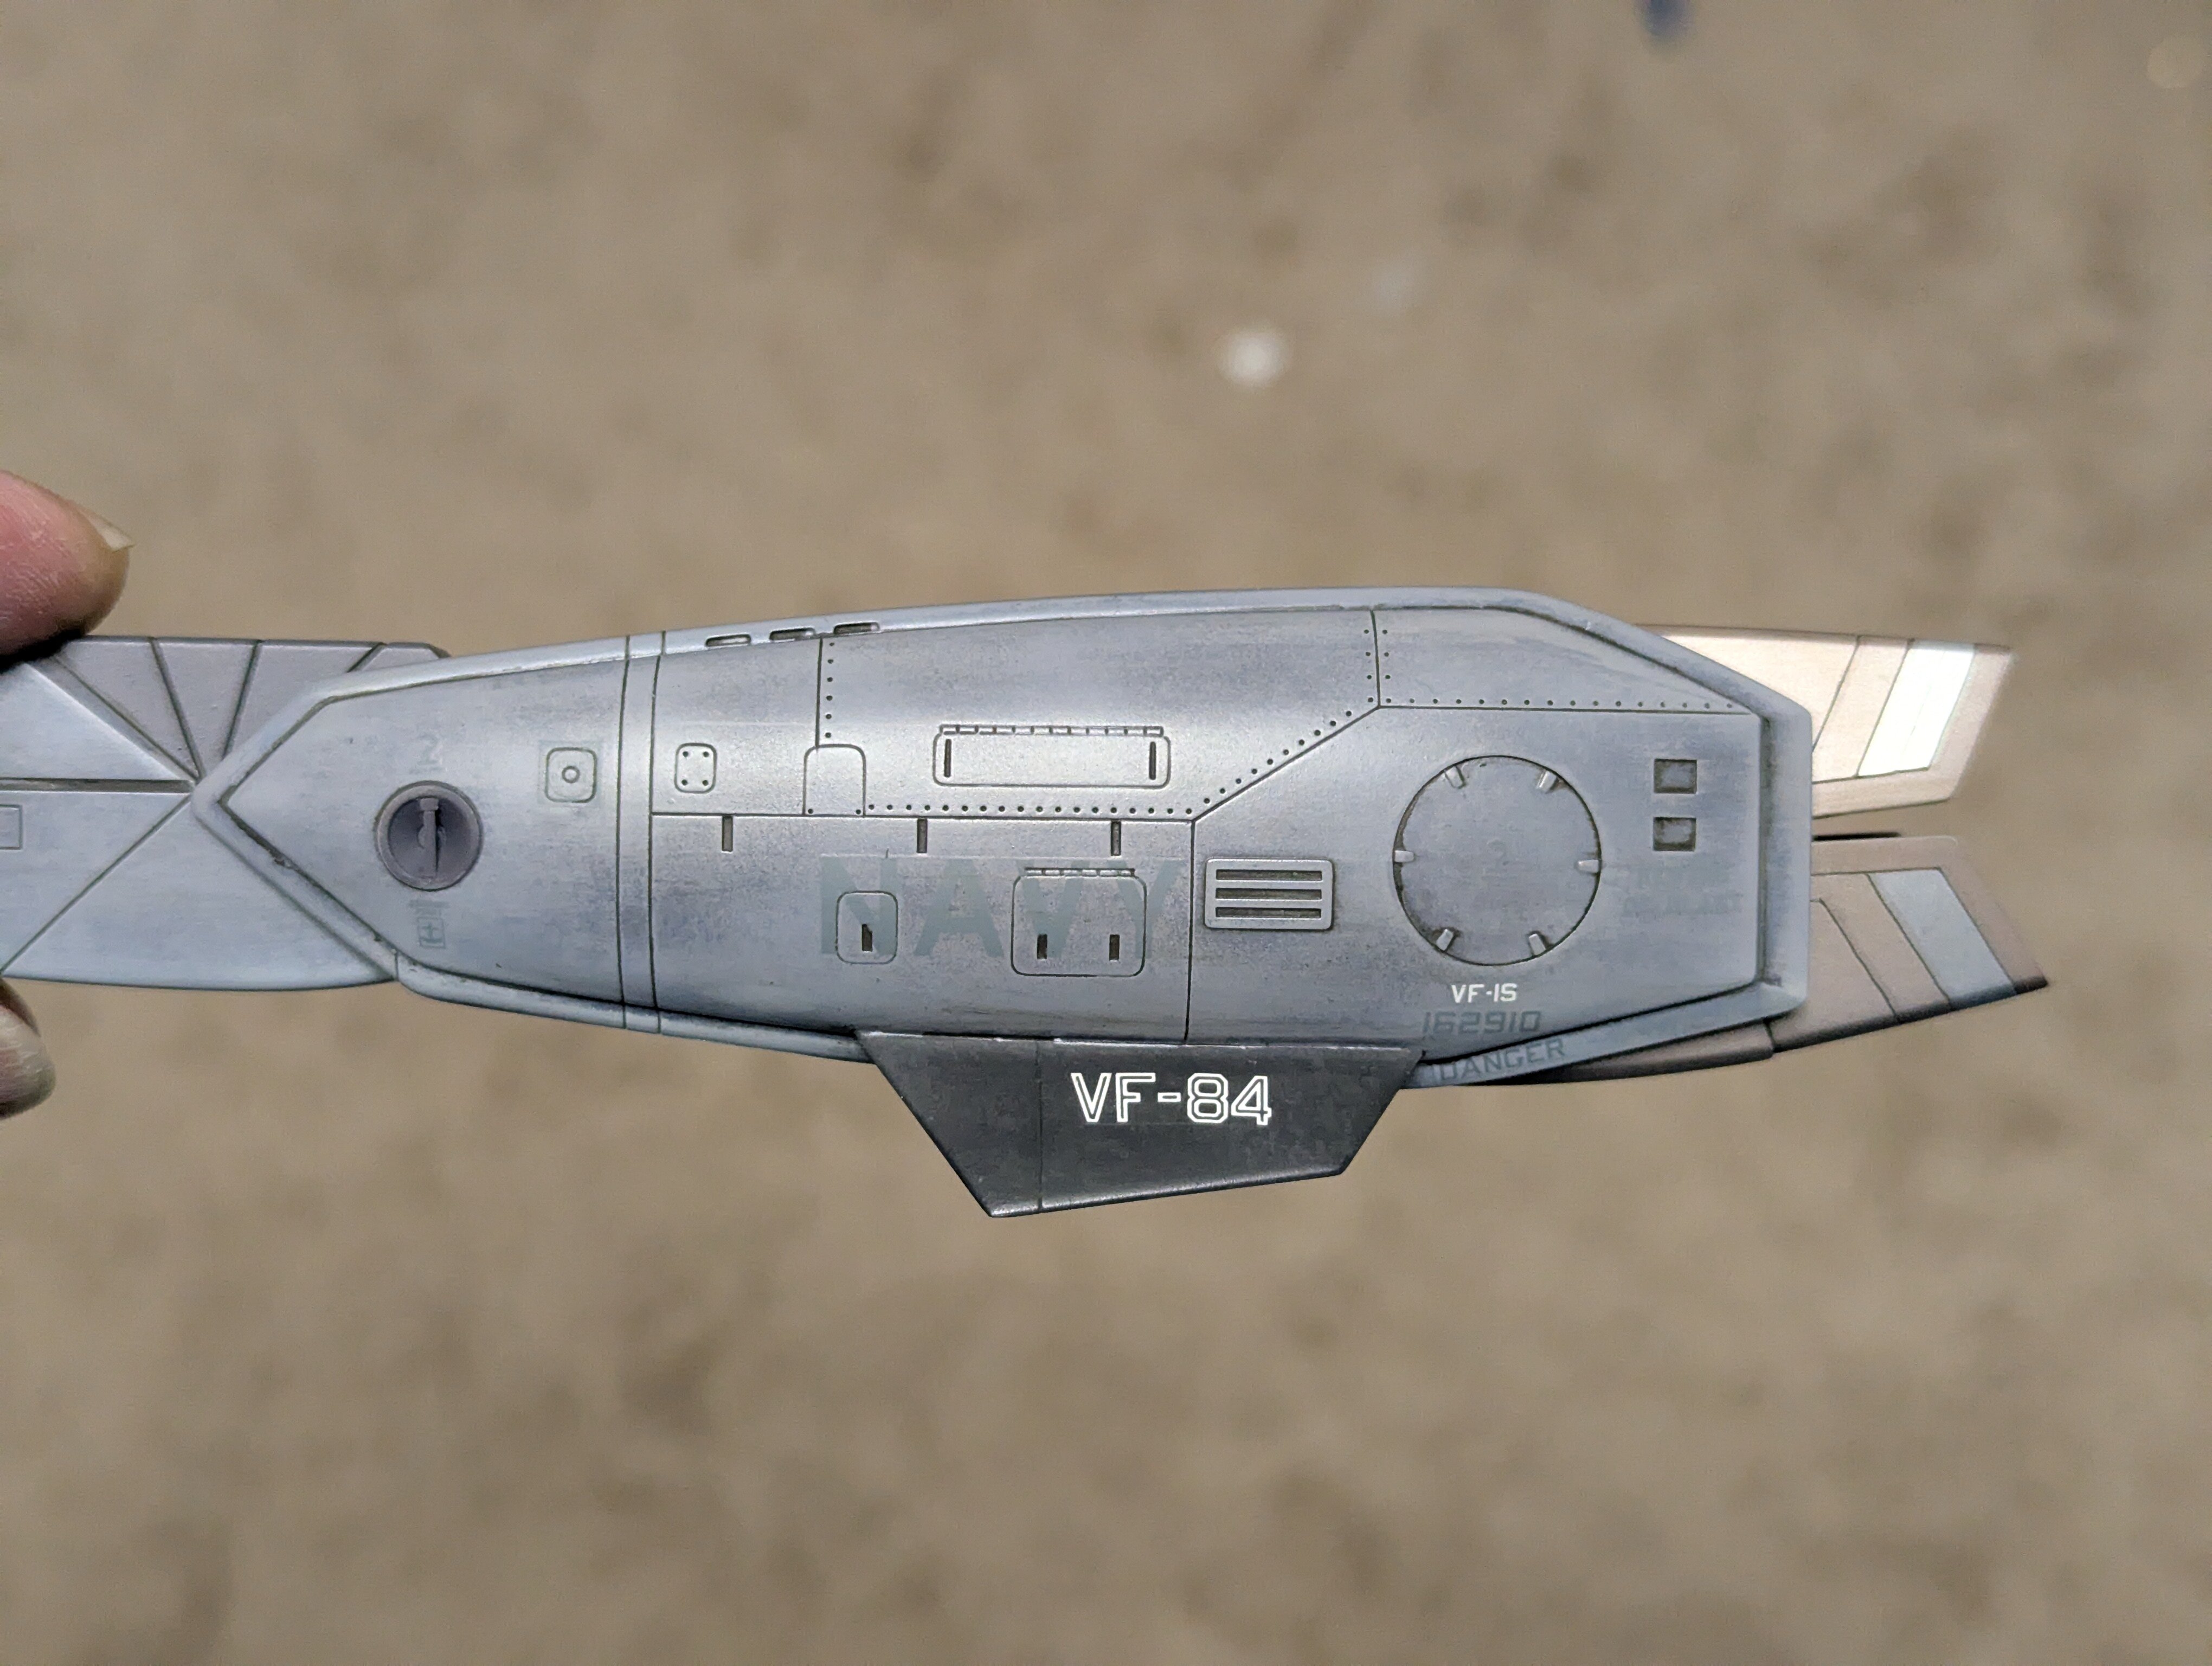
1/48 Hasegawa VF-1S "What If?" US Navy VF-84 Jolly Rogers Low Viz
JNordgren42 replied to JNordgren42's topic in The Workshop!
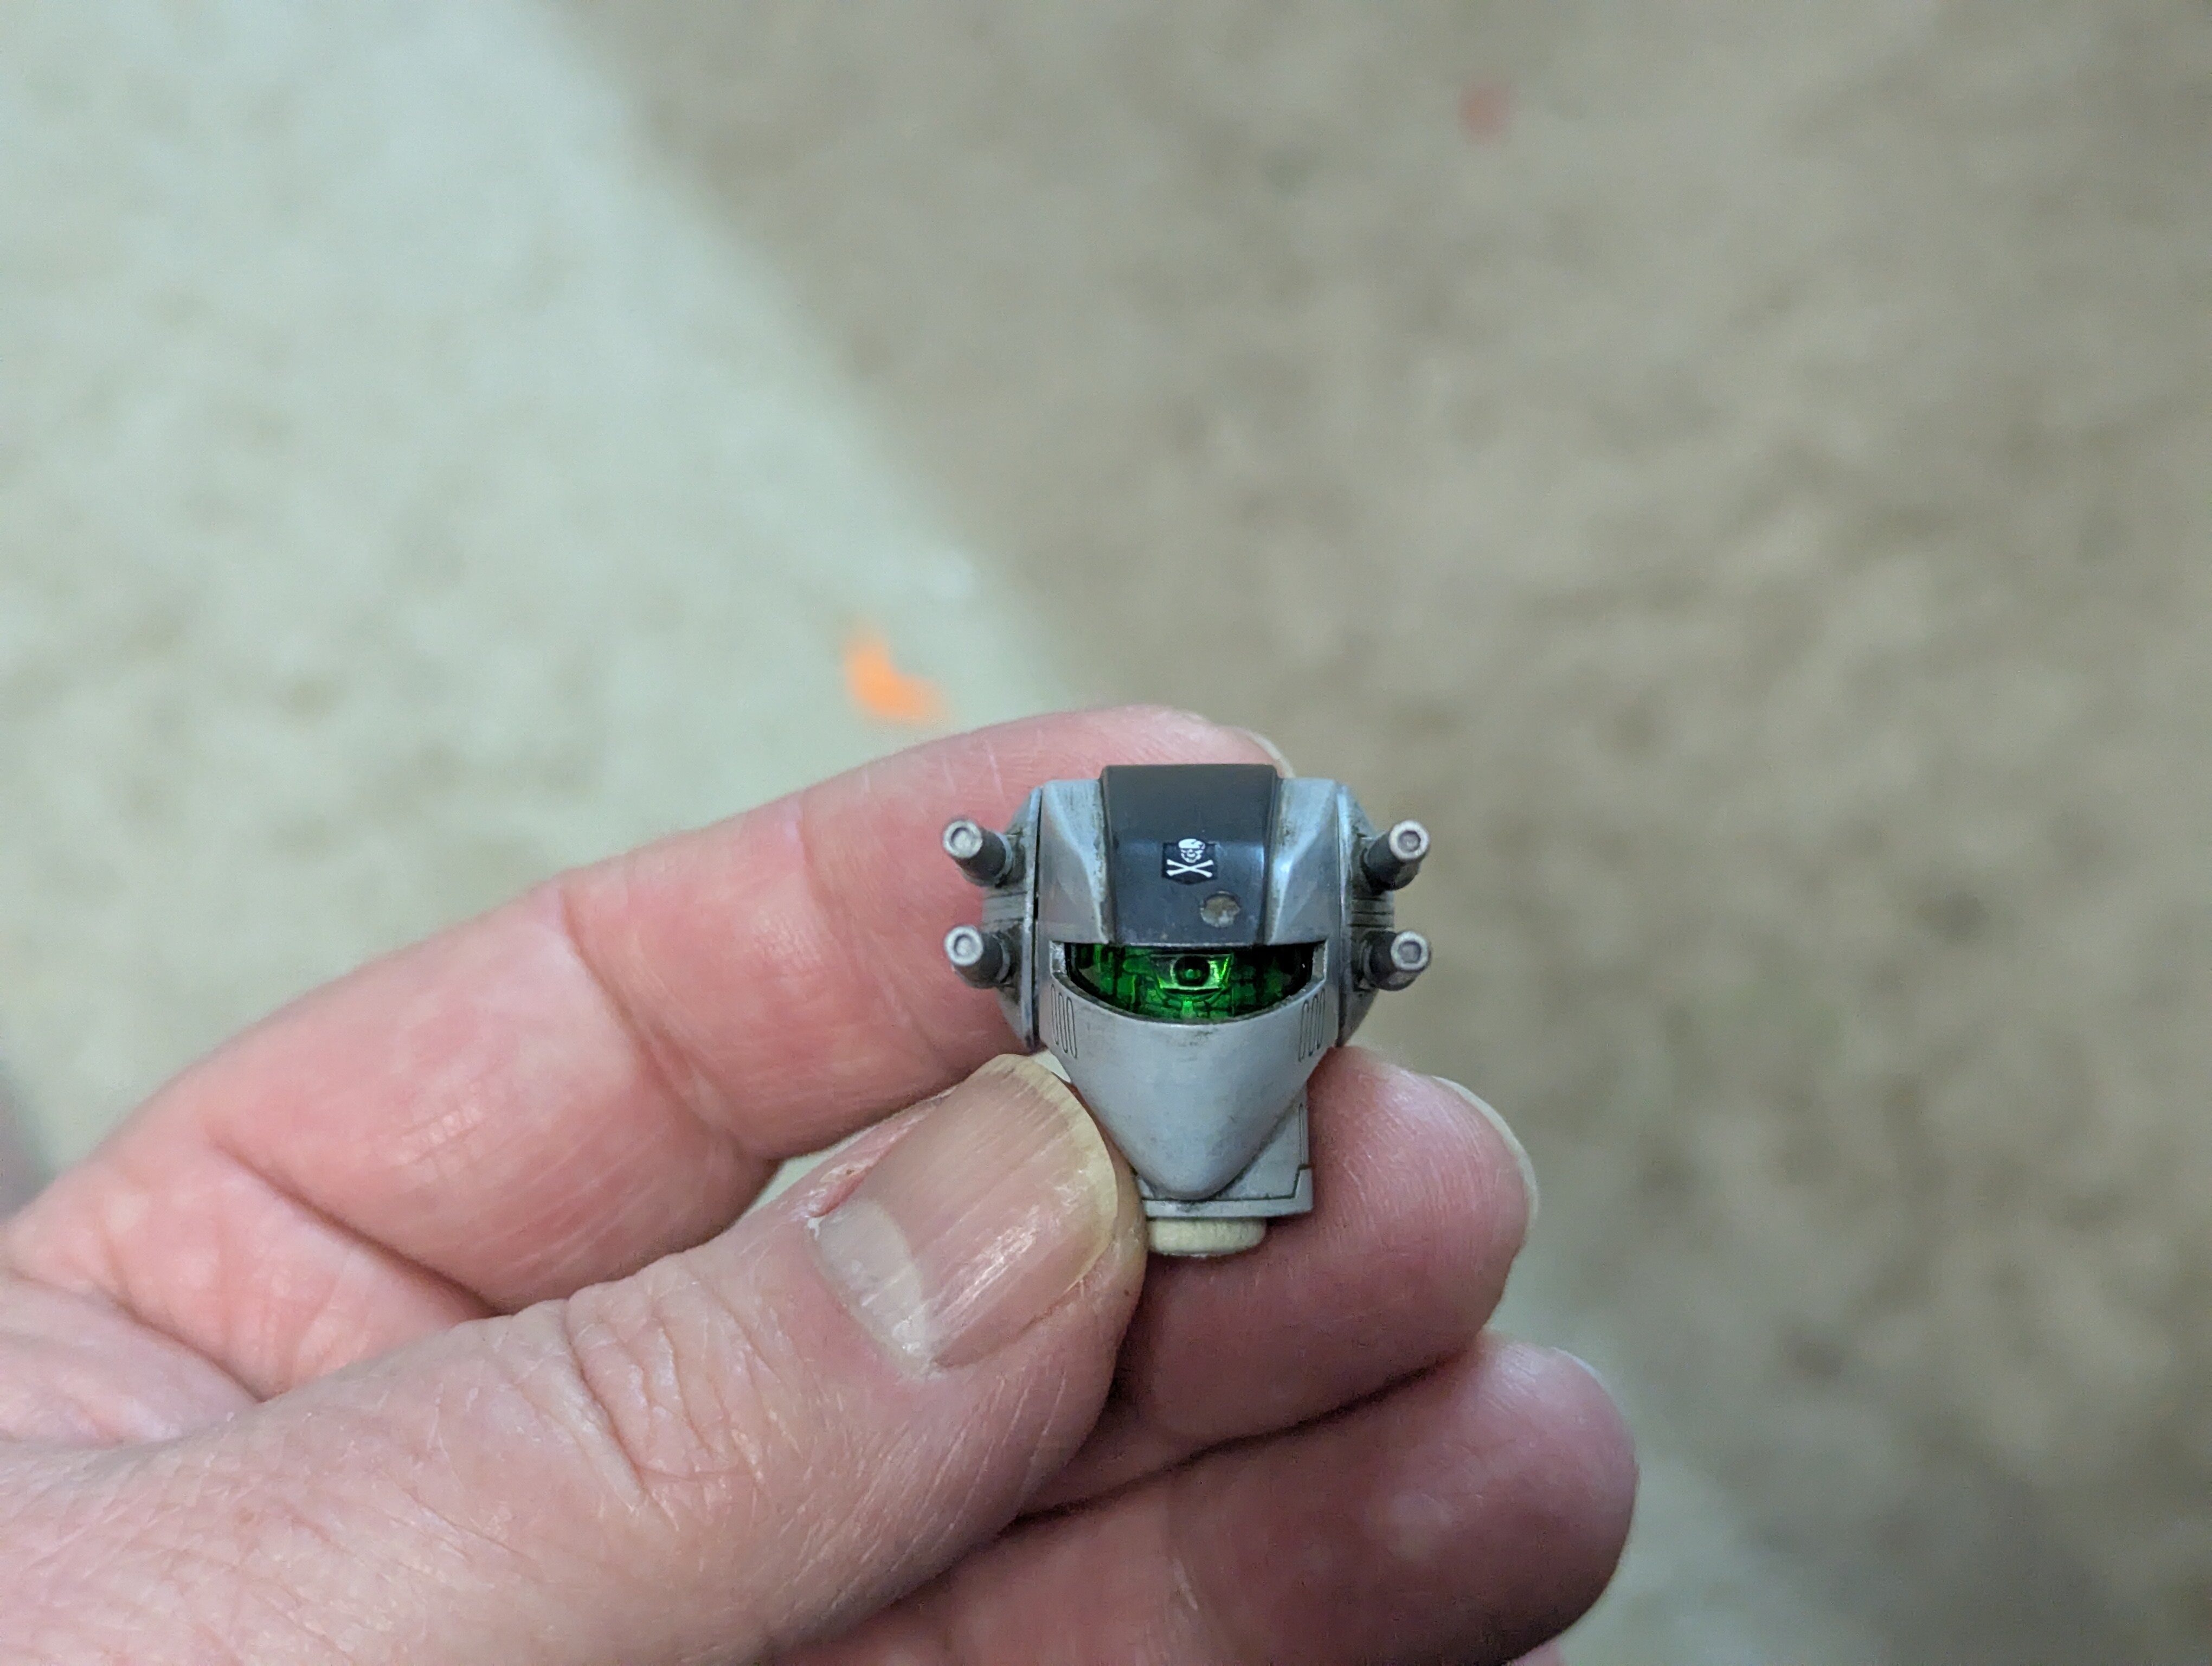
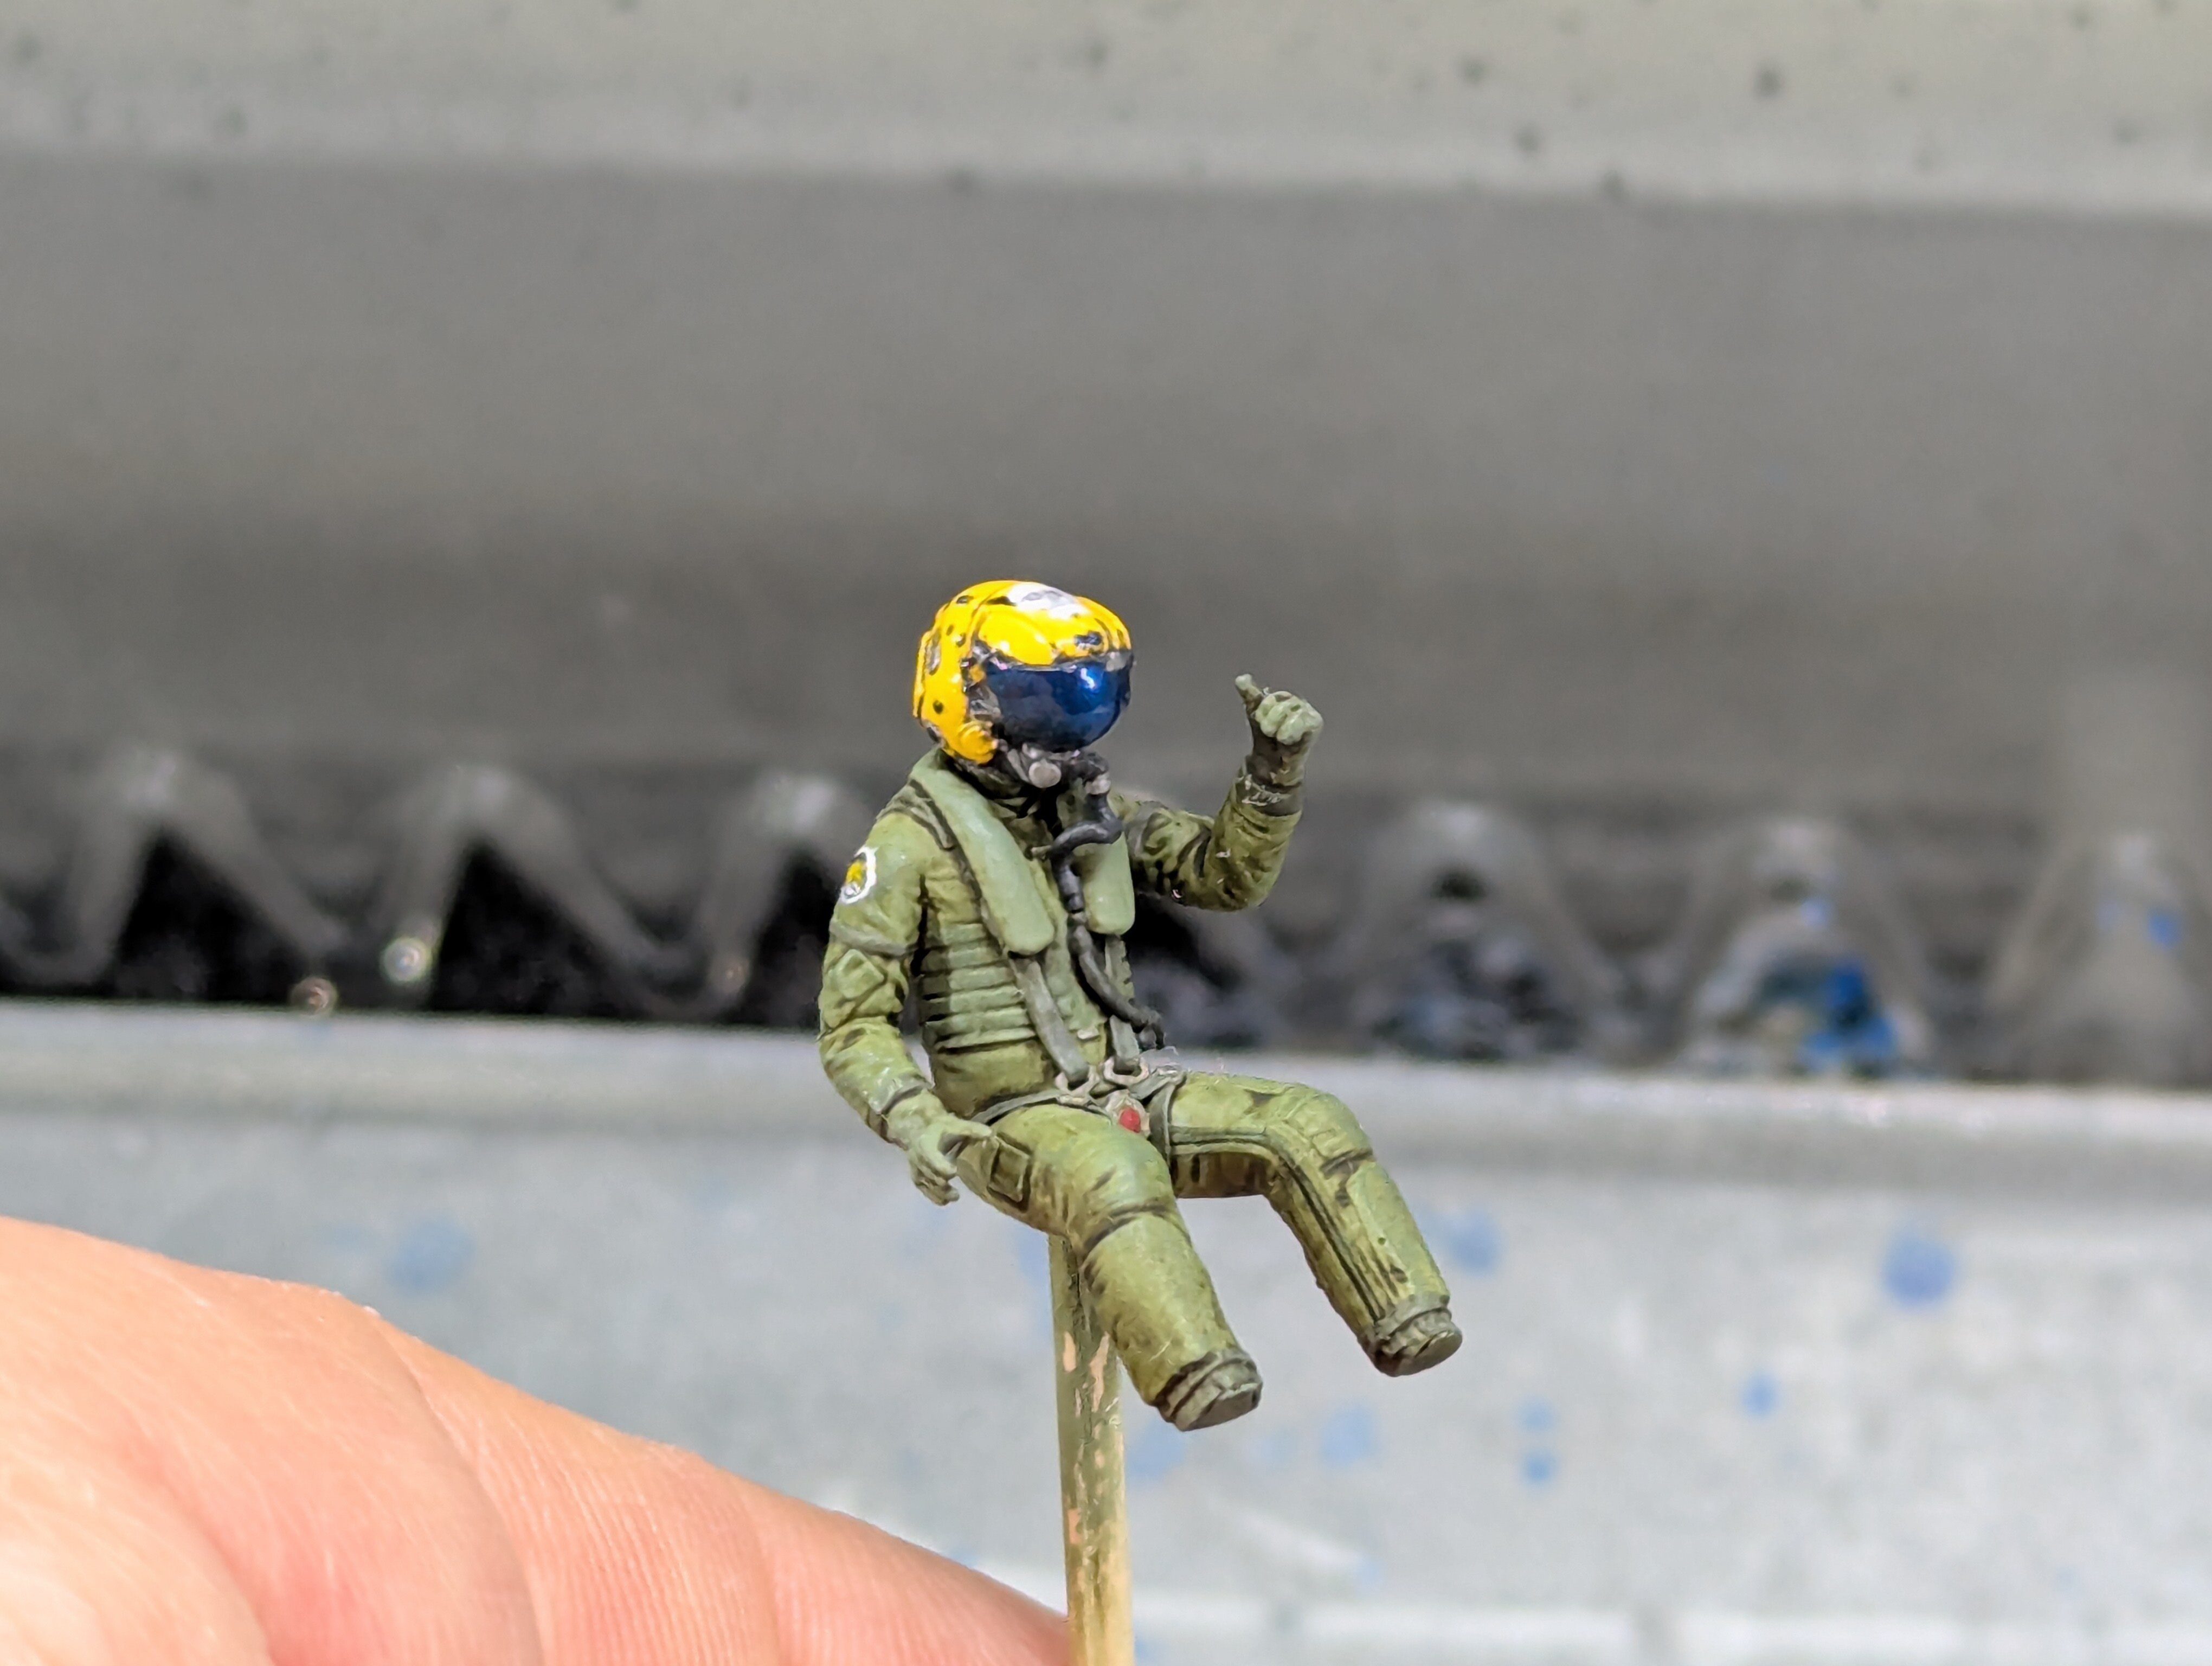
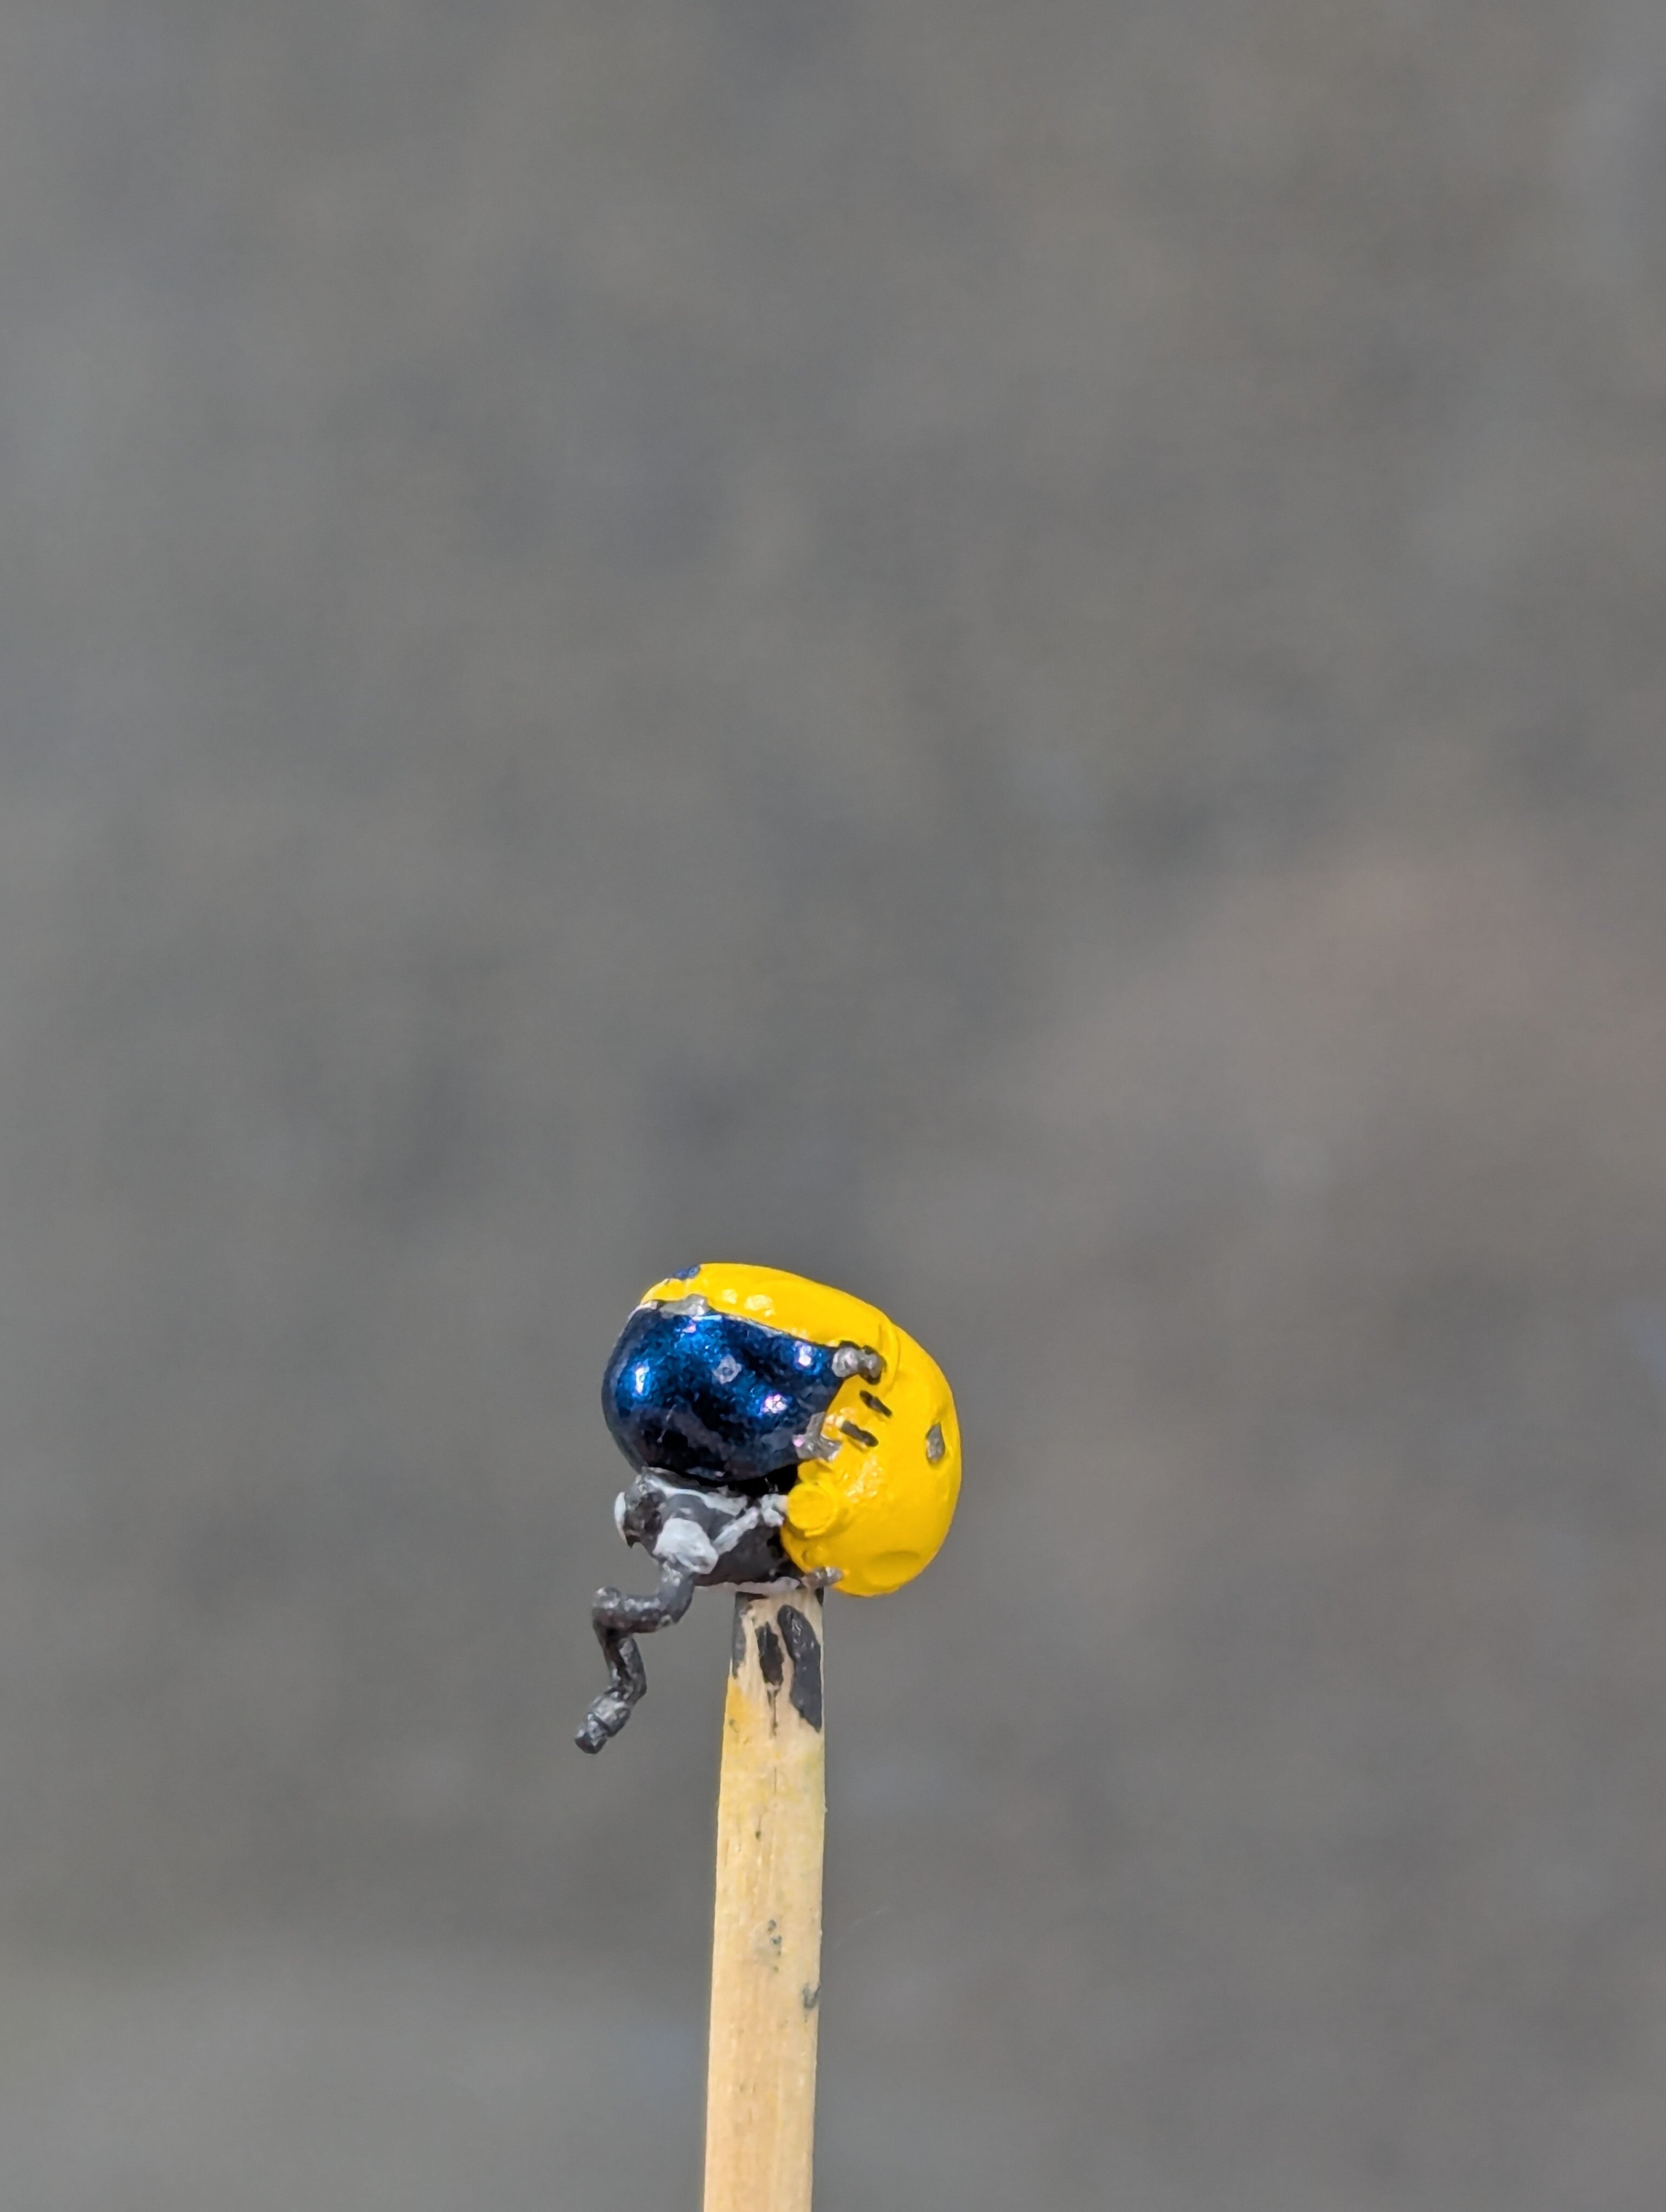
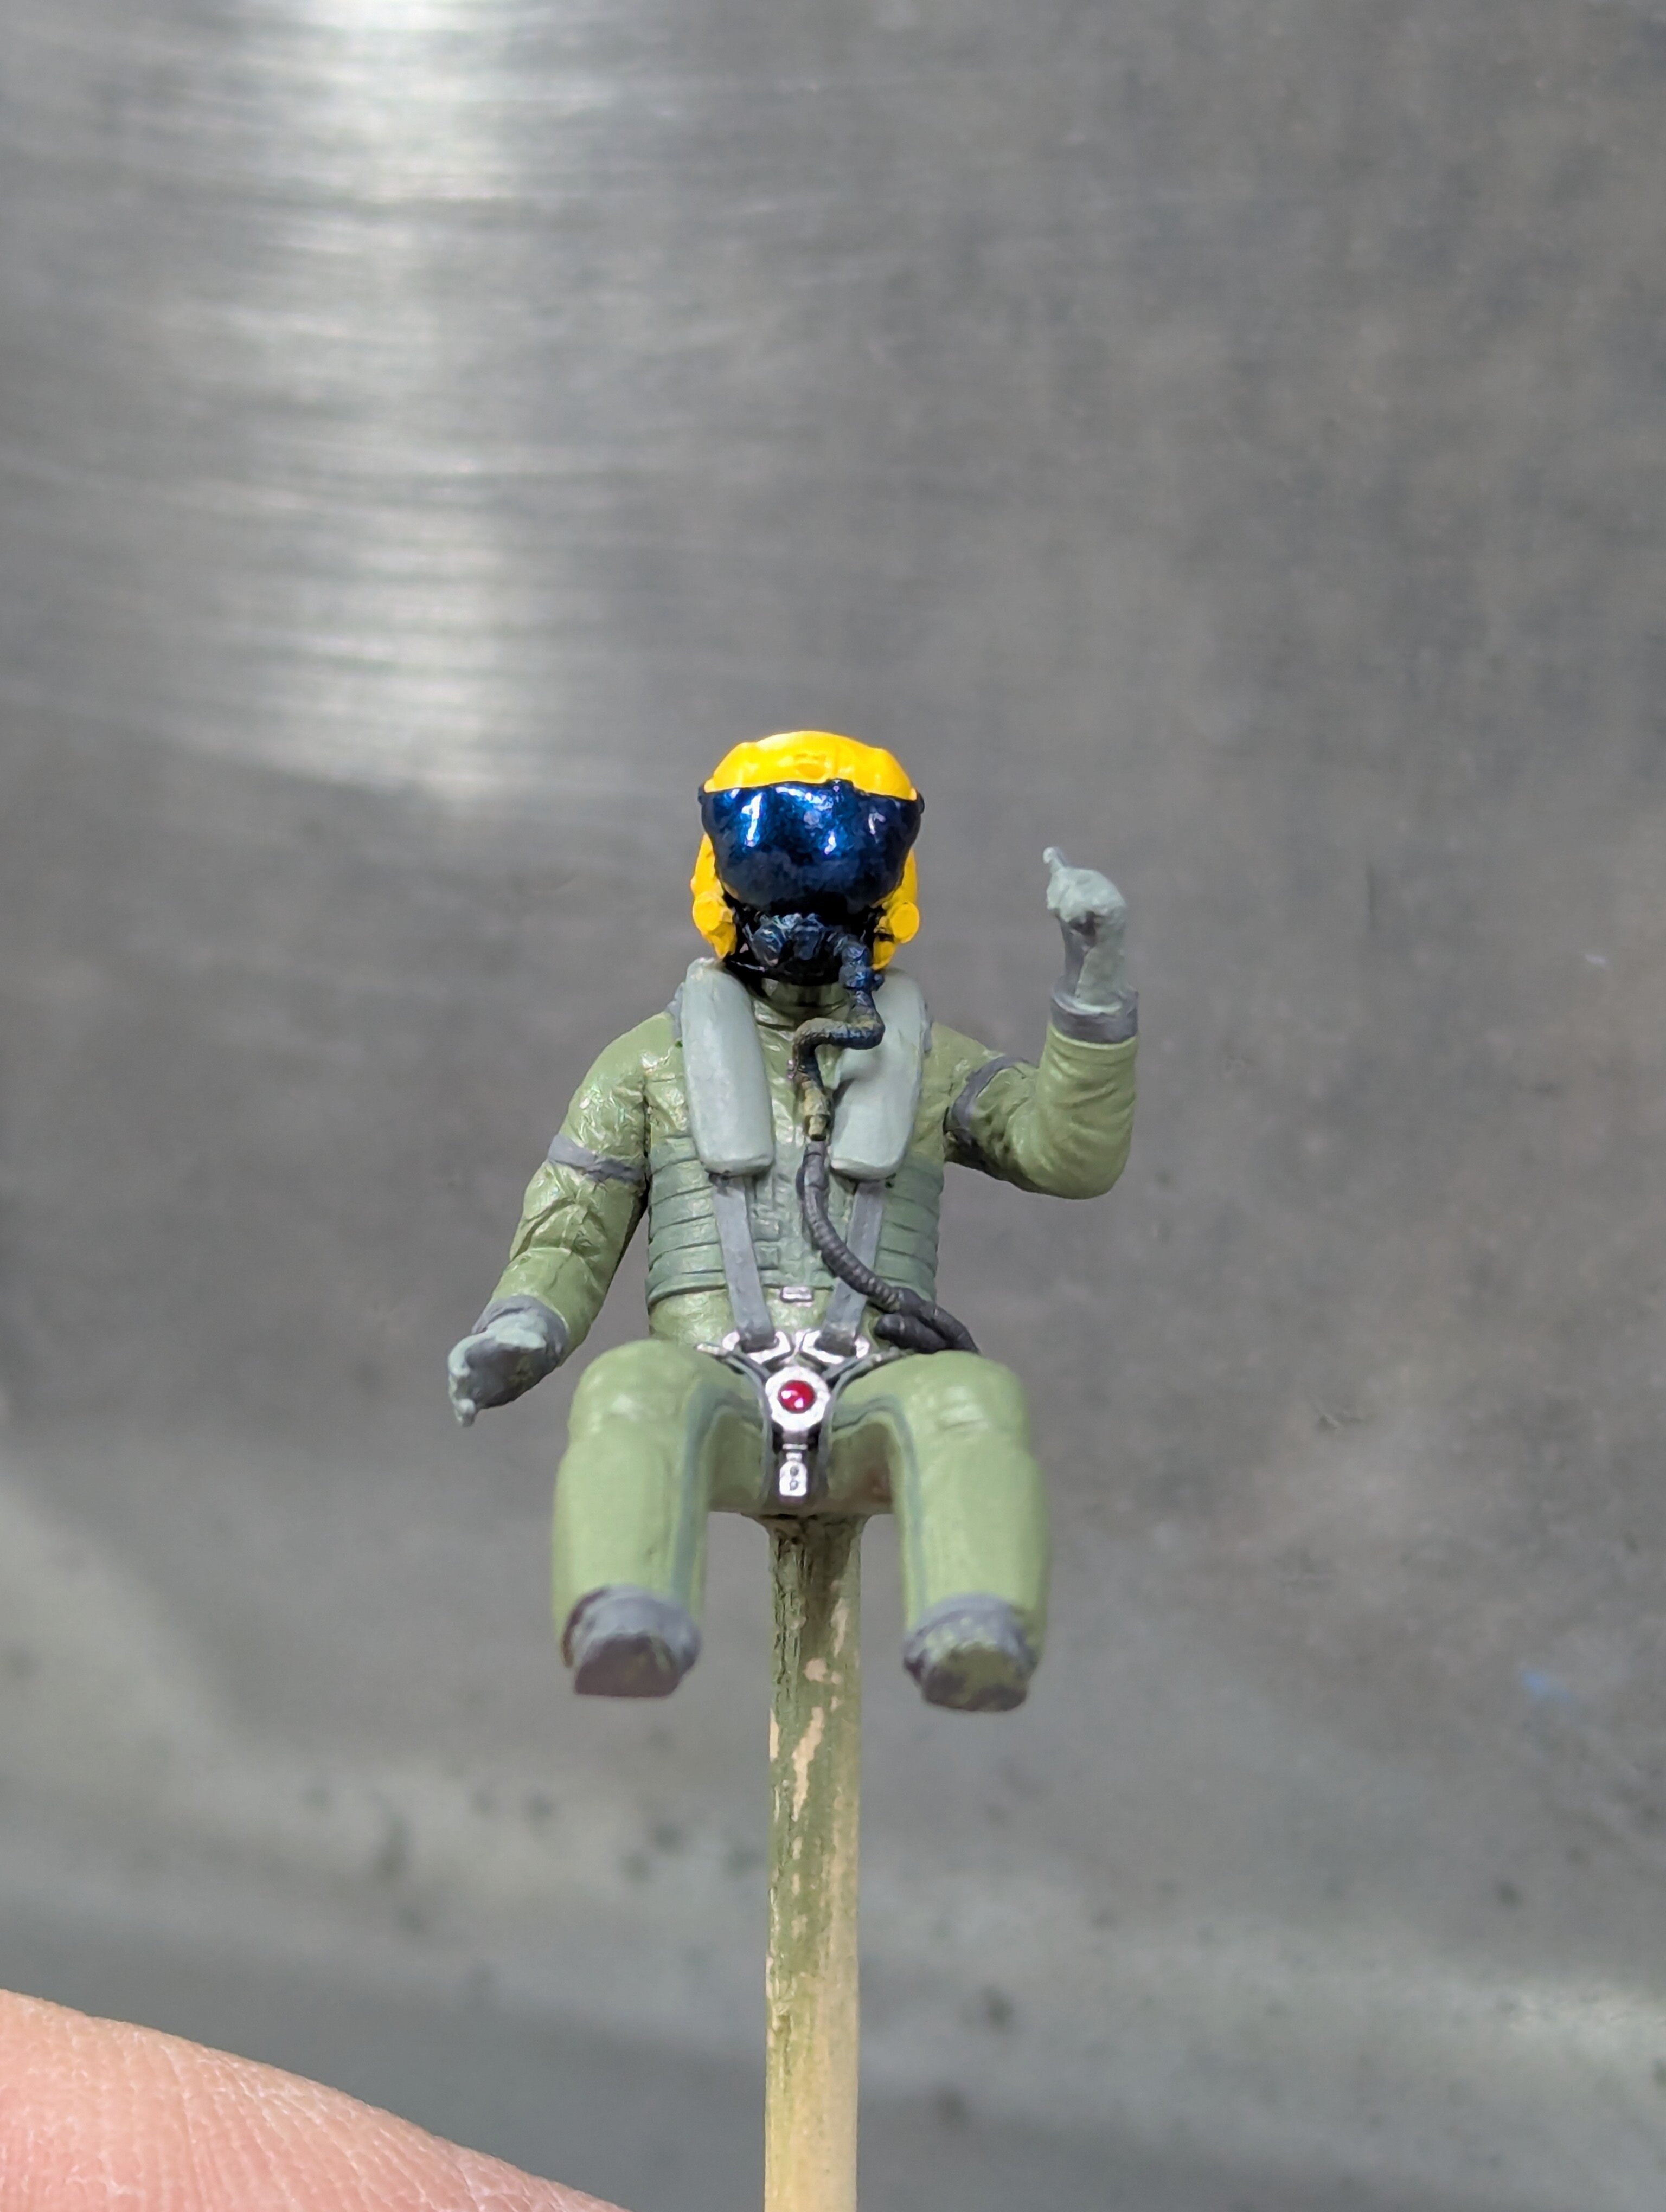
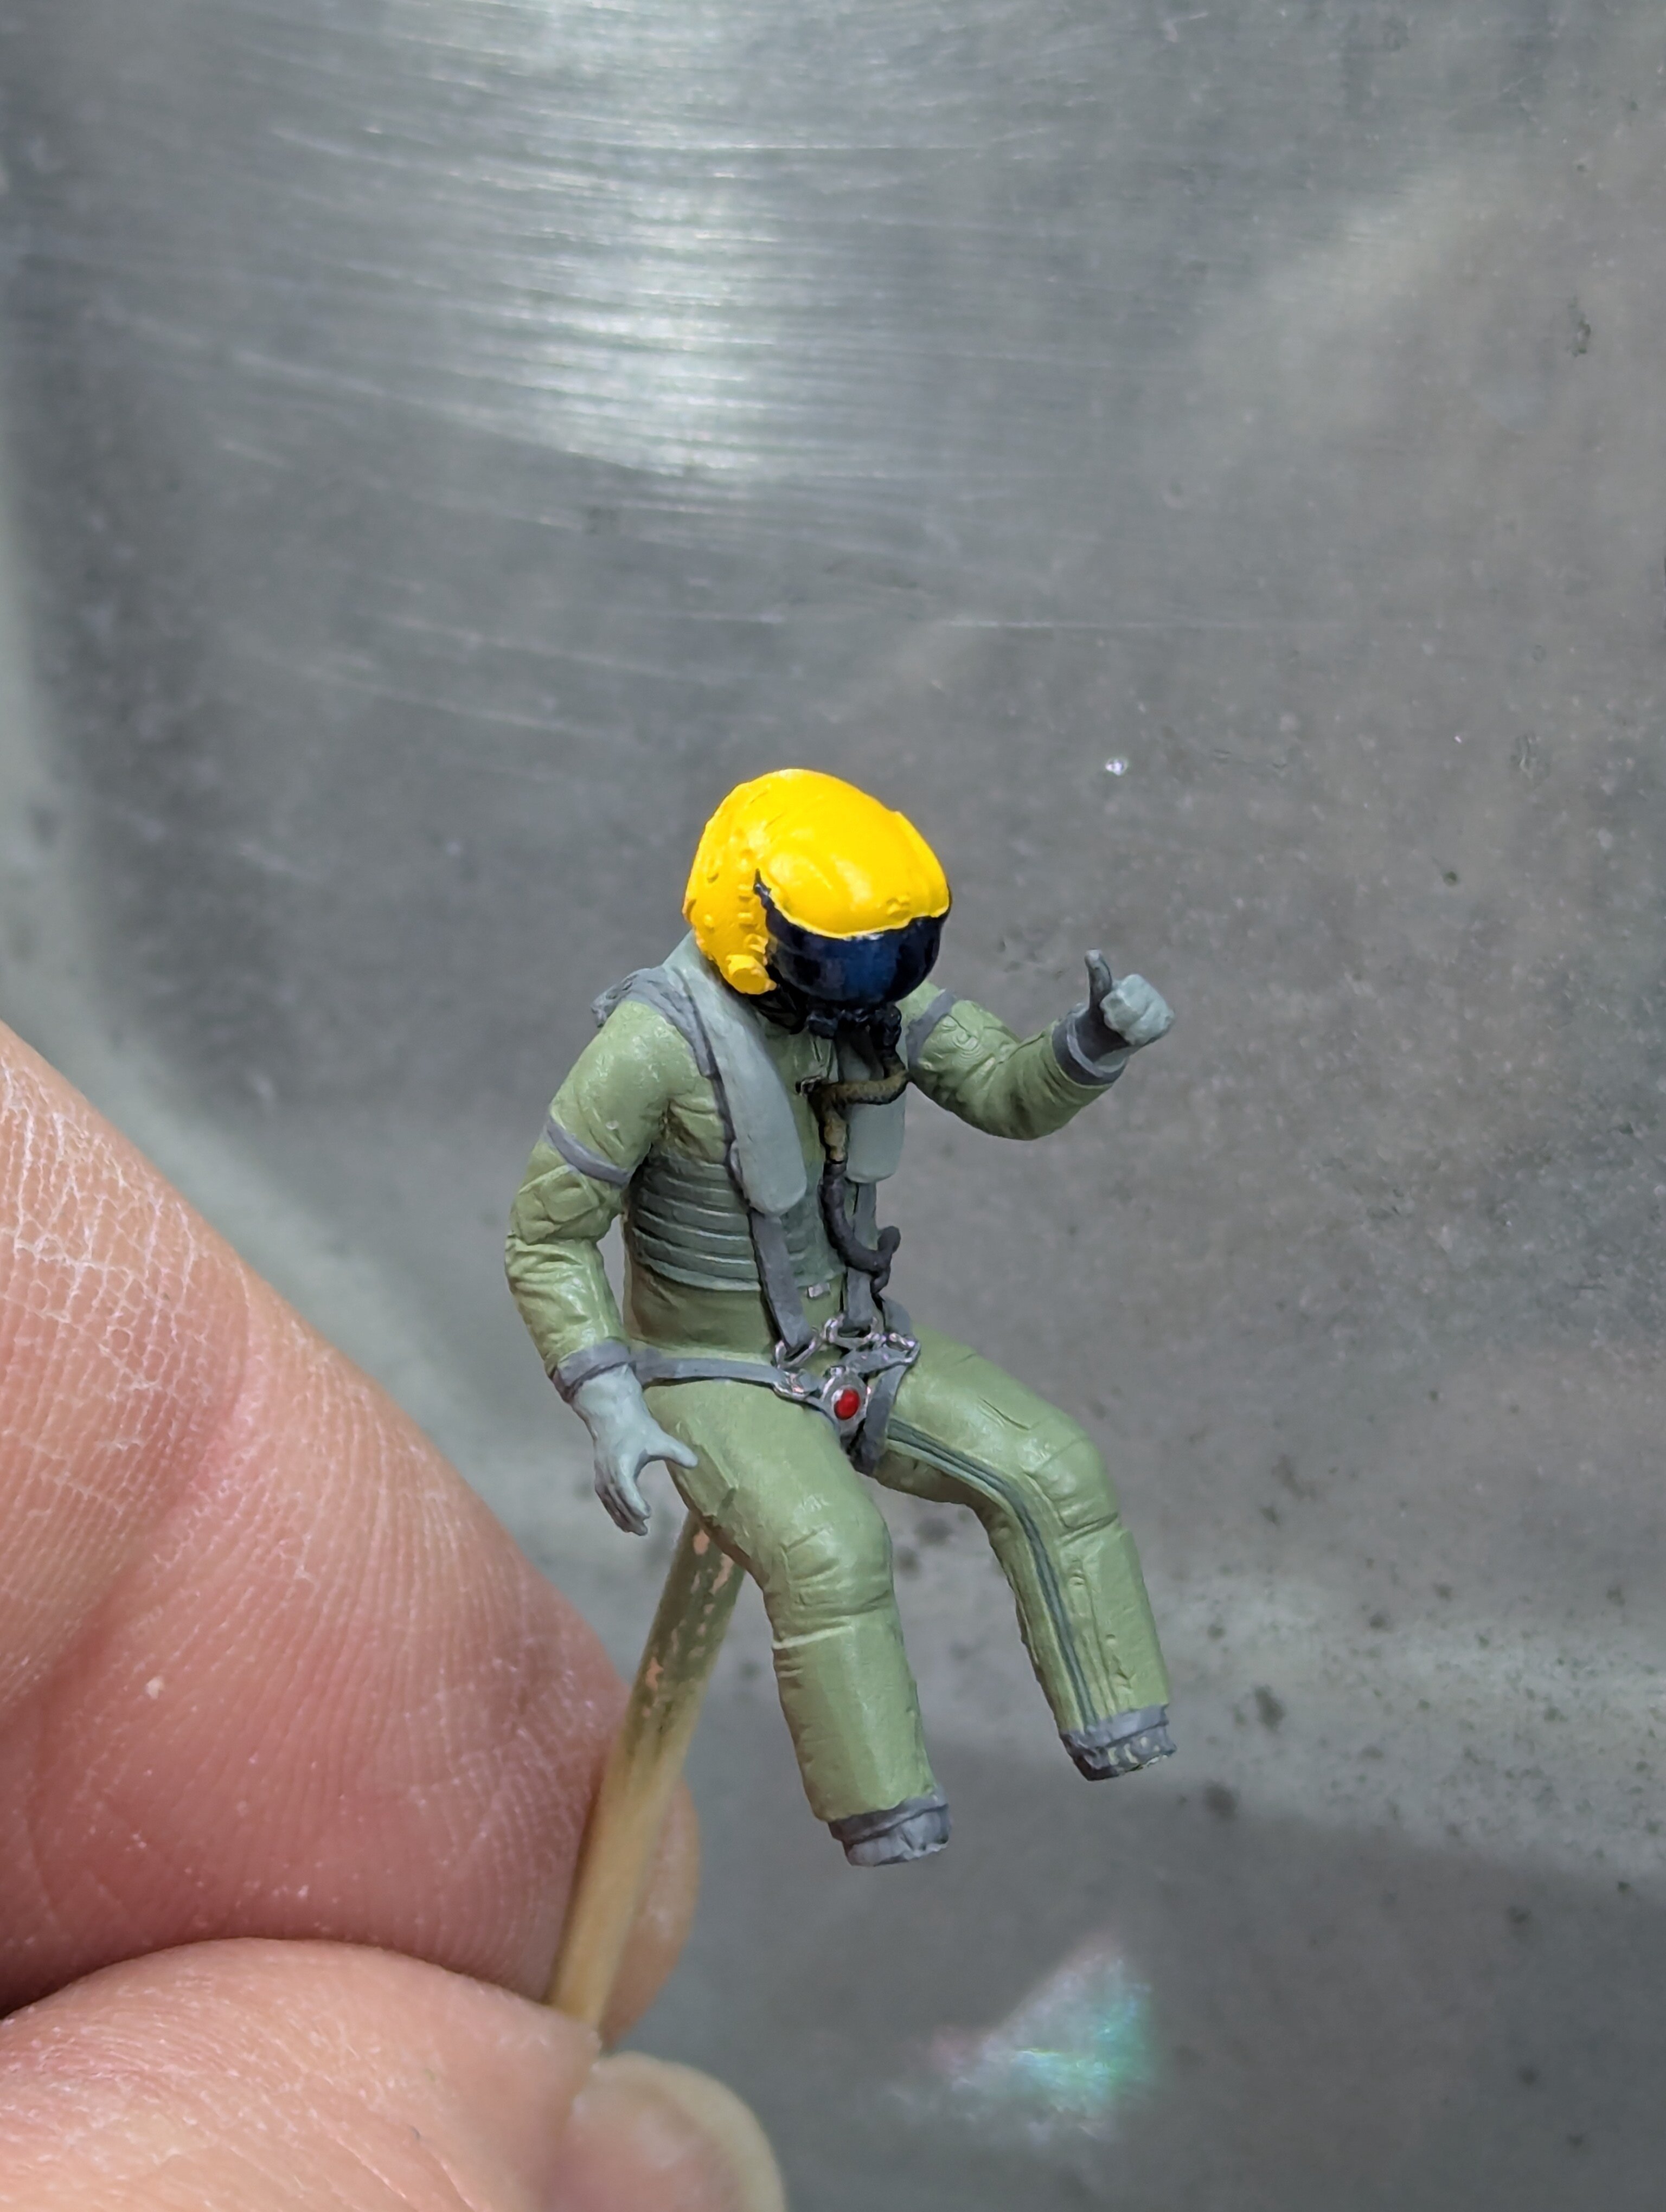
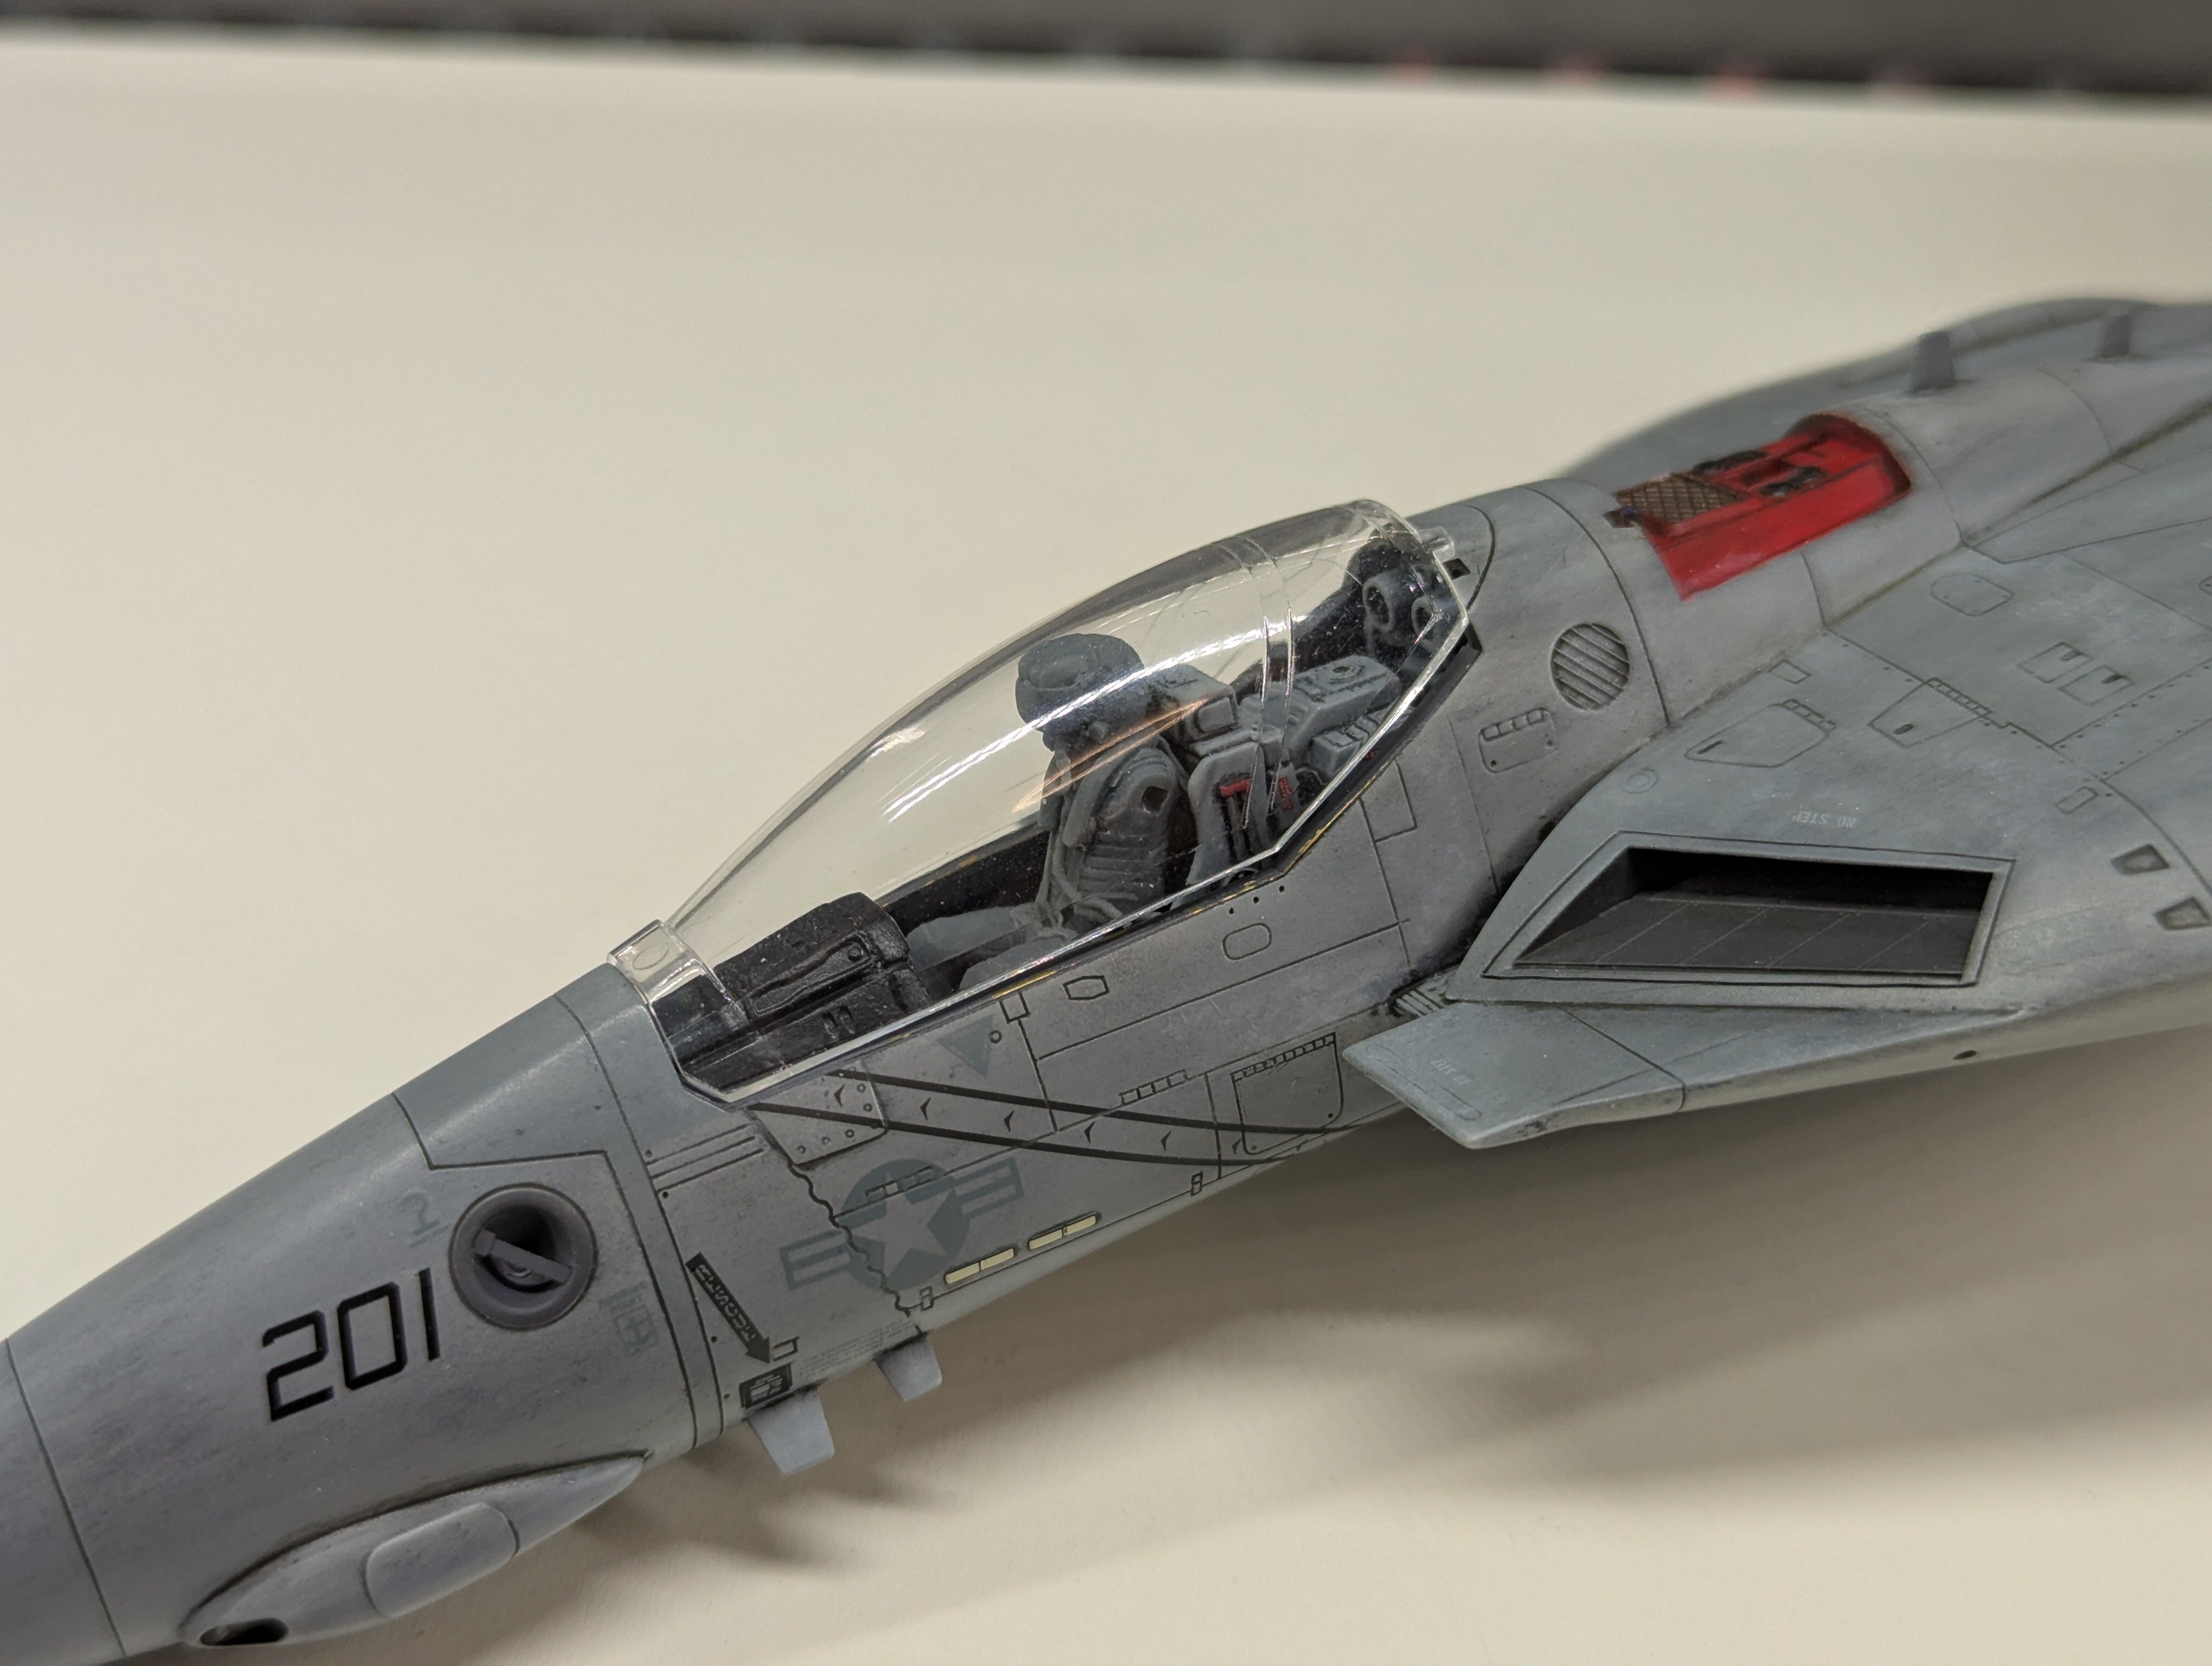
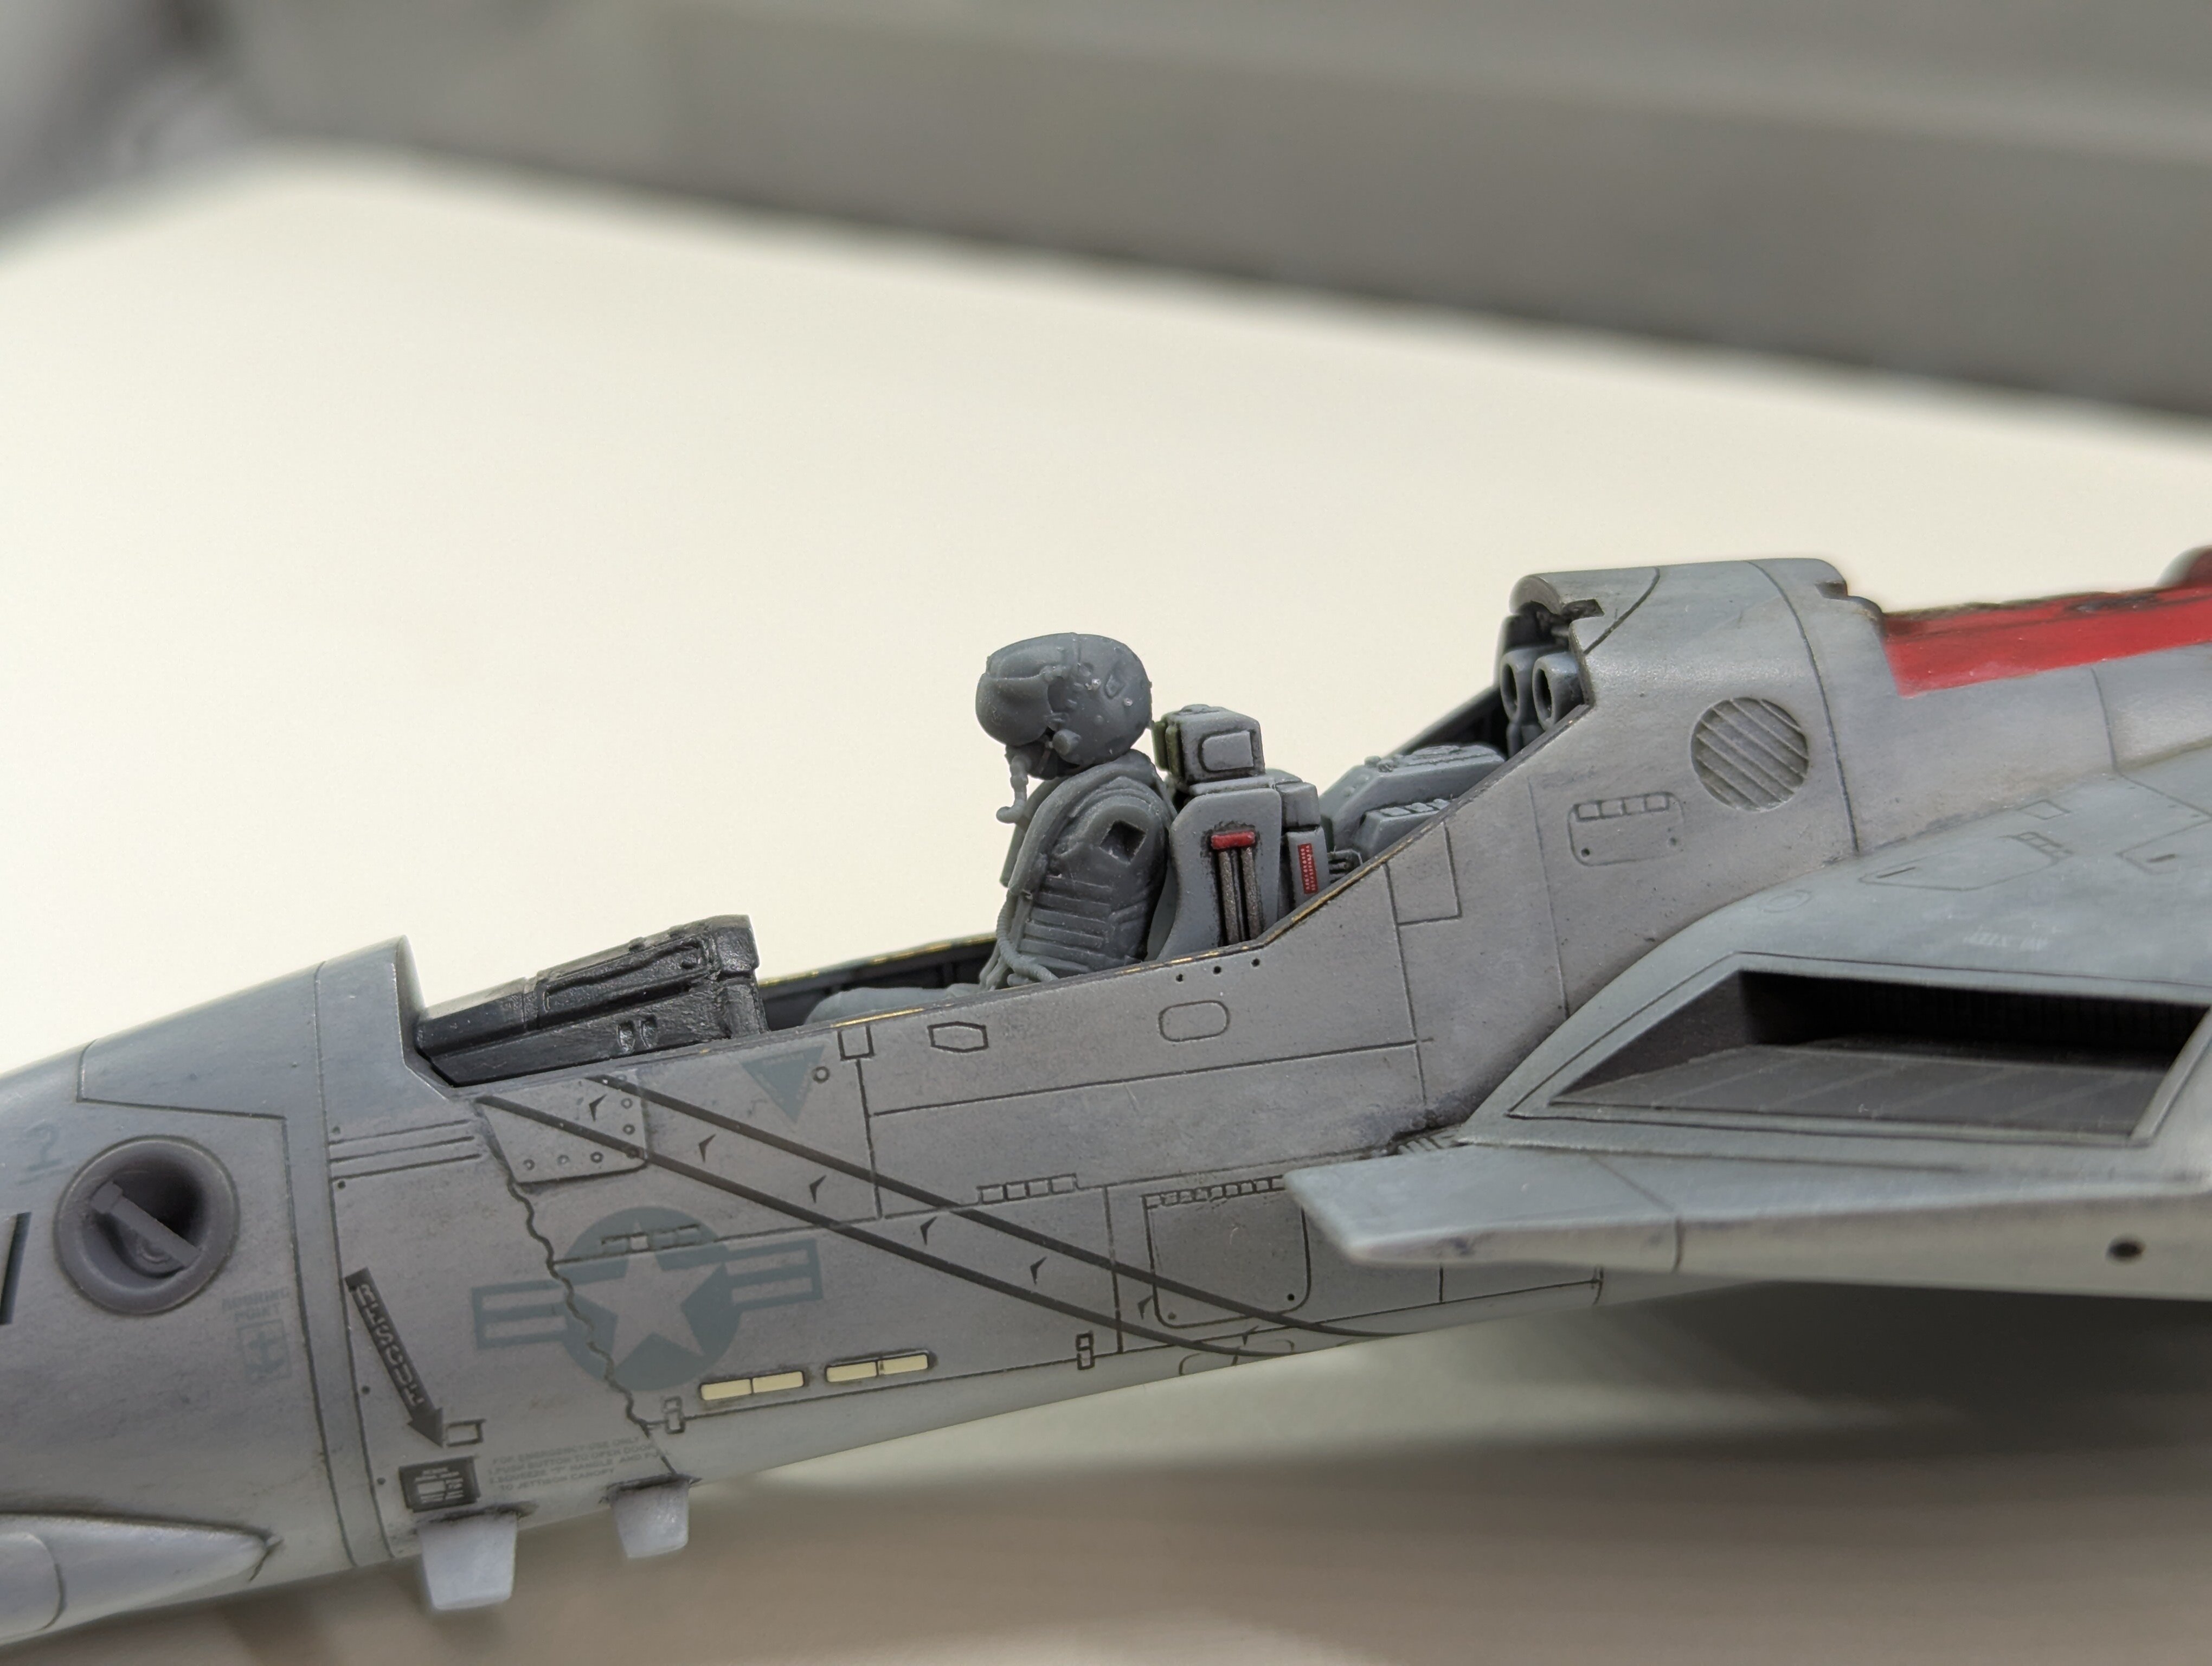
I'm inching closer to the finish line. The oil weathering is taking me much longer than I expected, but I really like how it's all coming together. Each layer brings a new dimension. I've also got the shading and detailing done on the pilot.


-
My journey on building my Hasegawa 1//48 VF-1S has gotten me back into watching Macross. The last thing I watched was Macross Zero around the time it originally came out and I never watched M7 so I decided to give it a try. While there were some bright moments and on the balance I enjoyed it, it was definitely a slog to get through all 50 episodes of the main series. There's a lot of repetition and whole episodes where the plot goes absolutely nowhere. There were a lot of interesting ideas and expansion of the universe, but I think they would have been much better served by focusing the narrative and streamlining things, I think they could have easily fit everything into a 25 episode run. That being said, I decided to skip all of the supplemental M7 stuff and jump into Macross Frontier and that is much more my speed.
-
Nice work on the flight deck crew so far! Is this 1/72 scale? If so where did you get your crew? I'm looking at options for when I get around to building my Phantom launch diorama and these look pretty nicely detailed.
-
YF-19 Alternate Livery Line Art: USN VF-1 Wolfpack Inspired
JNordgren42 replied to JNordgren42's topic in Fan Works
Here are the final versions of the 3 views I did. I did some clean up and added a gradient to denote metallic leading edges on the flight surfaces.

- 6 replies
-
- 2
-

-
- illustrator
- yf-19
- (and 2 more)
-
Macross Lineart and Profile Color Scheme Art, Round II
JNordgren42 replied to Talos's topic in Fan Works
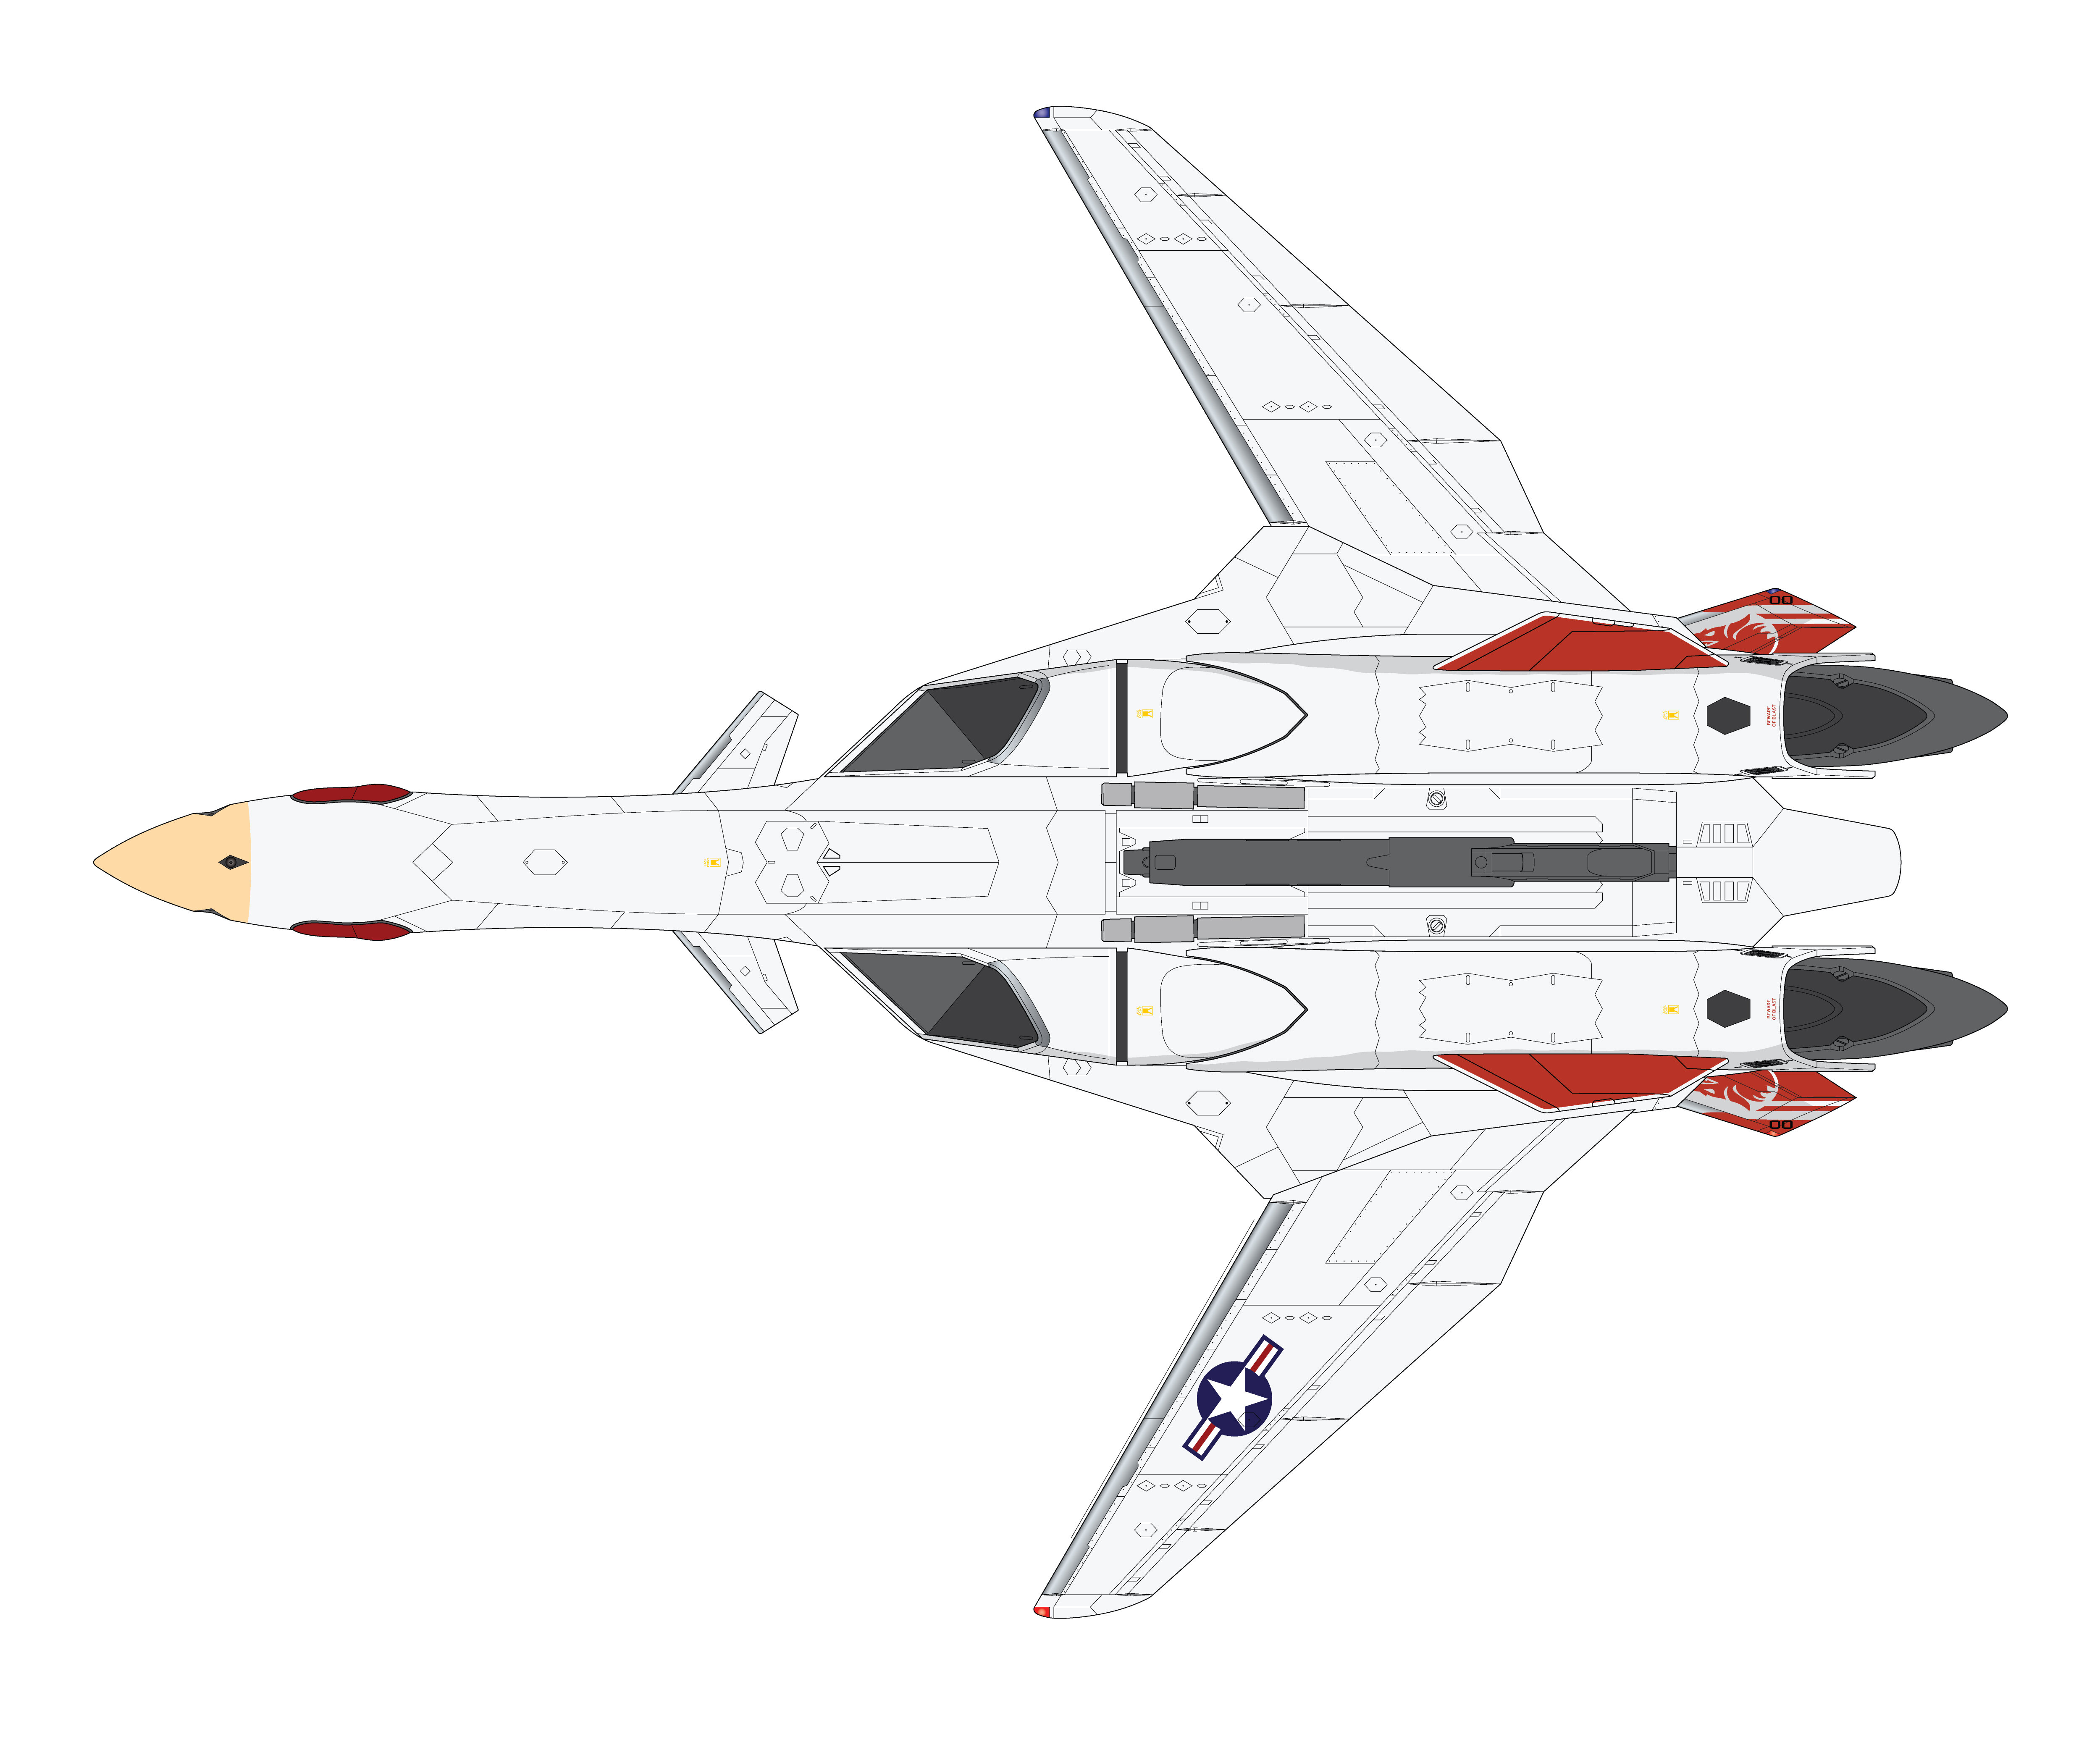
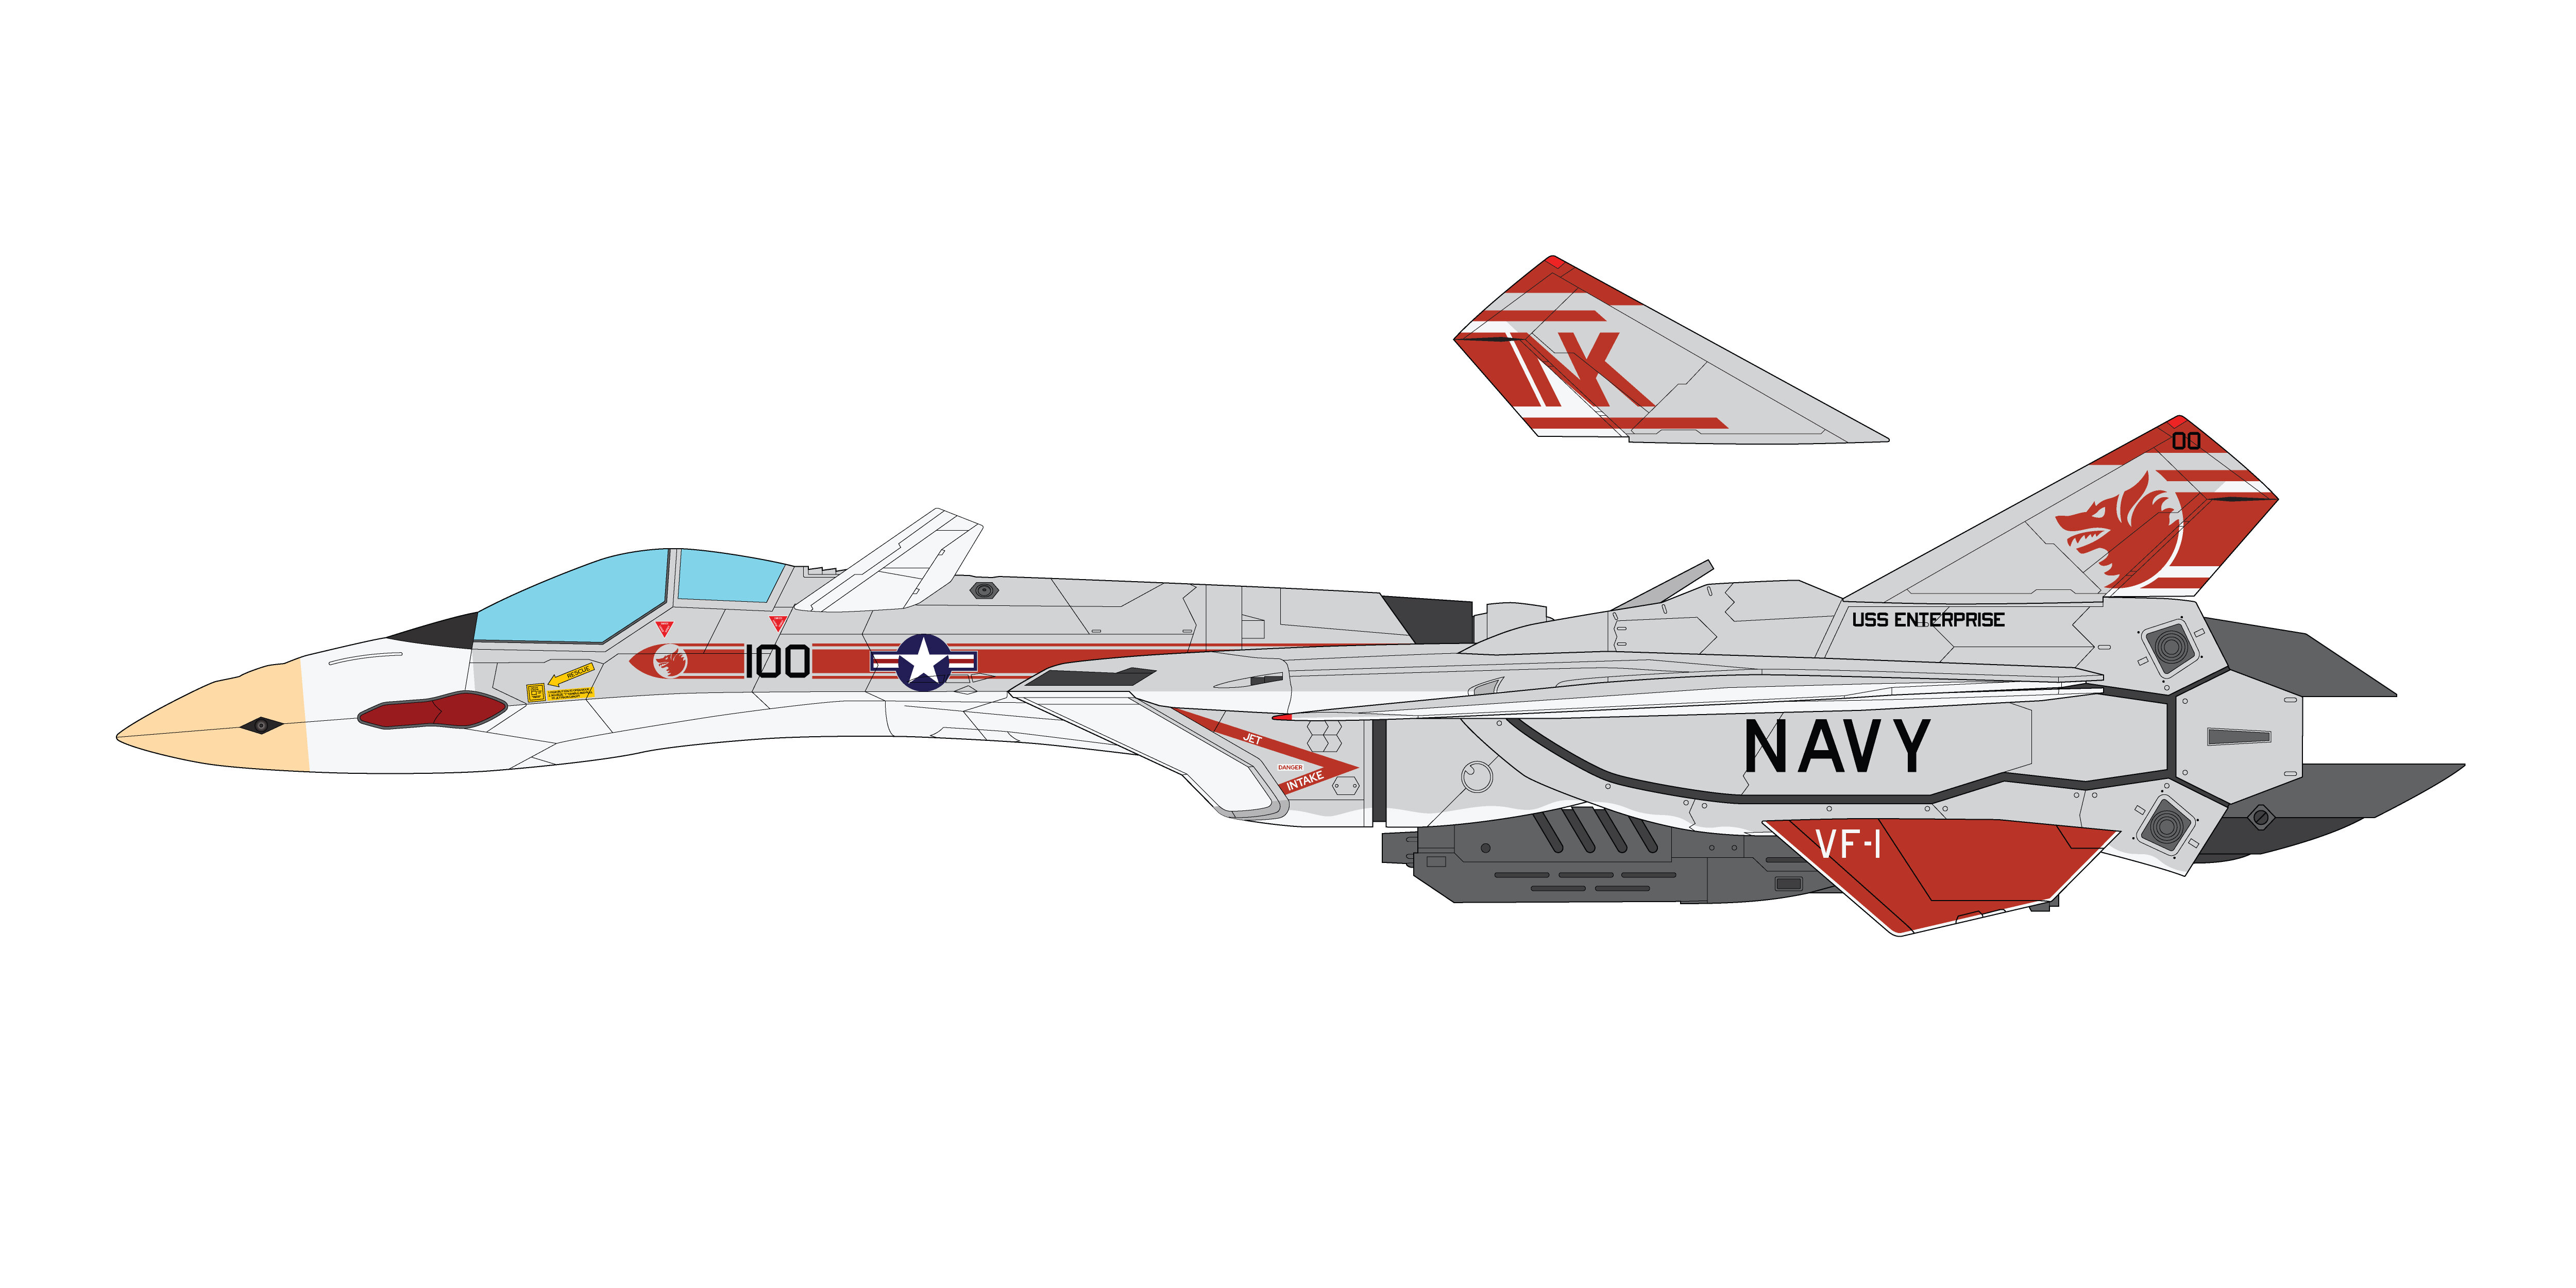
Adding my "What If?" VF-1 Wolfpack USN scheme for the YF-19 to the thread. Line art is done in Illustrator based on the Hasegawa 1/48 instruction sheet. No shading except for a metallic gradient for the leading edges of the flight surfaces. The markings are scaled from the HAD Models 1/48 Wolfpack F-14 decal sheet and should in theory work on a the 1/48 Hase YF-19 (in fact, I have both the decals and model on order for a future build).

-
YF-19 Alternate Livery Line Art: USN VF-1 Wolfpack Inspired
JNordgren42 replied to JNordgren42's topic in Fan Works
I finished up the bottom view: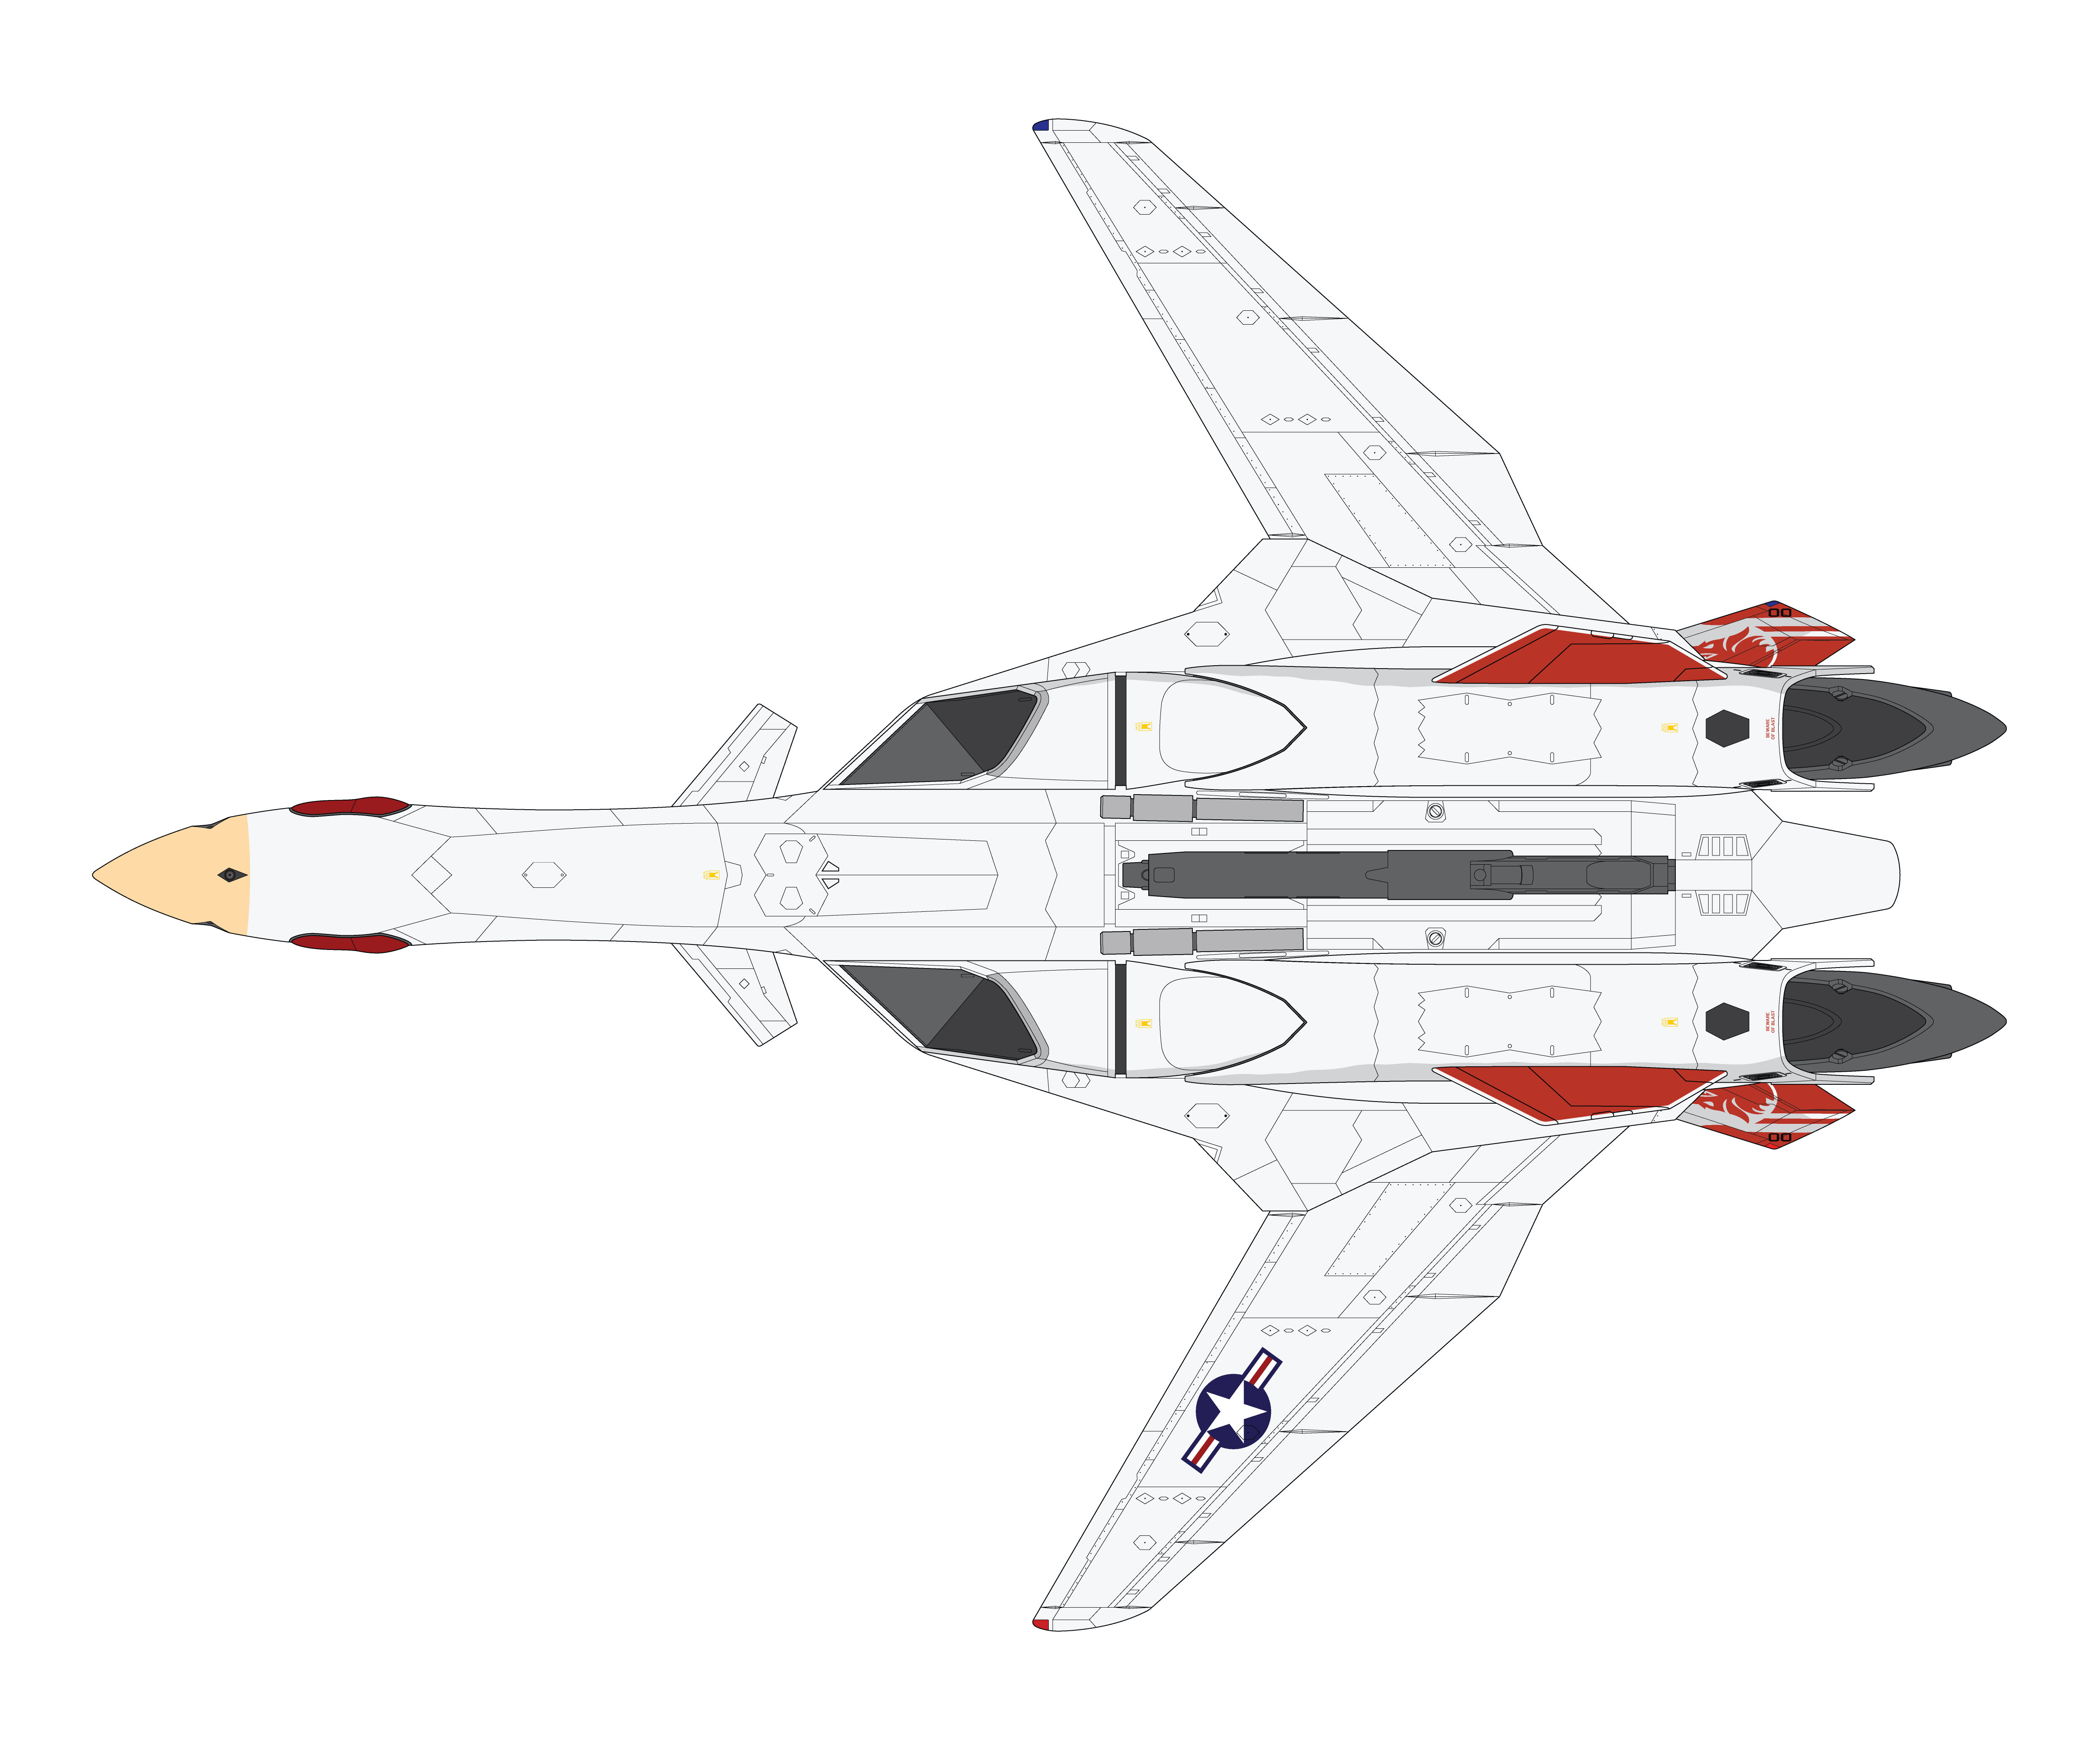
- 6 replies
-
- 1
-
-
- illustrator
- yf-19
- (and 2 more)
-
YF-19 Alternate Livery Line Art: USN VF-1 Wolfpack Inspired
JNordgren42 replied to JNordgren42's topic in Fan Works
It's probably going to be a bit, I'm planning on getting back to my Polar Lights 1/350 Refit USS Enterprise after this. It's a monster model and I'm doing a full custom lighting rig for it. But I'll probably use the YF-19 as a palette cleanser when I need a break from the Big E. Thanks! And that's neat info. It would have been cool to see a Wolfpack inspired theme in one of the shows. Thanks! -
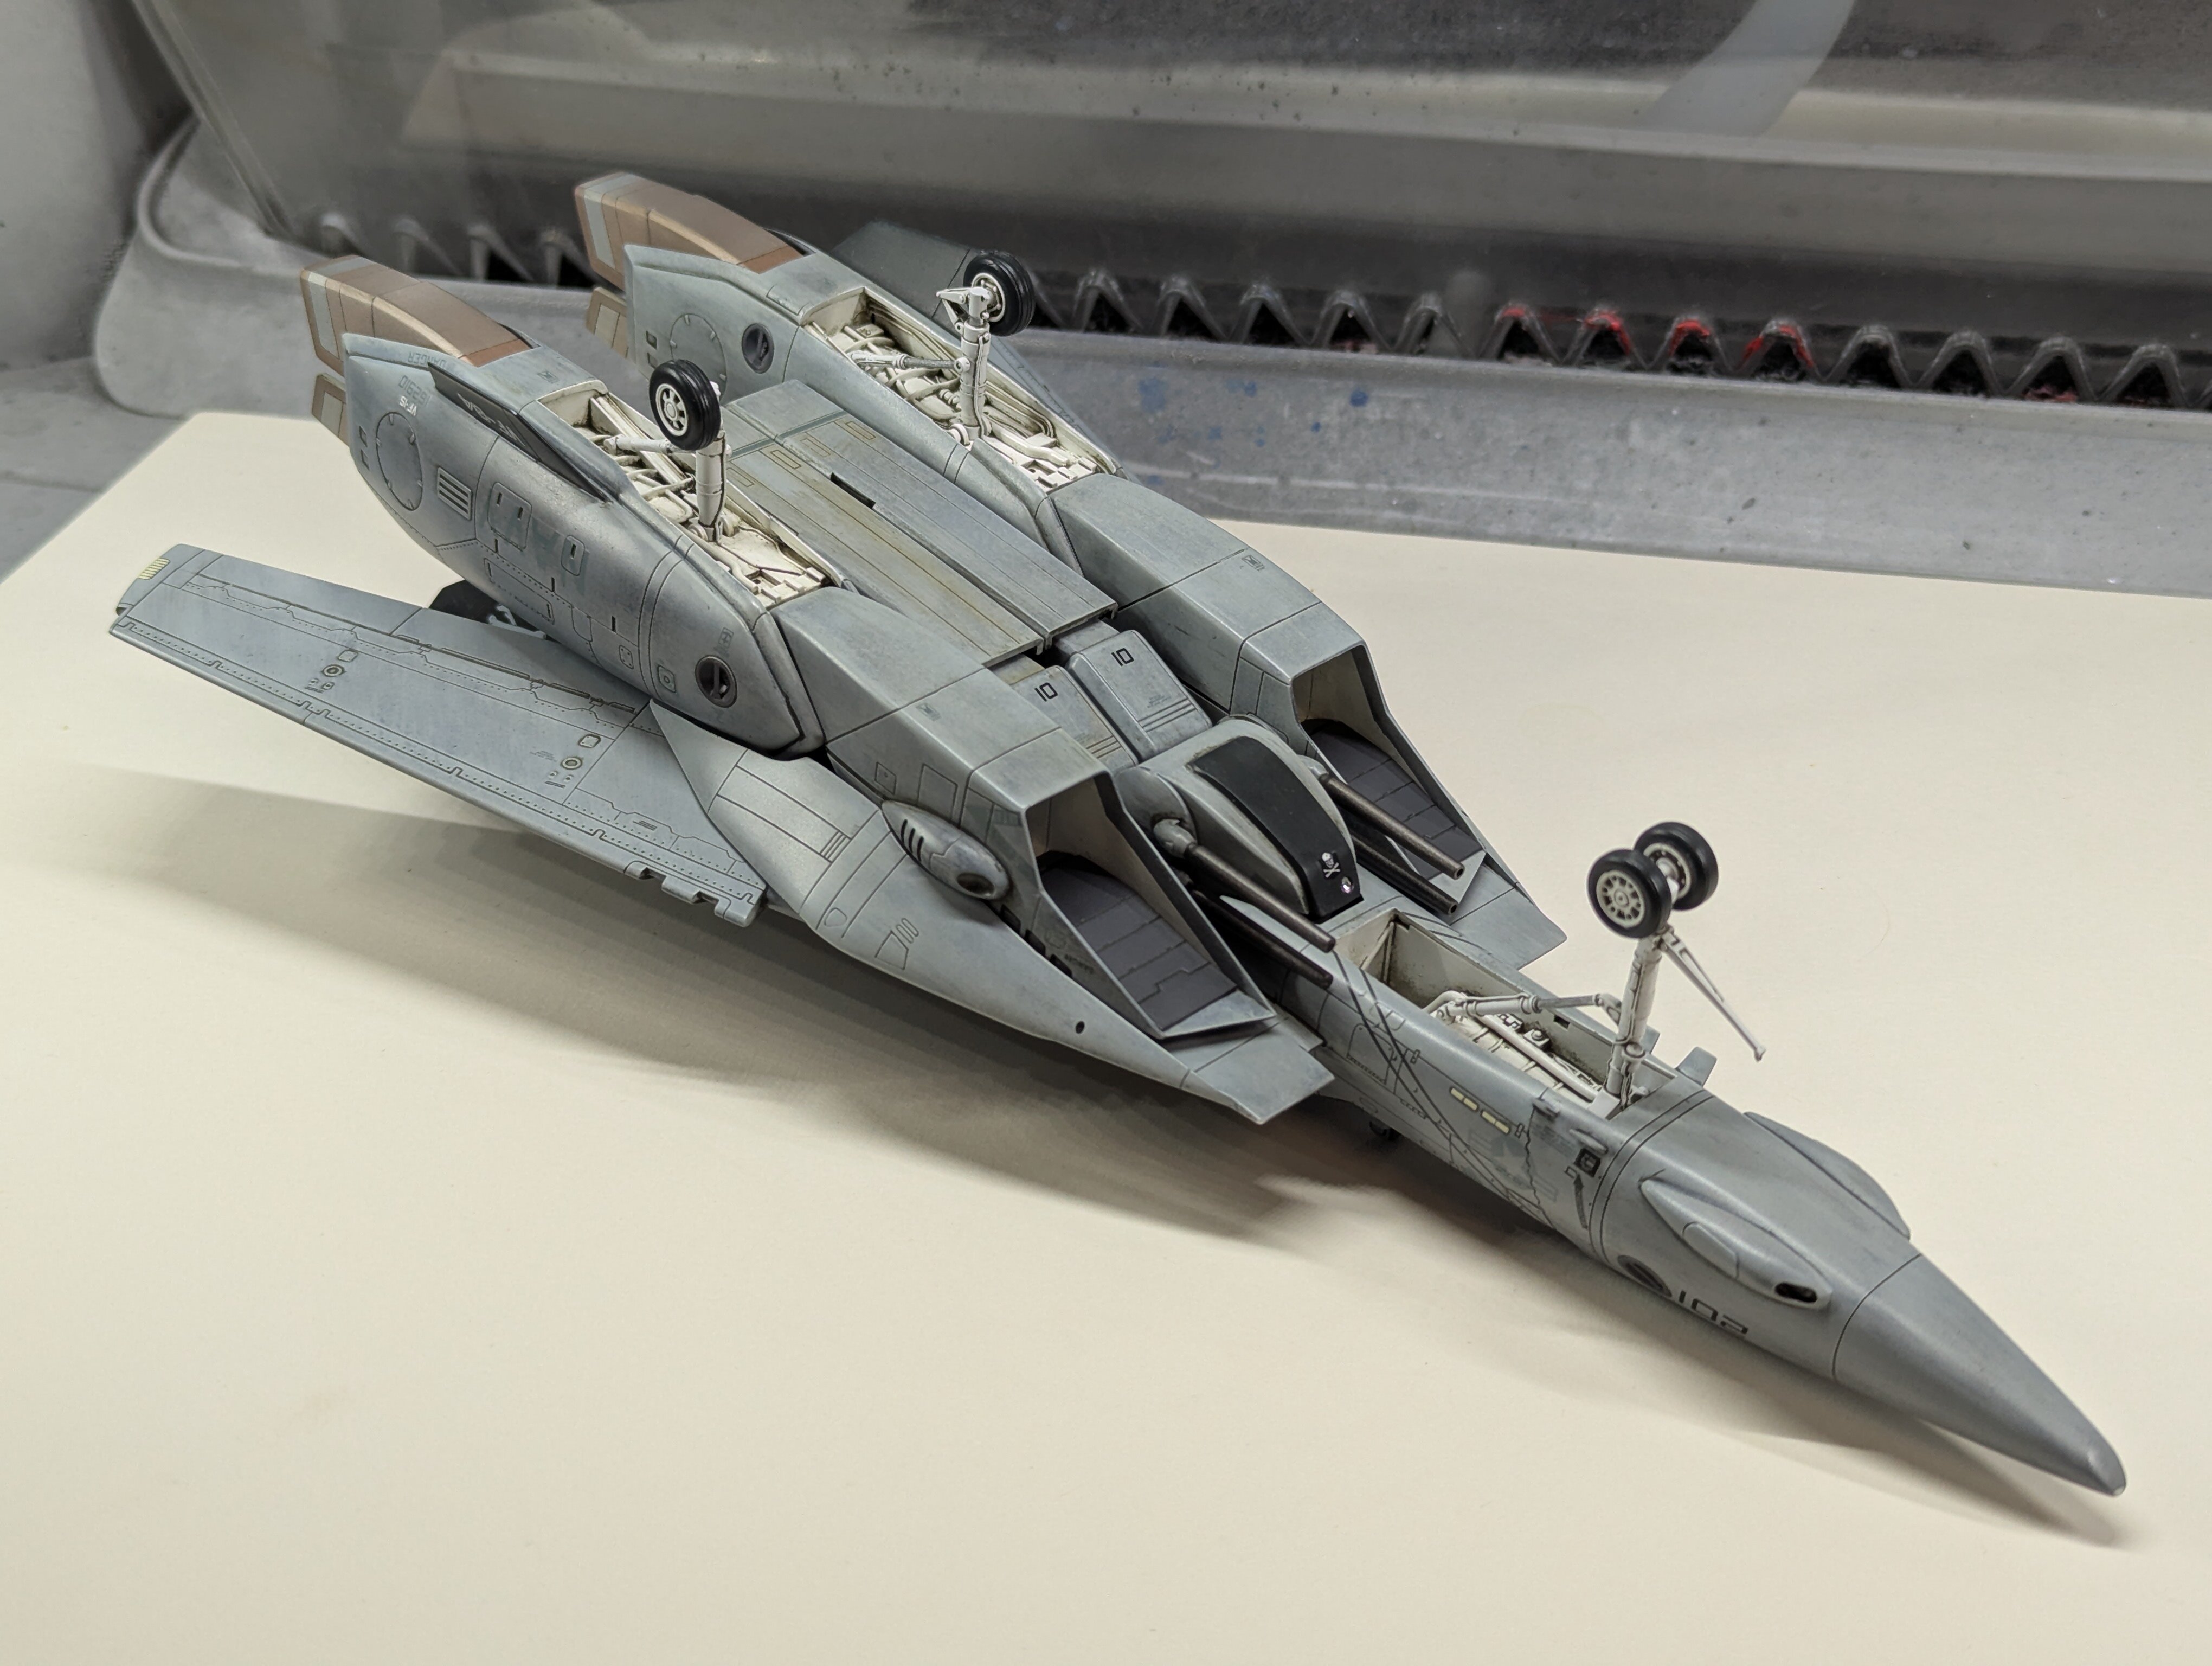
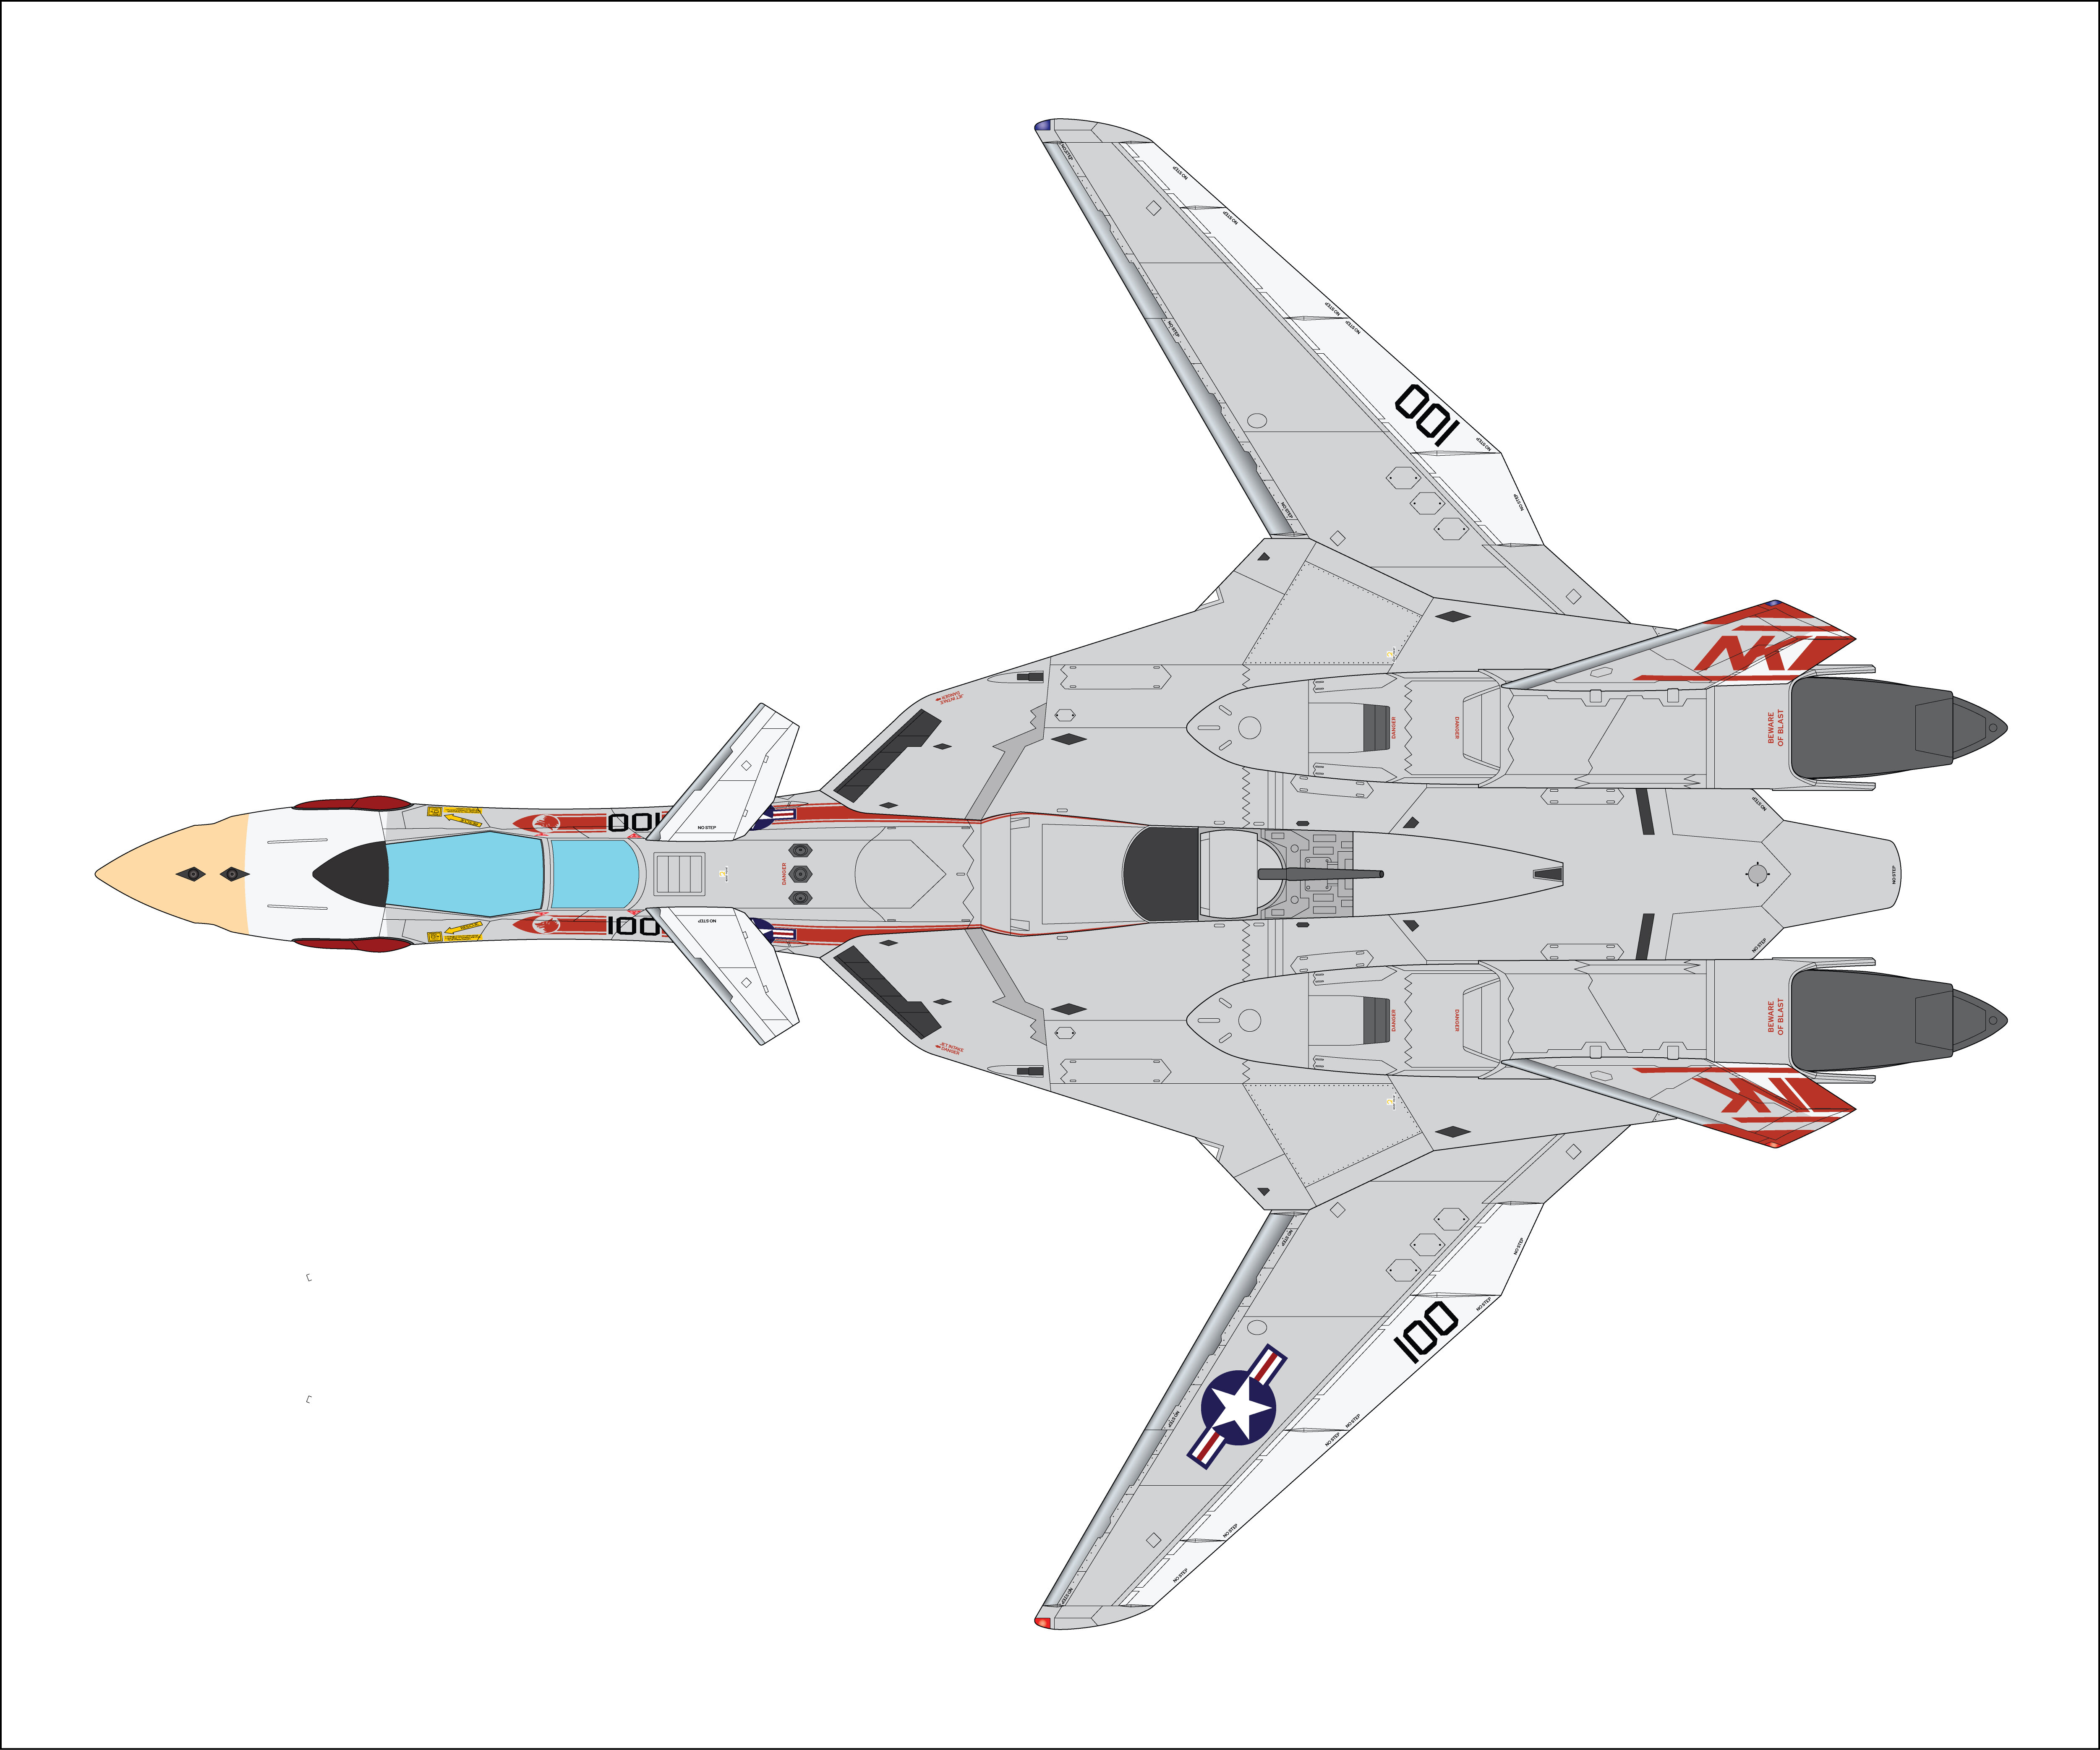
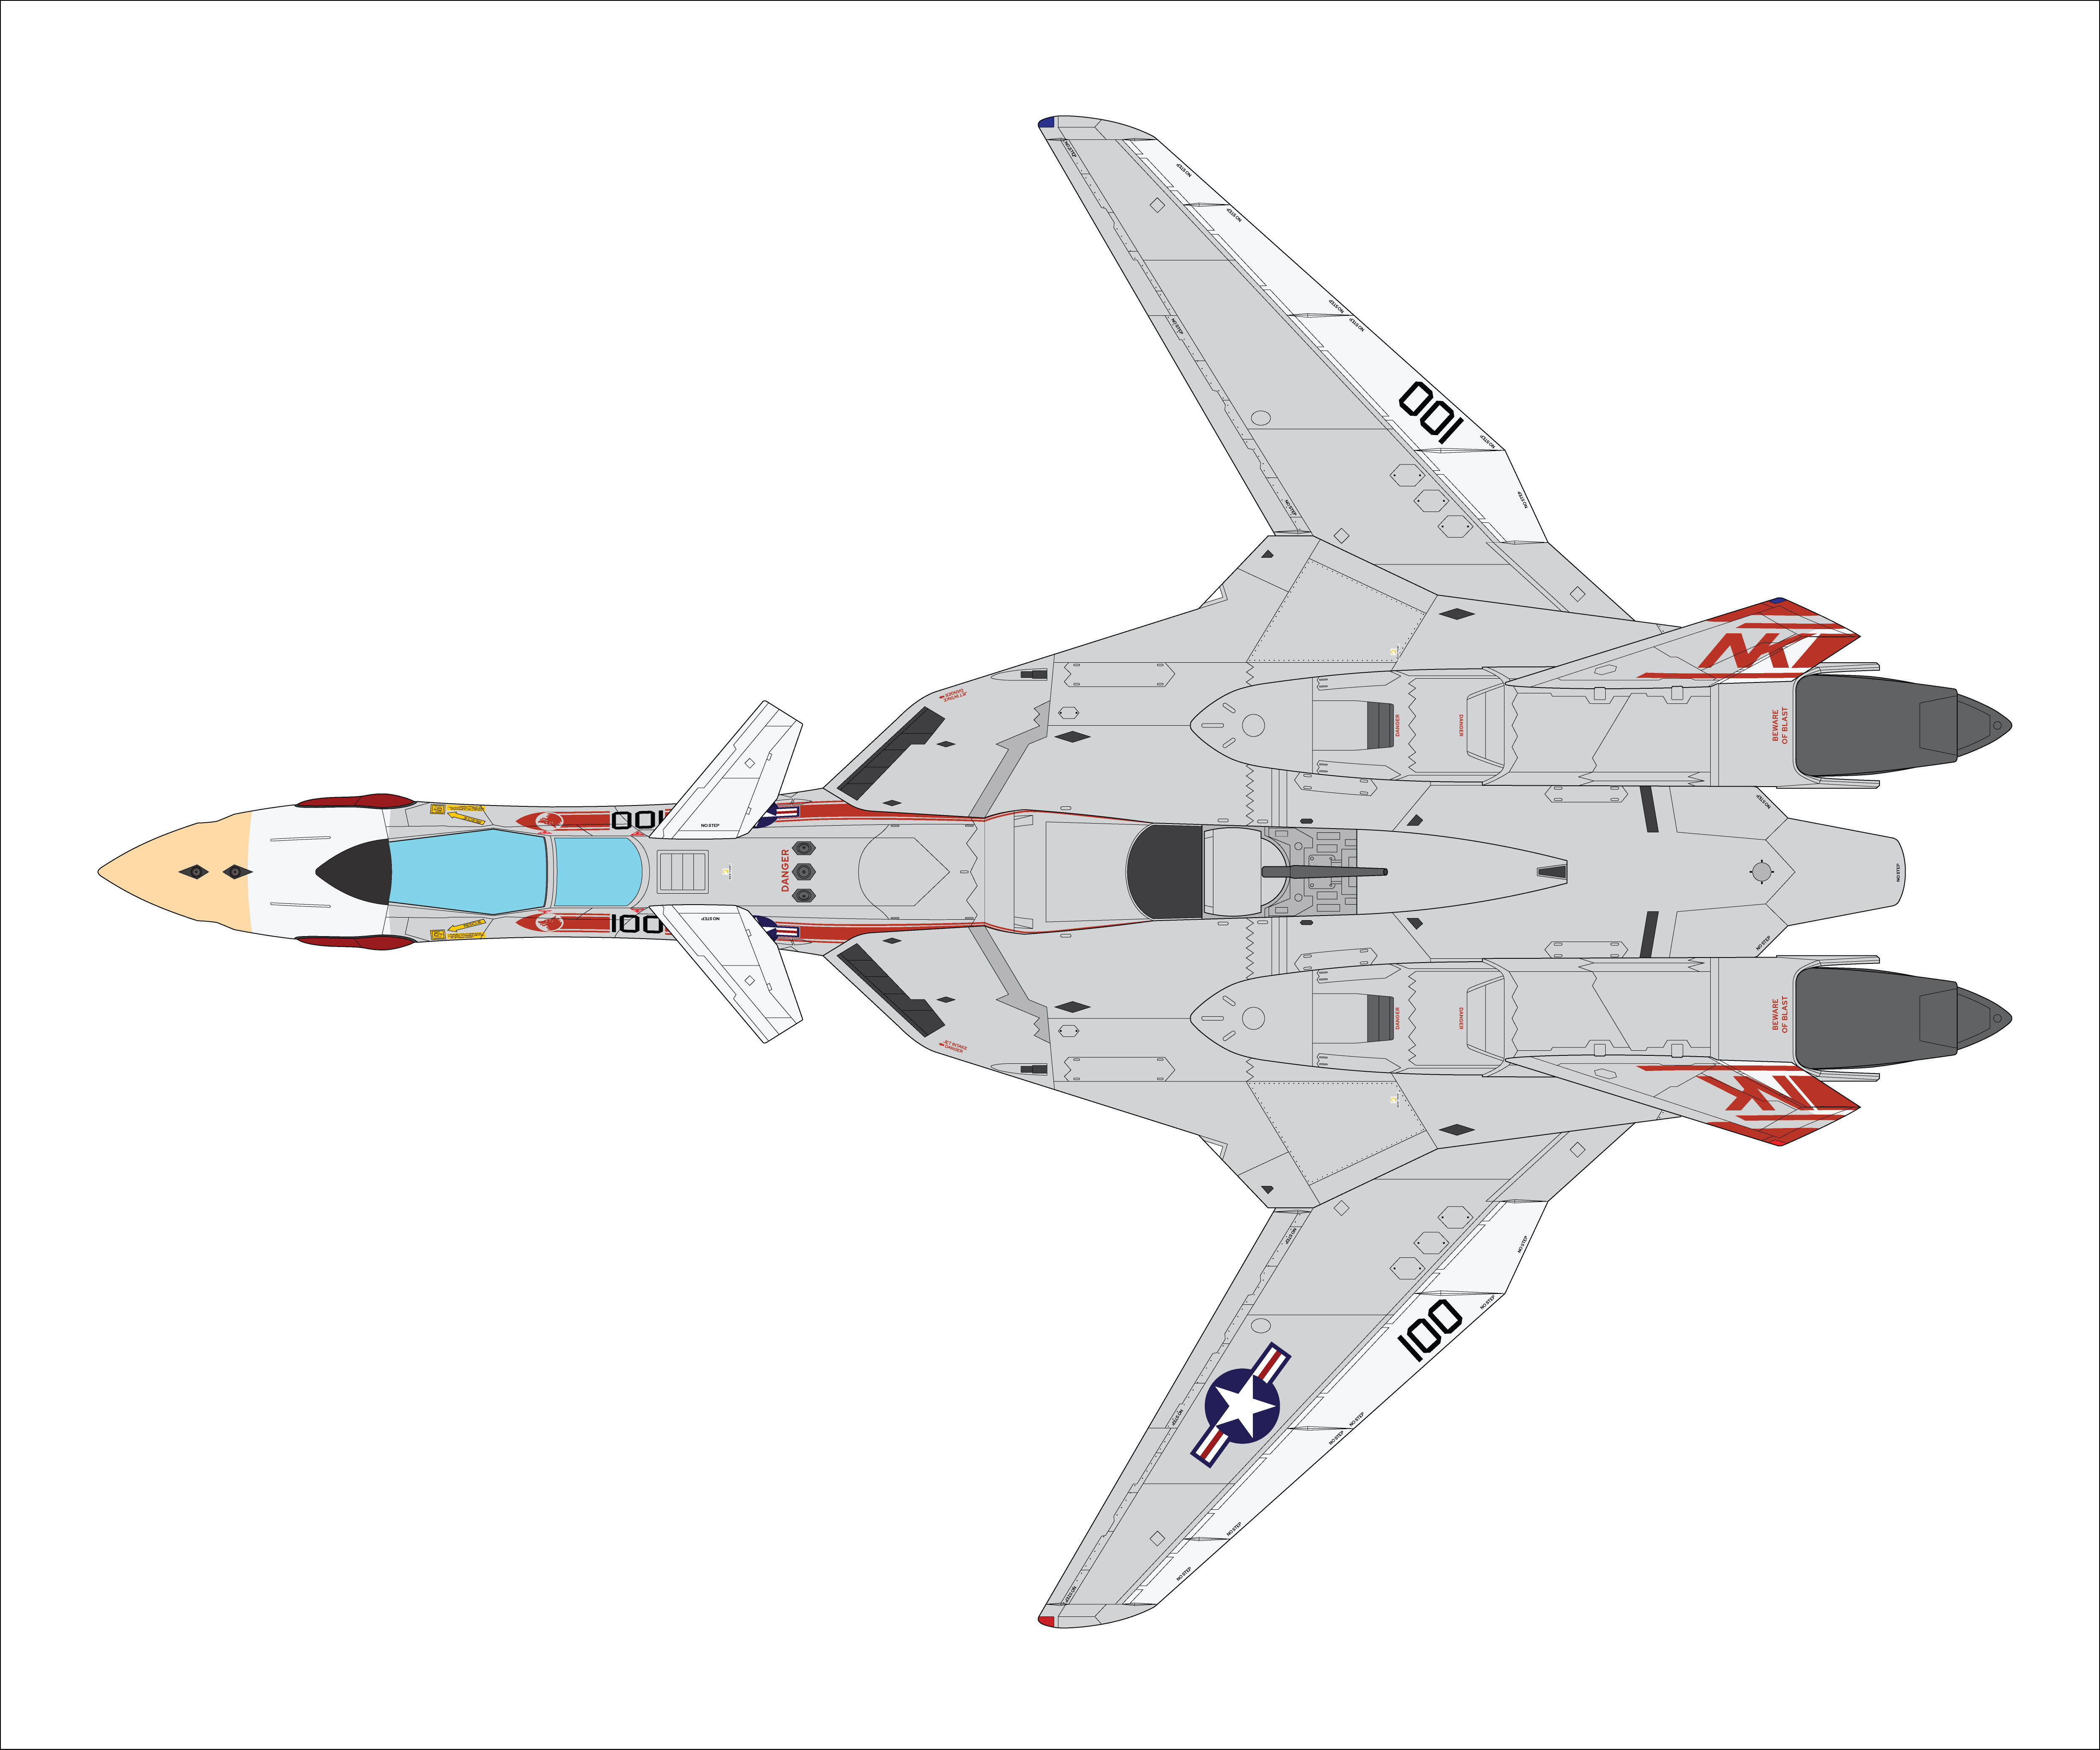
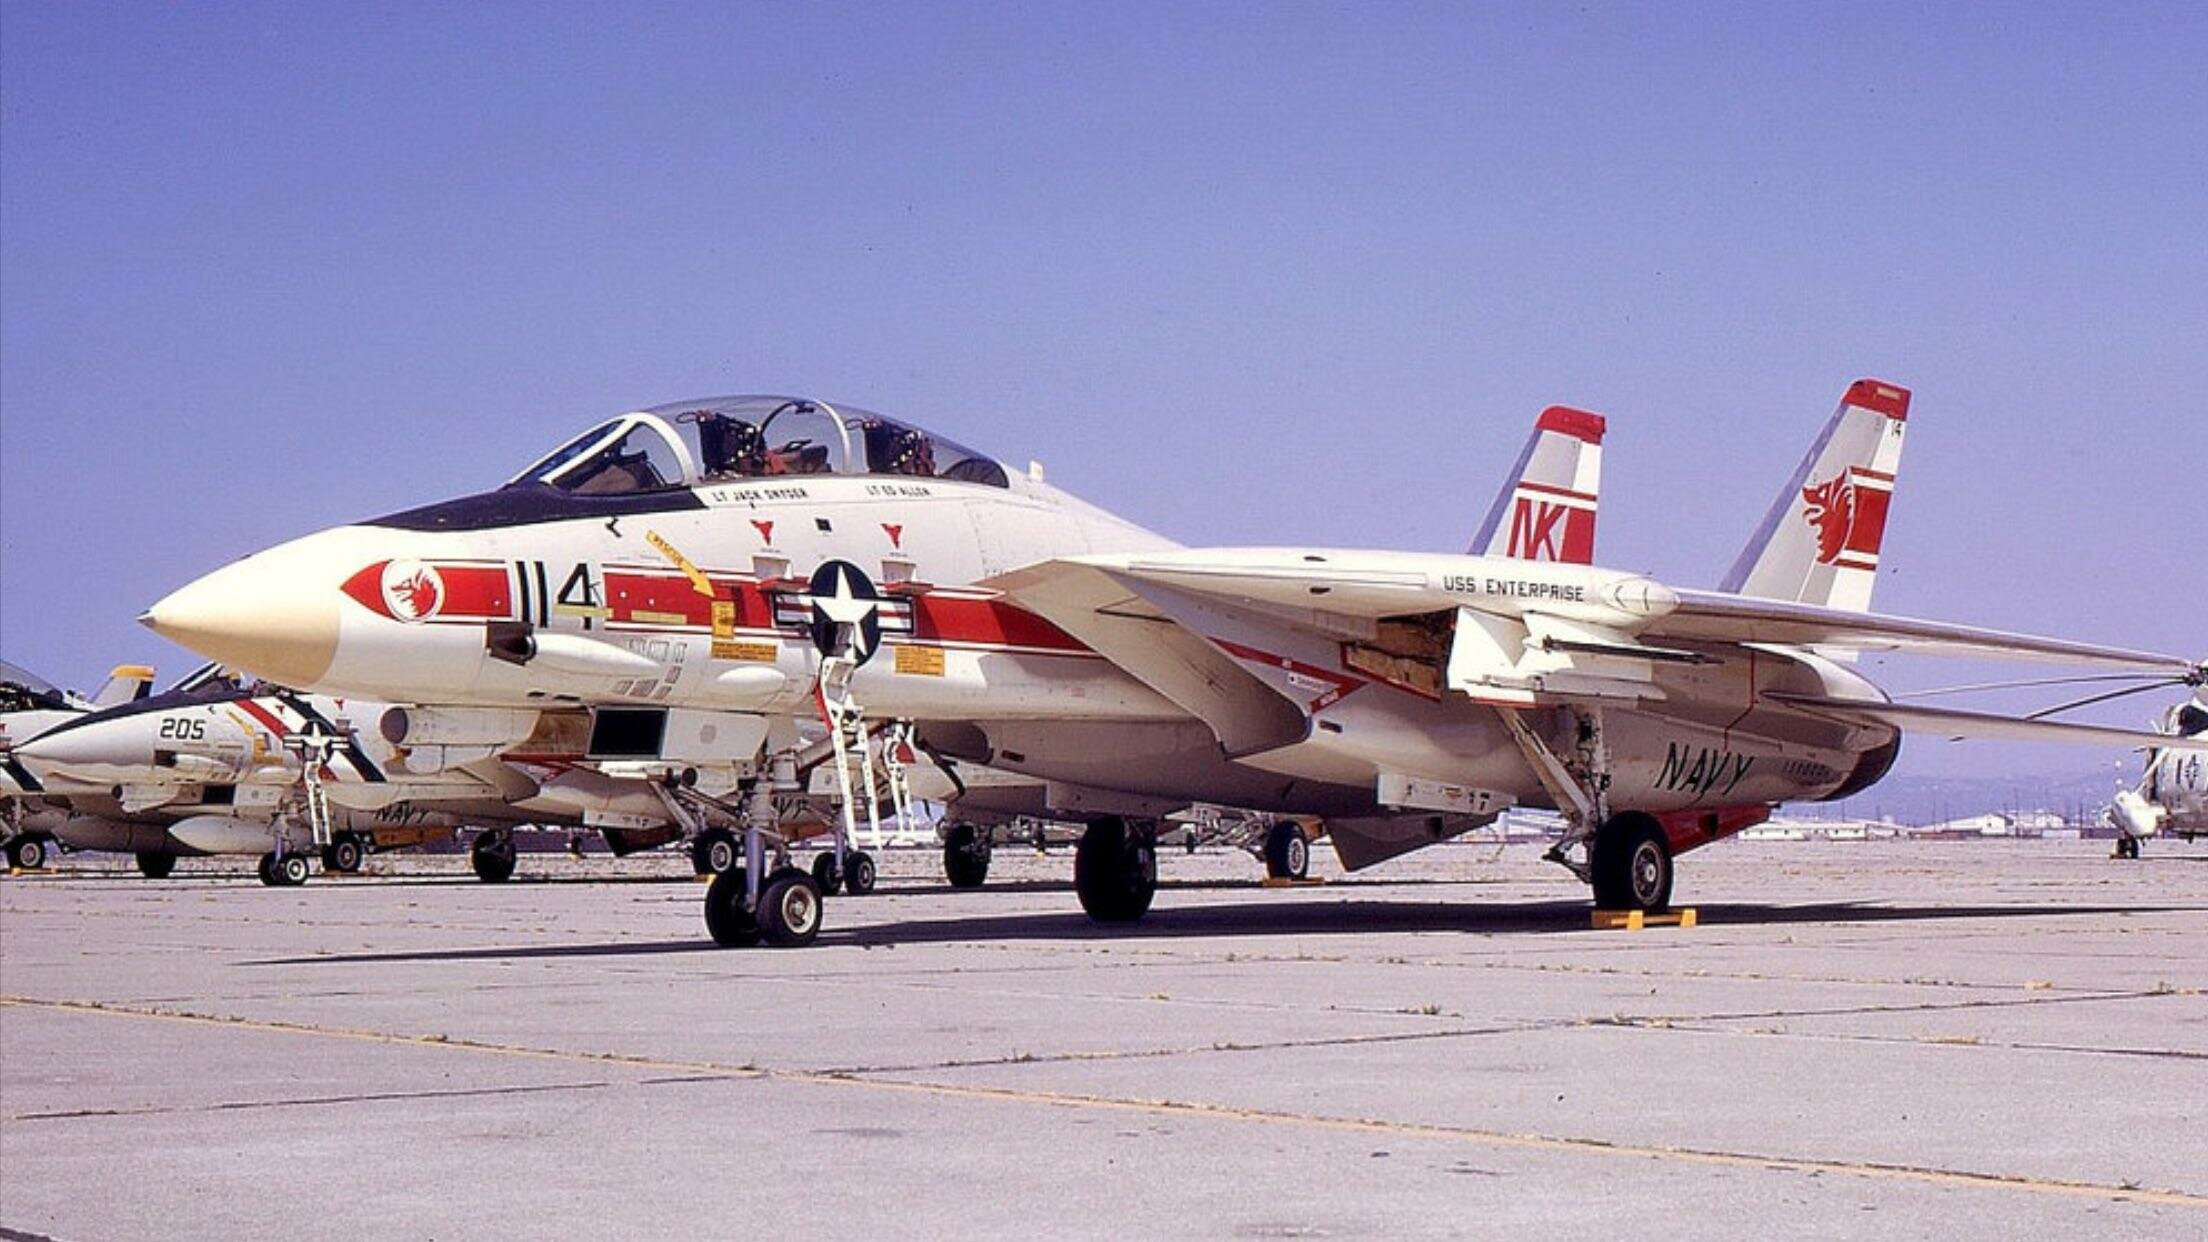
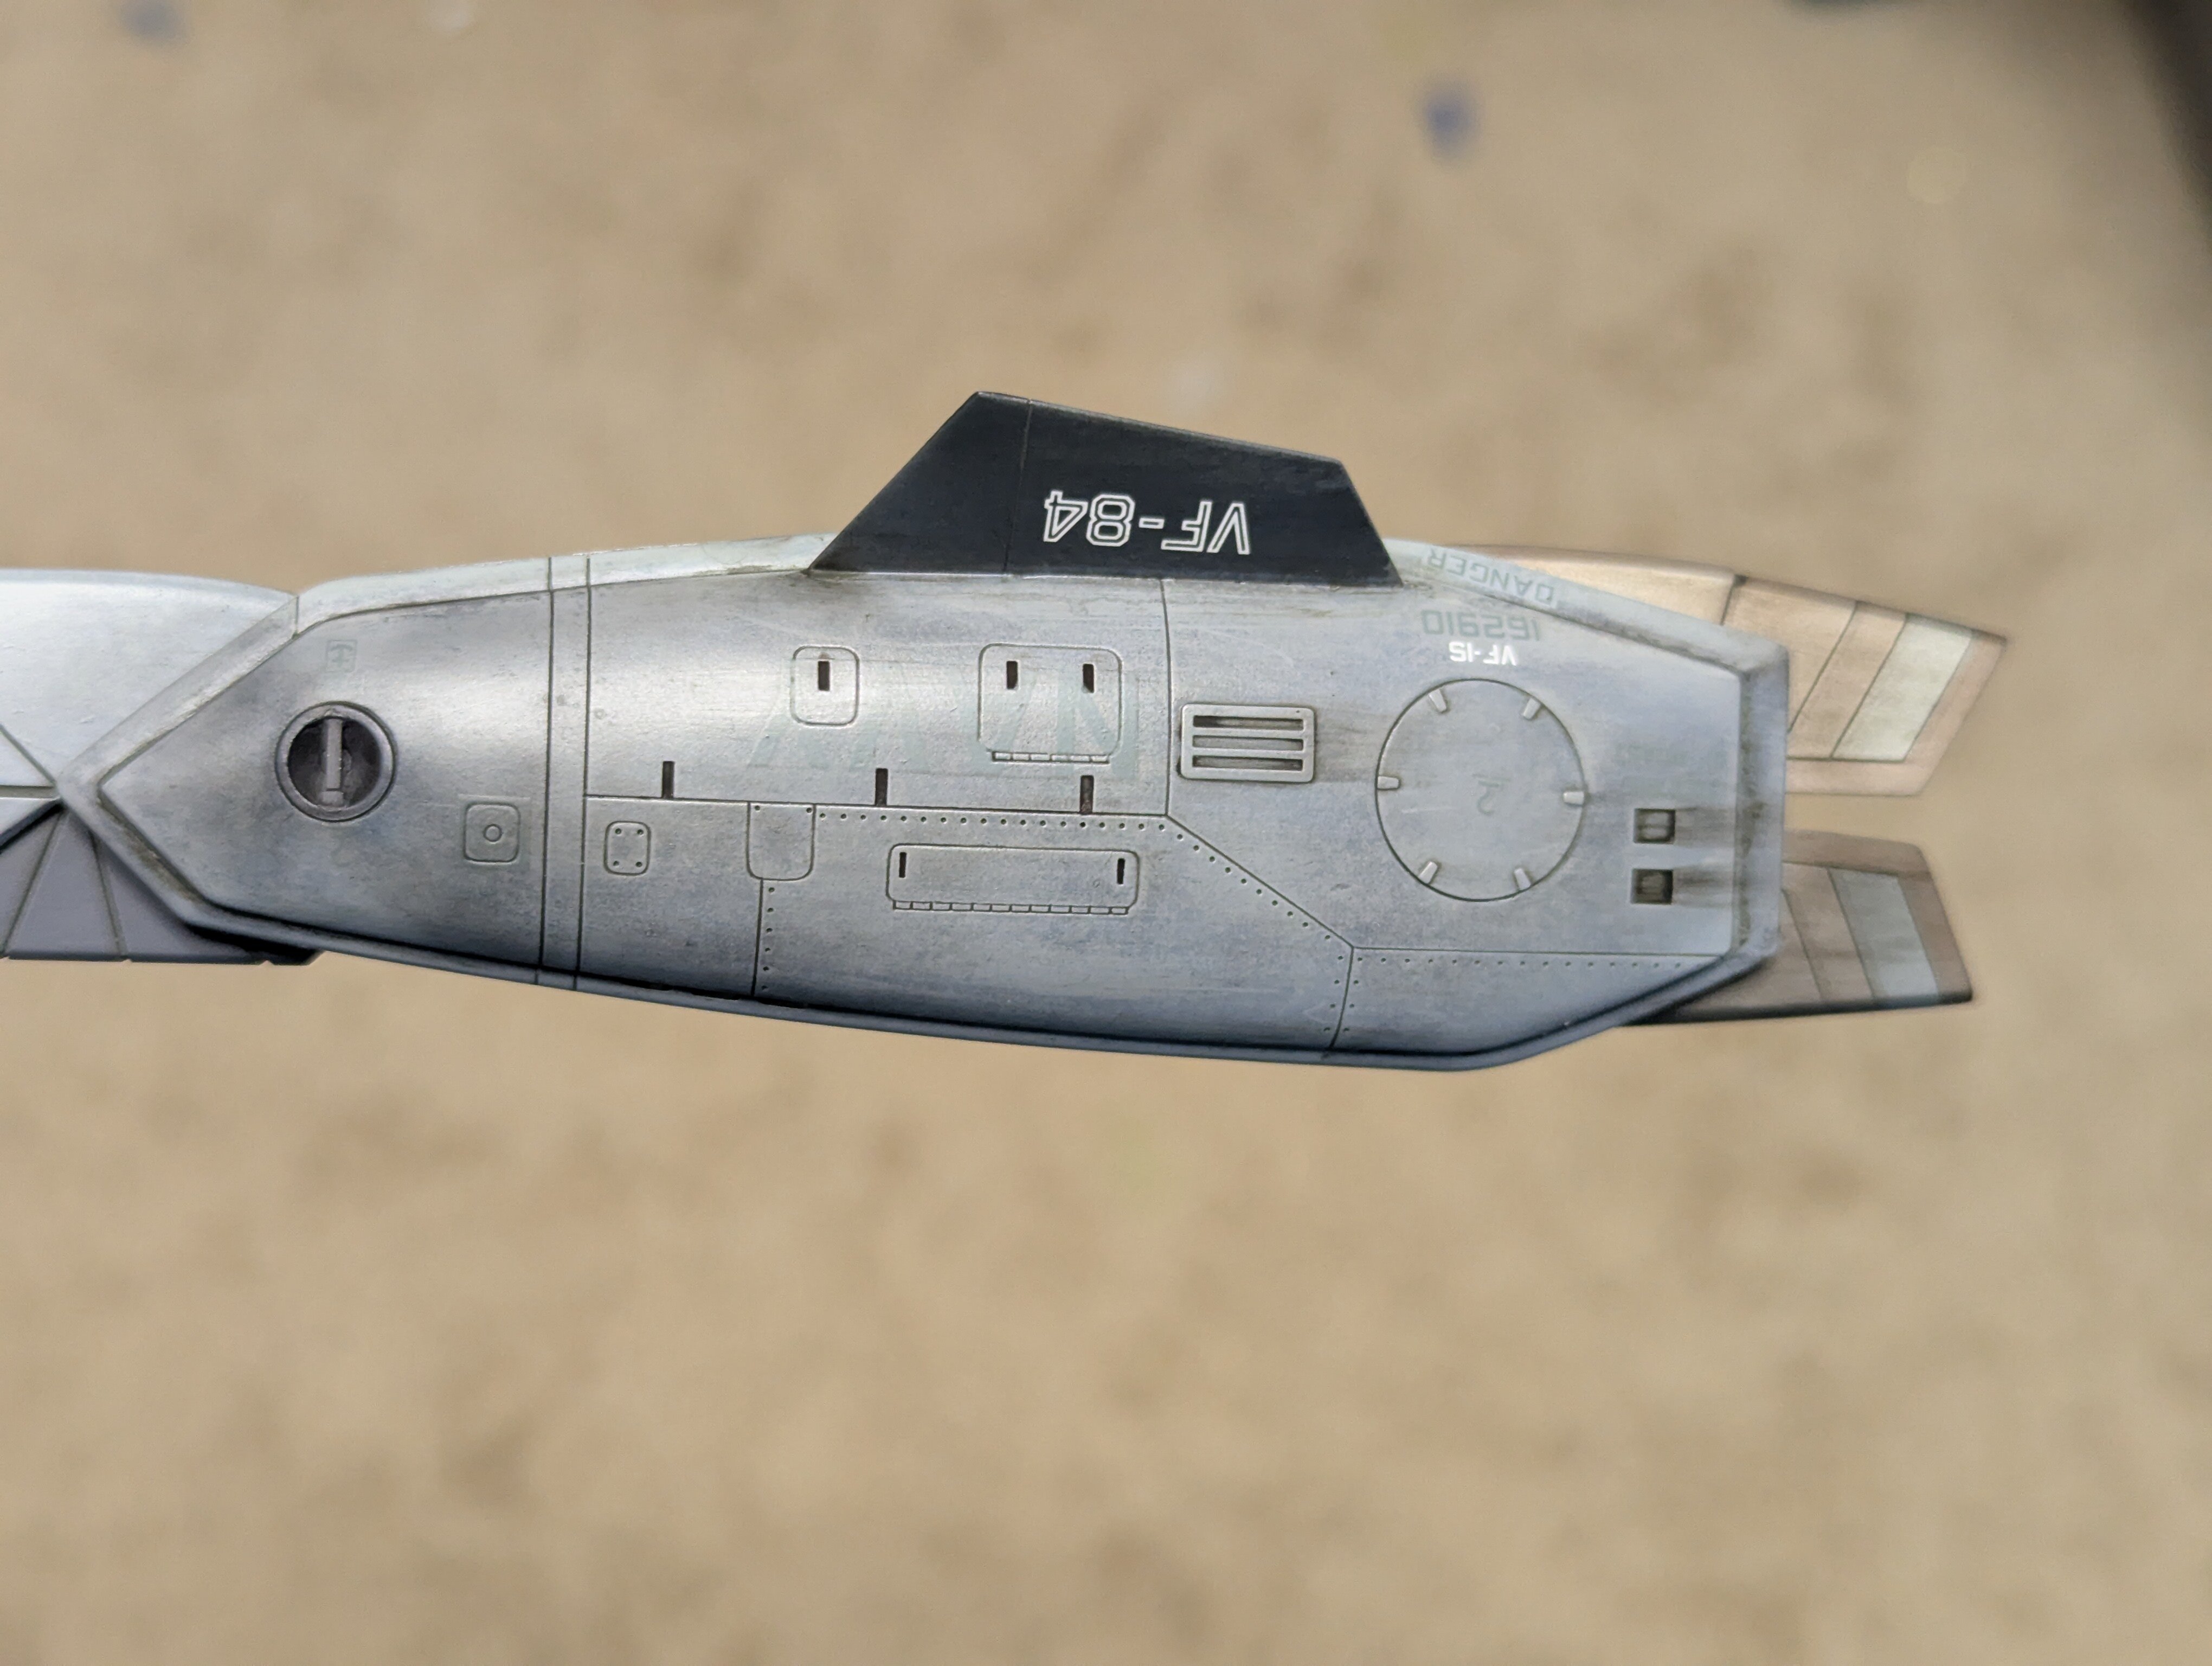
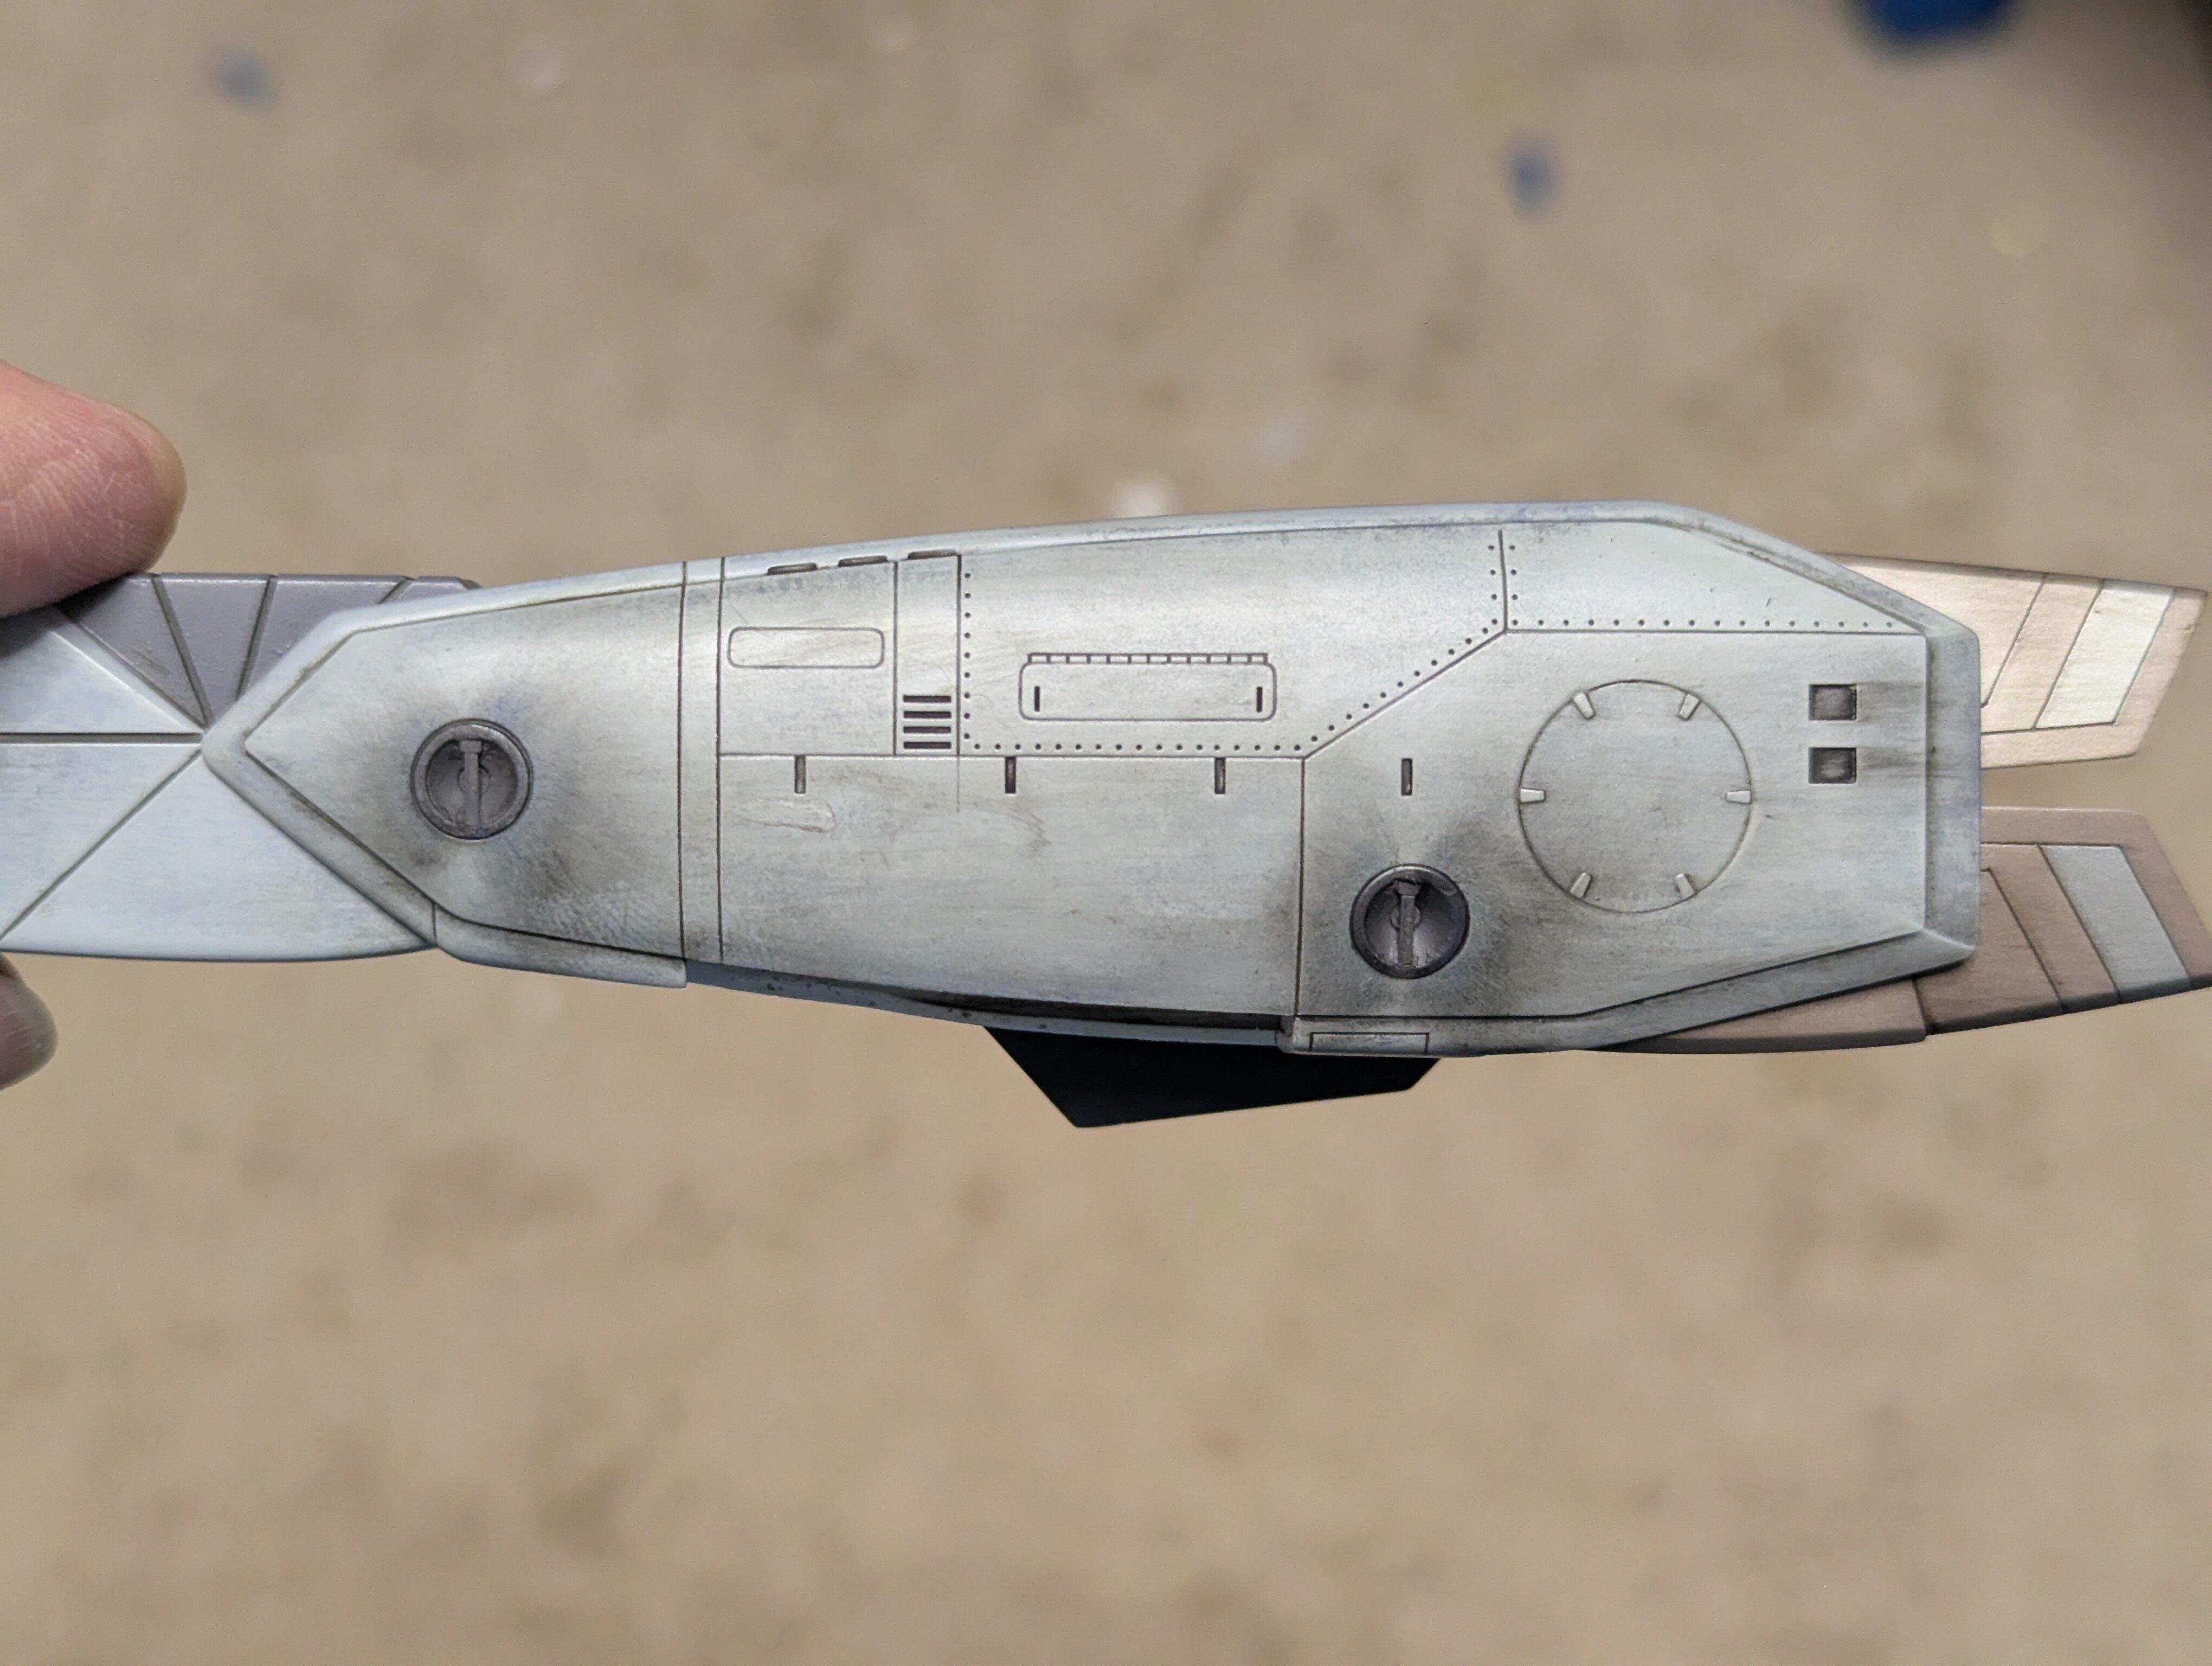
I'm in the final stages of my Hasegawa 1/48 VF-1S build in low visibility Jolly Rogers livery. I've had a lot of fun with the build and really expanded my repertoire of techniques. It's really rekindled my love of Macross and after rewatching Macross Plus, I really want to do a YF-19 build next. But me being me, I can't do an out of the box build and want to do something different again. So I'm delving back into the waters of the US Navy (pun intended) and the F-14 Tomcat that so heavily influenced the VF-1 design. The Jolly Rogers have always been my favorite aircraft livery, but the VF-1 (not to be confused with the Valkyrie) Wolfpack markings are also up there, especially the first high visibility iteration when they were the first squadron to get the Tomcat. In order to make sure it is feasible with the aftermarket Wolfpack decal sets available, I did a quick scaling exercise to see how the YF-19 might look with the iconic red wolf tail and nose flash. My OCD being what it is, that quick and dirty sketch ballooned into a full blown foray into an Illustrator line drawing. The lines are based on the paint guide included in the Hasegawa 1/48 YF-19, and I'm really liking how it looks in the white, light gull grey, and red markings. So without further ado, I give you my alternate dimension YF-19: assigned to US Navy Fighter Squadron VF-1, call sign Wichita 100 I still need to do the bottom at some point, but I'm confident I can get the paint job done with the available decals. Here is the inspiration for the design. VF-1 was the first squadron to receive the F-14 Tomcat, I love the old high visibility markings with the stark red on the grey and white. The radome tan nose is a nice little touch and I included it on the YF-19 livery:
- 6 replies
-
- 3
-
-
- illustrator
- yf-19
- (and 2 more)
-
1/48 Hasegawa VF-1S "What If?" US Navy VF-84 Jolly Rogers Low Viz
JNordgren42 replied to JNordgren42's topic in The Workshop!
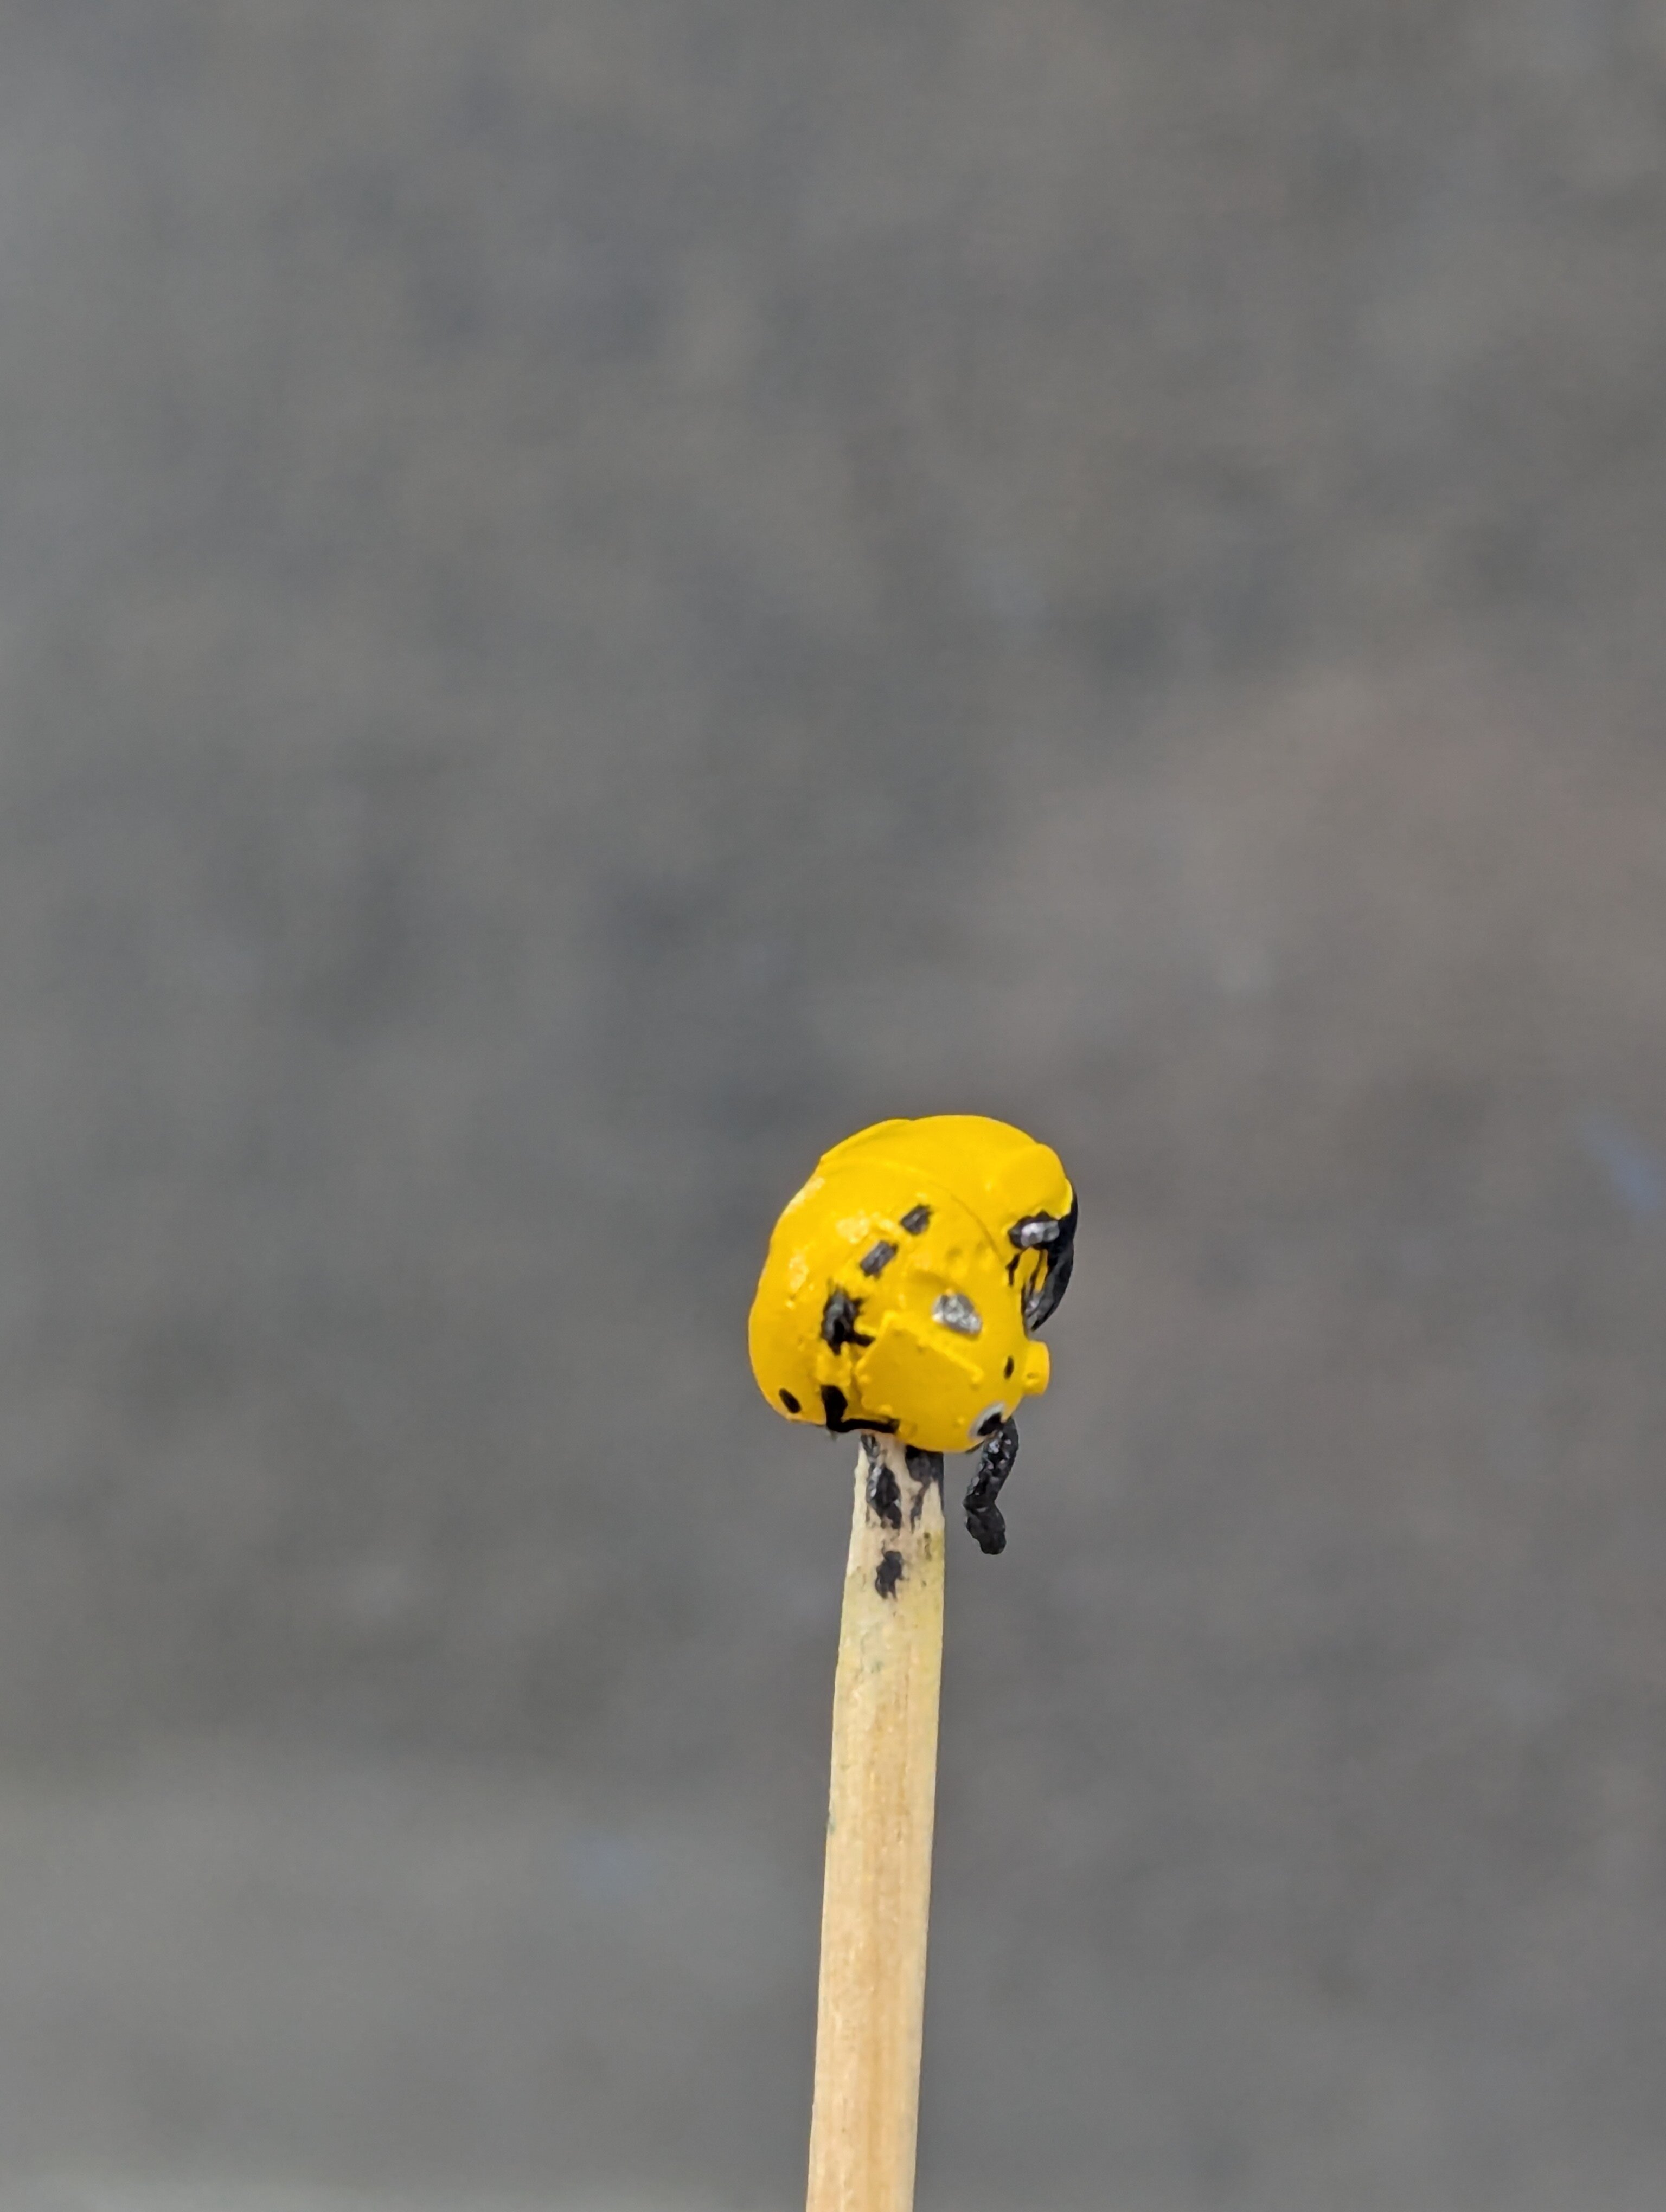
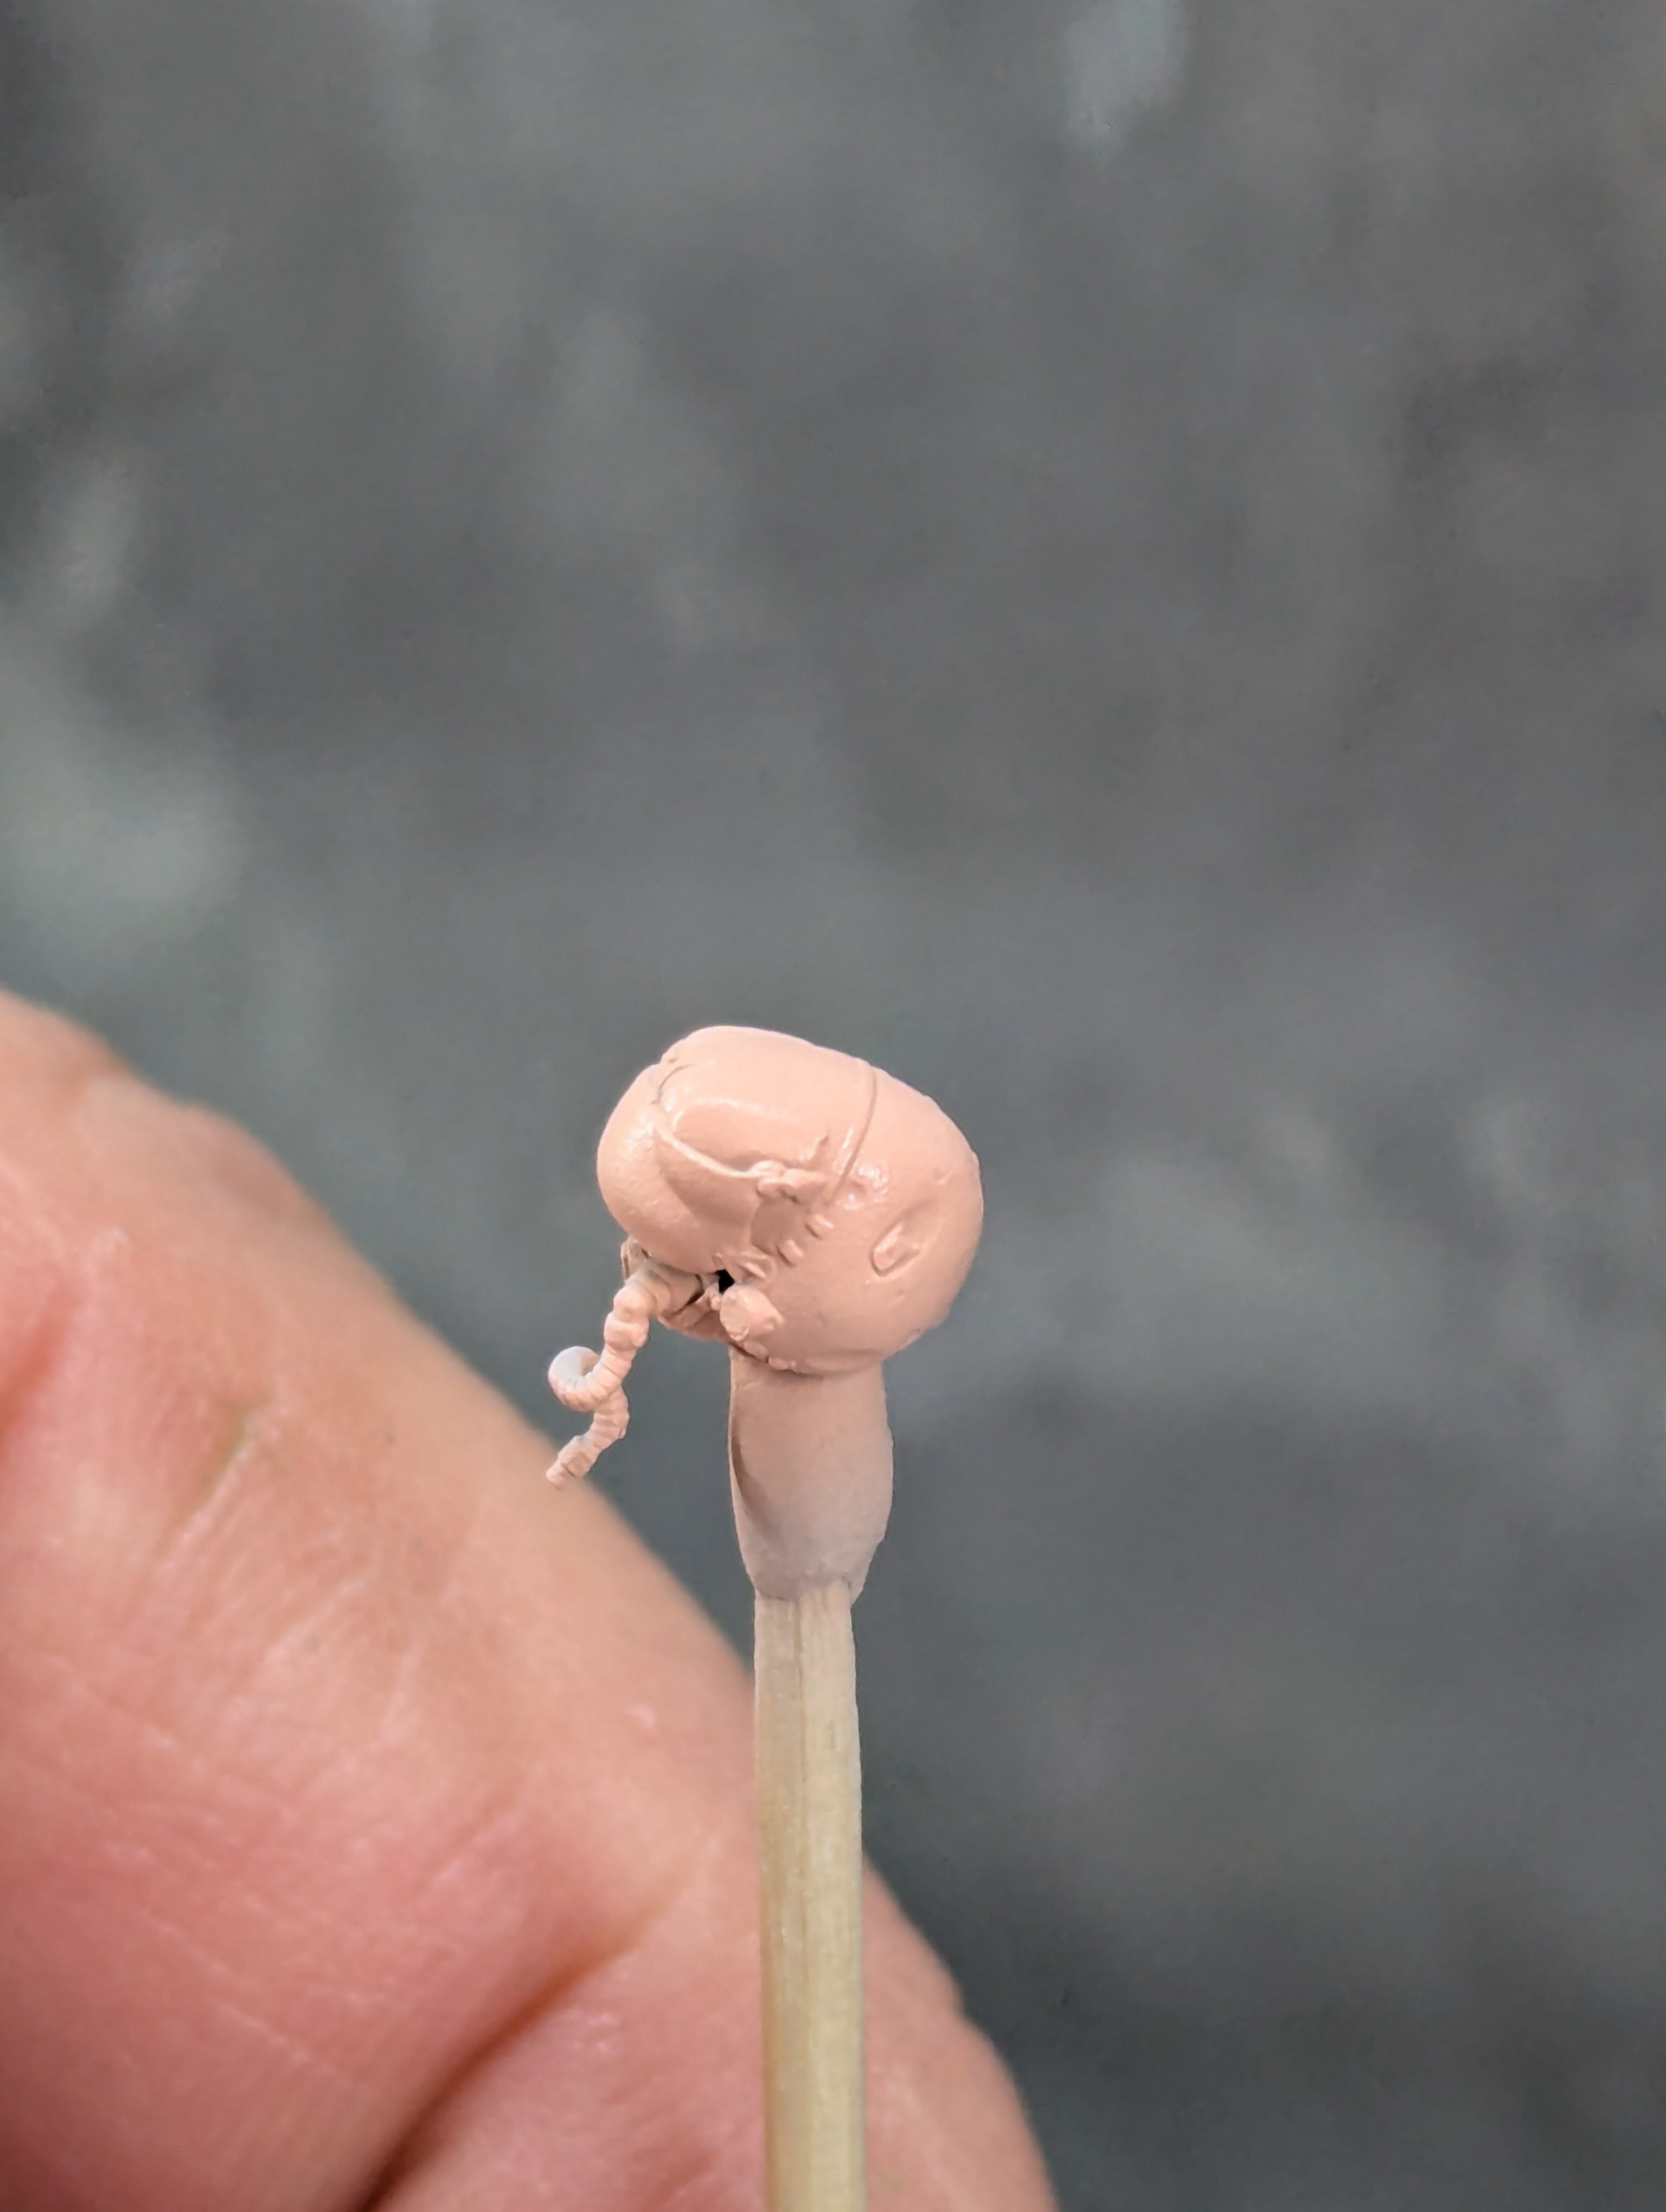
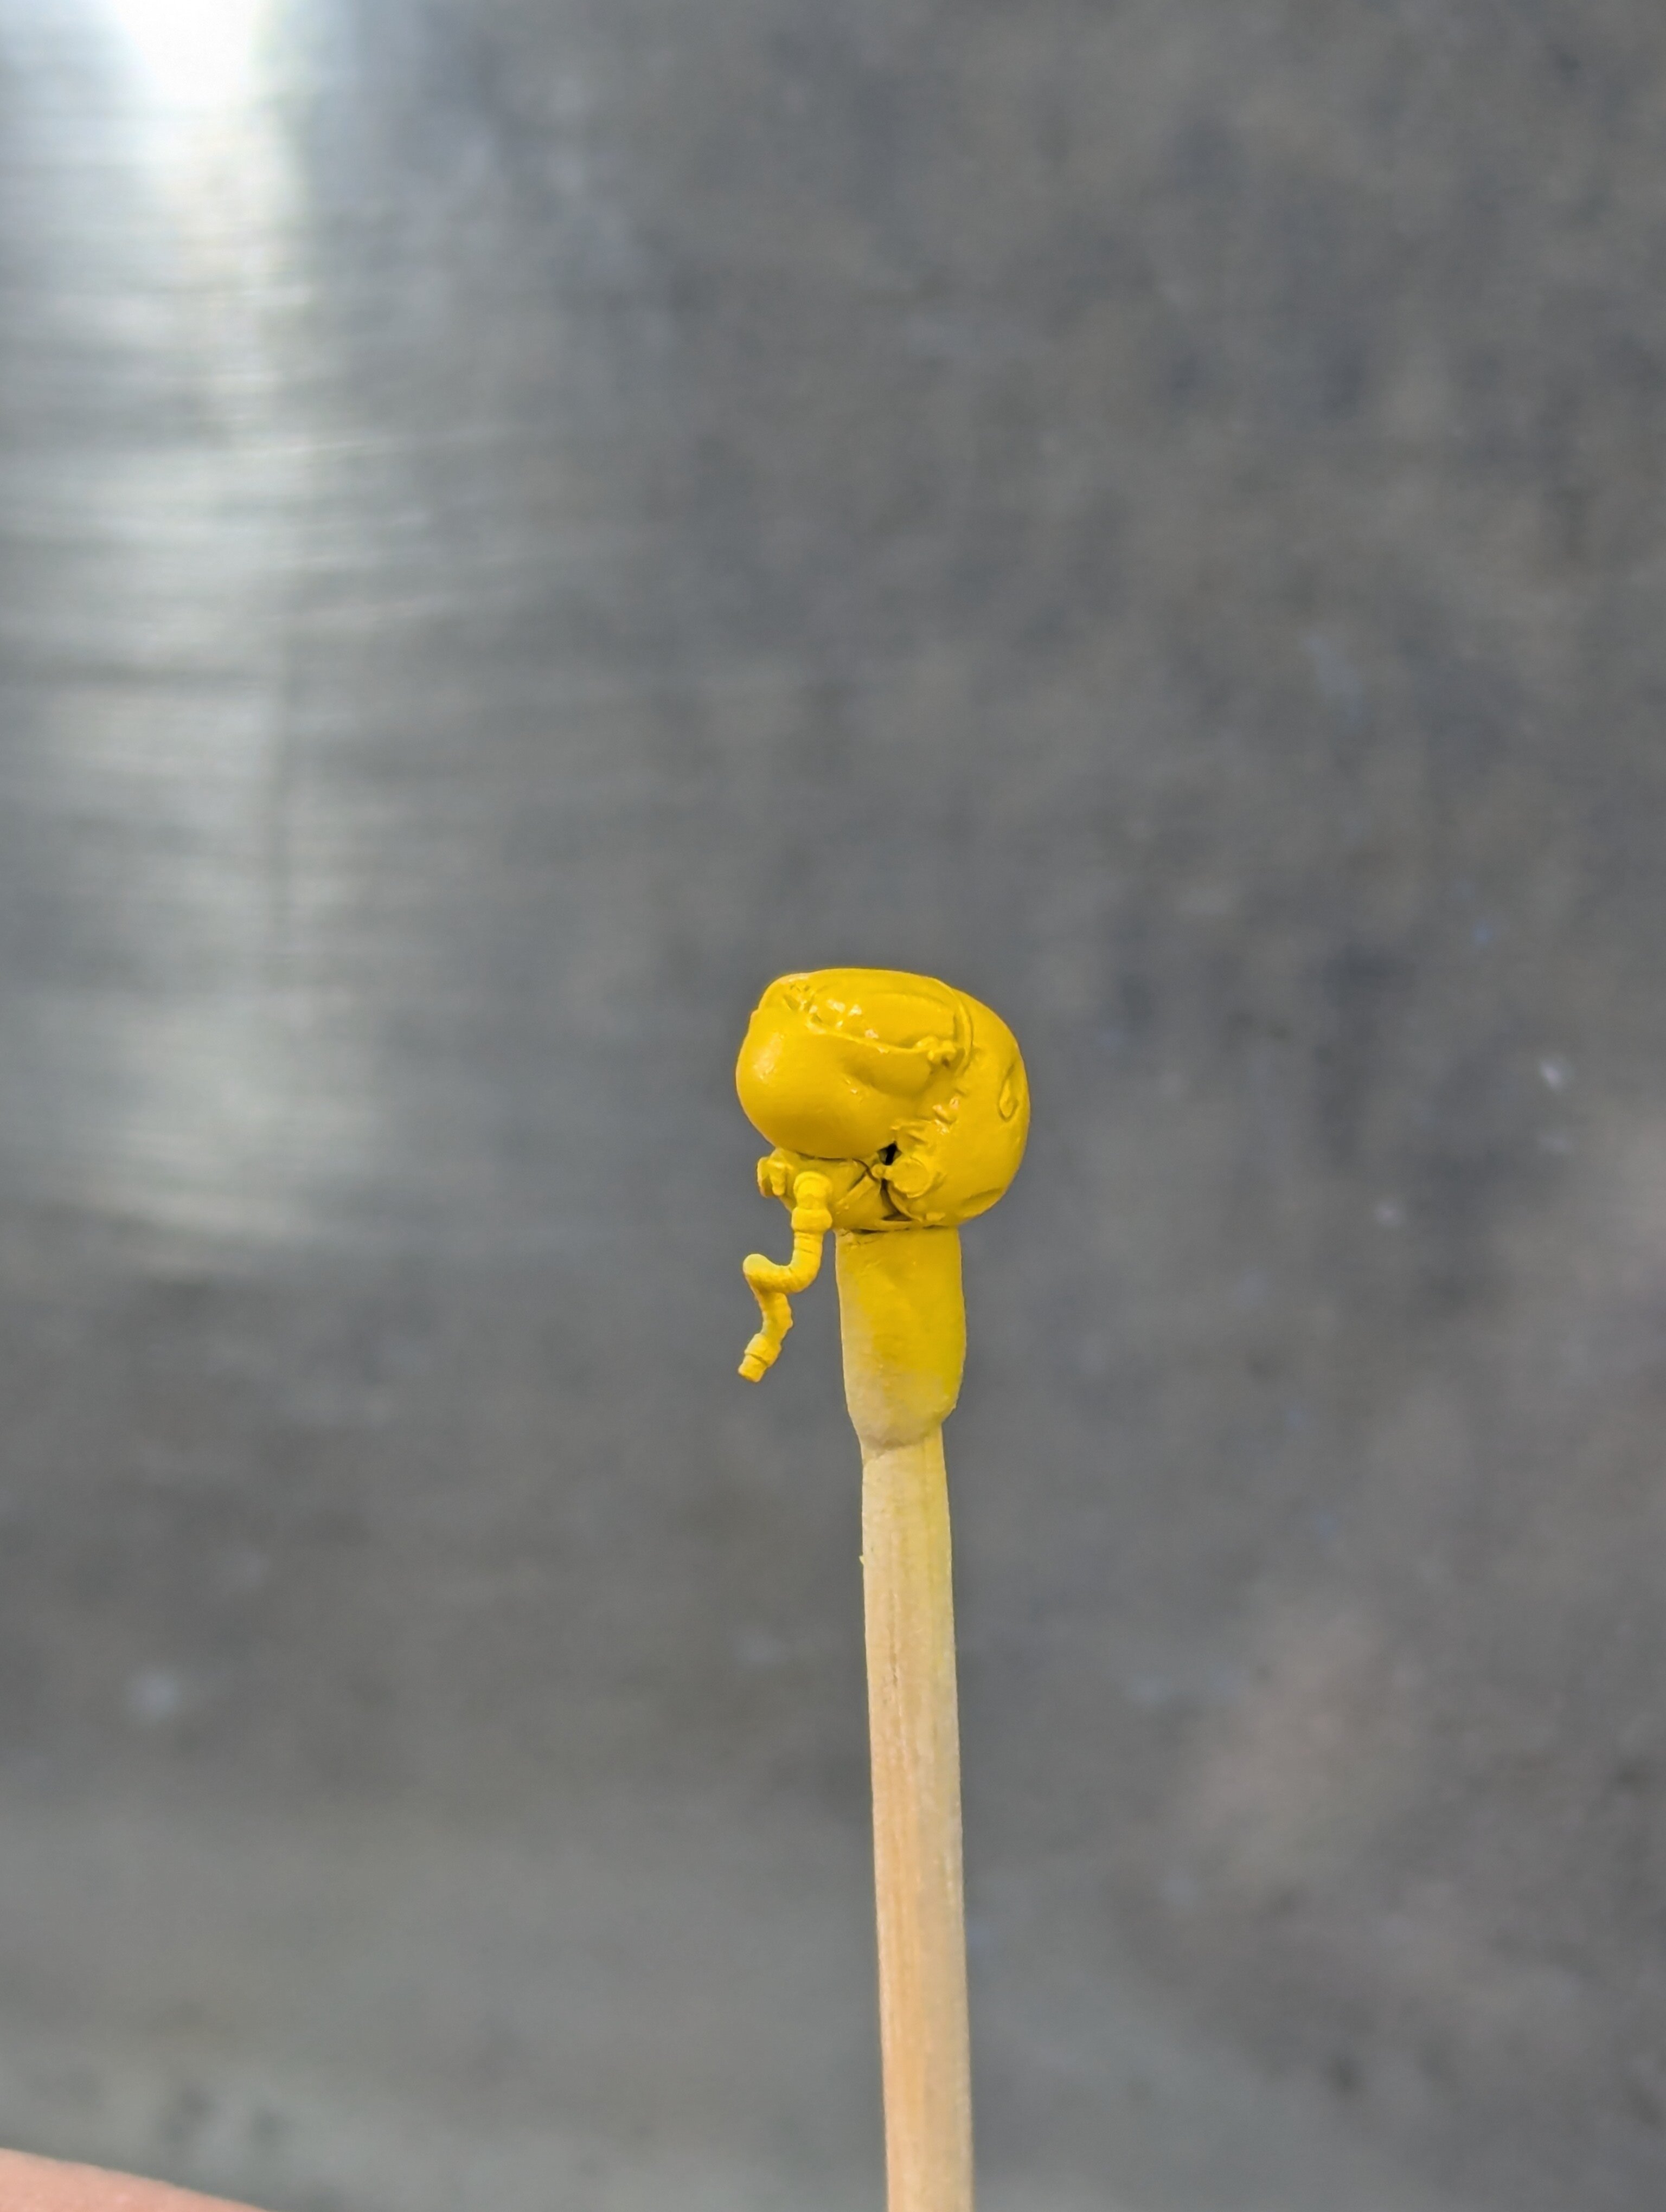
One last update for the weekend. I finished the first round of detail painting on the head. I'll clear coat it the figure tomorrow and start on adding some depth.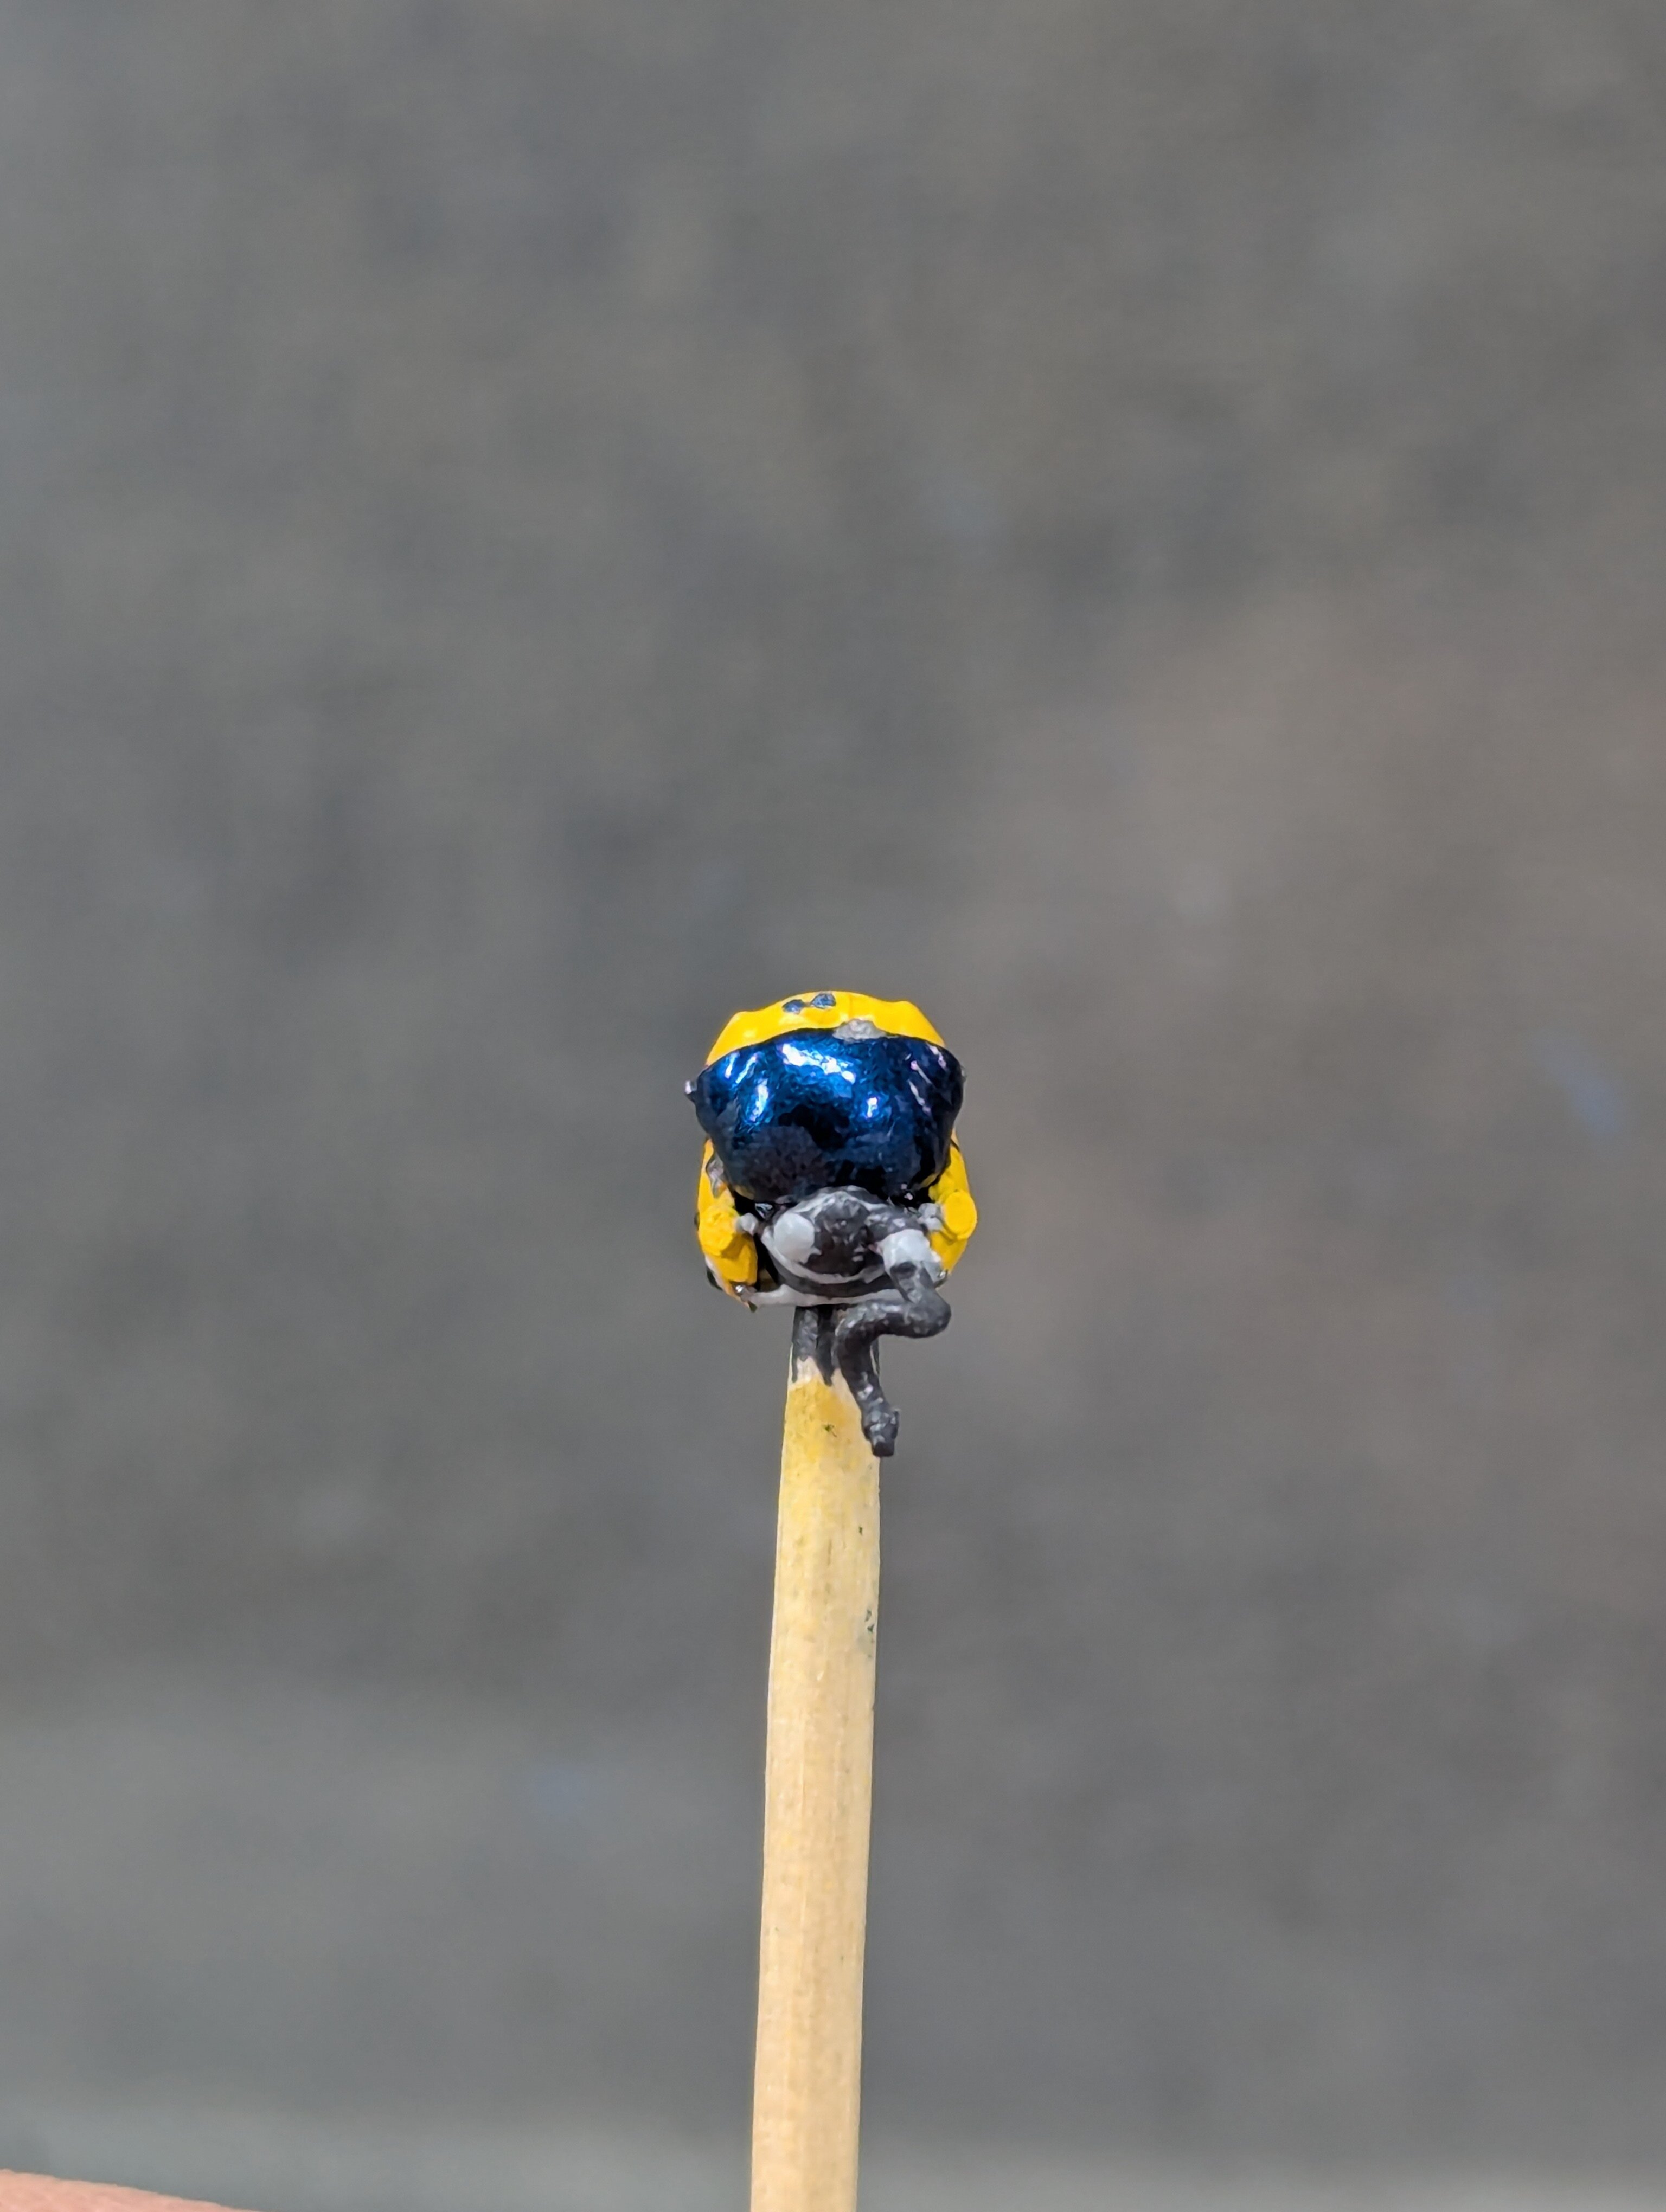
-
A Little Teaser of a Conversion Kit...
JNordgren42 replied to PsYcHoDyNaMiX's topic in The Workshop!
That's a really nice set of conversion parts, fantastic job all around.- 26 replies
-
- 1
-
-
- wip
- conversion
- (and 7 more)
-
1/48 Hasegawa VF-1S "What If?" US Navy VF-84 Jolly Rogers Low Viz
JNordgren42 replied to JNordgren42's topic in The Workshop!
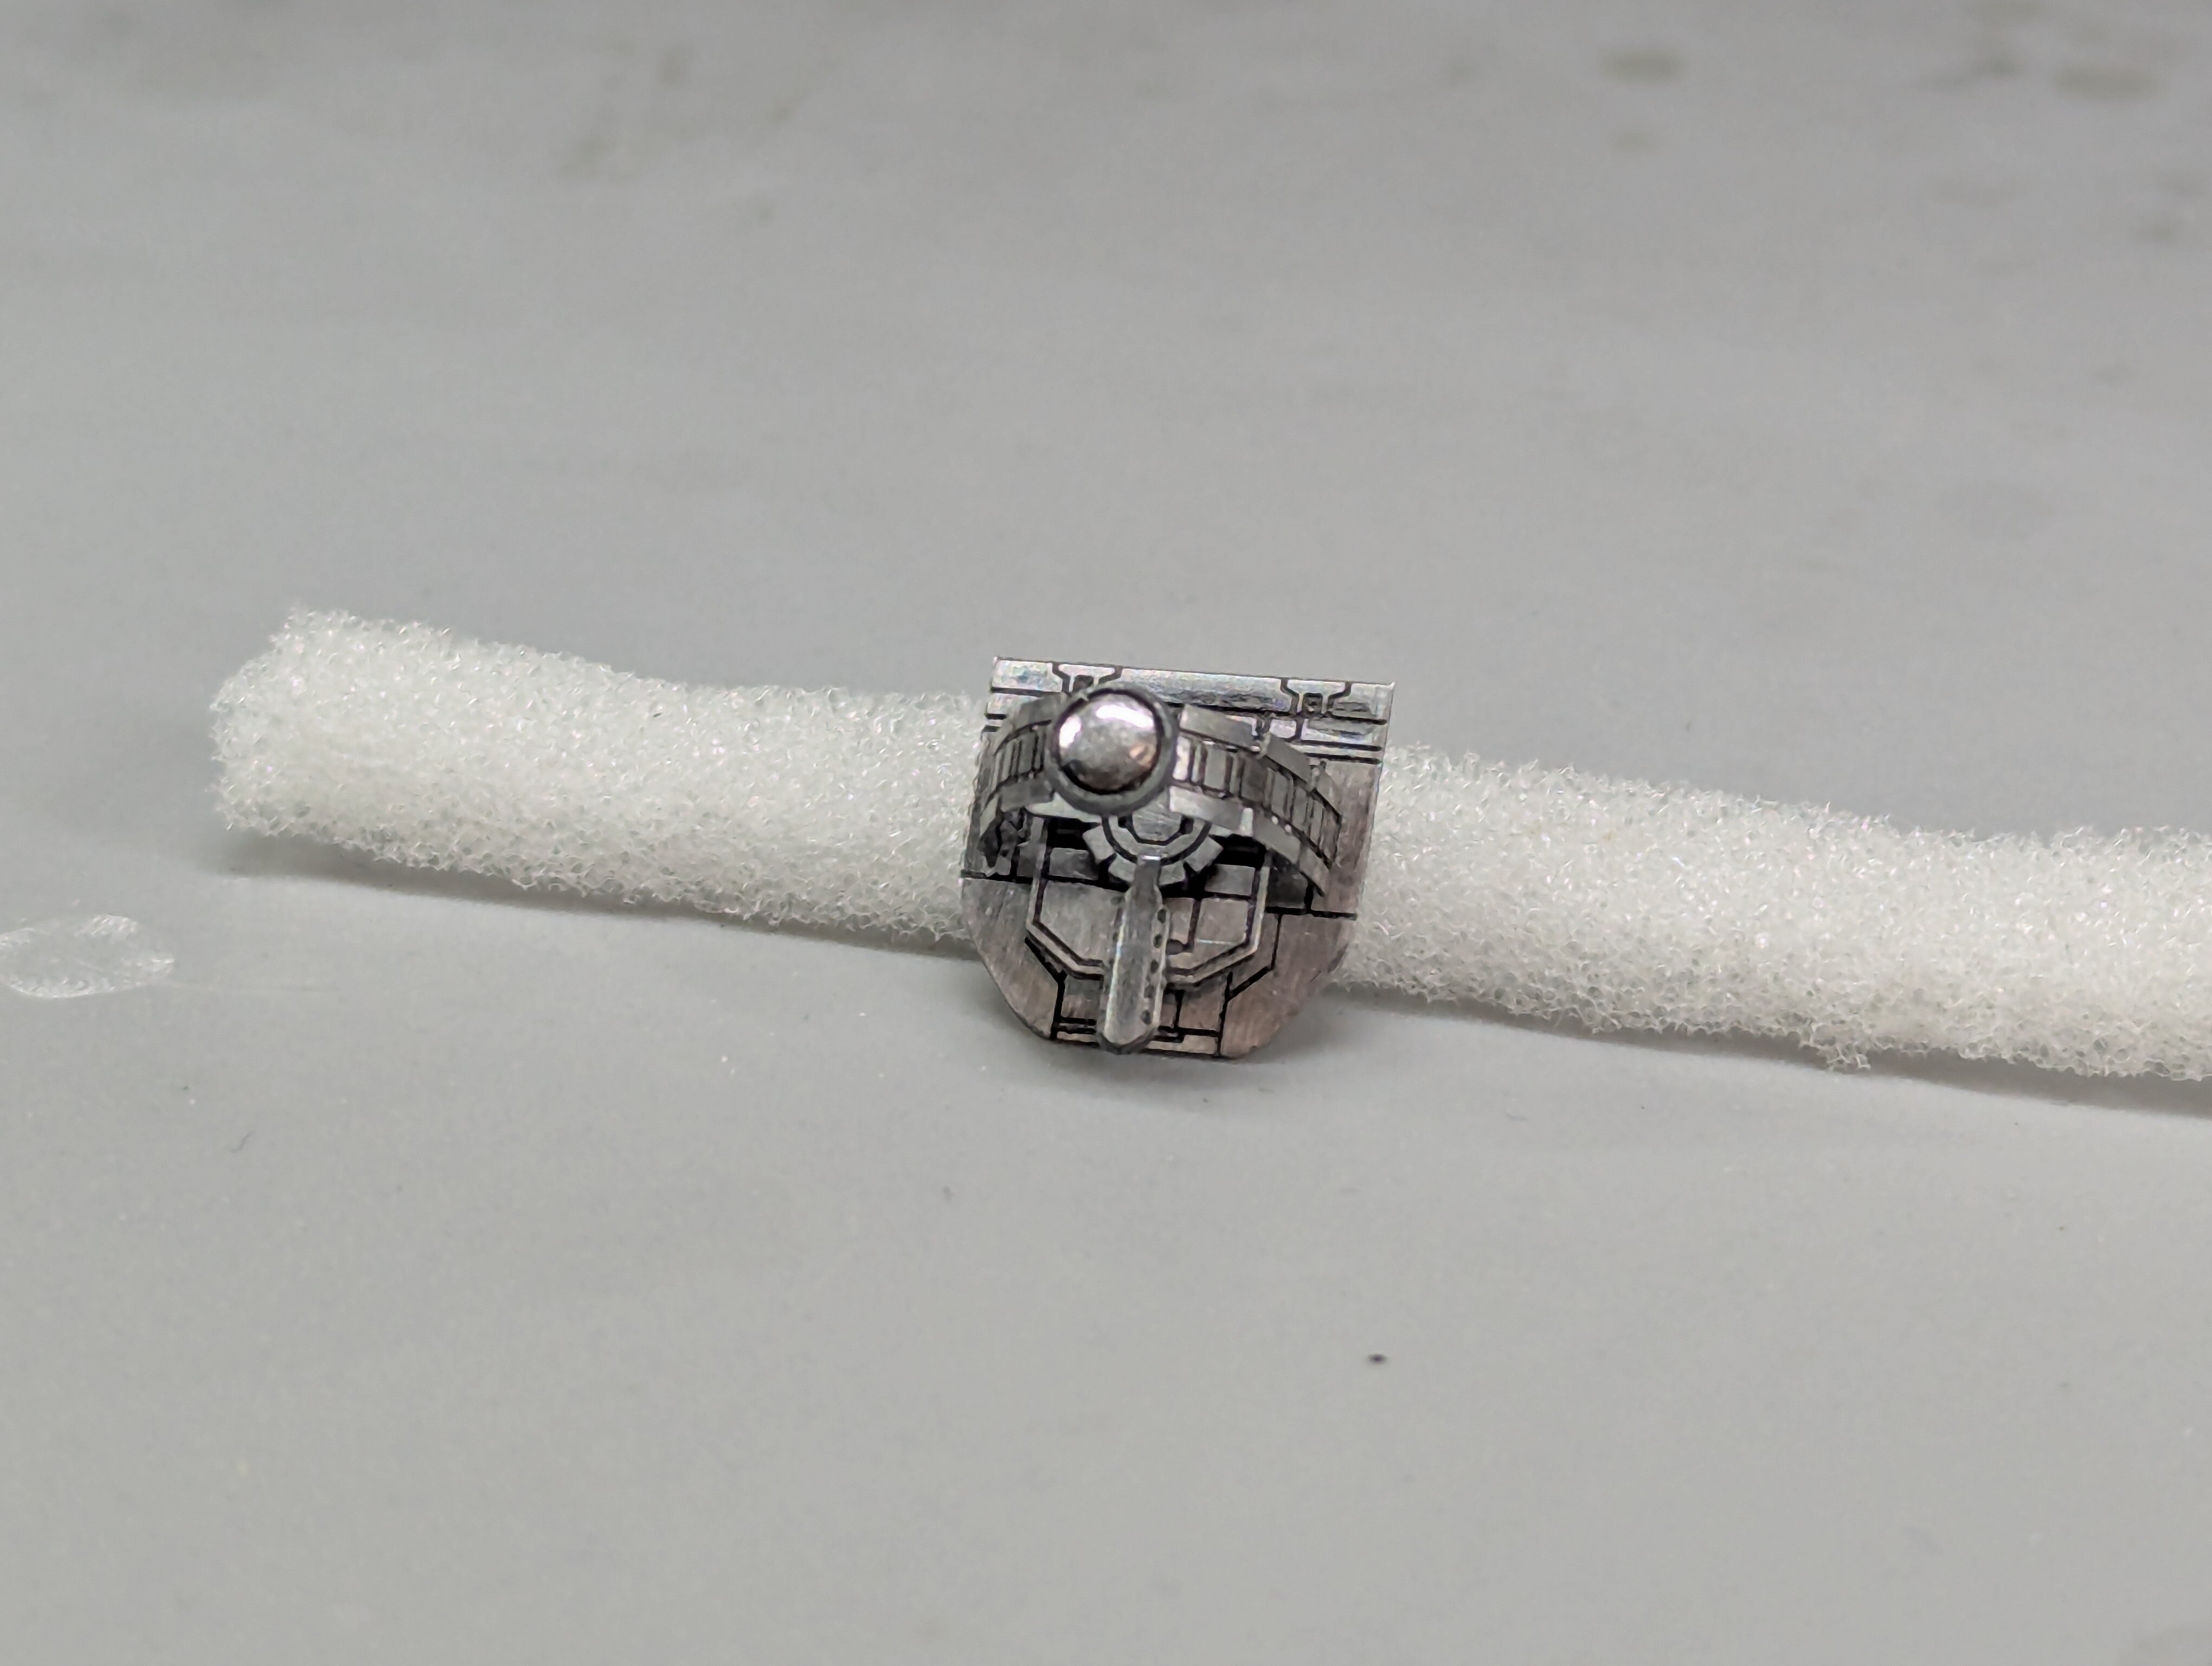
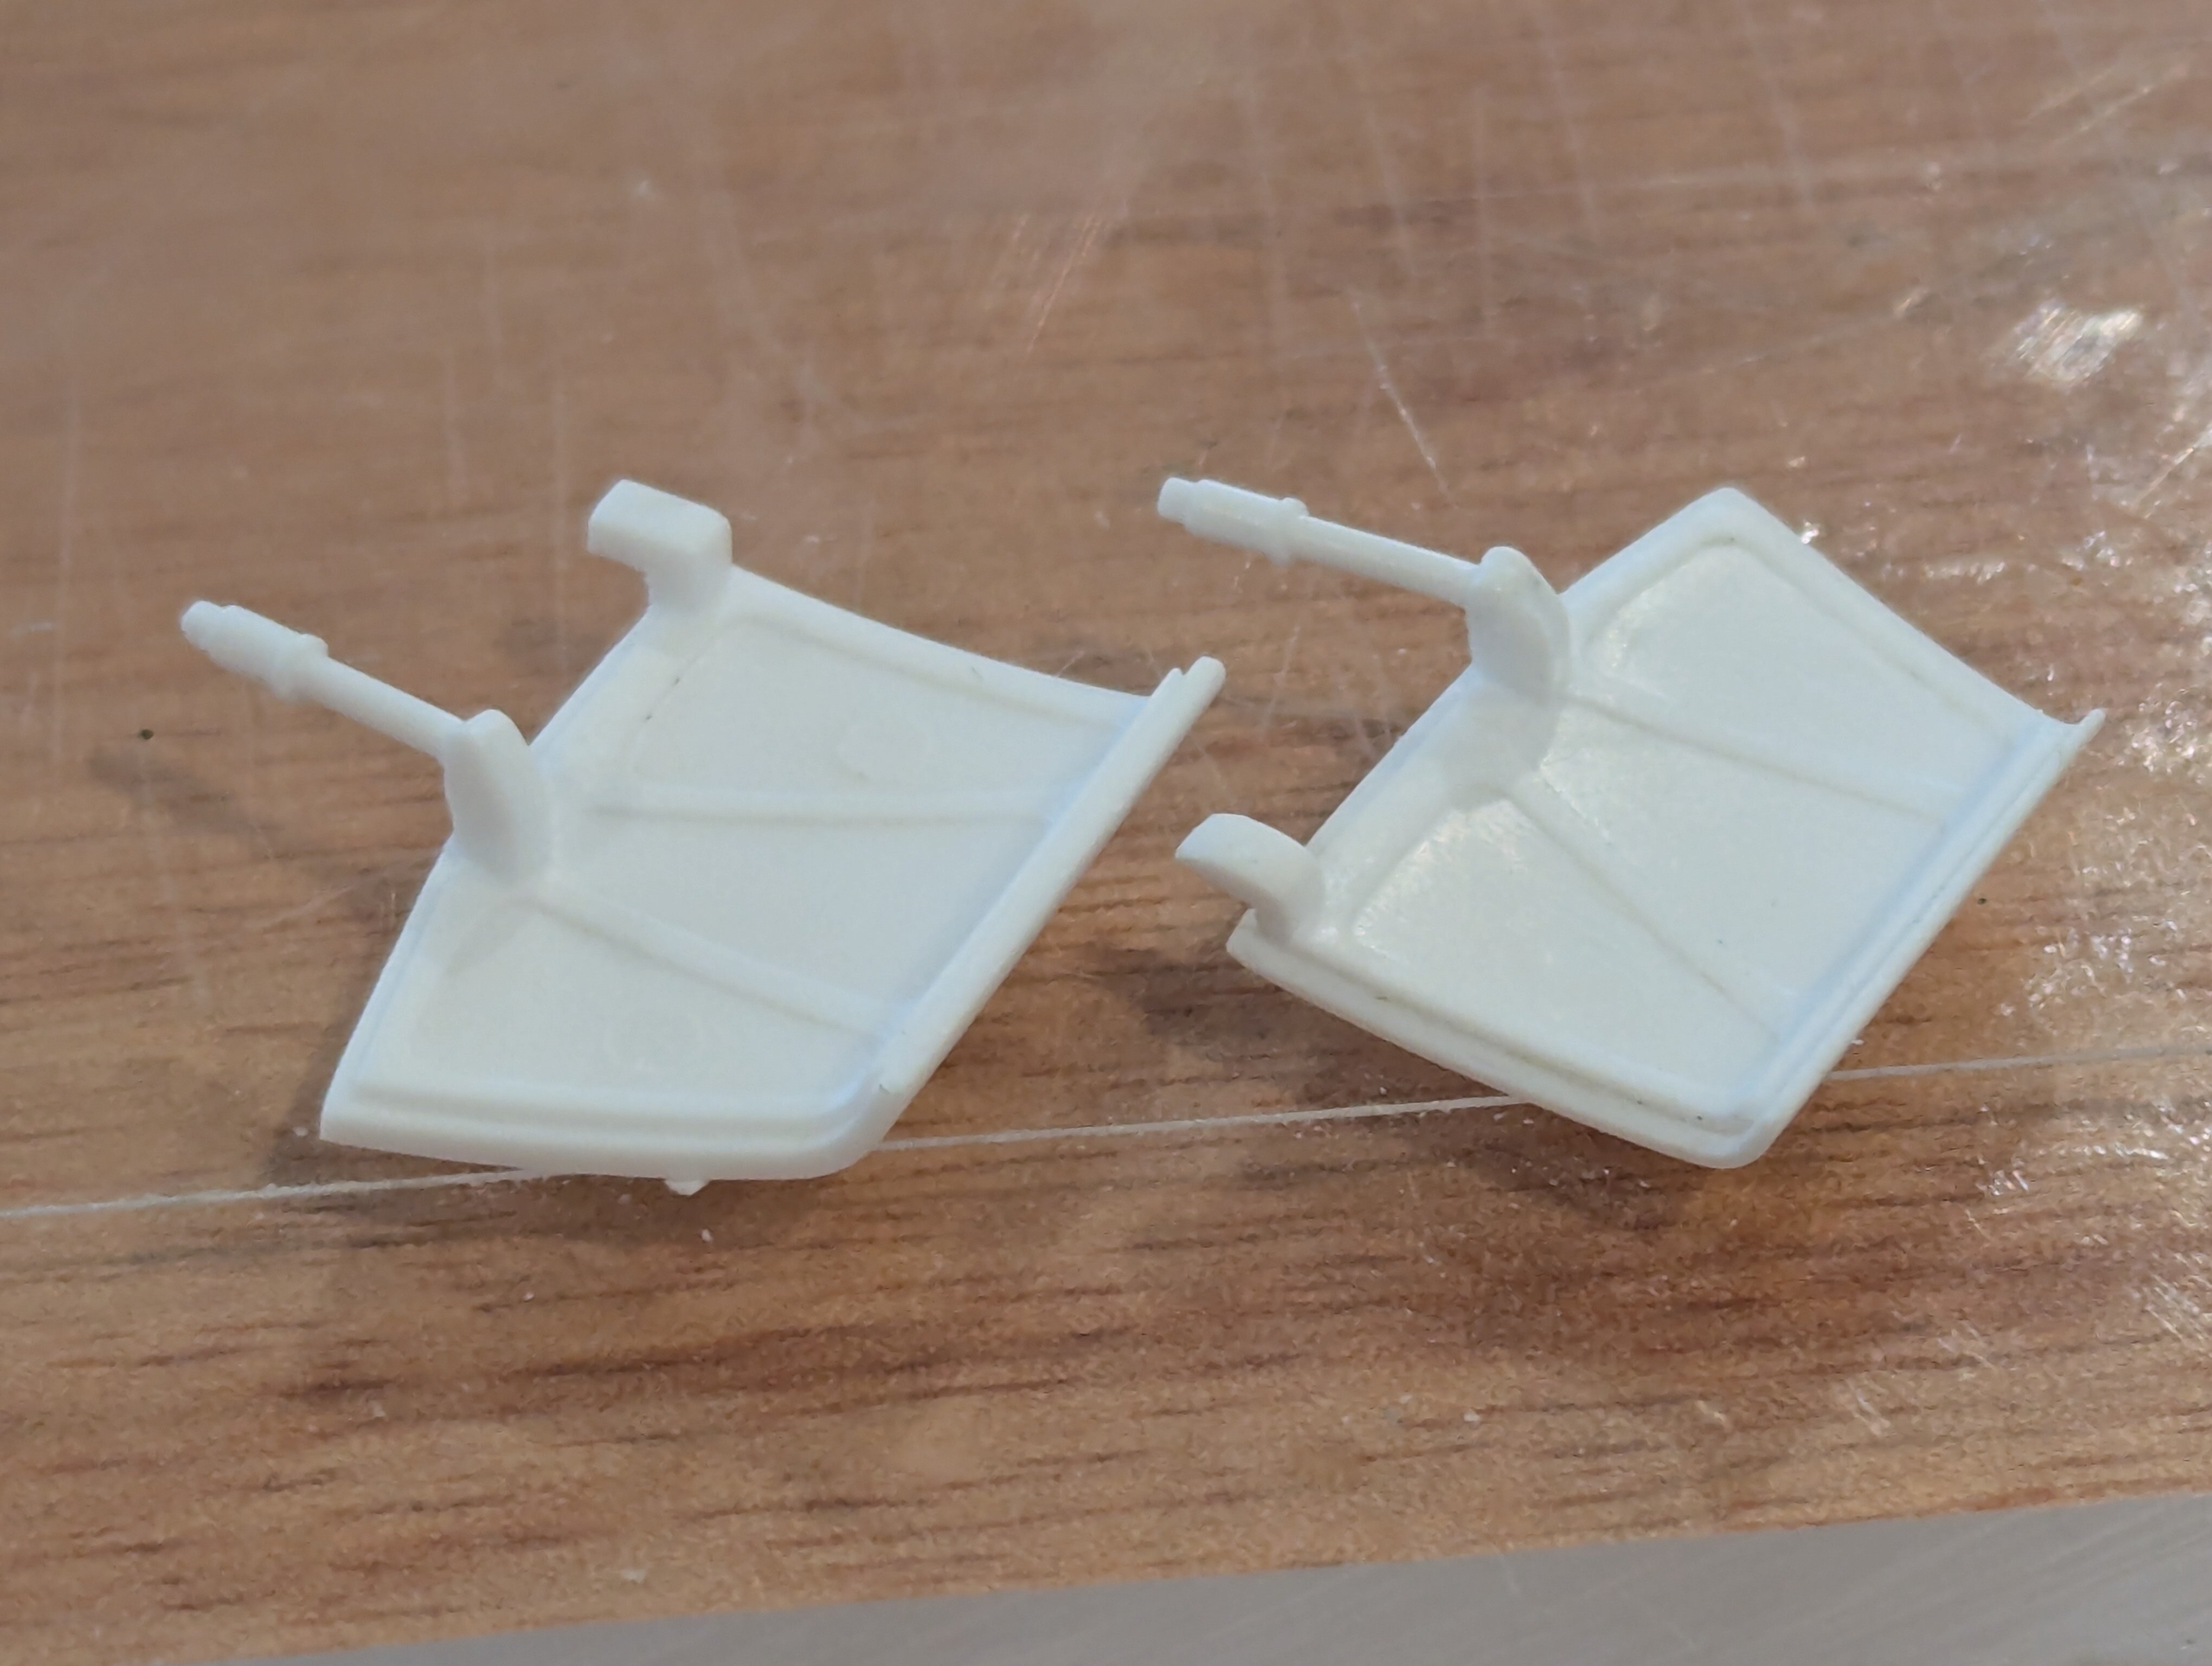
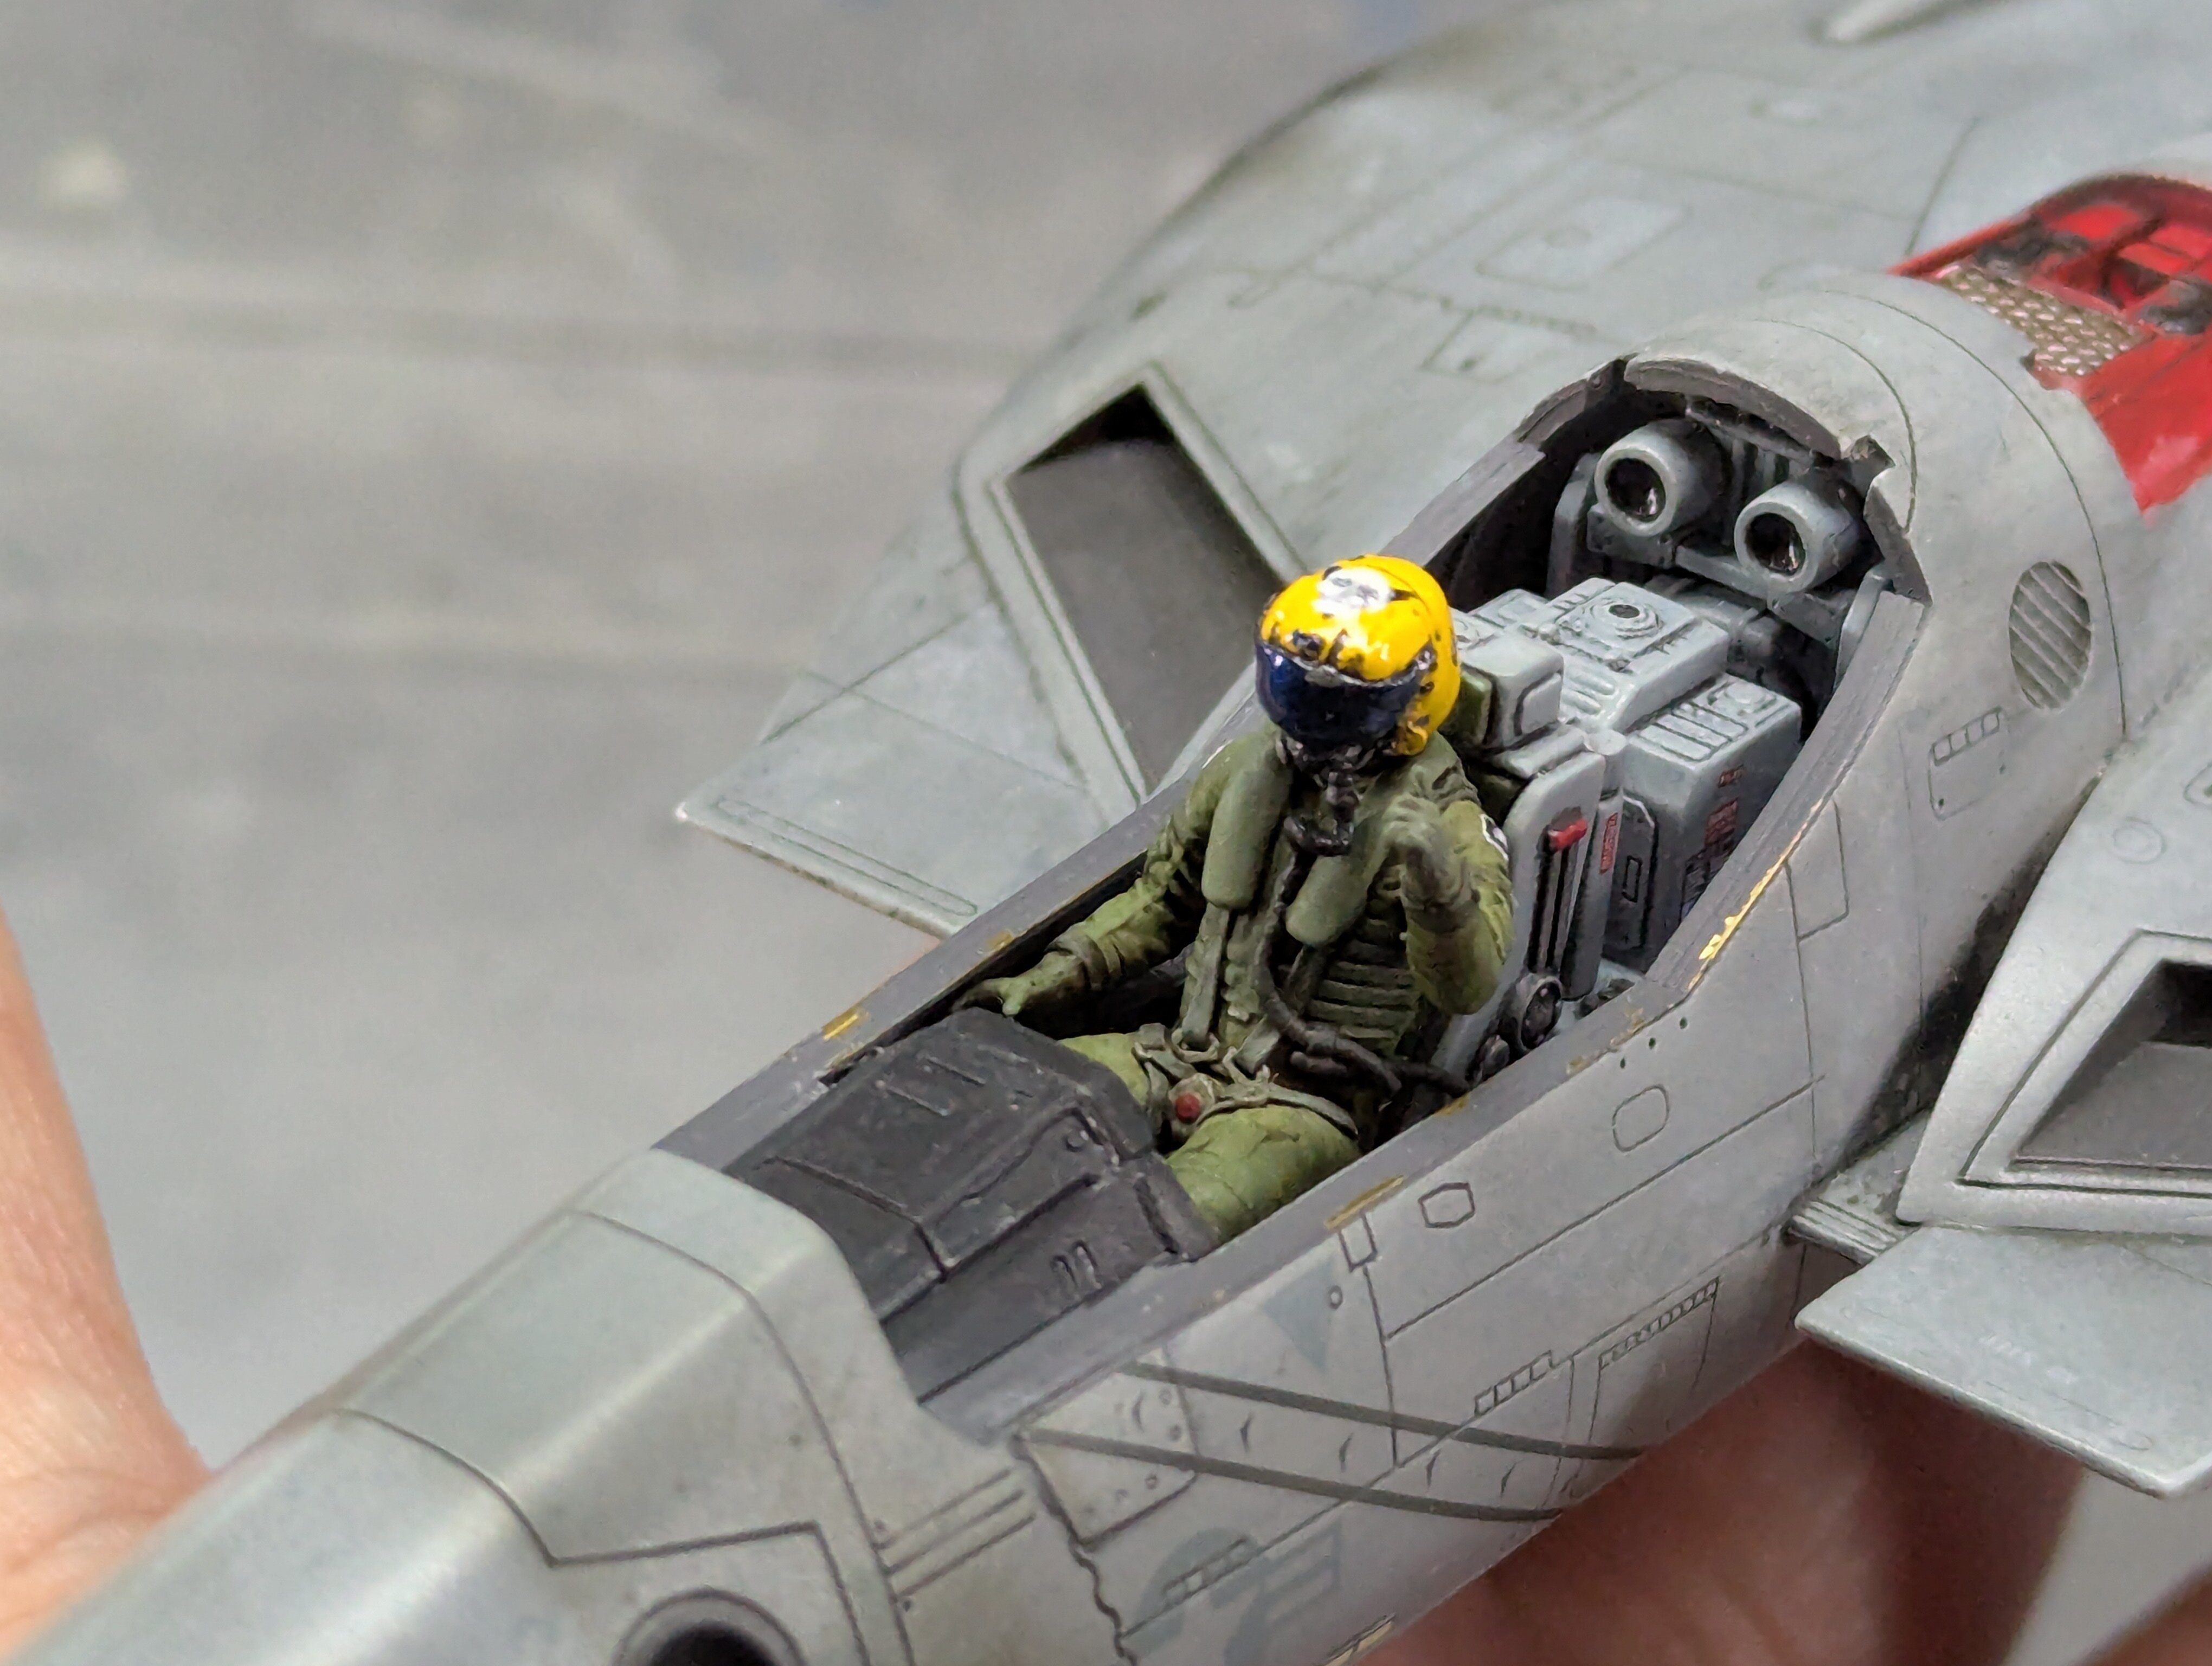
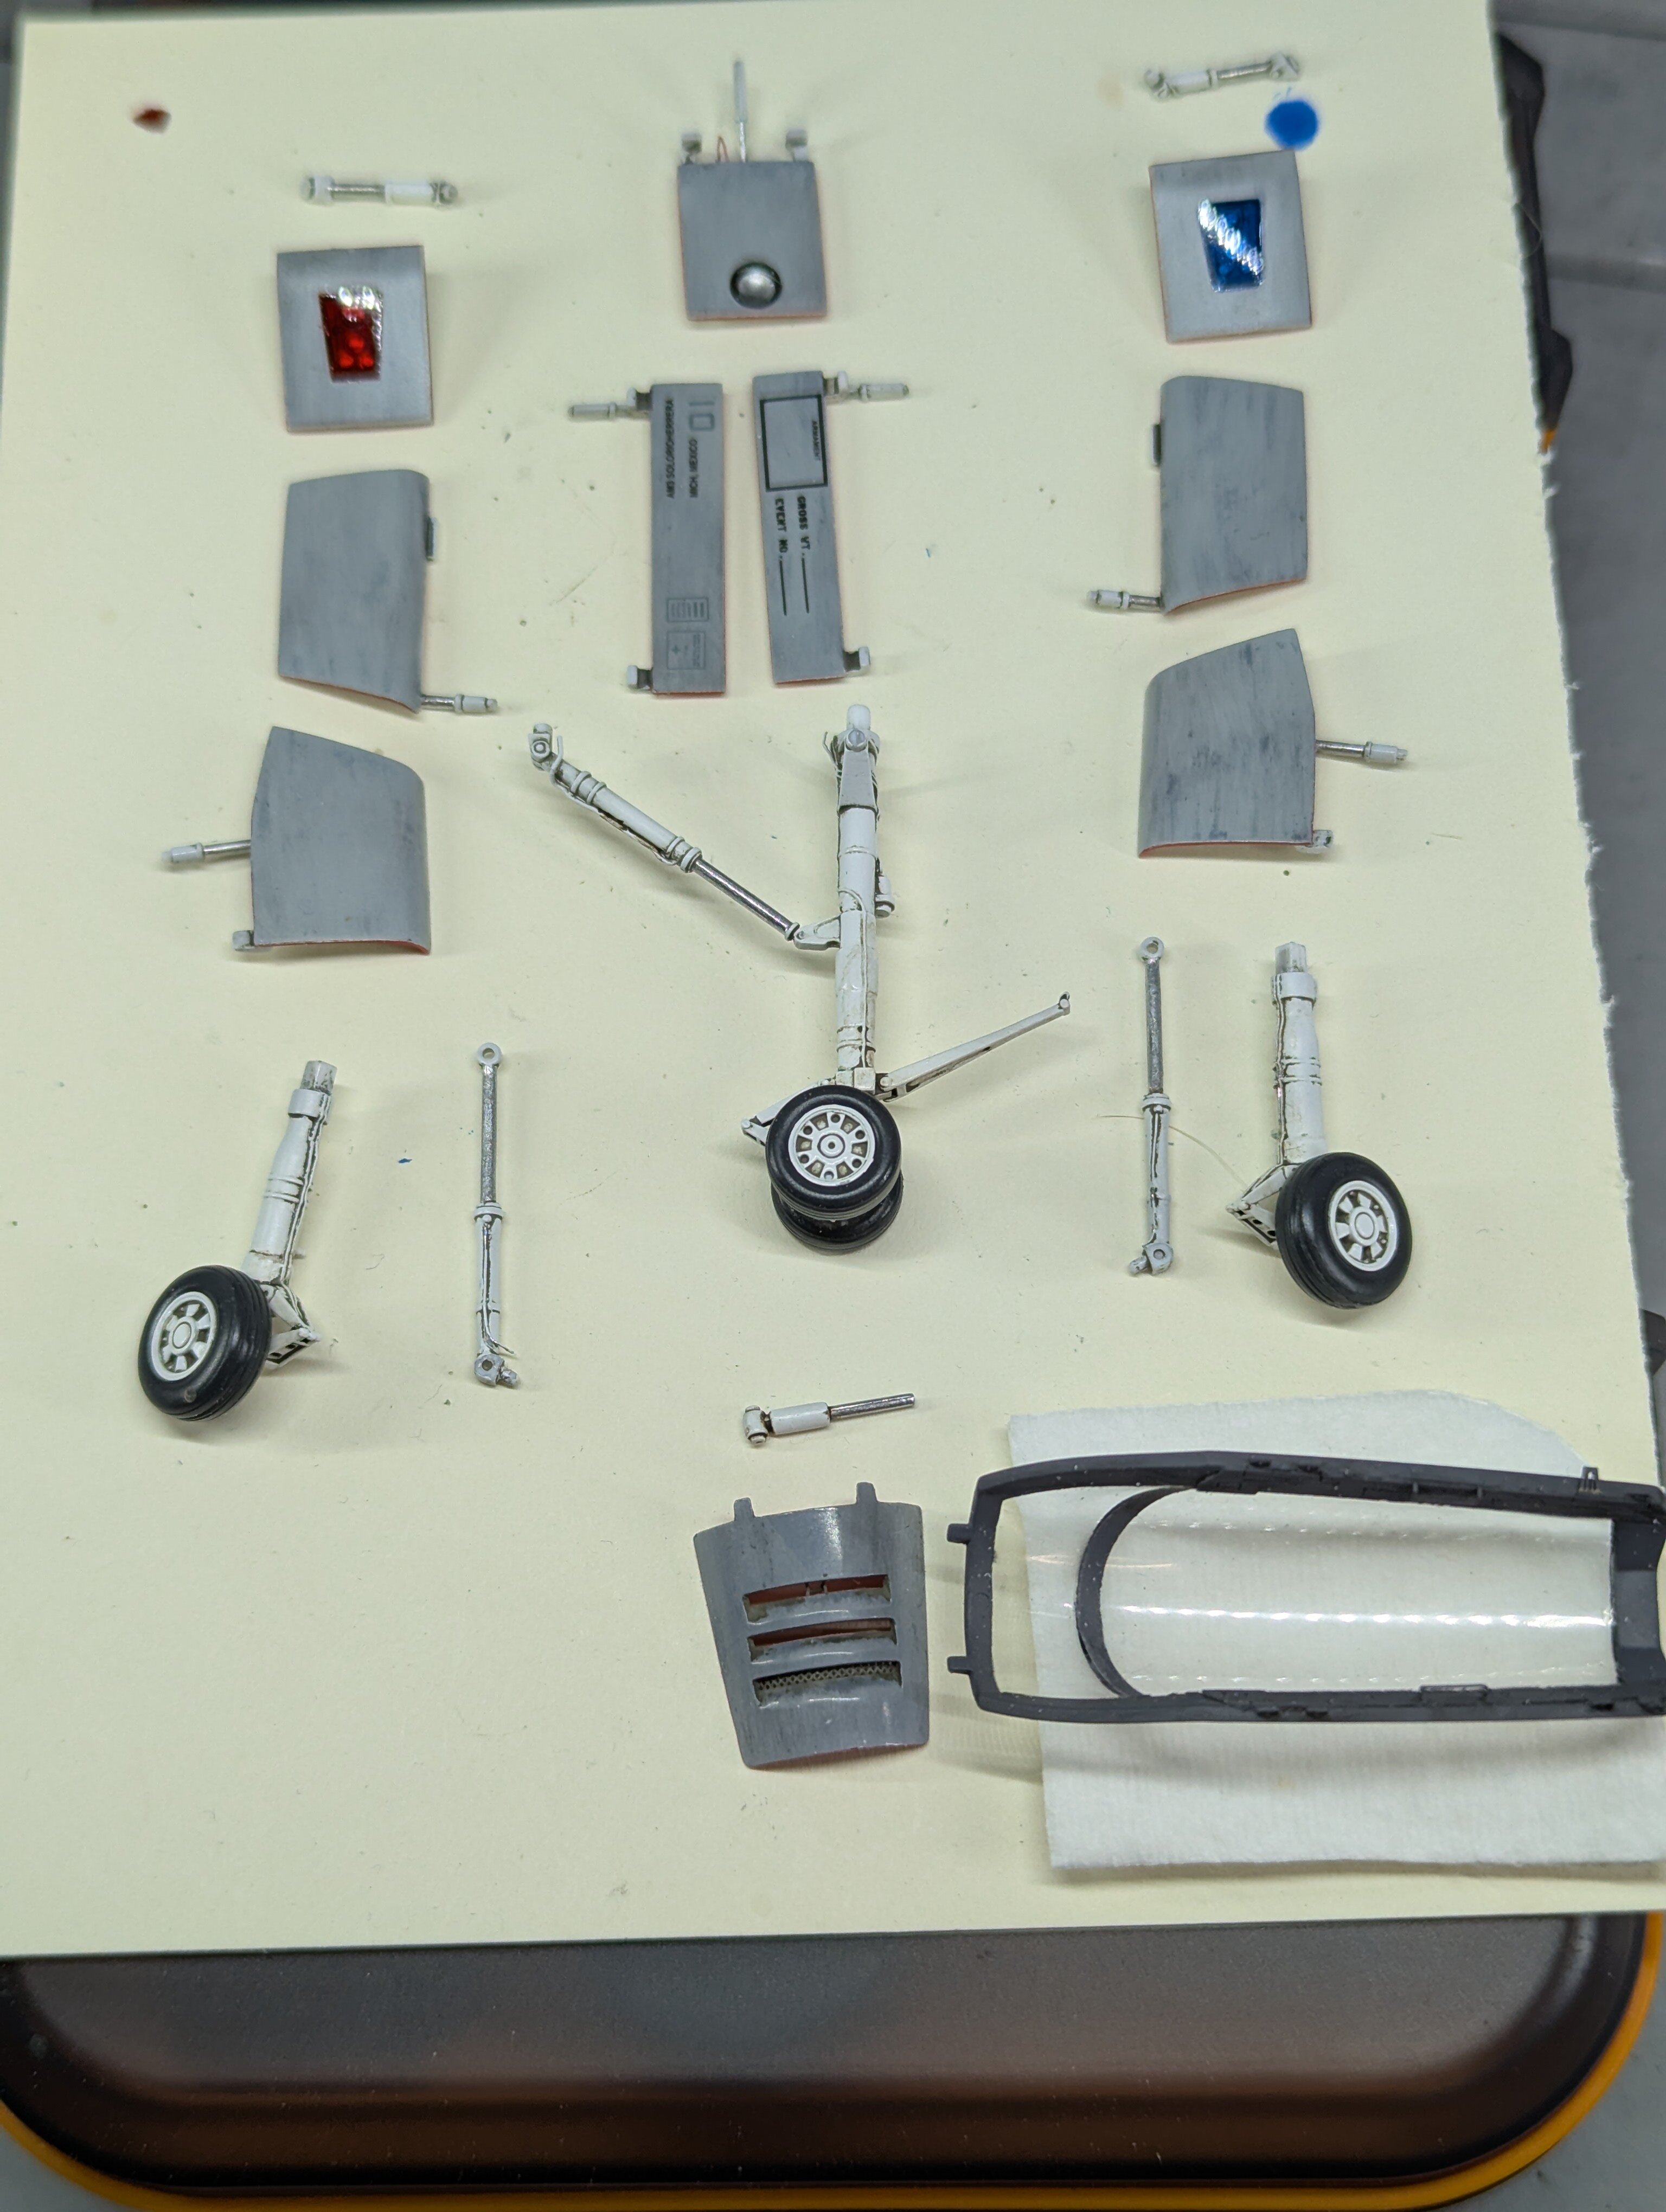
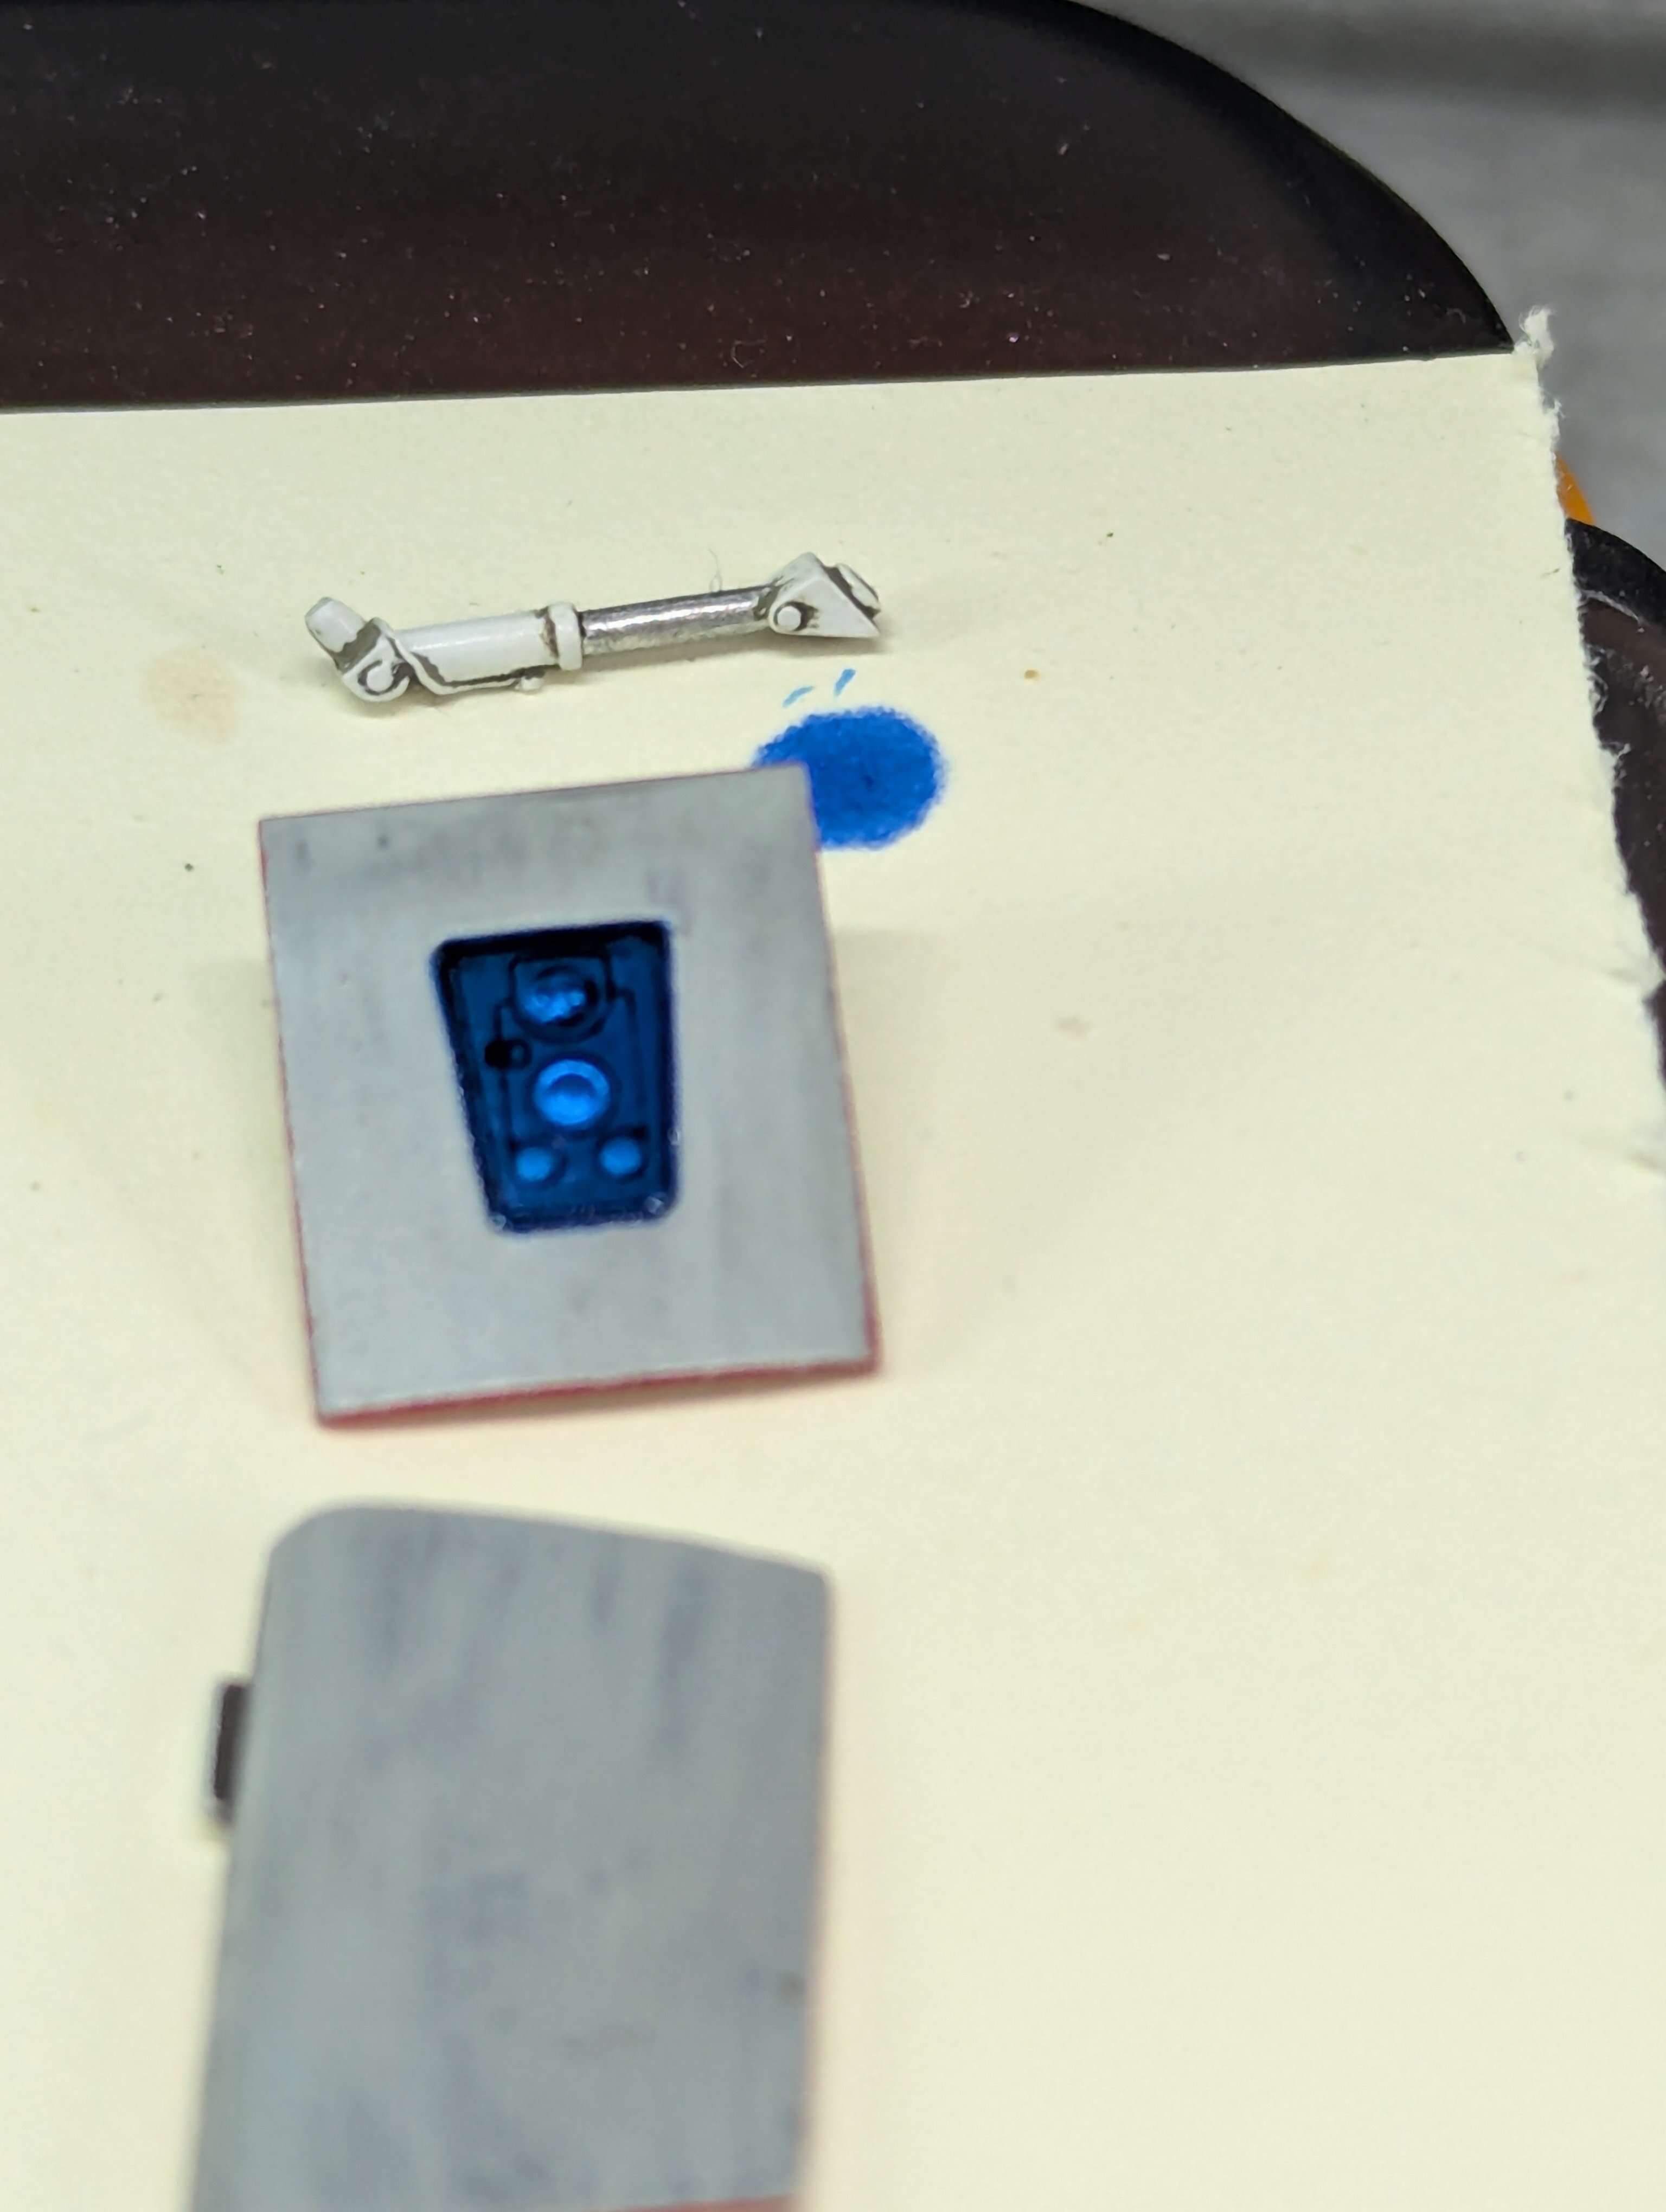
I got the pilot all cleaned up and put together, seams filled, base coat down, and the first round of detail painting done on the body. I also got the head base coated with yellow for the shell as a nod to the old school Jolly Rogers livery. The visor was based on gloss black, then had a very light directional mist of Alclad chrome from the front, and finally topped with clear blue. I really like the effect it produces. Finally, I finished the detailing on the accessory parts, including the clear blue and clear red on the front main gear doors. At this point, I just need to finish the pilot and the oil weathering and I'll be ready for final assembly. I used a lot of subtle variations of greys and greens for the detail painting, I think it adds a lot of life and should really look great once I get some washes and dry brushing done for some more contrast and to highlight things. A new truck I very recently learned for painting yellow is to undercoat with a light pink. It really helps to make the difficult color pop without having to put down too many coats. This is with just a single relatively light coat after laying down the pink. Accessory parts all laid out and waiting for assembly. I really like how the combination of the PE insert, the clear UV resin, and clear top color came together to make the doors pop.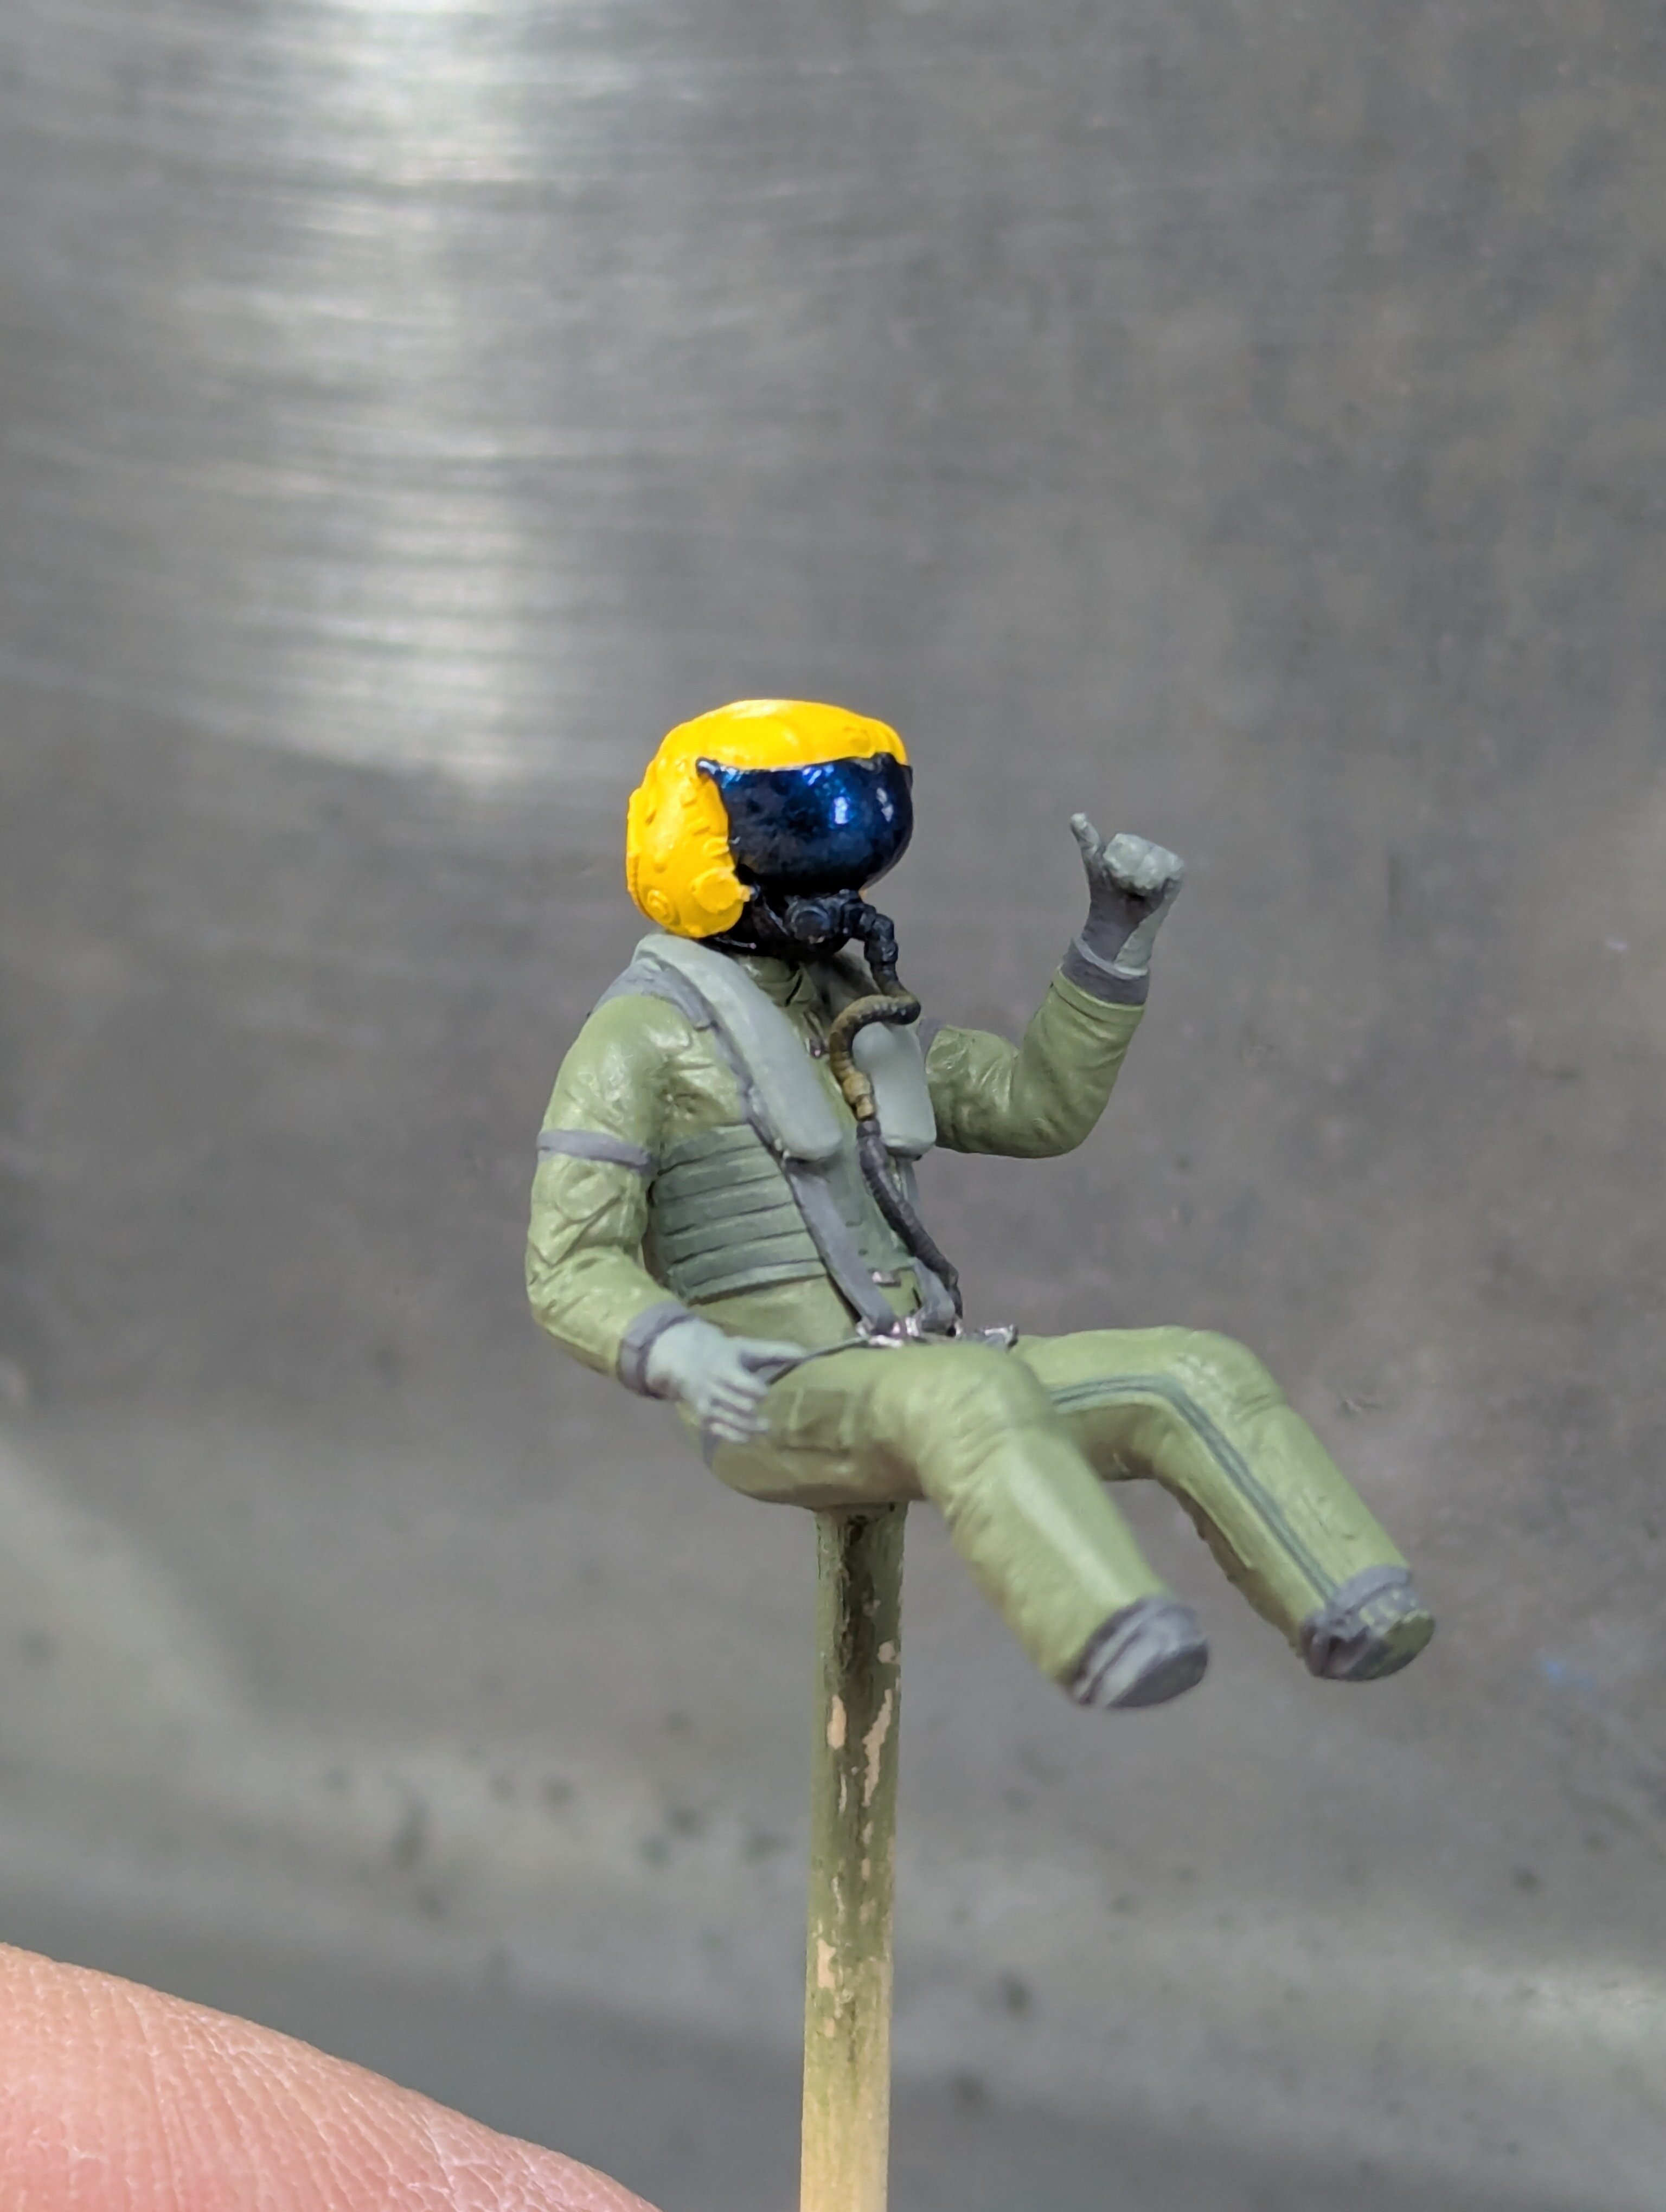

-
1/48 Hasegawa VF-1S "What If?" US Navy VF-84 Jolly Rogers Low Viz
JNordgren42 replied to JNordgren42's topic in The Workshop!
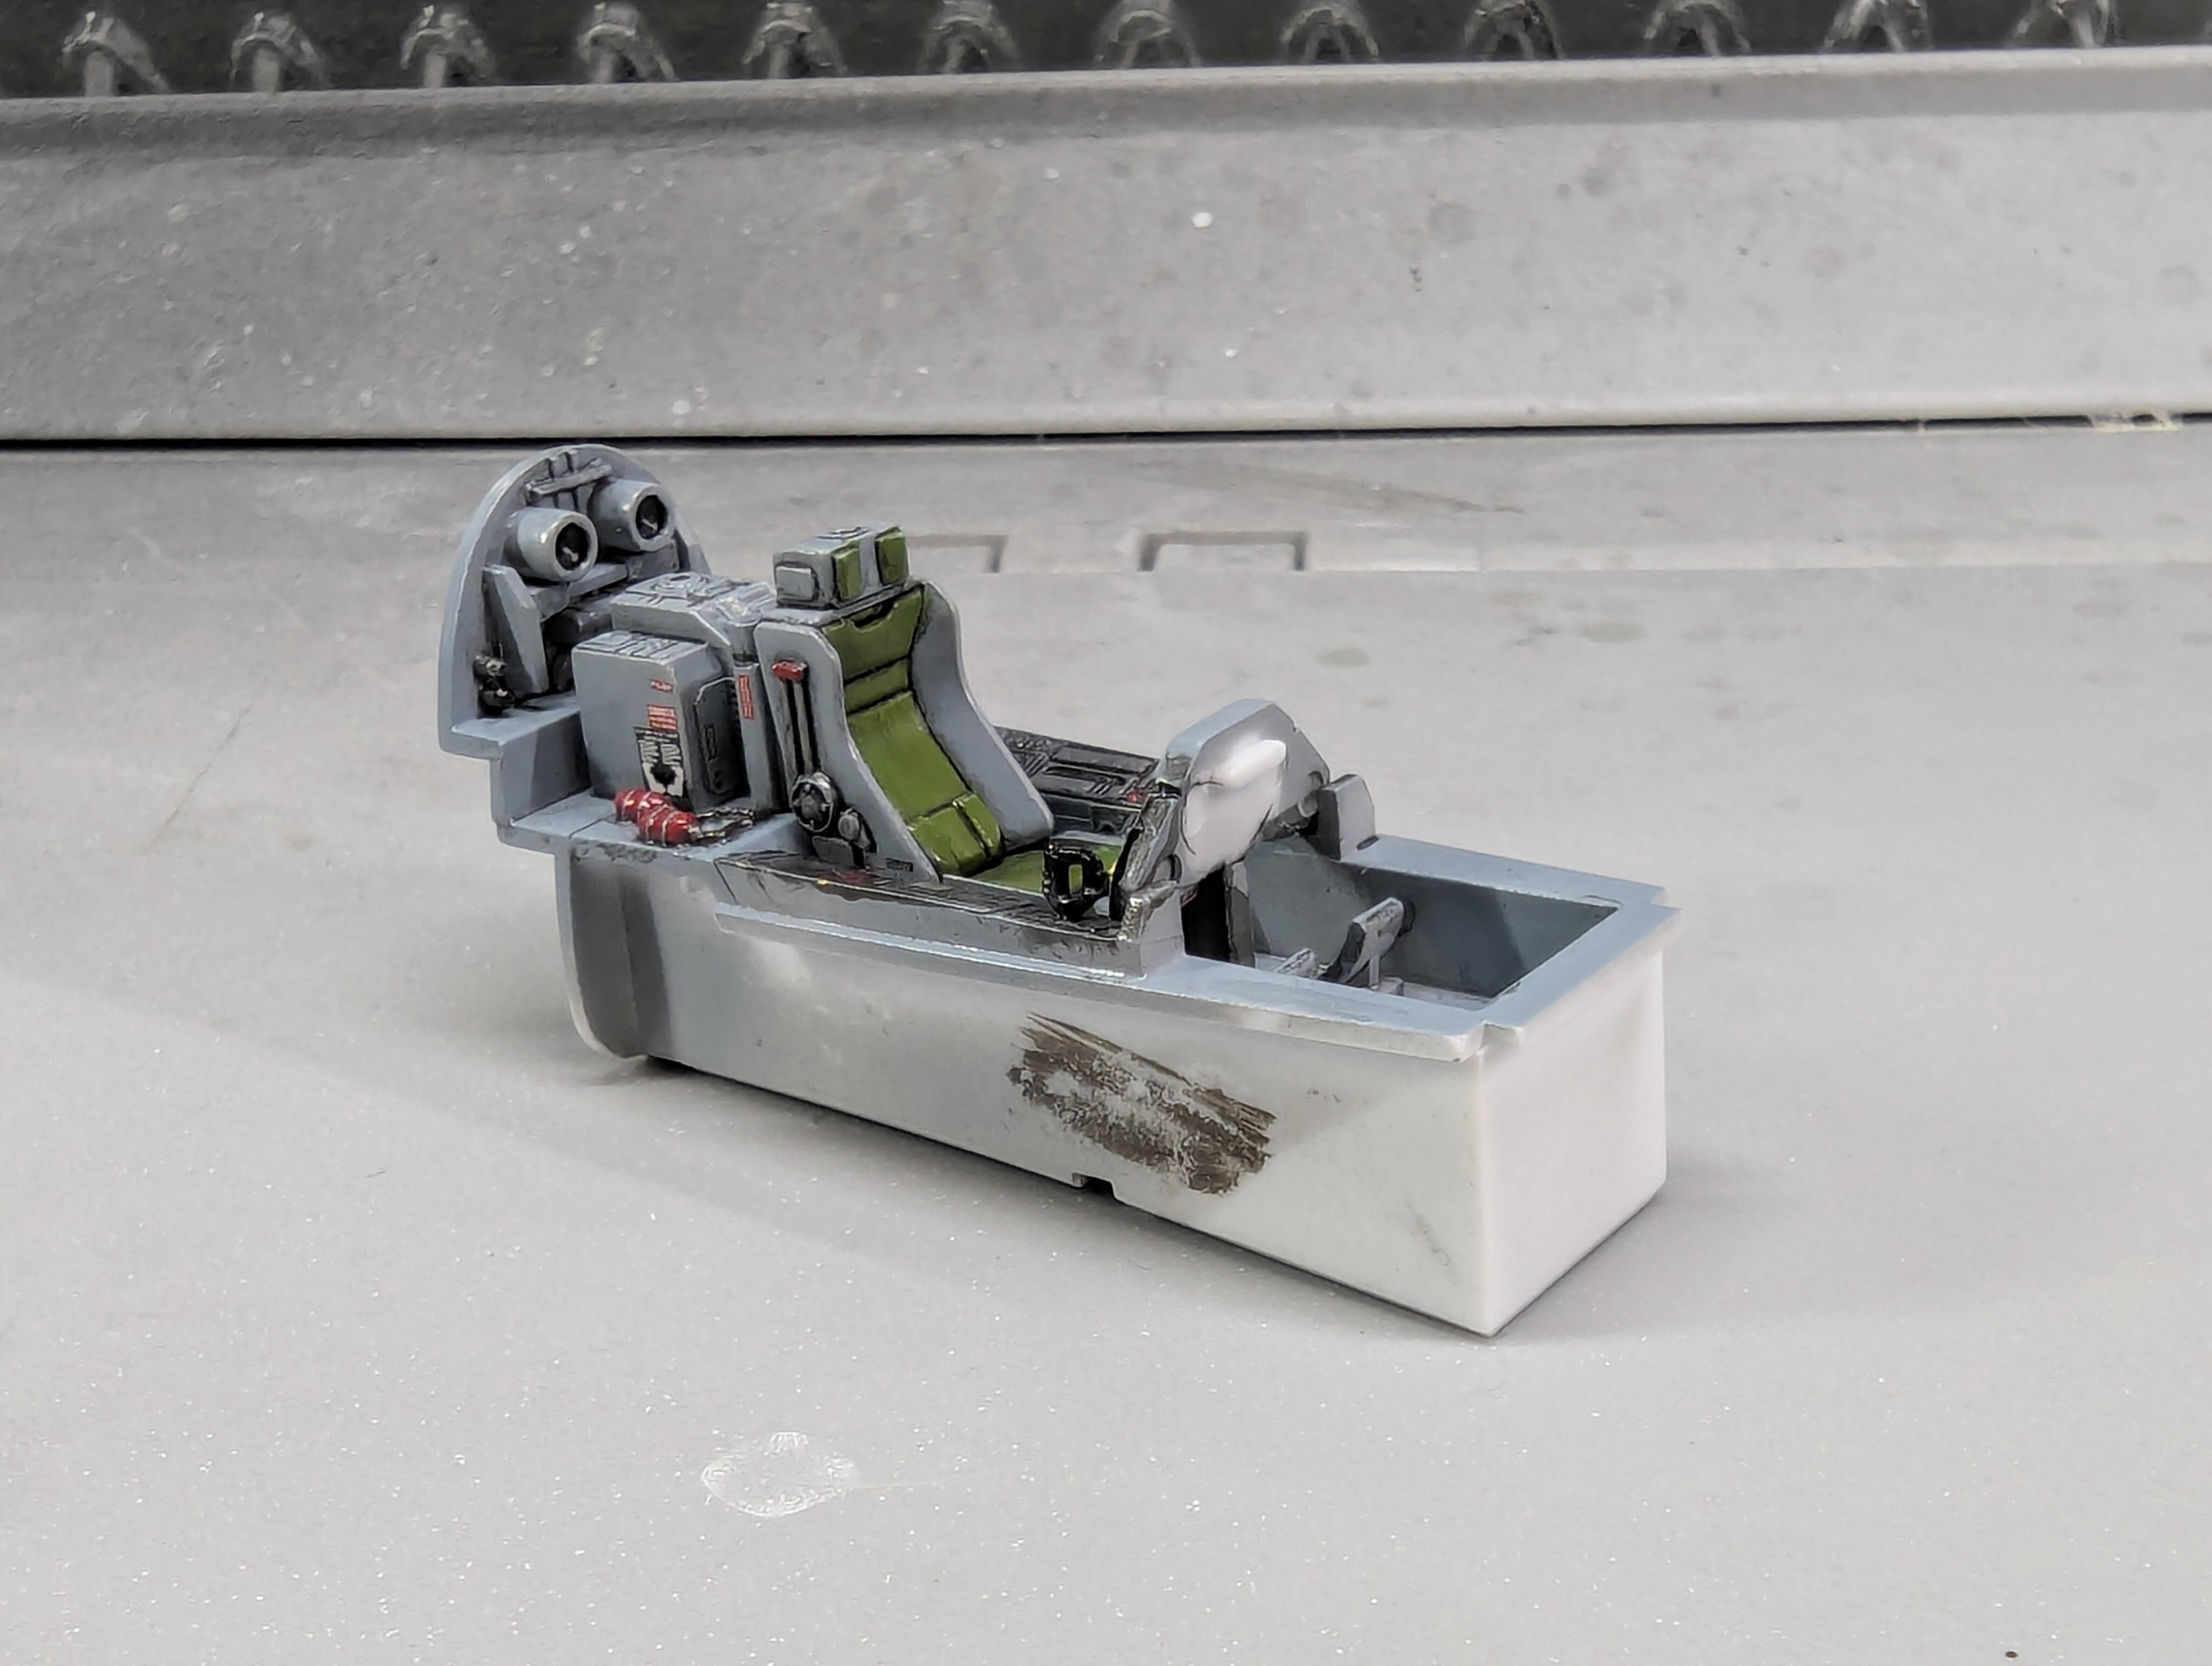
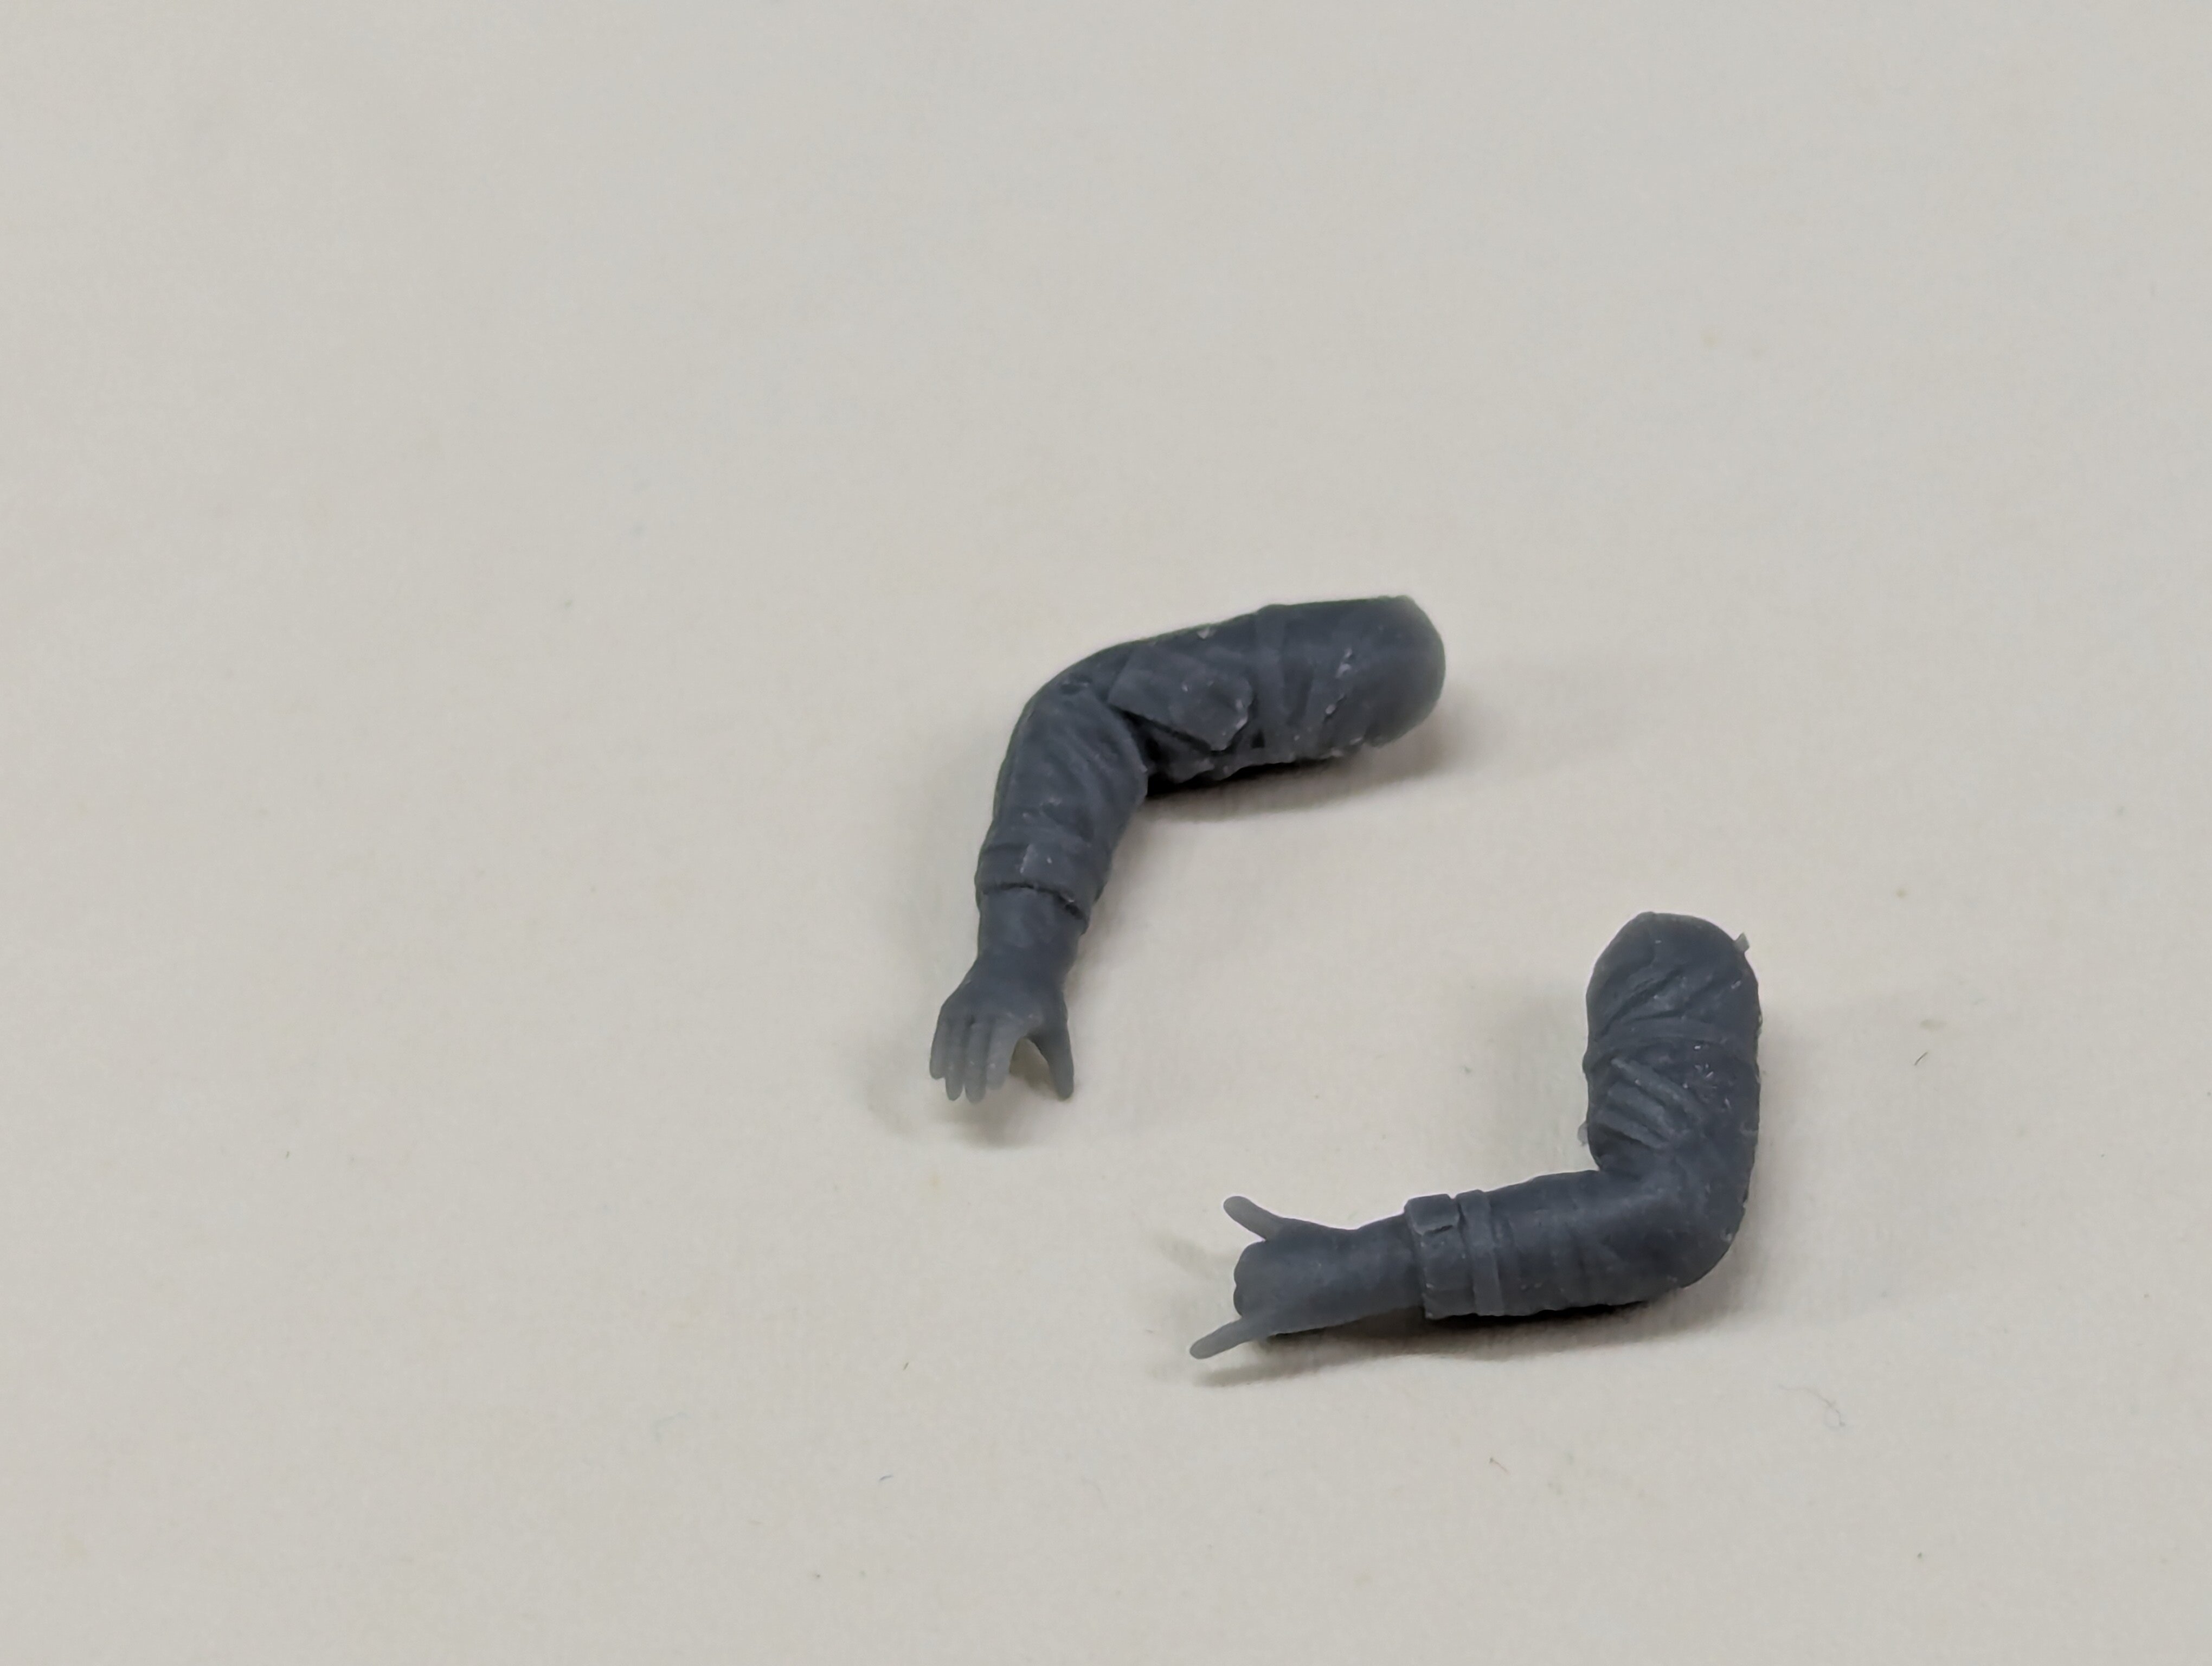
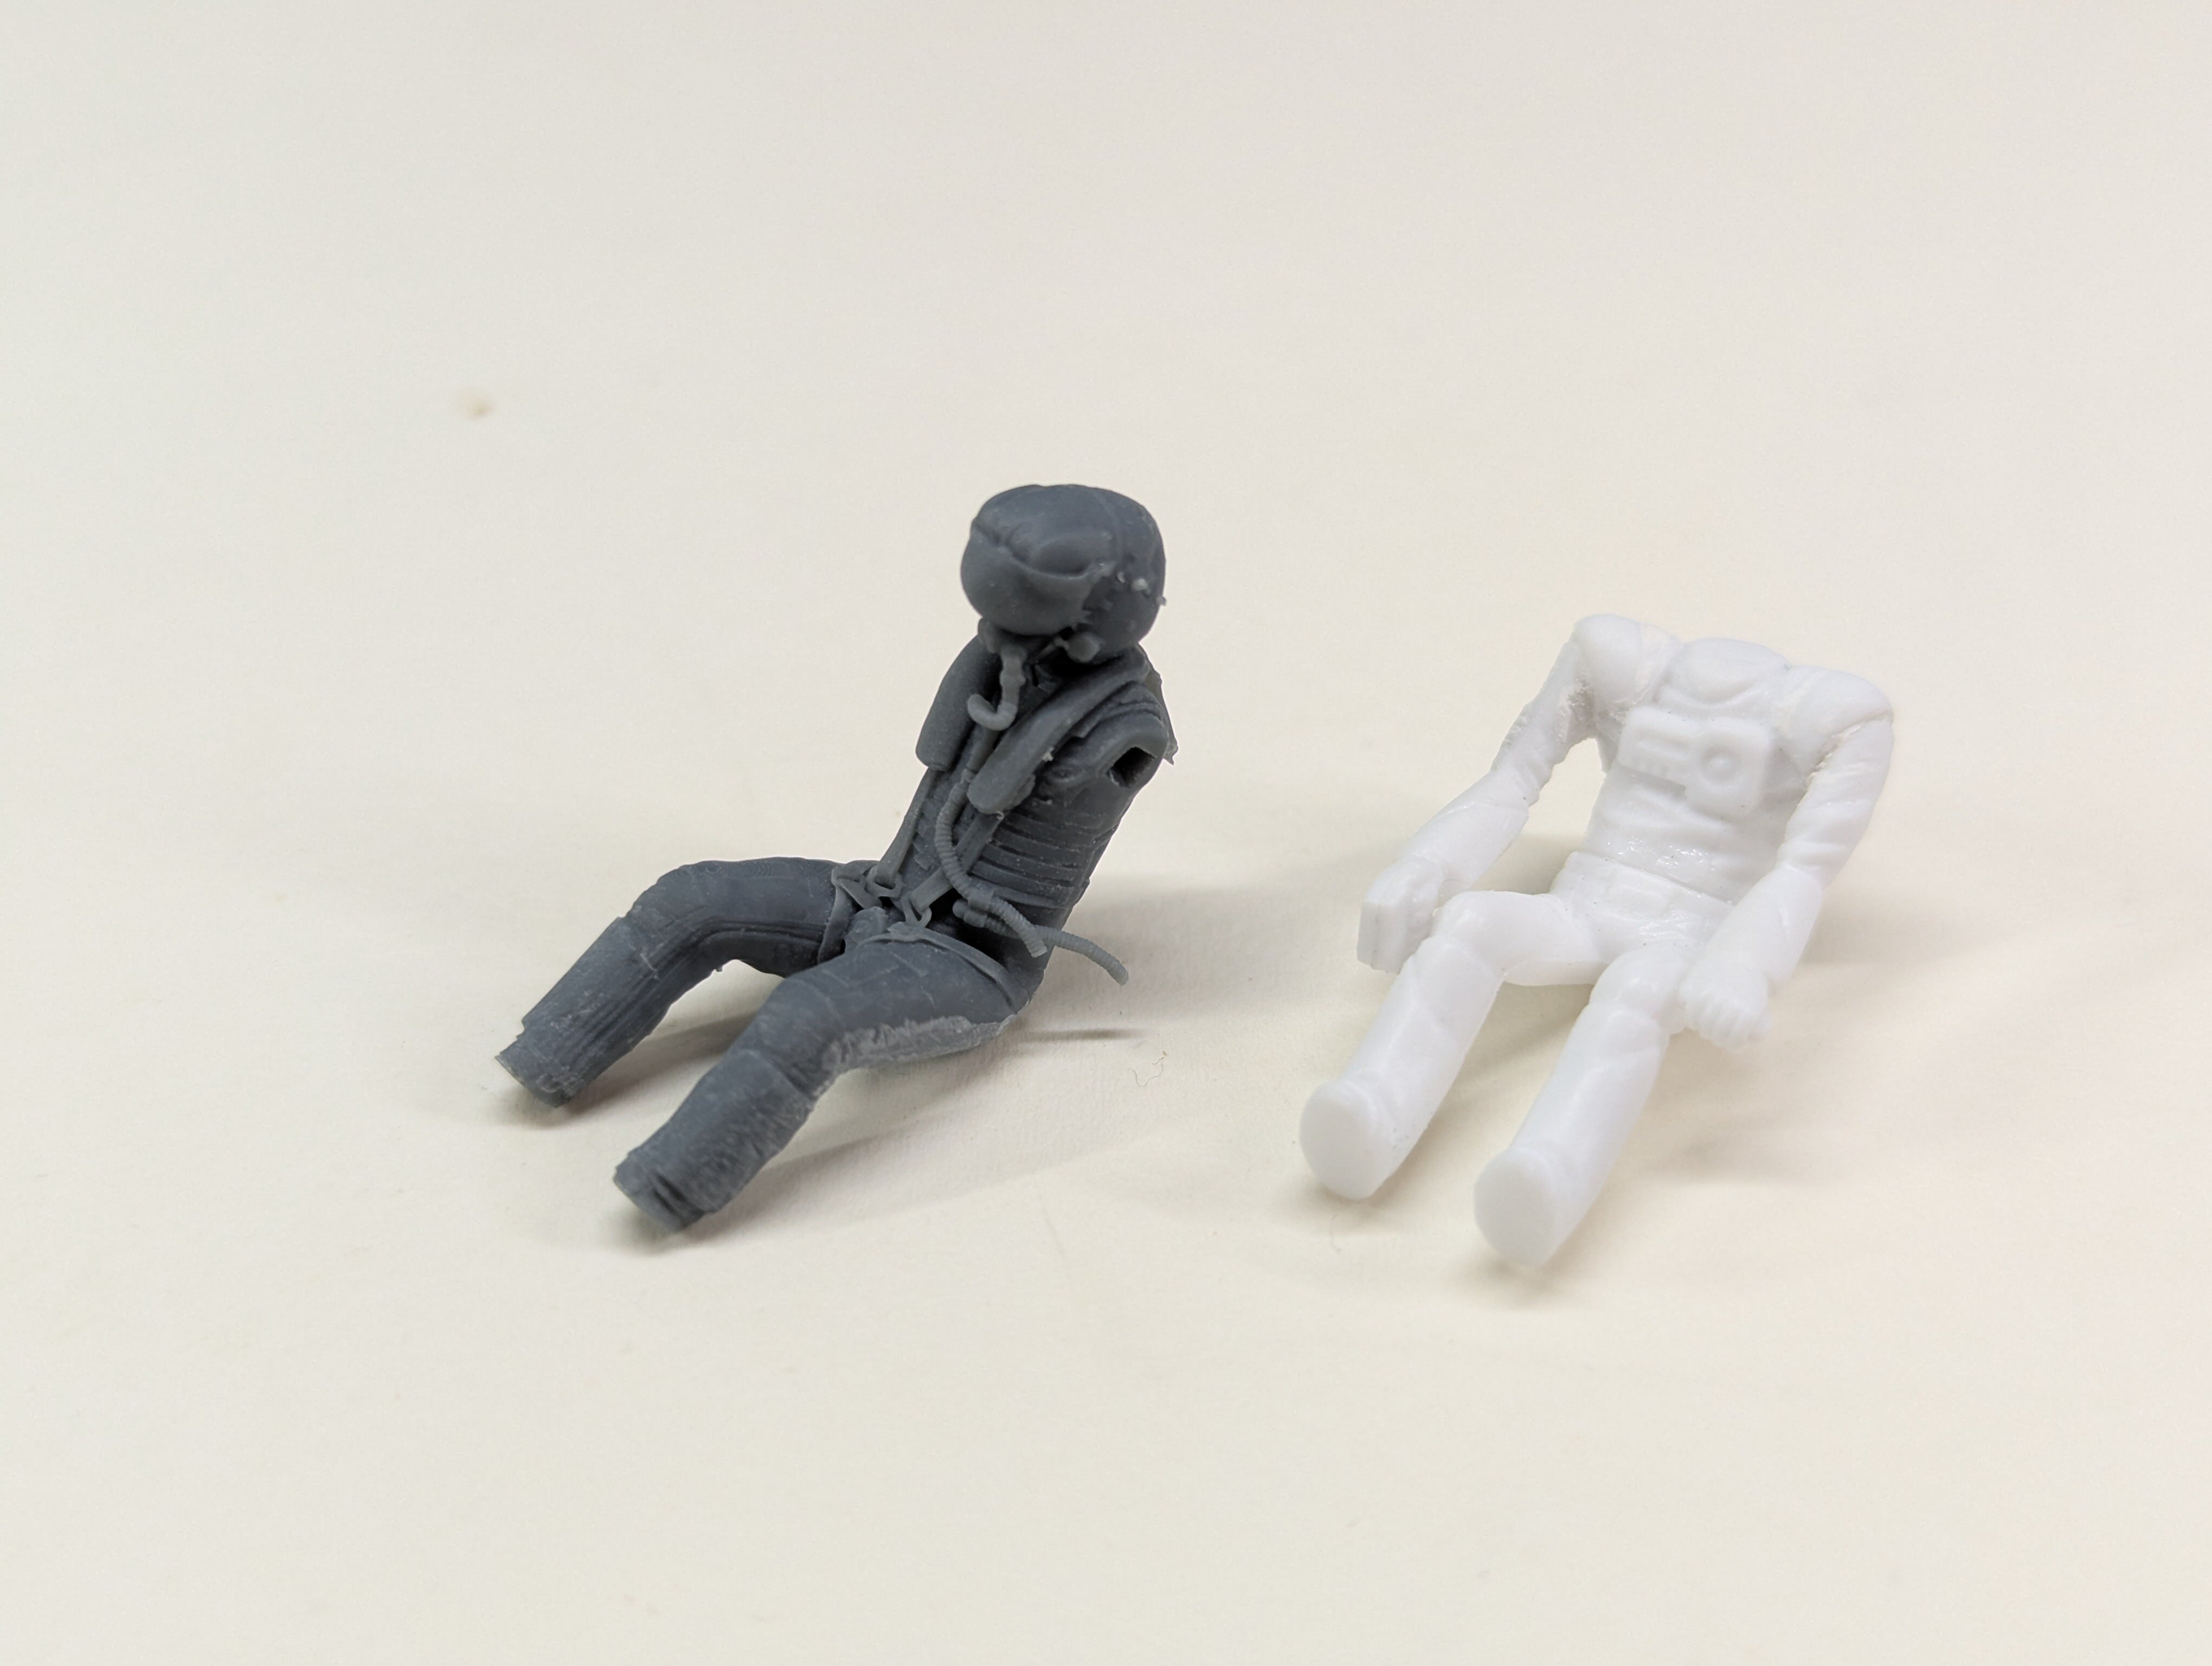
My Reskit F-35 pilot arrived today and I got straight to work cleaning him up and doing an extraction surgery to remove him from the ejection seat. There were some butt puckering moments sawing and cutting on the brittle resin, but I managed to separate him from the seat without any issues. I had to do a lot of sanding, some more butt puckering time under hot water to squeeze his legs closer together, and an emergency footectomy to get him to fit, but the task was (mostly) accomplished. The kit cockpit and pilot are fairly under scale and the F-35 figure is a good deal larger, so the canopy will not quite fit closed without a large amount of additional modification, but I planned to have an open canopy anyway, so no problem. I'll finish cleanup and I'm probably going to cut his pinky off and sculpt it back on closed to change his hand gesture from "hang ten" to "thumbs up"... Then it's time to throw some primer on him so I can start painting. All snug for a rest fit. He's a little large compared to the scale of the cockpit,but it's not too bad. The canopy doesn't quite fit closed. No problem since I planned to build it open anyway. The seat does almost look comically small from the side. I may cut the head rest off and scratch build a new one. After sanding and a footectomy... Next to the kit figure. He's much more chonky.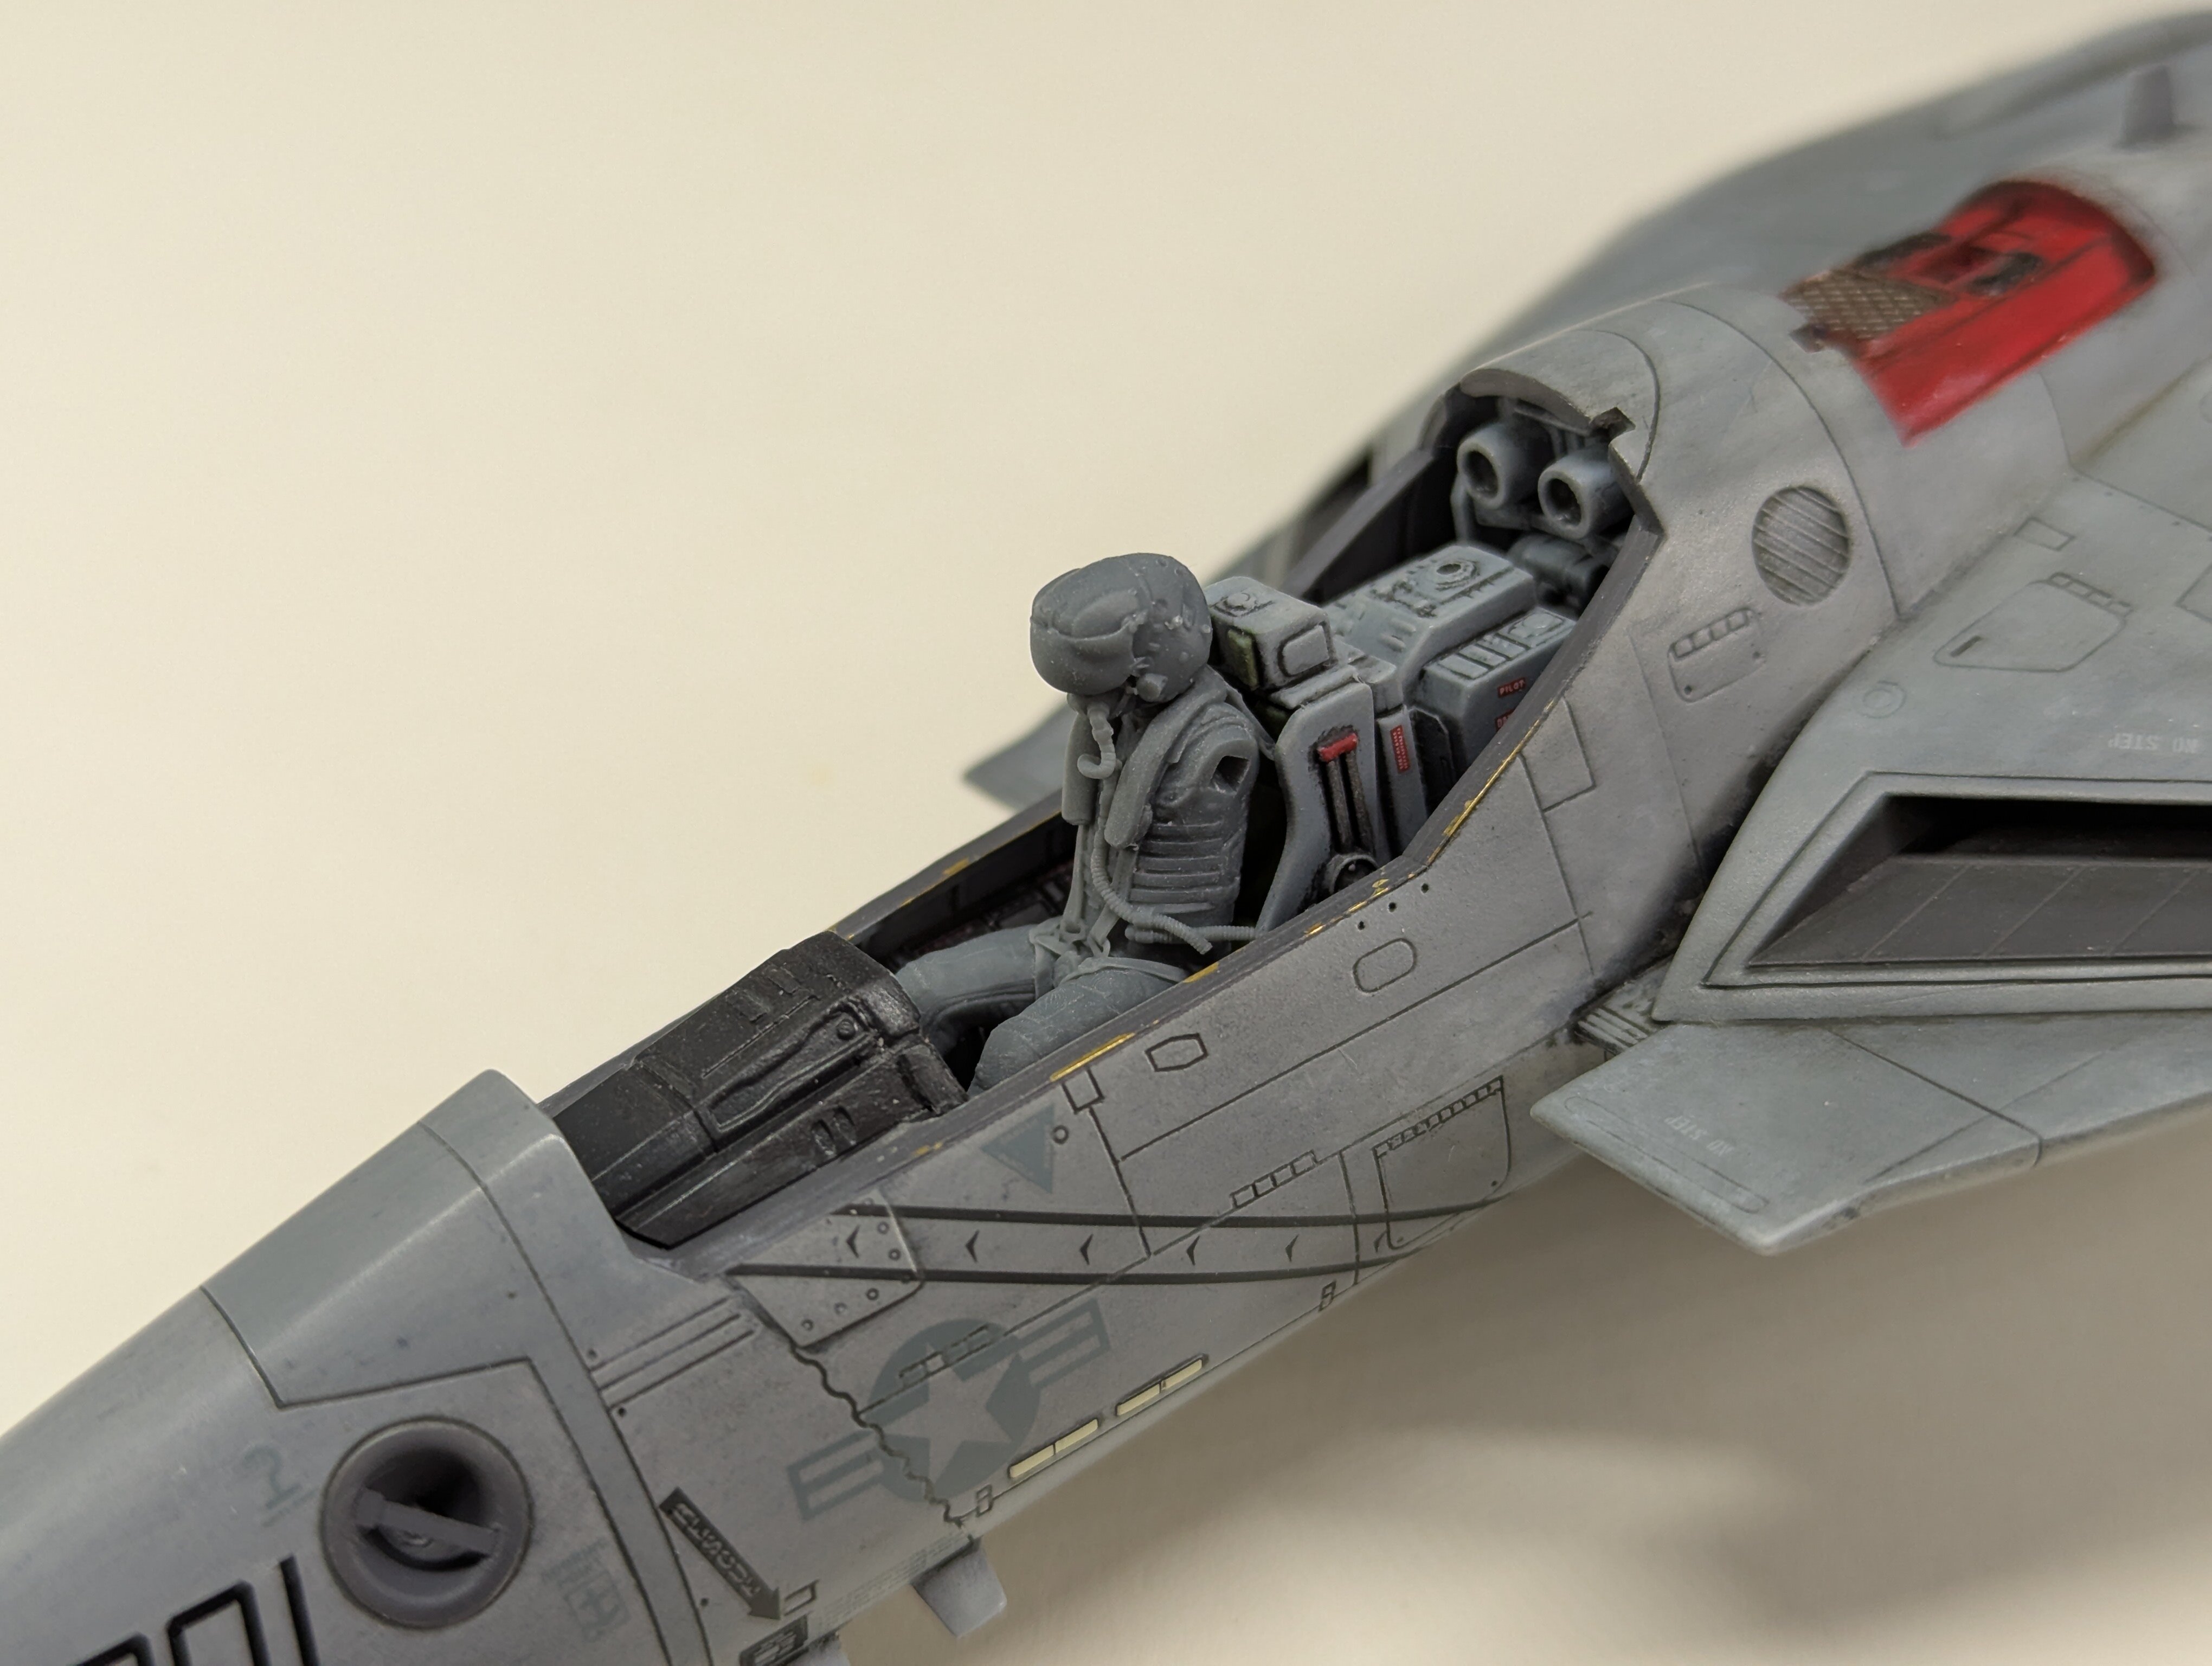

-
1/48 Hasegawa VF-1S "What If?" US Navy VF-84 Jolly Rogers Low Viz
JNordgren42 replied to JNordgren42's topic in The Workshop!
I put them on my rotary tool to construct a makeshift lathe (shades of Guy Fleegman there 😁) and sanded the seams nice and smooth. Then I used a scribing chisel to cut the grooves, a little more light sanding to debur, and viola! -
A little necropost here to say amazing work! I'm trying oils for the first time on my 1/48 VF-1S and I'm really enjoying the process, even if it is time consuming. This has inspired me to put a YF-19 in my Amazon cart and I'm looking at decal sheets for a little something different. My VF-1S is in low viz VF-84 Jolly Rogers and I'm thinking of going with the old school VF-1 Wolfpack markings if I do the 19. Decisions, decisions... 😁
- 90 replies
-
- 2
-
-
- macross vf-x2
- vf-19 excalibur
- (and 2 more)
-
A Little Teaser of a Conversion Kit...
JNordgren42 replied to PsYcHoDyNaMiX's topic in The Workshop!
That's some fantastic modeling and print work, well done! 3D printing is really a game changer for the hobby. -
This looks fantastic! Great work on both the Valkyrie and the base. I love the paint scheme, it's very unique. I plan on doing a catapult launch diorama with the Fine Molds F-4B I recently picked up and this gives me some great ideas on ways to construct the deck and blast deflectors.
-
1/48 Hasegawa VF-1S "What If?" US Navy VF-84 Jolly Rogers Low Viz
JNordgren42 replied to JNordgren42's topic in The Workshop!
I did some more work with the oils yesterday. I got some white down on the upper fuselage for some subtle sun bleaching and panel variation. I also finished up the detailing in the wheel wells. I'm really enjoying working with the oils, but it's definitely a slow, methodical process. And even with leaching the oils out by dispensing the paint on to cardboard, the drying time is long (but that's also one of the advantages of oils). I think it's definitely worth it and my patience is being rewarded.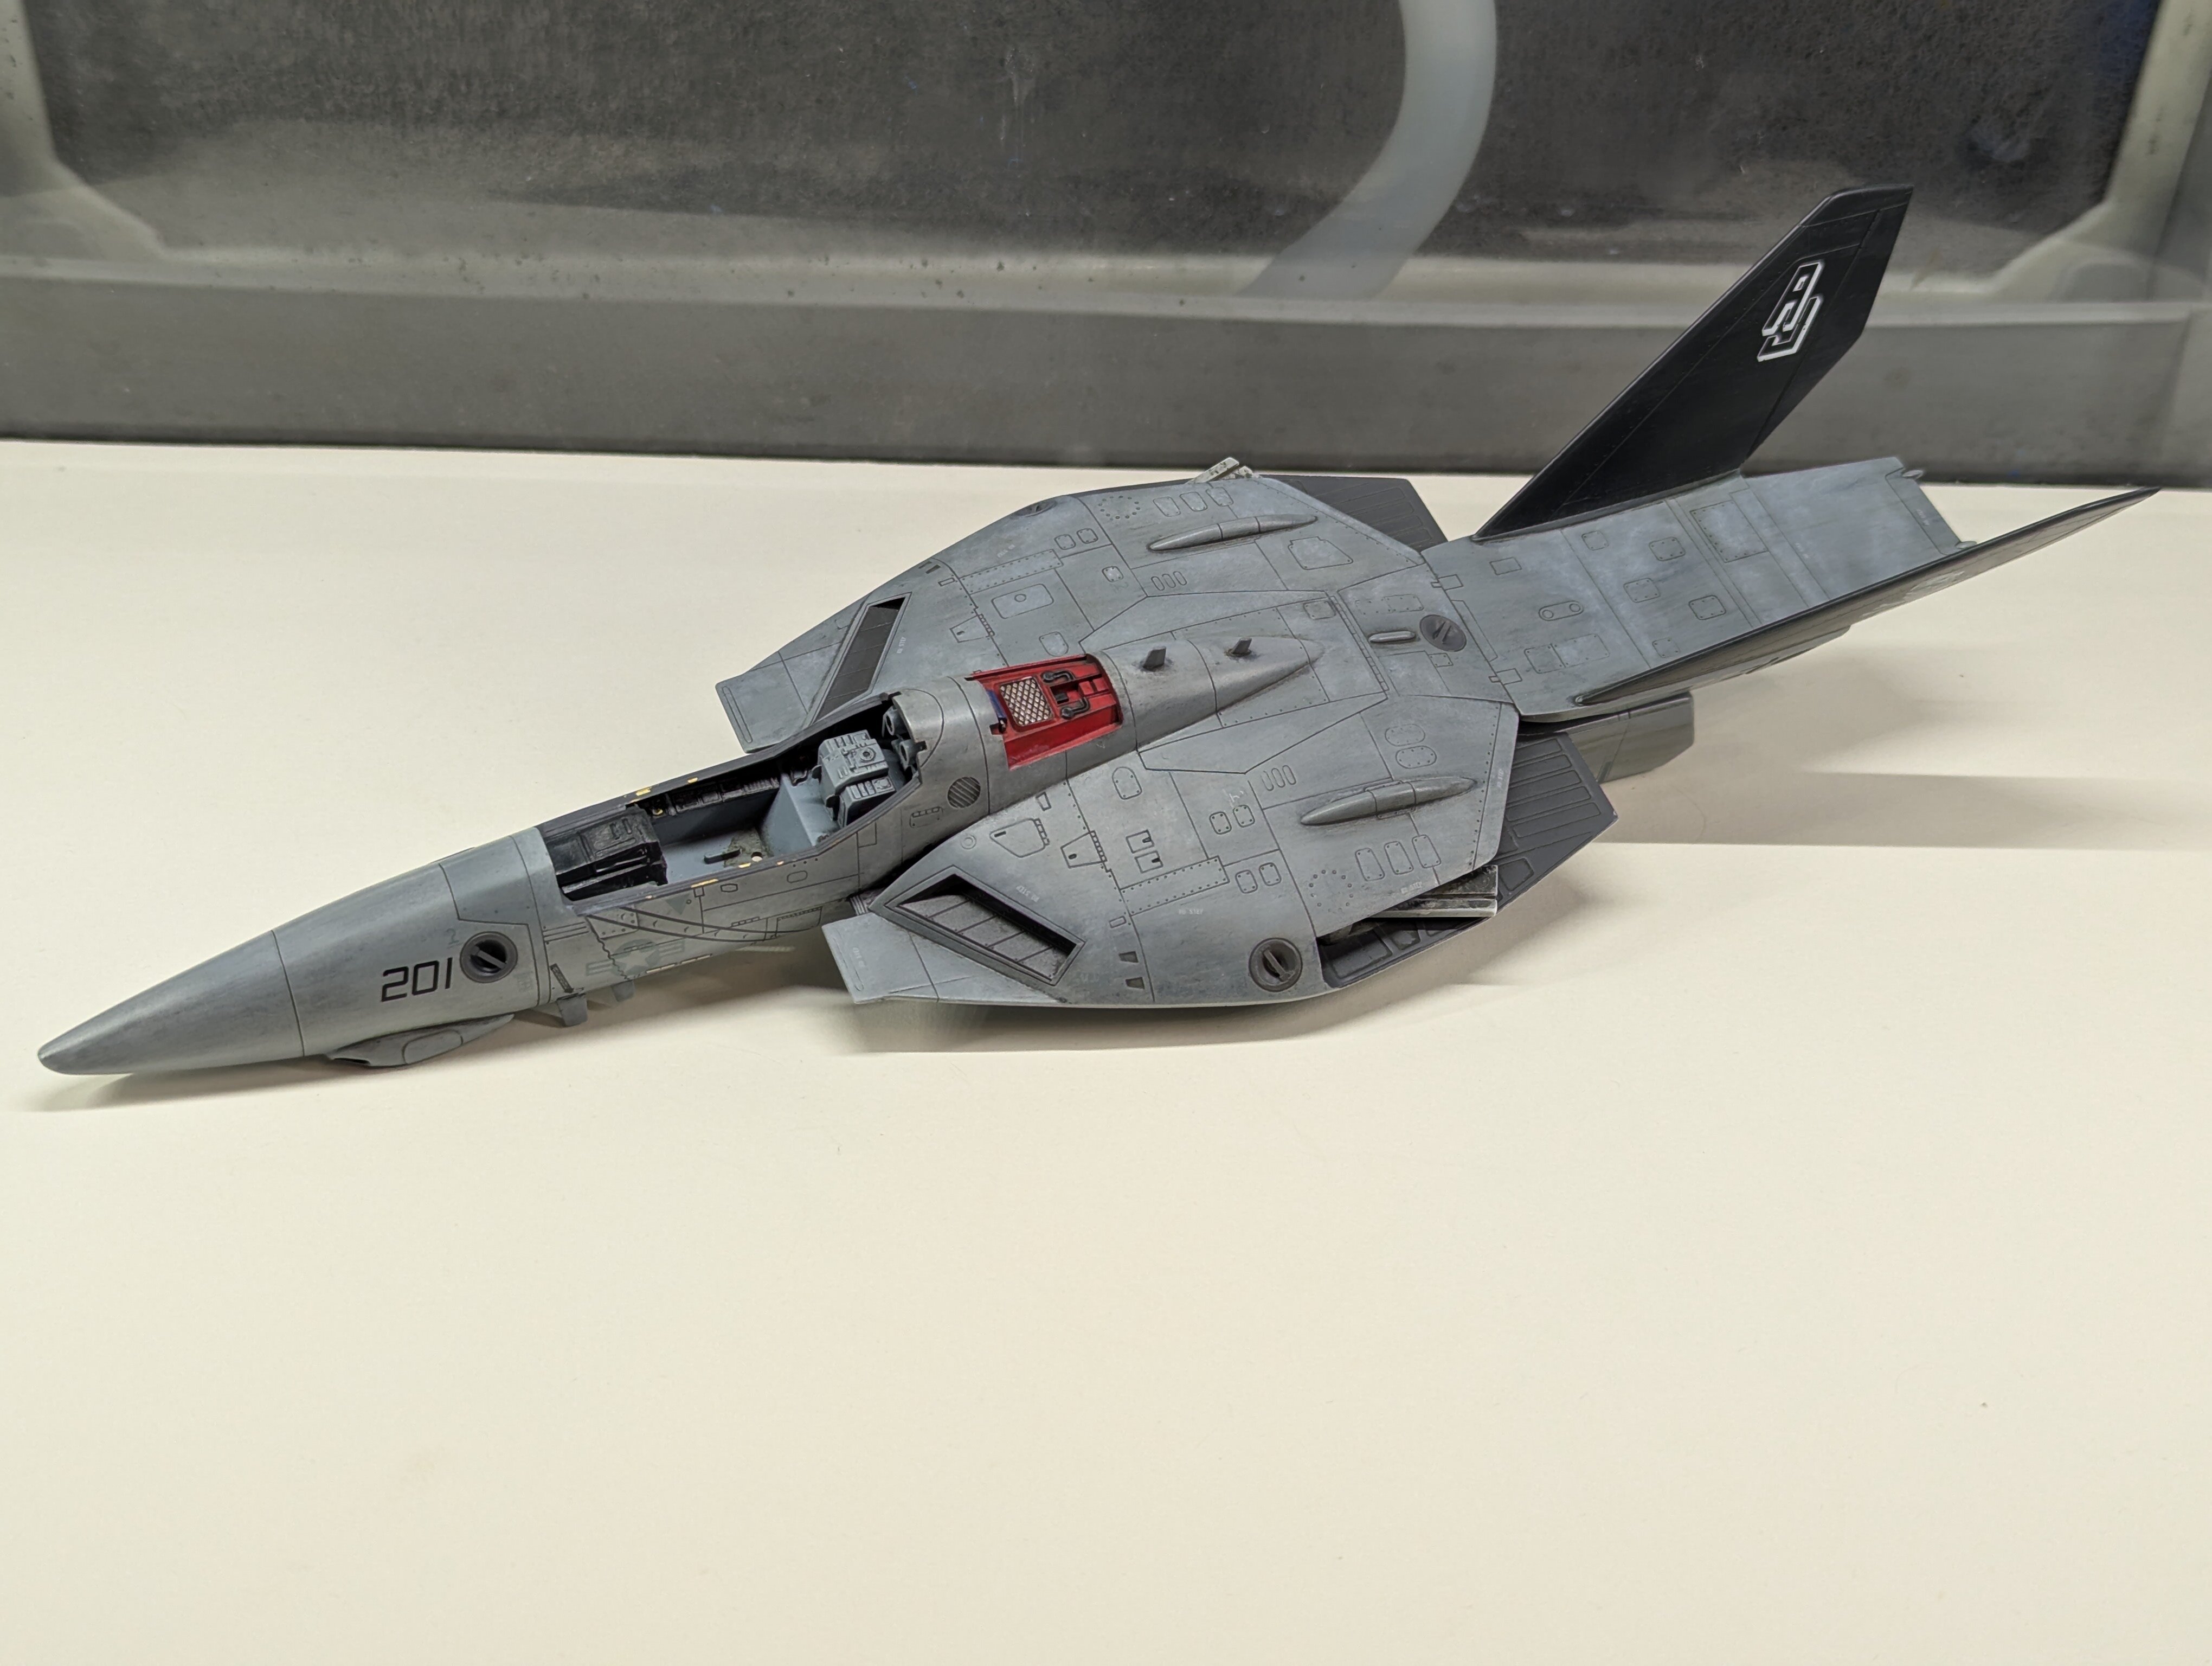
-
1/48 Hasegawa VF-1S "What If?" US Navy VF-84 Jolly Rogers Low Viz
JNordgren42 replied to JNordgren42's topic in The Workshop!
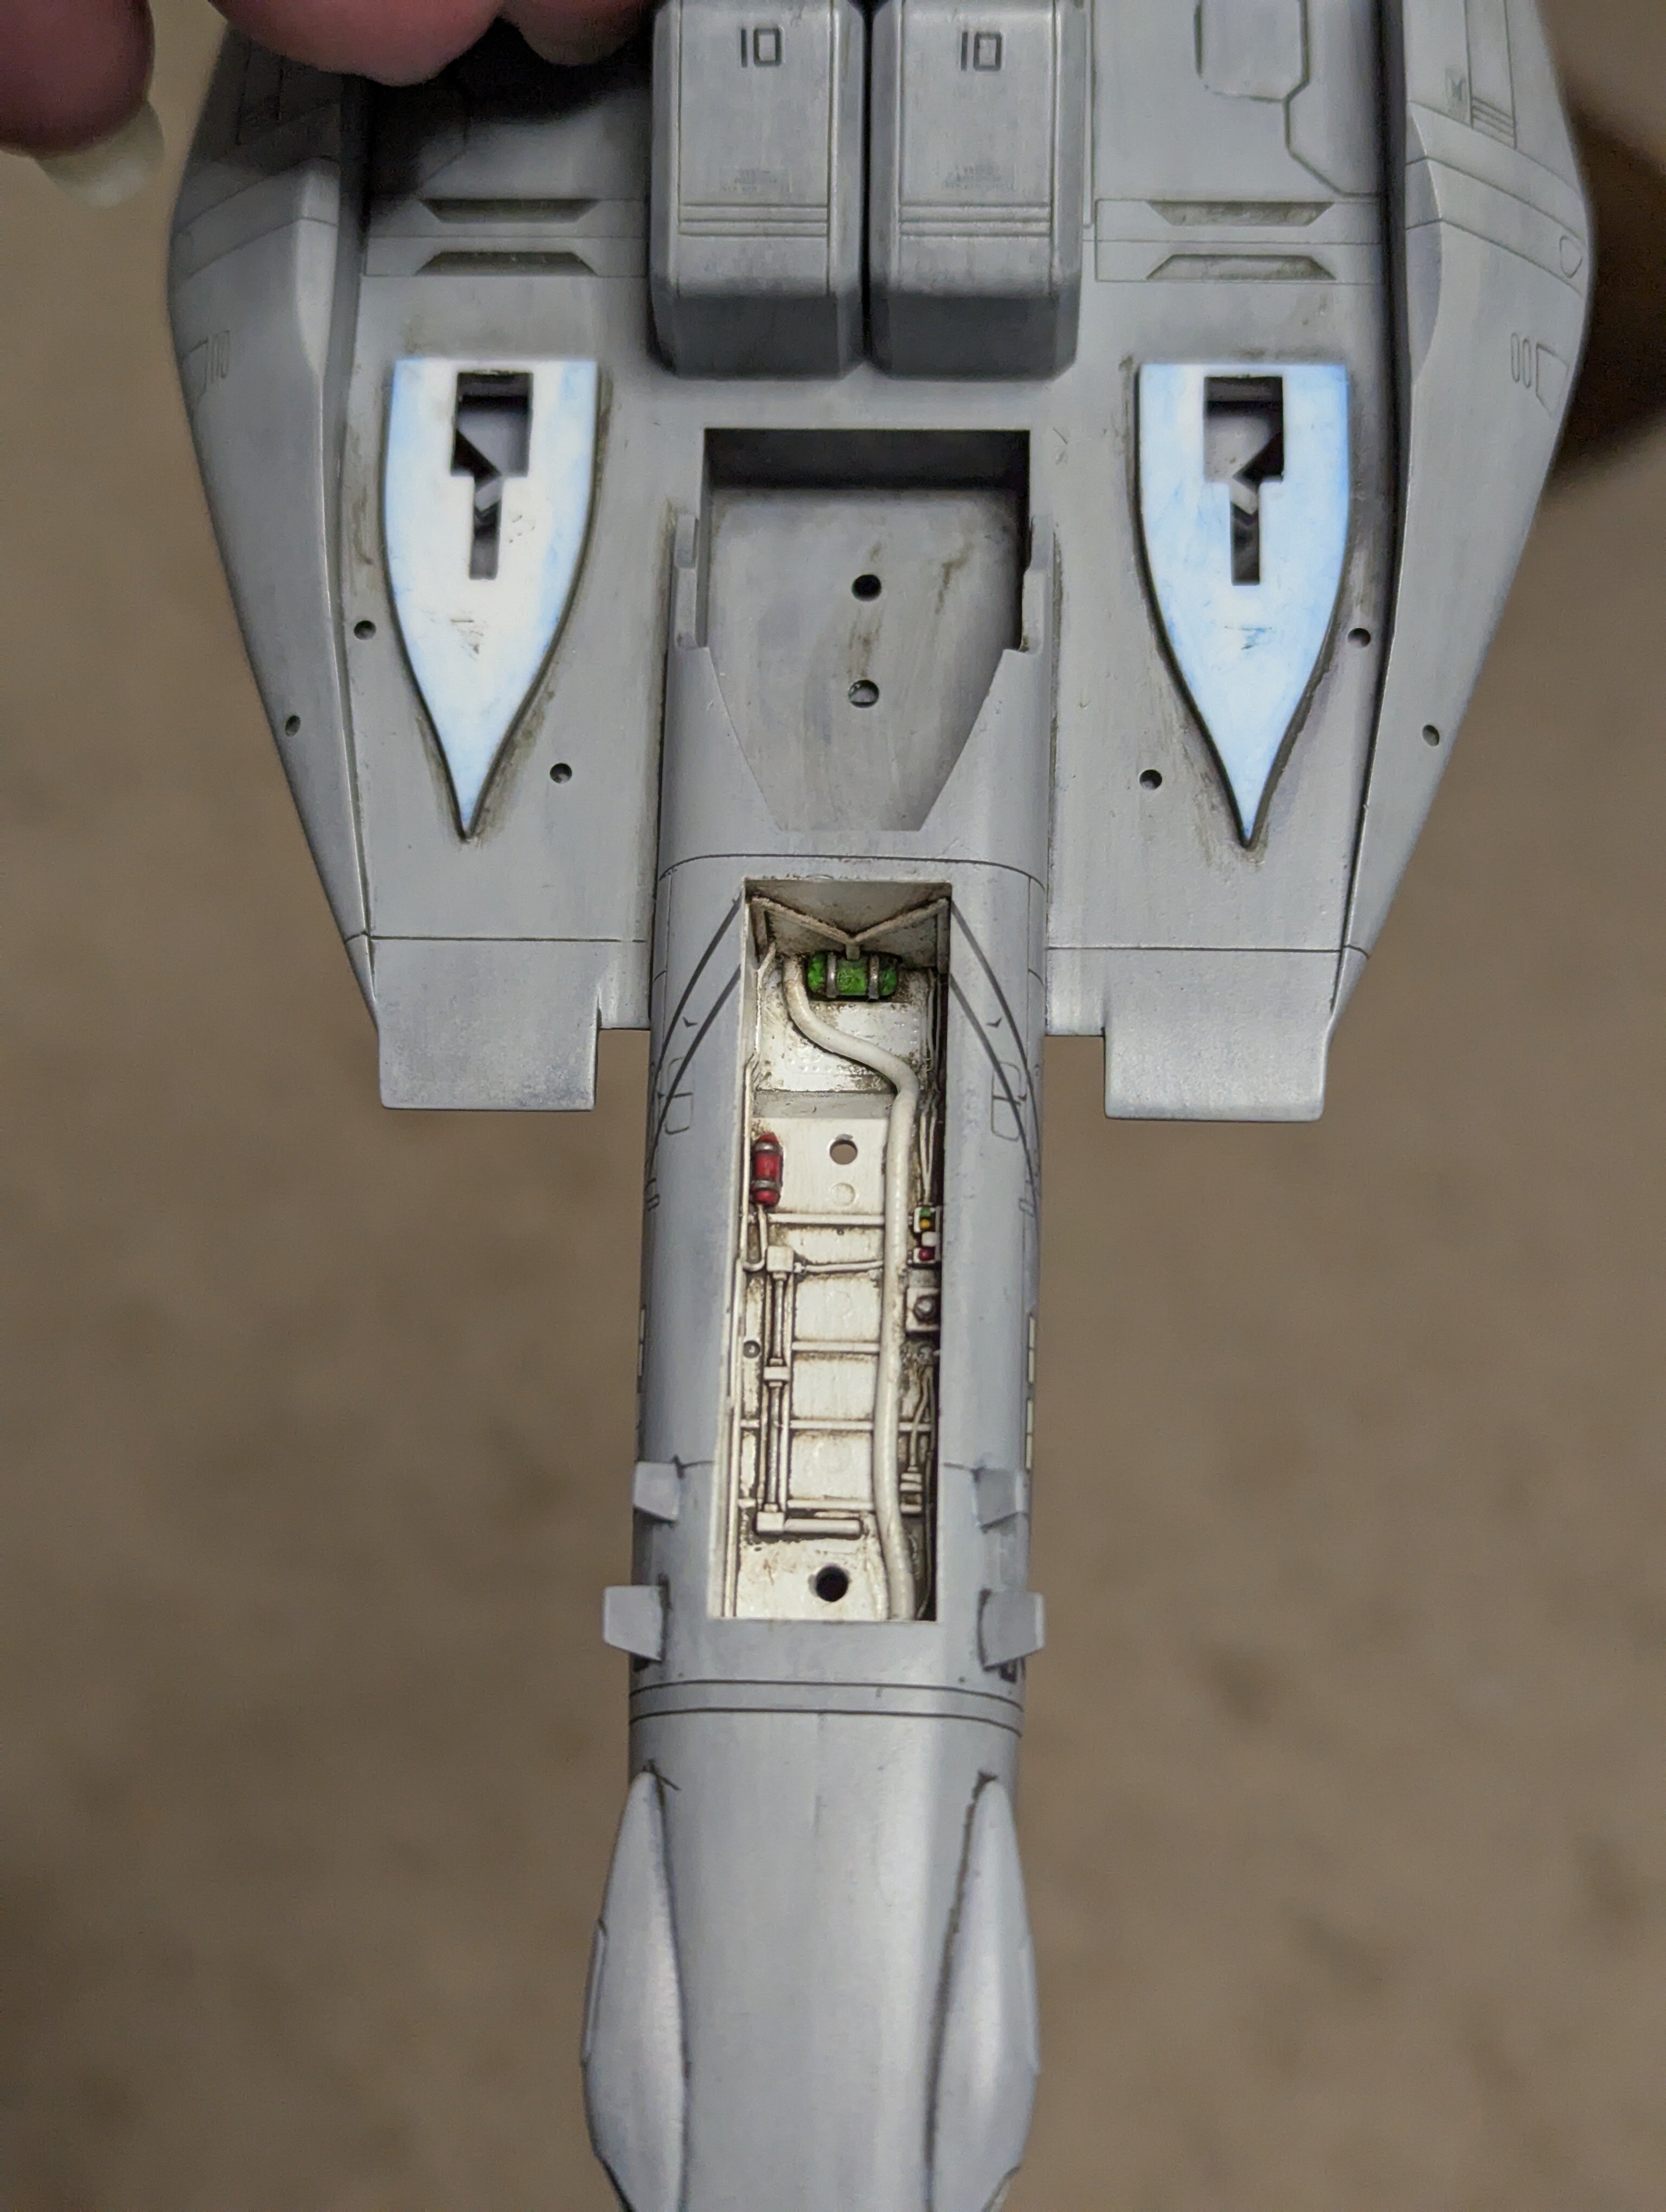
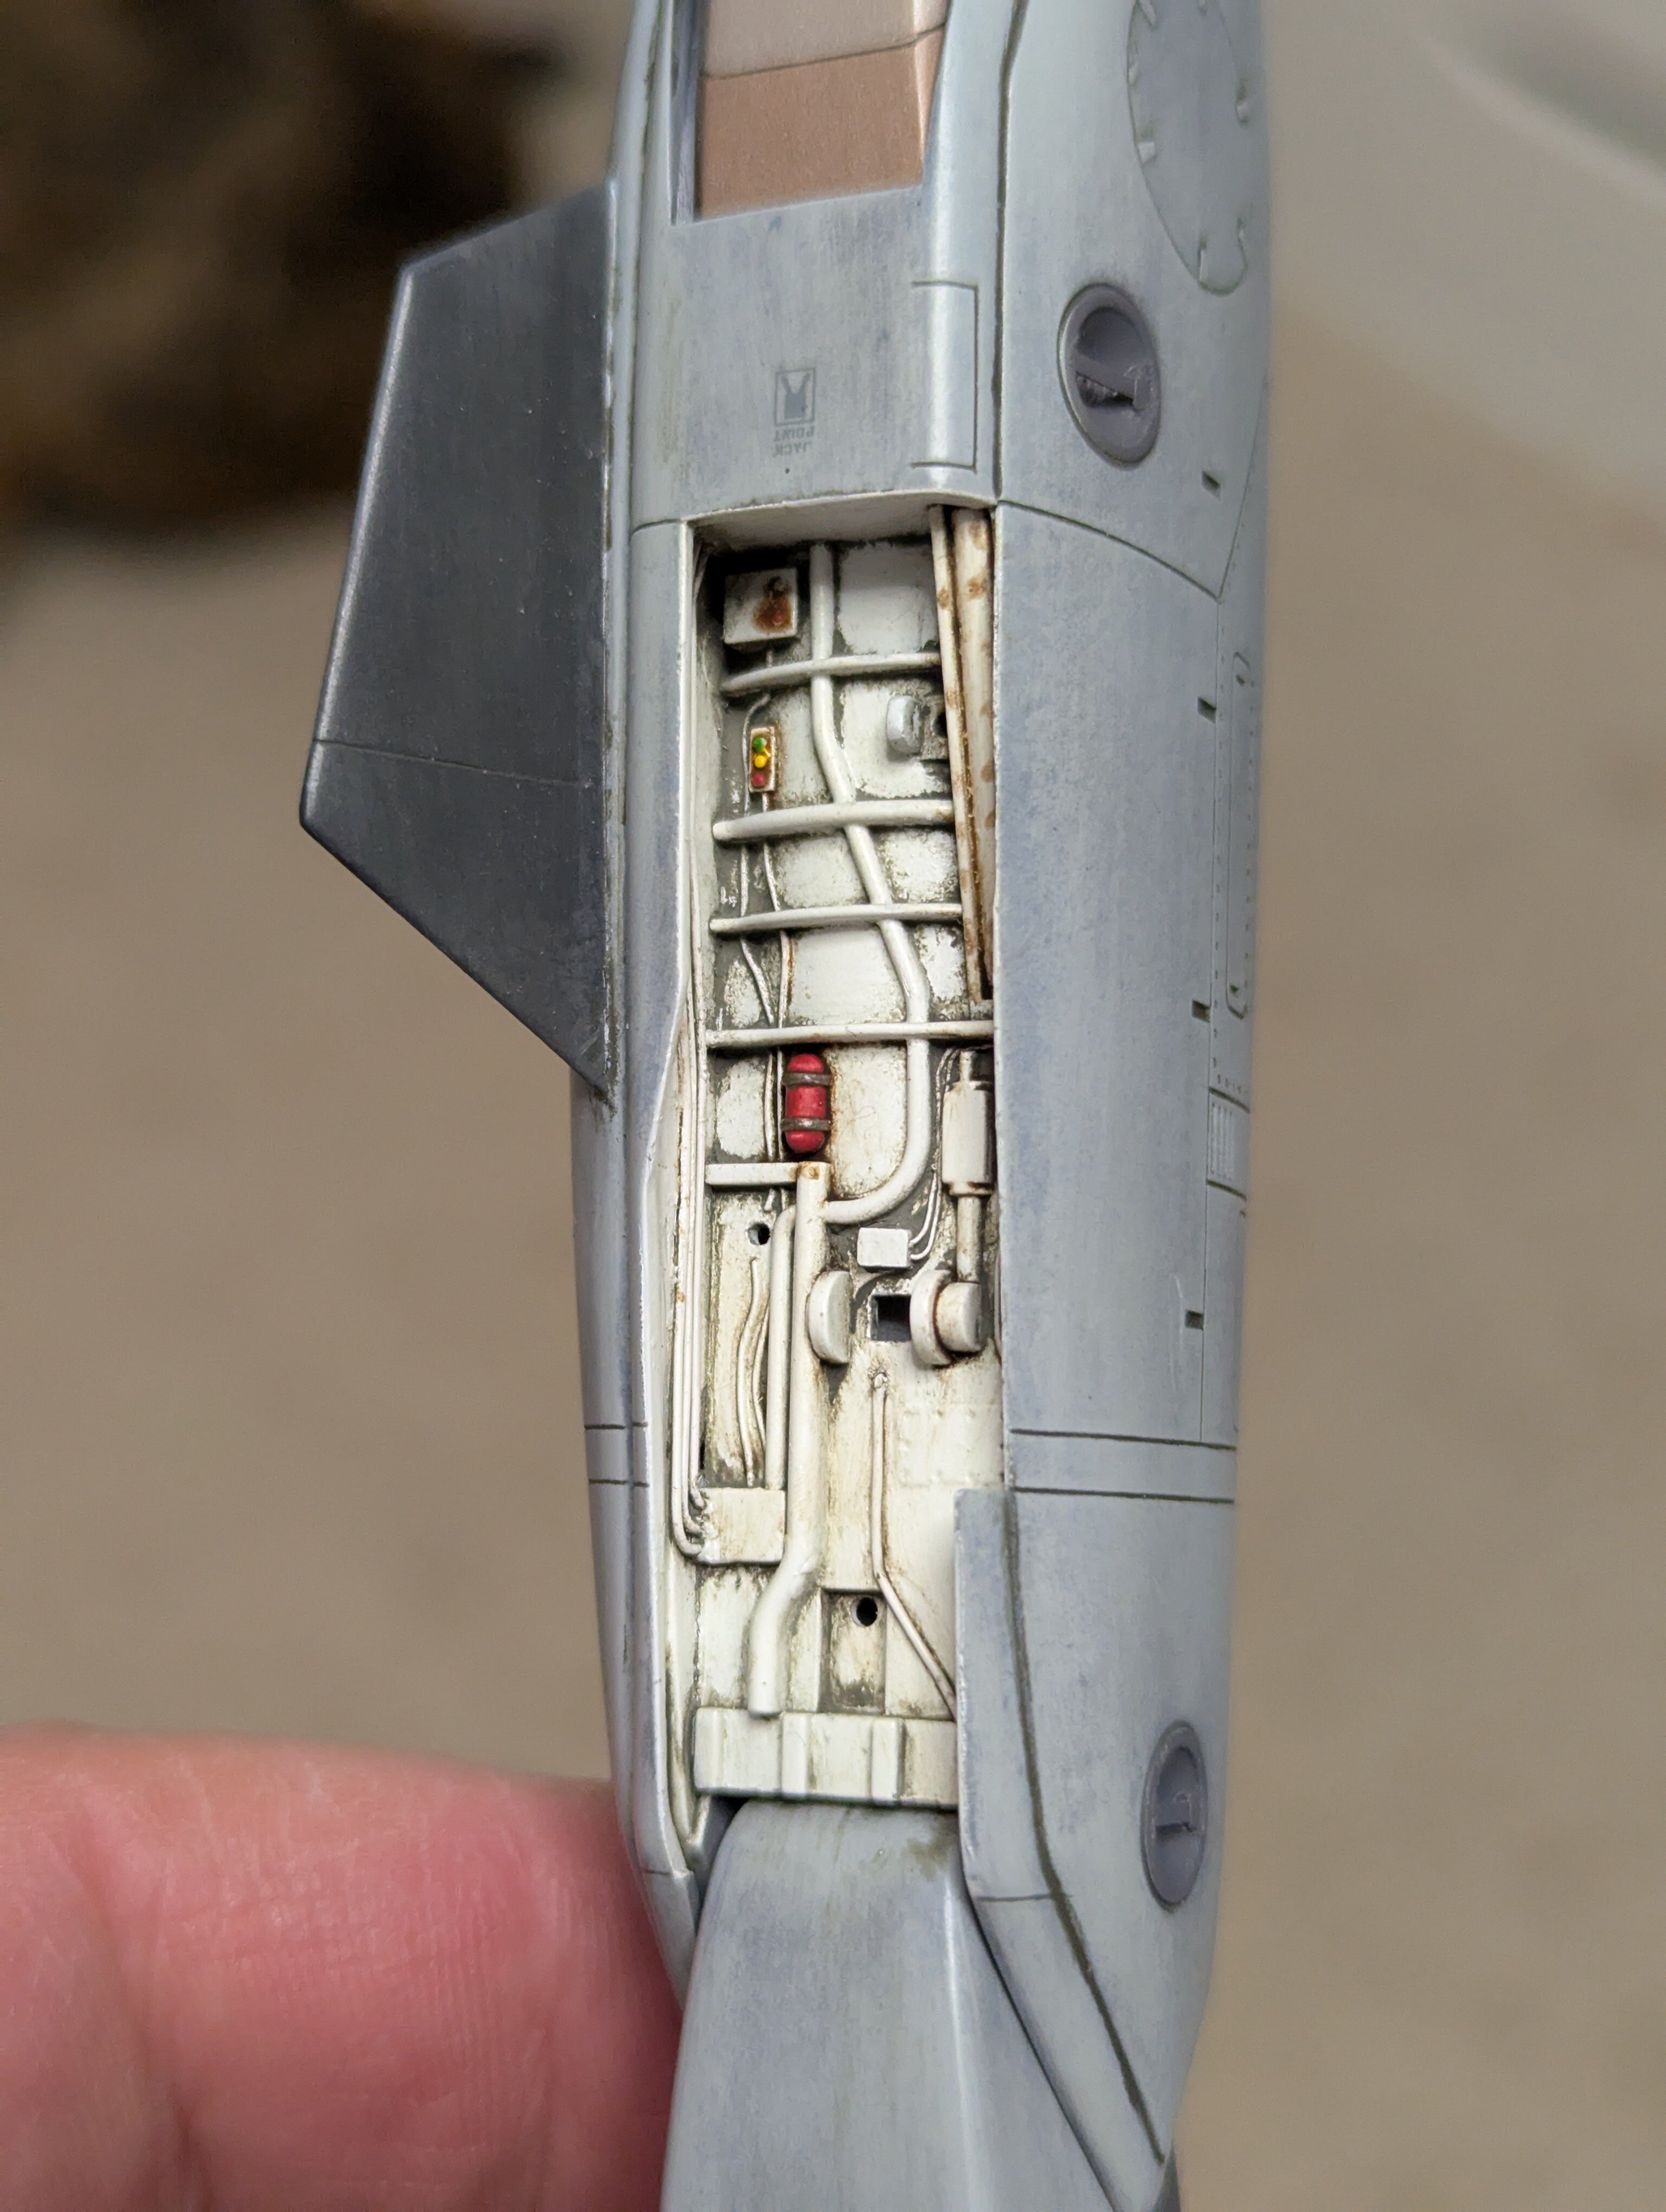
Thanks! It's been a really fun build and I'm enjoying it so far and really pushing myself with new techniques. I had a fair amount to time today to start detail painting in the wheel wells and started the oil paint weathering in earnest. I'm experimenting with adding some exhaust streaking from the RCS thrusters and I'm really liking how it's working. I'll definitely keep posting updates. Before: After: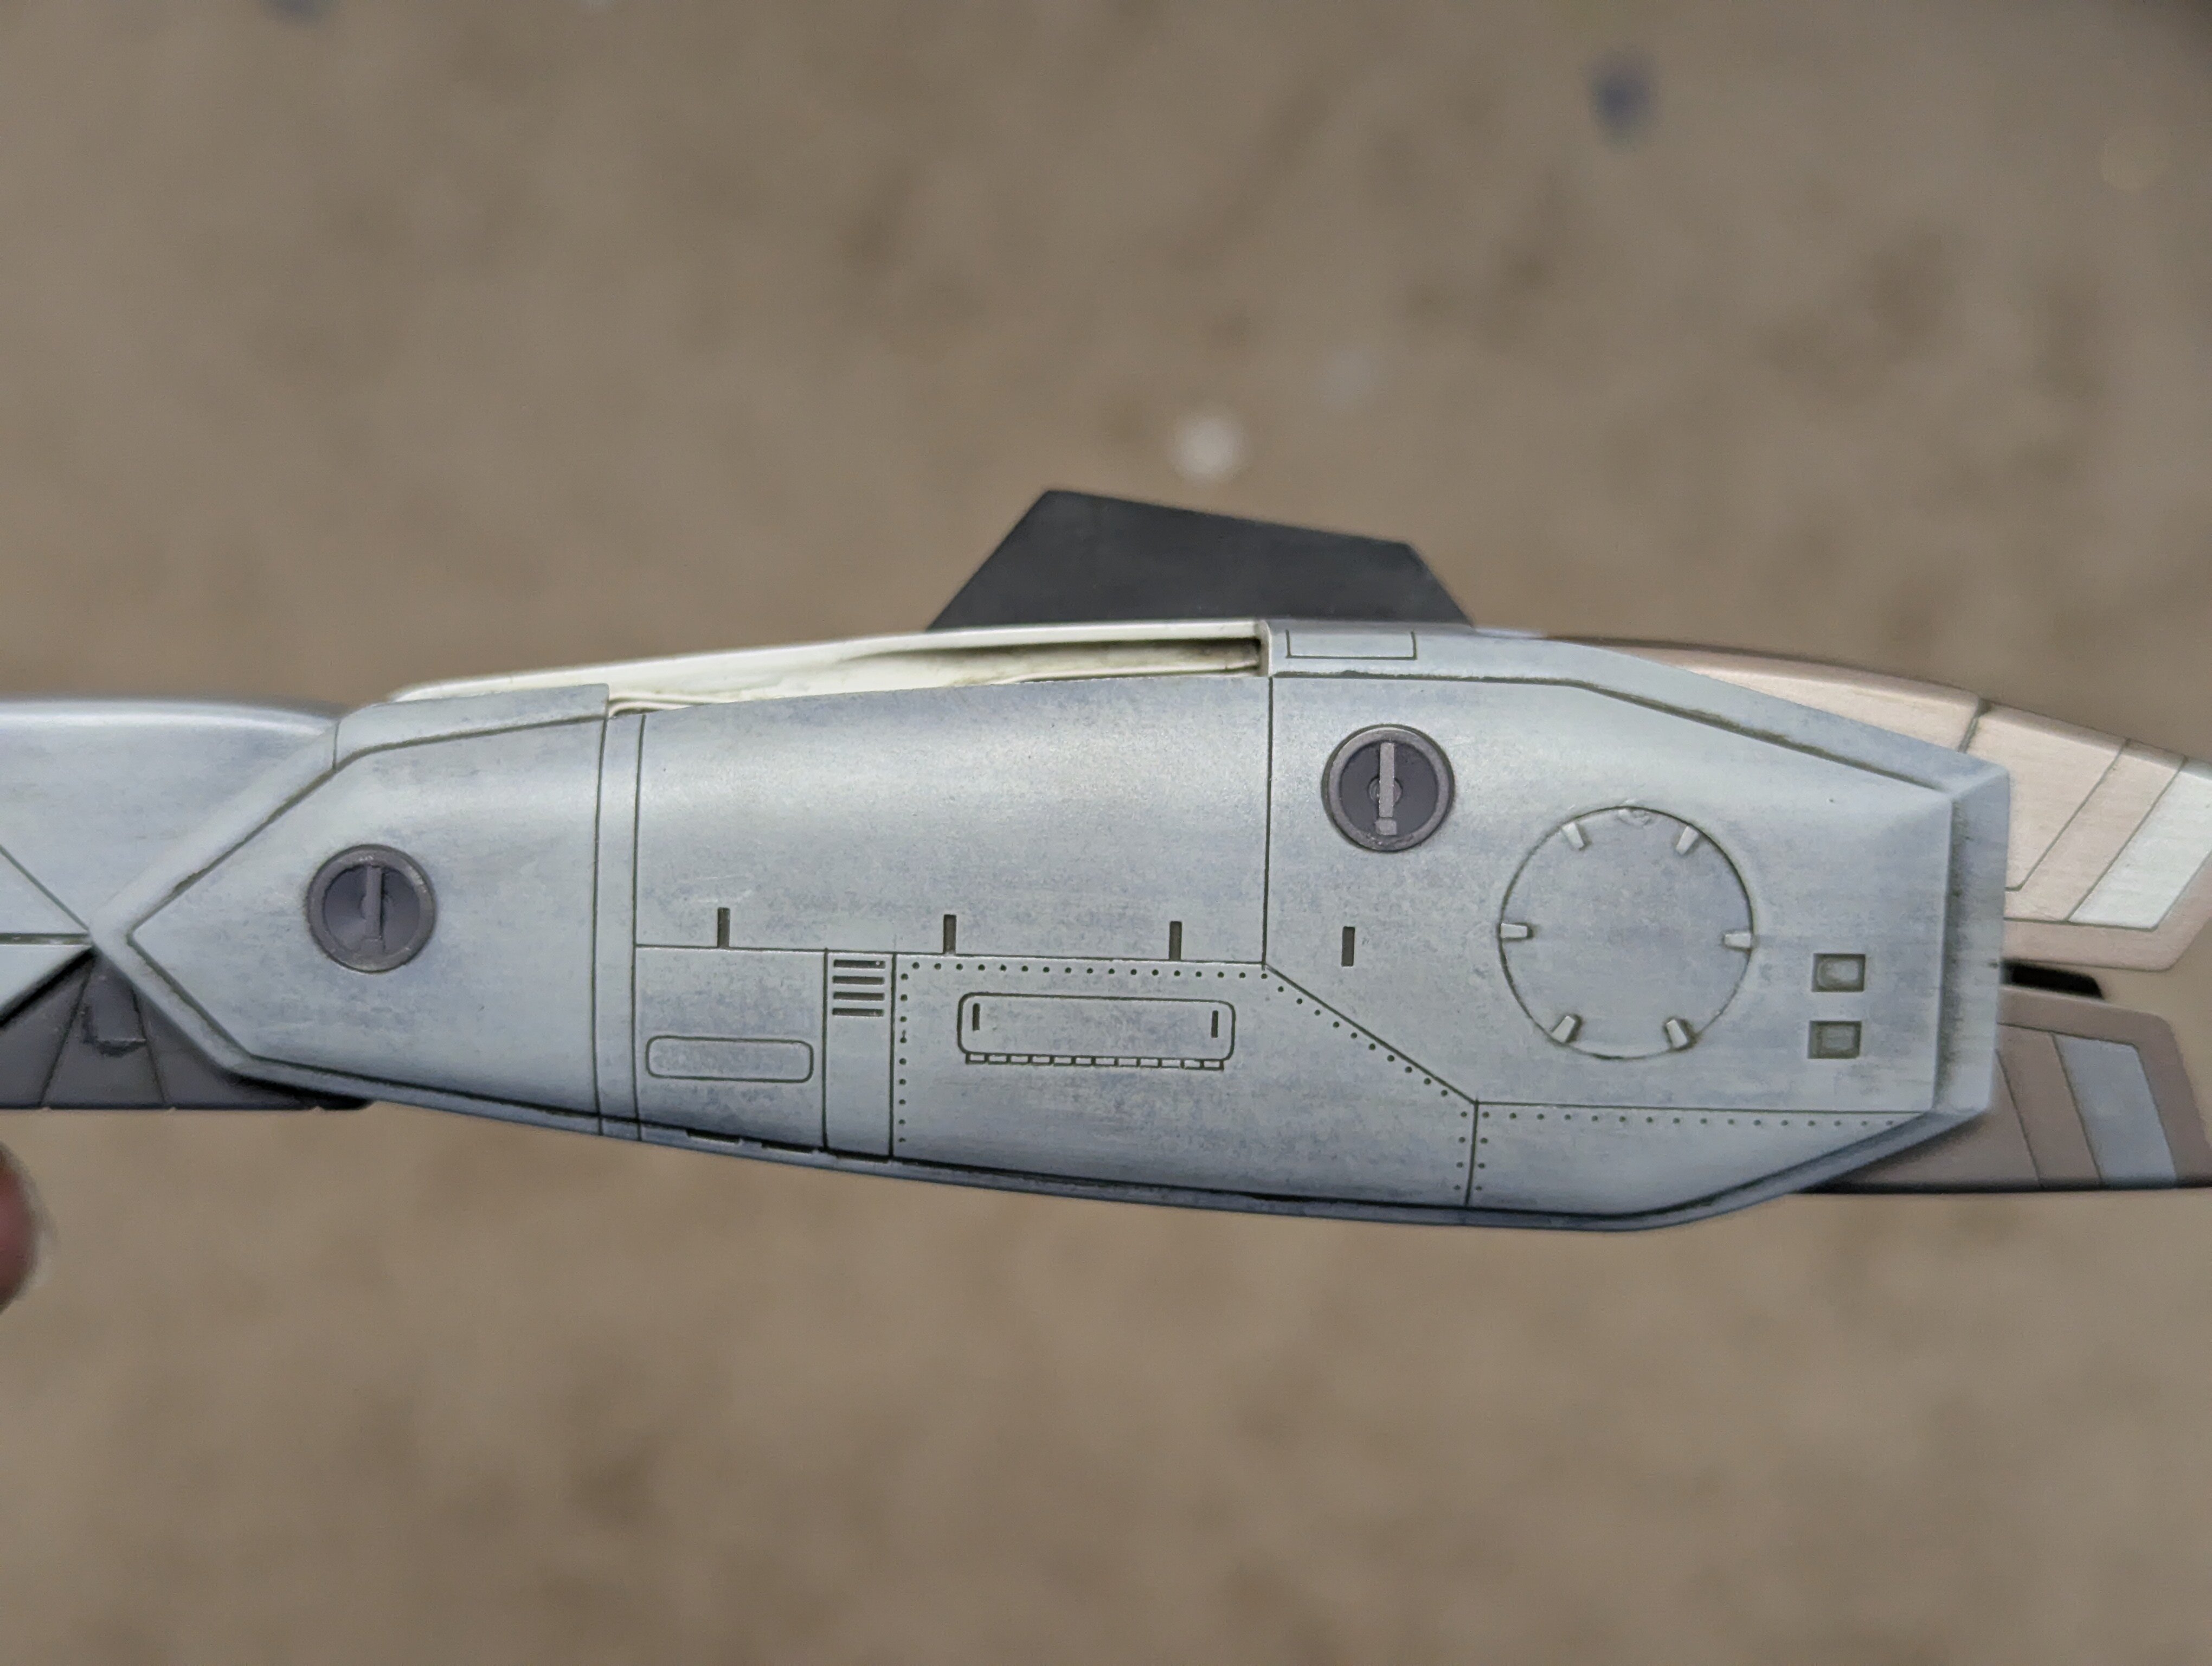
-
1/48 Hasegawa VF-1S "What If?" US Navy VF-84 Jolly Rogers Low Viz
JNordgren42 replied to JNordgren42's topic in The Workshop!
Thanks! And yep, I chucked them on to my rotary too and put the grooves in. A small detail,but worth the time. -
1/48 Hasegawa VF-1S "What If?" US Navy VF-84 Jolly Rogers Low Viz
JNordgren42 replied to JNordgren42's topic in The Workshop!
Thanks for the welcome everyone! I put some time in on the kit pilot figure and decided that the sculpt sucks (the arms, especially the left one, are very weirdly proportioned). So I bit the bullet and ordered a 3D printed F-35A pilot from Reskit (I've used their aftermarket weapons before and I'm very impressed with the quality of their products). The body is printed integral to the seat, but I think it should be fairly easy to trim the seat off and any loss of detail will be on the back, so it should be fine. I'm keeping my fingers crossed that it fits in the cockpit without too much difficulty. -
Looking amazing! I'm a strong proponent of painting as much of the markings on an aircraft as possible.
-
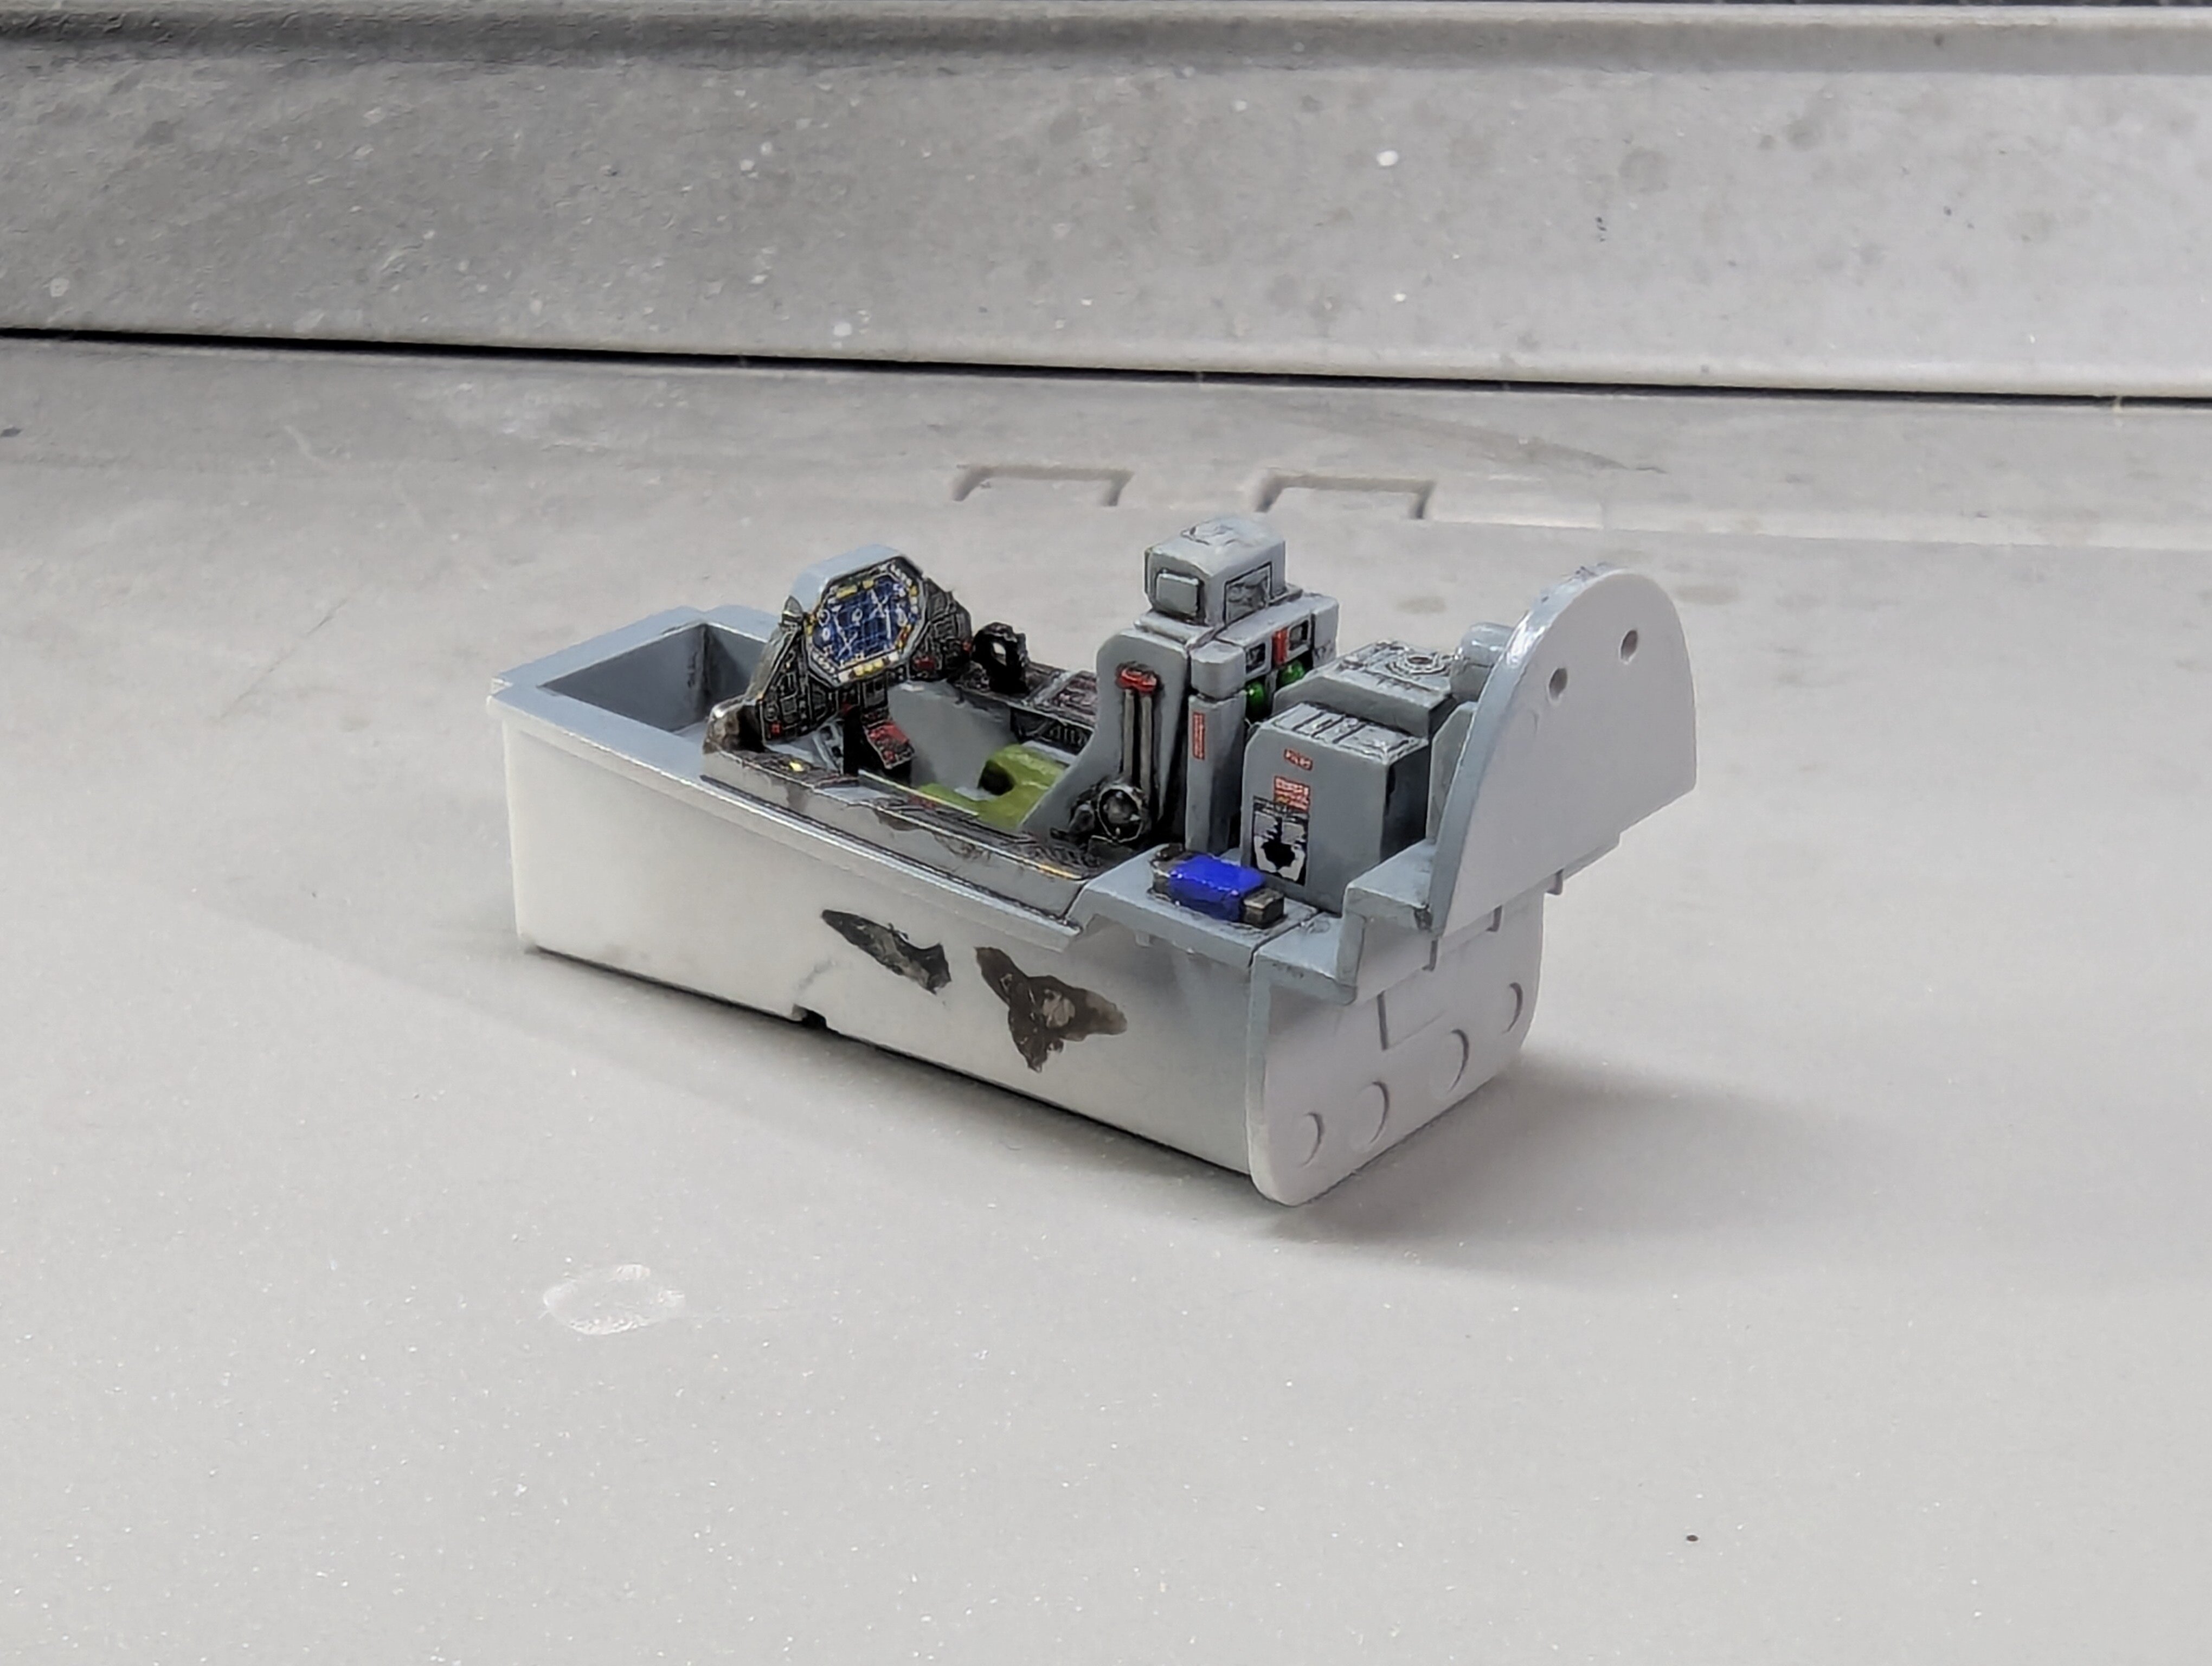
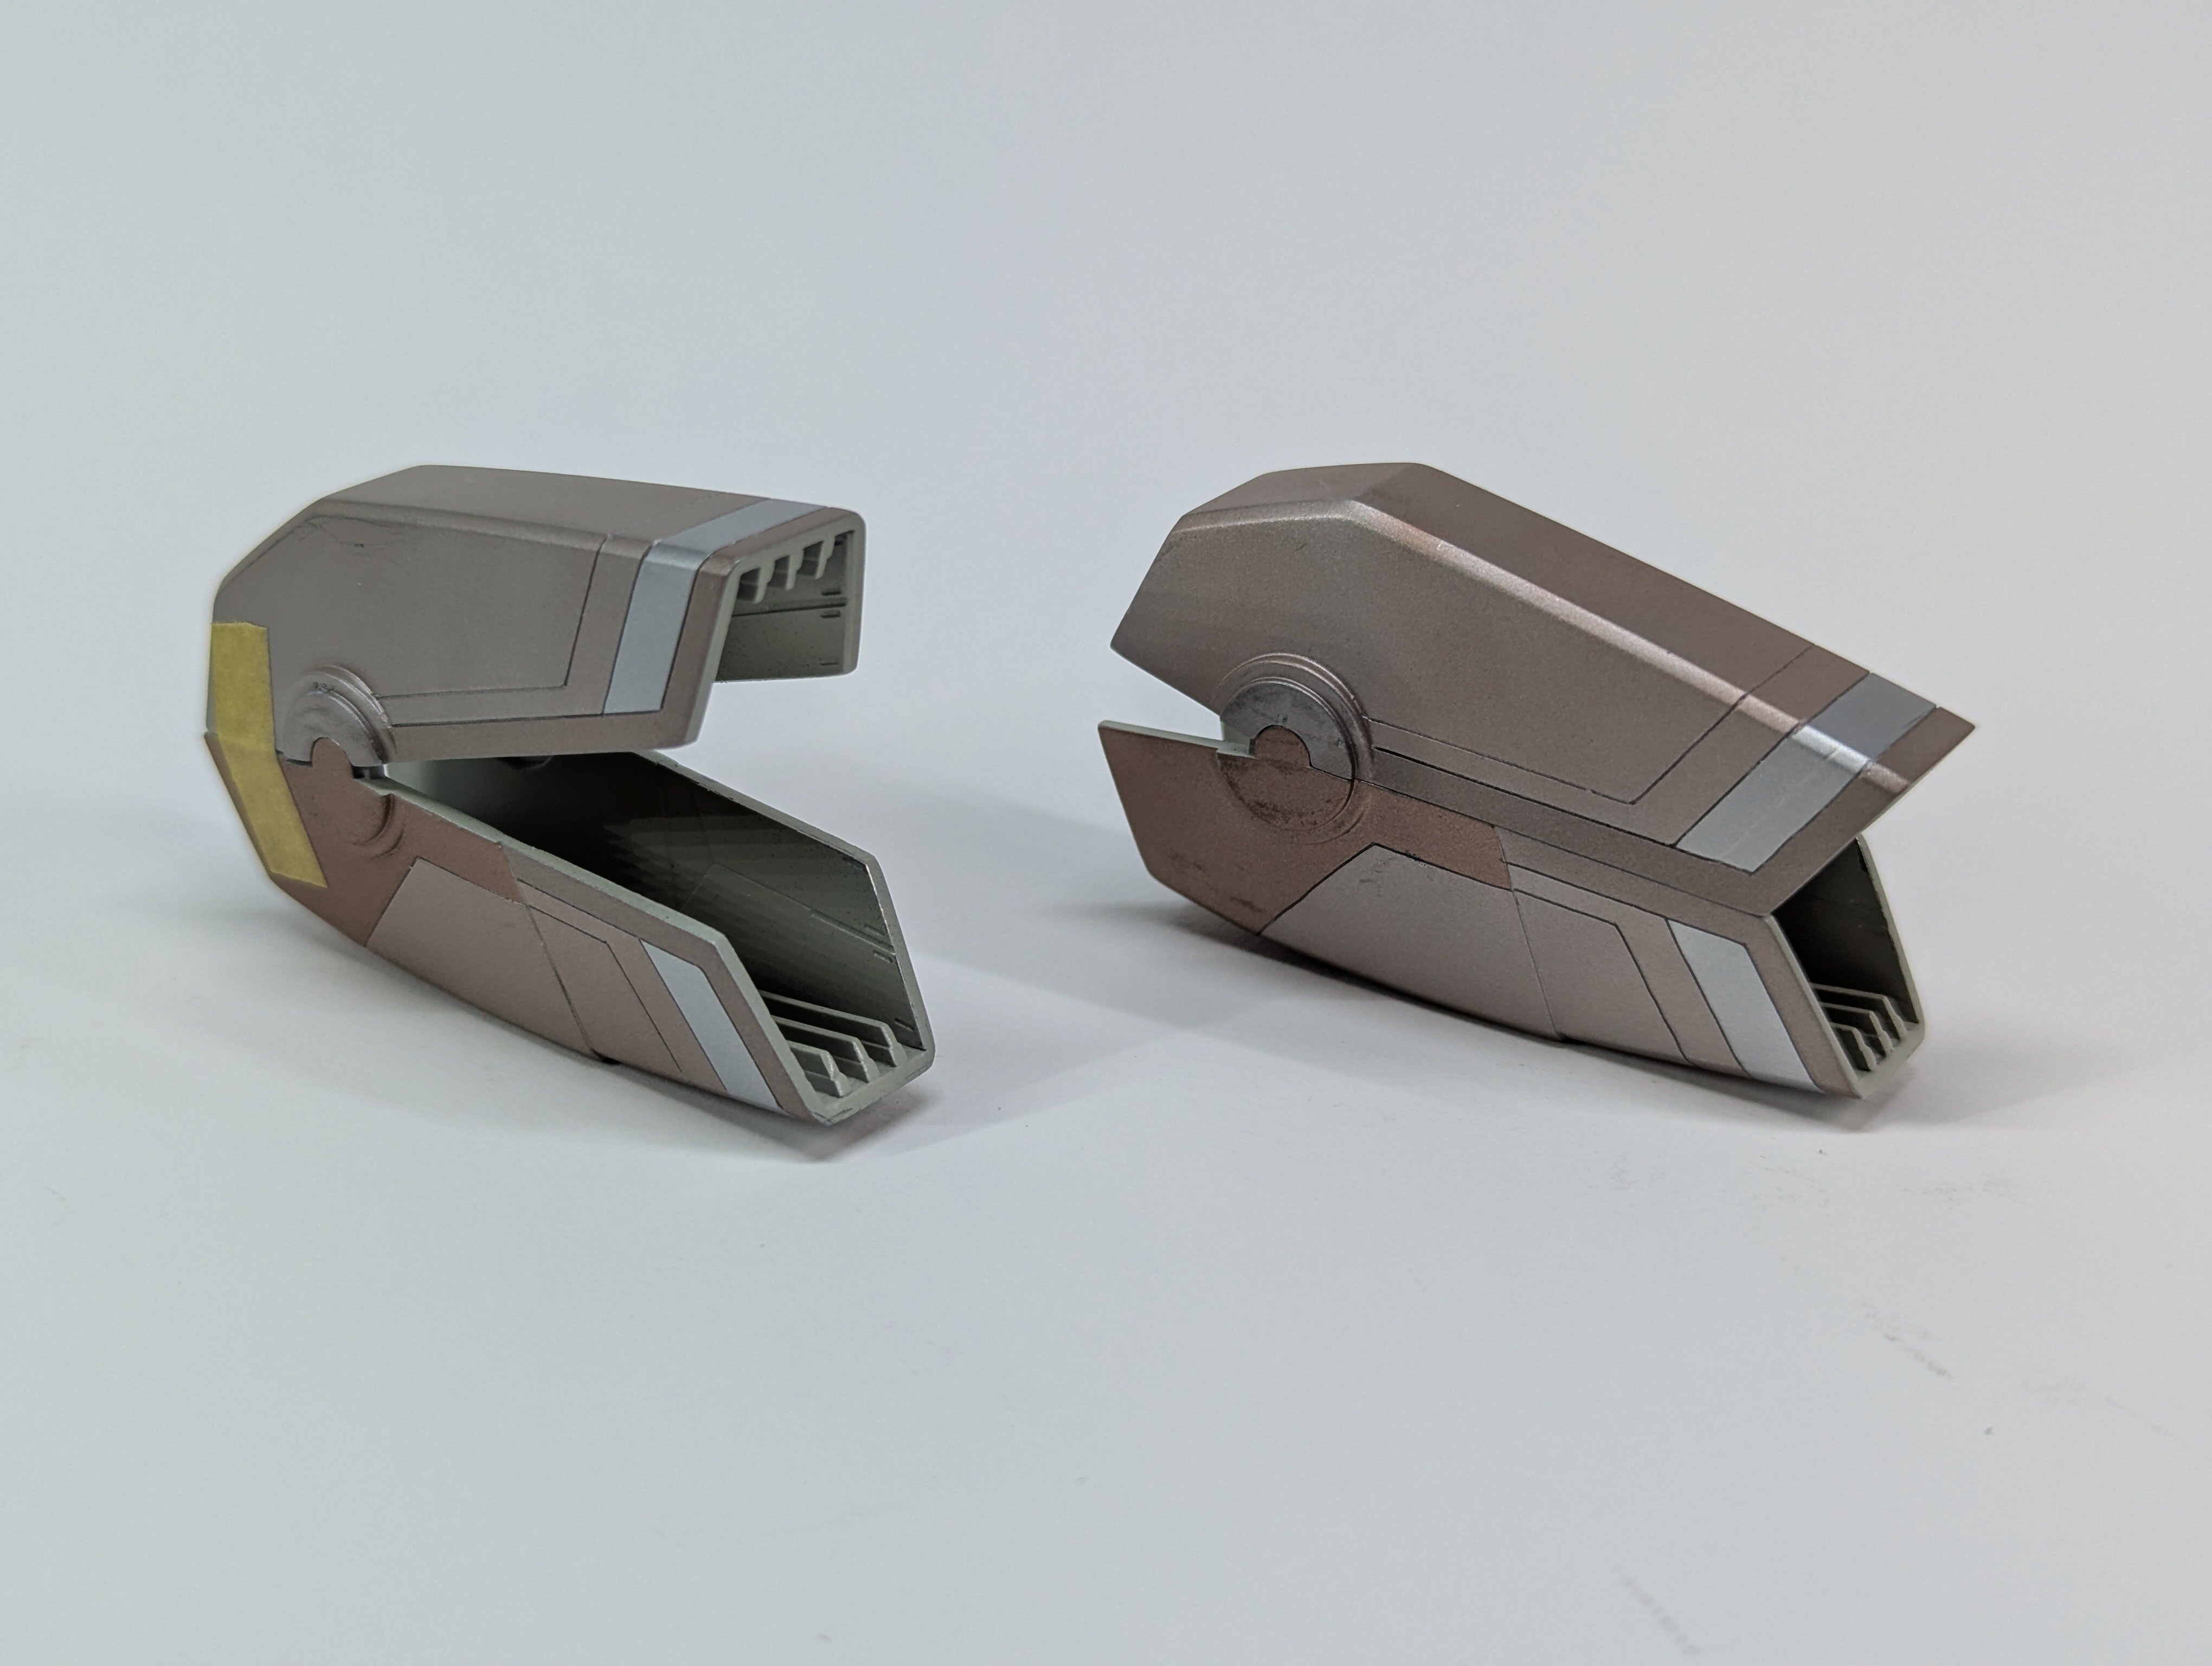
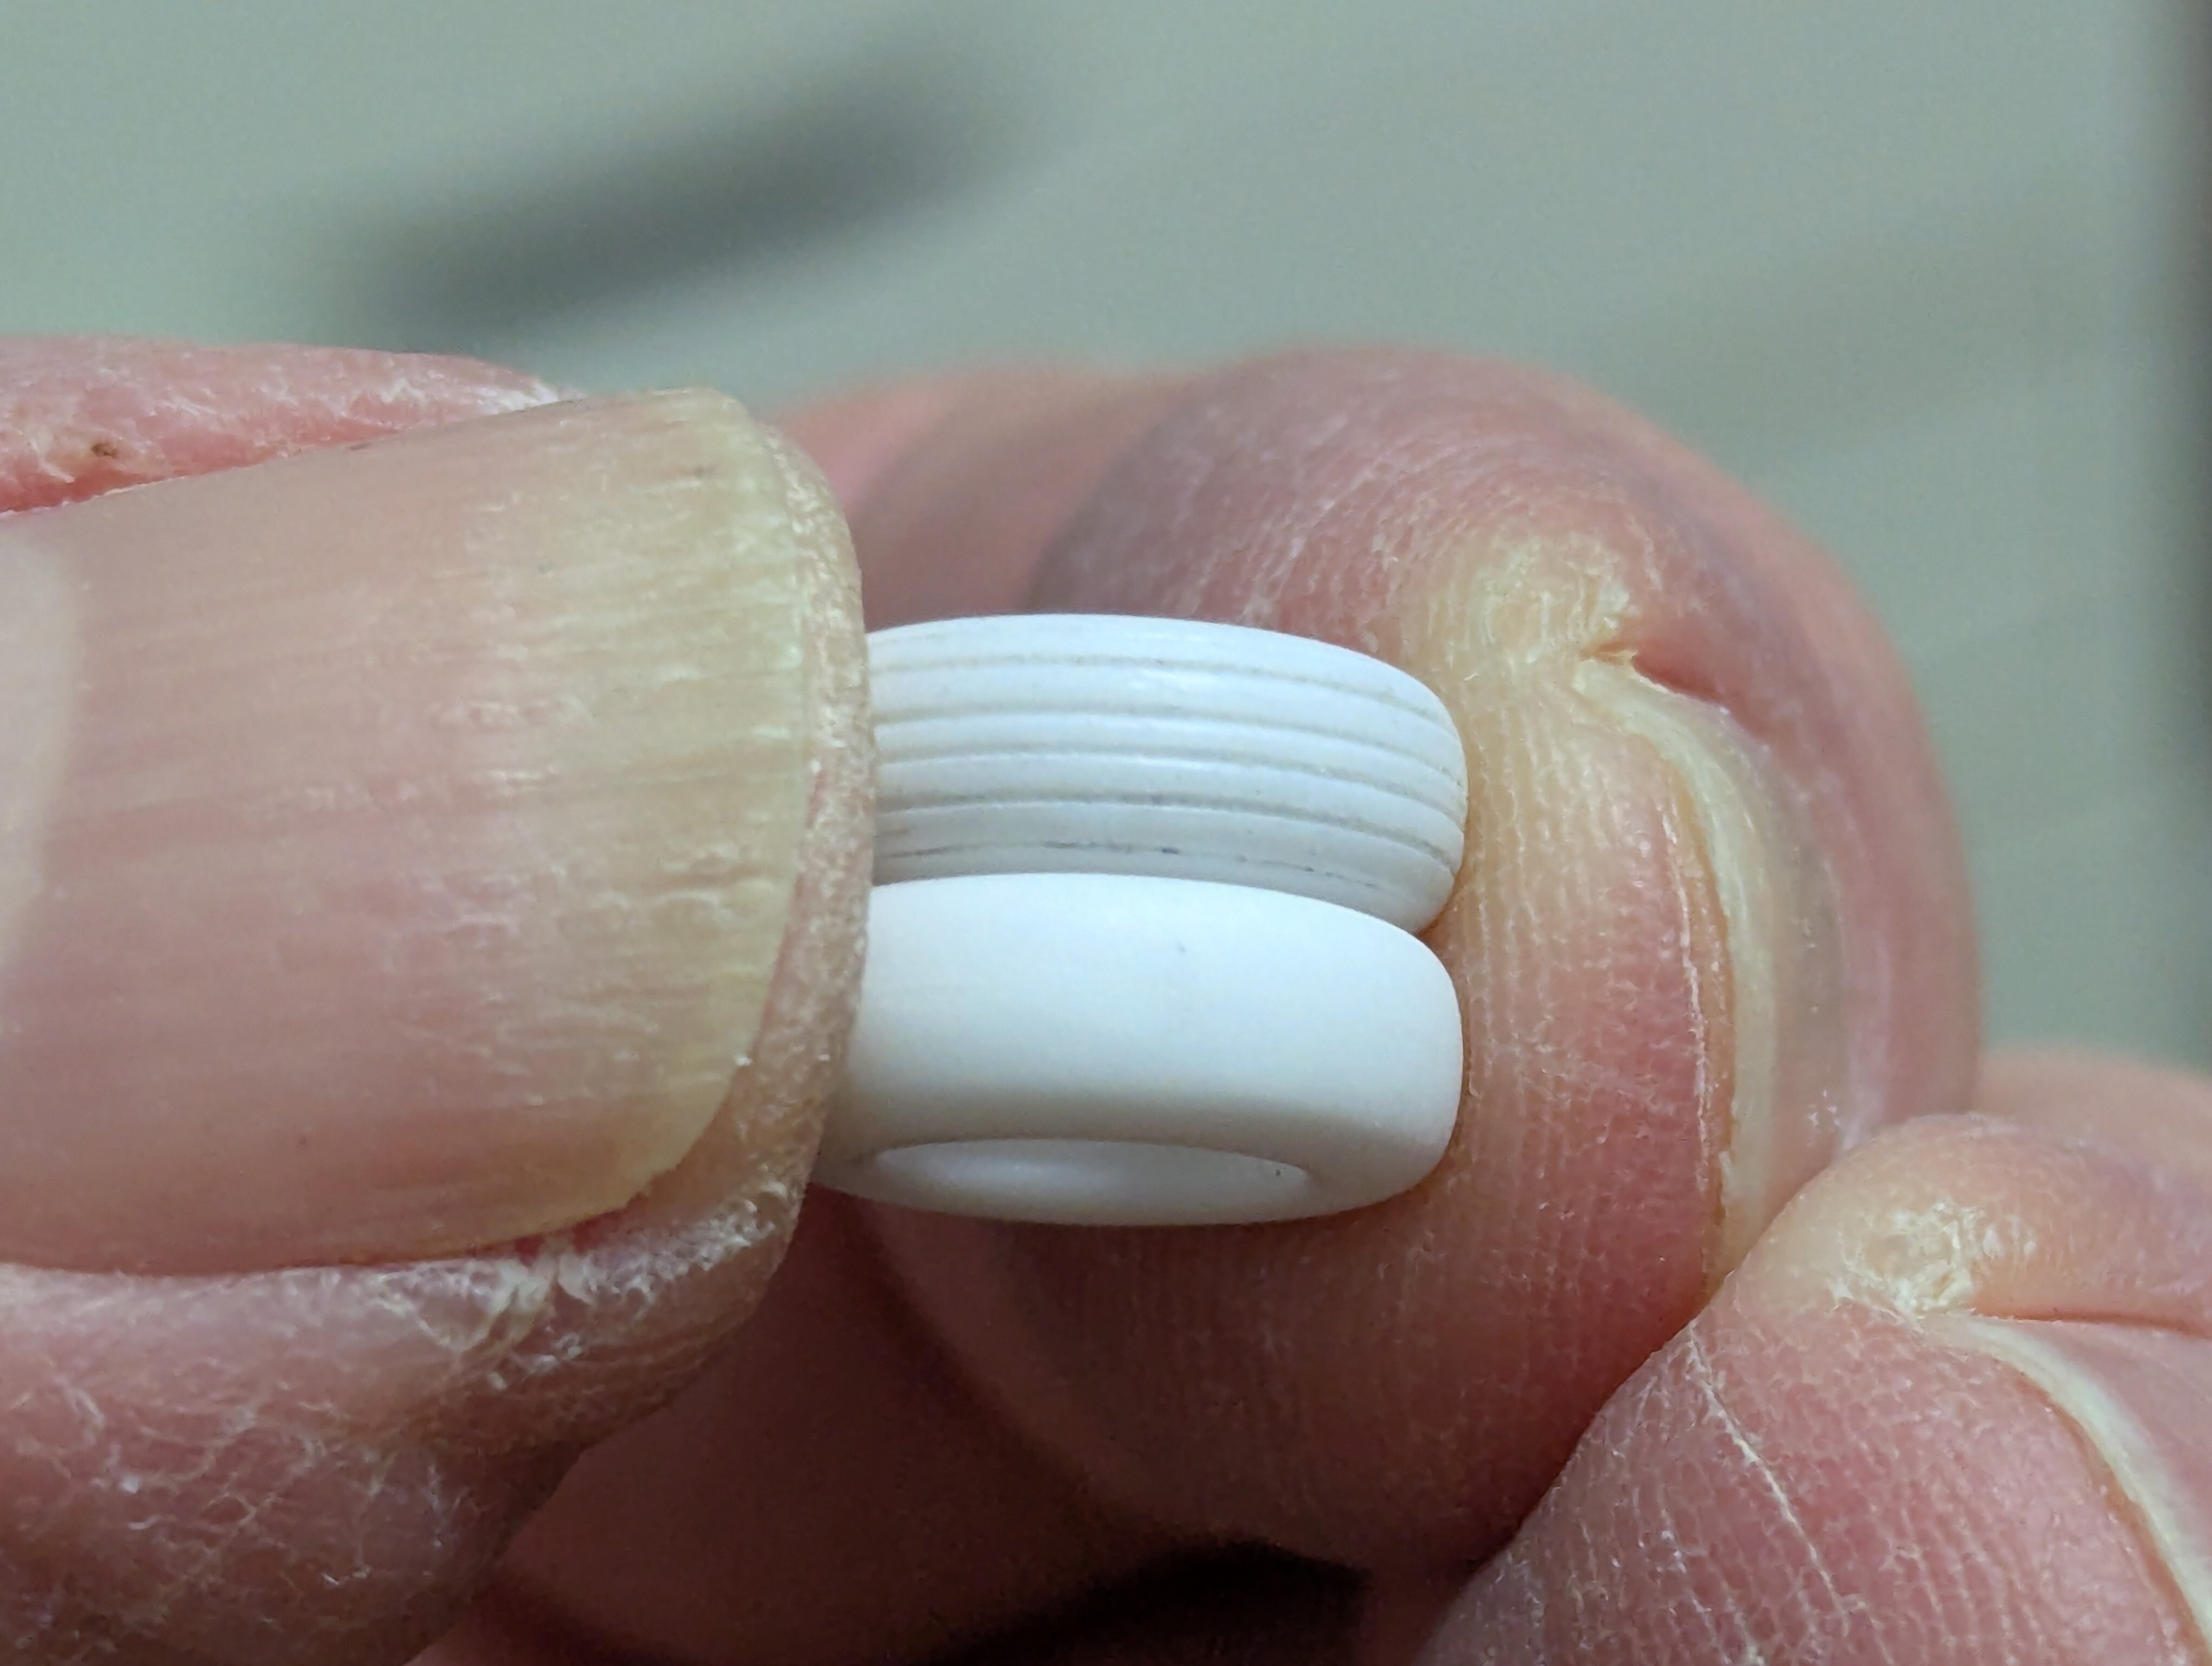
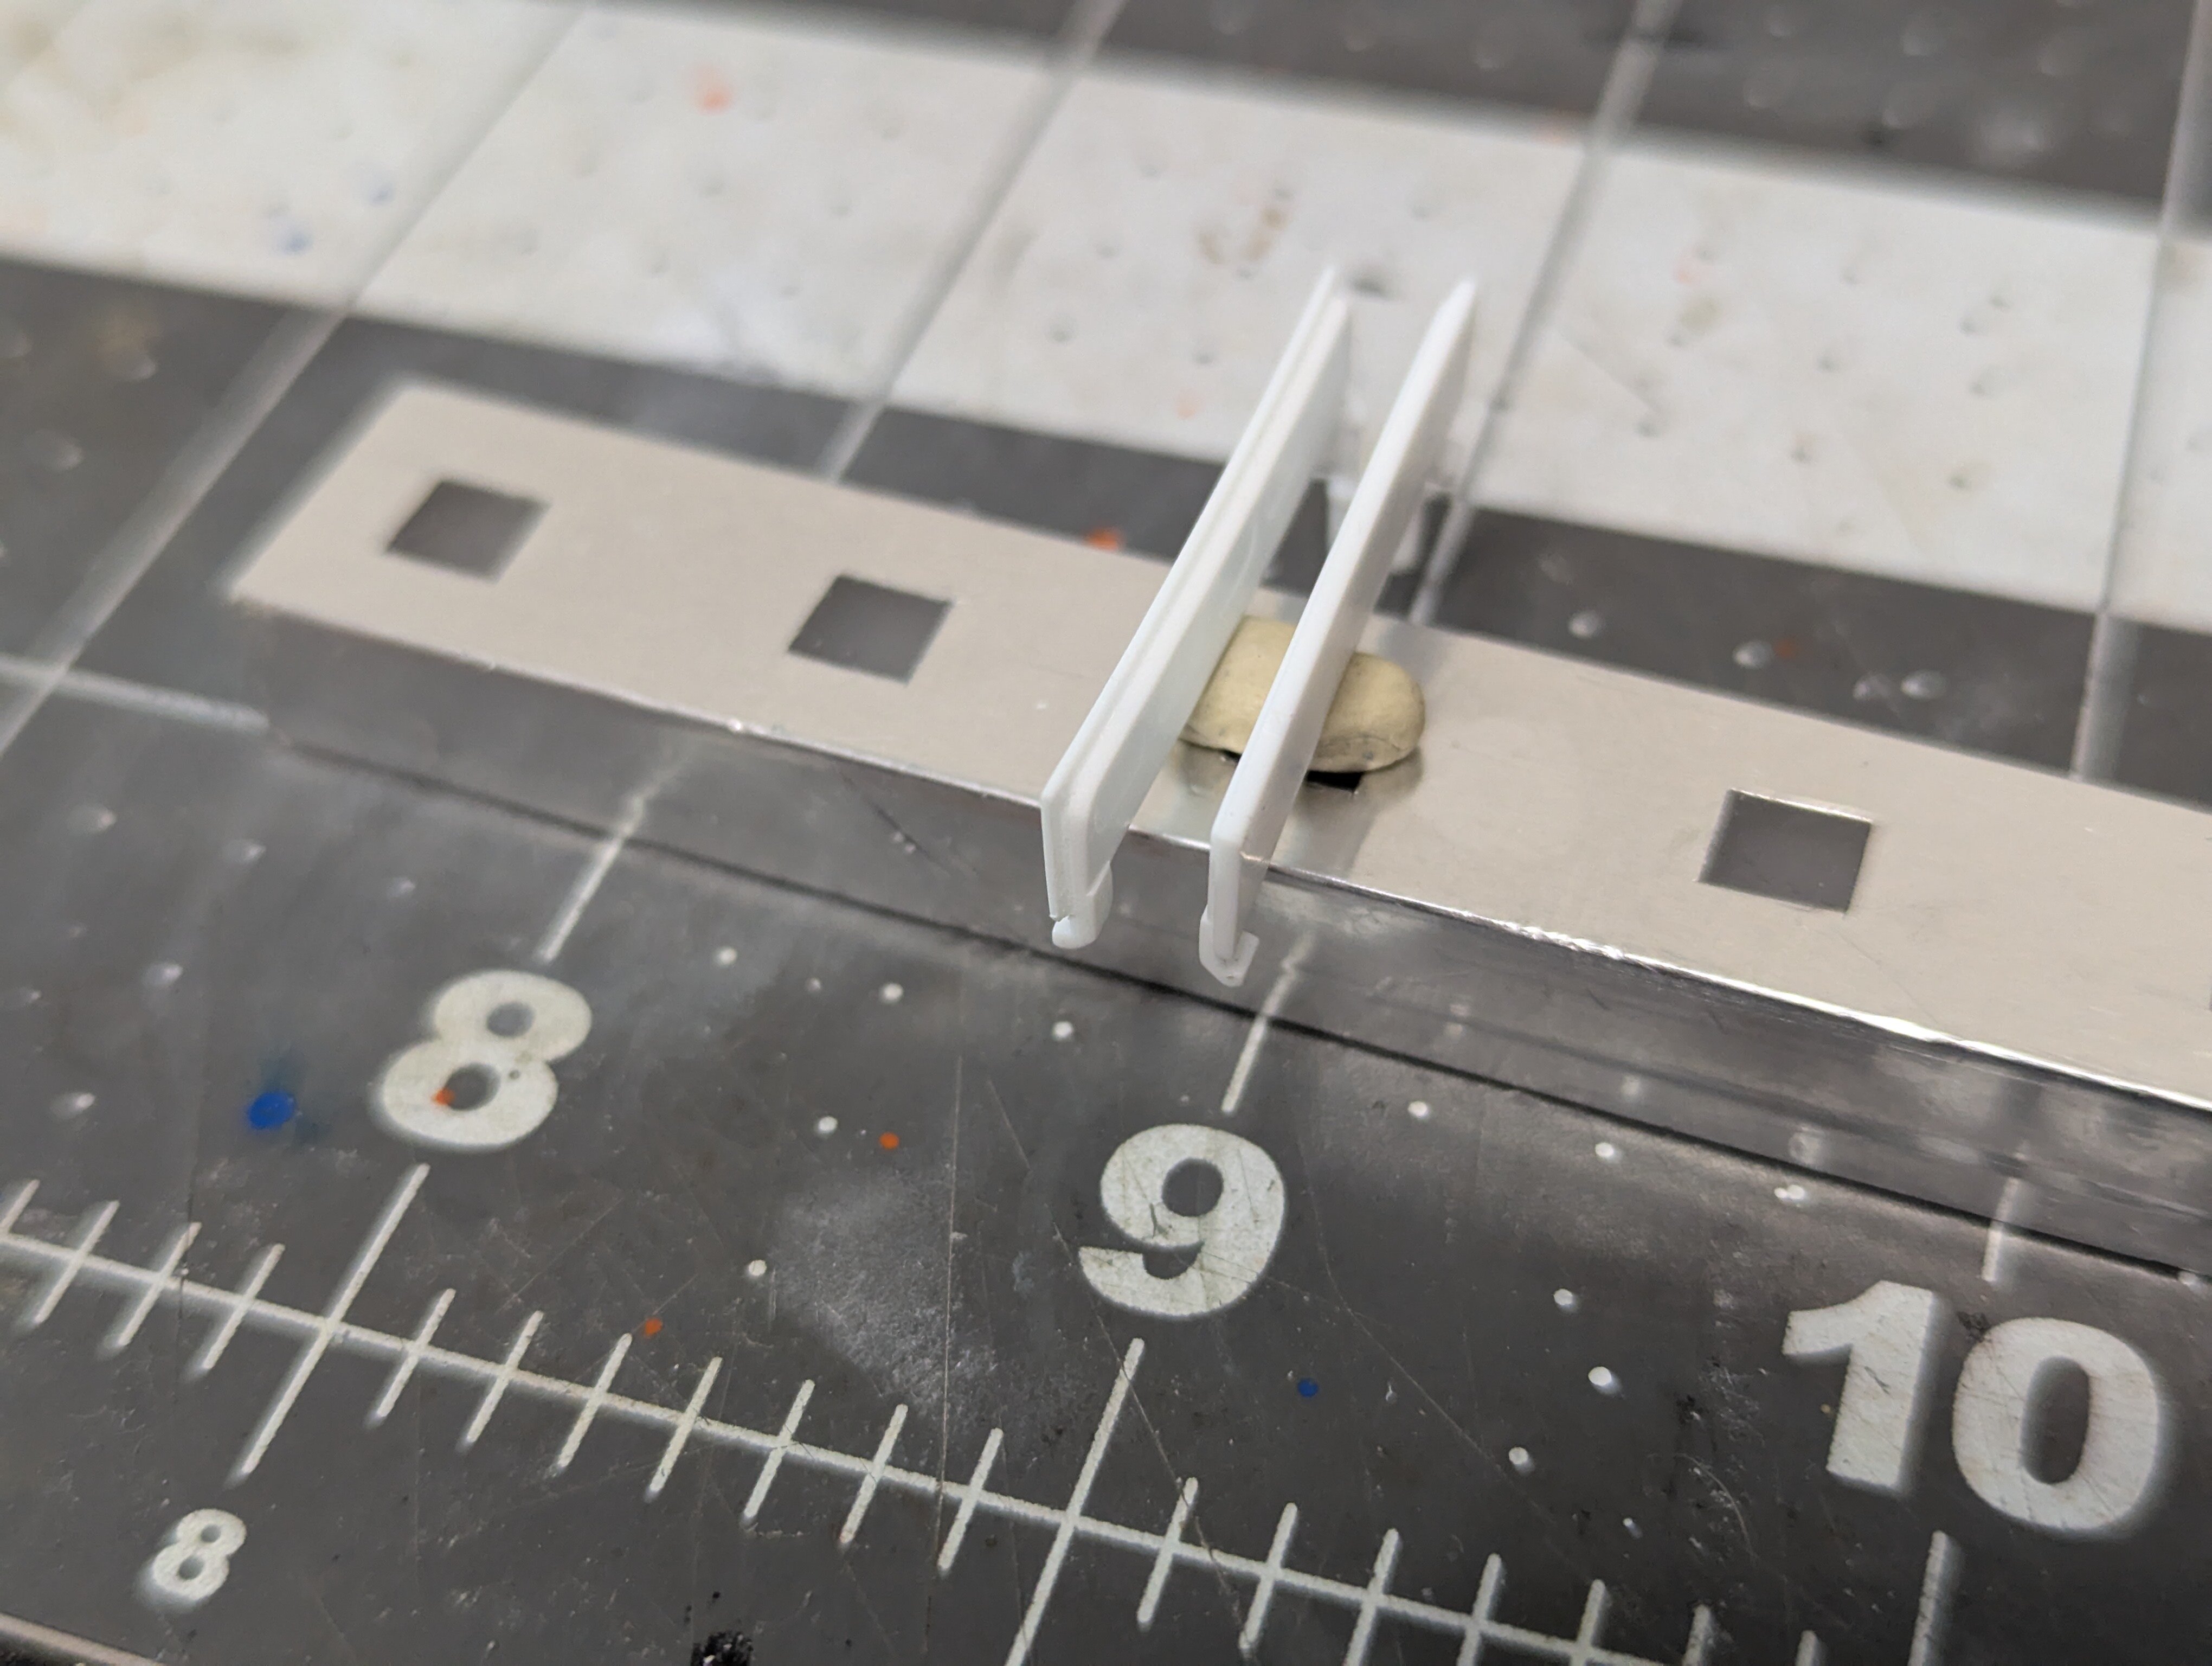
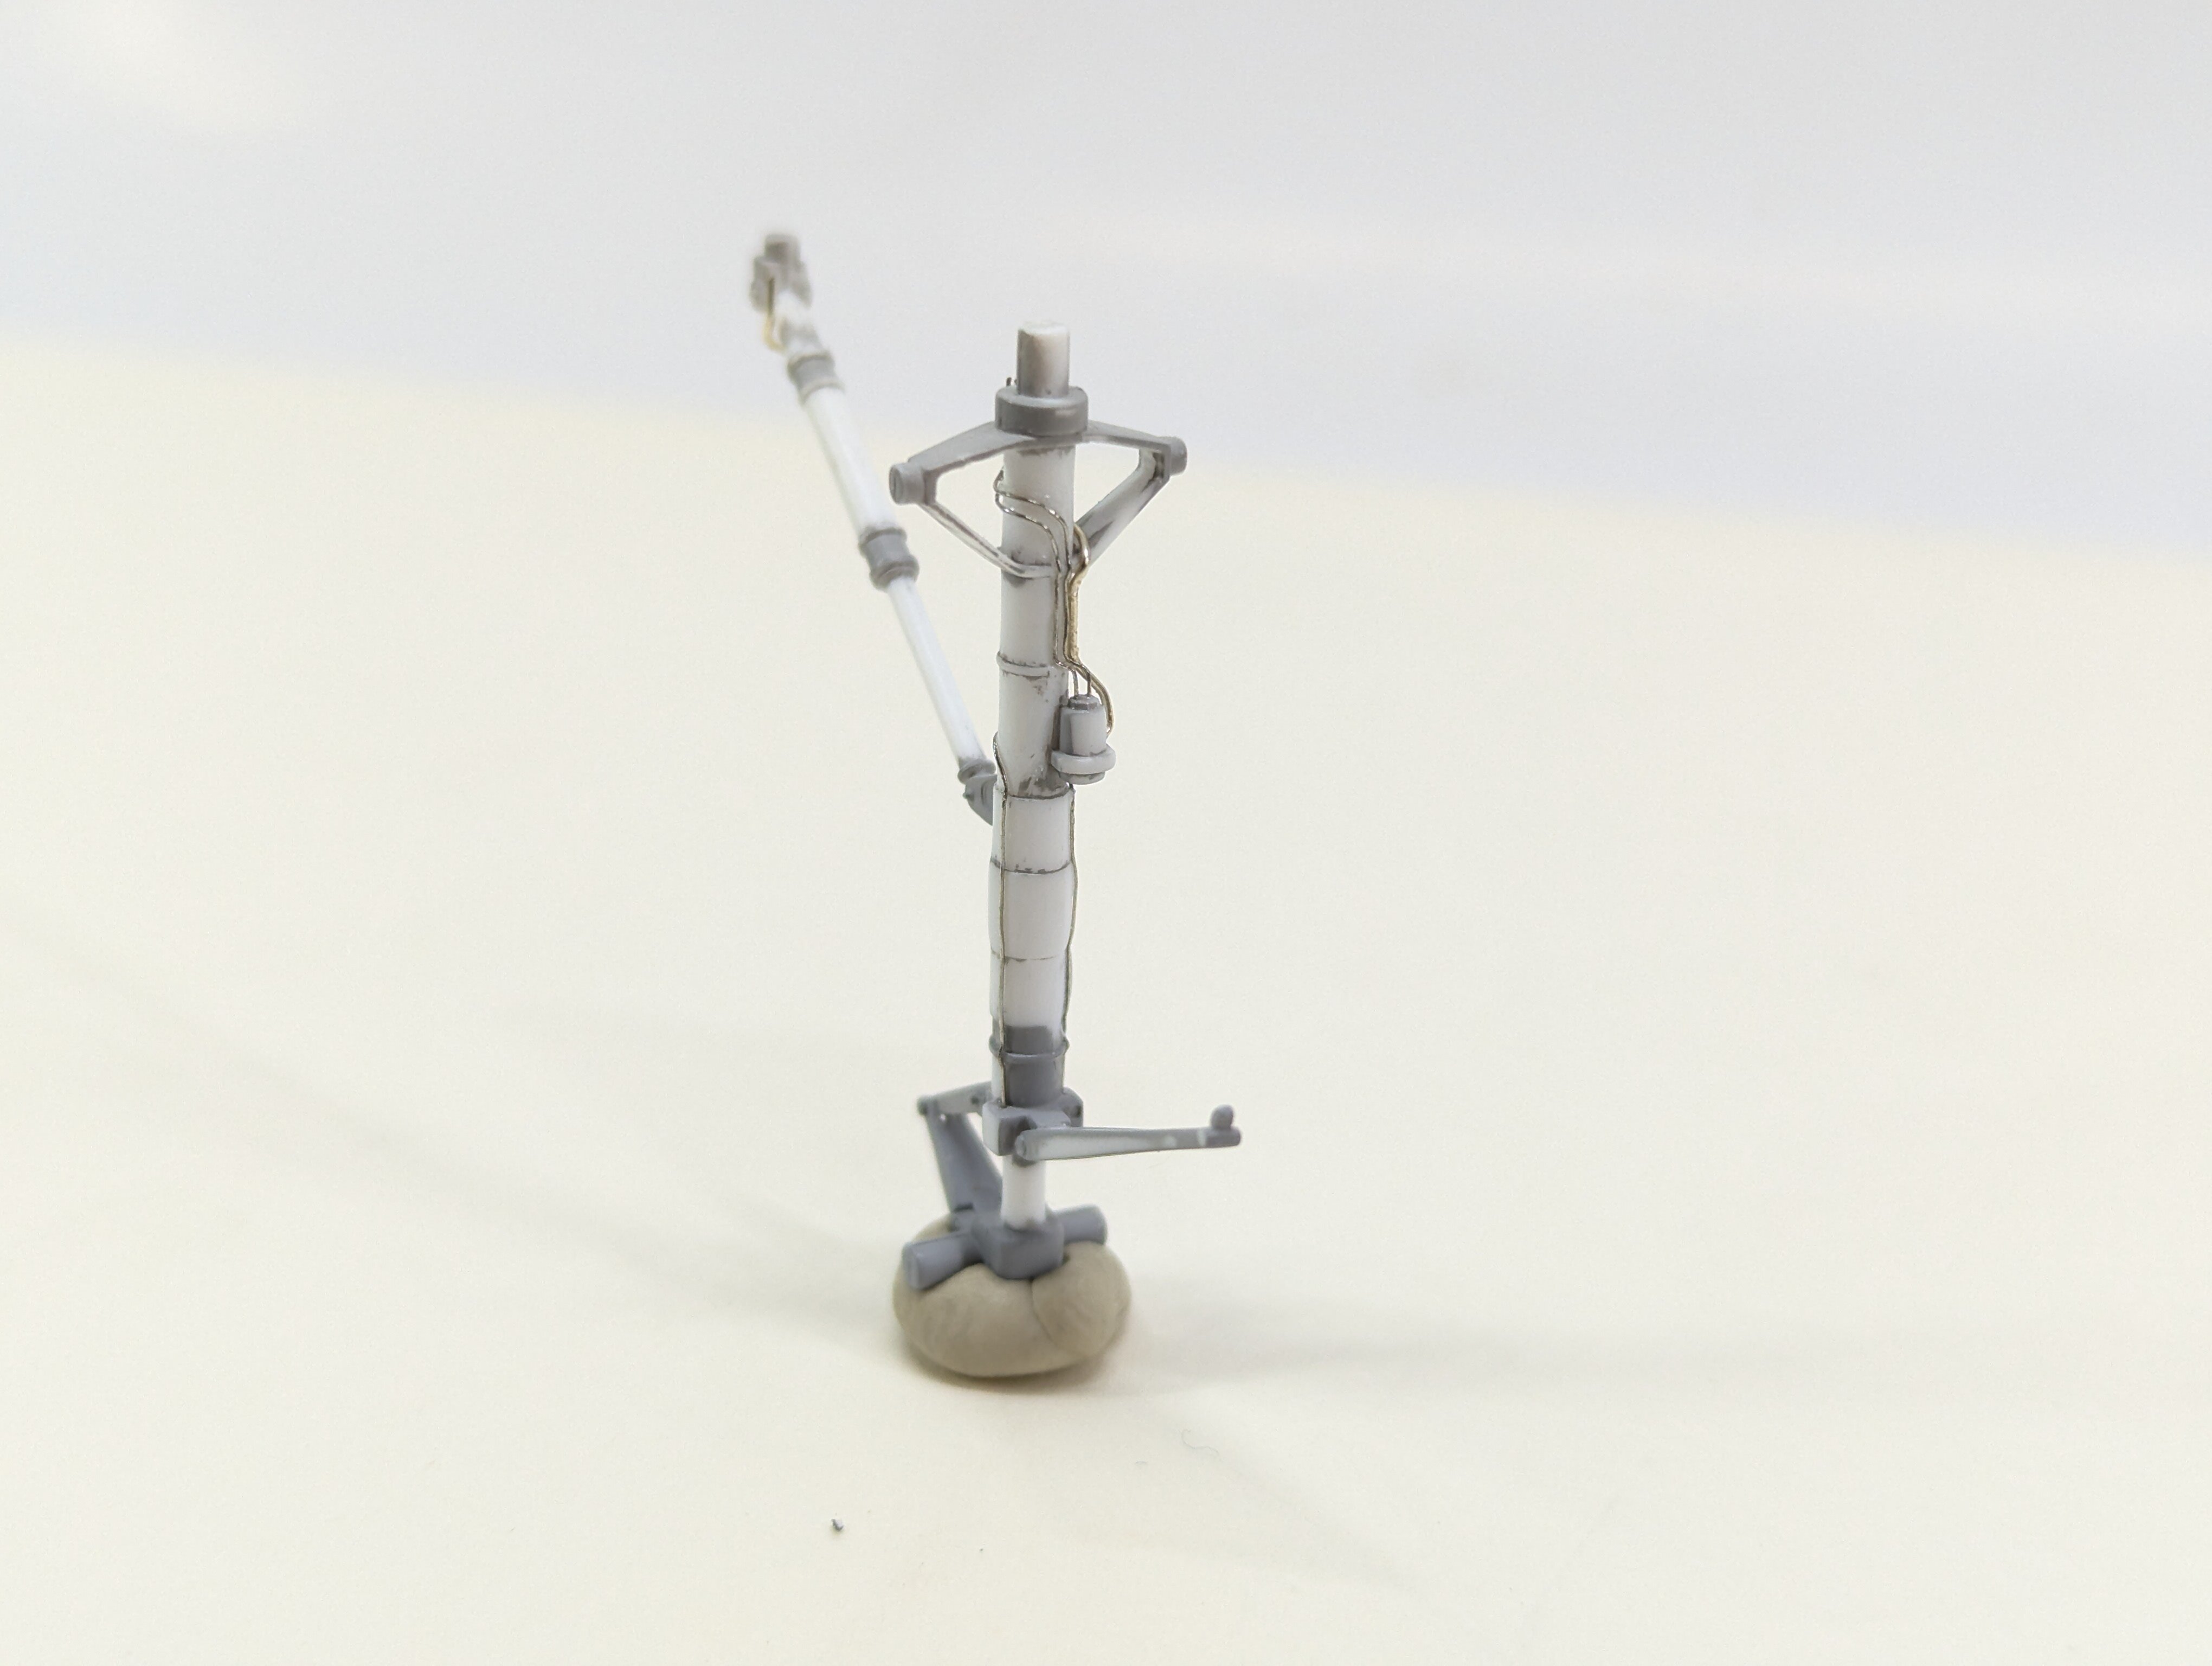
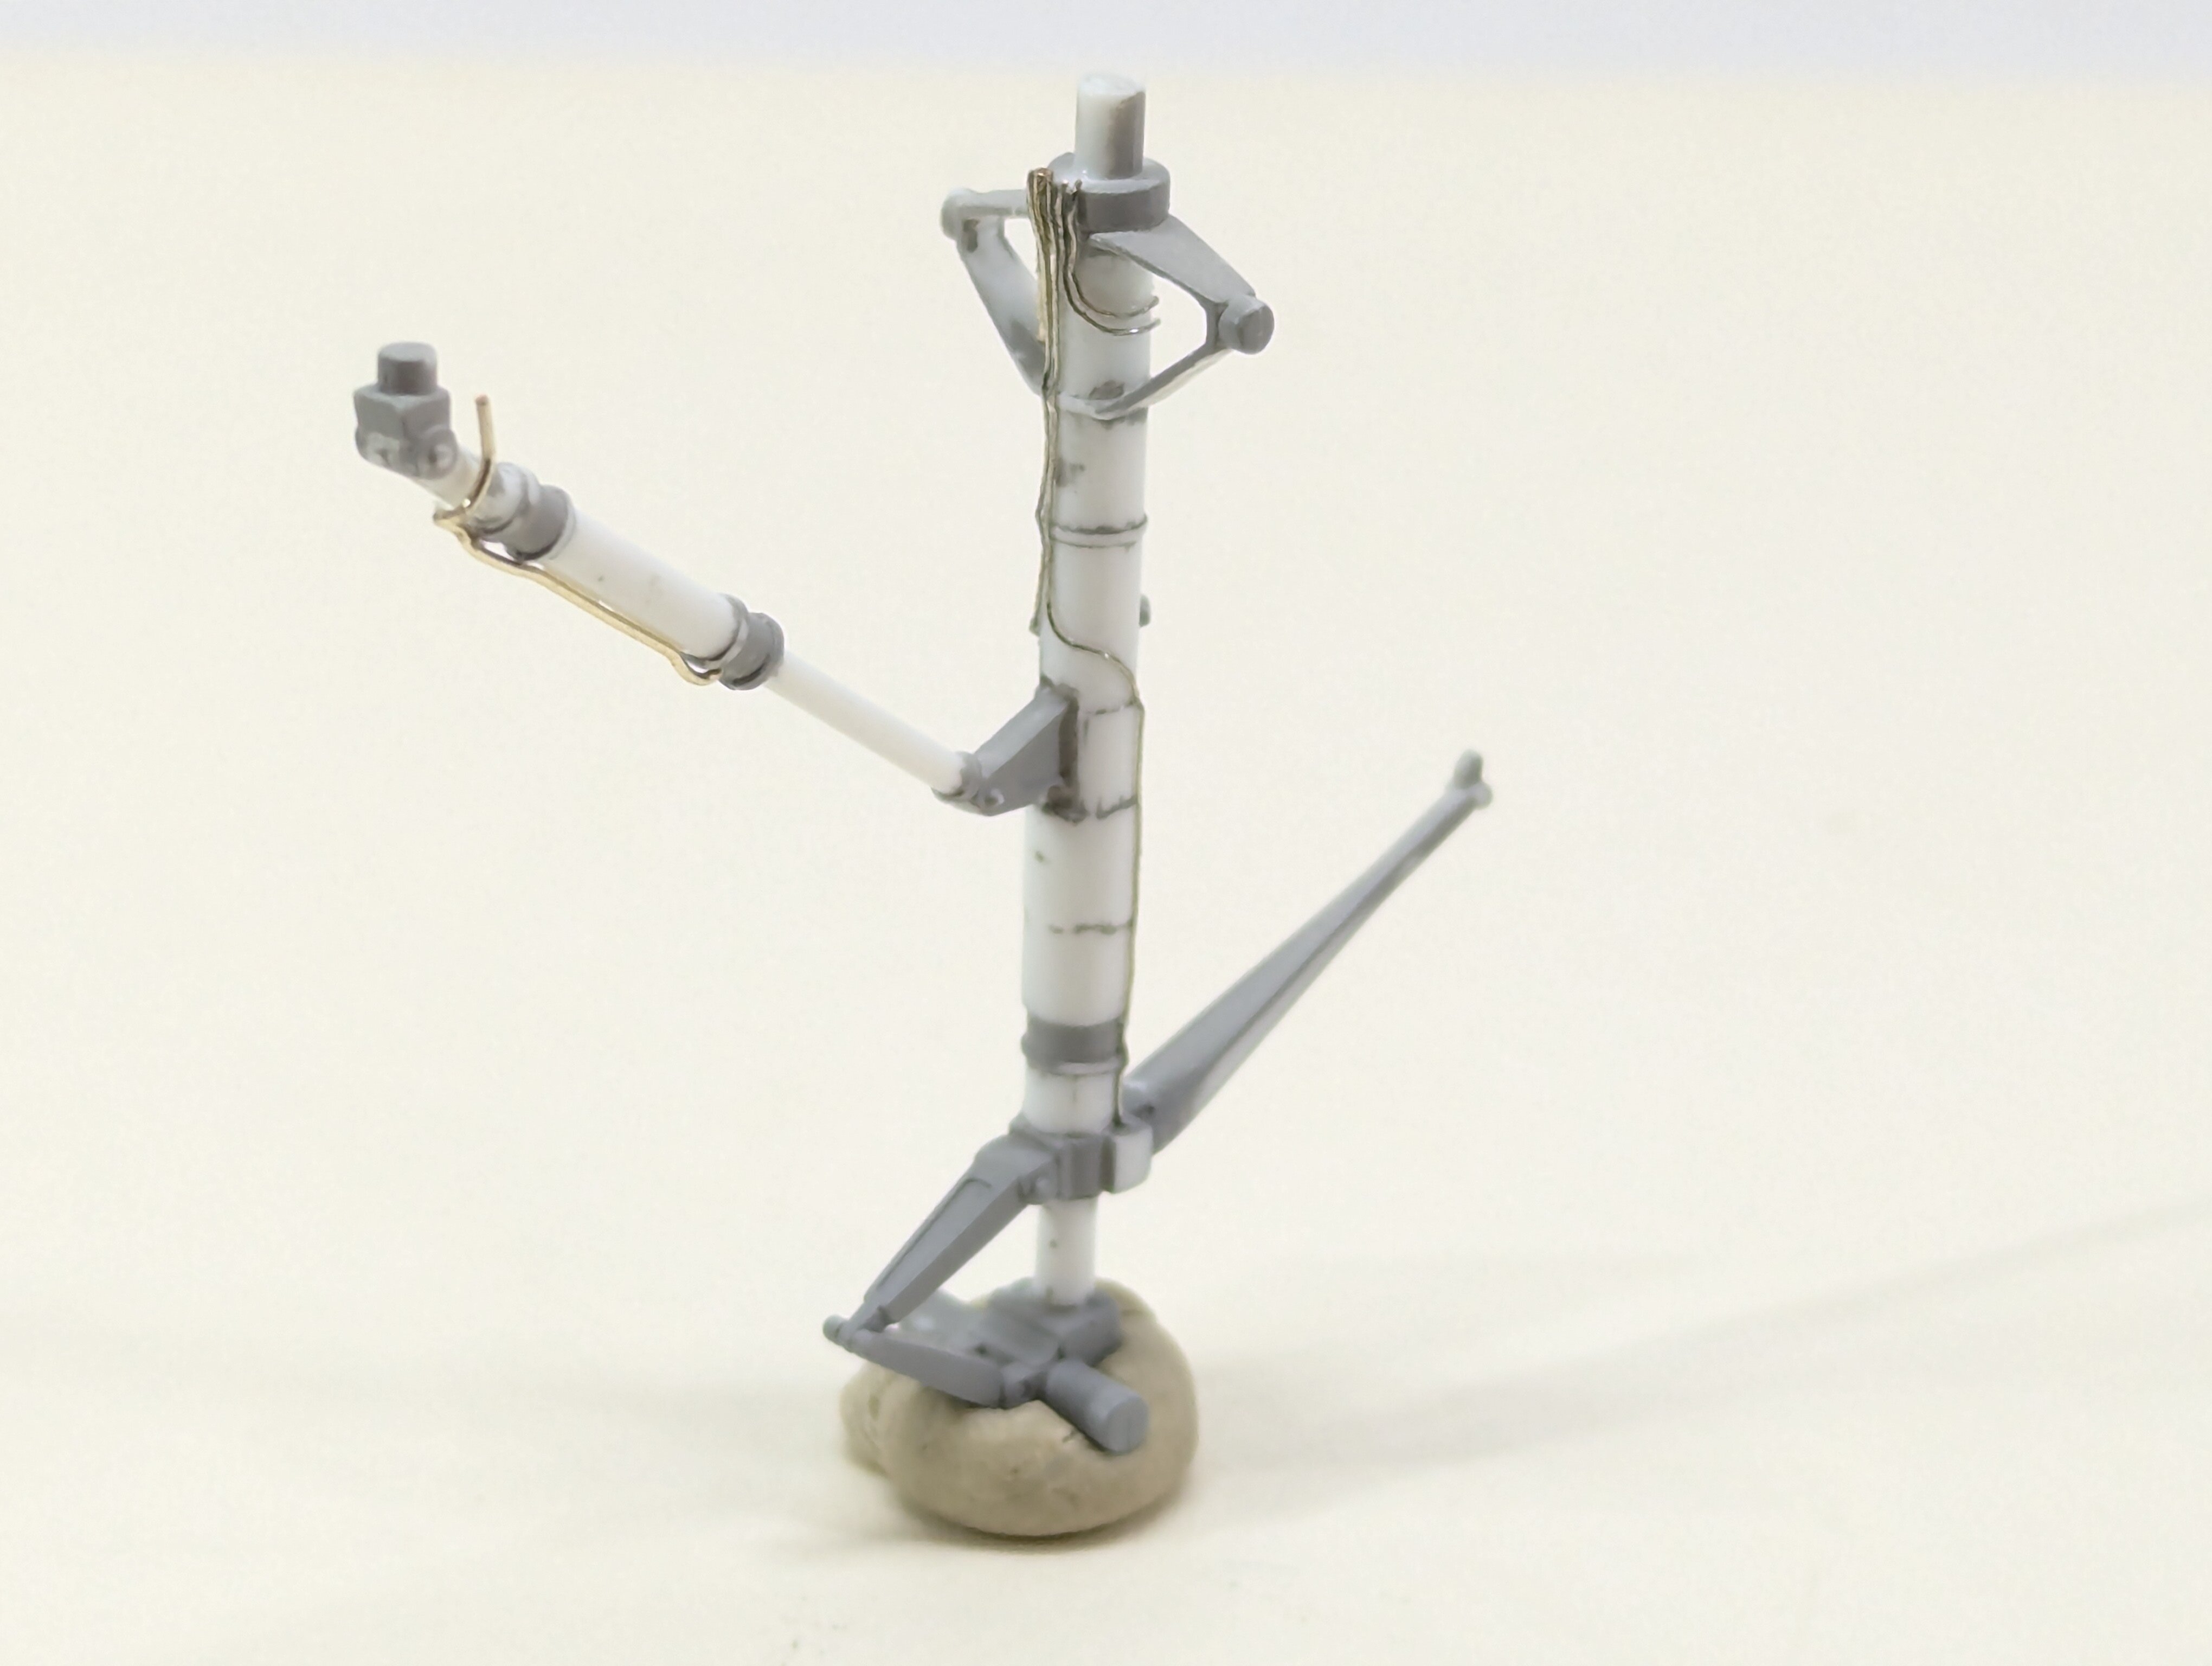
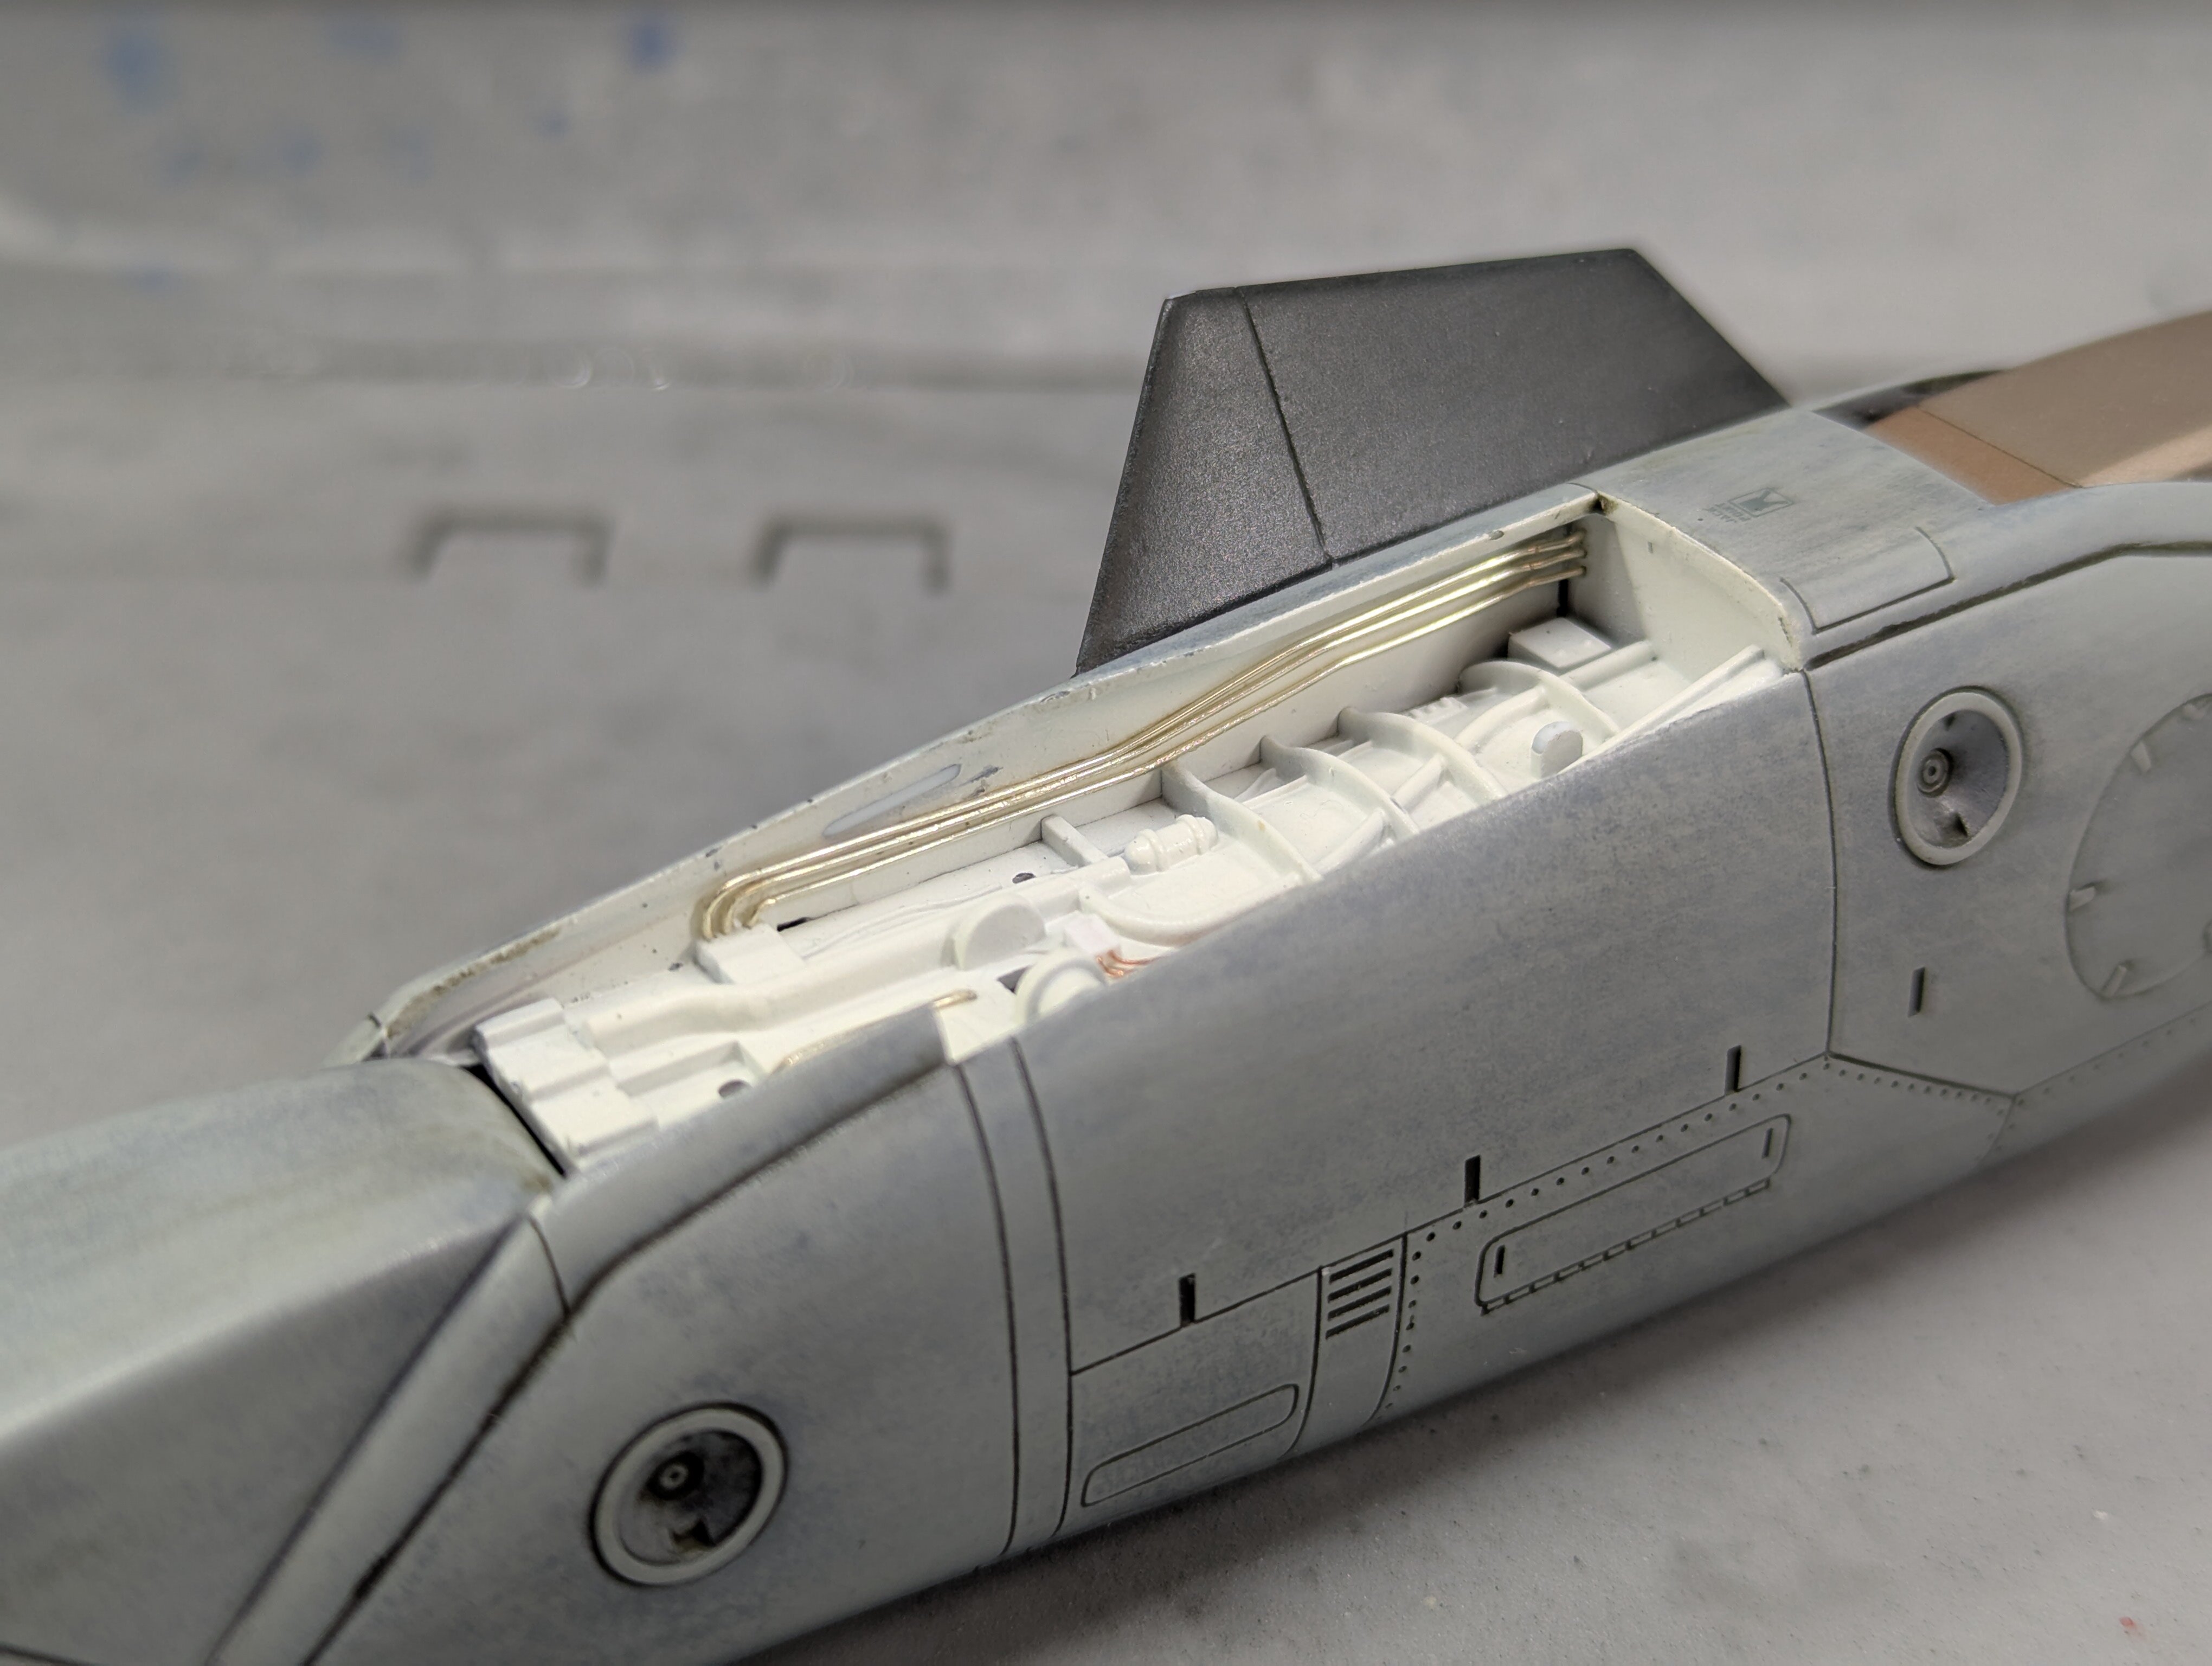
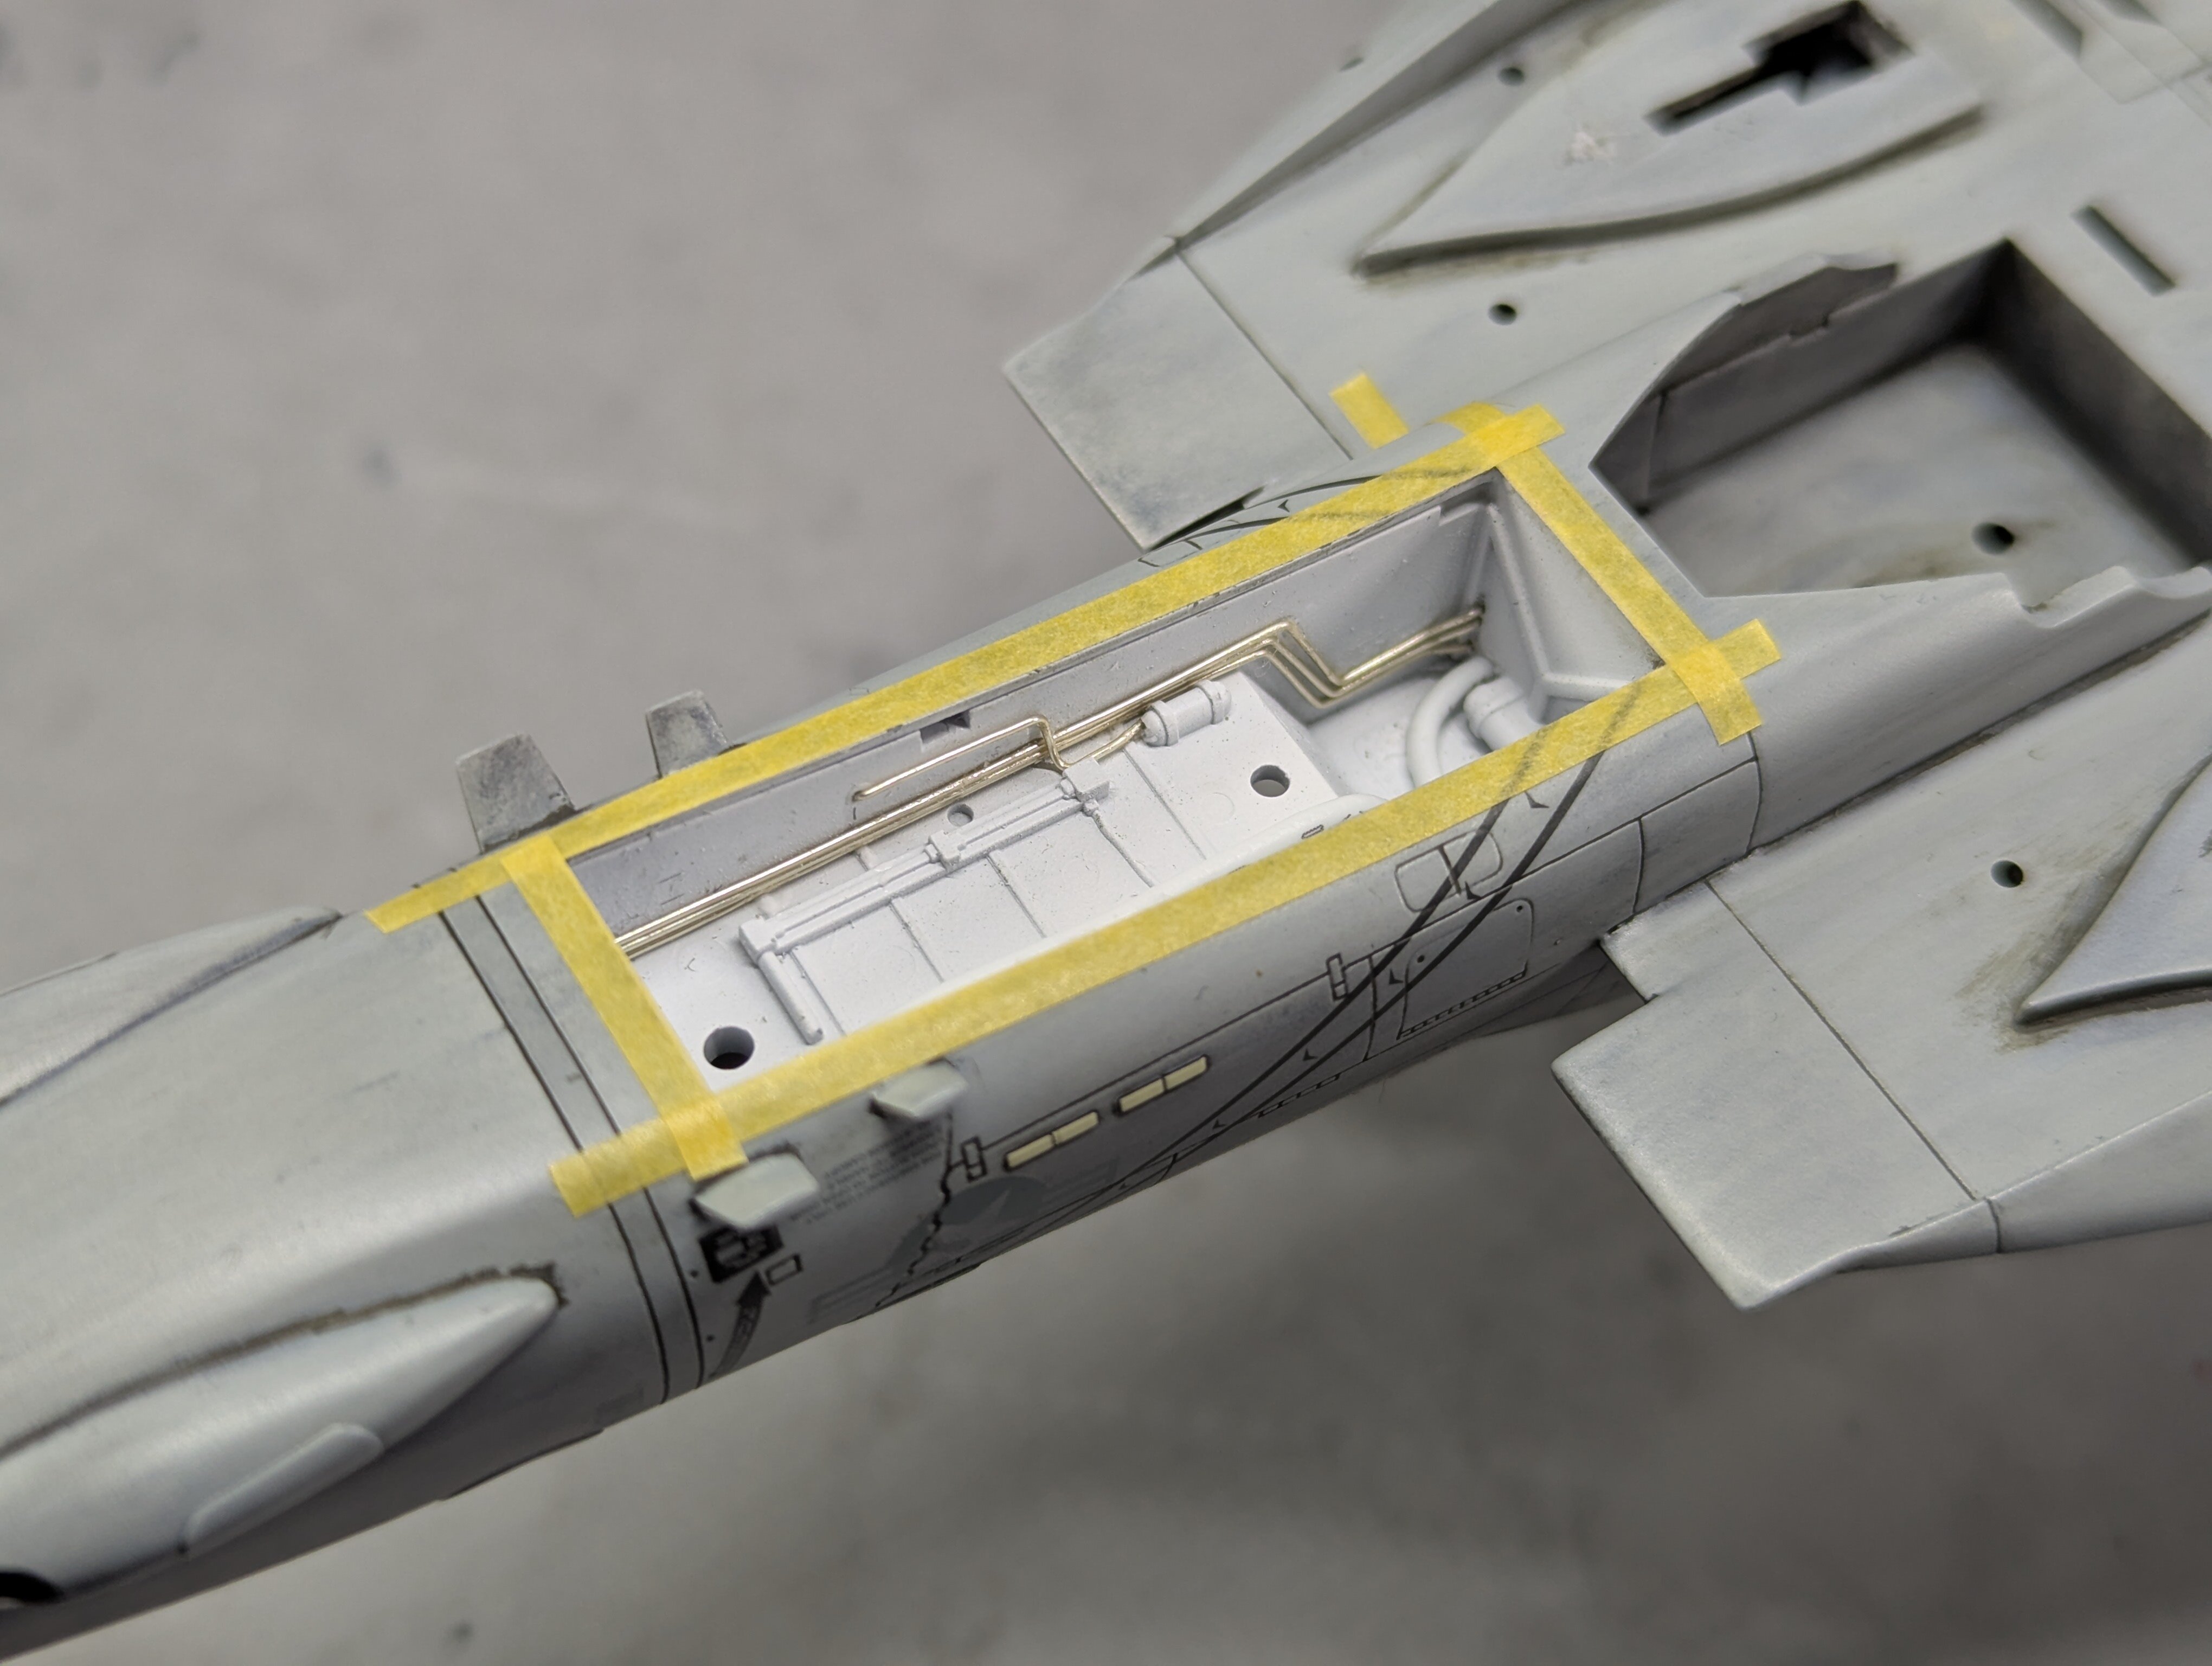
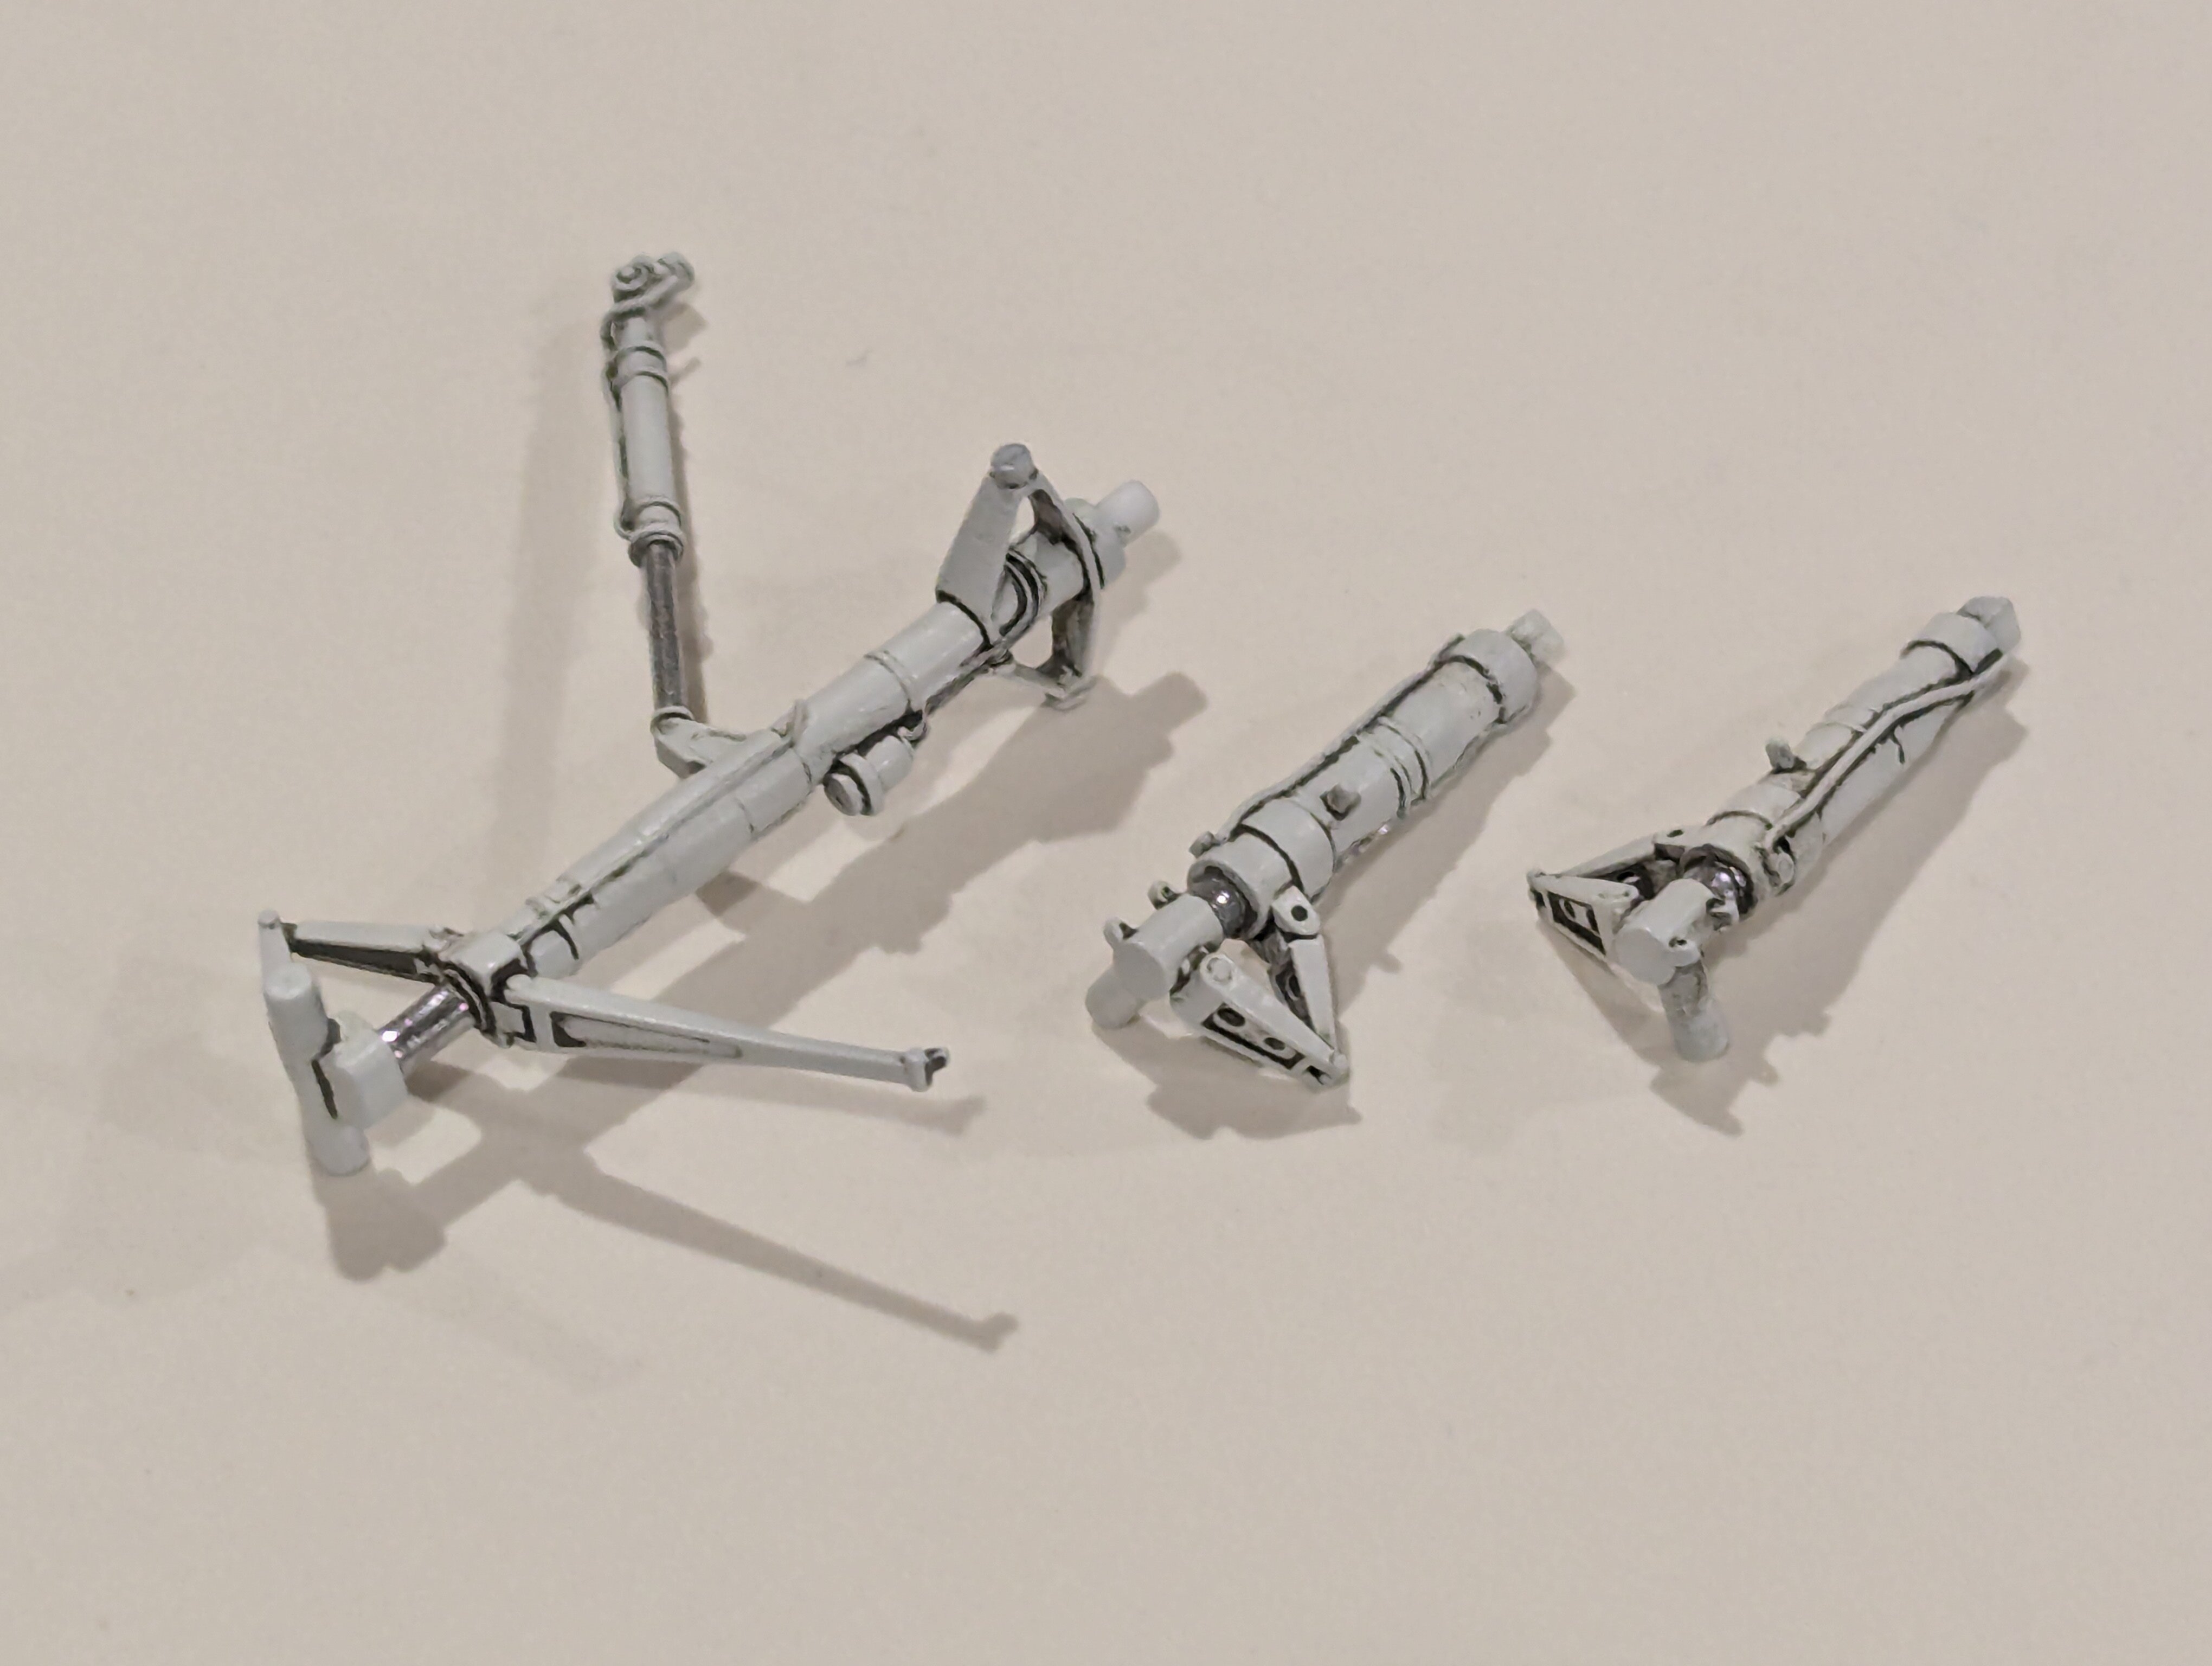
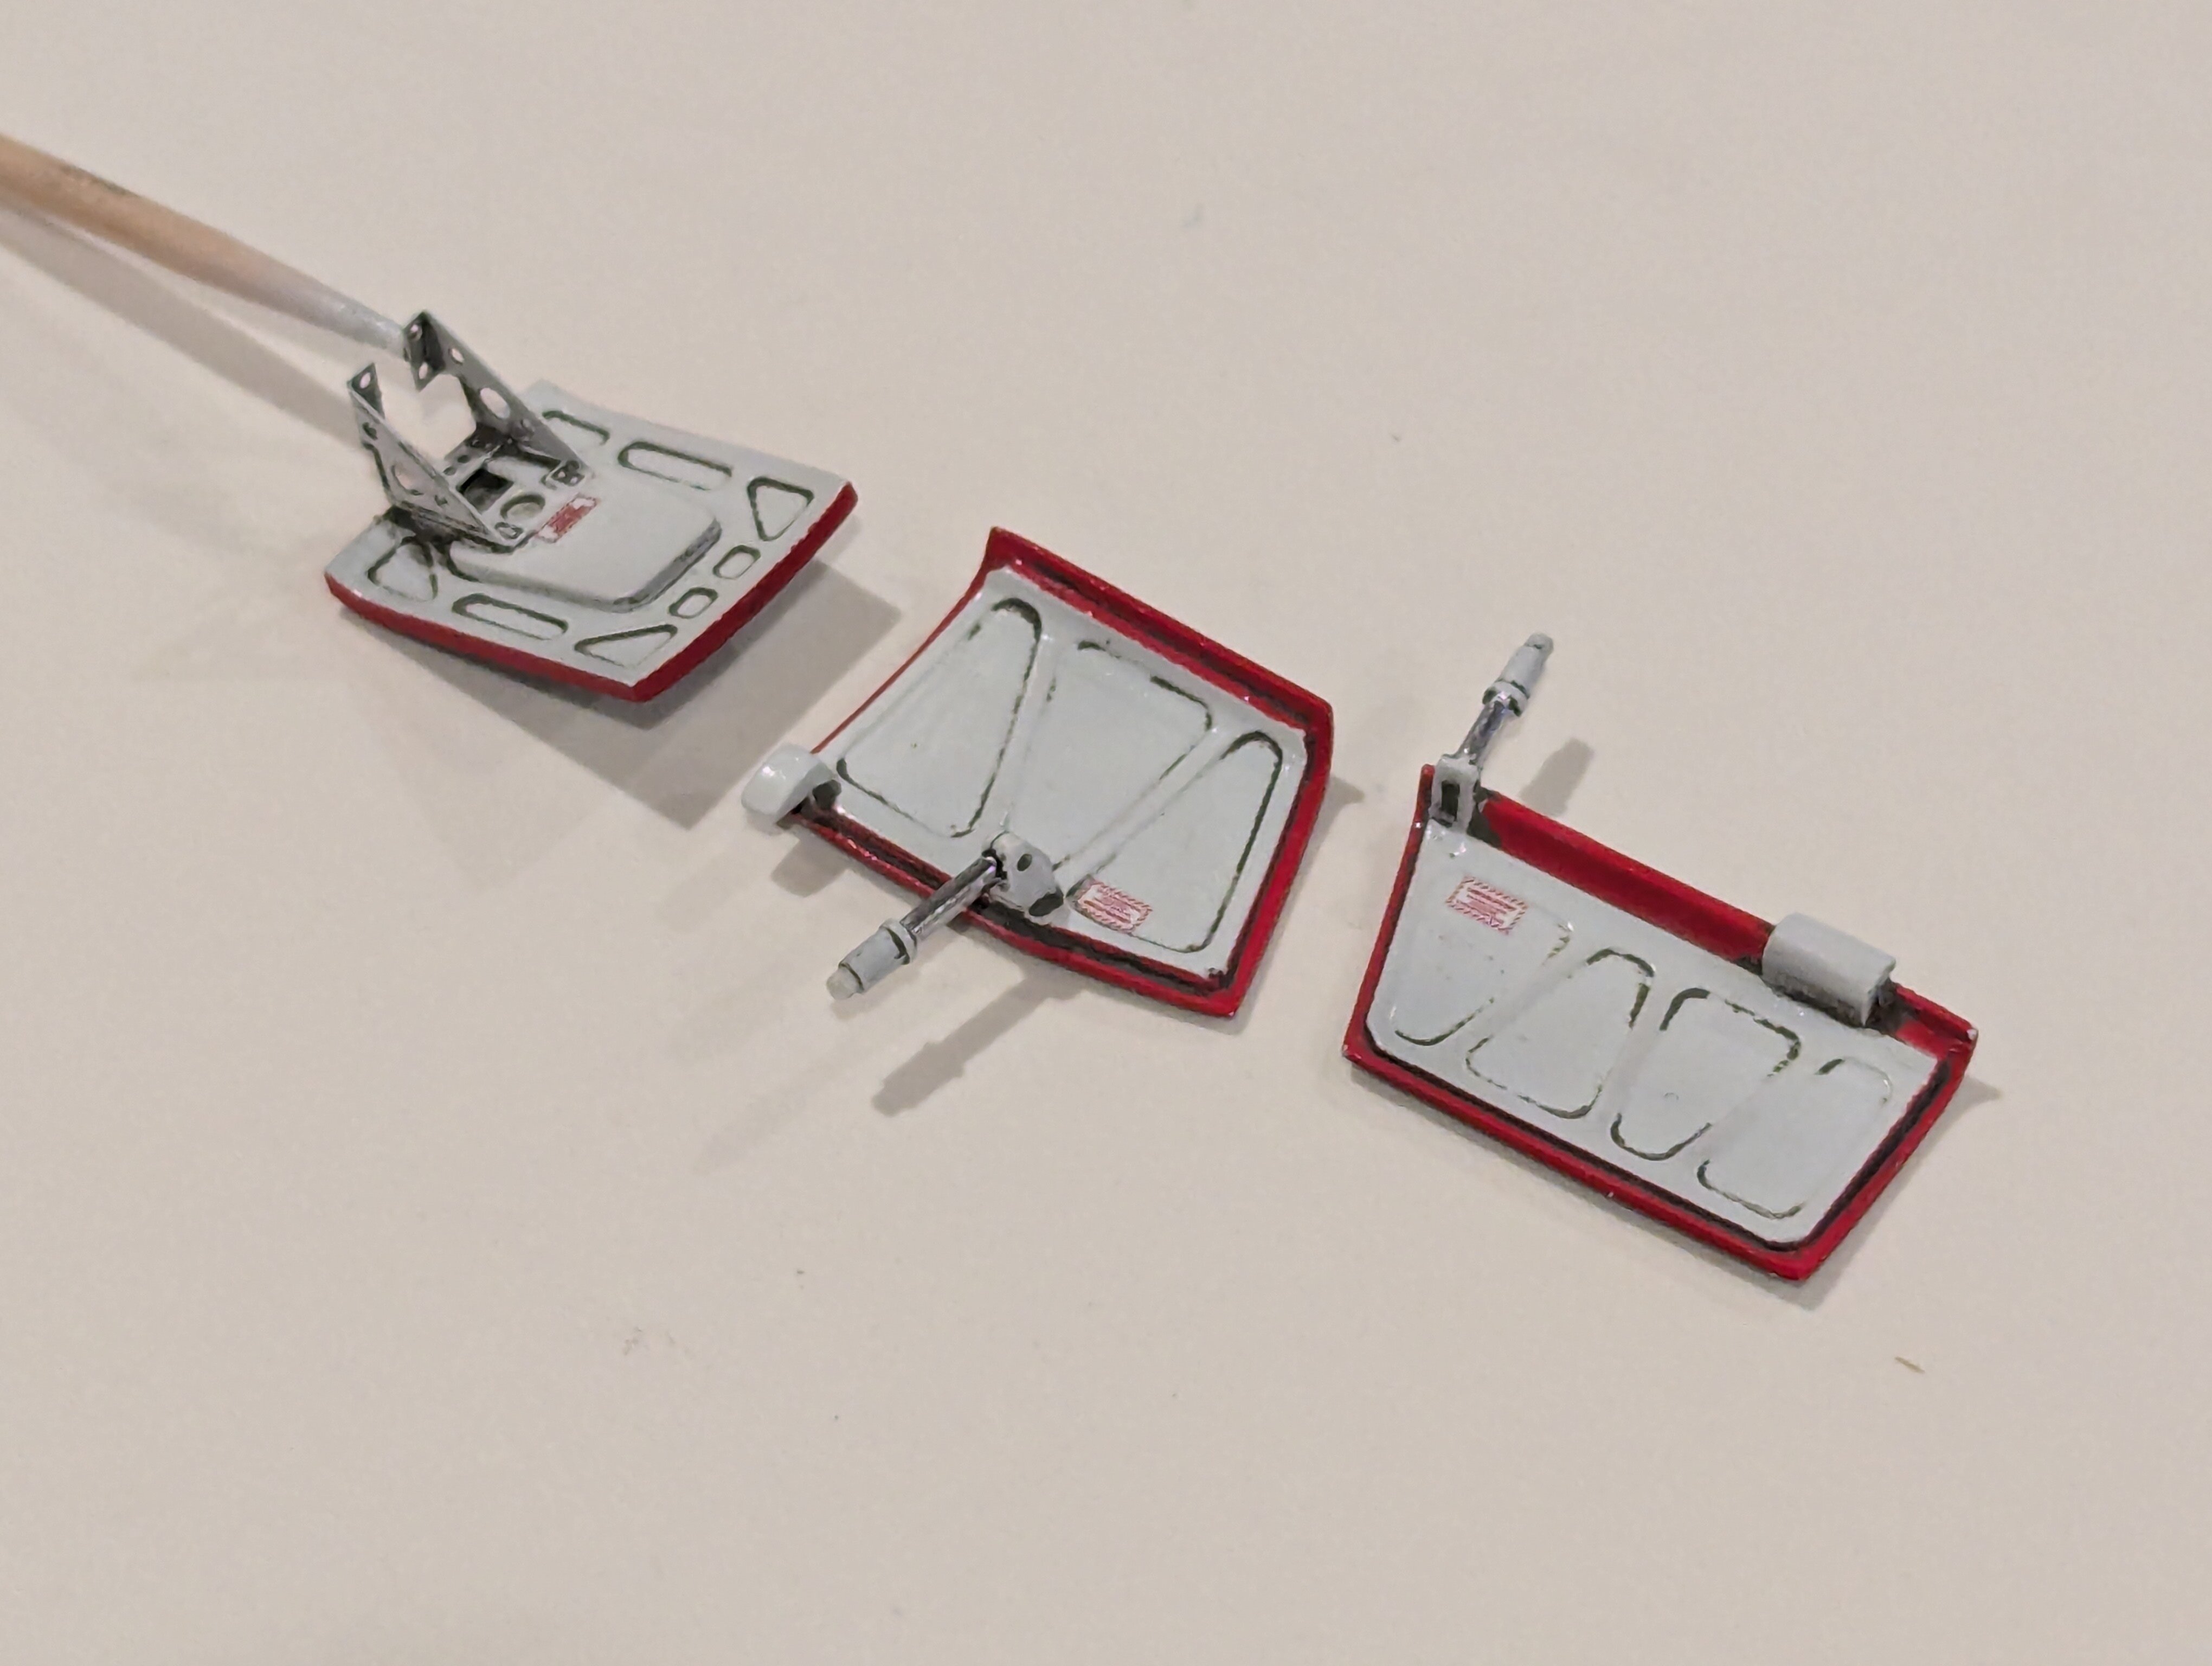
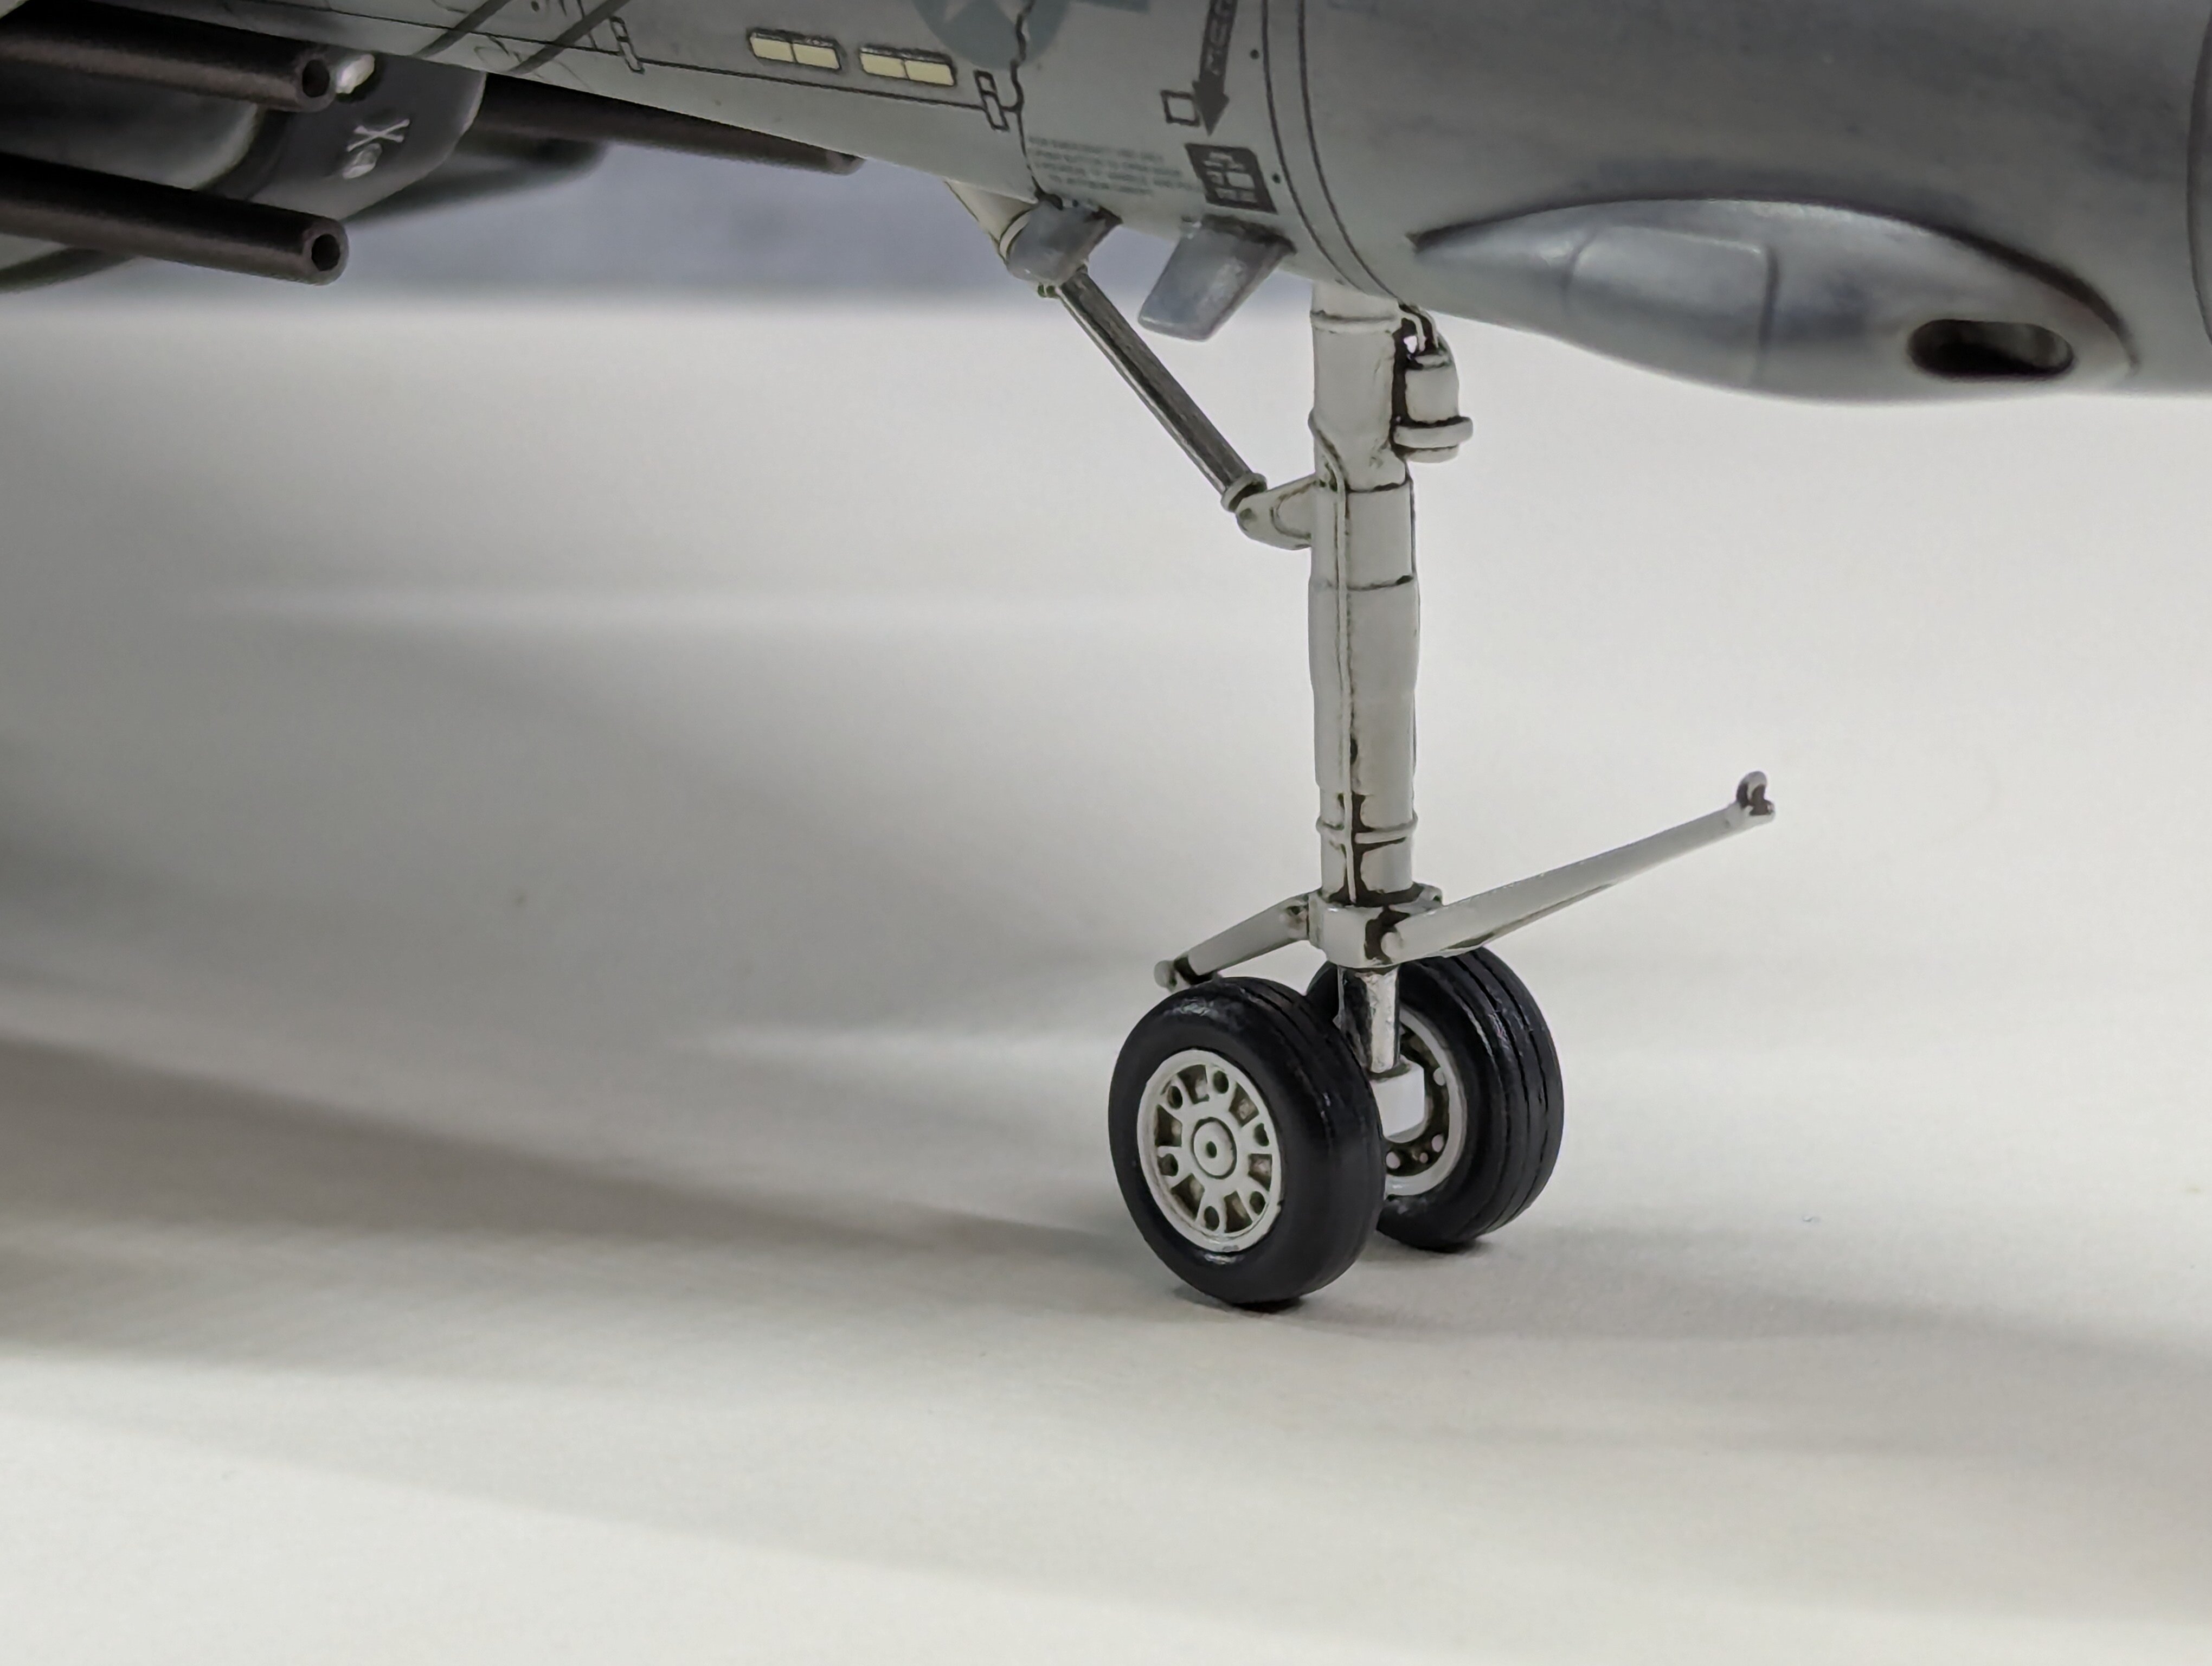
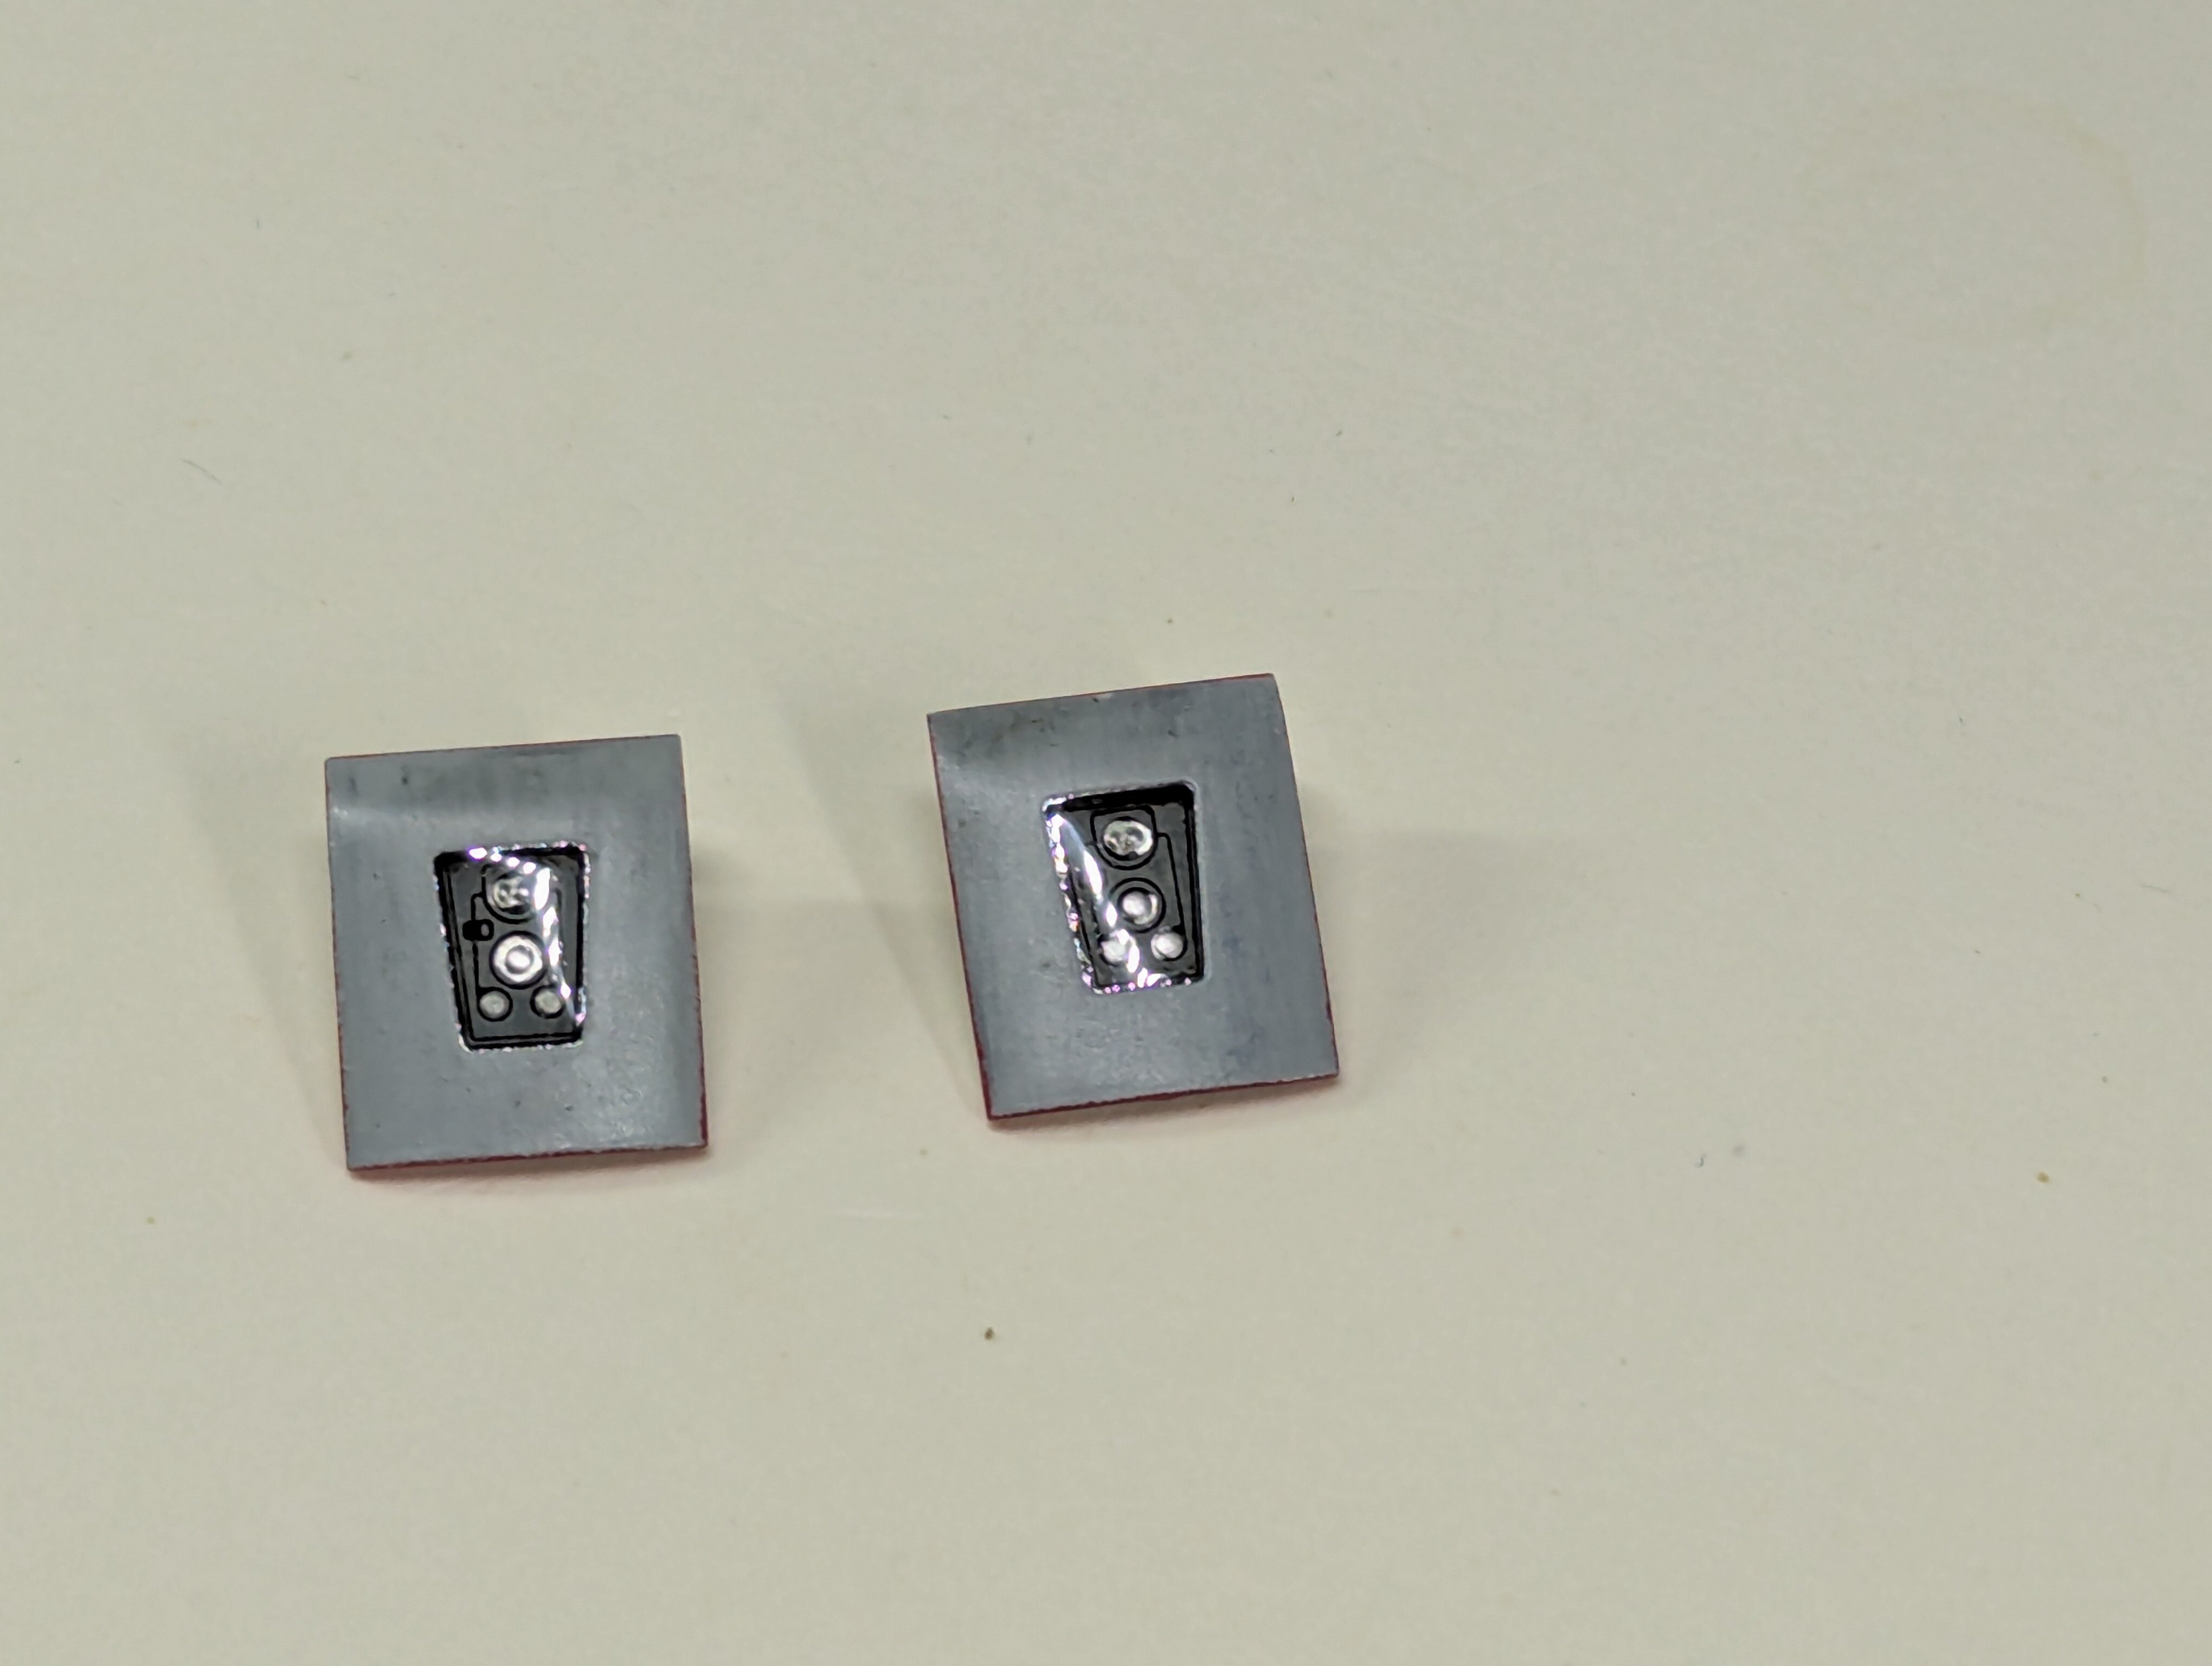
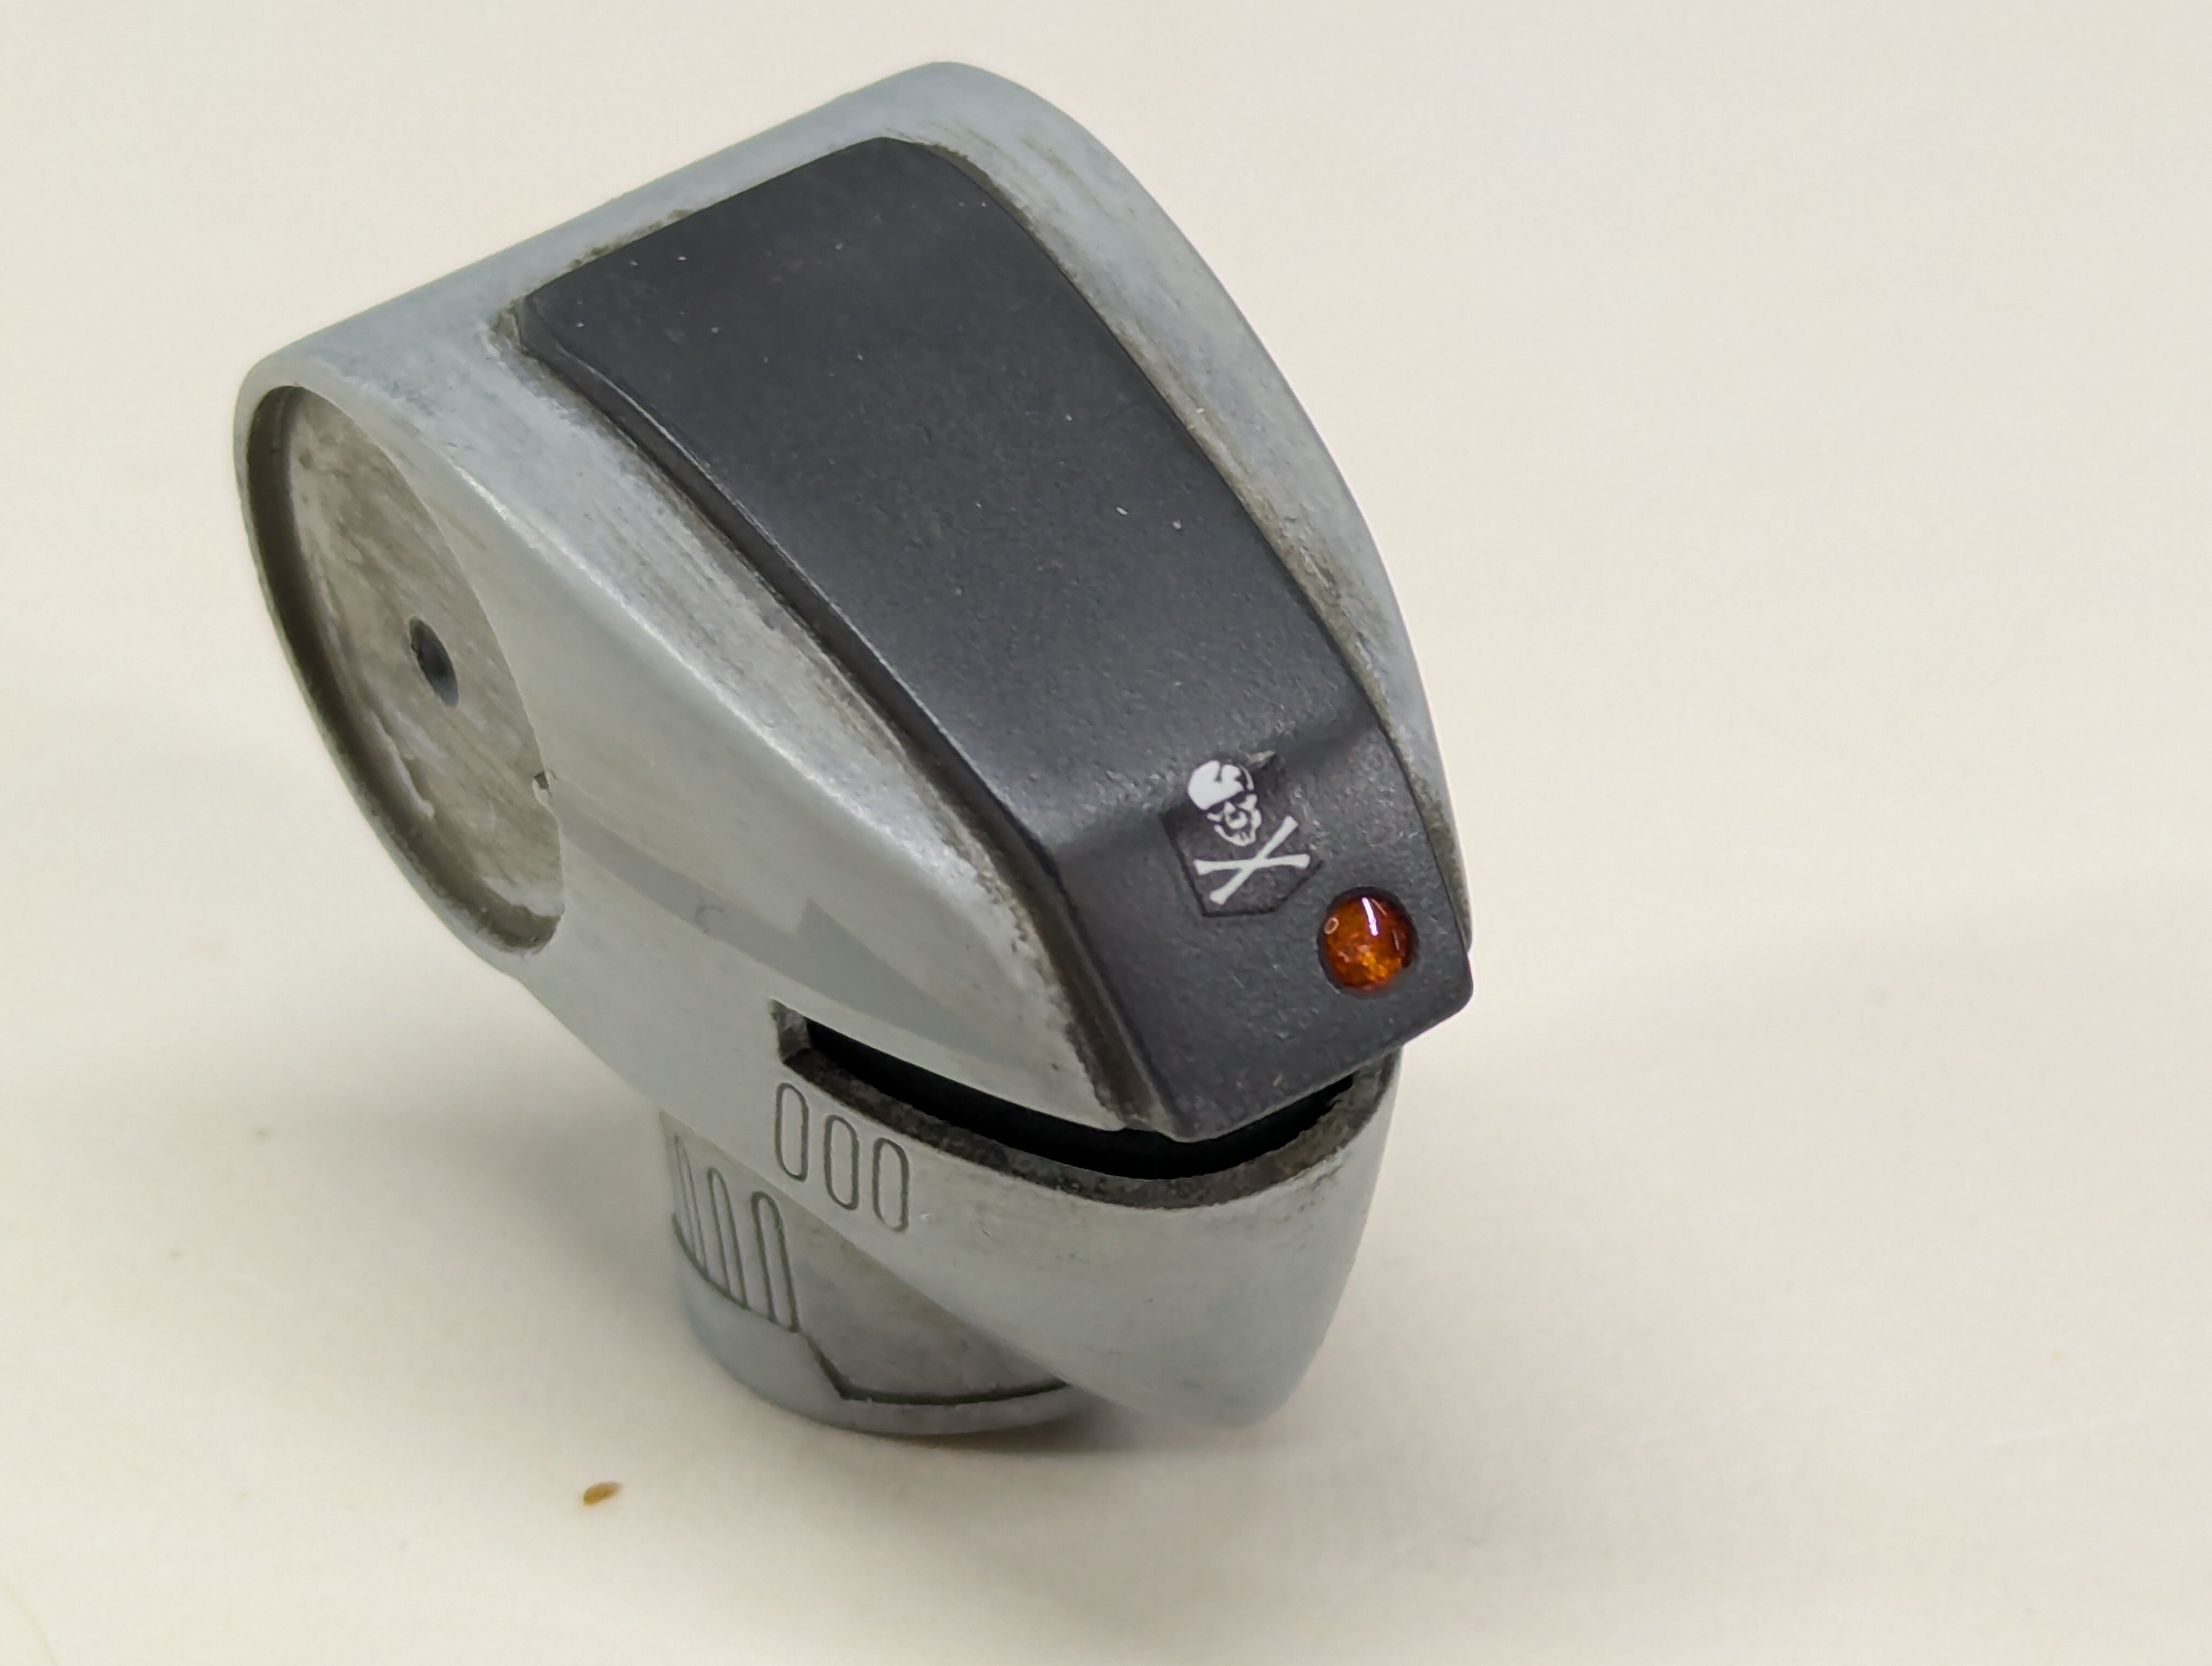
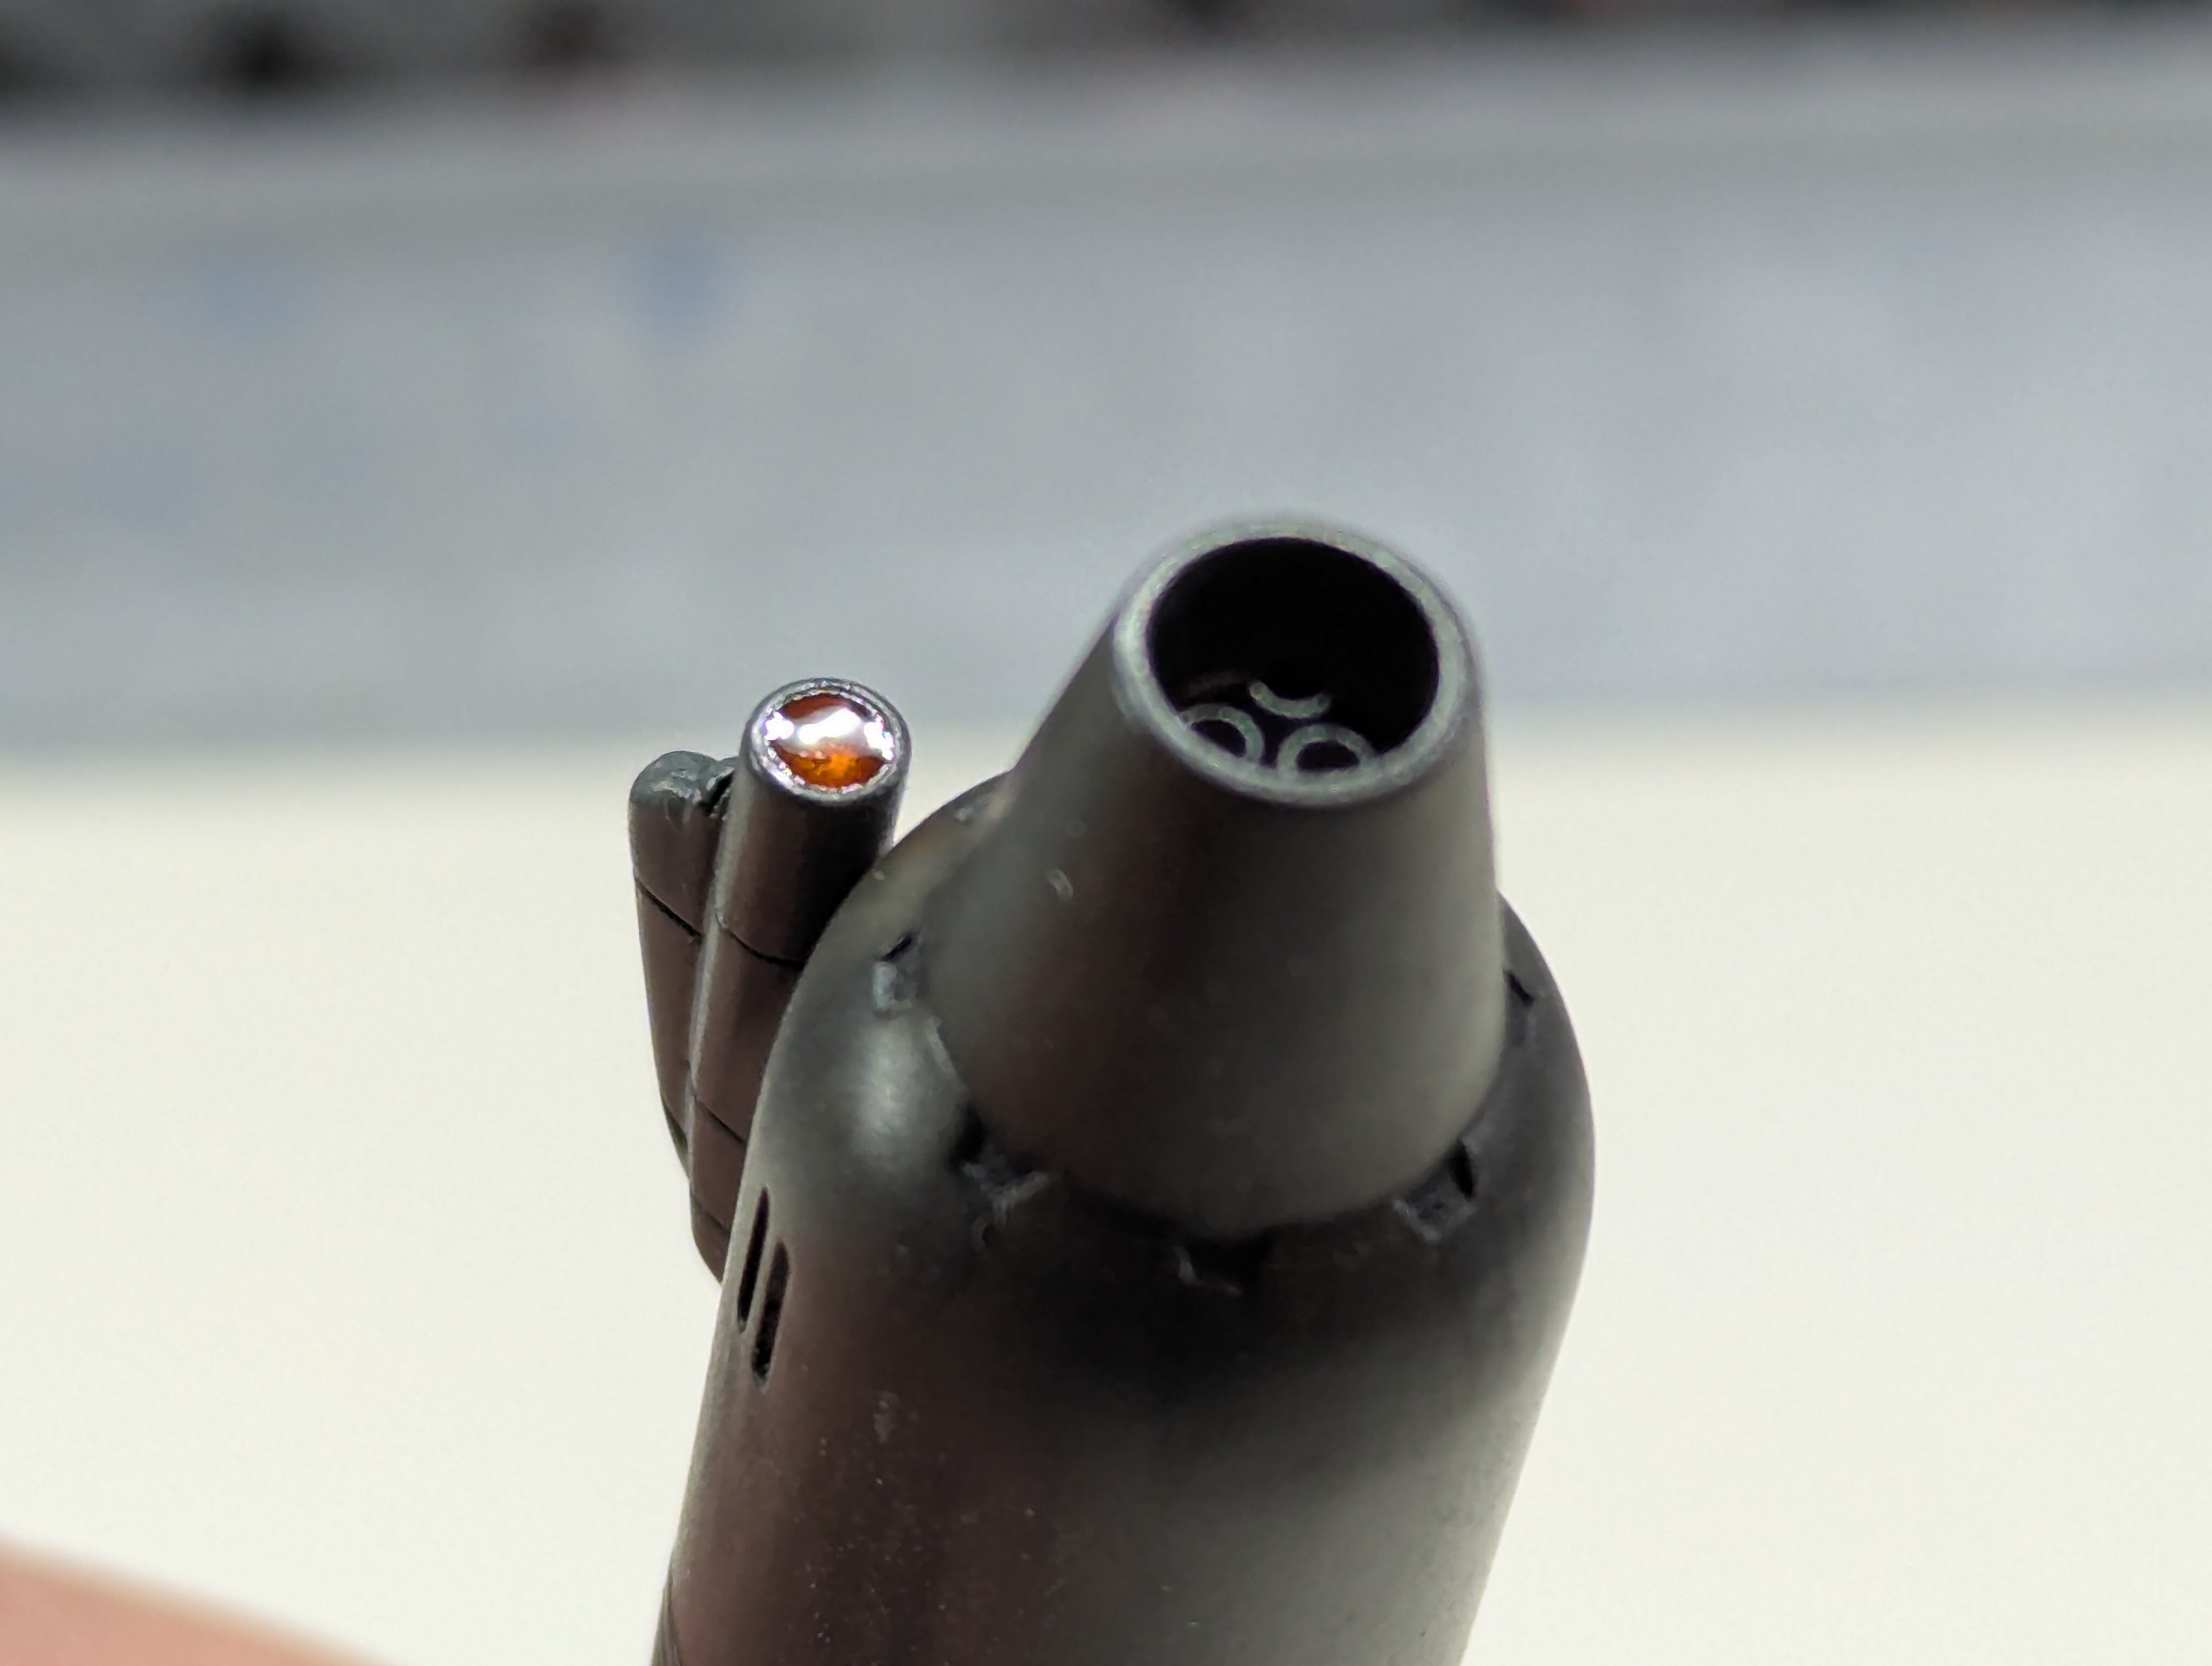
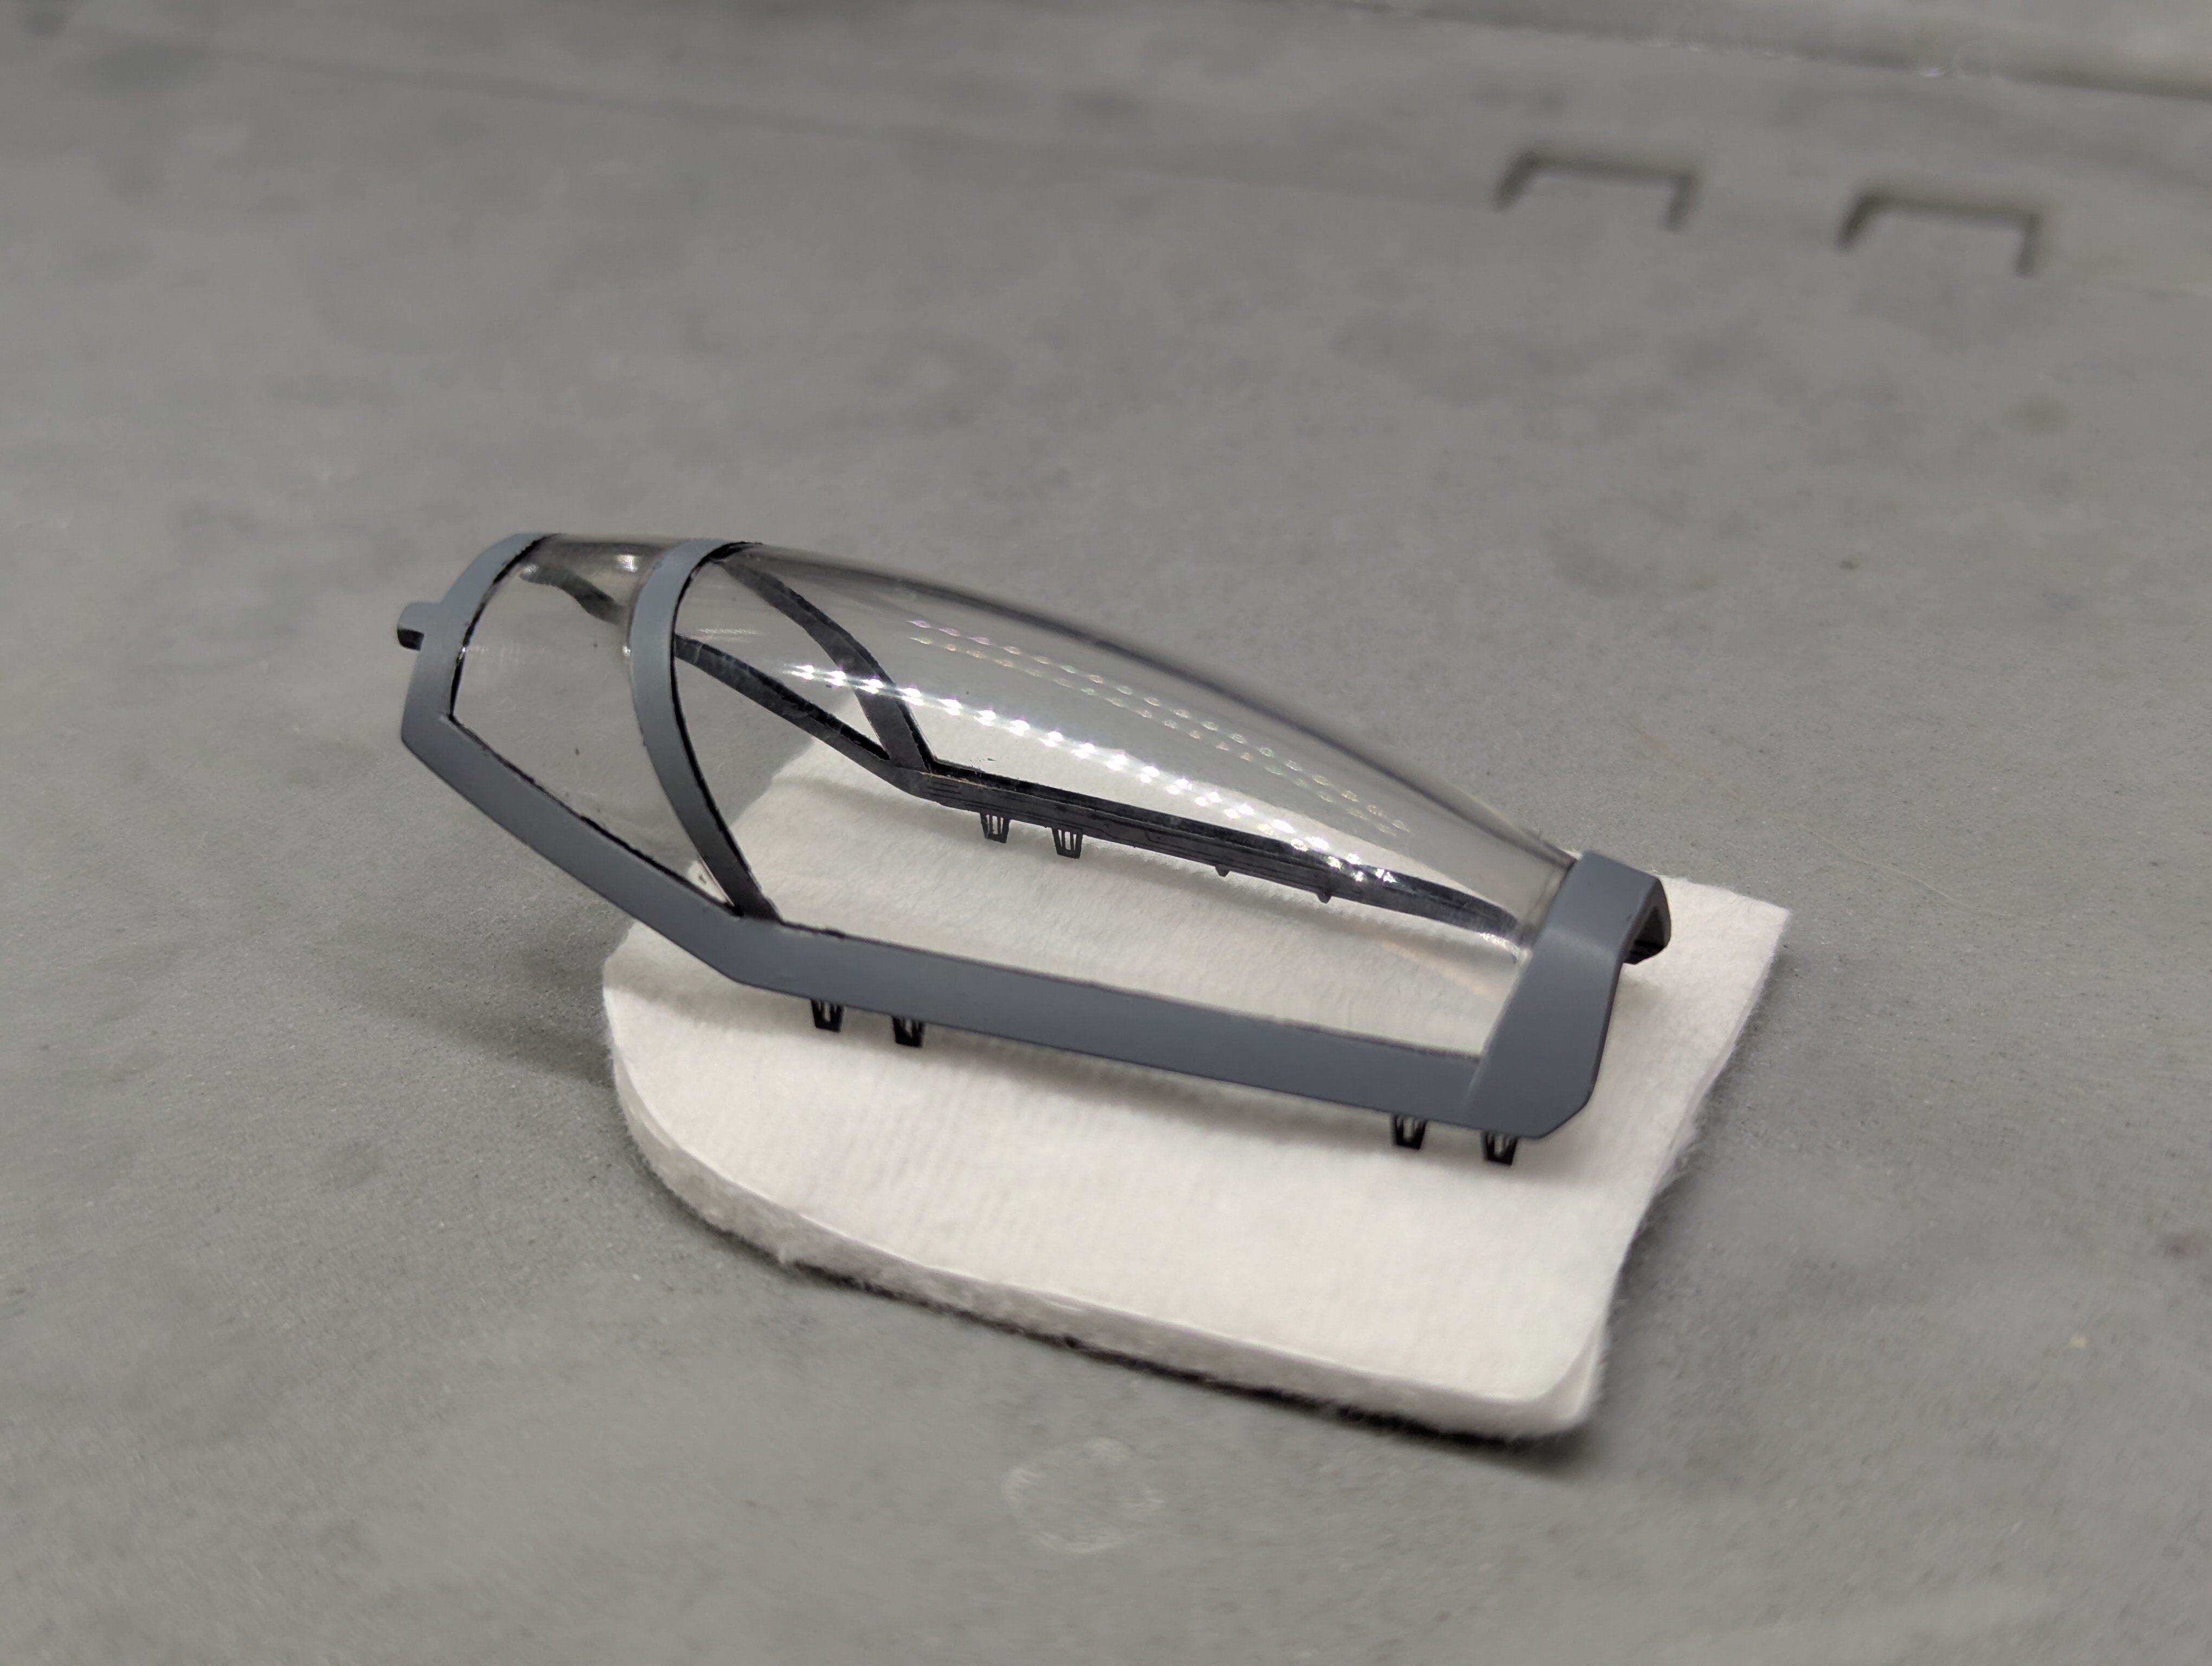
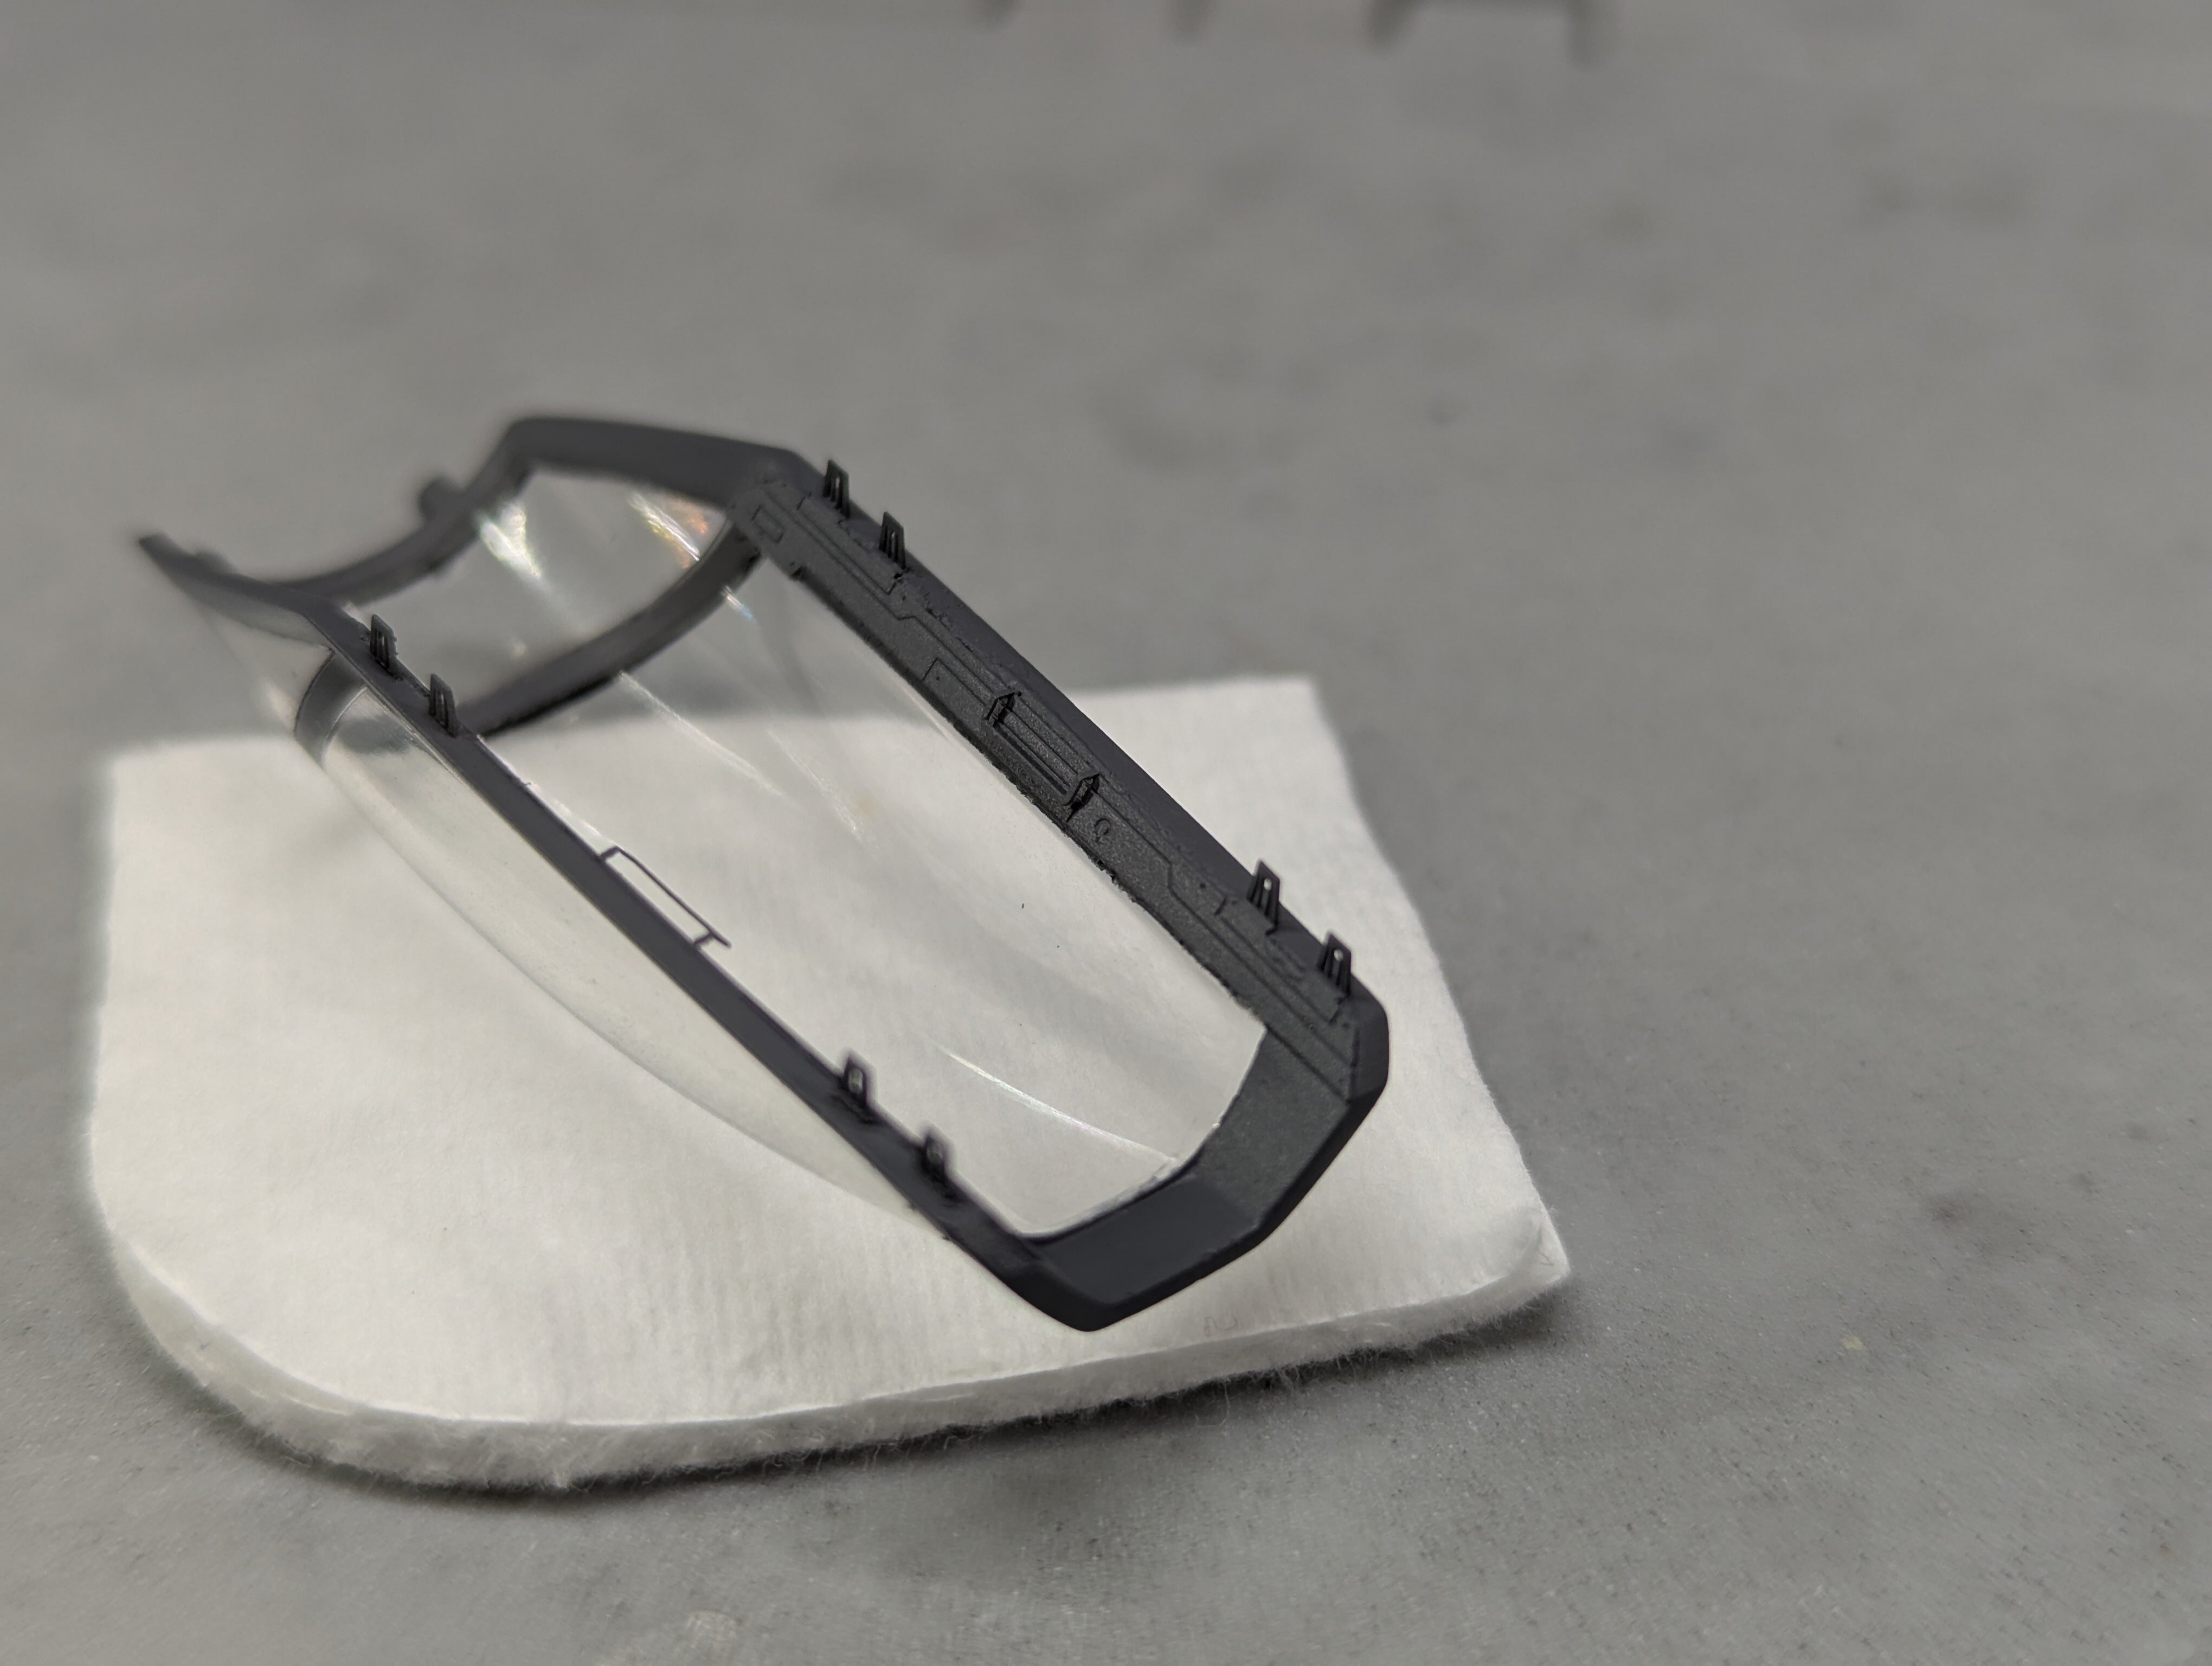
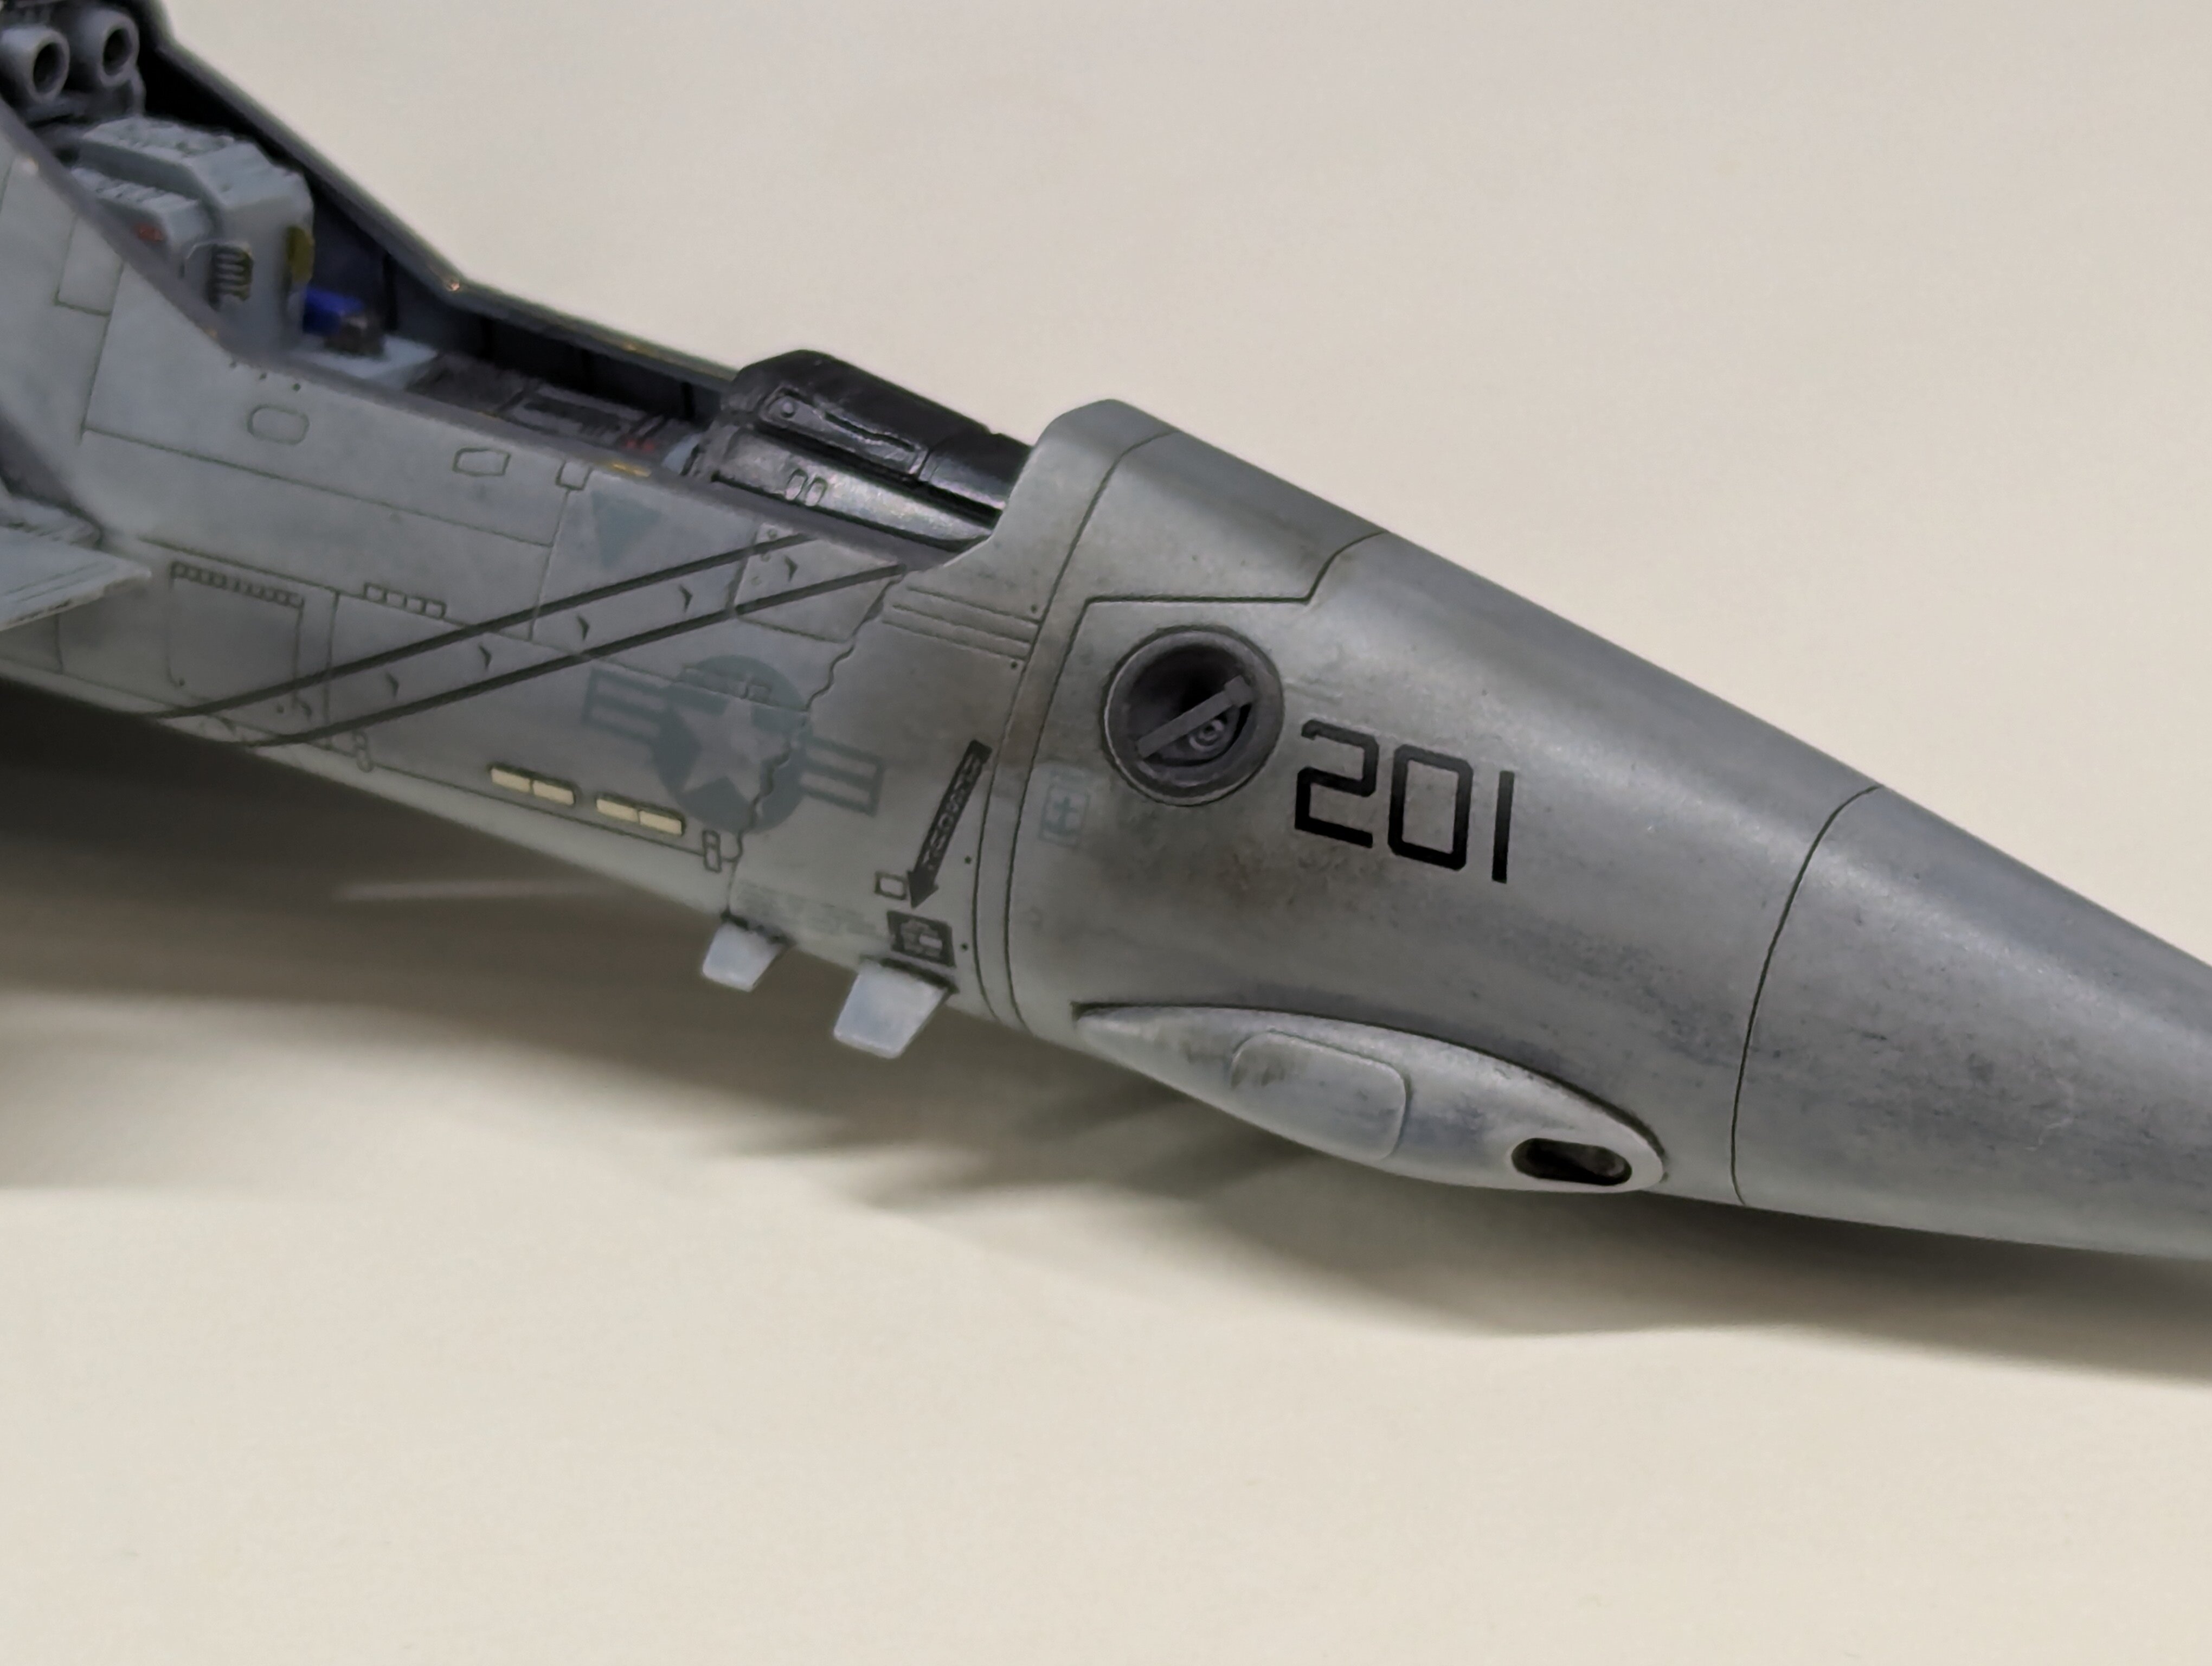
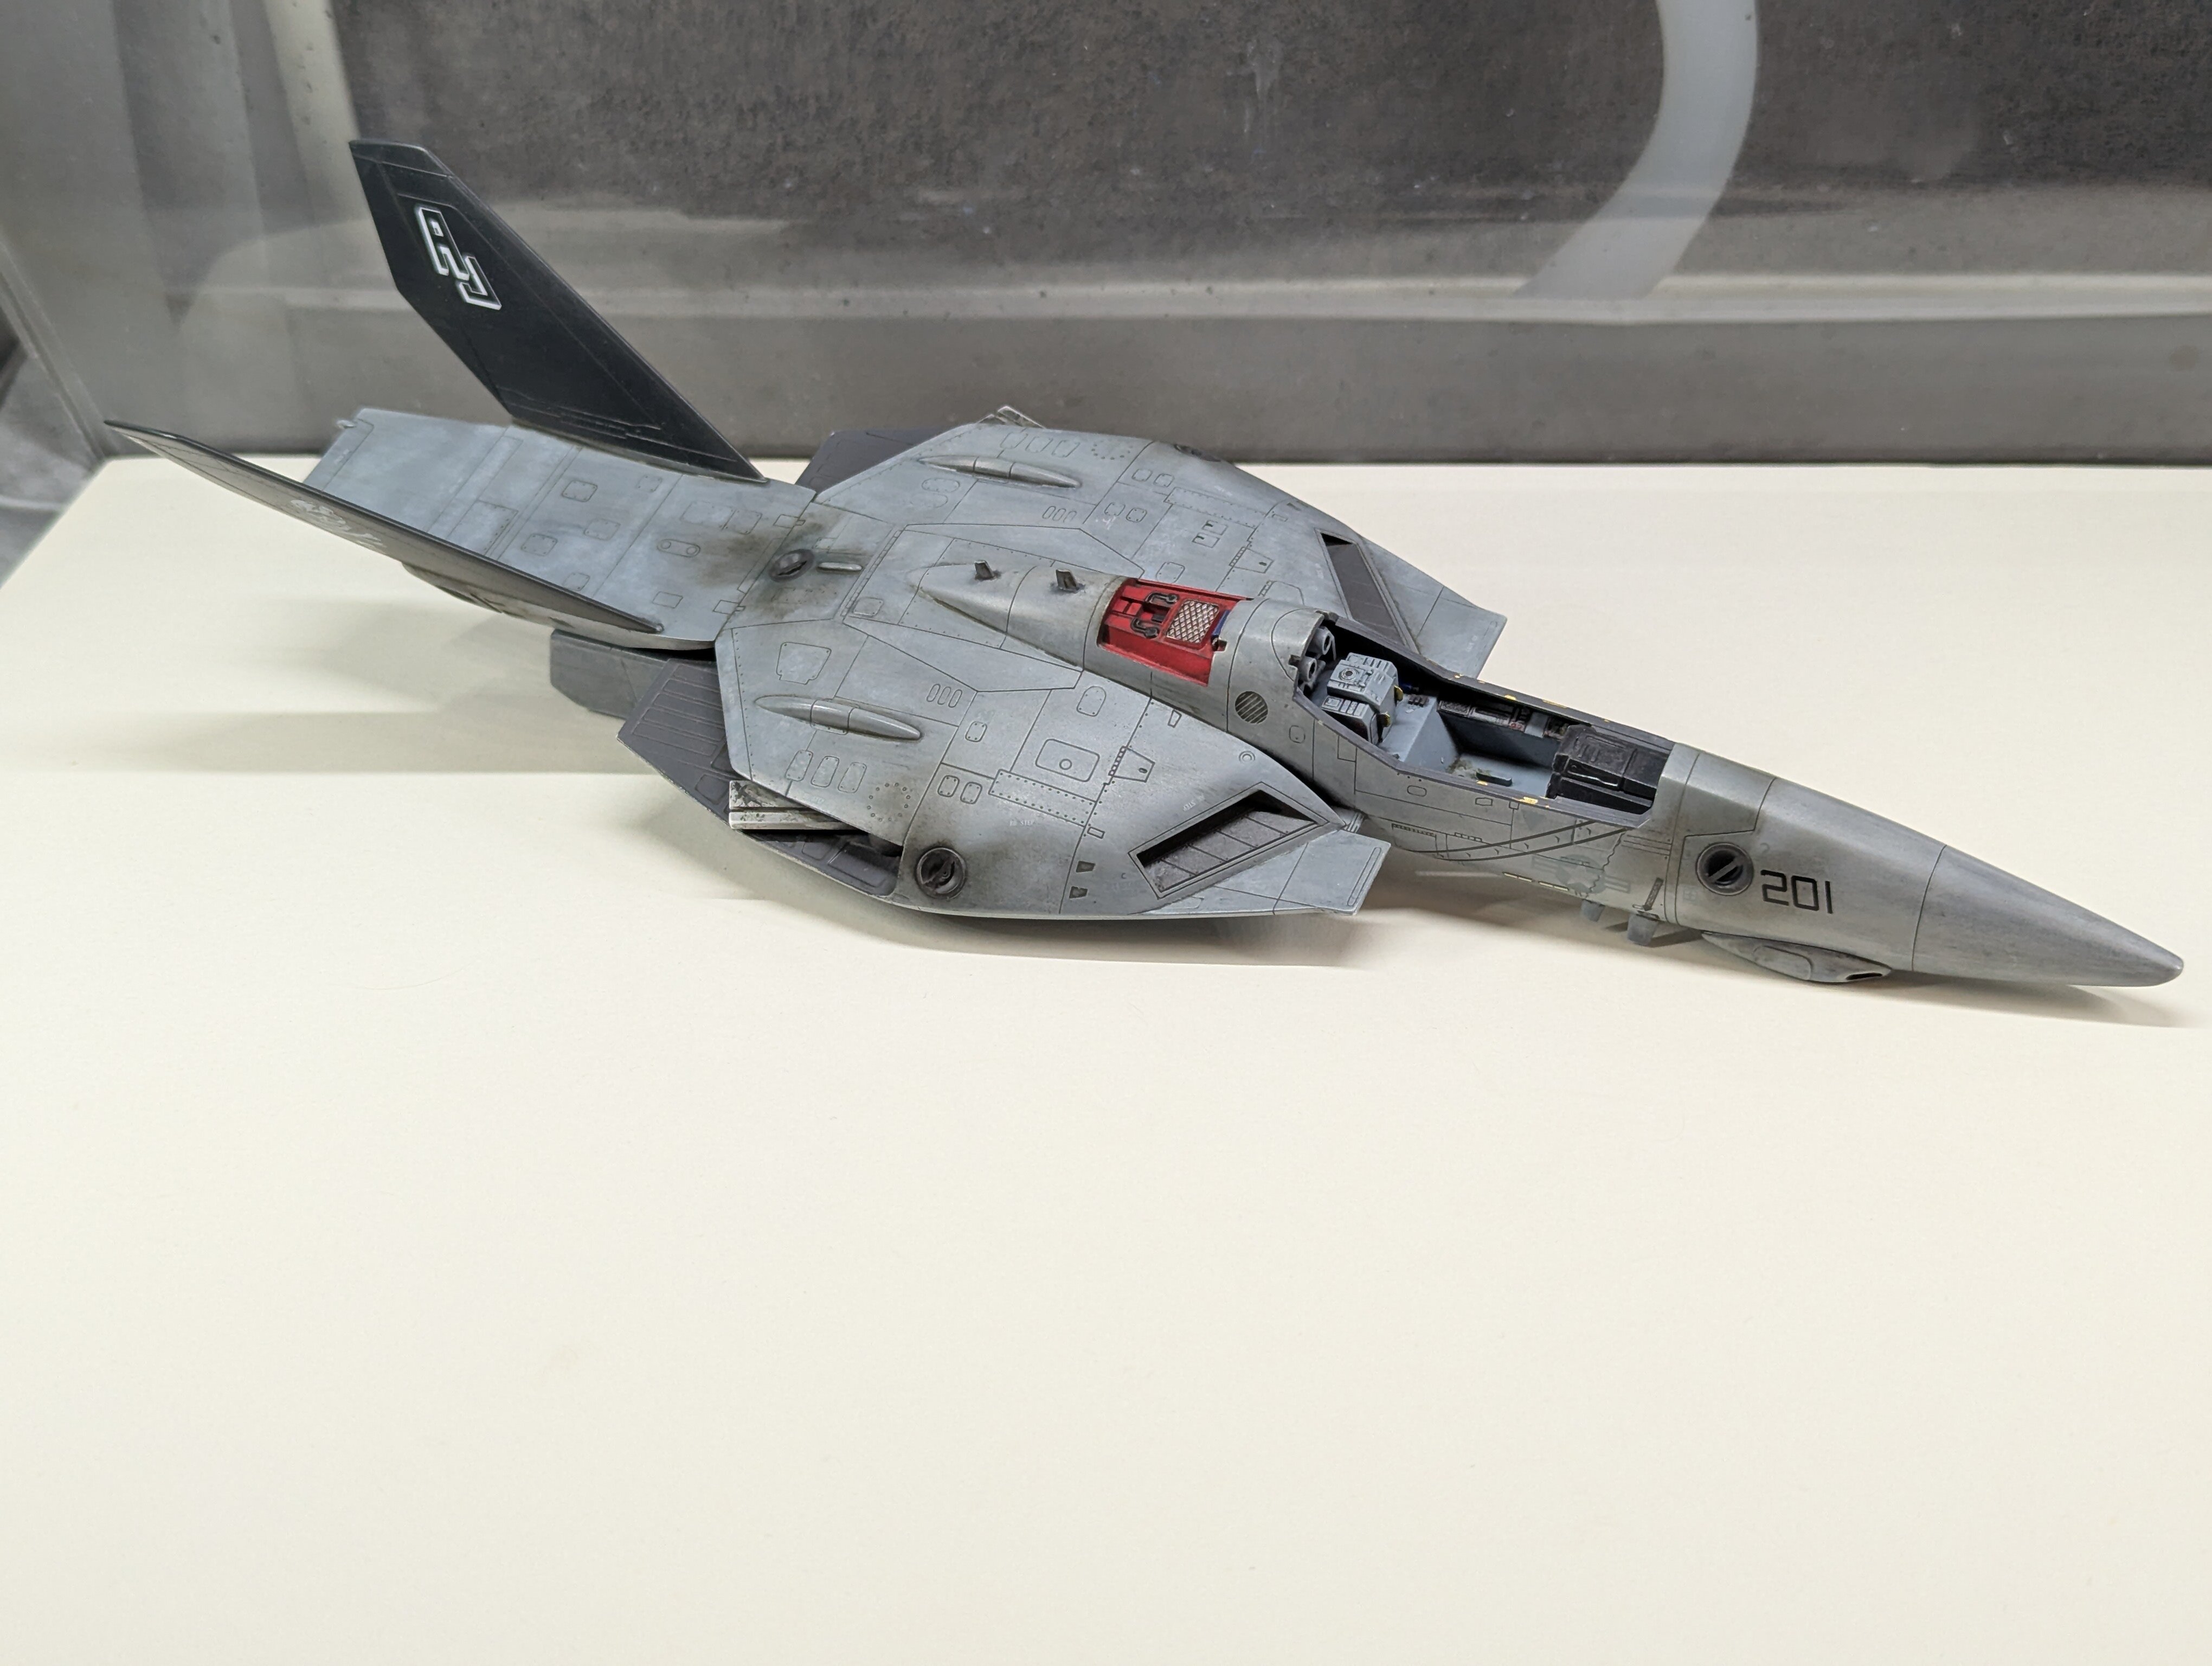
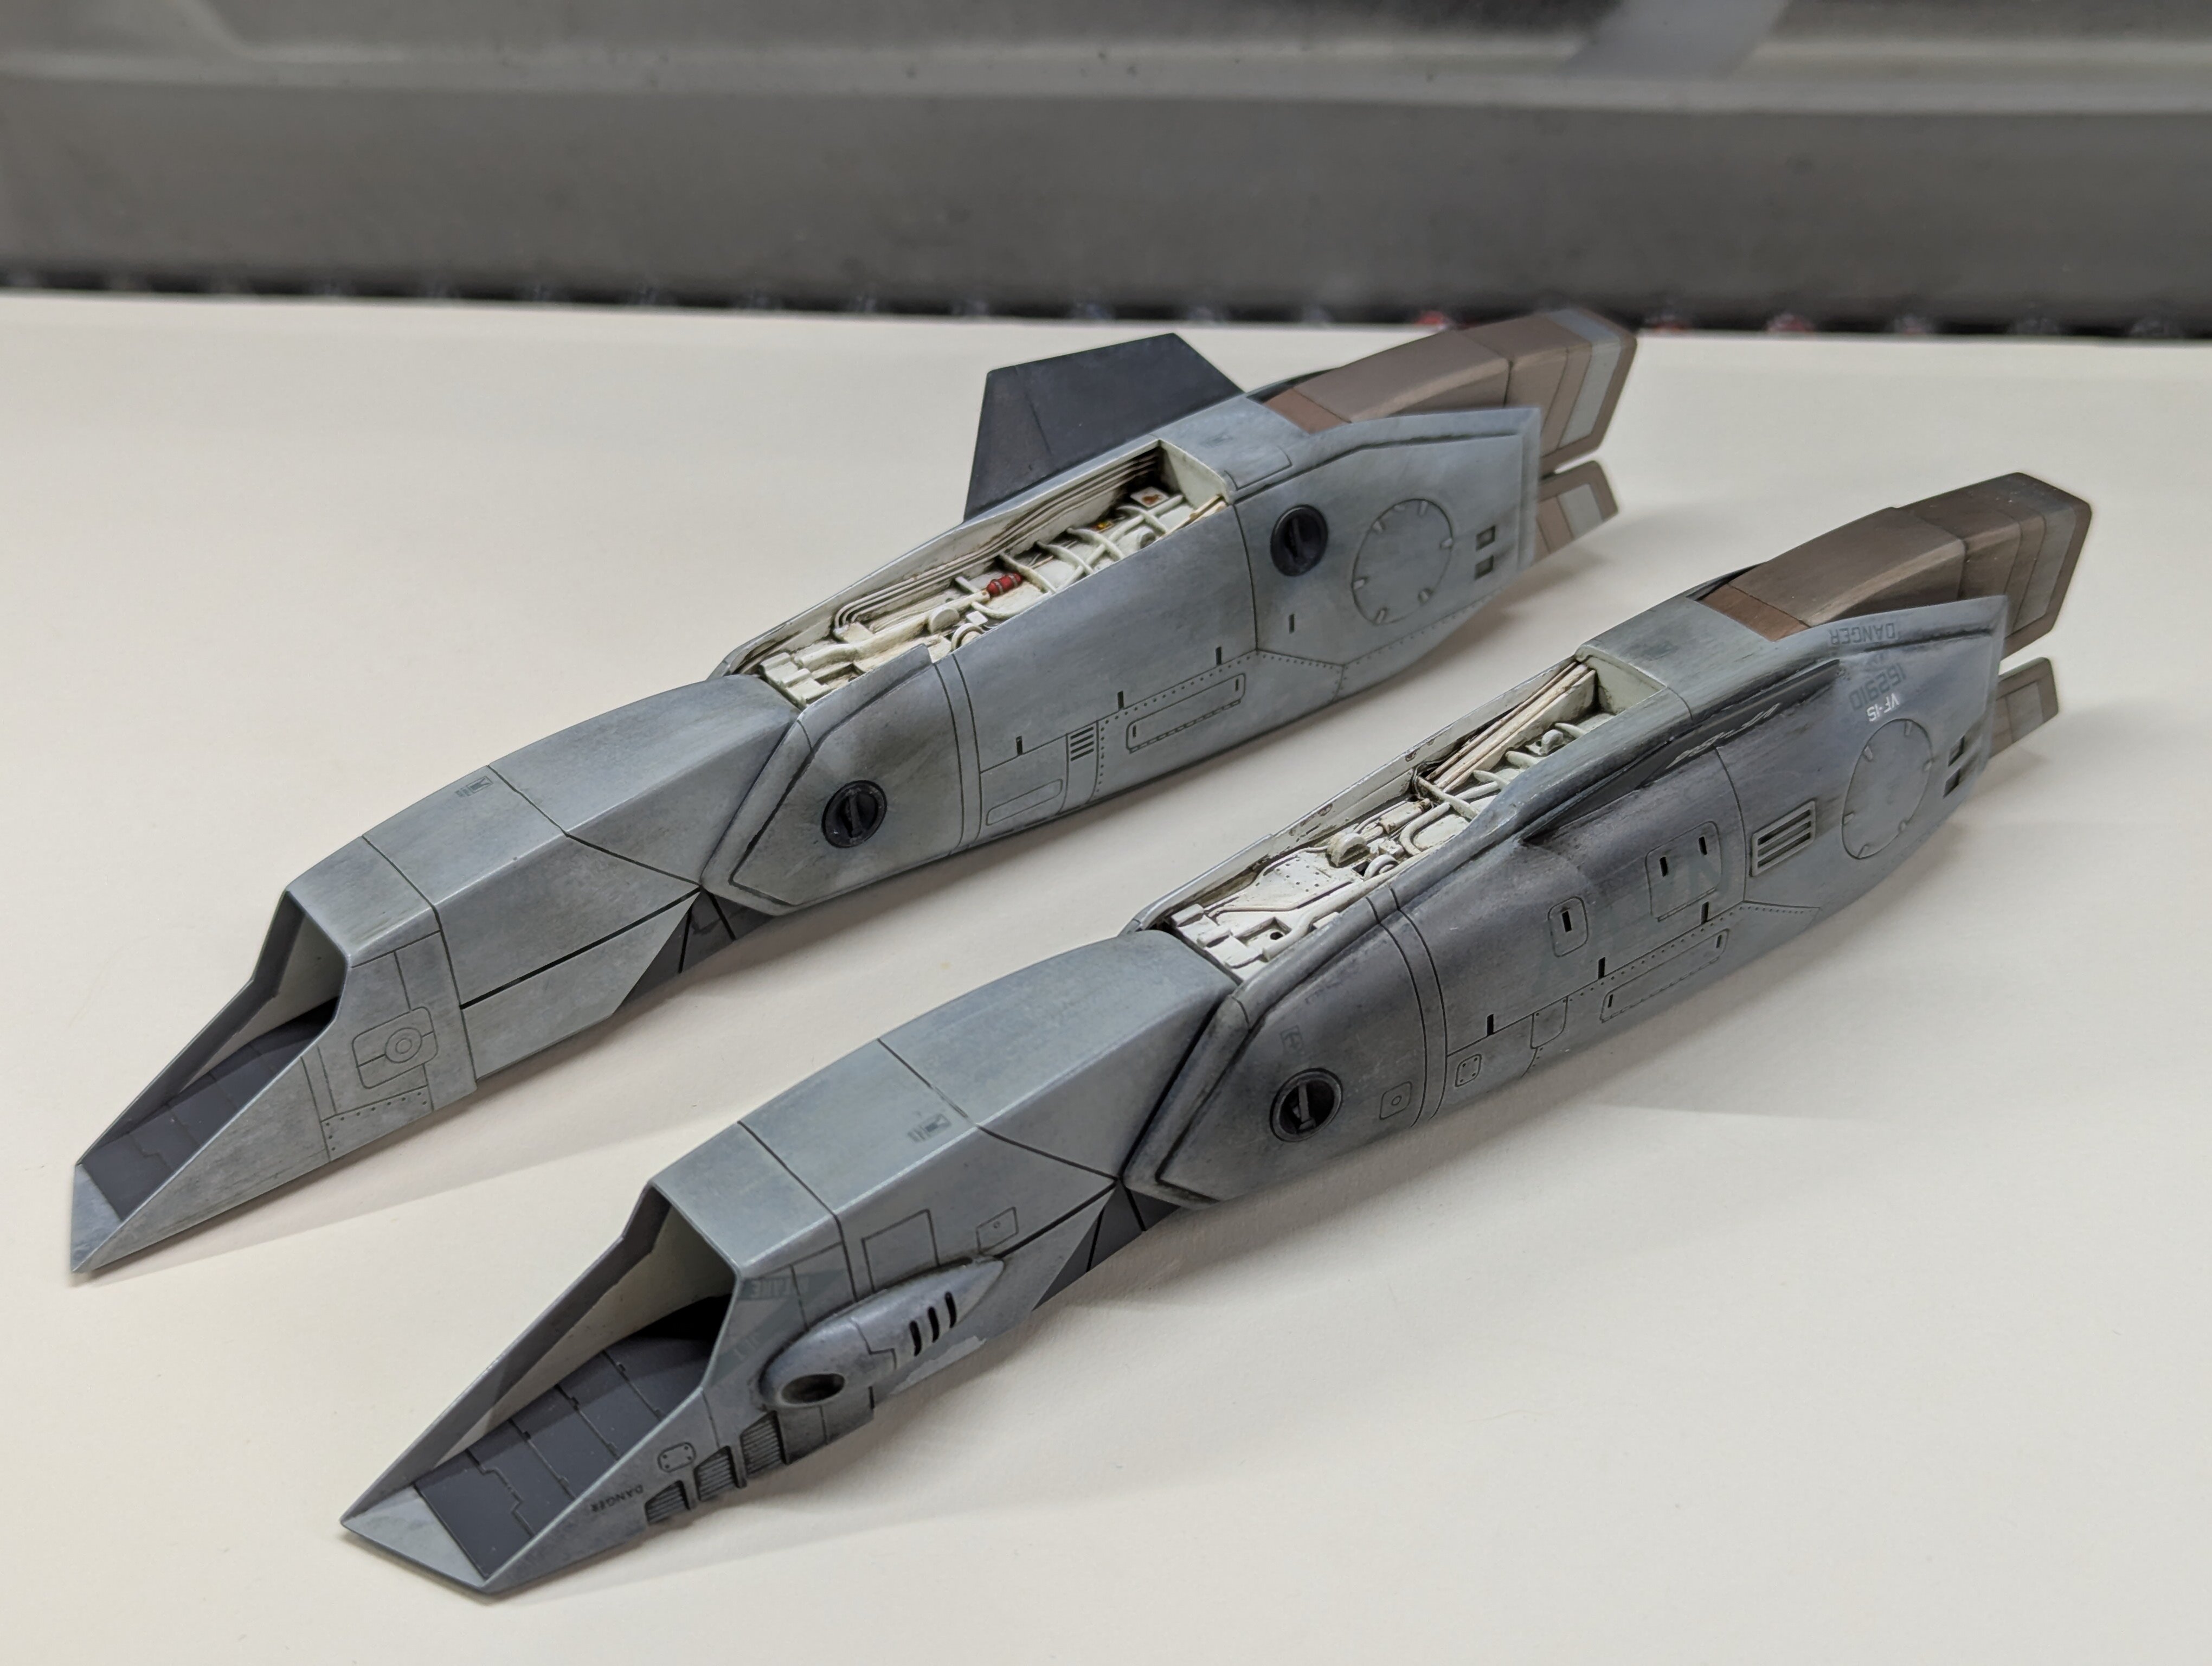
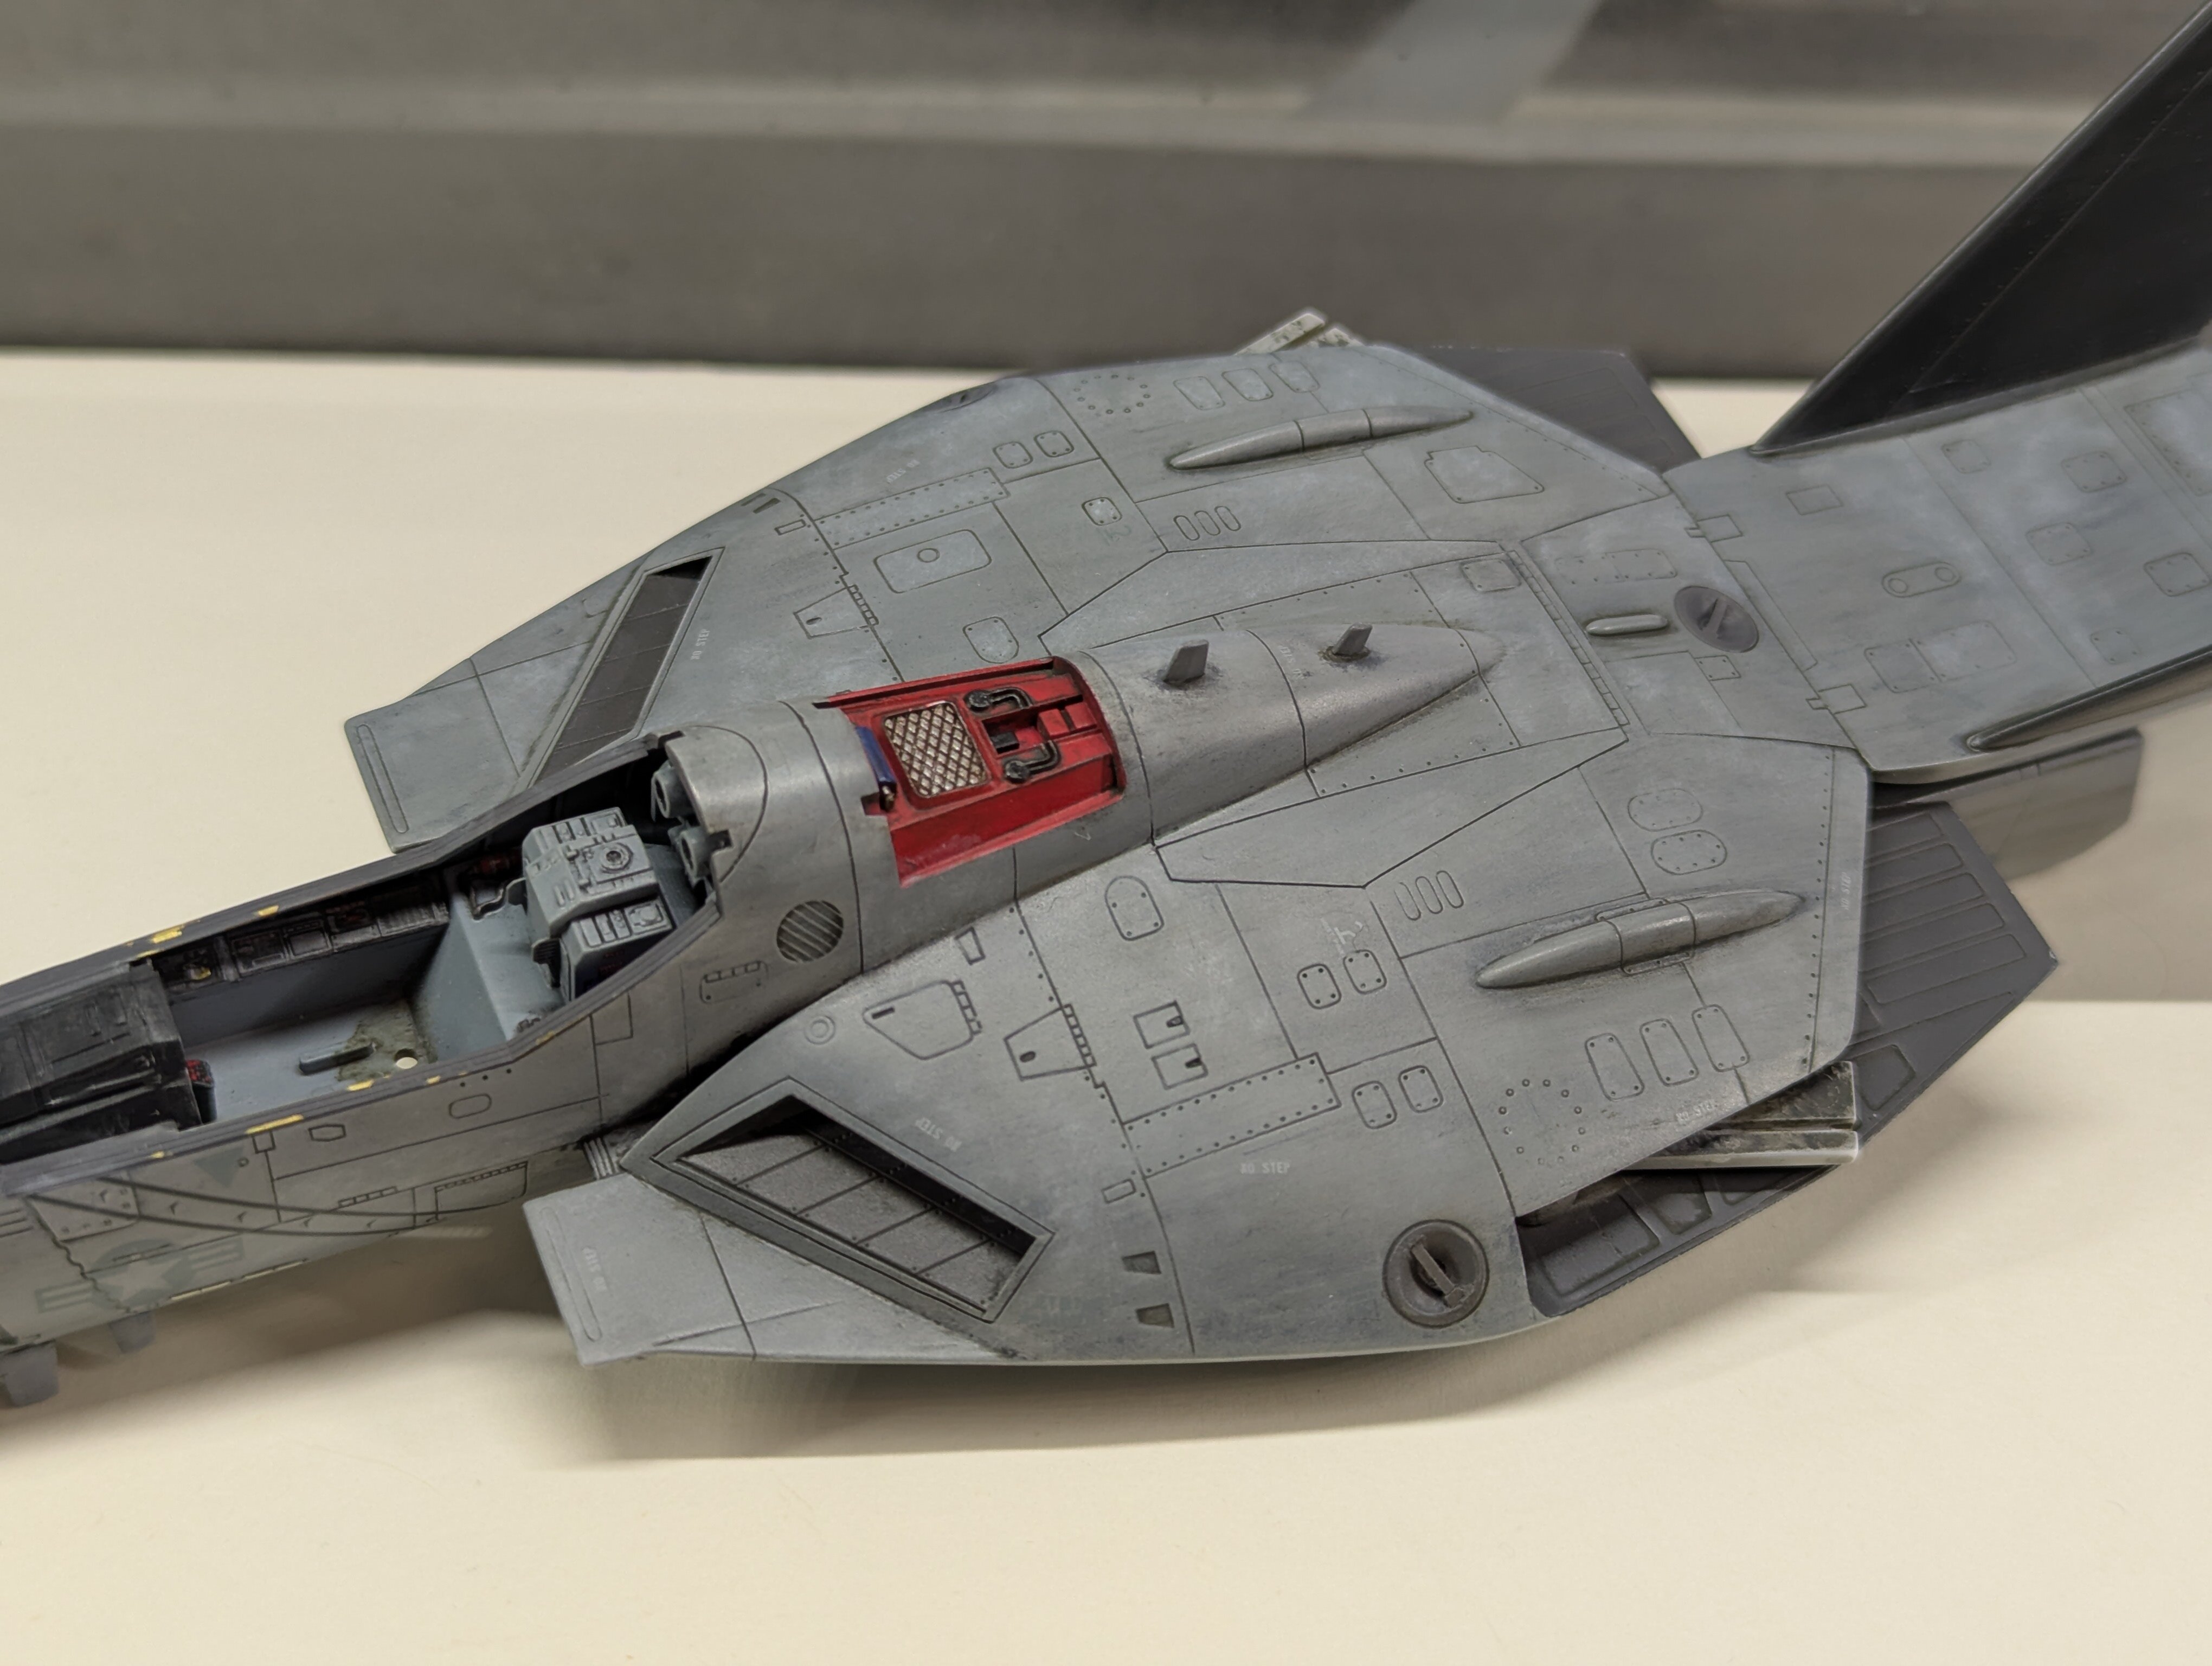
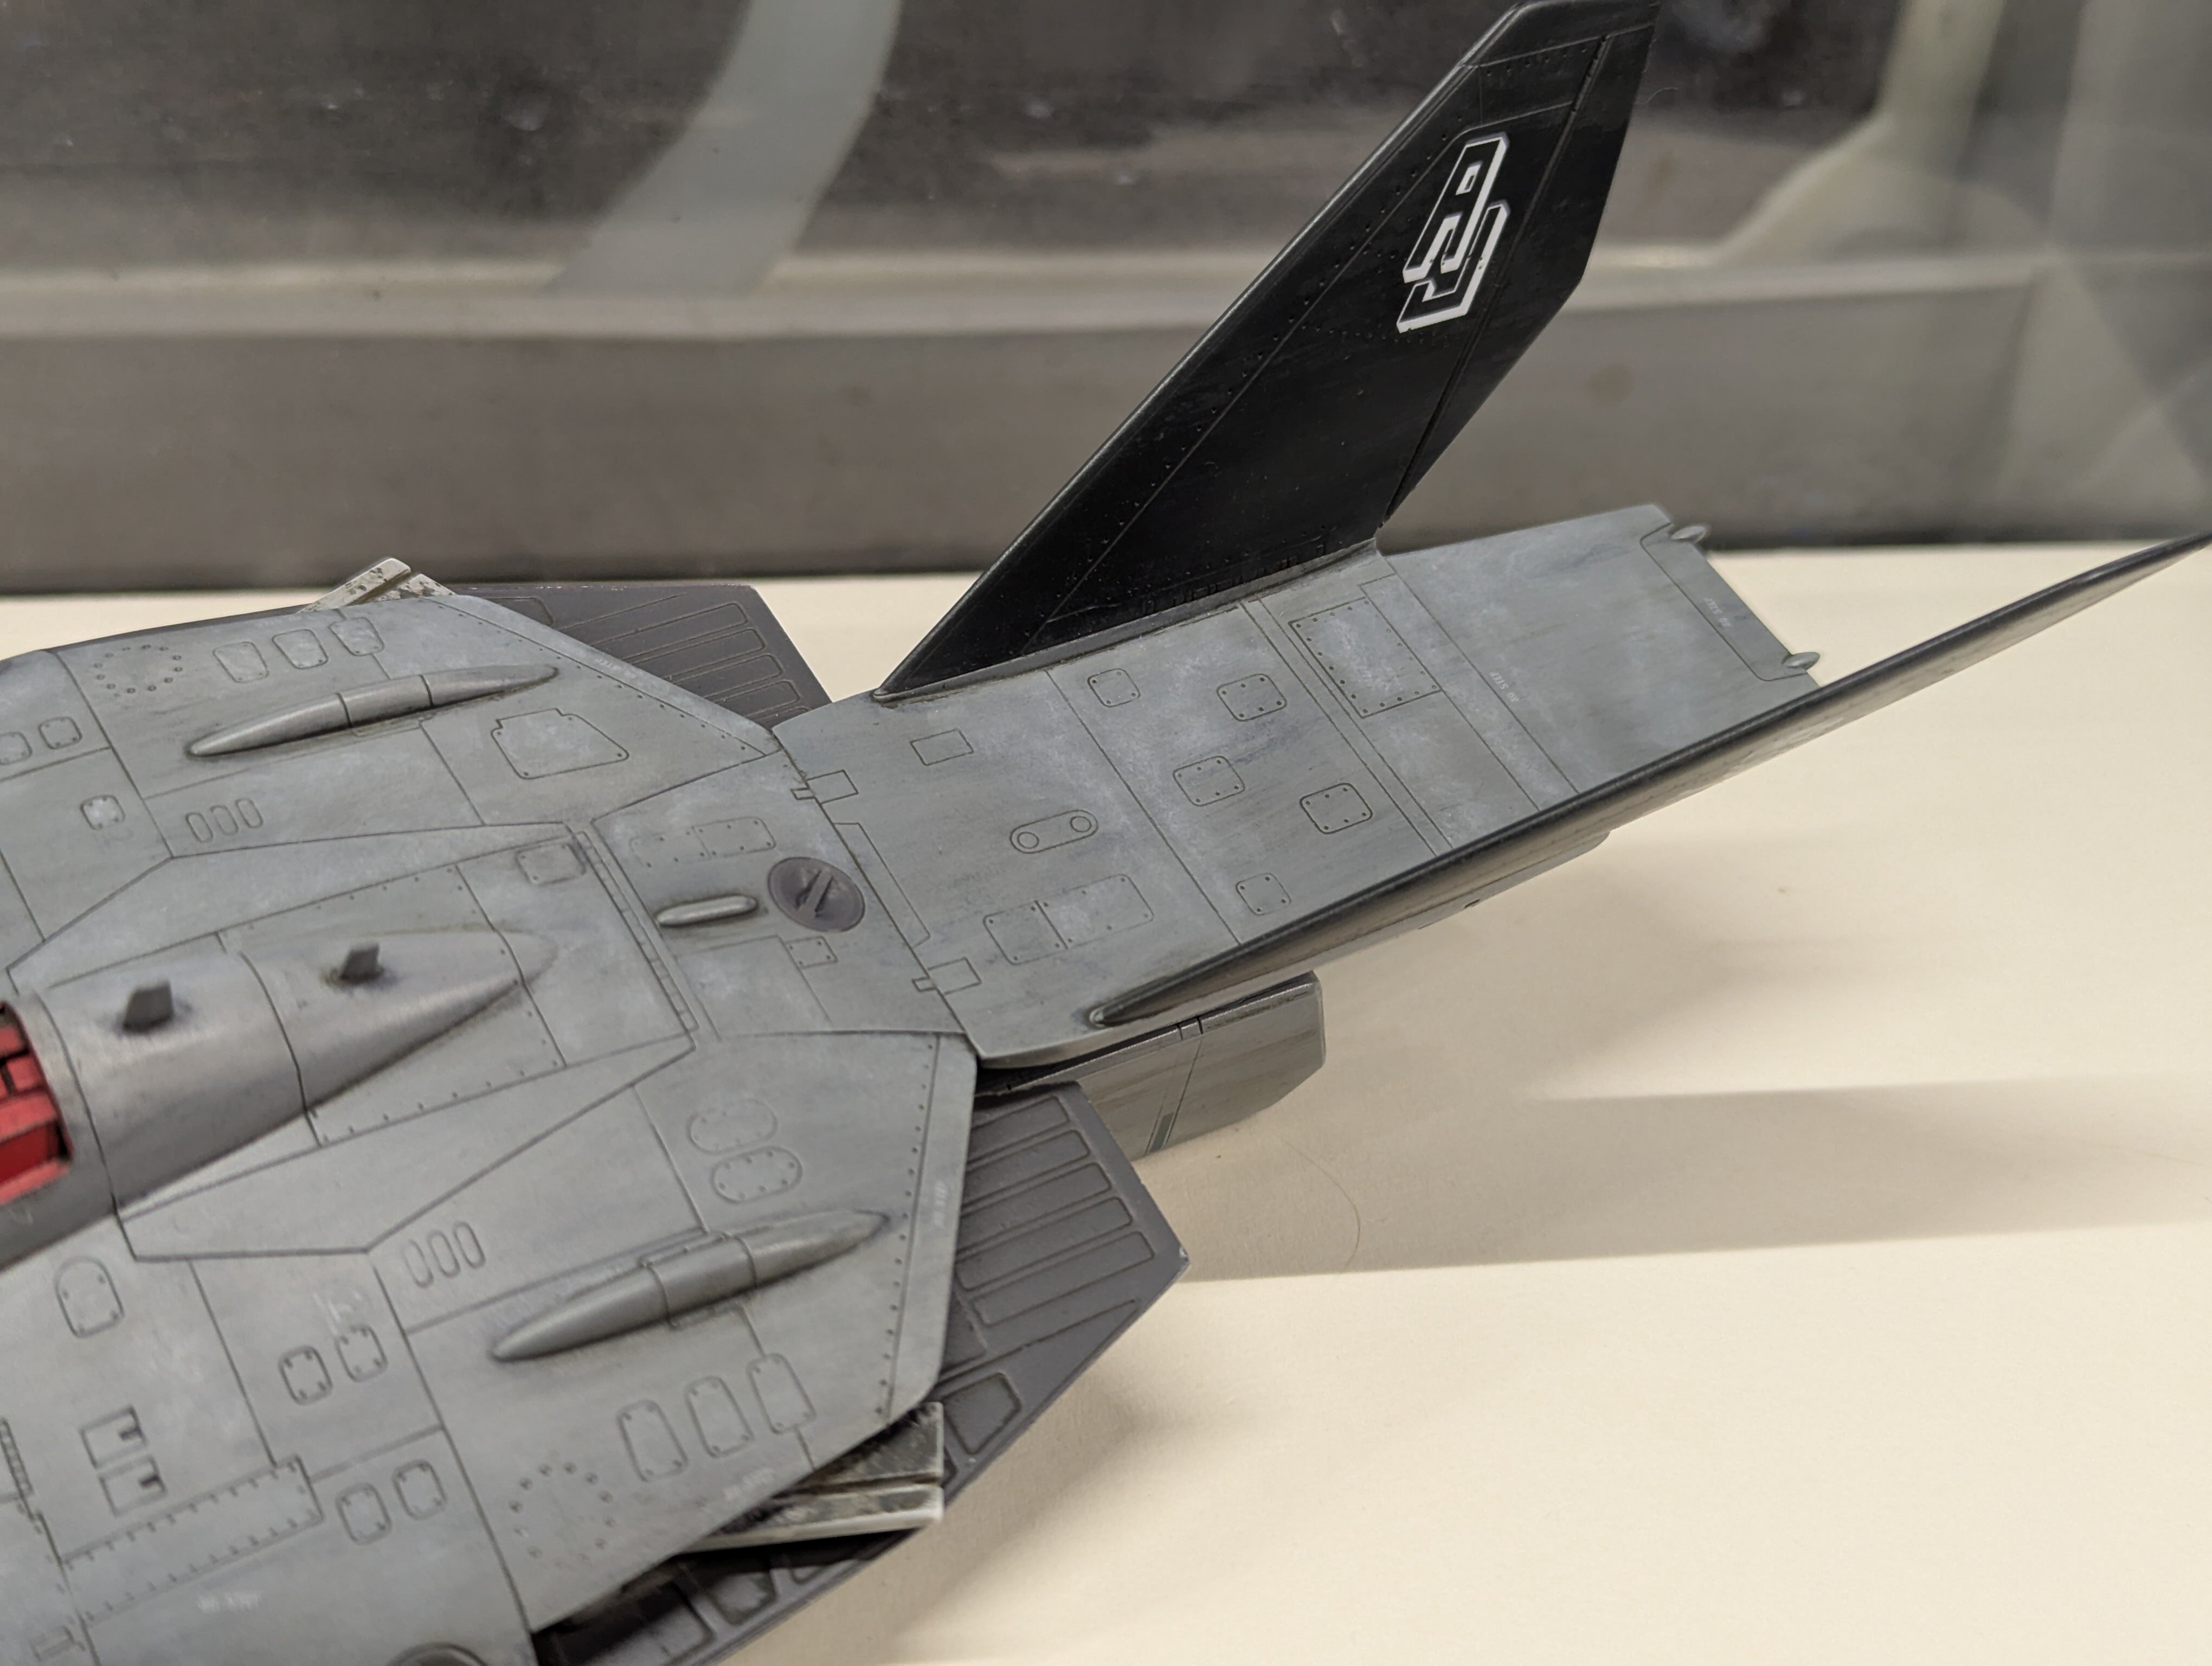
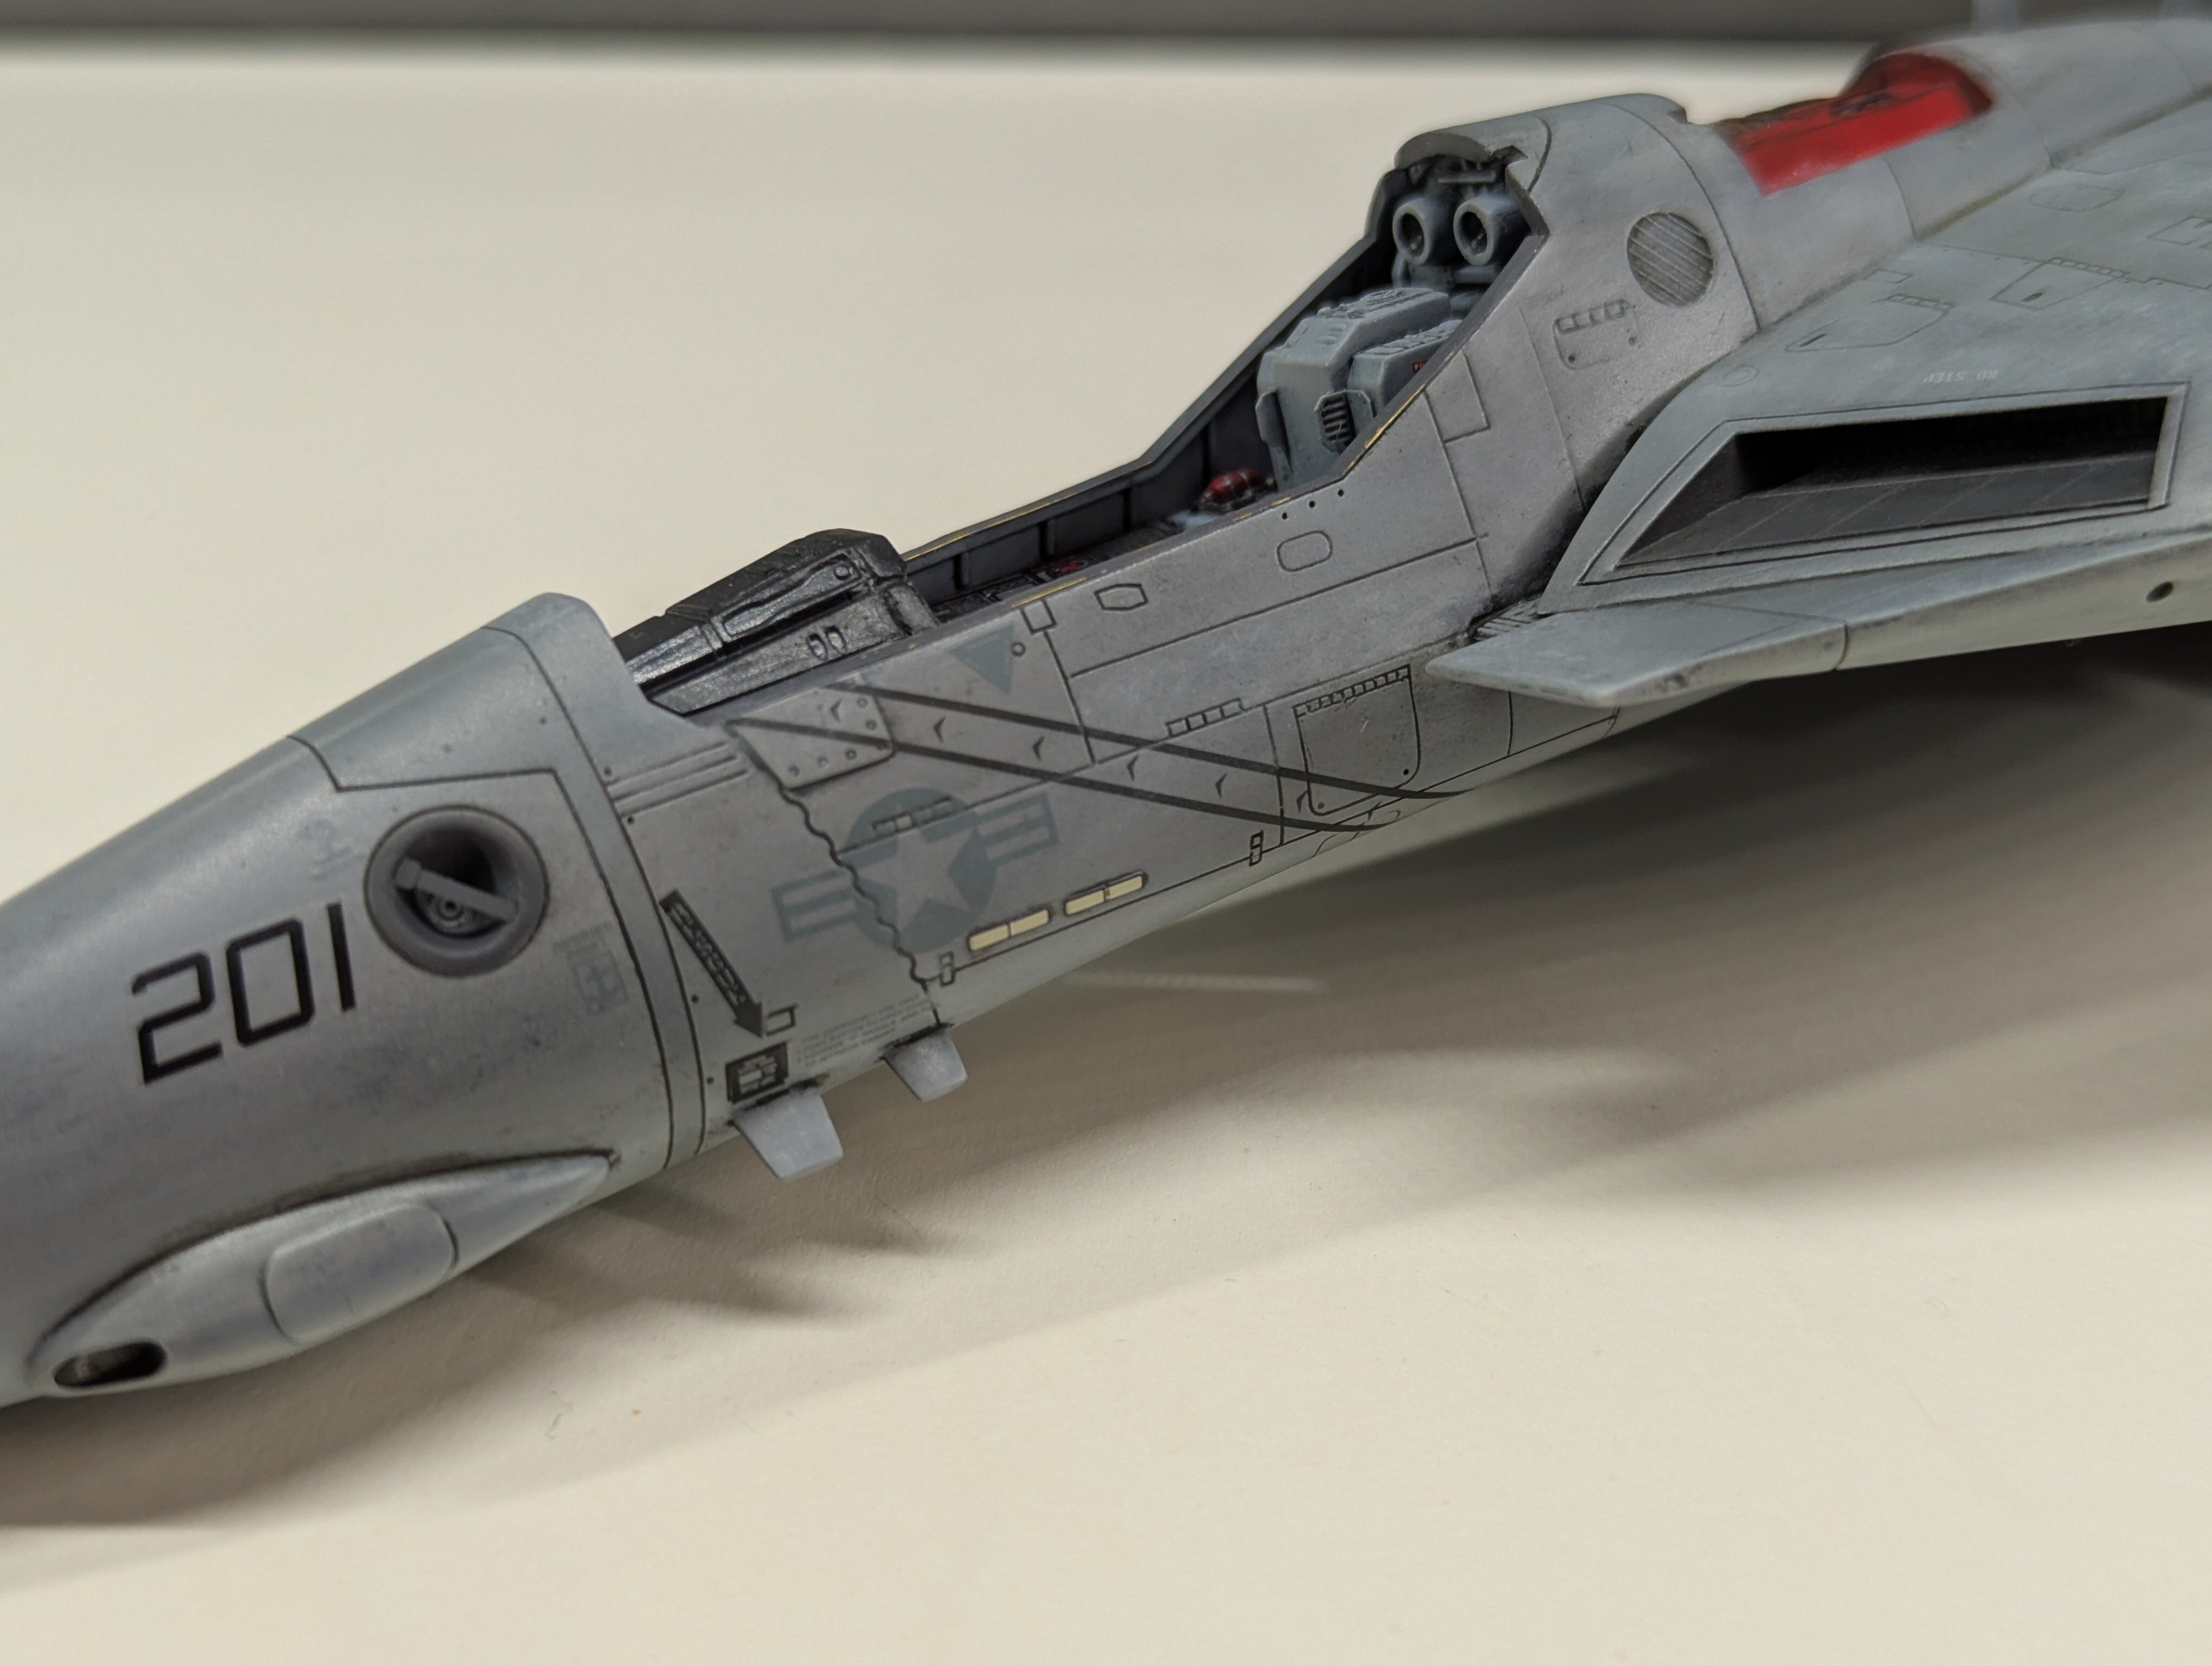
Hi All! I'm new to the forum, I've been into Macross and Robotech since I was a kid in the 80's. I started building models again during the pandemic and I started my first Macross project at the beginning of the year. I'm building a custom 1/48 Hasegawa VF-1S in a "What If?" US Navy Jolly Rogers low viz paint scheme. I added elements from both the Hasegawa and Jasmodel PE sets, as well as some custom details from my parts box, most notably the chin sensor from a 1/72 Academy F-14A to replace the stock gun pod sensor. I also added custom hydraulic line details to the landing gear and gear bays with wire strands, as well as sanding down the edges of the landing gear doors to get a better scale appearance. I used a combination of 1/72 F-14 decals for the squadron markings since they fit the small size of the Valkyrie better, 1/48 F-14 data stencils for most of the other markings, and a few select stock kit decals. I tried a multi-layer acrylic ink patina technique for the primary painting and weathering, which is supplemented by a grimy enamel wash, and oil paint weathering. I'm almost to the finish line, I just have a bunch of small details, and the oil weathering to complete before final assembly. Current state of the build. Legs, wings, head, and landing gear are not glued in yet. Custom sensor mechanics for the head built out of spare PE parts. It will be complete impossible to see once assembled. 😅 Cockpit. I haven't decided if I will use the kit pilot, an aftermarket pilot (I'm leaning towards using a resin F-35 pilot since the helmet looks pretty futuristic but still grounded in reality), or leaving it empty. I'll add PE belts if I leave it empty. I went my own way with the exhaust nozzles, I used the F-22 nozzles as inspiration and added both Hasegawa and Jasmodel PE to the interior along with some custom scribing on the exterior for more detail and to break up the shapes. The wheels got some sanding and scribing to add tread ridges. Sanding and cleanup on the landing gear door edges to make them look more in scale. The left one has been done and the right one is still stock. More cleanup on the main gear doors. Left one is stock and the right one has been modified. The curves were a pain to do, but worth it. Finished gun pod. This was my first go at oil weathering and I think it came out great. I also had an extra set of the Jolly Rogers Vagabond stripes on the decal sheet so I added them to the gun for some interest. I've seen one Tomcat where they did the stripes on the fuel tanks and like the look. You can also see the sensor from the F-14 instead of the stock sensor bump. I sanded off the hydraulic lines on the landing gear struts and added them back in with wire. I also hollowed out the pivot braces for a more realistic look. I added some hydraulic lines to the wheel wells. I didn't go too crazy since it's extremely fiddly and time consuming, but another little detail that's worth it IMO. Painted nose and main gear struts: Painted main gear doors with red caution edging: Close up of the nose gear with the wheels on. It's really starting to look great at this point. Leg light/sensor packs filled with clear UV resin. I still need to paint them with transparent red and blue. Aux head sensor filled with resin and tinted red. Resin lens for the gun pod. I'm using the DYRL canopy so I had to scrape, sand, and polish the seam down. I also used the Jasmodel interior PE canopy frames.