honneamise
-
Posts
483 -
Joined
-
Last visited
Content Type
Profiles
Forums
Events
Gallery
Everything posted by honneamise
-
This is going to be the bridge. For the three intakes on each side (or are they machine guns like on an F-86?) I glue syringe needle tips to each side. The sides will be "beefed up" by 1mm and, hopefully, only the openings will be visible then.

-
I buy them and build them. No matter if it is Hasegawa, Imai, Arii, Bandai whatever.- That´s what I will do ONE DAY! Fact is I have very little time do build them but that does not mean I´d call myself a collector. I open every box and stick the parts together just to get a feel what it looks like when finished. If I buy 3 of the same kit it is just because I want to build 3. Collecting just for the sake of it will only cramp my flat even more.
-
So I guess I´m a lucky guy, because I missed to get the 0A AND the SV-51 Ivanow limited models when they came out. Finally I will get both plus the boosters/ghost. But I too think the ghost will look good on it´s own. Wasn´t there a scene in Ep. 2 or 3 where one was briefly seen taking off from the Asuka? I wondered what it was until Ep.5. Maybe I´ll have to get another one..
-
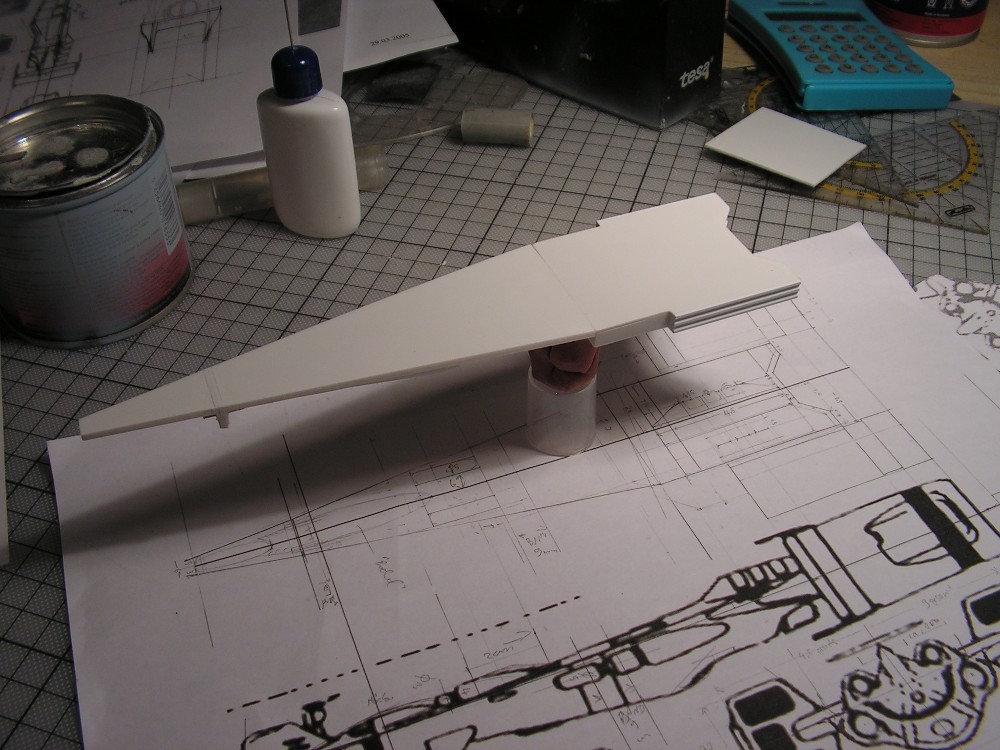
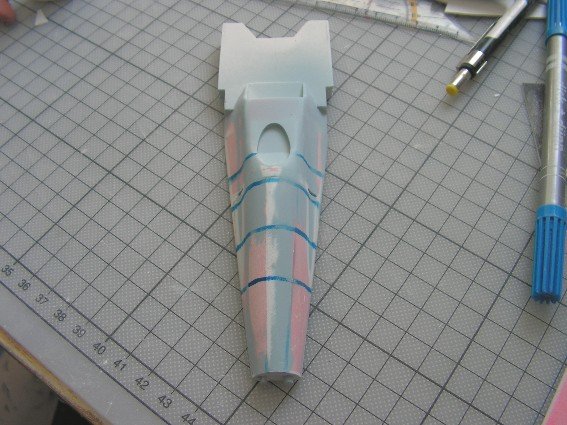
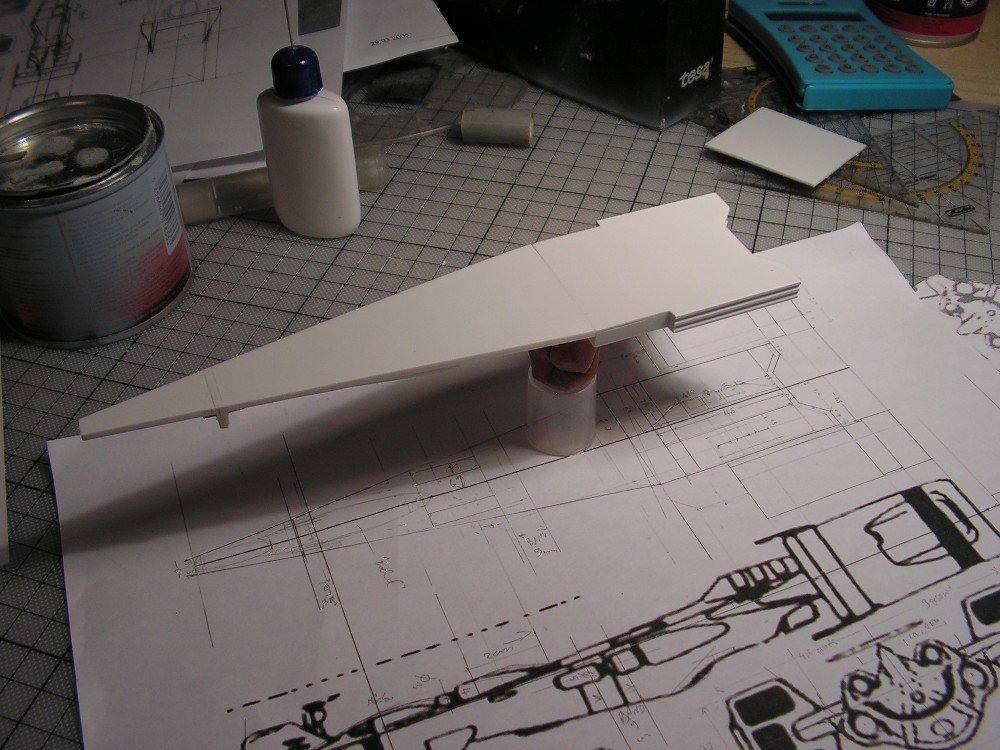
Hi guys I wanted to post new images with bridge and gun bulges, but these items can only be added after the hull is completely smooth and symmetrical. So I prime the hull, draw stripes on to be able to check if left and right sides look the same, they don´t, so I sand again, then redraw the stripes, check again, find the next flaw, sand again,......this sucks but without an accurate shape all following work will be wasted - and who said modeling has to be pure fun? At this stage it is more.....er...challenging i guess.
-
Great work Mechmaster, I very much appreciate this - I built my first (and only so far) Regult 20 years ago just like you but mine was one of my first partially airbrushed models - looks plain and boring compared to yours! And in the 80s I was still years away from your skills of superdetailing as well. Before I had an airbrush I tried to use a technique similar to yours to create soft edged camouflage schemes. When I finally had one I put all my efforts into airbrushing and never tried these things again. Your models prove that hand painting is not a dead end at all - no airbrush technique creates surfaces like these! And yes, your Regults look very Takani-style! My first contact to any Macross stuff was through the IMAI kits with Takani box art on them. I didn´t know his name but his renditions immediately got me hooked . I had seen japanese robots before but I considered them as being toys. The Macross mechas on the boxes were clearly big walking tanks, made of steel and fighting real battles - I had to have them! I consider Takani as the greatest box art artist - Shigeo Koike or Hidetaka Tenjin are more perfect in terms of smooth surfaces, lighting, realistic skies, tiny details and even perspective - I love their work, but still the Takani style is more...I guess I should call it "dramatic". His paintings rock!
-
Great model Grayson72 - I´d say the ARII Armored kit alone has deserved a 10 for its lousiness so your kitbash is at least a 12 on the difficulty scale from 1-10. I have seen your built and dug out my old ARII kit - man that´s easily the WORST of all the old kits with its thick parts, bad proportions (those upper arms, the head-what did they think they were doing?)and those crude details. Now that I´ve taken a good look at this disaster I can appreciate your work even more. Good to have your buildup thread - I guess for now this will be the ONLY way to get a perfect looking 1/72 Armored Valkyrie! I´m looking forward to see more of your work!
-
Thanks Grayson72! I guess casting this ship will not be too difficult since it is neither too big nor too complex. The more I´m working on it the more I like it, so, if I don´t screw it up for any reason, I will make a kit out of it. But I guess I shouldn´t start a waiting list or something before I´m finished with the parts.
-
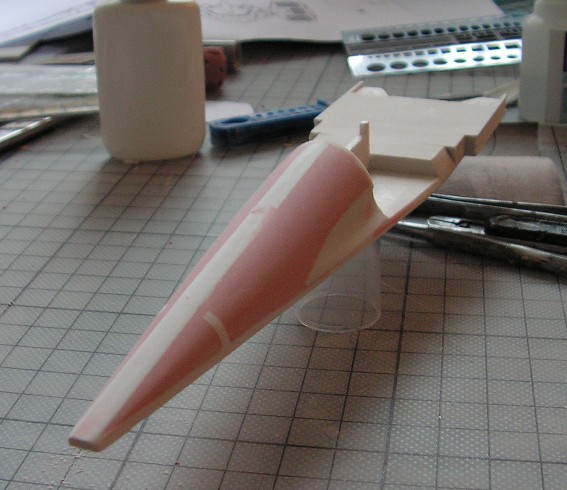
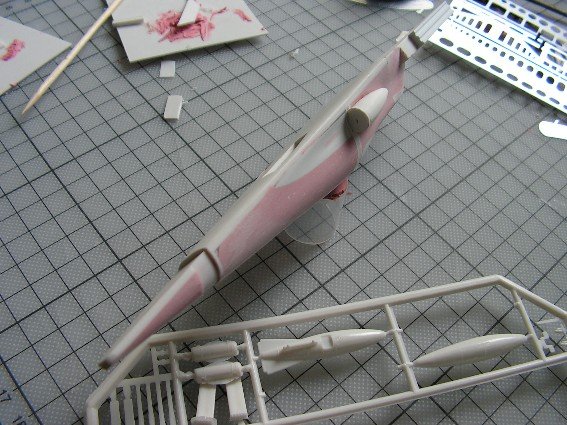
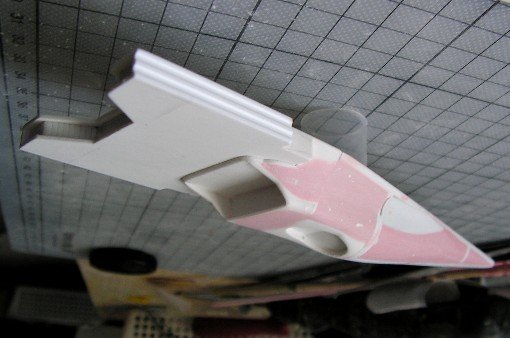
Finally, a pic of the underside (sort of). At the front you can see the thinned down area for the vernier thruster belt (All credit for naming this part goes to Nanashi. I didn´t know what this was meant to be. To me it was just one of those recessed panels which has to be painted black).
-
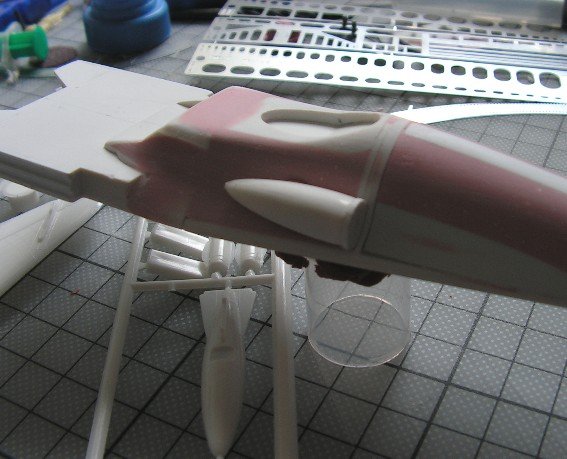
The bulges for the big guns are drop tanks from an old 1/72 MIG-15 kit. Those Anti-UN-Parts look exactly ike the lineart! With styrene discs of the right diameter glued to the front, they fit into the little slots I have left in the fuselage so the whole assembly will be forced into the right angle. At least I hope so.
-
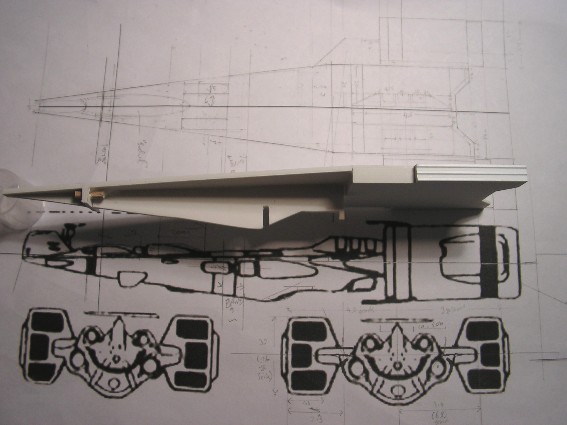
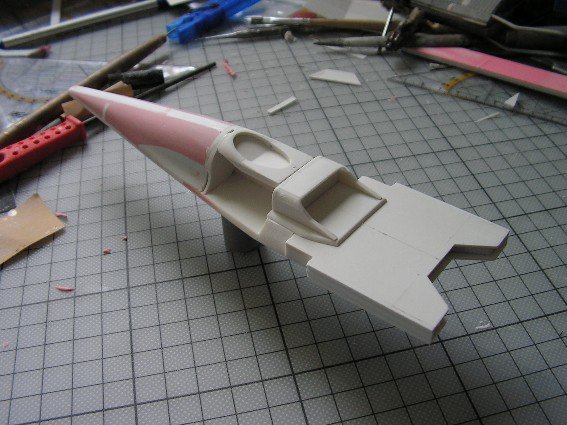
Of course. Dont´you, Gerwalker? Honestly, I had the lineart of the underside in mind and thought it might look good for a comparison. Could just have turned the model upside down instead of the picture i guess. I was rather busy with other things so only little progress for now: I glued the first part of the upper deck to the fuselage. It has a slightly curved profile and recesses where the upper guns go.

-
Regult in 1/35? Finally a worthy opponent for my 1/35 Defender! No, honestly, considering my display space and my wallet, I´ll stick to 1/72 and if it is a Regult, I have already Captain Americas on order. Still want to know what it looks like...especially what "image scale" means...
-
[/quote oh, which brand is it ? as i recall 1/72 is made by Arii/Imai/Bandai ] Well the 1/72 variable kit was first manufactured by Imai, after their first bankrupcy Bandai got the molds. They still make it today just different box art and they added a ladder and a bomb trolley or something like that. The 1/72 always was and still is a non-Fastpack(FP)- Version. The 1/100 kit was made by Arii. The first batch was non-FP , later they reissued them with FP´s. Arii was forced to sell their molds (at least the bigger ones) to Bandai, too, so the Arii kits were later reissued under the Bandai label as well. Bandai added further parts to make a STRIKE-Version of the VF-1. The newer releases show Strike OR Super Variants on the box art and you can build both versions but NOT the basic Valkyrie without the added armor. I have old Imai/Arii/Bandai/Revell issues of all the kits and no matter how old the plastic is the same quality on all the kits.
-
Great work Grayson72. The surface looks very smooth and the detailed areas are perfecty finished. I can´t spot any flaws - considering all the air bubbles you mentioned this must have been a long and hard work to get it to this level of perfection! I really love the paint job with the flat red and the shiny accents on some panels. Did you use just plain red with a flat coat or is it somehow toned down? A red finish no matter how well applied does often look toyish IMO - maybe because you don´t see it that often in real life - but your Ghost´s red is perfect! The metalizer paints add to the realism and make it even more believable. Is the front "eye" /sensor a clear piece and maybe even lit from behind? You definitely have the skills to bring out the best of a kit no matter how basic/flawed it is in the beginning! Can´t wait to see what you make out of that old VF-1 D!
-
More Oberth now... more filling and sanding and the underside is slowly starting to look like it is supposed to be - still very rough though
-
CoolZero, I´d go for the 1/72. If you look closely there ARE many differences between the two models, overall the 1/72 has better proportions. What Skull Leader mentioned is true: the elbows suck! Moreover, I don´t like the narrow cockpit canopy, made of too thick material, I don´t like the squattyness of the chest plate, the nosecone in Battroid mode is not slim enough, the head tends to fall off in Battroid mode because of the bad polycaps etc etc. The 1/72 is a better build and looks better IMO. It Should last a few transformations longer before it starts to fall apart.
-
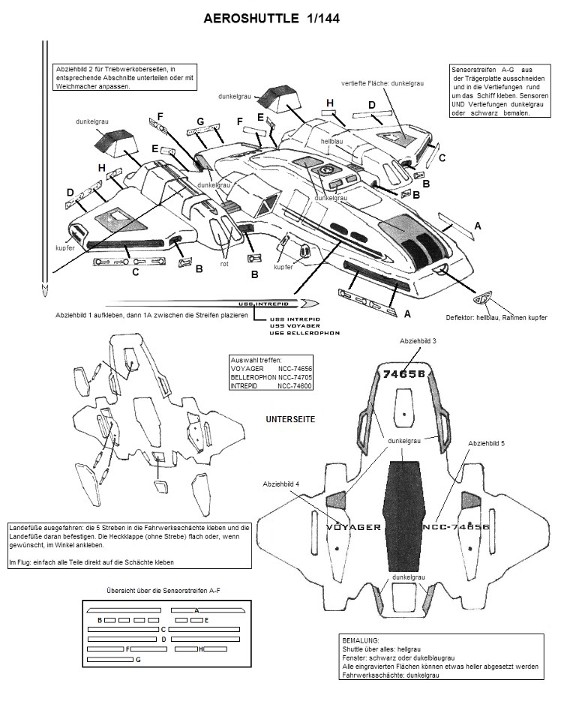
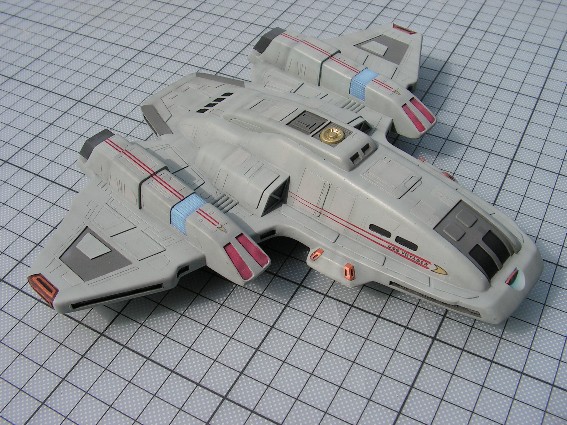
Grayson72 did you mean the Oberth or the Aerowing? Thanks for your support guys, yes there are still some aerowings for sale, at least the mold for the main body will still be OK for about five more I think. But, first of all, let me point out that by posting the aerowing image I did NOT intend to turn my own thread into a non-Macross-related promotion for this kit! Still, for once, here is some info on this one: It is my own take on the aerowing based on a photo of the Voyager underside and the CG image from the Starship Spotter Book. It is basically guesswork and so it looks slightly different from the small Federation Models kit. The upper surfaces are less flat and the engines are somewhat slimmer. Length is 17,5cm, scale is around 1/144, 1 solid main body (no clear windows, can not be lighted), option for landing gear up/down (just my own assumption that it HAS a landing gear unlike most other shuttles in ST), parts count 30, most of them being sensor strips for the recessed areas around the ship, decals with registrations for 3 ships (Yoy, Intrepid, Bellerophon) but only printed on ink jet printer so no white, look OK but JT Graphics is lightyears ahead. Here in Germany it is sold for 80 EURO but considering the current USD exchange rate I will make it 60 EURO for MW members (plus shipping) to get you a USD=EURO rate. Please consider this model is not pressure cast (though the Oberth will be if I get it right) so there will be some imperfections. I do howewer hand-laminate the surface of the main body so the quality is still somewhere on the upper end of the ST Garage kits you can get nowadays. I will have to make some new molds for smaller parts so it will take some time to finish these kits. And I will translate the instructions of course. I don´t want any downpayment, just PM if you want one and I can send you a shipping quote/more pics/whatever you want. Finally here is a pic of the instructions to get you an idea of the build.

-
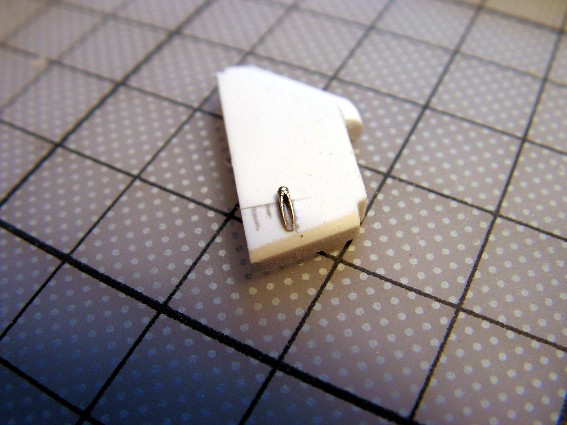
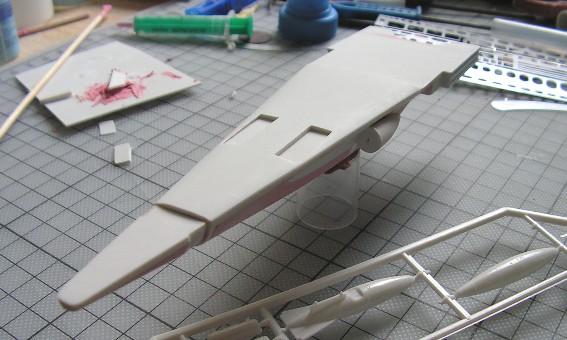
Thank you Ravenstar, and I´d love to make a kit out of this if there is enough interest. But at this stage I hesitate to announce this as a fact because there are still many things that could go wrong or in the end it might just look wrong. I build this ship in sections so that I can decide whether to just glue everything together at the end or make molds out of the individual parts and have a kit. You may have noticed the nose cone is fastened to the rest of the body via two small wooden plugs. That´s where the hull will be split to allow casting of two separate pieces ( that fit into my pressure pot). And jardann, I´m using a standard polyester car putty, almost white stuff, mixed with a small amount of red hardener. Curing time is about 2 minutes, after 20 minutes you can sand it. I guess it is made for fast car repairs you get it in almost any bigger store. You can work fast and the best thing is - it doesn´t shrink! (but it smells....) So IF I make a kit out of this I´ll be using pressure casting for the first time. My last project was an Aeroshuttle from Voyager (the Captain´s Yacht style ship that can be seen under the Saucer of Voyager but they forgot about it and never used it) and I have a hard time hand laminating all the parts to avoid air bubbles. Still came out OK , here is a pic on a finished Aeroshuttle.

-
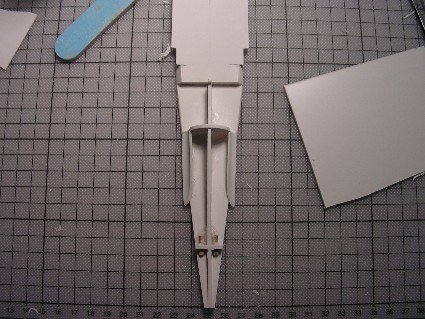
Well Grayson72 I just cut the Styrene along a ruler with a common cutter. I then sand the part again to get rid of those raised seams that are always present along the cutting lines (at least if you use a cutter, a saw will make a "seamless" cut but I haven´t got one). Maybe that´s why it looks very clean after all. I added more underside details and made the aft portion of the fuselage more angular, looked too shallow when I looked at the lineart again. Now it is time for some more filling and sanding but I´m done for today. Had way too much coffee
-
After some filling and sanding mayhem the underbelly starts to take shape.

-
Here two tube sections are glued on to form the recessed shape where the big guns go.
-
Well the basic frame is made of 2mm styrene while the rectangular "main" part is 6mm thick. The "ribs" on the sides are from Evergreen. They will not be seen on the finished model, the engines will get a corresponding part on the inside to slide them in place for accurate placement. I have now glued some ribs to the underside, then the whole thing gets filled and sanded to shape. Looks awful at the moment, I´´ll post more images when the sanding is done.
-
Sorry for the first picture, found out too late it is way too big. Here is a smaller side view

-
So finally I scaled all the plan views to 1/1000 then made LOTS of changes and adjustments to the proportions ( they are all inconsistent in the lineart drawings) I started to build an Oberth. Hope this will finally look almost anime-correct but as you can tell by the first pics it will be a long way to go so for now have a good laugh. Got almost completely discouraged when I saw the Captains Regult and how fast he did it.
-
Pic of the kit parts left me with an open mouth...that´s a handmade garage resin kit??? Some of the big manufacturers should take a long look at this.. box art is cool, too. Either this simple graphic style or have a box art specially commissioned by Yoshiyuki Takani
-
I´ve been airbrushing for quite a long time now (over 15 years) and I found out the key to have fun with it is NOT to get the most high-tech brush but to stick to a (reliable) brand! Then airbrush anything you can get hold of! Spray patterns, try pictures of clouds, replicate chrome or marble, try to get an even, shiny finish on a car model, then spray camouflage patterns on a japanese plane in 1/144. Try out everything, and if you don´t succeed, don´t blame it on the airbrush - try again!! Sounds awful but helps after a while. My first one was a Rich (Iwata-"bootleg"), then a Badger, then a genuine Iwata HP-BC, then a Sogoolee HP (which a really cheap Iwata lookalike from Poland). I was never satisfied with the first three because I never got the finishes right and after a while they even seemed impossible to clean. I DID manage to do some reasonable paint jobs after all but I just felt I could not fully control what I was doing. After srcewing up on the expensive Iwata I decided to get a real cheap one (Sogolee, about 50$) AND switch all my colours from enamels to acrylics. Well this cheap Polish thing still works perfect after ten years of continuous use, I can do everything from a shiny car to wheathering effects. It is not because I found the perfect airbrush, it is because over the time I learned how to hold it properly, how to control the airflow AND the amount of colour at the same time, how to get the right distance and angle to the object, how to dilute the colour properly and what thinner to use, how to use the adequate pressure for a certain paint job etc.. ..it is much easier to learn how to drive a car, but in the end it is worth it!! And: the acrylics. Since I switched to Tamiya and Gunze (aqueous) paints I actually spend more time spraying than cleaning the airbrush! With the old enamels I was constantly cleaning and even disassembling the thing just to get the paint residues out! I say go for acrylics. Needless to say if I had my old airbrushes back I could do any paint job with them now (although I didn´t like the Badger). I once even considered to get an Aztec but other modelers´opinions seemed to change from initial enthusiasm to later dissapointment so I did never try my hands on this brand. I doubt that ANY brand can save you from spending lots of time getting your own experiences. So my two cents are: Get a good airbrush, and anything looking like an IWATA seems to do the job here, get some acrylics and then: paint! Starting with airbrushing will not give you instant gratification, but don´t let anything discourage you and in the end you´ll be able to do ANY paint job you desire.