jadefalconguard
-
Posts
388 -
Joined
-
Last visited
Content Type
Profiles
Forums
Events
Gallery
Everything posted by jadefalconguard
-
Drool, this is awesome. See you got the weight under control. I'm almost afraid to ask, but when will she be flying ?
-
@ IAD, I guess they are some sort of tracking system (like the Mig 29's) only much more advanced afcourse @pensives_wetness : those are 1/72 scale from Hase kits, don't know who made them
-
Great work on the SV-51 I like the way it comes together. Just one little remark, if you take a look at Macross Zero you'll see that 'Barbie Pink' is a color for a combat aircraft
-
Cool, thanks I was up for a new one
-
Thanks mate for the link......I'm afraid I'll have to stop working on my VF1 in favor of this paper Monster That's the problem with these darn kids these days...they don't have patience
-

What is lying on your workbench?
jadefalconguard replied to Tuffskull's topic in Hall Of The Super Topics
HWR when is the public display ? I'm planning some R&R and might cross over to Great Brittain. Should be fun to combine it.....then again you'll never now with twins -
Jeez, I'll need to get my contacts cleanend....you guys see things I missed in this model I'm spending my evenings with
-
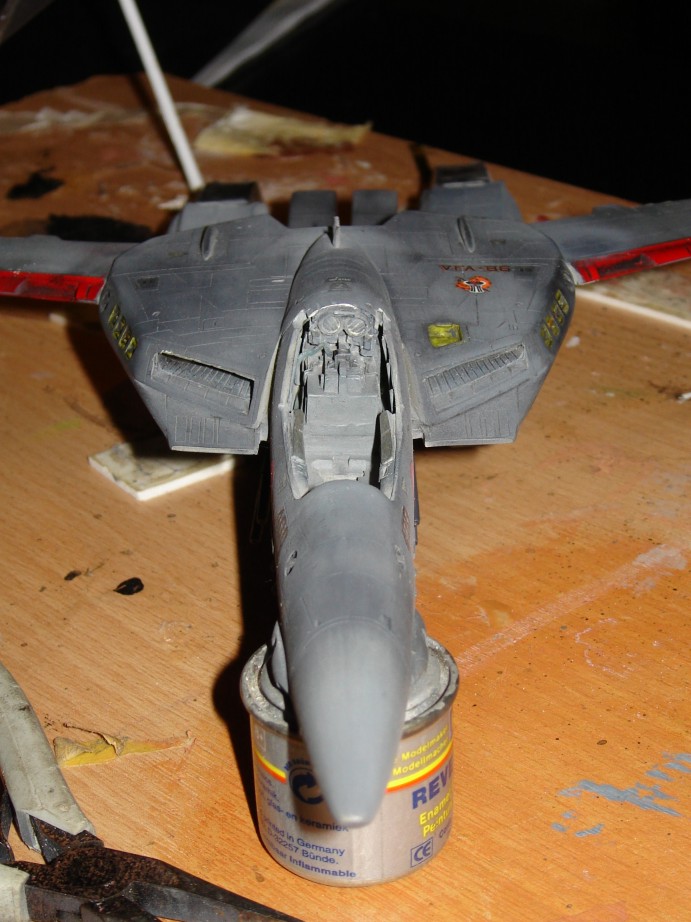
@ Nightmare, man you had me running scared.... after I removed the seat and gears I took the time to examen the nose and........it's quite good. Not perfect, there is indeed a slight mistake in the allignement, but not noticeable. Anyway, thx for the remark I'll pay extra attention when placing the seat in there

-
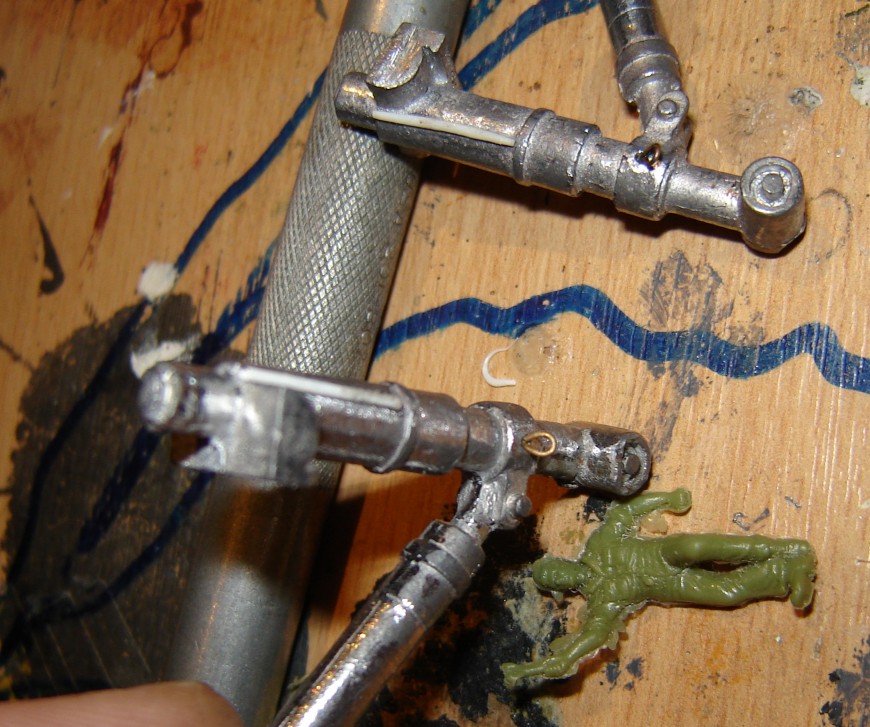
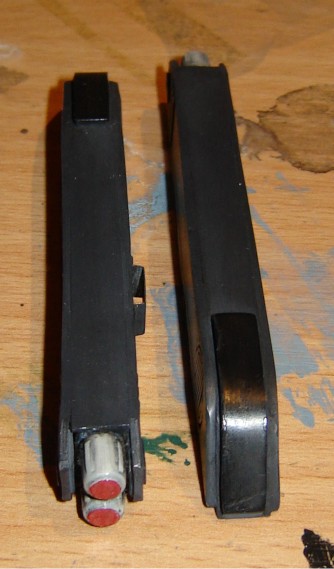
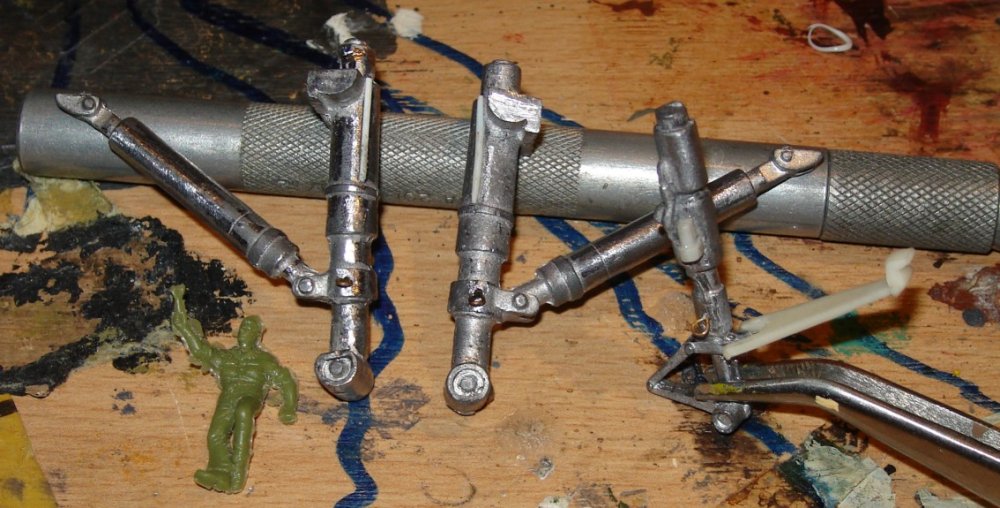
As I started to rework the launching pods I noticed I ran out of sheet styrene I'll need to go shopping this weekend So I started cleaning and updating the landinggear. I've decided from the beginning to use tie down chains I've still have lying around so I needed to add tie down points on the struts . I've got some stapling thread from my father in laws job. Instead of standard preshaped staples, this is a brass wire on a wheel and ideal for this kind of work. I started with drilling a little hole on the struts where the tie downs need to come. Once this is done I took a needle file and wrapped an end of brass wire around it. Coming to the desired shape I heated the brass wire with a candle and cut to shape : here's the result, quit nice if I say so myself All gears : the green 'hombre' is a 1/72scale I had laying around for comparison. Detail of the main gear : Nose Gear : EDIT : I added some 'things' around there just to fill it up. Might add some hoses, oillines and brakelines later on to give it a more realistic look.

-
I've used the dullcote on several occasions. It works great on giving a flat finish, which is very nice on model kits. Just make sure you work in very thin layers. Dullcoat tends to give a grayish white fog when applied to liberal (to much at once). I'm not sure about the other. hope this helps. G.
-
What is lying on your workbench?
jadefalconguard replied to Tuffskull's topic in Hall Of The Super Topics
You're kidding me....that's like 1200 to 1300€ Man those are almost cheap here -
What is lying on your workbench?
jadefalconguard replied to Tuffskull's topic in Hall Of The Super Topics
Great, I was deciding to buy the Full Option Tiger I but in Belgium you'll have to pay around 500€ (around $550/570). -
What is lying on your workbench?
jadefalconguard replied to Tuffskull's topic in Hall Of The Super Topics
@ HWR I hope you have a very solid funding under your floor, 'cause that's what I call heavy metal Nice work and a nice investment if you bought these here in Europe Edit; is the Tiger with sound and light equipment ? -
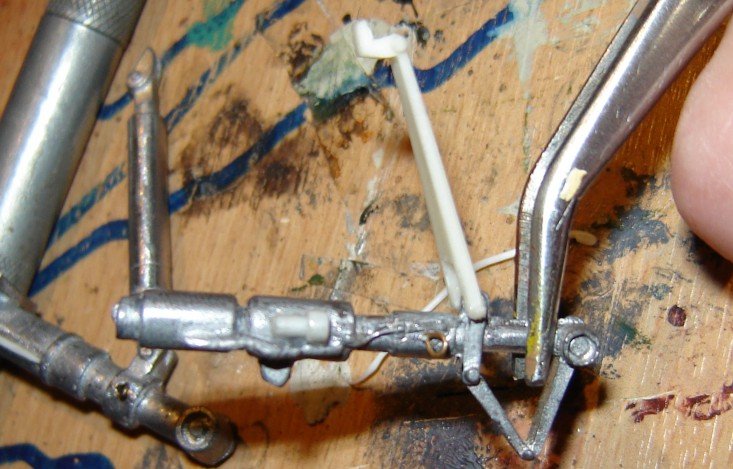
@nightmaerB4macross : you're right.... 2B honest the seat still needs some detailpainting so isn't glued on Cool to see you noticed. I've still haven't decided how I'll be painting some hoses on there. Edit : after looking more closely to the picture I'm afraid there's indeed something not quite right. Might be the fact that the wheelstruts are only temp. fixed. We'll I'll be looking to the model tonight and see
-
What is lying on your workbench?
jadefalconguard replied to Tuffskull's topic in Hall Of The Super Topics
During a break on the VF1 recast a nice little PVC kit : Roy Fockers VF1 in battroid mode. Some bootleg I picked up for around $30 (I don't know if I been ripped, but I liked the pose). So here goes 1 night's work
-
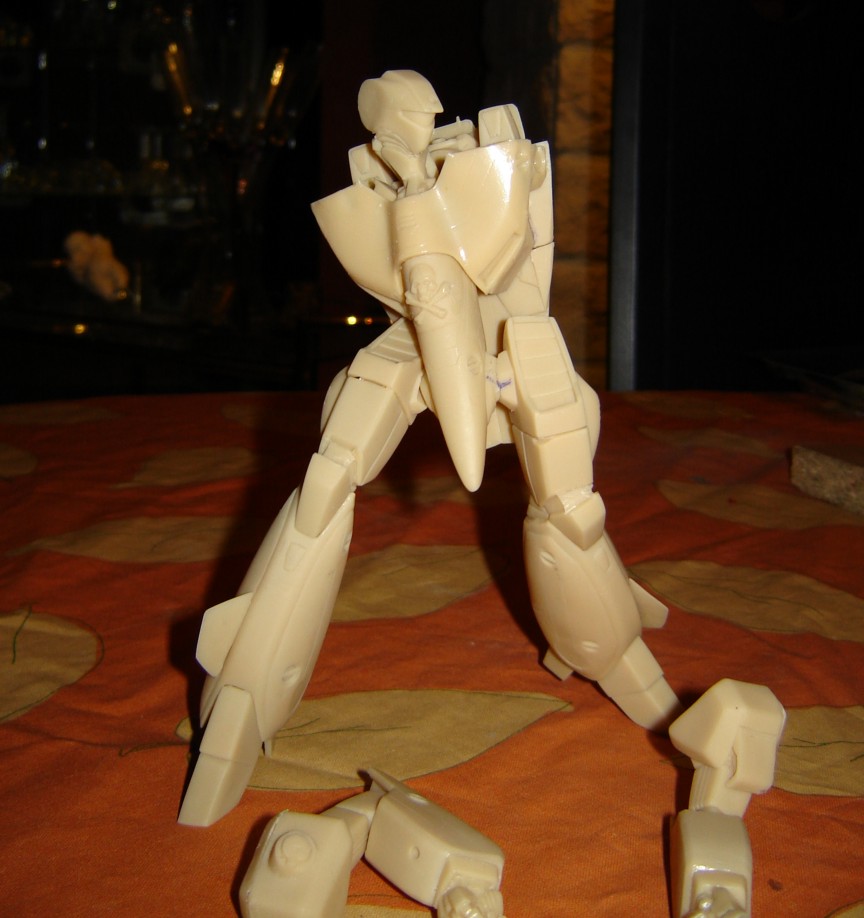
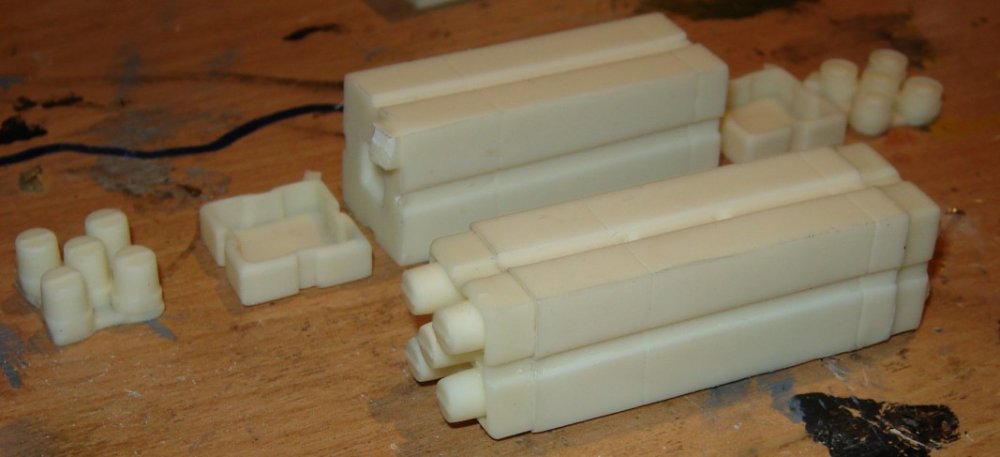
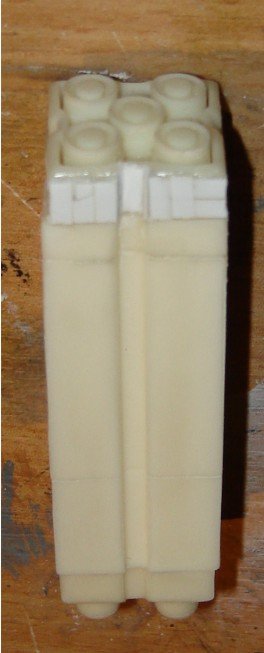
Challenges, challenges. I started working on the weapons load out. The "Angels of Death" are quite nice, with some minor flash and only some minor repair works necessary on the nosecone The pods, however, are an entirelly different story. The 3 pieces that make up the pod are not quite the same. Yeah right. The front and end plate are smaller then the main body. In the pic you'll see my solution to all problems sheet styrene
-
Finally the cockpit has been finished. I've took a leave on this project after the first part of the cockpit Tonight I've put up the back part. Glad that's over and done with. This weekend I'll get some new Future and make it a bright and shiny hood Already sprayed and weathered the armpacks. Still trying to find some extra colors to put on there, just a quick look

-
Oh cool. To bad the link isn't working( I know, I'm not original ). I have a 5-year old who would like to see this real life. Please, could anyone update the link ....thx
-
What is lying on your workbench?
jadefalconguard replied to Tuffskull's topic in Hall Of The Super Topics
Awesome, it scares me just by looking at it Nice work HWR, please finish it so we can see :-) -
@ IAD Respect man..... I've build a P51D 'Stang wich was true to scale and it flew beautifully. Except on landing I needed a lot of speed to keep it controllable. I have no experience with ducted fans, but gives the augmented speed (vs a 'conventional' engine) extra stability ? What about the possible reaction of the bird when 1 fan decides to quit on you (if they work indipendeble from each other ). Anyhow, I'll be keeping an eye on the progress on RC groups, good luck and I hope things work out perfect. G
-
Cool they try to do this, but I've been flying with RC planes for 12 years and the prob. have to rearrange the wings and cords to get this a stable RC model. I think the SV51 has a slighty better chance to fly.... but then again, it's a while since I flew
-
What is lying on your workbench?
jadefalconguard replied to Tuffskull's topic in Hall Of The Super Topics
Now if only someone would recast this thing for a reasonable price I would get me one of these babys. Awesome work HWR....do you by change have any drawings you would like to share Can't wait to see this one finished -
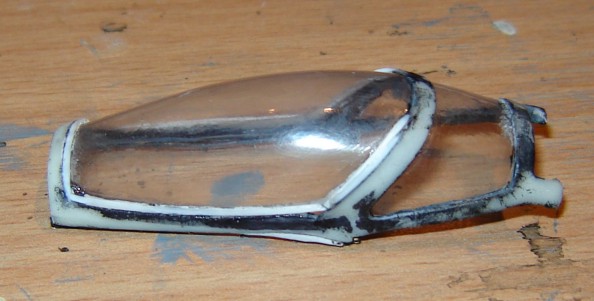
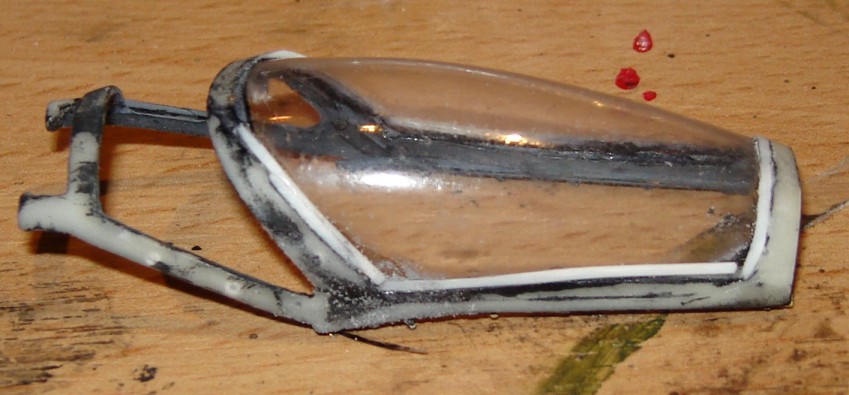
I know, I was thinking all the time I was 'playing' with the hood.....I should have listen to HWR, I should have listen to HWR, I should have listen to HWR.... Anyhow, this is how it came out. Edit : the specles on there are actually some toothpaste residu


-
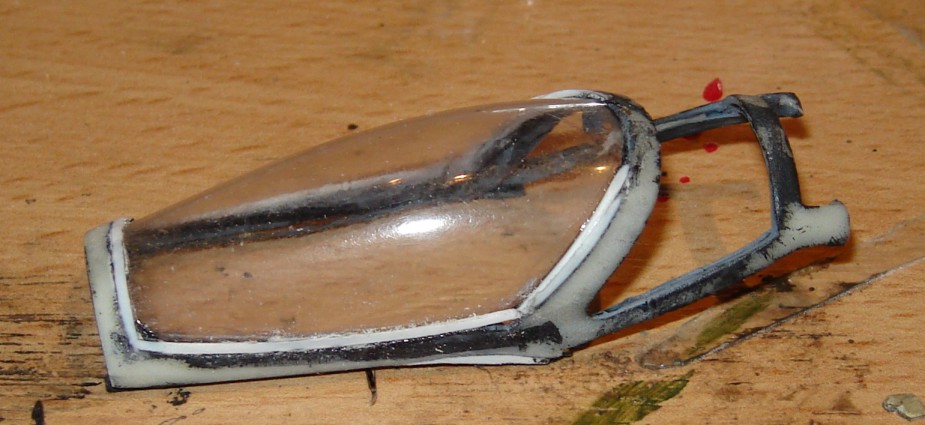
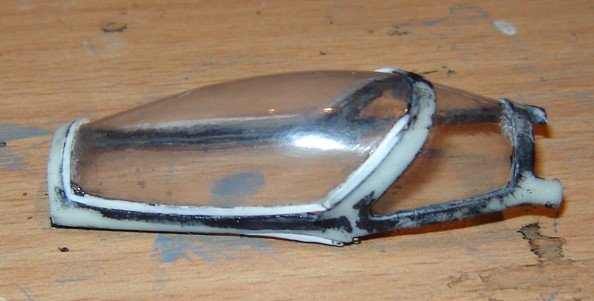
I've been playing around this weekend with the clear plastic pieces...... I think I've lost about 2/3 of my hair and all my nails Pff, this was kind of stressy. Cockpit : basicly I trimmed down the cockpit stills and placed the clear plastic inside the canopy. After that I rebuild the stills with white plastic (still needs some filling and touching up here and there, but it's quit good. After this abuse I used an old trick I learned : toothpaste . Put some toothpaste on your finger/piece of cloth and start polishing the hood. It'll remove the little glue you've spilled and remove the white film from CA glue. The end result is a nearly shining cockpit. I still need to do the back piece. Landing Lights : I gave up trying to get the clear plastic t conform. I'll be trying to form a piece of clear acrylic rod shaped and sanded in place. Only prob. I already sealed the wings, so I'll have to be carefull. Sorry I'm at work right now so no picture, but I'll post one tonight when I get home G.
-
LtSO, thx for the feedback and the tip Should read the manual some day. I'll take some macro shots tonight and see what it gives. HWR, did you already restarted working on yours ? On the website from G-system I saw that the VF1 is anounced to be coming out again Unless they mean the pictures for it