jadefalconguard
-
Posts
388 -
Joined
-
Last visited
Content Type
Profiles
Forums
Events
Gallery
Everything posted by jadefalconguard
-
Other view
-
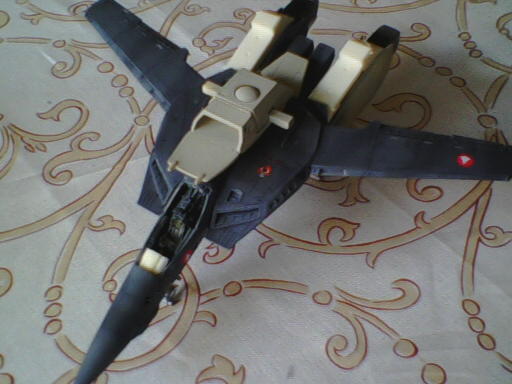
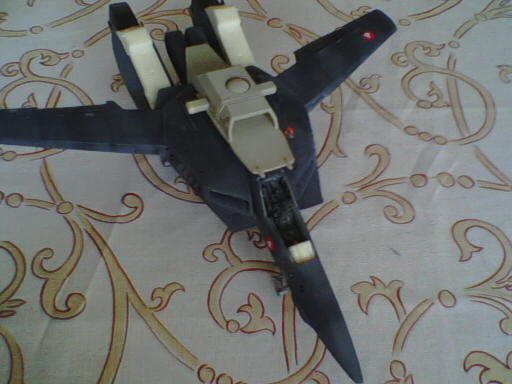
Finally some extra pics..... As previously mentioned the weathering is done and the decalling started. After that I gave it a dull coat finish with some VERY thinned light gray to get a bit lighter total finish

-
Try using raw umber instead of Lamp Black. Raw Umber is much lighter and gives you the same effect. Lamp Black is extremely dark and gives a very smudgy effect if some is left on the plane. Judging at your pic, using raw umber will give you a better look.
-
As always to late, I can confirm that there are talks of recasting the UD VF1. Neova asked me for some pictures from the alternations I made on the cockpit. I'll normally will get this completely finished within a couple of days. So yes, if Neova gets 15 confirmed orders there will be a recast.
-
Now for some update. I have started decalling with the High Vizz markings from Hasegawa. The result is amazingly nice I think . I've already started the VFA 86 markings wich give a nice contrast. I'll try to get my hands on a real camera this weekend. EDIT : break out the champagne.....I'm promoted to ARMD deck swabber......
-
And just for kicks : here's one leg
-
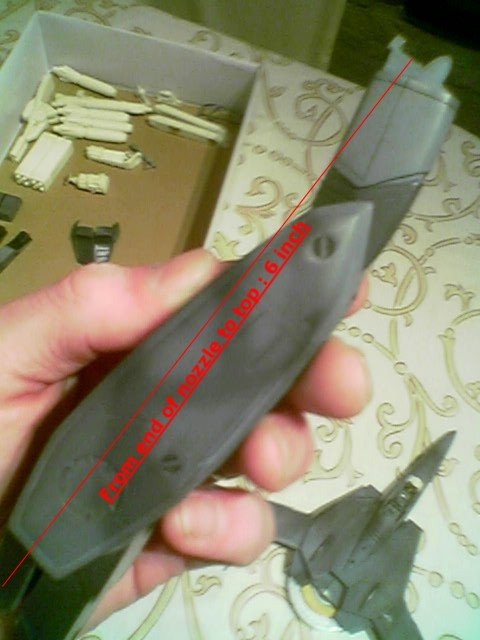
It looks alot sleeker than Yamato. Ofcourse, it doesn't have to transform. Anyway I measured the unfinihed main body without the aft booster and tailpart. Once installed this gives you 1 inch mor. Hope this helps.

-
@ zeo-mare, 2 B quit honest I don't know the exact size of the Yamato's. But in my feel of the model it holds the line between 1/72 and 1/48. I'll try to explain : compared to the other fighters I made on 1/48th Tomcats, Falcons, Eagles etc. you get a distinct scale effect wich gives you the idea that it is a 1/48th fighter. This bird doesn't really fit in there, but it's to big to be a 1/72nd. Ofcourse, this plane doesn't really exists, so it's difficult to say. But if you're itnerested, I'll measure up tonight and let you know
-
Next step, the wash the other parts, detail paint the 'interiors' on the legs that are now visible because of the angle of the legs. I'll be using metalizer for these parts, gives a nice contrast. I'm very anxious to get the decals on there, to see the effect. Once this bird is completely decalled I'll be spraying thinned base colours the get a bit of the camo back, but not to much. It gives a nice dimension to it this dark.....menacing
-
And now for a group shot
-
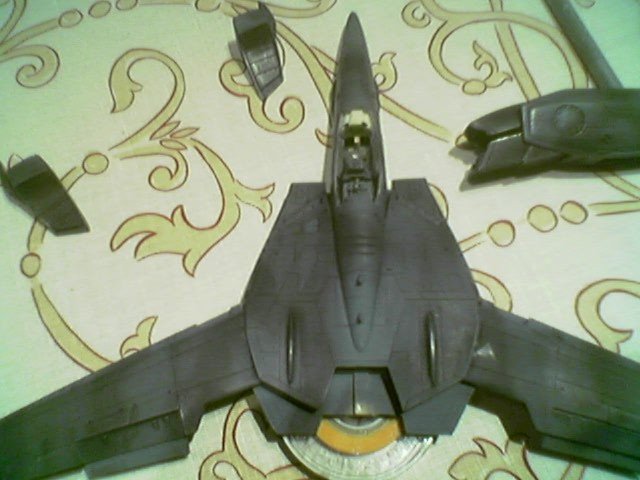
Now here's the best pic I managed : the legpart. This gives a nice idea of the impact from the black wash. The front end (air intake and fan blades) remained the basic color

-
I love my wife, she took care of the twins this afternoon, let the oldest son play on the PC (LEGO game) and started weathering this lean mean killin' machine I wanted to get a dark and quit "dirty" look to it so I thinned lamp black oilpaint with thinner. Ran along all the crevises and lines and cleaned up. If you're going to try it make sure your wash is heavilly thinned as it will darken the base colors A LOT. Once again sorry for the crappy pics but it's all I got at this moment. The dark grey leans to black (although on the pics it's kind of green to me).

-
OMG that thing is huge. Good luck on that one.......Want to see that thing finished
-
Next step, weathering : see if I find the time this afternoon to wash the whole thing. The reason I like to sue Tamiya paint is that you can thin oil paint with 'white spirit' (mineral thinner) and use it on the Tamiya paint without ruiining your base paint. Kind of lazy I'll be using the decals from Hasegawa (1/72) for teh Macross Logo's. They give a nice effect on the dark paint. Please LMK what you guys think
-
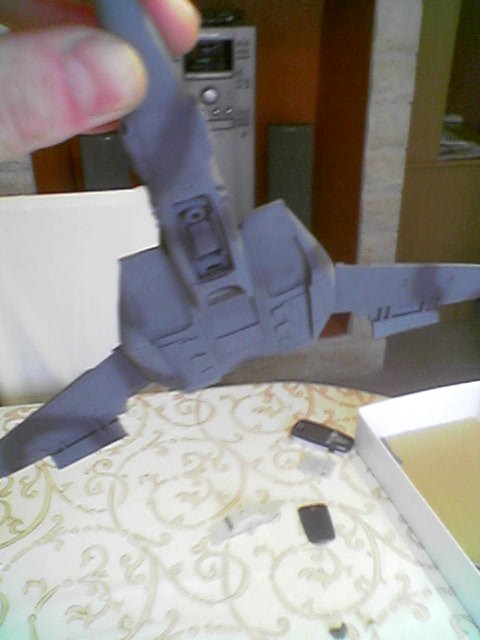
Even got time to detail paint the leg and arm parts. The 'canvas' covers over the joints received a flat black coat with the brush. This way when drybrushing these parts they give you a 'canvas' look to it.

-
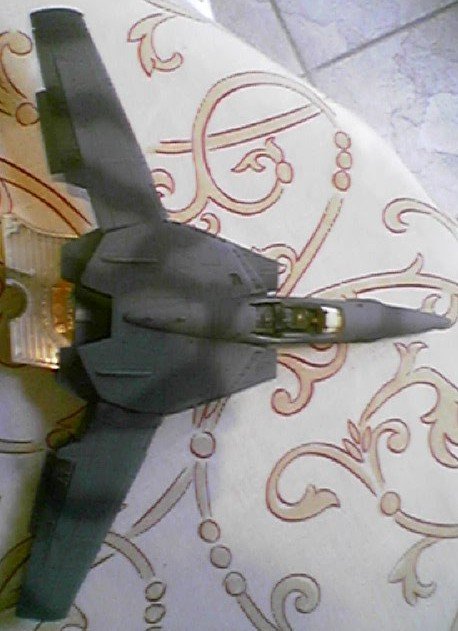
bottom view
-
And another angle

-
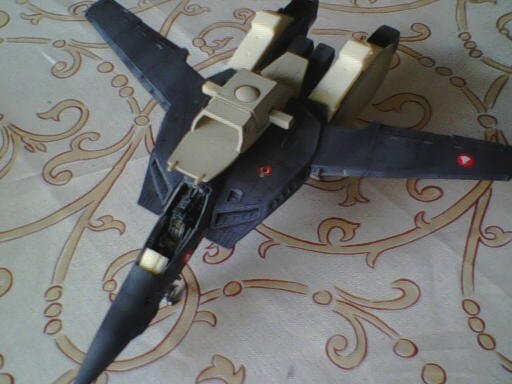
CAUTION WET PAINT Alright as promised : paint update ! After the presahding fase I started out with Neutral Grey thinned so I didn't cover up the base coat. After two layers I was happy with the result and let the first paint dry. I used Tamiya, which dry very very fast so after about half an hour I was off for the second color : Dark Grey also thinned. The camo patron was sprayed freehand and more or less based on the F15 agressor from the JSDF. Here's the result
-
Thanks for the comments. Sean, indeed as mentioned I'll be changing the shape and size of the camo. The dark patches will be smaller and more in the style of the Japanese F15 Agressors. But instead of using green it'll be dark grey Still pounding my head wether or not it'll be the high vizz Macross logo's on 1/72 scale or t he original 1/48th scale. Don't really like 'm though. Anyway, I skipped one client today and preshaded all the necessary parts. So this weekend the colours hopefully. CU
-
Finale a litle update that is worth something. Finally got to the point where I decided the colors for the VF1 It'll be a low vizz based upon the A7D : http://www.jpsmodell.de/dc/shemes/a7dwrap3.jpg Now the difference will be that I'm going to lighten the colors just a little bit and be using a different kind of wrap around, less bigger patches than the A7 as the VF1 is a lot sleeker. I've decided against a canon squadron within the Macross Universe and created my own : VFA86 Sidewinders, based upon an existing Marine Crops squadron, flying F18 Hornets. http://www.globalsecurity.org/military/age...navy/vfa-86.htm I've got some decals for the CAG bird of VFA86 for a 1/72 Hornet. These can be used on the VF 1. http://www.hlj.com/product/CAM48-073 Normally I'll have time to lay the first coats of paint this weekend and maybe sooner. So I'll give an update as soon as possible. So If anyone would want to give feedback on the colorsplease do.
-
BUMP keeping it alive. Real life issues interfere with building project
-
There aren't that much available for the moment. Hobbyfan was the last I found, but they are also out of stock. Neova has confirmed that there will be a new run as soon has there are 20 confirmed orders. I got one, HWRMkII also expressed interest (even for two I believe). So still 17 to gou. Maybe you can drop Neova a PM. G.
-
2B honest it was both ! I've been looking at the oleo's and the struts and they look heavy duty. I've compared them to the gear of an F14 (same scale) and they are nearly twice there size (in thickness). The wheels on the other hand seem very akward. Maybe I'll change them with a kit. The final decission will be taken when I can put it together with full weapons load out the see how it feels. But looking at the pictures from various websites I'll be changing them.
-
Now these remarks on the landing gear had me thinking. What if I was to remake the entire assembly with brass tubing. Never done this of even considered it, but has someone got any ideas or tried this before ? I'dd apreciate feedback on this. It still is an idea but maybe..... Hell wonder where the saw is going to end
-
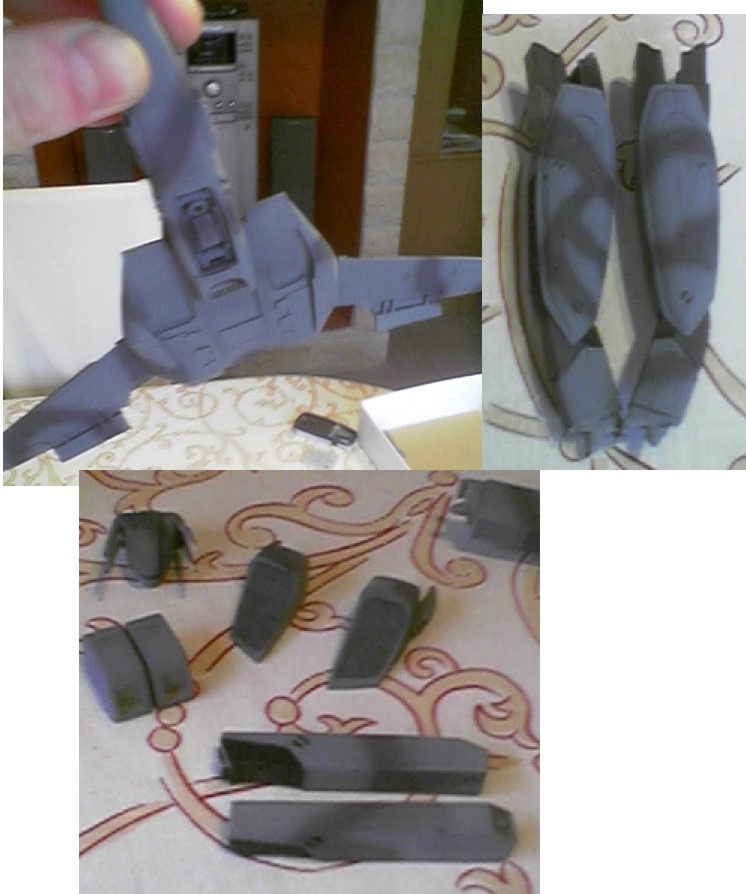
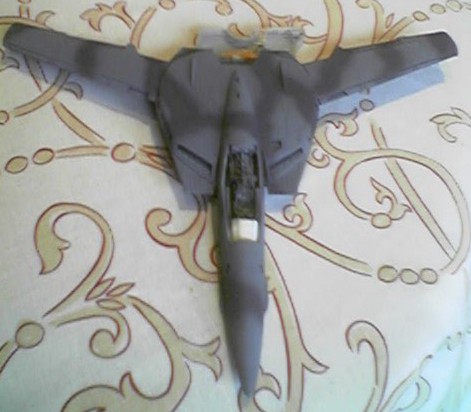
VF 1 is laying low right now. Don't even ask, but will I was cleaning a resin piece my X Acto knife got in my leg Up to the hilt it went in, now this model costs me blood, sweat and tears. Someone should give me a toy insted of a knive Now, back to the VF. I have been cleaning up the seams and added the vernier thrusters all over the body/legs/arms etc. Sorry HWR mkII that stupid camera of me doesn't focus enough to get you these pices. The fowler flaps are finally cleaned and almost completely ready, they look nice. But I've dicovered that for some reason my left wing is starting to curl upwards. So have to straighten him out. Also have been cleaning my Angel of Death missiles and finished the micro missile pods. The castings I had didn't seem real 'boxy' enough. So I glued the different pieces together and sanded it all over untill I got an even bxlike finish. Rescribed the pannel lines and will be adding the little fairings with sheet styrene.