
jadefalconguard
-
Posts
388 -
Joined
-
Last visited
Content Type
Profiles
Forums
Events
Gallery
Everything posted by jadefalconguard
-
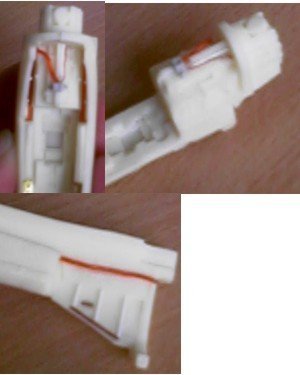
After the cockpit got some time to dry I decided to work on the cockpit area. It looked quite bare to me so I decided to add some things behind the cockpit area. That's where 'creatice gizzmology' comes around the corner (I read this term somewhere, it's not mine ). I didn't want it to look crowded, just an area with alot of 'stuff' around so I added some cables, extra stills to the side and some bits of plastic
-
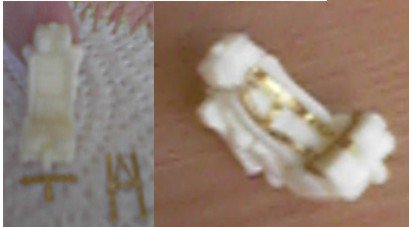
First order of business : the seat ! After searching for about half an hour for a piece that's casted directly on the seat I decided to add a seatbelt from my spare box. I opted for the harnass from a Mig29 update set as this looked quite right according to a drawning I have. On the right seat there is a PE part that reminds my of an ejection handle. It was not quit convincing so I took one from an updateset for an F14 and glued that in place. The pics below give you an idea how it looks.
-
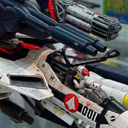
I finally got down and uploaded some pictures I took during construction. Upfront I apologize for the bad quality of these pics, but my camera is broke . So I'll be taking new ones with my reflex but that takes time to develop Anyway, some info : G System recast of the VF1 Strike/Super valkyrie Number of pieces : very much First impressions : Pro's - very nice kit, wel done panel lines and crisp details. Some warpage, but nothing to really worry about. Fit seems good ( Yeah right, that is untill you start building the thing) - nicelly done photo etched parts and clearly organized - "Wow" factor upon opening the box : very high: how did they get all those pieces in there Con's - Some pieces are recast in 1 so you keep searching for them (eg feetthrusters, fast pack thrusters,....) - Very bare gunpod, will need some extensive 'gizmollogy' - basic decal sheet , up comes the spare box All in all : I'll give it an 8/10 You can see some pics here : http://www.macrossworld.com/macross/models...48_ultimate.htm
-
As far as points for the VF1 recast I'll have to agree that it's a recast and therefore has some flwas. I'm used to working with resin updatesets for aircraft and I can say that the fit and reshaping is well within the to be aspected lines As far as putty goes, I always tend to us plastic to fill up big seams, which seems to work for me. Anyhow, just my 2c
-
Geez and I thought my VF1 Recast was though Good luck, as soon as I get my camera to work I'll post some pics
-
I'm in Belgium, so I think the brandnames will be completely different but I use ZAP alot (they are green)
-
Hm, wth these kind of gaps I'd rather use some wite plastic to fill the opening, leaving out some of the plastic. Then sand it flush your seam is filled. Oh and use gap filling superglue (the thick one. This way you normally don't have to use filler.
-
Some basic modelling skills suffice for rescribing the panel lines. For the hardpoints, these are 'optional' parts, so you can choose to install them. Repositioning these isn't that difficult, so I don't think there are any 'updatesets' for this. In the defense of Hasegawa, they made a realistic VF1 model, which could be able to fly. They have designed there kit with the same reallity sense they use in their normal fighter kits. But I agree they should heve kept closer to the "real thing"
-
Maybe the wrong place to ask, but can someone point me to a 3 sides line drawing of the VF1 ? I'm working on a recast from G system in 1/48 scale. his one only has 4 wingpoints for ordenance which seems correct. Thx for the assist G.
-
I've got * I hate it when it does this ** I've got a scan somewhere from a kitbashing project using a battroid and a fighter kit to make a gerwalk VF1. Normally you should be able, by using some plastic chirgurie to get those wings to fit the battroid. I'm afraid that you'll have to give up on the posebillity from the wings
-
Thanks for the tips. I'll be checking 'm out, but I could change thoughts Anyway, I'll be making some progress shots and keep you posted. Anyhow, I got the model on Hobbyfan.com. Shipment went OK and I got it the 31st of december Upon opening the box, you get a lot of resine, nicely cast and fairly thin (to 1.5 mm), 1 fret with nice photo etched parts, a vac formed canopy and metal landing gear. G-system did some nice work recasting this kit and upon checking the content I was startled that I missed some little detailpieces from the boosters . However it turned out that they recasted some pieces in 1 bigger piece, so everything accounted for after 4 hours of searching Now for the bad news : I had some minor warpped wings and slats. This can be easilly solved by submerging the wings in nearly boilling water, straighten and cool down. One of my leg pieces is about 0.5cm shorter then the other, so I'll be cutting this and putting a piece of styrene between. Idea's : To my impression the landing gears look a bit empty, I'll be kitbashing some pieces from 1/48 fighters to spruce up these gears. I'm planning on using tie down chains from an aircraft carrier set. Deacals : I'll be getting extra decals for the 'no step' and other small stencilling as this isn't included as aren't the markings for the fastpacks. As soon as I get my digital camera to work again I'll take some pictures. But for those who can't wait check out the MacrossWorld website on models and choose the Club M Ultimate valk I'll keep on posting till the end, but this will take some months I'm afraid G.
-
Hi, I've been lurking around here for a while doing "research" on a brand new diorama I'll attempt. To keep a long story short, here's the basic idea in the attached pic. Only I was looking for a VF1 in 1/48 scale. I found a recast from G-system and it's awesome Main problem : I would like to use another color scheme than gloss white. I was thinking along the lines of a low Vizz 'Tomcat' grey scheme. So here's my question : does anyone know if there exist UN SPACY decals in low vizz for this scale. I would like to hear your comments/tips and feasibility on this project. THX and keep up this forum G.


