Kylwell
-
Posts
585 -
Joined
-
Last visited
Content Type
Profiles
Forums
Events
Gallery
Everything posted by Kylwell
-
Yes, the truck. Booster I can get (I think I know somebody who has one) but some other views of the truck and booster handling mechanism would be nice. Or I could just start drawing and see what works.
-
Is that the only refrence picture available?
-
Wow, that's seriously cool looking. If you do find a bank you want to pick me up one also? I'l pay ya back, really
-
With as sharp of an edge as the MB bases has, paint isn't too much of an issue. Paint it white then brush gently out from teh edge. If youdo it right (and don;t allow your brush to flip down) you'll get a nice clean edge. If not, I'd suggest a liquid masking agent. Cover it all and trim/sand off the high points.
-
It's worked for me in the past. I usually threaten to run something nasty through it. Looks good, glad you were able to get it in.
-
Thanks all. For my next trick....
-
Other than this I don't know of any. There might be some at the Makzbv 3000 site.
-
Very nice.
-
Xabungle! Nice work on it too.
-
Thought you might like that. It's my favorite weathering refrence site.
-
What...awe man I wuz hopin' fur an update. *sigh* I'll just go back to sanding.
-
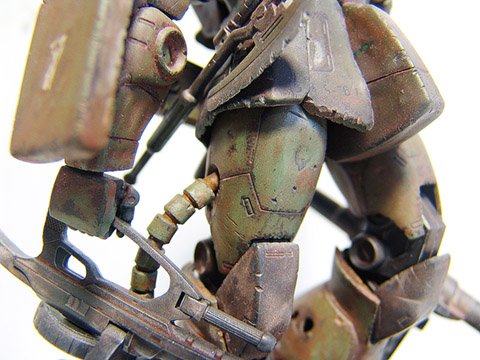
Nice. Good use of stowage, love the sheet metal bullet holes, good work n the cockpit (big flaw iin that kit). Now for the critcal points. Feet need to be more dinged up based on the rest of your look. Try Cody's Coop for an excellent set of weathering and wear & tear instructions. And while I love the sheet metal bulet holes I would have tied for a divoted depression look due to the ablative armor used in Battletech. You should also look into RustAll for rusting purposes. Your rust & dirt streaks look great except for those few 'spots' on the rear skirt (or at least I think that's a rear skirt). Dang, still impressed by that cockpit work. Love beat up mechs.
-
or a marital aid.
-
Well, got rid of most that junk a while back and had the 29 gauge wire sitting around. It's really not that hard to get it to lay flat, it's the bending and shaping that's a pain.
-
Do you really want to have to sand in that gap? Easier to do it all around. Yes, you could manage to split it on one of those ridge thingies but your mold master guy would hit you.
-
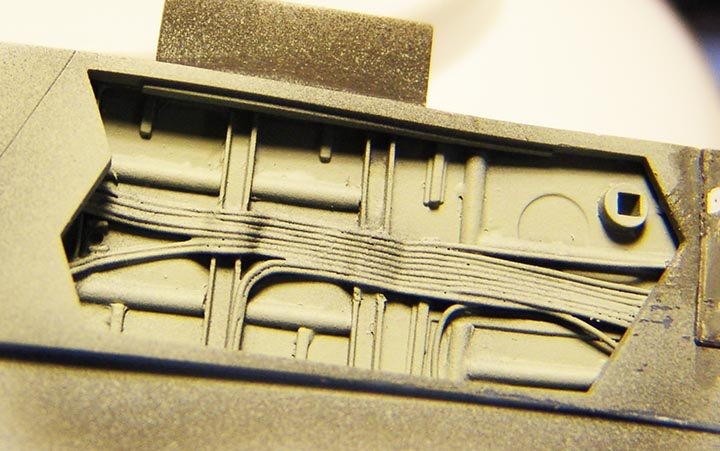
Really thin wire, wrap loosely around 2 fingers (about 5 times IIRC). Flatten between fingertips to form a kinda ribbon look. Trim off one end and glue the other end with CA. So now you have (hopefully) a bunch of wires laying next to each other secured at one end by glue. Then the tricky part. Figure out your starting point, this wil be where the glued end will be. Using what ever tools sound good bench and shape the wires to give you a general layout. Then using fingers and soft erasers mash the wires into place to shape them around the ribs & what-not. Then glue the glued end down (you may need to trim the knob of glue off) and finish shaping the wires and carefully glueing them down where they run over the tops of things. If you're needing to thread the wires through holes in a bulk head do that first before glueing the wire set down. Easy right?
-
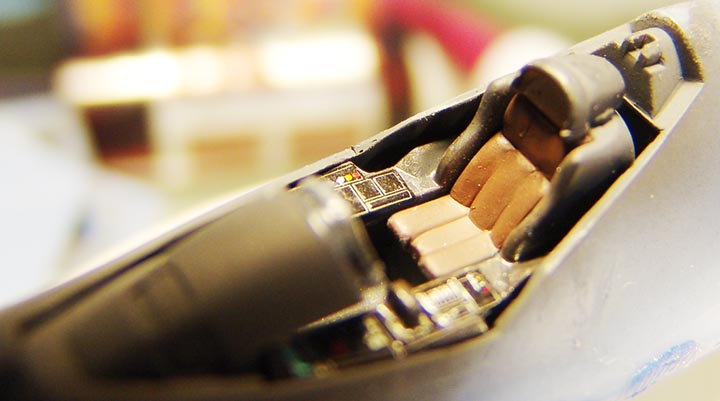
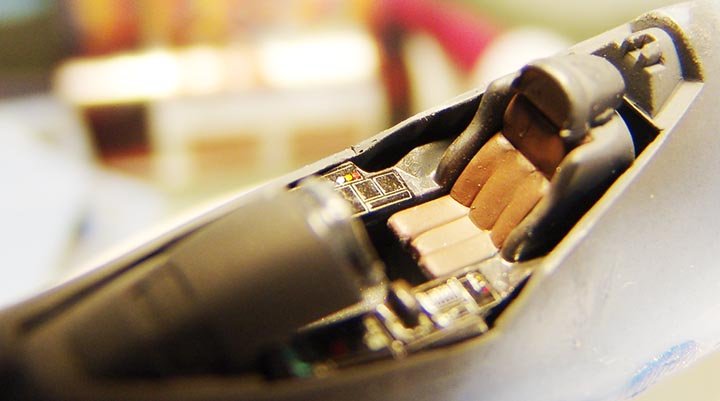
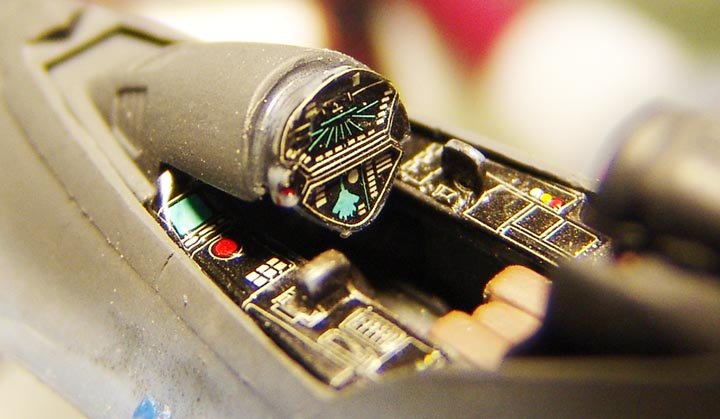
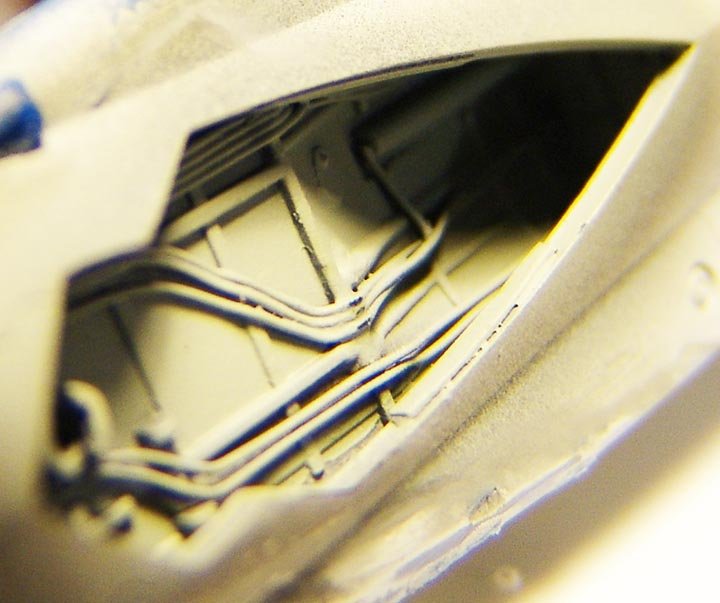
Tanks Mule. My current projetc is a VF-22s. Added some detail to the cockpit walls, more struts & wire to he landing gear bays and did some work on that gaping hole in the back. Thank goodness for Wave option parts.
-
Actually that's a 1:4 scale ruler makes it look much bigger... I gotta admit, I'm interested.
-
I've gotten tricky with my gear-up stands. Acrylic rod (never glass), neobium magnets, base. Drill out the end of the acrylic rod to accept one of the magents, secure with super glue. Find the CG of the model and glue the second magent a bit in front of that point (this will make the model sit on it's butt a wee bit). Now the tricky part. Shape the end of the acylic rod to match the profile of where the magnet iside the model is. This will help the craft not spin as easily on the magnets. Make sure the end of the acrylic rod is as smooth as you can make it to avoid damaging the finsih on the model. Fun eh? You can get acrylic rod fairly cheap at USPastics.
-
Well intakes aren't exactly small. It also depends on what the material is too! Soft Resin, Hard Resin, Metal, leve of finish, etc all figure into the price. Hell of a business to get into though! 347177[/snapback] A good biz plan and a quarter mil and you too can get in on industrial stereolithography. I just want to get a little laser cutter is all.
-
I'm just happy my wife doesn't care what I do with my allowance.
-
That's kinda cool. Now, when is Hase going to produce a line of Destroids?
-
Apparently so.
-
It's done. Even have pictures taken. Just haven't had the chance to put them up. But here's something to keep you satified.
-
Omega, that is one sweet bird. Love that mellow rusting on the hinges. Sha'weet!