MechTech
-
Posts
4701 -
Joined
-
Last visited
Content Type
Profiles
Forums
Events
Gallery
Everything posted by MechTech
-
See there's another one! 1/32nd is normally for big aircraft and some older American armor models. 1/35th is for armor with some aircraft too. You're both right! Our hobby has more scales than the fish in the ocean! -MT
-
All of the scales DO drive me nuts! For example, I want to get a plane in 1/350th scale, but it is only available in 1/400th (big in France thanks to Heller). 1/400th is close, but TOO small! I HAVE the 1/20th Votoms kit, bought the 1/24th scale aluminum parts thinking they'd be close - NOPE! 1/20th is also a BIG car scale too in Japan. Yes, some standards would be nice like USB has become for computers versus all the other connectors that used to be used (hated that too). But variety is the spice of life I suppose." Just gets too spicy sometimes! - MT
-
"C'mon suckas, spend your cash!" OK, I could be wrong, but that's what it should say! These look better with each post. Looking at HLJ's photos, I guess the two in the set are parts swapable for three versions. Kinda the easy way some of us have been doing it the hard way with model kits. - MT
-
More cool stuff! You got us scheming now NZEOD! - MT
-
That does look cool!!! The Russians have circles on their carrier decks. We have lines so they have to have circles. It's an old US vs Russia thing - MT http://www.naval-technology.com/projects/kuznetsov/kuznetsov5.html
-
1/20 is popular in Japan. I thought the same thing too at first, and then said, "oh yeah, forgot." Same thing with 1/60th scale. We're victims of different cultures Then again, the different cultures are bringing us some GREAT models! - MT
-
Somehow I missed this a couple of years ago!? They look great Andrea! The stands are a nice break from the usual "flat" carrier decks and airfield dioramas. - MT
-

spray booth? howd I make this cheeper & Better PART 2
MechTech replied to ARK 3's topic in The Workshop!
I don't currently have a spray booth, but the plan is to make it fold up against the wall/bench with hinges. Similar to this: http://www.micromark.com/fold-up-spray-booth,11594.html A key feature is to make a cover with heavy plastic sheeting (tarp material). I knew a guy that urethane coated woodwork and after applying the urethane, he set it under a clear plastic "tent." It kept dust off his work. So my plan is to paint and then "tent" the work in the booth. That way no dust settles on the work. I'll still have to use rattle cans outside to paint, but then I can tent them in the booth to gas-off and cure without ticking off my wife. Everyone is happy that way - MT -
Those are terrific! It gives me some great ideas! The first tank is a little overboard with a CF bulb. LEDs would be better and last longer. Plus the CF creates UV that will bleach the "blast" from the inside out. Thank for sharing, those are cool! - MT
-
Thanks guys! It felt good to get a piece of history ready for display again. Looking great Xigfrid! - MT
-
Looks great! Reminds me of the plastic bakers baskets bread get transported on the trucks with - MT
-
It looks GREAT! For all that effort, you might as well print it! - MT
-
If only we could all have a copy of this in resin! - MT
-
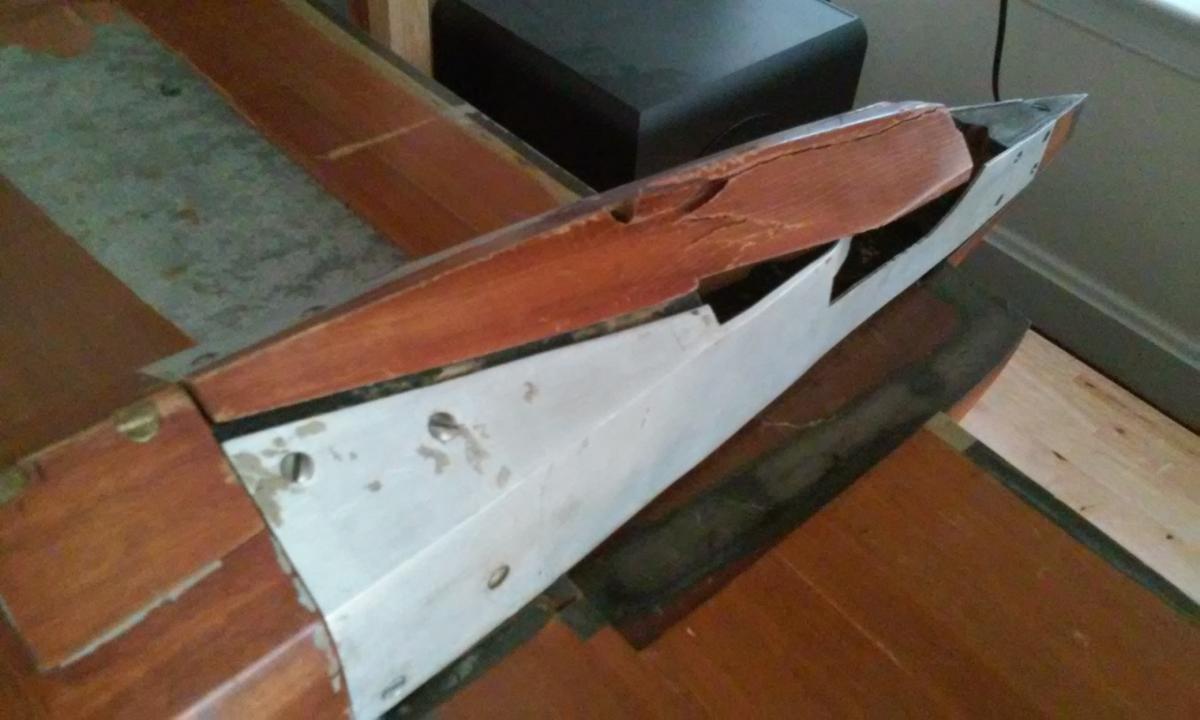
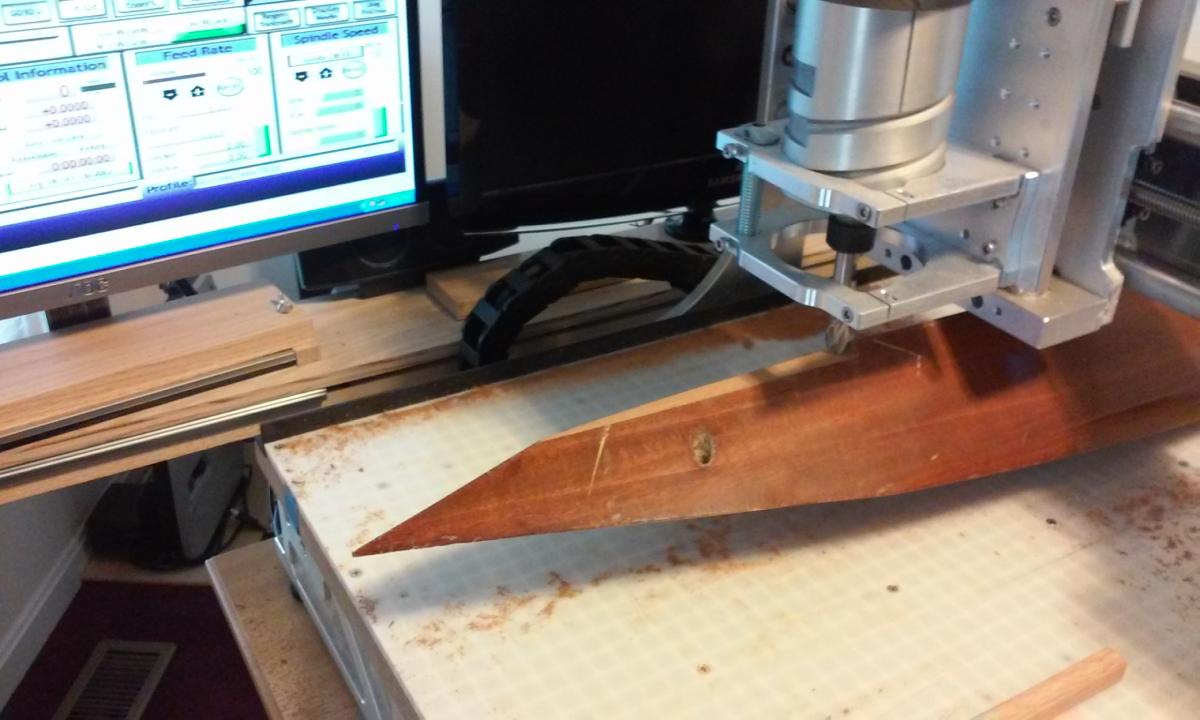
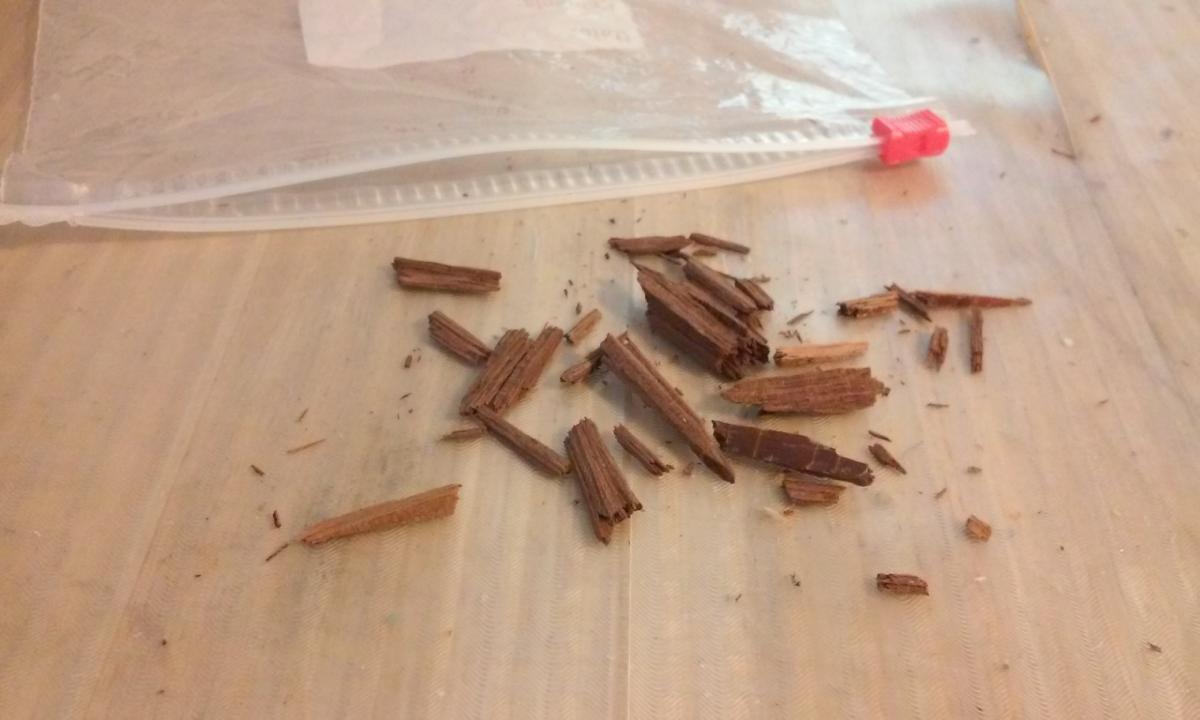
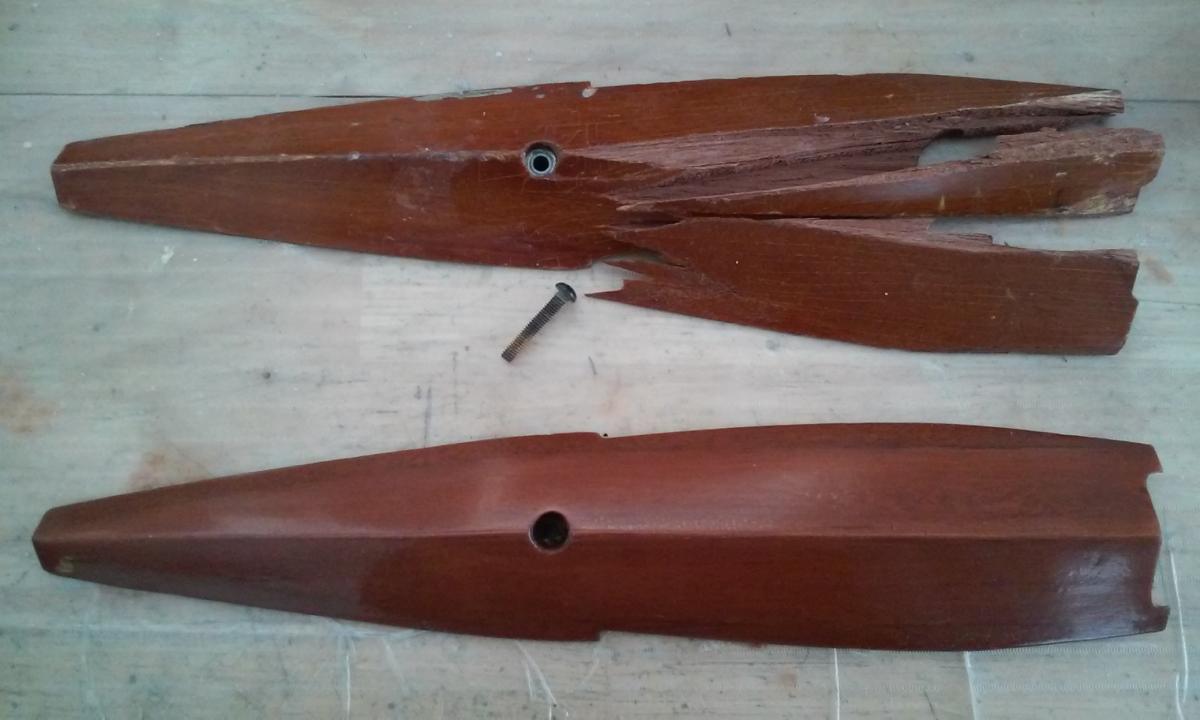
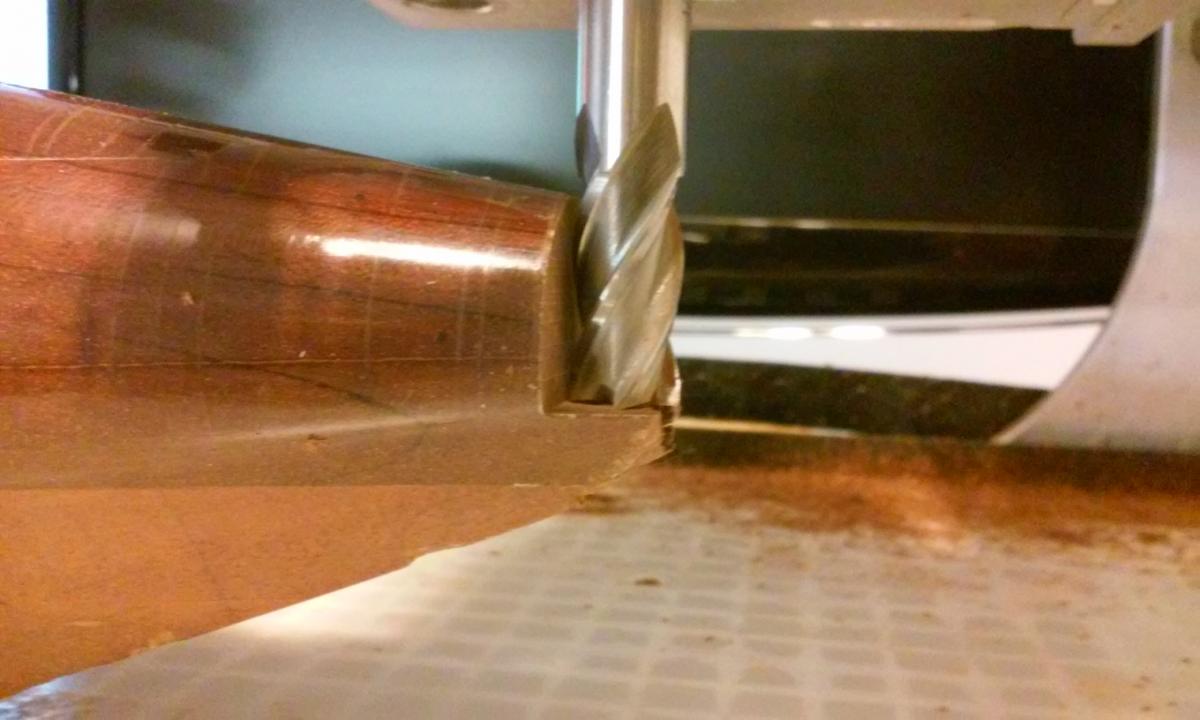
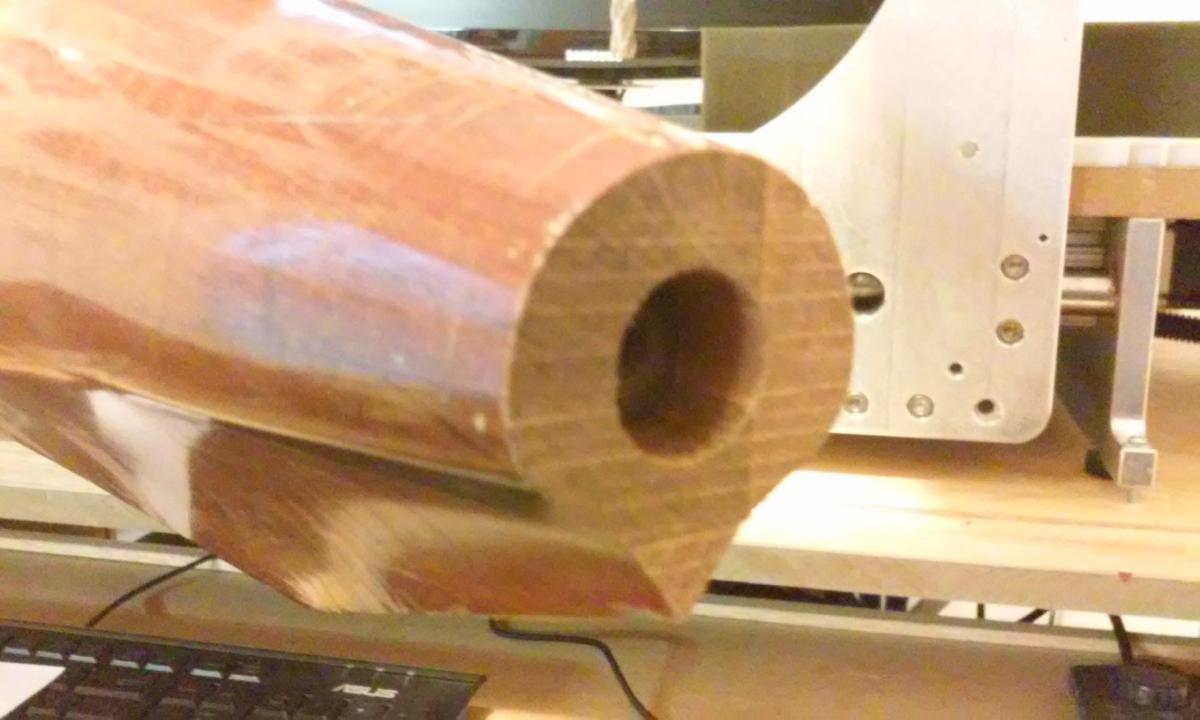
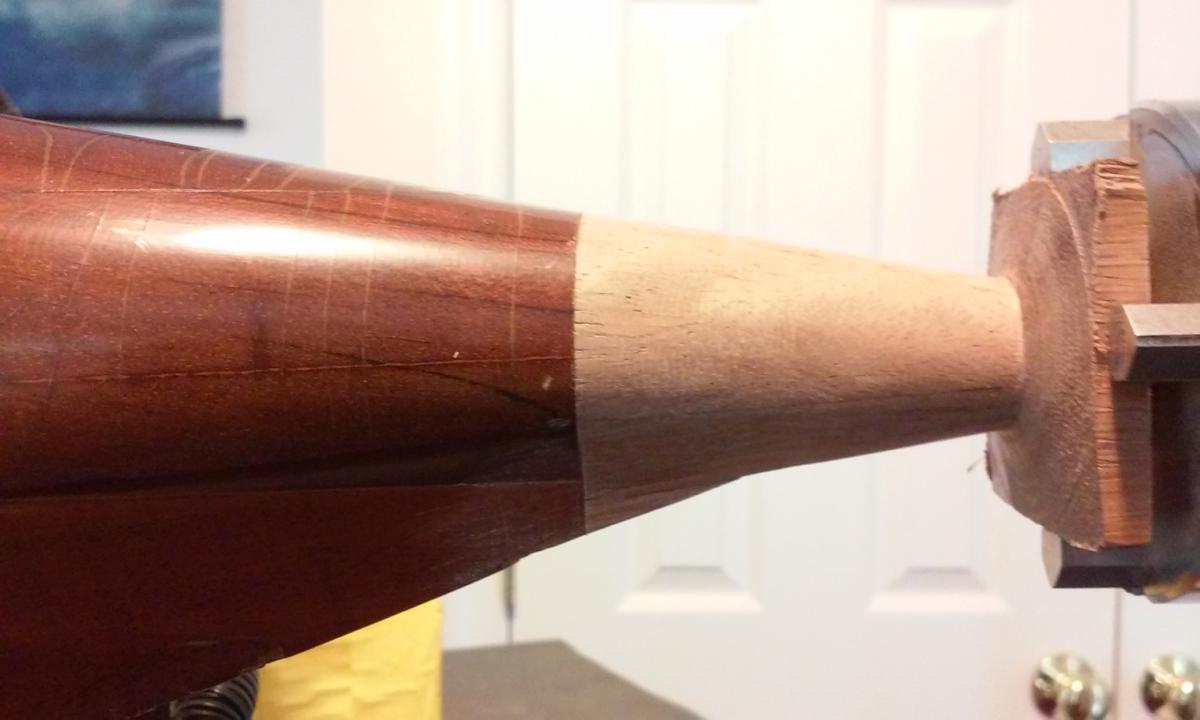
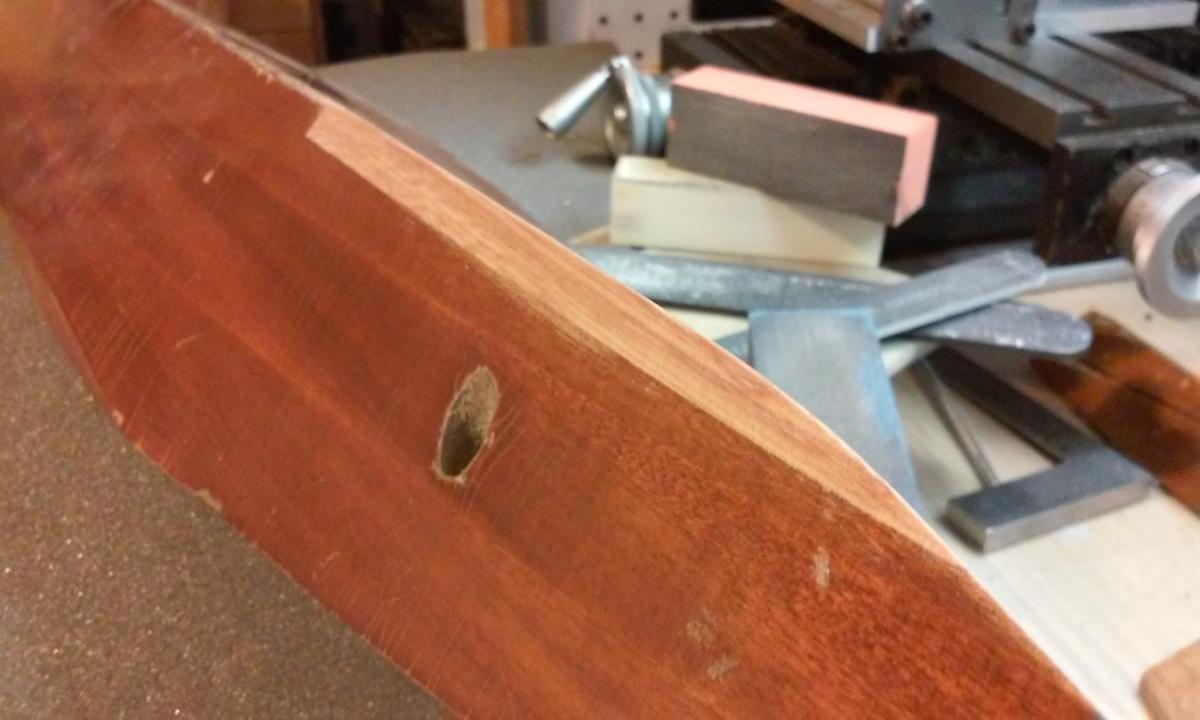
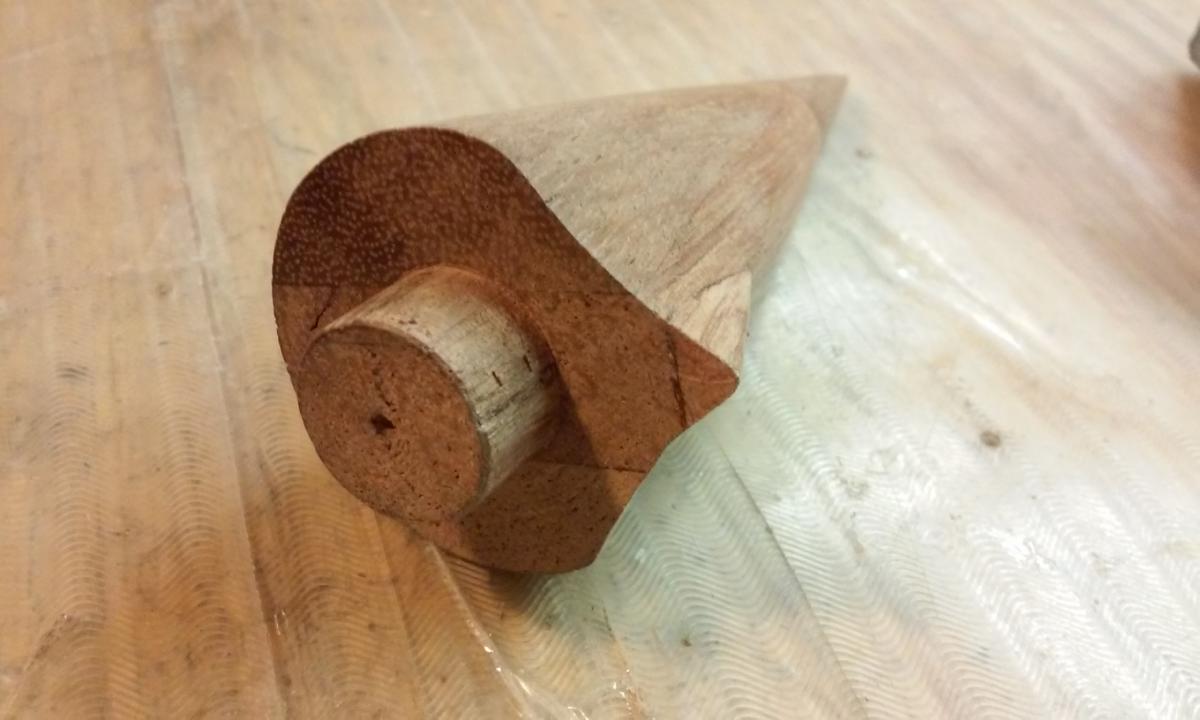
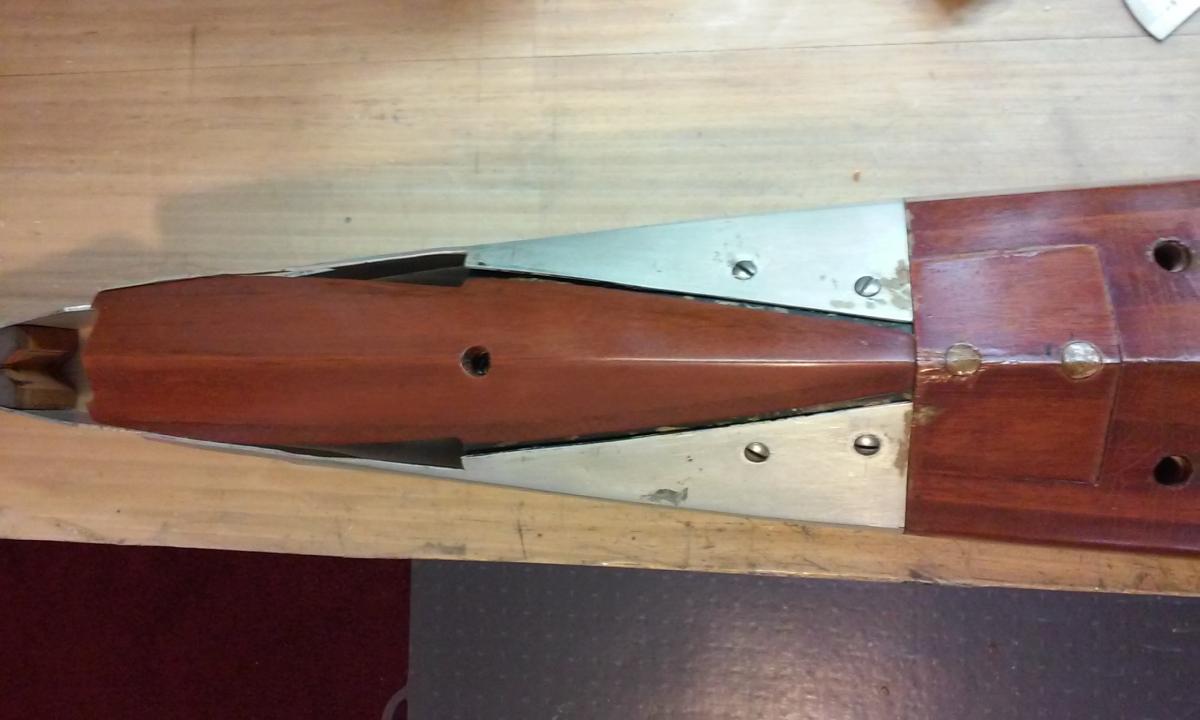
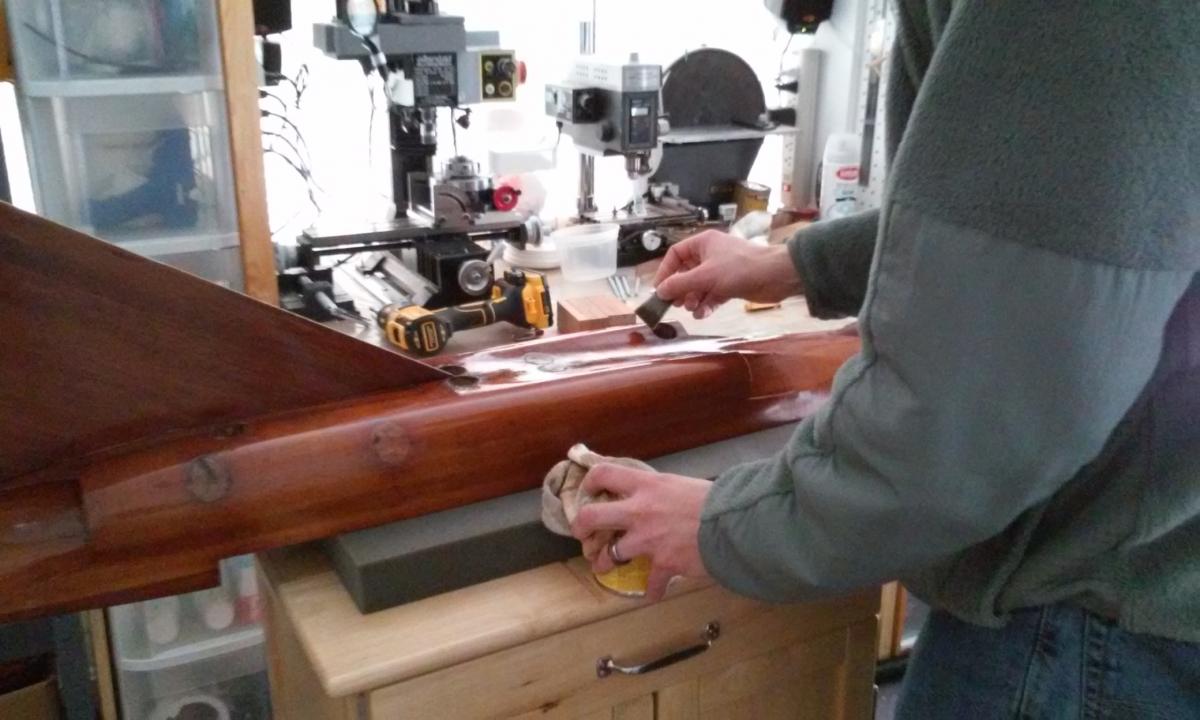
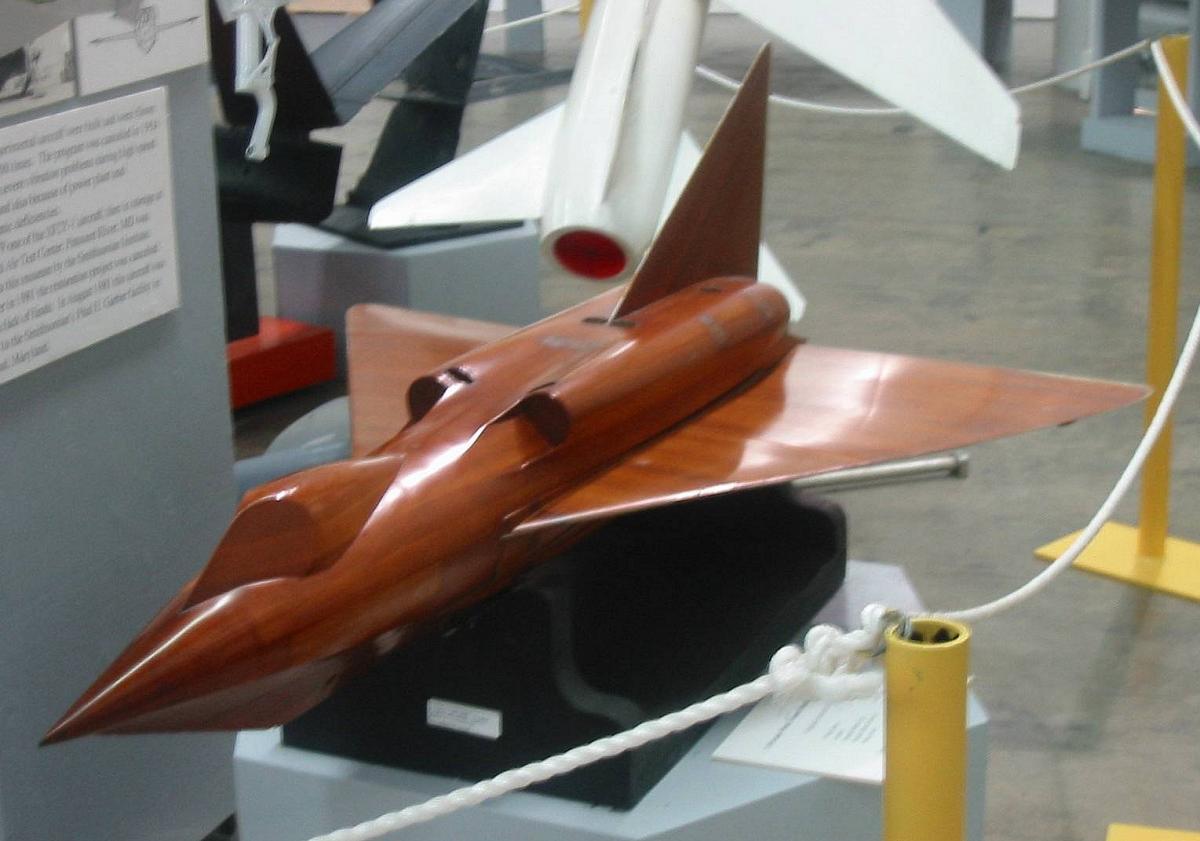
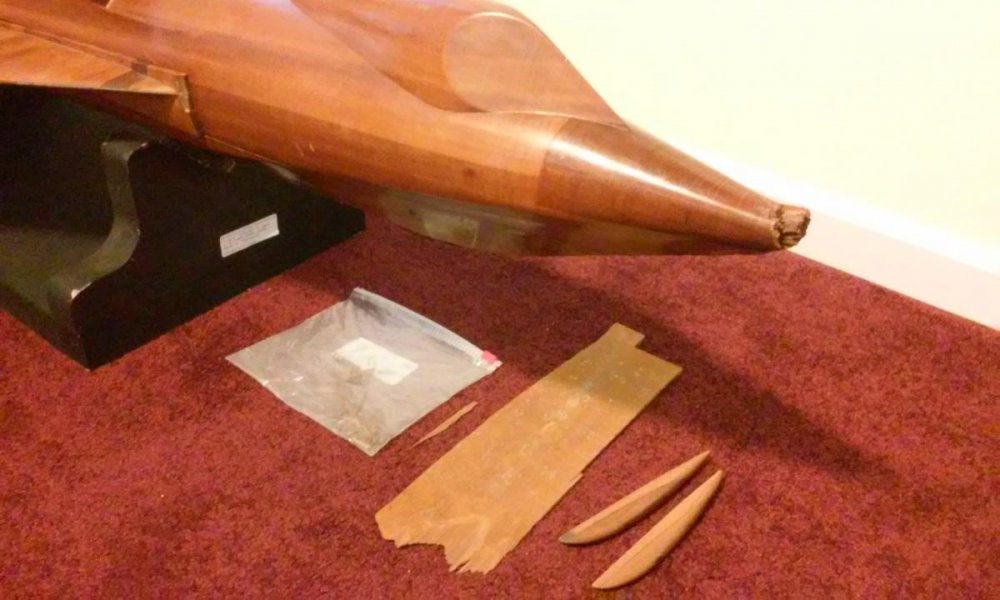
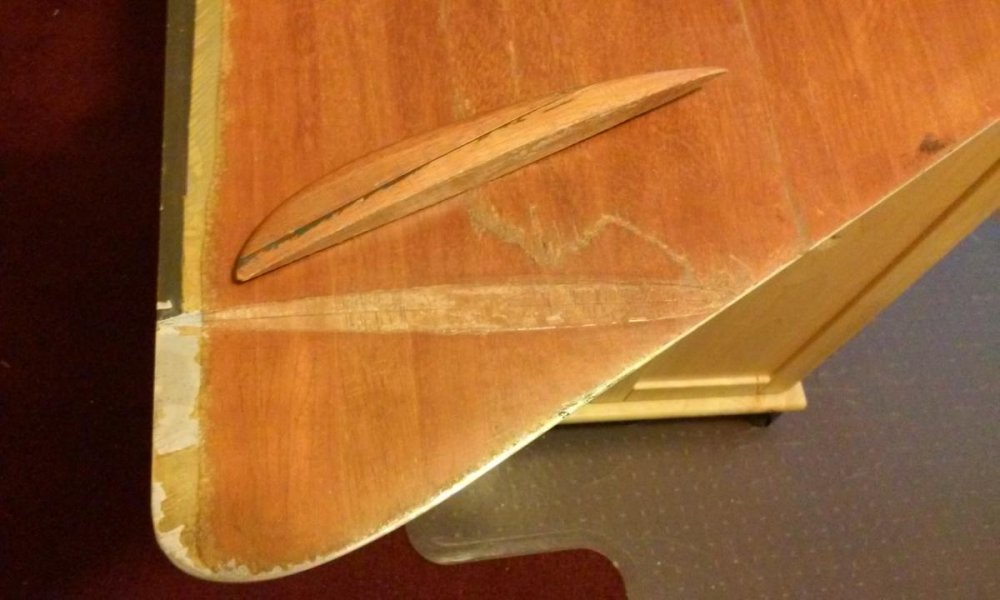
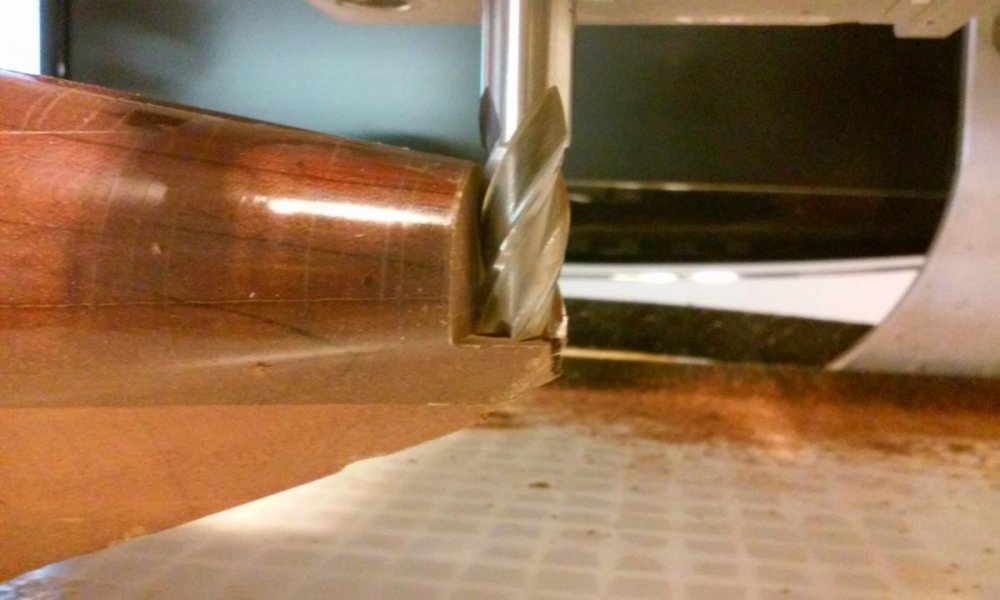
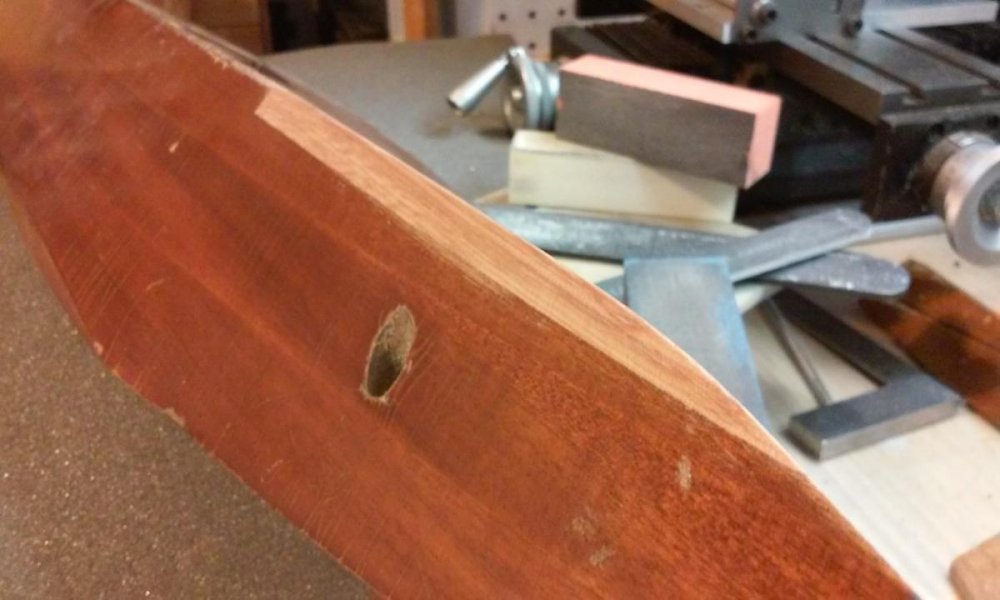
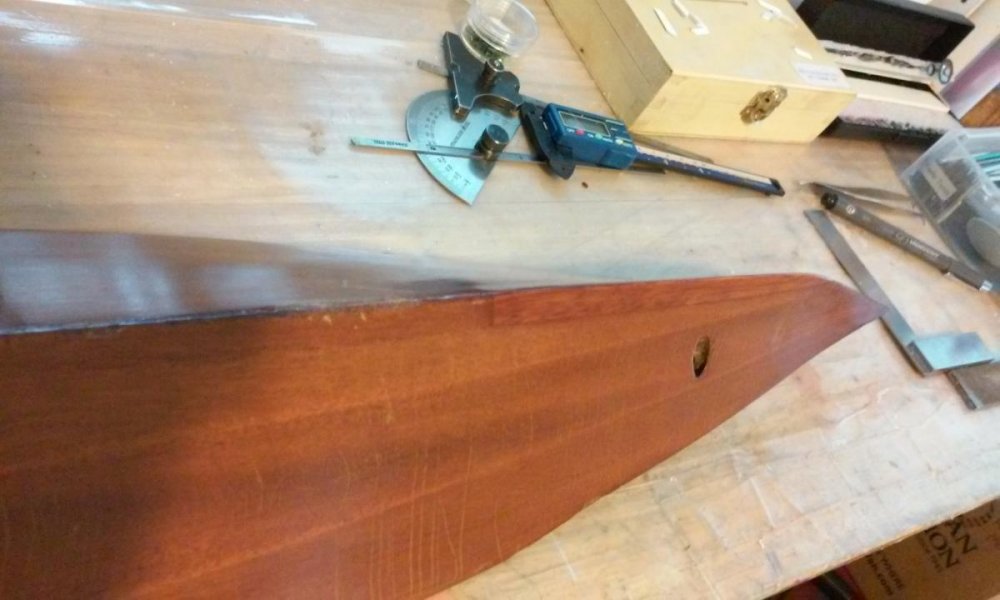
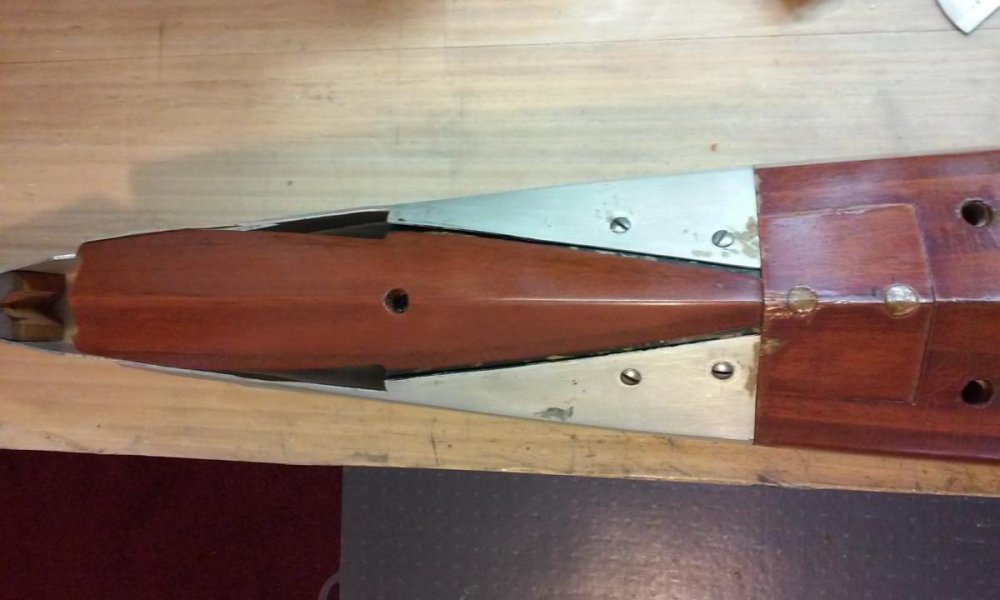
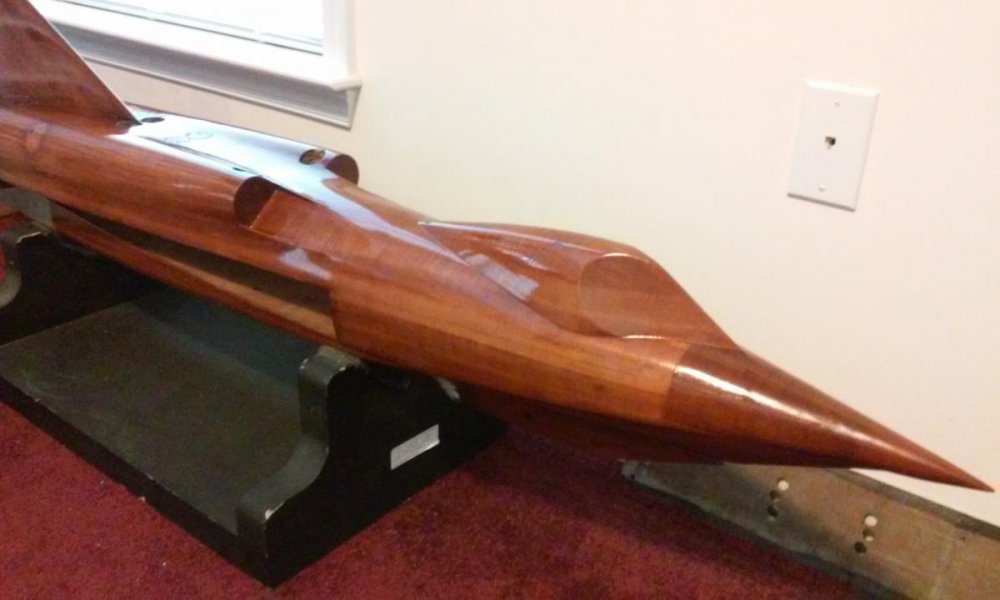
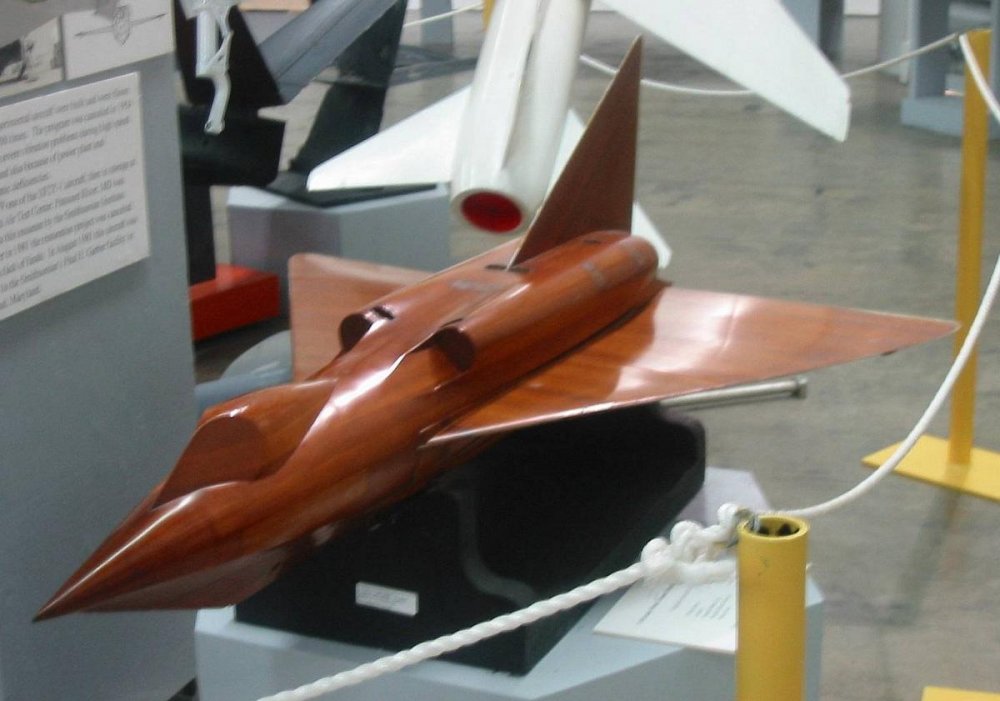
This last semester was kicking my butt with a TON of classwork. Thankfully I'm done and on break for a week. Something else completed is the Sea Dart AND I finally got my shop space back! For those of you not familiar with the Sea Dart, here is a historical movie with a hysterical soundtrack: The Convair Sea Dart is a giant 1/10th scale wind tunnel model from around 1952 and weighs about 80 pounds or about 36 kilos. It's solid mahogany and an example of beautiful craftsmanship from back in the day when people had skills instead of computers. The model shows some marks in between pieces that suggest it may have been used in water tank testing. Long story short, the model had some damage and I volunteered to restore it. I'm more of a styrene guy, but I love woodworking too! First, the "BEFORE" pictures. Busted nose, busted fairings on the wings, busted stern rudder area, cracked finish, HUGE cracks in wings, busted ventral hull area and even the stand needed some love. The bag is what was left of the nose. The after pictures include a trimmed nose, a new nose, repaired wings and cracks, repaired hull, and A LOT of finish work getting the colors to match and match at the joints. I don't have a good overall shot yet because it won't be assembled until it goes on display in a case. I've attached a pre-damage photo which is what it looks like today. Hopefully, you history buffs will enjoy! - MT


-
Nice work NZEOD! I don't think "war movies" always help the case of servicemembers. On the other hand, sometimes they help. When I came back from Afghanistan my wife asked if I wanted to go shopping with her. When we walked into the store, I felt like the scene in "Hurt Locker" where the guy comes back and his wife asks him to pick a box of cereal and how overwhelmed he was. At least I could point to it and say, "that's how I felt." You sound like my mill, always breaking bits off it and having to fix parts of it (yes, time for a new mill). - MT
-
VERY NICE custom paint and work! The launch arm and lighting look great too! - MT
-
I'm not big into pink and purple, but that color scheme works and looks good! - MT
-
spray booth? howd I make this cheeper & Better PART 2
MechTech replied to ARK 3's topic in The Workshop!
The only key is getting a blower that is either brushless or has an indirect drive like a belt on the fan and motor. Personally, I used a bunch of muffin fans due to lack of other components. The other safety item is to use metal dryer tubing just in case a spark from static sets off your exhaust and VOOOooom! I never had problems though. I hope your idea works out! - MT -
It is looking good!!! - MT
-
More AWESOME looking every day! You have made the official "Mini Me" to the 6" Daedalus - MT
-
Looks cool! Just needs blue hair for that anime look - MT
-
That looks great! Reminds me of the Twilight Zone episode with the Gremlin Maybe some nail polish in the joints to tighten them up (pull apart, coat joints lightly, dry, reassemble)? A little superglue is good too once totally dried before reassembling. - MT
-
Here's some ideas that I hope helps you (oil paint and other mediums): - MT
-
You can't win every fight Xigfrid Slap on a couple of Macross roundels and you're good to go! - MT
-
Guys, that's the low-profile red stealth version of the valkyrie. It's supposed to look flat - MT