MechTech
-
Posts
4702 -
Joined
-
Last visited
Content Type
Profiles
Forums
Events
Gallery
Everything posted by MechTech
-
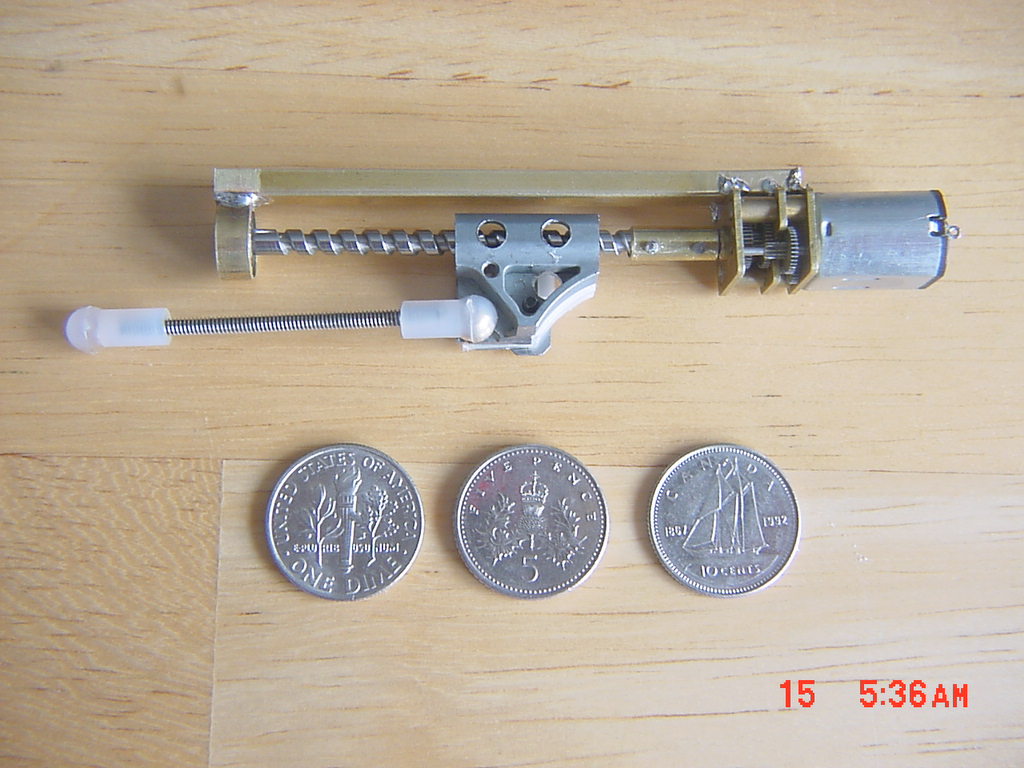
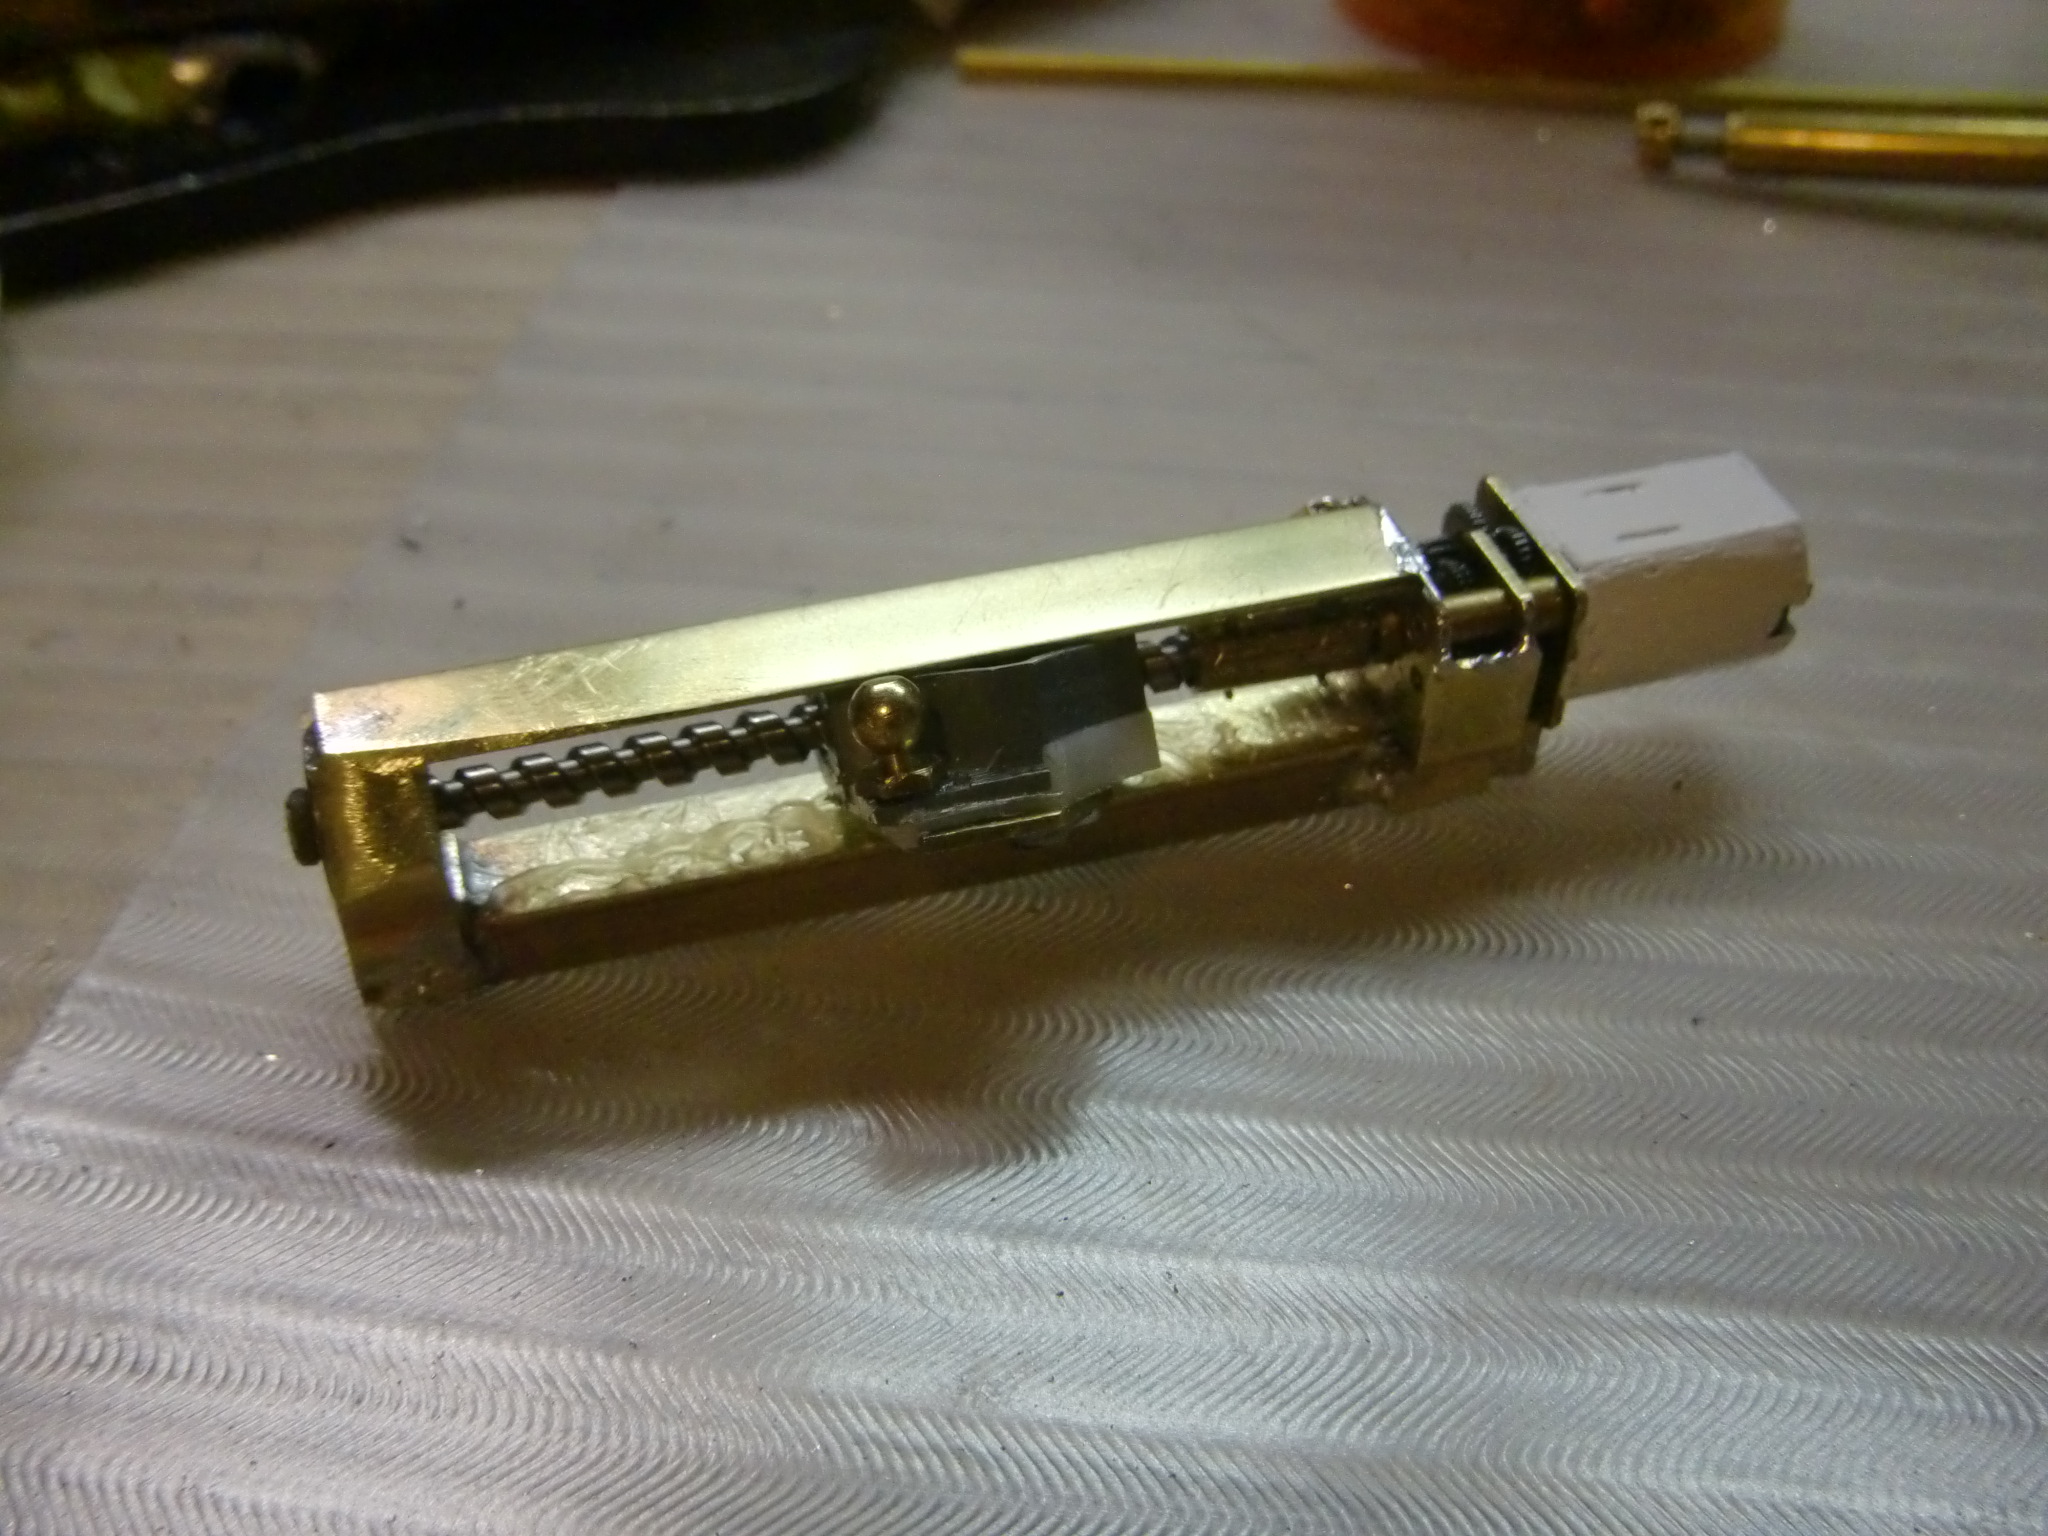
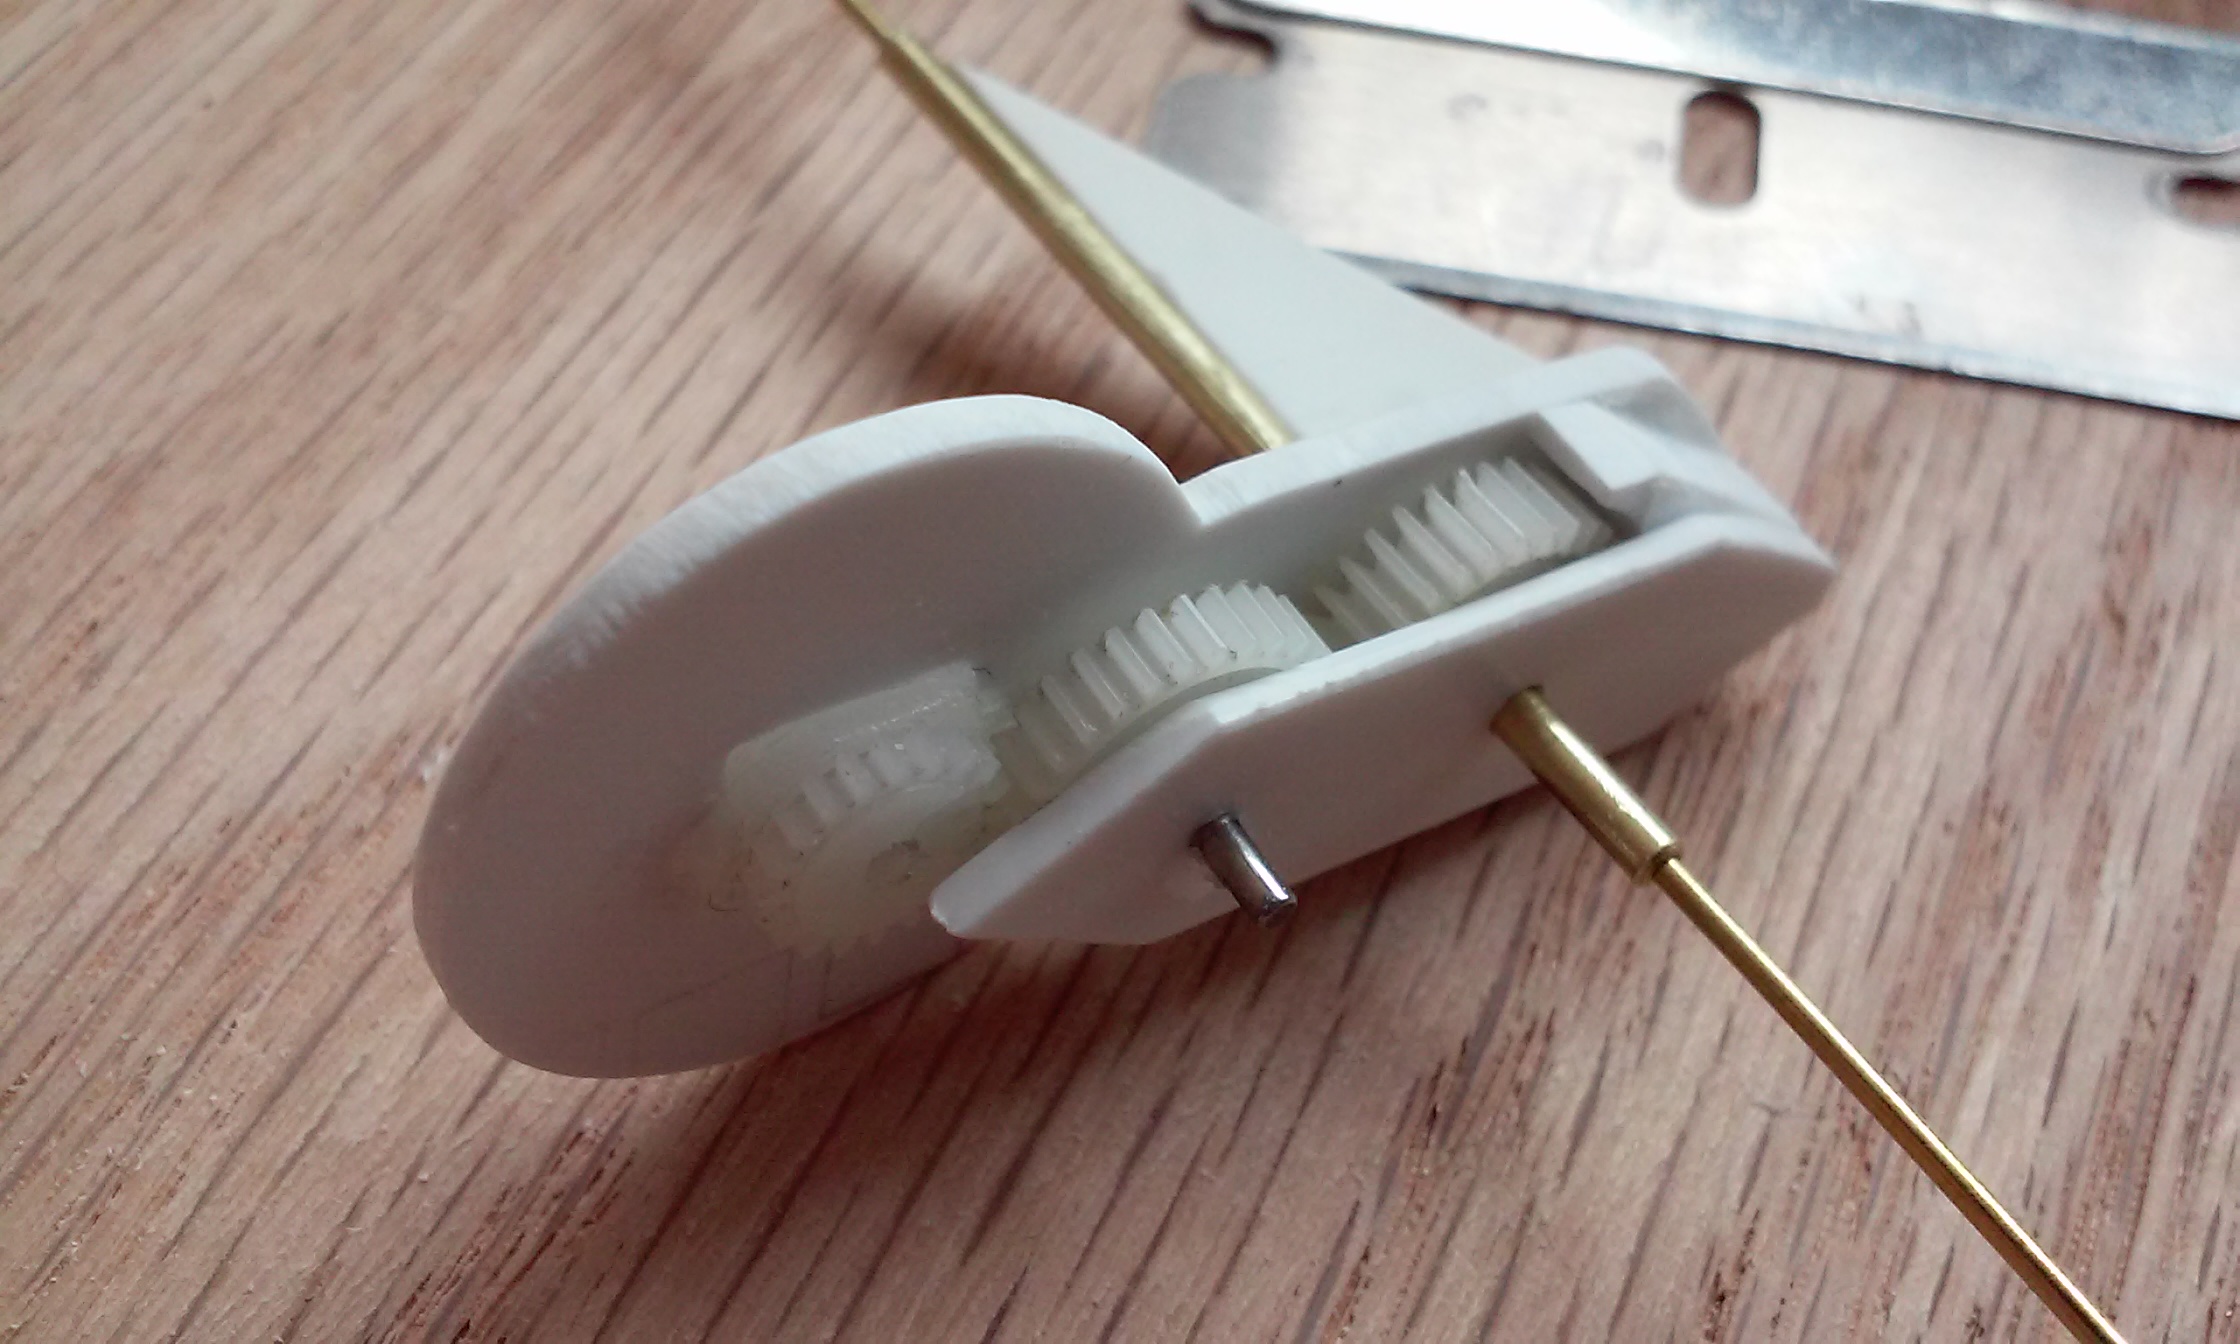
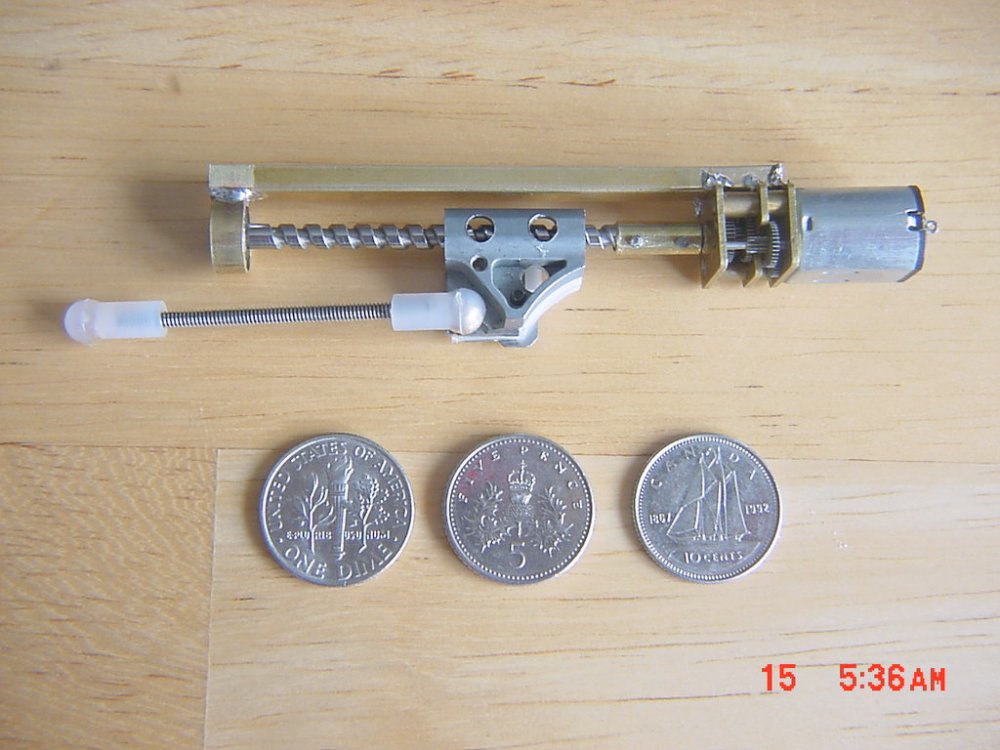
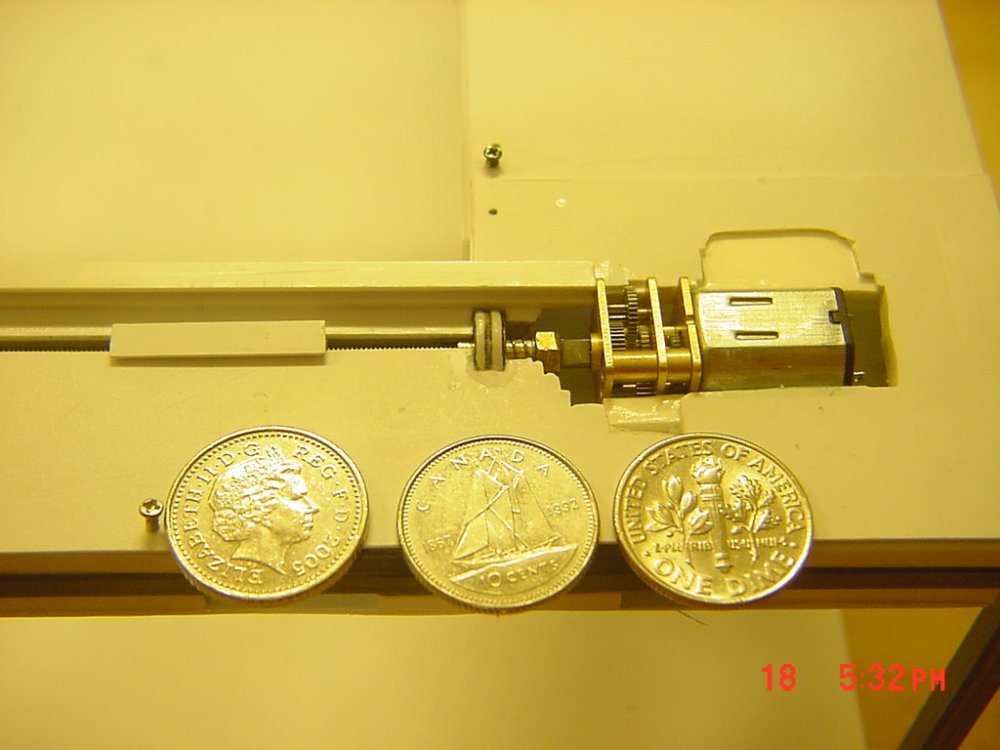
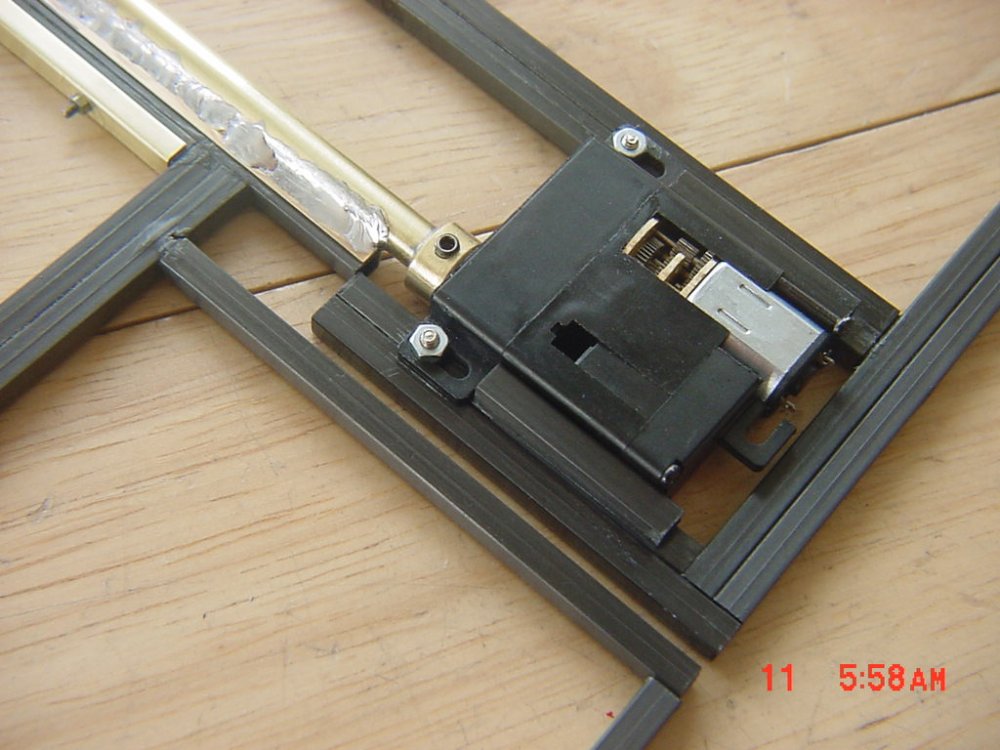
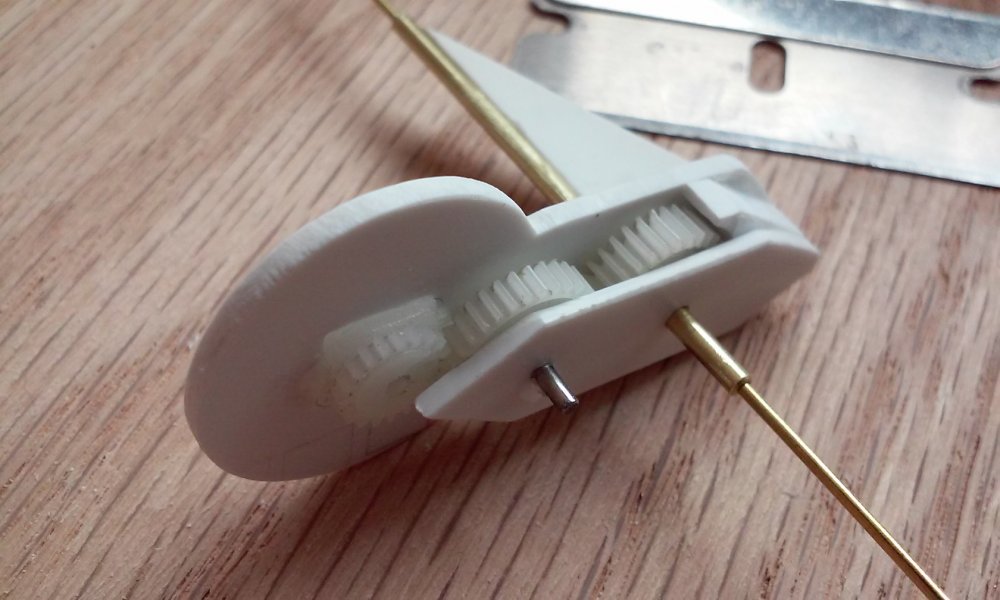
Go to the hardware store and get some threaded rod with matching nut, then you can use the motor of your choice! NZEOD has a great idea by the way. The Daedalus had several screw drives, they are some of the strongest and easiest to make. You can couple the motor with a u-joint or gears. Part of the Daedalus ramp (similar to doors) was also direct drive from metal geared servos (below). You could easily do that too with a cheap servo.- MT
-
Gerwalk mode on my old work keyboards would have been awesome! Those little tabs in the back never seemed to tilt it up enough! - MT
-
Before hitting all the classwork I have to do, I just popped in to see the new stuff. GREAT WORK EVERYONE! I don't have time to give individual props, but it's ALL looking great! - MT
-
Thanks Pengbuzz! I'm just catching up on all this weekend's builds here. Your diorama is looking good! The perspective in the artwork is a nice touch. - MT
-
Oh, make yours R/C like this dude (wish I could read Japanese: - MT
-
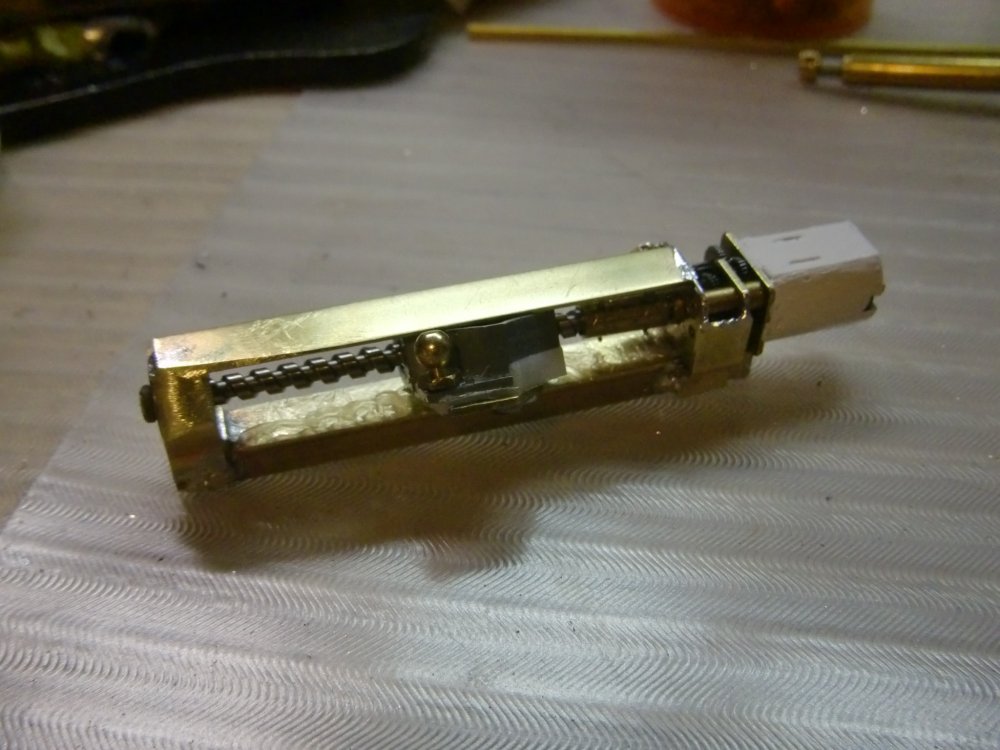
Sorry Arbit, I just now saw that you guys have been posting here (busy with school and museum stuff). That Yamato fiber looks great! The problem is you can still see the fiber. I think he sliced it at an angle and laied it in the rifle grooves of the barrel. Watching your video, this one popped up too, talk about "wave motion!" I have the fiber and I have a board from something else that I think will work. I thought of gluing the fiber to the other side of the clear barrel piece or drilling holes, the problem is the fiber or holes are always visible. Trying to work that one out before I leap into it. Did you try using those small motors for the doors? You could go direct drive or have some sort of clutch for model safety.- MT
-

Bandai Macross Δ Mecha Collection Small Scale Plastic Model Kits
MechTech replied to IXTL's topic in Model kits
Nice finish; I like the colors too! - MT -
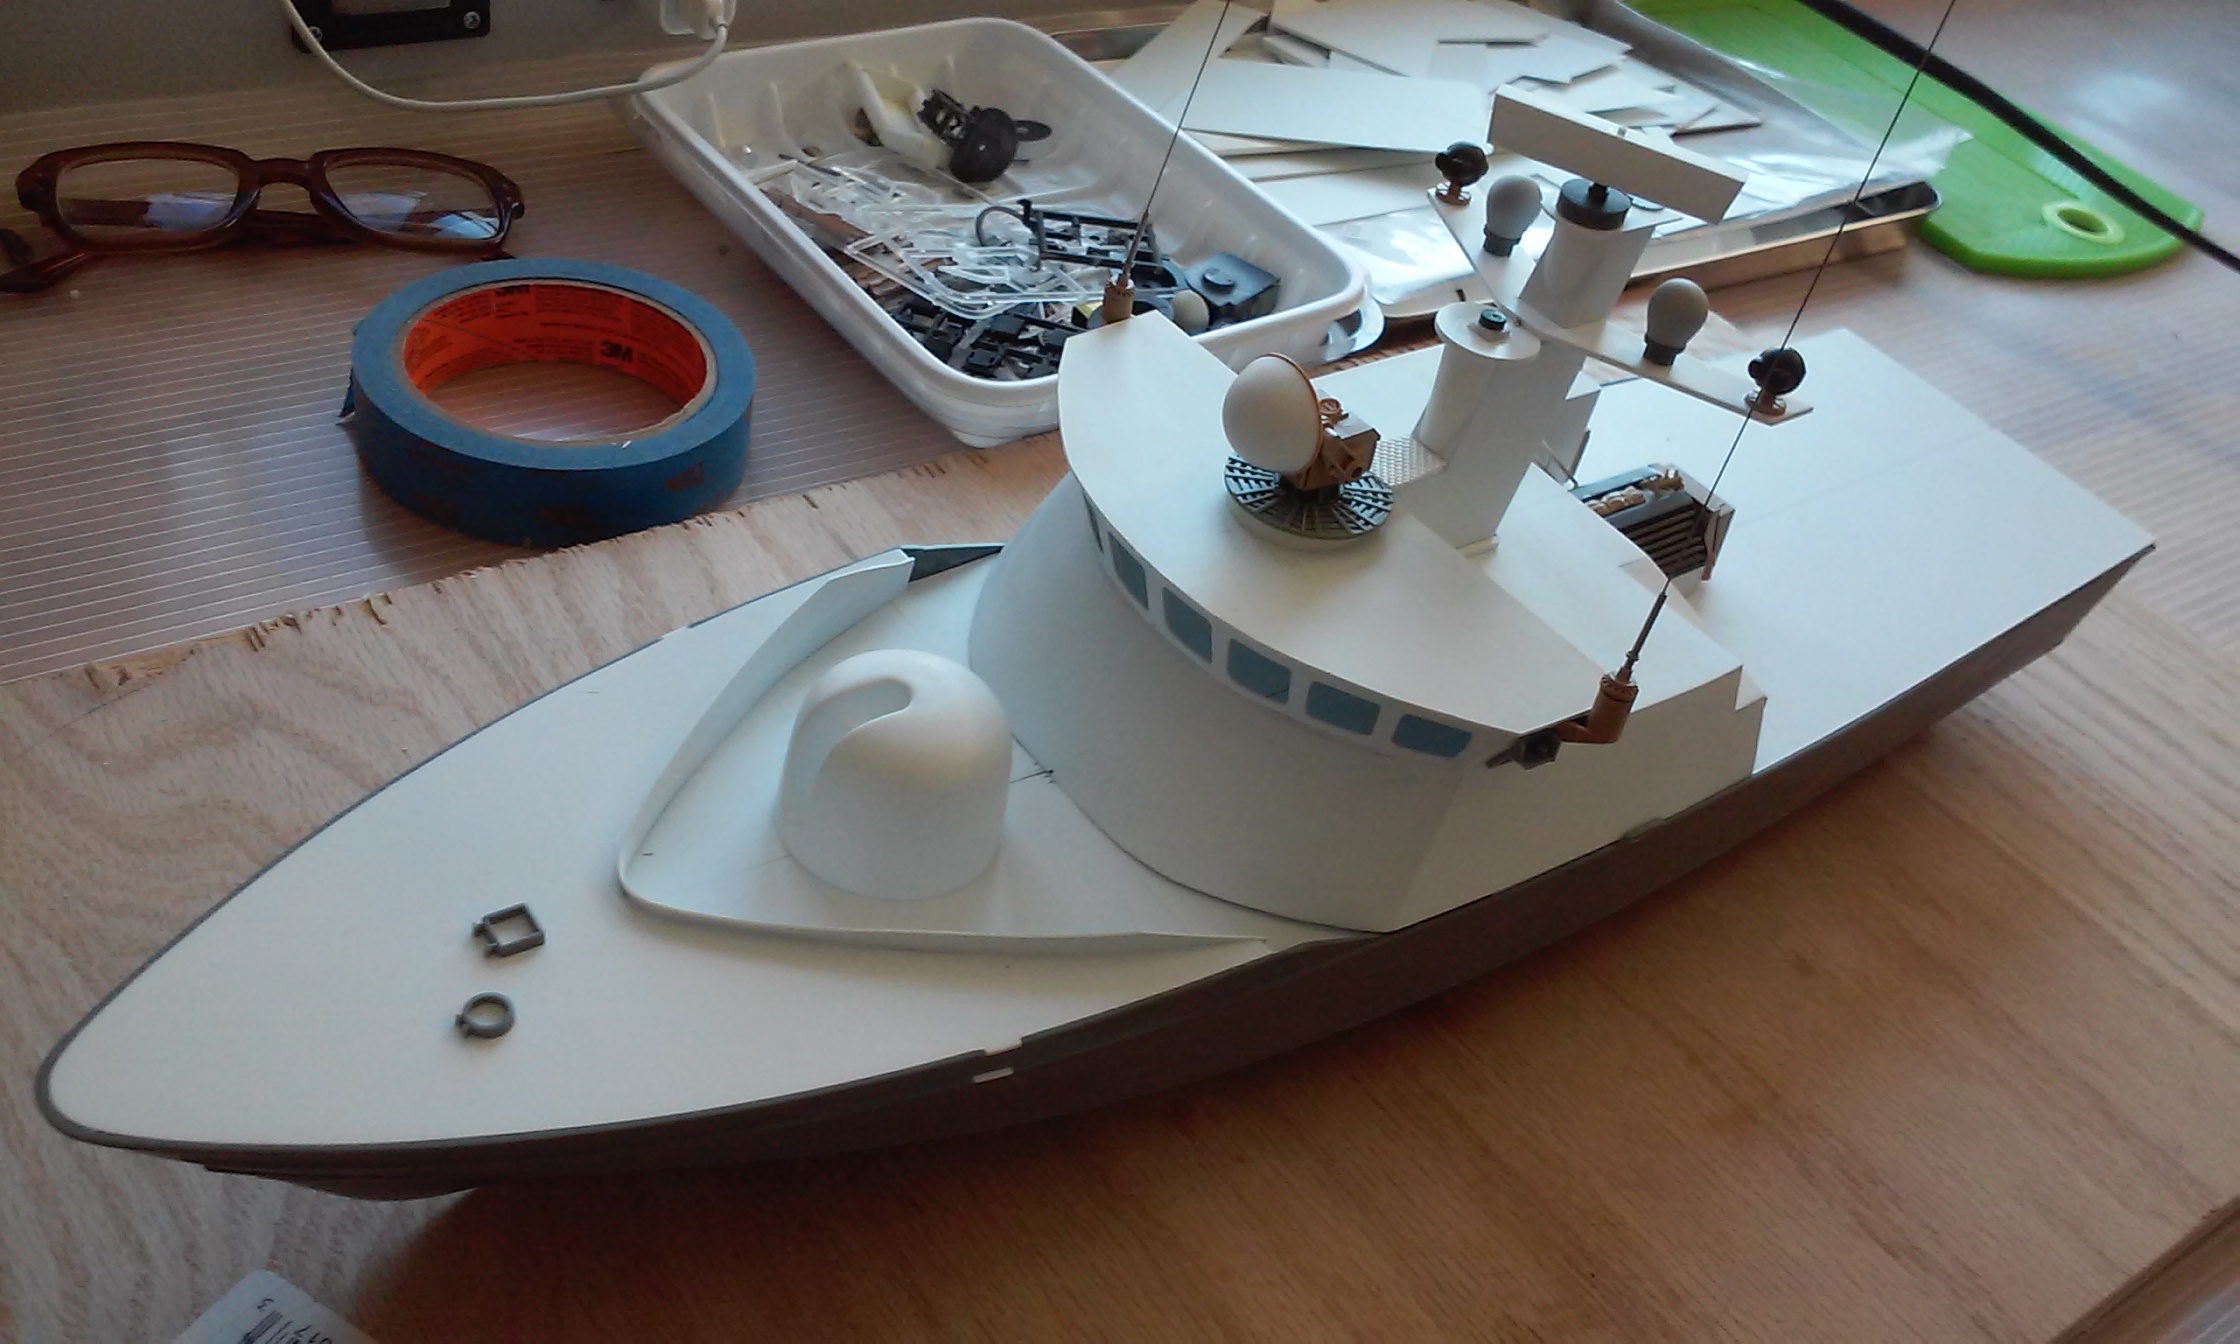
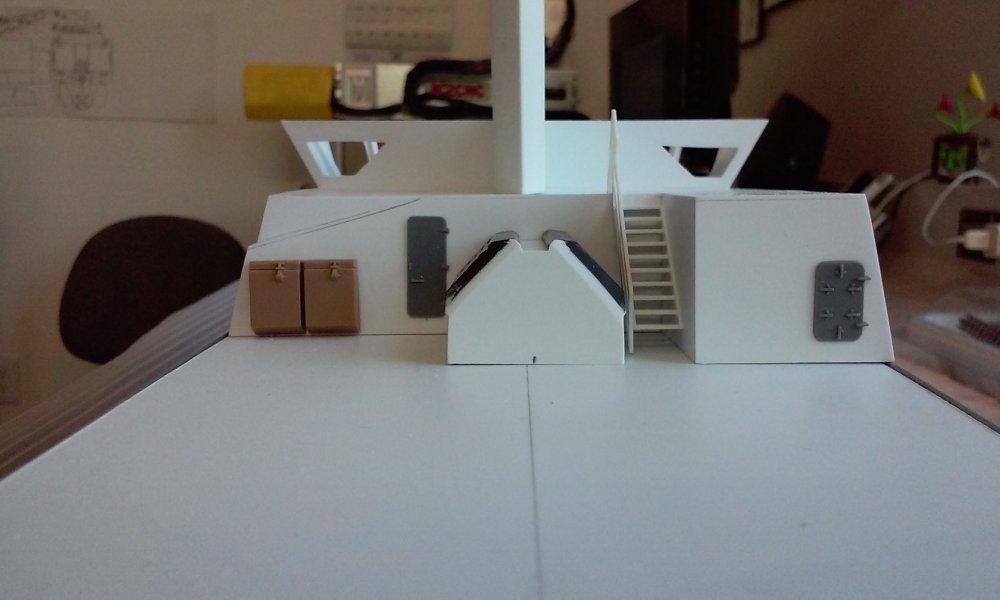
Talking about old VCR's...I take whatever dies and strip it of whatever I think I may need later. That keeps things clean and keeps me from being a hoarder Built a simple gear case from recycled gears and styrene for the two radars (surface and combination search). Stuck that into the mast sealed forever and added some more details to include the SATCOM antennas with optronics to the mast too. Then built an illuminating radar (illuminates targets for missiles to home in on) from spares and added a few more details. Hopefully It'll have some weapons soon other than the placeholder turret. - MT


-
Thanks guys! I don't think I do anything quick. The Daedalus was supposed to be quick, and nine years later... Today it's the radar gears in the mast. - MT
-
Bandai Macross Δ Mecha Collection Small Scale Plastic Model Kits
MechTech replied to IXTL's topic in Model kits
It came out great Sketchley! The smaller scales are more "fun" top deal with anyhow. - MT -
1/72 Imai VF-1S Kitbash PART II: The VF-1S STRIKEs back!!!
MechTech replied to pengbuzz's topic in The Workshop!
This was a great rescue job and turned out great! - MT -
I'm just now seeing this, but it came out AWESOME! Great design and building! - MT
-
This thing is a museum piece now! Looking great! Keep it in a covered case. - MT
-
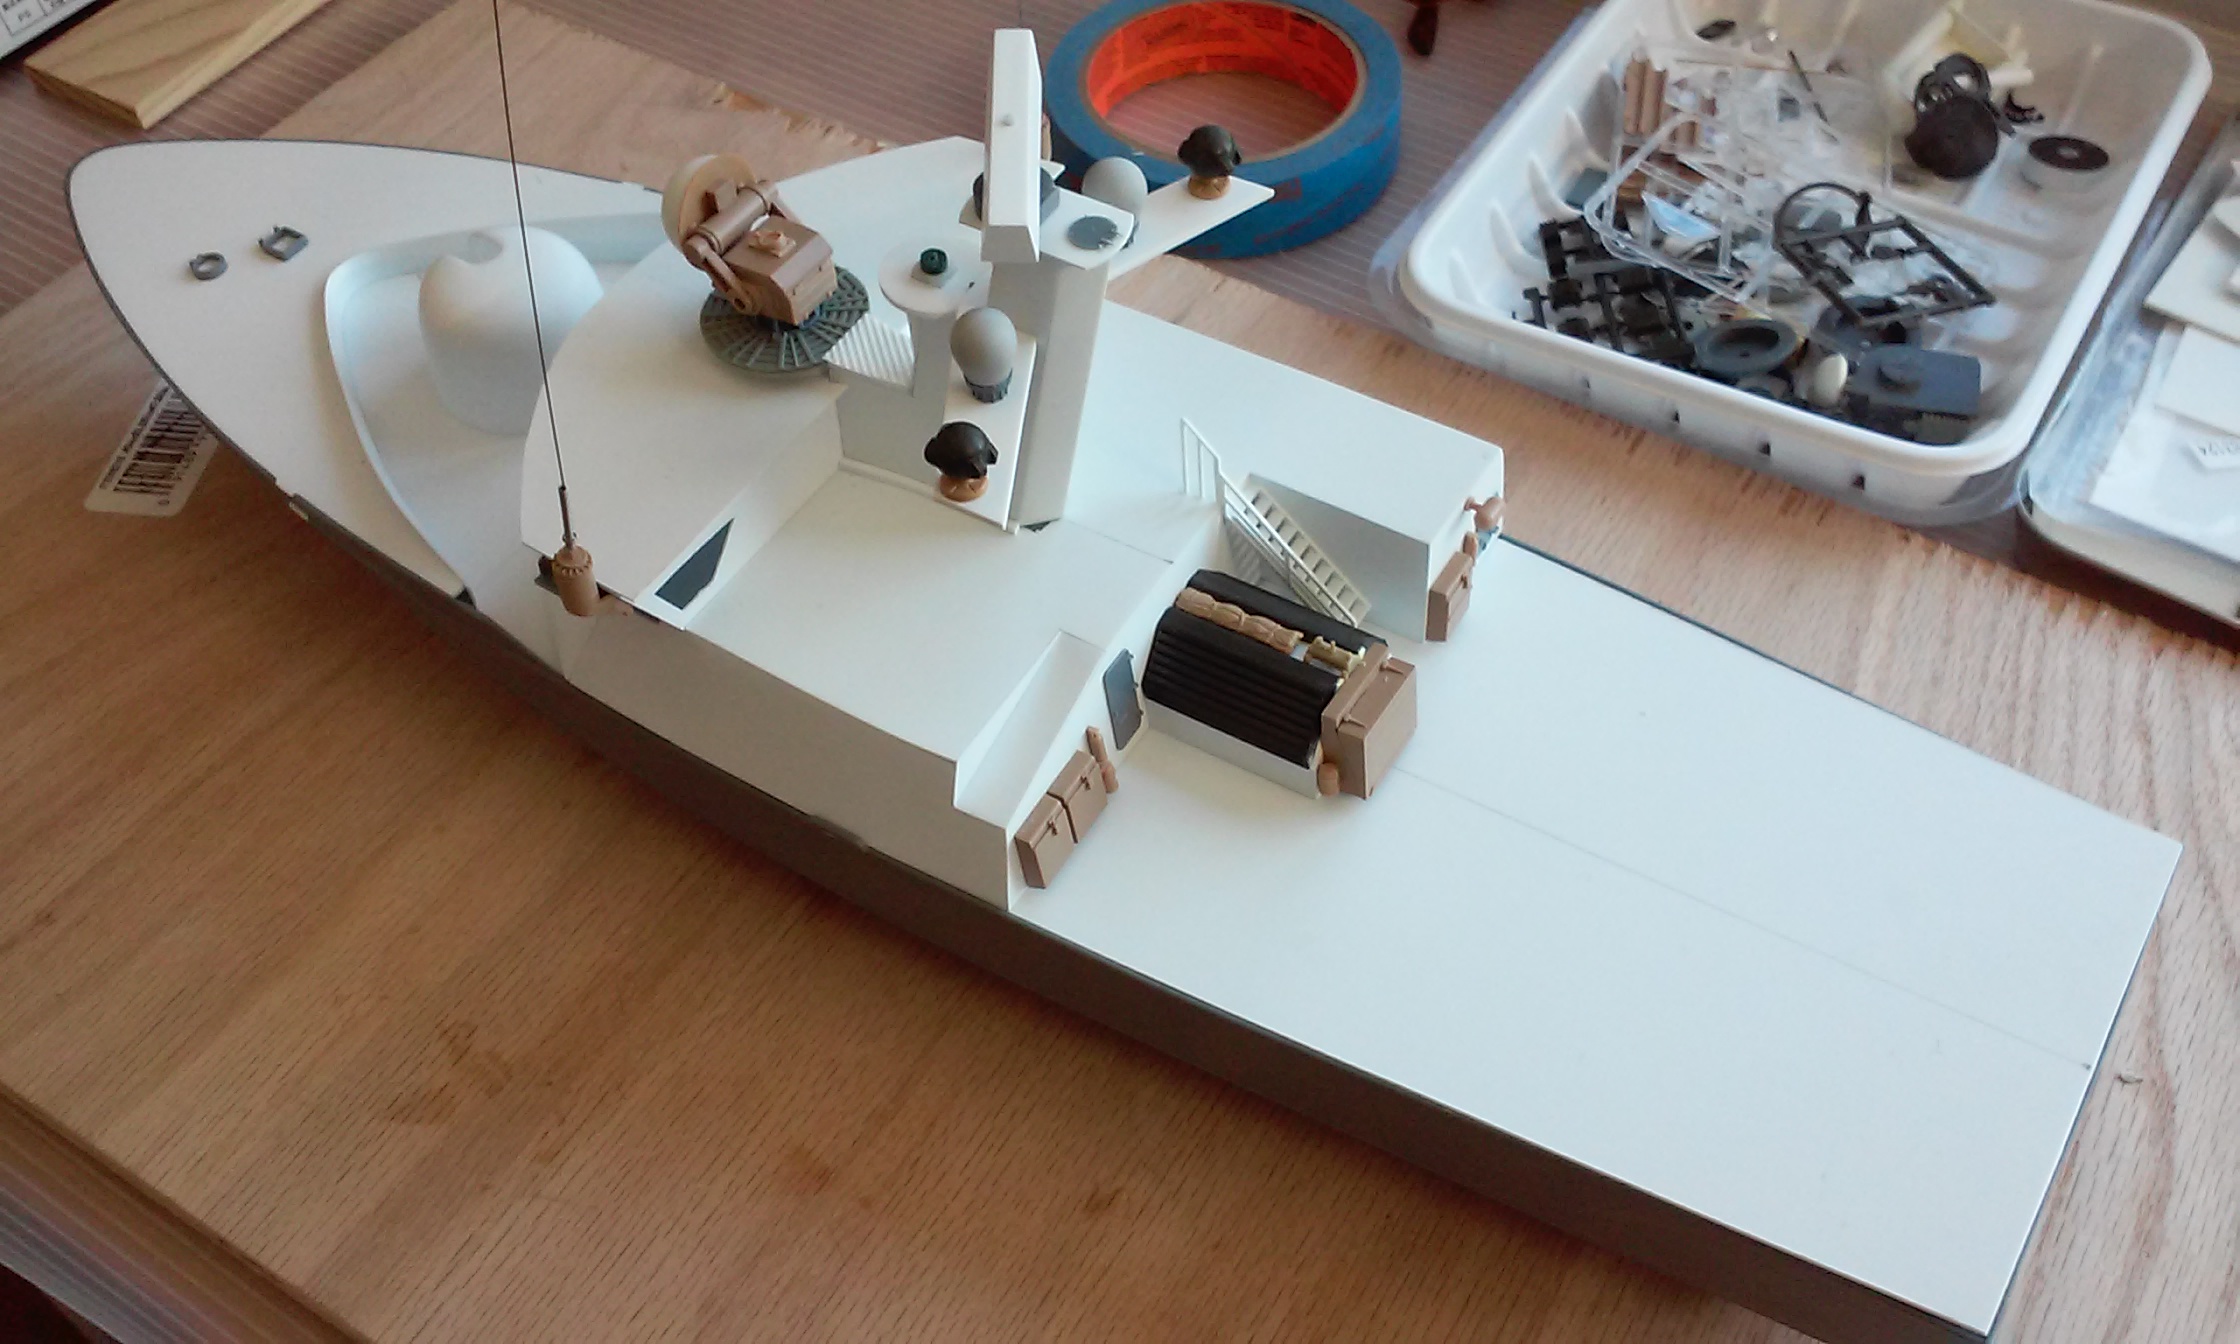
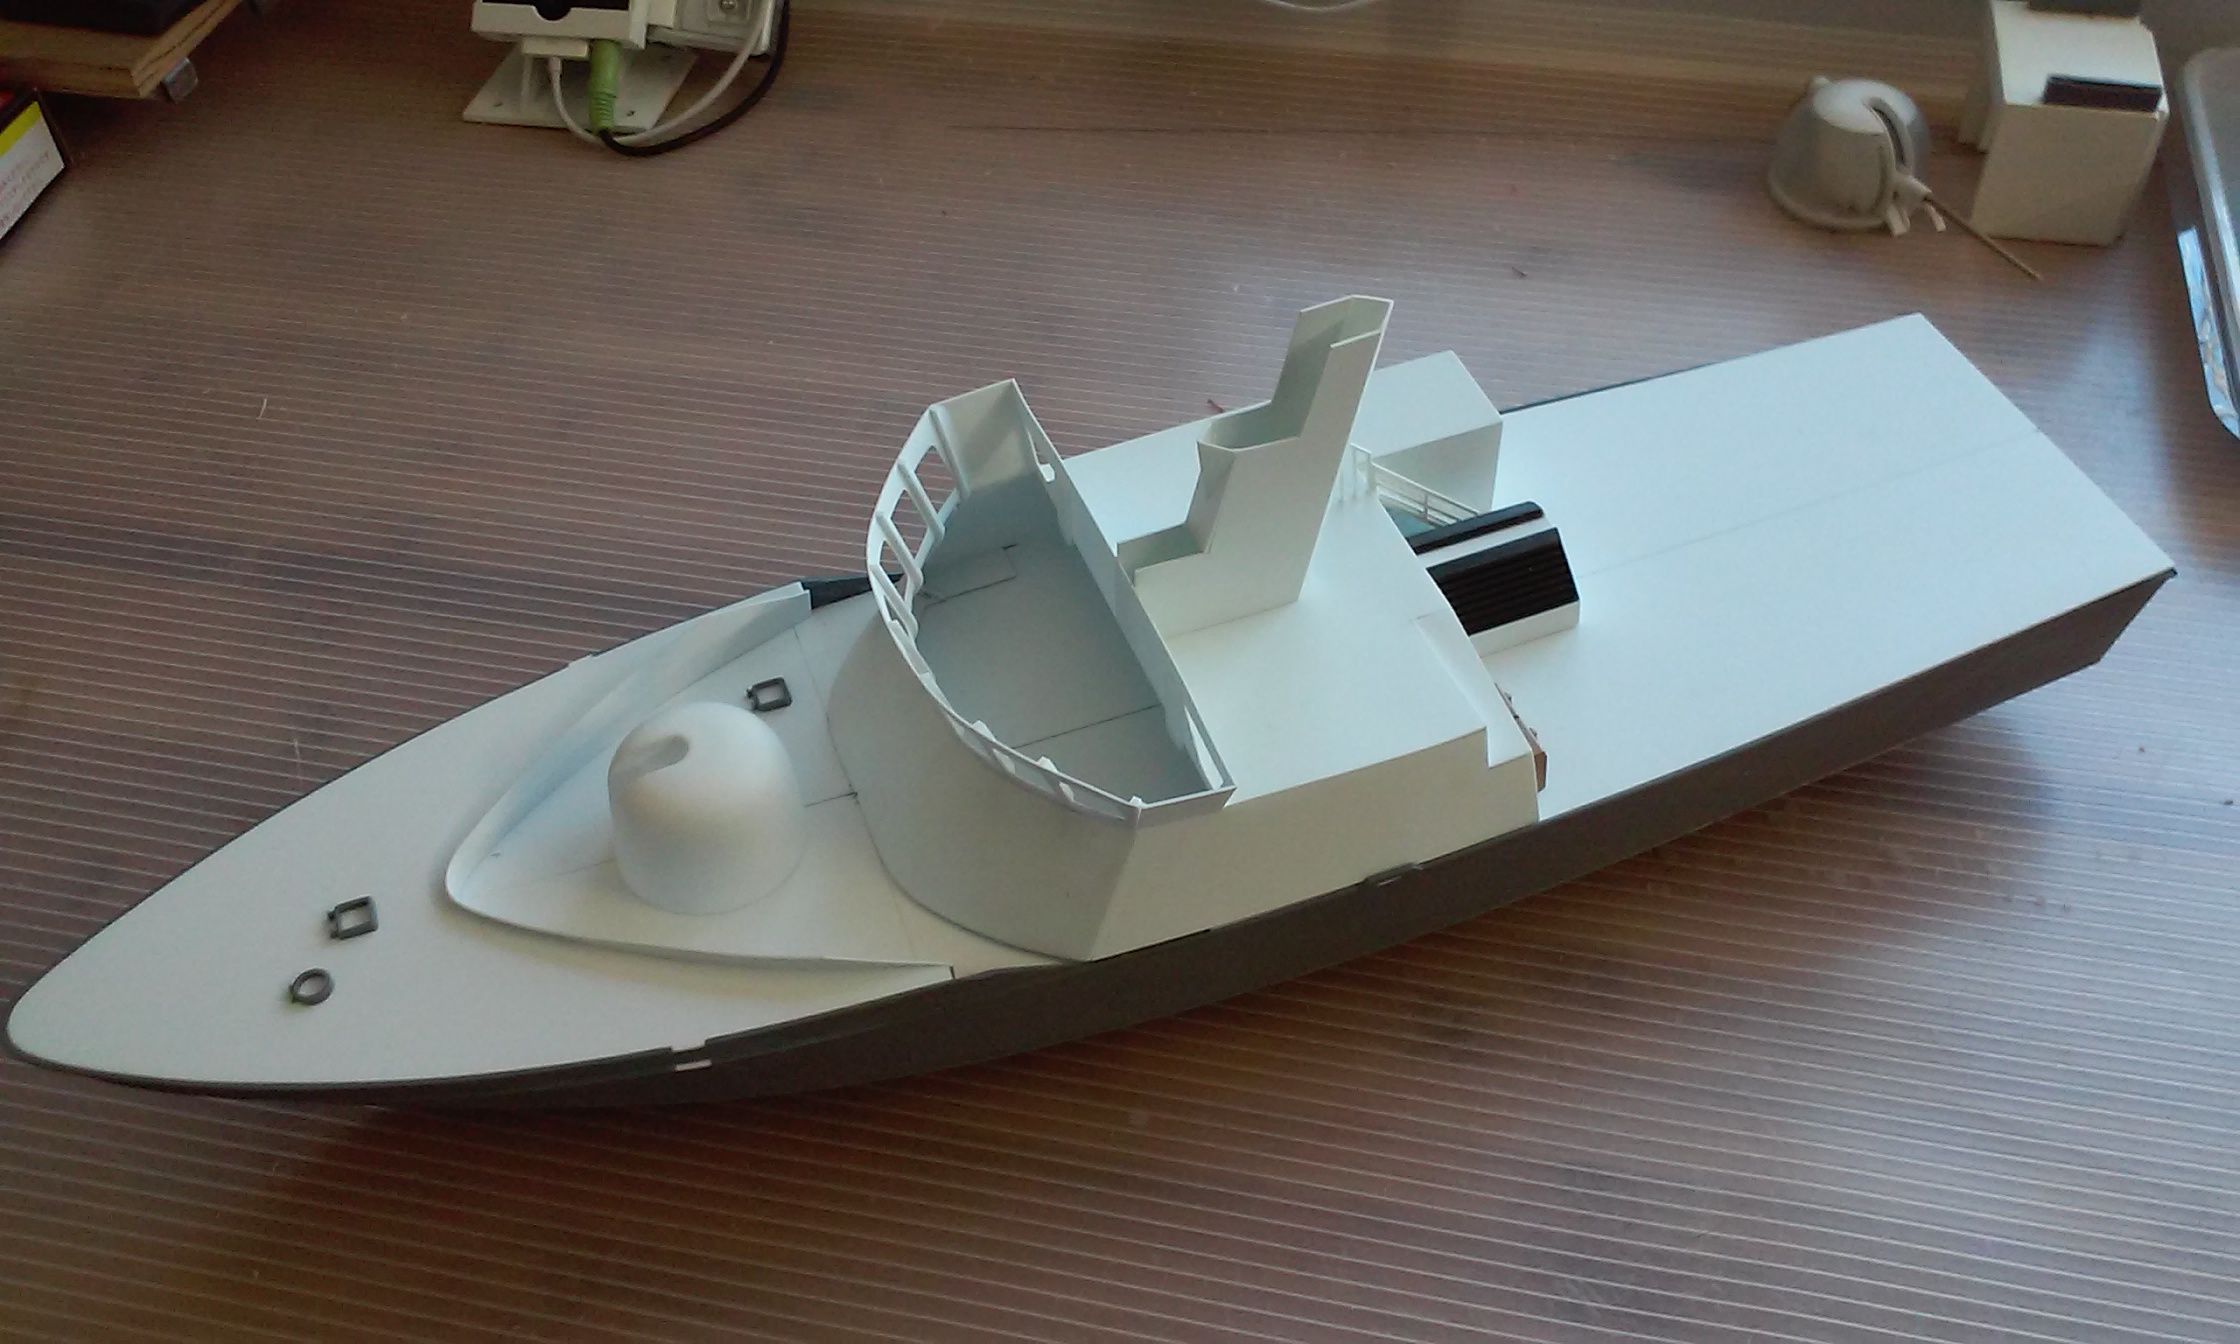
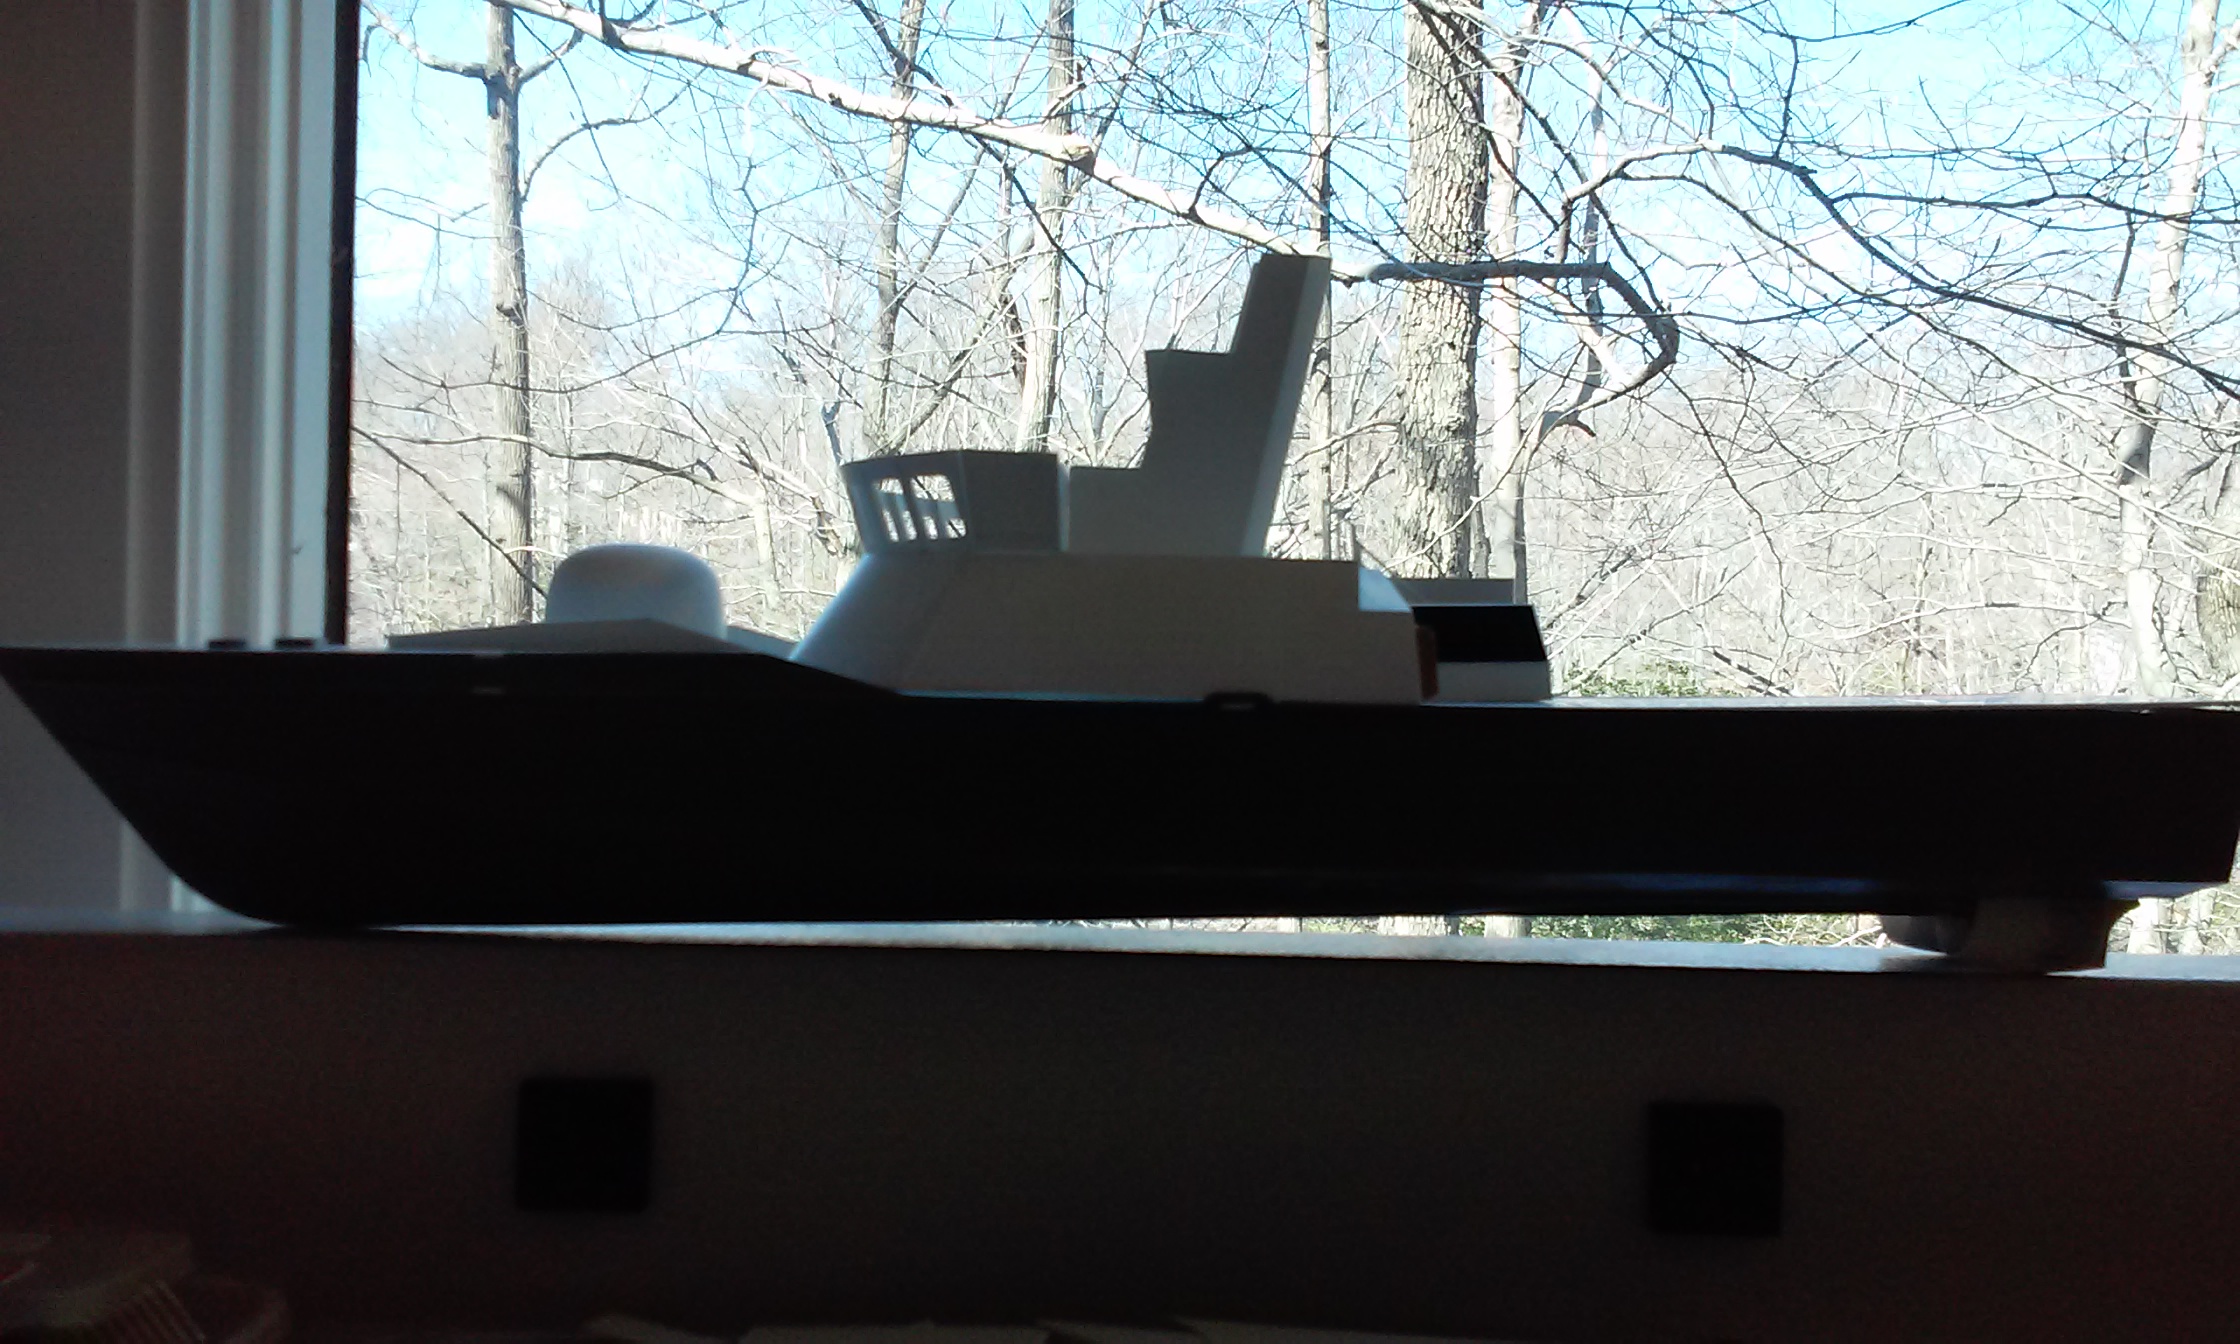
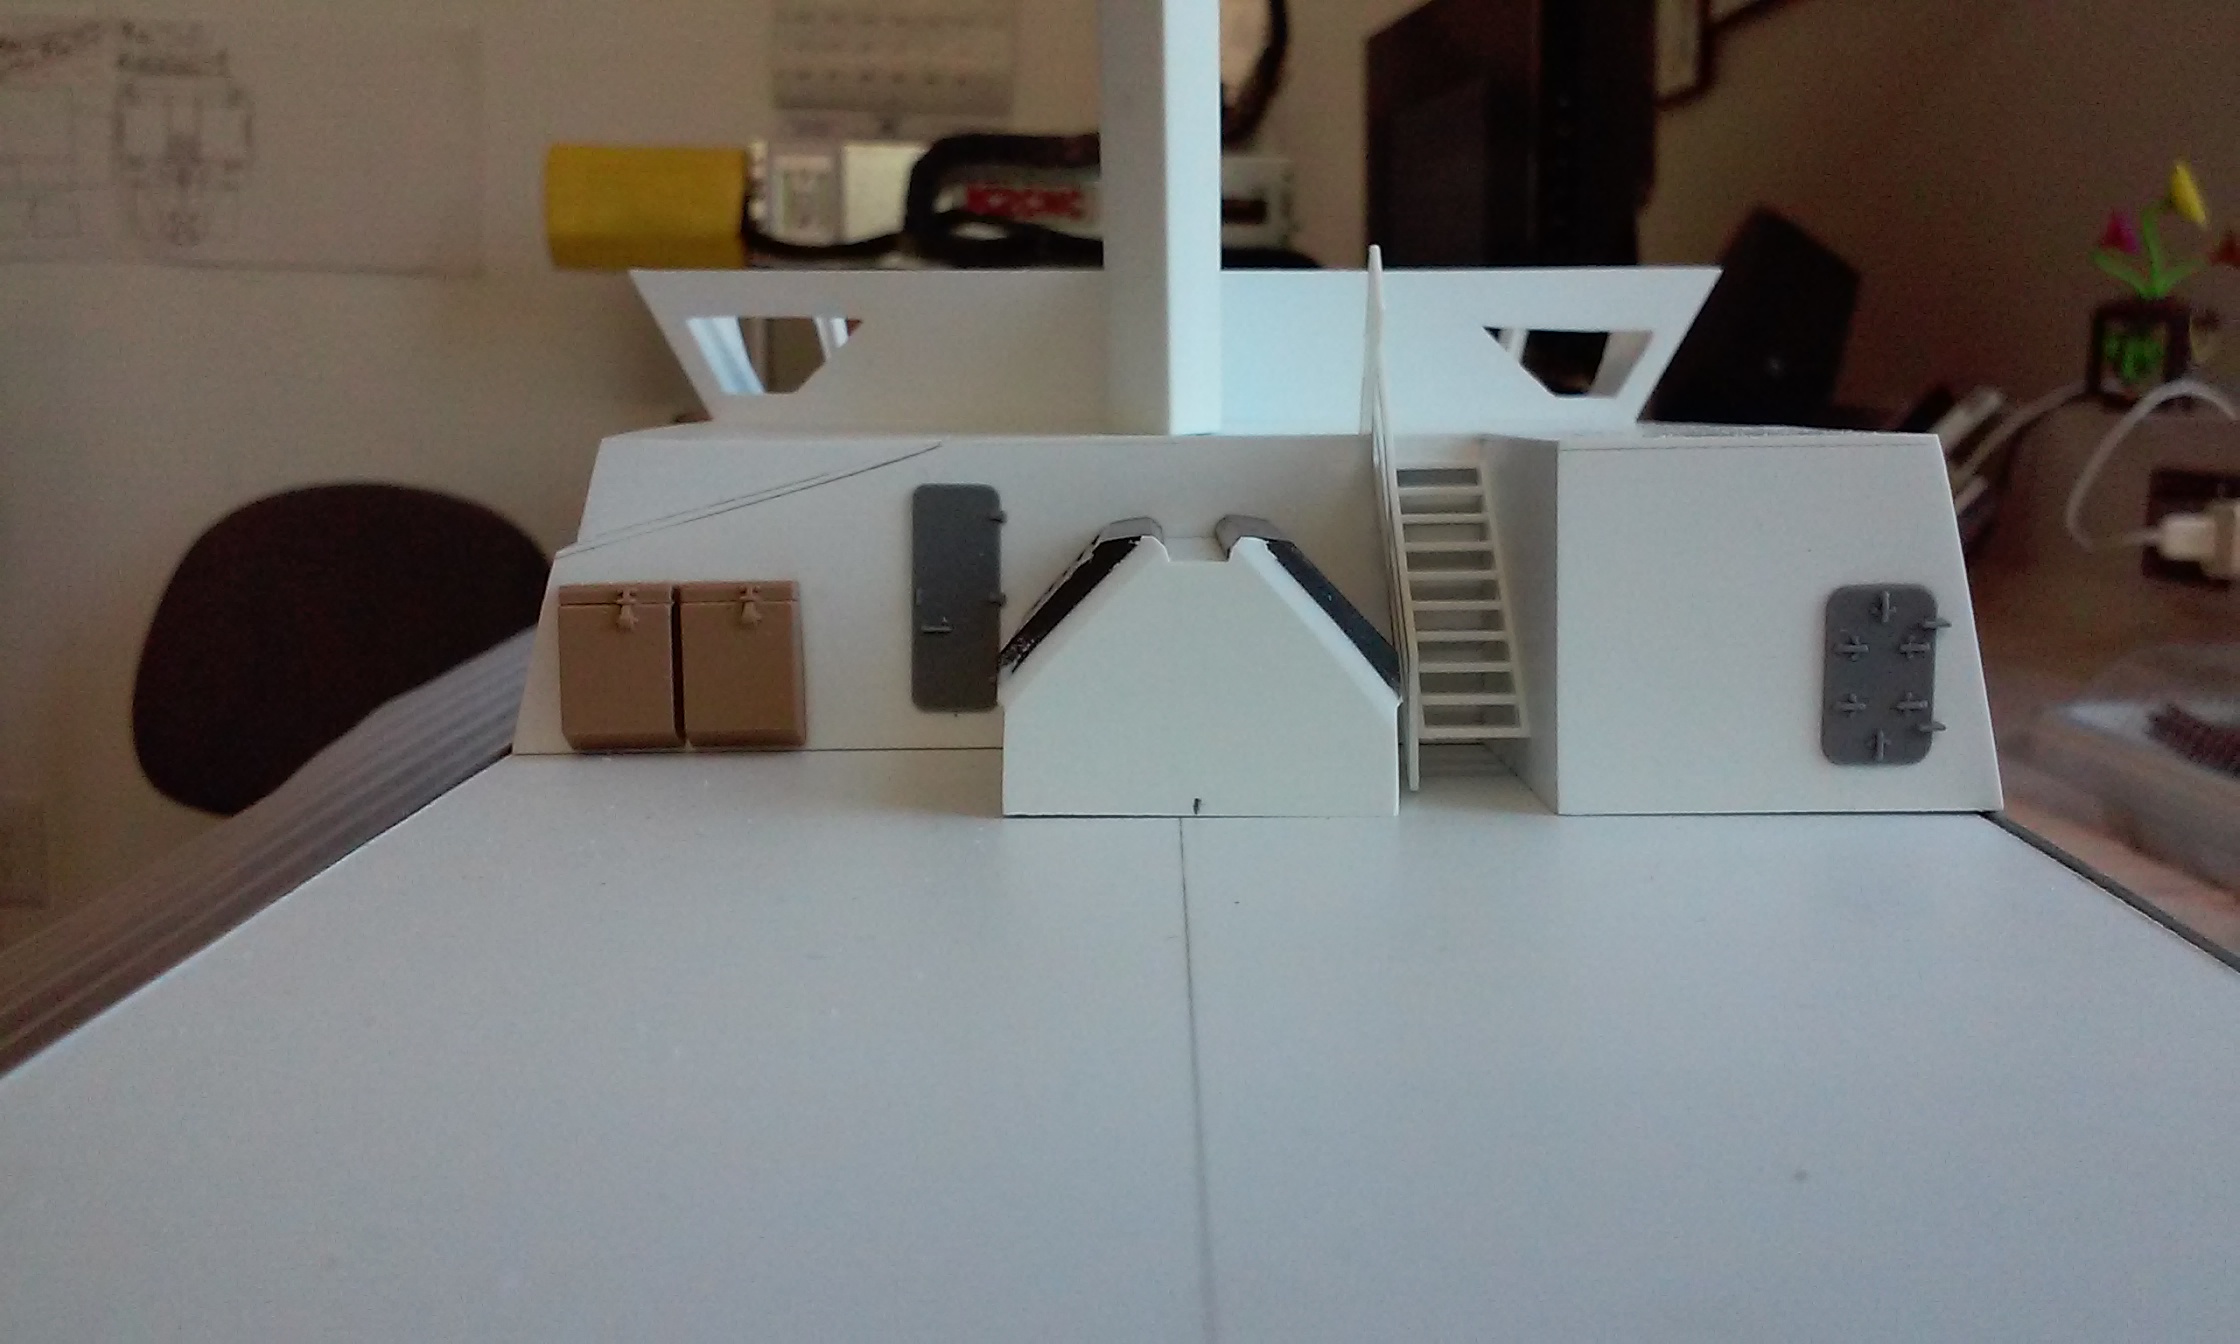
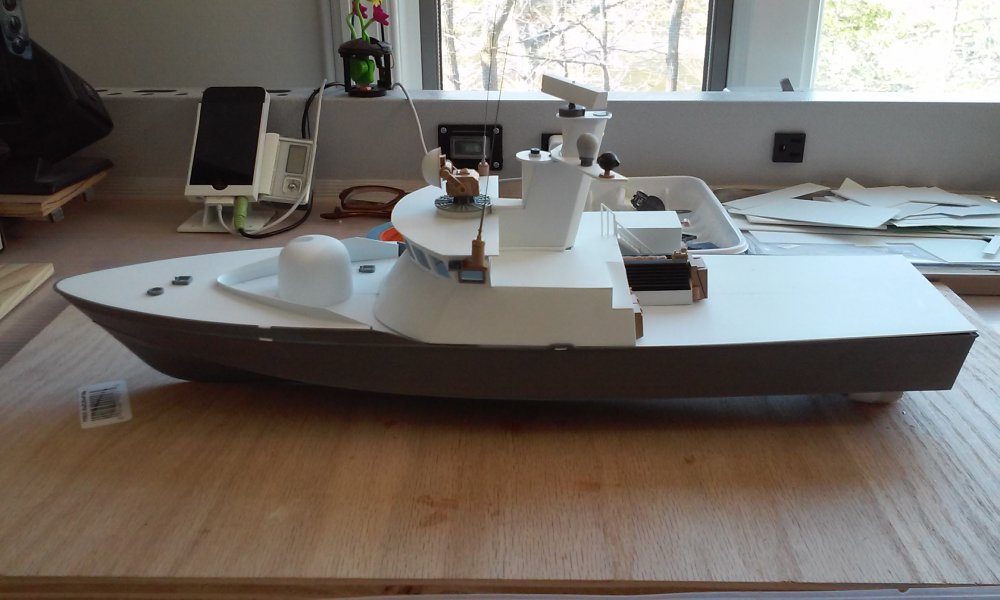
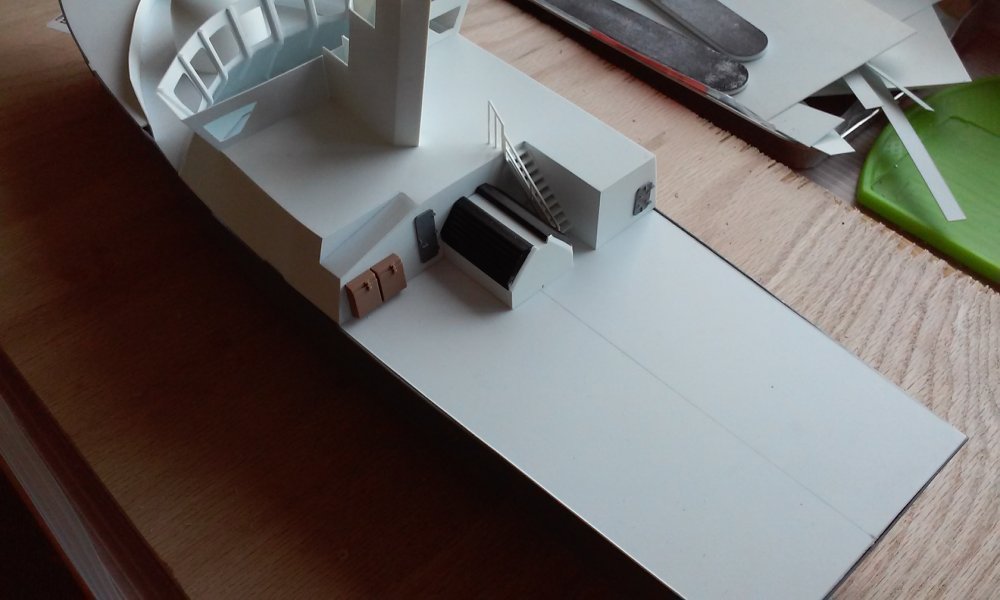
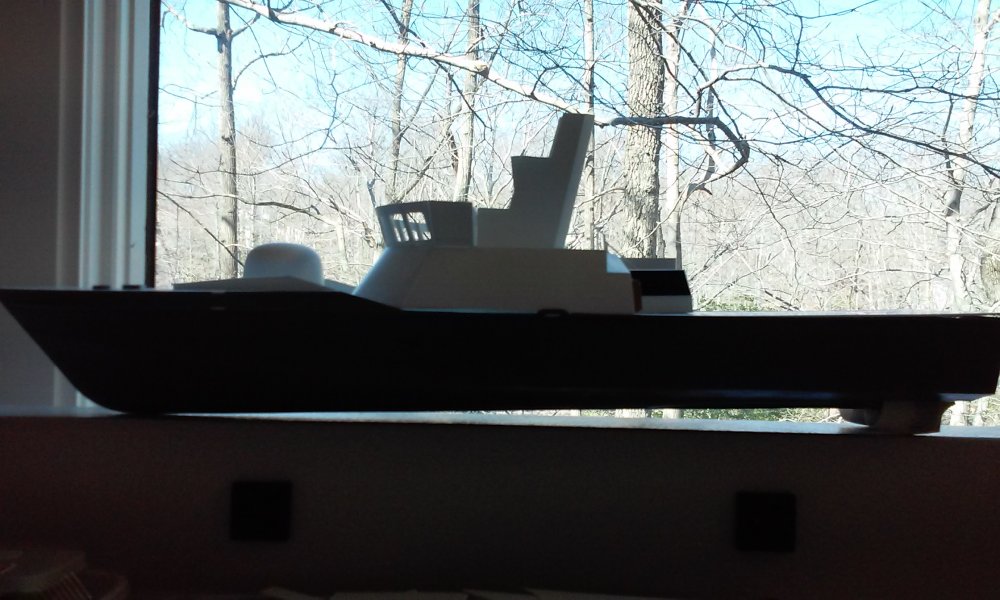
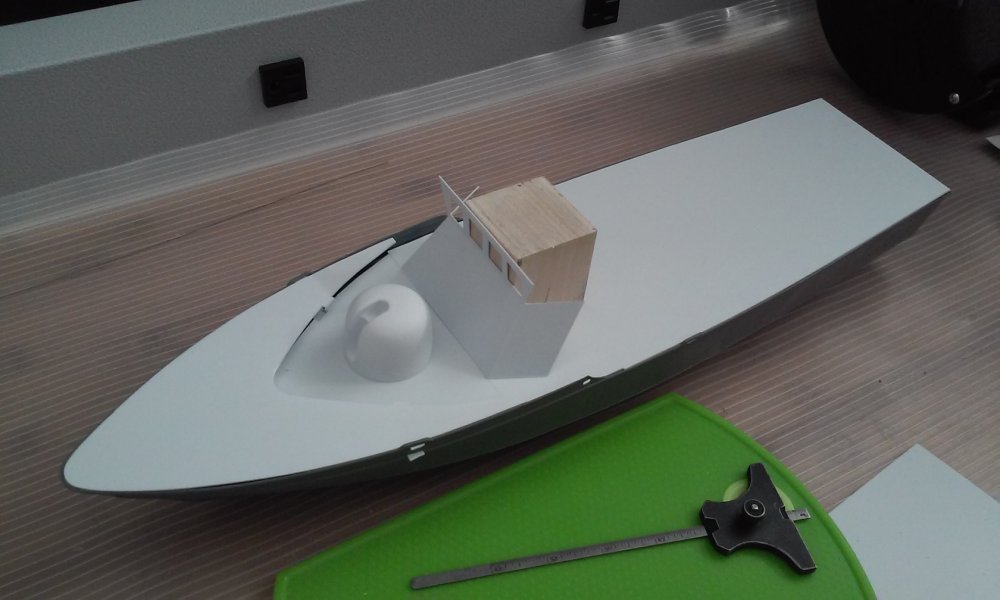
The TIE looks great Derex! The laser effects are a nice touch. Pengbuzz, I'm glad to see your model got spared the death of hitting a wall! It came out great and was a good save! NZEOD, I need sunglasses to look at all that bling on your model! SHINEY! Got a LONG WAY to go, but it's starting to take shape now. Just fit the parts together to get an idea of things so far. Asked my wife for some ideas and feedback and all I got was "whatever floats your boat!" Thanks babe! This will be a modern fast missile patrol ship when done. - MT


-
Milliput is GREAT stuff! Very strong structurally too! - MT
-
That looks great William! You can't tell it's 1/144 from the photos. Is it just me, or does Han look REALLY grey haired now! I'm with ya William! I've had to sort out several ways of magnification even adding it to a couple of machines. Between last year when we moved house and a couple of months ago when I started back seriously into building, I lost part of my vision. Maybe it's in one of the storage boxes from the move... The Valk is coming along great Pengbuzz!- MT
-
Many people say the A-10 is an ugly plane. That is until it's providing cover overhead! This looks great! Are you going to give it an acetone bath to smooth it over? - MT
-
1/72 Imai VF-1S Kitbash PART II: The VF-1S STRIKEs back!!!
MechTech replied to pengbuzz's topic in The Workshop!
Lookin great! I'm glad to see your back on it. Sketchly's right. I've even used "blochin" as a finish. Keep up the great work! - MT -
The face plate upgrade looks great Electric Indigo. What is it with those era Gundams? They always seemed to get the proportion wrong. How about "Chocolate Thunder!" It works on multiple levels - MT
-
Hasegawa 1/72 VF-25F/S Super Messiah Macross Frontier
MechTech replied to Mintox's topic in The Workshop!
Looking great Mintox! - MT -
Pengbuzz, that sucks dude! I think those guys forgot where they came from. NOBODY takes a model for the first time or even first few times and makes it look AWESOME without some bumps here and there. On the other hand, it's great that we do have some nice people on the forums! I've been on these forums for years and I can't tell you how many people started out asking for help to becoming near professionals giving help. You also get the TENACITY AWARD for not giving up when the model went far from what you wanted it to. On a side note, if you're on a tight budget, need styrene but don't have a hobby shop or hobby shop budget, go to the big stores and buy yard signs. Walmart has a $1.00 "Keep Out" styrene sign made of either .020" or .040". Just turn the lettered printed side to the inside. Or buy two and hang one in your work area NYANKODEVICE: Your scheme and finish look great! I think your design is better than some of the Palladium books creations. - MT
-
That thing is HUGE! The gunpod looks like it could fire BB's! The shnoz does look too long! Hopefully it's the camera. It does look off. I had an old camera that would warp anything like that. My 1/100 Monster barrels looked like they were sagging in photos - MT
-
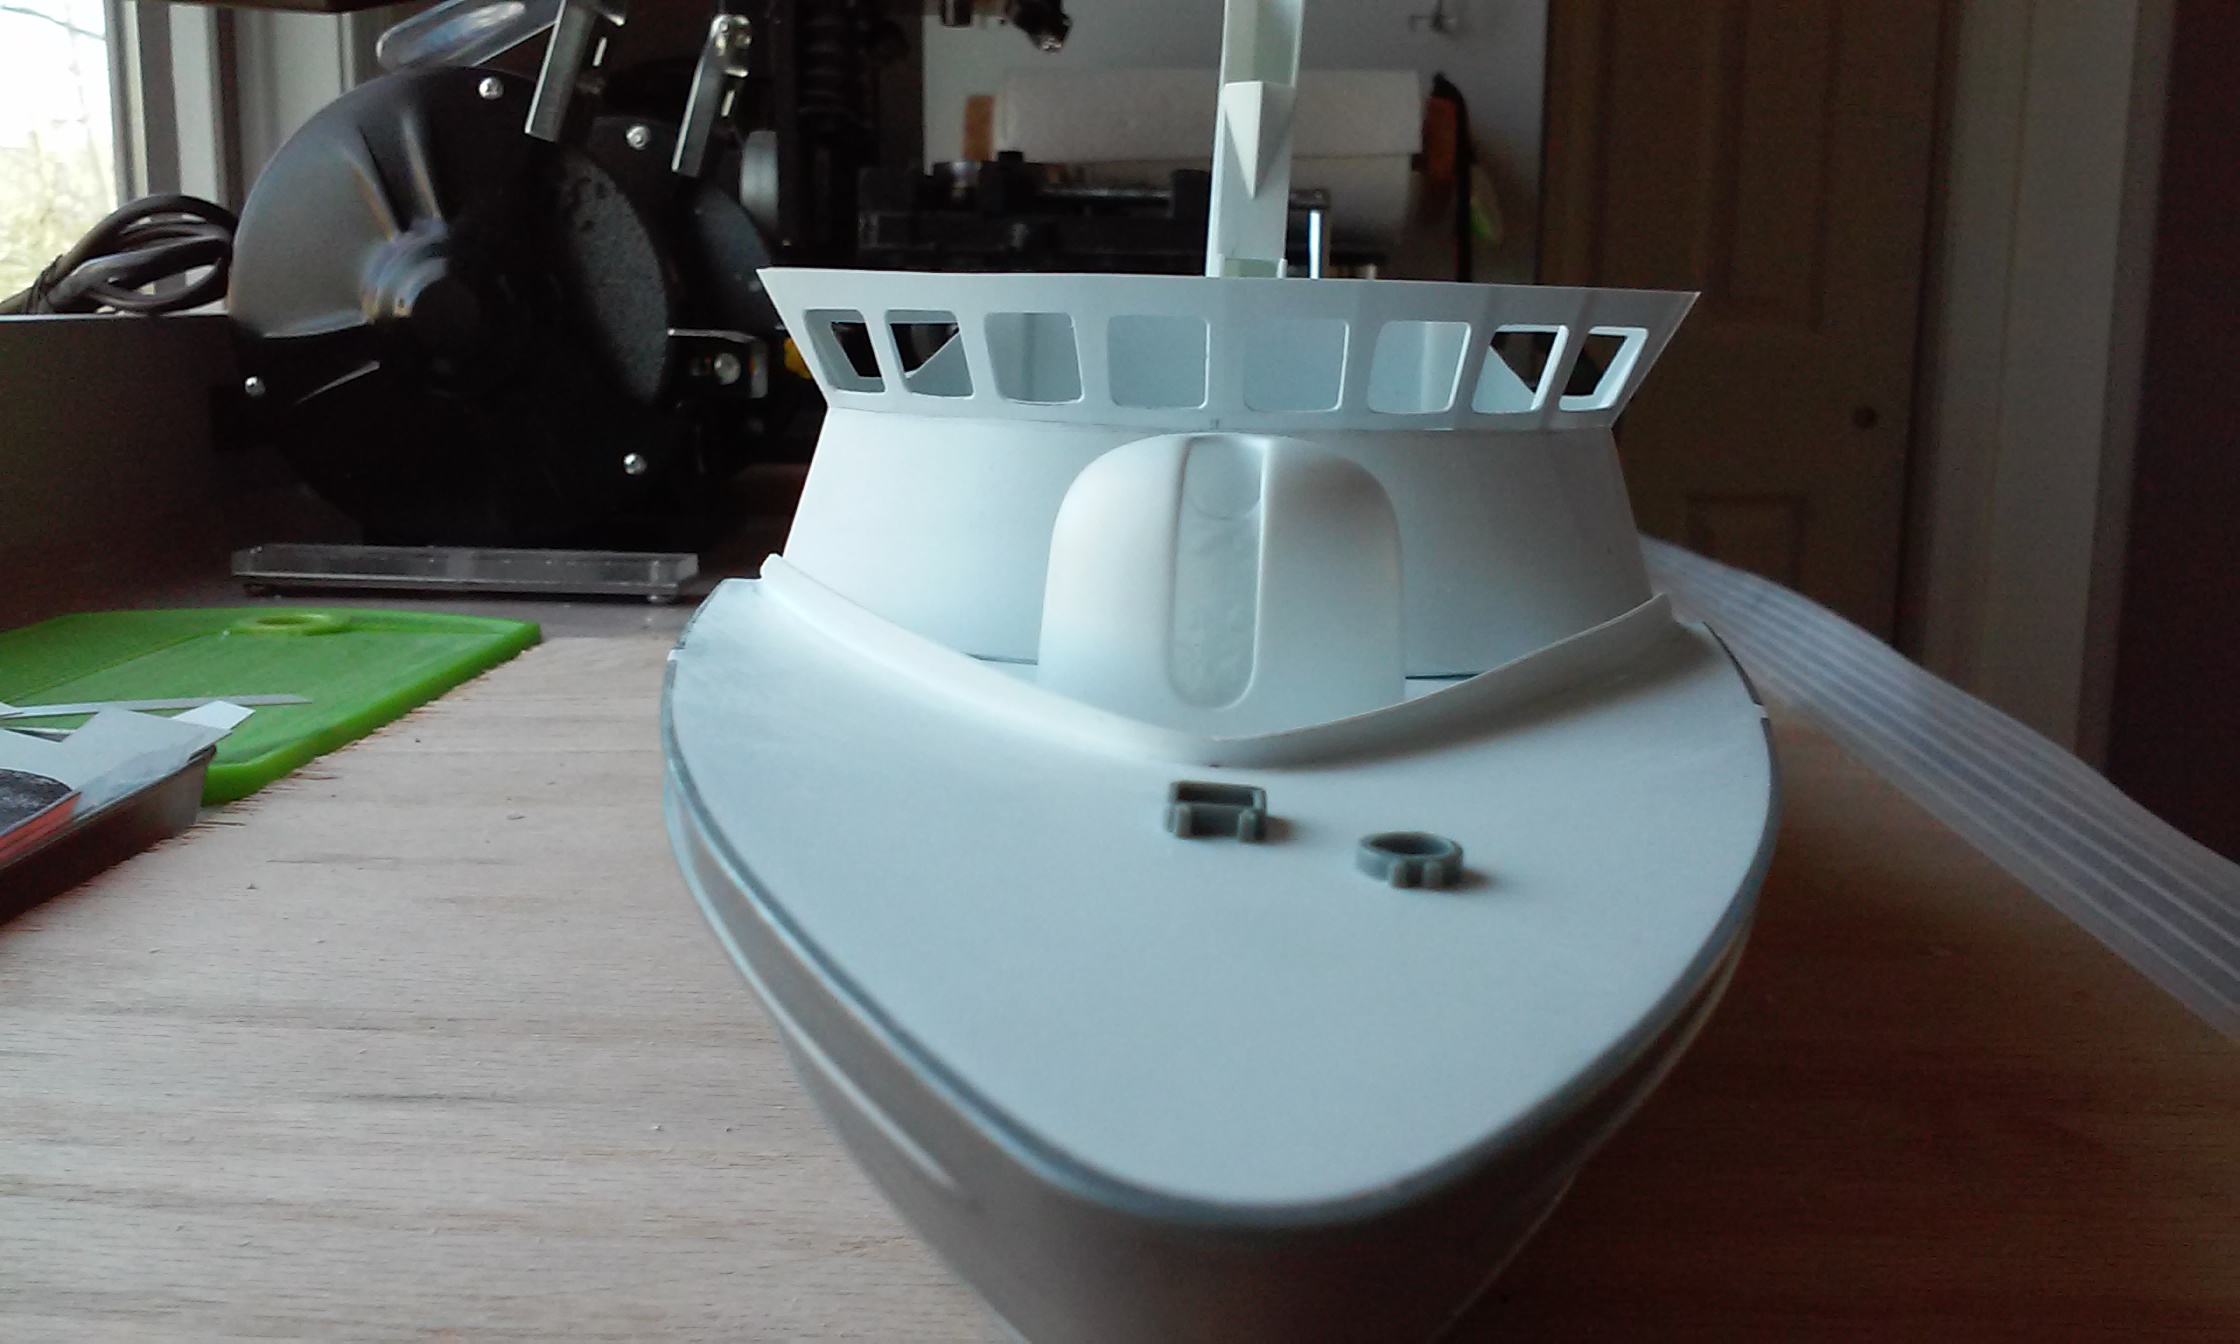
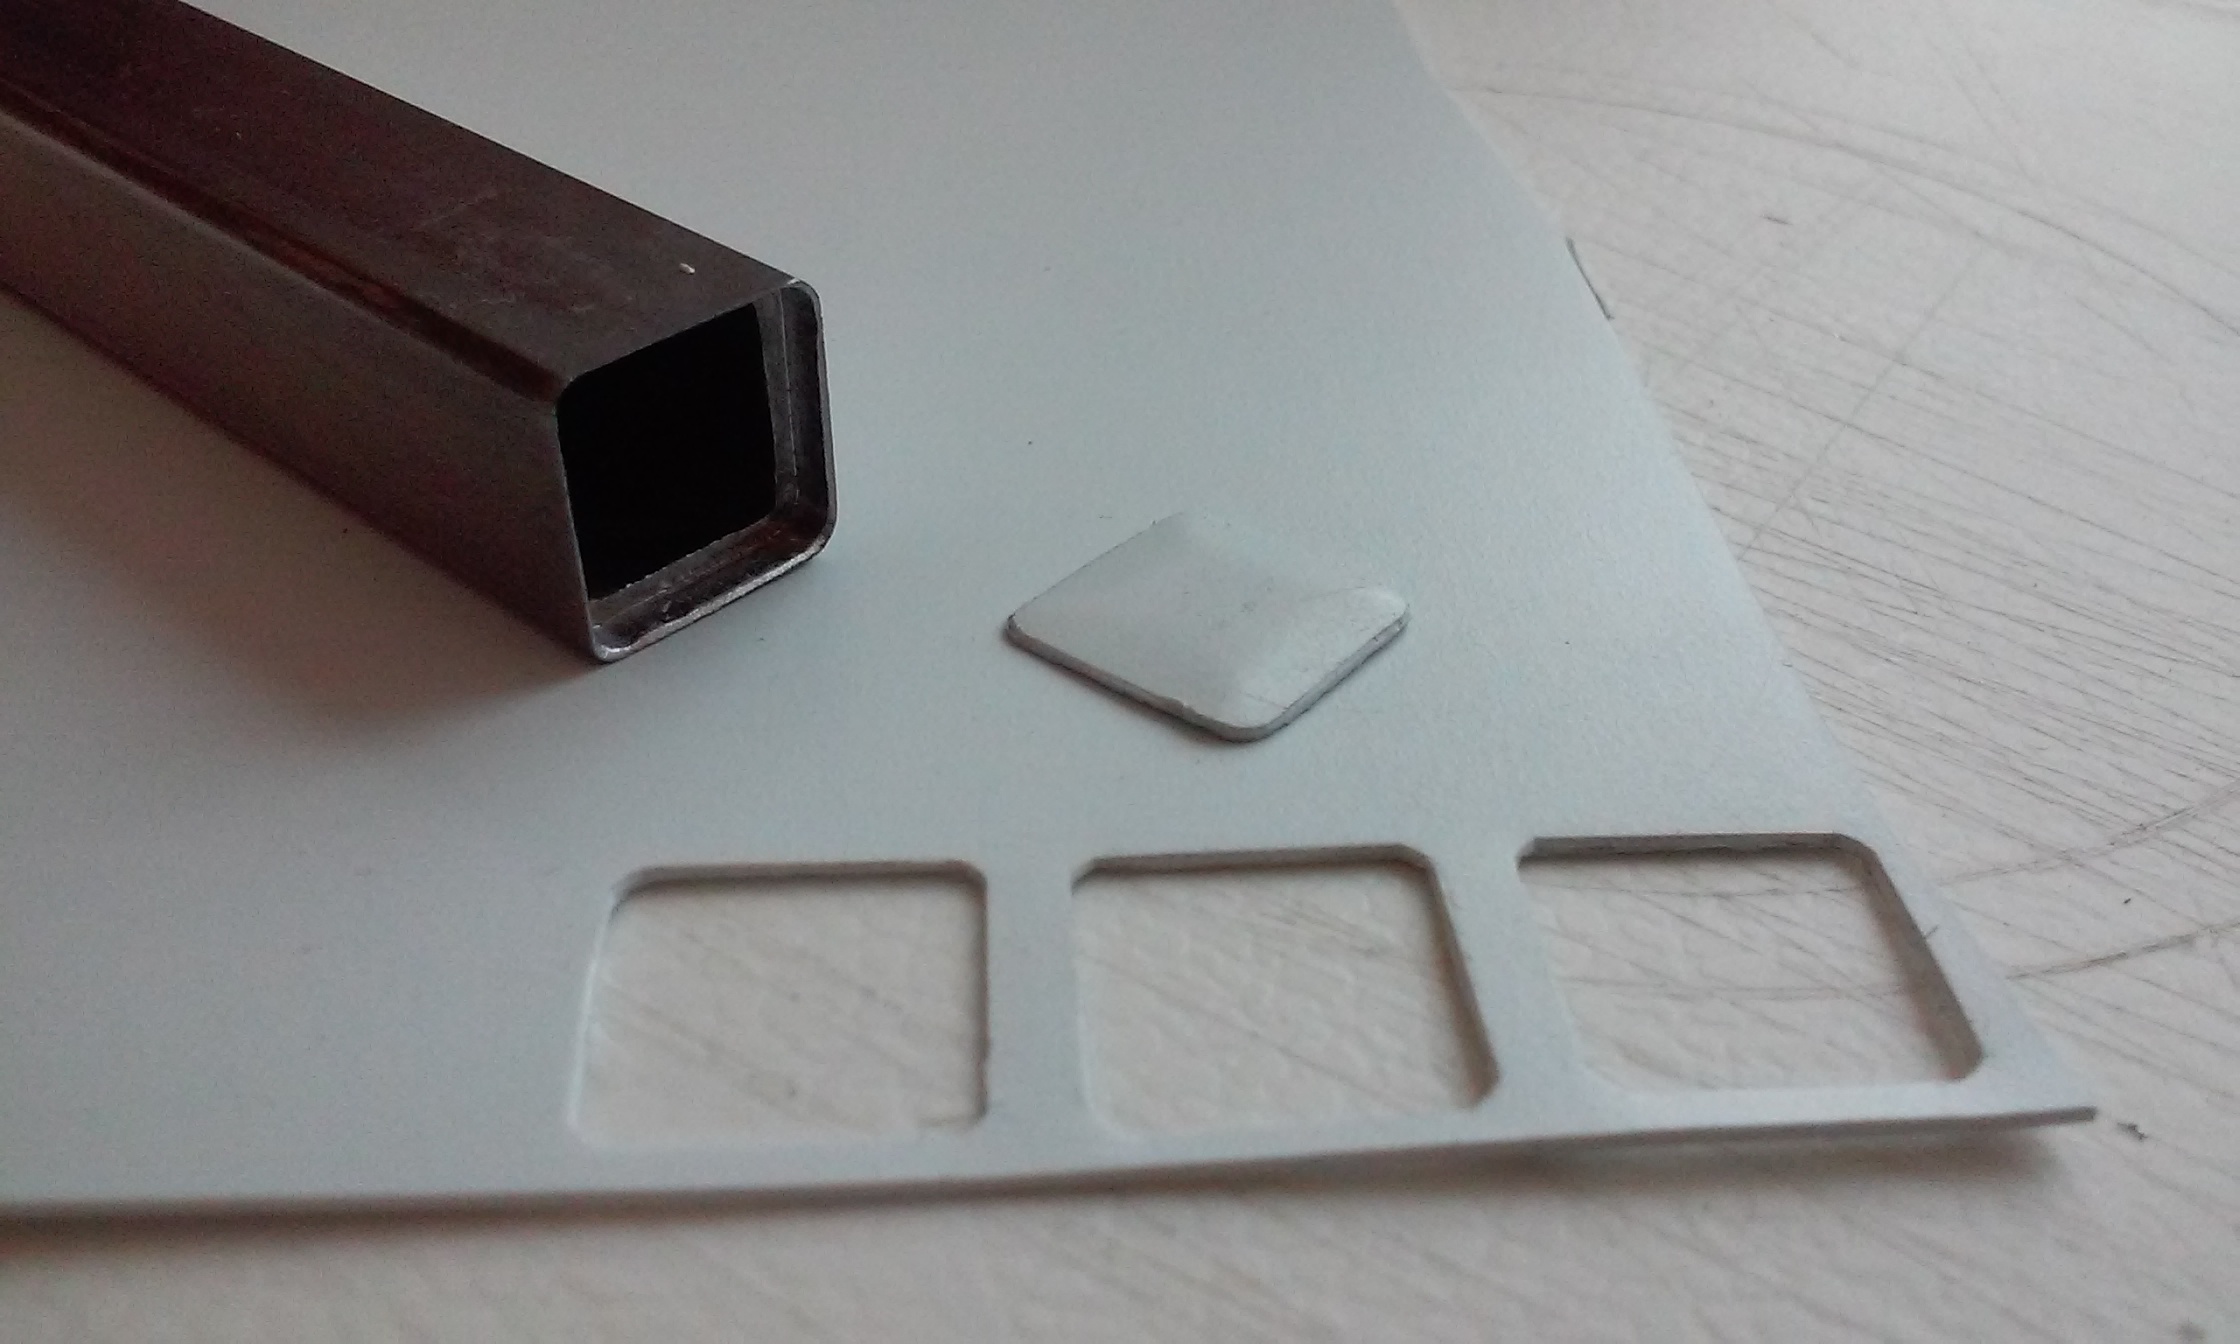
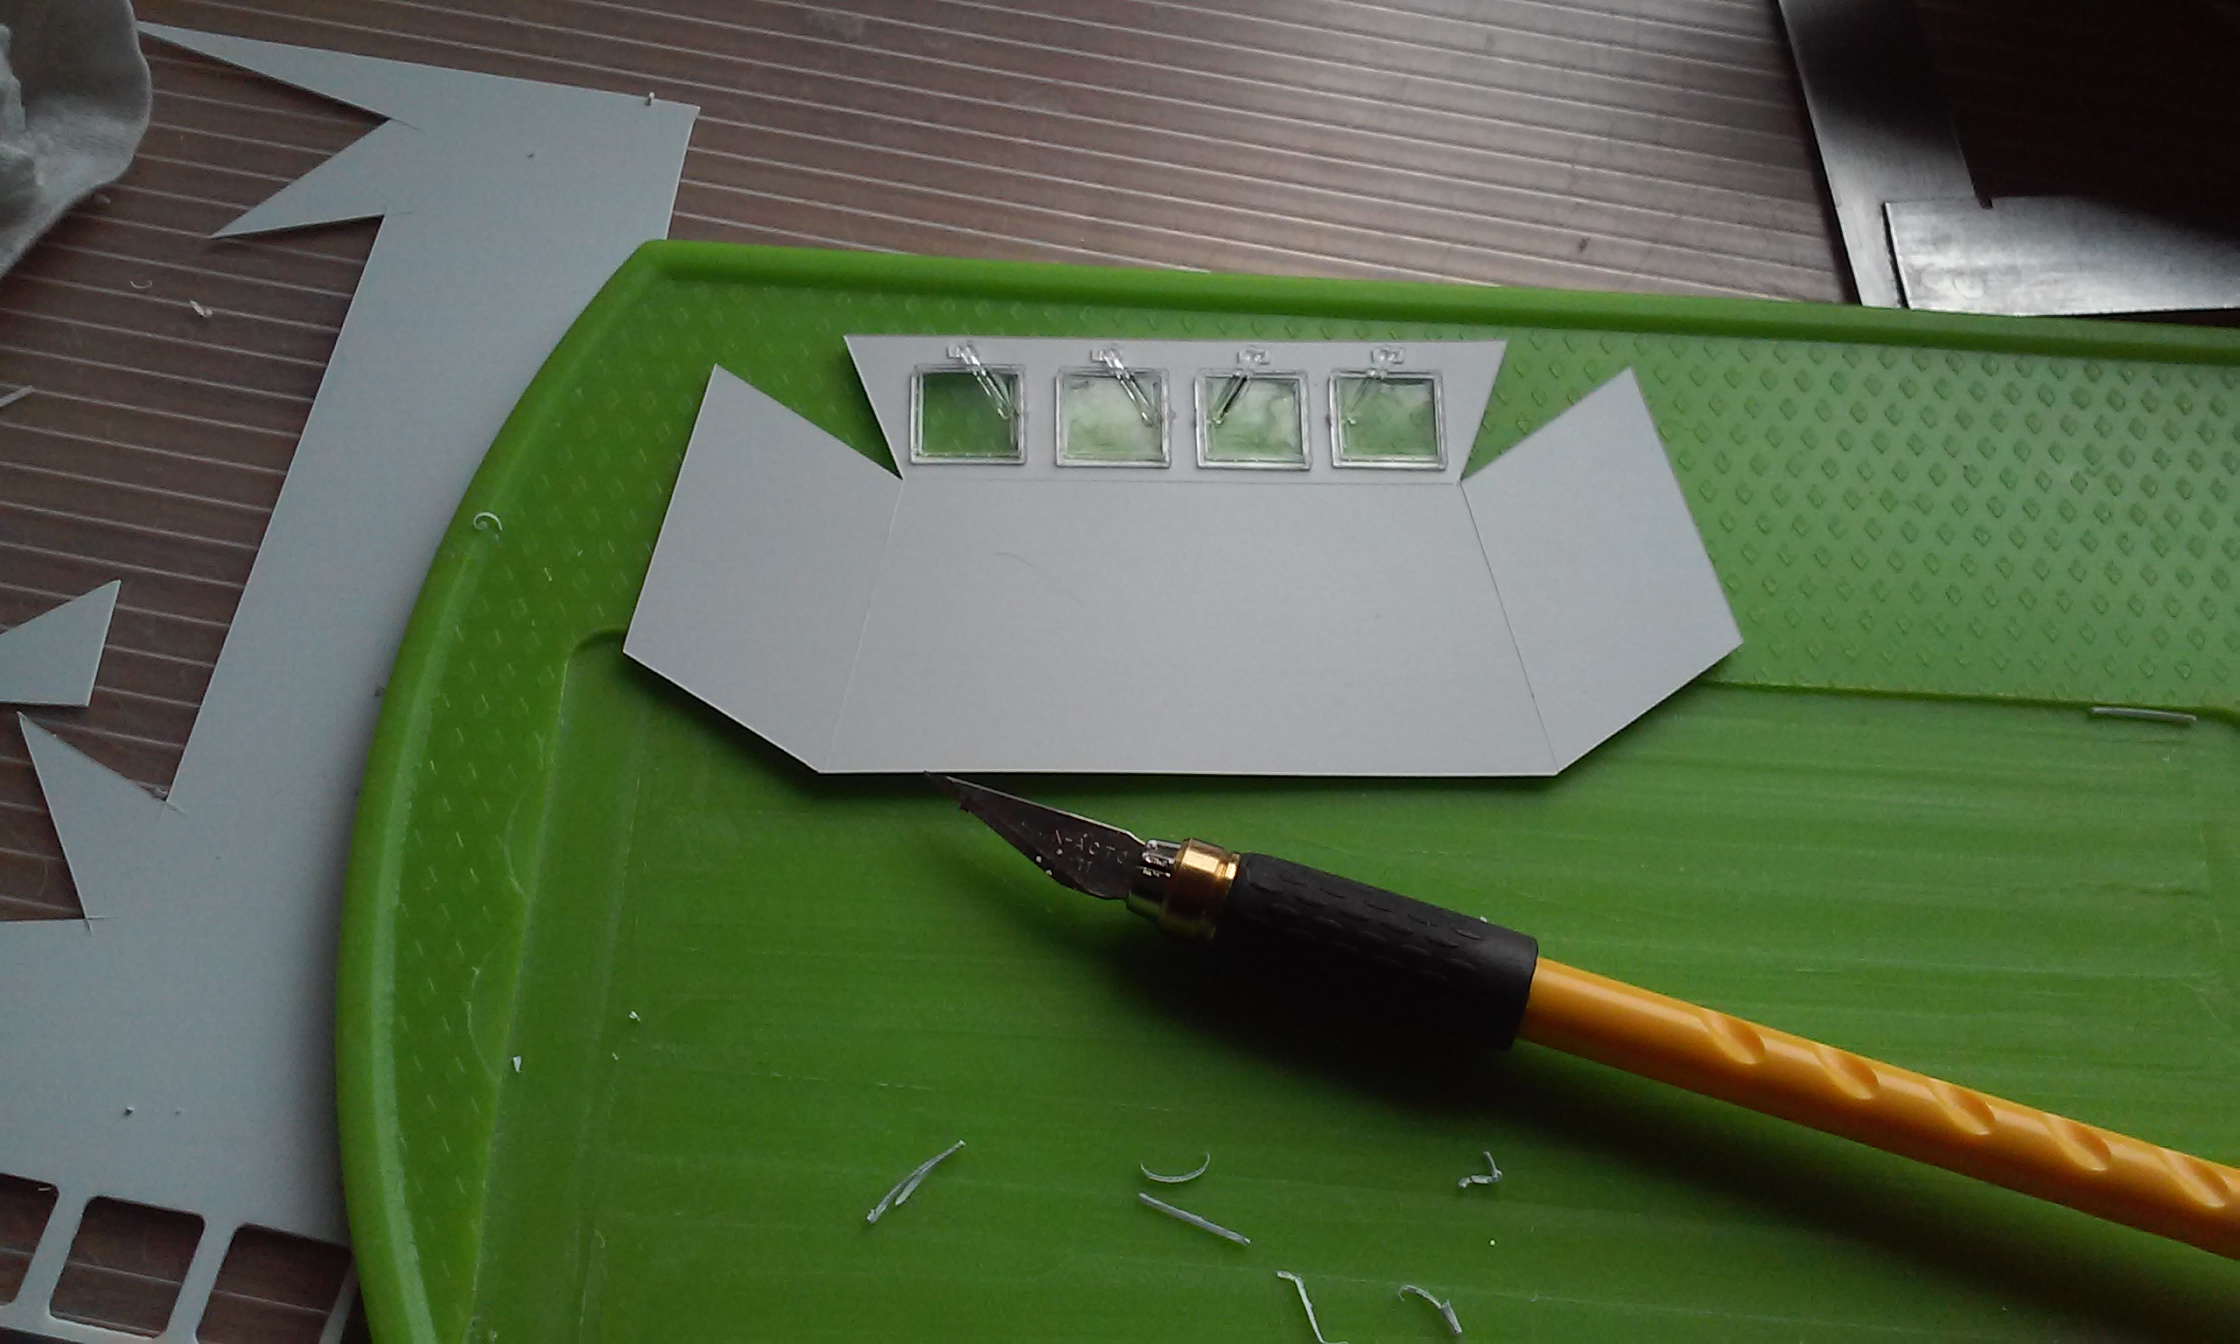
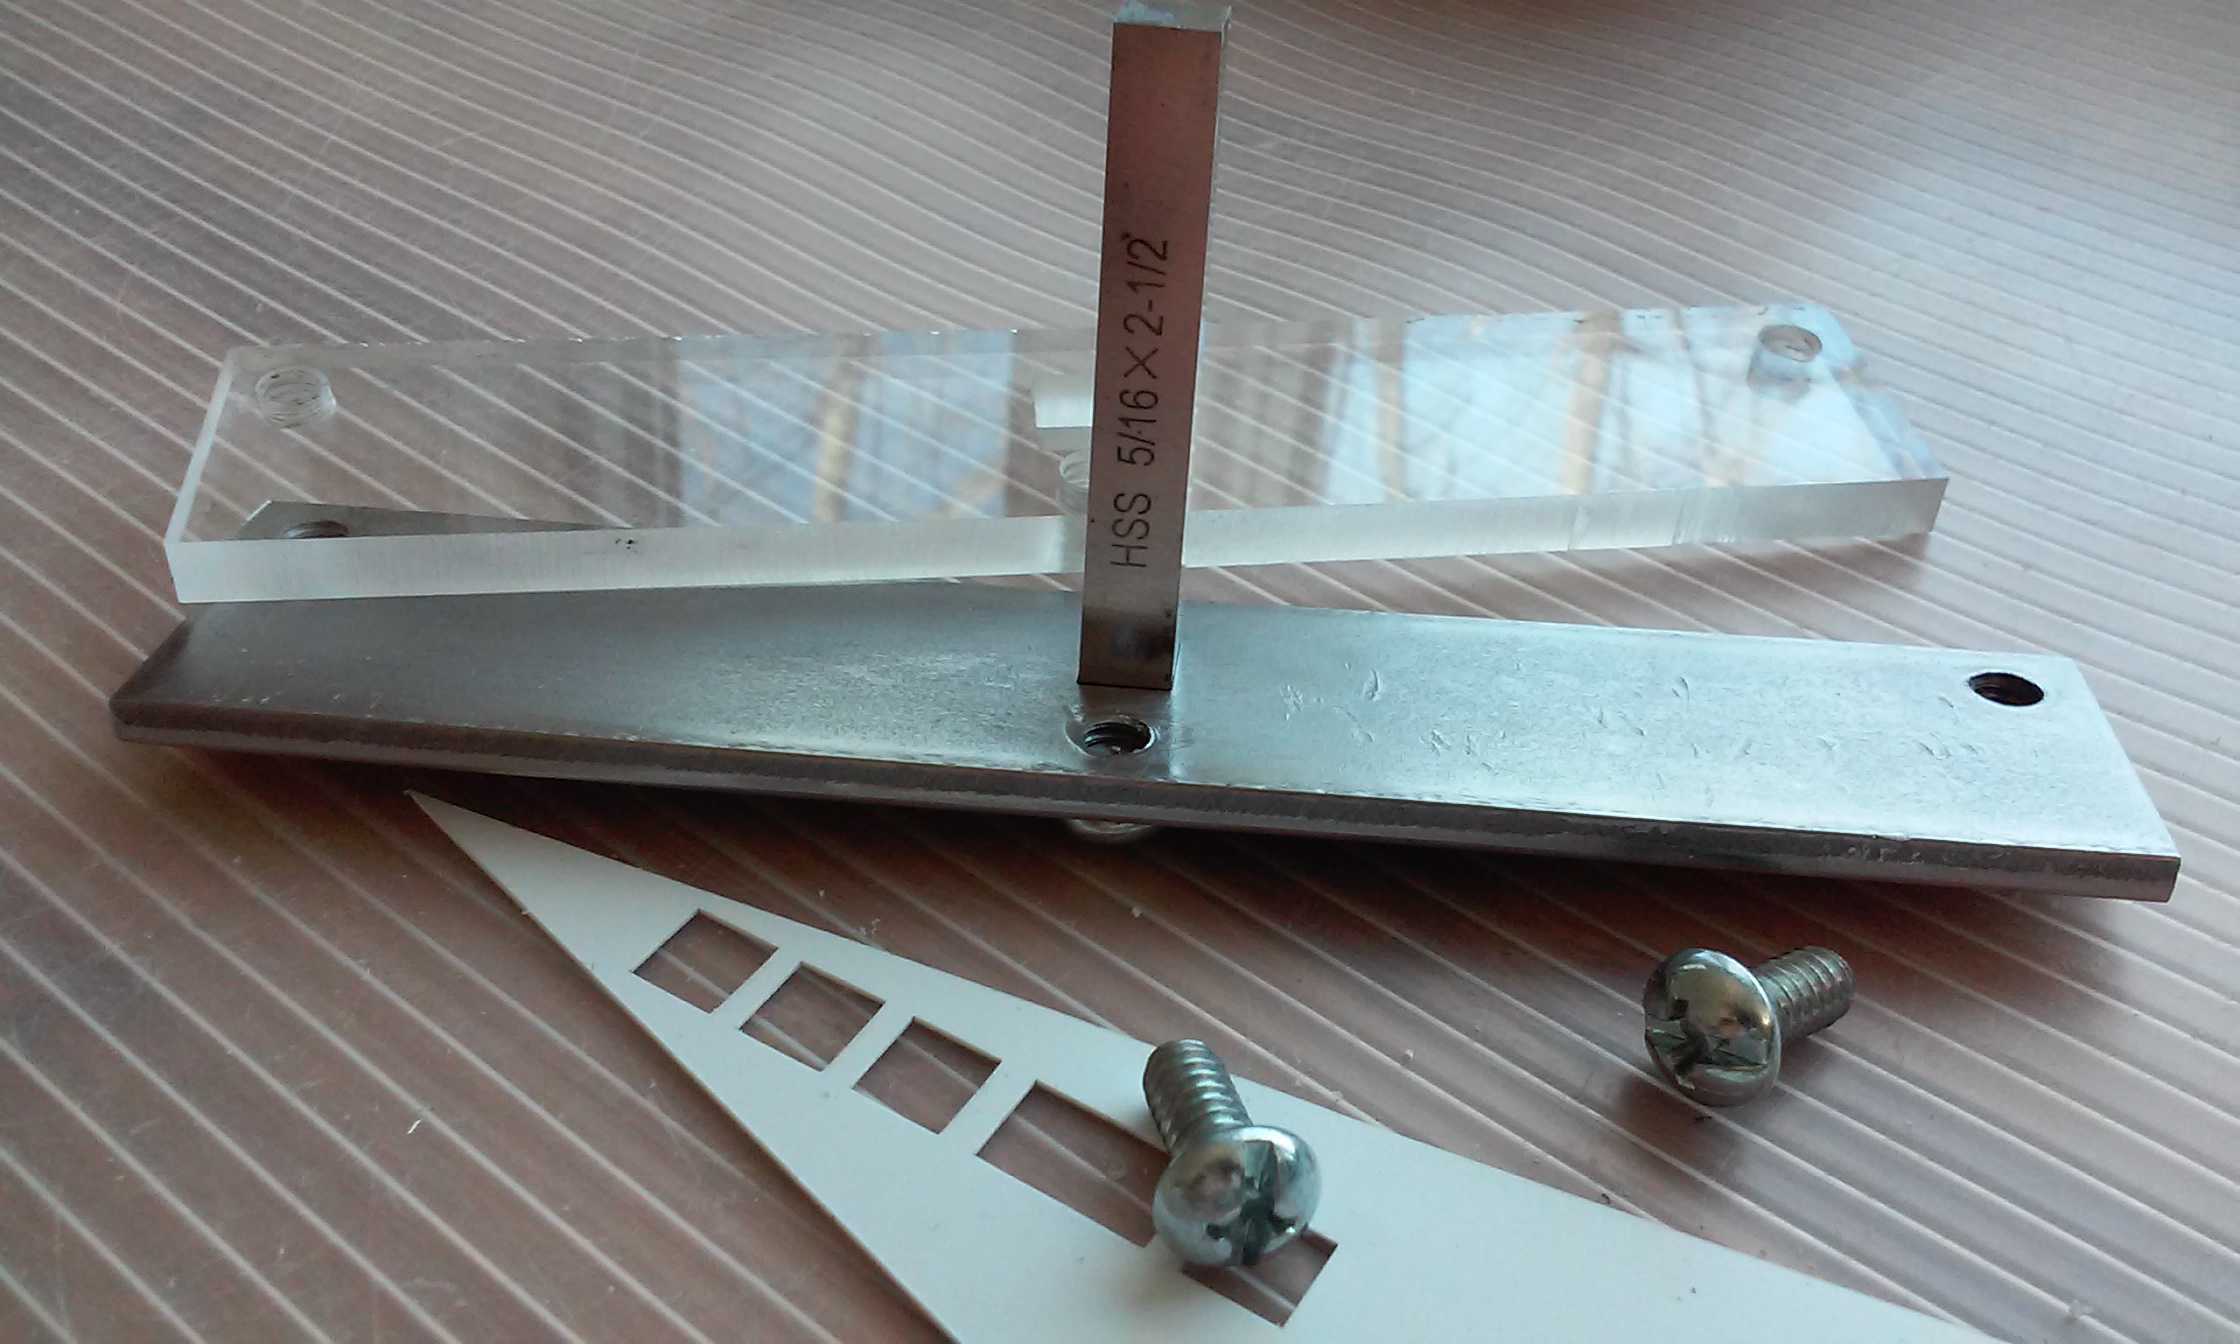
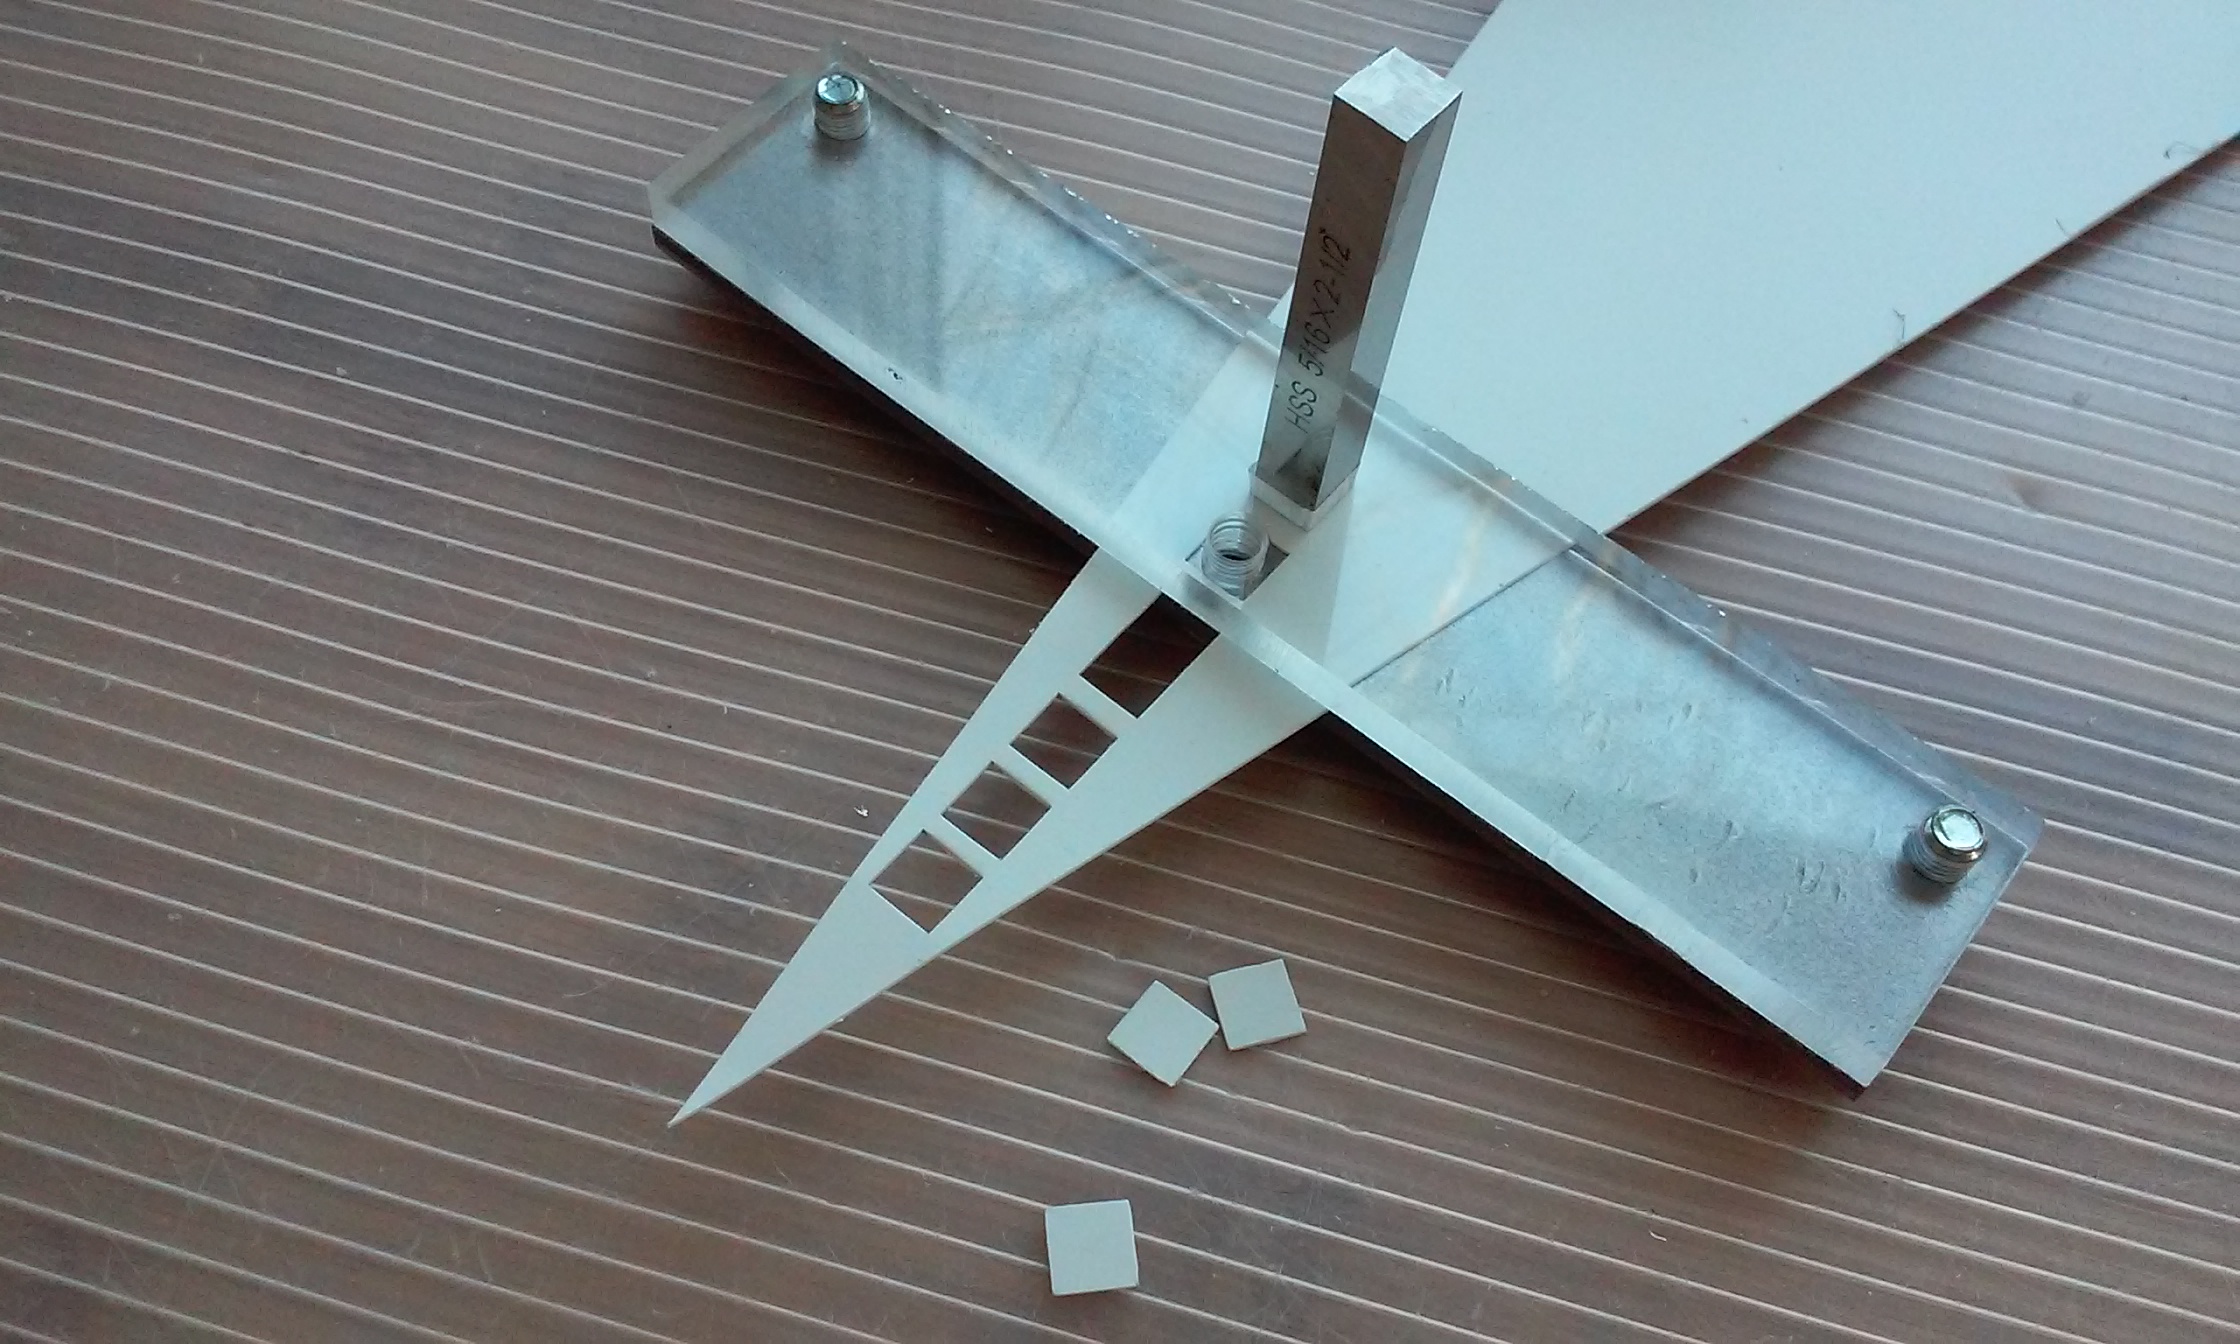
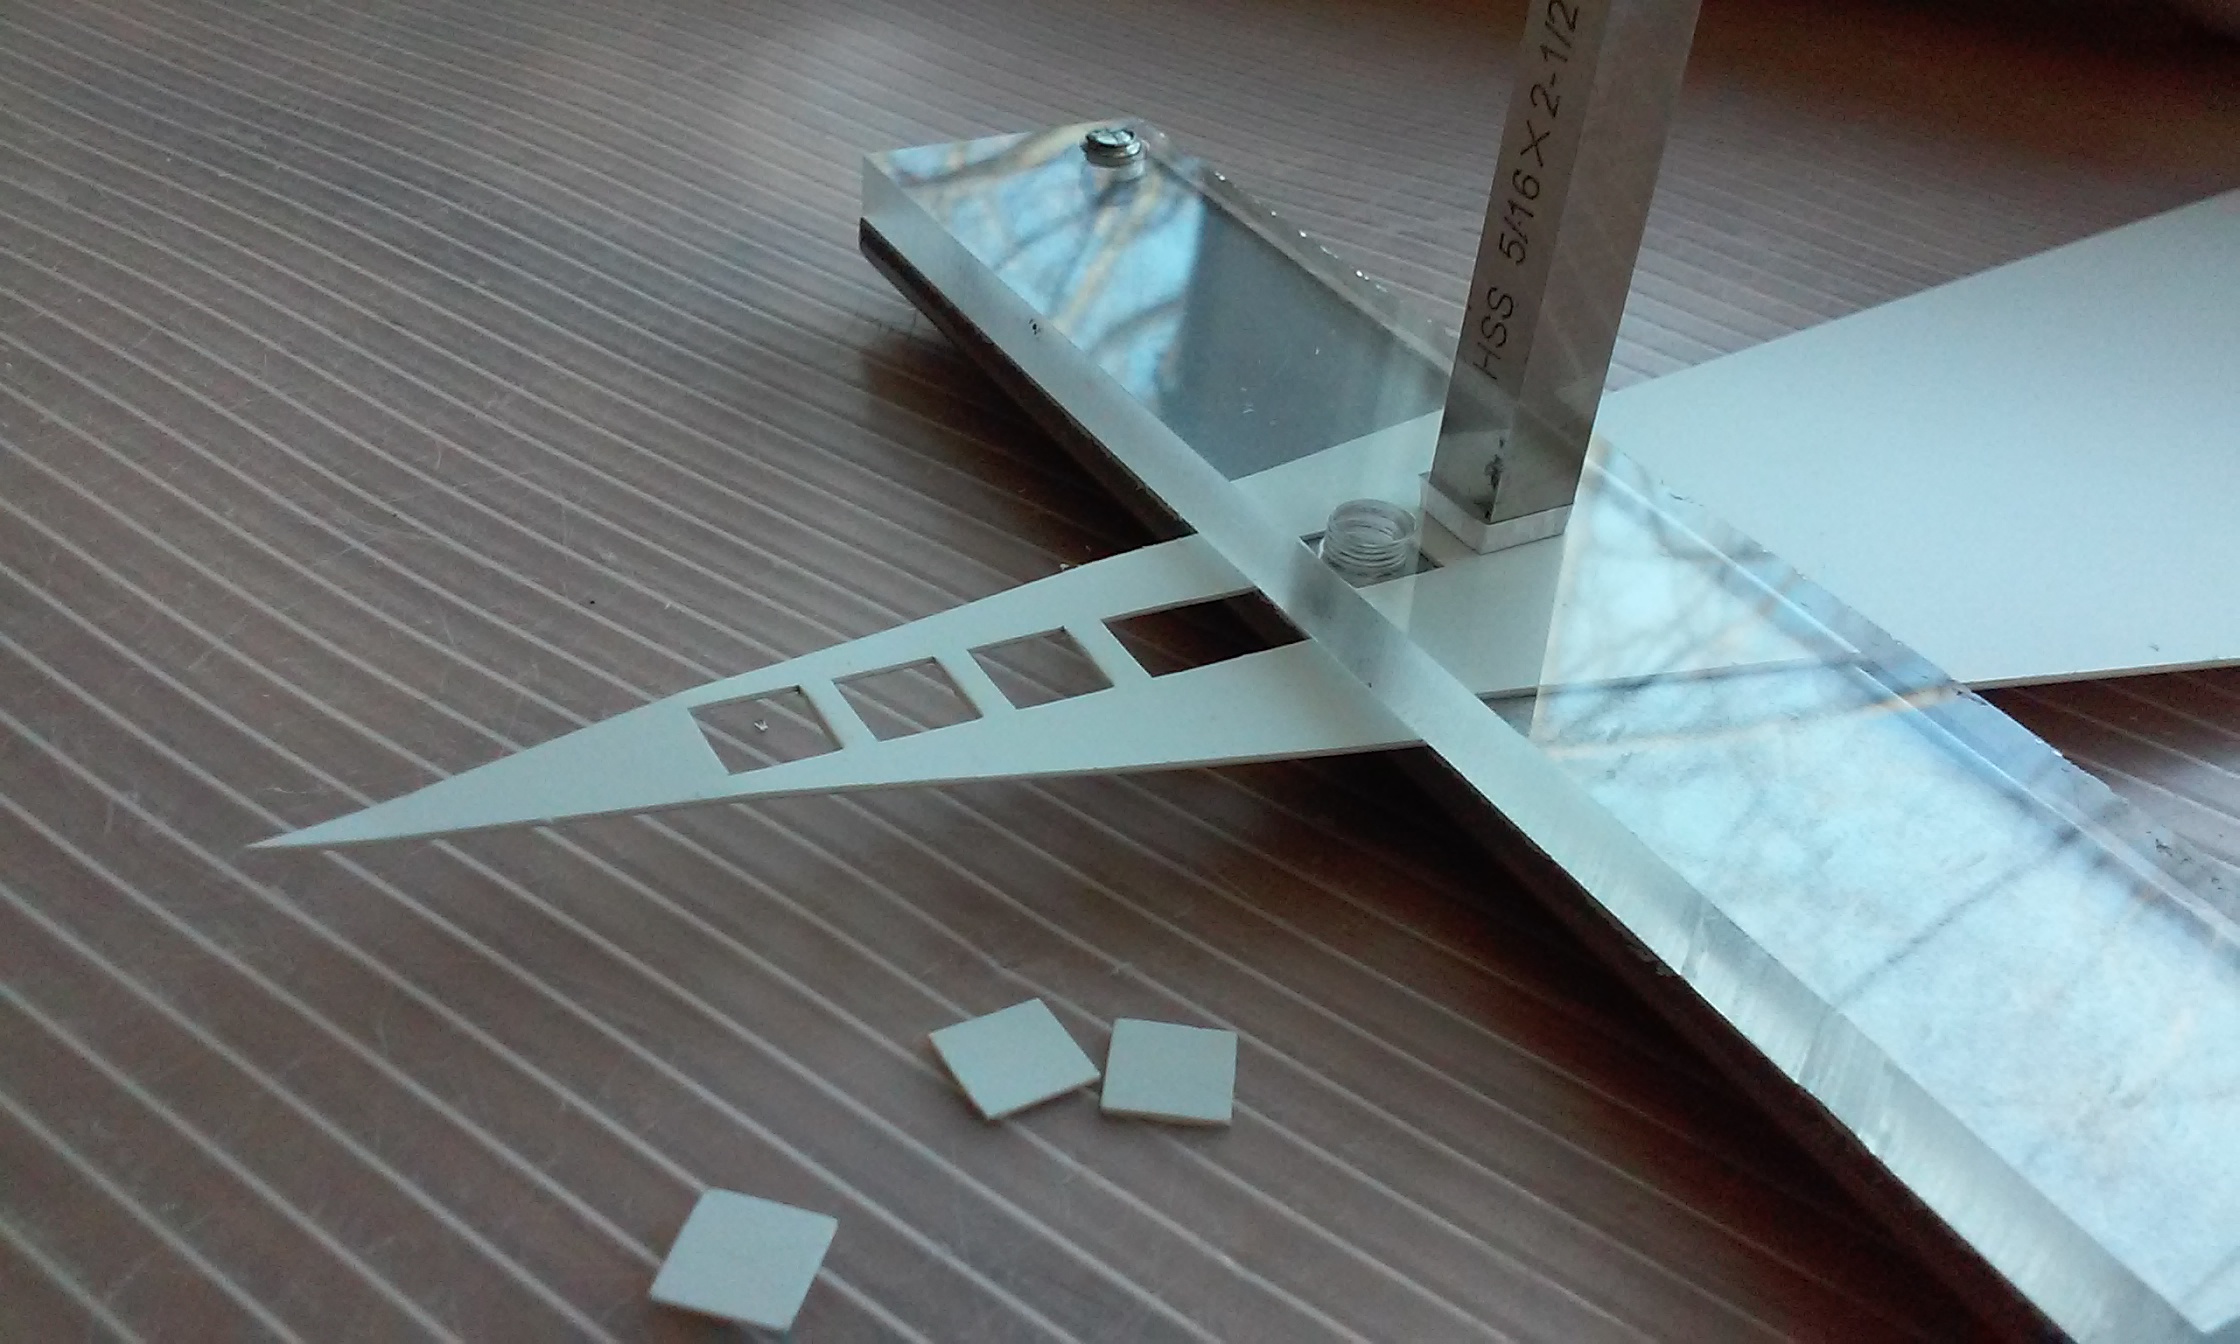
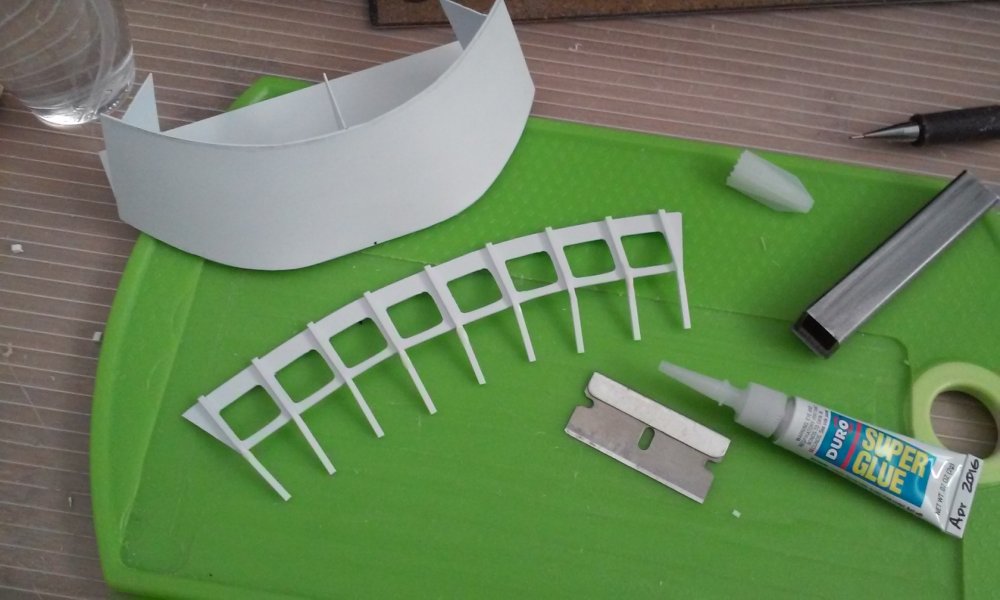
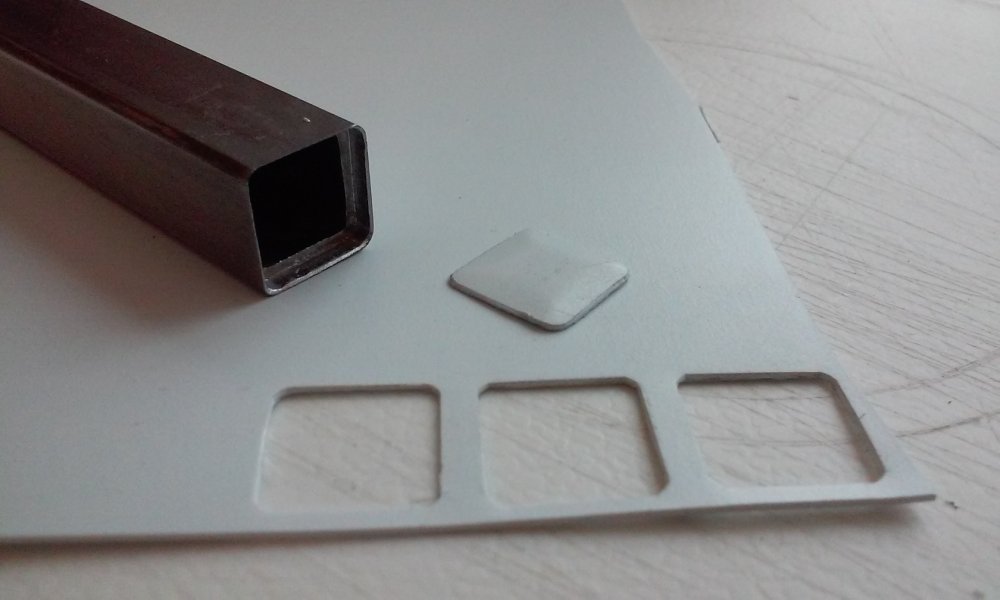
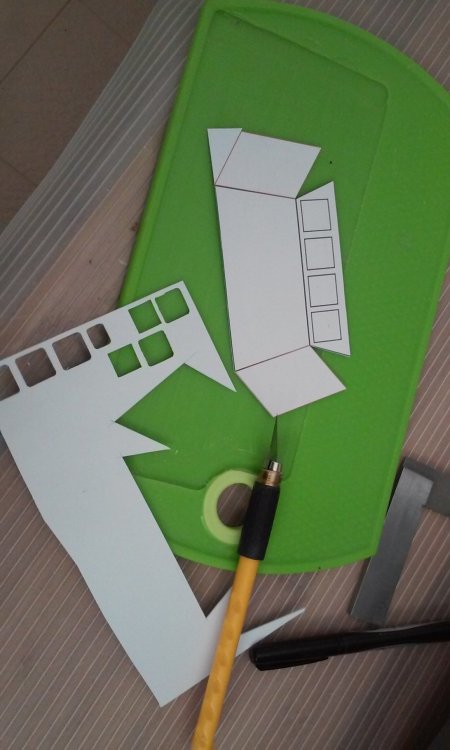
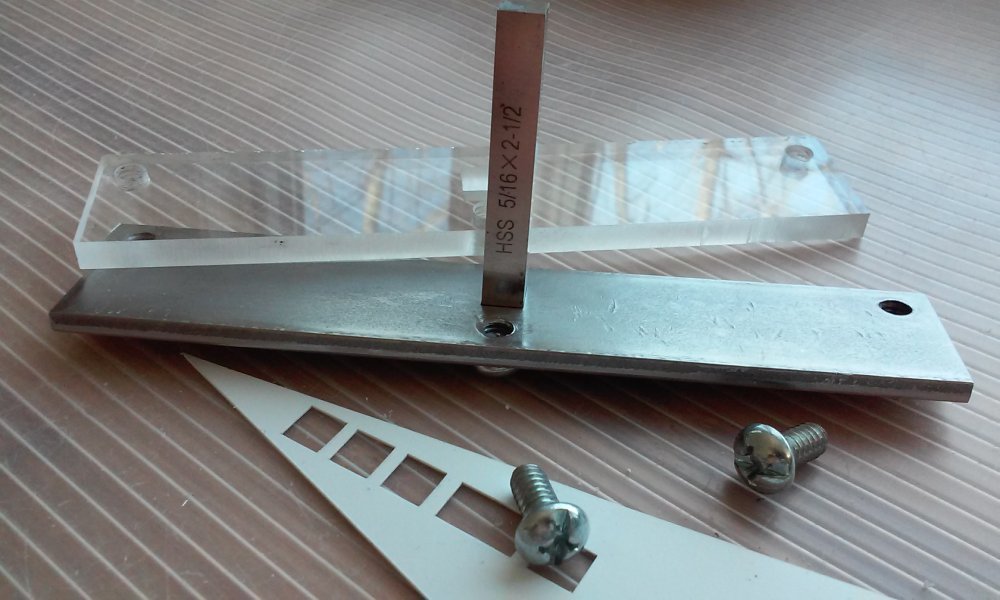
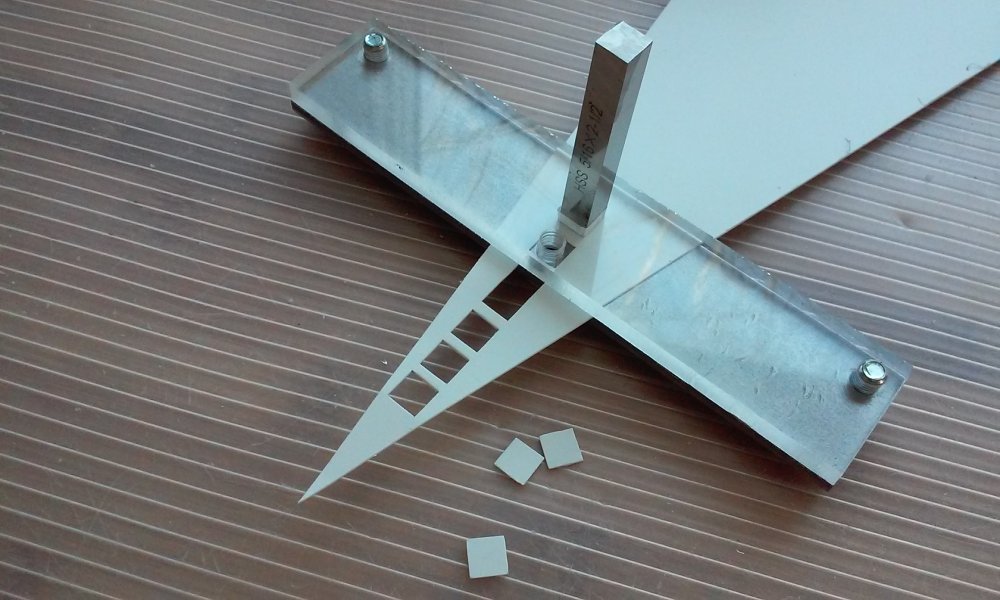
That looks great Thom! Nice finish! Your paint and scheme look great Nyankodevice! The lines are a nice touch! So far I seem to be doing more metal work than styrene work! You know how cutting windows or square holes is a pain and they never seem to quite come out right or need a ton of clean-up? What if you had to make a bunch of them? I machined two steel punches. I'm trying out two bridge designs. One with the big punch and big windows, the other a smaller punch and smaller windows. The test bridge is shown in the photos. The smaller test bridge still needs to be drawn out and designed. - MT


-
Wow, I blinked and lots of cool stuff is made AND Derex gets engaged! Congrats Derex! If they EVER do a live Macross Movie, they'll have to include the River Dance scene! - MT
-
Sorry, the "Macross" roundel has been around for decades! But that's what I thought the first time I saw it! Makes you wonder, who came first, the Macross or the egg (paint can) - MT