MechTech
-
Posts
4701 -
Joined
-
Last visited
Content Type
Profiles
Forums
Events
Gallery
Everything posted by MechTech
-
Looks like it is the same basic kit - from the 70's! The "new parts" are probably weapons, sensor pods, and the like. "New tooling" would be a new kit. - MT https://www.scalemates.com/kits/hasegawa-65761-f-14--1072239
-
Those look awesome Claus!!! No, you never can have enough missiles! Great work! - MT
-
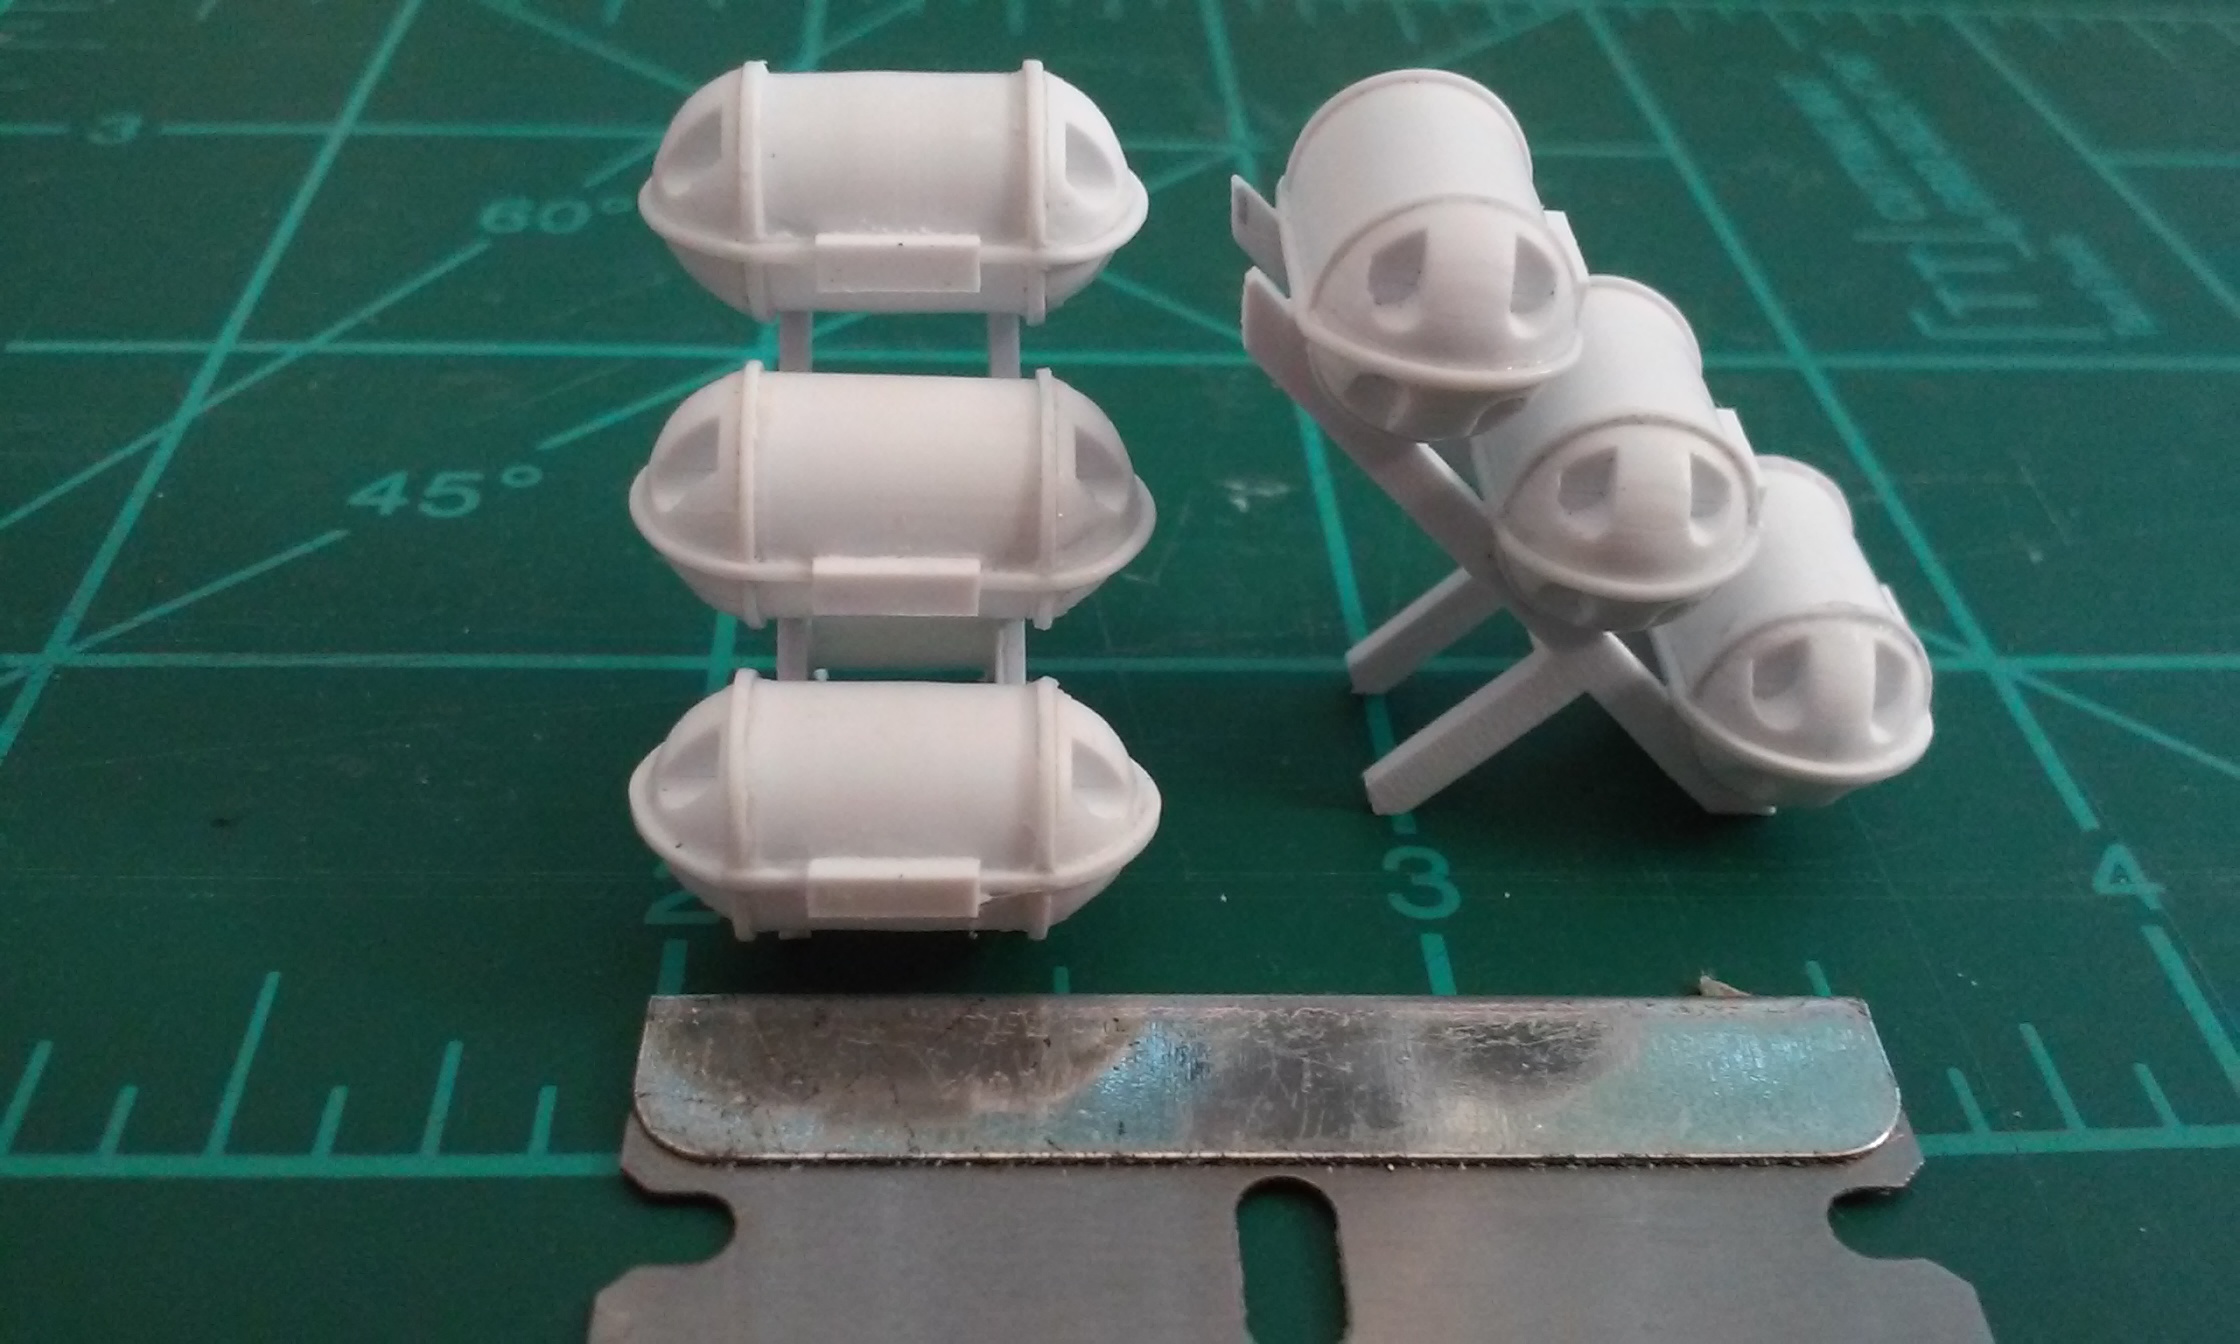
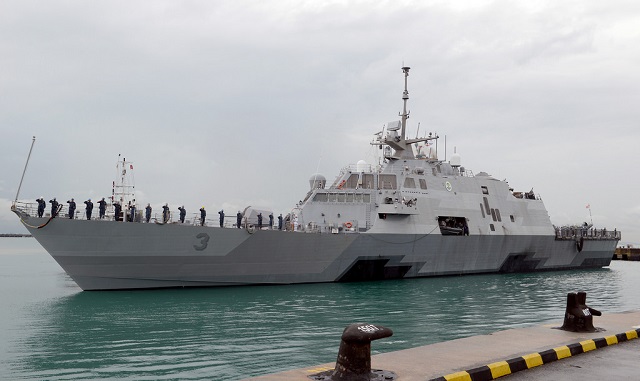
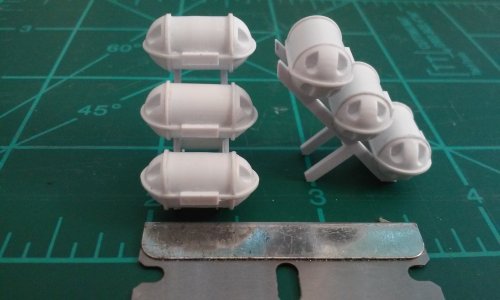
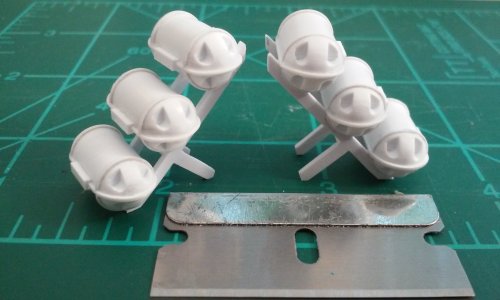
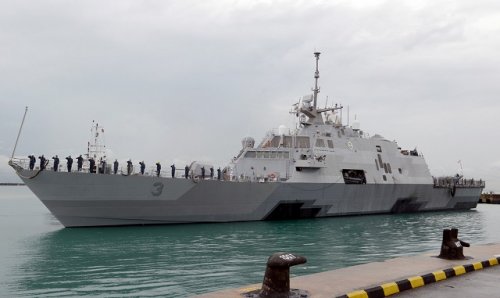
@derex3592 Ha ha, sorry! I have the LCS-2 and it's a great kit. It has a lot of the same details as the LCS-3. It even comes with the MQ-8B and MH-60S helos - which are both good kits in themselves for that scale. This version has the 30mm turrets on the back which is another bonus. I'd get it too! Finished the life raft canisters! On to the decoys and smaller stuff now... - MT
-
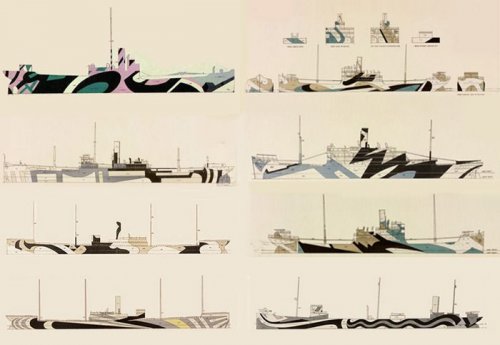
@Gabe Q Bummer, BUT - work is good! Now you can buy more kits! @derex3592 I'm glad that is what you're looking for. I don't even know how they painted that full size. Probably caused deaths in the process from dizzy people falling to their deaths. Go with the Sea Shepherd and you can save the whales @Sanity is Optional is right. I think it was just a throw-back. Isn't there a guy around here from Ft. Worth? Check out her namesake (LCS-3) - also with a throwback pattern. The two darkest areas of the pattern are diesel exhaust. Coincidence? Probably not. But more fuel for the fire. - MT
-
Thanks guys! @wm cheng Great recovery on the canopy! I hate it when the color stripes on missiles get mixed up. You don't know what the warhead or engine is! Don't worry, most people won't notice. We won't tell! @Convectuoso It's coming along great! Have fun with the decals @derex3592 If I'm the master of ships, we're all going down on the Titanic! Are you talking about dazzle camo (see sample)? Take some Dramamine and do a search. It will make you sick just looking at it! WWII is a little milder. You can also search "Razzle Dazzle" camo. Have fun masking that! - MT
-
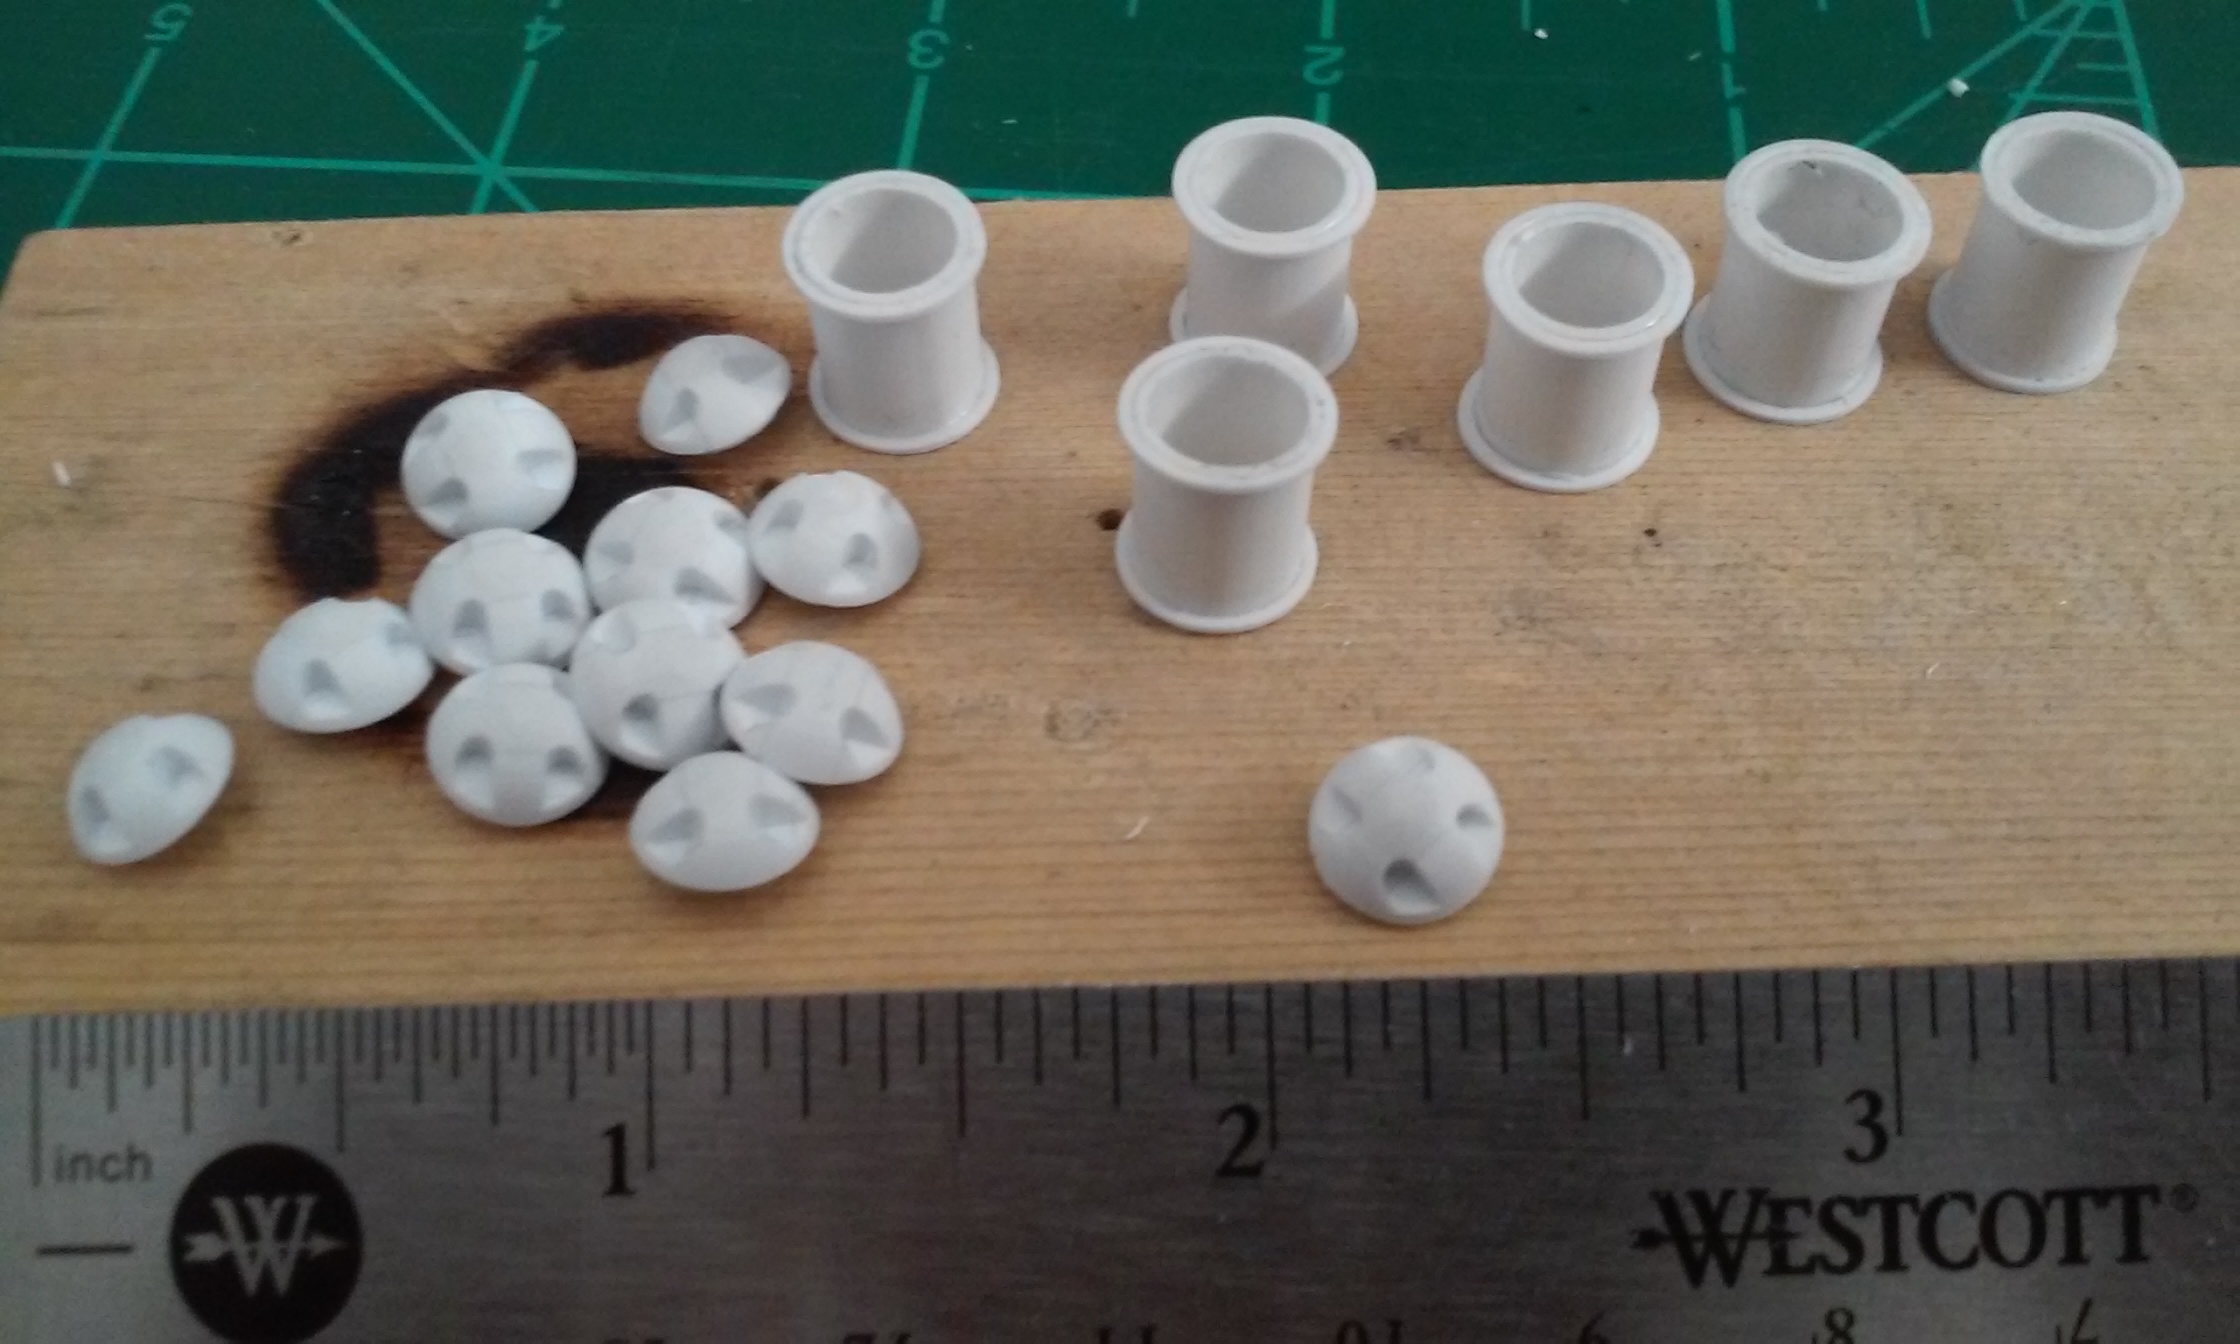
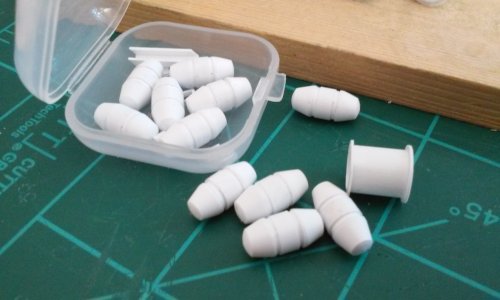
@MacrossJunkie You make dirty look good! Wait...that sounds wrong. @derex3592 Cool! I always did like that kit. Too bad the canopies are such a pain. @electric indigo Forget the age card, eyes in any scale other than 1:1 are a pain! @UN_MARINE Those look cool, especially for that scale! @arbit Thanks for the info on the paint shaker. I already use nail supply sanding blocks, why not a paint shaker too! The way 2020 is going, I thought some life rafts might be a good idea! I made the smaller life raft canisters (that almost look like beer kegs), but I don't think they quite look right. So I made another larger style of canister. Still waiting on the glue to dry before I clean up the edges and glue the ends on. - MT

-
The video looks great! Cool way to show off your innovative design! - MT
-
@MacrossJunkie That looks REALLY good! Much more realistic and helps to give it a bigger size. I think you caught the airflow and dirt areas just right. - MT
-
@Chas I have them for the battroid mode. Are the green and blue the same, maybe different numbers? They look the same on the boxes. - MT
-
@Convectuoso That's coming along great! @MacrossJunkie That weathering looks awesome and realistic! @Thom Are you competing with Peter to see how much hardware you can squeeze into a model Just don't drop it now! That sucker will have some weight to it. It will feel more realistic though. Now you REALLY need those Leah headphones to go with it! - MT
-
@Gabe Q Thank you Gabe! I'm disappointed too The bolts line up with all that junk on top, so stuff on top was awkward to get lined up. Yea! Build the SDF-1! I think new parts are when you plate them in chrome - that's new - right? @Thom Cool Thom. So are you going to make the hair buns to go with it too? Different princess, same idea:
-
@derex3592 The screen work looks authentic! OCD about wiring is a GOOD thing! It means you'll have an easier time assembling and troubleshooting later. @peter Thanks Peter! Sorry, it doesn't actually work. There might be pyrotechnic effects elsewhere though Way to go with the 'ole school special effects! That looks cool! @pengbuzz That looks awesome! Are you sure you didn't steel that from a movie screenshot @arbit Thank you, I appreciate it! This is some of the smallest work I've done since moving on from 1/350 scale back to good ole' 1/72. I STILL need a magnifying glass though! - MT
-
@Gabe Q That's funny! I hope you like it. It's too bad Hasegawa never came through with an accurate kit. Is that the cruiser mode kit like Pengbuzz asked? - MT
-
Wow! Just the VF-1Ds are around $70-$100 on their own! No matter the packaging, that is STILL the best SDF-1 TV version model kit. The coloring book pages put it at about $200 worth of stuff!
-
Thank you, Thom, I appreciate it! I'm hoping to finish all the detail pieces soon. - MT
-
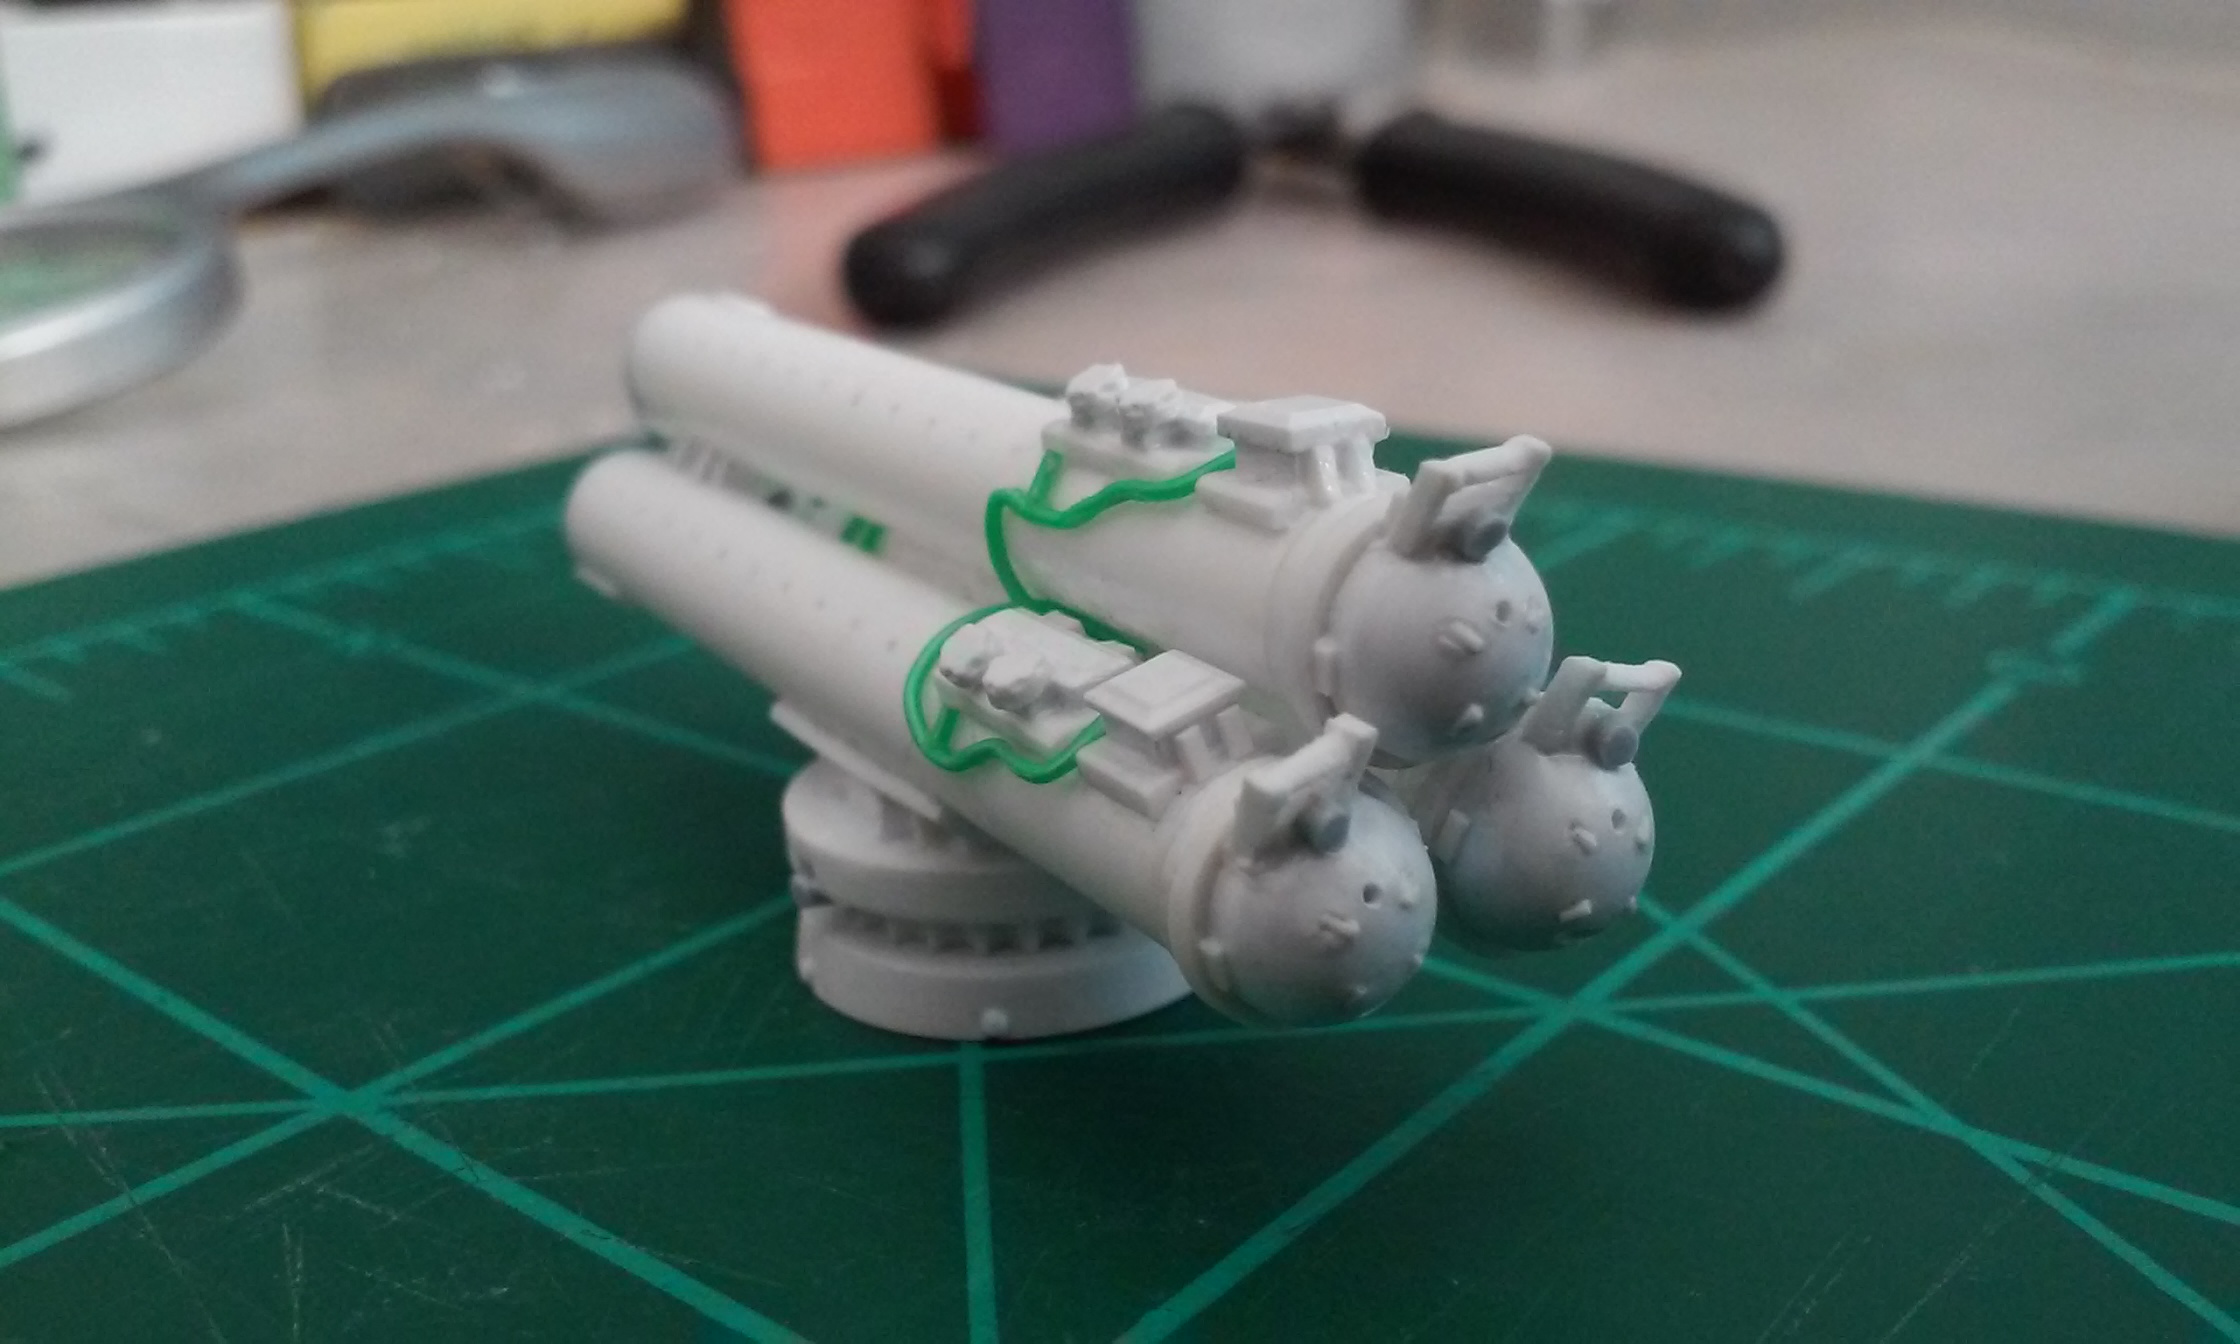
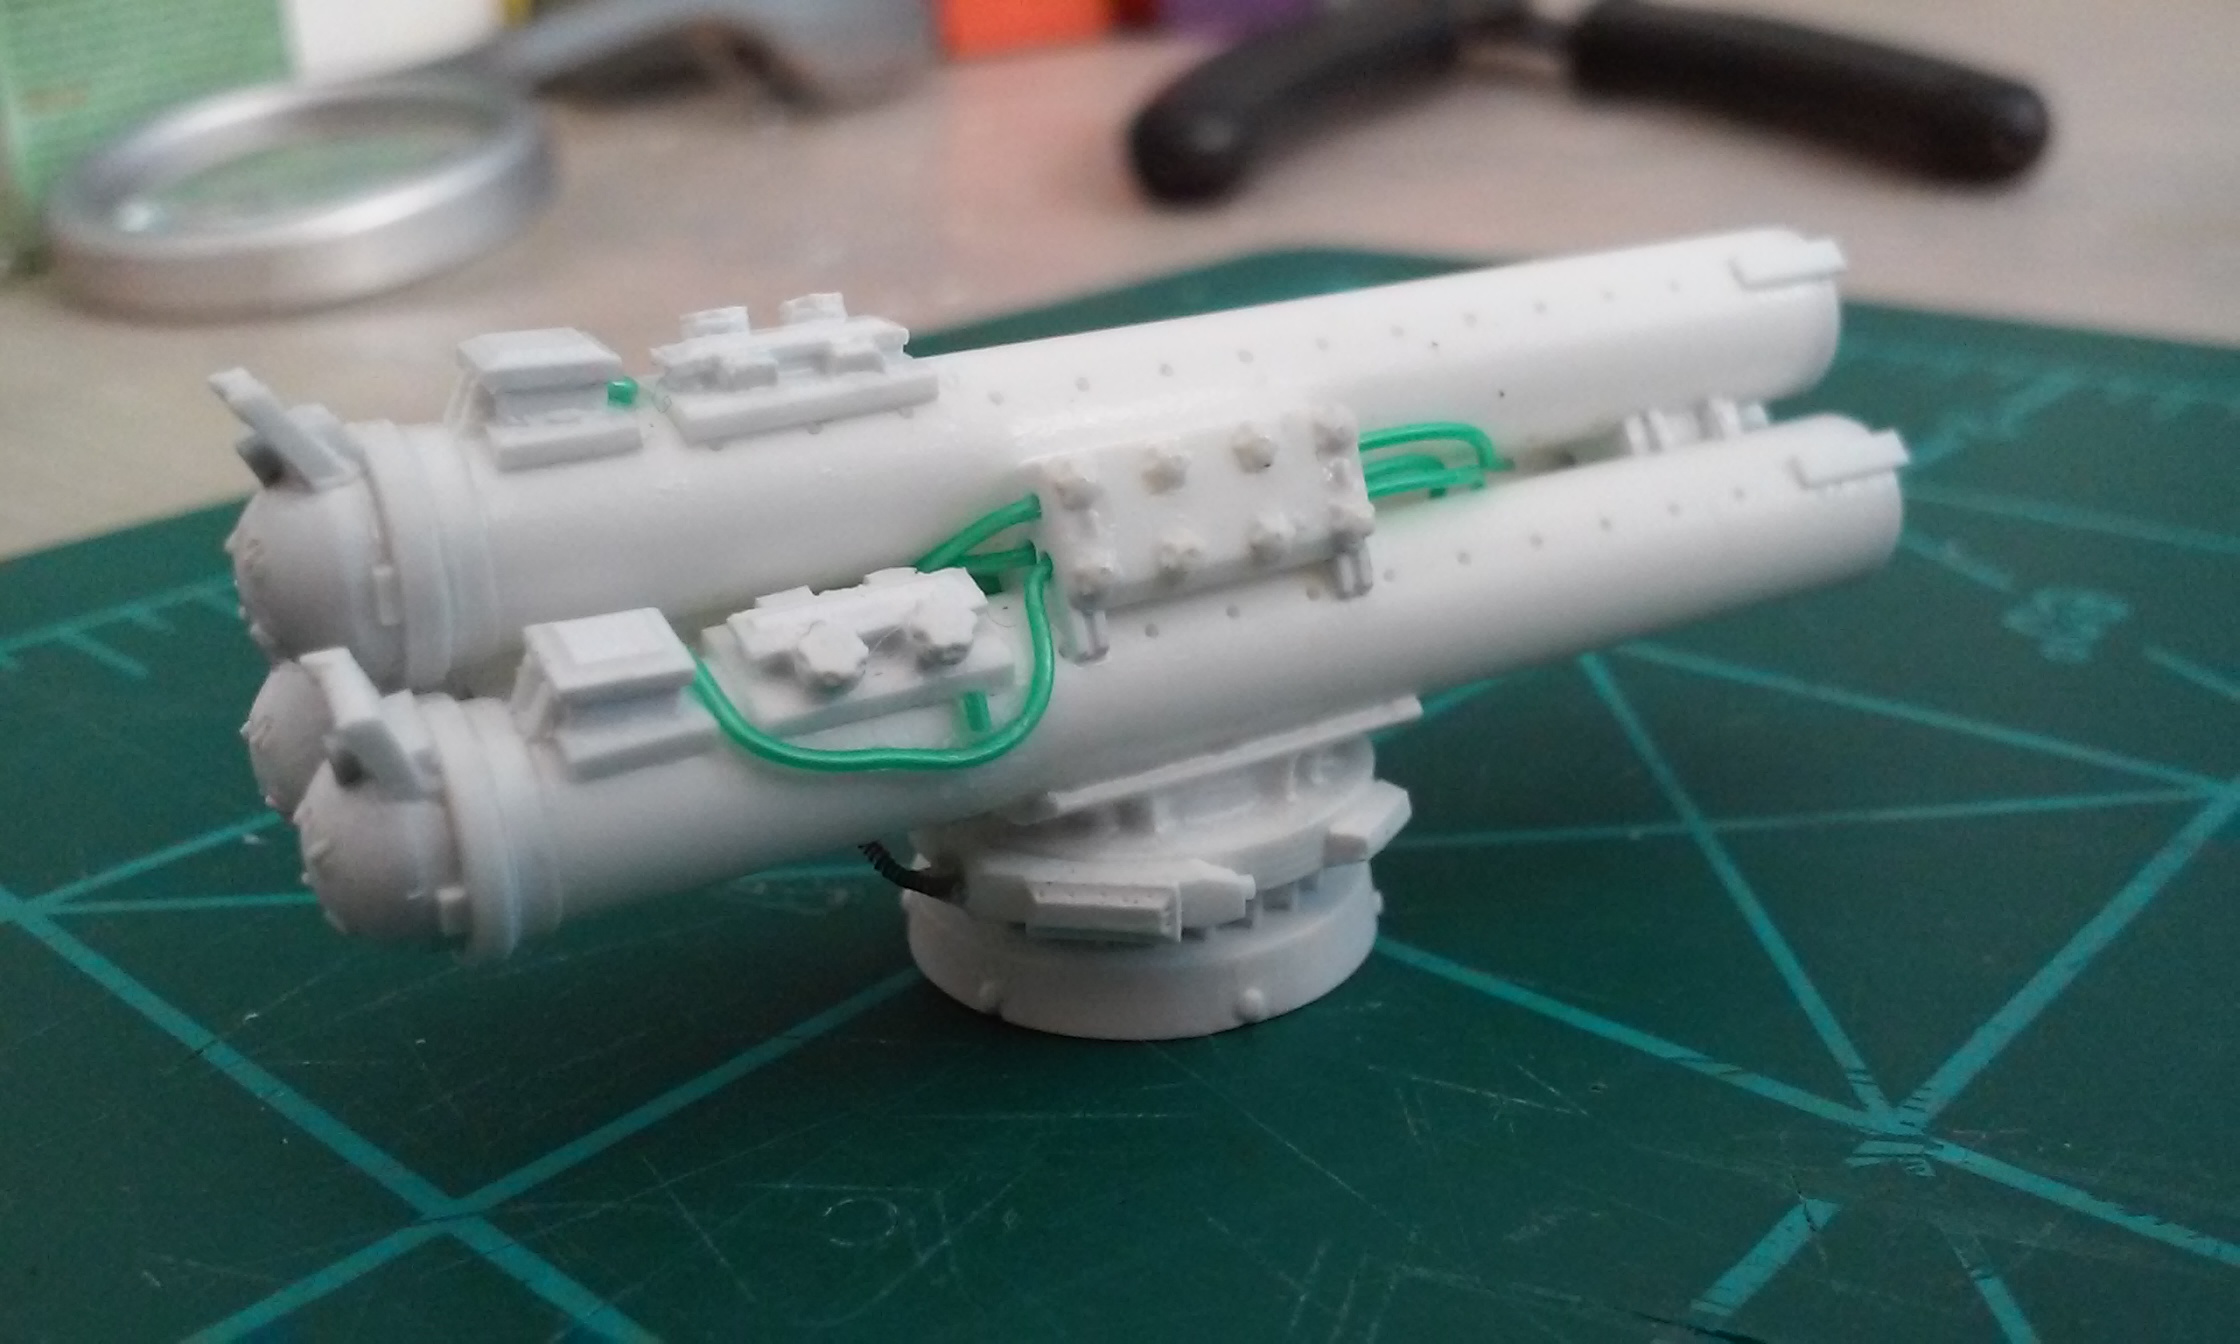
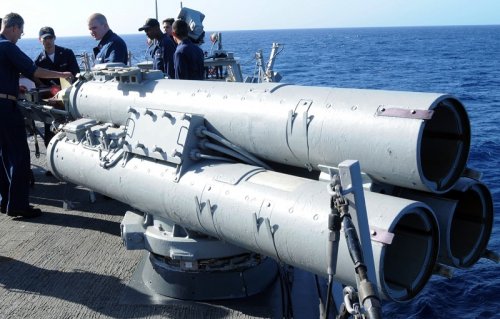
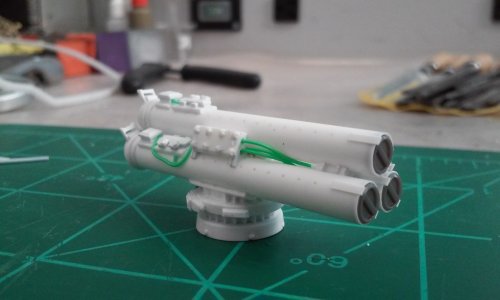
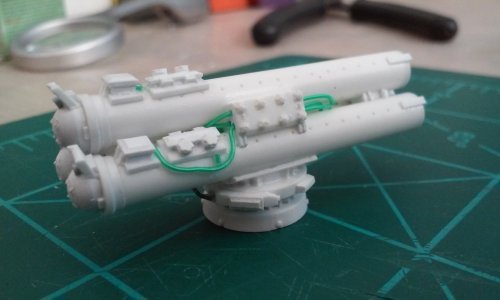
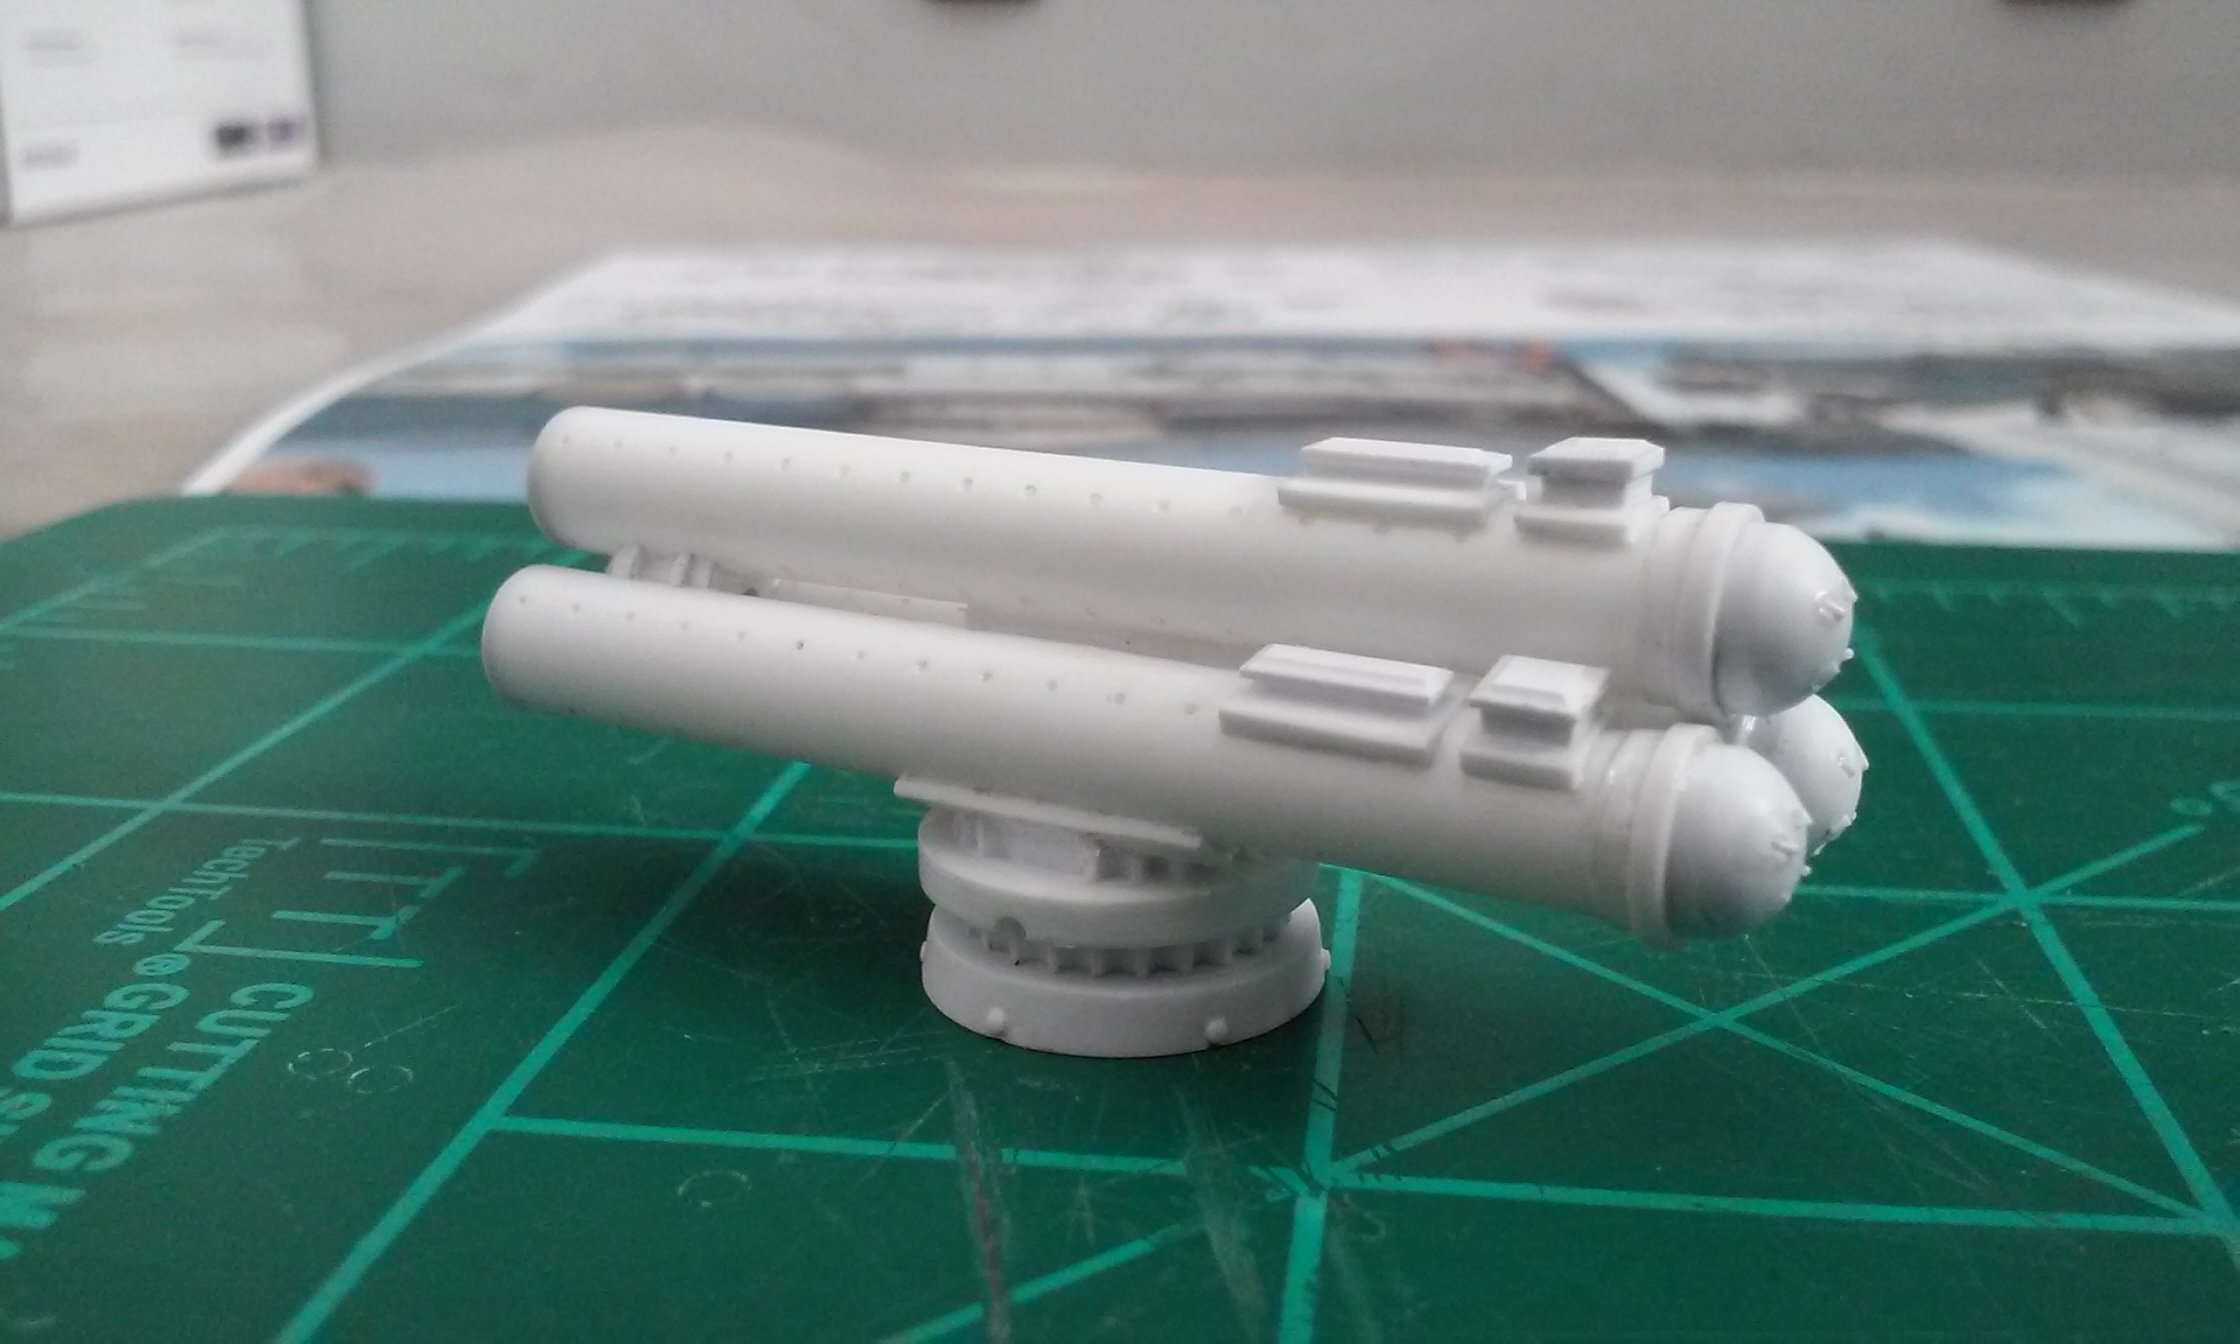
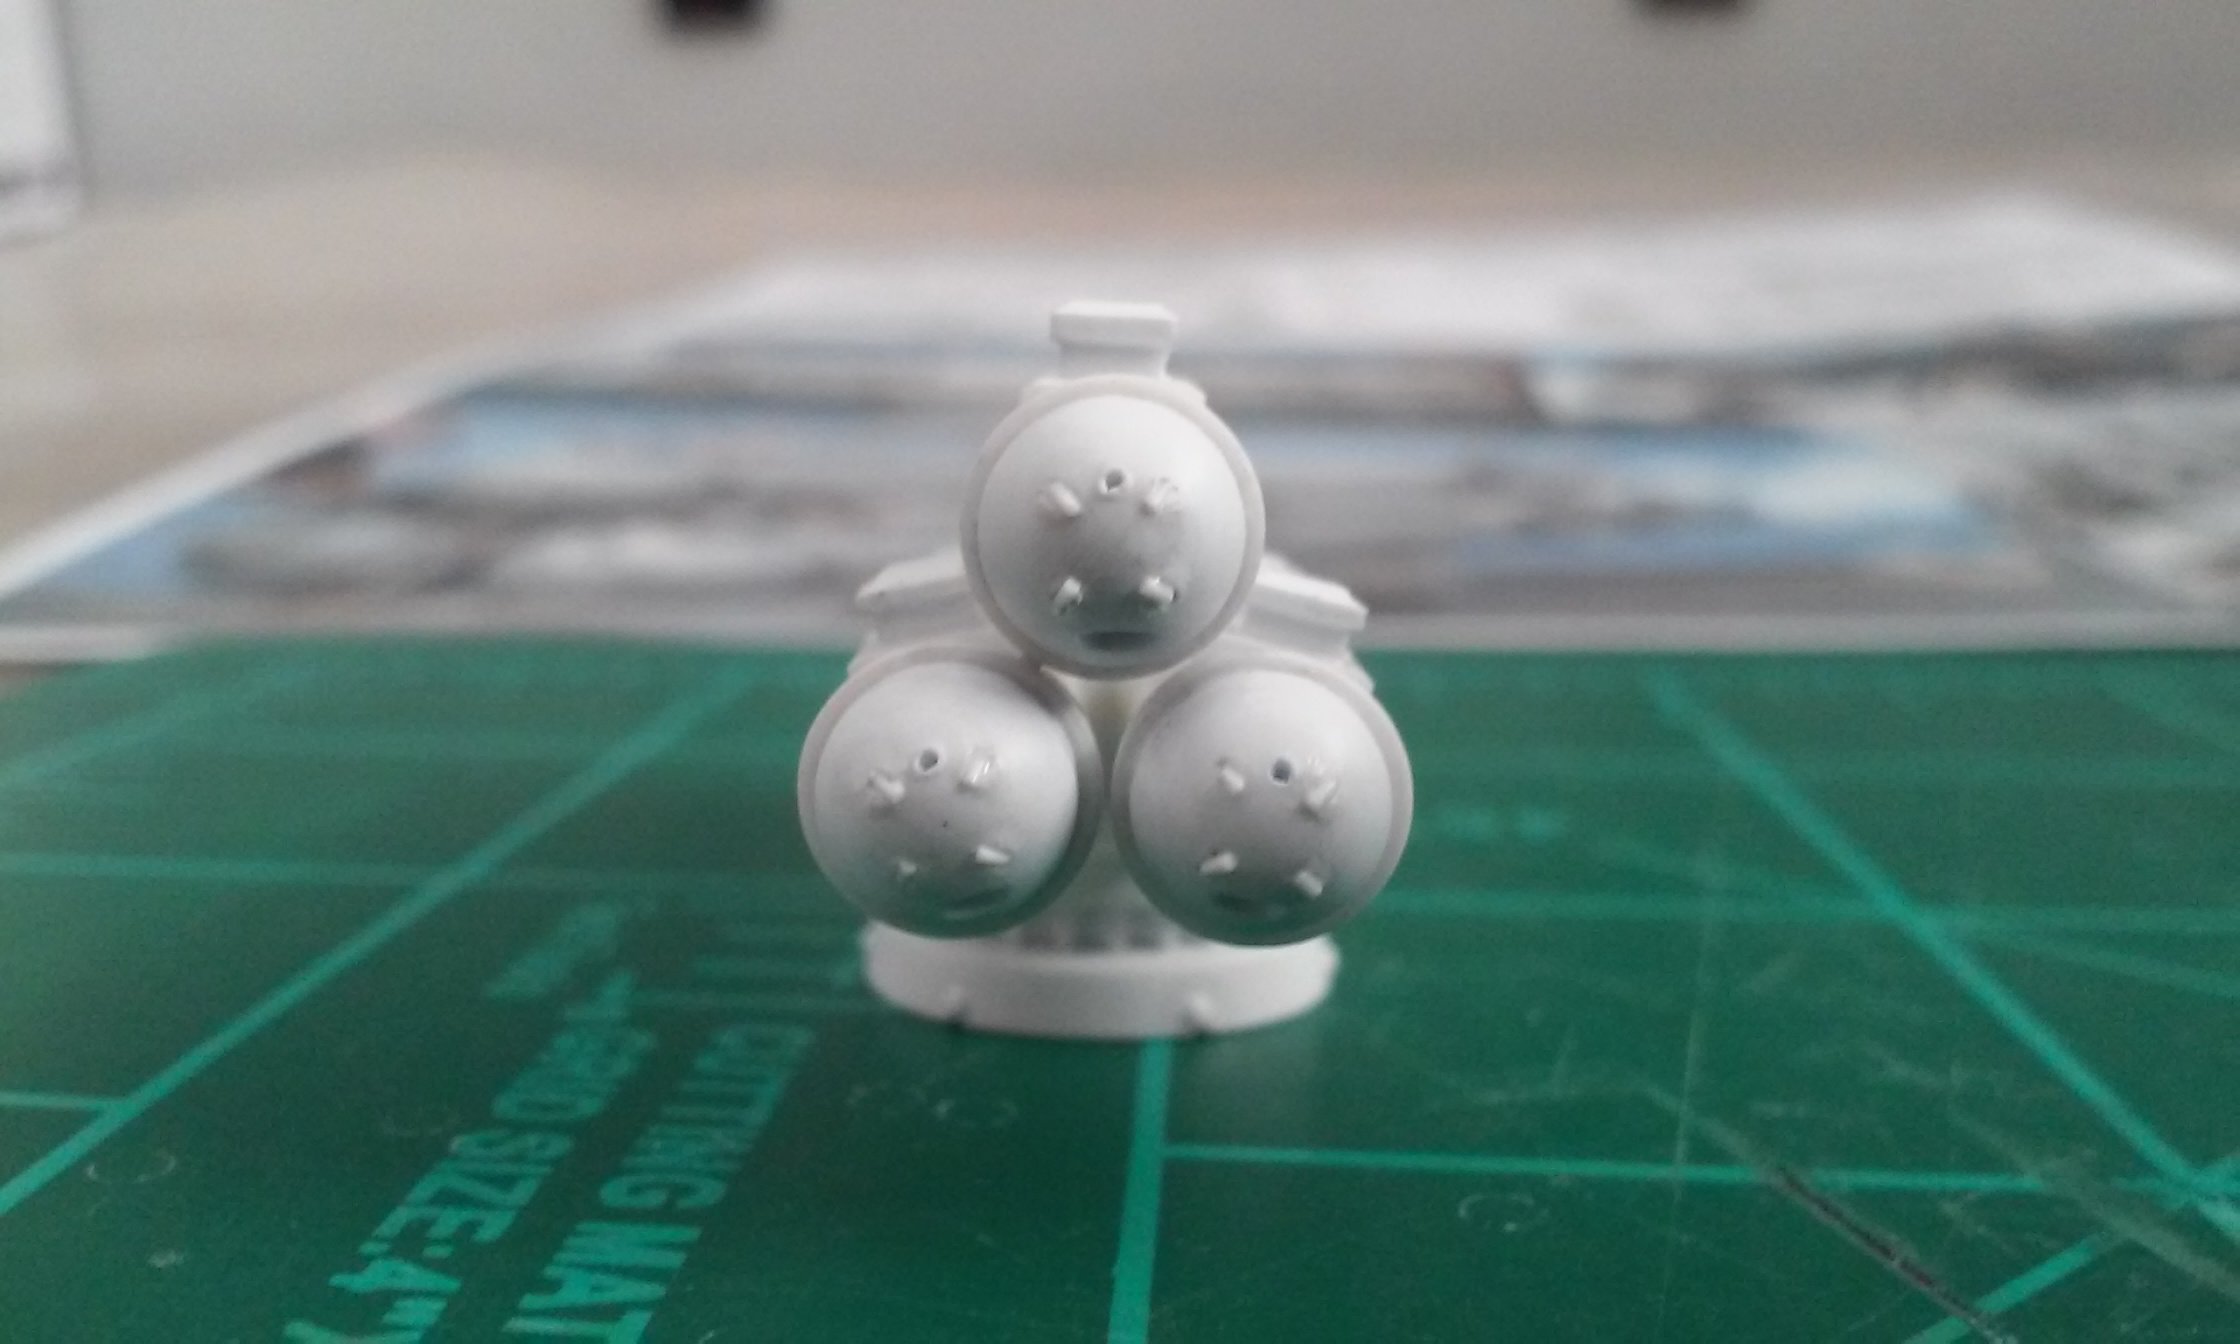
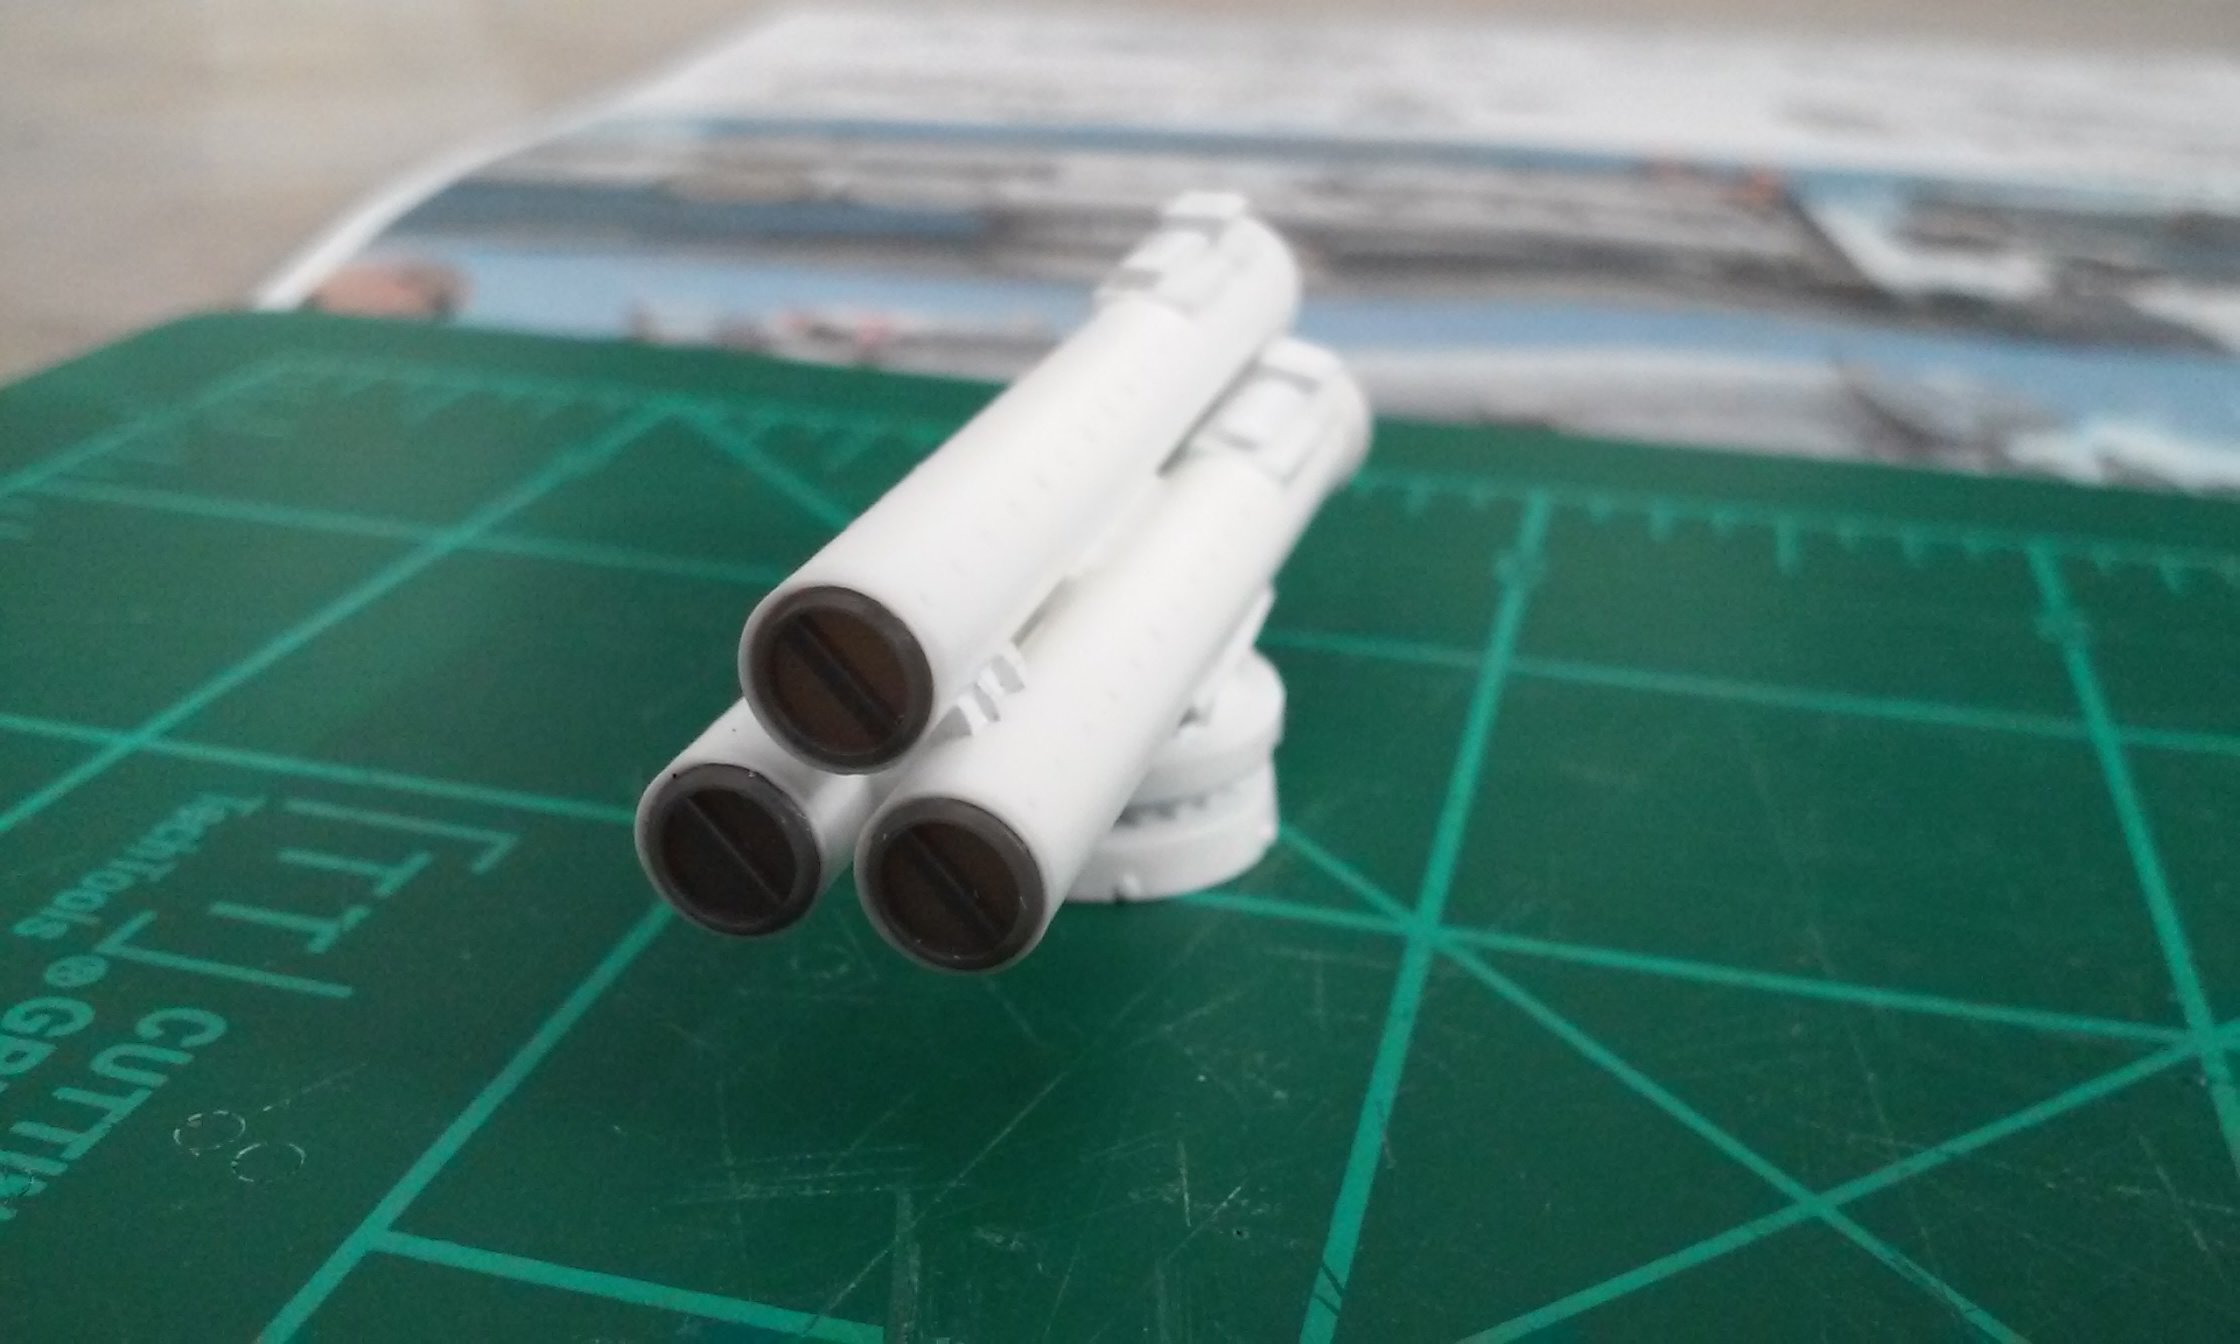
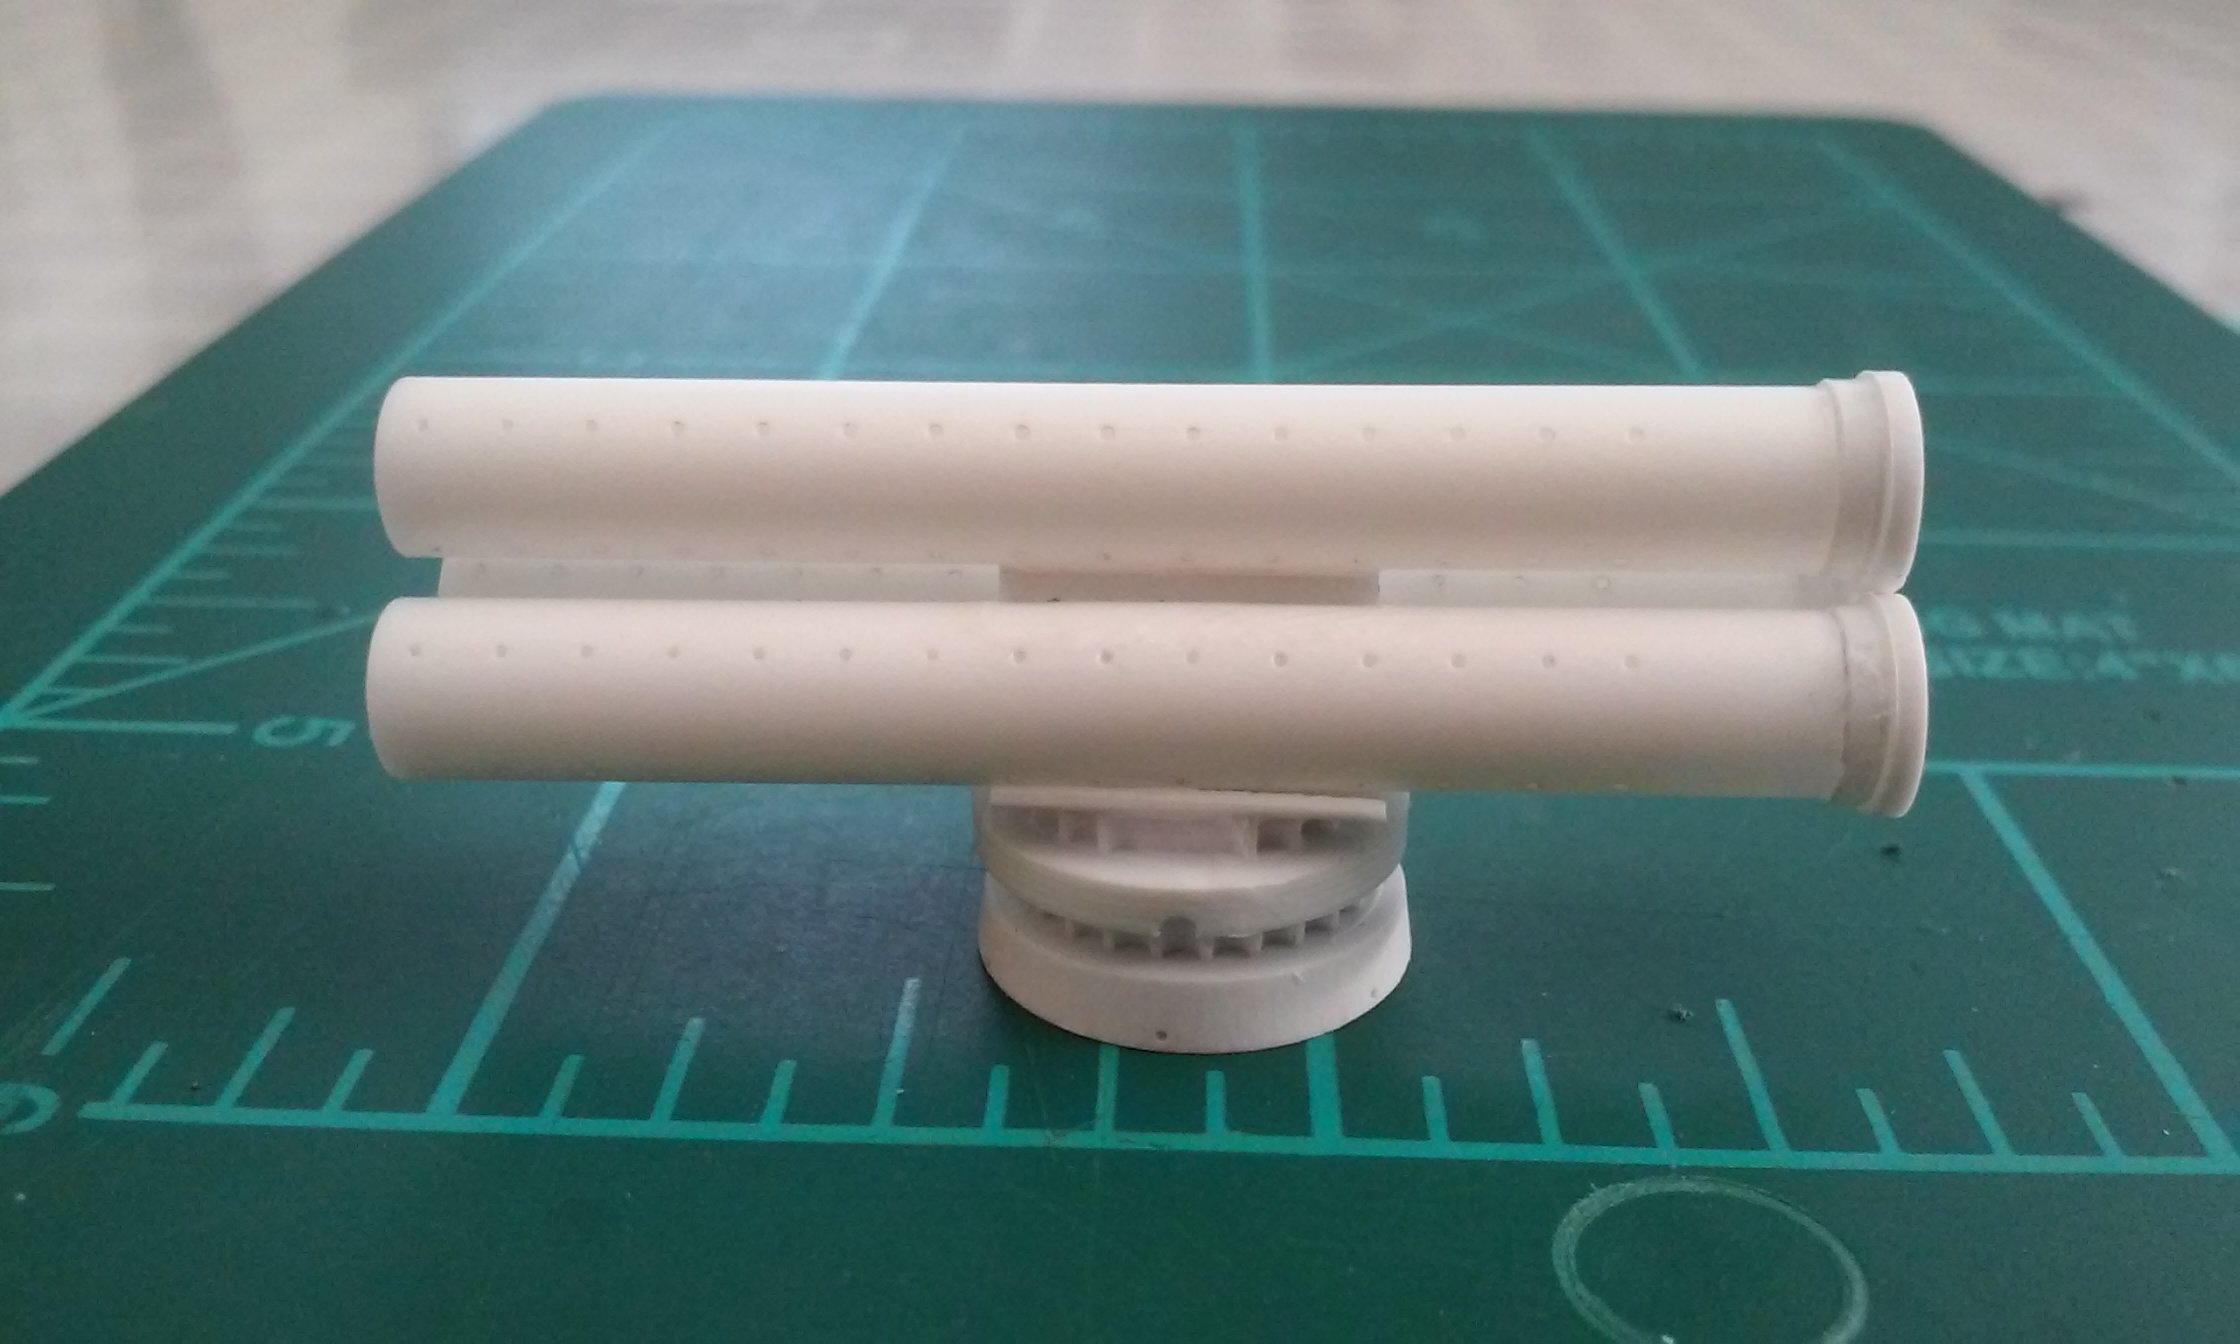
Derex - I'm glad it worked out! Is that a screw post electrical bus going in there? For those wondering what I was making, it's the next weapon system for my ship. It's the Mk-32 (Mod 14) torpedo tubes. It's finally finished today! I'm actually not sure where I'm going to put it, but thank God I decided not to make two of them! Lots of little details to include the side hand knobs which are smaller than a pin head. Different wires didn't work until I tried some old jumper wire. That's what was around the right size and actually held super glue well. Some details are actually too big because of tooling limitations. Like the bolts across the tube sides. There are twenty bolts, but I could only fit 15 - after several attempts with different bits. The model is less than two inches long making it a scale nightmare for details all round it. But it's built from Navy drawings and was scaled down according to dimensions. Reference photos are confusing because there are so many mod versions of it. Feedback and ideas are welcome! - MT

-
@Gabe Q Cool! That's a win-win! You're welcome. - MT
-
Urashiman - Cool work! Those things need some practice. Arbit - Thanks for sharing! That guy should just use styrene Derex - Sorry man, that stinks! Get creative I guess and cover it up with something? - MT
-
Gabe - I thought those looked familiar. They are from the 1/40 variable Orguss model. - MT
-
Chas - Thanks for posting that! It's almost like someone threw down the gantlet and challenged me! I have an old Aztec airbrush that looks like Peter's Enterprise now The compressor looks cool too for a workout before you airbrush! At least it's nearly whisper quiet. The larger fish tank air pumps will work too. Peter - Would you be insulted if I called that a WRECK? Your work paid off! Creative touches with everything. - MT
-
Nice catch! - MT
-
Those look great NZEOD! The shots outside really show the colors off better. Peter - Your damage looks even better (that still sounds wrong)! The details all will work together - you'll like the work you put into it. Dobber - Your pencil work looks superb! That would definitely have me bored out of my gourd doing all that! My family has been watching Halloween Wars on Food Network. So I spent some hours in the shop working on this project beforehand, then was watching the show with them. Bad combo! Later that night I was dreaming of building this project out of cake frosting! It was frustrating too! I finally found a "real world" use for the Minus Molds from Kotobukiya. For those trying to figure out what I'm working on, they are not photon torpedoes but... Still only about 2/3rds done now. - MT
-
It may be a little too obvious now what it is, but its only half way done. - MT
-
He he, school portraits! Model photography is tough anyhow focusing on something so small and losing depth. - MT
-
You don't have enough cars Peter! Nice shelving! - MT