MechTech
-
Posts
4701 -
Joined
-
Last visited
Content Type
Profiles
Forums
Events
Gallery
Everything posted by MechTech
-
Thanks for the info Kylwell. I'm gonna give it a shot. I've been using Millliput for almost 15 years and loved it, but it seems to get nasty in a short shelf life period. It won't fully mix and leaves lumps after a month or two from purchase, probably because it sits a the store for a while due to cost.
-
As far as release agents go, I haven't messed with any "home remedies," but I usually use Vaseline for the two part silicone molds. Can't beat the cost. I actually did break down and buy the proper stuff, guess what, no difference. All of the resin I use is self releasing so I have no problems with mold release agents. For heavy undercuts and fine detail, the mold release agent is great to adding life to the mold in my case.
-
Here's a great fan site for Mospeada: http://members.optusnet.com.au/~cyc01/index.htm
-
Thanks guys for the tips, and I might hold off on Urethane solely for simplicity sakes. All the stuff I'm using is 1-1 so it's a piece of cake. I am seriously considering getting a pressure chamber. I even purchased an air compressor to de-gas my resin in a chamber someday. New drill press comes first! Resin set-up times vary like the tides! I've had the same resin set at varying times! It's all in the temperature, age of resin (older sets up fast for my stuff) even mold temperature. I heard of a guy puting resin in a fridge to slow the cure time. It worked, the resin never fully "cooked inside." Screwed up my mold with uncured goo too! Even after a couple of days, no catalyst affect. I need to get a face mask respirator too. I've been modeling way too long long now and would like to keep my hobby and health!
-

I Hope This Is Not A New Macross Series
MechTech replied to Morpheus's topic in Movies and TV Series
I never saw Sapce Gundam V, but does it have a a powrfull space battleship, ditzy super hero girls with guns and a little annoying mascot (robot or animal)? Or did they forget to rip those off too? -
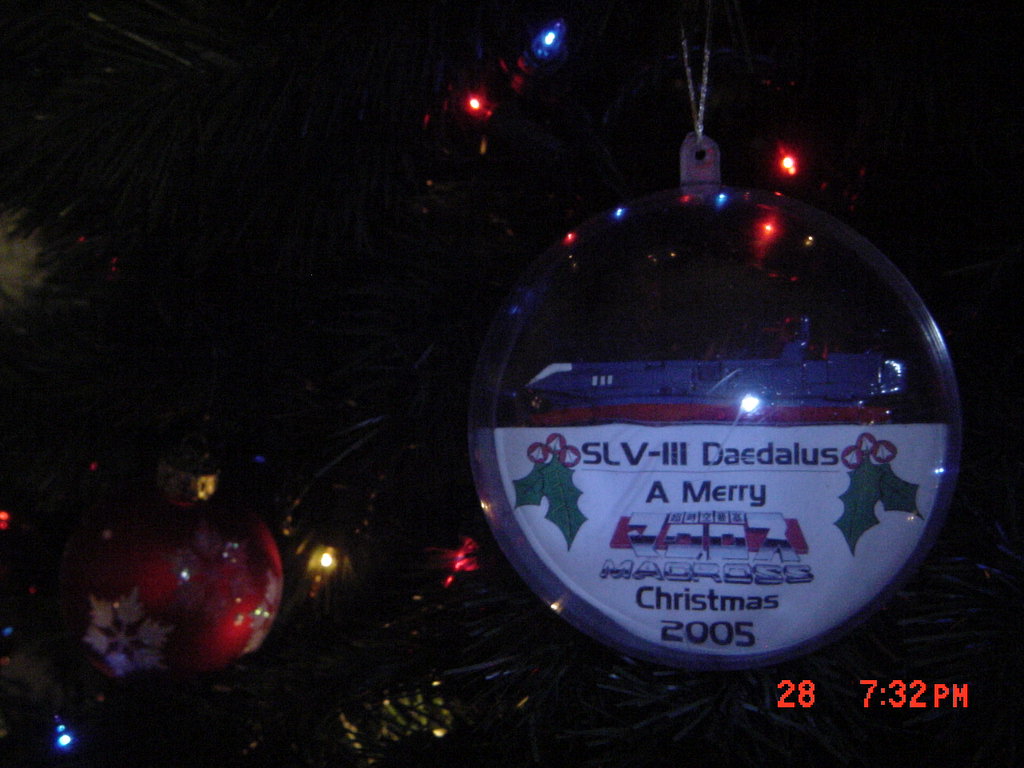
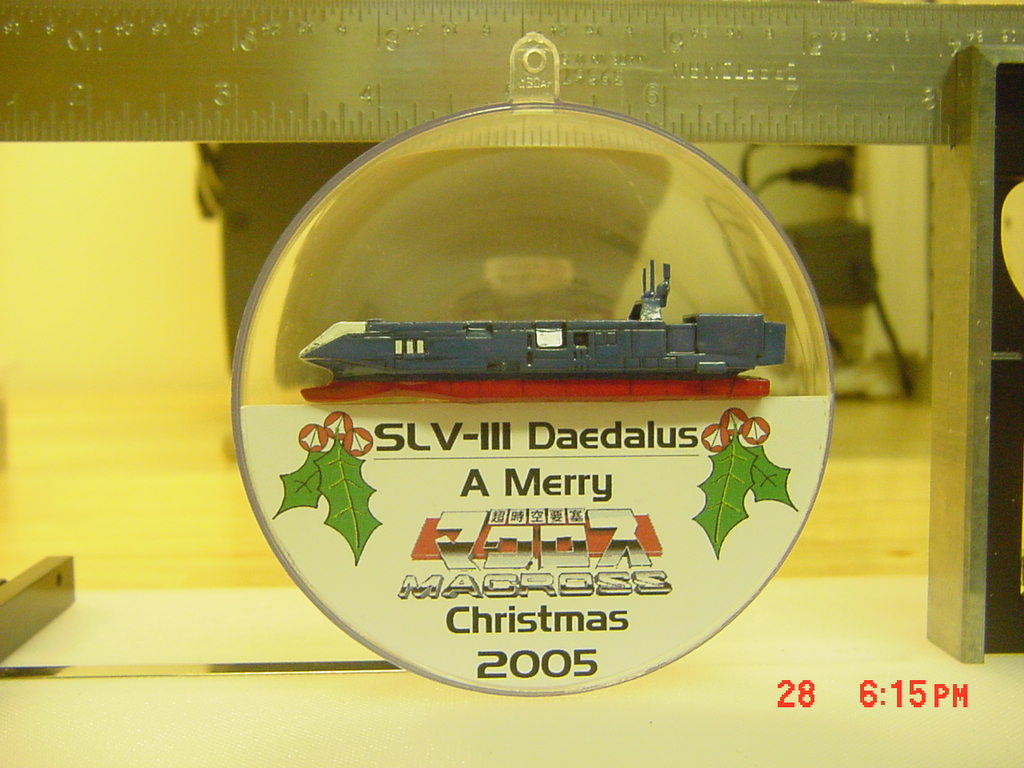
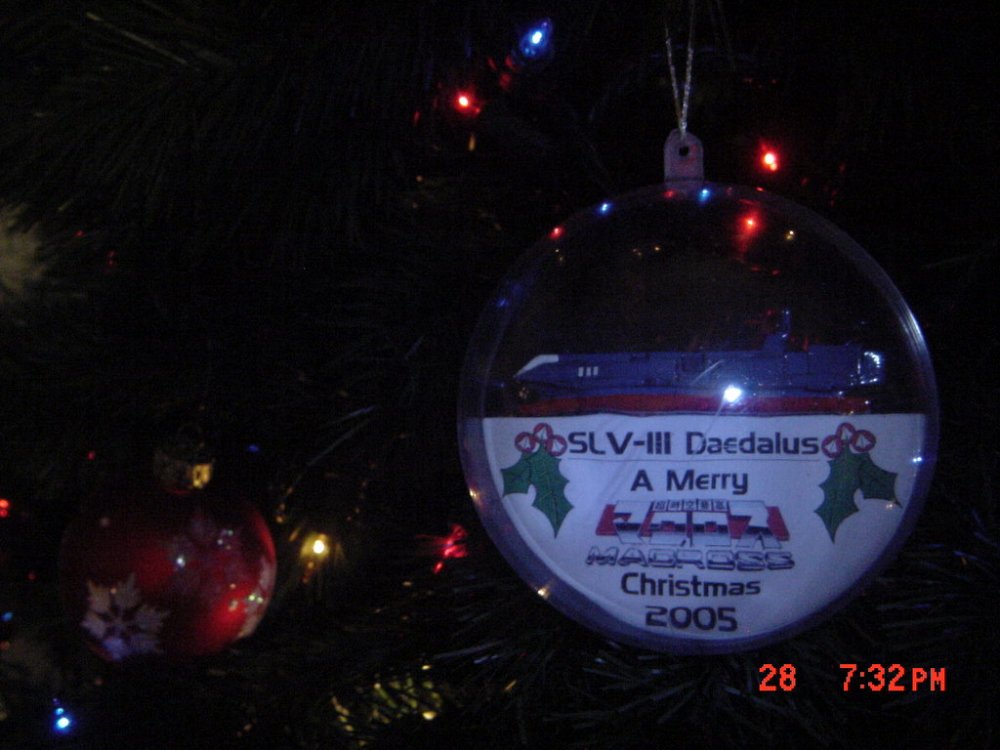
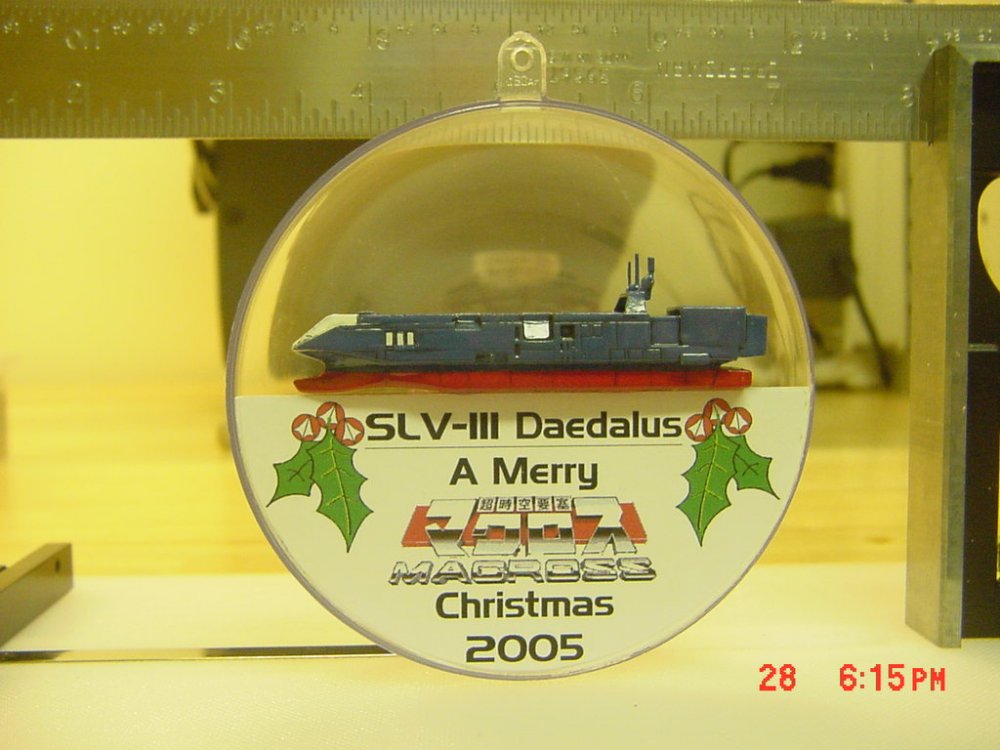
Sorry for the delay in posting, I know New Year's Day is around the corner. It's been a busy holiday season for me this year. Here's something I came up with making a Daedalus resin copy for scaling purposes. Everything went wrong from the resin and paint being old to the decal paper getting ate up by my printer. After some serious help, here it is: (Hmmm, wonder if Hallmark will make these)
-
To answer the question, I've never seen that in a kit. Mospeada's creators lost out when it came to marketing. Thought it was an interesting series too.
-
Thanks Fernarius, I hadn't thought of using urethane rubber for some reason. I'm going with that my next run. No degassing! Awesome! Even turning my molds so the bubbles won't show up doesn't always help. Now if they could just get the bubbles out of the resin without degassing. Big F, if you find a good place in England, please shoot me a PM. Having to order from across the pond is, well, ponderous! That type of resin you mentioned first was what I first used. It stinks to high heaven and so do the parts. My wife loved that! Another good source where I normally get my stuff is Micromark.com. They have ALL the accessories you need and they even have metal molding supplies! I am a big fan of tinting my resin. It saves paint and adds a proffesional touch to production runs. Just a little drop and you have your part molded in color! - MT
-
For casting pieces needing strength, try using epoxy resin. It's more durable, especially with fiberglass filler. If the part is large and "open" in the mold, you can simply use 45minute epoxy off the shelf.
-
Whatever you do, stay away from flourescent lights (all types). They DO put out UV and even break down the very plastic fixtures a lot of them are made with. I say this from personal experience. ABS and Styrene plastics are really susceptable. I'd go with the LED's myself. In fact, I just bought a Christmas wreath with 45 white LED's on it. It cost about 30 bucks for 45 LED's. you can't beat it! I'll take them off their flasher circuit and on straight battery (I'm putting them in my 6 foot Daedalus model). Plus, you can arrange them around the cabinet and arrange them to spot light affect in areas. Really slick! I'll be putting them around the top for overhead lighting and the side for "spotting." Just my two cents from a model builder and a "do it yourselfer."
-
That's an intersting idea. Make some custom album art, put it in the jewel case and attach some coat hanger wire. If you take the wire and bend a triangle into one end and attach it to the bottom with some epoxy and do a half loop out and over the front of the case, you can either do a "model on a stick," or hang from it depending on the size and scale and length of wire used. Using a CDR-W holder sounds great too. I kept one to do the same thing.
-
Looks great! I think someone is single handedly keeping Hasegwa in business!
-
Anyone get the VT links before they died! Super VT would be awesome. Dead links are the pits!
-
If those are the pens I think they are (petroleum solvent based) you can use a bit of laquer thinner, acetone (acetone nail polish remover), or other petroleum based paint thinners. If it's a water based marker, Isopropyl Rubbing Alcohol works wonders (not to be confused with Ethyl Rubbing Alcohol) and it costs about a dollar for several ounces. You can usually tell by the smell. Tamiya and the Gunze BOTTLED paints are water based. Testors enamels and other enamels are uasually petroleum based. Use good ventilation with both too by the way. Hope that helps!
-
Hey Spatula, the others are correct in what they say. This place is a great referance for most topics. Some of the books that helped me were the Macross Model Book (Japanese) and others. I was able to go to a book store and look. If you can, check out some on anime model building. They come and go with reprints. Sorry I can't be of more help than that. There are several Gundam building books out there, just pick your major series and you can find it. There's even one out there on the "Sentinel" series. Can you check out any Japanese bookstores around you (if there are any)?
-
Spatula, I've read (looked at) a lot of anime books and whatever you can look at in person first is usually best. I've ordered books that didn't help, and I've found others that I still use as referances years later. In English, Fine Scale Modeller magazine is excellent for all general notes on model building. I've subscribed for years and have learned all that we discuss here years ago. They do little on anime subjects (few readers submit anime articles). Just a suggestion...
-
That model looks a THOUSAND times better than the plastic kit. I've got the whole set and and the only thing accuarate on it is the box art! I wonder if they'll do all the classes in the fleet, hmmm...
-
Looks SHAWEEeeeet! I'd agree with posing the photos so that they look like they're comin' from the ARMD. If there weren't so many licensing complications, I'd say photograph and sell it as a poster. Maybe you can get one of our coherts in crime to take photos of the arm and Valk seperately and do some digital work to make the valk look like it's launching off! That wood be awesome!
-
Thanks Dave for the link. I've seen it before, but forgot about it. I'm considering giving it a try.
-
Yeah, I got a nightmare. It involves a beautiful 1/200 scratchbuilt fanliner (Hikaru's yellow one) with opening canopies, spinning fan blade and two months of work. My three year old "melted" mine. I saw this pin head sized landing gear door on my bookshelf and thought, NOOOOoooo! I looked in the case I keep it in and well - it was in a lot more pieces than when I finished it off. How she got up that high is a mystery!? I don't honestly know if I can fix it. It may be easier to make a new one. I always wanted to do the fan racer(red and white one), but it has to wait for my Daedalus project.
-
Thanks fernarias. I might be able to use this next time around on some of my projects.
-
If you don't wanna airbrush, get the GOOD automotive paints with a fine fan spray nozzle. The nozzle will look different than the regular ones, the button on top has a pin that you can just barely see, it should also have a graphic on the side showing it (help me out there guys with the brand). Make sure you get primer and coat it first to find scratches or other flaws you won't see 'till later on. Clear coat when you're all done! For airbrushing - personnally, I love Tamiya's paints. With a good primer, they'll stay on through a lot of abuse. Clean up is with their stuff or Isopropyl rubbing alcohol ($1.00 at the grocery store). Not to mention using a gloss coat (Future Floor Finish). Cover that all with a flat coat last to stop the shine.
-
Alright, I'm dizzy and my neck is sore, but looks great! By the way, you should submit some articles to FSM. "Mounting Models on Magnets" could actually get you some money. Get paid for your hobby! Spouses seem more appreciative if you actually have fun and make some extra cash on the side with your hobby.
-
If you REALLY can't buff it out and if your canopy is TOTALLY wasted, put some Vaseline into it (THIN and SMOOOOTH) then pour some resin into it. When the resin cures, take the molded piece out and vacu-form some clear plastic over the resin "copy." Or you can simply heat up some clear plastic and "pull" it over the resin copy on a stick. Make sure the resin block is cooled before any tries you make. Hope that helps.
-
Myersjessee, you can get white decal paper (MicroMart.com) which of course won't work for all things, but with a sharp pair of scissors and some time...