MechTech
-
Posts
4679 -
Joined
-
Last visited
Content Type
Profiles
Forums
Events
Gallery
Everything posted by MechTech
-
The model looks great! The paint and decaling look realistic. (I'm staying out of the other conversation ) - MT
-
Funny! Sorry, just a minivan! I can dream can't I - MT
-
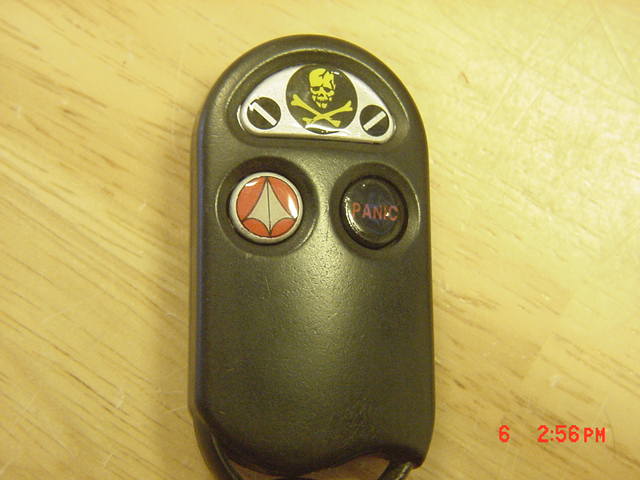
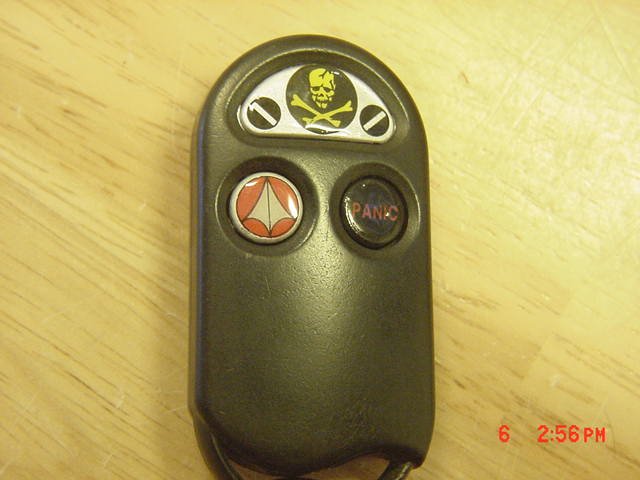
This is a customization, so I thought I'd post it here... I had to step back from the Daedalus floorplan drawings, so I did this. I'm also taking a weeks vacation tomorrow so I didn't want to start anything big right now. [attachmentid=41777] Customized Buttons for my "Valks" keyless entry. Got some leftover decals? Clean up the buttons on whatever electronics device you want to mod (has to be hard plastic), cover in silver or other backing color, slide on your decals, and cover with 5min or other epoxy resin. A thin coat should last a long time. The old printing on the buttons wore off anyhow except "Panic," but a good valk pilot shouldn't use "Panic" much anyhow . I whish I had a decal that said "Easy" for an easy button! That would be cool! - MT
-
mslz22, if you ever totally lost your sanity, you could still probably go with resin still for the big projects, and foam fill it. My wife has a giant bear that was cast in resin and foam filled. Of course I never build anything that big. - MT
-
"Y" is for test aircraft, non-production. I just saw Macross zero a couple of weeks ago and I seem to recall everyone calling it the "zero." Like a throwback to WWII. The zero's are still revered in Japan like the Mustangs and Spitfires in the US and UK. "X" is experimental of course, but you can have civilian production kits in that category too. Bet you'll never guess what the "K" stands for in the tanker designations. I laughed when I found out because it's so obvious (once you know what its named for). No Googling! - MT
-
AAhaa! Now I see. The palms with the coin looked like a magazine article photo, "get more for your money on vacation." . That must be a small scale kit! - MT
-

Minor Customs for Max & Milia Gerwalk Gashapons.
MechTech replied to ruskiiVFaussie's topic in The Workshop!
The poses do look great. Not only can you do all that, but if you drop one, do you yell out, "Oh no!"? Nah, you just pick it up and continue on. The bigger they are, the harder they fall - and cost a lot more too! - MT -
Cowie, that's alright. Get all your bad work out on the non-macross kits. They're cheaper! TSP, somebody's been VERY busy. You doin' some magazine spreads? - MT
-
I told my wife and everything, she thought it was horrible too. Then the Capn's message. I guess you can't believe everything on the internet. So is like Elvis still really living!? - MT
-
Minor Customs for Max & Milia Gerwalk Gashapons.
MechTech replied to ruskiiVFaussie's topic in The Workshop!
1)The conversions look great! 2)You get bonus points for working in 1/200th scale(my personal fav right now)! Keep it up man! - MT -
Both look great! Berttt's right though . - MT
-
THANK YOU!!! - MT
-
Looks great dude! - MT
-
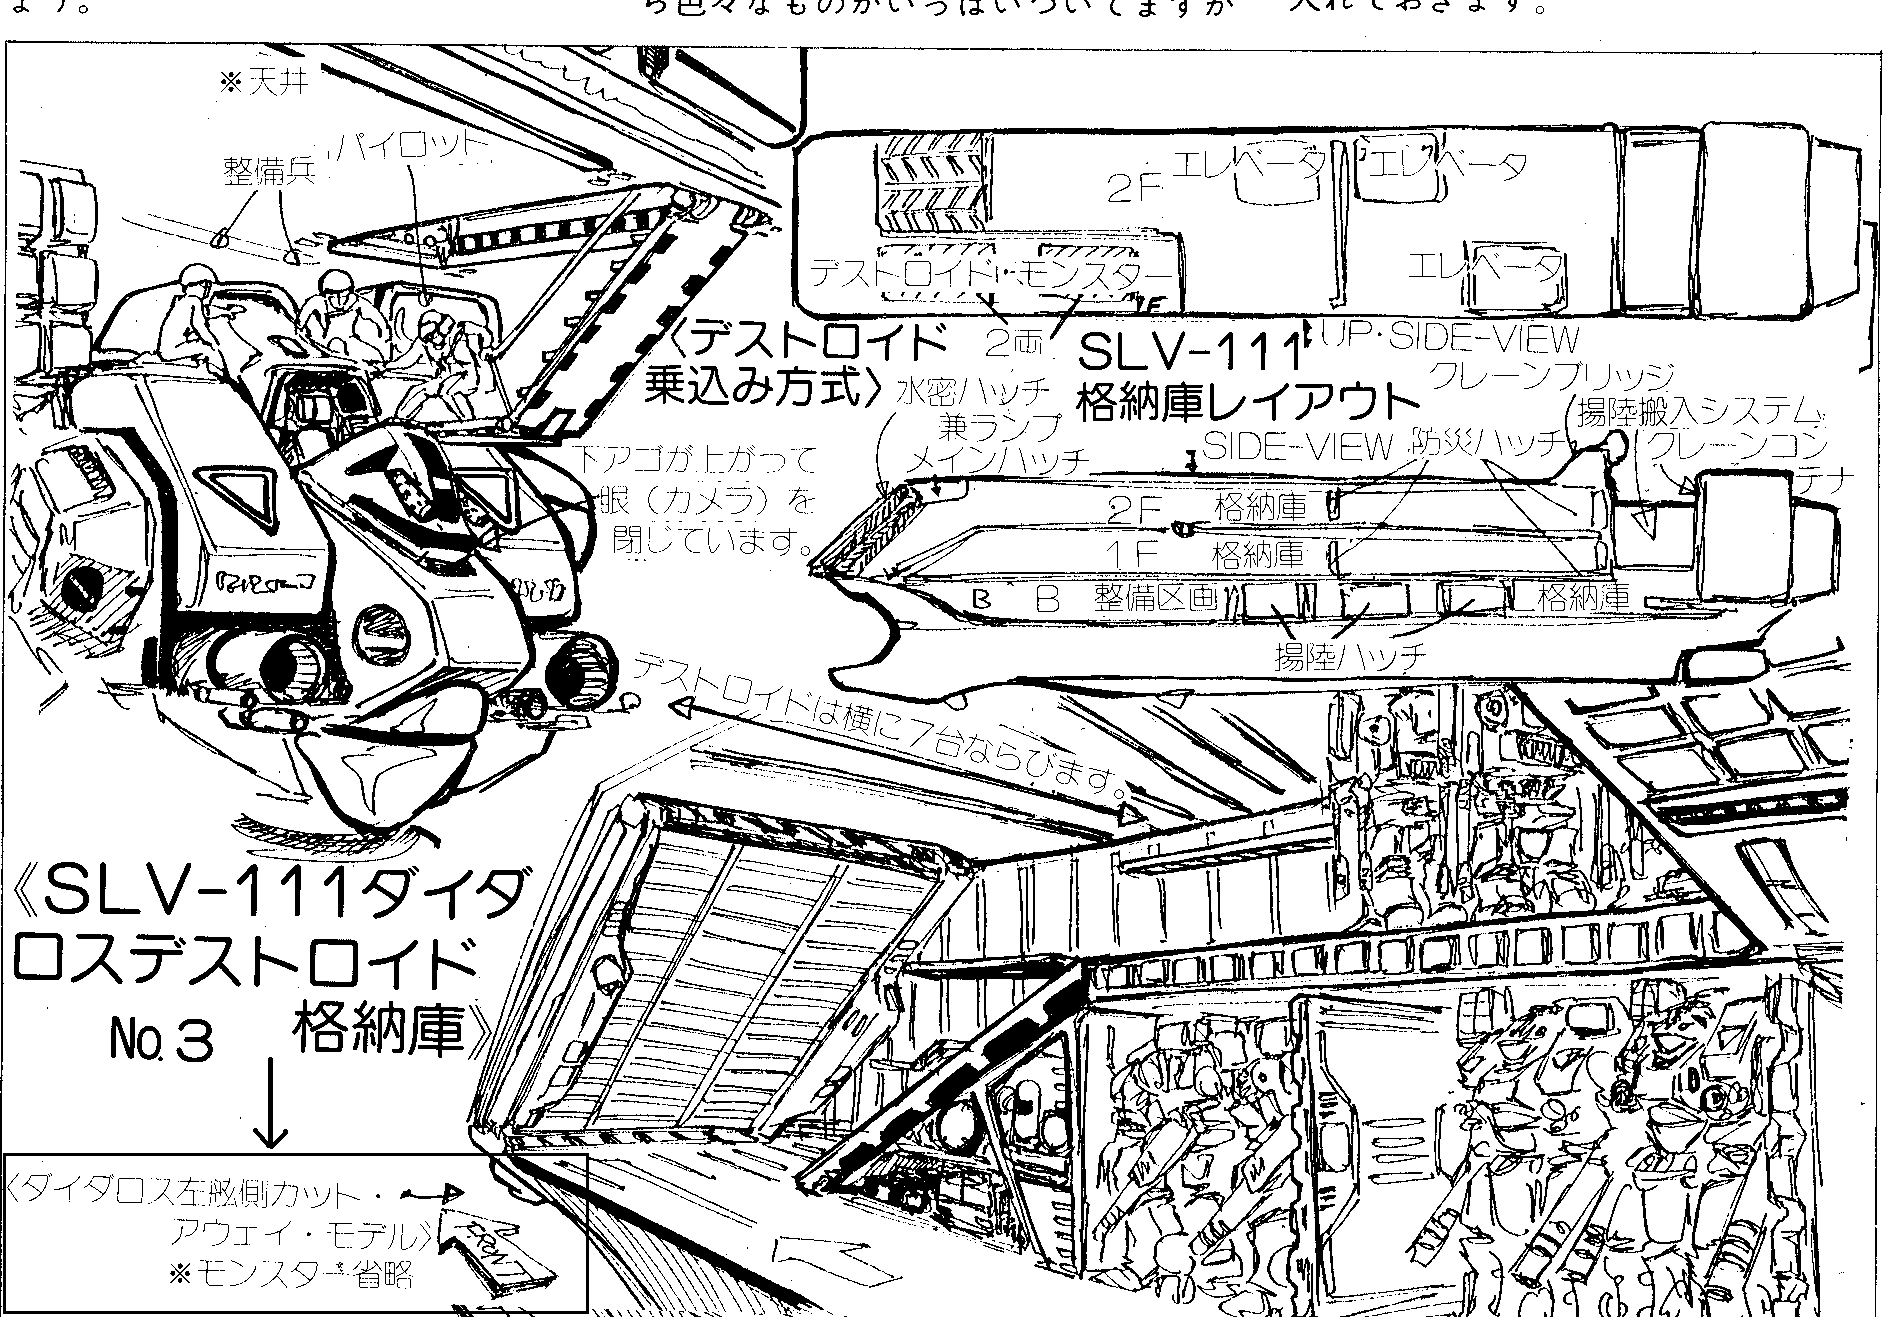
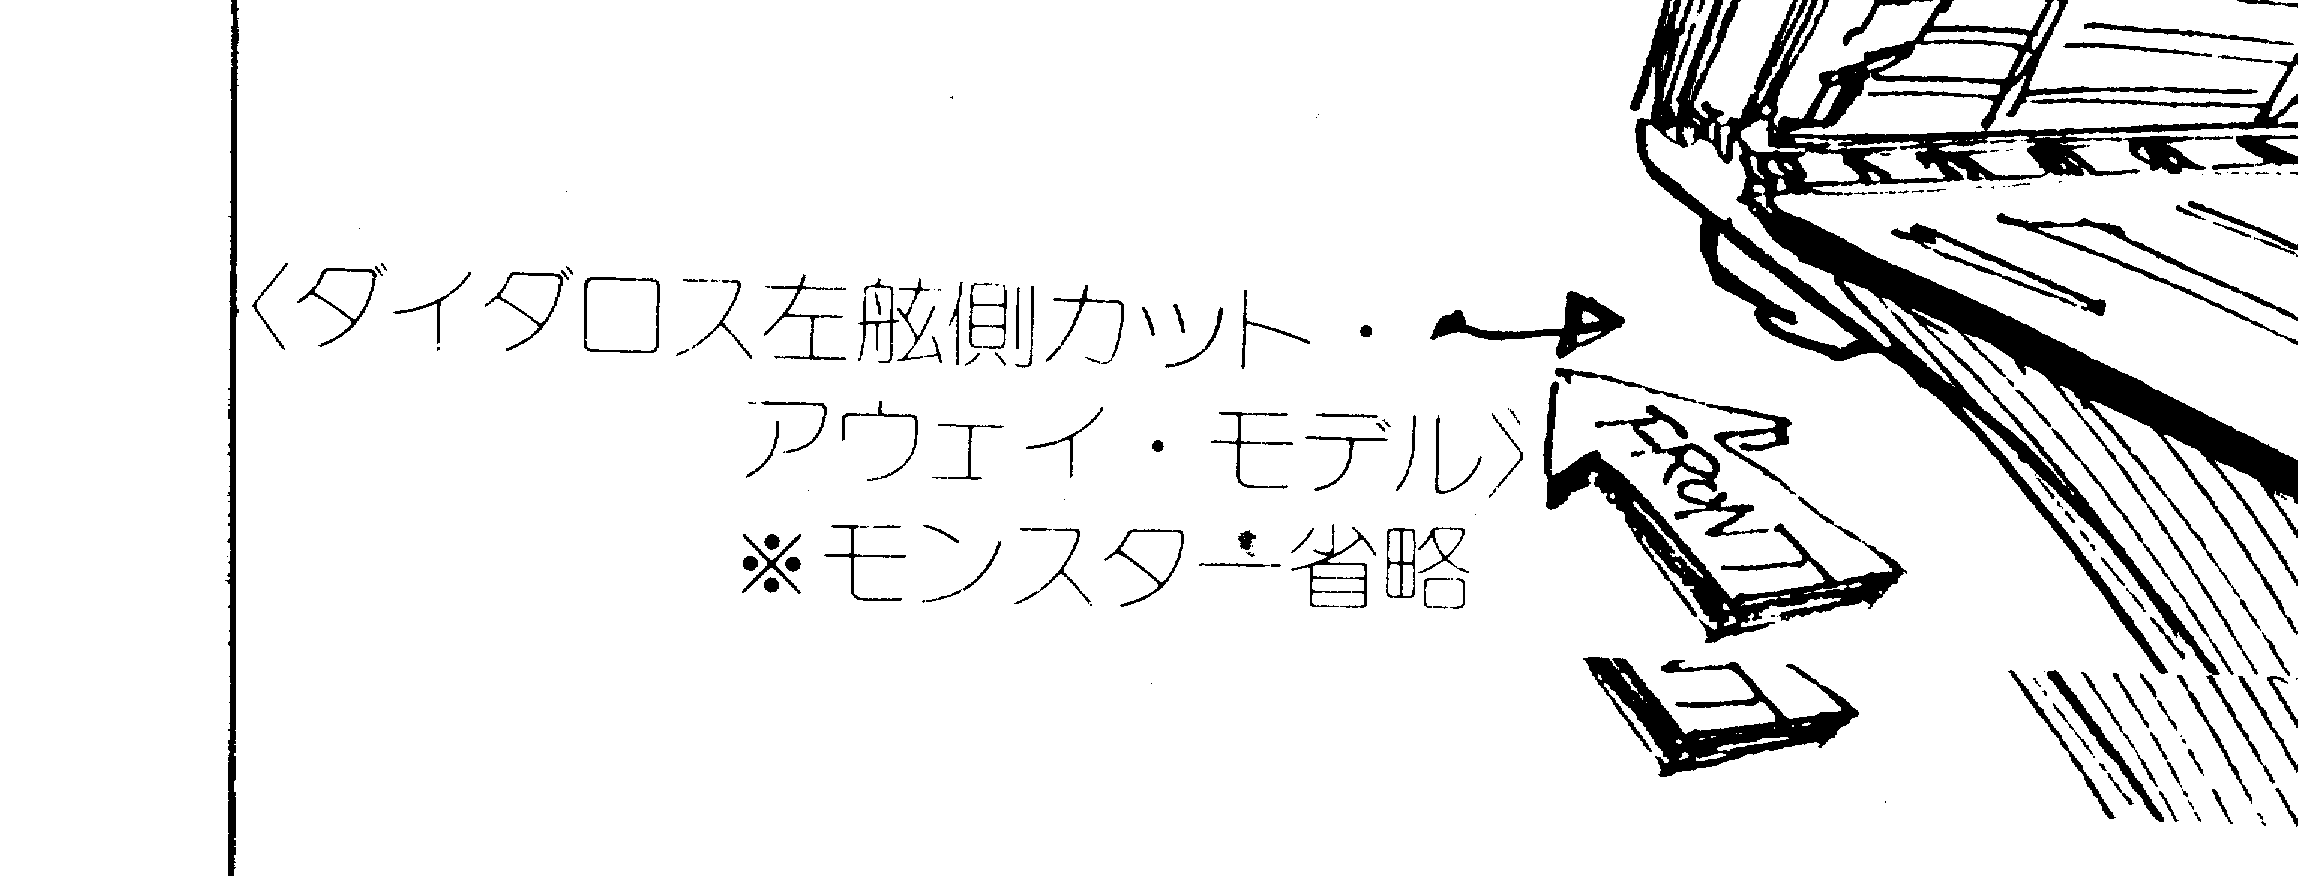
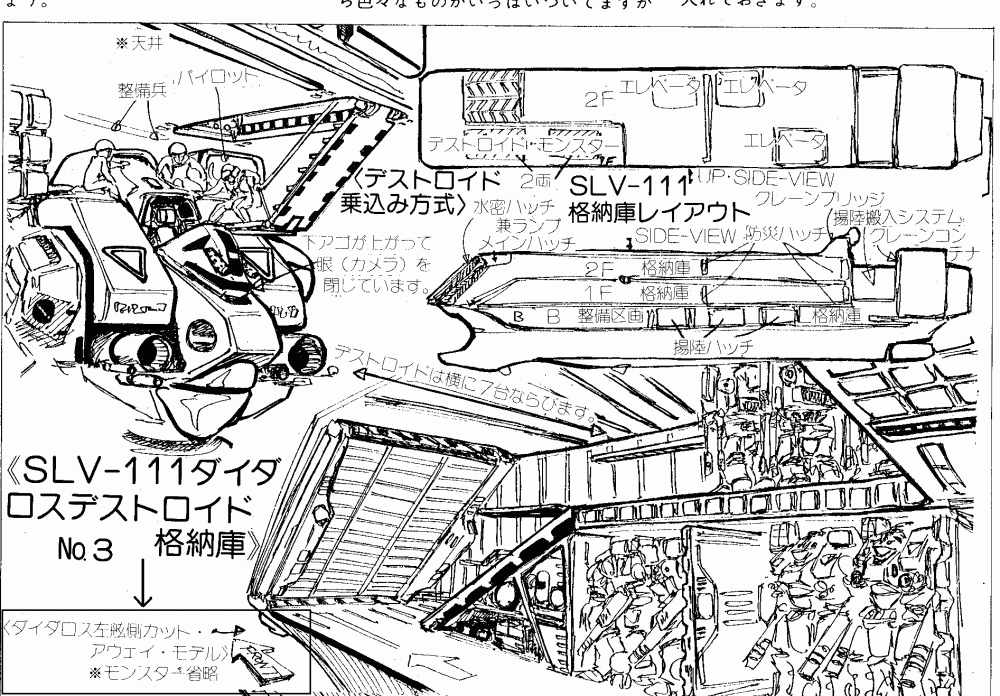
Hopefully someone's language talents can translate the phrase below in the box with an arrow pointing to it: [attachmentid=41588] [attachmentid=41589] I got all the other info translated years ago, and just realized they left this part out! It may be critical to my build (link in my signature). I'm now building the hanger area and NEED to know what this says. I shoulda took Kanji instead of Spanish! Thanks for your help! - MT
-
household alternatives to paint thinner
MechTech replied to skull_leader_v1's topic in The Workshop!
I use Isopropyl like it's going outa style! I prep my surfaces with it, thin with it, and clean with it. I only use the 70% stuff, not the hardcore 90-100%. I've only used it on flats, not gloss. It dries quite quickly, so may dim glosses. Always test on scrap plastic card or a yoghurt cup (cleaned). Don't botch up a work of art! - MT -
Absolutely shaweet! And molded in color! - MT
-
I would not have guessed your a Minmei fan ! Looks great! Be prepared to make copies in plastic resin. - MT
-
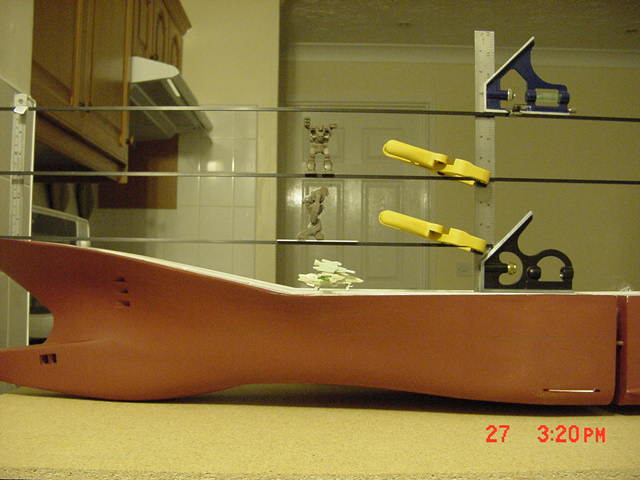
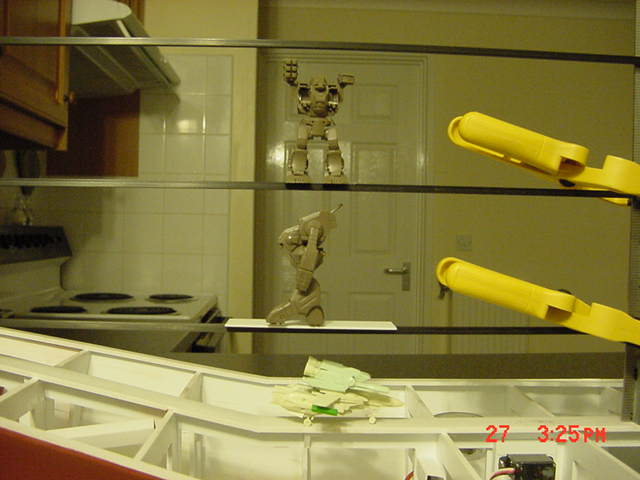
TESTING UPDATE 27 MAR 07 Here's a couple of measurement and test shots. Remember, the side will open to reveal the decks. [attachmentid=41508] [attachmentid=41509] Oh yeah, the entry way is 6 inches high. Overall height is 8" roughly. I'm still waiting on the carbon fiber I ordered. I only have four lengths, enough to do nothing with yet . - MT


-
1/55 VF-1J "Harriska" - Jetfire to Low Viz Valkyre
MechTech replied to Skull-1's topic in The Workshop!
Looks so real I can just see the bird strike! - MT -
There will be two people. One will be overjoyed and look at their toy in the box and try not to drool on it. The second will modify it. I can already envision the mods section with improvements, paint schemes and oh yeah, adding missiles! C'mon, you know it's gonna happen - MT
-
Great Idea. I have another radio...

-
You just need a "Monster" to stand beside it! - MT
-
Thanks guys! I can get a motor and AAAA battery into a tube that fits into the square tubes. Torpedo time! I've seen guys make larger scaled torpedos. It wil just have to go the same time as the airsoft or water cannon. I'm out of channels! - MT
-
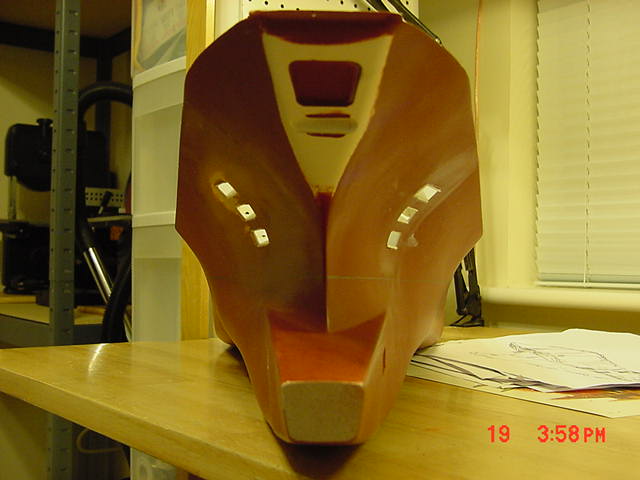
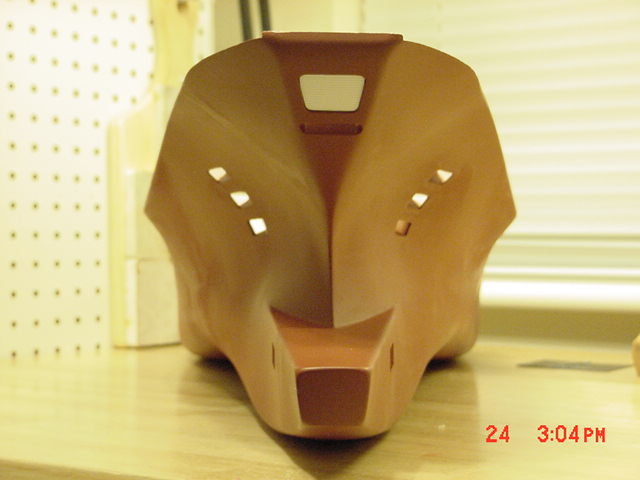
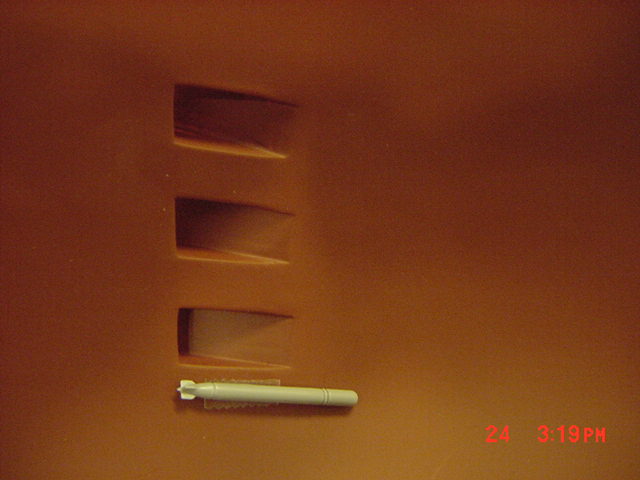
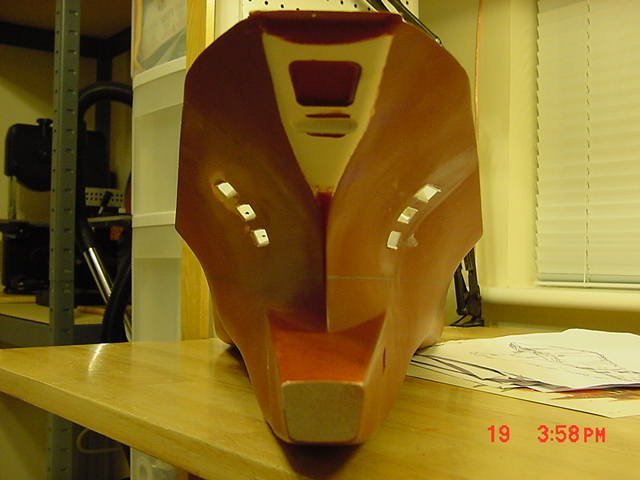
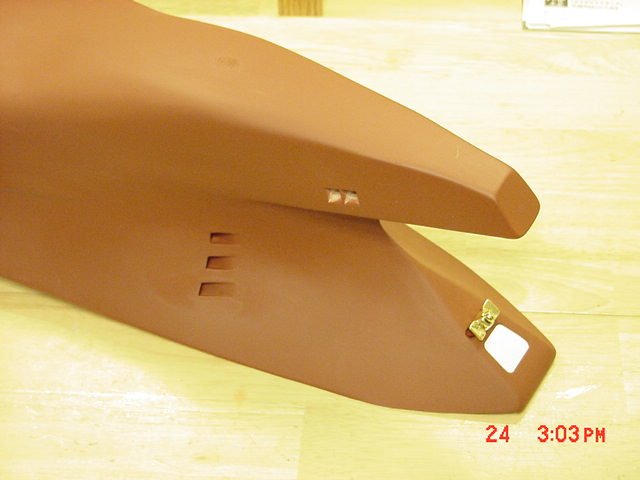
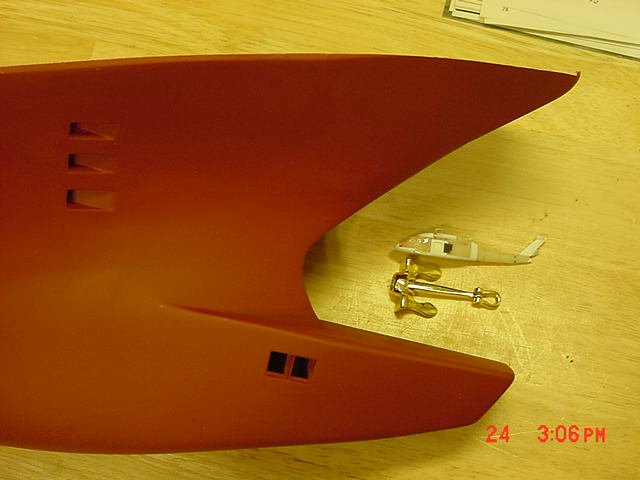
Thanks Tinderfitles. I spent a couple a years in Georgia and EVERYONE has "Saweet Teee." I was even offered it in every Chinese/Japanese restaraunt I went to. Peanut brittle is great stuff too! UPDATE 24 MARCH 07 Things ahve slowed downa bit. My local supplier for the graphite still has it on order. I can't do the drawings for the side panels of the hanger area or anything else just about until I build the frame. Everything will be custom cut to fit it. I did finish the bow details though... [attachmentid=41451] Adding the anchor well and "torpedo" tubes. [attachmentid=41452] Torpedo tubes and anchor area primed. Brass anchor temporarily inserted. [attachmentid=41453] Bow head on after priming. The lower port tube is lower. It is actually several inches long to hold a motorized torpedo for future fun projects! [attachmentid=41454] Here's a comparison shot showing the brass anchor (still requiring modification) next to a same scale HH-60. Thanks to Macross Zero I only have to slap some Macross emblems on the side and I'm good to go! [attachmentid=41455] Here's a 1/200 (same scale) torpedo next to one of the tubes. The tubes were probably meant for larger weapons. The torpedo is a full sized submarine weapon, not a compact aircraft weapon. You can fit four of these in one of the square Daedalus tubes. That's it for now. I'm going to go scale and draw out the hanger bay area now. - MT


-
Looks great man! The guy in the white shirt doesn't look like he's feeling too good ! Keep it up! - MT