MechTech
-
Posts
4702 -
Joined
-
Last visited
Content Type
Profiles
Forums
Events
Gallery
Everything posted by MechTech
-

Whats Lying on your Workbench MKIII
MechTech replied to HWR MKII's topic in Hall Of The Super Topics
Somewhere there are a couple of naked valks shivering in the cold of space without boosters Just kidding. Great idea! I did something to a battleship after seeing Space Battleship Yamato for the first time (about !@#$ years ago). You just need a BIG wavegun now and you're good! - MT -
I'm guessing somebody wants the "Vamp" character. If you get stuck, let me know. It shouldn't be hard to composite something close to that. - MT
-
Great job on the custom Alfye. My only complaint is that your Macross corner is too small Great work! -MT
-
I like the colors and weathering as well. Nice custom! - MT
-
I spent about $15. Not much, but it does the job. I haven't used that model, but I'd guess it's alright. As long as you can swap out the cartridge or drain it. The humidity where you live will ultimately decide. Keeping your tank drained of air/water after every use helps too! Hopefully someone else has used the linked trap? - MT
-
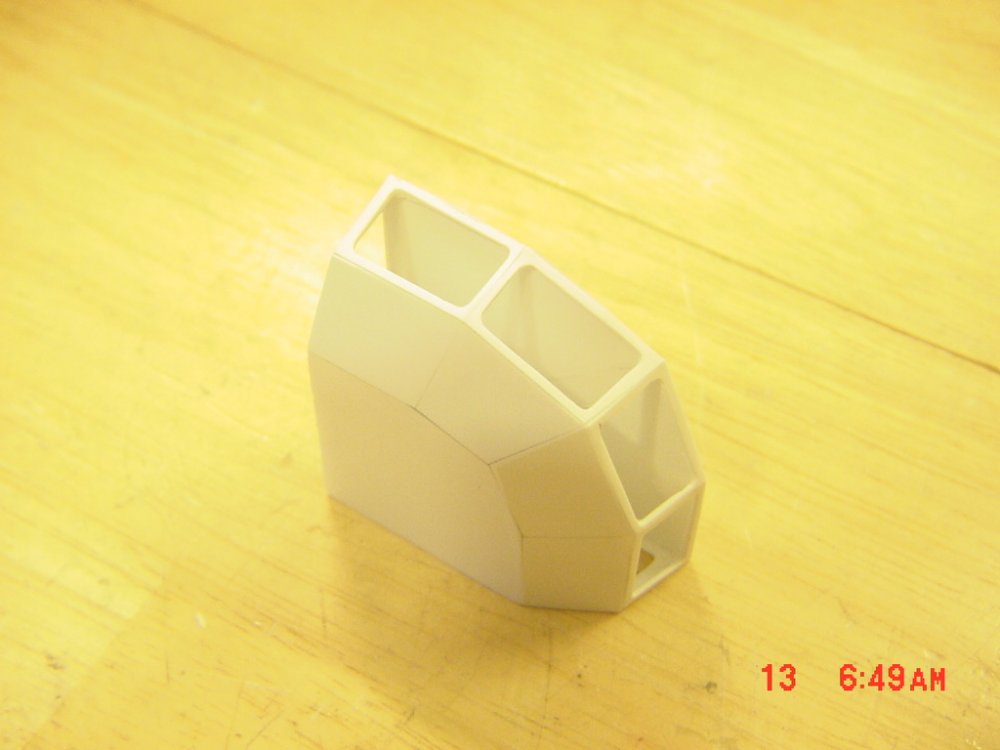
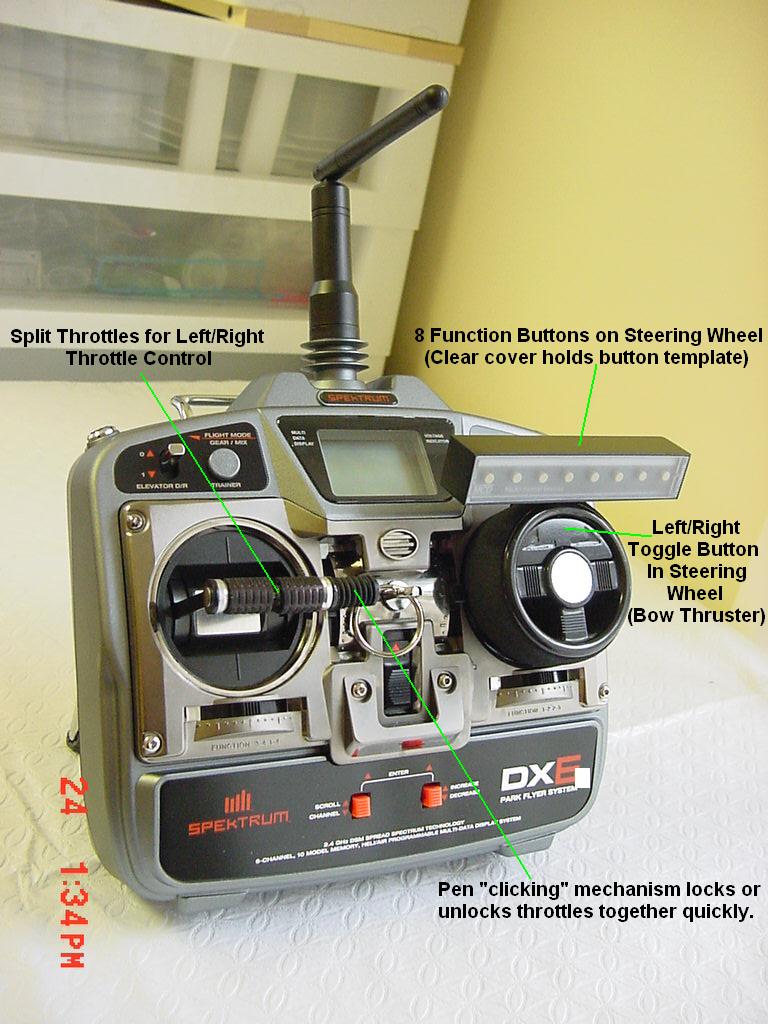
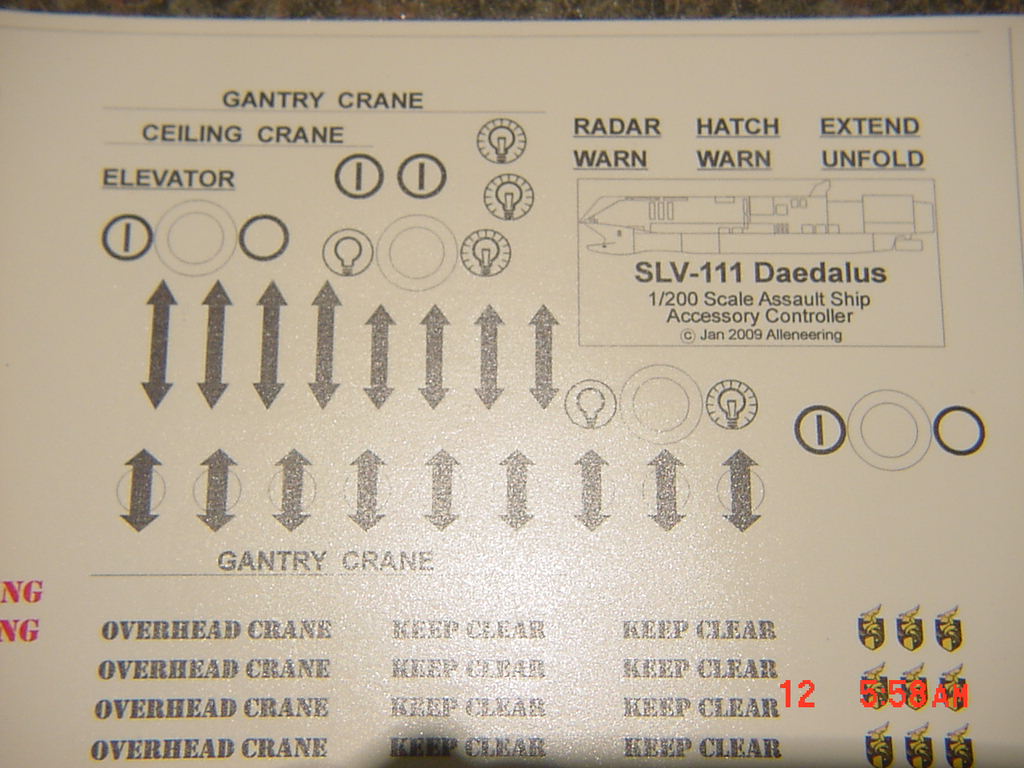
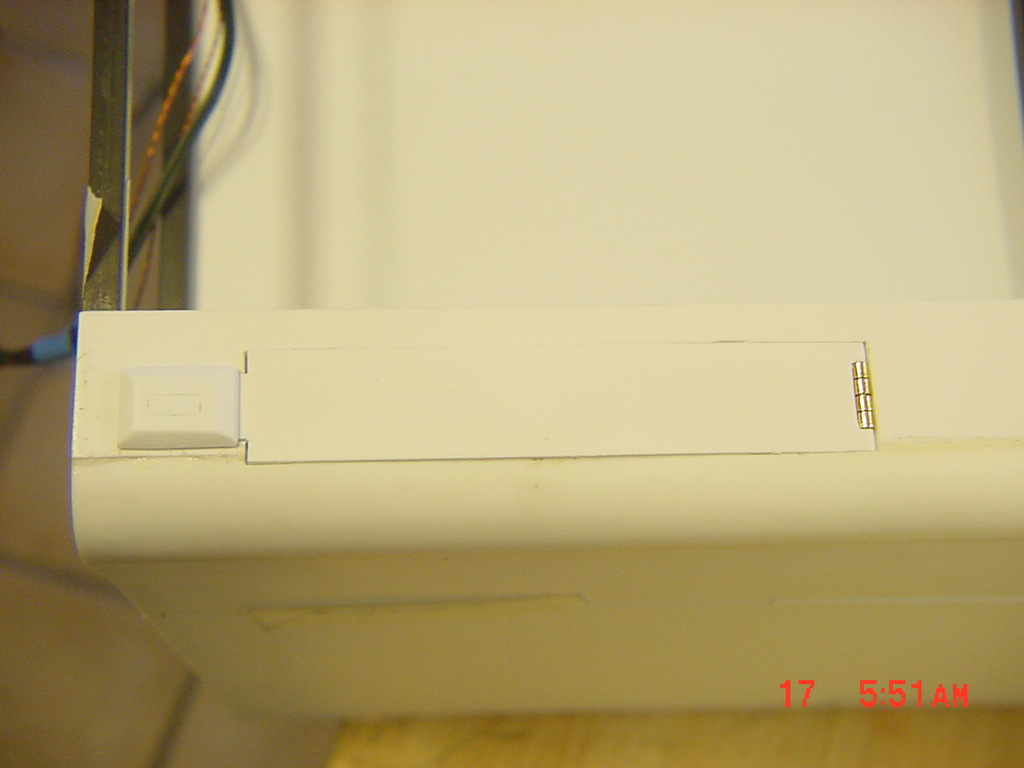
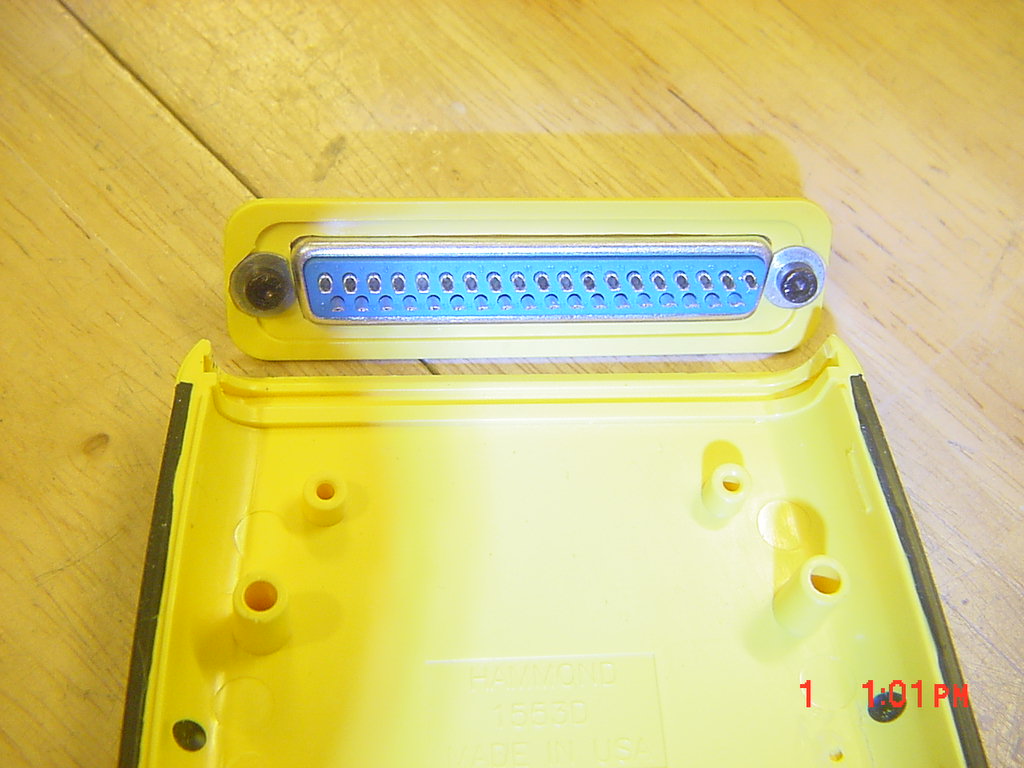
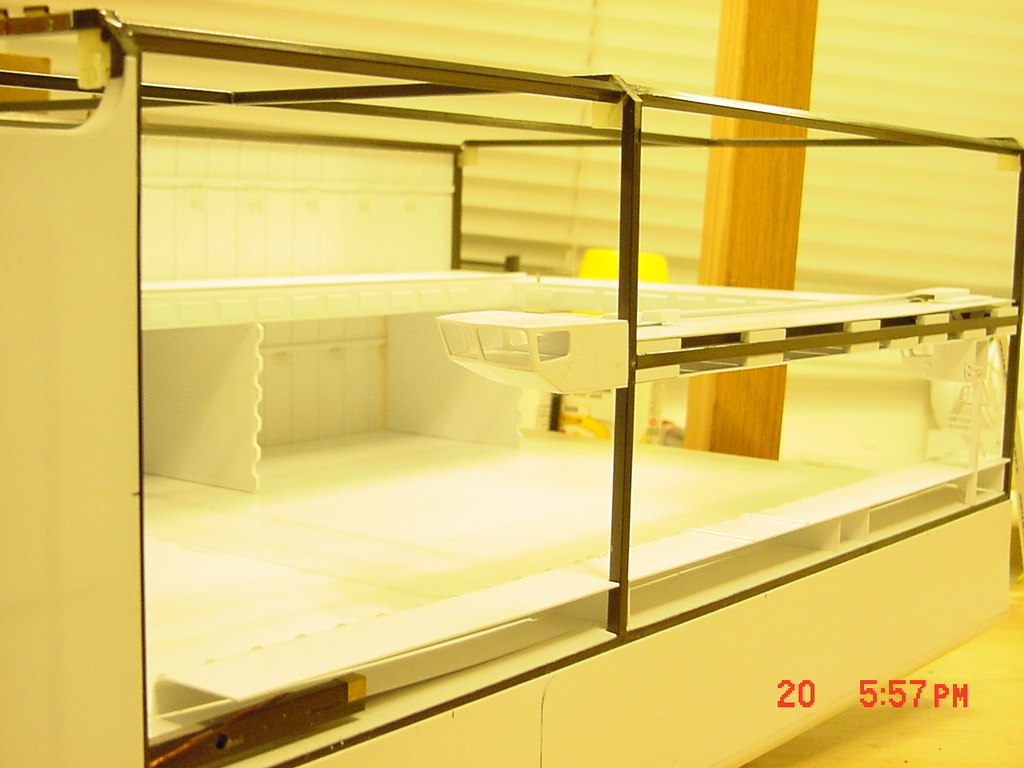
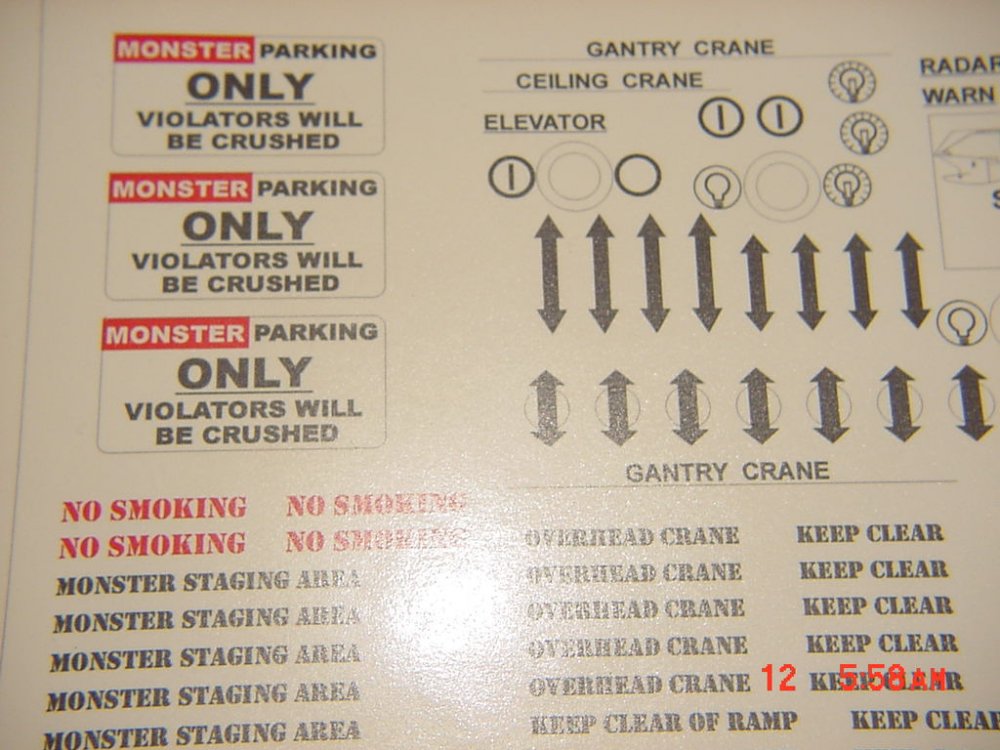
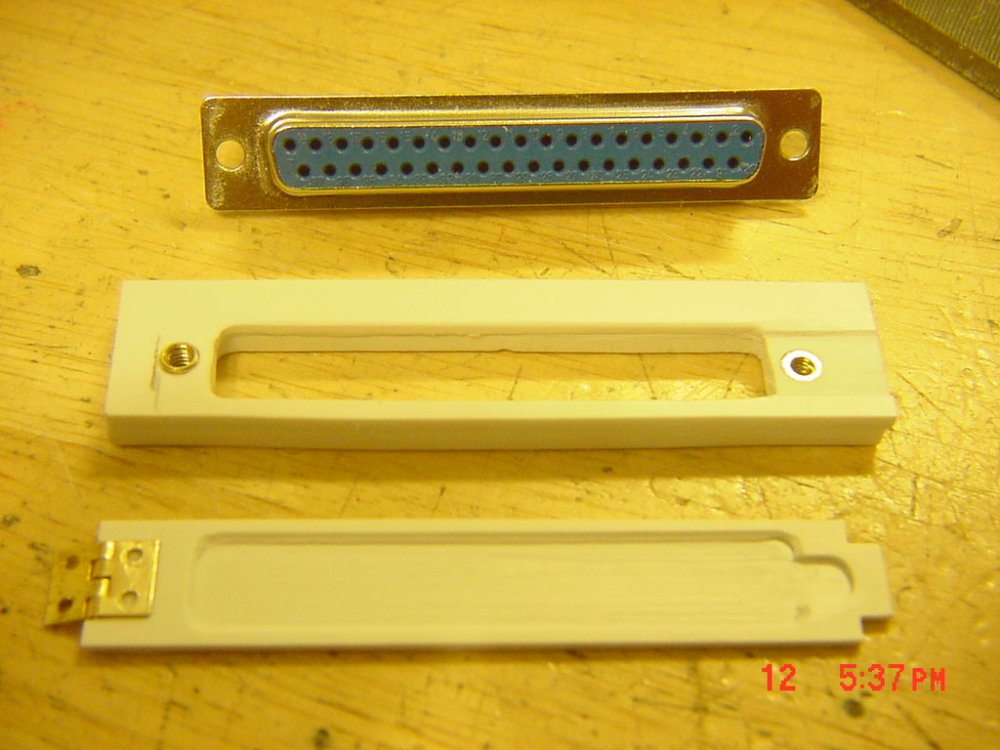
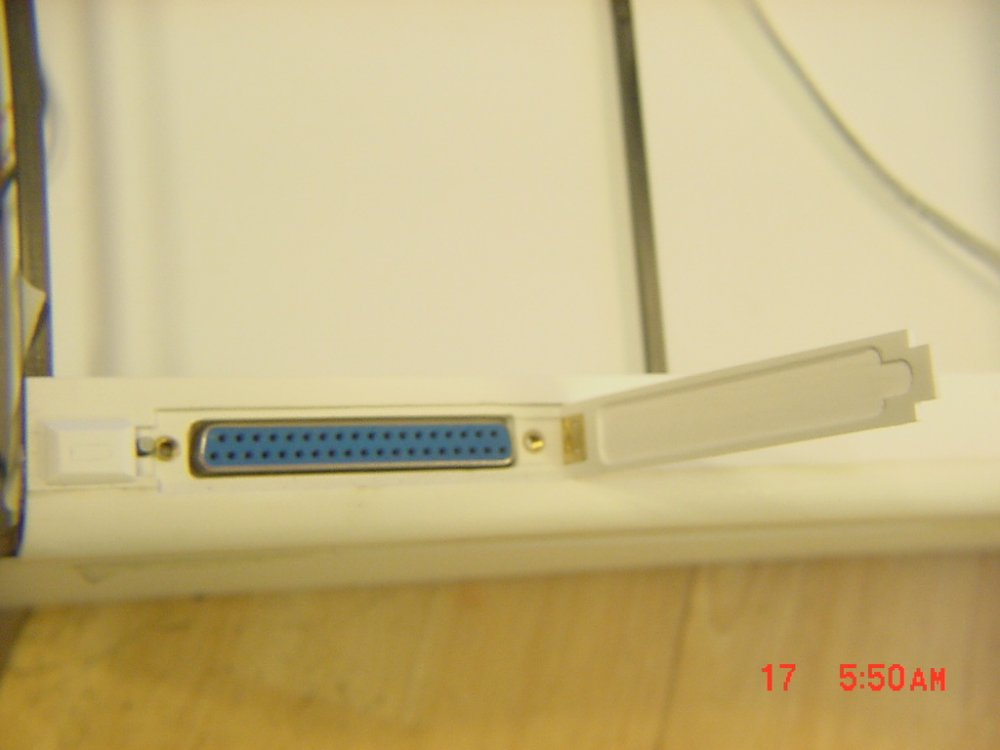
First off, a BIG thank you to everyone's compliments. I'm glad people are reading or I wouldn't bother posting (I could be building instead ) I stopped posting at the shipbuilding site since I stopped getting feedback. It was a scale ship site so everyone was probably like "what the heck is that?!" Olivers, thanks for the R/C suggestion. I've already got an expander on my Spektrum for some things: This is for display purposes mainly and means I won't have to sacrifice function if I have to impound my radio at a "float-in." Is it a model, boat or ship - YES! In fact, the crate to store it in will be about coffin sized I'll probably build it two piece to keep it manageable UPDATE 17 JANUARY 09 It's been slow going since I started two on-line classes. My goal is to finish the model and the first part of my degree by summer; can I do it ? I needed decals for the controller to label the switches and needed decals for the Daedalus interior so why waste paper? Yes I do have a sense of humor-park your destroid in my monster spot and it WILL be crushed! The controller case work is done! I just need to wire it up when I decide on the pin-outs. The receptacle parts for the Daedalus: The door is one pieced carefully machined on my drill press to "hug" the connector and keep it dry. Now you see it Now you don't The latch just slides over the receptacle to lock it closed; nice and simple. It's hard to see when right side up. That's it for now. On to some wiring! - MT


-
I've got a Campbell/Hausfeld 2 gallon (single tank) unit and it works great. I purchased a moisture trap for it too. The regulator means I can inflate my car's tires, children's bikes, or airbrush a model. DO GET a unit with a tank on it. I had a regular piston direct flow unit and they pulse with the piston strokes. And as was said, no regulator or moisture trap. Shop around! Mine works great, but the motor could wake the dead! I just let it run up, unplug it and use the tank's air (indoors). - MT
-
Whats Lying on your Workbench MKIII
MechTech replied to HWR MKII's topic in Hall Of The Super Topics
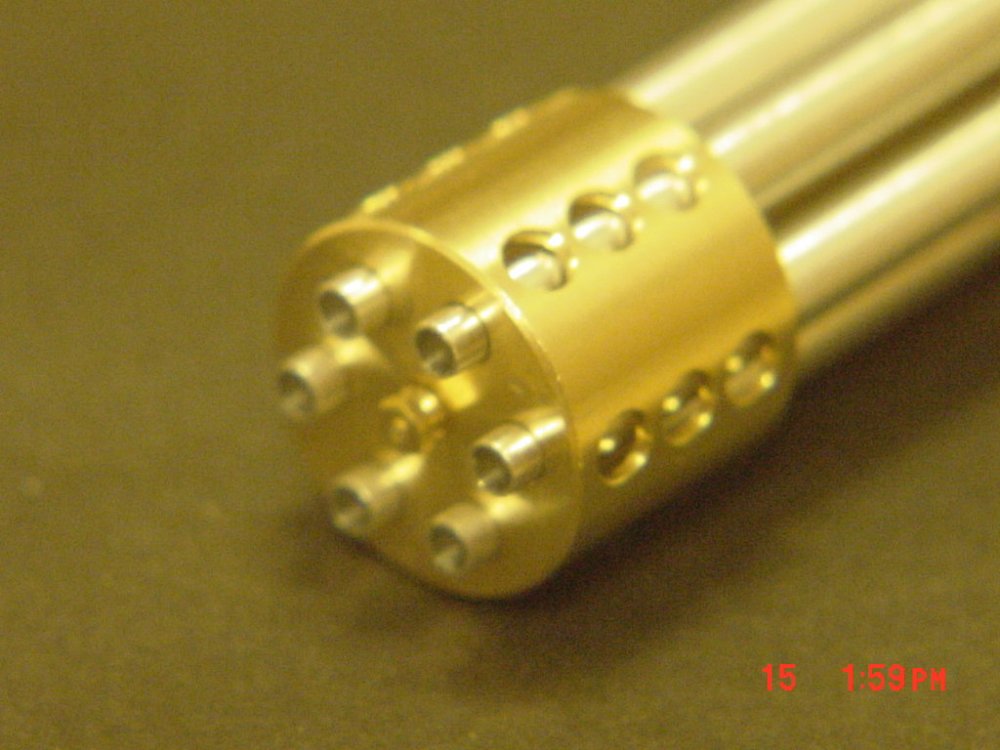
I didn't glue this together yet, but I KNOW somebody out there is going to want one of these: HLJ has these http://www.hlj.com/product/ADNANE-0147 or these http://www.hlj.com/product/ADNANX-007 The latter one with the muzzles. I found these looking for detail parts and just had to get one! The muzzle is 13mm diameter and if you want matching ammo, there are companies who make 1/35th 40mm ammo that will go nicely with this. - MT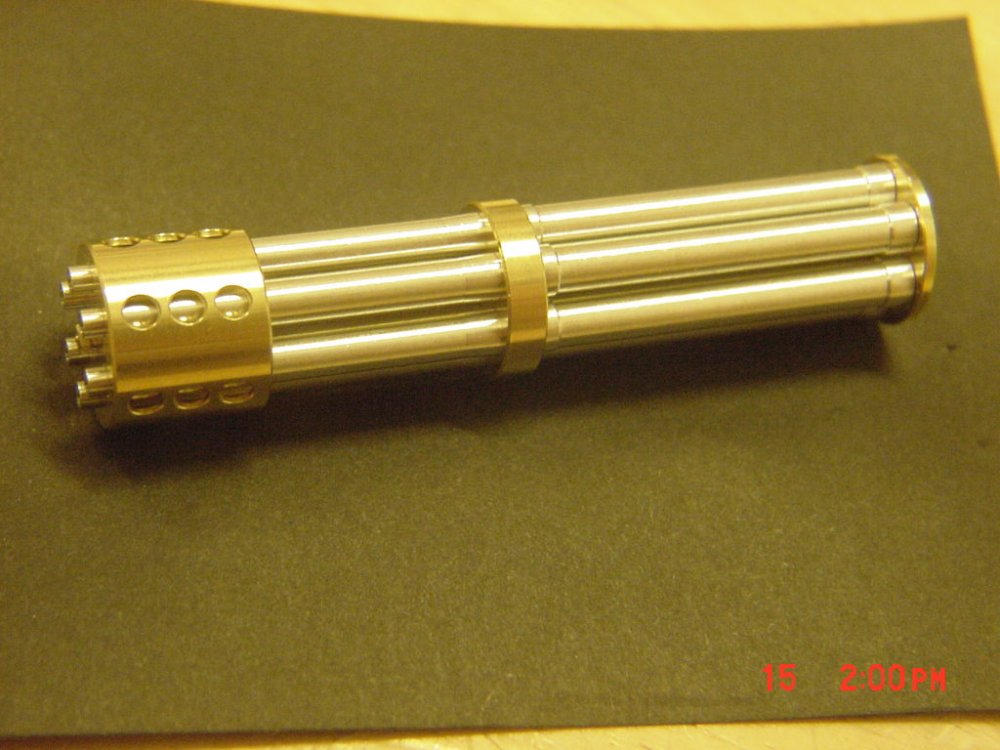
-
Whats Lying on your Workbench MKIII
MechTech replied to HWR MKII's topic in Hall Of The Super Topics
Tank looks good, it needs more cannon -MT -
"Danielson, wax on- wax off." Seriously, I have a collection of sanding blocks. There's nothing better. My wife goes to beauty supply places every now and then. There's another great place to go (with your wife of course ). I think Sally Beauty supply is in both the UK and US. I just checked and they have a website too http://www.sallybeauty.com It should be under "Manicure" stuff. Just don't tell anyone your sanding block is pink! They're also a good source of acrylic for building stronger parts-stinks to high heaven though. Hey, now my wife can order her stuff online and I don't have to wait around bored! Most of mine are 3M. I went through several course ones building the Daedalus lower hulls. They just seem to smooth out better than anything else overall. Add water and your golden! - MT
-
Looks great despite the non-canon scheme. I always did like that color combo anyhow. - MT
-
Whats Lying on your Workbench MKIII
MechTech replied to HWR MKII's topic in Hall Of The Super Topics
The model looks great! Tactically it's an "easy hit barn door," but it looks cool! - MT -
All I'm going to say is models rock! Toys are mass produced in a team effort, models are a work of art by an artist! Plus there's just no comparison when it comes to detail and accuracy! Styrene rules! - MT
-
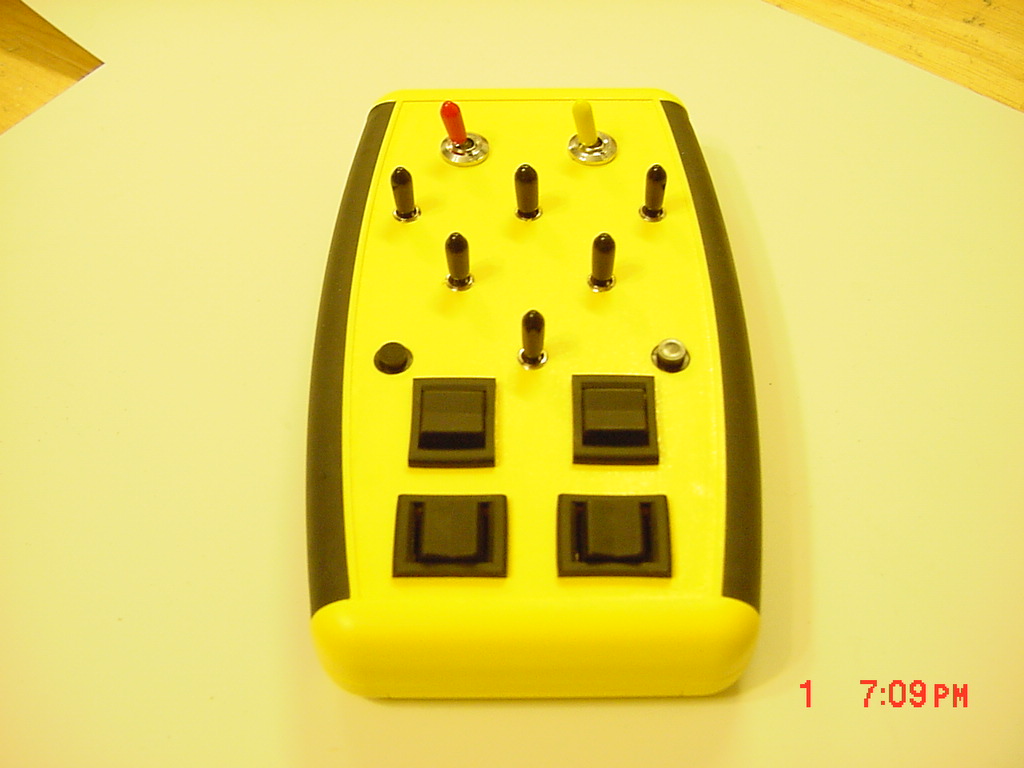
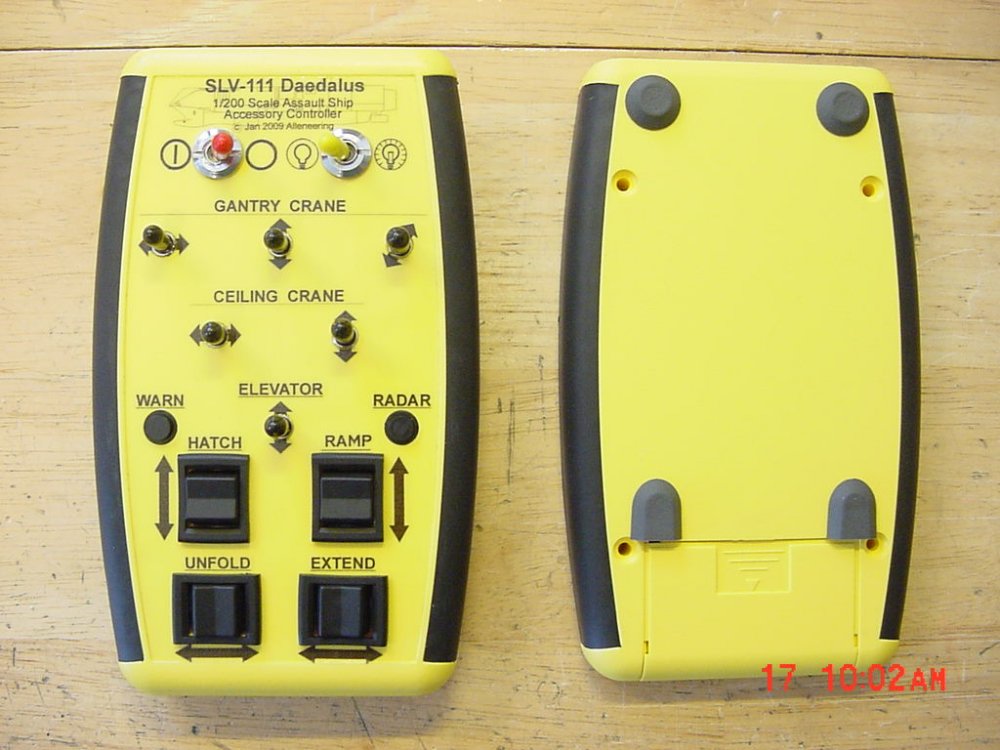
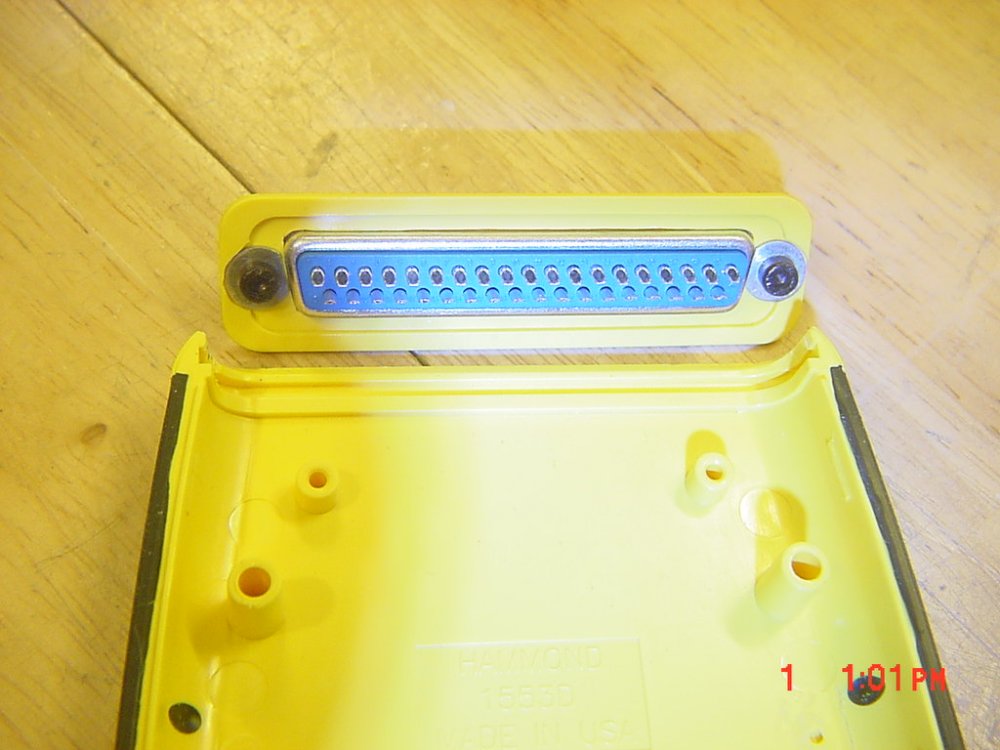
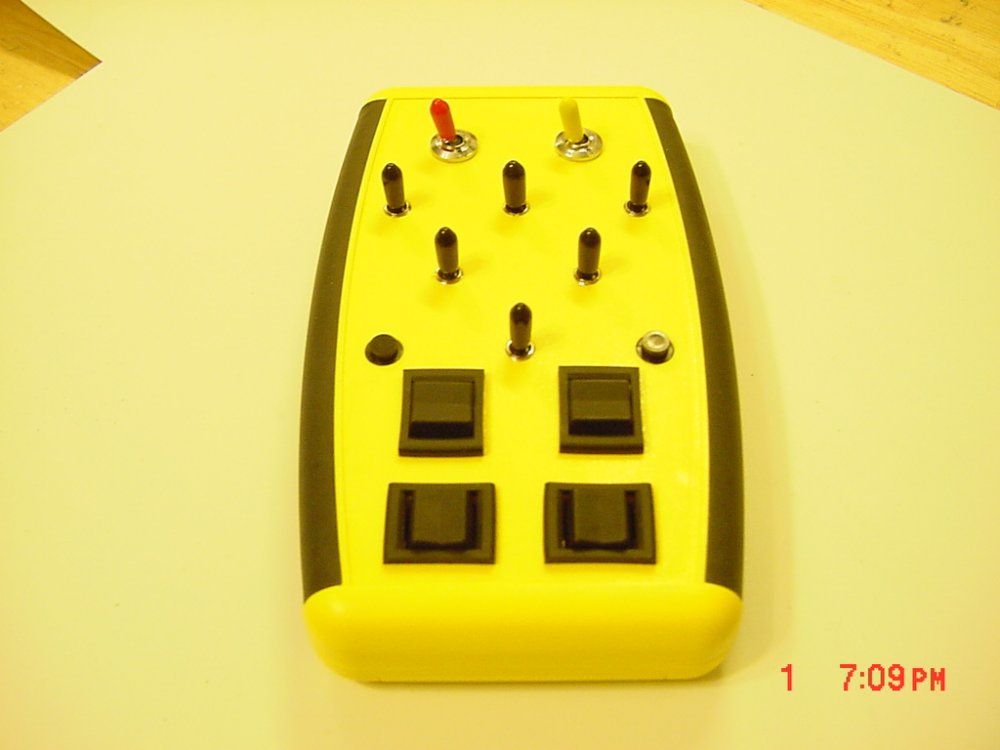
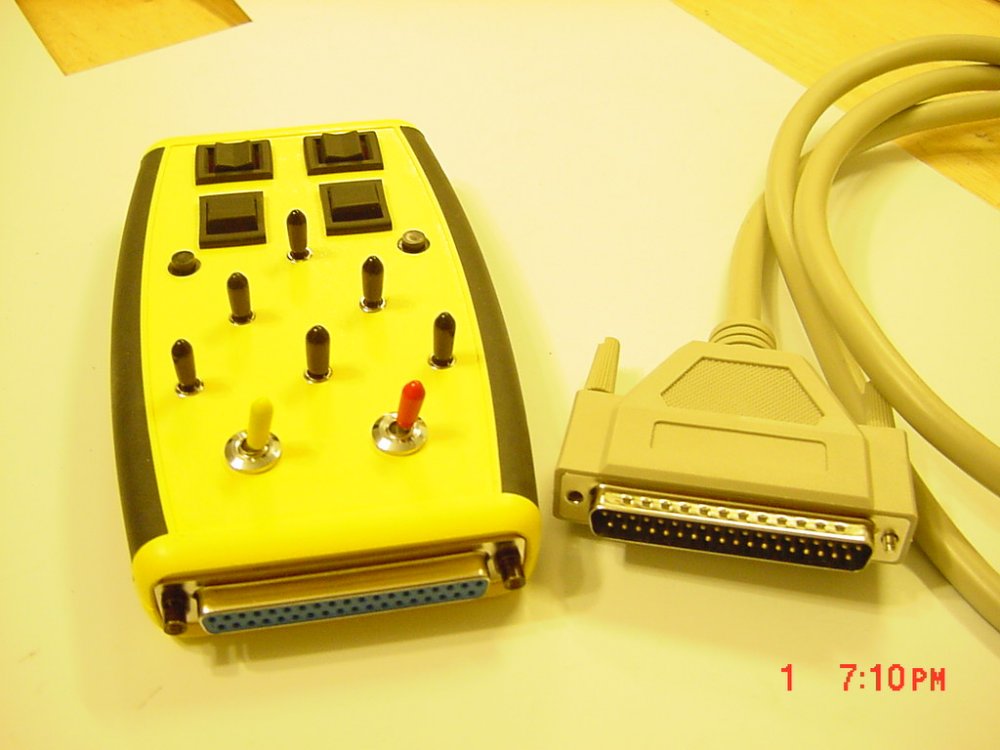
First off, thank you to everyone for the compliments! I'm really humbled by your reactions. UPDATE 7 Jan 08 Nothing exciting, but a lot of engineering work! This is the controller for ALL of the accessories! There are so many cable pairs needed to make everything go, I needed a 37 pin connector at least! There's no school like the old school so I went with a rugged and good ole DB-37 connector set. Winford.com still sells all that good stuff so I bought a 6ft male to male cable and the controller and ship have the female connectors on them. The female connector JUST fits into the case I bought. A lot of cutting and fitting to get everything to go! Here's the controls. Top two are for power and lighting, switches are for cranes and elevator (still to come),and the rocker switches are all for the hatch and ramp controls. The two side buttons are for the radar and warning lights/sound (also yet to come). The case fits in your hands great (black rubberized sides) and the switch locations took a while to be ergonomic. Almost every switch is a DPDT toggle/rocker just to reverse polarity for the motors. The 4 rocker switches cost $40 - talk about fancy! In typical style with this project, I even had to make the nuts the connectors go into and file the washers on the interior connector to make them fit! I'm working on decals for the face panel so you know what is what. I'm still trying to figure out where to put the massive connector on the ship side of things! That's it for now. - MT
-
We've been boinged! Seriously, everything looks great! I can't wait to get mine! - MT
-
Easy fix: get a hole punch (the size you want), punch a clear piece out. Then drill the same diameter hole in the side where you want it to go. The shape is close in keeping with the concept. - MT
-
I second that! I like that little picture of the "boat" at the bottom - MT
-
1/72 Macross VF-1J/1S Full Armored Super Valkyrie
MechTech replied to shinagami's topic in Model kits
Not to mention that kit is not canon, it's got too much "artistic license." It still looks cool though. - MT -
I'd say a bubble is more in line with the look too, or rounded window cut-outs in the side similar to what was shown before. Cool conceptual idea! - MT
-
Looks great Petar! I'm guessing the stock canopy wasn't doin' it for ya? Your new one looks better anyhow! - MT
-
I'm sure HLJ would stock it. They've got just about everything else Wave. - MT
-
Looks great and it is a nice clean build! - MT
-
I think Vifam7 is right. If the economy was going better, there'd be more new Macross stuff. Most of what's going on now was planned/executed pre-economical disaster. - MT
-
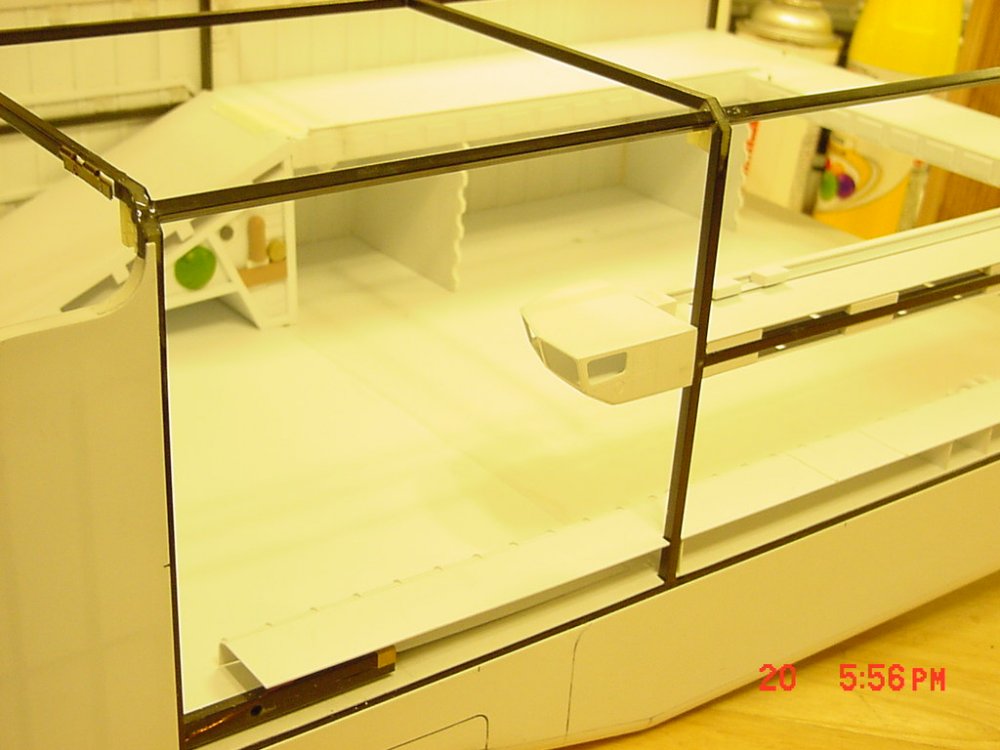
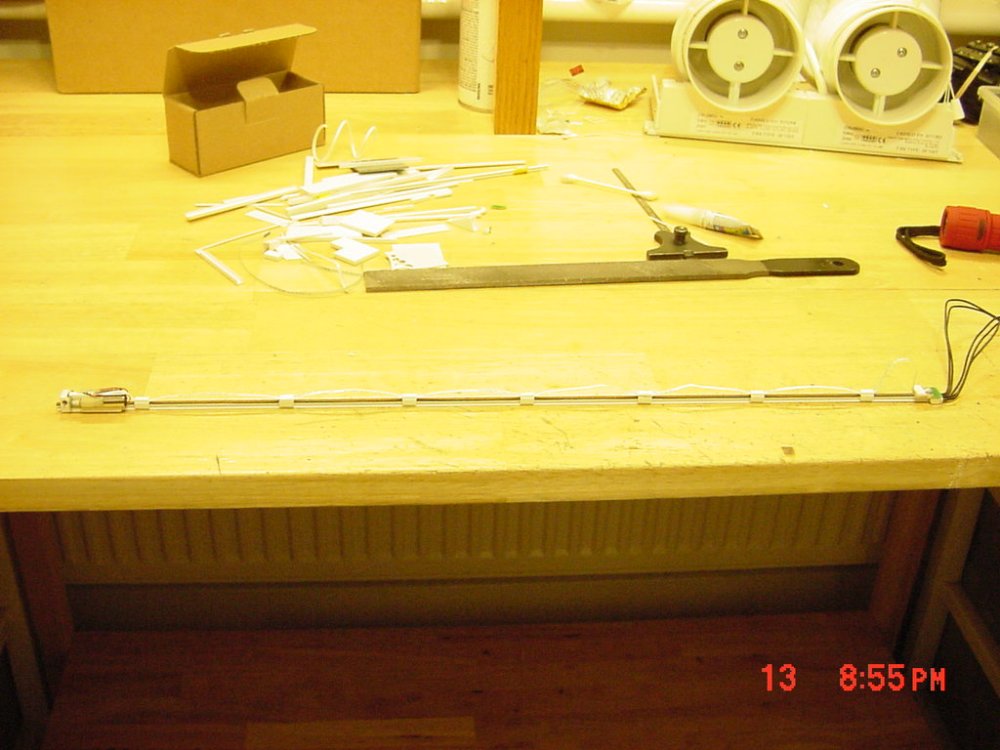
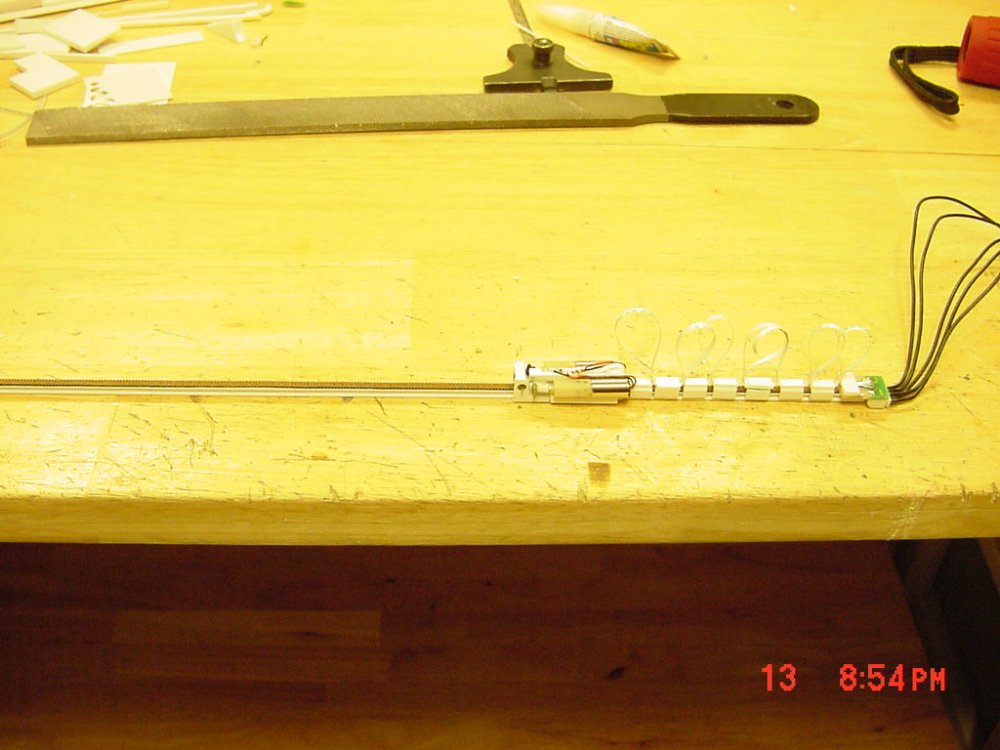
Thanks guys! I think I'll have a 1/200 scale "steel beach" party (beach party on a ship) UPDATE 25 DECEMBER 08 MERRY CHRISTMAS As promised, here's some special video of the main hatch and ramp in full affect. I realized none of you have seen the whole thing. I only did the "Daedalus Attack" mode, not the Assault Mode (Beach Landing). Don't laugh at my hodge podge destroids . Sorry for the back ground noises (my children were playing and my wife was preparing our Christmas Dinner). I also had a hard time filming and controlling the switches at the same time. The control box is not done yet so everything is "hot wired" for now. Of course paint and further work (like the ceiling) is yet to come. I also had diskette limitations so the ramp down segment is in two parts. Yes I still use a diskette camera (only for model building), great small size files! I also included a brief bit of the newer overhead crane too. Have a Merry Christmas and a Happy New Year! - MT Main_Hatch_Up.MPG Ramp_Down_1.MPG Ramp_Down_2.MPG Overhead_Crane.MPG
-
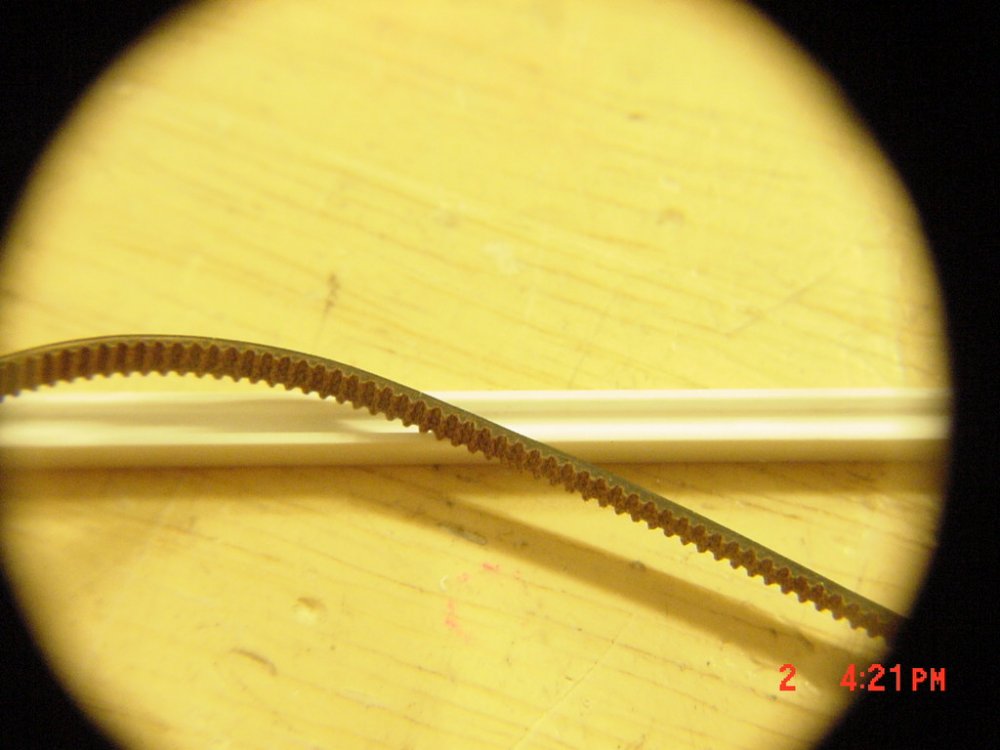
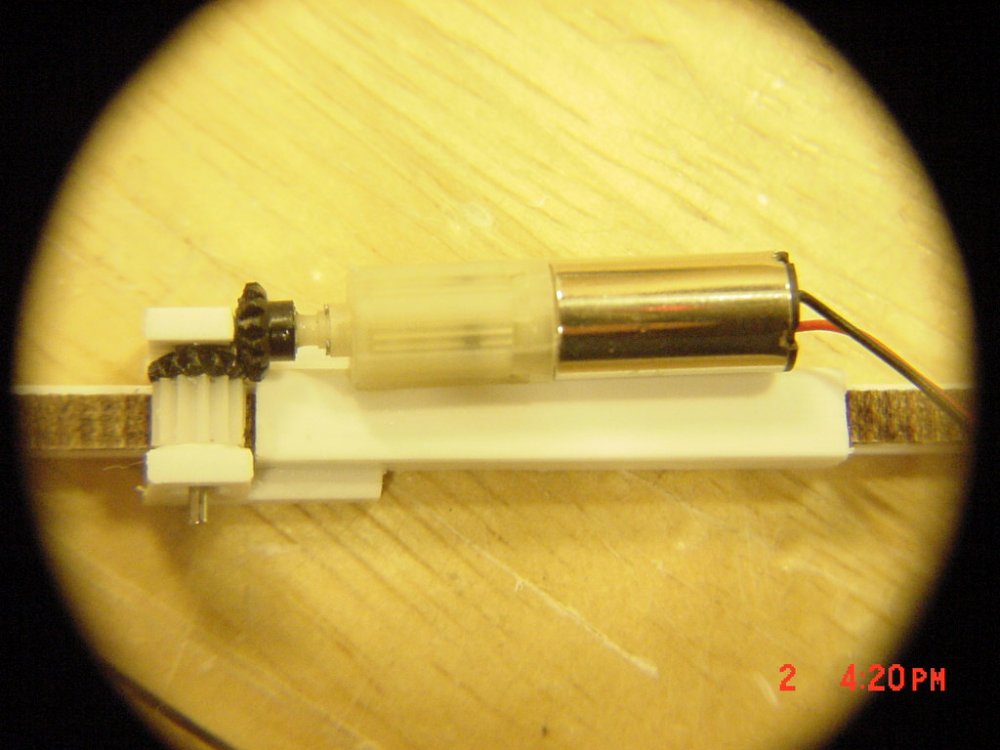
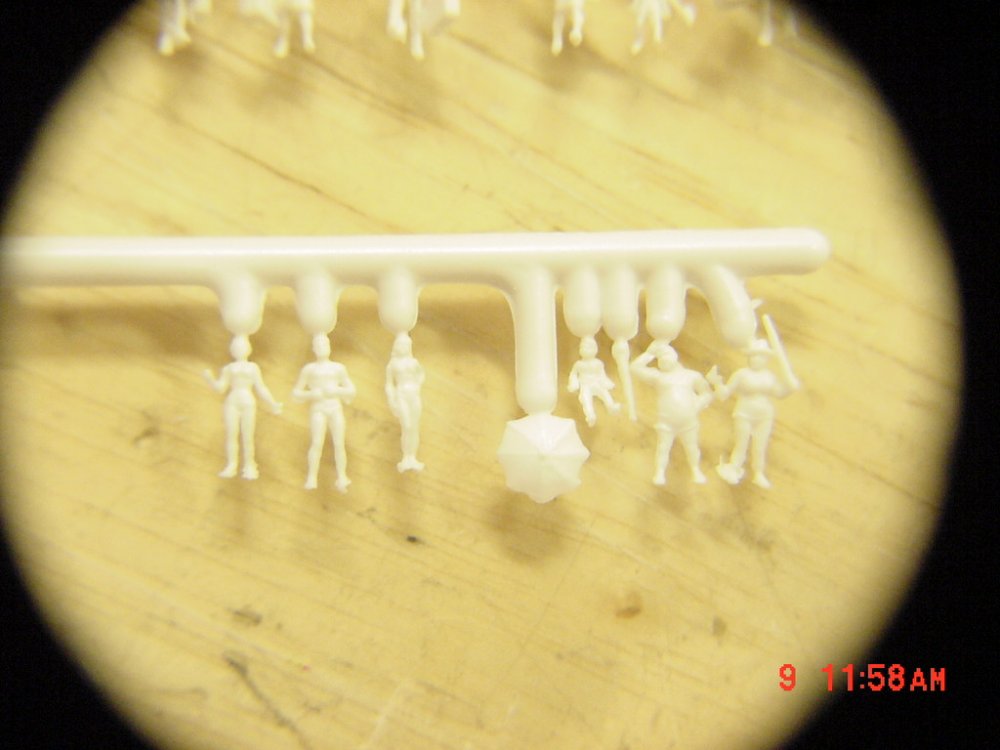
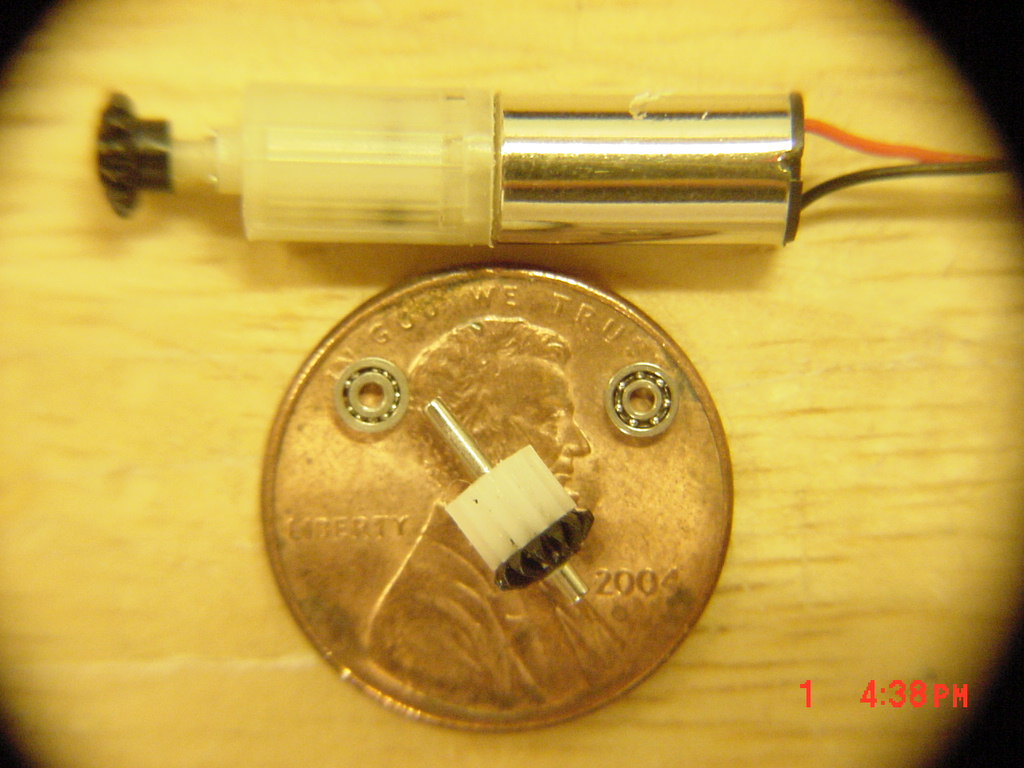
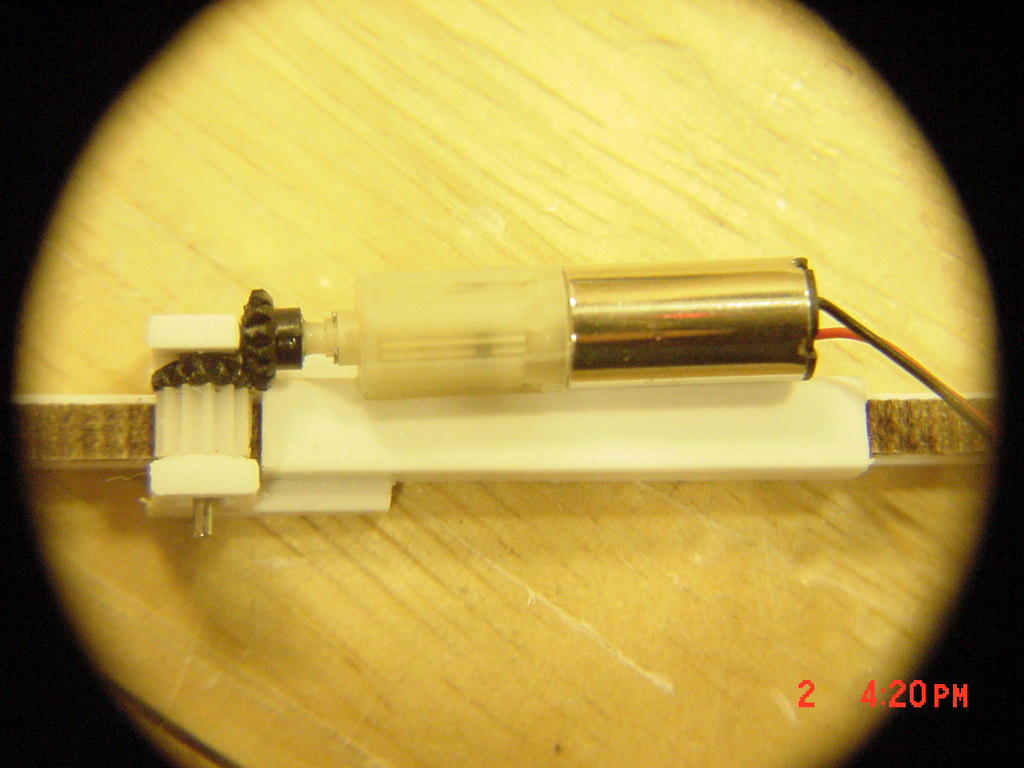
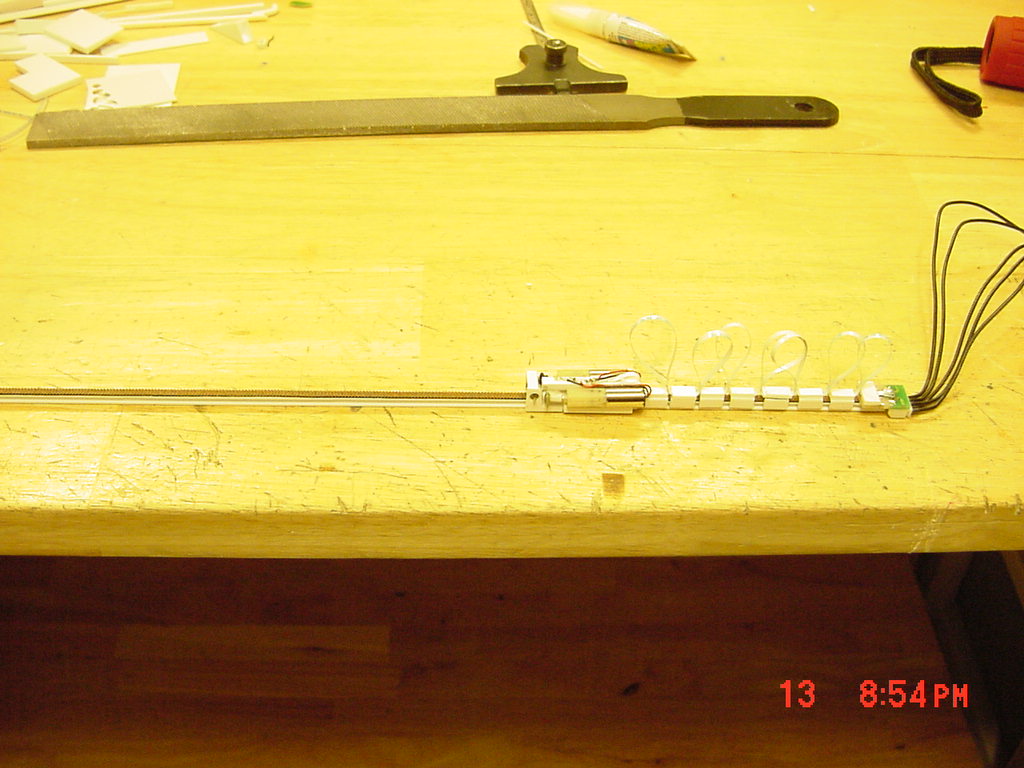
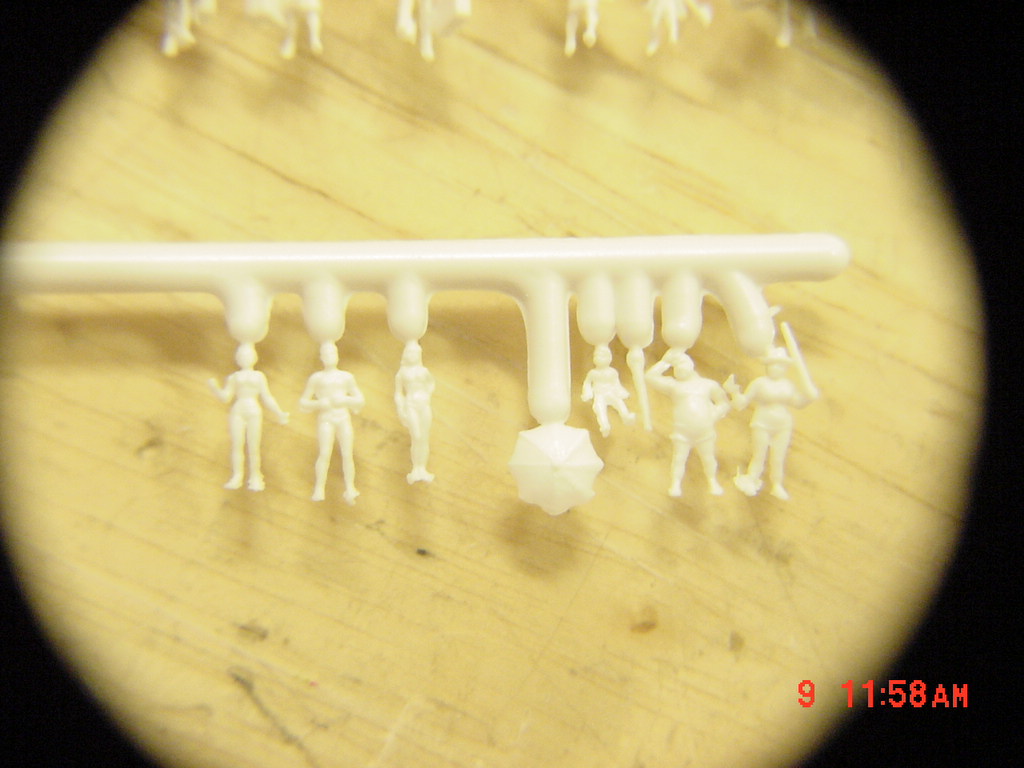
Thanks guys for the compliments and support. I'm trying to keep things as canon as possible! UPDATE 22 DECEMBER 2008 Sorry for the delay in posts. I was out sick a week and was even too sick to build - stupid influenza! As I said before, there was a BIG empty spot and no control cabin for the cranes, main hatch(about the size of two football fields), ramp (several football fields), and all the other operations going on in the front. So I built and installed a bigger control cabin with a 180 degree view from front to back. And because you can't have enough cranes (they're drawn all over the ship's interior lineart): Get some old (fine pitched) printer cogged belt and Plastruct "I" beam and glue them together (both 1/8" wide). Then get some micro (1mm) bearings (http://www.technobots.co.uk) and gears (gizmoszone) and build a gearbox that hugs the track like a giant rack and pinion system. Attach a second gearcase next to it to winch up your load. Then waste several hours trying to solder 2mm wide, 4 conductor hair thin ribbon cable lengths together to feed the whole thing! It works great and should handle moving around even the Monster destroids (like you see in the animation). I purchased the Preiser 1:220 (Z Scale) people. Turns out they ARE 1/200 scale and you can get 160 of them unpainted pretty cheap. They funny part is you even get their sets like "at the beach" cattle, horses and stuff. I'm trying to figure out what do with all the livestock too That's it for now. Working on the wiring now. I'm hoping to have an extra special post for Christmas! - MT