MechTech
-
Posts
4691 -
Joined
-
Last visited
Content Type
Profiles
Forums
Events
Gallery
Everything posted by MechTech
-
Looks awesome! Did the leg art come from the Macross modeling book, or was it part of the kit? - MT
-
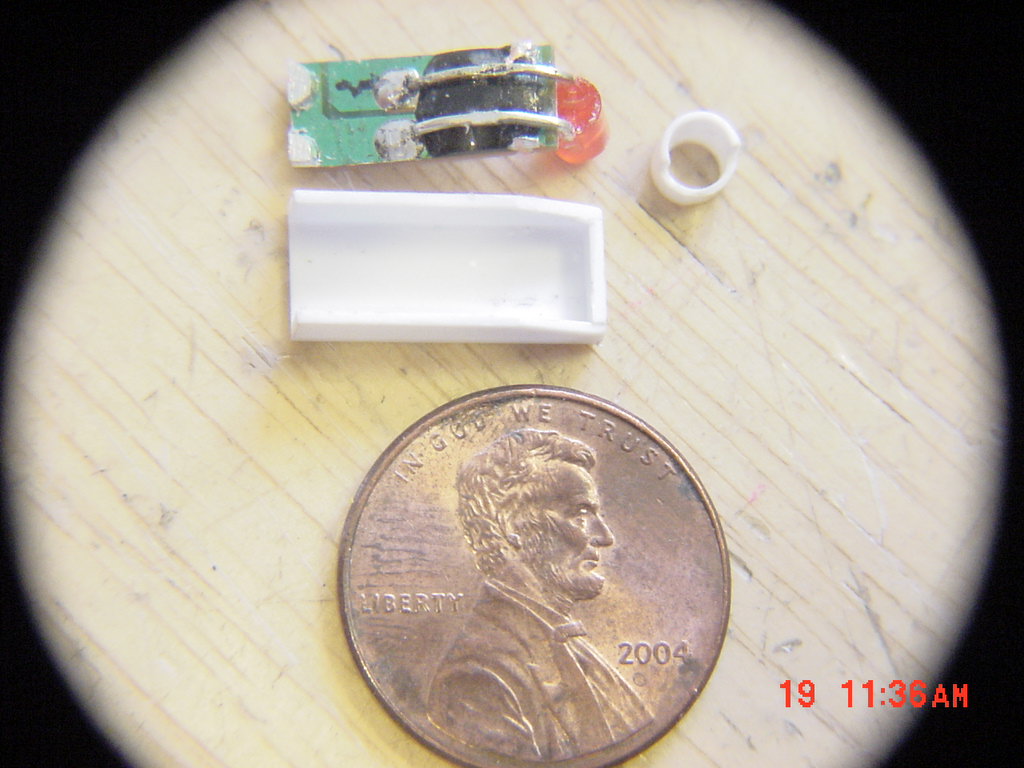
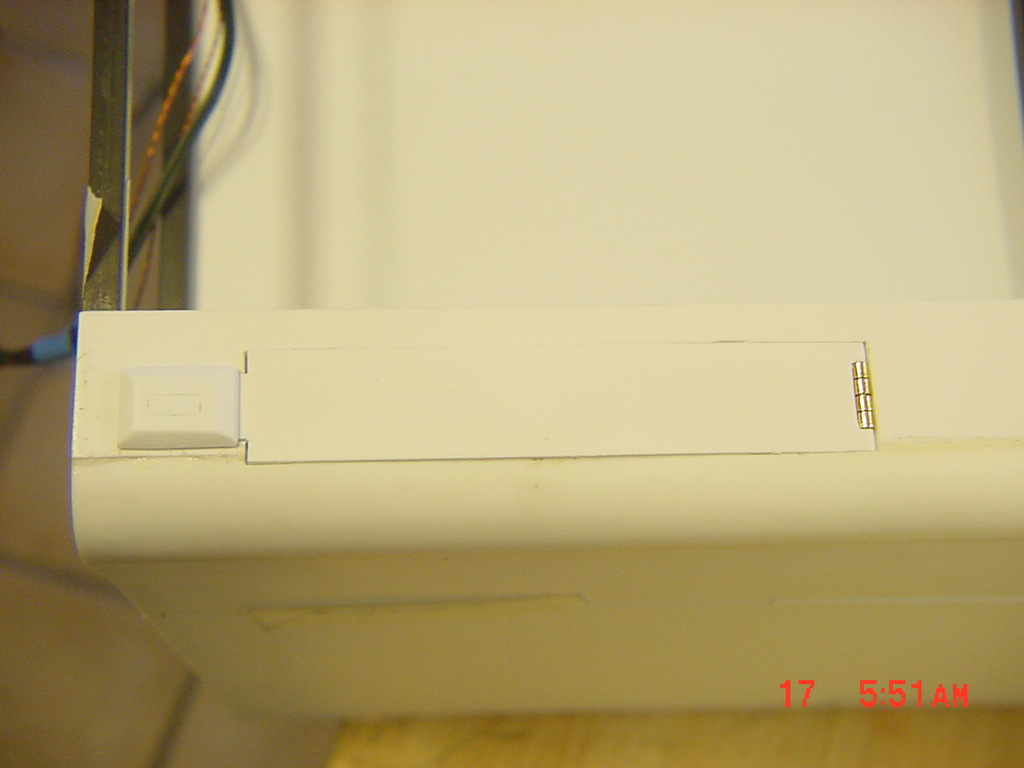
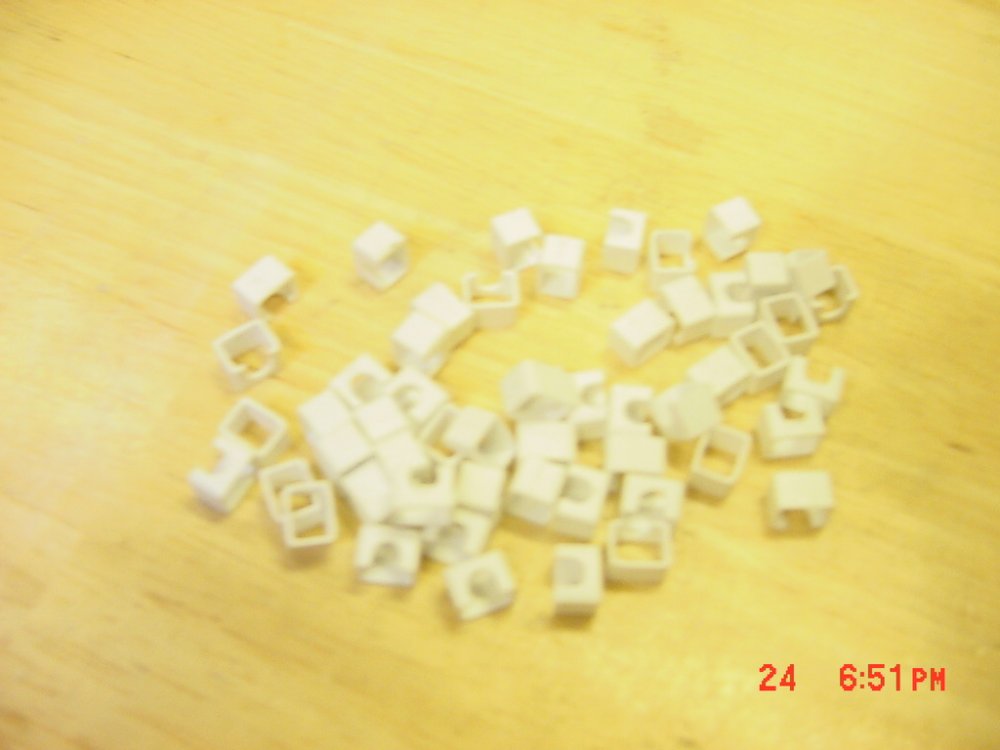
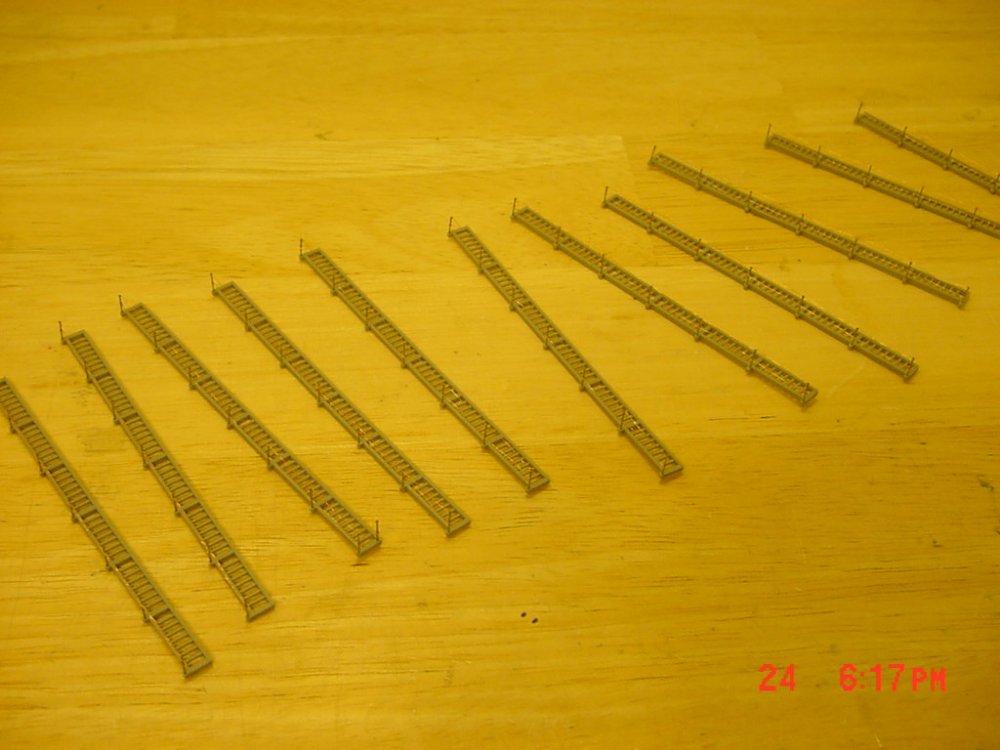
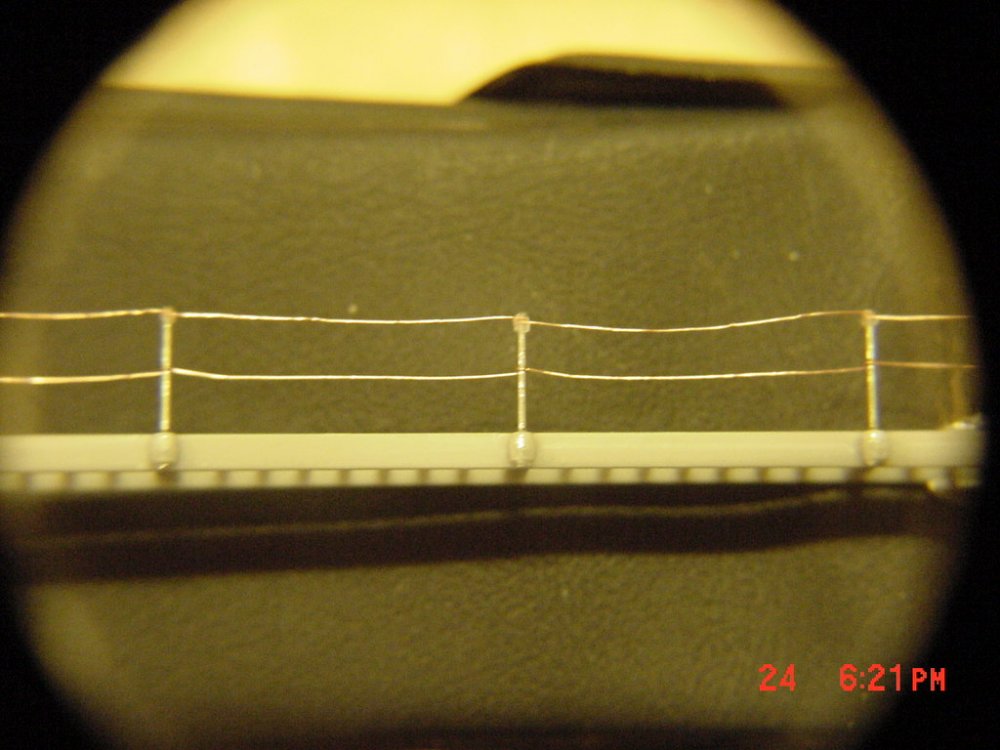
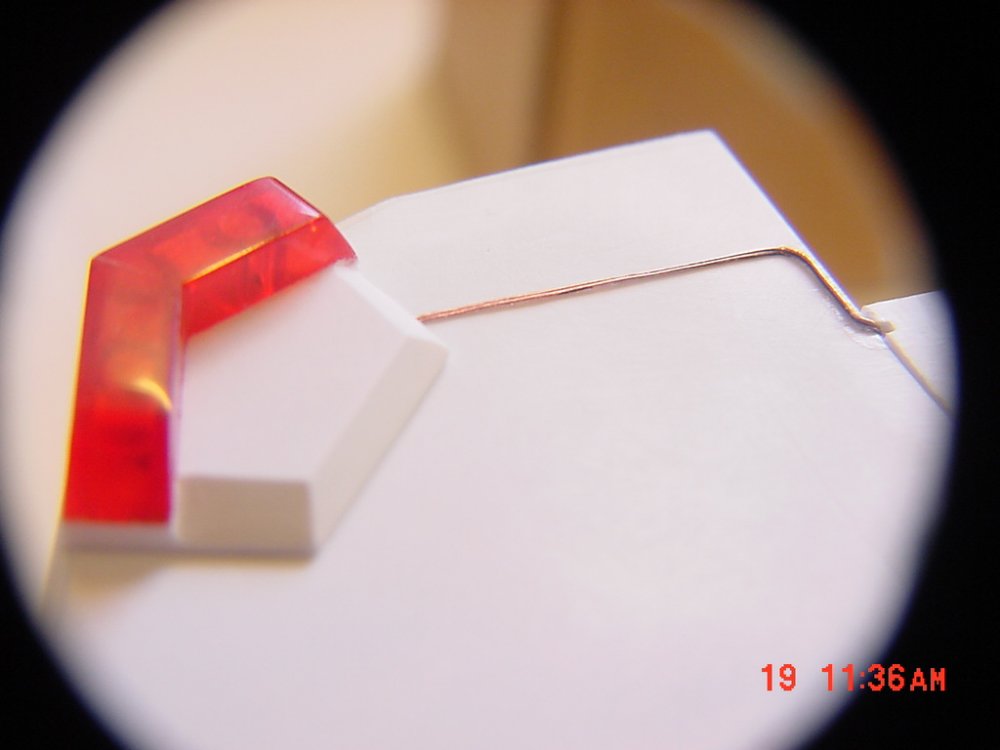
Thanks guys! I actually got to get some work done today. I got my assignment in on time, so I rewarded myself with most of today working on parts. BigF, I used Corel Draw, but even Power Point will work! I ran out of paper so I bought clear and white sheets from http://www.craftycomputerpaper.co.uk/produ...14&catid=14 I also bought their FLAT coating. I wiped the flat coating down with a dry rag after about five coats because it had a "dust" on it from the flat coating. I then just got a brush and brushed on a coat of Micro Super Film. I put a few coats of flat coating thinking it would be enough - nope! Still need the Micro Super Film. The end result gave me a nice semi-gloss finish. Now you know how to do it too! UPDATE 24 JANUARY 2009 After building all those lights on the sides (44 so far), I realized, "how the heck am I going to mask those!" I tried tape and liquid mask. Neither worked or was easy to use in the cramped areas. I prayed and thought, "what else would work?" Then a little divine intervention, I was reminded I have some rectangle tubing. I tried it and it fits snug right over the lights! I set up a jig and sanded/cut about sixty pieces - talk about monotonous! Then I set up a jig on my drill press to mill out a 1/8" goove for the LEDs in the lights to fit into. After I put some tape over these, they'll slide right on like a cap and mask the lights! Remember when I said I was done with the inside details? I forgot about the catwalks over the light conduits! It took most of today, but I made 16 of these. Each rail was Z gauge fencing. After I cleaned up the mold seams, I drilled 7 - .07mm holes in each tab sticking out to put the posts into. Then I got some FINE piano wire and cut all those little pieces (also with a jig) to make the posts with. The posts were then rigged with hair-fine wire. The wire was glued to the posts after positioning it. It looks better than photo-etched parts and doesn't have the "flat" look to it either. The wire has a realistic "droop" to it too. Last week I started to wire things up when I realized the warning lights (blinking and strobing) were not in yet. More details to be built and added in. I saved a few silicone inserts that you put in your teeth I found on sale 8 years ago (yes, I was planning this build that far back!). They contain a flashing LED module that strobes across 4 LEDs. Add some leftover Patlabor lenses, machine them to an angle and glue to carefully cut pieces of styrene, and you get this... I bought my children a few of those ring lolypops that flash. After they finished the candy, I cut the rings open, removed the chip and filed the board to about 3mm wide. The LED was remounted and the whole assembly was put in a styrene case. and the lights strobing/flashing Lights_Flashing.MPG The "Warn" button will activate these. They are for when the main hatch or ramp are in operation. You don't want one of your crew in the way and get crushed That's it for now. I think my next step will be to paint the catwalks white before gluing them in. Oh yeah, fine mesh strips will sit on top of the catwalks when completed to simulate grading. - MT


-
ahiachris, do you think you can help us get through to him? Thank you! - MT
-
Welcome Bluemaxx. I quite toys decades ago when I was like 5! I had a toy F-16 (when they first came out) and it was alright. Then I got a model F-16 and it looked like the real thing! Not to mention all the ordnance, the engine came out, and it had a wheeled stand for the engine to go on (you guys knwo what I'm talking about out there-they've re-issued it too). The models may not be as durable, but they will be far superior for accuracy, detail, and over all appearance. The price is much better too (as you said). Just get some white gloves - MT
-

Whats Lying on your Workbench MKIII
MechTech replied to HWR MKII's topic in Hall Of The Super Topics
Looking great so far. I try to stay away from modeling figures. That's one area I need some skills in! - MT -
Hasegawa 1/72 scale VF-1A Roll Out Colors
MechTech replied to Shin Densetsu Kai 7.0's topic in Model kits
Thanks SDK for posting! The colors do look cool. Hasegawa has always made great models and also milked the molds for all their worth too! I advise you guys shoot Hasegawa e-mails with suggestions. Revell Germany built its new 1/144 C-17 on requests by customers. You never know... - MT -
Hong Kong I believe. I e-mailed him and am waiting to hear back. Hopefully he can read English (let alone his PC having the English character plug-in). - MT
-
Welcome Skonchboy. Great concept! It reminds me of the cardboard SDF-1. I had some of my Nichimo valks hanging on clear line "flying" around it. That thing took up most of my ceiling! Good idea and I'd keep pushing the envelope with it if I were you! - MT
-
I'll be putting my order in and the older set is only about $25!!! Might have to get more! - MT
-
And everyone thinks I build in a small scale! That's awesome work! Pricey though! You could put a whole squadron on your coffee pot, but don't drink any when painting! Talk about needing steady hands! - MT Oops, correction this is about 9 US dollars, or 7 UK pounds if I read right!
-
Whats Lying on your Workbench MKIII
MechTech replied to HWR MKII's topic in Hall Of The Super Topics
ce25254 - I think your skills are just fine. Besides, no project is the same as the real thing! Big F and 505, With the classes I'm taking right now, even thinking about a Prometheus is crazy! By 2027 people will be like, "SDF-1 what?" I just realized that wherever I move next, I'll need a whole wall for the Daedalus! Maybe over the bed in the bedroom, I'm sure my wife would like it. She's want to stick flowers in the front of it or something like . Now where would I put th SDF-1? By the way, rumor has it someone else might be building another Daedalus from scratch. It's NOT me and it won't be as large a scale. - MT -
All the details make it look much better! That's where building gets separated from art. Great job! - MT
-
No sweat! I love that book. Some of the emblems look dumb, but some look awesome. I think the ones for the Monster look bad. I was thinking of getting a BIG woman in a bikini holding two big cannon barrels. The title would say "BIG guns." - -MT
-
Looks great! - MT
-
Whats Lying on your Workbench MKIII
MechTech replied to HWR MKII's topic in Hall Of The Super Topics
Somewhere there are a couple of naked valks shivering in the cold of space without boosters Just kidding. Great idea! I did something to a battleship after seeing Space Battleship Yamato for the first time (about !@#$ years ago). You just need a BIG wavegun now and you're good! - MT -
I'm guessing somebody wants the "Vamp" character. If you get stuck, let me know. It shouldn't be hard to composite something close to that. - MT
-
Great job on the custom Alfye. My only complaint is that your Macross corner is too small Great work! -MT
-
I like the colors and weathering as well. Nice custom! - MT
-
I spent about $15. Not much, but it does the job. I haven't used that model, but I'd guess it's alright. As long as you can swap out the cartridge or drain it. The humidity where you live will ultimately decide. Keeping your tank drained of air/water after every use helps too! Hopefully someone else has used the linked trap? - MT
-
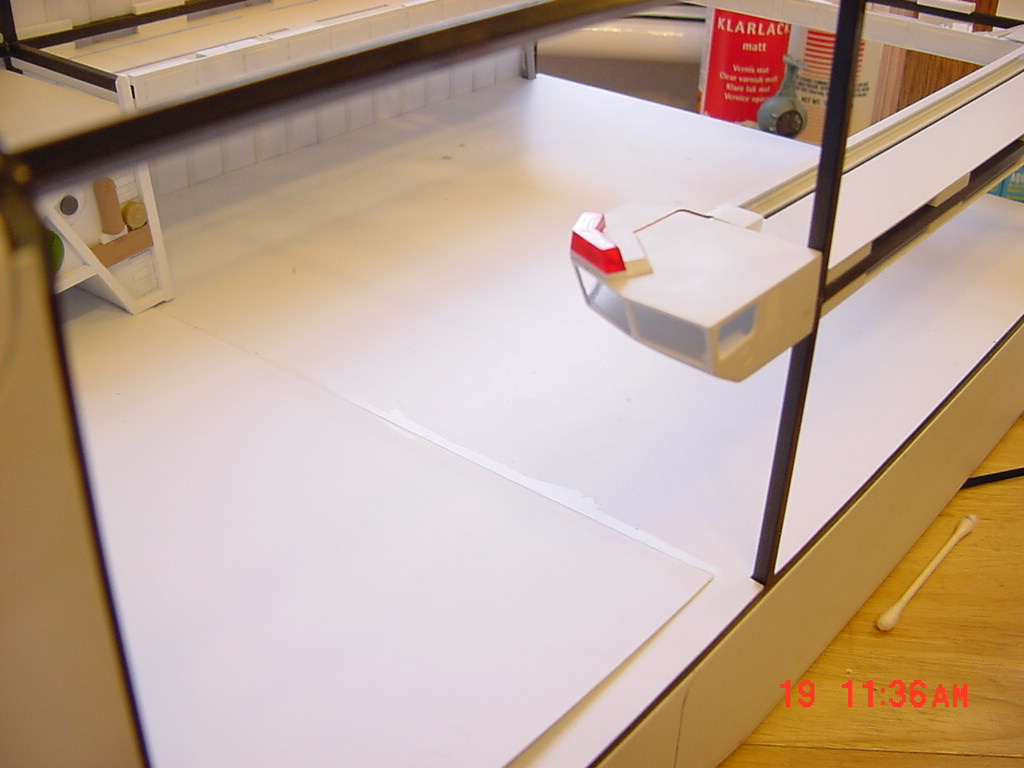
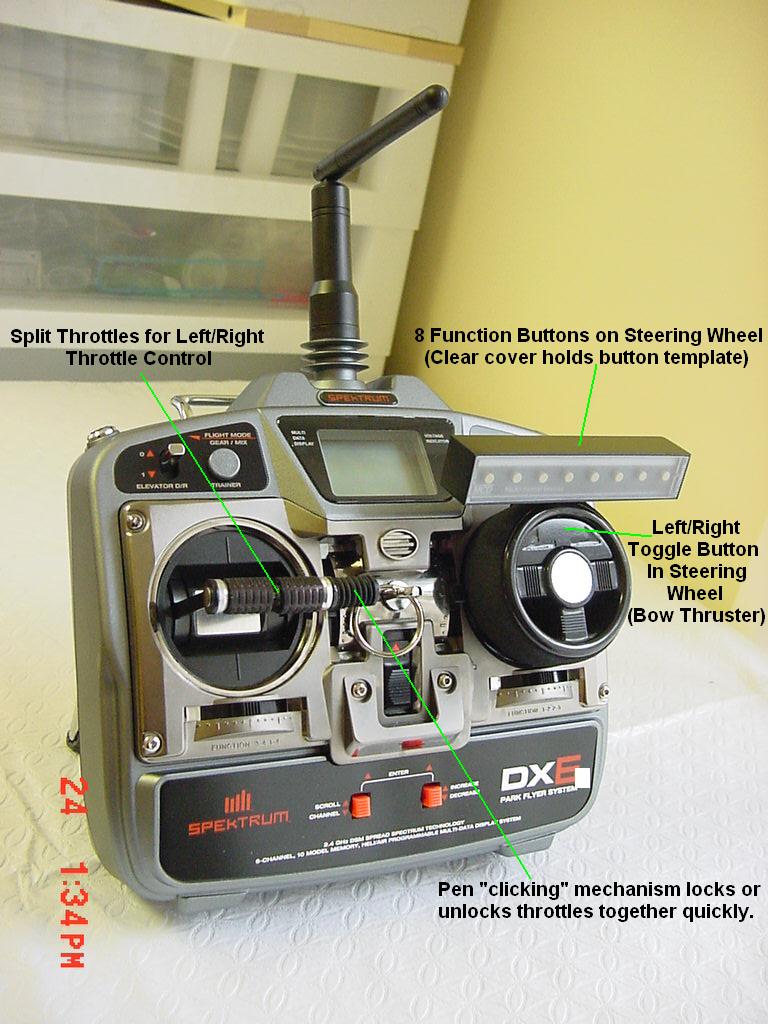
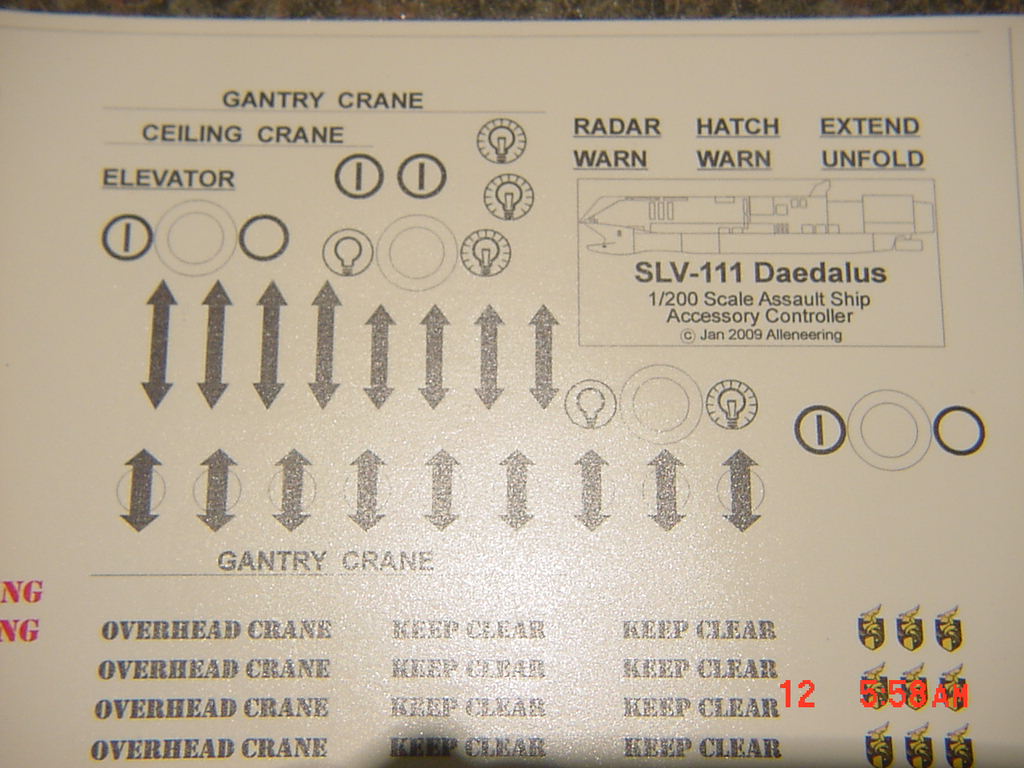
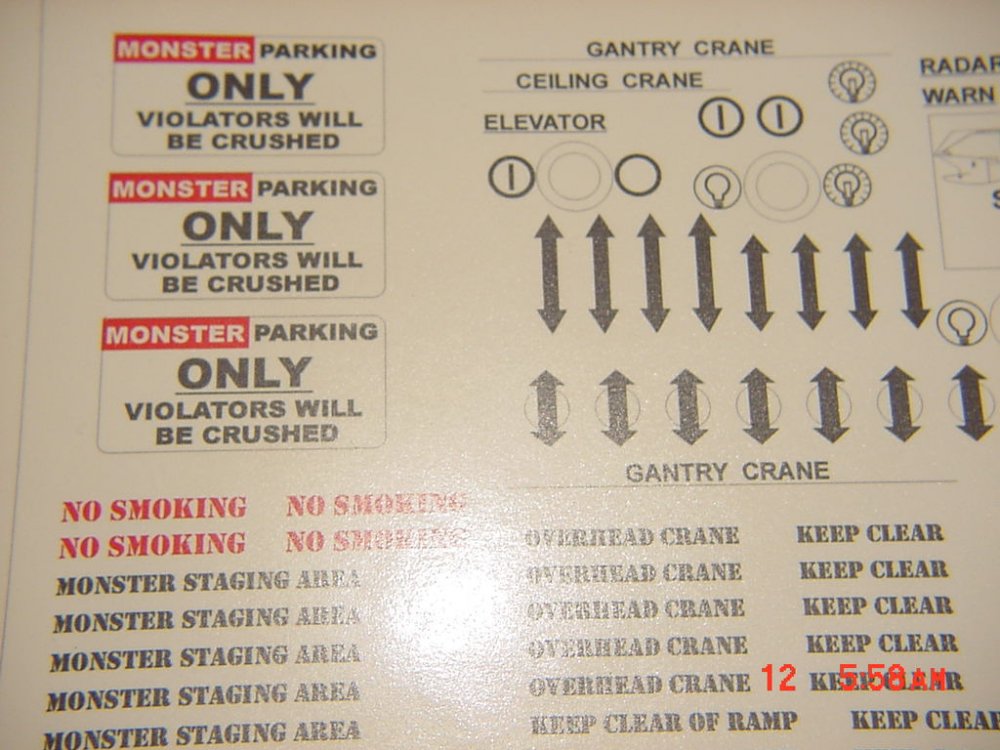
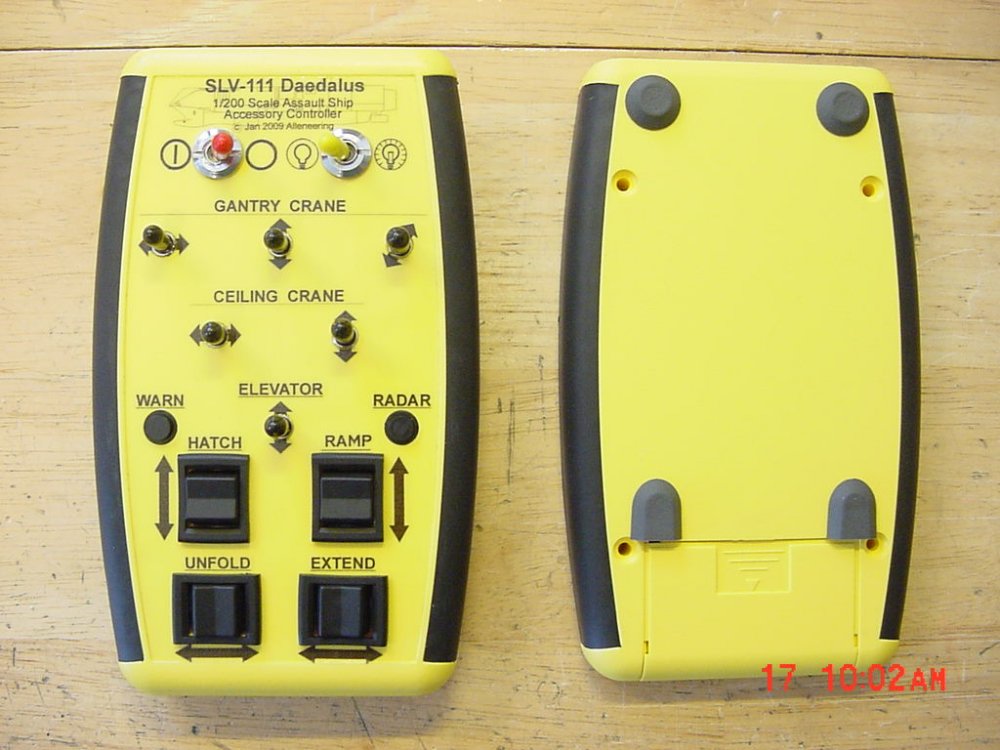
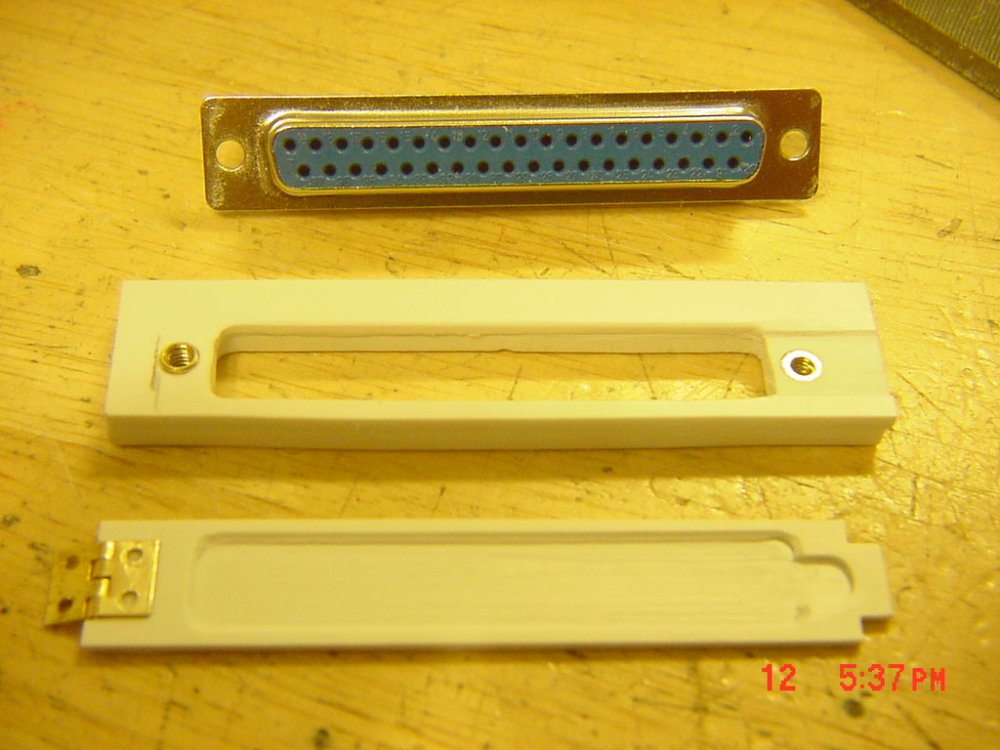
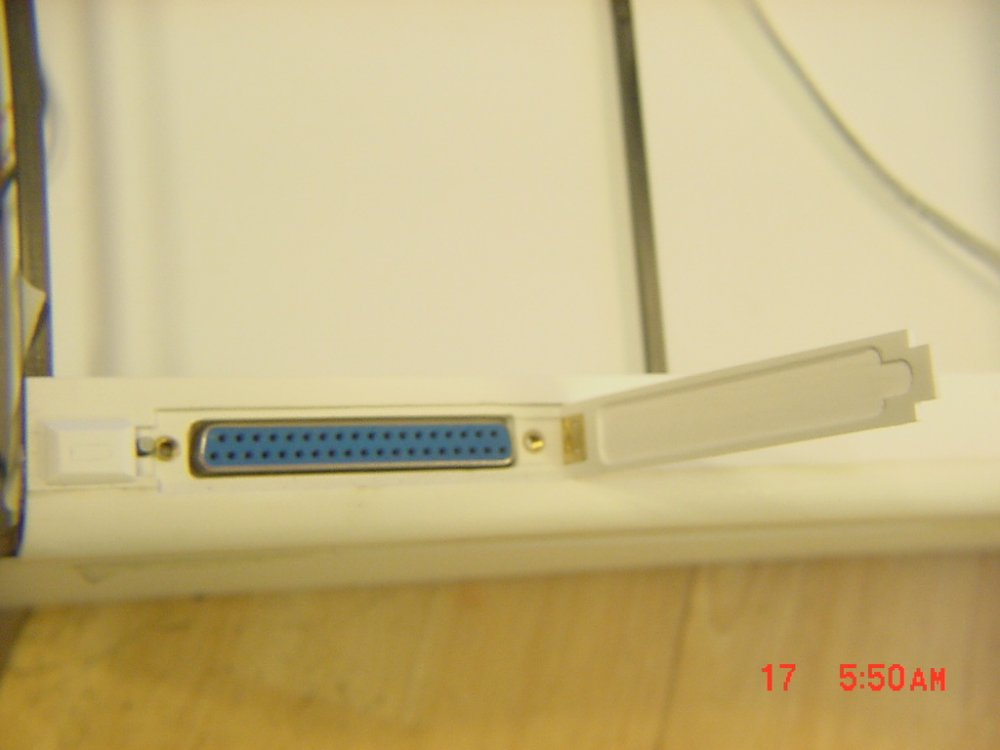
First off, a BIG thank you to everyone's compliments. I'm glad people are reading or I wouldn't bother posting (I could be building instead ) I stopped posting at the shipbuilding site since I stopped getting feedback. It was a scale ship site so everyone was probably like "what the heck is that?!" Olivers, thanks for the R/C suggestion. I've already got an expander on my Spektrum for some things: This is for display purposes mainly and means I won't have to sacrifice function if I have to impound my radio at a "float-in." Is it a model, boat or ship - YES! In fact, the crate to store it in will be about coffin sized I'll probably build it two piece to keep it manageable UPDATE 17 JANUARY 09 It's been slow going since I started two on-line classes. My goal is to finish the model and the first part of my degree by summer; can I do it ? I needed decals for the controller to label the switches and needed decals for the Daedalus interior so why waste paper? Yes I do have a sense of humor-park your destroid in my monster spot and it WILL be crushed! The controller case work is done! I just need to wire it up when I decide on the pin-outs. The receptacle parts for the Daedalus: The door is one pieced carefully machined on my drill press to "hug" the connector and keep it dry. Now you see it Now you don't The latch just slides over the receptacle to lock it closed; nice and simple. It's hard to see when right side up. That's it for now. On to some wiring! - MT


-
I've got a Campbell/Hausfeld 2 gallon (single tank) unit and it works great. I purchased a moisture trap for it too. The regulator means I can inflate my car's tires, children's bikes, or airbrush a model. DO GET a unit with a tank on it. I had a regular piston direct flow unit and they pulse with the piston strokes. And as was said, no regulator or moisture trap. Shop around! Mine works great, but the motor could wake the dead! I just let it run up, unplug it and use the tank's air (indoors). - MT
-
Whats Lying on your Workbench MKIII
MechTech replied to HWR MKII's topic in Hall Of The Super Topics
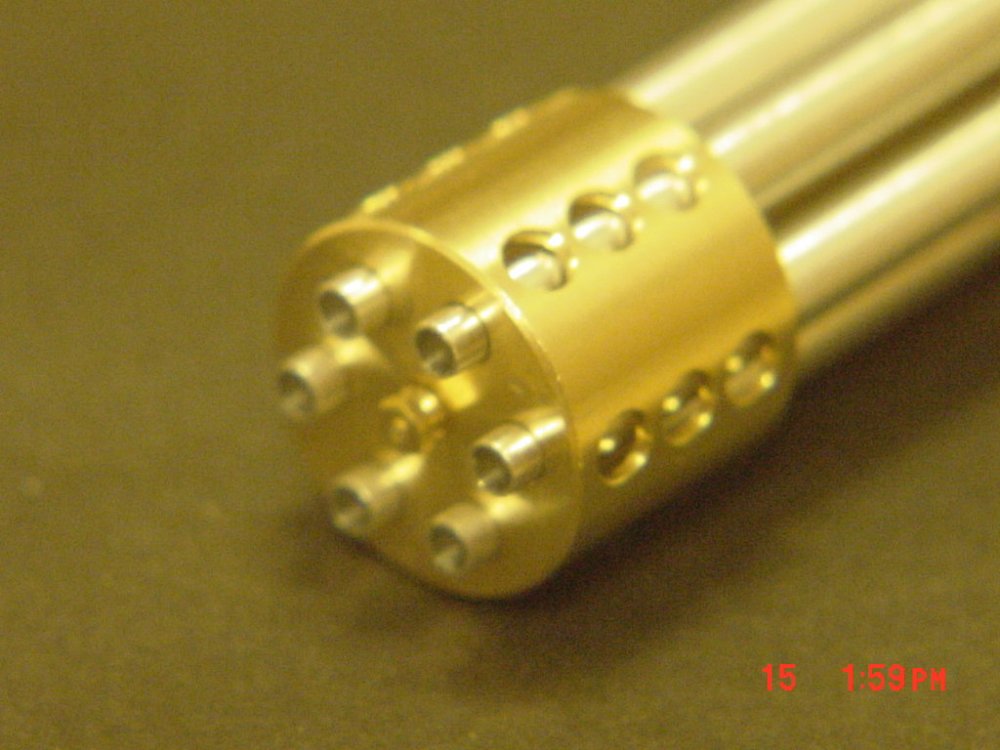
I didn't glue this together yet, but I KNOW somebody out there is going to want one of these: HLJ has these http://www.hlj.com/product/ADNANE-0147 or these http://www.hlj.com/product/ADNANX-007 The latter one with the muzzles. I found these looking for detail parts and just had to get one! The muzzle is 13mm diameter and if you want matching ammo, there are companies who make 1/35th 40mm ammo that will go nicely with this. - MT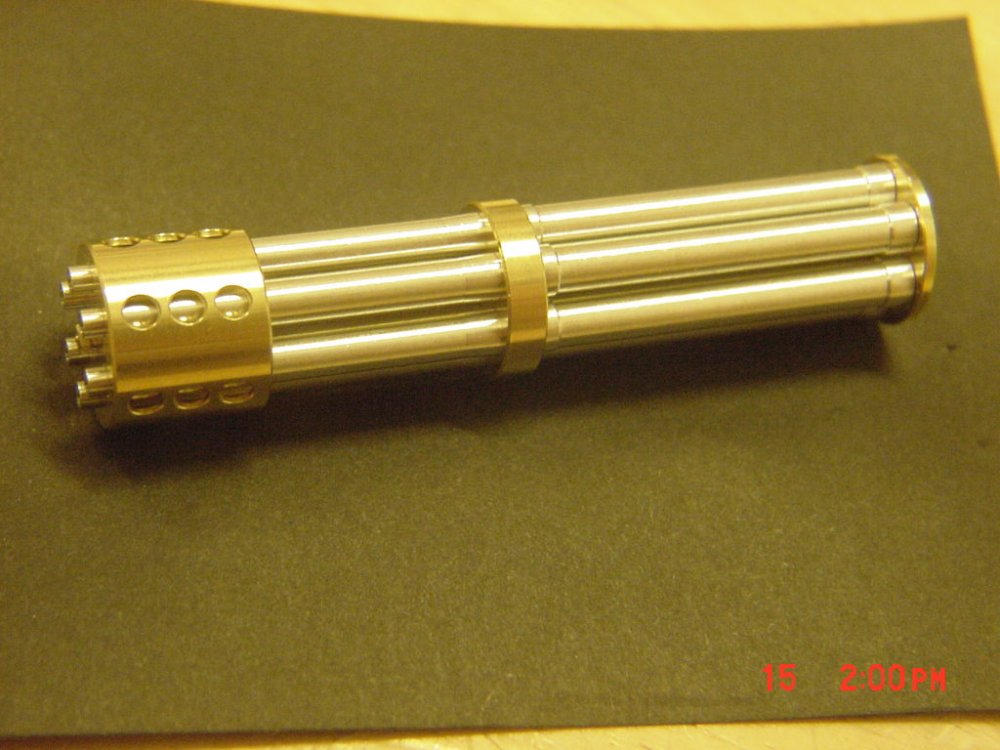
-
Whats Lying on your Workbench MKIII
MechTech replied to HWR MKII's topic in Hall Of The Super Topics
Tank looks good, it needs more cannon -MT -
"Danielson, wax on- wax off." Seriously, I have a collection of sanding blocks. There's nothing better. My wife goes to beauty supply places every now and then. There's another great place to go (with your wife of course ). I think Sally Beauty supply is in both the UK and US. I just checked and they have a website too http://www.sallybeauty.com It should be under "Manicure" stuff. Just don't tell anyone your sanding block is pink! They're also a good source of acrylic for building stronger parts-stinks to high heaven though. Hey, now my wife can order her stuff online and I don't have to wait around bored! Most of mine are 3M. I went through several course ones building the Daedalus lower hulls. They just seem to smooth out better than anything else overall. Add water and your golden! - MT
-
Looks great despite the non-canon scheme. I always did like that color combo anyhow. - MT